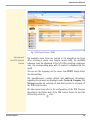
1
ThinPrint® Gateway TPG-25 / TPG-65 User Manual Manufacturer: SEH Computertechnik GmbH Suedring 11 33647 Bielefeld Germany Phone: +49 (0)521 94226-29 Fax: +49 (0)521 94226-99 Support: +49 (0)521 94226-44 Email: [email protected] Web: http://www.seh.de Document: Type: User Manual Title: TPG-25 / TPG-65 Version: 1.0 Online Links to Important Websites: Support Contacts & Information: http://www.seh-technology.com/support Sales Contacts & Information: http://www.seh-technology.com/sales Downloads: http://www.seh-technology.com/services/ downloads/tpg.html InterCon is a registered trademark of SEH Computertechnik GmbH. SEH Computertechnik GmbH has endeavored to ensure that the information in this documentation is correct. If you detect any inaccuracies please inform us at the address indicated above. SEH Computertechnik GmbH will not accept any liability for any error or omission. The information in this manual is subject to change without notification. All rights are reserved. Copying, other reproduction, or translation without the prior written consent from SEH Computertechnik GmbH is prohibited. © 2012 SEH Computertechnik GmbH All trademarks, registered trademarks, logos and product names are property of their respective owners. Table of Contents 1 General Information. . . . . . . . . . . . . . . . . . . . . . . . . . . . . . . . . . . . . . 5 1.1 ThinPrint® Gateway . . . . . . . . . . . . . . . . . . . . . . . . . . . . . . . . . . . . . . . . . . . . . . . . 6 1.2 Documentation. . . . . . . . . . . . . . . . . . . . . . . . . . . . . . . . . . . . . . . . . . . . . . . . . . . . 8 1.3 Support and Service . . . . . . . . . . . . . . . . . . . . . . . . . . . . . . . . . . . . . . . . . . . . . . 10 1.4 Your Safety . . . . . . . . . . . . . . . . . . . . . . . . . . . . . . . . . . . . . . . . . . . . . . . . . . . . . . . 11 1.5 First Steps . . . . . . . . . . . . . . . . . . . . . . . . . . . . . . . . . . . . . . . . . . . . . . . . . . . . . . . . 12 1.6 Saving the IP Address in the TPG . . . . . . . . . . . . . . . . . . . . . . . . . . . . . . . . . . 13 2 Administration Methods . . . . . . . . . . . . . . . . . . . . . . . . . . . . . . . . 17 2.1 Administration via the TPG Control Center. . . . . . . . . . . . . . . . . . . . . . . . . 18 2.2 Administration via the InterCon-NetTool . . . . . . . . . . . . . . . . . . . . . . . . . . 20 2.3 Administration via Email . . . . . . . . . . . . . . . . . . . . . . . . . . . . . . . . . . . . . . . . . . 22 2.4 Administration via the Status/Reset Button of the Device . . . . . . . . . . 24 3 Network and Device Settings . . . . . . . . . . . . . . . . . . . . . . . . . . . . 25 3.1 How to Configure IPv4 Parameters . . . . . . . . . . . . . . . . . . . . . . . . . . . . . . . . 26 3.2 How to Configure IPv6 Parameters . . . . . . . . . . . . . . . . . . . . . . . . . . . . . . . . 28 3.3 How to Configure the DNS . . . . . . . . . . . . . . . . . . . . . . . . . . . . . . . . . . . . . . . . 30 3.4 How to Configure SNMP . . . . . . . . . . . . . . . . . . . . . . . . . . . . . . . . . . . . . . . . . . 31 3.5 How to Configure POP3 and SMTP . . . . . . . . . . . . . . . . . . . . . . . . . . . . . . . . 32 3.6 How to Configure Bonjour . . . . . . . . . . . . . . . . . . . . . . . . . . . . . . . . . . . . . . . . 35 3.7 How to Configure the Device Time . . . . . . . . . . . . . . . . . . . . . . . . . . . . . . . . 36 3.8 How to Determine a Description . . . . . . . . . . . . . . . . . . . . . . . . . . . . . . . . . . 37 3.9 How to Use the Notification Service . . . . . . . . . . . . . . . . . . . . . . . . . . . . . . . 38 4 ThinPrint Settings . . . . . . . . . . . . . . . . . . . . . . . . . . . . . . . . . . . . . . . 40 4.1 How to Define the ThinPrint Port . . . . . . . . . . . . . . . . . . . . . . . . . . . . . . . . . . 41 4.2 How to Define the Bandwidth . . . . . . . . . . . . . . . . . . . . . . . . . . . . . . . . . . . . . 41 4.3 How to Embed Printers . . . . . . . . . . . . . . . . . . . . . . . . . . . . . . . . . . . . . . . . . . . 42 4.4 How to Define Timeouts . . . . . . . . . . . . . . . . . . . . . . . . . . . . . . . . . . . . . . . . . . 44 4.5 How to Get Status Information on the Printer Connections . . . . . . . . . 45 4.6 How to get Printer Messages . . . . . . . . . . . . . . . . . . . . . . . . . . . . . . . . . . . . . . 47 4.7 How to Use the ThinPrint Connection Service . . . . . . . . . . . . . . . . . . . . . . 48 4.8 How Does the TPG Receive Encrypted Data? . . . . . . . . . . . . . . . . . . . . . . . 50 TPG User Manual 3 5 Security . . . . . . . . . . . . . . . . . . . . . . . . . . . . . . . . . . . . . . . . . . . . . . . . 51 5.1 How to Control the Access to the TPG Control Center . . . . . . . . . . . . . . 52 5.2 How to Control the Access to the TPG (TCP Port Access Control). . . . 53 5.3 How to Use Certificates Correctly . . . . . . . . . . . . . . . . . . . . . . . . . . . . . . . . . . 55 5.4 How to Use Authentication Methods . . . . . . . . . . . . . . . . . . . . . . . . . . . . . . 62 6 Maintenance. . . . . . . . . . . . . . . . . . . . . . . . . . . . . . . . . . . . . . . . . . . . 69 6.1 How to Secure the TPG Parameters (Backup). . . . . . . . . . . . . . . . . . . . . . . 70 6.2 How to Use a Connected USB Device . . . . . . . . . . . . . . . . . . . . . . . . . . . . . . 71 6.3 How to Reset Parameters to their Default Values (Reset). . . . . . . . . . . . 74 6.4 How to Perform an Update. . . . . . . . . . . . . . . . . . . . . . . . . . . . . . . . . . . . . . . . 77 6.5 How to Restart the TPG? . . . . . . . . . . . . . . . . . . . . . . . . . . . . . . . . . . . . . . . . . . 78 6.6 How to Print a Status or Service Page . . . . . . . . . . . . . . . . . . . . . . . . . . . . . . 79 6.7 How to Display the Job History . . . . . . . . . . . . . . . . . . . . . . . . . . . . . . . . . . . . 81 7 Appendix . . . . . . . . . . . . . . . . . . . . . . . . . . . . . . . . . . . . . . . . . . . . . . . 83 7.1 Glossary . . . . . . . . . . . . . . . . . . . . . . . . . . . . . . . . . . . . . . . . . . . . . . . . . . . . . . . . . . 84 7.2 Parameter List . . . . . . . . . . . . . . . . . . . . . . . . . . . . . . . . . . . . . . . . . . . . . . . . . . . . 87 7.3 Troubleshooting. . . . . . . . . . . . . . . . . . . . . . . . . . . . . . . . . . . . . . . . . . . . . . . . .102 7.4 List of Figures. . . . . . . . . . . . . . . . . . . . . . . . . . . . . . . . . . . . . . . . . . . . . . . . . . . .104 7.5 Index . . . . . . . . . . . . . . . . . . . . . . . . . . . . . . . . . . . . . . . . . . . . . . . . . . . . . . . . . . . .105 TPG User Manual 4 General Information 1 General Information What information do you need? This chapter contains information concerning the device and the documentation as well as notes about your safety. You will learn how to benefit from your ThinPrint® Gateway and how to operate the device properly. • ’ThinPrint® Gateway’ Ö6 • ’Documentation’ Ö8 • ’Support and Service’ Ö10 • ’Your Safety’ Ö11 • ’First Steps’ Ö12 • ’Saving the IP Address in the TPG’ Ö13 TPG User Manual 5 General Information 1.1 What is ThinPrint®? ThinPrint® Gateway ThinPrint® is a software-based technology providing print job compression and bandwidth control for network printing. The data traffic between the application server or the print server and the local printer is reduced considerably and networks are relieved. The ThinPrint technology enables the transmission of compressed and bandwidth-optimized print jobs within a network. Print jobs are compressed using the server component of the .print technology, the so-called ThinPrint Engine. The server sends the compressed print data to a device with the implemented ThinPrint Client. This client then decompresses the print data, transferring it to any printer. Purpose The TPG (ThinPrint®Gateway) contains a fully embedded ThinPrint client. This ThinPrint .print client allows you to receive and decompress print data. The ThinPrint ® gateways TPG-25 and TPG-65 have been specifically designed for environments in which the ThinPrint technology for print job compression and bandwidth control are used. Up to two network printers can be quickly and easily embedded into the network using the TPG-25. Up to six devices can be embedded using the TPG-65. Users send compressed print jobs to the ThinPrint® gateway, which decompresses these print jobs and sends them to the appropriate printers. TPG User Manual 6 General Information Features The TPG supports the following features (amongst others): • The feature AutoConnect allows you to automatically create the required printer objects for the relevant client on the server. AutoConnect will automatically connect all selected printers on the server with a ThinPrint port; provided that templates exist. • The ThinPrint Connection Service allows you to print to ThinPrint clients, that are found behind a firewall, for example. This allows the connection via masked networks as well as the assignment of the relevant print job to the respective end device. • By means of the ThinPrint SSL/TLS encryption, the print data is protected during the transmission and will be decrypted by the ThinPrint clients or gateways before printing. System Requirements TPG User Manual The TPG has been designed for the use in TCP/IP-based networks. A ThinPrint server must be integrated within this network. The network printers involved must support RAW or socket printing (printing via TCP/IP ports), IPP printing or LPD printing. If you want to use the ThinPrint Connection Service, you need a license. 7 General Information 1.2 The TPG documentation consists of the following documents: HT M L HT M L Pr in t PD ed F PD F Structure of the Documentation Documentation Document Features User Documentation Detailed description of the TPG configuration and administration. Quick Installation Guide Information about security, hardware installation, and the initial operation procedure. Online Help (TPG Control Center) The Online Help contains detailed information about how to use the 'TPG Control Center'. Online Help (InterCon-NetTool) The Online Help contains detailed information about how to use the software tool 'InterCon-NetTool'. This documentation has been designed as an electronic document for screen use. Many programs (e.g. Adobe® Reader®) offer a bookmark navigation feature that allows you to view the entire document structure. This document contains hyperlinks to the associated information units. If you want to print this documentation, we recommend using the printer setting 'Duplex' or 'Booklet'. Terminology Used in this Document TPG User Manual The explanation of technical terms used in this document is summarized in a glossary. The glossary provides a quick overview of technical matters and background information; see: Ö84. 8 General Information Symbols and Conventions A variety of symbols are used within this document. Their meaning is listed in the following table: Table 1: Conventions within the documentation Symbol / Convention Description Warning A warning contains important information that must be heeded. Non-observance may lead to malfunctions. Note Proceed as follows: 1. Mark ... The ‘hand’ symbol marks the beginning of instructions. Individual instructions are set in italics. ª Confirmation The arrow confirms the consequence of an action. ; Requirements Hooks mark requirements that must be met before you can begin the action. Option A square marks procedures and options that you can choose. • TPG User Manual A notice contains information that should be heeded. Eye-catchers mark lists. This sign indicates the summary of a chapter. Ö The arrow marks a reference to a page within this document. In the PDF file, you can jump to this page by clicking the symbol. Bold Established terms (of buttons or menu items, for example) are set in bold. Courier Command lines are set in Courier font. 'Proper names' Proper names are put in inverted commas 9 General Information 1.3 Support Current Services Support and Service If questions remain, please contact our Computertechnik GmbH offers extensive support. Monday through Thursday Friday ℡ +49 (0)521 94226-44 @ [email protected] hotline. SEH from 8:00 a.m. to 4:45 p.m. and from 8:00 a.m. to 3:15 p.m. (CET) The following services can be found on the SEH Computertechnik GmbH homepage: http://www.seh-technology.com • current firmware • current tools • current documentation • current product information • product data sheet • and much more TPG User Manual 10 General Information 1.4 Your Safety Read and observe all safety regulations and warnings found in the documentation, on the device and on the packaging. This will avoid potential misuse and prevent damages to people and devices. SEH Computertechnik GmbH will not accept any liability for personal injuries, property damages and consequential damages resulting from the non-observance of the mentioned safety regulations and warnings. Non-observance will result in the warranty claims becoming void. Intended Use The TPG is used in TCP/IP networks. The TPG allows communication between up to two/six network printers and one ThinPrint server. The TPG has been designed for use in office environments. Improper Use All uses of the device that do not comply with the TPG functionalities described in the documentation are regarded as improper uses. It is not allowed to make modifications to the hardware and software or to try to repair the device. Safety Regulations Before starting the initial operation procedure of the TPG, please note the safety regulations in the 'Quick Installation Guide'. The Quick Installation Guide is enclosed in the packaging. Warnings Read and observe all warnings mentioned in this document. Warnings are found before any instructions known to be dangerous. They are presented as follows: Warning! TPG User Manual 11 General Information 1.5 First Steps This section provides all the information that you need for a fast operational readiness. 1. 2. 3. 4. 5. ª TPG User Manual Proceed as follows: Read and observe the security regulations in order to avoid damages to people and devices, see: Ö11. Carry out the hardware installation. The hardware installation comprises the connection of the ISD to the network and the mains supply; see: 'Quick Installation Guide'. Make sure that an IP address is stored in the TPG; see: ’Saving the IP Address in the TPG’ Ö13. Specify the ThinPrint port and other ThinPrint settings; see: Ö40. Specify the printers to which the TPG6 will send the print jobs; see: ’How to Embed Printers’ Ö42. The TPG is operational. 12 General Information 1.6 Saving the IP Address in the TPG Why IP Addresses? An IP address is used to address network devices in an IP network. TCP/IP network protocols require the storing of the IP address in the TPG so that the device can be addressed within the network. How Does the TPG Obtain IP Addresses? TPG are shipped without an IP address. The TPG is able to assign itself an IP address during the initial installation. Boot protocols are used to assign an IP address automatically to the TPG. Upon delivery, the boot protocols 'BOOTP' and 'DHCP' are enabled. Once the TPG is connected to the network, it checks whether an IP address can be obtained via the boot protocols BOOTP or DHCP. If this is not the case, the TPG assigns itself an IP address via ZeroConf from the address range (169.254.0.0/16) which is reserved for ZeroConf. Once the TPG has automatically received an IP address via a boot protocol, you can save a freely definable IP address in the TPG. The assigned IP address of the TPG can be determined and modified via the software tool 'InterCon-NetTool'. Different methods for the assignment of the IP address are described in the following. Automatic Methods of IP Address Assignments • ’ZeroConf’ Ö14 • ’BOOTP’ Ö14 • ’DHCP’ Ö14 • ’Auto Configuration (IPv6 Standard)’ Ö15 Manual Methods of IP Address Assignments TPG User Manual • ’InterCon-NetTool’ Ö15 • ’TPG Control Center’ Ö15 • ’ARP/PING’ Ö16 13 General Information ZeroConf If no IP address can be assigned via boot protocols, the TPG assigns itself an IP address via ZeroConf. For this purpose, the TPG picks an IP address at random from the address range (169.254.0.0/16) which is reserved for ZeroConf. You can use the domain name service of Bonjour for the name resolution of the IP address; see: Ö35. BOOTP The TPG supports BOOTP, which means that the IP address of the TPG can be assigned via a BOOTP server. Requirements ; The 'BOOTP' parameter has been enabled, see: Ö26. ; A BOOTP server is available in the network. If the TPG is connected, it asks the BOOTP host for the IP address and the host name. The BOOTP host answers and sends a data packet containing the IP address. The IP address is saved in the TPG. DHCP The TPG supports DHCP, which means that the IP address of the TPG can be assigned dynamically via a DHCP server. Requirements ; The 'DHCP' parameter has been enabled, see: Ö26. ; A DHCP server is available in the network. After the hardware installation, the TPG asks a DHCP server for an IP address by means of a broadcast query. The DHCP server identifies the TPG on the basis of its hardware address and sends a data packet to the TPG. This data packet contains, among others, the IP address of the TPG, the default gateway, and the IP address of the DNS server. The data is saved in the TPG. TPG User Manual 14 General Information Auto Configuration (IPv6 Standard) The TPG can have an IPv4 address and several IPv6 addresses at the same time. The IPv6 standard is used to automatically assign IP addresses in IPv6 networks. When connected to an IPv6 network, the TPG will automatically obtain an additional 'link-local' IPv6 address from the IPv6 address range. The TPG uses the 'link-local' IP address to search for a router. The TPG sends so-called 'Router Solicitations' (RS) to the special multicast address FF02::2. The available router will then return a 'Router Advertisement' (RA) containing the required information. With a prefix from the range of the global unicast addresses, the TPG can compose its own address. It simply replaces the first 64 bits (prefix FE80::) with the prefix that was sent in the RA. Requirements ; The 'IPv6' parameter has been activated. ; The 'Automatic configuration' parameter has been activated; see: Ö28. To configure the assignment of IPv6 addresses, see: Ö28. InterCon-NetTool The InterCon-NetTool has been developed by SEH Computertechnik GmbH for the administration of SEH network devices. The IP Wizard of the InterCon-NetTool helps you to configure the TCP/IP parameters, e.g. the IP address. You can manually enter the desired IPv4 address and save it in the TPG using the IP Wizard. To configure an IPv4 address via the InterCon-NetTool, see: Ö26. TPG Control Center You can manually enter the desired IP address and save it in the TPG using the TPG Control Center. • To configure an IPv4 address via the TPG Control Center, see: Ö26. • To configure an IPv6 address via the TPG Control Center, see: Ö28. TPG User Manual 15 General Information ARP/PING The assignment of the IP address to the hardware address can be done via the ARP table. The ARP table is an internal system file in which the assignment is temporarily saved (about 15 min). This table is administered by the ARP protocol. By means of the 'arp' and 'ping' commands, you can save the IP address in the TPG. If the TPG already has an IP address, the 'arp' and 'ping' commands cannot be used to save a new IP address. However, an IP address from the address range (169.254.0.0/16) which is reserved for ZeroConf can be overwritten by means of the 'arp' and 'ping' commands. The 'arp' command is used for editing the ARP table. The 'ping' command transfers a data packet containing the IP address to the hardware address of the TPG. If the data packet has been successfully sent and received, the TPG permanently saves the IP address. The implementation of the 'arp' and 'ping' command depends on the system used. Read the documentation for your operating system. Requirements ; The 'ARP/PING' parameter has been enabled, see: Ö26. Edit the ARP table: Syntax: arp -s <IP address> <hardware address> Example: arp -s 192.168.0.123 00-c0-eb-00-01-ff Assign a new IP address to the TPG: Syntax: ping <IP address> Example: ping 192.168.0.123 The separators within the hardware address that are used in this example correspond to the Windows® platform. TPG User Manual 16 Administration Methods 2 Administration Methods You can administer and configure the TPG in a number of ways. The following chapter gives you an overview of the various administration options. You will get information on when to use these methods and which functions these methods support. What information do you need? • ’Administration via the TPG Control Center’ Ö18 • ’Administration via the InterCon-NetTool’ Ö20 • ’Administration via Email’ Ö22 • ’Administration via the Status/Reset Button of the Device’ Ö24 TPG User Manual 17 Administration Methods 2.1 Which Functions Are Supported? Administration via the TPG Control Center The TPG Control Center comprises all features for the administration of the TPG. The TPG Control Center is stored in the TPG and can be displayed by means of a browser software (Internet Explorer, Firefox, Safari). Requirements ; The TPG is connected to the network and the mains voltage. ; The TPG has a valid IP address. Starting the TPG Control Center Proceed as follows: 1. Open your browser. 2. Enter the IP address of the TPG as the URL. ª The TPG Control Center appears in the browser. If the TPG Control Center is not displayed, check the proxy settings of your browser. You can also start the TPG Control Center via the software tool ’InterCon-NetTool’. Proceed as follows: 1. Highlight the TPG in the device list. 2. Select Actions – Launch Browser from the menu bar. ª The TPG Control Center appears in the browser. TPG User Manual 18 Administration Methods Fig. 1: TPG Control Center - START Structure of the TPG Control Center The available menu items are located in the navigation bar (top). After selecting a menu item (simple mouse click), the available submenu items are displayed at the left. After selecting a submenu item, the corresponding page with its content is displayed (at the right). You can set the language via the menu item START. Simply select the relevant flag. The manufacturer’s contact details and additional information regarding the product are displayed under Product & Company. The Sitemap provides an overview of and direct access to all pages of the TPG Control Center. All other menu items refer to the configuration of the TPG. They are described in the Online Help of the TPG Control Center. To start the Online Help, click the icon. TPG User Manual 19 Administration Methods 2.2 Administration via the InterCon-NetTool The software InterCon-NetTool has been developed by SEH Computertechnik GmbH for the administration of SEH network devices (TPG, TPR, print server, etc.). Depending on the network device you can configure various features via the InterCon-NetTool. Mode of Operation After the InterCon-NetTool is started, the network will be scanned for connected network devices. The network range to be scanned is freely definable. All network devices found will be displayed in the 'device list'. You can modify the device list and adopt it to your individual needs. You can mark and configure the devices in the device list. Installation In order to use the InterCon-NetTool, the program must be installed on a computer with a Windows operating system. The installation file of the InterCon-NetTool can be found on the SEH Computertechnik GmbH homepage: http://www.seh-technology.com/services/downloads/tpg.html 1. 2. 3. ª Program Start Proceed as follows: Start the InterCon-NetTool installation file. Select the desired language. Follow the installation routine. The InterCon-NetTool will be installed on your client. To start the program, double-click the InterCon-NetTool icon The icon is found on the desktop or the Windows start menu. . (Start --> Programs --> SEH Computertechnik GmbH --> InterCon-NetTool) The settings of the InterCon-NetTool are saved in the 'NetTool.ini' file. The file is stored in the directory 'Documents and Settings' with the relevant user name. TPG User Manual 20 Administration Methods Structure of the InterCon-NetTool After the program start you will see the main dialog with the following elements. The dialog may vary, depending on which elements you have chosen to be shown or hidden. Menu bar Filter for the device list Toolbar Device list Shortcut menu Fig. 2: InterCon-NetTool - Main Dialog Which Functions Are Supported? The InterCon-NetTool allows you to • assign an IPv4 address to the TPG Ö26 • restart the TPG Ö78 • reset the parameter values of the TPG to their default settings Ö74 • start the TPG Control Center Ö18 • switch from the BIOS mode to the default mode Ö102 Detailed information on how to use the InterCon-NetTool can be found in the Online Help. To start the Online Help, select Help – Online Help from the menu bar. TPG User Manual 21 Administration Methods 2.3 Administration via Email You can administer the TPG via email and thus via any computer with Internet access. Functionalities An email allows you to • send TPG status information • specify TPG parameters or • perform an update on the TPG. Requirements ; In order to receive emails, the TPG must be set up as user with its own email address on a POP3 server. ; A DNS server has been configured on the TPG; see: Ö30. ; POP3 and SMTP parameters have been configured on the TPG; see: Ö32. Sending Instructions via Email If you want to administer the TPG, you must enter the relevant instructions into the subject line of your email. 1. 2. 3. 4. 5. ª Syntax and Format of an Instruction TPG User Manual Proceed as follows: Open an email program. Write a new email. Enter the TPG address as recipient. Enter an instruction into the subject line; see: ’Syntax and Format of an Instruction’ Ö22. Send the email. The TPG receives the email and carries out the instruction. Note the following syntax for instructions in the subject line: cmd: <command> [<comment>] 22 Administration Methods The following commands are supported: Commands Option Description <command> get status Sends the status page of the TPG. get parameters Sends the parameter list of the TPG. set parameters Sends parameters to the TPG. The syntax and values can be obtained from Ö the parameter list, see: 87. Parameter and value must be entered into the email body. update tpg Carries out an automatic update using the software that is attached to the email. help Sends a page containing information about the remote maintenance. [<comment>] Freely definable text for descriptions. The following applies for the instructions: • not case-sensitive • one or more space characters are allowed • max. length is 128 byte • only the ASCII format can be read Security with TAN You will need a TAN for updates or parameter changes on the TPG. You will get a current TAN from the TPG via email, e.g. when receiving a status page. Enter the TAN into the first line of the email body. A space character must follow. Parameter Changes Parameter changes are integrated into the email body with the following syntax: <parameter> = <value> The syntax and values can be obtained from the parameter list, see: Ö87. TPG User Manual 23 Administration Methods Example 1 This email causes the TPG to send the parameter list to the sender of the email. Email address of the TPG as configured on the POP3 server. Command Fig. 3: Administration via Email - Example 1 Example 2 This email configures the parameter 'Description' on the TPG. Email address of the TPG as configured on the POP3 server. Command TAN Parameter and parameter value Fig. 4: Administration via Email - Example 2 2.4 Administration via the Status/Reset Button of the Device LEDs, the status/reset button and various ports can be found on the TPG. These components are described in the 'Quick Installation Guide'. The status/reset button allows you to • print a status page; see: Ö79. • print a service page; see: Ö79. • reset the TPG parameters to their default settings; see: Ö74. TPG User Manual 24 Network and Device Settings 3 Network and Device Settings What information do you need? You can define various settings for an ideal integration of the TPG into a network. You can also configure various device settings. This chapter describes which network and device settings are supported. • ’How to Configure IPv4 Parameters’ Ö26 • ’How to Configure IPv6 Parameters’ Ö28 • ’How to Configure the DNS’ Ö30 • ’How to Configure SNMP’ Ö31 • ’How to Configure POP3 and SMTP’ Ö32 • ’How to Configure Bonjour’ Ö35 • ’How to Configure the Device Time’ Ö36 • ’How to Determine a Description’ Ö37 • ’How to Use the Notification Service’ Ö38 TPG User Manual 25 Network and Device Settings 3.1 How to Configure IPv4 Parameters TCP/IP (Transmission Control Protocol over Internet Protocol) forwards data packets across several connections and establishes a connection between the network participants. The boot protocols DHCP and BOOTP belong to the TCP/IP protocol family. You can define various IPv4 parameters for an ideal integration of your TPG into a TCP/IP network. For further information about the assignment of IP addresses, see: Ö13. What do you want to do? ’Configuring IPv4 Parameters via the TPG Control Center’ Ö26 ’Configuring IPv4 Parameters via the InterCon-NetTool’ Ö27 Configuring IPv4 Parameters via the TPG Control Center 1. 2. 3. 4. ª Proceed as follows: Start the TPG Control Center. Select NETWORK - IPv4. Configure the IPv4 parameters; see: Table 2 Ö26. Click Save & Restart to confirm. The settings are saved. Table 2: IPv4Parameters Parameters Description DHCP BOOTP ARP/PING Enables or disables the protocols DHCP, BOOTP, and ARP/PING. Protocols offer various possibilities to save the IP address in the TPG. Ö (See ’Saving the IP Address in the TPG’ 13.) We recommend disabling these options once an IP address has been assigned to the TPG. TPG User Manual IP address IP address of the TPG Subnet mask Subnet mask of the TPG Gateway Gateway address of the TPG 26 Network and Device Settings Configuring IPv4 Parameters via the InterCon-NetTool Requirements ; The InterCon-NetTool is installed on the client, see: Ö20. ; The network scan via Multicast has been enabled in the InterCon-NetTool. ; The router in the network forwards multicast requests. Proceed as follows: 1. Start the InterCon-NetTool. 2. Highlight the TPG in the device list. The TPG is displayed in the device list under 'ZeroConf' with an IP address from the address range (169.254.0.0/16) which is reserved for ZeroConf. 3. Select Installation – IP Wizard from the menu bar. The IP Wizard is started. 4. Follow the instructions of the IP Wizard. ª The settings are saved. Fig. 5: InterCon-NetTool - IP Wizard TPG User Manual 27 Network and Device Settings 3.2 How to Configure IPv6 Parameters You can integrate the TPG into an IPv6 network. What are the Advantages of IPv6? IPv6 (Internet Protocol version 6) is the successor of the more common IPv4. Both protocols are standards for the network layer of the OSI model and regulate the addressing and routing of data packets via a network. The introduction of IPv6 has many benefits: • IPv6 increases the IP address space from 232 (IPv4) to 2128 (IPv6) IP addresses • Auto Configuration and Renumbering • Efficiency increase during routing due to reduced header information • Integrated services such as IPSec, QoS, Multicast • Mobile IP What is the Structure of an IPv6 Address? An IPv6 address consists of 128 bits. The normal format of an IPv6 address is eight fields. Each field contains four hexadecimal digits representing 16 bits. Each field is separated by a colon (:). Example: fe80 : 0000 : 0000 : 0000 : 0000 : 10 : 1000 : 1a4 Leading zeros in a field can be omitted. Example: fe80 : 0 : 0 : 0 : 0 : 10 : 1000 : 1a4 An IPv6 address may be entered or displayed using a shortened version when successive fields contain all zeros (0). In this case, two colons (::) are used. However, the use of two colons can be used only once in an address. Example: fe80 : : 10 : 1000 : 1a4 As a URL in a Web browser, an IPv6 address must be enclosed in brackets. This prevents port numbers from being mistakenly regarded as part of an IPv6 address. Example: http://[2001:608:af:1::100]:443 TPG User Manual 28 Network and Device Settings The URL will only be accepted by browsers that support IPv6. Which Types of IPv6 Addresses are available? There are different types of IPv6 addresses. The prefixes of the IPv6 addresses provide information about the IPv6 address types. • Unicast addresses can be routed globally. These addresses are unique and therefore unambiguous. A packet that is sent to a unicast address will only arrive to the interface that is assigned to this address. Unicast addresses have the prefixes '2' or '3'. • Anycast addresses are assigned to more than one interface. This means that a data packet that is sent to this address will arrive at various devices. The syntax of anycast addresses is the same as the one of unicast addresses. The difference is that anycast addresses choose one interface out of many. A packet that is dedicated to an anycast address arrives at the nearest interface (in line with the router metrics). Anycast addresses are only used by routers. • Multicast addresses allow you to send data packets to different interfaces at the same time without a proportional increase of the bandwidth. A multicast address can be recognized by the prefix 'ff'. 1. 2. 3. 4. ª TPG User Manual Proceed as follows: Start the TPG Control Center. Select NETWORK – IPv6. Configure the IPv6 parameters; see: Table 3 Ö30. Click Save & Restart to confirm. The settings are saved. 29 Network and Device Settings Table 3: IPv6 Parameters Parameters Description IPv6 Enables/disables the IPv6 functionality of the TPG. Automatic configuration Enables/disables the automatic assignment of the IPv6 address for the TPG. IPv6 address Defines a manually assigned IPv6 Unicast address in the n:n:n:n:n:n:n:n format for the TPG. Every 'n' represents the hexadecimal value of one of the eight 16 bit elements of the address. An IPv6 address may be entered or displayed using a shortened version when successive fields contain all zeros (0). In this case, two colons (::) are used. Router Defines the IPv6 unicast address of the router. The TPG sends its 'Router Solicitations' (RS) to this router. Prefix length Defines the length of the subnet prefix for the IPv6 address. The value 64 is preset. Address ranges are indicated by prefixes. The prefix length (number of bits used) is added to the IPv6 address and specified as a decimal number. The decimal number is separated by '/'. 3.3 How to Configure the DNS DNS is a service that translates domain names into IP addresses. Using DNS, names can be assigned to IP addresses and vice versa. If a DNS server is available in your network, you can use DNS for your TPG. If you use a domain name during the configuration process, you must first enable and configure DNS. DNS is used for the configuration of the time server, for example. 1. 2. 3. 4. ª TPG User Manual Proceed as follows: Start the TPG Control Center. Select NETWORK – DNS. Configure the DNS parameters; see: Table 4 Ö31. Click Save & Restart to confirm. The settings are saved. 30 Network and Device Settings Table 4: DNS Parameters Parameters Description DNS Enables/disables DNS. Primary DNS server Defines the IP address of the primary DNS server (e.g. 192.168.0.21). Secondary DNS server Defines the IP address of the secondary DNS server. The secondary DNS server is used if the first one is not available. Domain name (suffix) Defines the domain name of an existing DNS server (e.g. company.de). 3.4 How to Configure SNMP SNMP (Simple Network Management Protocol) has become the standard protocol for the administration and monitoring of network elements. The protocol controls communication between the monitored devices and the monitoring station. SNMP allows you to read and edit management information provided by the network elements (e.g. the TPG or printers). The TPG supports versions 1 and 3 of SNMP. SNMPv1 The SNMP Community is a basic form of access protection. A large number of SNMP managers are grouped together in the community. The community is then assigned (read/write) access rights. The general community string is 'public'. The community string for SNMPv1 is transferred in plain text and does not provide sufficient protection. SNMPv3 TPG User Manual SNMPv3 is a continuation of the SNMP standard, which provides improved applications and a user-based security model. Distinguishing features of SNMPv3 include its simplicity and security concept. 31 Network and Device Settings 1. 2. 3. 4. ª Proceed as follows: Start the TPG Control Center. Select NETWORK - SNMP. Configure the SNMP parameters; see: Table 5 Ö32. Click Save & Restart to confirm. The settings are saved. Table 5: SNMP Parameters Parameters Description SNMPv1 Enables/disables SNMPv1. Read-only Enables/disables the write protection for the community. Community SNMP community name The SNMP Community is a basic form of access protection in which several participants with the same access rights are grouped together. SNMPv3 Enables/disables SNMPv3. User name Defines the name of the SNMP user. Password Defines the password of the SNMP user. Hash Defines the Hash algorithm. Access rights Defines the access rights of the SNMP user. Encryption Defines the encryption method. 3.5 How to Configure POP3 and SMTP You must configure the protocols POP3 and SMTP on the TPG so that the notification service (Ö38) and the administration via email (Ö22) will work properly. POP3 TPG User Manual 'POP3' (Post Office Protocol Version 3) is a transfer protocol that a client can use to fetch emails from a mail server. POP3 is required in the TPG to administer the TPG via email. 32 Network and Device Settings SMTP What do you want to do? 'SMTP' (Simple Mail Transfer Protocol) is a protocol that controls the sending of emails in networks. SMTP is required in the TPG to administer the TPG via email and to run the notification service. ’Configuring POP3’ Ö33 ’Configuring SMTP’ Ö34 Configuring POP3 1. 2. 3. 4. ª Proceed as follows: Start the TPG Control Center. Select NETWORK - Email. Configure the POP3 parameters; see: Table 6 Ö33. Click Save & Restart to confirm. The settings are saved. Table 6: POP3 Parameters TPG User Manual Parameters Description POP3 Enables/disables the POP3 functionality. POP3 - Server name Name of the POP3 server. POP3 - Server port Defines the port used by the TPG for receiving emails. The port number 110 is preset. When using SSL/TLS, enter 995 as port number. POP3 - Security Defines the authentication method to be used. (APOP / SSL/TLS) POP3 - Check mail every Defines the time interval (in minutes) for retrieving emails from the POP3 server. POP3 - Ignore mail exceeding Defines the maximum email size (in Kbyte) to be accepted by the TPG. (0 = unlimited) POP3 - User name Defines the user name used by the TPG to connect to the POP3 server. POP3 - Password Defines the user password used by the TPG to connect to the POP3 server. 33 Network and Device Settings Configuring SMTP 1. 2. 3. 4. ª Proceed as follows: Start the TPG Control Center. Select NETWORK - Email. Configure the SMTP parameters; see: Table 7 Ö34. Click Save & Restart to confirm. The settings are saved. Table 7: SMTP Parameters Parameters Description SMTP - Server name Defines the name of the SMTP server. SMTP - Server port Defines the port number used by the TPG to send emails to the SMTP server. The port number 25 is preset. SMTP - TLS Enables/disables TLS. The security protocol TLS (Transport Layer Security) is used to encrypt the transmission between the TPG and the SMTP server. SMTP - Sender name Defines the email sender name to be used by the TPG. SMTP - Login Enables/disables the SMTP authentication for the login. SMTP - User name Defines the user name for the SMTP authentication. SMTP - Password Defines the password for the SMTP authentication. SMTP - Security (S/MIME) Enables/disables the encryption and signing of emails via S/MIME. SMTP - Signing emails Defines the signing of emails. A signature created by the sender allows the recipient to verify the identity of the sender and to make sure that the Ö55) email was not modified. An S/MIME certificate ( is required for the signing of emails. SMTP - Full encryption Defines the encryption of emails. Only the recipient can open and read the encrypted email. An S/MIME certificate ( encryption. SMTP- Attach public key TPG User Manual Ö55) is required for the Sends the public key together with the email. Many email clients require the public key to be attached in order to view the emails. 34 Network and Device Settings 3.6 How to Configure Bonjour Bonjour allows the automatic recognition of computers, devices, and network services in TCP/IP-based networks. The TPG uses the following Bonjour functions: • Checking the IP address assigned via ZeroConf • Assignment of host names to IP addresses • Location of server services without knowledge of the device’s host name or IP address. When checking the IP address assigned via ZeroConf (see: ’ZeroConf’ Ö14) the TPG sends a query to the network. If the IP address has already been assigned elsewhere in the network, the TPG will receive a message. The TPG then sends another query with a different IP address. If the IP address is available, it is saved in the TPG. The domain name service is used for additional Bonjour features. Since there is no central DNS server in Bonjour networks, each device and application has its own small DNS server. This integrated DNS server (mDNS) collects and administers the information of all participants in the net. In addition to the features of a classical DNS server, the mDNS server also saves the IP address, the service name and the offered services of each participant. 1. 2. 3. 4. ª TPG User Manual Proceed as follows: Start the TPG Control Center. Select NETWORK - Bonjour. Configure the Bonjour parameters; see: Table 8 Ö36. Click Save & Restart to confirm. The setting will be saved. 35 Network and Device Settings Table 8: Bonjour Parameters Parameters Description Bonjour Enables/disables Bonjour. Bonjour name Defines the Bonjour name of the TPG. The TPG uses this name for its Bonjour services. If no Bonjour name is entered, the default name will be used (device name@ICxxxxxx). 3.7 How to Configure the Device Time You can set the time of the TPG via a time server (SNTP server) in the network. A timeserver is a computer networking device that reads the actual time from a reference clock and distributes this information to its clients. In the TPG, the time server is defined via the IP address or the host name. Benefits and Purpose If the time server is activated, all ThinPrint print jobs that are handled by the TPG will get a time stamp. Date and time are then displayed under (Ö81) 'Job History'. UTC The TPG uses 'UTC' (Universal Time Coordinated) as a basis. UTC is a reference time and used as a time standard. Time zone The time received by the time server does not necessarily correspond to your local time zone. Deviations from your location and the resulting time difference (including country-specific particularities such as Daylight Saving Time) can be handled by means of the 'Time zone' parameter. Requirements ; A time server is integrated into the network. Proceed as follows: 1. Start the TPG Control Center. 2. Select NETWORK - Date/Time. 3. Tick Date/Time. TPG User Manual 36 Network and Device Settings 4. Enter the IP address or the host name of the time server into the Time server box. (A host name can only be used if a DNS server was configured beforehand.) 5. Select the code for your local time zone from the Time zone list. 6. Click Save & Restart to confirm. ª The settings are saved. 3.8 How to Determine a Description You can assign freely definable descriptions to the TPG. This gives you a better overview of the devices available in the network. 1. 2. 3. 4. ª TPG User Manual Proceed as follows: Start the TPG Control Center. Select DEVICE - Description. Enter freely definable names for Host name, Description and Contact person. Click Save & Restart to confirm. The data is saved. 37 Network and Device Settings 3.9 How to Use the Notification Service You can get notifications in the form of emails or SNMP traps from the TPG. By means of these notifications up to four email recipients can be informed about various events irrespective of time and location. The following message types are possible: • The status email periodically informs the recipient about the status of the TPG. • The event notification informs you about a specific event on the TPG via email or SNMP trap. The event can be: - The restart of the TPG. - The connection or disconnection of a USB flash drive to/from the TPG. - A problem with the TPG. What do you want to do? ’Configuring the sending of status emails’ Ö38 ’Configuring event notifications via email’ Ö39 ’Configuring event notifications via SNMP traps’ Ö39 Configuring the sending of status emails Requirements ; SMTP parameters can be configured on the TPG, see: Ö32. ; A DNS server has been configured on the TPG; see: Ö30. For the notification service you can specify up to two email recipients. 1. 2. 3. 4. TPG User Manual Proceed as follows: Start the TPG Control Center. Select DEVICE - Notification. Enter the email address of the recipient into the Email recipient box. Tick Status for the relevant recipient. 38 Network and Device Settings 5. Specify the sending interval in the Status notification time area. 6. Click Save & Restart to confirm. ª The settings are saved. Configuring event notifications via email Requirements ; SMTP parameters can be configured on the TPG, see: Ö32. ; A DNS server has been configured on the TPG; see: Ö30. For the notification service you can specify up to two email recipients and the message types. 1. 2. 3. 4. 5. ª Proceed as follows: Start the TPG Control Center. Select DEVICE - Notification. Enter the email address of the recipient into the Email recipient box. Tick the options with the desired message types. Click Save & Restart to confirm. The settings are saved. Configuring event notifications via SNMP traps For the notification service you can specify up to two SNMP trap recipients and the message types. 1. 2. 3. 4. 5. 6. ª TPG User Manual Proceed as follows: Start the TPG Control Center. Select DEVICE - Notification. Enter the trap address of the recipient into the Trap target box. Enter the trap community of the recipient into the Trap community box. Tick the options with the desired message types. Click Save & Restart to confirm. The settings are saved. 39 ThinPrint Settings 4 ThinPrint Settings What information do you need? You must define the port, the bandwidth as well as the printer and the printer properties if you want the TPG to communicate with a ThinPrint server via a port or if you want the TPG to receive and forward print jobs. This chapter describes how to match the parameter values in an ideal way. • ’How to Define the ThinPrint Port’ Ö41 • ’How to Define the Bandwidth’ Ö41 • ’How to Embed Printers’ Ö42 • ’How to Define Timeouts’ Ö44 • ’How to Get Status Information on the Printer Connections’ Ö45 • ’How to get Printer Messages’ Ö47 • ’How to Use the ThinPrint Connection Service’ Ö48 • ’How Does the TPG Receive Encrypted Data?’ Ö50 The settings described here refer to the client-side (TPG). Information about the installation, configuration and administration of the ThinPrint environment can be found in the ThinPrint documentation at http://www.thinprint.com. TPG User Manual 40 ThinPrint Settings 4.1 How to Define the ThinPrint Port In ThinPrint environments, printing is done to a TCP/IP port via a socket connection. The port number of the TPG must be identical to the port number that was defined for the ThinPrint server. Port 4000 is preset. You can change the port number, if necessary. 1. 2. 3. 4. ª Proceed as follows: Start the TPG Control Center. Select DEVICE – ThinPrint®. Enter the port number into the ThinPrint® port box. Click Save & Restart to confirm. The setting will be saved. 4.2 How to Define the Bandwidth Bandwidth describes the capacity of a data connection. The bandwidth of the TPG is indicated in bit/second (bit/s). The bandwidth that is needed for print jobs can be limited to a freely definable value for each ThinPrint port (server side). You can further decrease the bandwidth limit on the port of the TPG (client side). Defining a bandwidth value on the TPG which is higher than the defined value (server side) will have no effect. In this case, the pre-defined value will be applied. 1. 2. 3. 4. 5. ª TPG User Manual Proceed as follows: Start the TPG Control Center. Select DEVICE – ThinPrint®. Tick Bandwidth. Enter the desired bandwidth. Click Save & Restart to confirm. The setting will be saved. 41 ThinPrint Settings 4.3 How to Embed Printers Print jobs are sent from the ThinPrint server to the TPG. After the decompression of the print jobs, the TPG forwards the print jobs to the printers. The print jobs are assigned via the printer ID. Up to two (TPG-25) or six (TPG-65) network printers can be embedded via the TPG. When integrating the connected network printers you must define the printer parameters (name, class, driver, address) and a transfer method. Transfer Methods The data transfer between the TPG and the network printers can be done in three ways: • Usually the data is transferred to the TCP/IP port via a raw/socket connection. Port 9100 is preset. If required, you can configure a different port number. • By means of IPP connections (Internet Printing Protocol) the print data is transmitted via HTTP 1.1 via local networks or the Internet to the printer. To this purpose, you must configure a printer URL that needs to be implemented according to the information of the manufacturer. Please refer to the documentation of your printer. The printer URL 'ipp/lp1' is preset and can be changed, if needed. Your advantage: The connection between the TPG and the printer can be encrypted via SSL/TLS. • Data transfer can also be done via the LPD protocol (Line Printer Daemon). During LPD printing the print data is sent to the IP address of the printer by means of an LPD queue. The LPD queue name 'lp1' is preset. If required, you can configure a different LPD queue name. Depending on the configuration, the printing behavior is either compliant to RFC1179 or resembles Microsoft LPD printing. Your advantage: When using the LPD protocol for data transfer, additional print job attributes will be transferred and displayed in the 'job history' (Ö81). TPG User Manual 42 ThinPrint Settings The support of the transfer methods depends on the printer. Consult your printer manual for more information. 1. 2. 3. 4. 5. ª Proceed as follows: Start the TPG Control Center. Select DEVICE – ThinPrint®. Enter the printer parameters into the boxes; see: Table 9 Ö43. Select a transfer method for every printer. Click Save & Restart to confirm. The settings are saved. Table 9: Printer Parameters TPG User Manual Parameters Description ID The ID clearly identifies the printers for the ThinPrint server. Printer Defines the printer name. The printer name is purely a description and is used to distinguish the printers. The printer can only use the ThinPrint AutoConnect feature if a printer name was defined. If the printer supports SNMP, the printer class is derived automatically via SNMP. A freely definable description can be entered at any time and will override any automatically derived printer name. Class Printers with compatible drivers can be arranged in one class. In addition to the defining of the printer name, you can also define a printer class if you want to use the ThinPrint AutoConnect feature. If the printer supports SNMP, the class name is obtained automatically via SNMP. A freely definable description can be entered at any time and will override any automatically derived class name. Driver Defines the printer driver for the ThinPrint® AutoConnect feature. Printer address Defines the IP address or host name of the printer. The host name can only be used if a DNS server was configured beforehand. 43 ThinPrint Settings Parameters Description Port Defines the port number for RAW/socket printing. (Default = 9100) Is used when selecting 'RAW' as the transfer method. URL Specifies the second part of the printer URL for IPP printing. (Default = ipp/lp1) Is used when selecting 'IPP' as the transfer method. SSL Enables/disables the SSL/TLS encryption for IPP printing. Is used when selecting 'IPP' as the transfer method. LPD Queue Defines the queue name for LPD printing. (Default = lp1) Is used when selecting 'LPD' as the transfer method. RFC Enables/disables the RFC1179 conformity for LPD printing. Is used when selecting 'LPD' as the transfer method. If this option is disabled, the printing behavior resembles that of Microsoft® LPD printing. 4.4 How to Define Timeouts You can use timeouts to control how errors are handled before and during a print job. Printer connection timeout The 'Printer open timeout' parameter specifies the period of time (in seconds) after which a connection attempt to the printer should be aborted. It is advisable to abort a connection attempt if the printer is not physically available for the TPG and the ThinPrint port is to be freed for subsequent print jobs, for example. Job sending timeout The 'Job send timeout' parameter specifies the period of time (in seconds) after which a current print job should be aborted. It is advisable to abort a print job if the print job cannot be executed due to a printer error (for example, no paper). Both timeouts cause the print jobs to be deleted. In 'pure' ThinPrint printing, an error message is also sent to the ThinPrint server. No error message is sent to the ThinPrint server when printing takes place via the Connection Service. TPG User Manual 44 ThinPrint Settings 1. 2. 3. 4. ª Proceed as follows: Start the TPG Control Center. Select DEVICE – ThinPrint®. In the Printer connection timeout and Job sending timeout fields, enter the periods of time in seconds after which the timeouts should take effect (0 s = off). Click Save & Restart to confirm. The settings are saved. 4.5 How to Get Status Information on the Printer Connections You can view the connection status of the embedded printers. The following connection statuses can be displayed: Connection Status Description Time out No connection to the printer at present. A connection was available at an earlier stage. reachable A connection to the printer is available at present. unreachable No connection to the printer so far. Unknown The connection status to the printer cannot be determined. In order to get the connection status, you must configure a 'ping' query. What do you want to do? TPG User Manual ’Configuring a 'ping' Query via the TPG Control Center’ Ö46 ’Displaying the Printer Connection Status via the TPG Control Center’ Ö46 45 ThinPrint Settings Configuring a 'ping' Query via the TPG Control Center 1. 2. 3. 4. 5. ª Proceed as follows: Start the TPG Control Center. Select DEVICE – ThinPrint® printer. Tick Monitoring via ping. Enter the interval (in seconds) into the Monitoring interval box. Click Save & Restart to confirm. The settings are saved. Displaying the Printer Connection Status via the TPG Control Center Proceed as follows: 1. Start the TPG Control Center. 2. Select DEVICE - ThinPrint® printer. ª The printer connection status is displayed under 'ThinPrint® printer status' in the 'Status' column and is assigned to the printer IDs. TPG User Manual 46 ThinPrint Settings 4.6 How to get Printer Messages You can view printer error messages (Paper empty, Offline, Paper jam, etc.) and printer status messages (idle, printing, warming up, etc.). In order to get printer messages, you must configure an SNMP query beforehand. Not all printers support SNMP. Consult your printer manual for more information. What do you want to do? ’Configuring an SNMP Query via the TPG Control Center’ Ö47 ’Displaying Printer Status Messages via the TPG Control Center’ Ö47 Configuring an SNMP Query via the TPG Control Center Requirements ; The printer supports SNMP. 1. 2. 3. 4. 5. ª Proceed as follows: Start the TPG Control Center. Select DEVICE – ThinPrint® printer. Tick SNMP. Enter the interval (in seconds) into the Monitoring interval box. Click Save & Restart to confirm. The settings are saved. Displaying Printer Status Messages via the TPG Control Center Proceed as follows: 1. Start the TPG Control Center. 2. Select DEVICE – ThinPrint® printer. ª The printer messages are shown under 'ThinPrint® printer status' in the 'Status' column and are assigned to the printer IDs. TPG User Manual 47 ThinPrint Settings 4.7 How to Use the ThinPrint Connection Service The ThinPrint Connection Service sends print jobs via TCP/IP to ThinPrint clients (i.e. the TPG) in masked networks (NAT). The Connection Service manages the entire communication between the ThinPrint server and the corresponding client. This allows the connection via masked networks as well as the assignment of the relevant print job to the respective end device. To use this service, you must prepare the TPG. For each end device that uses the Connection Service, you must store the client ID and an authentication key in the database of the Connection Service. You must also set these two values on the TPG. Please note that you need a ThinPrint license for each client ID. 1. 2. 3. 4. 5. ª Proceed as follows: Start the TPG Control Center. Select DEVICE – ThinPrint®. Tick Connection Service. Enter the relevant parameters; see: Table 10 Ö48. Click Save & Restart to confirm. The settings are saved. Table 10: Connection Service Parameters TPG User Manual Parameters Description Connection Service Enables/disables the ThinPrint Connection Service. Server name IP address or host name of the server on which the Connection Service is installed. The host name can only be used if a DNS server was configured beforehand. Port Defines the TCP port used by the TPG for communicating with the Connection Service. The port number 4001 is preset. 48 ThinPrint Settings Parameters Description Client ID Client ID as stored in the database of the Connection Service. The Connection Service needs the Client ID to send print jobs to the TPG. Authentication key Authentication key as stored in the database of the Connection Service. Keep alive Interval (in seconds) after which the connection to the Connection Service is refreshed. The value has to be equal to or lower than the 'KeepAliveTO' value set on the Connection Service server. (allowed entry: 1 - 60000 | default = 60) Connection retry Defines the time interval (in seconds) after which a connection retry is executed if the Connection Service cannot be reached. (allowed entry: 1 - 60000 | default = 120) The connection status is displayed next to the ’Connection Service’ option. If the connection to the Connection Service was refused, it is because a value (client ID, authentication key, port or server name) was entered incorrectly. In this case, verify and correct your settings and click Save & Restart. TPG User Manual 49 ThinPrint Settings 4.8 How Does the TPG Receive Encrypted Data? A secure connection during the transfer of print jobs between ThinPrint (server or Connection Service) and the TPG is guaranteed by means of an SSL/TLS encryption. The ThinPrint server requests a certificate from the TPG. By means of this certificate, the ThinPrint server checks whether the TPG is authorized to receive the print data. If an encryption was enabled on the ThinPrint server, you must install a certificate from a corresponding Certification Authority both on the ThinPrint server and the TPG. To authorize the TPG to receive encrypted print data, proceed as follows: • Create a certificate request; see: Ö58. • Save the CA certificate; see: Ö59. TPG User Manual 50 Security 5 Security A number of security mechanisms are available to ensure optimum security for the TPG. This chapter describes how to make use of these security mechanisms. The following security mechanisms can be configured and activated according to your demands: What information do you need? • ’How to Control the Access to the TPG Control Center’ Ö52 • ’How to Control the Access to the TPG (TCP Port Access Control)’ Ö53 • ’How to Use Certificates Correctly’ Ö55 • ’How to Use Authentication Methods’ Ö62 TPG User Manual 51 Security 5.1 How to Control the Access to the TPG Control Center You are able to restrict the administrative web access to the TPG Control Center with a password or by selecting the permitted types of connection. What do you want to do? ’Specifying the Permitted Web Connection Type’ Ö52 ’Protecting the web access via a password’ Ö53 The TPG Control Center can also be protected by the SNMP security concept. The concept includes administration of user groups and access rights. For further information; see: ’How to Configure SNMP’ Ö31. Specifying the Permitted Web Connection Type Types of Connection (HTTP/HTTPS) The web access to the TPG Control Center can be secured by selecting the permitted types of connection (HTTP/HTTPS). If HTTPS is exclusively chosen as the connection type, the administrative web access to the TPG Control Center is protected by SSL/TLS. SSL/TLS requires a certificate to check the identity of the TPG. During a so-called ’handshake’, the client asks for a certificate via a browser. This certificate must be accepted by the browser. URLs that require an SSL/TLS connection start with 'https'. 1. 2. 3. 4. ª TPG User Manual Proceed as follows: Start the TPG Control Center. Select SECURITY - Device access. Tick HTTP/HTTPS or HTTPS only in the Web area. Click Save & Restart to confirm. The setting will be saved. 52 Security Protecting the web access via a password You can use a password to protect the TPG Control Center against unauthorized web access. If a password is set, only the start page of the TPG Control Center can be visited and displayed. If you select a menu item, you will be asked to enter a password. You will also be asked to enter a non-definable user name. Leave this field blank at the password prompt. 1. 2. 3. 4. 5. ª Proceed as follows: Start the TPG Control Center. Select SECURITY - Device access. In the web area, enter a password into the Password box. Repeat the password. Click Save & Restart to confirm. The setting will be saved. 5.2 How to Control the Access to the TPG (TCP Port Access Control) TCP Port Access Control You can control the access to the TPG. To do so, various TCP port types on the TPG can be locked. Network elements with access rights can be defined as exceptions and excluded from blocking. The TPG only accepts data packets from network elements defined as exceptions. Security Levels The port types to be blocked must be defined in the 'Security level' area. The following categorization can be selected: • Lock TCP access (locks TCP ports: HTTP/HTTPS/...) • Lock all (locks IP ports) Exceptions TPG User Manual In order to exclude network elements (e.g. clients, DNS server, SNTP server) from port locking, they must be defined as exceptions. To do so, the IP addresses or MAC addresses (hardware addresses) of the network elements with access rights must be entered in the 'Exceptions' area. Please note: 53 Security • MAC addresses are not delivered through routers! • The use of wildcards (*) allows you to define subnetworks. Test Mode The 'test mode' allows you to check the configured access protection. If the test mode is activated, access protection remains active until the TPG is rebooted. After restarting, the protection is no longer effective. The 'test mode' option is activated by default. After a successful test, you must deactivate the test mode so that access protection remains permanently active. 1. 2. 3. 4. 5. 6. 7. 8. Proceed as follows: Start the TPG Control Center. Select SECURITY - TCP port access. Tick Port access control. Select the desired protection in the Security level area. In the Exceptions area, define the network elements which are excluded from port blocking. Enter the IP or MAC addresses and tick the options. Make sure that the test mode is enabled. Click Save & Restart to confirm. The settings are saved. The port access control is activated until the device is restarted. Check the port access and configurability of the TPG. If the TPG can no longer be reached using the TPG Control Center, restart the device; see: Ö78. 9. Clear Test mode. 10. Click Save & Restart to confirm. ª The settings are saved. The port access control is active. Access to the ports is restricted. TPG User Manual 54 Security 5.3 How to Use Certificates Correctly The TPG has its own certificate management. This section explains how certificates are used and when the use of certificates is recommended. What are Certificates? Certificates can be used in TCP/IP-based networks to encrypt data and to authenticate communication partners. Certificates are electronic messages containing a key (public key) and a signature. Benefits and Purpose The use of certificates allows for various security mechanisms. Use certificates on your TPG • to receive encrypted print data; see: Ö50. • to check the identity of the TPG in the network; see: ’Configuring EAP-TLS’ Ö63. • to authenticate the TPG/client if the administrative web access to the TPG Control Center is protected via HTTPS (SSL/TLS); see: Ö52. If you want to use certificates, it is advisable to protect the administrative web access to the TPG Control Center by a password so that the certificate on the TPG cannot be deleted by unauthorized persons; see: Ö52. Which Certificates are available? Both self-signed certificates and CA certificates can be used with the TPG. The following certificates can be distinguished: • Self-signed certificates have a digital signature that has been created by the TPG. If a self-signed certificate is used, the ThinPrint server cannot print via SSL/TLS. A CA certificate is mandatory to print via SSL. • CA certificates are certificates that have been signed by a certification authority (CA). • The authenticity of the CA certificate can be verified by means of a so-called root certificate issued by the certification TPG User Manual 55 Security authority. The root certificate is stored on an authentication server in the network. • Upon delivery, a certificate (the so-called default certificate) is stored in the TPG. It is recommended that you replace the default certificate by a self-signed certificate or CA certificate as soon as possible. • S/MIME certificate S/MIME certificates (*.pem file) are used to sign and encrypt the emails that are sent by the TPG. The corresponding private key must be installed as an own certificate in the pkcs(12) format (as *.p12 file) in the intended email program (Thunderbird, Outlook, etc.). Only then can the emails be verified and displayed (in the case of encryption). The following certificates can be installed at the same time in the TPG: - 1 Self-signed certificate - 1 CA certificate or pkcs(12) certificate - 1 Root certificate - 1 S/MIME certificate You can also generate a certificate request for a CA certificate. All certificates can be deleted separately. Existing certificates will be overridden when installing or generating new certificates. A pkcs(12) certificate can only be installed if there are currently no certificate requests or CA certificates installed. Fig. 6: TPG Control Center - Certificates TPG User Manual 56 Security What do you want to do? ’Displaying Certificates’ Ö57 ’Creating a Self-Signed Certificate’ Ö57 ’Creating a Certificate Request for CA Certificates’ Ö58 ’Saving the CA Certificate in the TPG’ Ö59 ’Saving the root certificate on the TPG’ Ö60 ’Saving the pkcs(12) certificate in the TPG’ Ö60 ’Saving the S/MIME certificate on the TPG’ Ö61 ’Deleting Certificates’ Ö62 Displaying Certificates Certificates installed on the TPG and certificate requests can be displayed and viewed. Proceed as follows: 1. Start the TPG Control Center. 2. Select SECURITY - Certificates. 3. Select the certificate via the icon ª The certificate is displayed. . Creating a Self-Signed Certificate If a self-signed certificate has already been created on the TPG, you must first delete the certificate; see: Ö62. 1. 2. 3. 4. 5. TPG User Manual Proceed as follows: Start the TPG Control Center. Select SECURITY - Certificates. Click Self-signed certificate. Enter the relevant parameters, see: Table 11 Ö58. Click Install. 57 Security ª The certificate will be created and installed. This may take a few minutes. Table 11: Parameters for the Creation of Certificates Parameters Description Common name Is used to clearly identify the certificate. It is advisable to use the IP address or the host name of the TPG to allow a clear assignment of the certificate to the TPG. You can enter a maximum of 64 characters. Email address Specifies an email address. You can enter a maximum of 40 characters. (Optional Entry) Organization name Specifies the company that uses the TPG. You can enter a maximum of 64 characters. Organizational unit Specifies the department or subsection of a company. You can enter a maximum of 64 characters. (Optional Entry) Location Specifies the locality where the company is based. You can enter a maximum of 64 characters. State name Specifies the state in which the company is based. You can enter a maximum of 64 characters. (Optional Entry) Domain component Allows you to enter additional attributes. (Optional Entry) Country Specifies the country in which the company is based. Enter the two-digit country code according to ISO 3166. Examples: DE = Germany, GB = Great Britain, US = USA Issued on Specifies the date from which on the certificate is valid. Expires on Specifies the date from which on the certificate becomes invalid. Creating a Certificate Request for CA Certificates As a preparation for the use of a CA certificate, a certificate request that has to be sent to the certification authority can be created in the TPG. The certification authority will then create a CA certificate on the basis of the certificate request. The certificate must be in base 64 format. TPG User Manual 58 Security If a certificate request has already been created on the TPG, it will be overwritten. Proceed as follows: 1. Start the TPG Control Center. 2. Select SECURITY - Certificates. 3. Click Certificate request. 4. Enter the required parameters, see: Table 11 Ö58. 5. Click Create a request. The creation of the certificate request is in progress. This may take a few minutes. 6. Select Upload and save the requests in a text file. 7. Click OK. 8. Send the text file as certificate request to a certification authority. When the CA certificate has been received, it must be saved in the TPG; see: Ö59. Saving the CA Certificate in the TPG If a CA certificate has already been installed on the TPG, it will be overwritten. Requirements ; A certificate request has been created at an earlier date; see: Ö58. ; The certificate must be in base 64 format. 1. 2. 3. 4. TPG User Manual Proceed as follows: Start the TPG Control Center. Select SECURITY - Certificates. Click Requested certificate. Click Browse. 59 Security 5. Specify the CA certificate. 6. Click Install. ª The CA certificate is saved in the TPG. Saving the root certificate on the TPG The TPG offers a number of authentication methods to verify its identity in a network. If you use the authentication method 'EAP-TLS', you must install the root certificate of the authentication server (RADIUS) on the TPG; see: Ö63. If a root certificate has already been installed on the TPG, it will be overwritten. Requirements ; The certificate must be in base 64 format. 1. 2. 3. 4. 5. 6. ª Proceed as follows: Start the TPG Control Center. Select SECURITY - Certificates. Click Root certificate. Click Browse. Specify the root certificate. Click Install. The root certificate is saved in the TPG. Saving the pkcs(12) certificate in the TPG Certificates with the pkcs(12) format are used to save private keys and their respective certificates and to protect them by means of a password. If a pkcs(12) certificate has already been installed on the TPG, it will be overwritten. Requirements TPG User Manual ; The certificate must be in base 64 format. 60 Security ; No certificate request may exist. To delete the certificate request, see: Ö62. ; No CA certificate may be installed. To delete a CA certificate, see: Ö62. 1. 2. 3. 4. 5. 6. 7. ª Proceed as follows: Start the TPG Control Center. Select SECURITY - Certificates. Click pkcs12 certificate. Click Browse. Specify the pkcs(12) certificate. Enter the password. Click Install. The pkcs(12) certificate will be saved in the TPG. Saving the S/MIME certificate on the TPG S/MIME certificates (*.pem file) are used to sign and encrypt the emails that are sent by the TPG. If an S/MIME certificate has already been installed on the TPG, it will be overwritten. Requirements ; The certificate must be in base 64 format. 1. 2. 3. 4. 5. 6. ª TPG User Manual Proceed as follows: Start the TPG Control Center. Select SECURITY - Certificates. Click S/MIME certificate. Click Browse. Specify the S/MIME certificate. Click Install. The S/MIME certificate will be saved on the TPG. 61 Security Deleting Certificates Proceed as follows: 1. Start the TPG Control Center. 2. Select SECURITY - Certificates. 3. Select the certificate to be deleted via the icon certificate is displayed. 4. Click Delete. ª The certificate is deleted. 5.4 . The How to Use Authentication Methods By means of an authentication, a network can be protected against unauthorized access. The TPG can participate in various authentication procedures. This section describes which procedures are supported and how these procedures are configured on the TPG. What is IEEE 802.1x? The IEEE 802.1x standard provides a basic structure for various authentication and key management protocols. IEEE 802.1x allows you to control the access to networks. Before users gain access to a network via a network device, they must authenticate themselves in the network. After the authentication was successful, the access to the network will be freed. What is EAP? The standard IEEE 802.1x is based upon the EAP (Extensible Authentication Protocol). EAP is a universal protocol for many authentication procedures. EAP allows for a standardized authentication procedure between the network device and an authentication server (RADIUS). First you must define the authentication procedure (TLS, PEAP, TTLS, etc.) to be used and configure it on all network devices involved. What is RADIUS? RADIUS (Remote Authentication Dial-In User Service) is an authentication and account management system that validates user login information and grants access to the desired resources. The TPG supports various EAP authentication methods in order to authenticate itself in a protected network. TPG User Manual 62 Security What do you want to do? ’Configuring EAP-MD5’ Ö63 ’Configuring EAP-TLS’ Ö63 ’Configuring EAP-TTLS’ Ö65 ’Configuring PEAP’ Ö66 ’Configuring EAP-FAST’ Ö67 Configuring EAP-MD5 Benefits and Purpose EAP-MD5 validates the identity of devices or users before they gain access to network resources. You can configure the TPG for the EAP-MD5 network authentication. This makes sure that the TPG gets access to protected networks. Mode of Operation EAP-MD5 describes a user-based authentication method via a RADIUS server. The TPG must be defined as user (with user name and password) on a RADIUS server. The authentication method EAP-MD5 must then be enabled on the TPG and the user name and password need to be entered. Requirements ; The TPG is defined as user (with user name and password) on a RADIUS server. 1. 2. 3. 4. 5. ª Proceed as follows: Start the TPG Control Center. Select SECURITY – Authentication. Select MD5 from the Authentication method list. Enter the user name and the password that are used for the configuration of the TPG on the RADIUS server. Click Save & Restart to confirm. The settings are saved. Configuring EAP-TLS Benefits and Purpose TPG User Manual EAP-TLS (Transport Layer Security) validates the identity of devices or users before they gain access to network resources. You can 63 Security configure the TPG for the EAP-TLS network authentication. This makes sure that the TPG gets access to protected networks. Mode of Operation EAP-TLS describes a certificate-based authentication method via a RADIUS server. For this purpose, certificates are exchanged between the TPG and the RADIUS server. An encrypted TLS connection between the TPG and the RADIUS server is established in this process. Both RADIUS server and TPG need a valid, digital certificate signed by a CA. The RADIUS server and the print server must validate the certificate. After the mutual authentication was successful, the access to the network will be freed. Since each device needs a certificate, a PKI (Public Key Infrastructure) must be available. User passwords are not necessary. If you want to use the EAP-TLS authentication, you must observe the instructions below in the indicated order. If this procedure is not adhered to, the TPG in the network may not be addressable. In this case you have to reset the TPG parameters; see: Ö74. Procedure • Create a certificate request on the TPG; see: Ö58. • Create a CA certificate using the certificate request and the authentication server. • Install the CA certificate on the TPG; see: ’Saving the CA Certificate in the TPG’ Ö59. • Install the root certificate of the authentication server on the TPG; see: ’Saving the root certificate on the TPG’ Ö60. • Enable the authentication method 'EAP-TLS' on the TPG. 1. 2. 3. 4. ª TPG User Manual Proceed as follows: Start the TPG Control Center. Select SECURITY – Authentication. Select TLS from the Authentication method list. Click Save & Restart to confirm. The settings are saved. 64 Security Configuring EAP-TTLS Benefits and Purpose Mode of Operation EAP-TTLS (Tunneled Transport Layer Security) validates the identity of devices or users before they gain access to network resources. You can configure the TPG for the EAP-TTLS network authentication. This makes sure that the TPG gets access to protected networks. EAP-TTLS consists of two phases: • In phase 1, a TLS-encrypted channel between the TPG and the RADIUS server will be established. Only the RADIUS server authenticates itself using a certificate that was signed by a CA. This process is also referred to as 'outer authentication'. • In phase 2, an additional authentication method is used for the communication within the TLS channel. EAP-defined methods and older methods (CHAP, PAP, MS-CHAP und MS-CHAPv2) are supported. This process is also referred to as 'inner authentication'. The advantage of this procedure is that only the RADIUS server needs a certificate. Therefore no PKI is needed. Moreover, TTLS supports most authentication protocols. Requirements ; The TPG is defined as user (with user name and password) on a RADIUS server. 1. 2. 3. 4. 5. 6. 7. ª TPG User Manual Proceed as follows: Start the TPG Control Center. Select SECURITY – Authentication. Select TTLS from the Authentication method list. Enter the user name and the password that are used for the configuration of the TPG on the RADIUS server. Select the settings intended to secure the communication in the TLS channel. To make the connection more secure, you can also install the root certificate of the RADIUS server on the TPG (Ö60). Click Save & Restart to confirm. The settings are saved. 65 Security Configuring PEAP Benefits and Purpose PEAP (Protected Extensible Authentication Protocol) validates the identity of devices or users before they gain access to network resources. You can configure the TPG for the PEAP network authentication. This makes sure that the TPG gets access to protected networks. Mode of Operation In the case of PEAP (compare EAP-TTLS, see Ö65), an encrypted TLS (Transport Layer Security) channel is established between the TPG and the RADIUS server. Only the RADIUS server authenticates itself using a certificate that was signed by a CA. The TLS channel is then used to establish another connection that can be protected by means of additional EAP authentication methods (e.g. MSCHAPv2). The advantage of this procedure is that only the RADIUS server needs a certificate. Therefore no PKI is needed. PEAP uses the advantages of TLS and supports various authentication methods, including user passwords and one-time passwords. Requirements ; The TPG is defined as user (with user name and password) on a RADIUS server. 1. 2. 3. 4. 5. 6. 7. ª TPG User Manual Proceed as follows: Start the TPG Control Center. Select SECURITY – Authentication. Select PEAP from the Authentication method list. Enter the user name and the password that are used for the configuration of the TPG on the RADIUS server. Select the settings intended to secure the communication in the TLS channel. To make the connection more secure, you can also install the root certificate of the RADIUS server on the TPG (Ö60). Click Save & Restart to confirm. The settings are saved. 66 Security Configuring EAP-FAST Benefits and Purpose EAP-FAST (Flexible Authentication via Secure Tunneling) validates the identity of devices or users before they gain access to network resources. You can configure the TPG for the EAP-FAST network authentication. This makes sure that the TPG gets access to protected networks. Mode of Operation EAP-FAST uses (as in the case of EAP-TTLS, see Ö65) a channel in order to protect the data transfer. The main difference is that EAP-FAST does not require certificates for authentication purposes. (The use of certificates is optional.) PACs (Protected Access Credentials) are used to build the channel. PACs are credentials that comprise up to three components. • A shared secret key that contains the preshared key between the TPG and the RADIUS server. • An opaque part that is provided to the TPG and presented to the RADIUS server when the TPG wishes to obtain access to network resources. • Other information that may be useful to the client. (Optional) EAP-FAST uses two methods to generate PACs: • The manual delivery mechanism can be every mechanism that the administrator configures and considers to be safe for the network. • In the case of the automatic delivery, an encrypted channel is established in order to protect the authentication of the TPG as well as the delivery of the PACs. Requirements ; The TPG is defined as user (with user name and password) on a RADIUS server. Proceed as follows: 1. Start the TPG Control Center. 2. Select SECURITY – Authentication. TPG User Manual 67 Security 3. Select FAST from the Authentication method list. 4. Enter the user name and the password that are used for the configuration of the TPG on the RADIUS server. 5. Select the settings intended to secure the communication in the channel. 6. Click Save & Restart to confirm. ª The settings are saved. TPG User Manual 68 Maintenance 6 Maintenance What information do you need? A number of maintenance activities can be carried out on the TPG. This chapter gives a short overview. • ’How to Secure the TPG Parameters (Backup)’ Ö70 • ’How to Use a Connected USB Device’ Ö71 • ’How to Reset Parameters to their Default Values (Reset)’ Ö74 • ’How to Perform an Update’ Ö77 • ’How to Restart the TPG?’ Ö78 • ’How to Print a Status or Service Page’ Ö79 • ’How to Display the Job History’ Ö81 TPG User Manual 69 Maintenance 6.1 How to Secure the TPG Parameters (Backup) All parameter values of the TPG (exception: passwords) are saved in the 'parameters' file. You can save the parameters file as backup copy on your local client. This allows you to get back to a stable configuration status at any time. You can edit the parameter values of the copied file using a text editor. Afterwards, the configured file can be downloaded to a TPG. The parameter values included in the file will be taken over by the device. What do you want to do? ’Displaying Parameter Values’ Ö70 ’Saving the Parameter File’ Ö70 ’Loading the parameters file to a TPG’ Ö71 Displaying Parameter Values Proceed as follows: 1. Start the TPG Control Center. 2. Select MAINTENANCE - Parameter backup. 3. Click the icon . ª The current parameter values are displayed. A detailed description of the parameters can be found in the ’Parameter List’ Ö87. Saving the Parameter File Proceed as follows: 1. Start the TPG Control Center. 2. Select MAINTENANCE - Parameter backup. TPG User Manual 70 Maintenance 3. Click the icon . The current parameter values are displayed. 4. Save the 'parameters' file on a local system with the help of your browser. ª The parameter file is copied and secured. Loading the parameters file to a TPG 1. 2. 3. 4. 5. ª Proceed as follows: Start the TPG Control Center. Select MAINTENANCE - Parameter backup. Click Browse. Specify the 'parameters' file. Click Import. The parameter values in the file are applied to the TPG. You can also automatically load a parameters file from a USB flash drive to a TPG; see: Ö71. 6.2 How to Use a Connected USB Device You can connect a USB flash drive to the USB port of the TPG to make use of additional features of the TPG. Print job buffering If a printer is not available, the print jobs that are sent to that printer can be automatically buffered in the USB flash drive. As soon as the printer becomes available, the print jobs will be transferred to the printer and printed. If this option has been disabled and the printer is not available, the print jobs will be discarded after a specified timeout (’printer connection timeout’ Ö44). Parameter Backup During the 'parameter backup', the 'parameters' file will be saved automatically on the USB flash drive and updated after a parameter change. The file contains all parameter values of the TPG (exception: TPG User Manual 71 Maintenance passwords). The TPG will automatically take over the values contained in the parameters file on the USB flash drive. This way, the parameter values can be quickly and easily loaded to other TPG via a USB flash drive (e.g. when configuring new devices). Formatting To use the USB flash drive on the TPG, the USB flash drive must have the correct file system. You may have to format the USB flash drive, if necessary. During the formatting process, all data on the USB flash drive will be permanently lost. Whether formatting is required, will be displayed under 'MAINTENANCE - USB device status' in the TPG Control Center. What do you want to do? ’Formatting the USB Flash Drive’ Ö72 ’Automatic print job buffering’ Ö73 ’Saving the Parameter Values Automatically’ Ö73 ’Loading the Parameter Values Automatically to a TPG’ Ö73 Formatting the USB Flash Drive Requirements ; A USB flash drive has been connected to the TPG. 1. 2. 3. ª TPG User Manual Proceed as follows: Start the TPG Control Center. Select MAINTENANCE – USB device. Click Formatting. The USB flash drive will be formatted. 72 Maintenance Automatic print job buffering Requirements ; A USB flash drive has been connected to the TPG. ; The USB flash drive has been formatted correctly; see: Ö72. 1. 2. 3. 4. ª Proceed as follows: Start the TPG Control Center. Select MAINTENANCE – USB device. Tick Print job buffering. Click Save & Restart. The settings are saved. Saving the Parameter Values Automatically Requirements ; A USB flash drive has been connected to the TPG. ; The USB flash drive has been formatted correctly; see: Ö72. 1. 2. 3. 4. ª Proceed as follows: Start the TPG Control Center. Select MAINTENANCE – USB device. Tick Parameter backup. Click Save & Restart. The settings are saved. Loading the Parameter Values Automatically to a TPG Requirements ; The USB flash drive has been formatted correctly; see: Ö72. ; A parameter file exists on the USB flash drive; see: Ö71. Proceed as follows: 1. Connect a USB flash drive to the USB port of the TPG. ª The parameter values in the file are automatically applied to the TPG. TPG User Manual 73 Maintenance 6.3 How to Reset Parameters to their Default Values (Reset) It is possible to reset the parameters of the TPG to their default values (factory settings). All previously configured parameter values will be deleted in this process. Installed certificates will not be deleted. If you reset the parameters, the IP address of the TPG may change and the connection to the TPG Control Center may be terminated. You must reset the parameters, for example, if you have changed the location of the TPG and if you want to use the TPG in a different network. Before this change of location, you should reset the parameters to their default settings to install the TPG in a different network. Remove an attached USB flash drive before resetting the parameters. If a parameters file is saved on the USB flash drive, the TPG will - after the reset - automatically use the parameter values saved on the USB flash drive (see: Ö71). By means of the status/reset button of the device you can reset the parameters without entering the password. What do you want to do? ’Resetting the parameters via the TPG Control Center’ Ö74 ’Resetting Parameters via the InterCon-NetTool’ Ö75 ’Resetting the parameters via the status/reset button’ Ö75 Resetting the parameters via the TPG Control Center Proceed as follows: 1. Start the TPG Control Center. 2. Select MAINTENANCE - Default settings. TPG User Manual 74 Maintenance 3. Click Default settings. ª The parameters are reset. Resetting Parameters via the InterCon-NetTool 1. 2. 3. 4. ª Proceed as follows: Start the InterCon-NetTool. Highlight the TPG in the device list. Select Actions – Default Settings from the menu bar. Click Finish. The parameters are reset. Resetting the parameters via the status/reset button LEDs, various ports and the status/reset button can be found on the TPG. These components are described in the 'Quick Installation Guide'. Using the status/reset button you can reset the parameter values of the TPG to their default settings. The reset process can be divided into three phases. • During phase one, the TPG is forced into the reset mode. During the reset mode, the parameters are reset. • The second phase describes the restart of the device. • The third phase describes the printing of a status page. The reset process can be checked by means of the status page. IMPORTANT: The reset mode is indicated if the activity LED is alternatingly blinking green and red. The activity LED will then blink orange. You must release the status/reset button at this moment, otherwise the TPG switches to the BIOS mode. If this happens, try the reset again. TPG User Manual 75 Maintenance The phases are described in the following: [Phase 1] Reset [Phase 2] Restart of the device Turn off the TPG (interrupt the power supply). Turn off the TPG (interrupt the power supply). Remove the network cable (RJ-45) from the TPG. Connect the network cable (RJ-45) to the TPG. Press and hold the status/reset button. Turn on the TPG (establish the power supply). Turn on the TPG (establish the power supply). The activity LED will then be permanently lit in orange. After a few seconds, the activity LED will alternatingly blink green and red. [Phase 3] Status check Press and hold the status/reset button for a short time. The status page is printed. Wait until the activity LED will blink orange. Release the status/reset button for about 1 second. The activity LED alternatingly blinks green and red. Press and hold the status/reset button again. The activity LED blinks orange twice. Release the status/reset button. The activity LED blinks green. TPG User Manual 76 Maintenance 6.4 How to Perform an Update You can carry out software and firmware updates on the TPG. Updates allow you to benefit from currently developed features. What Happens during an Update? In the course of an update, the old firmware/software will be overwritten and replaced by the new firmware/software. The parameter default settings of the device remain unchanged. When is an Update recommended? An update should be undertaken if function do not work properly and if SEH Computertechnik GmbH has released a new software or firmware version with new functions or bug fixes. Check the installed software and firmware version on the TPG. You will find the version number on the TPG Control Center homepage or in the product list in the InterCon-NetTool. Where do I Find the Update Files? Current firmware and software files can be downloaded from the homepage of SEH Computertechnik GmbH: http://www.seh-technology.com/services/downloads/tpg.html Every update file has its own 'readme' file. Take note of the information contained in the 'readme' file. 1. 2. 3. 4. 5. ª TPG User Manual Proceed as follows: Start the TPG Control Center. Select MAINTENANCE - Update. Click Browse. Select the update file. Click Install. The update is executed. The TPG is restarted. 77 Maintenance 6.5 How to Restart the TPG? The TPG is rebooted automatically after parameter changes or updates. If the TPG is in an undefined state it can also be rebooted manually. What do you want to do? ’Rebooting the TPG via the TPG Control Center’ Ö78 ’Restarting the TPG via the InterCon-NetTool’ Ö78 Rebooting the TPG via the TPG Control Center 1. 2. 3. ª Proceed as follows: Start the TPG Control Center. Select MAINTENANCE - Restart. Click Restart. The TPG is restarted. Restarting the TPG via the InterCon-NetTool 1. 2. 3. 4. ª TPG User Manual Proceed as follows: Start the InterCon-NetTool. Highlight the TPG in the device list. Select Actions – Restart from the menu bar. The Restart print server dialog appears. Click Finish. The TPG is restarted. 78 Maintenance 6.6 How to Print a Status or Service Page You can print status or service pages. Both pages are available in English. Status Page A status page contains basic information of the TPG such as the model type, hardware address, IP address, subnet mask, gateway, etc. Service page A service page contains basic information of the TPG as well as a list of the current parameter values of the TPG. Before a status or service page is printed, the printing function must be enabled and the relevant printer as well as the data format of the status or service page (ASCII, PostScript, DATAMAX or Citizen-Z) must be specified. The printer ID 1 and the data format ASCII are preset. The relevant printer is highlighted in blue in the Device - ThinPrint® printer menu bar. What do you want to do? ’Specifying the Printing Function, Printer and the Data Format via the TPG Control Center’ Ö79 ’Printing a status page via the TPG Control Center’ Ö80 ’Printing a Status Page via the Status/Reset Button’ Ö80 ’Printing a service page via the TPG Control Center’ Ö80 ’Printing a Service Page via the Status/Reset Button’ Ö80 Specifying the Printing Function, Printer and the Data Format via the TPG Control Center 1. 2. 3. 4. TPG User Manual Proceed as follows: Start the TPG Control Center. Select MAINTENANCE – Status page. Select the desired printer ID from the Status Page Printer list. Select the desired data format from the Status page mode list. 79 Maintenance 5. Tick Printing. 6. Click Save & Restart to confirm. ª The settings are saved. Printing a status page via the TPG Control Center 1. 2. 3. ª Proceed as follows: Start the TPG Control Center. Select MAINTENANCE – Status page. Click Status page. The status page is printed. Printing a Status Page via the Status/Reset Button You can print a status page via the status/reset button of the device. Proceed as follows: 1. Press the status/reset button for a short time. ª The status page is printed. Printing a service page via the TPG Control Center 1. 2. 3. ª Proceed as follows: Start the TPG Control Center. Select MAINTENANCE – Status page. Click Service page. The service page will be printed. Printing a Service Page via the Status/Reset Button You can print a service page via the status/reset button of the device. Proceed as follows: 1. Keep the status/reset button pressed for five seconds. ª The status page is printed. TPG User Manual 80 Maintenance 6.7 How to Display the Job History You can get information about the ThinPrint print jobs that have been sent to the TPG. Only these print jobs are registered and shown in the job history. A time server (Ö36) must be configured on the TPG so that the date and time can be displayed correctly. If no time server is configured, the time stamp corresponds to the default time. A maximum of 32 print jobs are displayed. The first-in, first-out method is applied from the 33rd print job onwards. The saved print jobs will be deleted when the TPG is turned off or reset. The print jobs can also be deleted manually. The print jobs will not be deleted when the TPG is restarted. What do you want to do? ’Displaying the job history’ Ö81 ’Deleting Print Jobs Manually’ Ö82 Displaying the job history Proceed as follows: 1. Start the TPG Control Center. 2. Select MAINTENANCE - Job history. ª The Job History is displayed. The following information is shown in the Job History: TPG User Manual Information Description ID Identification number of the printer that has spooled the print job. 81 Maintenance Information Description Status Status of the print connection. The following statuses are possible: • 'Initialized' means that there is a connection to the ThinPrint server. In a next step, the connection to the printer will be established. • 'Try to connect' means that the connection to the printer will be established. • 'Connection rejected' means that the printer rejected the connection. • 'Pending' means that the print job has been accepted by the TPG but that the data transfer has not yet started. • 'Processing' means that the print job has been transferred from the TPG to the printer. • 'Processing stopped' means that the data transfer to the printer was interrupted. This can occur if, for example, the printer ran out of paper. If the printer error is fixed, data transfer will be resumed. • 'Completed' means that the TPG has completely forwarded the print job to the printer. • 'Aborted' means that the print job has been aborted. This can occur if, for example, the TPG has been restarted while the print job was processed. Protocol Protocol used to transfer the print data. The presentation consists in a combination of the following values: • 'ThP' - ThinPrint • 'Stp' - status or service page • 'Sock' - RAW/Socket printing • 'IPP' - IPP printing • 'LPD' - LPD printing Name Name of the print job Sender Name of the sending host: • '<domain user name>@<domain>' appears with ThinPrint print jobs. • 'TPG-25' or 'TPG-65' appears when printing a status or service page. Start Time at which the print job has been sent to the TPG. Size Size (in Kb) of the print job. Duration The time needed by the TPG for processing the print job. Deleting Print Jobs Manually 1. 2. 3. ª TPG User Manual Proceed as follows: Start the TPG Control Center. Select MAINTENANCE - Job history. Click Delete. All print jobs listed in the job history will be deleted. 82 Appendix - 7 Appendix What information do you need? The appendix contains a glossary, the TPG parameter list, a trouble shooting and the index lists of this document. • ’Glossary’ Ö84 • ’Parameter List’ Ö87 • ’Troubleshooting’ Ö102 • ’List of Figures’ Ö104 • ’Index’ Ö105 TPG User Manual 83 Appendix - Glossary 7.1 Glossary The glossary contains information about manufacturer-specific software solutions and terms from the world of network technology. What information do you need? Manufacturer-Specific Software Solutions • ’InterCon-NetTool’ Ö86 • ’TPG Control Center’ Ö86 Network Technology • ’Default Name’ Ö84 • ’Gateway’ Ö85 • ’Hardware Address’ Ö85 • ’Host Name’ Ö85 • ’IP Address’ Ö86 • ’Subnet Mask’ Ö86 Default Name The default name of the TPG is made up of the two letters 'IC' and the device number. The device number consists of the last six numbers of its hardware address. Default name IC0001ff Device number The default name can be found in the TPG Control Center, the InterCon-NetTool, on the status or service page. TPG User Manual 84 Appendix - Glossary Gateway Using a gateway, you can address IP addresses from external networks. If you wish to use a gateway, you can configure the relevant parameter via the TPG Control Center or the InterConNetTool. Hardware Address The TPG is addressable by means of its world-wide unique hardware address. This address is commonly referred to as the MAC or Ethernet address. The manufacturer has defined this address in the hardware of the device. The address consists of 12 hexadecimal numbers. The first six numbers represent the manufacturer, while the last six numbers identify the individual device. Hardware Address 00:c0:eb:00:01:ff Manufacturer Device ID number The hardware address can be found on the housing, the InterConNetTool, the status or service page. The use of separators within the hardware address depends on the platform. Note the following conventions when entering the hardware address: Host Name TPG User Manual Operating system Representation Example Windows Hyphen 00-c0-eb-00-01-ff UNIX Colon or period 00:c0:eb:00:01:ff or 00.c0.eb.00.01.ff The host name is an alias for an IP address. The host name uniquely identifies the TPG in the network and makes it easier to remember. 85 Appendix - Glossary InterCon-NetTool The software InterCon-NetTool has been developed by SEH Computertechnik GmbH for the administration of SEH network devices within a predefined network. IP Address The IP address is the unique address of each node in a network, i.e. an IP address may occur only once on a local network. The system administrator usually assigns the IP address. The address must be saved in the TPG to make sure that it can be addressed within the network. Subnet Mask With the help of the subnet mask, large networks can be split up into subnetworks. In this case, the user IDs of the IP addresses are assigned to the various subnetworks. The TPG is configured not to use subnetworks by default. If you wish to use a subnet, you can configure the relevant parameter via the TPG Control Center or the InterCon-NetTool. TPG Control Center TPG User Manual The TPG can be configured and monitored via the TPG Control Center. The TPG Control Center is stored in the TPG and can be displayed by means of a browser software (Internet Explorer, Firefox, Safari). 86 Appendix - Parameter List 7.2 Parameter List This chapter gives an overview of all parameters of the TPG. The parameter list gives details about the functions and values of the individual parameters. What information do you need? • ’Parameter List - IPv4’ Ö88 • ’Parameter List – IPv6’ Ö88 • ’Parameter List - DNS’ Ö89 • ’Parameter List - SNMP’ Ö90 • ’Parameter List - POP3’ Ö91 • ’Parameter List - SMTP’ Ö92 • ’Parameter List - Bonjour’ Ö93 • ’Parameter List - Date/Time’ Ö93 • ’Parameter List - Description’ Ö93 • ’Parameter List - ThinPrint®’ Ö94 • ’Parameter List - ThinPrint Connection Service’ Ö95 • ’Parameter List - ThinPrint® printer’ Ö95 • ’Parameter List - Notification’ Ö97 • ’Parameter List - Web access’ Ö99 • ’Parameter List - TCP port access’ Ö99 • ’Parameter List - Authentication’ Ö100 • ’Parameter List - USB device’ Ö101 • ’Parameter List – Status page’ Ö101 To view the current parameter values of your TPG, see: ’Displaying Parameter Values’ Ö70 and ’How to Print a Status or Service Page’ Ö79. TPG User Manual 87 Appendix - Parameter List Table 12: Parameter List - IPv4 Parameters Value Default Description ip_dhcp [DHCP] on/off on Enables/disables the DHCP protocol. ip_bootp [BOOTP] on/off on Enables/disables the BOOTP protocol. ip_auto [ARP/PING] on/off on Enables/disables the IP address assignment via ARP/PING. ip_addr [IP address] valid IP address 169.254. 0.0/16 Defines the IP address of the TPG. ip_mask [Subnet mask] valid IP address 255.255. 0.0 Defines the subnet mask of the TPG. ip_gate [Gateway] valid IP address 0.0.0.0 Defines the gateway address of the TPG. Table 13: Parameter List – IPv6 TPG User Manual Parameters Value Default Description ipv6 [IPv6] on/off on Enables/disables the IPv6 functionality of the TPG. ipv6_auto [Automatic configuration] on/off on Enables/disables the automatic assignment of the IPv6 address for the TPG. ipv6_addr [IPv6 address] n:n:n:n:n:n:n:n :: Defines a manually assigned IPv6 Unicast address in the n:n:n:n:n:n:n:n format for the TPG. Every 'n' represents the hexadecimal value of one of the eight 16 bit elements of the address. An IPv6 address may be entered or displayed using a shortened version when successive fields contain all zeros (0). In this case, two colons (::) are used. 88 Appendix - Parameter List Parameters Value Default Description ipv6_gate [Router] n:n:n:n:n:n:n:n :: Defines the IPv6 unicast address of the router. The TPG sends its 'Router Solicitations' (RS) to this router. ipv6_plen [Prefix length] 0 - 64 [2 characters; 0-9] 64 Defines the length of the subnet prefix for the IPv6 address. Address ranges are indicated by prefixes. The prefix length (number of bits used) is added to the IPv6 address and specified as a decimal number. The decimal number is separated by '/'. Table 14: Parameter List - DNS TPG User Manual Parameters Value Default Description dns [DNS] on/off on Enables/disables the name resolution via a DNS server. dns_primary [Primary DNS server] valid IP address 0.0.0.0 Defines the IP address of the primary DNS server. dns_secondary [Secondary DNS server] valid IP address 0.0.0.0 Defines the IP address of the secondary DNS server. The secondary DNS server is used if the primary DNS server is not available. dns_domain [Domain name (suffix)] max. 255 characters [., a-z, A-Z, 0-9] [blank] Defines the domain name of an existing DNS server. 89 Appendix - Parameter List Table 15: Parameter List - SNMP TPG User Manual Parameters Value Default Description snmpv1 [SNMPv1] on/off on Enables/disables SNMPv1. snmpv1_ronly [Read-only] on/off off Enables/disables the write protection for the community. snmpv1_community [Community] max. 64 characters [a-z, A-Z, 0-9] public Defines the name of the SNMP community. The SNMP Community is a basic form of access protection in which several participants with the same access rights are grouped together. snmpv3 [SNMPv3] on/off on Enables/disables SNMPv3. any_name [User name] max. 64 characters [a-z, A-Z, 0-9] anonym ous Defines the name of the SNMP user group 1. any_pwd [Password] max. 64 characters [a-z, A-Z, 0-9] [blank] Defines the password of the SNMP user group 1. any_hash [Hash] md5 sha md5 Specifies the HASH algorithm of the SNMP user group 1. any_rights [Access rights] --- [None] readonly readwrite readonly Defines the access rights of the SNMP user group 1. any_cipher [Encryption] --- [None] aes des --- Defines the encryption method of the SNMP user group 1. admin_name [User name] max. 64 characters [a-z, A-Z, 0-9] admin Defines the name of the SNMP user group 2. admin_pwd [Password] 8 - 64 characters [a-z, A-Z, 0-9] administ rator Defines the password of the SNMP user group 2. admin_hash [Hash] md5 sha md5 Specifies the HASH algorithm of the SNMP user group 2. admin_rights [Access rights] --- [None] readonly readwrite readwrite Defines the access rights of the SNMP user group 2. 90 Appendix - Parameter List Parameters Value Default Description admin_cipher [Encryption] --- [None] aes des --- Defines the encryption method of the SNMP user group 2. Table 16: Parameter List - POP3 TPG User Manual Parameters Value Default Description pop3 [POP3] on/off off Enables/disables the POP3 functionality. pop3_srv [Server name] max. 128 characters [blank] Defines the name of the POP3 server. pop3_port [Server port] 1-65535 [max. 5 characters; 0-9] 110 Defines the port of the POP3 server used by the TPG for receiving emails. When using SSL/TLS, enter 995 as port number. pop3_sec [Security] 0 = --- [no security] 1 = APOP 2 = SSL/TLS 0 Defines the authentication method to be used. pop3_poll [Check mail every] 1-10080 [max. 5 characters; 0-9] 15 Defines the time interval (in minutes) for retrieving emails from the POP3 server. pop3_limit [Ignore mail exceeding] 0-4096 [max. 4 characters; 0-9; 0 = unlimited] 10 Defines the maximum email size (in Kbyte) to be accepted by the TPG. pop3_usr [User name] max. 128 characters [blank] Defines the name used by the TPG to log on to the POP3 server. pop3_pwd [Password] max. 128 characters [blank] Defines the password used by the TPG to log on to the POP3 server. 91 Appendix - Parameter List Table 17: Parameter List - SMTP TPG User Manual Parameters Value Default Description smtp_srv [Server name] max. 128 characters [blank] Defines the name of the SMTP server. smtp_port [Server port] 1-65535 [max. 5 characters; 0-9] 25 Defines the port number used by the TPG to send emails to the SMTP server. smtp_ssl [TLS] on/off off Enables/disables TLS. The security protocol TLS (Transport Layer Security) is used to encrypt the transmission between the TPG and the SMTP server. smtp_sender [Sender name] max. 128 characters [blank] Defines the email sender name to be used by the TPG. smtp_auth [Login] on/off off Enables/disables the SMTP authentication for the login. smtp_usr [User name] max. 128 characters [blank] Defines the name used by the TPG to connect to the SMTP server. smtp_pwd [Password] max. 128 characters [blank] Defines the password the TPG uses to connect to the SMTP server. smtp_sign [Security (S/MIME)] on/off off Enables/disables the encryption and signing of emails via S/MIME. smtp_encrypt [Full encryption] [Signing of emails] on/off [off = sign, on = encrypt] off Defines the signing and encryption of emails. smtp_attpkey [Attach public key] on/off on Enables/disables the attachment of a public key to an email. 92 Appendix - Parameter List Table 18: Parameter List - Bonjour Parameters Value Default Description bonjour [Bonjour] on/off on Enables/disables the Bonjour service. bonjour_name [Bonjour name] max. 64 characters [a-z, A-Z, 0-9] [Default Name] Defines the Bonjour name of the TPG. Table 19: Parameter List - Date/Time Parameters Value Default Description ntp [Date/Time] on/off on Enables/disables the use of a time server (SNTP). ntp_server [Time server] max. 255 characters [., a-z, A-Z, 0-9] pool.ntp. org Defines a time server via the IP address or the host name. (A host name can only be used if a DNS server was configured beforehand.) ntp_tzone [Time zone] UTC, GMT, EST, EDT, CST, CDT, MST, MDT, PST, PDT, etc. CET/CE ST (EU) The time zone is used to equalize the difference between the time received over the time server and the local time. Table 20: Parameter List - Description TPG User Manual Parameters Value Default Description sys_name [Host name] max. 64 characters [a-z, A-Z, 0-9] [blank] Defines the host name of the TPG. sys_descr [Description] max. 64 characters [a-z, A-Z, 0-9] [blank] Freely definable description (of the TPG). sys_contact [Contact person] max. 64 characters [a-z, A-Z, 0-9] [blank] Freely definable description (of the contact person). 93 Appendix - Parameter List Table 21: Parameter List - ThinPrint® TPG User Manual Parameters Value Default Description tpgPort [ThinPrint® port] 1 - 65535 [max. 5 characters; 0-9] 4000 Defines the TCP port used by the TPG for communicating with the ThinPrint server. tpgBdwidth [Bandwidth] on/off off Enables/disables the bandwidth functionality of the ThinPrint® port (TPG side). tpgBdwidthVal [Bandwidth value] 1600 - 1000000 [at least 4 characters, max. 7 characters; 0-9] 256000 Defines the bandwidth (in bit/second) used to decrease the bandwidth of the ThinPrint® port (TPG side). tpgPrtoToVal [Printer connection timeout] 0 - 86400 [max. 5 characters; 0-9; 0 = off] 60 Defines the period of time (in seconds) after which a connection attempt to a printer is aborted. A connection attempt should be aborted if a printer is physically not available. This frees the ThinPrint® port for subsequent print jobs. tpgJobSndTout [Job sending timeout] 0 - 86400 [max. 5 characters; 0-9; 0 = off] 180 Defines the period of time (in seconds) after which a current print job is aborted if it cannot be printed due to a printer error, e.g. no paper. 94 Appendix - Parameter List Table 22: Parameter List - ThinPrint Connection Service Parameters Value Default Description conService [Connection Service] on/off off Enables/disables the ThinPrint Connection Service. conServer [Server name] max. 255 characters [., a-z, A-Z, 0-9] [blank] Defines the Connection Service server via the IP address or the host name. (A host name can only be used if a DNS server was configured beforehand.) tpgClientID [Client ID] 0 - 99999 [max. 5 characters; 0-9] 0 Defines the client ID as stored in the database of the Connection Service. tpgAuthKey [Authentication key] 0 - 99999 [max. 5 characters; 0-9] 0 Defines the authentication key as stored in the database of the Connection Service. conPort [Port] 1 - 65535 [max. 5 characters; 0-9] 4001 Defines the TCP port used by the TPG for communicating with the Connection Service. tpgKeepalive [Keep alive] 1 - 60000 [max. 5 characters; 0-9] 60 Defines the time interval (in seconds) after which the connection to the Connection Service is refreshed. Note: The value has to be equal to or lower than the 'KeepAliveTO' value set on the Connection Service server. tpgRetry [Connection retry] 1 - 60000 [max. 5 characters; 0-9] 120 Defines the time interval (in seconds) after which a connection retry is executed if the Connection Service cannot be reached. Table 23: Parameter List - ThinPrint® printer TPG User Manual Parameters Value Default Description prtName_1 ~ prtName_6 [Printer] max. 32 characters [a-z, A-Z, 0-9, _, -] [blank] Defines the printer name for the ThinPrint AutoConnect feature. 95 Appendix - Parameter List TPG User Manual Parameters Value Default Description prtClass_1 ~ prtClass_6 [Class] max. 7 characters [a-z, A-Z, 0-9] [blank] Defines the printer class name for the ThinPrint AutoConnect feature. prtDriver_1 ~ prtDriver_6 [Driver] max. 64 characters [a-z, A-Z, 0-9, _, -] [blank] Defines the printer driver for the ThinPrint AutoConnect feature. remoteIp_1 ~ remoteIp_6 [Printer address] max. 64 characters [., a-z, A-Z, 0-9] [blank] Defines the IP address or host name of the printer. (A host name can only be used if DNS was configured beforehand.) remoteMode_1 ~ remoteMode_6 [Printing protocol] raw = RAW/Socket connection ipp = IPP connection lpd = LPD connection raw Specifies the transfer method between the TPG and the printer. remotePort_1 ~ remotePort_6 [Port] 1 - 65535 [max. 5 characters; 0-9] 9100 Defines the port number for RAW/socket printing. remoteUrl_1 ~ remoteUrl_6 [URL] max. 64 characters ipp/lp1 Specifies the second part of the printer URL for IPP printing. The implementation of the printer URL is depends on the manufacturer. Consult your printer manual for more information. remoteIPPs_1 ~ remoteIPPs_6 [SSL] on/off off Enables/disables the SSL/TLS encryption for IPP printing. remoteQ_1 ~ remoteQ_6 [Queue] max. 64 characters [a-z, A-Z, 0-9] lp1 Defines the queue name for LPD printing. lpdModeRFC_1 ~ lpdModeRFC_6 [RFC] on/off on Enables/disables the RFC1179 conformity for LPD printing. 96 Appendix - Parameter List Parameters Value Default Description monitorPing [Monitoring via ping] on/off on Enables/disables monitoring via ping. The ping query allows you to view the printer availability. monitorSNMP [SNMP] on/off on Enables/disables monitoring via SNMP. The SNMP query shows printer messages. monitorPoll [Monitoring interval] 10 - 86400 [max. 5 characters; 0-9] 30 Defines the interval of a 'Ping' or 'SNMP' query in seconds. Table 24: Parameter List - Notification TPG User Manual Parameters Value Default Description mailto_1 mailto_2 [Mail recipient] valid email address [max. 64 characters] [blank] Defines the email address of the recipient for notifications. noti_pup_1 noti_pup_2 [Restart] on/off off Enables/disables the sending of emails when the TPG is restarted. noti_stat_1 noti_stat_2 [Status] on/off off Enables/disables the periodical sending of a status email to recipient 1 or 2. notistat_d [Interval] al su mo tu we th fr sa al Specifies the interval at which a status email is sent. notistat_h [hh] 1 = 1. Hour 2 = 2. Hour 3 = 3. Hour etc. 0 Specifies the time at which a status email is sent. = daily = Sunday = Monday = Tuesday = Wednesday = Thursday = Friday = Saturday 97 Appendix - Parameter List TPG User Manual Parameters Value Default Description notistat_tm [mm] 0 = 00 min 1 = 10 min 2 = 20 min 3 = 30 min 4 = 40 min 5 = 50 min 6 = 00 min 0 Specifies the time at which a status email is sent. noti_usb_1 noti_usb_2 [USB] on/off off Enables/disables the sending of emails after a USB flash drive was connected to or removed from the TPG. noti_err_1 noti_err_2 [Problems] on/off off Enables/disables the sending of emails if a problem occurs at the TPG. trapto_1 trapto_2 [Trap target] valid IP address 0.0.0.0 Defines the SNMP trap address of the recipient for notifications. trapcommu_1 trapcommu_2 [Trap community] max. 64 characters [a-z, A-Z, 0-9] public Defines the SNMP trap community of the recipient. trappup [Restart] on/off off Enables/disables the sending of SNMP traps when the TPG is restarted. trapusb [USB] on/off off Enables/disables the sending of SNMP traps after a USB device was connected to or removed from the TPG. traperr [Problems] on/off off Enables/disables the sending of SNMP traps if a problem occurs at the TPG. 98 Appendix - Parameter List Table 25: Parameter List - Web access Parameters Value Default Description http_allowed [HTTP/HTTPS] on/off on Defines the permitted type of connection (HTTP/HTTPS) to the TPG Control Center. If HTTPS is exclusively chosen as the connection type [http_allowed = off], the administrative access to the TPG Control Center is protected via SSL/TLS. http_pwd [Password] max. 64 characters [a-z, A-Z, 0-9] [blank] Defines the password for the administrative access to the TPG Control Center. Table 26: Parameter List - TCP port access TPG User Manual Parameters Value Default Description protection [Port access control] on/off off Enables/disables the locking of the selected ports. protection_test [Test mode] on/off on Enables/disables the test mode. The test mode allows you to test the parameters set using the access control. If the test mode is activated, the access protection remains active until the TPG is rebooted. protection_level [Security level] protec_tcp protec_all protec_t cp Specifies the port types to be locked: - TCP ports - all ports (IP ports) ip_filter_on_1 ~ ip_filter_on_8 [IP address] on/off off Enables/disables an exception from the port locking. ip_filter_1 ~ ip_filter_8 [IP address] valid IP address [blank] Defines elements that are excluded from port locking, using the IP address. 99 Appendix - Parameter List Parameters Value Default Description hw_filter_on_1 ~ hw_filter_on_8 [MAC address] on/off off Enables/disables an exception from the port locking. hw_filter_1 ~ hw_filter_8 [MAC address] valid hardware address 00:00:00 :00:00:0 0 Defines elements that are excluded from port locking, using the hardware address. Table 27: Parameter List - Authentication TPG User Manual Parameters Value Default Description auth_typ [Authentication method] --- [None] MD5 TLS TTLS PEAP FAST ---- Defines the authentication method that is used to identify devices or users in the network. auth_name [User name] max. 64 characters [a-z, A-Z, 0-9] [blank] Defines the name of the TPG as saved in the authentication server (RADIUS). auth_pwd [Password] max. 64 characters [a-z, A-Z, 0-9] [blank] Defines the password of the TPG as saved in the authentication server (RADIUS). auth_extern [PEAP/EAP-FAST Options] --- [None] PEAPLABEL0 PEAPLABEL1 PEAPVER0 PEAPVER1 FASTPROV1 --- Defines the kind of external authentication for the EAP authentication methods TTLS, PEAP, and FAST. auth_intern [Inner Authentication] --- [None] PAP CHAP MSCHAPV2 EAP-MD5 EAP-TLS --- Defines the kind of inner authentication for the EAP authentication methods TTLS, PEAP, and FAST. auth_ano_name [Anonymous name] max. 64 characters [a-z, A-Z, 0-9] [blank] Defines the anonymous name for the unencrypted part of the EAP authentication methods TTLS, PEAP, and FAST. 100 Appendix - Parameter List Parameters Value Default Description auth_wpa_addon [WPA add-on] max. 255 characters [a-z, A-Z, 0-9] [blank] Specifies an optional WPA expansion. Table 28: Parameter List - USB device Parameters Value Default Description tpgBuffer [Print job buffering] on/off off Enables/disables the automatic buffering of print jobs if a printer cannot be reached. autoSync [Parameter backup] on/off on Enables/disables the automatic parameter backup to a connected USB flash drive. Table 29: Parameter List – Status page TPG User Manual Parameters Value Default Description spage [Status page] on/off on Enables/disables the printing of status and service pages on the relevant printer. The print job can be triggered by pressing the status/reset button on the device or by clicking the corresponding button in the TPG Control Center. spPrinter [Status page printer] TPG-25 = 1-2 TPG-65 = 1-6 1 Defines the printer on which status pages and services pages are printed, via the printer ID. spMode [Status page mode] ASCII PostScript DATAMAX Citizen-Z ASCII Defines the data format in which the status page is printed. 101 Appendix - Troubleshooting 7.3 Troubleshooting This chapter describes some problems and their solutions. Problem • ’The TPG indicates the BIOS mode’ Ö102 • ’A connection to the TPG Control Center cannot be established’ Ö103 • ’The password is no longer available’ Ö103 The TPG indicates the BIOS mode Possible Cause The TPG switches to the BIOS mode if the firmware functions well but the software is faulty. This may happen in the case of an incorrect software update, for example. The TPG indicates the BIOS mode when the activity LED is blinking green. The TPG is not operational in the BIOS mode. If the TPG is in the BIOS mode, the filter 'BIOS mode' will be created automatically in the device list of the InterCon-NetTool. The TPG is displayed within this filter. Fig. 7: InterCon-NetTool - TPG in the BIOS Mode TPG User Manual 102 Appendix - Troubleshooting The software must be reloaded to the TPG so that the TPG can switch from the BIOS mode to the normal mode. Gehen Sie wie folgt vor: 1. Start the InterCon-NetTool. 2. Highlight the TPG in the device list. (You will find the TPG under the filter 'BIOS mode'.) 3. Select Installation – IP Wizard from the menu bar. The IP Wizard is started. 4. Follow the instructions of the wizard in order to assign an IP address to the TPG. The IP address is saved. 5. Carry out a software update on the TPG; see: Ö77. ª The software will be saved in the TPG. The TPG switches to the normal mode. A connection to the TPG Control Center cannot be established Eliminate possible error sources. First of all, check: - the cabling connections, - the IP address of the TPG (Ö13) as well as - the proxy settings of your browser. If you still cannot establish any connection, the following safety mechanisms might be the cause: The access is protected via SSL/TLS (HTTPS) Ö52. The TCP port access control is enabled Ö53. The password protection is enabled Ö52. The password is no longer available The access to the TPG Control Center can be protected by a password. If the password is no longer available, you can reset the parameter values of the TPG to their default settings to get access to the TPG Control Center Ö77. Previous settings will be deleted. TPG User Manual 103 Appendix - List of Figures 7.4 List of Figures TPG Control Center - START . . . . . . . . . . . . . . . . . . . . . . . . . . . . . 19 InterCon-NetTool - Main Dialog . . . . . . . . . . . . . . . . . . . . . . . . . . 21 Administration via Email - Example 1 . . . . . . . . . . . . . . . . . . . . . 24 Administration via Email - Example 2 . . . . . . . . . . . . . . . . . . . . . 24 InterCon-NetTool - IP Wizard . . . . . . . . . . . . . . . . . . . . . . . . . . . . 27 TPG Control Center - Certificates . . . . . . . . . . . . . . . . . . . . . . . . . 56 InterCon-NetTool - TPG in the BIOS Mode . . . . . . . . . . . . . . . . 102 TPG User Manual 104 Appendix - Index 7.5 Index A Address Ethernet address 85 Hardware Address 85 IP address 86 MAC Address 85 Administration 17 Email 22 Status/reset button 24 TPG Control Center 18 ARP/PING 16 Authentication 62 AutoConnect 7 B Backup copy 70 Bandwidth 41 Bandwidth limit 41 BIOS Mode 102 Bonjour 35 BOOTP 14 C CA certificate 55 Certificate 55 create 57 delete 62 display 57 Saving 59 Certificate request 58 Connection Service 7 Configuring 48 D Default certificate 56 TPG User Manual Default name 84 Default setting 74 Descriptions 37 Device number 84 DHCP 14 DNS (Domain Name Service) 30 Documentation 8 Domain name 30 E EAP 62 EAP-FAST 67 EAP-MD5 63 EAP-TLS 63 EAP-TTLS 65 Email 22 Encrypted print data 50 Encryption 50 Ethernet address 85 F Firmware 77 G Gateway 85 H Hardware Address 85 Host name 85 Hotline 10 HTTP/HTTPS 52 I IEEE 802.1x 62 Improper Use 11 Intended Use 11 InterCon-NetTool 20, 86 install 20 IP Wizard 15 105 Appendix - Index Start 20 Structure 21 IP address 86 Saving 13 IPP connection 42 IPv4 26 IPv6 28 J Job history 81 delete 82 display 81 L LPD protocol 42 M MAC Address 85 N NAT 48 Notification Service 38 Email 39 SNMP Trap 39 Notifications 38 P Parameter backup 71 Parameter list 87 Parameters default settings 74 display 70 Load 71 load automatically 73 Parameter list 87 save automatically 73 Saving 70 Parameters file 70, 71 Password 53 TPG User Manual PEAP 66 ping 45 pkcs(12) 60 POP3 32 Print Service page 80 Status page 80 Print job buffering 71 Printer Connection Status 45 ID 42 integrate 42 Messages 47 Transfer method 42 Printer messages 47 Protocol BOOTP 14 DHCP 14 IPP 42 IPv4 26 IPv6 28 LPD 42 POP3 32 SMTP 33 SNMP 31 ZeroConf 14 Purpose 6 R RADIUS 62 RAW/socket connection 42 Reset 74 reset 74 Restart 78 Root certificate 55 S S/MIME certificate 56 Security 51 Security level 53 SEH Homepage 10 Self-signed certificate 55 106 Appendix - Index Service page 79 Data format 79 Printer 79 Printing 80 SMTP 33 SNMP 47 SNMPv1 31 SNMPv3 31 SNMP Trap 38 SNTP Server 36 Software 77 SSL/TLS encryption 50 Status email 38 Status page 79 Data format 79 Printer 79 Printing 79 Status/reset button 24, 75 Print status page 80 Printing the Service Page 80 resetting parameters 75 Subnet mask 86 Support 10 System Requirements 7 Transfer methods 42 Types of connection 52 U Update 77 USB device format 72 Parameter backup 71 Print job buffering 71 UTC 36 V Version Number 77 W Web access 52 Web connection types define 52 Z ZeroConf 14 T TCP port access control 53 TCP/IP 26 Test mode 54 ThinPrint 6 ThinPrint Client 6 ThinPrint Connection Service 7 Configuring 48 ThinPrint encryption 7, 50 ThinPrint Engine 6 ThinPrint port 41 Time of the device 36 Time server 36 Time zone 36 TPG Control Center 18, 86 Language 19 Start 18 Structure 19 TPG User Manual 107