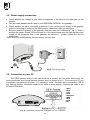
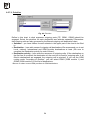
1
2N ® GSM ISDN GATEWAY Lite User’s Manual Version: 1.9 Dear customer, We congratulate you on purchasing your 2N ® GSM ISDN GATEWAY Lite product. This new product was developed and produced with emphasis on maximum utility value, quality and reliability. Our wish is to make you satisfied with the ISDN GSM gateway completely and for a long time. ! Important ! • • • The manufacturer is gradually improving the control program that is included in this product (referred to as firmware). The used ISP (In System Programming) technology gives you the possibility to store the most recent control program in your GSM ISDN gateway by means of a standard computer. The most recent version of the program together with all that is necessary can be found in www.2n.cz and necessary instructions in the chapter “Upgrading the control program” of this manual. It is recommendable to use the most recent version of the program – thus, you will avoid unnecessary encounters with possible shortcomings that have been eliminated already. If you program parameters of your GSM ISDN gateway by means of your computer, you will need the “ISDN GSM – program“. You will find the most recent version of this programming tool in www.2n.cz as well. In www.2n.cz you will also find the most recent version of this manual in the popular PDF format. We recommend you to use it especially in connection with the control program upgrade since the new functions are explained here. • Before you start installing this product, check whether the delivery is complete with the following packing list and read this manual thoroughly. The manufacturer cannot be held responsible for any damages that occurred due to incorrect use of this product in contradiction to this manual. The guarantee terms do not cover damages of the product caused by rough handling, incorrect storage or by exceeding the quoted technical parameters. • Limited warranty on accumulators: The warranty on batteries (accumulators) supplied separately or as part of a product or together with a product does not also apply to wear and tear of batteries (accumulators) and their components as a result of normal use (e.g. discharge of the battery, reduction of the accumulator capacity as a result of wear and tear) as fact that may not be deemed as a lack of conformity with the contract of sale in accordance with Article 2 of Directive 1999/44/EC of the European Parliament and of the Council. • This manual is very detailed and it also contains sections that are not essential for the basic installation as well as sections dealing with other types of GSM ISDN gateways. This is why you should pay attention to information which sections are essential for you and which are not. It will save your time. • Preliminary information about functions that are not available yet are differentiated by light grey background or by grey letters instead of black ones. 1 Packing list Parts that make up the 2N ® GSM ISDN GATEWAY Lite product and its accessories correspond to the following list: Item Quantity GSM gateway – model corresponding to the ordering no., see the data plate at the back side of the GSM gateway 1 pc Mains adapter 1 pc Serial cable 1 pc Note 1) ISDN cable 4-wire (RJ-45) 1 - 2 pcs 1) Antenna 1 - 2 pcs 1) Wall mounting bracket 1 pc Dowels 2 pcs Wood screws 2 pcs This manual 1 pc Warranty certificate 1 pc A floppy disk or a CD-ROM with software 1 pc Notes: 1) Depending on type 2) Delivered software: • GSM program • SMS program • PC DISA message loading program 2 2) CONTENTS 1. I N T R O D U C T I O N .......................................................................................... 4 1.1. 1.2. 1.3. 1.4. PURPOSE ........................................................................................................................................ 4 HOW TO SAVE TELEPHONE FEES ...................................................................................................... 4 OTHER BENEFITS AND POSSIBILITIES OF USE.................................................................................... 5 SAFETY INSTRUCTIONS CONNECTED WITH HIGH-FREQUENCY RADIATION ........................................... 5 2. G E T T I N G 2.1. TO KNOW 2N ® GSM ISDN GATEWAY L I T E ...................................... 6 QUICK INSTALLATION ...................................................................................................................... 7 3. BASIC DESCRIPTION OF 2N ® GSM ISDN GATEWAY LITE INSTALLATION ................................ 8 3.1. 3.2. 3.3. 3.4. 3.5. 3.6. 3.7. 3.8. CORRECT POSITIONING ................................................................................................................... 8 CONNECTING AN EXTERNAL ANTENNA ............................................................................................. 9 SETTING AND INSTALLING THE SIM CARD ........................................................................................ 9 INSERTING SIM CARD INTO 2N ® - GSM ISDN GATEWAY LITE ..................................................... 11 POWER SUPPLY CONNECTION ........................................................................................................ 12 CONNECTION TO YOUR PC ............................................................................................................ 12 CONNECTING NT AND TE CONNECTORS ........................................................................................ 14 SIGNALLING LED LAMPS ............................................................................................................... 15 4. P O S S I B L E 4.1. 4.2. 5. W A Y S 5.1. 5.2. 5.3. 5.4. 5.5. 5.6. 5.7. 5.8. 5.9. CONNECTION TOPOLOGIES OF YOUR OF CONNECTING 16 2N ® GSM ISDN GATEWAY L I T E ............................... 17 T O U SE ISDN GSM L I T E PR O G R A M ......................................... 27 INSTALLING ISDN GSM LITE PROGRAM......................................................................................... 27 RUNNING ISDN GSM LITE PROGRAM ............................................................................................ 27 CONNECTING 2N ® GSM ISDN GATEWAY LITE TO YOUR PC ....................................................... 28 MAIN MENU AND BUTTON BAR........................................................................................................ 28 CONFIGURATION ........................................................................................................................... 35 7. PC- B A S E D SMS 8. C O N F I G U R A T I O N 8.1. E Q U I P M E N T ....................... ROUTING PRINCIPLE ...................................................................................................................... 17 CONNECTING AN ISDN TELEPHONE SET TO 2N ® GSM ISDN GATEWAY LITE ............................... 18 CONNECTING 2N ® GSM ISDN GATEWAY LITE .............................................................................. 19 CONNECTION OF MORE ISDN TERMINALS TO MSN ISDN LINE ...................................................... 20 OUTGOING CALL VIA GSM GATEWAY CONNECTED TO PBX ............................................................ 21 INCOMING CALLS FROM GSM AND ISDN........................................................................................ 22 MOBILITY EXTENSION .................................................................................................................... 24 RECORDING DISA MESSAGE ......................................................................................................... 26 RECORDING CALLBACK MESSAGE ................................................................................................. 26 6. I N S T R U C T I O N S 6.1. 6.2. 6.3. 6.4. 6.5. ISDN POINT-TO-POINT (EUROISDN WITH DDI)........................................................................................ 16 POINT-TO-MULTIPOINT (EUROISDN WITH MSN)............................................................................. 16 S EN D I N G A N D R E C E I V I N G .................................................... 55 ................ 56 AND COMMUNICATION USING A STANDARD TERMINAL TERMINAL COMMANDS .................................................................................................................. 58 9. S A V I N G I N F O R M A T I O N O N M A D E C A L L S ( C D R ) ............................................... 59 10. T E C H N I C A L P A R A M ET E R S .......................................................................... 60 3 1. Introduction 1.1. Purpose • • • • • 2N ® GSM ISDN GATEWAY Lite is mainly designed to be connected to any ISDN PBX. It enables direct calling to the GSM network. It can also be used in connection with an ISDN phone set, with a phone set via a terminal adapter, with a coin payphone via a terminal adapter, etc. Its basic function is the voice mode, i.e. outgoing or incoming calls. The gateway is equipped with all functions necessary for this use and it provides maximum comfort in this mode. Besides, it is possible to use it (in connection with a PC) to receive and send SMS. For remote control you can use function “Diagnostic SMS messages”. These are supplementary functions that increase the utility value of the gateway. No additional equipment (an external GSM phone, etc.) is necessary for the operation. Even a layman can install the gateway. The programmable parameters are pre-set to ideal values. Having connected the ISDN line, antenna, supply and having installed the SIM card you can start using the equipment immediately. What is new is the possibility to use the GSM gateway for the Mobility Extension service (remote GSM branch). GSM gateway enables* this function for up to 8 users who can control this function easily using DTMF tones. *A license key is required for the activation of the Mobility extension function. 1.2. How to save telephone fees • • • • • • • • • • • • • • • • By connecting 2N ® GSM ISDN GATEWAY Lite to your ISDN PBX you will be able to perform outgoing calls to mobile networks directly. Thus, you will save telephone fees for the connection between the public telephone system and the mobile network. Calls coming from the mobile phones of your area workers will be cheaper as well. For the GSM gateway you can use the most convenient tariff rate of your GSM provider since calls of all users of your GSM gateway are added together. If you use a voice box – a GSM service, you pay for collecting your voice messages but if you connect your own voice box to the ISDN GSM gateway you do not pay anything for listening to voice messages and you do not pay anything for reading messages either. With your GSM gateway you can restrict calling to selected numbers. You will not pay for those calls you restrict. You can also obtain a record on the time and length of selected calls. You can easily find out why your telephone bill is higher than it should be. You can use the ISDN services together with the GSM services. The function of intelligent routing of incoming calls makes connection of incoming calls faster and provides a higher comfort of calling. You can connect the GSM gateway to your PBX with easy control of call by password. Inteligent function CALLBACK enables to you and your workers making calls on GSM gateway’s SIM cards charges. Auto CLIP routing enables inteligent management of incomming calls from GSM networks Comfortable remote access through GSM with the diagnostic SMS sending option. The gateway enables all kinds of ISDN connection. DISA voice message with a possibility to record and edit the welcome message easily. Possibility to use conditioned and unconditioned call forwarding. Possibility of automatic SMS message sending with a defined text in case that the call is no aswered (SMS message can hold calling party number) Possibility to use mobility extension function. 4 1.3. Other benefits and possibilities of use • • • While phoning you are not exposed to a direct impact of a high-frequency electromagnetic field as in the case of a mobile phone. You can also connect a coin payphone via a terminal adapter – the ISDN GSM gateway can send tariff impulses. You may determine the price for various kinds of connection yourselves (with a profit). You can use the ISDN GSM gateway in your company network together with the MobilChange application 1.4. Safety instructions connected with high-frequency radiation ! It is forbidden to use any transmitters, including the ISDN GSM gateway in ! ! ! ! ! such areas where explosives are used, e.g. near quarries. It is also forbidden to use mobile phones at petrol stations which holds good for the ISDN GSM gateway too. In medical facilities the ISDN GSM gateway may influence operation of sensitive life-maintaining equipment. This is why it is forbidden to use mobile phones as well as the GSM gate here. In general any prohibition to use mobile phones due to radiation of highfrequency energy is valid for ISDN GSM gateways as well. If necessary, you may install the GSM port in a safe distance (e.g. in a building next-door) and bring an ISDN line to the forbidden building from the ISDN GSM gateway. Although the ISDN GSM gateway is not designed for use in planes or cars the restriction and regulations for ISDN GSM gateways are valid here too. 5 ® 2. Getting to know 2N GSM ISDN GATEWAY Lite Reset button SIM card holder 2 Wall mounting bracket Connector for GSM 2 antenna SIM card holder 1 Connector for GSM 1 antenna TE1 NT1 RS232 connector Power connector Fig.1: External description of connectors, signalling LED lamps and functional parts of the ISDN GSM GATEWAY Lite 6 2.1. Quick installation • Correct position - 2N ® GSM ISDN GATEWAY Lite is designed for a vertical surface Installation. Fix the bracket that is a part of the delivery to the wall and hang the gateway onto it. Recommended working position and other more detailed recommendations are described in chapter 3.1. • Connecting cables - Use ISDN cables to connect the gateway to your ISDN PBX (or other ISDN terminals). Connect the cables from your ISDN connection to the gateway. More detailed information on correct connections are found in chapter 3.7. • Antenna connection – Use the SMA antenna connector to connect either the entire antenna or the cable from an external antenna you have installed in a place with a good GSM signal (see 3.2). • PC connection – To be able to adjust configuration of your gateway by means of the ISDN GSM program, you must connect your gateway to a PC. The connection is performed by means of a “not crossed” (1:1) extension cable – the same as for connecting PC to any external modem (see 3.6). • Power supply – The packing contains a mains supply adapter. Connect the connector of the adapter to the gateway and plug it in the mains. The gateway is switched on immediately (see 3.5 page 12). • Inserting SIM cards – To be able to insert a SIM card you should use a suitable object to press the micro-button of the microform reader to push the drawer out. Take the drawer out, insert the SIM card into is and slide it back into the reader (see 3.3 and 3.4). • Installing the configuration program – Run the installing file from the installation CD on a connected PC and install the ISDN GSM configuration program (see 6.1). • Configuration program – Run the installed ISDN GSM program, set the communication of the serial channel where the gateway is connected. Start communication of your PC with the gateway. More detailed information see 6.3. • Configuring 2N ® GSM ISDN GATEWAY Lite – Using the configuration program you can now start adjusting parameters that determine the behaviour of your gateway. The adjusted parameters include e.g. ISDN parameters, basic GSM parameters and tariffs, routing, restrictions and system parameters. Set the parameters that correspond to the required function of your gateway and send the configuration data to the gateway by means of the serial channel. You can find some more detailed information on the configuration program in chapter 6. *To select basic settings for the ISDN GSM GATEWAY Lite, you can use a guide (installed together with the ISDN GSM program). 7 ® 3. Basic description of 2N GSM ISDN GATEWAY Lite installation 3.1. Correct positioning • 2N ® GSM ISDN GATEWAY Lite is designed to be installed on a vertical surface. The required working position is shown in fig. 2. • The ISDN GSM GATEWAY Lite may be operated in another working position (e.g. lying on a table) just temporarily – e.g. when being quickly tested during servicing. • The range of acceptable working temperatures and humidity is quoted in the “Technical parameters“ chapter. • The ISDN GSM GATEWAY Lite must never be operated in places with direct sunshine and near sources of heat. • If acceptable working temperature is exceeded it does not have an immediate impact on the ISDN GSM GATEWAY Lite function but it may result in quicker ageing and loss of reliability. • Fig.2: The required working position The ISDN GSM GATEWAY Lite is designed for use inside buildings. It must not be exposed to rain, leaking water, condensed humidity, fog, mist, etc. The ISDN GSM GATEWAY Lite must not be exposed to aggressive gases, vapours of acids, solvents, etc., nor it must be exposed to aggressive liquids, e.g. during cleaning of the cover. • The ISDN GSM GATEWAY Lite should not be used in high-vibration environment as means of transport, plant-rooms, etc. • Over and under the ISDN GSM GATEWAY Lite there must be a free space for cables and the ventilation air that dissipates heat generated during operation. • The ISDN GSM GATEWAY Lite must be positioned with regard to GSM signal quality. • If you put the ISDN GSM GATEWAY Lite or antenna in an unsuitable position near TV, radio or other receivers or other appliances sensitive to the high-frequency field, their function may be impaired. • The ISDN GSM GATEWAY Lite antenna transmits high-frequency energy and this is why it should not be very close to human body. The health risk is higher than in the case of mobile phones as a GSM gateway usually transmits very often if more people use it for calling. 8 3.2. Connecting an external antenna antenna Konektory antén Use the SMA antenna connector to connect either the entire antenna or the cable of an external antenna you have installed in a place with a good GSM signal. The antenna should be in a vertical position. The parameters of the antenna and cable are quoted in Technical parameters. Tighten the antenna connector lightly with your hand, do not use a wrench! For signal strength see 6.4.3. Note: Models with one a GSM module have just one connector for one external antenna. 3.3. Setting and installing the SIM card Provider selection, SIM card type For the function of the ISDN GSM gateway you need a SIM card of a GSM provider working in the band of 900 MHz,1800 MHz / 850 MHz and 1900MHz. 2N ® GSM ISDN GATEWAY Lite with SIM cards, which are supported by Siemens mobile telephones and equipment. To make sure that your provider‘s SIM card is supported by the ISDN GSM gateway, try to use this SIM card in a Siemens mobile telephone (C35, e.g.). Blocking entering PIN (optional) Fig.3: Connecting an external antenna The ISDN 2N ® GSM ISDN GATEWAY Lite is set for entering PIN automatically by the manufacturer. You may block entering PIN in your SIM card (by means of a mobile phone where you insert your SIM card for this operation). If you do so, it does not matter how the ISDN GSM gateway is programmed or if there is a PIN in its memory or not. If you do not do so, the ISDN GSM gateway will require entering PIN after the first switching on by lighting the signalling LED’s. If you enter the correct PIN, it will store it in its memory and enter it automatically after that. Note: If a SIM card with active PIN is inserted and the PIN is not entered, the GSM module LED flashes 1:1 in red. PIN is entered from an ISDN phone (connected to the ISDN GSM gateway), see later, or using the ISDN GSM configuration program (connected to the ISDN GSM gateway), see 6.4.2: PIN (PUK) entering from ISDN telephone*: To enter PIN: Procedure Description of steps Pick up the earpiece, dial the service prefix (default dial or PIN PIN Press ), (PIN entering service). or to select GSM 1 or GSM 2 module. Enter the PIN. If it is shorter than eight digits, then press quit. Re-enter the PIN. 9 to Hang up. To enter PUK (use if you have confused three times or forgotten the PIN): Procedure Description of steps Pick up the earpiece, dial the service prefix (default ), dial or PUK PUK (PUK entering service). Press or to select GSM 1 or GSM 2 module. Enter the PUK. If it is shorter than eight digits, then press to quit Re-enter the PUK. Hang up. * Entering PIN and PUK codes you are guided by voice instructions. Setting GSM services (voice box, routing) Before you install the SIM card you have to decide whether you want to use the incoming call routing services provided by GSM networks (in case of busy line, absence, unavailability…). In connection with a PBX it is usually convenient to switch all routing off (especially to the provider’s voice box) and use your own voice box. If you have more GSM gateways with one PBX, you can route calls from one gateway to another in case one of them is engaged. (Activation and deactivation of different call forwarding modes is more advantageous with the SIM card inserted in a standard GSM telephone). Setting roaming parameters (calling via foreign GSM networks) 2N ® GSM ISDN GATEWAY Lite is pre-set by the manufacturer with switched off roaming (it can be set in the configuration program – see 6.5.3.1 page 39). You hardly ever travel with the ISDN GSM gateway and in border areas roaming would represent a risk that e.g. in case of a local service failure the gateway would log in a foreign network and the price of calls would rise significantly. If you want to authorise roaming and prefer some networks, fill in a list of preferred GSM networks by means of a mobile phone and then, when programming the GSM gateway do not forget to authorise roaming. 10 3.4. Inserting SIM card into 2N ® - GSM ISDN GATEWAY Lite Insert SIM card Fig.4: Inserting SIM cards into the ISDN GSM gate Take the SIM holder out SIM card provider 1 SIM card provider 1 If you want to insert a SIM card, you should use a suitable object to press the yellow micro-button to push the drawer out. Take the drawer out, insert the SIM card and slide it back. You can insert a SIM card when the gate is switched on but have to reset the gate. Fig.4: Inserting SIM cards into the ISDN GSM gate 11 3.5. Power supply connection • Check whether the voltage in your mains corresponds to the data on the data plate on the product. • Use the supply adapter that is a part of your ISDN GSM GATEWAY Lite package. * • Check whether you have connected an antenna. If you connect power supply to the gateway without connecting an antenna, the GSM module transmitter might get damaged. • Plug the adapter connector in the gateway (see the lower front connectors – fig. 1). After a moment the green “Power” LED must light up. If the control lamp does not light up the power supply or the protective fuse in the gateway are defective – please contact the service department. *Rack version of GSM gateway has powesuppy on back bus. Fig.5: Connecting supply 3.6. Connection to your PC The GSM gateway works in the data mode as a modem: the connector has exactly the same connection as a normal external modem and it is shown in fig. 6. To connect the PC you should use a so-called not crossed (1:1) “extending” cable – the same as for connecting a PC to any external modem. Maximum length of the cable is a few meters. (Connect the cable to the PC serial COM port.) 1 DCD 2 RxD 3 TxD 4 DTR 5 GROUND 6 DSR 7 RTS 8 CTS 9 RI Fig..6: Connection of the ISDN GSM gate to a PC via RS232 12 13 3.7. Connecting NT and TE connectors The connection diagrams of NT or TE connector are shown in figs. 7 and 8. Individual connections may be selected in accordance with chapter 5 “Ways of connecting 2N ® GSM ISDN GATEWAY Lite“ while you should know the connection topology of your ISDN equipment, see chapter 4. The configuration of pins of RJ-45 connectors for TE and NT is shown in figs. 10 and 11. ISDN network NT ISDN net NT PBX Fig 8: Connection of connectors ISDN terminal Fig.9: Connector placing on the bottom side 4 5 3 6 2 7 1 8 1 not connected 1 nepoužit 2 not connected 3 Tx2 nepoužit 4 Rx3 Tx 5 Rx4 Rx 6 Tx5 Rx 7 not connected 6 Tx 8 not connected 4 5 3 6 2 7 1 8 1 not connected 2 not connected 1 nepoužit 3 Rx 4 2Txnepoužit 5 3TxRx 6 4Rx Tx 7 not connected Txconnected 8 5not 6 Rx 7 nepoužit 7 nepoužit 8 nepoužit 8 nepoužit Fig.10: Connector wiring for TE interface Fig.11: Connector wiring for NT interface 14 3.8. Signalling LED lamps 3.8.1. Charts – basic functions of LED lamps Fig.12: Signalling LED lamps Status of LED lamps for ISDN Each of the two lines of opposite direction (TE1/NT1 ; TE2/NT2) has a LED lamp of its own to indicate the status of B channels on the line. Status BRI ISDN Line Free 1. B-channel busy 2. B-channel busy TE1 / NT2 not connected Colour / Status of LED diode Light off Green / light on BRI1 Green / light on BRI2 Red / Light BRI2 Statuses of LED lamps for GSM Each module has a LED lamp of its own to indicate its status. Module status Module not available Wrong firmware in module Module programming No SIM inserted PIN request PUK request Module looking for network Module logging into network Module logged in network Active call of the module LED GSM 1 and GSM 2 GSM 1 and/or GSM 2 Both GSM module LEDs Both GSM module LEDs GSM 1 and/or GSM 2 GSM 1 and/or GSM 2 GSM 1 and/or GSM 2 GSM 1 and/or GSM 2 GSM 1 and/or GSM 2 GSM 1 and/or GSM 2 GSM 1 and/or GSM 2 15 Colour / Status Red on Orange flashing slowly 1:1 Orange on Red flashing slowly 1:3 Red flashing slowly 1:1 Red flashing quickly 1:1 Green flashing slowly 1:3 Green flashing quickly 1:1 No light Green on 4. Possible connection topologies of your ISDN equipment 4.1. Point-to-Point (euroISDN with DDI) To be able to configure your ISDN GSM GATEWAY Lite you have to know the connections of your ISDN equipment. The first option is the Point-to-Point connection (euroISDN with DDI) as shown in fig. 13. You can recognise a line in the Point-to-Point configuration easily because there is no ISDN telephone, modem, etc. connected to it. Public phone net. ISDN Net NT 1 Telephone PBX Local phone lines ISDN sets Fig.13: Point-to-Point connection 4.2. Point-to-Multipoint (euroISDN with MSN) Another option how to connect your ISDN equipment is Point-to-Multipoint. ISDN telephones, modems, etc. can be connected directly to this ISDN line. ISDN net NT 1 Up to 8 ISDN equipments Public phone net. Telephone PBX Local phone lines ISDN sets Fig.14: Point-to Multipoint connection Note: For details on the ISDN line type see the registration sheet of your ISDN provider or contact your telephone network administrator. 16 ® 5. Ways of connecting 2N GSM ISDN GATEWAY Lite The ISDN GSM gateway is used to route calls from ISDN lines to GSM modules. The gateway can be connected as follows: • Gateway as NT ( simulates a network ) in configuration Point-to-Point and Point-to-Multipoint. • Gateway as TE ( simulates a phone) in configuration Point-to-Point and Point-to-Multipoint. Among other things, it supports the following functions: • Routing calls depending on called destination via the provider of this destination • Call forwarding • Intelligent incoming CLIP routing • Outgoing time LCR routing • Mobility extension (remote GSM extension)* • DISA (tone DDI) • DISA to GSM (dial-in tone from ISDN TE ports to GSM networks) • Callback to GSM networks • Direct call to operator • SMS send/receive * A license key is required for the activation of the Mobility extension function. 5.1. Routing principle The ports in the gateway are logically divided into internal and external ones (according to configuration). A call from an internal port is routed to GSM port according to the routing algorithm. A call from an external port is routed directly to the internal port (TE1/NT1) or DISA (tone DDI) is activated, or it is rerouted to the operator 1 or 2. Further, an incoming call may also be routed according to CLIP (incoming call number). ISDN port is internal, GSM ports are external. The routing algorithm recognises incoming call types, the current time rate, day in a week, or free minutes of the GSM provider and routes outgoing calls accordingly. If an outgoing call is routed through a busy port, another available port is dialled (depending on configuration). If none of allowed outgoing ports is free, the outgoing call is rejected. For details on this function see section ISDN GSM program, rates (6.5.7). 17 5.2. Connecting an ISDN telephone set to 2N ® GSM ISDN GATEWAY Lite The TE1 port are connected to the ISDN. If the network is not connected, the telephone must by supplied by an external supply adapter that simulates the voltage of the ISDN. The mains supply adapter that simulates the ISDN voltage may be ordered with its ordering no. 502000. GSM network Power adapter ISDN GSM gate ISDN terminals Fig.15: Connecting an ISDN phone set to the port with a possible simulation of supply voltage for ISDN phones 18 5.3. Connecting 2N ® GSM ISDN GATEWAY Lite The 502081, 502083, 502085 models contain the following interfaces: 1 connector for a GSM module antenna 1 RJ45 TE/NT connector to connect NT1/TE1 1 RS232 serial interface connector to communicate with a PC. The 502082, 502084, 502086, 502088 models contain the following interfaces: 2 connectors for GSM module antennas 1 RJ45 TE connector to connect NT1 1 RJ45 NT connector to connect TE1 1 RS232 serial interface connector to communicate with a PC. ISDN net ISDN net ISDN GSM gate ISDN GSM gate ISDN terminals ISDN terminals fig. 16: Connection of gate in NT mode fig.17: Connection of gate in TE mode As you can see in fig. 16 and 17, you can connect the gateway to your PBX by using TE or NT. In this case is necessary to set-up your PBX to route GSM calls to the specific port. In connection with this the probability that fees for telephone connections between the public and GSM networks are saved will be higher as well 19 5.4. Connection of More ISDN Terminals to MSN ISDN Line Terminals (connected to the same NT, TE) must be connected using not-crossed fourwire connection cables. If you connect a remote ISDN terminal, attach a terminating circuit to the end, see fig. below. Fig 21: Correct MSN ISDN bus configuration ISDN, ISDN GSM gateway, ISDN tel., fax, ISDN terminal, terminating circuit socket Max. 8 devices ISDN ISDN síť činet PBX or PBX Socket with termination circuit. Max. 500 m Correct connection MSN ISDN bus line 20 5.5. Outgoing call via GSM gateway connected to PBX Routing to a GSM network When a subscriber connected to the PBX lifts the phone and dials a number that is evaluated by the PBX as a “GSM gateway onset”, the list of restricted numbers is checked and if the same number is found the call is rejected. You may add an exception to prohibited destinations in the chart of authorised numbers. These numbers will be accepted even though they lie in a prohibited destination. If, on the other hand, the call is not rejected, the call will go through the GSM gateway, which saves telephone fees for the connection between the public and mobile network. This number depends on the PBX type and its particular setting. Some PBX’s may be programmed to evaluate the GSM code number this way. The subscribers then do not need to worry whether they are calling via the GSM gateway or not. In case that you have connected the GSM gateway to an extension of your PBX, you have to activate DISA function to GSM. In this case the gateway hangs-up every incomming call and is waiting to dial a number to the GSM network. You can restrict this function by an access pasword or by enabling this function for a calling party with a known CLIP number. Note: If the GSM gateway is engaged already the solution of the situation depends on the PBX: The subscriber either obtains the engaged tone , or the PBX selects another connection (more GSM gateways may be connected to one PBX). LCR (Least Cost Routing) The LCR function is activated for each particular port (Port Modes chart). The chart of GSM destinations includes the provider with the corresponding code, prefix, SMS centre number and the number of figures that follow the prefix. A SIM card of the provider whose name and code corresponds to the provider’s data quoted in the chart is inserted in the GSM gateway. Then all numbers starting with this prefix will be preferentially connected to this port. If this port is engaged and the other GSM module of the same provider has free minutes, the outgoing call will be routed through the other GSM module. If it has no free minutes, the number will be dialled to the port of a lower priority (if selected). In case no allowed port is free or the called number is included in the chart of barred numbers, the outgoing call is rejected. The ISDN GSM gateway provides outgoing call routing into GSM according to the SIM card – i.e. an outgoing call is not routed via the GSM provider by the network number xxxxx, but to GSM module 1 or 2 as selected. Making connection A connection is only paid for from the moment the called subscriber answers the phone. This moment (connect) is signalised by the GSM network and the GSM gateway passes this information onto the PBX. With outgoing calls through the GSM network, the calling party gets the so-called connecting tone. To disable it, set the “B-Channel Delay” properly, see 6.5.3. * TC35 GSM module versions 3.10 and higher do not contain this connecting tone any more. Entire call During an outgoing call the GSM gateway can send tariff impulses – AOC. With outgoing calls, the ISDN GSM gateway waits until the dialling is completely terminated. This waiting time (see 0) causes a certain delay between number dialling and actual selection. Therefore, you are advised to select the “Number of Dialled Digits” item (see 6.5.4.3, 6.5.4.4) for the most frequently called destinations while configuring your ISDN GSM gateway, thus making the ISDN GSM gateway dial immediately upon receipt of the last digit. 21 5.6. Incoming calls from GSM and ISDN Below, you will find points that an incoming call goes through. These points are listed in their real order. All these services can be authorised or prohibited selectively. 1. 2. CALLBACK When the function CALLBACK is activated and an incomming call has the same CLIP as CLIP for CALLBACK, the GSM gateway for defined time doesn’t receive this incomming call (the call is only ringing). In case that the calling party is still calling (after timeout), the GSM gateway connects this call according to below listed points. In case the calling party terminates the call before timeout, the GSM gateway activates the function CALLBACK: It starts calling to a defined extension. When the extension hangs-up the call, the gateway starts calling to GSM (called party number = CLIP of incoming call). During building of this outgoing call, the gateway plays to an extension a defined voice message. When the called party hangs-up the call, the gateway connects this call to the extension Prohibited numbers (restricted CLIP) If the gateway finds an agreement between a received number from a GSM network and a number listed in the chart of prohibited numbers, the call is rejected correctly. The phone with this number has no possibility to call the gateway. 3. Clip Routing If the gateway finds an agreement between the incoming number and a number listed in the CLIP routing chart, it activates the connection to the PBX or telephones connected via the port listed in the same chart with the “direct dial number” from the chart. The CLIP chart can be modified by the ISDN GSM program. You can also add items using your ISDN telephone. 4. Auto CLIP routing When this function is activated, the gateway begins to register information about outgoing unconnected (connected) calls in to its local RAM memory. The following information is saved in to the memory: - The called number - The calling number - Date and time of the call In the case that a number that had been previously dialed and registered in to the memory calls back to the gateway within a configurable period of time, this call is routed to the subscriber who last dialed the particular number. 2.1. Saving CLIP into chart from an ISDN telephone Procedure Description of steps Pick up your earpiece, dial the service prefix (default ), dial (CLIP entering service) Enter CLIP (2 chars at least), terminate with . Select the line to which calls with the CLIP shall be forwarded (MSN terminal number). Dial to quit. Select the port where the terminal is located (022 TE1,1-NT1,2-TE2,3-NT2). Quit with . Select validity in days (0- permanent validity, . maximum 250). Terminate with If you selected a higher number than 0 in the preceding step, select the mode: 1 - time in which the item is restored whenever this number is called; 0 – item will be deleted in the number of days selected in the validity step. Hang up. * Saving CLIP you are guided by voice instructions. 23 4. DISA If DISA is activated and a welcome message has been recorded, this message is played for every incoming call with the exception of calls listed in point 2 and there is a waiting time for the DTMF number. This timeout is listed in the general parameter chart as “Waiting time for the first number”. If the gateway receives the number of digits mentioned in the parameter “number of direct dial digits”, it activates the connection to the PBX or telephone connected via the port listed in the chart with the number received by DISA. If a connection is to be made with a smaller number of digits than it is mentioned in the parameter “Number of direct dial digits”, the selection must be finished with #. If DISA does not accept the programmed number of digits or the # sign, the connection is not established. For this reason it is always necessary to activate the Operator service (see below) together with the DISA function 5. Operator 1, Operator 2 The gateway supports direct dialling to two operators. So it is possible to adjust destination number for both the GSM channels. The number of the operator is set in the general parameter chart. E.g. the gateway may only work with the Operator service in the incoming operation. Then, all incoming calls will be routed to the operator’s number via the ISDN port immediately. 6. Enable CLIP from GSM to ISDN The gateway is forwarding information about calling party number (CLIP) from GSM to ISDN (default). Nevertheless, you can switch this function off for a particular module(s). (see 6.5.3) 5.7. Mobility Extension 5.7.1. Service description Benefits of this service: - You will never miss an important call, you are always reachable - You can send information text messages (SMS) in the event of a missed call - You have the redirecting services of your company’s PBX on your mobile phone - Easy-to-use control using DTMF codes - Fully automatic function; you don’t have to perform any complicated redirecting - Works with any BRI ISDN PBX - Installation instead of any ordinary ISDN telephone - Calling your mobile phone is free or for a small charge thanks to the VPN service* - You don’t have to worry about integration of an expensive DECT system - High-quality EFR/AMR voice 24 5.7.2. Connection diagram GSM gateway 111 222 PBX 333 Description of a model situation: A customer is calling Mr. “Z” from a landline. PBX is set up to call also line 333 when calling line 222. Mr. “Z” is out of his office (business trip, lunch), the GSM gateway redirects the call to a defined mobile telephone number (Mr. “Z”’s mobile telephone). Mr. “Z” answers the call with his mobile phone and, after a few minutes, parks the call and calls 111 (e.g., secretary). After having discussed the details, Mr “Z” switches the parked call to 111 and hangs up the mobile phone. Landline (PSTN) 5.7.3. Instructions for correct ME setup - - GSM gateway needs to be connected to your PBX using a ISDN BRI connection; the GSM gateway will be in TE mode (like the ordinary ISDN telephones) Check whether the license key for the activation of the ME service is correctly entered In the configuration in the section Routing, Mobility extension this service needs to be activated In the configuration in the section Routing, GSM destination insert another prefix corresponding with the MSN number, which PBX calls (e.g., 333, according to the above illustration) In the configuration in the section Routing, CLIP routing enter the individual ME users ME (maximum 8 !) 25 5.8. Recording DISA message The DISA message can be put in the gateway in two ways: 1. You can record the message in your PC and store the disa.vce file in the gateway (see 6.4.3). 2. You can record the message from an ISDN telephone. As regards the PBX, it depends on its programming. It must be connected to a port of the gateway and proceed in the same way as in the case of a phone. The DISA recording service is activated from the internal port by dialling the service prefix, which is ** by default ( you can change it in the program in the menu “System Parameters, Service Prefix ), and the two-digit service number. DISA message recording Procedure Description of steps Pick up the earpiece, dial the service prefix (default ), dial recording service). (DISA message Record the DISA message (15 seconds max.). Hang up. DISA message saving Procedure Description of steps Pick up the earpiece, dial the service prefix (default service). ), dial (DISA message saving The DISA message is played. To save the DISA message, press up. and hang *A disa.vce file may also be created outside the gateway with a PC by means of a sound card. It must have a maximum length of 15s, compression according to the ISDN codec A-law, mono, sampling frequency of 8 kHz. The message-recording program is part of your ISDN GSM gateway software. 5.9. Recording Callback message You can save the CALLBACK voice message to the GSM gateway from your PC* - by saving a file callback.vce (see. 6.4.3). *A disa.vce file may create with a PC by means of a sound card. It must have a maximum length of 15s, compression according to the ISDN codec A-law, mono, sampling frequency of 8 kHz. The messagerecording program is part of your ISDN GSM gateway software. 26 6. Instructions to use ISDN GSM Lite program 6.1. Installing ISDN GSM Lite program The 2N ® GSM ISDN GATEWAY Lite package includes an installation CD that contains the installation of the ISDN GSM program. When you insert the CD or floppy disks into the drive of your PC the entire installation will be started. If your CD is not run automatically after being inserted (or you use installation diskettes), start installing by running the ISDN GSM program. Wait until the installation is completed. The guides and the auto-update program are installed together with the ISDN GSM program 6.2. Running ISDN GSM Lite program When the installation is completed, you can run the program by clicking on “ISDN GSM program“ in the program menu of your PC, or by clicking on the icon in the working surface of your PC or by running the “ISDN GSM Lite program.exe“ file that you can find in your installation location by means of any explorer or file viewer. After starting the program these features will be available: Main menu Button bar menu (everything is also contained in the main menu) Card menu − Topics with configuration items − Alphabetical glossary with configuration items (contained in the subject index as well) Window for editing configuration items Fig.22: Window for editing configuration items 27 6.3. Connecting 2N ® GSM ISDN GATEWAY Lite to your PC To set parameters you must first establish communication with the gateway after starting the program. To establish the communication correctly you should use the MENU “Setting > Communication“. The basic setting is shown in fig. 23. More detailed information see 6.4.4. To connect the gateway and establish mutual communication with your PC you should use the MENU “Gateway > Connect gateway“, or the icon “Connect gateway“ in the button bar: Fig.23: Setting communication of gate and PC Select the “Use Modem” function only in connection with remote gateway supervision using a connected ISDN modem. Into the “initialisation” input box fill in the AT command that is used to switch on data communication for the particular modem x72 (x75) transparent. Note: If your have more gateways, refer to 6.4.2 to establish communication with the gateway. 6.4. Main menu and button bar The following menus are available here: File – for physical work with the configuration file; (storing, reading, etc. – see 6.4.1 below). Gateway – for physical operations with the gateway or more gateways; (connecting, disconnecting, etc. – see 6.4.2 below). Gateway control – entire command operations with the gateway; (diagnostics, reset, DISA etc. – see 6.4.3 below). Setting – contains items for communication setup and language selection; Help – contains items for work with the help. 28 6.4.1. File menu Fig. 24: File menu Using this menu you can work with the gateway configuration file config.cfg or firmware configuration file, i.e. read, store, etc. It also contains an item for finishing the program. Load – The configuration file “config.cfg“ that was last stored will be downloaded from the directory where the ISDN GSM program is stored. Or during the first run downloading the firm parameters will be requested. Save – stores currently set parameters into the file/directory where the ISDN GSM program is located (or into the item defined in the list of gateways – see 6.4.2). Load otherwise – downloads the file from the directory selected by you. Save as – saves the file in a directory selected by you. Default settings – reads the pre-set firm parameters. Program end – ends the program. 29 6.4.2. Gateway menu This menu contains commands for connecting/disconnecting the gateway and a list of gateways for remote supervision. Fig.25: Gateway menu Connect gateway – connects the ISDN GSM gateway with your PC and establishes mutual communication via the RS232 serial interface. Note: The gateway must be connected and the communication must be correctly set in the “Setting > Communication” menu. Disconnect gateway – disconnects the gateway and interrupts the gateway-PC communication. Menu for more gateways: Select gateway from list – selects a gateway (directory with the configuration file) to be connected to the PC Connect gateway from list – connects a selected gateway to the PC. List of gateways – editing the list of gateways, groups. Terminal – command control of and work with ISDN GSM gateway (see chapter 8). Fig.26: List of gateways 30 6.4.3. Gateway control menu It contains the following command items for the ISDN GSM Lite gateway: Diagnostics – information about GSM modules including charts showing how strong individual GSM signals are, information on SIM cards, free minutes for each GSM provider, PIN entering – you enter the PIN if you have a new SIM card with the PIN code active; you enter the PIN just once, the gateway will remember it; you can enter the PIN from your ISDN telephone too (see chapter 3.3), and on free minutes offered by each provider. Fig.27: Gateway Control Diagnostics menu o Free minutes - Data "Number of free minutes" shows number of free minutes for 1 month. Counter "Free minutes left" will exchange into "Number of free minutes" on specific day (day of credit recharge). Parameters "Number of seconds in 1st pulse" and "Number of seconds in following pulse" shows how many seconds will be discounted from the counter "Free minutes left" when telephone connection (let us say, Each next pulse). o In diagnostics window you can also check actual GSM lock of the gateway (this value can change only 2N service) Data from gateway – downloads the configuration file from the gateway to the program. Data to gateway – uploads and saves the configuration file into the gateway. The program then resets the gateway for internal configuration update purposes and saves the config.cfg file into a ISDN GSM program directory (if you use the Menu for more gateways, it saves it into the directory pre-defined by you). Reset – resets the gateway, initialising all pre-set gateway functions. Password change – activates and changes the PC-gateway communication password. To disable this protection, select an empty string. The password is stored in the gateway memory. Time setting – sets time and date in the gateway. Upload firmware – uploads firmware into the gateway. WARNING! Be sure to use original and undamaged firmware files for uploading to avoid gateway function troubles! For the latest firmware versions see our web sites (www.2n.cz). FIRMWARE uploading procedure: 31 1/ Get ready firmware file (Pmain.bin) in a pre-selected directory. 2/ Select Upload firmware, open the Pmain.bin file. 3/ The program now uploads your new firmware automatically – the gateway is reset several times during the process. Do not interrupt the procedure to avoid wrong uploading and gateway breakdown! Load trace – stores a record of the gateway operation and faults on a disk/in the current directory (the contents of this record can be selected in the “System Parameters > Trace“ menu). Entering the license key – with this item you can enter a new license key to the GSM gateway. The license status can be obtained using the diagnostics item. The GSM gateway restarts after having entered the license key. Upload DISA – puts the DISA message on the disk (in the current directory) in the ALAW format. Download DISA – stores the DISA message into the gateway. For downloading conditions see 5.8. The file to be stored must be named “disa.vce”! If you record the message in the said way, you can check it by calling the incoming line with active DISA (i.e. the control using an ISDN telephone as mentioned in 5.8 does not work!). Download CALLBACK – saves CALLBACK voice file to disk (to current directory) in format A-LAW Upload CALLBACK – savse CALLBACK voice file to gateway. For downloading conditions see 5.8. The file to be stored must be named “callback.vce”! Saving the Mobility Extension notification – saves ME notification on a disk (in the current folder) in the A-LAW format Saving the Mobility Extension notification - saves ME notification in the gateway. The file saved must be named "me.vce" Download Virtual ring tone – saves voice file to disk (to current directory) in format A-LAW Upload Virtual ring tone – saves voice file to gateway. For downloading conditions see 5.8. The file to be stored must be named “ring.vce”! Saving voice messages – saves the “Serv.vce” file, other gateway communication messages, such as telephone-based switch control, telephone-based PIN entering, etc. (This file must be generated by 2N – you find right files on attached CD). 6.4.4. Setting menu It contains communication setting (see fig. 23) and program language selecting menus. • Communication Serial port – select the serial port to which your gateway is connected to. Transmission rate – is recommended and set by default at “115200Bd“. Parity – is set by default and should be “none”. Number of stop-bits – is set by default and should be 1. Number of data bits – is set by default and should be 8 for correct communication. Use modem – sets gate communication via a modem. Initialisation – sends an initialisation command to the ISDN modem (here select the AT command for the modem to use x72 (x75) transparent). 32 6.4.5. Help menu This menu contains the ISDN GSM Lite program help, instructions to the help and details on the program version. 33 6.4.6. Button bar Fig.28: Button bar - Download configuration file - Store configuration file - Read in firmware - Connect gateway - Disconnect gateway - Select gateway from the list and connect selected gateway from the list - Download parameters from the gateway - Upload parameters to the gateway - Select language - Finish program - Help 34 6.5. Configuration As already mentioned, you will find the following card menus in the program: “Topics“ and “Alphabetical glossary“. These card menus contain duplicated items (as shown in figs. 29 and 30) and it is up to the user to decide which menu to choose to make editing parameters clear. In these parameters you can set the particular behaviour of the ISDN GSM gateway. 6.5.1. Topics and Alphabetical glossary Fig.29: Topics Fig.30: Alphabetical glossary 35 6.5.2. ISDN Fig.31: Basic ISDN parameters 6.5.2.1 Basic parameters Connection type The type of connection depends on the equipment the gateway port is connected to. The parameter must be the same for all interconnected pieces of equipment. - Point-to-Multipoint is used to connect two to eight ISDN devices and it uses the MSN service (Multiple Subscriber Number). This type of connection is used for telephones and ISDN terminals. - Point-to-Point is used to connect just two pieces of equipment and it uses the DDI service (Direct Dialling In). This type of connection is used for PBXs, but cannot be used for ISDN telephones and modems. Note: For details on the ISDN line type see the registration sheet of your ISDN provider or contact your telephone network administrator. TEI Management TEI (Terminal Equipment Identification) is an internal ISDN identification of connected telephones. - Auto must be used for the point-to-multipoint connection. - 0 is used for the point-to-point connection. (Can be changed in exceptional cases.) 36 Dialling mode This parameter determines the mode of transferring numbers in the TE<>NT communication. There are two ways of number transfer in the ISDN - either in a data packet called “setup” or in packets called “info”. - Overlap, this parameter determines that the “setup” packet does not contain any number and all digits are sent in “info” packets. This parameter is used for communication with some PBXs. Never use it for ISDN telephones. - Enblock, this parameter determines that the whole number is sent in the “setup” packet. This parameter must be set for those ports to which an ISDN telephone or similar terminal is connected. - Onsetup, this parameter combines both the above-mentioned parameters and is set for ISDNs and most PBXs. Never use it for ISDN telephones. DISA to GSM Global activation/deactivation of the function on the selected port. The DISA to GSM is DTMF dial-in to GSM networks. In cases of the GSM gateway is installed to a extension of your PBX or on a ISDN bus with more than one TE terminals. In second case is necessary to set for selected port right MSN number (the GSM gateway will accept only call requests with this number). In case that MSN number isn't present, the GSM gateway will accept all requests. The MSN number you set in section "Routing>Trunk lines" (see 6.5.4.6 page 50). For right instalation is necessary to set up correctly all additional parameters in sections "Routing>General parameters" (see 6.5.4.1 page 44) and "Routing>CLIP routing" (see 6.5.4.6 page 50.). Send to ISDN progress - In case that the parameter is switched on, th GSM gateway will inform your ISDN equipment that calling phone is in non-ISDN network (call is routed to GSM network) and require voice connection via B-channel before the connection with caled party (in this case the calling party can hear all tones and voice messages from GSM network). When the parameter is switched off, the ring tone is generated by your ISDN equipment. Send CONNECT_ACK in TE mode - The gateway in TE mode sends optional ISDN message CONNECT ACK. This message can be required by some of Ericsson PBX Don’t send TE progress in SETUP_ACK - Removal of the TE progress from corfirmation message in ISDN communication. It is neccessary to use this parameter with some of Alcatel PBXes (e.g. Alcatel 4400) Mode of dial tone - Sets type of dial tone with activated DISA function on TE port. Error ISDN cause - Number of ISDN cause, which the GSM gateway will sends back in REJECT message. This message is sent in case, that the GSM gateway receives request for make outg. call and there is no free way(route) for this call - call will be rejected. In case that you're using intellingent PBX/Router you can reroute (and establish) this call via another device. If this parameter is switched off, the gateway sends CAUSE number=1. Convert keypad facility dial to called party number– Some ISDN terminal are sending letters “#” and “*” as Keypad facility dial mode. With activate this parameter gateway will convert this dial to Called party number. 37 Opposite mode of ISDN layer 1 – This parameter enables to switch ISDN Layer 1 to mode=TE, but Layers 2 and 3 will be still as NT. In case that switching of layers is supported by connected PBX, you can easly solve potencial problem with synchronization. Keep activated layer 1 – In case that this parameter is enabled and 2N GSM gateway detect deactivating of ISDN Layer 1, its immediately try to re-activate it. This feature is active only for ISDN port mode = TE. 38 6.5.3. GSM 6.5.3.1 Basic parameters Calling Line Identification Restriction, CLIR This parameter decides whether the gateway SIM card subscribing number will be sent to the GSM network. All subscribers of a PBX using the GSM gateway connected to this PBX are presented with the same caller’s number, which is the SIM card number in the GSM network. From the technological point of view it is impossible to transmit information about the caller’s number from the ISDN into GSM. (This function is supported the other way round, i.e. all ISDN subscribers can see the number of a GSM caller). So it is mostly convenient to prohibit sending the number (activate CLIR) to avoid problems of back calls to the gateway (e.g. when a GSM phone call is missed. - On, CLIR is active, the number is not sent to the GSM network. WARNING: This function must be supported and activated by your GSM provider. If not, your number will be transmitted to the network and, in some GSM networks, you cannot perform an outgoing call. - Off, CLIR is inactive, the number is transmitted. Allowed call route This parameter allows to establish connections in the incoming and outgoing directions. - Incoming from GSM, you can just receive calls from the GSM network. You cannot perform active (outgoing) calls from the gateway. - Outgoing to GSM, you can use the gateway for outgoing calls only. All incoming calls will be rejected. - Both, the gateway supports establishing connections in both directions. Fig.32: Basic GSM parameters 39 Roaming This parameter allows to log the gateway into a foreign network (roaming). Practically, e.g. in boarder areas roaming an undesirable logging into a foreign network may happen as a result of signal variations or a GSM cell failure. - On, roaming is authorised, the gateway can log into a foreign network (this function works only if your tariff rate enables full roaming with available foreign networks; if more foreign networks are available and you want to prefer any of them, then add it into the list of preferred networks on your SIM card using any GSM telephone). Note that such roaming means higher incoming and outgoing call costs from/into the GSM network. - Off, roaming is prohibited, the gateway cannot log into a foreign network. Transmit/Receive level These parameters can change the level of transmission and reception volumes. Such a change may, in some cases, impair the other transmission parameters, e.g. echo. Do not change these optimally set parameters unless absolutely necessary. Echocanceller This parameter switches the module mode and activates the echo-suppressing circuit. Caution! It may be activated in production numbers 1-300-XXXX and higher! Preferred network This paraments defines to which GSM network the GSM module will be logging on (in case that at the installation place there are more available GSM networks). To this column you have to enter „Network code“ of the selected GSM network – This is the international ID of the GSM network (gennerally it contains five digits). B-channel connection delay [ms] Defines the time delay for connection to the GSM network (with outgoing calls to the GSM network), after which the calling subscriber hears tones coming from the GSM network - this delay eliminates connection-establishing tones. The connection is established upon answer of the called subscriber regardless of the length of this parameter. The optimum value is about 5,000 ms. Network connectivity timeout [ms] This parameter defines the timeout after which the module, which failed to log into a GSM network, will be restarted and logged into the GSM network with priority. The SIM card must be inserted and the correct PIN code entered. The optimum value is about 60,000 ms. Relax Delay [ms] Defines the delay time between the end of one call into GSM and the beginning of another call into GSM (via one and the same GSM module). You are advised to select 2,000ms in case your ISDN GSM gateway is heavily used for calling into the GSM network – this delay makes difficult the detection of your ISDN GSM gateway by the GSM network and avoids call rejections (caused by the GSM network). CAUTION! The maximum setting is 2,500ms!!! Password After the correct password is entered, you can add auxiliary AT commands for GSM module communication into input boxes. However, you are not recommended to add these commands because of the risk of GSM module dysfunction or damage. 40 SMS mode SMS saving format in the ISDN GSM gateway: − TXT: The ISDN GSM gateway saves incoming SMS into files (SMSxxx.txt) in the text format. The available SMS ISDN GSM program works with these files. − PDU : The ISDN GSM gateway saves incoming SMS into files (SMSxxx.pdu) in a special format compatible with the MobilChange application. GSM Callback Timeout During this timeout the gateway doesn’t receive any incomming calls with CLIP with activated GSM CALLBACK. After this period of time the gateway starts receiving this call. In case the calling party disconnects the call, the gateway will activate CALLBACK function. Default time=10 seconds Enable CLIP from GSM to ISDN By enabling this function you activate transfer of calling party number (CLIP) from GSM to ISDN. In case, that this parameter will be switched off, CLIP from GSM won't be forwarded to ISDN. Replace international country prefix This function will activate replacing of the international prefix of country where the gateway is installed. Enable after free minute spending With this function you can enable or disable the GSM module which has no free minutes (in case that this function is activated) Delay before dialing to GSM (ms) – Delay between receiving called party number from ISDN and sending to GSM network. Software checking of incomming call – In case that you activate this function, the gateway three times checks if on GSM side is really incomming call. It have effect increasing delay between first ring from GSM network and sending alerting to ISDN interface, but you limit number of missing incomming calls from GSM which ring length is very short. Maximum length of call – It defines maximum length of outgoing connected call for each GSM module. Parameter is defined in minutes (0=unlimited). Activate calling numer filtering – When this function is enabled, the gateway will filter Calling number and keep only 0-9 digits, the others characters (except +) will be removed. Lenght of virtual ring tone – Gateway with activated the feature will play customized message* (can be speech or tone) after start dialing to GSM. With this parameter you can define how length of playback. Playback of the tone will be automaticly interrupted when the call connected. *this message you have to upload to the gateway. See page 31, chapter 6.4.3 . 41 Billing To get information about the price of an outgoing call from the gateway to a GSM network, you can activate transmission of this information from the GSM gate to ISDN terminal via the AOC service. The information may be generated in two ways. - Transmit Aoc information from GSM, the information about the price of the call is received from the GSM network and transformed into the AOC service. The subscriber gets accurate information about the price. NOTE: Only some providers offer this service. - Off, the AOC service is inactive, no information is transferred to the ISDN. - Generate, in case the GSM network does not support transferring charge information you can activate this parameter to start generating this information in the gateway – this information may slightly differ from the actual cost. After activation, the following two items should be added: - Number of tariff impulses, this parameter determines how many impulses are transmitted after the connection is established. - Pulse repetition time is the time period of sending another impulse after the initial series of impulses. Fig.33: GSM charging 42 6.5.4. Routing Port modes CLIP By activating this parameter you switch on the I2CR function (Intelligent Incoming Call Routing). Every incoming call that contains information about the subscriber number CLIP is compared to numbers listed in the Clip Routing chart (see 0). If there is a match, the incoming call is connected directly from the given port to the port and number (MSN, ISDN number, or similar terminal number) quoted in this chart. This parameter may be activated regardless of other parameters. DISA DISA is a service that distributes incoming calls. All incoming calls (except those mentioned in the “CLIP” section above) are answered and get a DISA message – to activate this function, select the required parameters in the “Routing > General parameters” section (see 6.5.4.1). You are recommended to activate the Operator service (see below) at the same time. Fig.34: Routing - port modes Operator 1, 2 Every incoming call (except those that are mentioned in the “CLIP“ and “DISA“ sections above) is dialled directly to the number included in the “Routing > General parameters” section (see 6.5.4.1). If you use this function together with the DISA service, every incoming call will be forwarded to the operator (except for the “CLIP” section) that does not tone-dial the DDI number – refer to DISA. Number Normalising If this parameter is activated, all calls are performed using complete numbers including all normalised prefixes (+420 2 223344, e.g.). Respective prefixes must be correctly filled in in the National and International Destination charts (see 6.5.4.2, 6.5.4.3). It is particularly suitable for roaming activated in GSM networks. CALLBACK Global enable/disable of CALLBACK function on a selected GSM port. For right function you have to activate function CLIP! Auto CLIP routing When this function is activated, the gateway begins to register information about outgoing unconnected (connected) calls in to its local RAM memory. The following information is saved in to the memory: - The called number - The calling number - Date and time of the call In the case that a number that had been previously dialed and registered in to the memory calls back to the gateway within a configurable period of time, this call is routed to the subscriber who last dialed the particular number. For this function to work properly, it is necessary to activate CLIP. More information about the configuration of Auto CLIP routing can be found in section 6.5.4.1, on page 44. 43 6.5.4.1 General parameters Fig.36: Routing – General parameters Operator 1, 2 Parameters setting the Operator 1,2 function mentioned in 0, “Operator 1, 2“. - Number, sets the operator’s DDI number (MSN, ISDN telephone or other ISDN terminal number). DISA The chart sets the behaviour of the DISA service that can be de/activated in the “Routing > Port modes” section (see 0). - First digit waiting time is the time during which the calling subscriber gets the DISA message and should transmit the first DTMF tone. If no number is detected during the timeout, the operator is dialled-in if activated, if deactivated, the caller gets the busy tone! - Next digit waiting time is the time of waiting for the second and further digits of the direct dial number. If the next number is not detected during this timeout, the call is routed to Operator 1 or 2. The Operator service must be activated. - Number of DDI digits is the number of digits after which DDI to the PBX or an ISDN terminal is made. If the DISA DDI has a lower number of digits than selected, terminate dialling by pressing a #. It is recommended that all DDI numbers should have the same number of digits to prevent the calling subscriber from pressing a #. . Dialling parameters These parameters refer to dialling in ISDN ports (TE, NT). - Waiting for first digit - the time the port waits for the first digit. If it does not receive any sign by then, the caller gets the busy tone. - Waiting for next digit - the time of waiting for the second and following digits. If no other digits comes within this timeout, dialling is performed with characters received so far. - Call forwarding to operator in case of absence [s] Timeout for call forwarding to the operator if the called line does not answer 44 DISA do GSM Password – Access password, which the GSM gateway will request before dialling an outg. number to a GSM network (at first the gateway sends a special dial tone – for password, after the passord if correctly entered the gateway sends a normal dial tone). To finish the access procedure you have to send to the gateway char „#“ First digit waiting time is the time during which the calling subscriber gets the DISA message and should transmit the first DTMF tone. If no number is detected during the timeout, the operator is dialled-in if activated, if deactivated, the caller gets the busy tone Next digit waiting time is the time of waiting for the second and further digits of the direct dial number. If the next number is not detected during this timeout, gateway start to dial received number to GSM network. Unknown CLIP enabling – In case that this parameter will be disabled, the GSM gateway will start rejecting all requests for calls from calling parties with disabled CLIPs (e.g. with active CLIR function). Enable only for CLIP tab numbers. – In case that you activate this parameter, the GSM gateway accepts the request for a call only from calling parties with CLIP included in table „CLIP routing“. In case that this CLIP isn’t in the table the gateway rejects such a call. SMS at no anwer This parameter activates the following function: In case that an outgoing call from GSM gateway won't be connected (only rings for a defined time period), the gateway will send an SMS to the same number with predefined text message. In this text you can use chars %N, these chars will be replaced by MSN number of calling party. Please, write text without special chars, lenght of message is restricted to 150 chars. International local prefix this parameter replaces the international country prefix (code) in every incomming call from the GSM network) (see. 6.5.4.5 page 49 and 6.5.3.1 page 39) Validity (hours) Validity of line in Auto Routing CLIP function. After this time the line will be automaticly deletedErase after using In case that some line in Auto Routing CLIP table will be used (somebody call back to the GSM gateway), this line will be deleted. Store connected call In normal mode the gateway store only unconnected call (only ring) to Auto Routing CLIP table. In case that you will activate this parameter the gateway will store all outgoing calls (unconnected+connected) 45 CLIP routing Fig.37: Routing – CLIP routing - - - This chart determines behaviour of the intelligent routing of incoming calls. In individual lines the sequence goes like this: CLIP – calling line identification presentation Extension – DDI number (to which the call should be connected) Port – port to which the destined ISDN terminal is connected Validity – total time (days – max. 250) of record validity if 0 means permanently valid Mode – defines whether the “Remaining days” item should be restored to the “Validity” value if an incoming call with this CLIP comes (1 – restored, 0 – not restored) Remaining days – number of days until the item is deleted from the chart (days are always deducted at midnight). Callback – 0=Incomming call from GSM with defined CLIP has no activated Callback function. 1=Incomming call from GSM with defined CLIP has activated Callback function, DISA to GSM – 0=Request for outgoing call with defined CLIP is rejected. 1=Request is accepted and gateway will pict-up the call and give dial tone or tone for enter password. Callback number – optional enhancement of the callback function by the possibility of calling back a different number DISA for Callback - After performing the callback function the caller will not be switched to a defined branch. Instead, the caller will receive from the GSM gateway a voice DISA notification to perform another DTMF dialing Incoming DISA from GSM – If the GSM gateway is set up to route incoming calls to a defined branch, it will receive the defined CLIP DISA DTMF dialing instead of direct connection using this parameter. ME – allowing/banning ME for the selected CLIP Follow me – allowing/banning the function of call routing from ISDN to GSM (included in the ME function) SMS at no answer – allowing/banning the function for a selected CLIP *Note: Items can be added to the CLIP Routing chart using a telephone (see 5.6). To make CLIP work properly, satisfy the following conditions: Complete the correct national prefix in the National Destination chart (see 6.5.4.3 page 48). The international installation site must be identical with the international prefix included in the CLIP Routing chart (see 6.5.4.2 page 47). Enter the number in the long-distance call format (0603xxxxxx, 02xxxxxxxx, e.g.). 46 6.5.4.2 International destinations This chart describes the prefix (code number) and direct dial number of international numbering. Fig.38: International destinations Prefix Prefix means signs used to enter the international network (mostly “+“ and “00“). Destination Dialling numbers of individual countries are filled in here, e.g. Czech Rep. 420, or Austria 43. For future completion of the “Installation Site” section (see 6.5.4.5 page 49), it is necessary to fill in the international installation site at least. If you use outgoing call routing according to countries, add them into the chart too. For simplicity, you can work with the chart as with a text file by means of the “edit” function. 47 6.5.4.3 National destinations This chart describes numbering within the national destination. Fig.39: National destinations Prefix Prefix means the sign necessary to get into the national network for long-distance calls. E.g. in the Czech Republic it is “0“. Destinations The chart of destinations describes numbering in the national destination without the prefix, e.g. Prague 2, Linz 70. GSM gateway installation destinations must be included at least (e.g. Prague = “2”, Linz “20”). With every destination the maximum number of digits that follow the destination number must be filled in (e.g. Prague = “8”). In this way it is guaranteed that the dialling to the outgoing line is faster (the gateway starts dialling immediately after the last digit). If the called destination is not included in the list (or a shorter number of digits is selected), the gateway waits for the time mentioned in chapter 6.5.4.1 page 44, “Dialling Parameters” for the next digit and then starts dialling into the outgoing line. If you use outgoing call routing according to national destinations, add these destination to the chart. We recommend you to add frequently called destinations to the chart. For simplicity, you can work with the chart as with a file with values separated by a semicolon (“edit” button). 6.5.4.4 GSM destinations Fig.40: GSM destinations 48 This chart is necessary for a correct LCR function, i.e. routing calls to GSM networks. In individual lines there is all information about the GSM network of individual providers. Name is the text name of the provider and is used for easy orientation in the chart. Provider’s code is essential for the LCR function. The code of the provider must be filled in here in exactly the same way as it is transmitted by the GSM network (e.g. Paegas 23001). You can find it in the menu “Gateway control > Diagnostics”. (A SIM card of the provider must be inserted in the gateway.) If the provider’s code is quoted in the GSM destination chart, in the diagnostics menu you will find the provider’s text name for better orientation. SMS centre number - must be filled in here in its complete form. This number is essential for future SMS transmission from the ISDN GSM gateway. Prefix - Enter the prefix only if you do not use the function of outgoing call routing into GSM “According to position”. all calls containing prefixes included this list are routed through this provider (if the provider is logged to a GSM channel). The prefix is followed by the number of signs (e.g. Paegas = “6”) that make the number complete. This guarantees that any dialling into the GSM network starts after the last digit, not after the timeout mentioned in 6.5.4.1 page 44 in “Dialling parameters”. Prefixes must be entered in a defined format, 603;606;777..., e.g. if the national destination prefix is filled in (see 6.5.4.3 page 48). If not, prefixes should have the 0603;0606;0777,... format. Be sure to complete the “Installation site” chart carefully to avoid dysfunction (see 6.5.4.5 page 49). - According to position – From the firmware version 9.00 up, the ISDN GSM gateway provides two ways of outgoing call routing into GSM – according to GSM provider (network number) and now according to SIM card position in the gateway. This parameter is useful where you have SIM cards from one and the same provider in your ISDN GSM gateway but want to set the outgoing call routing to GSM for each GSM module separately. Enter the prefixes as in the “National destination” chart. In case you use this mode, you can select destinations GSM1 (for position 1) and GSM2 (for position 2) in the “Tariff rates>Priorities” section. - By B-channel – Gateway will bypase LCR table and use same GSM channel as used ISDN B-channel (1.GSM = B-channel 1 ; 2.GSM = B-channel 2) ATTENTION! It's necessary, for the correct function, to fill in the number of the network, the title and the SMS center of the used operator in the GSM destination chart (it must be from those operator, whose SIM cards are used in the ISDN GSM Gateways) and these destinations must be filled in correctly to the chart in "tariff-priorities" section 6.5.4.5 Installation site Fig.41: Installation site For a correct LCR function it is necessary to specify where the gateway is located. National destination – select the place where the gateway works from the National destination chart. International destination - select the place where the gateway works from the International destination chart. 49 6.5.4.6 Trunk number In case you have enbled DISA to GSM function and the gateway is connected to ISDNbus with more TE terminals. It is necessary to add MSN number of the GSM gateway for each connected TE port*. In case you let this table blank, the GSM gateway accepts all requests for calls (all incomming SETUP messages)! 6.5.4.7 Mobility extension Using this box you can globally allow/ban the Mobility Extension service in the GSM gateway. It is also possible to modify here the DTMF codes used for setting and controlling the ME function. We recommend leaving the factory settings: Putting a call on hold: *7 Hanging up a call: #9 Deactivating the follow me function: #55 Activating the follow me function: *55 Deactivating the SMS at no answer function: #33 Activating the SMS at no answer function: *33 Delay when dialing DTMF: 2000ms 6.5.5. Restrictions 6.5.5.1 Barred outgoing call destinations Fig. 45: Barred outgoing call destinations Global restrictions By selecting one of the global restrictions you can prohibit calling to an entire destination. E.g. Restrict all international calls. It means that all calls that contain the changing sign from the prefix in the “Routing > International destinations” section are rejected. In the restricted destination you can make an exception by putting an individual number or a part of it in the Allowed outgoing call destinations chart (see 6.5.5.2). Destinations In this chart you can make a list of unauthorised destinations (videotext 090, e.g.). You can work with the chart as with a text file using the “Edit” button. Note: You cannot enter combinations of global restriction parameters (“00” for international call barring, e.g.) into the chart. 50 6.5.5.2 Allowed outgoing call destinations This chart enables you to make a list of individual numbers or parts of destinations that can be called in spite of the fact that they lie in a restricted destination or the prefix is included in the ”Restriction > Barred outgoing call destinations” section (if, e.g., the global restriction “Long-distance” is selected in the Barred outgoing call destination chart and prefix “05” is entered into the Allowed destination chart, then outgoing calls to Brno are allowed only). You can work with the chart as with a text file by means of the “Edit” function. 6.5.5.3 Barred incoming call numbers With this chart you can make a list of numbers of subscribers whose all calls are to be rejected. Caution: This function works only if the calling subscriber has not activated CLIR (non-public number). Numbers should be entered including prefix, for example: 0603xxxxxx. Be sure to activate the CLIP function (see 0) for this function on incoming ports. 6.5.6. System parameters 6.5.6.1 Remote access The ISDN GSM gateway supports remote supervision including download of firmware, the configuration file and a file monitoring the gateway operation via GSM network. Fig.46: Remote access Remote access enable - enables or disables remote access. Remote supervision from the GSM network is always activated for data calling. 6.5.6.2 Trace This chart makes it possible to record individual events occurring during gateway operation. This file may be used for diagnostic purposes or check of operation and costs if necessary (cdr information). Moreover, you can activate the automatic diagnostic SMS sending function here*, giving details on the ISDN GSM gateway status. Function „Restart at“ makes it possible to automatic restart of the GSM gateway every day at defined time. Attention! All events are saving to RAM memory! When the gateway is switched off the RAM memory will be erased! 51 Fig.47: Trace 6.5.6.3 Service prefix This parameter is a number (signs) used to gain complementary services from NT ports. (such as recording a DISA message, input control, etc.). This parameter is set at “**” by default and should not be changed for simplicity when you use gateway services. 52 6.5.7. Tariff rates This section helps you to utilise fully the time LCR of your ISDN GSM gateway. 6.5.7.1 Times Fig. 48: Times You have to define day time zones (subrates) in this chart. You can select different routing modes for each subrate. • Subrates – enter names of time zones. • Holidays – enter dates of bank holidays or other significant days that are governed by the holiday chart, see below. • Time zones – set times for each subrate: time – time limit of the selected subrate, time of the next subrate means end of the preceding subrate. The last-entered rate is valid until 11:19 p.m. For an example of settings see fig. 48. 53 6.5.7.2 Priorities Fig. 49: Priorities Define in this chart in what sequence outgoing ports (TE, GSM1, GSM2) should be engaged. Select the priorities for each destination and subrate separately! Remember that outgoing calls are also governed by the Barred outgoing call destination chart. • Subrates – you have folders for each subrate in the upper part of the chart to be filled in. • Destination – here add names of outgoing call destinations We recommend you to set Local, national, International and GSM provider destinations at least. (Be sure to complete the Destination priority for each of them). • Destination priority – here enter the sequence of outgoing calls. (If the destination on the first line is occupied, the destination on the next line is used for outgoing calls. If all filled-in destinations are engaged, the outgoing call is rejected). If you use the GSM routing mode “According to position”, you can select GSM1 (GSM module 1) and GSM2 (GSM module 2) in the list of destinations. * Be sure to select correct GSM providers in GSM destinations. 54 7. PC-based SMS sending and receiving The included PC-based SMS sending and receiving program works like common electronic mail. It is available free of charge on an enclosed medium or at www.2n.cz. To get a correct function, connect your PC to the GSM gateway via a standard RS232 port (COM). For configuration choose the “SMS > Communication menu. Select items as described in 6.4.4. Do not select checkbox initialisation. If set successfully, the ISDN GSM gateway gets connected to the PC automatically. If your PC is not connected, the ISDN GSM gateway stores all coming SMSs into the memory and reads them automatically upon PC connection. 55 8. Configuration and communication using a standard terminal You can communicate with the GSM gateway via an internal serial line. The setting is as follows: SIO: Modem: 115 kb/s 8N1 (RTS -CTS) X.25 (X.75) transparent For the modem connection you should dial the service prefix from the internal port and the number quoted in the configuration file from the external port. If no number is quoted, every data call is considered as remote monitoring (protection of deleting the configuration file). The gateway can be operated by any modem SW (Hyperterminal, Qmodem ...). The gateway behaves like an ANSI terminal with echo. Commands are entered as text and the Y-modem protocol is designed for transferring files. For the access you can set a password. If the gateway requires a password, there is the “PASSWORD:“ prompt, if the password is entered or if it is not required there is the > prompt. As far as the organisation of information is concerned, the gateway behaves like a system with 4 disks numbered 0-3 and their designation is as follows: Disk 0 Read Only, with firmware necessary for the ISDN communication, Disk 1 Second firmware disk. The rest of firmware that cannot get into the first disk. During downloading it is used as a mirror disk. During operation used for recording , storing and editing messages. Disk 2 Disk for storing configuration files. (model 2006 has moved disk 2 to disk 3) Disk 3 Ramdisk for Log a Debug trace. You can read from the disks and store in them. There are xxx.EXE files in the disk 0 and 1, which are individual processes. Disk 2 contains the following files: SERV.VCE messages for services DISA.VCE DISA message CALLBACK.VCE CALLBACK voice message Disk 2 contains the following files: CONFIG.CFG Cofiguration file CLIPROUTI.CFG file with CLIP routing table In disk 3 information is stored in circle files. The name is NAMExxx.EXT, where xxx is a decadic number from 000 to 999. The size of individual files is limited to 1/8 of the disk size and if the remaining space in the disk is lower than 1/4, the oldest files start to be deleted. This disk contains these files: Lxxx.LOG System LOG SMSxxx.TXT Received SMS (text format) SMSxxx.PDU Received SMS (PDU format, for communication with MobilChange) Txxx.TRC Debug trace, which has size 0 in normal operation. As the last file is always open for entering, there are special commands for downloading and deleting files. DOWNLOAD closes the last file, downloads all files that are on the disk and 56 creates another empty file. REMOVE deletes all closed files. So if you call DOWNLOAD more times without deleting, it is very likely that the same files will come. 57 8.1. Terminal commands 8.1.1. General TIME [HH:MM[:SS]] DATE [MM.DD.YY] SETRD Par RESET VER PASS LOGOUT GETSN GETSMSMODE GETTYPE Read or set time in RTC Read or set date in RTC Set the Ramdisk size, hexagonal input in paragraphs (80-180 32k to 96k) Reset Gateway Readout of firmware version Set access password Log out Writes out the gateway serial number Writes out information on the SMS receiving mode Type of the gateway (1- 50208x 0- 50207x) 8.1.2. Disk system UL disk: .. DL disk:file.ext ULM ULB DEL disk:file.ext REN disk:oldfile.ext,Newfile.ext DIR disk: FORMAT disk: DLLOG REMOVELOG DLSMS REMOVESMS Upload file Download file Upload firmware Upload Bios Delete file Rename file Readout of the disk contents Format disk Download LOG Delete LOG Download received SMS Delete SMS 8.1.3. Communication with GSM modules PIN module,PIN Enter PIN for module PUK module,PUK Enter PUK and PIN for module SMS module,number,text Send SMS from module to number SMSPDU module,handle,Len,pdu sends SMS from module in PDU format GSMINFO module Readout information on GSM module SMSSTAT Readout information on received SMS status GETFM module Readout information on free minutes on module SETFM MOD,MIN,DAY,FIRST,NEXT,ACTMIN Set information on free minutes min number of free minutes in month (default 0) day day in month for new free-minute recording (1) first number of seconds in the first tariff rate pulse (0) next number of seconds in next tariff rate pulses (1) actmin number of minutes used (0) The PIN is stored in the CMOS and the GSM gateway remembers the number and PIN of the last SIM card. If it finds out that it the SIM card number matches the CMOS number, the PIN error counter is 3 and the card requires PIN, the gateway enters the PIN itself, if not you have to enter your PIN or PUK manually. SMSSTAT returns either PRESENT if there are some SMSs on disk 3, or EMPTY if not. 58 8.1.3.1 General file transfer The terms ‘upload’ and ‘download’ are from the viewpoint of the modem, i.e. ‘download’ means loading from the gateway. After upload or download commands are entered, the Y modem sender/receiver ready is displayed and the YMODEM is started. If an error occurs, ASCII is quitted with Q. 8.1.3.2 Upload of BIOS After ULB is entered, the YMODEM receiver is activated and a file is awaited. After the entire file is received, the old and new BIOS versions are readout and the gateway requires confirmation. Upon confirmation, the old BIOS is overwritten with the new one and the gate resets itself. Caution, if a nonsensical file or a lower version is uploaded, it is highly probable that the gateway stops working and flash has to be re-programmed in the programmer. This command is just an insurance against serious problems. 8.1.3.3 Upload of firmware the firmware (pmain.bin) is uploaded using ULM, then reset is made and the secondary part is uploaded by ULM. ULM expects a file via the YMODEM to be saved on disk 1. Upon reset, it is found out whether disk 1 is a mirror of disk 0. If so, it is copied into disk 0 and deleted. If not, it is tested whether the disk is a valid secondary disk and if the content is nonsensical, disk 1 is re-formatted. This eliminates any failure during firmware uploading. 9. Saving Information on Made Calls (cdr) If you select the “Outgoing call” or “Incoming call” items in the “System settings>Trace” menu, the ISDN GSM gateway saves information on selected accomplished calls into the trace file. The cdr information line structure is as follows: 23.04.02 15:02:27 : OUT CALL : TE1:200 -> GSM1:0603123456 B:15 A:27 U:27 DATE TIME: OUT CALL: INTERFACE: calling MSN number -> GSM module:called number B:call connecting time (s) A:call time (s) U:number of tariff rate pulses from GSM network 59 10. Technical parameters GSM: SIM card Transmission power Reception sensitivity EGSM 900 MHz phase II GSM 1800 MHz plug-in 3 V (“small”) 2W -104 dBm Antenna: Frequency Impedance Max. power Antenna connector type Cable length 900/1800 MHz 50 Ω 2W SMA (male) 3-10 m or without a cable Power supply: Adapter DC supply Supply connector Lithium battery 110 - 250 V, 50/60 Hz / 12V DC 12 V DC / 1 A DC jack, 2.1 mm CR2032 Mobile network type ISDN: ISDN protocol Type ISDN connector NT interface supply So, point to multipoint So, point to point So, point to multipoint So, point to point EuroISDN, DSS - 1 RJ 45 From an external adapter or ISDN Serial interface: Interface type Connector Interface transfer speed RS-232C D-Sub 9 contacts – holes 115 200 bit / s Remote control GSM data (CSD) Others: Dimensions (without connectors) Operation temperature Rel. air humidity 250 x 150 x 55 mm 10°C to 45°C 5 to 95% Type of ISDN NT connection Type of ISDN TE connection 60 Use the product for the purposes it has been designed for by the manufacturer, in accordance with this manual. The manufacturer reserves the right to modify the product as compared to the presented documentation in such a way that improves the properties of the product. 2N ® GSM GATEWAY ISDN Lite does not contain any components harmful to the environment. When the life cycle of this products is exhausted and you do not find any other use for it, dispose of it in accordance with valid legal regulations. ©2007 2N TELEKOMUNIKACE a.s. - Prague, PR 1020 v.1.9 61