1
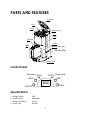
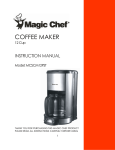
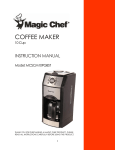
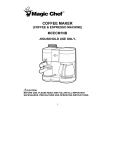
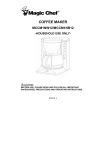
COFFEE MAKER 12 Cup INSTRUCTION MANUAL Model: MCSCM12TB THANK YOU FOR PURCHASING A MAGIC CHEF PRODUCT. PLEASE READ ALL INSTRUCTIONS CAREFULLY BEFORE USING 1 THE PRODUCT. CONTENTS SAFETY INSTRUCTIONS ……………………………………………….……………………………………………………… 3 IMPORTANT SAFEGUARDS ………………….…………………………………………………………………………….… 4 PARTS AND FEATURES ……………………………………………………………………….……………………... 6 BEFORE USE ……………………………………………………………………………………………………………………….. 7 OPERATING INSTRUCTIONS ……………………………………………………………………………..…………………. 8 COOKING TIPS …..………………………………………………………………………………………………….………..…… 9 CARE AND MAINTENANCE …………………………….………………………………………………………………... 10 WARRANTY ……………………………………………………………………………………………………………………... 11 2 What You Need to Know About Safety Instructions Warning and Important Safety Instructions appearing in this manual are not meant to cover all possible conditions and situations that may occur. Common sense, caution and care must be exercised when installing, maintaining, or operating appliance. Always contact your dealer, distributor, service agent or manufacturer about problems or conditions you do not understand. SAVE THESE INSTRUCTIONS FOR HOUSEHOLD USE ONLY 3 IMPORTANT SAFEGUARDS When using electrical appliances, basic precautions should always be followed, including the following: 1. READ ALL INSRUCTIONS BEFORE USING. 2. Do not touch hot surfaces. Use handles or knobs. 3. To protect against fire, electric shock and injury to persons, do not immerse cord or plug in the water or other liquid. 4. Not allow children to use without supervision. 5. The carafe is designed for use with this appliance. It cannot be used on a range top. 6. Overfilling can also cause scalding. 7. Unplug from the outlet when not in use and before cleaning. Cool the appliance before assembling or disassembling parts, and before cleaning the appliance. 8. Do not operate any appliance with a damaged cord or plug or after the appliance malfunctions, or is damaged in any manner. Return the appliance to the nearest authorized service facility for examination, repair or adjustment. 9. The use of accessory attachments not recommended by the appliance manufacturer may result in fire, electric shock, or injury to persons. 10. Do not clean the carafe with cleansers, steel wool pads, or other abrasive materials. 11. This appliance can only be used with the carafe properly positioned on the stand. 12. Do not let the cord hang over the edge of table or counter, or touch hot surface. 13. Do not place on or near a hot gas or electric burner, or in a heated oven. 14. To disconnect, turn all control to “OFF”, then remove the plug from the outlet. 15. Do not use a carafe that is cracked or has a loose or weakened handle. 16. Never leave an empty carafe on the warming plate, otherwise the carafe is prone to crack. 17. Do not set a hot carafe on a hot or cold surface. 18. Do not use this appliance for other than intended use. 19. Do not use outdoors. 4 Notes on the cord plug This appliance has a polarized plug. To reduce the risk of electric shock, this plug is intended to fit into a polarized outlet only in one way. If the plug does not fit fully into the outlet, reverse the plug. If it still does not fit, contact a qualified electrician. Do not attempt to modify the plug in any way. Notes on the cord: A. A shorter power-supply cord (or detached power-supply cord) is provided to reduce the risk resulting from being entangled in or tripping over a longer cord. B. Longer detachable power-supply cords or extension cords are available and may be used if care is exercised in their use. C. If a long detachable power-supply cords or extension cord is used: 1. The marked electrical rating of the detachable power-supply cord or extension cord should be at least equal or great than the electrical rating of the appliance. 2. If the appliance is a grounded type, the extension cord should be a grounding-type 3-wire cord. 3. The longer cord should be arranged so that it will not drape over the counter top or table top where it can be pulled on by children or tripped over. WARNING: To protect against electric shock, fire, and injury to person(s), do not immerse main cord, plug, or unit in water or any other liquid. CAUTION: Do not use an extension cord with this appliance. If necessary, an extension cord must have compatible rating for power and voltage. Do not modify the plug and extension cord with this appliance; including 3 prong grounded plug. 5 PARTS AND FEATURES Top cover Filter Funnel Funnel support Tank Gauge Carafe lid Carafe Handle Keeping warm plate Housing Warming Plate Control panel Control Panel Red lamp AUTO Green lamp RUN MIN HOUR 12:00 PROG ON/OFF Specifications • • • • Voltage Rating: Power Rating: Maximum Capacity: Carafe Type: 120V 1000 Watts 12 Cups Thermal 6 BEFORE USE Check that accessories are complete and the unit is not damaged. Do not fill the ground coffee until brewing clean water up to the marker indicated “MAX” then pouring out the water; follow the steps below for one or two times. Using warm water, thoroughly clean: carafe, carafe lid, funnel, filter. Note: the carafe lid is packaged separately. Before using, you must assemble the lid and the carafe. Assemble according to the following: 1. Firstly remove the carafe lid from the package, and place the lid on the carafe; make sure the two tubers on the lid are aligned with the groove of carafe. 2. Then press the lid on the arrow position with a little force (see Fig.1); the notches will be pressed into the groove. The lid is assembled on the carafe. 7 Fig.1 OPERATING INSTRUCTIONS Making Coffee 1. Open the top cover of coffee maker and fill in the appropriate amount water into the tank with the carafe. The water level should not exceed the MAX level. 2. Place the funnel into the funnel support and make sure it is assembled correctly. Insert and position the filter correctly. 3. Add ground coffee into the filter. Usually a cup of coffee needs a leveled spoon of ground coffee, but you may adjust according to your taste. 4. Insert the carafe on the warming plate. 5. Plug the power cord into the outlet, the LCD will display “12:00“(see Control Panel). 6. Press ON/OFF button, the red lamp of RUN will be illuminated. The appliance will begin working. NOTE: While brewing, you may remove the carafe for serving. The appliance will stop dripping automatically, but the time cannot exceed 30 seconds. 7. Do not open the tank cover when brewing is in progress. The flow back of hot water will damage the appliance. 8. You can remove the carafe, pour and serve when finished brewing (about 1 minute after the coffee stops dripping). NOTE: The volume of brewed coffee will be less than the water filled initially since ground coffee absorbs some water. For Safety, keep the carafe lid closed. 9. Always turn OFF the coffee maker before unplugging the power cord from the electrical outlet and when the coffee maker is not in use. NOTE: Be cautious when pouring the hot coffee. 8 Automatic Start Function Automatic Start Function is used by programming the brew start time in advance. For example, if the current time is 8:10 AM, you may program the appliance to start brewing at 1:00 PM. At 1:00 PM, the green light AUTO will turn off, and the red light RUN will be turn on for automatically starting the appliance. The coffee can be kept warm after brewing. If the coffee maker is unattended for 2 hours, the appliance will power off automatically. First follow the operating instruction steps 1 to 5, and set the automatic start function as the following. 1. Press PROG button, then LCD will display CLOCK. 2. Set the current time by pressing the HOUR and MIN (see Fig. 1) NOTE: The time cycle is 24 hours. Set the desired time by using the HOUR and MIN buttons. 3. Press PROG button again, then LCD will display TIMER. Set the automatic start time by pressing the HOUR and MIN buttons. (Fig. 2) 4. Press the ON/OFF button twice, then the green light AUTO will be illuminated after about 10 seconds. LCD will display the current time, you may see the automatic start time by pressing PROG. NOTE: The auto start function can be cancelled by pressing ON/OFF button. If you want to change the auto start time, repeat steps 1 to 3. Hints for Great Tasting Coffee 1. A clean coffee maker is essential for making great-tasting coffee. Regularly clean the coffee maker as specified in the CARE AND MAINTENANCE section. Always use fresh, cold water in the coffee maker. 2. Store unused coffee grounds in a cool, dry place. After opening a package of coffee grounds, reseal tightly and store it in a refrigerator to maintain its freshness. 3. For optimum coffee taste, buy whole coffee beans and finely grind them just before brewing. 4. Do not reuse coffee grounds since this will greatly reduce the coffee flavor. Reheating the coffee is not recommended as the coffee flavor peaks immediately after brewing. 5. Clean the coffee maker when over-extraction causes oiliness. Small oil droplets on the surface of brewed, black coffee are due to the extraction of oil from the coffee grounds. 6. Oiliness may occur more often if heavily roasted coffee beans are used. 9 CARE AND MAINTENANCE CAUTION: Be sure to unplug this appliance from the electrical outlet before cleaning. To protect against the electrical shock, do not immerse the cord, plug, or unit in the water or other liquid. 1. After each use, use soapy water to clean: funnel, filter, carafe, carafe lid. 2. Wipe the product’s exterior surface with a soft and damp cloth to remove stains. 3. Water droplets may buildup in the area above the filter and drip onto the product base while brewing. To manage the dripping, wipe off the area with a clean, dry cloth after each use of the product. 4. Use a soft and damp cloth to gently wipe the warming plate. Never use abrasive material to clean the appliance. Cleaning Mineral Deposits For efficiently operating the coffee maker, mineral deposits contained in the used water should be cleaned from the unit. Carefully clean the coffee maker as the following. 1. Fill the carafe with 1/4 of white vinegar and 3/4 of cold water. 2. Pour the water and vinegar mixture into the tank. Do not fill in the coffee ground. 3. Brew the water-vinegar solution per OPERATING INSTRUCTIONS. 4. If necessary, repeat the process until no yellow liquid comes out. 5. Pour out the mixed solution. 6. Brew with tap water until no vinegar odor is left. 10 LIMITED WARRANTY Unless otherwise prohibited, MC Appliance Corporation warrants each 12 CUP COFFEE MAKER MCSCM12TB to be free from defects in material and workmanship and agrees to remedy any such defect or to furnish a new part(s) (at the company’s option) of the unit that fails during the warranty period. A copy of the dated sales receipt or invoice is required to receive warranty service or a refund. This warranty covers an appliance in use within the continental United States, Puerto Rico and Hawaii. The warranty does not cover the following: Damages due to shipping or improper installation. Damages due to misuse or abuse. Content losses due to failure of the unit. Repairs performed by unauthorized service agents. Service calls that do not involve defects in material and workmanship such as instruction on proper use of the product or improper installation. Failure of this product if used for other than for its intended purpose. Disposal costs for any failed unit not returned to our factory. Any delivery costs incurred as the result of a unit that fails to perform as specified. This warranty is in lieu of any and all warranties expressed or implied and no representative or person is authorized to assume for us any other liability in connection with the sale of this product. Under no circumstances is the consumer permitted to return this unit to the factory without prior written consent from MC Appliance Corporation. Model Parts & Labor Type of Service MCSCM12TB One-Year Carry-In For Service or Assistance please call 888-775-0202 Or visit us on the web at www.magicchef.com to request warranty service 11