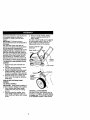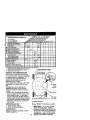
1
Owner's Manual
ICRRFTSMRN°I
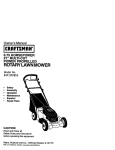
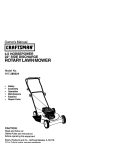
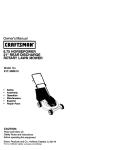
6.75 HORSEPOWER
21" REAR DISCHARGE
ROTARY LAWN MOWER
Model No.
917.389690
•
•
•
•
Safety
Assembly
Operation
Maintenance
•
•
Espa_ol
Repair Parts
NOTE: Engines which are certified to comply with California and U.S. EPA emission regulations
for SORE (Small Off Road Equipment), are certified to operate on regular unleadedgasoline,
and include the following emission control systems: Engine Modification (EM), and Three-way
Catalyst (TWC) (If so equipped).
AVISO: Los motores homalogados para cumplir con la reglamentacibn sobrs emisiones de
California y de la Agencia de Proteccibn Ambien_l estadounidense (EPA) para equipes
pequeFios no circulanfes (SORE) funcionan con gasolina normal sin plomo, e inclwen los
siguientes sistemas de control de emisiones: modificaci6n del motor (EM) y catalizado_ de triple
acci6n (TWC) (en caso de tenet/o).
The D.O.M. decal includes engine life specifications for the emissions-related useful life penod of
your engine. This pedod relates to _he emission compliance life as certified by EP/VCARB. To
find the life pedud specification for your engine, please match one of the following letters with the
letter pdnted on your D.O.M, decal: (C) 125 hours, (B) 250 hours, (A) 500 hours.
La calcomanla D.OM. incluye espechtcaolones sobre la duracibn del motor para eT periodo de
vida Otil de su motor relaccionado con emisiones, Este pertode se relaciona con la duracibn en
conformidad con las emisiones segdn Io cartificado por EPA/CARB, Para hallar la especificacibn
del periode de vide de su motor, mire cual de las siguientes lelras viene impresa en su
calcomanla D.O.M.: (C) 125 horas, (B) 250 horas, (A) 500 horas.
CAUTION:
Read and follow all
Safety Rules and Instructions
before operating this equipment
Sears, Roebuck and Co., Hoffman Estates, IL 60179
Visit our Craftsman website: www.sears.corn/craftsman
Warranty .................................................
2
Safety Rules ........................................ 2-4
Assembly ................................................ 5
Operation ............................................. 6-9
Maintenance Schedule ........................ 10
Maintenance .................................... 10-13
Product Specifications .......................... 11
Service and Adjustments ...................... 14
Storage ............................................ 15-16
Troubleshooting .............................. 16-17
Repair Parts ..................................... 34-39
Parts Ordering ........................ Back Cover
LIMITED TWO YEAR WARRANTY ON CRAFTSMAN POWER MOWER
For two years from date of purchase, when this Craftsman Lawn Mower is maintained,
lubricated, and tuned up according to the operating and maintenance instructionsin
the owner's manual, Sears will repair free of charge any defect in material or workmanship.
If this Craftsman Lawn Mower is used for commercial or rental purposes, this warranty
applies for only 90 days from the date of purchase.
This Warranty does not cover:
• Expendable items which become worn during normal use, such as rotary mower
blades, blade adapters, belts, air cleaners and spark plug.
• Repairs necessary because of operator abuse or negligence, including bent
crankshafts and the failure to maintain the equipment according to the instructions
contained in the owner's manual.
Warranty service is available by retuming the Craftsman power mower to the nearest
Sears Service Center/Department in the United States. This warranty applies only
while this product is in use in the United States.
This Warranty gives you specific legal dghts, and you may also have other rights
which vary from state to state.
SEARS, ROEBUCK AND CO., D/817 WA, HOFFMAN ESTATES, ILLINOIS 60179
IMPORTANT: This cutting machine is capable of amputating hands and feet and
throwing objects. Failure to observe the following safety instructions could result in
serious injury or death.
I, GENERAL OPERATION
• Read, understand, and follow all
instructions on the machine and in the
manual(s) before starting. Be thoroughly familiar with the controls and
the proper use of the machine before
starting.
• Do not put hands or feet near or under
rotating parts. Keep clear of the
discharge opening at all times.
• Only allow responsible individuals,
who are familiar with the instructions, to
operate the machine.
• Clear the area of objects such as
racks, toys, wire, bones, sticks, etc.,
which could be picked up and thrown
by the blade.
• Be sure the area is clear of uther
people before mowing. Stop machine ff
anyone enters the area.
• Do not operate the mower when
barefoot or wearing open sandals.
Always wear substantial foot wear.
• Do not pull mower backwards unless
absolutely necessary. Always look
down and behind before and while
moving backwards.
• Do not operate the mower without
proper guards, plates, grass catcher or
other safety protective devices in place.
• See manufacturer's instructionsfor
proper operation and installation of
accessories. Only use accessories
approved by the manufacturer.
• Stop the blade(s) when crossing gravel
drives, walks, or roads.
• Stop the engine (motor) whenever you
leave the equipment, before cleaning
the mower or unclogging the chute.
• Shut the engine (motor) off and wait
until the blade comes to complete stop
before removing grass catcher.
• Mow only in daylight or good artificial
light.
• Do not operate the machine while
under the influence of alcohol or drugs.
• Never operate machine in wet grass.
Always be sure of your footing: keep a
firm hold on the handle and walk; never
• Be alert and turn machine off if children
enter the area.
• Before and while walking backwards,
look behind and down for small
children.
• Never allow children to operate the
machine.
• Use extra care when approaching blind
comers, shrubs, tress, or other objects
that may obscure vision.
IV. SERVICE
• Use extra care in handling gasoline
and other fuels. They are flammable
and vapors are explosive.
- Use only an approved container.
- Never remove gas cap or add fuel
with the engine running. Allow
engine to cool before refueling. Do
not smoke.
- Never refuel the machine indoors.
- Never store the machine or fuel
container inside where there is an
open flame, such as a water heater.
• Never run a machine inside a closed
run.
• Disengage the self-propelled mechanism or ddve clutch on mowers so
equipped before starting the engine
(motor).
• If the equipment should start to vibrate
abnormally, stop the engine (motor)
and check immediately for the cause.
Vibration is generally a warning of
trouble.
• Always wear safety goggles or safety
glasses with side shields when
operating mower.
II. SLOPE OPERATION
Slopes are a major factor related to slip
and fall accidents which can result in
severe injury. All slopes require extra
caution. If you feel uneasy on a slope, do
not mow it.
DO:
• Mow across the face of slopes: never
up and down. Exercise extreme caution
when changing direction on slopes.
• Remove obstacles such as rocks, tree
limbs, etc.
• Watch for holes, ruts, or bumps. Tall
grass can hide obstacles.
DO NOT:
• Do not trim near drop-offs, ditches or
embankments. The operator could lose
footing or balance.
• Do not tdm excessively steep slopes.
• Do not mow on wet grass. Reduced
footing could cause slipping.
II1. CHILDREN
Tragic accidents can occur if the operator
is not alert to the presence of children.
Children are often attracted to the
machine and the mowing activity. Never
assume that children will remain where
you last saw them.
• Keep children out of the tdmming area
and under the watchful care of another
responsible adult.
area.
• Never make adjustments or repairs with
the engine (motor) running. Disconnect
the spark plug wire, and keep the wire
away from the plug to prevent accidental starting.
• Keep nuts and bolts, especially blade
attachment bolts, tight and keep
equipment in good condition.
• Never tamper with safety devices.
Check their proper operation regularly.
• Keep machine free of grass, leaves, or
other debds build-up. Clean oil or fuel
spillage. Allow machine to cool before
storing.
• Stop and inspect the equipment if you
strike an object. Repair, if necessary,
before restarting.
• Never attempt to make wheel height
adjustments while the engine (motor) is
running.
• Grass catcher components are subject
to wear, damage, and deterioration,
which could expose moving parts or
allow objects to be thrown. Frequently
check components and replace with
manufacturer's recommended parts,
when necessary.
• Mower blades are sharp and can cut.
Wrap the blade(s) or wear gloves, and
use extra caution when servicing them.
• Do not change the engine governor
setting or overspeed the engine.
3
_,Look for this symbol to point out
important safety precautions. It means
CAUTIONIII BECOMEALERT!!I YOUR
SAFETY IS INVOLVED.
A CAUTION: In order to prevent
accidental starting when setting up,
transporting, adjusting or making repairs,
always disconnect spark plug wire and
place wire where it cannot contact spark
plug.
A,WARNING: Battery posts, terminals and
related accessories contain lead and
lead compounds, chemicals known to the
State of California to cause cancer and
birth defects or other reproductive harm.
Wash hands after handling.
CAUTION: Muffler and other engine
parts become extremely hot during
operation and remain hot after engine
has stopped. To avoid severe burns on
contact, stay away from these areas.
_,WARNING: Engine exhaust, some of its
constituents, and certain vehicle
components contain or emit chemicals
known to the State of California to cause
cancer and birth defects or other
reproductive harm.
These accessorieswere avellablewhen thislawn mowerwas produced. "n_eyare not
shipped with your rnowar.They are also avalable at most Sears retailoutletsand service
centers. Most Searsstorescan also order repair partsfor you, whenyou providethe model
numberof yourlawn mower. Some ofthese accessoriesmay not applyto yourlawnmower.
LAWN MOWER PERFORMANCE
FOR REAR DISCHARGE LAWN MOWERS
MULCHER KITS
nEAR DISCHARGE
LAWN MOWERS
STABIUZER
SIDE DISCHARGE
LAWN MOWERS
GAS CANS
LAWN MOWER MAINTENANCE
®
BELTS
BLADES
AIR RLTERS
BLADE ADAPTERS
SPARK PLUGS
WHEELS
ENGINE OIL
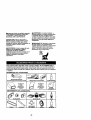
Read these instructionsand this manual
in its entirety before you attempt to
assemble or operate your new lawn
3. Remove handle padding holding
operator presence control bar to
upper handle.
Your lawn mower handle can be adjusted
for your mowing comfort. Refer to "ADJUST HANDLE" in the Service and
Adjustments section of this manual.
mower.
IMPORTANT: This lawn mower is
shipped WITHOUT OIL OR GASOLINE in
the engine.
Your new lawn mower has been assembled at the factory with the exception
of those parts left unassembled for
shipping purposes. All parts such as nuts,
washers, bolts, etc., necessary to complete the assembly have been placed in
the parts bag. To ensure safe and proper
operation of your lawn mower, all parts
and hardware you assemble must be
tightened securely. Use the correct tools
as necessary to ensure proper tightness.
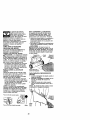
TO REMOVE LAWN MOWER FROM
CARTON
conVol bar
Upper
Lift u
position
1. Remove loose parts included with
mower.
2. Cut down two end comers of carton
and lay end panel down flat.
3. Remove all packing materials except
padding between upper and lower
handle and padding holding operator
presence control bar to upper handle.
4. Roll lawn mower out of carton and
check carton thorougly for additional
loose parts.
HOWTO SET UPYOUR LAWN
MOWER
TO UNFOLD HANDLE
IMPORTANT: Unfoldhandle carefully so
as not to pinch or damage control cables.
1. Raise handles until lower handle
section locks into place in mowing
position.
2. Remove protective padding, raise
upper handle section into place on
lower handle and tighten both handle
knobs.
Lower handle
pin
3-Position
handle
J
bracket
TO INSTALL ATTACHMENTS
Your lawn mower was shipped ready to
be used as a mulcher. To convert mower
to bagging, see "TO CONVERT MOWER"
in the Operation section of this manual.
5
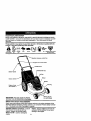
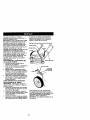
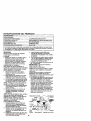
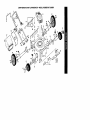
KNOWYOUR LAWN MOWER
READ THiS OWNER'S MANUAL AND SAFETY RULES BEFORE OPERATING YOUR
LAWN MOWER. Compare the illustrationswith your lawn mower to familiarize yourself
with the location of various controls and adjustments. Save this manual for future
reference.
These symbols may appear on your lawn mower or in literature supplied with the
product. Learn and understand their meaning.
CAUTION
OR WARNING
ENGINE
ON
ENGINE
OFF
FAST
SLOW
CHOKE
FUEL
OIL
DANGER, KEEP HANDS
AND FEET AWAY
control bar
I cable
knob
Gasoline filler cap
Air filter
Grass catche
primer
MuffLer
Engine oil cap
with d
IMPORTANT: This lawn mower is shipped
WITHOUT OIL OR GASOLINE in the engine.
Housing
Wheel adjuster
(on each wheel)
MEETS CPSC SAFETY REQUIREMENTS
Sears rotary walk-behind power lawn mowers conform to the safety standards of the
American National Standards Institute and the U.S. Consumer Product Safety CommissiGn. The blade turns when the engine is running,
Operator presence control bar - must be
Primer - pumps additional fuel from the
held down to the handle to start the
carburetor to the cylinder for use when
engine. Release to stop the engine,
starting a cold engine.
Starter handle - used for starting the
engine.
6
Theoperation
of any lawn
mower can result in foreign
objects thrown into the
eyes, which can result in
severe eye damage.
Always wear safety glasses or eye
shields while operating your lawn mower
or performing any adjustments or repairs.
We recommend a wide vision safety
mask over spectacles or standard safety
glasses.
HOWTO USEYOUR LAWN MOWER
ENGINE SPEED
The engine speed was set at the factory
for optimum performance, Speed is not
adjustable.
ENGINE ZONE CONTROL
_I, CAUTION: Federal regulations require
an engine control to be installed on this
lawn mower in order to minimize the dsk
of blade contact injury. Do not under any
circumstances attempt to defeat the
function of the operator control.The blade
turns when the engine is running.
• Your lawn mower is equipped with an
operator presence control bar which
requires the operator to be positioned
behind the lawn mower handle to start
and operate the lawn mower.
TO CONVERT MOWER
Yourlawn mowerwas shippedreedy to be
used as a mulchar.To convert to bagging :
REAR BAGGING
• Liftrear door ofthe lawn mower and place
the grasscatcher frame hooksontothe
door pivotpins.
• To convertto mulchingoperatJon,remove
_lgrass catcherand dose rear door.
CAUTION: Do not run your lawn mower
without clipping deflector or approved
grass catcher in place. Never attempt to
operate the lawn mower with the rear
door removed or propped open.
Pivot
Grass
catcher
handle
TO EMPTY GRASS CATCHER
1. Lift up on grass catcher using the
frame handle.
2. Remove grass catcher with clippings
from under lawn mower handle.
3. Empty clippings from bag using both
frame handle and bag handle.
NOTE: Do not drag the bag when
emptying; it will cause unnecessary wear.
Grass
_catcher
frame
handle
PlateTab_
S
RaiseWheelsfor Low Cut
Rear
Catcher frame hook
TO ADJUST CUTTING HEIGHT
Raise wheels for low cut and lower
wheels for high cut, adjust cUttingheight
to suit your requirements. Medium
position is best for most lawns.
To change cutting height, squeeze
adjuster lever toward wheel. Move
wheel up or down to suit your requirements. Be sure all wheels are in the
same setlJng.
NOTE: Adjuster is properly positioned
when plate tab inserts into hole in lever.
Also, g-position adjusters (if so equipped)
allow lever to be positioned between the
plate tabs.
LowerWheelsfor HighCut
"
Bag
I
Lever
7
Al_CAUTION: Fill to bottom of gas tank
BEFORE STARTING ENGINE
filler neck. Do not overfill. Wipe off any
ADD OIL
spilled oil or fuel. Do not store, spill or
Your lawnmower is shipped without oil in
use gasoline near an open flame.
the engine. Engine holds 20 oz. of oil.
For type and grade of oil to use, see
Gasolins
=ENGINE" in Maintenance section of this
manual.
1. Be sure lawnmower is level and area
around oil fill is clean.
2. Remove engine oil cap and fill to the
full line on the dipstick. Pour oil slowly.
filler cap
Do not over fill.
NOTE: Allow oil to settle down into engine
for accurate reading. To read proper level,
tighten engine oil cap, then remove it to
read the dipstick.
3. Reinstall engine oil cap and tighten.
• Check oil level before each use. Add
oil if needed. Fill to full line on dipstick.
• Change the oil after every 25 hours of
TO START ENGINE
operation or each season. You may
need to change the oil more often
NOTE: Due to protectivecoatings on the
under dusty, dirty conditions.
engine, a small amount of smoke may be
ADD GASOLINE
present during the initial use of the
• Fill fuel tank. Use fresh, clean, regular
product and should be considered
unleaded gasoline with a minimum of
normal.
87 octane. Do not mix oil with gaso1. To start a cold engine, push primer
line. Purchase fuel in quantities that
three (3) times before tryingto starf.
can be used within 30 days to assure
Use a firm push. This step is not
fuel freshness.
usually necessary when starting an
_I,WARNING: Experience indicates that
engine which has already run for a
few minutes.
alcohol blended fuels (called gasohel or
2. Hold operator presence control bar
using ethanol or methanol) can attract
down to the handle and pull starter
moisture which leads to separation and
handle quickly. Do not allow starter
formation of acids during storage. Acidic
rope to snap back.
gas can damage the fuel system of an
engine while in storage. To avoid engine
TO STOP ENGINE
problems, the fuel system should be
• To stop engine, release operator
emptied before storage of 30 days or
presence control bar.
longer. Drain the gas tank, start the
NOTE: In cooler weather it may be
engine and let it run until the fuel lines
necessary to repeat priming steps. In
and carburetor are empty. Use fresh fuel
warmer weather over pdming may cause
next season. See Storage Instructionsfor
flooding and engine will not start. If you
additional information. Never use engine
do flood engine, waif a few minutes
or carburetor cleaner products in the fuel
before attempting to start and do not
repeat priming steps.
tank or permanent damage may occur.
MOWINGTIPS
MULCHING
• Under certain conditions, such as very
tall grass, it may be necessary to raise
the height of cut to reduce pushing
effort and to keep from overloading the
engine and leaving clumps of grass
clippings. It may also be necessary to
reduce ground speed and/or run the
lawn mower over the area a second
time.
• For extremely heavy cutting, reduce the
width of cut by overlapping previously
cut path and mow slowly.
• For better grass bagging and most
cutting conditions, the engine speed
should be set in the fast position.
• When using a rear discharge lawn
mower in moist, heavy grass, clumps of
cut grass may not enter the grass
catcher. Reduce ground speed
(pushing speed) and/or run the lawn
mower over the area a second time.
• If a trail of clippings is left on the right
side of a rear discharge mower, mow in
a clockwise direction with a small
overlap to collect the clippings on the
next pass.
• Pores in cloth grass catchers can
become filled with dirt and dust with
use and catchers will collect less grass.
To prevent this, regularly hose catcher
off with water and let dry before using.
• Keep top of engine around starter clear
and clean of grass clippings and chaff.
This will help engine air flow and
extend engine life.
IMPORTANT: For best performance,
keep mower housing free of built-up
grass and trash. See "CLEANING" in the
Maintenance section of this manual.
• The special mulching blade will recut
the grass clippings many times and
reduce them in size so that as they fall
onto the lawn they will disperse into the
grass and not be noticed. Also, the
mulched grass will biodegrade quickly
to provide nutdents for the lawn.
Always mulch with your highest engine
(blade) speed as this will provide the
best recutting action of the blades.
• Avoid cutting your lawn when it is wet.
Wet grass tends to form clumps and
interferes with the mulching action. The
best time to mow your lawn is the eady
afternoon. At this time the grass has
dded and the newly cut area will not be
exposed to the direct sun.
• For best results, adjust the lawn mower
cutting height so that the lawn mower
cuts off only the top one-third of the
grass blades. If the lawn is overgrown it
will be necessary to raise the height of
cut to reduce pushing effort and to keep
from overloading the engine and
leaving clumps of mulched grass. For
extremely heavy mulching, reduce your
width of cut by overlapping previously
cut path and mow slowly.
• Certain types of grass and grass
conditions may require that an area be
mulched a second time to completely
hide the clippings. When doing a
second cut, mow across or perpendicular to the first cut path.
• Change your cutting pattern from week
to week. Mow north to south one week
then change to east to west the next
week. This will help prevent matting
and graining of the lawn.
MOWINGTIPS
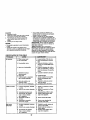
MAINTENANCE
SCHEDULE
FILL tN DATES
AS YOU COMPLETE
REGULAR SERVICE
Clean/Inspect
Grass
Catcher
Check for Loose
Fasteners
(ifEquipped)
SERV]CE
"_
i,4
Clean Lawn Mower
Clean Under Ddve Cover
Power-propelled Mowers)
Check ddve ben ulleys
(Power_Propelle_PMowers)
'l iS/ "
"
L_'
t/
fl/
V#
_/
II/
ChectdSharperv_eplace Blade
Luhdcaffon Chart
Clean Battery/Recha_
IElectrlc Start Mowers
Check Engine Oil Level
Chancre Engine Oil
Clean Air Filter
Inspect Muffler
DATES
f_3
_
M/
1_4
t##
f_l_.
It/ 2
Clean or Replace Spark Plug
t# #
Replace Air Filter Paper Cadddge
(It/2
1 * Cl_P_e mornoftml when o_ting
ulna- a heavy bad or _ high a_bie_t _raturE_.
2 - Servlc_ _
often _'1_e_ope_tll_ II_dirty ot dusly conditK_ns,
3. Rop_
blades more often whe_ mowing In sa_ soil
4. Chapge 48 hc_m at s_d of m.
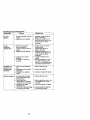
LUBRICATION
GENERAL RECOMMENDATIONS
The warranty on this lawn mower does
not cover items that have been subjected
to operator abuse or negligence. To
receive full value from the warranty,
operator must maintain mower as
instructed in this manual.
Some adjustments will need to be made
periodically to propedy maintain your
unit.
All adjush'nents In the Service and
Adjustments section of this manual
should be checked at least once each
season.
• Once a year, replace the spark plug,
clean or replace air filter element and
check blade for wear. A new spark
plug and clean]new air filter element
assure proper air-fuel mixture and help
your engine run better and last longer.
• Follow the maintenance schedule in
this manual.
BEFORE EACH USE
1. Check engine oil level.
2. Check for loose fasteners.
CHART
(_) Wheeladjuster
each wheel)
(_ Brake
spring
bracket
Rear
(_) Handle bracket mounting pins
door Nnge
(_) Spray lubricant
_) See "ENGINE" in Maintenance section.
LUBRICATION
Keep unit well lubricated (See "LUBRICATION CHART").
10
IMPORTANT: Do not oil or grease
plastic wheel bearings, viscous
lubricants will attract dust and dirt that
will shorten the life of the self-lubricating bearings. If you feel they must be
lubricated, usa only a dry, powdered
graphite type lubricant sparingly.
PRODUCT
SPECIFICATIONS
SERIAL NUMBER:
DATE OF PURCHASE:
GASOLINE CAPACITY/TYPE:
OILTYPE (API-SF-SJ):
OIL CAPACITY:
1.5 QUARTS UNLEADED REGULAR
SAE 30 (ABOVE 32°F)
SAE 5W-30 (BELOW 32°F)
20 OZS.
SPARK PLUG (GAP: .045")
BLADE BOLTTORQUE:
CHAMPION RESISTOR TYPE RJ19LM4
35-40 FT. LBS.
The model and sedal numbers will be found on a decal attached to the rear of the
lawn mower housing. Record both sedal number and date of purchase in the space
provided above.
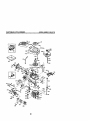
LAWN MOWER
TO REPLACE BLADE
Always observe safety rules when
performing any maintenance.
TIRES
• Keep tires free of gasoline, oil, or insect
control chemicals which can harm
rubber.
• Avoid stumps, stones, deep ruts, sharp
objects and other hazards that may
cause tire damage.
BLADE CARE
For best results, mower blade must be
kept sharp. Replace bent or damaged
blades.
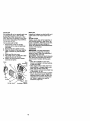
1. Position the blade adapter on the
engine crankshaft. Be sure key in
adapter and crankshaft keyway are
aligned.
2. Position blade on the blade adapter
aligning the two (2) holes in the blade
with the raised lugs on the adapter.
3. Be sure the trailing edge of blade
(opposite sharp edge) is up toward
the engine.
4. Install the blade bolt with the lock
washer and hardened washer into
blade adapter and crankshaft.
5. Use block of wood between blade and
lawn mower housing and tighten the
blade bolt, turning clockwise.
• The recommendsd tightening torque is
35-40 ft. Ibs.
IMPORTANT: Blade bolt is grade 8 heat
treated.
TO REMOVE BLADE
1. Disconnect spark plug wire from spark
plug and place wire where it cannot
come in contact with spark plug.
2, Turn lawn mower on its side. Make
sure air filter and carburetor are up.
3. Use a wood block between blade and
mower housing to prevent blade from
turning when removing blade bolt.
NOTE: Protect your hands with gloves
and/or wrap blade with heavy cloth.
4. Remove blade bolt by turning counterclockwise.
5. Remove blade and attaching hardware (bolt, lock washer and hardened
washer).
NOTE: Remove the blade adapter and
check the key inside hub of blade
adapter. The key must be in good condition to work properly. Replace adapter if
damaged.
Crankshaft
Key_,
Blade
bolt
Hardene
washer
11
_ keyway
shaft
Trailing edge
Blade adapter
TO SHARPEN BLADE
NOTE: We do not recommend sharpening blade - but if you do, be sure the
blade is balanced.
Care should be taken to keep the blade
balanced. An unbalanced blade will
cause eventual damage to lawn mower
or engine.
• The blade can be sharpened with a file
or on a grinding wheel. Do not attempt
to sharpen while on the mower.
• To check blade balance, drive a nail
into a beam or wall. Leave about one
inch of the straight nail exposed. Place
center hole of blade over the head of
the nail. If blade is balanced, it should
remain in a horizontal position. If either
end of the blade moves downward,
sharpen the heavy end until the blade
is balanced.
GRASS CATCHER
• The grass catcher may be hosed with
water, but must be dry when used.
• Check your grass catcher often for
damage or detedoration. Through
normal use it will wear. If catcher needs
replacing, replace only with a manufacturer approved replacement catcher.
Give the lawn mower model number
when ordedng.
ENGINE
LUBRICATION
Use only high quality detergent oil rated
with API service classification SF-SJ.
Select the oil's SAE viscositygrade
according to your expected operating
temperature.
SAlE VISCOSITY
TE_pERAllJRE
RANGE ANTICIPATED
Change the oil after every 25 hours of
operation or at least once a year if the
lawn mower is not used for 25 hours in
one year.
Check the crankcase oil level before
starting the engine and after each five (5)
hours of continuous use. Tighten oil plug
securely each time you check the oil
level.
TO CHANGE ENGINE OIL
NOTE: Before tipping lawn mower to
drain oil, drain fuel tank by running
engine until fuel tank is empty.
1. Disconnect spark plug wire from spark
plug and place wire where it cannot
come in contact with spark plug.
2. Remove engine oil cap; lay aside on a
clean surface.
3. Tip lawn mower on its side as shown
and drain oil into a suitable container.
Rock lawn mower back and forth to
remove any oil trapped inside of
engine.
4. Wipe off any spilled oil on lawn mower
and on side of engine.
5. Fill engine with oil. (See "ADD OIL" in
the Operation section of this manual.)
6. Reconnect spark plug wire to spark
plug.
GRADES
BEFORE NEXI" C4L C_GE
_°
NOTE: Although multi-viscosityoils
(5W30, 10W30 etc.) improve starting in
cold weather, these multi-viscosity oils
will result in increased oil consumption
when used above 32°F. Check your
engine oil level more frequently to avoid
possible engine damage from running
low on oil.
12
AIR FILTER
Your engine will not run properly and may
be damaged by using a dirty air filter.
Replace the air filter every year or after
every 100 hours of operation, more often
if you mow in very dusty, dirty conditions.
Do not wash air filter.
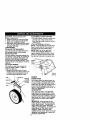
TO CHANGE AIR FILTER
1. Remove the air filter by turning
clockwise to the stop and pull away
from collar.
2. Remove filter from inside of cover.
3, Clean the inside of the cover and the
collar to remove any dirt accumulation.
4. Insert new filter into cover.
5. Put air filter cover and filter into collar
aligning the tab with the slot,
6. Push in on cover and turn counterclockwise to tighten.
Collar
Turn
clockwise
to
remove
Clip
Slot
Air tilter"
Air titter covet
ctockwise
MUFFLER
Inspect and replace corroded muffler as it
could create a fire hazard and/or damage.
SPARK PLUGS
Replace spark plugs at the beginning of
each mowing season or after every 100
hours of operation, whichever occursfirst.
Spark plug type and gap setting are
shown in =PRODUCT SPECIFICATIONS"
section of this manual.
CLEANING
IMPORTANT: For best performance,
keep mower housing free of built-up
grass and trash. Clean the underside of
your mower after each use.
_,CAUTION:
Disconnect spark plug wire
from spark plug and place wire where it
cannot come in contact with the spark
plug.
• Clean the underside of your lawn
mower by scraping to remove build-up
of grass and trash.
• Clean engine often to keep trash from
accumulating. A clogged engine runs
hotter and shortens engine life.
• Keep finished surfaces and wheels free
of all gasc4ine, oil, etc.
• We do not recommend using a garden
hose to clean lawn mower unless the
electrical system, muffler, air filter and
carburetor are covered to keep water
out. Water in engine can result in
shortened engine life.
Turn
courter*
to tighten
13
_,CAUTION: Before performing any
service or adjustments:
1. Release control bar and stop engine.
2. Make sure the blade and all moving
parts have completely stopped.
3. Disconnect spark plug wire from spark
plug and place where it cannot come
in contact with plug.
LAWN MOWER
TO ADJUST cU'nlNG HEIGHT
See "TO ADJUST CU I-rING HEIGHT" in
the Operation section of this manual.
REAR DEFLECTOR
The rear deflector, attached between the
rear wheels of your mower, is provided to
minimize the possibilitythat objects will
be thrown out of the rear of the mower
into the operator's mowing position. If the
deflector becomes damaged, it should be
replaced.
TO ADJUST HANDLE
The handle on your lawn mower has
three (3) height positions- adjust to
height that suits you.
• Squeeze the bottom ends of lower
handle towards each other until the pin
in handle can be inserted into one of
the three height adjustment holes.
High
3-position
handle
adjustment
bracket
TO ASSEMBLE GRASS CATCHER
1. Put grass catcher frame into grass bag
with rigid pert of bag on the bottom.
Make sure the frame handle is outside
of the bag top.
2. Slip vinyl bindings over frame.
NOTE: If vinyl bindings are too stiff, hold
them in warm water for a few minutes. If
bag gets wet, let it dry before using.
_,CAUTION: Do not run your lawn
mower without clipping deflector or
approved grass catcher in place. Never
attempt to operate the lawn mower with
the rear door removed or propped open.
handle
fram_
Frame
ENGINE
ENGINE SPEED
Your engine speed has been factory set.
Do not attempt to increase engine speed
or it may result in personal injury. If you
believe that the engine is running too fast
or too slow, take your lawn mower to a
Sears or other qualified service center for
repair and adjustment.
CARBURETOR
Your carburetor has a non-adjustable
fixed main jet for mixture control. If your
engine does not operate properly due to
suspected carburetor problems, take your
lawn mower to a Sears or other qualified
service canter for repair and/or adjustment.
IMPORTANT: Never tamper with the
engine governor, which is factory set for
proper engine speed. Overspeeding the
engine above the factory high speed
setting can be dangerous. If you think the
engine-governed high speed needs
adjusting, contact a Sears or other
qualified service center, which has proper
equipment and experienoe to make any
necessary adjustments.
14
Immediately
prepare your lawn mower for
storage at the end of the season or if the
unit will not be used for 30 days or more.
LAWN MOWER
When lawn mower is to be stored for a
period of time, clean it thoroughly, remove
all dirt, grease, leaves, etc. Store in a
clean, dry area.
1. Clean entire lawn mower (See
"CLEANING" in the Maintenance
section of this manual).
2. Lubricate as shown in the Maintenance section of this manual.
3. Be sure that all nuts, bolts, screws,
and pins are securely fastened.
Inspect moving parts for damage,
breakage and wear. Replace if
necessary.
4. Touch up all rusted or chipped paint
sudaces; sand lightly before painting.
HANDLE
You can fold your lawn mower handle for
storage.
1. Loosen the two (2) handle knobs on
sides of the upper handle and allow
handle to fold down to the rear.
2. Squeeze the bottom ends of lower
handle toward each other until pins in
handle clear the brackets and pivot
entire handle assembly forward and
allow it to rest on mower.
• When setting up your handle from the
storage position, the lower handle will
require manually locking into the
mowing position.
IMPORTANT: When folding the handle
for storage or transportation, be sure to
fold the handle as shown or you may
damage the control cables.
Operator presence----._..R_
controlbar
Fold
h._.
//:1o==
Upperhandle---_7/L,7/ for
/7
t_///
storagej//
...'_""
_"
/_[
,,/:_
backward
pin
Squeeze
3-Position
handle
adjustment
acket
ENGINE
FUEL SYSTEM
IMPORTANT: It is important to prevent
gum deposits from forming in essential
fuel system parts such as carburetor, fuel
filter, fuel hose, or tank during storage.
Also, experience indicates that alcohol
blended fuels (called gasohol or using
ethanol or methanol) can attract moisture
which leads to separation and formation
of acids during storage. Acidic gas can
damage the fuel system of an engine
while in storage.
1. Drain the fuel tank.
2. Start the engine and let it run until the
fuel lines and carburetor are empty.
• Never use engine or carburetor cleaner
products in the fuel tank or permanent
damage may occur.
• Use fresh fuel next season.
NOTE: Fuel stabilizer is an acceptable
alternative in minimizing the formation of
fuel gum deposits during storage. Add
stabilizer to gasoline in fuel tank or
storage container. Always follow the mix
ratio found on stabilizer container. Run
engine at least 10 minutes after adding
stabilizer to allow the stabilizer to reach
the carburetor. Do not drain the gas tank
and carburetor if using fuel stabilizer.
ENGINE OIL
Drain oil (with engine warm) and replace
with clean engine oil. (See "ENGINE" in
the Maintenance section of this manual).
\=ow,°g
15
CYLINDER
1. Remove spark plug.
2. Pour one ounce (29 ml) of oil through
spark plug hole into cylinder.
3. Pull starter handle slowly a few times
to distribute oil.
4. Replace with new spark plug.
OTHER
• Do not store gasoline from one season
to another,
• Replace your gasoline can if your can
starts to rust. Rust and/or dirt in your
gasoline will cause problems.
TROUBLESHOOTING
PROBLEM
Does not start
• If possible, store your unk indoors and
cover it to give protection from dust and
dirt.
• Cover your unit with a suitable protective cover that does not retain moisture.
Do not use plastic, Plastic cannot
breathe, which allows condensation to
form and will cause your unit to rust.
IMPORTANT: Never cover mower while
engone and exhaust areas are still warm,
CAUTION:Never store the lawn mower
with gasoline in the tank inside a building
where fumes may reach an open flame or
spark, Allow the engine to cool before
stodng in any enclosure.
CHART
CORREC_ON
CAUSE
1. Dirty air filter,
2. Out of fuel.
3. Stale fuel.
4. Water in fuel.
5. Spark plug wire is
disconnected.
6. Bad spark plug.
7. Loose blade or broken
blade adapter.
8. Control bar in released
position.
9. Control bar defective.
Loss of power
1. Rear of lawn mower
housing or cutting blade
dragging in heavy grass,
2. Cutting too much grass.
3. Dirty air filter.
4. Buildup of grass, leaves,
and trash under mower,
5. Too much oil in engine.
6. Walking speed too fast.
)oor cut uneven
1. Wom, bent or loose blade,
2. Wheel heights uneven.
3. Buildup of grass, leaves
and trash under mower.
Excessive
_ibratlon
1. Wom, bent or loose blade.
2. Bent engine crankshaft.
16
1, Clean/replace air filter.
2. Fill fuel tank.
3. Drain tank and refill with
fresh, clean fuel.
4. Drain fuel tank and
carburetor and refill tank
with fresh gasoline.
5, Connect wire to plug.
6. Replace spark plug.
7. Tighten blade bolt or
replace blade adapter.
8. Depress control bar to
handle,
;9. Replace control bar.
1. Set to =Higher Cut"
position.
2. Set to =Higher Cut"
position.
3. Clean/replace air filter.
4. Clean underside of mower
housing.
5. Check oil level.
6. Cut at slower walking
speed.
I.
Replace blade. Tighten
blade bolt.
2. Set all wheels at same
height.
3. Clean underside of
mower housing.
1. Replace blade, Tighten
blade bolt.
2. Contact a Sears or other
qualified service center.
TROUBLESHOOTING
PROBLEM
CHART
CAUSE
CORRECTION
Starter rope hard
topul!
1. Engine flywheel brake is on 1. Depress control bar to
when control bar is released
upper handle before
pulling starter rope.
2. Bent engine crankshaft,
2, Contact a Sears or other
qualified service center.
3. Blade adapter broken.
3. Replace blade adapter.
4, Blade dragging in grass.
4. Move lawn mower to cut
grass or to hard surface.
Grass catcher
notfilllng (if so
equipped)
1, Cutting height too low.
2. Lift on blade wom off.
3. Catcher not venting air.
1. Raise cutting height.
2. Replace blade.
3. Clean grass catcher,
Hard to push
1. Grass is too high or wheel
height is too low.
2. Rear of lawn mower
housing or cutting blade
dragging in grass.
3. Grass catcher too full.
4. Handle height position not
right for you.
1. Raise cutting height.
17
2. Raise rear of lawn mower
housing one (1) setting
higher,
3. Empty grass catcher.
4, Adjust handle height to suit.
Garantfa ...............................................
18
Reglas de Seguddad ..................... 18-20
Montaje ................................................ 21
Operaci6n ....................................... 22-25
Mantenimiento ..................................... 26
Programa de Mantenimiento .......... 26-29
Especificaciones del Producto ............ 27
Servicio y Adjustes .............................. 30
Almacenamiento ............................ 31-32
Identificacibn de problemas ........... 32-33
Partes de repuesto ........... Vea el manual
ingles del due_o
Orden de Partes .................... Contratapa
GARANTJA LIMITADA DE DOS AltOS PARA LA SEGADORA A MOTOR CRAFTSMAN
por dos (2) afros, a partir de la fecha de compra, cuando esta Segadora Craftsman se
mantenga, lubrique y afine segLin las instrucciones pare la operack_n y el mantenimiento en al
manual de! due5o, Sears reparar_ gratis todo defecto en el rnatedal y la mano de obra.
Si la Segadora Craftsman se usa pare tines comemiales o de arriendo, esta garantla sblo se
apiica por noventa (90) dfas a partir de la fecha de compra.
Esta Garantla no cubre:
• Art(calos que se desgastan durante el uso normal tales como las cuchillas segadoras
rotatodas, los adaptadores de la cuchilla, las correas, los filtros de aim y las buj[es.
• Reparaciones necesarias debido al abuso o ala negligencia dal operador, incluyendose a los
cigSefiales doblados y ala fatia de mantenimiento dal equipo segdn tas Instrucciones que se
incluyen en el manual del due_o.
EL SERVICIO DE GARANT[A ESTA DISPONIBLE al devolver la segadora a motor Craftsman al
Centro/Departrnento de Ser'.,icio Sears mas cercano en los Estados Unidos. Esta garantla se
aplica solarnente mientras el producto este en uso en los Estados Unidos.
Esta Garantla le otorga derechos legales especlficos, y puede que tambi6n tenga otros
derechos que vat[an de estado a estado.
SEARS, ROEBUCK AND CO., D/817WA, HOFFMAN ESTATES, IL 60179 USA
IMPORTANTE: Esta rnaquina cortadaora es capaz de amputar las manos y los manos y los
pies y de lanzar objetos. Si no se observan las instnJcciones de seguridad siguientes se pueden
producir lesiones graves o la muerte.
I.OPERACION
• No tire de la segadora hacia atr'&sa menos
• Antes de empezar, debe familiarizarse
que sea absolotamente necesado. Mire
completamente con los controles y el uso
siempre hacia abajo y hacia det_s antes y
correcto de la maquina. Pare eslo, debe leer
mientras que se mueve hacia at_s.
y comprender todas las instrucciones que
• No opere la segadora sin los respectivos
aparecen en la maquina yen los manuales
resguardos, las placas, el recogedor de
de operacibn.
cdsped u otros editarnentos dise ados pare
• No ponga las manos o los pies cerca o
su pmtecck_n y seguridad.
debajo de las partes mtatodas. Mant6ngase
• Refi_rase alas instrucciones del fabdcante
siempre lejos de la abertuta de la descarga.
para el funcionaralento e instalacibn de
• Permita que salarnente las personas
accesorios. Use t3nicamente accesodos
responsables que est_n familiadzadas con
aprobados por el fabdcante,
tas instrucciones operen la mz_quina.
• Detenga la cuchilla o las cuchillas cuando
• Despeje el _rea de objetos tales como
cruce por calzadas, calles o caminos de
piedras, juguetes, alambres, huesos, palos,
grava.
etc. que pueden ser recogidos y lanzados
•Parar
el motor cada vez que se abandona
pot las cuchillas.
el aparato, antes de limpiar la segadora o de
• Asegdrese que el &rea no se hallen
remover residuos del tubo,
personas, antes de segar. Pare la rn_quina
• Apagar el motor y esperar haste que las
si alguien entre en el &rea.
cuchinas est_n completamente parades
• No opere la maquina sin zapatos o con
antes de remover el receptor de hierba.
sandallas abiertas. P6ngase sJempre
• Segar solamente con luz del dia o con una
zapatos sblidos.
buena luz artificial.
18
• Nunca permita que los niSos operen la
mdquina.
• Tenga un cuidado extra cuando se acerque
a esquinas donde no hay visibilidad, a los
arbustos, drboles u otros objetos que
pueden interfedr con su _inea de visibn.
IV. SERVIClO
• Tenga cuidado extra el manejar la gasolina
y los dern_s combustibles. Son inflamables
y los gases son explosivos.
- Use solamente un envase aprobado.
- Nunca ramueva la tapa del depbsito de
gasolina o agregue combustible con el
motor funcionando. Permita clue el motor
se enfrle antes de volver a pone
combustible. No fume.
- Nunca vuelva a porter combustible en la
rn_quina en recintos cerrados.
- Nunca almacene la mdquina o el envase
del combustible dentro de alghn lugar en
donde haya una Ilarna expuesta, lal como
la del calentador de agua.
• Nunca haga funcionar una mdquina dentro
de un drea cerrada.
• Nunca haga ajustes o reparaciones
mientras el motor estd en mamha.
Desconecle el cable de la bujia, y
mant_ngalo a cierta distanela de _sta para
prevenir un arranque accidental.
• Mantenga las tuercas y los pemos,
especialmente los pemos del accesorio de
la cuchilla, apretados y mantenga el equipo
• Renueva todos los objetos extm_os, tales
en buenas condiciones.
como guijarros, mmas, etc.
• Nunca manipule de forma indebida los
• Debe prestar atencibn a hoyos, baches o
dispositivos de seguridad. Contrele
pmtuderanoias. Recuerde que la hierba elta
regularmente su funelonamiento correcto.
puede esconder obst&culos.
• Mantenga la mdquina libre de hierba, hojas
NO HACEFh
u otras acumulaciones de desperdicio.
• No recorte cerca de pendientes, zanjas o
Limpie los derrames de aceite o combusterraplenes. El operador puede perder la
tible. Permita que la m.dquina se enfrle antes
de elmacenada.
tracci6n en los pies o el equilibrio.
• No recorte cuestas demasiado inclinadas.
• Pare e in_speccioneel equipo si le pega a un
• No mcorte en hierba mojada. La reduccibn
objeto. Reparelo, si es necesario, antes de
hacerlo arrancar.
en la traccibn de la pisada puede causar
resbalones.
• En ningun caso hay que regular la altura de
las ruedas mientras el motor est_ en
Ill.Nil;lOS
marcha.
Se pueden producir accidentes trztgicos si el
• Los componentes del receptor de la hierba
operador no presta atencibn a la pmsencia de
van sujetos a desgaste, da_os y detedero,
los niBos. A menudo, los nifios se sienten
que pueden exporter las partes en
atra/dos por la rndquina y por la actividad de ta
movimiento o permitir que objetos sean
siega. Nunca suponga que los elAos van a
disparados. Controlar frecuentemente y
permanecer en et mismo lugar donde los vio
cuando sea necesado susfitulr con partes
pot dltima vez.
acossejadas por el fabricante.
• Mantenga a los niF_osalejados del drea de la
• Las cuchillas de la segadora estdn afiladas
siega y bajo el cuidado estdcto de otra
y pueden cortar. Cubrir 1as hojas o Ilevar
persona adulta responsable.
guantes, y utilizar precauelones especiales
• Est_ alerta y apague la mdquina si hay niflos
cuando se efect0a mantenimiento sobre las
que entran al area.
mismas.
• Antes y cuando este retrocadiendo, mire
• No cambie el ajuste del regulader del motor
hacia arras y hacia abajo para verificar si
ni exceda su velocidad.
hay niAos peque5os.
• NOopere la m_quina bajo la influencia del
alcohol o de las drogas.
• Nunca opera la maquina cuando la hierba
este mojada. Aseg_rese siempre de tener
buena traccibn en sus pies; mantenga el
mango firmemente y camine; nunca corra.
• Desconectar el rnecanismo de pmpelsibn
aut6noma o el embrague de transmiside en
las segadoras que Io tienen antes de poner
en marcha el motor.
• Si el equipo empezara a vibrar de una
rnanera anormal, pare el motor y revise de
inmediato para averiguar la causa.
Generalmente la vibraci6n suele indicar que
existe alguna averfa.
• Siempre use galas de seguridad o anteojos
con pmtecci6n lateral cuando opere la
segadora.
II. OPERACION
SOBRE LAS CUESTAS
Los accidentes ocurmn con m_s frecuencia
en las cuestas. Estos accidentes ocurren
debido a resbaladas o cafdas, las cuales
pueden resuttar en graves lesiones. Operar la
recortadora en cuestas requiere mayor
concentracibn. Si se siente inseguro en una
cuesta, no la recorte.
HACER:
• Puede recortar a tray,s de La superlicie de
la cuesta, nunca hacia arriba y hacia abajo.
Proceda con extrema precaucibn cuando
cambie de dimccion en las cuestas.
19
_qsque
e6te sirnboloque sei_la las precaucicnes de seguddadde imlx_anda. Ouiem decitIiiATENCIC_)N!H[IIESTE ALERTO!H SU
SEGURIDAD ESTA COMPROMETIDA.
A_,PRECAUCI(_N: Siempre desosnecteel
alambre de la bujia y p_lo
deride no pueda
entrar en co_daclocon ta buj_a, para evitar el
arranque pot accidente,durante la pm_,
el
transporte,el ajuste o cuande se haosn
reparaciones.
_,ADVER_.NClA:
El tubo de escape del motor,
algunosde sus osr_-_Jyentss y algunos
componentesdel vehfculocordieneno
despmnden productos quirdcos conocidose_ el
Estadode Calif_nia como causa de cdnosry
de_ectosal nadrr_entou otros daJ_os
reproductivos.
_6.DVERTENCIA: Los homes, terrninales y
aoceson_ rek_lNosde la baterla contk3t_np_omo
o compuest_s de pk,no, productosquimicos
conoddosen el Estadode California como causa
de cdncery defectos el nacin'iento u (tcos daSos
mproduclJvos.Lavar las manos despu_s de
manlpulartos.
_,PRECAUCl6N: El silenciador y otras piezas
del motor Ilegan a set extremadamente
calientes durante ta operacibn y siguen siendo
calientes despu6s de que el motor haya
parade. Para evitar quemaduras sevems,
permanezca lejos de estas dreas.
Es_osacosso_os estaban dL_oor._bles
cuando se produjota segadora. No son fadlltados junto al
cortacesped. Estdn disponib_esen la rnayoda de las 'dendasde Sears yen los cenlms de servicio.La
mayoria de 1astiendes Sears tambidn pueden mandar a pedir partes de repuesto para usted, si les
p_k_na
el ntimem del rnodelo de su segadem. Algunos de estos accesodos tal vez no se ap;iquena
su _.
RENDIMIENTO
DE LA SEGADORA
DESV1ADOR
DERECORTES
PARA SEGAI_3RAS
CON OESCARGA
TRASERA
JUEOOS PARA LA ACOLCHADORA
SEGADORAS
CON DESCARGA
TRASERA
MANTENIM|ENTO
SEGADO_AS
CON DESCARGA
LATERAL
ENVASE$
DE OASOMNA
DE LA SEGADORA
SILENICIACORES
CORREA8
ESTABIMZADORIES
CUCHR.LAS
RLTROS
DE CUCH_LI.A
20
DE AJRE
RUEDAS
BUJ{AS
OEL MOTOR
Lea estas instrucciones y el manual
comple_amente antes de l_atar de montar u
operar su sngadora nueva.
IMPORTANTE: ESTE CORTACESPED VIENE
SIN ACEITE O GASOLINA EN EL MOTOR.
Su segadora nueva ha sido montada en la
|dbdca con ta excepcion de aque;las pades
que se dejamn sin montar par razones de
envlo. Todas las partes como las tuercas, las
arandelas, los pamos, etc., que son
necesarias para completar el montaje han sido
colocadas an la bolsa de partes. Pard
asegurarse que su segadora funcione an
forma segura y adecuada, todas Las partes y
los articulos de ferrateda que se monten
tienen que ser apratados seguramente. Use
las herramientas correctas, como sea
necesado, para asegurar que se apdeten
adecuadamente.
PARA REMOVER
LA SEGADORA
DE
LA CAJA DE CART6N
1. Remueva las partes sueltas que se
incluyen con la segadora.
2. Corte las dos esquinas de los extremos de
ta caja de canbn y tienda el panel de;
extremo piano.
3. Remueva todo el material de empaque,
excepto la cuSa entre el mango superior y
e; inferior, y la cuba que sujeta la bana de
los control que exige la presencia de;
operador junto con el mango superior.
4. Haga rodar la segadora hacia aft,era de la
caja de cartbn y revise;a cuidadosamante
para vedficar si todavfa quedan partes
sueltas adicionales.
COMO PREPARAR
SU SEGADORA
El mango de la segadora puede ajustarse
seg_n le acomode para segar. Refidrase a
"AJUSTE DEL MANGO" en la SecciSn de
Servicio y Ajustes de este manual.
Barra de control c
la preser_ia del operader
Mango supedo¢
Mango Inledor
Levantar
Pinza del mango
Sopode de
ajuste mango
PARA DESDOBLAR EL MANGO
IMPORTANTE: Despliegue el mango con
mucho cuidado para no pellizcar o daSar los
calves de control.
1. Levante los mangos hasta que la secd6n
de; mango infedor se asegure en su lugar,
en la posicibn para segor.
2. Remueva la cuSa proteclora, levante la
seccibn del mango superior hasta su lugar
en el mango inferior, y apriete ambas
manillas de; mango.
3. Remueva la cu6a de; mango que sujeta la
barra de los control que exige la presene;a
de; operador junto con el mango superior.
PARA INSTALAR LOS ACCESORIOS
Su segadera fue anviada lista para usarse
como una acolcl_adora de capa vegetal. Para
convertirla de modo que pueda ensacar,
mfi6rase a "PAPA CONVERIR LA
SEGADORA" en la Seccibn de Operacibn de
es_e manual.
21
FAMIUARICESE
CONSUSEGADORA
LEA ESTE MANUAL DEL DUENO Y I-AS REGLAS DE SEGURIDAD ANTES DE OPARAR SU
SEGADORA. Compare las ilustracionescon su segad_a para farnilianzarsecon la ubicaci(_ de los
diversosoonVolesy ajustes Guarde este manual para referenda en el futuro.
Estos s|mbolos pueden apareser sobre su sagadora o en ta Ilteratura proporclonada
el producto. Aprenda y comprenda sus s|gniflcados.
A3"rENCI_
0
MOTOR
MOTOR
R_PIDO
LENTO
ESTRANGU
COM-
ACBTE
con
PELIGRO, GUARDE LAS
]ue exige la pmsencla del operador
:ontml de la zona del motor
Manllla del mango
Tapa del ®desito
de ta gasolina
Cordbn arrancader
FIItro de alre
Cededer
Recogedor de cdsped
Tapa del deposilo de aciote
del motor con vadlla
Indlcadora de nlvel
Aj_tador de la n.leda
(en cada rueda)
IMPORTANTE: Este cortacdsped viene
SIN ACEITE O GASOLINA en el motor.
CUMPLE CON LOS REQUISITOS
DE SEGURIDAD DE LA CPSC
Las segadoras a motor, que se conducen desde la parte de altos, rotatorias, Sears, cumplen
con los estdnderes de seguridad del Amedcan National Standards Institute y de ta U.S. Consumer Product Safety Commission. La cuchilla gira cuando el motor estd funcionando.
Barra de control qua exlge la presencla del
operador, tiene que sujetarse abajo, junto
con el mango, para hacer arrancar el motor,
Su_ltela para parer el motor,
Cord6n arrancador- se usa para hacer
arrancar el motor.
22
Cebador - bombea combustible adicional
desde el carburador al cilindro para uso
cuando se necesita hacer arrancar un motor
frlo.
La operacibn de cualquier
segadora puede hacer que
sa_ten objetos extraSos dentro
de sus ojos, Io que puede
producir dar_os graves en _stos.
Siempre usa anteojos de seguridad o
proteccibn pare los ojos mientras opera su
segadora o cuando haga ajustes o
reparaciones. Recomendamos una mascara
de seguridad de visibn amplia, pare uso
espejuelos o anteojos de seguridad
estandade.
COMO USAR SU SEGADORA
PARA CONVERTIR
LA SEGADORA
Su segadora rue enviada lista pare usarse
corno acolchadora de cape vegetal. Pare
convertida a una operacibn de ensacado:
SEGADORAS CON DESCARGA TRASERA
• Levantar la puerta trasera de cortac_sped y
celocar los ganchos del armaz6n de la
recolectora de hierba en los pasadores del
quLciode la puerta.
• Pare pasar ala odercelbn de acolchamiento,
remover la recolectora de hierba y cerrar ia
puerta trasera.
_ORECAUCI(_N;
No haga funolonar su
segadora sin el desviador de recortes o sin el
recogedor de cdsped, aprobades, an su lugar.
Nunca trate de operar la segadora cuanclo se
ha removido la puerta trasera o cuando estd
un poco abierta.
VELOCIDAD
DEL MOTOR
La velocidad del motor se estab_ecib en la
fdbdca pare un mndimiento bptimo. La
velocidad no se puede ajustar.
CONTROL DE ZONA DEL MOTOR
_PRECAUCI6N;
Las regulaciones federeles
extgen que se instale un control pare et motor
en esta segadora para reducir a un minimo el
desgo de lesionarse debido el contacto con la
cuchilla. For ning0n motivo trate de eliminar la
funci6n del control de1operador. La cuchilla
giFacuando el motor est& foncionando.
• $u segadora viene equipada con una barra
de controles que exigen la presencia del
operador, Io que requiere que el operador
est_ detras del mango de la segadora para
hacerla arrancar y operada.
PARA AJUSTAR
LA ALTURA DE
CORTE
Levante las ruedas pare el corte bajo y baje
las ruedas p_a el corte alto., ajuste la altura
de corte pare que se acomode a sus
requ[sltos. La posicibn del madio es la rnejor
p_ra la mayorla de los cdspedes.
•Para camb_ar la altura de code, empuje la
palanca del _ustador hada la rueda. Mueva
la rueda hacia ardba o hacia abajo de modo
que se acomode a sus requisitos.
Aseg0rese que todas las ruedas quedan
iguelmente ajustades.
AVISO: El ajustador esta correctamente
colocado cuando las orejas de fa ptaca est&n
insertadas en el agujem del mango. Tamb_n,
los ajustes de 9 posiciones (si equipado)
permlten que el mango pueda ser movido
entre las orejas de laplaca.
Pare uncodealto,baje1asruedas
Pasador dal
Mango dal
b_tidor del
mcogedor de
Gancho lateral del
ba=stldordel recogedor
PARA VACIAR
EL RECOGEDOR
DE
C_SPED
1.
Levar_e el recogeder de cSsped usando el
mango del bastidor.
2. Remueva el recogedor de c6sped, con los
recortes, de debajo del mango de la
segadora.
3. Vacie los recortes de la bolsa usando
tanto el mango del bastidor como dl de la
boise.
AVISO: No arrastre la bolsa cuando la vaele;
se producir_ un desgaste ionecesado.
/
Oreja.sd_
la place
Pare uncodebajo,levantelasruedas
Puerta
Mango
Mango
de la
balsa
23
ANTES DE HACER ARRANCAR
MOTOR
EL
AGREGUE ACEITE
Su segadora rue enviada sin aceite en el
motor. El motor puede contener 20 oz. de
aceite. Para el tipay la calidad vea =MOTOR"
en la secci6n de las Mantenimento an este
manual.
1. Aseg_Jreseque la segadore es_e n_valada
y que el drea alrndedor det depdeito de
aceite est_ limpia.
2. Remuava la tapa del dep6sito de aceite dal
motor y rellene basts la lines de Ileno en
6eta. Vacle el aceite lentamente. No lo liens
demaslade.
AVISO: Perrnita qua el aceite se aciente bien
en el motor pars una leotura exacta. Para leer
el nivel apropiado, apriete la tapa de1relleno
dal acalte de motor, remuavaJa pars Jeer la
variUamedidora del aceite.
3. Vuatva a instalar la tapa del depbsito dal
aceife y apd6tela.
• Revise el nive[de1 acalte antes de cads uso.
Agregue aceite sJ es necesado. Lleua basts
la lines de Ileno en la varilla indicadora de
nivel.
• Cambie el aceite despL_s de 25 horas de
operaci6n o una vez par temparada. Puade
neuasitar cambiar el aceite rods a menudo
cuando las condiciones son polvorosas o
El Almacenamiento para rnds intormacibn.
Nunca tJse produntos de limpieza pars el
motor o pars el carburador en el estanque del
combustible puss se pueden prodecir dafios
_ermanentes.
_I=PRECAUCI(_N: Liens hasta ta parle inferior
dal cuello de mlleno del es_anqua de gasalina.
No Io lleua demasiado. Limpie el aceife o el
combuslJble derramado. No almacene,
detrains o use gasolina cerca de una llama
expuesta.
Taps del
la gasolina
Tapa del
deposlto de
acelte
SUCiaS.
AGREGUE GASOLINA
• Liens el estanque de combustible. Usa
gasolina regular, sin plomo, nueva y limpia
con el rninimo de 87 octanos. (El uso de
gasolina con p_omo auruantar_ los
depbsitos de bxido de plomo y carbono y se
reducir_ Jaduraci6n de la v_lvula). No
mezc]e M aceite con Ja gasolina. Pars
asegurar que la gasolina utilizada sea
fresca compre estanques los euales
puedan ser otilizados durante los pnmeros
30 dias.
,_DVERTENCIA:La
expedencia ha Jndicado
qua los combustibles mezclados con alcohol
(conocidos como gasohol, o el uso de etanol o
metanol) puaden atraer la humeded, la qua
conduce a la separacibn y fonnaalbn de
_cJdos durente el aJmacenarn_ento.La gasotina
acidica puede dafiar el sistema del cOmbL_tible de un motor durante el almacenamiento.
Para evitar los problemas con el motor, se
debe vablar el sistema del combustible antes
de guardarJopor un per/ode de 30 dlas o rnds.
Vacie el estanque dal combustible, hags
arrancar el motor y hdgalo funcionar basts
que las Ifneas del combustible y al carburador
queden vaclos. La pr_xima temporada use
combustible nuevo. Vea las Jnstruccionespars
PARA HACER ARRANCAR
EL MOTOR
AVISO: Debido a las capas protectoras dal
motor, una cantidad paquef_a de humo puade
estar presents durante el uso inicial del
producto y se debe considemr normal.
1. Pare hauar arrancar un motor frio, empuje
et cebador tres (3) veces antes de tratarlo.
Empuje firmemente. Este paso
nonnalmente no es necesario cuande se
hace arrancar un motor qua ya ha estado
funcionando por unos cuantos minutos.
2. Sujefe ta barra de controles que exigen la
presencia del operador abajo en el mango
y tire el mango dal arrancador
rdpidamente. No permita que el cord_ de]
arrancador se devuelva abruptamente,
PARA PARAR EL MOTOR
• Pars parar el motor, suatte la barra de
controles que exigen la presencia del
oparador.
AVISO: En climas rn_s frfos puade qua sea
necesado repatir los pasos del cebado. En
climas rnds caJurosos el cebar demasiado
puede producir el ahogo y el motor no va a
arrancar. Si se ahoga el motor espere unua
cuantos minutos antes de tratar de hacedo
arrancar y no repita los pasos dal cebade.
24
CONSEJOS
PARA SEGAR
CONSEJOS
PARA SEGAR Y
ACOLCHAR
IMPORTANTE: Pare obtener el mejor
rendimiento mantenga la caja de la segadora
sin acumulacion de cesped y basura. Vea
"LIMP]ET_.A"in la seccion Mantenimiento de
este manual.
• La cuchilla acolchadora especial vaa volver
a cortar los recortes de c_sped muchas
veces, y los reduce en tamat3o, de modo
que si se caen en el c6sped se van a
dispersar entre dste y no se van anotar.
Tarnbi_n, el cdsped acalchade se va a
deshacer rdpidarnente entregando
substancias nutritivas para el cesped.
Siempre acolcha con la velocidad del motor
(cuchilla) mds alia, pues asl se obtendrd la
mejor accibn de reco,-te de 1as cuchillas.
• Evlte cotter el crisped cuando est_ rnojado.
El cesped rnojado tiende a format montones
e interfiere con la acci6n de acolchado. La
major hora para sager el cesped es
temprano en la tarde. A esa hora dste se ha
secado y el area reci_n cortada no quedard
expuesta al sal direclo.
• Para obtener los mejores resultados, ajuste
la altura del corte de la segadora de mode
que dsta code solarnente el tercio superior
de las hojas de cesped. En el caso de que
el c_sped haya crecido demasiado, puede
ser necesario el elevar la altora dal corte
para reducir el esfuerzo necesario pare
empujar la segadora y para evitar
sobrecargar el motor, dejando montones de
recortes de cesped. Pare un acalchamiento
muy pesado, reduzca el ancha del corte
pasando por encima del lugar antefiormenle
cortado y siegue lentamente.
• Ciedos tipos de c_sped y sus condiciones
pueden exigir que un _,rea tenga que ser
acolchada pot segunda vez para esconder
completamente los recortes. Cuando se
haga el segundo corte, siegue atravesado o
en forma perpendicular ala pasada dal
primer come.
• Camble su patr6n de corte de semana a
semana. Siegue de node a sur una semana
y luego cambie de este a oeste la _6xime
semana. Esto evitard que el cdsped se
enrede y cambie de direccibn.
• Bajo ciedas condiciones, tal como cesped
muy alto, puede ser necesado el elevar la
altura del corte pare reducir el esfuerzo
necesario pare empujar la segadora y para
evhar sobrecargar el motor, dejando
monlones de recodes de c6sped. Puede
que sea necesafio reducir la velocidad del
recorrido y/o haga funcionar la segadora
sobre el drea pot segunda vez.
• Pare un corte muy pesado, reduzca el
ancho del come pasando parcialmente pot
encima dal lugar antedormente cortado y
siegue lentarnente.
• Pare un mejot ensacado del c_sped y pare
la mayorfa de las condiciones de code, la
velocidad del motor debe ajualarse ala
poalcibn de rdpido.
• Cuando use una segadora con descarga
trasera en cdsped h_medo y pesado, los
montones del cdsped cortado puede que no
entren en el recogedor de cesped. Reduzca
]a valocidad del recorddo (valocided de
empuje) y/o haga funcionar la segadora
sobre el _rea por segunda vez.
• Si queda una hualla de comes en e] lado
derecho de una segadora con descarga
trasera, siegue en la direcci6n en que giran
las manillas del reloj, solapando un poco
para recaudar los recodes en la pr6xima
pasada.
• Los poros en los recogedores de cdsped
de te[a pueden Ilenarse con mugre y polvo
con el uso y los recogedores mcaudardn
menos cesped. Para evitar _ste, rocie el
recogedor con la rnanguera de agua
regularmente y dejalo secarse antes de
usado.
• Mantenga la parts supedor dal molor,
alrededor dal arrancador, despejada y sin
recodes de c_sped y paja. Esto ayudard el
flujo del aim del motor y extendera su
duracibn.
'MAXI_
25
PROGRAMADE MANTENIMIENTO
LLENELASFECHASA MEDIDA
QUECOMPLETE
SUSERVICIOREGULAR
FECHASDE SERVICtO
Revissrslha)'sulotadetes
sue]tos
Llmplar/]nsdecclonar el recogeder de
_ded (,Iv_.°_ulp.de)
LImplm
la segadera
L
d_DaJo de I= cubleda de lat rans-
V/
"
'
"
_/
_ I v'
V'
I_
L_l_de(=egadoruconpealer
propulsor)
Reviser las corteas y la= pc4e_ssimpuli
ulsades (se_tad......
poder propulsor_
J
Reviser o/afllarlcambtar
(1_ 3
la cuchll!a
Table de lubricack_n
I_
V /
_
V°i
Llmpiar la batedeJrecargar
($egad_ras con armnqu°
e_ctdco)
Reviser e4nlvel del 8ce_te
Cambiar el aceS° del motor
t_1.2
Limpfar el filtm de aire
IJ2
Inspeccionar el silenc_ador
I1_
LImplar o/cambiar la buJia
CambL_r el cartucho de papel del filtro
Vt2
I dealro
1. _
rm_sa menudo cuar,do Fa_opere bajo c_g a pe_ad a o an a_lbier_
con at,as temperatum_,
2 - Oar seP_cio r_
a n_s_udo cu and c*se ope m _ coezIP.J_PA_ =_las
o .0_{_ls.
3. Cafnble las cuChlllas _
a m_qudo cuando =deg_
_1 t oom_o are_oso,
4.c=_-por40ho==_t,,_0o,_d=
TABLA
DE LUBRICACK_N
(_) Ajustador de la rueda
RECOMENDAClONES
GENERALES
La garantla de esta segadora no cubre los
art[culos que han estado suje'_osal abuso o a
la negligencia del operador. Pare recibir todo el
valor de la g_rantia, el operador tieR° que
mantener la segadora seg_n las instrucciones
descritas en este manual.
Hay algunos ajustes que se tienen que hacer
en forma ped{_lica para poder mantener su
unidad adecuadamente.
Todos los ajustes en la seccidn de Sewicio y
Ajustes de este manual tienen que ser
revisados por Io rnenos un vez por cada
temporada.
• Una vez al aSo, cambie la bujla, limpie o
cambie el elemento del filtro de air° y revise
si la cuchi[la estd desgastada. Una bujla
nueva y un elemento del filtro de aim limpio/
nuevo aseguran la mezcla de air°combustible adecu_da y ayudan a que su
motor funcione mejor y que dure rods.
• Siga e_programa de mantenimiento eneste
m_'3tJal.
ANTES DE CADA USO
1. Revise el nivel del acede del motor.
2. Revise si hay sujetadores sueltos.
LUBRICACI(_N
Mantenga la unidad bien lubdcada (yea la
=TABLA DE LUBRICACI(_N").
(_) Puntal de
resort° del
freno
del motor
Bis_gm de
la puerta
traser
(_) Clavija de montaje del puntal del mango
Rocleel lubricant°
(_ Vu "MOTOR"onla =ecclon de Mantenlmlento
26
IMPORTANTE: No aceite o engrase los
rodamientos de la rueda de p_astico.Los
fubdcantes viscosos ateemn polvo y
mugre, fo acortara la duracion de los
rodamientos aotolubricantes. S_cree que
tienen que lubdcarse, use Iosamente un
lubricant° tipo crafito, de polvo seco, en
forma moderada.
ESPEClFICACIONES
DEL PRODUCTO
NOMEROOESERIE:
FECHADECOMPR/_
:APACIDAD
YTIPODE GASOLINA:
1.5 CUARTOS REGULAR SIN PLOMO
TIPO DEACEITE(API-SF-SJ):
CAPACIDAD
DEACEI_:
SAE 30 (SOBRE 3_°F) o SAE 5W÷30 (DEBAJO 32°F)
20 OZ. DE CAPACIDAD
BLIJIA(ABERTURA:.045")
TORSIONDELPERNODELACUCHILLA:
CH,_PION
RJ19LM4
35"40 F_ LBS.
El numdm del nedelo y el de sede se encuentran en la calcomanla adjunta ala parte trasera
de la caja de la segadora. Debe registrar tanto el num_m de sene come ta fecha de compra y
manter_jaLosen un lugar seguro para refencia en el futuro.
SEGADORA
Siempre observe 1as reglas de seguridad
cuando haga el mantenimiento,
LLANTAS
• Mantenga las Ilantas sin gasoline, aceite o
substancias qufmicas pare control de
insectos que pueden daRar la goma.
• Evite los tocones, las piedras, las gdetas
profundas, los objetos afilados y otros
peligros que pueden daRar a las Ilantas.
CUIDADO DE LA CUCHILLA
Pare obtener los mejores resultados, la
cuchilla de la segedora tienen que mantenerse
afilada. Cambie la cuchilLadoblada o daSada.
PARA REMOVER LA CUCHILLA
1.
Desconecte el alambre de la bujla y
p6ng_lo en doede no pueda entrar en
contacto con dsta.
2. Haga descansar la segadora en su lado.
Asegdrese que el filtro de aire y que el
carburador queden mirando hacia arriba.
3. Use un I_oque de rnadera entre la cuchilla
y ta caja de la segadom para evitar que la
cuchilla gire cuando se le quite el derno.
AVISO: Proteja sus rnanos con guantes y/o
envuelve la cuchilla con una tela gruesa.
4. Remueva el pemo de la cuchilla gir_ndolo
en el sentido contrario en que giran tas
manit/as de/re/oj.
5. Remueva la cuehHlay los art[culos de
ferreterla edjuntadores (el perno, la
arandela de seguridad y la amndela
endurecida).
AVISO: Remueva el adaptador de la cuchilla y
revise el cubo intedor de la ranura del
adaptador de la cuchilla. La ranura tiene que
ester en buenas condiciones para que
funcione en forma edecuada, Cambie el
adaptador si estd daf_ado,
PARA CAMBIAR LA CUCHILLA
1, Ponga el adaptedor de la cuchilta on el
cigue_al det motor. Asegt_rese que la
ranura del adaptador y que el chavetero
del cigueSal estdn alineados.
2, Ponga la cuchilla en el adaptador de dsta
alineando los dos (2) agujeros en la
cuch_llacon las salientes elevadas en el
adaptador,
3. Asegurese de que el borde de salida de la
cuch_lla (opuesto al borde afilado) est6
hacia ardba ha_ta el motor.
4.
Instale el perno de la cuchilla con la
arandela de seguddad y ta arandela
endurecida en el adaptador de la cuchilla y
el cigueRaL
5. Use un bloque de madera entre la cuchilla
y la caja de la segadora y apdete el pemo
de la cuchilla gir_ndolo en el sentido en
que giran las rnanillas del reloj.
• La toreldn para apretar recomendada es de
35 - 40 pies libras.
IMPORTANTE: El pamo de la cuchLIlaes
clase 8 tratado a calo.
PARA AFILAR LA CUCHILLA
AVISO: No recomendamos el afilar la cuchilla
- pero si Io hace, asegOrese de que quede
balanceada.
Se tiene que tener cuidado de mantenerla
balanceada. Una cuchilla que no estz_
balanceada va a preducir eventualmente daRo
en la segadora o en el motor.
• La cuchilla puede afilarse con una itma o en
una rueda rectificadora. No trate de afilada
mientras se encuentra en la segadora.
•Para reviser el balance de la cuchilla, clave
un clavo en una riga o en la pared. Deje
alrededor de una pulgada de un clavo recto
expuesto. Ponga el agujero central de la
cuchilla sobre la cabeza del clavo. Si la
cuchilla estd balanceada depa parmanecer
en la posicibn hedzontaL Si cualquiera de
los extremos de la cuchilla se mueve hacia
abajo, afile el extremo pasado hasta que
esta quede balanceada.
Adaptadorde la cUChllla_-_
Pemo
cuchlfla
27
Ch_veterodel
C_gu_nal
Bordede salida
Adaptadorde la cuchilla
RECOGEDOR DE ClaSPED
• El recogedor de c_sped puede ser rociado
con el agua de la manguera pero tiene que
es_ar seco cuando se vaya a usar.
• Revise su recogedor de c_sped a menudo
para venticar si est,. da_ado o deteriorado.
Se va a desgastar con el uso normal. Si se
necesita cambiar el recogedor, cambielo
solamente por uno que sea apmbado por el
tabdcarde. De el nOrnero del modelo de la
segadora cuando Io ordene.
MOTOR
LUBRICACI(_N
Use solarnente aceite de detergente de alta
selidad clasificado con la clasificacibn SF-SJ
de servicio API. Seleccione la calidad de
viscosidad SAE segL_nsu temperatura de
operaci6n esperada.
PAPA CAMBIAR EL ACEITE DEL MOTOR
AVISO: Antes de inclinar la segadora para
drenar el aceite, drene el tanque de combustible haciendo correr el motor basra queef
tanque este vacio.
1. Desconecte el alambre de la bujla y
pbngalo de modo que no pueda entrar en
contacto con dsta,.
2. Remueva la tapa del depd_ito del aceite;
dejela a un lado en una supedicie limpia.
3. Incline la cortadora de cdsped por este
costado tal como se rnuestra y purgue el
aceite en un recipiente id6neo. Mueva la
segadora de arras para adelante para
remover todo el aceite que se haya
quedado atrapado dentro del motor.
4. Umpie todo el aceite dertamado en la
segadora yen el lad<) del motor.
5. Rellene el motor con aceite. (Vea =PAPA
AGREGAR EL ACEiTE" en la seccion de
Operacibn de este manual.)
6. Vuelva a coneotar el alambre de la bujla a
esta.
AVISO: A pesar de que los ace_tes de
multiviscosidad (5W30, 10W30, etc.) mejoran
el arranque en clima frio, estos aceites de
multiviscosidad van ha aumentar el consumo
de aceite cuando se usan en temperaturas
sobre 32° F Revise el nivel del aceite del
motor m_s a rnenudo, para eVrtar un posible
daSo en el motor, debido a que no tiene
suficiente aceite.
Cambie el aceite despu_s de 25 horas de
opereci6n o po_ Io menos una vez al aSo si la
segadora se utiliza menos 25 horas el aSo.
Revise el nivel del aceite del carter antes de
arrancar el motor y despues de cada cinco (5)
horas de uso continuado. Apriete el tapbn del
aceite en forma segura cada vez que revise el
nivel del aceite.
"Envase
28
FILTRO DE AIRE
Su motor no funcionar_ en forma adecuada y
puede sufrir da6os si se usa un filtro de aire
sucio.
Cambie el fil_rode aire cada a6o o despu_s de
cada 100 horas de operacibn, y m_s a
menudo si siega en condiciones muy
polvorosas o sudas. No lave et fifiro de aire.
PARA CAMBIAR EL FILTRO DE AIRE
1. Remueva el filtro de aire gir_ndolo en el
sentido en que girela de 1asmanillas del
reloj para apretada, hasta el tope, y retfrelo
del collar.
2. Rernueva el firm de la parte interior de la
cubierta.
3. Limpie la parte interior de ta cubierta y el
collar para remover toda acumulaci_ de
mugre.
4.. Inserte el filtro nuevo en la cubierta.
5. Ponga la cubierta del filtm de aire denim
del collar alineando la oreja con la ranura.
6. Empuje ]a cubierta hacia adentro y grrela
en el sentido contrario de las manillas clel
reloj para apretada.
Co,at
Gire en el senUdo a las manillas del
reloj para
remover
Abrazadera
RarlLim
SILENCIADOR
Inspeccione y cambie el silenciador si esta
corroido puede producir un peligro de
incendio y/o daRo,
BUJIAS
Cambie las bujlas al comienzo de cada
temporada de sisga o despu_s de cada 100
horas de operaci_, Io que suceda primero, El
tipo de bujla y el ajuste de la abertura
aparecen en =ESPECIFICACIONES DEL
PRODUCTO" secci6n de este manual.
LIMPIEZA
IMPORTANTE: Para obtener el mejor
rendimiento, mantenga la caja de la segadom
sin acumulacion de cesped y basura, Limpin la
parte de abajo de su segadora despues de
cada uso.
_PRECAUCI6N:
Desconecte el alambre de
la bujla y p6ngalo en donde no pueda entrar
en contanto con 6sta.
• Lirnpie la parte infedor de su segadora
raspdndola pare remover la acumufacibn de
c6sped y basura.
• Limpie el motor a menudo para evitar que
se acumule la basura. Un motor tapedo
funciona mds caliente y se acorta su
duraci6n.
• Mantenga las superficies pulidas y las
ruedas sin gasolina, aceite, etc.
• No recomendamos el uso de una manguera
de jardln para limpiar la segadora a menos
que el sistema eldc_rico,el silenciador, el
filtm de aire y el carburador estdn tapados
para evitar que les entre el agua. El agua en
el motor puede acortar la duraci6n de 6ste.
Filtro de aim
Cubierta del filtm de aim
Gireen
._1se_do
contrado las manlllas
del reloj para apreiar
29
_,PRECAUCK_N: Antes de dar calquier
servico o de hacer ajustes:
1. Suette la barra de control y pare el motor.
2. AsegGrese qua la cuchiila y qua todas ]as
partes movibles se hayan detenido
completamente.
3. Desconente el alambre de la bujia y
pbngalo en donde no pueda entrar en
contacto con dsta.
SEGADORA
PARA AJUSTAR LA ALTURA DE CORTE
Vea =PARA AJUSTAR LA ALTURA DE
CORTE" en la secci6n de Operaci6n de esta
mariuS.
DESVIADOR TRASERO
Se proporciona un desviador trasero, adjunto
entre las ruedas lraseras de su segadora,
para reducir a un mloimo la poelbindad qua
objetos sean tanzados hacia afuera de la parte
trasem de la segadora, en la posicibn en
donde se encuentra el operador. Si se daha el
desviador debe cambiarse.
TPARA AJUSTAR EL MANGO
El mango de su segadora cuenta con tres (3)
posielones de altura - aj_stelo a la altura qua
le acomode.
• Presione las extremidades inferiores del
mando inferior una en contra una de la otra
hasta que la pinza dee mango pueda ser
insertada en uno de los tres agujeros del
control de la altura.
• Pinza de1mango
Apriete
Pun_
deajuste
PARA MONTAR Y ADJUNTAR EL
RECOGEDOR DE C_SPED
1. Ponga el bastidor del recogedor de cesped
en la bolsa del cdsped con la parte rigida
de la bolsa en la parte inferior. Asngurese
qua el mango del bastidor estd en el
exterior de la pade superior de ta bolsa.
2. Deslice los sujetadores de vinilo sobre el
bastidor.
AVISO: Si los sujetadores de vtnilo estdn muy
duros, mdtalos en agua caliente por elgunos
rninutos. Si se moja la bolsa, dejela qua se
seque antes de usarla.
_1, PRECAUCI(_N: No haga funcionar su
segadora sin el desviador _e recortes o sin el
recogedor de cdsped, aprobados, en su
lugar. Nunca trate de operar la segadora
cuando se ha removido la puerta trasera o
cuando est_ un poco abierta.
Man_
_
bastld_drec_t_
_
_
\
VELOCIDAD DEL MOTOR
La velocidad del motor ha sido ajustada en la
fdbdca. No trate de aumentar la velocidad del
motor puss se pueden producir leslones
personales. SI cree qua el motor est_
funclonando demasiado r_oido o demasiado
lento, Ileve su segadora a contaclo con su
centro de ewiclo Sears o con un otro centro
de servido cuelificado para repamrla o
ajustarla.
CARBURADOR
Su carburador tiene un chon'o principal fijo no
ajustable para controlar la mezcla. Si su motor
no est_ funclonando en forma adecuada
debido a problemas qua se sospecha vienen
del carburador, Ileve su segadora a contacto
con su centro de servicio Sears o con on otto
centro de servicio cualificado para reparada y/
o ajus_rla.
IMPORTANTIE: Nunca manipule el regulador
del motor, el qua ha sido ajustado en la fzibnca
para la velocidad del motor adecuada. Puede
ser peligroso hacer funcionar el motor a una
velocidad por sobre el ajuste de alta velocidad
de la fdbdca. Si cree qua la velccidad alta
regulada del motor necesita ajuste,conlacto
con su centro de sewicio Sears o con un otro
centro de sen,'iclo cuelificado, el que cuenta
con el equipo adecuado y la experiencia para
30hacer los ajustes necesarios.
Inrnediataruante prepare su segadora para el
almacenamiento el final de cada temporada o
si la unidad no se va a usar gor 30 dlas o
m_ts.
SEGADORA
Cuando se va a guardar la segadora por
cierto periodo de tiemgo, Ifmpiela
cuidedosameote, remueva toda la mugre, la
grasa, las hojas, etc. Gu&rdela en un drea
limpia y seca.
1. Limpietodalasegadora(Vea'l.IMPIEZA"
en _asecol6n de Mantenimento de este
manual).
2. Lubr[quela segdn se muestra en la
secci6n de Mantenimento de este manual.
3. AsegQrese de qua todas las tuercas y
clavijas y todos los pemos y tornitlos est_n
apretados en forma segura. Inspeccione
las partes que se mueven para verificar si
est&n daSadas, quebradas o desgastadas.
C&mbielas si es necesado.
4. Retoque todas 1as supedicies que esten
oxidadas o con la pintura picada; use una
lija antes de pintar.
MANGO
Puede doblar el mango de su segadora para el
almacenarblento.
1. Suelte las dos (2) manillas del mango en
cada lade del mango superior y permita
qua el mango se doble hacia detras.
2. Apdete los extremos inferiores del mango
inferior entre si hasta que el mango infedor
quede separado del puntal del mango,
luego mu_valo hacia adelante.
• Cuando prepare su mango a partir de la
posici6n de elmacenamiento, el mango
infedor nesecitara cerrado manuelmente
para la posicibn de sega.
IMPORTANTE: Cuando doble el mango para
el elmacenamiento o el transporte, asegL_rese
qua Io doble segOn se muestra o purde dahar
los cables de control.
Barrade contro4
que
ex_gela presenclade]
y/
Mangosupedo_
Mango inffo.do_
Poslcl6npara segar
'tnza del mango
J
Sopodede
aJuste
Mangode3
poslciones
MOTOR
SISTEMA DE COMBUSTIBLE
IMPORTANTE: ES importante evitar que se
formen depositos de coma en parles
fundament_les del sistema de combustible
tales como el carburador, eLfiltro del combustible, la manguera del combustible o en el
estanque durante el almacenamiento. La
exdedencia tambien indica qua los combustibles tambien indica que los combustibles
mezclados con alcohol (conocido como
gasoho] o que tienen etanol o metanol) puaden
atraer humedad, Io qua conduce a la
separacion y a la formacion de acidos durante
el almacenamiento. La gaselina acidica puede
danar el sistema de combustible de un motor
durante el pedodo de almacenamiento.
1. Drene el estanque de combustible.
2. Haga arrancar el motor y d6jelo fuacionar
basra que las lineas del combustible y el
carburador est6n vac[os.
• Nunca use los productos para limp_eza del
carburador o del motor en el estanque de
combustible puss se pueden producir
daSos permanentes.
• Use combustible nuevo la pr6xima
temporada.
AVISO: El estabiflzador de combustible es una
altemativa aceptable para reducir a un mlnimo
la formacibn de depdeitos de gorna en el
combustible durante el periodo de
almacenamiento. Agregua estabilizador a la
gasolina en el estanque de combustible o en el
envase para el almacena-mieoto. Siempre siga
la proporci6n de mazcla que se encuentra en
el envase del estabilizador. Haga luncionar el
motor por Io menos 10 minutos despuds de
agregar el estabilizador, para permitir qua este
Ilegue al carburador. No drene la gasolina del
estanque de gasolina y el carburador si se
estd usando estabilizador de combustible.
ACEITE DEL MOTOR
Drene el aceite (con el motor celiente) y
cdmbielo con aceite de motor limpio. (Vea
"MOTOR" en la seccide de MaotenimJento de
este manual.)
31
• Si es posible, guarde su unidad en un
recinto cerrado y cdbmla para pmtegeda
contra el poivo y la mugm.
• Cub_a su unidad con un torro protector
adecuado que no retenga la humedad. No
use pldstico. El pldstico no puede respirar, Io
que permile la formaci(_n de condensaci6n,
Io que producird la oxidacibn de su unidad.
IMPORTANTE: Nunca cubra la segadora
mientras el motor y las areas de escape to
davia estan calientes.
CILINDRO
1. Remueva la bujfa.
2. Vac[e 29 ml (una onza) de acelte a tmvds
del agujem de la bujla en el ci[indro.
3. Tire la manilla de arranque lentamente
unas cuantas veces para distribuir el
aceite.
4. Cambie por una bujia nueva.
OTROS
• No guarde la gasolina de una temporade a
la otra.
• Camb[e el envase de la gasolina si se
empieza a oxidar. La oxidaci6n y/o la mugre
en su gasotina p_oducirdn problemas.
DENTIFICACI_)N
PROBLEMA
No arranca
_PRECAUCI(_N:
Nunca aJrnacene la
segadom con gasolina en el estanque dentro
de un edificio en donde los gases pueden
alcanzar una llama expuesta o una chispa.
Permita que se enfde el motor antes de almacenade en algun recinto cermdo.
DE PROBLEMAS
CORRECCION
CAUSA
1. Filtro de aim sucio,
2. Sin combustible.
3. Combustible rancio.
4. Agua en el combustible.
5. Alambre de la bujla
desconectado.
5. Bujfa mala.
7. Cuchilla suelta o adeptador
de la cuchitla quebrado.
8. Barra de control en la
posici6n suelta.
9. Barra de control defectuos8.
Falta de fuerza
1. Cuchilla desgastade, dobtada
o sueHa.
2. Altura de las nJedas dispareja.
Mal corteo
dlsparejo
1. Limpie/cambie el filtro de aim.
2. Llene el estanque de combus
tible.
3. Drene el estanque y vuelva a
Ilenarlo con combustible timpio
y nuevo.
4. Drene el estanque de combus
tible y el carburador y vuelva a
Ilenar el estanque con gasolina
nueva.
5. Conecte el alambre a la bujla.
6. Cambie la bujla,
7. Apriete el pemo de la cuchilla
cambie el adeptador de la
cuchilla.
8. Presione la barra de control
hacia et mango.
9. Cambie la barra de control
1. Ajuste a la posicidn de "Corte
m_s alto".
2. Ajuste a la posici6n de "Cone
rnds afro".
3. Velocidad del motor lenta.
4. Acumulacibn de c_sped,
hojas o basura debajo
de la ssgadera.
5. Dernasiado aceite en
el motor.
6. Velocidad de recorddo
demasiado rz_pide.
3. Limpie/cambie el filtro de aire.
4. Lirnpie la parte inferior de la
caja de la segadora.
1. Cuchilla desgastade, doblada
o suelta.
2. Altura de las ruedas dispareja.
1. Cambie la cuchilla. Apdete el
pemo de la cuchilla.
2. Ajuste todes las ruedas a la
misma altura.
3. Limpie la pane infedor de la
caja de la segadom,
3. Acumulacibn de crisped,
hojas o basura debajo
de [a ssgadera.
32
5. Revise el nJveldel 8ceite.
5. Corte a ur_ velocidad de
recorrido m&s lenta.
IDENTIFICACI{_N DE PROBLEMAS
PROBLEMA
CAUSA
CORRECCION
Vlbracl6n
exceslva
1. Cuchilla desgastade, dobtada
o suelta.
2. Ciguefial del motor doblado.
1, Cambie ta cuchilla. Apriete el
pemo de la cuchilla.
2. Pbngase en contaoto con su
centro de servicio Sears o con
un otto centre de servicio
cualificado.
Cord6n
arrancador
d_il de Urar
1, El freno del volante del
motor est-_,aplicado
cuando se suelta la barta de
control.
2. CigueSal del motor doblado.
1. Presione la barra de control
hacia e_mango
superior antes de tirar el
cordbn arrancador.
2. P_gase en contaoto con su
centro de servicio Sears o con
un otro ceotro de servicio
cualiflcado.
3. Cambte el adeptador de la
cuchilla.
4, Mueva la segadora a un lugar
en donde el cdsped ha sido
cortado o a una superficie firrne
para hacer arrancar el motor.
3, Adaptador de la cuchilla
quebrado.
4. La cuchil]a se arrastra en
el c_sped.
Recogedor de
¢6sped no se
liana _lv_ne
Bqutpado)
D|f|cll de empuJar
1. Altura de corte demasiado
1. Eleve la altura de code.
baja.
2. Levantamieoto de la cuchilla
2. Cambie las cuchi]las.
desgastado,
3, Recogedor sin ventilacidn
de aire.
3. Limpie el recogedor de cesped.
1. El cdsped estd demasiado
alto o la altura de la rueda
demasiado baja.
2. Parte trasera de la
caja/cuchilla de la segadera
arrastrdndose en el cesped.
3, Recogedor de c_sped
demasiado Ileno.
4. PosiciSn de la altura del mango
no adecuada para usted.
33
1. Eleve la altura de corte.
2. Eleve la perle trasera de la caja
de la segadora (1) un lugar
m_s alto.
3. Vacfe el recogedor de cdsped
4. Ajuste la altura del mango de
modo que le acomode.
CRAFTSMAN
ROTARY
LAWN MOWER--
MODEL NU MBER 917.389690
49
14
34
33
68
47
67
7
2238
36
!
2O
4O
8
19
CRAFTSMAN ROTARY LAWN MOWER- - MODEL NUMBER 917.389690
KEY
NO.
1
2
3
4
5
6
7
8
11
12
13
14
15
17
18
19
20
21
22
23
24
25
26
27
29
30
33
34
35
36
37
38
39
4O
PART
NO.
131696
166860X479
161105X479
132001
636O1
131959
66426
7478_512
156577
750097
850733X004
136376
51793
165946X479
17600406
167132X004
167133X004
165858
168360X004
166875
751153
166236X479
166243x479
851856
160835X007
19112222
87877
167130X004
166785
16O828
151162
164362
83923
774OO
DESCRIPTION
ContmlBar
Upper Haedle
LowerHaedle
Rope Guide
Loaknut 1/4-20
Handle Bolt
Wire T_
Hex Bo_t5/16-18 x 3/4
Engine Zone Control Cable
Hex Washer Head Screw #10-24 x 1/2
Up-Stop Bracket
Haedle Knob
Hairpin Cotter
Support Bracket
Screw
Axle Arm Assembly - LF
Axle Arm Assembly - RF
Rear Skirt
Selector Spdng
Rear Door Assembly Kit (Incl. Springs)
Locknut 5/16-18
Handle Bracket Assembly (Left)
Handle Bracket Assembly (Right)
Screw 1/4-20 x 3/8
Wheet Adjusting Bracket - Front
Spacer
Selector Knob
Axle Arm Assembly - LR
Locknut 5/1 6-18
Shoulder Bolt 5/1 6-16
Wheel Assembly
Shoulder Bolt
Ranged Lccknut
Hubcap
KEY
NO.
PART
NO.
41
42
43
44
45
46
47
48
49
50
51
52
53
54
55
56
57
58
67
68
70
88652
165766
165767
165912
150406
85463
63124
167131X004
151161
57143
73990500
166872
851084
850263
851074
175064
851514
161551
166113
165755
- -
°.
161058
177419
DESCRIPTION
Hinge Screw
Spring(LH)
Spring(RH)
Door Bolt
Hex Head Tnread Rolling Screw 3/6-I 6 x 1
Danger Decal
Nut
Axle Arm Asaembly - RR
Wheel
WaveWasher
Nut
Houstng Assembly (Incl. Ref. #17, 18 & 46)
Hex Head Screw 3/6-24 x 1-3/8 Grd. 8
Helical Lock'washer
Hardened W&shet
21" 8lade
Blade Adapter
Adjustment Bolt
Grass Bag
Cat_her Frame
Engine - (See Breakdown)
Craftsman 143 016712
Warning Decal (Not Shown)
Owner's Manuol
Available accessories not included with lawn mower:
71 33623
Gas Can ( 2.5 Gallon)
7t 33500
Fuel Stabilizer
71 330_
SAE 30W Oil (20 oz.)
71 33085
Chute Deflector
NOTE: All component dimensionsgiven in U.S. inches.
1 inch= 25.4 mm
CRAFTSMAN 4-CYCLE ENGINE
MODEL NUMBER 143.016712
,390
110_
130
120
119
416
125
'"310
_307
36
CRAFTSMAN 4-CYCLE ENGINE
KEY PART
NO. NO,
1
2
6
7
12
12A
37465
26727
33734
36557
36775
36558
12S
14
15
16
17
18
19
20
30
40
41
36694
28277
30589
34839A
31335
651018
36281
32600
37464
40027
40042
42
43
40006
20381
45
46
48
50
36777
32610A
27241
37460
52
66
70
29914
07669
37608
72
73
75
80
81
82
37615
28833
27897
30574A
30590A
30591
83
86
89
90
92
93
100
161
103
30588A
650488
611004
611112
650815
650816
34443C
610118
651007
104
110
119
126
125
37480
37047
36787
36825
36780
125
37288
126
130
135
37289
6021A
37596
150
151
151A
31672
31673
40017
DESCRIPTION
Cylinder IncL. 2 & 20)
Dowe Pn
Breather Element
Breather Ass'y. (incL 6 & 12A)
Breather Tube
Breather Cover & Tube
(Includes Key Number 12B)
Breather Tube Elbow
W_,sher
Govemor Rod 0ncludes #14)
Governor Lever
Governor Lever Clamp
Screw, TorxT-15, 8-32x19/64
Extension Spring
Oil Seal
Crankshaft
Piston, Pin & Ring Set (Std.)
Piston & Pin Assembly(Std.)
(klcludes Key Number 43)
Ring Set (Standard)
Piston Pin Retaining Ring
Connestin
Rod Assembl
(Includes g
Key Number 46
Connecting Rod Bait
VaNe Litter
Camshaft Exhaust(MCR)(Inc.
ref 104)
Oil Pump Ass_.
Mounting Flange Gasket P
Mounting Flange (Incl. 72
thru 83)
Oil Drain Plug (IncL 73
Drain Plug Gasket
Oil Seal
Governor Shaft
Washer
Governor Gear Assembly
(Includes Key Number 61)
Governor Spool
Screw, 1/4-20 x 1-1/4"
Flywheel Key
Flywheel
BellevilJe Washer
Flywheel Nut
Solid State igrlnitinn
Spark Plug _.over
Screw, Torx, T-15,
#10-24 x 15/16"
Cam Bushing
Ground Wire
• Cylinder Head Gasket
Cylinder Head
Exhaust Valve (1/32" OS)
(Inbludes Key Number 151
Exhaust Valve (Standard
Includes Key Number 151)
Intake Valve (Std.) (IncL 151)
Screw, 5/16-18 x 1-1/2
Resistor Spark Plug
(RJ19LM4)
Valve Spring
Valve Spring Cap
Intake Valve Seal
MODEL NUMBER 143.016712
KEY
NO.
PART
NO.
169
172
174
178
182
184
185
186
189
191
195
207
216
223
224
238
239
241
245
256
266
261
262
263A
275
277
265
287
290
292
298
300
301
305
306
307
309
309A
310
311A
313
347
355
370A
3700
370R
380
390
400
36783
36784
30200
29752
6201
26756
37466
32653
650839
36559A
610973
34336
33086
650451
36786
650932
34338
36919
36906
37122
36980
30200
650831
37164
37462
650968
35000A
650926
29774
26460
28763
36916
36246
35647
37610
35499
650562
650783
35646
37611
34080
651038
590701
36261
37318
37317
640271
590739
36792B
416
36685
417
900
900
650760
-----
.....
DESCRIPTION
• VaNe Cover Gasket
Valve Cover
Screw, 10-24 x 9/16"
Nut & Lock Washer, 1/4-28
Screw, 1/4-28 x 7/6"
• Carb. TO Intake Pipe Gasket
Intake Pipe
Governor Link
Screw, 1/4-20 x 3/8"
S.E. Brake Bracket (Incl. 195)
Terminal
Throttle Link
R.RM. AdjustingLever
Screw, 1/4-20 x 1"
• Intake Pipe Gasket
Screw, 10-32 x 49/64"
• Air Cleaner Gasket
Air Cleaner Collar
Air Cleaner Filter
Air Cleaner Cover
Blower Housing
Screw, 10-24 x 9/16"
Screw, I/4-20 x 1/2"
Starter Grill
Muffler
Screw, 1/4-20 x 2-9/16"
Starter Cup
Screw, 8-32 x 21/64"
Fuel Une
Fuel Une Cb.mp
Screw, 10-32 x 35/64"
Fuel Tank Incl. 292 & 301)
Fuel Cap (_lack)
Oil Fill Tube
* "O"-Ring
"O"-Ring
Screw, 10-32 x 1/2"
Screw, 10-24 x 3/4"
Dipstick
Hold Down Bracket
Spacer
Screw, 10-32 x 51/64"
Starter Handle
Lubrication Decal
Pdmer Decal (0 X)
Warning Decal
Carburetor (Incl, 184)
Rewind Starter
Gasket Set
_neludes All Items Marked *)
park Arrestor Kit (llncludes
Key Number 417) (Optinnal)
Screw, 8-32 x 9/8" (Op6onal)
Replacement Engine NONE
Replacement S/B 750865
Order from 71 -999
RPM High 2900 to 3200
NOTE: This engine could have been built with
590702 starter)
NOTE: All component dimensionsgiven in U.S.
inches. 1 inch= 25.4 mm
37
MODEL NUMBER
CRAFTSMAN 4-CYCLE ENGINE
KEY PA_
NO. NO.
°_
1
2
4
5
6
7
16
17
18
20
20A
25
27
28
29
3O
31
35
36
36A
37
4O
44
47
48
6O
640271
31615
31767
631184
631183
640070
650506
631807
651025
630766
640027
640200
631867
631024
632019
631028
631021
631022
640259
640080
632766
632547
640030
27110A
630748
631027
632760B
DESCRIP_ON
*
*
*
*
*
*
"
°
*
*
Carburetor (Incl, 184 of Engine Parts Ust)
ThroNe Shaft & Lever Assembly
Throttle Return Spring
Dust Seal Washer
Dust Seal ('_rottle)
Throttle Shutter
Shutter Screw
Fuel Fitting
Throttle Crack Screw/Idle Speed Screw
Tension Spring
Idle Rs<s_ictor Screw
Idle Restdctor Scrwe Cap (Black)
Rcet Bowl
F_oat Shaft
Float
Float Bowl "O" Ring
Inlet Needle. Seat, & Clip (Incl. 31)
Spling C!ip
Pdmer Bulb/Retainer Ring
Main Nozzle Tube
Carburetor Tube
"O" Ring, Main Nozzle Tube
High Speed Bowl Nut
Bowl Nut Washer
Welch Plug, Idle Mixture Well
Welch Plug, Atmospheric Vent
Repair kit (Incl. Items Marked * in Notes)
38
143.016712
MODEL NUMBER 143.016712
CRAFTSMAN 4-CYCLE ENGINE
KEY PART
NO. NO.
-1
2
3
4
5
6
7
8
11
590702
590599A
590600
590696
590601
590697
590698
590699
590700
590703
12
590535
13
690701
DESCRIPTION
Recoil Starter
Spring Pin (Incl. 4)
Washer
Retainer
Washer
Brake Spring
Starter Dog
Dng Spdng
Pulley & Rewind Spring Ass'y
Starter Housing Assembly
_t0 degree grommet)
arter Rope
_8" long x 9/64" diameter)
arter Handle
_m5
q_----2
12
KEY pART
NO. NO.
590740
590616
590617
590618A
590638
590739
12
590535
13
14
590701
590760
--1
i"
6
7
8
11
_--_
_--=
39
DESCRIPTION
Rewind Starter
Retainer
Starter Dog
Dog Spdng
Pu;ley & Rewind Spdng Ass'y
Starter Housing Assembly
_40 degree grommet)
Starter Rope
_98" long x 9/64" diameter)
Starter Handle
Spring Clip
Forrepairof majorbrandappliances In your own home...
nomatterwho made it, no matterwho sold
1-800-4-MY-HOME @ ,_wjttne,
day_ ,tjht
(1_)
(U.S.A andCanada)
www.s_ll,S.com
"_ww.se_ls.ca
Forrepairof canyonproductslike vacuums,lawn equipment,and
electronics,callfor thenearest Sears Parts and Repair Center,
1-800-488-1222
An,/_ne,
dayornigh(U.S_.ody)
,#,_Nw.seats.colt'l
For _e reptacementparts,accessoriesand owners manuals
thatyou need to do-R-yourself,call Sears PadsDirect_'!
1-800-366-PART
(1-600-,366-7278)
6 a.m.- 11 p.m., 7 days aweek
(US.A.
vt_w.sea_corn,_a_sdlrect
To purchase or inquire abouta SearsServiceAgreement
or SearsMaintenanceAgreement:
1-800-827-6655 (u.s_)
7 a.m.- 5 p.m.,CST, Mort.- Sat.
1-800-361-6665 (Canada)
9 a.m. - 8 p.n_EST, M - F, 4 p.m.Sat.
® Registered Trademark / TM Trademark / su Service Mark of Sears, Roebuck and Co.
® Mama Reglatrada I "ruMama de Fdbdca / s_ Mama de Servtclo de Sears, Roebuck and Co.
MCMarque de commerce / vo Marque d6pos_e de Sears, Roebuck and Co.
177419 03.27.01 BY
Printed in U.S.A.