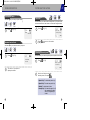
1
MCI-3300.(03 00.8.22 5:04 PM 페이지1
Dual Mode Digital CDMA Telephone
MCI-3300
Owner’
s Manual
555 Wireless Blvd., Hauppauge, NY 11788
631-233-3300 ● http://www.audiovox.com
REV.01
MCI3300-02/10 00.8.22 5:32 PM 페이지1
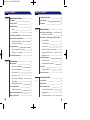
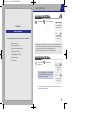
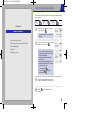
TABLE OF CONTENTS
Chapter
1
6
Adjusting Ringer Volume
24
Precautions
7
Auto Answering
25
Package Contents
8
Flip Answer
26
Handset Functions
9
Memory Functions
28
How to Store a Phone Number
29
Before Using Your Phone
•Handset
•Function Buttons
Battery Insertion and Detachment
12
Chapter
3
•Entering Letters and Numbers
How to Make a Call Using a Stored Phone Number
30
31
•Battery Insertion Method
12
•One-touch Dialing
•Battery Detachment Method
12
•Two-touch Dialing
31
13
•List of Last Calls
32
14
•Recalling by Memory Location Number
33
34
31
14
•Recalling by Phone Number
Tips on Efficient Battery Use
15
•Recalling by Name
35
Schedule Management
36
Basic Operation
16
Basic Operation
17
•Battery Life ( for new Battery )
•How to Turn the Handset On
17
•How to Turn the Handset Off
17
36
•Checking and Deleting Schedule
37
Alarm Call
•Editing the Alarm Call
38
38
39
Convenient Functions
40
Using the Menu
41
20
Menu Structure
42
21
How to Adjust the Screen
44
18
•How to Answer a Call
19
•Recalling Last Number Dialed
20
•Signal Strength
20
•Remaining Battery Indicator
•Setting the Schedule
Electronic Calculator
•How to Make a Call
How to Adjust Volume
Chapter
4
21
•Current Date and Time Display
44
Ringer/Vibration/Light Selection
22
•Backlight Function
45
Ringer Type Selection
23
•LCD Contrast Adjustment
46
•Using the Volume Button
2
10
11
•Time to Complete Battery Charging
2
9
Screen Display and Functions
Charging the Battery
Chapter
TABLE OF CONTENTS
3
MCI3300-02/10 00.8.22 5:32 PM 페이지3
TABLE OF CONTENTS
•LED Use Selection
47
•Microphone Muting Feature
63
48
•Ear Volume
63
•Verification of All Calls
48
•Voice Privacy
63
•Verification of the Last Call
Verifying Call Time
48
•Link Dialing
64
•Verification of Roaming Calls
48
•Inserting a Hyphen
65
•Verification of Recent Calls
48
Phone Information
66
Alert Function
49
•Self Number Check
66
•Time Alert
49
•Handset Version Check
66
•Area Alert
50
Security Information
System Selection Feature
67
51
•Force Call
67
•Selecting Preferred System
67
Supplementary Functions
68
Short Message Service(SMS)
69
•Automatic Lock
51
•Lock Code Change
52
•Greeting Change
53
Chapter
54
5
•Call Restriction
55
•Message Reception
69
Blocking Outgoing Calls
55
•Checking Received Messages
70
Blocking Stored Phone Numbers
56
•Checking Missed Messages
71
Blocking Incoming Calls
•Clearing Memory
57
Biorhythm Checking
72
Clearing Stored Numbers
57
Stopwatch
74
Clearing Last Calls
58
World Time Display
75
Clearing Recent Calls
58
Etiquette Feature
76
Clearing Roam Time
59
Optional Devices
79
•Reset Phone
60
•Voice Privacy Mode Selection
61
•Hands-Free Kit for Vehicles
79
62
•Others
79
Features Used While Call is Connected
4
TABLE OF CONTENTS
•Caller Number Sending
62
•Self Number Check
62
•Silent Pad Phone Number Storage Function
63
Appendix
Summary Table of Functions
80
5
MCI3300-02/10 00.8.22 5:32 PM 페이지5
1
PRECAUTIONS
Chapter 1
Fully charge battery
before use.
Before Using Your Phone
Do not use in high-temperature or
high-humidity environments. Do
not expose the handset to rain or
spilled beverages.
Please read this chapter before using this product.
Precautions
Package Contents
Handset Functions
Screen Display and Functions
Do not modify
or take apart
the handset
Battery Insertion and Detachment
Charging the Battery
Tips on Efficient Battery Use
Do not touch the
antenna during a
call.
Do not clean your
handset with
chemical solutions
such as solvent or
thinner.
Keep the handset in a safe
place when not in use.
Avoid striking, shaking, or
shocking.
Do not use your
handset near
explosives or
flammable liquids.
7
MCI3300-02/10 00.8.22 5:32 PM 페이지7
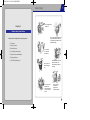
PACKAGE CONTENTS
1
HANDSET FUNCTIONS
Thank you for your purchasing Audiovox CDMA cellular phone. Please
check the product contents by comparing them with the following pictures.
Handset
● Folder Cover
● Ear-microphone Jack
Key lock is enabled
when the folder cover
is closed (however,
key lock is disabled
when receiving a call).
● Volume Button
Used to adjust
earpiece volume,
key tone volume
and handsfree
volume.
◀ Handset
● Earpiece
◀ Desktop Charger
● LCD Display
● Antenna
◀ User’s Manual
◀ Belt Clip
▲ Portable Loop
● END/
● Feature
Buttons
◀ Standard battery
Used to power on/off.
End Calls.
◀ Ear-microphone
(Option)
● Mute
Used to silence Audible
Tones In Standby And
Mute Conversation.
Check with your local distributor which battery type is supplied as standard. If there
are any product defects, please report them to the place of purchase immediately.
8
● Microphone
9
MCI3300-02/10 00.8.22 5:32 PM 페이지9
HANDSET FUNCTIONS
1
SCREEN DISPLAY AND FUNCTIONS
Function Buttons
This button is used to access the menu.
This button is used to make or receive a call
Press this button to terminate a call or exit the
current menu. Press and hold to turn the phone on
or off.
This button is used to clear digits and /or texts from
the display or exit the current menu.
Signal Strength
The strength of the current signal is displayed by the
number of bars (0-5).
Roaming
This icon indicates the user is outside the normal service
area.
Service / No Service
When within service area,
If not,
is displayed.
(In Busy)
This button is used to access a sub menu or store
set parameter; store names and numbers; view
stored or just called numbers; and the Scheduler and
Calculator.
These scroll buttons are used to select screen
contents.
This button is used to access text and voice
messages.
Used to silence Audible Tones In Standby And
Mute Conversation.
10
is displayed.
Appears when the line is busy
Short Message Service
Blinks when text or voice messages have been received
and stored.
Digital Mode
Displayed when the phone is in digital mode.
Balance of Battery Power
The balance of battery power available is displayed by the
number of bars (0-4).
Mute
Used to silence Audible Tones In Standby And Mute
Conversation.
11
MCI3300-02/10 00.8.22 5:32 PM 페이지11
1
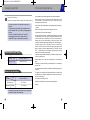
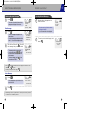
BATTERY INSERTION AND DETACHMENT
CHARGING THE BATTERY
Battery Insertion Method
•The battery is not charged when you purchase the product. Use the battery
only after it is fully charged.
•Charge your battery when the battery low-voltage alarm sounds.
1
As shown in picture ①, insert the battery to fit into the
groove at the bottom of the handset.
Then press in the direction of ② until it snaps.
②
1
Power Connection
Connect the charger to a standard
120V AC outlet.
LED’
s will blink orange when the
power is connected.
2
Charging the Battery Only
To charge the battery only, insert
the battery pack into the charger.
LED will indicate charging status.
①
•The battery must be correctly placed in the battery compartment. If the battery is
incorrectly inserted, the handset will not turn on or the battery may slip out.
•Red indicates charging.
•Green indicates charging is complete.
Battery Detachment Method
2
•Battery is not charged when you purchase the product.
•Fully charge the battery before use.
Push the handset separation tab ① with one hand and
pull in the direction of ② to separate.
②
①
3
Charging the Battery with the
Handset
To charge the battery with the
handset, insert the handset into the
charger.
•Charging the battery with the handset on is less efficient than charging it with the
handset off.
12
13
MCI3300-02/10 00.8.22 5:32 PM 페이지13
CHARGING THE BATTERY
4
TIPS ON EFFECTIVE BATTERY USE
Charging Completion
Charging is completed when the green-colored light stays on.
•The handset may remain in the charger after the green light is
turned on.
•Charge the battery when the battery low-voltage alarm sounds
from the handset and the“Very Low Battery!”message appears on
the screen.
•When the“Low Battery Warning! Phone is Turning OFF!”
message appears on the screen the handset will turn off
automatically. Change or charge the battery immediately.
1
Use only batteries and chargers approved by the phone manufacturer.
When a charger is not in use, disconnect it from the power source. Do not
leave the battery connected to a charger for longer than a week;
overcharging may shorten its life.
If left unused, a fully charged battery may completely drain (discharge) in 1
- 4 weeks.
Never use any charger or battery that is damaged or worn out.
Use the battery only for its intended purpose.
Do not short circuit the battery. Accidental short circuiting can occur when
a metallic object (e.g. coin, clip or pen) causes direct connection of the two
terminals of the battery (metal strips on the back of the battery), for
example, when you carry a spare battery in your pocket or purse. Short
circuiting the terminals may damage the battery or the connecting object.
Leaving the battery in hot or cold places, such as in a closed car in
summer or winter conditions, reduces the capacity and lifetime of the
battery. Always try to keep the battery between 41ºF and 95ºF (5ºC and
35ºC). A phone with a hot or cold battery may temporarily not work (or
charge) even if the battery is fully charged.
Time to Complete Battery Charging
Temperature extremes affect the ability of your battery to charge; allow it to
cool down or warm up first.
Battery Type
Standard Battery
Charging Time
About 200 mins.
When the battery is not in use, store it uncharged in a cool, dark and dry
place.
The battery is a sealed unit with no serviceable parts. Do not attempt to
open the case.
It is recommended that you allow your battery to fully discharge before you
recharge it.
Battery Life (for New Battery)
Status
Type
Continuous Call
The battery can be charged and discharged hundreds of times but will
eventually wear out. When the operating time is shorter than normal, it is
time to buy a new battery.
Standard Battery
120-150min.
Do not dispose of a battery in a fire!
Dispose of used batteries in accordance with local regulations.
Recycle!
Continuous
Standby
30-60 hours
•The operating times are approximate values and may vary depending
on network configuration and handset usage.
14
15
MCI3300-02/10 00.8.22 5:32 PM 페이지15
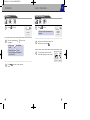
2
BASIC OPERATION
How to Turn the Handset On
1
Hold down
until for 2 seconds.
MCI WORLDCOM
XXX-XXX-XXXX
Chapter 2
Basic Operation
MCI WORLDCOM
Jan 20, Wed
4:03pm
This chapter describes the basic operation of the handset.
Basic Operation
How to Adjust Volume
Ringer/Vibration/Light selection
Ringer Type Selection
•If the phone is in Auto Lock mode the“Lockcode?”message will appear on the screen.
You must enter the 4-digit lock code to use the phone. You can make emergency calls
in Auto Lock mode. Initial lock code will be
“0000”
(refer to p.51).
•If an error message appears on the screen, contact your local dealer.
Adjusting Ringer Volume
Auto Answering
How to Turn the Handset Off
Flip Answer
1
Hold down
powers off.
until the phone
MCI WORLDCOM
Jan 20, Wed
4:03pm
Use only the [
] button to turn off the phone.
Turning off the phone by removing the battery
could result in memory damage.
============
Power Off
•If the phone does not power on or acts abnormally, remove
and reinstall the battery.
17
MCI3300-02/10 00.8.22 5:32 PM 페이지17
BASIC OPERATION
How to Make a Call
1
Area
Code
Press
How to Answer a Call
1
213555-5262
Start the conversation after the call
is connected.
Phone rings and the green and red
LED on the folder cover flash.
Incoming
Call
•To change receiver type
(Ringer/Vibration/Ringer + Vibration/Lamp),
please refer to p 22. Initial setting is
“Ringer”
.
.
•If the line is busy, terminate the call, wait
for a moment, then try again.
•The“Call Failed”
message will appear on
the screen if the call cannot be connected.
3
Phone
Number
Enter the phone number.
To delete a wrong number, press [CLR] to
back up. To delete all entered digits, press
[END] or hold down [CLR].
2
2
BASIC OPERATION
2
Calling...
213-555-5262
00:00:01
213555-5262
3
Open the folder or if the folder is
already open, press any key. except
[
]key. If you are using earmicrophone, press the ear-microphone
button for more than 2 seconds.
If you press button once in short, the
bell sound will stop, twice in short, the
function will be some on End
00:00:01
Start the conversation.
•Closing the folder while using the ear-microphone
does NOT end the call.
4
To end the call, close the phone or
press
. If you are using the
ear-microphone, press the earmicrophone button shortly.
4
MCI WORLDCOM
Jan 20, Wed
4:03pm
•To dial the number you have just called, press [
].
If you are using the ear-microphone, press the ear-microphone button for more than
2 second.
•If
is displayed, you are in an out-of-service area and cannot make a call.
18
To end the call, close the folder or
press
.
•If Auto Answering Feature is enabled, the call will be answered after the preset number
of rings. (refer to p 25)
19
MCI3300-02/10 00.8.22 5:32 PM 페이지19
BASIC OPERATION
HOW TO ADJUST VOLUME
Recalling Last Number Dialed
Using the Volume Button
This feature is used to dial the number just called.
1
2
Press
and the phone number
you just dialed or the number most
recently saved will dial automatically.
If you are using ear-microphone,
press the ear-microphone button for
more than 2 second.
1
213-555-5262
2
00:00:01
213-555-5262
3
•Conversation : Adjusts ear-piece volume
•Standby : Adjusts key-tone volume
•Conversation while using hands-free :
Adjusts hands-free volume
Calling...
Start the conversation after the call
is connected.
Press
or close the folder to
end the call. If you are using earmicrophone, press the ear-microphone
button once again shortly.
Press the volume buttons to adjust
the volume.
2
Ear Volume
[
]
[END]
After adjusting the volume, press
to save settings.
Beep Volume
•The volume setting is automatically saved
in 2 seconds after the volume is adjusted.
[
]
[END]
Handfree Volume
[
]
[END]
•Closing the folder while using the ear -
microphone does NOT end the call.
Signal Strength
1
The strength of the signal is
displayed by the number of bars (0~5).
Remaining Battery Indicator
1
20
The bars inside the battery icon indicate
the remaining power in the battery. Fully
charged batteries are displayed with four
bars. If the battery power expires and needs
to be charged, no bars are displayed and an
alert beep sounds with a“Very Low Battery!”
message.
21
MCI3300-02/10 00.8.22 5:32 PM 페이지21
RINGER /VIBRATION/LIGHT SELECTION
This feature is used to select ringer, vibration or Lamp.
1
Press
②
This feature is used to select ringer type.
①.
Receive Type
Ringer
[
2
3
22
]
1
Press
②
②.
Ringer Select
Bell 1
[
[END]
Use the scroll buttons to select the
receiver type you want.
2
Use the scroll buttons to select
ringer type.
Correct order in phone
•Ringer
•Vibration
•Lamp
•Vib + Ringer : Vibrates for 18 seconds
then the bell sounds
3
Press
Press
2
RINGER TYPE SELECTION
]
[END]
.
.
23
MCI3300-02/10 00.8.22 5:33 PM 페이지23
ADJUSTING RINGER VOLUME
2
AUTO ANSWERING
The call is connected automatically after ringing a set number of times.
This Feature is Used to Adjust Ringer Volume
or
1
Press
②
③.
Ringer Volume
To move between the menu items, use the
scroll buttons [
/
] or the volume
buttons.
2
Adjust the volume by pressing the
volume buttons or the scroll buttons,
then press
to store the setting.
[
]
1
Press
②
④.
Auto Answer
Off
[
[END]
2
]
[END]
Use the scroll button to select the
setting you want.
•1/2/4/6 Rings : The number of rings before
the call is connected automatically.
•Off : Auto answering feature is disabled.
3
Press
.
•If the receiver type is not set for“Ringer”the auto answering feature is disabled.
•In hands-free mode, this feature works regardless of the receiver type and whether
or not the folder is closed.
24
25
MCI3300-02/10 00.8.22 5:33 PM 페이지25
FLIP ANSWER
MEMO
2
This feature allows you to choose whether you want to receive a call by opening
the folder. This is particularly useful if you want to see the Caller ID before
answering calls.
1
Press
②
⑤.
Flip Answer?
Yes
[
2
]
[END]
Use the scroll button to select the
desired setting.
•Yes : Allows you to receive calls by
opening the folder.
•No : Does not allow you to receive calls by
opening the folder. To receive a call when
the folder is closed, open the folder then
press any key. except [
]key.
3
26
Press
.
27
MCI3300-02/10 00.8.22 5:33 PM 페이지27
3
HOW TO STORE A PHONE NUMBER
Up to 100 phone numbers can be stored in the memory and retrieved by using
a variety of ways.
Location
Number
(2-digit)
Phone
Number
Chapter 3
1
Memory Functions
or
Location
Name
Enter the phone number you wish to
store and press
.
•The first available location is automatically
displayed.
How to Store a Phone Number
How to Make a Call Using a Stored Phone Number
2
To store the number in the first available
location displayed, press
.
Schedule Management
Alarm Call
•To store a number at a different location,
use the numeric keypad to enter the 2-digit
location number desired.
•Locations 90 to 99 are stored with the
hidden feature.
•If the desired location already has a phone
number stored, the
“Overwrite?“ message
will appear on the screen.
- To overwrite, press [
].
- To store the number at a different
location, press [
].
Electronic Calculator
3
Use the numeric keypad to enter the
name for that location. (refer to p30)
4
Press
letters.
Default :
XX
213-555-5262
[
]
[END]
Overwrite?
Yes
[
]
Location :
Name?
[
]
[END]
XX
[END]
after entering all the
29
MCI3300-02/10 00.8.22 5:33 PM 페이지29
HOW TO STORE A PHONE NUMBER
Entering Letters and Numbers
One-Touch Dialing
This feature allows you to make a call with phone numbers stored in the
memory location 0 to 9 without having to press the [SEND] key.
Press the numeric keypad to select the letter.
Keypad
Once
Twice
3 times
4 times
5 times
1
1
1
2 ABC
A
B
C
2
3 DEF
D
E
F
3
4 GHI
G
H
I
4
5 JKL
J
K
L
5
6 MNO
M
N
O
6
7 PQRS
P
Q
R
S
8 TUV
T
U
V
8
9 WXYZ
W
X
Y
Z
•To enter the number“0”
, press [ ].
•To enter special characters, keep pressing [ ].
( ! . ? , - ( )‘“ * # = $ _
+
To enter the next letter, press
EUGENE
213-555-5262
7
Calling...
9
213-555-5262
Two-Touch Dialing
[
] & @ )
.
].
Hold down the location number for
more than 1 second.
Dialing to
memory X
•The cursor will automatically move left in 2 seconds after a letter
has been entered.
•The maximum number of letters is 16.
To edit entered letters.
•To delete a letter : Press [
].
•To delete all letters : Hold down [
3
HOW TO MAKE A CALL USING A STORED PHONE NUMBER
This feature allows you to make a call with phone numbers stored in the
memory location 10 to 99 without having to press the [SEND] key.
1
Press the first digit, then hold down
the second digit for the location.
•If the location is empty, the
“Empty
Location”message appears on the screen.
•If the phone number was stored with the
hidden feature, the number is not
displayed on the screen while calling.
Dialing to
memory XX
EUGENE
213-555-5262
Calling...
213-555-5262
30
31
MCI3300-02/10 00.8.22 5:33 PM 페이지31
HOW TO MAKE A CALL USING A STORED PHONE NUMBER
HOW TO MAKE A CALL USING A STORED PHONE NUMBER
List of Last Calls
Recalling by Memory Location Number
3
Memory
Location
1
Press
①
①.
•Ten last calls can be seen.
1) Call To : Displays date and time of the
outgoing calls.
2) Called By : Displays date and time of
received calls.
3) Missed : Displays date and time of
missed calls.
※ The number displayed at the bottom is
the caller ID in 2) and 3).
1
2
3
4
:
:
:
:
Last Call
Location
Number
Name
Jan 20
4:26pm
[01] Call To
1
2
[
3
•
“Erase Memory?”message appears on the
screen. Use the scroll keys to select
between“Yes/No”
, then press [
].
4
To call the number displayed, press
Recall
Location?
--
Use the scroll buttons to select the
phone number you want.
[
Erase Memory?
YES
[
.
]
] goes to the next number and,
] goes to the previous number.
To delete the stored number, hold
down the CLR button for 1 second.
•
“Erase Memory?”message appears on the
screen. Use the scroll keys to select
between“Yes/No”
, then press [
].
[END]
5
[END]
Recall
Location?
01
•[
4
]
Enter the two-digit memory location.
[
] goes to the next number and,
] goes to the previous number.
To delete the stored number, hold
down the CLR button for 1 second.
②.
213-555-5262
Use the scroll buttons to select the
phone number you want.
•[
①
[
3
2
Press
To call the number displayed, press
]
EUGENE
Location :
[END]
[01]
213-555-5262
Erase Memory?
YES
[
]
[END]
.
• If the phone number stored with the hidden feature was found, only the name
of the location is displayed on the screen and the
“Lockcode?”message
appears on the screen.
• To view the phone number, enter the 4-digit lock code.
32
33
MCI3300-02/10 00.8.22 5:33 PM 페이지33
HOW TO MAKE A CALL USING A STORED PHONE NUMBER
HOW TO MAKE A CALL USING A STORED PHONE NUMBER
Recalling by Phone Number
Recalling by Name
Phone
Number
1
Press
①
Name
③.
3
Enter the phone number (or part of
the number) you wish to find.
Press
.
Use the scroll buttons to find the
phone number you desire.
•[
] goes to the next number and,
[
] goes to the previous number.
•The first available location containing the
entered numbers is displayed.
4
5
34
1
Recall
Number?
[
2
To delete the stored number, hold
down the CLR button for 1 second.
3
]
Erase Memory?
YES
To call the number displayed, press
.
]
Enter the name (or initial part of the
name) you wish to find.
Press
.
Use the scroll buttons to find the
phone number you desire.
•[
] goes to the next number and,
[
] goes to the previous number.
•The first available location containing the
entered letters is displayed.
[01]
4
[
Recall
Name?
-
[END]
213-555-5262
•
“Erase Memory?”message appears on the
screen. Use the scroll keys to select
between“Yes / No”
, then press [
].
④.
[
3
EUGENE
Location :
①
[END]
2
Recall
Number?
5262[
]
Press
[END]
5
To delete the stored number, hold
down the CLR button for 1 second.
]
Recall
Name?
EUG[
]
EUGENE
Location :
[END]
[END]
[01]
213-555-5262
Erase Memory?
YES
•
“Erase Memory?”message appears on the
screen. Use the scroll keys to select
between“Yes / No”
, then press [
].
[
To call the number displayed, press
.
]
[END]
35
MCI3300-02/10 00.8.22 5:33 PM 페이지35
SCHEDULE MANAGEMENT
Setting the Schedule
1
Press
②
Up to 10 schedules can be set.
Checking and Deleting Schedule
②.
1999.6
Su Mo tu We Th Fr
1 2 3 4 5
6 7 8 9 10 1 11 2
13 14 15 16 17 18 19
20 21 22 23 24 25 26
27 28 29 30
•The calendar is displayed. Move to the date
you desire then, press [
].
•The date selected is displayed inverted .
- Moving the cursor
- Up/Down : [
]/[
]
- Left/Right : [
] /[
]
- Volume buttons : moves between the months
•The calendar can be seen from 1997 to 2010.
1
Use the scroll buttons to select the
location, then press
or enter
the 2-digit location number.
[
Use the scroll button to select the
desired setting, then press
.
Enter the desired time, then press
Once
[
]
] goes to the next number and,
] goes to the previous number.
LUNCHEON
XX/XX
XX:XX
Alarm Msg
XX
[END]
3
[END]
To delete a schedule, move to the
location that you wish to delete, then
hold down the CLR button for 1 second
•
“Erase Alarm?”message appears on the
Erase Alarm?
YES
[
]
[END]
.
Daily
•Enter the desired date in the
order, hr:min.
36
①.
screen. Use the scroll keys to select
between“Yes / No”
, then press [
].
- Set Time 11/01/1999
00:00
5
]
Alarm Set
Off
•Off : Disables alarm alert.
•Once : The melody plays for one minute,
then the alert feature is disabled.
•Daily : The melody plays for one minute
every day at the time set.
•If Etiquette feature is enabled, unit will
vibrate.
4
②
Use the scroll buttons to check the
schedules.
•[
[
Alarm Msg : XX
•The first available empty location is displayed.
3
Press
•The first available location with a schedule
is displayed on the screen.
2
2
3
SCHEDULE MANAGEMENT
Enter the desired message, then
press
.
- Set Time 00:00
•Enter the desired time in
the order hr:min.
Alarm Msg : XX
Message?
--[
]
[END]
37
MCI3300-02/10 00.8.22 5:33 PM 페이지37
ALARM CALL
ELECTRONIC CALCULATOR
Editing the Alarm Call
Calculator
1
Press
③.
Alarm Call Set
Off
[
2
]
Use the scroll buttons to select the
desired setting, then press
.
Enter the desired time, then press
Once
Daily
•Enter the desired date and time
in the order, mm/dd/year and
hr:min.
4
- Set Time 00:00
•Enter the desired time in the
order, hr:min.
-CALCULATOR-
Using the calculator.
•Definitions
+:[
], — : [
], X : [
],
/:[
], = : [
], . : [
],
•Up to 7 integer digits and up to 2 decimals
can be displayed. If the calculated result has
more than 7 digits, the result is displayed in
7 digit logarithm.
•There is no (-) sign. To express a negative
number, use‘0-value’
.
•To see the help screen, press the volume
key, even if you are in the middle of a
calculation.
•Example
To calculate 128 X 32 =
2. Press [
Enter Number
]
3. Enter 32
4. Press [
38
Equal to:[ ]
Dot:[SEND]
+:[ ]
:[ ]
- :[MENU]/ :[#]
1. Enter 128
Enter the phone number, then press
.
•To call the number displayed on alarm alert, press [
④.
0.
2
.
- Set Time 11/01/1999
00:00
Press
[END]
•Off : Disables the Alarm Call
•Once, Daily : The melody plays for one
minute. The phone number and “-Alarm Call-”
message are displayed, then the Alarm Call is
disabled.
•If the Etiquette feature is enabled, unit will
vibrate
3
1
3
]
].
39
MCI3300-02/10 00.8.22 5:33 PM 페이지39
USING THE MENU
1
Press
and use the numeric
keypad to choose the desired menu
item.
•Use the scroll buttons [
/ ] or the
volume buttons to move between the menu
items.
Chapter 4
Convenient Functions
2
Using the Menu
4
To go back to the previous menu,
press
.
.
Menu Structure
How to Adjust the Screen
Verifying Call Time
Alert Function
Security Information
Features Used While Call is Connected
•If there are sub menu items,
The sub menu is displayed on the screen.
•If there are no sub menu items,
Use the scroll buttons to select the menu
item, then press [
] to store the value.
To cancel, press [
].
Phone Information
System Selection Feature
41
MCI3300-02/10 00.8.22 5:33 PM 페이지41
MENU STRUCTURE
1st Step
1. Display
2nd Step
3rd Step
1: Time Show
Yes/ No
2: Back Light
Off
4th Step
6: Phone Info
1: Phone Number
2: Phone Version
7: System
1: Force Call
2: Prefer System
1/2/4/6/8/10
4: LED Use
Yes/No
Ringer / Vib+Ringer
Ring
Home Sys only
■■■□□□□
1: Receive Type
0: Security
/Vibration / Lamp
2: Select Ring
Melody 1 / 2 / 3 / 4 / 5 / 6 / 7
3. Timer
1: Auto Lock
2: Set Lock No.
3: Greeting
Yes/No
Greeting ?
4: Restrict
Yes/ No
1: Incoming
2: Outgoing
3: Use Memory
5: Memory Erase
1: Clr Memory
2: Clr Dialed
3: Clr Recent
4: Clr Roam Tm
Yes/No
Bell 1 / 2 / 3 / 4 / 5 / 6
3: Ringer Volume
1 - 5 Step(s)
4: Auto Answer
Off
5: Flip Answer
Standard
System B only
Off in Day
2. Receive
Temp Analog
System A only
Second (s)
3: Contrast
4
MENU STRUCTURE
1 / 2 / 4 / 6 Ring(s)
6: Reset Phone
Yes / No
Yes/No
7:Voice Privacy
Standard
Enhanced
1: All Calls
2: Last Call
3: Roaming Calls
<MEM KEY>
4: Recent Calls
4. Alert
1: Time Alert
(
Yes/No
1: Directory
Key )
2: Area Alert
5. Special
1: Biorhythm
1: Today
1:Last Call
[01] 02-131
2:Location
Location?
3:Number
Number?
4:Name
Name?
2: Scheduler
1:View
OFF / Once / Daily
2:Edit
2: Other Day
Set Date
3: Alarm Call
3: Birthday
Set Date
4:Calculator
- Set Time-
2: Stopwatch
3: World Time
42
Athens /.. / Wellington
43
MCI3300-02/10 00.8.22 5:33 PM 페이지43
HOW TO ADJUST THE SCREEN
4
HOW TO ADJUST THE SCREEN
Current Date and Time Display
Backlight Function
This feature allows you to adjust the time the backlight stays on, enabling easy
access to the handset in a dark place.
1
Press
①
①.
Show time?
Yes
[
2
Use the scroll buttons to select the
desired value.
•Yes : Displays the current time.
•No : Does not display the current time.
]
1
Press
①
②.
Back Light
10 Seconds
[END]
[
MCI WORLDCOM
Jan 20, Wed
4:03pm
2
]
[END]
Use the scroll buttons to select the
desired setting.
•1,2,4,6,8,10 Seconds : The time the
backlight stays on after a button has been
pressed.
•Off : Always off.
•Off in Day :The backlight is off in daytime
( 9 a.m ~ 5 p.m. )
3
44
Press
.
45
MCI3300-02/10 00.8.22 5:34 PM 페이지45
HOW TO ADJUST THE SCREEN
HOW TO ADJUST THE SCREEN
LCD Contrast Adjustment
LED Use Selection
1
Press
①
③.
LED Contrast
1
Press
①
④.
LED Use?
Yes
■■■□□□□
[
2
Use the scroll buttons to select the
desired level.
]
[
[END]
2
Press
.
3
46
]
[END]
Use the scroll buttons to select the
desired value.
•Yes : LED on the folder cover blinks RED
if the phone is in a NO SVC area, blinks
GREEN if the phone is in standby and
blinks between RED and GREEN while a
call is in progress.
•No : LED on the folder cover blinks RED
when the phone is powered on or when
the user ends a call and blinks RED and
GREEN only when there is an incoming
call or if you are trying to make a call.
•There are 7 levels of brightness.
3
4
Press
.
47
MCI3300-02/10 00.8.22 5:34 PM 페이지47
VERIFYING CALL TIMERS
Verification of All Calls
1
Press
③
Time Alert
An alert beeps every minute letting the user know how much time has elapsed
during a call.
①.
•Lists all outgoing calls.
•Can not be reset or clear at Memory Erase
4
ALERT FUNCTION
XXX
XXX
XX
XX
Calls
Hours
Minutes
Seconds
1
Press
④
①.
Time Alert?
No
[
Verification of the Last Call
1
Press
③
2
②.
•Displays the duration of the most recent call.
XX
XX
XX
]
[END]
Use the scroll buttons to select the
desired value.
•Yes : Enables the feature.
•No : Disables the feature.
Hours
Minutes
Seconds
3
Press
.
Verification of Roaming Calls
1
Press
③
③.
•Displays the total call time during roaming.
XXX
XXX
XX
XX
Calls
Hours
Minutes
Seconds
XXX
XXX
XX
XX
Calls
Hours
Minutes
Seconds
Verification of Recent Calls
1
Press
③
④.
•Displays the most recent calls.
48
49
MCI3300-02/10 00.8.22 5:34 PM 페이지49
ALERT FUNCTION
4
SECURITY INFORMATION
Area Alert
Automatic Lock
An alert beeps and a message is displayed when the phone goes into a new
service area, goes into a service area provided by an another system provider
or goes out of a service area.
This feature is used to protect the phone from unauthorized users. However,
calls can be received and emergency calls can be made.
Lock
Code
1
Press
④
1
②.
]
Lockcode?
---[END]
2
3
There are three kind of messages.
Changing Svc Area.
The phone is going into a service area
provided by other system provider.
Leaving Svc Area.
The phone is going out of a service area.
Entering Svc Area.
The phone is going into a new service area.
Press
.
Enter the 4-digit lock code.
•The initial lock code at the time of
purchase is“0000”
.
Use the scroll buttons to select the
desired value.
•Yes : Enables the feature.
•No : Disables the feature.
3
.
Area Alert?
No
[
2
Press
1:
2:
3:
4:
Auto Lock
Set Lock No.
Greeting
Restrict
Press ① for“Auto Lock”
.
Auto Lock?
No
[
4
]
[END]
Use the scroll buttons to select the
desired value.
•Yes : Enables auto lock.
•No : Disables auto lock.
5
Press
.
The phone remains in locked state after power on if Auto Lock is set.
50
51
MCI3300-02/10 00.8.22 5:34 PM 페이지51
SECURITY INFORMATION
Lock Code Change
Greeting Change
This feature allows you to change the 4-digit lock code to unlock the phone.
Lock
Code
1
Press
4
SECURITY INFORMATION
This feature allows you to change the greeting message displayed on the
screen. Up to 16 characters can be entered.
Lock
Code
New
Lock Code
1
.
Press
.
Lockcode?
Lockcode?
----
2
Enter the 4-digit lock code.
•The initial lock code at the time of
purchase is“0000”
.
3
1:
2:
3:
4:
----
2
Enter the 4-digit lock code.
3
Press ③ for“Greeting”
.
1:
2:
3:
4:
Auto Lock
Set Lock No.
Greeting
Restrick
Press ② for“Set Lock No.”
.
Auto Lock
Set Lock No.
Greeting
Restrict
Greeting?
Lockcode?
The present lock code
4
Enter the new 4-digit lock code.
[
0000
4
]
[END]
Use the numeric keypad to enter the
new greetings.
•refer to p30 for text editing.
5
52
Press
.
5
Press
.
53
MCI3300-02/10 00.8.22 5:34 PM 페이지53
SECURITY INFORMATION
Call Restriction
Call Restriction
This feature restricts the use of the handset in three ways.
Restricting incoming calls
Lock
Code
1
Press
This feature restricts incoming calls.
1
.
Press ① for“Incoming”
.
Incoming?
Allow
Lockcode?
[
----
2
2
Enter the 4-digit lock code.
•The initial lock code at the time of purchase
i“0
s 000”
.
1:
2:
3:
4:
Auto Lock
Set Lock No.
Greeting
Restrict
]
[END]
Use the scroll buttons to select the
desired setting.
•Restrict : Blocks incoming calls.
•Allow : Feature disabled.
3
3
4
SECURITY INFORMATION
Press
.
Press ④ for“Restrict”
.
Restrict?
Yes
Restricting Outgoing Calls
This feature restricts outgoing calls. Emergency calls can be made.
[
]
[END]
1
4
Outgoing?
Allow
•If you choose“No”
, the menu goes back to
the previous menu.
[
2
5
Press
.
]
[END]
Use the scroll buttons to select the
desired setting.
•Restrict : Blocks outgoing calls.
•Allow : Feature disabled.
1: Incoming
2: Outgoing
3: Use memory
3
54
Press ② for“Outgoing”
.
Use the scroll buttons to select“Yes”
.
Press
.
55
MCI3300-02/10 00.8.22 5:34 PM 페이지55
SECURITY INFORMATION
SECURITY INFORMATION
Call Restriction (Can’t)
Clearing Memory
This feature allows you to delete the call history, call time, and phone numbers
stored in the memory.
Restricting Stored Phone Numbers
Lock
Code
This feature restricts calls stored in the memory.
1
Press ③ for“Use Memory”
.
Use Memory?
Allow
[
2
]
[END]
1
Press
2
Enter the 4-digit lock code.
Press
.
.
•The initial lock code at the time of purchase
i“0
s 000”
.
Use the scroll buttons to select the
desired setting.
•Restrict : Restricts memory usage.
•Allow : Disables this feature.
3
4
Lockcode?
-----
3
Press ⑤ for“Memory Erase”
.
Clearing Stored Numbers
This feature allows you to delete all the phone numbers stored in the memory.
1
Press ① for“Clr Memory”
.
1:
2:
3:
4:
2
Use the scroll buttons to select the
desired setting.
•Yes : Deletes phone numbers in the memory.
•No : Does not delete phone numbers in
the memory.
3
56
Press
Clr
Clr
Clr
Clr
Memory
Dialed
Air Time
Roam Tm
Clr Memory?
No
[
]
[END]
.
57
MCI3300-02/10 00.8.22 5:34 PM 페이지57
SECURITY INFORMATION
SECURITY INFORMATION
Clearing Memory
Clearing Memory
Clearing Last Calls
Clearing Roam Time
This feature deletes the call history.
1
Press ② for“Clr Dialed”
.
2
Use the scroll buttons to select the
desired setting.
•Yes : Deletes the call history.
•No : Does not delete the call history.
3
Press
4
This feature allows you to delete total roaming time.
Clr Dial No.?
No
[
]
1
Press ④ for“Clr Roam Tm”
.
2
Use the scroll buttons to select the
desired setting.
•Yes : Deletes the total roaming time.
•No : Does not delete the total roaming time.
[END]
3
.
Press
Reset Roam Tm?
No
[
]
[END]
.
Clearing Recent Calls
This feature allows you to delete the total time of recent calls
1
Press ③ for“Clr Recent”
.
2
Use the scroll buttons to select the
desired setting.
•Yes : Deletes the total time of recent calls.
•No : Does not delete the total time of recent
calls.
3
58
Press
Reset Recent Time?
No
[
]
[END]
.
59
MCI3300-02/10 00.8.22 5:34 PM 페이지59
SECURITY INFORMATION
SECURITY INFORMATION
Reset Phone
Voice Privacy Mode Selection
4
This feature allows you to reset phone to factory default setting.
Lock
Code
1
Press
2
Enter the 4-digit lock code.
Lock
Code
.
•The initial lock code at the time of purchase
is“0000”
.
1
Press
2
Enter the 4-digit lock code.
•The initial lock code at the time of purchase
is“0000”
.
Lockcode?
-----
3
Press ⑥ for“Reset Phone”
.
.
3
Use the scroll buttons to select the
desired setting.
•Yes : Reset the phone.
•No : Does not reset the phone.
5
Press
5: Memory Erase
6: Reset Phone
7: Voice Privacy
4
Reset Phone?
No
[
.
]
-----
Press ⑦ for“ Voice Privacy”
.
5: Memory Erase
6: Reset Phone
7: Voice Privacy
4
Lockcode?
Use the scroll buttons to select the
desired setting.
•Standard : Uses standard voice privacy.
•Enhanced : Uses enhanced voice privacy.
[END]
5
Press
Voice Privacy?
Standard
[
]
[END]
.
•
“Please Wait For a moment”message
appears on the screen and the phone
powers off automatically.
Phone numbers stored in memory, call time and lock code are not reset.
60
61
MCI3300-02/10 00.8.22 5:35 PM 페이지61
FEATURES USED WHILE CALL IS CONNECTED
Caller Number Sending
Call in
progress
Used to silence Audible Tones In Standby And Mute Conversation.
1
Press
① when requested for
your number.
Self Number Check
Press
④ or Press
the call is in progress.
•To cancel
•To move between the menu items, use the scroll
buttons [
/
] or the volume buttons.
Call in
progress
Microphone Muting
This feature enables the user to send a phone number when requested (for
example, when the user is paging someone) without having to press the
numbers.
1
4
FEATURES USED WHILE CALL IS CONNECTED
00:00:23
213-555-5262
Press [
Press [
]+④
]
while
00:00:23
-Mute213-555-5262
Ear Volume
Call in
progress
Call in
progress
This feature is used to check the phone number while the call is in progress.
1
Press
② to view your number.
CDMA
•The number displays for 5 seconds, then
returns to the calling state screen.
213
555-5262
Silent Pad Phone Number Storage
Call in
progress
Press
progress.
2
Enter the phone number that you
wish to store.
Press
2
Use the scroll buttons to select the desired level.
3
Press
⑤
Voice Privacy
This feature allows you to store a phone number while a call is in
progress.
1
1
Call in
progress
③ while the call is in
•Refer to p30 for instructions on how to store
a phone number.
00:00:23
Silent
1
Press
2
Use the scroll button to select the desired setting.
•Standard : Uses standard voice privacy.
•Enhanced : Uses enhanced voice privacy.
3
Press
Pad
⑥
213-555-5262
•To cancel a specific operation, repeat the above procedure.
62
63
MCI3300-02/10 00.8.22 5:35 PM 페이지63
FEATURES USED WHILE CALL IS CONNECTED
Phone
Number
Link Dialing
Inserting a Hyphen
This feature is useful for Voice Mail provided by banks or paging. Enter the pause(P)
character after a combination of numbers and the numbers. Numbers entered after
the pause character will only be sent if the [SEND] key is pressed again.
1
Enter the phone number.
Phone
Number
This feature allows you to insert hyphens in the phone number.
1
Enter the phone number.
213555-5262
2
Press
①.
•The pause character (P) is displayed on the
screen.
3
Press
②.
2135
55-5262P
Enter the remaining set of numbers
that are to be pressed after the call
is connected.
Press
213
2
213-
3
2135555262P11#
4
4
FEATURES USED WHILE CALL IS CONNECTED
Enter the remaining set of numbers
213-5555
.
00:00:01
Press [SND]
213-555-5262P
5
After the message requesting you to
type in a set of numbers (ID, phone
number, password etc.), press
.
00:00:09
213555-5262P11#
64
65
MCI3300-02/10 00.8.22 5:35 PM 페이지65
PHONE INFORMATION
4
SYSTEM SELECTION FEATURE
Self Number Check
Force Call
This feature allows you to check your phone number.
This feature allows you to make a call in the analog mode only. The phone returns
to the normal mode when the call is ended or 10 minutes after setting this feature.
1
Press
⑥
1
①.
CDMA
Press
⑦
①.
Force Call?
Temp Analog
213
555-5262
[
2
Handset Version Check
]
[END]
Press
button to set this mode or
[END] tp cancel
This feature allows you to check the version of your phone.
Selecting Preferred System
1
Press
⑥
②.
This feature allows you to select the preferred system of operation for the handset.
XXXXXXXX
XXX.XX
1
Press
⑦
②
Prefer System
Standard
2
[
The version of your phone is
displayed as shown.
2
]
[END]
Use the scroll keys to select the
desired system, then press
.
•System A Only : The handset uses system A only.
•System B Only : The handset uses system B only.
•Standard : The handset uses all system.
•Home Sys Only : The handset uses system (A or B)
that corresponds to the system /
network ID designated by the
handset.
66
67
MCI3300-02/10 00.8.22 5:35 PM 페이지67
5
SHORT MESSAGE SERVICE(SMS)
This feature allows you to check text or voice messages.
Message Reception
Chapter 5
Supplementary Functions
Text Message
Upon reception of a text message, the
message shown on the right is displayed on
the screen with
icon.
MESSAGE
5:06 PM FROM
XXX-XXX-XXXX
Short Message Service(SMS)
Missed Call Display
Checking Biorhythm
Stopwatch
World Time Display
Voice Message
Upon reception of a voice message, the
message shown on the right is displayed on
the screen with
icon.
Etiquette Feature
12NEW
VOICE MAIL
MESSAGES
•Up to 25 messages are automatically
stored.
•If Etiquette feature is enabled, the reception
of a message is indicated by vibration only.
69
MCI3300-02/10 00.8.22 5:35 PM 페이지69
SHORT MESSAGE SERVICE(SMS)
Checking Received Messages
1
Press
Text Message
1
Press
NEW MESSAGES
12 VOICE
3 TEXT
[VOICE*] [TEXT#]
1
Use the scroll buttons +
to select
the message that you want to check.
•The message scrolls up automatically.
•Use the scroll buttons [
/
] or the
volume buttons to scroll up or down the
whole message.
•To delete a message, press [
], then
choose between YES/NO.
N 01: LET’S MEET
02: I LOVE H.O
03: THANK YOU
04: 213-555
Missed calls are displayed on the
screen as shown.
•If the auto answering features is enabled,
this feature is disabled.
•Up to 99 missed calls can be displayed.
.
•The list of messages are displayed in the
order received.
•Unchecked messages are displayed with the
letter‘N’in front of the message number.
2
Checking Missed Messages
.
•The number of unchecked text and voice
messages are displayed on the screen.
5
MISSED CALL DISPLAY
2
To back up to the initial display, hold
down
.
MISSED
XX CALLS
4:00 PM
MCI WORLDCOM
Jan 20, Wed
4:03pm
12/25 5:06PM
MESSAGE FROM
STEVE
213-555-5262
•Press [
] and the phone number of the sender is displayed on the screen. To call
that number, press [
] again.
•To back up to the previous screen, press [
].
Voice Message
1
Press
.
•Voice messages can only be checked, not
stored in the list.
2
Press
VOICE MAIL
12/25 5:06PM
213-555-5262
.
•Short message service is an optional service. Contact your local service provider to
see if this service is available in your area.
70
71
MCI3300-02/10 00.8.22 5:35 PM 페이지71
CHECKING BIORHYTHM
5
CHECKING BIORHYTHM
This feature allows you to check the biorhythm for today or a specific day by
using your birthday.
Vital period
Dangerous
Day
1
2
Press
⑤
①.
1: Today
2: Other Day
3: Birthday
Press ③ for“Birthday”
.
•Enter the year/month/day, then press [
3
].
To check today’
s biorhythm press 1.
To check the biorhythm of a specific
day, press 2.
•Today’
s biorhythm can only be checked if
time information is received from the
service provider.
- Set Date 01/01/1980
XXXXX days old
P
+98
E
+98
I
-98
Vital
period
Dangerous day
Vital period
Lethargic period
•The number of days elapsed since the birthday is displayed on the top of the screen,
and the physical (P), emotional (E), intelligent (I) quotients are displayed.
•What is biorhythm?
Biorhythm is a life rhythm that is governed by three rhythm curves called physical,
emotional, and intelligent and starts from within our bodies from birth to death.
Physical rhythm (P)
This rhythm indicates wide-ranging physical elements related to resistance to
diseases, physical strength, adjustment of muscle exercise, speed, physiology, and
other basic physical function with a cycle of 23 days.
Emotional rhythm (E)
This rhythm indicates creativity, sensitivity, mental health, and recognition about
the world and humans with a cycle of 28 days.
Intelligent rhythm (I)
This rhythm indicates our memory, susceptibility to fright, acceptance of
knowledge, and logical and analytic power with a cycle of 33 days.
72
Lethargic
period
Dangerous
day
Lethargic
period
Physical rhythm
Emotional rhythm
Intelligent rhythm
(23 days) (Health and
sports rhythm such as
weight, stamina,
courage etc.).
(28 days) (Stability
rhythm such as work
or love life).
(33 days)(Learning
and efficiency rhythm
such as memory,
ability to analyze,
concentration).
Suitable for tasks
requiring physical
strength, travel,
intensive sports
training. But be careful
about overconfidence
in your body and
overdrinking. Good
period for rapid
recovery from surgery.
Takes care of works
full of vitality. Good
time for joint work, love
seeking, and dating.
Fast brain activity, lots
of mental work.
Planning, reviewing.
Good time to make
decisions about
important matters.
High probability of
increased body
temperature,
occurrence of chronic
disease, cold, and
headache. Be careful
about driving and
hazardous situations.
Emotions and nerves
are easily shaken.
Irritation, slip of the
tongue, malicious
gossip can worsen the
condition of a disease.
Lack of attention and
concentration leads to
a mistake. Better to
postpone important
decisions or entering
into contracts. Be
careful about driving.
Easily fatigued. Need
to refrain from drinking,
overeating, and
excessive physical
exercise. Rest is
important. Regular and
light exercise will
increase your potential
power.
Become passive at
work. Better not tackle
work requiring
patience and creativity.
Need to take rests and
avoid personal
relationships and
challenges.
Relatively low level
mental work. Avoid
demanding brain work
and courses you are
not confident in.
Organize materials,
notes and cards.
73
MCI3300-02/10 00.8.22 5:35 PM 페이지73
STOPWATCH
WORLD TIME DISPLAY
Stopwatch
World Time Display
1
Press
⑤
1
②.
- Stopwatch -
Use the volume buttons
stopwatch.
to start the
•Volume Up key [ ] : Start/Stop/Split
Control.
•Volume Down key [ ] : Reset.
•The time is displayed at a resolution of
1/10th of a second.
⑤
③.
•The time of 36 cities in the world can be
displayed.
0:00:00:0
□□□□□□□□□□
2
Press
5
2
Use the scroll buttons to select the
desired city, then press
.
3
The city chosen will blink on the
world map displayed on the screen.
Athens
Baghdad
Bangkok
Beijing
↓
Gusubei
11/18
3:01:40
3
74
Press
menu.
to return to the previous
75
MCI3300-02/10 00.8.22 5:35 PM 페이지75
MEMO
Etiquette Feature
Appendix
This feature is useful for places such as library or cinema.
To enable
1
Press the Mute
button.
Etiquette
Mode
MCI WORLDCOM
JAN 20, WED
4:03pm
(Standby state)
00:00:09
-MuteXXX-XXX-XXXX
(Call in progress)
To disable
1
Press the Mute
button.
•The phone returns to the state before
entering the etiquette mode.
•Etiquette button can be used both in standby state or
while a call is in progress.
1. Standby state.
•If this feature is enabled, all the key tones and DTMF
tones, alerts and call connect beeps are muted and the
receiver type turns into vibration regardless of the type
chosen by the user.
If the phone is powered off, etiquette feature is disabled
and the phone returns to the state before entering the
etiquette mode.
2. Call in progress
•Refer to page 63.
76
Normal
Mode
MCI WORLDCOM
JAN 20, WED
4:03pm
(Standby state)
00:00:09
XXX-XXX-XXXX
(Call in progress)
77
MCI3300-02/10 00.8.22 5:35 PM 페이지77
OPTIONAL DEVICES
Appendix
Hands-Free Kit for Vehicles
Hands-free kit allows you to use the phone while you are driving.
Contents of the hands-free car-kit
Appendix
◀ Mounting Stand
◀ Mounting Stand
Base(including
screws)
Optional Devices
◀ Hands-free Box
Summary Table of Functions
◀ Hands-free Box Base
(including screws)
◀ Power Cable
▲ Hands-free Microphone
•For more information, refer to the hands-free kit user manual.
Others
Cigar Lighter Charger
Allows you to use the handset with or
without the battery pack installed.
Slim Battery
79
MCI3300-02/10 00.8.22 5:35 PM 페이지79
SUMMARY TABLE OF FUNCTIONS
Feature
Turning On/Off the Phone
Emergency Call
To Call
To End a Call
To Receive a Call
Adjusting Volume Using
the Volume Buttons
Selecting Ringer/Vibration
SUMMARY TABLE OF FUNCTIONS
Usage
Press [
] for 2 seconds
[Emergency number] [
]
[ Area Code ] [ Phone number ] [
Close the folder or press [
]
]
Open the folder or press any button except [
]key
Page
Feature
p17
Date and Time Display
][1][1][
/
][
Page
]
p44
Adjusting Backlight
[
][1][2][
/
][
]
p45
p18
Adjusting LCD Contrast
[
][1][3][
/
][
]
p46
p18
LED Use Selection
[
][1][4][
/
][
]
p47
p19
p21
[
Air Time Display
[
][3][1]
p48
Last Call Time Display
[
][3][2]
p48
Roaming Call Time Display
[
][3][3]
p48
/
][
]
p22
Recent Call Time Display
[
][3][4]
p48
[
][4][1][
/
][
]
/
Ringer Selection
[
][2][2][
/
][
]
p23
Time Alert
Adjusting Ringer Volume
[
][2][3][
/
][
]
p24
Change of Service Alert
[
][4][2][
][
]
Auto Answer
[
][2][4][
/
][
]
p25
Auto Lock
[
] [ 0 ] [Lockcode] [ 1 ] [
/
Changing Lockcode
[
[
] [ 0 ] [Lockcode] [ 2 ] [Enter new lockcode]
]
p52
Changing Greetings
[
[
] [ 0 ] [Lockcode] [ 3 ] [Edit new greetings]
]
p53
Restricting Handset Use
[
] [ 0 ] [Lockcode] [ 4 ] [
p54
Flip Answer
Storing Phone Number
[
p26
][2][5]
[Enter number] [
[Name] [
]
] [ Enter Location/
]
p29
One-Touch Dialing
Hold down the number ( 0~9 ).
p31
Two-Touch Dialing
Press the first digit, then hold down the second
digit ( 10~99 )
p31
Call History
[
][1][1][
p32
Searching/Recalling a Number by Location
[
] [ 1 ] [ 2 ] [Enter Location] [
/
]
p33
Searching/Recalling a Number by Number
[
] [ 1 ] [ 3 ] [Number] [
/
]
p34
Searching/Recalling a Number by Name
[
] [ 1 ] [ 4 ] [Name] [
80
Usage
[
p17
Press the volume buttons at the corresponding
state(while a call is in progress, standby state,
using hands-free)
][2][1][
Appendix
/
]
][
][
/
]
Editing Schedule
[
] [ 2 ] [ 2 ] [Location/
][
/
]
[Enter Date, Time] [
] [Edit Message] [
Viewing Schedule
[
][2][1][
/
]
p35
]
p36
p37
Setting Alarm Call
[
[
] [3][
/
][
] [Enter Time]
] [Enter phone number] [
]
p38
Calculator
[
][4]
p39
p49
p50
][
/
]
][
p51
]
Restricting Incoming Calls
… [1][
/
][
]
p55
Restricting Outgoing Calls
… [2][
/
][
]
p55
Restricting Memory Use
… [3][
/
][
]
Clearing Memory
[
p56
] [ 0 ] [Lockcode] [ 5 ] [ 1 ] [
/
][
]
p57
Clearing Call History
[
] [ 0 ] [Lockcode] [ 5 ] [ 2 ] [
/
][
]
p57
Clearing Recent Call Time
[
] [ 0 ] [Lockcode] [ 5 ] [ 3 ] [
/
][
]
p58
Clearing Roaming Call Time
[
] [ 0 ] [Lockcode] [ 5 ] [ 4 ] [
/
][
]
Reset Phone
[
] [ 0 ] [Lockcode] [6 ] [
][
]
Sending your Number
[
] [ 1 ] while a call is in progress
/
p58
p60
p62
81
MCI3300-02/10 00.8.22 5:35 PM 페이지81
SUMMARY TABLE OF FUNCTIONS
Feature
MEMO
Usage
Page
Silent Pad Number Storing
[
] [ 3 ] [Enter number] [
]
[Enter Location/
] [Enter Name] [
while a call is in progress
Muting the Microphone
[
]
] [ 4 ] while a call is in progress
p62
p63
[Enter number] [
][1]
[Number to dial after the call is connected]
p64
Checking Your Number
[
][6][1]
p66
Link Dialing
p66
Checking the Phone’s Version
[
][6][2]
Checking Received Message
[
][
Checking Biorhythm
[
[
] [ 5 ] [ 1 ] [1~3] {[Date / Entering Birthday]
]}
p72
Stopwatch
[
][5][2][
/
][
]
p74
/
][
]
p75
82
/
Appendix
p70
]
World Time
[
][5][3][
Etiquette Feature
[
] button (toggle)
p76
83