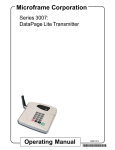
1
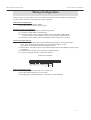
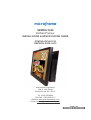
SERIES 5340
EzWait Premier
INSTALLATION & SPECIFICATION GUIDE
ITEM NO: D5340-7010
REVISION DATE: 08/12
Microframe Corporation
604 S. 12th Street
Broken Arrow, OK 74012
Tel: (918) 258-4839
Toll Free: 1-800-635-3811
Website: www.microframecorp.com
E-mail: [email protected]
A5340-7010
*A5340-7010*
Limited Warranty Agreement
Warning
Your Microframe System is warranted against failure
due to defects in workmanship or material for a period
of one (1) year from the date of purchase. Microframe
Corporation will repair or replace any defective unit.
Obvious abuse or mishandling of the unit is NOT covered
by this warranty.
All power adapters, line cords, and electrical equipment should be kept out of the reach of children and
away from water. (If you are installing cable in an air
plenum area, such as a drop ceiling used for air return,
you must use plenum-rated cable. The cable supplied
from Microframe is rated CL2 and is approved for indoor
installation everywhere except plenum areas.)
Merchandise Return
If your Unit does not work satisfactorily, please give
us a call. We may be able to clear up the problem by
phone. If it becomes necessary to return your Unit to
the factory, please observe the following:
1. Place Unit in a sturdy box with sufficient packing
material.
2. If requested, include the AC power adapter. It is
not necessary to return the cable and connectors unless
they are the problem.
3. Return the system insured and prepaid. Microframe
is not responsible for shipping damages and losses on
returned Units.
Warranty Service
For warranty service, please contact Microframe
toll-free at (800) 635-3811. A technician will gladly assist you.
Assistance
For any product assistance or maintenance help,
contact Microframe by either calling 1-800-635-3811 or
e-mailing us at: [email protected].
Safety
Do not install substitute parts or perform any modification to the product without first contacting Microframe.
Microframe Corporation
PO Box 1700
Broken Arrow, OK 74013
1-800-635-3811
Life Support Policy
Microframe's products are not authorized for use
as components in life support devices or systems
without the express written approval of the president of Microframe Corporation. As used herein:
1. Life support devices or systems are defined as systems which support or sustain life, and whose failure to
perform when properly used in accordance with instructions for use provided in the labeling, can be reasonably
expected to result in a significant injury to the user or
any one depending on the system.
2. A critical component is any component of a life
support device or system whose failure to perform can be
reasonably expected to cause the failure of the life support
device or system, or to affect its safety or effectiveness.
Disclaimer
We constantly strive to improve our products. Specifications are subject to change without notice.
Table of Contents
Parts and Features .......................................................... 4
Wiring Configuration ....................................................... 5
EzWait Configuration ...................................................... 6
Normal Operations .......................................................... 9
Microframe Corporation
Series 5340 User Guide
Parts and Features
Parts List:
1.
2.
3.
4.
19" All-in-one display EzWait Premier (D5340)
Push Buttons (B)
40' Wire (C)
Manual (not pictured)
(D5340)
(B)
4
(c)
Microframe Corporation
Series 5340 User Guide
Wiring Configuration
There are several configurations you can use when selecting monitors. EzWait is compatible with
any size LCD or Plasma monitor/television, large and small.
Stand alone configuration
1) After mounting the D5340 system.
2) Plug the power cord into a power outlet.
Multiple monitor configuration
1) After mounting the monitors in the desired positions.
2) Connect the VGA cables to the monitors.
3) Connect the other ends of the VGA cables to the video splitter (1960-0250).
If you don't have a video splitter, one can be purchased from Microframe.
4) Connect the video splitter input to the EzWait Premier output VGA connector.
Connecting input devices
1) If you are controlling the device with hardwired push buttons, connect the buttons
to any of the screw down terminals on the device labeled Btn 1-10 and
any of the Com terminals (see Terminal figure below).
2) Please Note: This device can be connected to D5100 series LED displays using the 485
connection.
6) EzWait Premier can also be controlled by wireless keyfobs.
6) If you are using the keyfobs, connect the antenna.
Screw Down Terminal
Com
A
B
Com
BTN 10
BTN 9
Com
BTN 8
BTN 7
Com
BTN 6
BTN 5
Com
BTN 4
BTN 3
Com
BTN 2
BTN 1
485
Powering EzWait Premier
1) The EzWait Server comes with a 6 ft. power cord.
3) Plug the power adapter into a 110v outlet.
4) After plugging in the EzWait Server, it will power on automatically.
5
Microframe Corporation
Series 5340 User Guide
EzWait Configuration
There are three ways to access the EzWait Admin Screen. Select the option that is best for you.
Ethernet Connection
One of the ways to configure the EzWait is over ethernet. To use this option you will need to
connect the EzWait to your network. You can get to the EzWait Admin by using
a computer on your network. Using any internet browser, type in the url "http://'ipaddress'/EzWait/
admin". This will connect you to the EzWait Admin screen.
EzWait Client Software
To access the configuration pages on the EzWait open the EzWait Client Software. This
software can be downloaded from www.microframecorp.com. This software requires Adobe Air
which can be downloaded from www.adobe.com. Once the software is installed, open the software and click "Find Server". Once the server is located, you can click the button labeled "Open
Admin". Follow the EzWait Configuration section to change the EzWait settings.
Keyboard and Mouse
If the EzWait is not connected to your network, you can configure it locally by connecting a
keyboard and mouse to the EzWait. Once the keyboard and mouse are connected, you can
press the "Ctrl"+"Alt"+"right arrow" keys to toggle between screens. From here you can click on
the Firefox icon and open up the configuration pages.
EzWait Configuration Screens
1)
Playlist Setup
2)
Audio settings
3)
Station Settings
4)
Screen Settings
5)
Additional Settings
6)
Help
The EzWait Configuration pages have an information drop down that can be veiwed by placing
your mouse over it. Some pages have a sample video that shows you how to use that page.
1. Playlist Setup Screen
There are two lists on this screen. The list on the left shows all the available content that can
be used. The list on the right is the Playlist order. This list can be modified by using the buttons
located between the two lists. By clicking on an item in the available Movies list you will notice a
"delete" button and a "play" button at the bottom of that list. The delete button will remove that image/movie from the computer and the playlist. To preview the image/movie, click the play button
and it will show up at the bottom right of the page in the preview pane.
Uploading New Content
Adding new content to the server is as simple as clicking the "Browse" button at the bottom left
side of the screen. Select the content you would like to upload from your computer and click
"Open." Click the Upload button and you will see it appear in the Movies Available list.
6
Microframe Corporation
Series 5340 User Guide
EzWait Configuration
Managing the Playlist
Select a image/movie from the Movies Available list and click "Move >>" button. This will add the
image/movie to the playlist. Once you have multiple images/movies in the playlist, you can
arrange them by clicking on the right list and clicking the "Move Up" and "Move Down" buttons. If
you would like to specify the amount of time that the content is shown, you can use the text box
at the bottom of the playlist to change the selected content show time in seconds and click "OK".
The Play button at the bottom of the playlist will show the content for the specified length of time.
To remove an image/movie from the playlist, select the content you wish to remove and click the
"Move <<" button. To preview the final playlist you can click the "Preview Playlist" button.
2. Audio Upload and Settings Screen
To play audio when you call the next number, or when the next window becomes available, check
the files that you would like to play. Click "Browse" and select the audio file you would like to upload, then click "Start Upload" to start the uploading process. Be sure to name the files correctly.
The first file to play is "prenum.mp3", and the number files should start at "0.mp3" thru "99.mp3".
For 3 digits you will need files "100.mp3", "200.mp3" thru "900.mp3". These files will play for the
Take-A-Number and Window Numbers. The file "preque.mp3" is the file that plays between the
Take-A-Number number and the window message ex.("At Window") The last file to play is "aftnum.mp3" ex. ("Thank You")
Example file structure.
prenum.mp3
Now Serving
55.mp3
55
preque.mp3
at window
2.mp3
2
aftnum.mp3
please
3. Station Settings Screen
To add a new window click the "Add" button. A new row should appear in the grid. There are 4
columns that will need to be input. Name Column is the text on the arrow that will show on the
main screen ex.("Window 1".) Window Column tells the computer what audio file to play ex. (1 will
play 1.mp3.) Address Column is the address of the device that will be used on this station. Please
see the Addressing section below. Direction Column can be 0, 1, or 2; 0 will show a left arrow, 1
will show a right arrow, and 2 will show a straight line. "Remove" button will remove the selected row.
Be sure to click the "Save" button when finished. This system will not auto save.
Addresses
EzWait Premier has 10 buttons that are addressed 1-10. Do not use these addresses for keyfobs
or displays. The D5100 displays can be connected to this device as well. To see how to address
them, check the documentation that comes with the displays and set the address column to the
address you desire. The keyfobs will need to be addressed also. The documentation that comes
with these devices will show how to set the address.
4. Screen Settings
Screen Ratio
You can select the ratio of the main screen so that you will be able to get a better idea of what it
will look like. Note that this might look unusual on your local screen.
Background
The background image can be changed by uploading a new one. Simply click the "New Image"
button and select the background image you would like to use. Be sure that the image is the
same aspect ratio and size as your main screen. You can also use a color for the background by
unchecking the "Use Background Image" option.
Number
Enable or disable the take-a-number option in EzWait Premier. Text Color is an option to allow
you to change what color you would like the number. You can also set the Digit size to be 2 or 3.
7
Microframe Corporation
Series 5340 User Guide
EzWait Configuration
Text Box
The text box must be less than 16 characters ex.("Now Serving"). Resize the Text Box by clicking on the
resizing dots and dragging them to the desired size.
Direction Arrows
Positioning the Arrow Box is as easy as clicking and dragging the box to the desired location
inside the main screen box. Adjust the size of the box by clicking on the sizing arrows and moving
them around. The seconds windows are active button is so you can have the arrows deactivate
after a few seconds if needed.
Playlist SlideShow
Click and drag the sample image to move the main content positioning. Resize the Content Box
by clicking on the resizing dots and dragging them to the desired size.
6. Additional Settings Screen
You can set your network address to be static or dynamic in this section. This system needs to
restart once a day. This can be done at night while no one is around. Please select a time for the
restarts to happen. Click "Save" to save your configuration. Be sure that the time on the machine
is correct as well. To change the time on the machine. Connect a keyboard and mouse to
EzWait Premier. Press and hold ctrl + alt and press the right arrow key once. In the top right
corner click the clock. To change the time you will need to type in the password "microframe". By
clicking the restart button you can manual restart the machine. This could take up to 1 minute to
fully restart.
7. Help Screen
Manual - This will bring up this Manual in pdf format.
Support - This will pull up the Support page at www.microframecorp.com.
Email - Please contact Microframe before clicking this button. This button emails us the configuration of the machine so we can better assist you.
Update - This will check to see if there are any available updates for EzWait.
8
Microframe Corporation
Series 5340 User Guide
Normal Operations
Line Queuing
With Keyfob
With Push Buttons
To show that your window is available, press the
right button.
Depending on the setup in the configuration
pages, pressing the button for your window will
show that you are available. If it is a change of
state, or latching button, when you unlatch or
change the state of the button the window will
show a non-available status.
To show that the window is not available and is
taking a client, press the left button.
Take-A-Number
With Keyfob
With Push Buttons
To advance the numbers, press the right button.
Depending on the setup in the configuration
pages, the button can be a "up" button or a
"down" button.
To go back to a number, press the left button.
To quickly go to a number, press and hold the
"up" button until the number shows red on the
display. Then tap the "up" or "down" button to
the desired number.
To start back at 0, press both the right and left
buttons at the same time.
To go back to a number, press the “down” button.
To count up press the “up” button.
To quickly go to a number, press and hold the
"up" button until the number shows red on the
display. Then tap the "up" or "down" button to
the desired number.
To start back at 0, press both the "up" and "down"
buttons at the same time.
Take-A-Number with Window Queuing
With Keyfob
With Push Buttons
To advance the numbers, press the right button.
This will also show that this window is available.
Depending on the setup in the configuration
pages, the button can be a "up" button or a "down"
button. This will also show that this window is
available.
To go back to a number, press the left button. This
will also show that this window is available.
To quickly go to a number press and hold the
"up" button until the number shows red on the
display. Then tap the "up" or "down" button to
the desired number. This will also show that this
window is available.
To start back at 0, press both the right and left
buttons at the same time.
To go back to a number, press the “down” button.
To count up press the “up” button. This will also
show that this window is available.
To quickly go to a number, press and hold the
"up" button until the number shows red on the
display. Then tap the "up" or "down" button to
the desired number. This will also show that this
window is available.
To start back at 0, press both the "up" and "down"
buttons at the same time.
9
Microframe Corporation
604 S. 12th Street
Broken Arrow, OK 74012
Tel: (918) 258-4839
Toll Free: 1-800-635-3811
Website: www.microframecorp.com
E-mail: [email protected]