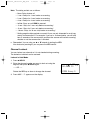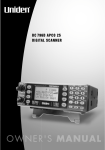
1
UB343ZH_UBC785XLT_OM_0628
6/28/06
10:27 AM
Page i
UBC785XLT
SCANNER
1000 Channel
memory State of the art Base station scanner
UB343ZH_UBC785XLT_OM_0622
6/22/06
3:01 PM
Page ii
UB343ZH_UBC785XLT_OM_0622
6/22/06
3:01 PM
Page iii
Contents
Introduction . . . . . . . . . . . . . . . . . . . . . . . . . . . . . . . . . . . . . . . . . . . . . . . . . . . . . . . . . . . . . . . . . . . . .1
Front and Rear View . . . . . . . . . . . . . . . . . . . . . . . . . . . . . . . . . . . . . . . . . . . . . . . . . . . . . . . . . . . . . .4
UBC785XLT SHORTCUTS . . . . . . . . . . . . . . . . . . . . . . . . . . . . . . . . . . . . . . . . . . . . . . . . . . . . . . . . .6
Important Notice . . . . . . . . . . . . . . . . . . . . . . . . . . . . . . . . . . . . . . . . . . . . . . . . . . . . . . . . . . . . . . . . .8
Terminology . . . . . . . . . . . . . . . . . . . . . . . . . . . . . . . . . . . . . . . . . . . . . . . . . . . . . . . . . . . . . . . . . . . . .9
What is Scanning? . . . . . . . . . . . . . . . . . . . . . . . . . . . . . . . . . . . . . . . . . . . . . . . . . . . . . . . . . . . . . .9
What is Searching? . . . . . . . . . . . . . . . . . . . . . . . . . . . . . . . . . . . . . . . . . . . . . . . . . . . . . . . . . . . . .9
Feature Highlights . . . . . . . . . . . . . . . . . . . . . . . . . . . . . . . . . . . . . . . . . . . . . . . . . . . . . . . . . . . . . . .10
Where to Obtain More Information . . . . . . . . . . . . . . . . . . . . . . . . . . . . . . . . . . . . . . . . . . . . . . . . . . .11
Information on the Internet . . . . . . . . . . . . . . . . . . . . . . . . . . . . . . . . . . . . . . . . . . . . . . . . . . . . . . .11
Included with Your Scanner Package . . . . . . . . . . . . . . . . . . . . . . . . . . . . . . . . . . . . . . . . . . . . . . . . .12
Setup . . . . . . . . . . . . . . . . . . . . . . . . . . . . . . . . . . . . . . . . . . . . . . . . . . . . . . . . . . . . . . . . . . . . . . . . .13
Connecting an Antenna . . . . . . . . . . . . . . . . . . . . . . . . . . . . . . . . . . . . . . . . . . . . . . . . . . . . . . . . .13
Mounting an Antenna . . . . . . . . . . . . . . . . . . . . . . . . . . . . . . . . . . . . . . . . . . . . . . . . . . . . . . . . . . .13
Optional Antenna . . . . . . . . . . . . . . . . . . . . . . . . . . . . . . . . . . . . . . . . . . . . . . . . . . . . . . . . . . . . . .13
Typical Mounting Methods . . . . . . . . . . . . . . . . . . . . . . . . . . . . . . . . . . . . . . . . . . . . . . . . . . . . . . .14
Mounting the Scanner in Your Vehicle . . . . . . . . . . . . . . . . . . . . . . . . . . . . . . . . . . . . . . . . . . . . . .14
Applying Power for Vehicle Installation . . . . . . . . . . . . . . . . . . . . . . . . . . . . . . . . . . . . . . . . . . . . . .15
Desktop Installation . . . . . . . . . . . . . . . . . . . . . . . . . . . . . . . . . . . . . . . . . . . . . . . . . . . . . . . . . . . .16
Applying Power Using Standard AC Power . . . . . . . . . . . . . . . . . . . . . . . . . . . . . . . . . . . . . . . . . . .16
Connecting an External Speaker . . . . . . . . . . . . . . . . . . . . . . . . . . . . . . . . . . . . . . . . . . . . . . . . . . .16
Connecting an Earphone . . . . . . . . . . . . . . . . . . . . . . . . . . . . . . . . . . . . . . . . . . . . . . . . . . . . . . . .16
Listening Safely . . . . . . . . . . . . . . . . . . . . . . . . . . . . . . . . . . . . . . . . . . . . . . . . . . . . . . . . . . . . . . .17
Connecting the Clone Cable . . . . . . . . . . . . . . . . . . . . . . . . . . . . . . . . . . . . . . . . . . . . . . . . . . . . . .17
Connecting the Tape Recorder . . . . . . . . . . . . . . . . . . . . . . . . . . . . . . . . . . . . . . . . . . . . . . . . . . . .17
Basic Operation . . . . . . . . . . . . . . . . . . . . . . . . . . . . . . . . . . . . . . . . . . . . . . . . . . . . . . . . . . . . . . . . .18
Turn the Scanner On . . . . . . . . . . . . . . . . . . . . . . . . . . . . . . . . . . . . . . . . . . . . . . . . . . . . . . . . . . .18
Setting the Squelch . . . . . . . . . . . . . . . . . . . . . . . . . . . . . . . . . . . . . . . . . . . . . . . . . . . . . . . . . . . .18
Understanding the Menu System . . . . . . . . . . . . . . . . . . . . . . . . . . . . . . . . . . . . . . . . . . . . . . . . . .19
Menu Description and Numeric Keypad Equivalents . . . . . . . . . . . . . . . . . . . . . . . . . . . . . . . . . . . .20
Programming . . . . . . . . . . . . . . . . . . . . . . . . . . . . . . . . . . . . . . . . . . . . . . . . . . . . . . . . . . . . . . . . . . .24
Storing Frequencies into Channels in Menu Mode . . . . . . . . . . . . . . . . . . . . . . . . . . . . . . . . . . . . .24
Deleting a Stored Frequency . . . . . . . . . . . . . . . . . . . . . . . . . . . . . . . . . . . . . . . . . . . . . . . . . . . . .25
Editing a Stored Frequency . . . . . . . . . . . . . . . . . . . . . . . . . . . . . . . . . . . . . . . . . . . . . . . . . . . . . .25
Duplicate Frequency Alert . . . . . . . . . . . . . . . . . . . . . . . . . . . . . . . . . . . . . . . . . . . . . . . . . . . . . . . .25
Transfer Frequencies . . . . . . . . . . . . . . . . . . . . . . . . . . . . . . . . . . . . . . . . . . . . . . . . . . . . . . . . . . .26
Storing Text Tags . . . . . . . . . . . . . . . . . . . . . . . . . . . . . . . . . . . . . . . . . . . . . . . . . . . . . . . . . . . . . .26
Beep Alert . . . . . . . . . . . . . . . . . . . . . . . . . . . . . . . . . . . . . . . . . . . . . . . . . . . . . . . . . . . . . . . . . . .27
Programming Tips . . . . . . . . . . . . . . . . . . . . . . . . . . . . . . . . . . . . . . . . . . . . . . . . . . . . . . . . . . . . .27
Scanning . . . . . . . . . . . . . . . . . . . . . . . . . . . . . . . . . . . . . . . . . . . . . . . . . . . . . . . . . . . . . . . . . . . . . .28
Scan Hold Feature . . . . . . . . . . . . . . . . . . . . . . . . . . . . . . . . . . . . . . . . . . . . . . . . . . . . . . . . . . . . .28
RF Attenuation Feature . . . . . . . . . . . . . . . . . . . . . . . . . . . . . . . . . . . . . . . . . . . . . . . . . . . . . . . . .29
Setting the Delay Mode for Frequency . . . . . . . . . . . . . . . . . . . . . . . . . . . . . . . . . . . . . . . . . . . . . .29
Channel Lockout . . . . . . . . . . . . . . . . . . . . . . . . . . . . . . . . . . . . . . . . . . . . . . . . . . . . . . . . . . . . . .30
Restoring a Locked-out Channel . . . . . . . . . . . . . . . . . . . . . . . . . . . . . . . . . . . . . . . . . . . . . . . . . . .31
Restoring All Locked-out Channels . . . . . . . . . . . . . . . . . . . . . . . . . . . . . . . . . . . . . . . . . . . . . . . . .31
Priority Scan . . . . . . . . . . . . . . . . . . . . . . . . . . . . . . . . . . . . . . . . . . . . . . . . . . . . . . . . . . . . . . . . . .32
Changing the Priority Channel . . . . . . . . . . . . . . . . . . . . . . . . . . . . . . . . . . . . . . . . . . . . . . . . . . . .32
Prioroty Channel Plus Scan . . . . . . . . . . . . . . . . . . . . . . . . . . . . . . . . . . . . . . . . . . . . . . . . . . . . . .32
Searching . . . . . . . . . . . . . . . . . . . . . . . . . . . . . . . . . . . . . . . . . . . . . . . . . . . . . . . . . . . . . . . . . . . . .33
Setting a Search Range . . . . . . . . . . . . . . . . . . . . . . . . . . . . . . . . . . . . . . . . . . . . . . . . . . . . . . . . .33
Starting Chain Search . . . . . . . . . . . . . . . . . . . . . . . . . . . . . . . . . . . . . . . . . . . . . . . . . . . . . . . . . .34
Search Hold Feature . . . . . . . . . . . . . . . . . . . . . . . . . . . . . . . . . . . . . . . . . . . . . . . . . . . . . . . . . . .34
Data Skip . . . . . . . . . . . . . . . . . . . . . . . . . . . . . . . . . . . . . . . . . . . . . . . . . . . . . . . . . . . . . . . . . . . .34
Frequency Skip . . . . . . . . . . . . . . . . . . . . . . . . . . . . . . . . . . . . . . . . . . . . . . . . . . . . . . . . . . . . . . .35
Storing Search Frequencies . . . . . . . . . . . . . . . . . . . . . . . . . . . . . . . . . . . . . . . . . . . . . . . . . . . . . .35
Auto Storing . . . . . . . . . . . . . . . . . . . . . . . . . . . . . . . . . . . . . . . . . . . . . . . . . . . . . . . . . . . . . . . . . .36
Squelch (SQ) Mode . . . . . . . . . . . . . . . . . . . . . . . . . . . . . . . . . . . . . . . . . . . . . . . . . . . . . . . . . . . .36
Additional Menu Options for Searching . . . . . . . . . . . . . . . . . . . . . . . . . . . . . . . . . . . . . . . . . . . . .38
iii
UB343ZH_UBC785XLT_OM_0622
6/22/06
Air Service Search . . . . . . . . . .
Using Aircraft Service Search
Air Service Search Skip . . . .
Changing the step . . . . . . . .
Remote Interface . . . . . . . . . . .
PC Control Mode . . . . . . . . .
Clone Mode . . . . . . . . . . . . .
Additional Features . . . . . . . . .
Care and Maintenance . . . . . . .
Troubleshooting . . . . . . . . . . . .
Specifications . . . . . . . . . . . . . .
Glossary of Terms . . . . . . . . . .
Declaration of Conformity . . . . .
.
.
.
.
.
.
.
.
.
.
.
.
.
.
.
.
.
.
.
.
.
.
.
.
.
.
.
.
.
.
.
.
.
.
.
.
.
.
.
.
.
.
.
.
.
.
.
.
.
.
.
.
.
.
.
.
.
.
.
.
.
.
.
.
.
.
.
.
.
.
.
.
.
.
.
.
.
.
.
.
.
.
.
.
.
.
.
.
.
.
.
3:01 PM
.
.
.
.
.
.
.
.
.
.
.
.
.
.
.
.
.
.
.
.
.
.
.
.
.
.
.
.
.
.
.
.
.
.
.
.
.
.
.
.
.
.
.
.
.
.
.
.
.
.
.
.
.
.
.
.
.
.
.
.
.
.
.
.
.
.
.
.
.
.
.
.
.
.
.
.
.
.
.
.
.
.
.
.
.
.
.
.
.
.
.
.
.
.
.
.
.
.
.
.
.
.
.
.
.
.
.
.
.
.
.
.
.
.
.
.
.
iv
.
.
.
.
.
.
.
.
.
.
.
.
.
Page iv
.
.
.
.
.
.
.
.
.
.
.
.
.
.
.
.
.
.
.
.
.
.
.
.
.
.
.
.
.
.
.
.
.
.
.
.
.
.
.
.
.
.
.
.
.
.
.
.
.
.
.
.
.
.
.
.
.
.
.
.
.
.
.
.
.
.
.
.
.
.
.
.
.
.
.
.
.
.
.
.
.
.
.
.
.
.
.
.
.
.
.
.
.
.
.
.
.
.
.
.
.
.
.
.
.
.
.
.
.
.
.
.
.
.
.
.
.
.
.
.
.
.
.
.
.
.
.
.
.
.
.
.
.
.
.
.
.
.
.
.
.
.
.
.
.
.
.
.
.
.
.
.
.
.
.
.
.
.
.
.
.
.
.
.
.
.
.
.
.
.
.
.
.
.
.
.
.
.
.
.
.
.
.
.
.
.
.
.
.
.
.
.
.
.
.
.
.
.
.
.
.
.
.
.
.
.
.
.
.
.
.
.
.
.
.
.
.
.
.
.
.
.
.
.
.
.
.
.
.
.
.
.
.
.
.
.
.
.
.
.
.
.
.
.
.
.
.
.
.
.
.
.
.
.
.
.
.
.
.
.
.
.
.
.
.
.
.
.
.
.
.
.
.
.
.
.
.
.
.
.
.
.
.
.
.
.
.
.
.
.
.
.
.
.
.
.
.
.
.
.
.
.
.
.
.
.
.
.
.
.
.
.
.
.
.
.
.
.
.
.
.
.
.
.
.
.
.
.
.
.
.
.
.
.
.
.
.
.
.
.
.
.
.
.
.
.
.
.
.
.
.
.
.
.
.
.
.
.
.
.
.
.
.
.
.
.
.
.
.
.
.
.
.
.
.
.
.
.
.
.
.
.
.
.
.
.
.
.
.
.
.
.
.
.
.
.
.
.
.
.
.
.
.
.
.
.
.
.
.
.
.
.
.
.
.
.
.
.
.
.
.
.
.
.
.
.
.
.
.
.
.
.
.
.
.
.
.
.
.
.
.
.
.
.
.
.
.
.
.
.
.
.
.
.
.
.39
.39
.39
.39
.40
.40
.41
.44
.46
.47
.48
.49
.55
UB343ZH_UBC785XLT_OM_0622
6/22/06
3:01 PM
Page 1
Introduction
The UBC785XLT is a state-of-the-art with automatic scanning capabilities. It can store
frequencies such as police, fire/emergency, marine, railroad, air, amateur, and other
communications into 10 banks of 100 channels for a total of 1000 channels.
Use your new scanner to monitor:
• Police and Fire Departments (including rescue and paramedics)
• Business/Industrial Radio
• Utilities
• Marine and Amateur (ham radio) Bands
• Air Band
• And much more...
The scanner has three band plans, which are useful for major regions in Europe.
To change the Band Plan, press and hold the band plan number 1, 2 or 3 while turning On
the scanner,
Note: This scanner remembers the last band plan.
The chart below identifies the scanner band numbers, the frequency range, the modulation
mode and the default step size settings.
<Band Plan 1>
No.
1
Frequency Range (MHz)
25.0000 - 29.9950
Mode
FM
Step (kHz)
5
2
30.0000 - 79.9875
FM
12.5
3
80.0000 - 82.9900
FM
10
4
83.0000 - 87.2875
FM
12.5
5
87.3000 - 87.9500
WFM
50
6
88.0000 - 107.9500
WFM
50
AM
12.5 / 8.33
7
108.0000 - 136.9875
108.0000 - 136.9916
8
137.0000 - 137.9950
FM
5
9
138.0000 - 157.9875
FM
12.5
10
158.0000 - 160.5900
FM
10
11
160.6000 - 162.5875
FM
12.5
12
162.6000 - 173.9900
FM
10
13
174.0000 - 215.9500
WFM
50
14
216.0000 - 224.9950
FM
5
15
225.0000 - 399.9500
AM
50
16
400.0000 - 405.9875
FM
12.5
17
406.0000 - 439.9937
FM
6.25
18
440.0000 - 465.9950
FM
5
19
466.0000 - 469.9900
FM
10
20
470.0000 - 512.0000
FM
6.25
21
806.0000 - 960.0000
FM
12.5
22
1240.0000 - 1300.0000
FM
12.5
1
UB343ZH_UBC785XLT_OM_0622
6/22/06
3:01 PM
Page 2
<Band Plan 2>
No.
1
Frequency Range (MHz)
25.0000 - 49.9950
Mode
FM
2
50.0000 - 84.0100
FM
3
84.0150 - 87.2950
FM
4
87.3000 - 107.9500
WFM
5
108.0000 - 136.9875
AM
108.0000 - 136.9916
Step (kHz)
5
5
20 with
15kHz Offset
50
12.5
8.33
6
137.0000 - 143.9950
FM
5
7
144.0000 - 145.9875
FM
12.5
8
146.0000 - 155.9900
FM
10
9
156.0000 - 157.4250
FM
12.5
10
157.4375 - 160.5875
FM
12.5
11
160.6000 - 162.0250
FM
12.5
12
162.0300 - 173.9900
FM
10
13
174.0000 - 215.9500
WFM
50
14
216.0000 - 224.9950
FM
5
15
225.0000 - 399.9500
AM
50
16
400.0000 - 405.9875
FM
12.5
17
406.0000 - 439.9937
FM
6.25
18
440.0000 - 449.9937
FM
6.25
19
450.0000 - 469.9900
FM
10
20
470.0000 - 512.0000
FM
6.25
21
806.0000 - 960.0000
FM
12.5
22
1240.0000 - 1300.0000
FM
12.5
2
UB343ZH_UBC785XLT_OM_0622
6/22/06
3:01 PM
Page 3
<Band Plan 3>
No.
1
Frequency Range (MHz)
25.0000 - 29.9950
Mode
FM
Step (kHz)
5
2
30.0000 - 79.9937
FM
6.25
3
80.0000 - 82.9937
FM
6.25
4
83.0000 - 87.2937
FM
6.25
5
87.3000 - 87.9500
WFM
50
6
88.0000 - 107.9500
WFM
7
108.0000 - 136.9875
AM
108.0000 - 136.9916
50
12.5
8.33
8
137.0000 - 137.9950
FM
5
9
138.0000 - 157.9937
FM
6.25
10
158.0000 - 160.5937
FM
6.25
11
160.6000 - 162.5937
FM
6.25
12
162.6000 - 173.9937
FM
6.25
13
174.0000 - 215.9500
WFM
50
14
216.0000 - 224.9950
FM
5
15
225.0000 - 399.9500
AM
50
16
400.0000 - 405.9875
FM
12.5
17
406.0000 - 439.9937
FM
6.25
18
440.0000 - 465.9937
FM
6.25
19
466.0000 - 469.9937
FM
6.25
20
470.0000 - 512.0000
FM
6.25
21
806.0000 - 960.0000
FM
12.5
22
1240.0000 - 1300.0000
FM
12.5
3
UB343ZH_UBC785XLT_OM_0622
6/22/06
3:01 PM
Page 4
Front and Rear View
3 4
VOL
5
6
SQL
MANUAL
SCAN
HOLD
MODE
1
AIR
CHAN/FREQ
RSM
LIMIT
SRCH
2
VFO/SELECT PUSH
9
1000
CHANNEL
UBC785XLT
MENU
BACK
8
7
101-200
1-100
1
201-300
2
4
3
401-500
301-400
501-600
5
7
6
701-800
601-700
801-900
8
9
901-1000
SELECT
0
E
PRI
TRNFR
RVRS
L/O
MUTE
10
11 12 13 14 15 16 17
1. Volume/Squelch Control
2. VFO/Select
Channel/Frequency Control
3. Scan Key (SCAN)
4. Air Service Search Key (AIR)
5. Display
6. Resume Key ( RSM )
7. Hold/Up/Manual Key (▲/HOLD)
8. Numeric Keypad
9. Menu/Back Key (MENU)
33
10.
11.
12.
13.
14.
15.
16.
17.
34
35
36
Search Key (SRCH)
Limit/Down Key (LIMIT/▼)
Reverse Key (RVRS)
Decimal Key
( )
Lockout Key (L/O)
Priority Key (PRI)
Transfer/Mute Key (TRNFR)
Enter/Select Key (E)
37
35. External Speaker Jack
36. DC Power Jack
37. Remote Control Terminal
33. Antenna Connector
34. Tape Recorder Output Jack
4
UB343ZH_UBC785XLT_OM_0622
6/22/06
3:01 PM
ICON
P
L
/O
Page 5
DESCRIPTION
Priority Channel Indicator
Lock Out Mode Indicator
Scan/Search Direction Indicator
SRCH
Chain Search Mode Indicator
SRVC
Service Search Mode Indicator
SCAN
Scan Mode Indicator
AM,FM
WFM,NFM
Receiving Mode Indicators
Signal Meter
Uniden® and Bearcat® are registered trademarks of Uniden
America Corporation.
5
UB343ZH_UBC785XLT_OM_0622
6/22/06
3:01 PM
Page 6
UBC785XLT SHORTCUTS
MENU
3
2
1
MENU
3
3
2
MENU
3
1
1
MENU
3
1
2
MENU
3
4
1
MENU
3
9
1
then by rotating the VFO control to
enter the text and using ▲/HOLD or
LIMIT/▼ to the move cursor.
After the text is entered, press E
reenter
SCAN
▲/HOLD
5
1
5
5
▲/HOLD
.
MENU
2
4
1
E
E
This shortcut card is designed to assist you in getting through the menu
screens using the direct entry mode for commonly used features. Please
read the manual thoroughly before using this card. Be sure to back out of
the menu screen after each shortcut by repeatedly pressing MENU or by
pressing SCAN or SRCH keys.
6
UB343ZH_UBC785XLT_OM_0622
6/22/06
3:01 PM
Page 7
UBC785XLT SHORTCUTS
1
MENU
7
2
MENU
1
1
2
2
4
Rotate the VFO control to enter the tag and
use ▲/HOLD or LIMIT/▼ to move the cursor
forward or back and then press
.
E
2
1
MENU
E
2
after each Frequency
entered. To begin Searching between
the Range, press SRCH .
MENU
2
1
E
E
Rotate the VFO control to enter the tag and
use ▲/HOLD or LIMIT/▼ to move the
cursor and then press
E .
MENU
2
5
1
To program and control your scanner
remotely from a PC using Uniden’s
E-Scanner third party software, do the
following:
E
Press MENU
To silence the scanner's audio output,
set the scanner to "Mute On".
Press and hold
TRNFR
.
7
3
5
select
speed
UB343ZH_UBC785XLT_OM_0622
6/22/06
3:01 PM
Page 8
Important Notice
• The installation, possession, or use of this scanning radio in a motor vehicle may be
prohibited, regulated, or require a permit in certain states, cities, and/or local jurisdictions.
Your local law enforcement officials should be able to provide you with information
regarding the laws in your community.
• Changes or modifications to this product are strictly prohibited or operation of this product
in any way other than as detailed by this Owner’s manual. Could void your authority to
operate this product.
• The screen displays used in this manual are representations of what might appear when
you use your scanner.
8
UB343ZH_UBC785XLT_OM_0622
6/22/06
3:01 PM
Page 9
Terminology
What is Scanning?
Unlike standard AM or FM radio stations, most two-way communications do not transmit
continuously. The UBC785XLT scans the Frequencies you have programmed into the
Scanner’s channels you program until it finds an active frequency.
Scanning stops on an active frequency and remains on that channel as long as the
transmission continues. When the transmission ends, the scanning cycle resumes until
another transmission is received.
What is Searching?
The UBC785XLT can search each of its 22 bands to find active frequencies. This is different
from scanning because you are searching for frequencies that have not been programmed
into your Scanner’s channels. The scanner automatically chooses between two speeds while
searching. Turbo Search can search the VHF FM bands at up to 300 steps per second
(while 5 kHz only).
9
UB343ZH_UBC785XLT_OM_0622
6/22/06
3:01 PM
Page 10
Feature Highlights
• 1000 Channels – Program one frequency into each channel. You must have at least one
channel programmed to use the Scan mode.
• 22 Bands – Includes 22 bands, with aircraft and 800 MHz.
• 25 MHz-1300 MHz – Indicates the range of frequencies that can be searched within the
bands of your scanner.
Note: The frequency coverage is not continuous and excludes 512-806 MHz and
960-1240 MHz.
• 10 Priority Channels – You can assign one priority channel in each bank. Assigning a
priority channel allows you to keep track of activity on your most important channel(s)
while monitoring other channels for transmissions.
• Priority Plus Scan – Allows you to scan only priority channels.
• Air Band Service – Allows you to search the aircraft frequencies at the press of a button,
and to choice the step from 12.5 kHz or 8.33 kHz.
• Unique Data Skip – Allows your scanner to skip unwanted data transmissions and
reduces birdies.
• Memory Backup – If power is disconnected, the frequencies programmed in your scanner
are retained in memory.
• Direct Channel Access – Go directly to any channel without entering the Menu mode.
• Attenuator – Reduces the signal strength on a per frequency basis.
• Turbo Search – Increases the search speed to 300 steps per second. This applies only to
transmission bands with 5 kHz steps.
• Text Tags – You can customize your scanner by storing text tags (up to 16 characters).
• Auto Store – The scanner automatically stores found active frequencies into an assigned
bank.
• CTCSS/DCS – The scanner can receive and search for subaudible tones.
10
UB343ZH_UBC785XLT_OM_0622
6/22/06
3:01 PM
Page 11
Where to Obtain More Information
Before using your scanner, you must program frequencies into available channels.
To obtain frequency information for your area, contact your local dealer:
Information on the Internet
If you have access to the internet, you may want to visit one of the following websites for
additional information:
www.racescanner.eu
11
UB343ZH_UBC785XLT_OM_0622
6/22/06
3:01 PM
Page 12
Included with Your Scanner Package
If any of these items are missing or damaged, immediately contact your place of purchase.
• UBC785XLT Scanner
• AC Adapter (AD 773)
• Cigarette Cord
• DC Cord
• Mounting Bracket
• Telescopic Antenna
• Operating Guide
• Other Printed Material
12
UB343ZH_UBC785XLT_OM_0622
6/22/06
3:01 PM
Page 13
Setup
Connecting an Antenna
You must install an antenna before you can operate the scanner. You have been provided a
standard telescopic antenna that works well with this scanner, but you may want to
purchases another type to increase the range. To connect the telescopic antenna, simply
connect it to the BNC type ANT. connector on the rear of the scanner. You can purchase a
variety of scanner antennas for both mobile and base station available at a local electronics
store. Choose the one that best meets your needs.
When deciding on a mobile or base station antenna and its location, consider these points.
• The antenna should be as high as possible on a vehicle or a house.
• The antenna and its cable should be as far as possible from sources of electrical noise
(ignition systems, gauges, and so on).
• The antenna should be vertical for the best performance.
Mounting an Antenna
Once you choose an antenna, follow the mounting instructions supplied with the antenna.
Then route the antenna cable to the scanner.
The antenna connector on your scanner makes it easy to use the scanner with a variety of
antennas, such as an external mobile antenna or an outdoor base station antenna.
Always use 50 ohm coaxial cable, such as RG-58 or RG-8, to connect an outdoor antenna.
For lengths over 50 feet, use RG-8 low-loss dielectric coaxial cable If your antenna’s cable
does not have a BNC connector, you will also need a BNC adapter (available at a local
electronics store).
Follow the Installation instructions supplied with the antenna, route the antenna cable to the
scanner, then connect it to the ANT. jack.
Warning: Use extreme caution when you install or remove an outdoor antenna. If the
antenna starts to fall, let it go! It could contact overhead power lines. If the
antenna touches a power line, contact with the antenna, mast, cable, or guy
wires can cause electrocution and death. Call the power company to remove
the antenna. DO NOT attempt to do it yourself.
Optional Antenna
If you have chosen an optional mobile antenna, connect the antenna plug into the ANT.
connector on the rear of the scanner. (For more information on antenna installation, please
refer to the instruction guide that came with your antenna.)
13
UB343ZH_UBC785XLT_OM_0622
6/22/06
3:01 PM
Page 14
Typical Mounting Methods
The UBC785XLT can be conveniently mounted on a table, bulkhead, overhead, or any other
desired location (refer to figure below for typical mounting methods).
Caution: Make sure there are no hidden electrical wires or other items behind the desired
location before proceeding. Check that free access for mounting and cabling
is available.
• Table top mount
• Bulkhead mount
• Overhead mount
Mounting the Scanner in Your Vehicle
Before you mount the scanner, make sure you have all the necessary materials. Then
confirm that the scanner fits your vehicle’s mounting area. This unit requires a mounting
area of 2-3/8 inch high by 6-15/16 inch wide by 6-9/16 inch deep (61 x 176.5 x 167 mm).
Caution: Be sure to avoid obstructions behind the mounting surface.
Follow these steps to mount the scanner in your vehicle.
1. Choose a mounting location, then use the supplied
mounting bracket as a template to mark the positions for
the mounting screw holes.
2. In the marked positions, drill holes slightly smaller than
the supplied screws.
3. Attach the mounting bracket to the mounting location
using the supplied screws and lock washers.
4. Attach the scanner to the mounting bracket using the
supplied mounting knobs.
5. Connect the antenna’s cable to the ANT. connector
on the back of the scanner.
Note: If the antenna cable’s connector does not fit in the ANT.
connector, you might also need a Motorola-to BNC
antenna plug adapter (available at a local
electronics store).
14
UB343ZH_UBC785XLT_OM_0622
6/22/06
3:01 PM
Page 15
Applying Power for Vehicle Installation
You can power your scanner using either the supplied DC power cord or your vehicle’s
cigarette lighter socket using DC cigarette lighter power cord.
Caution: You must use a power source that supplies 13.8 V DC and delivers at least
700 mA. Your standard 12 V car battery should be sufficient. The cord
connector’s center tip must be set to positive and its plug must fit the scanner’s
DC 13.8 V jack. The supplied DC power cord meets these specifications. Using a
power cord that does not meet these specifications could damage the scanner or
the adapter.
• Always connect the adapter or DC power cord to the scanner before you connect it to the
power source. When you finish, disconnect the adapter or DC power cord from the power
source before you disconnect it from the scanner.
• For added safety and to protect your scanner,
disconnect the cable from your vehicle battery’s
negative (-) terminal before you begin.
Follow these steps to connect the supplied DC power cord.
1. Connect the power cord’s black wire to a chassis ground, such as a metal screw
attached to a metal part of the vehicle’s frame. Be sure that the screw is not insulated
from the frame by a plastic part.
2. Connect the power cord’s red wire (with in-line fuse) to a source
of voltage that turns on and off with the ignition switch, such as
a spare accessory terminal in your vehicle’s fuse box.
3. Insert the power cord’s barrel plug into the DC 13.8 V jack
on the back of the scanner.
4. Reconnect the cable to the vehicle battery’s negative (-)
terminal.
To power the scanner from a vehicle’s 12 V power source
(such as a cigarette-lighter socket), you need a cigarette-lighter
adapter.
To connect an optional DC cigarette-lighter power cable, insert its barrel plug into the
DC 13.8 V jack on the back of the scanner, then plug the power cable into your vehicle’s
cigarette lighter socket.
Note: If you use a cigarette-lighter power cable and your vehicle’s engine is running, you
might hear electrical noise from the engine while scanning. This is normal.
15
UB343ZH_UBC785XLT_OM_0622
6/22/06
3:01 PM
Page 16
Desktop Installation
You can place this scanner on a desk, shelf, or table to use it as
a base station.
1. Flip up the feet for desk installation.
2. Extend the antenna to full vertical position.
Adjust the angle for best reception.
Applying Power Using Standard AC Power
To power the scanner from an AC outlet, use the provided AC adapter with a 5.5 mm outer
diameter/2.1mm inner diameter tip.
Caution: You must use a Class 2 power source that supplies 13.8 V DC and delivers at
least 700 mA. The cord connector’s center tip must be set to positive and its plug
must fit the scanner’s DC 13.8 V jack. Using an adapter that does not meet these
specifications could damage the scanner or the adapter.
• Always connect the AC adapter to the scanner before you connect it to AC power. When
you finish, disconnect the adapter from the AC power before you disconnect it from
the scanner.
1. Insert the adapter’s barrel plug into the DC
13.8 V jack on the back of the scanner.
2. Plug the adapter into a standard AC outlet.
13.8
V
Note: Use only the AC adapter supplied with
your scanner.
Connecting an External Speaker
In a noisy area, an external speaker (available at a local electronics store) positioned in the
right place might provide more comfortable listening.
Plug the speaker cable’s 1/8 inch (3.5 mm) plug into your scanner’s EXT. SP. jack.
Note: Connecting an external speaker
disconnects the scanner’s
internal speaker.
Connecting an Earphone
For private listening, you can connect an
earphone with a 1/8 inch (3.5 mm) plug to the
EXT. SP. jack on the back of the scanner. Be very careful as damage to your hearing
can result if the VOL control is not set to the lowest level first. See below for "Listening
Safely" instructions. (Your local electronics store should carry a wide selection of earphones.)
Once the earphone is connected, it will automatically disconnects the internal speaker.
16
UB343ZH_UBC785XLT_OM_0622
6/22/06
3:01 PM
Page 17
Listening Safely
To protect your hearing, follow these guidelines when you use an earphone or headphones.
• Do not listen at extremely high volume levels. Extended high volume listening can lead to
permanent hearing loss.
• Set the VOL to the lowest setting before you begin listening. After you begin listening,
adjust the VOL to a comfortable level.
• Once you set the VOL, do not increase it. Over time, your ears adapt to the volume level,
so a volume level that does not cause discomfort might still damage your hearing.
Connecting the Clone Cable
You can transfer the programmed data to and from another UBC785XLT scanner using a
RS232C Cable (9 pin to 9 pin) (not supplied). Connect the cable between each scanner’s
REMOTE jacks. See "Clone Mode" on page 41. You can also upload or download the
programmed data to or from a PC using an optional PC interface kit available through your
local electronics store.
Connecting the Tape Recorder
You can use a standard tape recorder or a VOX (Voice Operated Control) recorder. To
connect the recorder to the scanner, connect a cable with a 1/8 inch (3.5 mm) plug from the
tape recorder’s remote jack to the TAPE OUT jack on the back of the scanner. (Your local
electronics store should carry a wide selection of cables and tape recorders.) Refer to the
"Record" section under "Additional Features" in the manual.
Remember!
• You must mark a channel, ID, talkgroup, or bank for Recording in order for this feature to
work.
• This feature does not work if your scanner is set with MUTE ON.
17
UB343ZH_UBC785XLT_OM_0622
6/22/06
3:01 PM
Page 18
Basic Operation
Turn the Scanner On
Turn the VOL control clockwise out of the detent position. The scanner automatically starts
scanning. Since there are no frequencies programmed in your scanner initially, you may not
receive any signals. Once you set the squelch and program some frequencies, you will be
hearing conversations regularly.
Setting the Squelch
To set the squelch, you must be in the hold mode, and you should not be receiving a signal
on your scanner.
1. Press ▲/HOLD until you do not hear a signal.
STRONG SIGNALS
2. Make sure that the VOL is set to a comfortable
listening level.
3. Think of the Squelch Control as a gate.
Turn the SQUELCH control fully counter-clockwise.
This raises the "Squelch Gate" so high that only very strong
signals can get through.
MEDIUM SIGNALS
WEAK SIGNALS
NOISE
4. Turn SQUELCH clockwise until you hear a hiss. This lowers the
"Squelch Gate" so that everything gets through – noise, weak
signals, medium signals and strong signals.
STRONG SIGNALS
MEDIUM SIGNALS
WEAK SIGNALS
NOISE
5. Turn SQUELCH back counter-clockwise just until the hiss stops.
Now the "Squelch Gate" allows only clear signals through.
STRONG SIGNALS
MEDIUM SIGNALS
WEAK SIGNALS
NOISE
18
UB343ZH_UBC785XLT_OM_0622
6/22/06
3:01 PM
Page 19
Next you must program some frequencies (page 24). It is recommended that you read the
next part "Understanding the Menu System" because it will assist you in accessing and
understanding many of the features. Later in a section called "Additional Features", you will
find explanations on how to disable the keypad acknowledgement tones, to mute the audio,
to change the appearance of the display and other general features.
Understanding the Menu System
It is very important for you to understand the Menu screen. To navigate through the Menu
screen is really quite simple. Many of the features of this scanner, can only be accessed by
the Menu screens. There are several ways to get through the screens. First of all, press
MENU to get started. Anytime you want to exit this mode or simply quit from where you are,
repeatedly press MENU until the scanner returns to the original state or you can press
SCAN or SRCH to exit directly MENU MODE. Anytime you are in the Menu mode, the audio
will be muted.
To assist you in understanding the Menu screen, flow charts are provided towards the back
of the manual so you can follow along. Two things to remember are rotate the through the
menu and press E or VFO to execute the command. For simplicity, we have chosen to
rotate the VFO control up or down in order to scroll through the menu and the E key for
entering or executing a command. Once you have pressed the E key and executed the final
choice (for instance, ON or OFF), the display backs up to the previous level of options.
Also direct entry of the numbers in the flow chart will get you through the screens, but the
other screen options are not visible. This method should be used only after you have gone
through the manual at least once. Tearout shortcut cards (see pages 4 and 5) are provided
to assist you in the direct entry method for commonly used features.
The illustration below shows the first level of the Menu screen. These levels are then
provided in a flow chart on pages 52 to 54. You will find a description section to explain the
meanings of these functions on the next pages. Then, you will be walked through all the
steps of programming, scanning and searching.
☞Hint: You can check the options you programmed on the display when you press and
hold MENU for 2 seconds in the following modes.
• Scan mode/Scan Hold mode.
• Chain Search mode/Chain Search Hold mode
MENU MODE
1:SEARCH OPTION
2:SCAN OPTION
3:SYSTEM OPTION
19
UB343ZH_UBC785XLT_OM_0622
6/22/06
3:01 PM
Page 20
Menu Description and Numeric Keypad Equivalents
Below are the Menu screens and a brief description or purpose of the feature.
1:SEARCH OPTION
1:AIR STEP
You can select the air band step 12.5kHz or 8.33 kHz.
2:CHAIN SEARCH
1:CHAIN SEARCH
You need to turn Chain Search feature to ON if you use the Chain Search
feature.
2:SEARCH RANGE
You can program up to 10 search ranges. The first time you program a range
you will need to do so through the Menu. After the first time you can program
a range as you do on most any other scanner, using the numeric keypad, ▲,
▼ and VFO control. Use this Menu item to select the search range that you
want to program.
You can program range 1 through 10, one at a time. For each of the ranges,
the following options can be modified.
1:RANGE
Enter the upper and lower frequency limits of the Search Range.
2:STEPS
You can assign a variety of step sizes to the search range.
Note: The default step is usually acceptable and is listed on page XX.
3:MODE
You can change the Auto receive mode to AM, FM, WFM and NFM.
4:ALPHA TAG
You can name to each channels and banks with up to 16 charactors.
3:DELAY
Set the delay for the search ranges. This applies to all the ranges (See
CHANNEL DATA-STEPS).
4:ATTENUATOR
If you are near an signal source which emits unusually strong signal, the
scanner may be overloaded with its signal. Once overloaded, the scanner
may keep stopping on that signal and miss other transmissions.
UBC785XLT comes with an RF Attenuation feature. It attenuates (reduces)
the strength of a incoming signal in all modes to prevent stronger signals from
overloading the scanner.
5:TONE DATA
The default mode is OFF. This means that you will receive all transmissions
on any frequencies that are active within your search range(s). By selecting
CTCSS (analog) or DCS(digital) subaudible tone you can set the radio to
receive only a particular subaudible tone to be received during your search.
You can also lockout a particular subaudible tone. You may wish to do this if
you want to search a range but not hear transmissions on any frequency that
has a particular subaudible tone.
20
UB343ZH_UBC785XLT_OM_0622
6/22/06
3:01 PM
Page 21
Note: Through the System Menu you can set the radio to operate in Tone
Search mode during Search as well. In this mode, the radio will
automatically determine the active subaudible tone on any frequency
received during the search.
6:RECORD
With this feature set to on, any frequency that is active during the search, can
be recorded to an external tape recorder.
7:AUTO STORE
You can automatically store the active frequencies found during a search into
the memory. You can select the bank to program. The audio will be muted.
2:SCAN OPTION
1:FREQUENCY
Allows you to program a frequency to a memory channel or edit the frequencyl
already programmed. You can also set an alphanumeric text tag (alpha tag) for each
programmed frequencies.
2:DELAY
You can set delay for the memory channel. The default delay is two seconds.
3:TONE DATA
You can set a CTCSS (analog) or DCS (digital) subaudible tone for a frequency. To
do so you must have the SQ Mode in the System Menu set to Tone SQ. You can
also program a subaudible tone easily by pressing the E key in Scan Hold mode after
programming a frequency. This will bring up the Tone Data menu without having to
navigate the Menu. By doing this you will receive all transmissions on the frequency,
regardless of the subaudible tone, except the one which you have locked. Any
transmissions with that tone will not be received.
4:BEEP ALERT
You can set a Beep Alert per channel to alert you when specific frequencies are
active. For example, you may wish to be alerted anytime a mutual aid fire frequency
is active. With Beep Alert, you will hear three beeps at the start of each transmission
that you have flagged as such. You will also notice that as you scroll pass the flagged
channel(s), you will hear three beeps.
5:ATTENUATOR
See 1: SEARCH OPTION/ 2:CHAIN SERACH/ 4:ATTENUATOR.
6:STEPS
Your UBCD785D is programmed with default step sizes for each frequency range
(see page 1). Steps are important if you are interested in using the VFO to tune off
from a frequency programmed into memory or if you wish to program a frequency
that the default step size will not accept.
7:MODE
Default Auto receive modes are also programmed into memory. AM for aircraft for
example. You can change the default settings on a per-channel basis with this Menu
item.
21
UB343ZH_UBC785XLT_OM_0622
6/22/06
3:01 PM
Page 22
8:RECORD
You can flag any channel for recording using this menu function. Use your own
recording device plugged into the jack on the back of the scanner.
3:SYSTEM OPTION
1:DIMMER
Allows you to change the brightness of the display.
2:SCREEN MASK
Screen Mask allows you to limit what appears on the display to the alpha tags that
you have set for a channel along with a few function icons. Screen Mask removes the
frequency, receiving mode tone data and signal strength bars. This mode is
particularly useful in public safety vehicles where "information overload" is already a
problem. Screen Mask does not work in Search mode.
3:KEY BEEP
Use this function to turn OFF the keypad acknowledgement beep. The default setting
is ON.
4:ENTER LOCK
Use Enter Lock to prevent accidental re-programming of channels, tone
(CTCSS/DCS) and talk groups entered into memory. The default setting is OFF.
5:PC CONTROL
Use this function to set the transfer speed (baud rate) at which your personal
computer (PC) communicates with the scanner when downloading information into
your scanner using Uniden E-Scanner software. See page 40 for details.
6:CLONE
You can clone all the programming, including frequencies and alpha tags as well as
bank settings and other parameters from another UBC785XLT.
7:DATA SKIP
A scanner will normally stop on any transmission it receives. This means the
UBCD785D will occasionally stop on data signals and unmodulated transmissions.
You can automatically skip many of these types of transmissions during search.
8:SQ MODE
The SQ Mode allows you to set at your option, whether the scanner will stop on all
active transmissions on a particular frequency or it will only respond to transmissions
with a pre-set subaudible tone. This applies to both Conventional Search and Scan
modes. The options are as follows:
22
UB343ZH_UBC785XLT_OM_0622
6/22/06
3:01 PM
Page 23
1. CSQ - The default setting is CSQ (carrier squelch). In this mode the scanner will
stop on any transmission on a programmed frequency.
2. TONE SQ - In Tone Squelch mode, if you have set a subaudible tone for a
frequency, the scanner will only stop on that frequency if the transmission
includes the prescribed tone.
3. TONE SEARCH - In this mode, as soon as the scanner stops on any channel,
the scanner will begin to search for any subaudible tone that is being used on a
transmitted frequency. The scanner will check each CTCSS tone sequentially
and it will find DCS tones instantly.
9:BANK TAG
Allows you to set an alphanumeric text tag for individual banks in the scanner (1-10).
(The "0" key represents Bank number 10.) For example, you may wish to set the
Bank one text tag as Law Enforcement, the second bank as Fire, etc.
23
UB343ZH_UBC785XLT_OM_0622
6/22/06
3:01 PM
Page 24
Programming
Before the UBC785XLT can begin conventional scanning, you must program a frequency
into at least one channel.
Repeat this procedure for each channel you want to program.
Storing Frequencies into Channels in Menu Mode
1. Prepare frequencies you received from your dealer or from various sources on the
internet.
2. Press MENU.
3. Select 2:SCAN OPTION by rotating the VFO and pressing E.
4. Enter the channel number using the keypad, then press E.
C 001
855.0000 FM
ENTER CHANNEL No
5. Select 1:FREQUENCY by rotating the VFO and pressing E.
Then enter the frequency.
C 001
1:FREQUENCY
2:DELAY
3:TONE DATA
6. Enter the alpha tag and press E.
(See page 26.)
C 001
855.0000 FM
ALPHA TAG
¡
7. The following display appears. Select the action by rotating
VFO, then press E.
If you want to program other channel,
select 1:OTHER CHANNEL.
1:OTHER CHANNEL
2:CHANNEL OPTION
3:DONE
If you want to set other settings for this channel,
select 2: CHANNEL OPTION.
If you want to exit the menu, select 3:DONE.
☞ Remember! You can also use ▲ or ▼ instead of rotating the VFO.
Also instead of pressing E, you can press the VFO control.
24
UB343ZH_UBC785XLT_OM_0622
6/22/06
3:01 PM
Page 25
Note: • You can also ▲ or ▼ when selecting a channel. Press and hold ▲ or ▼ for
1second to move up/down more quickly.
• To clear a mistake while entering the frequency, press
until the display is cleared.
• If you enter a channel or frequency which is out of the
scanner’s range, a beep will sound and ERROR
appears on the display.
• For each channel, you can also change the step size or
the mode. (See page 53).
Deleting a Stored Frequency
1. Press MENU.
2. Select 2:SCAN OPTION by rotating the VFO and
pressing E.
3. Select the channel number you want to edit by rotating the
VFO and pressing E.
.
(decimal key) repeatedly
C 010
512.0000 FM
ERROR
OUT OF CHANNEL
C 010
512.0000 FM
ERROR
OUT OF BAND
C1000
0000.0000
4. Select 1:FREQUENCY using the keypad and pressing E.
5. Press 0 and pressing E.
☞ Remember! You can also use ▲ or ▼ instead of rotating the VFO.
Also instead of pressing E, you can press the VFO control.
Note: Channels with no frequencies are automatically
locked out.
Editing a Stored Frequency
1. Press MENU.
2. Select 2:SCAN OPTION by rotating the VFO and pressing E.
3. Select the channel number you want to edit using the keypad and pressing E.
4. Select 1:FREQUENCY by rotating the VFO and pressing E.
5. Enter a frequency by using
.
(decimal key) and the keypad and pressing E.
☞ Remember! You can use ▲ or ▼ instead of rotating the VFO.
Also instead of pressing E, you can press the VFO control.
Duplicate Frequency Alert
If you enter a frequency which has been stored in other channel,
you will hear a beep and the scanner displays WARNING.
Press
.
(decimal key) to enter a different frequency.
––– OR –––
Press E again to store the frequency in both channels.
25
C 010
512.0000 FM
WARNING
DUPLICATE 017
UB343ZH_UBC785XLT_OM_0622
6/22/06
3:01 PM
Page 26
Transfer Frequencies
You can transfer a frequency that has been stored in a channel to another channel.
1. Press ▲/HOLD.
2. Press TRNFR, and the smallest empty channel number along with the frequency will
flash on the display.
If you want to transfer the frequency to other channel, select the channel by rotating the
VFO or using ▲ or ▼ and pressing E.
3. Press E and the frequency can be stored in this channel.
Note: When the frequency is transferred, channel data (alpha tag, mode, attenuator, beep
alert and tone data) are also transferred.
Storing Alpha Tags
You can customize your scanner by storing text tags for easy identification of banks, channel
transmissions. The text tags can be set at the Menu mode. (Refer to “Understanding the
Menu System” on page 19.)
Assigning a Bank Tag to a Bank
1. Press MENU.
2. Select 3:SYSTEM OPTION / 9:BANK TAG by rotating the VFO or using ▲ or ▼
and pressing E.
3. Select the bank number by rotating the VFO or using ▲ or ▼
and pressing E.
BANK TAG 1
4. The cursor appears on the display. Rotate the VFO to select
the letter and then press ▲ or ▼ to move the cursor right or
left. Both capital and lower case letters are available, as well
as numbers and punctuation marks.
BANK TAG 1
Uniden Group
5. After entering the desired text, press E.
Assigning a Text Tag to a Channel
1. Press MENU.
2. Select 2:SCAN OPTION by rotating the VFO or using ▲ or ▼ and pressing E.
3. Select the channel number by rotating the VFO and pressing E. You can also enter the
channel number by using the keypad and pressing E.
4. Select 1:FREQUENCY by rotating the VFO and pressing E.
Note: You can only assign a text tag to the channel where the frequency is stored.
5. ALPHA TAG and the cursor appear on the display. Rotate
the VFO to select a letter, and press ▲ or ▼ to move the
cursor right or left. Both capital and lower case letters are
available, as well as numbers and punctuation marks.
6. After entering the desired text, press E.
☞ Remember! To enter a blank, press
.
(decimal key) twice.
26
C 001
855.0000 NFM
ALPHA TAG
¡
UB343ZH_UBC785XLT_OM_0622
6/22/06
3:01 PM
Page 27
Beep Alert
The scanner can alert you with three beeps at the beginning of a transmission on an
assigned frequency.
Assigning the Beep Alert to a Channel
This alert can be set ON/OFF for every channel.
1. Press MENU.
2. Select 2:SCAN OPTION by rotating the VFO and pressing E.
3. Select the channel number by rotating the VFO and pressing E. You can also enter the
channel number by using the keypad and pressing E.
4. Select 4:BEEP ALERT by rotating the VFO and pressing E.
5. Select 1:ON or 2:OFF by rotating the VFO and pressing E.
Note: If NOT REGISTERED appears, make sure a frequency is stored in the channel.
☞ Remember! You can also use ▲ or ▼ instead of rotating the VFO.
Also instead of pressing E, you can press the VFO control.
Programming Tips
• Group similar services into a bank. For example, program police frequencies in channels 1
through 10 and fire/emergency into channels 51 through 60, and so on.
• Put the frequency that you listen to the most or the most important frequency into a
Priority channel.
• To quickly program a series of channels, start with the lowest number channel.
For example, when you are programming five new frequencies into channels 4 through
8, start with channel 4. After you finish programming a channel, rotate the VFO up or
press ▲ to go to the next higher channel.
• Write down your programmed channels and frequencies and put them in a convenient
place in case of accidental reprogramming.
• Frequencies are rounded off according to the step of each channel.
• When you are overwriting a tagged channel with a new frequency, the previous alpha tag
will be deleted. Re-register the alpha tag.
• When programming frequencies, a 2 second delay is set automatically but can be
changed in the menu mode.
27
UB343ZH_UBC785XLT_OM_0622
6/22/06
3:01 PM
Page 28
Scanning
1. After programming frequencies, simply press SCAN to begin
scanning. During scanning, when you rotate the VFO, you can
select the direction (↑ or ↓) you want to scan.
C 001
SCAN
Bank 1234567890
2. The indicators of active banks appear on the display, and the
bank being currently monitored flashes. You can deselect
banks from active scanning by entering their number on your keypad. The deselected
bank indicator changes to "-", and the bank’s channels are not scanned.
Note: At least one bank must be active. You cannot deactivate all ten banks at the same
time. If you try to deselect all the banks, the first bank is automatically selected.
To restore a bank for active scanning, enter the bank’s number on your keypad.
The bank’s indicator will be displayed again.
SCAN
3. During normal scanning the scanner skips
unprogrammed or locked out channels.
4. When a transmission is received, the scanner
stops on that channel. When the transmission
ends, scanning resumes automatically.
CHANNELS
1 2 3 4 5 6 7 8 9 10
Frequency
Locked Out
(L/O)
Frequency
not entered
Scan Hold Feature
If you want to stop on a channel during scanning, press
▲/HOLD.
Note: When you press and hold SCAN for 2 seconds, the
scanner will move to the smallest empty channel.
C 001
1300.0000 FM
25cm Amateur 1
UNIDEN Group A
C1000
0000.0000
If you want to resume scanning, press RSM.
Bank 10
To directly access a specific channel:
There are several ways to access a specific channel quickly.
1. Press ▲/HOLD.
2. Using the keypad, enter the channel number.
3. Press ▲/HOLD again.
Another method is as follows:
1. Press ▲/HOLD.
2. When the VFO setting is in the channel mode, rotate the VFO until the desired channel
is displayed. The scanner will automatically go to Hold mode.
28
UB343ZH_UBC785XLT_OM_0622
6/22/06
3:01 PM
Page 29
Note: When in Hold mode, you can use the VFO to step up or down through the channels.
You can also switch from stepping up/down through channels to stepping up/down
through frequencies by pressing the VFO.
RF Attenuation Feature
The UBC785XLT comes with an RF Attenuation feature. If you're near an unusually strong
signal source, the signal may overload the scanner. The scanner may stop repeatedly on
that signal and miss other transmissions.
The RF Attenuation feature works in all modes and attenuates (reduces) the incoming signal
strength to prevent stronger signals from overloading the scanner.
1. Press MENU.
2. For Search mode, select 1: SEARCH OPTION / 2:CHAIN SEARCH /
4:ATTENUATOR by rotating the VFO and pressing E.
For Scan mode, select 2:SCAN OPTION by rotating the VFO and pressing E. Then
select the channel number by rotating the VFO and pressing E.
Select 5:ATTENUATOR by rotating the VFO and pressing E.
3. Select 1:ON by rotating the VFO and pressing E.
Note: Attenuation will only be active for the specified channel. In Search mode, it is applied
to the Search ranges in all banks.
☞ Remember! You can also use ▲ or ▼ instead of rotating the VFO.
Also instead of pressing E, you can press the VFO control.
Setting the Delay Mode for Frequency
When scan or search stops on a channel, there is a brief pause before resuming. A default
delay of 2 seconds is automatically set for each frequency . If you want to change the delay
period:
1. Press MENU.
2. For Scan mode, select 2:SCAN OPTION by rotating the VFO and pressing E.
3. Select the channel number of the stored frequency to be delayed by rotating the VFO
and pressing E.
4. Select 2:DELAY and press E.
5. Rotate the VFO to select one of the delay periods and press E.
6. For Search mode, select 1:SEARCH OPTION / :CHAIN SEARCH / 3:DELAY
by rotating the VFO and pressing E, then set to a delay period the same way as the
Scan mode setting.
29
UB343ZH_UBC785XLT_OM_0622
6/22/06
3:01 PM
Page 30
Note: The delay periods are as follows:
• None: Delay feature off
• 1 sec.: Delays for 1 sec. before re-scanning
• 2 sec.: Delays for 2 sec. before re-scanning
• 4 sec.: Delays for 4 sec. before re-scanning
• Infinite: Stays on until RSM is pressed
• -2 sec.: Stays for 2 sec. only before re-scanning *
• -5 sec.: Stays for 5 sec. only before re-scanning *
• -10 sec.: Stays for 10 sec. only before re-scanning *
* Setting negative delay periods are useful if you are only interested in small segments of conversations. For example: If you set a -5 second delay, you will only
hear 5 seconds of the conversation and then the scanner will resume scanning,
whether or not the conversation is finished.
☞ Remember! You can also use ▲ or ▼ instead of rotating the VFO.
Also instead of pressing E, you can press the VFO control.
Channel Lockout
You can lockout any channel so it is not checked during scanning.
The locked out channel can be restored.
Lockout in Hold Mode
1. Press ▲/HOLD.
2. Enter the channel number you want to lock out using the
keypad, then press ▲/HOLD again.
––– OR –––
Rotate the VFO up or down to change the channel.
3. Press L/O. L/O appears on the display.
30
C 001
141.5000 FM
UNIDEN Group A
UB343ZH_UBC785XLT_OM_0622
6/22/06
3:01 PM
Page 31
Lockout in Scanning Mode
If the scanner keeps stopping on a particular channel due to noise or frequent transmissions,
you may want to keep that channel from scanning.
1. Wait until the scanner stops on the channel.
2. Then press L/O.
3. The scanner immediately resumes scanning because the locked out channel is no longer
in the scanning sequence.
Lockout Tips
Write down your locked-out channels and put in a convenient place in
case you need to restore them.
Restoring a Locked-out Channel
1. Press ▲/HOLD.
2. Select a locked out channel by using the keypad, then press ▲/HOLD.
3. Press L/O. The L/O disappears.
Restoring All Locked-out Channels
You can restore all locked-out channels in a bank only when a bank is selected for scan. If
you have deselected a bank and you want to restore all of its locked-out channels using the
steps below, you must press SCAN and then enter the number of the bank on your keypad.
1. Press ▲/HOLD.
Note: You must be in Hold mode before restoring all locked-out channels.
2. Press and hold L/O for about 2 seconds.
You will hear two beeps when all the channels have been restored.
31
UB343ZH_UBC785XLT_OM_0622
6/22/06
3:01 PM
Page 32
Priority Scan
When Priority Scan is turned ON, your scanner checks the priority channel in the banks you
selected every 2 seconds for activity. If a signal is present on the priority channel, your
scanner monitors the channel until the transmission ends, then resumes normal scanning.
You can designate one channel in each bank as a Priority Channel. By default, the first
channel in each bank is the Priority Channel, but you can change this.
To activate Priority Scan (in either the Hold or Scan Mode):
1. Press PRI to select PRIORITY ON.
Note: If you have locked out the priority channel, ERROR
appears when you select Priority mode.
2. Press PRI to select PRIORITY OFF to deactivate Priority
Scan.
PRIORITY ON
C 010
1240.0000 FM
ERROR
PRI CH LOCKOUT
Changing the Priority Channel
You cannot eliminate the Priority Channel, but you can change it to any one of the 100
available channels in each bank.
1. Press ▲/HOLD.
2. Select a new Priority Channel using the keypad, then press ▲/HOLD again.
3. Press and hold PRI for 2 seconds to designate this channel
as your new Priority Channel.
Two beeps indicates that the Priority Channel has been
changed. The P icon appears on the display.
C 005
512.0000 FM
UHF TV 1
UNIDEN Group A
Priority Channel Plus Scan
You can scan only the Priority Channels (except for the locked out channels) in the banks
you selected.
To activate Priority Channel Plus (Only in Scan mode):
Press PRI to select PRIORITY PLUS.
To deactivate Priority Channel Plus:
Press PRI to select PRIORITY ON or PRIORITY OFF on the display to deactivate
Priority Channel Plus Scan.
Note: Priority or Priority Plus Scan are disabled while Search mode is selected.
32
UB343ZH_UBC785XLT_OM_0622
6/22/06
3:01 PM
Page 33
Searching
Setting a Search Range
Note: First you must set the search ranges through the Menu screen prior to searching.
The UBC785XLT can search up to 10 separate frequency ranges to help you discover new
stations in your area.
To set a Search Range, enter into the Menu mode.
1. Press MENU.
2. Select 1:SEARCH OPTION / 2:CHAIN SEARCH / 2:SEARCH RANGE by
rotating the VFO and pressing E.
3. Select a range number by rotating VFO and pressing E.
4. Select 1:RANGE by rotating the VFO and pressing E.
Enter the lowest frequency using the keypad and then
press E. Then repeat the same step for the highest
frequency, then press SRCH. The scanner starts searching.
If an active search is detected, SRCH flashes.
SRCH 12.5k
1240.0000 FM
Range 1234567890
––– OR –––
1. Press and hold SRCH for 2 seconds.
2. Select - range number - 1:RANGE and program the lowest and highest frequencies by
the same way as step 3 and 4 above.
☞ Remember! You can also use ▲ or ▼ instead of rotating the VFO.
Also instead of pressing E, you can press the VFO control.
In Search Hold mode, you can change lowest and highest frequencies to the selected
search range.
1. Press ▲/HOLD.
2. Enter the lowest frequency using the keypad, then press LIMIT/▼.
3. Enter the highest frequency using the keypad, then press LIMIT/▼.
4. Press SRCH.
Note: • The scanner can continuously search up to 10 ranges. (Chain Search)
• You can select or deselect the search range freely by pressing the corresponding
number with the keypad.
• The scanner automatically increases its search speed from 100 to 300 steps per
second for the bands having 5 kHz steps. (Turbo Search)
• After you have set the search range through the Menu the first time for a range,
you will be able to set new ranges for the same range by using the keypad and the
standard direct entry method.
33
UB343ZH_UBC785XLT_OM_0622
6/22/06
3:01 PM
Page 34
Caution: After you have entered the search range while still in the Menu mode, you can set
your alpha tag (see page 26), change the step size of the search, or change the
mode. Once the lower and upper parameters of your search are edited, the Menu
screen backs up one level to allow you to modify the step size, receive mode, and
alpha tag.
Select 2:STEPS for your step size choices and then press E or VFO. Select
3:MODE for the receiver mode choices and then press E or VFO.
Select 4:ALPHA TAG to enter an alpha tag using the VFO and then press E.
Starting Chain Search
1. After setting the search ranges, select 1:SEARCH OPTION / 2:CHAIN SEARCH
/ 1:CHAIN SEARCH by rotating the VFO and pressing E.
2. Select 1:ON by rotating the VFO and pressing E.
3. Press SRCH to search up to 10 ranges continuously.
☞ Remember! You can also use ▲ or ▼ instead of rotating the VFO.
Also instead of pressing E, you can press the VFO control.
Note: • If CHAIN SEARCH is OFF, only 1 range can be searched.
• When searching stops, press RSM to resume searching.
• When you rotate the VFO while searching, you can change the search direction to
up or down.
• When searching in WFM, it will stop before reaching the
desired frequency if the step is other than 50 kHz or 100
kHz.
Search Hold Feature
SRCH 12.5k
1240.0000 FM
Range 1
25cm Amateur Grp
1. Press ▲/HOLD or LIMIT/▼ at anytime to stop the search.
2. Press RSM or SRCH to resume searching.
Data Skip
A scanner will normally stop on any transmission it receives. This means the UBC785XLT
will occasionally stop on data signals and unmodulated transmissions. You can automatically
skip many of these types of transmissions during search. To
SYSTEM OPTION
activate the Data Skip feature, enter into the Menu mode.
1. Press MENU.
2. Select 3:SYSTEM OPTION / 7:DATA SKIP by
rotating the VFO and pressing E.
3. Select 1:ON by rotating the VFO and pressing E.
☞ Remember! You can also use ▲ or ▼ instead of rotating the VFO.
34
5:PC CONTROL
6:CLONE
7:DATA SKIP
UB343ZH_UBC785XLT_OM_0622
6/22/06
3:01 PM
Page 35
Also instead of pressing E, you can press the VFO control.
When Data Skip is active, your scanner may pause momentarily on an unwanted signal
but will resume searching in 2 or 3 seconds. The Data Skip feature is active as well as
Scan mode. Data Skip does not function during AM/WFM band Scan, Chain Search for
AM/WFM band or Priority Scan.
Frequency Skip
If a particular frequency continues to interrupt search scanning, it is possible to set your
scanner to skip the frequency.
To skip over a frequency, press L/O when stopping at the frequency you want to skip or
when in Search Hold mode.
Note: • You can program up to 200 skip frequencies.
When the 201st skip frequency is programmed, the first frequency is automatically
unlocked.
• If all frequencies in the search range are set to skip, a beep sounds and it moves
to Search Hold mode.
To resume searching.
1) Cancel the Frequency Skip by pressing L/O at the frequencies you want to
resume searching.
––– OR –––
2) Change the Search Frequency range.
To cancel all skipped frequencies, press and hold L/O for 2 seconds in Search Hold
mode.
Storing Search Frequencies
You can quickly store any frequency you find during Search.
1. Press ▲/HOLD or LIMIT/▼ to stop searching, or when the scanner stops on the
frequency you want to store, press TRNFR.
2. The smallest empty channel number flashes on the display.
If you want to store the frequency to other channel, select
the channel by rotating the VFO or using ▲ or ▼.
3. Press E.
SRCH 12.5k
1240.0000 NFM
Range 1
C004 0000.0000
Note: • If the frequency you want to store exists already,
WARNING appears on the display and you will hear a beep. (See “Duplicate
Frequency Alert” on page 25.)
• After storing the frequency, the scanner moves to the Search Hold mode.
• If no free channel exists, the frequency you want to store will automatically be
stored in the previous channel before you entered into Chain Search mode.
4. If you want to store other frequencies, resume search by pressing SRCH or RSM, then
repeat the step 1 to 3.
35
UB343ZH_UBC785XLT_OM_0622
6/22/06
3:01 PM
Page 36
Auto Storing
The scanner automatically stores active frequencies if its Auto Store feature is turned ON.
But the frequencies already stored can not be stored. To make use of this feature, set a
search range first (see page 33). If you start this feature without setting a search range, NO
LIMIT DATA appears on the display.
1. Press MENU.
2. Select 1:SERVICE OPTION / 2:CHAIN SEARCH / 7:AUTO STORE by
rotating the VFO and pressing E.
3. Select 1:ON by rotating the VFO and pressing E.
☞ Remember! You can also use ▲ or ▼ instead of rotating the
VFO. Also instead of pressing E, you can press the VFO
control.
AUTO STORE
SELECT BANK
12--56----
4. Select the bank number you want to store with the keypad.
The selected bank number appears on the display.
Note: If the selected bank has no free channels to store, CH
DATA FULL will appear on the display and you will
hear a beep.
AUTO STORE
ERROR
CH DATA FULL
6. Press SRCH to start auto storing.
7. When the selected bank has no free channel, the scanner
stop auto storing and STORE END appears. If you want to
stop auto storing on the way, press ▲/HOLD.
Squelch (SQ) Mode
C 001
1245.8500 FM
Bank 12--56---AUTO STORE
The scanner has the following SQ modes.
• Carrier SQ mode (default setting)
The scanner will stop on any active frequencies or squelch opening, regardless of whether
any subaudible tone has been programmed on your scanner for the channel or search
range.
• Tone SQ mode
The scanner will stop on any active frequency for which you have not programmed any
subaudible tone or whose subaudible tone is the same as the one you have programmed.
• Tone Search mode
When the scanner stops on an active frequency, the scanner will begin searching the subaudible tone used on the frequency one of which may also be in use. The scanner counts
up through the CTCSS tones and instantly determines any possible DCS tone. See Page
51 for a listing of the tones that the UBC785XLT decodes.
Note: When Tone Search is active and the scanner finds the subaudible tone used on a
frequency, CTCSS or DCS and subaudible tone flashes. You can press E to program that frequency with the found subaudible tone. When you change the mode
to Tone SQ from Tone Search, you can confirm the frequency and subaudible tone
has been programmed.
36
UB343ZH_UBC785XLT_OM_0622
6/22/06
3:01 PM
Page 37
• Tone Lock (out) mode
You can lock a particular subaudible tone. The scanner won't stop on any transmissions
which have the locked out subaudible tone.
To select the SQ mode:
1. Press MENU.
2. Select 3:SYSTEM OPTION / 8:SQ MODE by rotating the VFO and pressing E.
3. Rotate the VFO to select one the type from (1:CSQ, 2:TONE SQ, 3:TONE
SEARCH) and press E.
4. To set Tone Lock mode, do the following first, then select 2:TONE SQ in step 3.
1) For Scan mode, select 2:SCAN OPTION - select the channel number - / 3:TONE
DATA / 1:CTCSS or 2:DCS by rotating the VFO and pressing E, than press L/O.
2) For Search mode, select 1:SERVICE OPTION / :CHAIN SEARCH /
5:TONE DATA / 1:CTCSS or 2:DCS by rotating the VFO and pressing E, than
press L/O.
☞ Remember! You can also use ▲ or ▼ instead of rotating the VFO.
Also instead of pressing E, you can press the VFO control.
Note: • To unlock the tone, press E instead of pressing L/O on step 1) or 2).
• CTCSS: Continuous Tone Coded Squelch System.
• DCS: Digital Coded Squelch.
• When Search mode and Tone Search are selected, the display shows the
frequency and tone data alternately.
• If the delay feature (-2 sec/-5 sec/-10 sec) has been set while in Tone search
mode, it resumes scanning according to the delay period.
37
UB343ZH_UBC785XLT_OM_0622
6/22/06
3:01 PM
Page 38
C 001
512.0000 FM
CTCSS 250.3
Bank 1
C 001
512.0000 FM
DCS 025
Bank 1
C 001
512.0000 FM
Tone SQ ON,
CTCSS 250.3 Hz setting
Tone SQ ON,
DCS 025 setting
C 003
512.0000 FM
CTCSS 250.3
UNIDEN Group A
C 003
512.0000 FM
DCS 025
UNIDEN Group A
UNIDEN Group A
Tone Search,
CTCSS 250.3 Hz detecting
Tone Search,
DCS 023 detecting
Tone Search,
no signal received
Bank 1
Tone SQ ON,
CTCSS & DCS
non-setting
C 003
512.0000 FM
Additional Menu Options for Searching
Each of these additional menu options applys to all search ranges entered. If there is a
range that you do not want an option to apply, then simply enter the range number on the
numerical keypad. You will see the range number that you have selected disappears from
the display. (For more information on these options refer to the "Menu Descriptions" section
and "Additional Features" section.)
Options:
RECORD (for more information see page 17).
1. Press MENU.
2. Select 1:SERVICE OPTION / :CHAIN SEARCH / 6:RECORD by rotating the
VFO and pressing E.
3. Select 1:ON by rotating the VFO and pressing E.
ATTENUATOR (for more information see page 29).
1. Press MENU.
2. Select 1:SERVICE OPTION / :CHAIN SEARCH / 4:ATTENUATOR by rotating
the VFO and pressing E.
3. Select 1:ON by rotating the VFO and pressing E.
☞ Remember! You can also use ▲ or ▼ instead of rotating the VFO.
Also instead of pressing E, you can press the VFO control.
DELAY
Refer to page 29.
38
UB343ZH_UBC785XLT_OM_0622
6/22/06
3:01 PM
Page 39
Air Service Search
Using Aircraft Service Search
You can search the aircraft frequencies by pressing AIR. If the scanner stops on an
frequency, you can resume searching by pressing RSM.
Note: When you rotate the VFO while the Air Service Search is active, you can change the
search direction to up or down.
Air Service Search Skip
You can set the scanner to skip the unwanted frequencies during Air Service Search. 100
skipped frequencies are programmable.
1. To skip over a frequency, press L/O when stopping at the frequency you want to skip.
2. To cancel a skip during search, press ▲/HOLD or LIMIT /▼, select the desired
frequency by rotating the VFO or using ▲ or ▼, then press L/O.
To restore all skipped frequencies, press and hold L/O for
2 seconds.
SRVC 12.5k
118.0250 AM
SERVICE SEARCH
AIR
Changing the step
You can choice the step of Aircraft Service Search between 12.5 kHz or 8.33 kHz.
To change the step:
1. Press [MENU].
2. Select 1:SERCH OPTION / 1:AIR STEP by rotating the VFO and pressing E.
3. Select 12.5kHz or 8.33kHz, then press E.
39
UB343ZH_UBC785XLT_OM_0622
6/22/06
3:01 PM
Page 40
Remote Interface
You can communicate and program your UBC785XLT in numerous ways with peripheral
devices using the Remote Interface Cable port (the serial cable is optional). This radio offers
the following modes:
❖ PC Control mode
Program and control your scanner from a PC using optional ARC785 software.
❖ Clone mode
Clone all the frequencies into your scanner to another UBC785XLT.
PC Control Mode
To connect Scanner to PC:
Plug the scanner end of the RS232C straight cable into the remote port which is on the rear
of the scanner. Plug the other end of the cable (DB-9 serial connector) into a personal
computer’s serial port. A few PC’s may require an adapter, most will not. Of course, make
sure your PC is turned ON.
To program your scanner:
You can program and control your scanner remotely from a PC using optional ARC785
software.
After connecting the scanner to a PC, turn the scanner ON.
To use the Remote (PC Control) mode, you must install optional ARC785 software and use
as directed. Make sure that your scanner is connected to the serial port of the PC using the
RS232C straight cable.
40
UB343ZH_UBC785XLT_OM_0622
6/22/06
3:01 PM
Page 41
Start Remote Mode and Change Transfer Speed:
Through the Menu system, select 3:SYSTEM OPTION /
5:PC CONTROL by rotating the VFO and pressing E. To
start Remote mode, choose from the transfer speed list except
for 5:OFF.
SPEED
3:9600 bps
4:19200 bps
5:OFF
A unique feature of the UBC785XLT is that all the front panel keys as well as the VFO on
the radio remain operational in Remote mode.
For information on purchasing cables, connectors, and optional ARC785 software to
program and control your UBC785XLT, please contact your distributor and /
or you can contact the following :
www.racescanner.eu
PC Control Parameter
For your information:
Transfer speed : 2400/4800/9600/19200 bps (adjustable)
Start/Stop
: 1 bit, 1 bit
Data Length
: 8 bit
Parity bit
: None
Code
: ASCII code
Flow Control
: None
Return Code
: Carriage Return only
Clone Mode
You will need to purchase a RS232C straight cable a null modem adapter. RS232C straight
cables are available as male to male or male to female. Even if the RS232C straight cable
you buy already has the male to male connectors, you will still have to have the null modem
adapter. On the next page you will see the pin connections that are internal to a standard
device. (These items are available at your local electronics stores.)
41
UB343ZH_UBC785XLT_OM_0622
6/22/06
3:01 PM
Page 42
To connect the Scanner to Scanner:
Plug the male end of the RS232C straight interface cable into the
remote port on the rear of one of the two scanners. Then connect the
DB-9 to DB-9 null modem adapter to the cable. Plug the other end of
the null modem adapter into the other scanner.
(DB9 Gender Changers are also available at your local electronics
store.)
Null Modem Adapter
Pin connections
Female
DB9
1
2
3
4
5
6
7
8
9
Male
DB9
4
3
2
6&1
5
4
8
7
Not used
You can clone all of the programming of one UBC785XLT into another, including alpha tags,
delay settings, etc. After connecting the two scanners, turn the radios ON. Prepare each
scanner for clone mode as follows.
1. Press MENU.
2. Select 3:SYSTEM OPTION / 6:CLONE by rotating the VFO and pressing E.
3. Determine the scanner that has the frequency data that you want to transfer. This one
must be set up as the "Master Unit", and the other must be set as the "Slave Unit".
4. On the scanner that is the "Master Unit", select MASTER,
then press E.
CLONE
SELECT UNIT
MASTER
SLAVE
5. On the scanner that is the "Slave Unit", select SLAVE, then
press E.
CLONE
SELECT UNIT
MASTER
SLAVE
42
UB343ZH_UBC785XLT_OM_0622
6/22/06
3:01 PM
Page 43
6. Press SCAN on both scanners.
The data transfer begins from the Master Unit to the Slave
Unit.
During the data transfer, both scanners show the following
displays.
CLONE
== >
MASTER UNIT
CLONE
== <
SLAVE UNIT
When the data transfer is complete, COMPLETE displays.
CLONE
COMPLETE
MASTER UNIT
If the data transfer is not successful, the following error
message will appear.
CLONE
ERROR
MASTER UNIT
Note: • To clear ERROR, press . (decimal key).
To exit the Clone mode, press MENU repeatedly.
Note • Once you have completed the cloning of the scanners, reset the scanners by
turning the scanners OFF and then ON again. This is particularly important to know
if you wish to clone another scanner right away.
☞ Remember! You can also use ▲ or ▼ instead of rotating the VFO.
Also instead of pressing E, you can press the VFO control.
43
UB343ZH_UBC785XLT_OM_0622
6/22/06
3:01 PM
Page 44
Additional Features
The following additional features are designed for you to customize your scanner. Once
these features have been turned ON or OFF, they will remain as they are set until you reset
them, even if you turn the scanner OFF and then ON again.
Dimmer
To change brightness of the display:
1. Press MENU.
2. Select 3:SYSTEM OPTION / 1:DIMMER by rotating the VFO and pressing E.
3. Select one from 1:HIGH, 2:MEDIUM or 3:OFF by rotating the VFO and pressing E.
Enter Lock
You can lockout the keypad to prevent re-programming of channels.
1. Press MENU.
2. Select 3:SYSTEM OPTION / 4:ENTER LOCK by rotating the VFO and pressing
E.
3. Select 1:ON by rotating the VFO and pressing E.
Key Beep Option
To choose key beep sound 1:ON or 2:OFF:
1. Press MENU.
2. Select 3:SYSTEM OPTION / 3:KEY BEEP by rotating the VFO and pressing E.
3. Select 1:ON or 2:OFF by rotating the VFO and pressing E.
Screen Mask
The frequency, receiving mode, and signal meter indications on the display are masked
when this feature is activated (except while in Search mode). This feature reduces the
amount of displayed information.
Note: While Screen Mask is ON, Enter Lock is active.
1. Press MENU.
2. Select 3:SYSTEM OPTION / 2:SCREEN MASK by rotating the VFO and pressing
E.
3. Select 1:ON or 2:OFF by rotating the VFO and then press E.
Note: With SCREEN MASK on, press the VFO, then SCREEN MASK will be off.
44
UB343ZH_UBC785XLT_OM_0622
6/22/06
3:01 PM
Page 45
Reverse Mode
This key will allow you to observe the reverse frequency of the repeater. While pressing
RVRS, the standard pair frequency will be displayed. For a list of the standard pair
frequencies, refer to the table "Reverse List" in the Appendix. If the frequency that you have
chosen does not have an offset frequency, the display will indicate ERROR and NO
REVERSE.
Channel Step Selection
You can set frequency step, 5 kHz - 100 kHz or Auto in Chain search frequency. The default
receive mode should be the proper mode setting in almost all cases. You may wish to set
some VHF channels for NFM mode, depending on any adjacent channel interference
problems. WFM is typically only used for broadcast frequencies, such as TV audio or FM
radio.
See STEPS in "Menu Description" for details.
Mute On/Off
To manually turn ON the Mute function, press and hold MUTE until MUTE ON is displayed.
You will not hear any audio. To turn it OFF, press and hold MUTE again.
Receiving Mode Selection
You can also set the receiving mode, AM or NFM in Chain Search mode.
See MODE in "Menu Description" for details.
Frequency and Channel Tuning with the VFO Control
The VFO knob can be used for stepping frequencies or through memory channels.
To switch the setting for the VFO control, press the VFO. This will change modes from
Channel to Frequency or Frequency to Channel.
1. In scan hold mode, when the setting for the VFO is channel, rotate the VFO to move up
(to step up through channels) or down (to step down through channels).
2. In Chain Search mode, when the setting for the VFO is frequency, rotate the VFO to move up
to step up through frequencies sequentially or to down to step down through frequencies. To
change the step, you will need to go into the Chain Search menu and adjust the step for the
desired memory location.
☞ Remember! When you set Additional Features through the menu screen, you can also
use ▲ or ▼ instead of rotating the VFO.
Also instead of pressing E, you can press the VFO control.
45
UB343ZH_UBC785XLT_OM_0622
6/22/06
3:01 PM
Page 46
Care and Maintenance
General Use
• Turn the scanner OFF before disconnecting the power.
• Always write down the programmed frequencies in the event of memory loss.
• If memory is lost, simply reprogram each channel.
The display shows 000.0000 in all channels when there has been a memory loss.
• Always press each button firmly until you hear the entry tone for that key entry, unless you
have turned 2:OFF the
3:KEY BEEP in the menu system.
Location
• Do not use the scanner in high-moisture environments such as the kitchen or bathroom.
• Avoid placing the unit in direct sunlight or near heating
elements or vents.
• If the scanner receives strong interference or electrical noise, move it or its antenna away
from the source of the noise. If possible, a higher elevation, may provide better reception.
Cleaning
• Disconnect the power to the unit before cleaning.
• Clean the outside of the scanner with a mild detergent.
To prevent scratches, do not use abrasive cleaners or solvents. Be careful not to rub the
LCD window.
• Do not use excessive amounts of water.
Repairs
• Do not attempt any repair. The scanner contains no user serviceable parts. Contact the
Uniden Customer Service Center or take it to a qualified repair technician.
Birdies
• All radios can receive birdies (undesired signals). If your scanner stops during Scan mode
and no sound is heard, it may be receiving a birdie. Birdies are internally generated
signals inherent in the electronics of the receiver.
Press L/O to lockout the channel, and then press RSM to resume scanning.
46
UB343ZH_UBC785XLT_OM_0622
6/22/06
3:01 PM
Page 47
Troubleshooting
If your UBC785XLT is not performing properly, try the following steps.
Problem
Suggestion
Scanner won't work.
1. Check the connections at both ends of the AC Adapter.
2. Turn ON the wall switch of your room. You could be
using an outlet controlled by the wall switch.
3. Move the AC Adapter to another wall outlet.
Improper reception.
1. Check the antenna connection.
2. Move the scanner.
3. You may be in a remote area which could require an
optional multi-band antenna. Check with your dealer or
local electronics store.
Scan won't stop.
1. Adjust squelch threshold - refer to page 17, "Setting the
Squelch".
2. Check the antenna connection.
3. Check to see if many of the channels are Locked Out.
If so, the scanner has less chance of finding an
active channel.
4. Review each channels frequency to see if it is still
stored in Memory and is correct.
5. Its possible that none of the programmed frequencies
are currently active.
Scan won't start.
1. Press the SCAN key again.
2. Adjust the SQUELCH control.
3. Check to see if all channels are Locked Out.
Resetting the Scanner
If the scanner's display locks up or stops operating properly, you might need to reset the
scanner.
Caution: This procedure clears all the information (except the band plan data) you have
stored in the scanner. Before you reset the scanner, try turning it off and on to
see if it begins working properly. Reset the scanner only when you are sure it is
not working properly.
1. Turn off the scanner.
2. While holding down 2, 9, and Hold ▲, turn on the scanner. It takes about 15 seconds to
initialize and All Memory Clear please wait appears.
47
UB343ZH_UBC785XLT_OM_0622
6/22/06
3:01 PM
Page 48
Specifications
Channel:
1000
Banks:
10 (100 channels each)
Frequency Range:
See the band plan on page 1 to 3.
Operating Temperature: –20 °C to +60 °C (–4 °F to +140)
Scan Rate:
100 channels per second
Search Rate:
100 steps per second (Normal Search)
300 steps per second (Turbo Search)
Audio Output:
Maximum 3.0W (2.1W normal @ 10% THD)
Internal Speaker:
8 ohms (77 mm outer diameter)
Power Requirements:
AD773U AC Adapter (13.8V DC, 700mA)
Antenna:
Telescopic Antenna (included)
Antenna Jack:
BNC type
External Jacks:
External Speaker (EXT.SP.) (3.5 mm)
DC 13.8 V Power Jack, (center is positive)
Remote Control (REMOTE) Jack (DB-9)
Tape Recorder Out (TAPE OUT) Jack (3.5 mm)
Size:
6-15/16 in. (W) x 6-1/4 in. (D) x 2-1/4 in. (H)
176.5mm (W) x 168.3mm (D) x 68.6mm (H)
1.33 kg (46.6 oz.)
Weight:
Features and specifications are all subject to change without notice.
48
UB343ZH_UBC785XLT_OM_0622
6/22/06
3:01 PM
Page 49
Glossary of Terms
Alpha tag - This term refers to an alphanumeric text tag that you can enter to describe the
individual frequencies that you have programmed. Rather than having to associate a
specific frequency to the individuals that are using it, you can enter the actual name of the
group. This will eliminate the need for memorizing the group’s frequency.
Attenuator - This scanner comes with a feature to attenuate or reduce the signal strength.
The built-in attenuator can be turned on specific frequencies to prevent strong signals from
overloading the scanner input, possibly damaging the scanner or missing other
transmissions due to the repeated stopping on the stronger signal.
Clone - This term identifies the ability to set up a duplicate scanner. This function allows
you to clone all the programming information, including frequencies, talkgroups and alpha
tags as well as bank settings and other parameters from one UBC785XLT to another or
UBC785XLT.
CTCSS - (Continuous Tone Controlled Squelch System) refers to a system where the radio
receivers are equipped with tone responsive devices which allow audio signals to appear
at the audio output, select voice processing such as scrambling or control repeater
functions only when a carrier modulated with a specific tone is received. This method may
be used to restrict access to the repeater or receiver, or reduce interference where several
stations with output frequencies in close proximity of each other make it difficult to hear
the conversation you are interested in. With CTCSS squelching, you can eliminate the
possibility of hearing unwanted conversations by selecting one of the 38 standard
subaudible tones. You will only hear those transmissions that have been programmed on
specific frequencies with the specific subaudible tone that you have selected.
DCS - (Digital Controlled Squelch) refers to a system where the radio receivers are
equipped with data burst responsive devices which allow audio signals to appear at the
audio output, select voice processing such as scrambling or control repeater functions only
when a carrier modulated with specific data burst is received. This method may be used to
restrict access to the repeater or receiver, or reduce interference where several stations
with output frequencies in close proximity of each other make it difficult to hear the
conversation you are interested in. With DCS squelching, you can eliminate the possibility
of hearing unwanted conversations by selecting one of the 104 standard data burst
subaudible tones. You will only hear those transmissions that have been programmed on
specific frequencies with the specific subaudible tone that you have selected.
Enter Lock - This is the term used for locking the keypad. This prevents accidental
re-programming of channels and talkgroups entered into memory. The default setting is
OFF.
When ENTER LOCK is enabled, the following functions will be disabled:
• Enter or modify the Memory Channel frequency
• Enter or modify the Tone information
49
UB343ZH_UBC785XLT_OM_0622
6/22/06
3:01 PM
Page 50
Key Beep - This is another term for the tone you hear as a keypad acknowledgement beep.
The default setting is on.
If you have turned the Key Beep off, you now have a silent keypad. You will not hear a
tone each time you press a key.
PC Control - This term is associated with the ability to program frequencies and other
useful information via a computer by means of third party software. You can change the
transfer speed on the scanner needed to be compatible with your PC. (See page 40)
Screen Mask - Screen Mask reduces the amount of information that appears on the
display. Alpha tags that you have set for a channel along with a few function icons will
appear only on the display. This mode is particularly useful in public safety vehicles where
that are already overloaded with information. Screen Mask does not work in Search mode.
50
UB343ZH_UBC785XLT_OM_0622
6/22/06
3:01 PM
Page 51
CTCSS Frequency List (Hz)
67.0
91.5
71.9
94.8
74.4
97.4
77.0
100.0
79.7
103.5
82.5
107.2
85.4
110.9
88.5
114.8
118.8
156.7
210.7
123.0
162.2
218.1
127.3
167.9
225.7
131.8
173.8
233.6
136.5
179.9
241.8
141.3
186.2
250.3
146.2
192.8
151.4
203.5
DCS Tone Code
023
051
114
143
174
245
266
332
411
452
506
612
025
053
115
145
205
246
271
343
412
454
516
624
026
054
116
152
212
251
274
346
413
455
523
627
031
065
122
155
223
252
306
351
423
462
526
631
032
071
125
156
225
255
311
356
431
464
532
632
036
072
131
162
226
261
315
364
432
465
546
654
043
073
132
165
243
263
325
365
445
466
565
662
047
074
134
172
244
265
331
371
446
503
606
664
703
712
723
731
732
734
743
754
51
1 SEAECH OPTION
AIR STEP
CHAIN SEARCH
1
2
52
TONE DATA
RECORD
AUTO STORE
5
6
7
DELAY
3
ATTENUATOR
SEARCH RANGE
2
1: ON /2: OFF
1: ON /2: OFF
4
ALPHA TAG
5:AUTO
1:AM /2:FM /3:WFM /4:NFM
3:01 PM
1: CTCSS /2: DCS /3: OFF
1: ON /2: OFF
MODE
0: AUTO
3
7: 25KHz /8: 50KHz /9: 100 KHz
7:-5 SECONDS /8:-10 SECONDS
1: 5KHz /2: 6.25KHz /3: 7.5KHz
4: 10KHz /5: 12.5KHz /6: 20KHz
STEPS
RANGE
5:INFINITE /6:-2 SECONDS
2
1
3:2 SECONDS /4:4 SECONDS
1:NONE /2:1 SECOND
1:ON /2:OFF
6/22/06
4
CHAIN SEARCH
1
1: 12.5kHz/2: 8.33 kHz
UB343ZH_UBC785XLT_OM_0622
Page 52
UBC785XLT Flow Charts
2
SCAN OPTION
(Select Channel)
1:ON /2:OFF
1:ON /2:OFF
1:5KHz /2:7.5KHz /3:10 KHz
1: AM/2: FM/3: WFM/4: NFM
1:ON /2:OFF
BEEP ALERT
ATTENUATOR
STEPS
MODE
RECORD
4
5
6
7
53
8
7:100 KHz /8: AUTO
3:01 PM
4:12.5 KHz /5:25 KHz /6:50 KHz
1: CTCSS/ 2: DCS/ 3: OFF
TONE DATA
3
7:-5 SECONDS /8:-10 SECONDS
5:INFINITE /6: -2 SECONDS
3:DONE
2:CHANNEL OPTION
1:OTHER CHANNEL
6/22/06
3:2 SECONDS /4:4 SECONDS
1:NONE /2: 1 SECOND
DELAY
2
ALPHA TAG
(Select Frequency)
FREQUENCY
1
UB343ZH_UBC785XLT_OM_0622
Page 53
3
SYSTEM OPTION
DIMMER
SCREEN MASK
KEY BEEP
ENTER LOCK
PC CONTROL
CLONE
DATA SKIP
SQ MODE
BANK TAG
1
2
3
4
5
6
7
8
9
1:HIGH / 2:MEDIUM / 3:OFF
54
(Select Bank)
3:01 PM
1:CSQ /2:TONE SQ /3:TONE SEARCH
1:ON /2: OFF
MASTAR /SLAVE
1:2400 bps /2: 4800 bps /3:9600 bps/4:19200 bps /5:OFF"
1:ON /2: OFF
6/22/06
1:ON /2: OFF
1:ON /2: OFF
UB343ZH_UBC785XLT_OM_0622
Page 54
UB343ZH_UBC785XLT_OM_0622
6/22/06
3:01 PM
Page 55
Declaration of Conformity
Uniden Corporation
2-12-7 Hatchobori
Chuo-Ku, Tokyo 104-8512
Japan
declare, under our sole responsibility, that this equipment “Uniden Bearcat model
UBC785XLT” is in compliance with the essential requirements and other relevant provisions
of the EMC, R&TTE and LVD Council Directives of the EU.
55
UB343ZH_UBC785XLT_OM_0622
6/22/06
3:01 PM
© 2006 Uniden Corporation.
UBZZ01343ZZ(0)
Page 56
All rights reserved.
Printed in P.R.C.