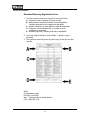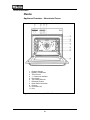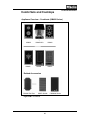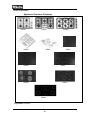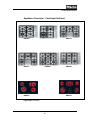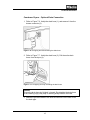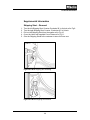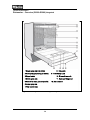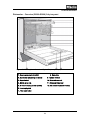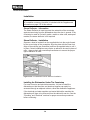
1
This page intentionally left blank. Technical Information Using this Manual.............................................................................................................. 7 General Information...........................................................................................7 Product Installation Information .........................................................................7 General Information .......................................................................................................... 9 Safety Information ...........................................................................................10 Responsibilities of Authorized Installers ..........................................................11 Extended Warranty Registration Form ............................................................12 Obtaining Assistance.......................................................................................13 Indemnification Agreement..............................................................................14 ETL / CSA Certification ...................................................................................16 Electrical Supply Voltages...............................................................................18 Performing the Electrical Connection ..............................................................19 Grounding Information.....................................................................................19 Electrical Outlets and Plugs ............................................................................20 Easy Install Kits (Laundry Products) ....................................................................... 21 Easy Install Kit – Model 057 .................................................................................... 22 Easy Install Kit – Model 060 .................................................................................... 23 Product Installation Information....................................................................................... 24 Rotary Iron ...................................................................................................................... 25 Appliance Overview.........................................................................................25 Technical and Safety Information ....................................................................26 Electrical Information.......................................................................................26 Installation Procedure......................................................................................26 Supplementary Information ..................................................................................... 27 DG4080 Steam Oven...................................................................................................... 29 Appliance Overview.........................................................................................29 Technical and Safety Information ....................................................................30 Electrical Information.......................................................................................30 Installation Procedure......................................................................................31 Supplementary Information .............................................................................32 Water Hardness ...................................................................................................... 32 Setting the Water Hardness .................................................................................... 32 DG2661 Steam Oven...................................................................................................... 33 Appliance overview .........................................................................................33 Control Panel .......................................................................................................... 34 Technical and Safety Information ....................................................................34 Electrical Information............................................................................................... 34 Plumbing Information .............................................................................................. 34 Installation Information ....................................................................................35 Installation Procedure ............................................................................................. 36 Supplementary Information .............................................................................37 Setting the Language .............................................................................................. 37 Setting Water Hardness .......................................................................................... 38 Setting the Altitude .................................................................................................. 39 CVA610 and CVA615 Coffee Systems ........................................................................... 40 Appliance Overview.........................................................................................40 Technical and Safety Information ....................................................................42 Electrical Information.......................................................................................42 1 Technical Information Installation Procedure......................................................................................43 Supplementary Information .............................................................................44 Door Hinge Adjustment ........................................................................................... 44 Expel Air Procedure ................................................................................................ 44 CVA2650 and CVA2660 Coffee Systems ....................................................................... 45 Appliance Overview.........................................................................................45 Technical and Safety Information ....................................................................47 Electrical Information.......................................................................................47 Installation Procedure......................................................................................48 Before Using for the First Time........................................................................48 Supplementary Information .............................................................................49 Leveling / Adjusting the Appliance Feet .................................................................. 49 Allocating the Coffee Types .................................................................................... 49 Setting the Clock ..................................................................................................... 50 Setting the Language .............................................................................................. 51 CVA4070/4075 Coffee System ....................................................................................... 52 Appliance overview .........................................................................................52 Technical and Safety Information............................................................................ 54 Electrical Information............................................................................................... 54 Plumbing Information – CVA 4075 Only.................................................................. 55 Installation Procedure......................................................................................56 Supplementary Information .............................................................................57 Operation and Use .................................................................................................. 57 Language Settings .................................................................................................. 58 Clock Settings ......................................................................................................... 59 Built In Plate Warmer ...................................................................................................... 60 Appliance Overview.........................................................................................60 Technical and Safety Information ....................................................................61 Electrical Information.......................................................................................62 Installation Procedure......................................................................................62 Supplementary Information .............................................................................63 Aligning the Front of the Plate Warmer ................................................................... 63 Ovens.............................................................................................................................. 64 Appliance Overview – Novotronic Ovens ........................................................64 Appliance Overview – Master Chef Ovens (All)...............................................65 Controls – Novotronic Ovens...........................................................................66 Controls - Master Chef (H39X Series).............................................................67 Controls - Master Chef (H4000 Series) ..........................................................68 Technical and Safety Information ....................................................................70 Electrical Information.......................................................................................70 Installation Procedure......................................................................................72 Supplementary Information .............................................................................73 Set the Clock – Novotronic Ovens .......................................................................... 73 Child Safety Lock – Novotronic Ovens.................................................................... 74 Set the Clock – Master Chef Ovens ........................................................................ 74 Child Safety Lock – Master Chef Ovens ................................................................. 75 Supplementary Information – (H4000 Series Only) .........................................76 2 Technical Information Programming Mode................................................................................................. 76 Speed Oven .................................................................................................................... 77 Appliance Overview (H4080BM) .....................................................................77 Overview of Controls .......................................................................................78 Microwave Energy and Safety Information......................................................79 Electrical Specifications...................................................................................79 Installation Procedure......................................................................................80 Programming Mode.........................................................................................81 Before Using the Appliance .............................................................................82 Supplementary Information .............................................................................83 Replacing Door Handle ........................................................................................... 83 ESW / Food Warming Drawer......................................................................................... 84 Overview – Food Warming Drawer (Typical)...................................................84 Technical and Safety Information ....................................................................85 Electrical Information.......................................................................................85 Installation Procedure......................................................................................86 Integrated Installations - Models 700-25FB and 760-25FB..................................... 87 Combi Sets and Cooktops .............................................................................................. 89 Appliance Overview – Combisets (KM400 Series) ..........................................89 Appliance Overview -Cooktops ...............................................................90 Technical and Safety Information ....................................................................92 Electrical Information.......................................................................................93 Combisets ............................................................................................................... 93 Cooktops ................................................................................................................. 93 Plumbing Information ......................................................................................94 Gas.......................................................................................................................... 94 Installation Procedure......................................................................................94 Ventilation Hoods ............................................................................................................ 95 Appliance Overview.........................................................................................95 Wall Hood (Typical) ................................................................................................. 95 Built-In Hood (Typical)............................................................................................. 97 Hood Controls - Typical...................................................................................98 Technical and Safety Information ....................................................................98 Electrical Information.......................................................................................98 Installation Procedure......................................................................................99 Supplementary Information .............................................................................99 Master On/Off Switch .............................................................................................. 99 Clothes Washer - Touchtronic....................................................................................... 100 Appliance Overview.......................................................................................100 Controls – Touchtronic Models......................................................................102 Detergent Dispenser – Touchtronic Models ..................................................102 Technical and Safety Information ..................................................................103 Electrical Information.....................................................................................103 Plumbing Information ....................................................................................104 Water Inlet (Intake)................................................................................................ 104 Drain Connection .................................................................................................. 104 Installation Procedure....................................................................................105 Supplemental Information .............................................................................107 3 Technical Information Shipping Strut - Removal ...................................................................................... 107 Basic Installation Faults ........................................................................................ 108 Cooling of Drain Water (Suds Cooling) ................................................................. 108 Clothes Dryer ................................................................................................................ 109 Appliance Overview.......................................................................................109 Controls – Touchtronic Models......................................................................111 Technical and Safety Information ..................................................................112 Electrical Information.....................................................................................112 Plumbing Information ....................................................................................113 Installation Procedure – All Models ...............................................................113 Installation Procedure – Vented Models................................................................ 114 Installation Procedure – Condenser Models ......................................................... 115 Supplemental Information .............................................................................116 Venting Information ............................................................................................... 116 Calculating the Effective Duct Length ................................................................... 116 Condenser Dryers – Optional Drain Connection ................................................... 117 Laundry Products – Optional Accessories .................................................................... 118 WTS Stacking Kit – Application Guide ..........................................................119 5 Kilogram Models ................................................................................................ 119 6 Kilogram Models ................................................................................................ 120 WTV408 – Installation Instructions ................................................................124 WTV421 / WTV423 – Installation Instructions ...............................................127 WTS420 - Installation Instructions.................................................................130 Undercounter Conversion / Installation Instructions ......................................133 Integrated Panel – Installation Instructions....................................................135 Custom Panel – Preparation Procedures.............................................................. 137 Clothes Washer- Super Large Capacity........................................................................ 145 Appliance Overview.......................................................................................145 Front of Appliance .........................................................................................145 Appliance Overview - Rear View ...................................................................146 Controls – SLC W4800 Models .....................................................................147 Controls – SLC W4840 Models .....................................................................147 Detergent Dispenser – Super Large Capacity Models ..................................148 Technical and Safety Information ..................................................................149 Electrical Information.....................................................................................149 Plumbing Information ....................................................................................150 Water Inlet (Intake)................................................................................................ 150 Drain Connection .................................................................................................. 150 Installation Procedure....................................................................................151 Supplemental Information .............................................................................153 Clothes Dryer- Super Large Capacity ........................................................................... 155 Appliance Overview.......................................................................................155 Front of Appliance ................................................................................................. 155 Rear of Appliance.................................................................................................. 156 Controls – Super Large Capacity Dryer.........................................................157 Technical and Safety Information ..................................................................157 Technical and Safety Information Cont .........................................................158 4 Technical Information Confined Space Installation...........................................................................158 Electrical Information............................................................................................. 159 Installation Procedure – All Models ...............................................................159 General Installation Procedure – Electric Models ................................................ 160 Installation Procedure – Electric Models Electrical Plug ...................................... 161 Installation Procedure – Leveling Dryer All Models.............................................. 162 General Installation Procedure – Gas Models...................................................... 163 Specific Installation Procedure – Gas Models ...............................................164 Specific Installation Procedure – Gas Connections ............................................. 165 Specific Installation Procedure – Gas Connections Cont...................................... 166 Specific Installation Procedure – Gas Connections Cont...................................... 167 Supplemental Information .............................................................................168 Venting Information ............................................................................................... 168 Calculating Effective Duct Length ......................................................................... 168 Types of Ducting ................................................................................................... 170 Laundry Stands – Installation Procedures............................................................. 171 Laundry Stands – Installation Procedures Cont. ................................................... 172 Dishwashers G1000-G2000 Series............................................................................ 178 Dishwasher Types.........................................................................................178 Dishwasher – Overview (G1000-G2000) Integrated ............................................. 180 Dishwasher – Overview (G1000-G2000) Fully integrated..................................... 181 Data Tag .......................................................................................................182 Controls Overview .........................................................................................183 Knob Controlled .................................................................................................... 183 Touch Controlled................................................................................................... 183 Fully Integrated ..................................................................................................... 184 Navitronic .............................................................................................................. 185 Child Safety Lock ..........................................................................................185 Electrical Information.....................................................................................186 Hard Wire Electrical Connection ........................................................................... 186 Plumbing Connection ....................................................................................187 Intake Connection ................................................................................................. 187 Water-Proof System Mounting Positions............................................................... 187 Connecting to Existing 3/8” Plumbing Line............................................................ 188 Drain Connection .................................................................................................. 189 Installation .....................................................................................................190 Steam Deflector - Installation ................................................................................ 190 Installing the Dishwasher Under The Countertop.................................................. 190 Install Control Panel and / or Door Panel to Dishwasher...............................191 Knob Controlled Models (dishwashers with selector knob)................................... 191 Knob Controlled (w/ Selector Knob & Turbothermic Fan) ..................................... 192 Touch Controlled Models ..............................................................................192 Adjusting Dishwasher Height ................................................................................ 193 Filler Strip Installation............................................................................................ 194 Custom Panel Install (Fully integrated - VI Models only)....................................... 195 Custom Panel Install (Knob and Touch Controlled) .............................................. 198 Custom Panel Specifications................................................................................. 201 Custom Panel Specifications................................................................................. 202 Secure unit ............................................................................................................ 203 5 Technical Information Door Spring Adjustment ........................................................................................ 203 Toe Kick Brackets ................................................................................................. 204 Toe Kick (plinth) .................................................................................................... 205 Water Softener ..............................................................................................206 Water Softener Salt ............................................................................................... 206 Water Softener- Manually Turning the Water Softener Off............................208 Touch Controlled Models ...................................................................................... 209 Fully Integrated Models ......................................................................................... 209 Knob Controlled Models ........................................................................................ 210 Water Softener – Programming the Water Hardness ....................................211 Water Hardness Settings ...................................................................................... 211 Detergent – Usage ................................................................................................ 212 Rinse Aid - Usage ................................................................................................. 212 Supplemental Information .............................................................................213 General Operation –......................................................................................214 Knob Controlled Series ......................................................................................... 214 Fully Integrated Series .......................................................................................... 214 Touch Controlled / Navitronic Series..................................................................... 215 6 Technical Information Using this Manual This manual is set-up in an easy to use format that makes obtaining the information you need quick and simple. The manual is divided into the following sections: General Information Contains non technical installer related information and general technical information (i.e. electrical information - including Easy Installation Kits) Product Installation Information Contains model specific installation information. Each section includes the following: Overview Technical & Safety Information Electrical Information Plumbing Information Installation Instructions / Procedures Supplementary Information 7 Technical Information Dear Factory Trained Installers, Welcome to the family of Miele Factory Trained Installers. We at Miele take pride in our superior products and the long, dependable service they provide our customers. Customer satisfaction is paramount to our success. Considering our explosive growth, it is not practical for us to install every appliance our dealers sell. Therefore, we must rely on well-trained, dedicated installers, such as you, to properly install our products. To become a Miele Factory Trained Installer, you must first attend an Installation Training Course conducted by one of our expert trainers at a mutually convenient location. The course covers our entire product line and will provide you with the knowledge necessary to properly install our appliances. Upon completion of the one-day course, you will receive a Certificate of Authorization and a wallet sized card that identifies you as a Miele Factory Trained Installer. Our appliances are normally warranted for one-year. If however, a Miele Factory Trained Installer performs the installation, the warranty period will be doubled at no additional cost to the customer. You can therefore see how valuable you, as a Miele Factory Trained Installer, are to our dealers and customers. Our installations are a three-phase process. The first phase consists of scheduling the installation. The second is the installation itself and the third is the completion and submitting of the Extended Warranty Form. During the Installation Course, you will be instructed on proper completion of the Extended Warranty documentation. Again, we welcome you to our family and look forward to many years of a profitable and rewarding relationship. Roland Weingartner Director of Technical Service 8 Technical Information General Information Contacting Miele On the web http://www.mieleusa.com E-Mail [email protected] Phone Numbers Main Number Main Number Toll Free In House Technical Support 1-609-419-9898 1-609-419-4298 1-800-843-7231 1-888-529-8790 Mail - US Headquarters Miele USA 9 Independence Way Princeton, New Jersey 08540 Showroom Locations 9 Independence Way, Princeton, New Jersey 08540 (609) 419-9898 189 North Robertson Blvd., Beverly Hills, California 90211 (310) 855-9470 7680 North Federal Highway, Boca Raton, Florida 33487 (800) 220-1744 554 Green Bay Rd, Kenilworth, Illinois, 60043 (847) 714-9433 555 Washington Street, Wellesley, Massachusetts 02482 (781) 431-2225 1700 Oak Lawn Ave Suite 200, Dallas, Texas 75207 (214) 752-6307 150 East 58th Street, 9th floor, Suite 951, New York, NY 10155 (800) 843-7231 Ext 1200 680 8th Street Suite 169-C, San Francisco, California 94103 (415) 431-8682 1112 Andover Park West, Tukwila, Washington 98188 (206) 547-0770 1400 West Third Ave, Denver, CO 80223 (303) 893-1423 2233 South 300 East, Salt Lake City, UT 84115 (801) 466-0569 9 Technical Information Safety Information ▪ Read and follow all Safety Guidelines and Installation Instructions before installing any appliance. If further information is needed; or any information requires clarification refer to the specific Operating Manual or contact the Miele Technical Support Center for assistance. ▪ All appliances are manufactured in accordance with current safety requirements. ▪ Only authorized Miele Technicians should perform repairs. Unauthorized repairs could result in unforeseen dangers for which Miele cannot accept responsibility. ▪ Ensure the electrical supply matches the requirements of the appliance being installed. The requirements can be found on the data tag affixed to every appliance. ▪ Power should be shut off prior to performing the electrical connection to the appliance. ▪ Appliances are designed for residential use only and should be completely installed according to all applicable building codes. ▪ Certain appliances are equipped with heating elements and / or hot surfaces. Care should be taken to prevent burns. ▪ Appliances can weigh more than expected. Use proper lifting techniques to avoid injuries. 10 Technical Information Responsibilities of Authorized Installers 1. Contact the customer and schedule appointments in a timely and professional manner. (preferably within 1 hour of notification, but no later than 24 hours) 2. Negotiate rates and pricing directly with the customer and/ or dealer. Both sales dealer and Miele must be notified of the standard fees for installation of: ▪ Side by side washer and dryer ▪ Stacked washer and dryer ▪ Dishwasher ▪ Oven ▪ Combi-Sets and Cooktops Note Installation charges should be reasonable and competitive. They should not be exorbitantly priced 3. Make all payment arrangements directly with either the customer and/or sales dealer. Miele WILL NOT be responsible for any payments. 4. Keep the scheduled appointment with the customers. 5. During the actual installation ensure that: ▪ ▪ ▪ ▪ ▪ ▪ ▪ Any existing damage in / around the installation area is noted on the work order and the customer is advised prior to performing any work. The appliance is not damaged - a damaged appliance should not be installed. The appliance has all covers in place and is fully installed before any operation. All applicable federal, state and local laws, codes and regulations are followed. Appliance is programmed; and functions are completely tested. General operations and usage are discussed with the customer. All Miele required paperwork is accurately completed and returned to Miele with 72 hours. 6. If questions or problems arise with the product or the installation contact the Miele Technical Support Center immediately from the site. It is the responsibility of the installer to take care of any problems or issues that may arise. 11 Technical Information Extended Warranty Registration Form 1. Print the required information in the form; as shown below. A - Customers Name, Address & Phone Number B - Model Number and Serial Number for each appliance installed (obtained from the appliance data plate) C - Installer Checklist for each appliance installed and tested D - Customer or authorized person on location to verify installation is completed E - Installers signature, company and date of installation 2. The white original should be sent to Miele - a faxed in copy is accepted. 3. The customer should be given the yellow copy of the form for their records. Completed forms should be returned to: Miele 9 Independence Way Princeton, NJ 08540 Attn. - Technical Service Administration FAX: 1-800-999-4710 12 Technical Information Obtaining Assistance Technical Assistance and Replacement Parts For technical assistance, Installation / Operating Manuals and replacement parts contact the Miele Technical Support Center at: 1-800-999-1360 phone 1-888-586-8056 fax for technical assistance 1-800 -999-4710 fax for parts only To help us serve you effectively and reduce inconvenience to the customer, please furnish us with as much information as possible. At a minimum, we will need the model number, serial number and operating voltage. This information can be found on the data plate of each appliance. It is beneficial to all if you can call directly from the site of the machine. Product Dimensions / Installation Requirements The product dimensions and installation requirements (i.e. electrical requirements…etc...) can be found on the Miele website at http://www.miele.com./ If the product is not listed; or you require further assistance please call the Miele Technical Support Center. 13 Technical Information Indemnification Agreement Prior to any installations or service on any imported appliance a Miele Indemnification Form must be filled out and returned to Miele. For specific technical information on connecting and/or converting any imported Miele appliance contact the Miele Technical Support Center (ensure you have the full model number and serial number). A copy of the “Indemnification Agreement” is provided on the following page. This page should be copied and used when applicable. The Indemnification Agreement must be completed before any installation and/or service procedures are performed. 14 Technical Information Indemnification Agreement The undersigned has requested that Miele, Inc. or one of its authorized agents, supply, sell, repair, perform training and/or electrical reconfiguration on one or more appliances, manufactured by Miele, that were originally built for sale or use in a country other than the United States of America. The undersigned understands that this means the product was manufactured to electrical, mechanical, plumbing and safety specifications or guidelines for a country other than the United States. Although Miele, Inc. will do its best to perform the services requested, the undersigned realizes that these appliances were not designed for use in the United States of America, and that: 1. Any time remaining on the appliance’s original warranty or guarantee, 2. 3. 4. 5. whether specific or implied, has been rendered null and void once the machine has left its country of origin. If Miele deems the appliance to be inherently unsafe for its intended use, or connected and/or used in an unsafe manner, Miele’s representative or agent will inform the undersigned and cease all further attempts to address the original request until such a time that the appliance has been deemed safe by Miele or its agents. Safety approvals, listings or markings on the appliance may not be accepted by Federal, State or Local Authorities in the U.S. Miele service representatives or authorized agents of Miele, Inc. may not have the experience, equipment or technical expertise to perform the desired services, and any services that are attempted may take longer than anticipated, or may not be possible. Acquiring the necessary parts, components, or consumables may take longer than is customary or be impossible entirely. Following said sale, service, training and/or electrical reconfiguration, the undersigned will release, defend and hold harmless Miele, Inc. or its service representatives or authorized agents, from any and all liabilities, or obligations arising out of, or resulting from said service and/or reconfiguration. PLEASE PRINT – ALL INFORMATION FIELDS MUST BE COMPLETED: Name: ____________________________________________________________ Address:___________________________________________________________ City: _____________________________________State_____ Zip: ____________ Phone Number: (_______) ______________ - __________________ Machine Model Number: _____________________________________ Machine Serial Number: _____________________________________ This form must be fully completed and submitted to Miele Technical Support before installation or service on any imported appliance. 15 Technical Information ETL / CSA Certification OSHA (Occupational Safety and Health Administration) is the government agency that oversees safety testing and labeling. According to law, it must adopt existing national standards whenever possible. Most of the standards in existence today are written by organizations that you may already be familiar with. UL, ANSI, NFPA, BOCA, etc. are just a few of the organizations that are responsible for various standards. In order for an appliance to be “listed”, it has to pass the tests required by these standards. If it passes, it is then approved (“listed”) and a safety label is allowed to be placed on the machine by the manufacturer. For many years, the standard writing organizations held a monopoly on testing appliances against their own standards. For instance in order to pass a UL standard, only Underwriters Laboratories could test the product. Needless to say this created a large “bottle neck” of machines that were ready for production, but waiting their turn in the approval testing line. In order to alleviate this “ bottle neck”, OSHA created the NRTL (Nationally Accredited Testing Laboratory) program which opened the door for other testing laboratories to do safety testing. ETL, ARL and AGA are some of the NRTL’s that Miele has used in the past. Any testing center, foreign or domestic; that passes OSHA’s accreditation process is designated an NRTL and allowed to test products against the existing safety standard. A common question often asked by a building inspector is “Where is the UL label on your machine?” The answer is usually “ Our machines do not have UL labels, they have ETL labels. ETL is an OSHA approved NRTL that tests our machines to UL standards.” In addition; this information also applies to any other NRTL we may use. Now you ask, which NRTL’s is Miele using? Any one that can do the job. The NRTL we select depends upon many factors such as; their ability to inspect our factories overseas; their ability to work with our factories, the complexity of the product, etc. For this reason you’ll see ETL on washers and dryers, AGA and IAS on gas cooktops, UL; on vacuum cleaners, and CSA or ETL on dishwashers. Current dishwashers now come with a CSA NRTL label. CSA is the Canadian standards agency and also has it’s own testing labs. As you may have guessed from designation, CSA is an OSHA approved NRTL and is approved as valid as ETL, UL or any other NRTL. 16 Technical Information ETL / CSA Certification - continued There are two types of labeling schemes currently in use: Direct imprinting and separate labeling. Separate labeling is nothing more than the name suggests; a separate label, issued by NRTL that is attached to the appliance next to the data plate. Direct imprinting is the method where the NRTL’s approval seal is placed directly on the data plate at the factory. This is the preferred method since the approval seal and the machines serial number will be forever linked together. Examples of Labeling Separate Labeling Direct Imprinting with seal Figure 1: Examples ETL / CSA labels. 17 Technical Information Electrical Supply Voltages Different Miele appliances use different types of an electrical supply. The electrical supply must conform to the information provided on the data plate of the appliance. The three basic electrical cord types found on Miele appliances are shown below. 120 Volts BLACK – LIVE (120VAC) WHITE - NEUTRAL GREEN - GROUND 120 / 208-240 Volts - 4 wire with ground BLACK – LIVE 1 RED – LIVE 2 WHITE – NEUTRAL GREEN - GROUND 208-240 Volts 3 wire no neutral BLACK – LIVE 1 RED – LIVE 2 GREEN - GROUND 18 Technical Information Performing the Electrical Connection The electrical supply should be shut off at the circuit breaker to the appliance, or main breaker within the home before any connection is performed. It is very important that any appliance connection to the electrical supply follow all national, state and local codes. If any doubt; contact a licensed and qualified electrician to perform the connection. All appliances require proper grounding be present and tested. Grounding Information A proper grounding circuit is vital to ensure safety and proper equipment operation. The primary function of the ground conductor is to carry current should a malfunction within an electrical circuit (or equipment) occur. However as the characteristics of electrical equipment and electronics change, the necessity of proper grounding expands from providing safety to the user, to insuring various types of equipment do not interfere with each other. Always ensure a proper ground circuit is present. 19 Technical Information Electrical Outlets and Plugs Several different styles of plugs are used on Miele appliances and Easy Install Kits and require different types of outlets to make the proper electrical connection. All plugs are NEMA (National Electrical Manufacturers Association) industry standard. The most frequently encountered model numbers are shown below... NEMA 5-15 (120 VAC / 15A) NEMA 6-15 (240 VAC / 15A) NEMA 6-20 (240 VAC / 20A) NEMA 10-30 (240 VAC/30A) NEMA 14-20 (240 VAC / 20A) NEMA 14-30 (240 VAC / 30A) Note Never cut off a molded plug to hardwire an appliance. 20 Technical Information Easy Install Kits (Laundry Products) The Miele Easy Installation Kit is not a requirement, however it makes the installation of a Miele Washer and Dryer much easier if a compatible outlet exist. The kit is designed to be plugged into a 240 Volt / 30 Amp receptacle, commonly found in residential dwellings. The Easy Installation Kit is available in two different versions, which both perform exactly the same function. The only difference in the kits is the type of outlet in which the kit will plugged into. The outlet in the home must be either a NEMA 10-30 or a NEMA 14-30. The Easy Installation Kit plugs into the existing outlet and allows each appliance to be protected by its own 15 amp circuit breaker. The entire system is then protected by the 30 amp breaker present within the customers breaker panel. 21 Technical Information Easy Install Kit – Model 057 22 Technical Information Easy Install Kit – Model 060 23 Technical Information Product Installation Information 24 Technical Information Rotary Iron Appliance Overview Figure B-1: Rotary Iron (B865 shown) Speed Control Indicator Light On / Off Switch Manual Release Figure B-2: Rotary Iron Controls (B865 shown) 25 Technical Information Technical and Safety Information Refer to the General Safety Guidelines in the General Information Section of this manual. Electrical Information Model Number Electrical Requirements 208-240 VAC, 60 Hz 20 Amp Circuit Breaker NEMA 6-20 120 VAC, 60Hz B865, B890 B890e Table B-1: Electrical information Plumbing Information None – not applicable Installation Procedure 1. Unpack / uncrate the appliance from the box. 2. Remove the Transit Fitting - see supplementary information for details. 3. Move the appliance to the desired location - see supplementary information for details on moving the appliance. 4. Place the appliance into the operating position see supplementary information. 5. Unlatch and remove the Feed Board from the appliance – refer to Figure B-3. ▪ First remove the feed board by lifting it out of the right hand holder, then pull it out to the left of the roller. Figure B-3: Feed Board removal. Continued on the next page… 26 Technical Information Installation Procedure (continued) 6. Plug appliance in and briefly turn on the power - the Heater Plate should rise automatically. 7. Turn the power off. 8. Refer to Figure B-4. Remove the protective cover from the roller. 9. Perform an operational check; ensure all safety features and functions are in working order. 10. Provide the customer with an operational overview. Figure B-4: Removing the protective cover from the roller. Supplementary Information Transit Fitting Figure B-5: Transit Fitting 1. Pull the transit fitting out of the hole (see Figure B-5). 2. Keep the transit fitting in a safe place. It must be refitted should the appliance ever need to be transported (i.e. when moving to new home). 3. The rotary iron should only be transported in the folded up position with the transit fitting installed. 27 Technical Information Moving the Appliance Figure B-6: Moving the appliance. ▪ ▪ Hold the appliance by the ironing table and push or pull it to move. To overcome obstacles such as carpet edges and to steer the appliance by tilting it slightly. Unlatching the Appliance for Use Figure B-7: Unlatching the appliance for use 28 Technical Information DG4080 Steam Oven Appliance Overview Figure DG4080-1: DG4080 Steam Oven overview 29 Technical Information Figure DG4080-2: DG4080 Steam Oven overview of controls Technical and Safety Information ▪ ▪ ▪ Refer to the General Safety Guidelines in the General Information Section of this manual. This steam oven is designed for installation in cabinets or beneath a counter. The steam oven must be supported by ledges or shelving. It must not rest directly on top of any other appliance - the only exception is the Miele Platewarmer. Electrical Information ▪ ▪ ▪ 208 - 240 Volt, 60Hz., 20 Amp breaker - the appliance is equipped with a 3 wire shielded cord located on the rear of the appliance Connection as follows: 1 black wire (L1), 1 red wire (L 2) and 1 green wire (GND) THIS APPLIANCE MUST BE GROUNDED 30 Technical Information Plumbing Information None – not applicable Installation Procedure 1. Connect electrical - per requirements. 2. Route the electric supply line in such a way that it will not interfere with the installation or operation of the appliance. 3. Install the vertical filler strips – if required. Refer to the Supplemental Information section, as necessary. 4. Remove front door. (using lift up hinge mounts) 5. Carefully place the appliance into the cabinet opening. 6. Reinstall the front door, secure hinge mounts. 7. Ensure the appliance is in correct position. (level & aligned with the cabinets etc...) 8. Open front door and secure the appliance with the supplied screws, as shown in Figure DG-4080-3. 9. Set water hardness and program any desired options. 10. Fill the steam generator with water, and place into the appliance. 11. Select “Cook Universal (100ºC) and operate the appliance for 15 minutes (very important!). 12. Empty the steam generator, dry the interior of the appliance. 13. Provide the customer with an operational overview. Figure DG4080-3: Securing the DG4080 Steam Oven 31 Technical Information Supplementary Information Water Hardness For the steam oven to function properly, the water hardness level must be programmed. You can use the supplied test strip to check the water hardness level; or contact the local water company to obtain this information. Use the chart below to determine what setting should be programmed. Setting Display I Soft 1 II Hardness Level 2 II Hardness Level 3 IV Very Hard 4 TableDG4080-1: Water hardness settings Hardness Level 1-7 GPG 8-14 GPG 15-21 GPG Greater then 21 GPG Setting the Water Hardness The steam oven is set at the factory to water hardness setting IV (Very hard 4). If your water hardness level differs from this you will need to reprogram the appliance as follows: 1. Switch on the appliance. 2. Touch one of the sensors to the right hand side of the arrows until the "Settings" menu appears. 3. Touch the sensor next to "Settings". 4. Touch the sensor next to "Water hardness". 5. Touch one of the sensors to the right hand side of the arrows until the desired water hardness level is displayed. 6. Touch the sensor next to the desired water hardness level. 7. Touch the sensor next to "OK". 8. Touch the "<C" sensor to return to the main menu. Important! The steam generator should be cleaned and dried after each use. Do not immerse the steam generator in water, or place it in a dishwasher for cleaning. Do not use scouring pads or hard brushes to clean the steam generator. 32 Technical Information DG2661 Steam Oven Appliance overview Figure DG2661: Steam Oven overview 33 Technical Information Control Panel Figure DG2661-2 : Steam Control Panel Technical and Safety Information ▪ ▪ ▪ Refer to the General Safety Guidelines in the General Information Section of this manual. This steam oven is designed for installation in cabinets or beneath a counter. The steam oven must be supported by ledges or shelving. It must not rest directly on top of any other appliance - the only exception is the Miele Platewarmer. Electrical Information ▪ ▪ ▪ 208 - 240 Volt, 60Hz., 15 Amp breaker - the appliance is equipped with a 3 wire shielded cord located on the rear of the appliance Connection as follows: 1 black wire (L1), 1 red wire (L 2) and 1 green wire (GND) THIS APPLIANCE MUST BE GROUNDED Plumbing Information None – not applicable 34 Technical Information Installation Information Figure DG2661-3: Installing Feet 35 Technical Information Installation Procedure 1. Connect electrical - per requirements. 2. Route the electric supply line in such a way that it will not interfere with the installation or operation of the appliance. 3. Carefully place the appliance into the cabinet opening. 4. Ensure the appliance is in correct position. (level & aligned with the cabinets etc...) 5. Open front door and secure the appliance with the supplied screws, as shown in Figure DG2661-4. 6. Set water hardness and program any desired options. 7. Fill the steam generator with water, and place into the appliance. 8. Select “Cook Universal (100ºC) and operate the appliance for 15 minutes (very important!). 9. Empty the steam generator, dry the interior of the appliance. 10. Provide the customer with an operational overview. Figure DG2661-4: Securing the Steam Oven 36 Technical Information Supplementary Information Setting the Language Figure DG2661-5: Language 37 Technical Information Setting Water Hardness Figure DG2661-6: Water Hardness 38 Technical Information Setting the Altitude Figure DG2661-6: Altitude 39 Technical Information CVA610 and CVA615 Coffee Systems Appliance Overview Figure CVA-1: Front Overview 40 Technical Information Figure CVA-2: Appliance Overview (Inside / Door Open) 41 Technical Information Technical and Safety Information ▪ ▪ ▪ ▪ ▪ Refer to the General Safety Guidelines in the General Information section of this manual. The CVA610 and CVA615 are designed to be built into cabinets and must be fully installed before any operation. The CVA610 and CVA615 can be installed above another appliance but, there must be a solid, closed shelf between the base of the coffee machine and the top of the appliance below (The shelf is not necessary when installation is in combination with the Miele built-in plate warmer). Before the appliance is connected, ensure the steam selector is in the off position to prevent an uncontrolled flow of steam and/or or hot water from exiting via the steam wand. Exercise caution while operating the appliance; coffee, hot water and steam can cause burns. Electrical Information Model Number Electrical Requirements Plug Style CVA610 240(208) VAC 15amp NEMA 6-15 CVA615 120 VAC 15amp NEMA 5-15 Table CVA-1: Electrical information Plumbing Information None – not applicable. 42 Technical Information Installation Procedure 1. Ensure opening in cabinet and supports in cabinet will allow for 2. 3. 4. 5. 6. 7. 8. proper installation. Connect the power cord to the wall outlet. Push appliance back into the cabinet - until fully seated. Open the front of the appliance and turn the 4 screws’ tightening them against the inside of the cabinet. The screws should be turned evenly to ensure the appliance is centered to cabinets. See Figure CVA-3. Fill beans container and water container. Perform the expel air procedure (see supplemental information). Perform an operational check. Provide the customer with an operational overview. Figure CVA-3: Installation screws 43 Technical Information Supplementary Information Door Hinge Adjustment A B Figure CVA-4: Door Hinge Adjustment 1. Open the front door 2. Lightly Loosen screw B 3. Turn screw A to adjust door, as needed. Turning screw A tilts the front door both horizontally and vertically. 4. While screw B still loose the door can be moved away or closer to the frame - as needed. 5. Tighten screw B 6. Check door alignment. Repeat steps 1-5 as needed. Expel Air Procedure 1. Fill the water tank. 2. Turn the program selector to "On with light" and place containers below the hot water dispenser and the steam nozzle. 3. Press the hot water button; turn the steam selector counterclockwise and let water run out until it streams steadily. 4. Press the hot water button again. 5. Turn the steam selector to "o" to shut off the water. 44 Technical Information CVA2650 and CVA2660 Coffee Systems Appliance Overview Figure CVA2650-1: Front Overview 45 Technical Information Figure CVA-2650-2: Appliance Overview (Inside / Door Open) Note The CVA2650 & CVA2660 come packaged with additional items including: cups, saucers, a red descaling plate, a perforator replacement tool and an additional steam sleeve. Do NOT throw these items away. Please have the customer store them in a safe location for future use. 46 Technical Information Technical and Safety Information ▪ ▪ ▪ ▪ ▪ ▪ Refer to the General Safety Guidelines in the General Information section of this manual. The CVA2660 is designed to be built into cabinets and must be fully installed before any operation. The CVA2650 is designed to be built into cabinets or installed within an optional housing. The appliance must be fully installed before any operation. This appliance can be installed above another appliance but, there must be a solid, closed shelf between the base of the coffee machine and the top of the appliance below Before the appliance is connected, ensure the steam selector is in the off position to prevent an uncontrolled flow of steam. Exercise caution while operating the appliance; coffee, hot water and steam can cause burns. Electrical Information Model Number Electrical Requirements Plug Style CVA2650 CVA2660 120 VAC 15amp NEMA 5-15 Table CVA-2650-1: Electrical information Plumbing Information None – not applicable. 47 Technical Information Installation Procedure 1. Ensure opening in cabinet and supports in cabinet will allow for proper installation. 2. Level the feet on the appliance (see Supplemental Information). 3. Connect the power cord to the wall outlet. 4. Push appliance back into the cabinet - until fully seated. 5. Open the front of the appliance and turn the 4 screws’ tightening them against the inside of the cabinet. The screws should be turned evenly to ensure the appliance is centered with the cabinets. 6. Perform the “Before Using for the First Time” procedure (below). 7. Set the clock. 8. Set the language (as necessary). 9. Test the appliance for proper operation. 10. Provide the customer with an operational overview. Before Using for the First Time Important This procedure must be performed by the installer. 1. Wash and Rinse the coffee capsule plate and water tank. 2. Fill the water tank with cold tap water to the “Max.” mark. 3. Place a cup under the steam valve. 4. Turn the left jog shuttle to "Hot water". 5. Press the right control knob. The steam valve dispenses hot water. 6. Press the right control knob again to turn the hot water off. 7. Press the steam lever down – until steam is dispensed. 8. Push the steam lever up – the steam stops. 9. Turn the left control knob to "Rinse". 10. Press the right control knob; water exits from the coffee dispenser. 11. Press the steam lever down. Water runs from the steam valve. Allow a few seconds of dispensing. 12. Push the steam lever up. 13. Fill the coffee capsule carousel (refer to the Operating Manual). 14. Allocate the coffee capsules (refer to the Operating Manual). 15. Return to the Installation Procedure (above). 48 Technical Information Supplementary Information Leveling / Adjusting the Appliance Feet Figure CVA2650-3: Adjustment of Feet on CVA2650/CVA2660 Allocating the Coffee Types Five different coffee types can be filled in the five chambers of the capsule carousel. The chambers can be either allocated to the desired coffee types or filled with the same coffee type in all chambers. SETTINGS F K1 2 3 4 5 L o Turn the left control knob to "Settings". ALLOCATE TYPE Z Turn the right control knob to the "Coffee bean" symbol. Continued on the next page 49 Technical Information Allocating the Coffee Types (Continued) Press to confirm. The upper line shows the coffee type, the lower line shows the chamber number. If no type is allocated to the chamber, the upper display line shows “empty”. Some coffee types are factory set, which you can either accept or change. Remove the carousel from the machine to see which coffee type is filled in each chamber. TYPE ARPEG Turn the right jog shuttle to the desired chamber and press to confirm. Turn the right jog shuttle to the desired coffee type and press to confirm it. Repeat for each chamber. For additional information – refer to the Operating Manual. Setting the Clock 1. 2. 3. 4. 5. 6. 7. 8. Turn the left jog shuttle to "Settings". The language symbol is highlighted in the right display. Turn the right jog shuttle to the clock symbol, press to confirm. Press the right jog shuttle again. Turn the right jog shuttle to select the time format, press to confirm. Turn the right jog shuttle to select the hours, press to confirm. Turn the right jog shuttle to select the minutes, press to confirm. The setting will be automatically saved and the display will go back to the previous screen. F 50 Technical Information Setting the Language 1. 2. 3. 4. Turn the left jog shuttle to "Settings". The language symbol is selected in the right display. Press the right jog shuttle to select the language option. Turn the right jog shuttle until the desired language shows in the display. A check marks the selected language. Selectable languages: English US, GB, German, French, Dutch, Italian, Spanish, Portuguese, Turkish, Swedish, Norwegian, Danish, Finnish, Polish, Czech, Hungarian, Greek and Russian. 5. Press the right jog shuttle to select the desired language option. The setting will be automatically saved and the display will go back to the previous screen. All displays will now appear in the selected language. Note If an incorrect language setting is accidentally selected, follow the flag to return to the language setting. Optional – Housings (fits CVA2650 only) CVSG50 CVUG50 Countertop Housing Hanging Housing Table CVA-2650-2: Available housings 51 Technical Information CVA4070/4075 Coffee System Appliance overview Figure CVA4070/4075-1 : Front Overview 52 Technical Information Figure CVA4070/4075-2 : Appliance overview (inside/ Door Open) 53 Technical Information Technical and Safety Information ▪ Refer to the General Safety Guidelines in the General Information section of this manual. ▪ The CVA4070/4075 is designed to be built into cabinets and must be fully installed before any operation. ▪ This appliance can be installed above another appliance but, there must be a solid, closed shelf between the base of the coffee machine and the top of the appliance below ▪ Exercise caution while operating the appliance; coffee, hot water and steam can cause burns. Electrical Information Model Number Electrical Requirements Plug Style CVA4070/4075 120 VAC 15amp NEMA 5-15 Table CVA-4070/75-1: Electrical information 54 Technical Information Rear View- Plumbing Connection CVA 4075 Figure CVA4070/4075-3: Water Compression Fitting Plumbing Information – CVA 4075 Only Plumbing connections is only available on the CVA 4075 model. (Cold water connection only). Plumbed CVA 4075 must operate with a special design water tank which contains two floats, where the CVA 4070 contains only one float. CVA 4075 system has a factory installed 90Xelbow with a ¼ compression fitting. Installer is responsible for supplying all plumbing connections, hoses. Ice maker supply kit available with copper or plastic tubing will work efficiently when installed correctly. (Not included with Coffee system) Provide additional depth of 2 ½ “for the installation of the CVA 4075 plumbing connection rear of the system. CVA system must be connected to the water supply by a licensed plumber in accordance with local and national regulations. Keep the length of tubing to the shortest distance possible and should not exceed 1.5m or 5’. Water pressure minimum 14.5psi to 145psi maximum, if higher pressure, install a pressure reduction valve. 55 Technical Information Installation Procedure 1. Ensure opening in cabinet and supports in cabinet will allow for proper installation, allow additional depth for CVA 4075. 2. Connect the power cord to the wall outlet. 3. Connect to a plumbed cold water supply (CVA 4075 system). 4. The on-site water line must have a water valve to turn water off if needed. If not present, have a water valve installed by a licensed plumber. 5. Push appliance back into the cabinet - until fully seated. 6. Open the front of the appliance and turn the 4 screws’ tightening them against the inside of the cabinet. The screws should be turned evenly to ensure the appliance is centered to cabinets. See Figure CVA4070/4075-4. 7. Fill beans container and water container. 8. Program user settings for proper CVA system. 9. Perform an operational check, check for leaks. 10. Provide the customer with an operational overview. Figure CVA4070/4075–4 : Install Screw Locations 56 Technical Information Supplementary Information Operation and Use Figure CVA4070/4075-5 : Operation and Use 57 Technical Information Language Settings Figure CVA4070/4075-6 : Language 58 Technical Information Clock Settings Figure CVA4070/4075-7 : Clock Settings 59 Technical Information Built In Plate Warmer Appliance Overview Figure EGW-1: Plate warmer 60 Technical Information Figure EGW-2: Plate warmer controls Technical and Safety Information ▪ ▪ ▪ ▪ ▪ Refer to the General Safety Guidelines in the General Information section of this manual. Read all operating and installation instructions for any other appliance installed in combination with the platewarmer. Do not use the plate warmer to reheat, cook or keep food or drinks warm. Condensation from food or drinks can cause moisture to develop resulting in damage to the appliance. The plate warmer must be installed on its own supporting shelf. With installations using a Miele Coffee System or Miele Steam Oven, the plate warmer must always be installed beneath the other appliance. A shelf between the appliances is not necessary. 61 Technical Information Electrical Information 120 VAC, 60Hz., 15amp breaker. The appliance is equipped with a power cord connected equipped with a NEMA 5-15 plug for connection to a standard 120VAC 3 prong outlet. Plumbing Information None – not applicable. Installation Procedure 1. Ensure the opening and the supports in cabinet allow for proper 2. 3. 4. 5. 6. 7. 8. installation. Connect the power cord to the electrical outlet. Push appliance back into cabinet until fully seated. Ensure appliance is level, and positioned Open the drawer on the appliance, secure the appliance to the cabinets, as shown in Figure EGW-3.. Remove the protective foil from the adhesive strips. Install metal strips to the platewarmer, on the top right and left edges. Install the combination appliance - refer to the specific installation instructions for the appliance being installed. Figure EGW-3: Plate warmer Mounting Screw Locations with Strips on Top Left and Right Edges. 62 Technical Information Supplementary Information Aligning the Front of the Plate Warmer After installing the combination appliance, it may be necessary under certain circumstances to align the front of the plate warmer. align the gap between the plate warmer and the combination appliance. To help you do this, there are adjusting points underneath the nuts that secure the drawer to the runners. 1. Loosen the nuts and take the plate warmer drawer out. 2. Use the adjusters to align the drawer correctly. 3. Reinstall the drawer and secure nuts - repeat as needed to align. 63 Technical Information Ovens Appliance Overview – Novotronic Ovens 1. 2. 3. 4. 5. 6. 7. 8. 9. 10. 11. Program Selector Display / Pushbuttons Timer Control + / - Buttons w/ Indicator Door Switch Top Heating Element Rotisserie Sockets Roast Probe Connection Runners Convection Fan Door Figure H-1: Novotronic Oven (H387BP-KAT shown) 64 Technical Information Appliance Overview – Master Chef Ovens (All) 1. 2. 3. 4. 5. 6. 7. 8. 9. 10. 11. Control Panel Door Lock Child Safety Lock Door Contact Switch Upper Heating Element Rotisserie Sockets Light Roast Probe Socket Convection Fan Six-level runners Oven Door Figure H-2: Master Chef Double Oven (H389BP2-KAT shown) 65 Technical Information Controls – Novotronic Ovens Figure H-3: Novotronic Oven Controls (H387 shown) 66 Technical Information Controls - Master Chef (H39X Series) A. B. C. D. E. F. G. Display: shows the time, oven status, or menu options. Touch Controls: used to select an option ON/OFF: turns the upper oven on/off. ON/OFF: turns the lower oven on/off. Keypad: used to enter times or temperatures. Clear: deletes the last entry or clears the menu. Timer: used to set up to 2 independent cooking timers. Figure H-4: Master Chef Oven Controls (H398BP2-KAT shown) 67 Technical Information Controls - Master Chef (H4000 Series) H4000 Series Single Oven Controls Figure H5: Overview of H4000 Series Single Oven Controls 68 Technical Information H4000 Series Double Oven Controls Figure H6: Overview of H4000 Series Double Oven Controls 69 Technical Information Technical and Safety Information Refer to the General Safety Guidelines in the General Information section of this manual. If the oven is to be installed under a cooktop, a sealing strip must replace the stainless steel rail above the control panel, to prevent liquids from entering the oven controls. Ensure oven vents are not obstructed. Caution Heating elements may be hot even though they are not glowing. Electrical Information Oven Series Novotronic Model Number(s) H350B H373B H387B H387BP H39X Single Oven H39X Double Oven H4XXX Single Oven (60cm & 70cm) Master Chef H4XXX Single Oven (30”) H4XXX Double Oven (30”) Electrical Information 120/240 VAC, 4 wire connection, 20 amp dedicated breaker *(1) 120/240 VAC, 4 wire connection, 30 amp dedicated breaker *(1) 120/240 VAC, 4 wire connection, 40 amp dedicated breaker *(1) 120/240 VAC, 4 wire connection, 20 amp dedicated breaker. Unit is supplied with NEMA 14-30 Plug*(2) 120/240 VAC, 4 wire connection, 30 amp dedicated breaker. Unit is supplied with pigtail connection*(2) 120/240 VAC, 4 wire connection, 40 amp dedicated breaker. Unit is supplied with pigtail connection*(2) Table H1: Electrical information *(1) – Note: Ovens may have an additional tag noting it has been equipped to operate at 120/208 VAC. Do not connect these models ovens to higher voltages. Always check the electric supply before performing the electrical connection. *(2) – Note: Ovens can be connected to 208VAC or 240VAC. Programming mode must be accessed to set proper voltage. Always check the electric supply before performing the electrical connection. 70 Technical Information Connection details are provided on the diagram located on the top of the ovens with pigtails. The electric supply should be always be checked against this diagram to ensure all electrical and safety requirements are met prior to the performing the electrical connection. For showroom / demonstration mode refer to the Miele Service Information or contact Miele for further assistance. Figure H7: Ventilation cutout NOTE: Important information For proper heat ventilation a 12’’ X 2” (24 sq inch) must be placed to the rear of the platform under the oven 71 Technical Information Plumbing Information None – not applicable. Installation Procedure 1. Ensure the opening in cabinet and supports in cabinet will allow for proper installation. 2. Remove all materials from the oven. 3. Place the oven near cabinet opening. 4. Ensure power supply is off; connect the oven to the electrical supply. 5. Remove the door(s) from oven. Warning The front door must be grasped at the sides during removal and transportation. Do not lift and transport the front door by handle! 6. 7. 8. 9. Install slide skids (does not apply to Novotronic Ovens). Place the oven into the cabinet as far as the ovens fascia trim; Reinstall the front door and align. Refer to Figure H-5. Carefully open the oven door and locate the two mounting screw holes in the oven frame. Mark and drill pilot holes. Secure the oven to the cabinets by inserting screws through the frame and into the cabinets. Figure H-8: Mounting hardware wall oven (typical) 10. Test the appliance. 11. Provide the customer with an operational overview. 72 Technical Information Note New ovens may have a slight odor during their first use. Operating the oven at a high temperature for at least an hour will eliminate the odors quickly. Ensure the room is well ventilated during this process. Supplementary Information Set the Clock – Novotronic Ovens 73 Technical Information Child Safety Lock – Novotronic Ovens The child safety lock can be used to prevent the oven from being turned on by accident / children. Activate 1. Place the oven selector knob in the “O” Off position. 2. Press and hold in the z button - until the key symbol appears in the display. (note: key symbol is present for 5 seconds - then clears from the display) De-Activate 1. Place the oven selector knob in any cooking mode. 2. Press and hold in the button z until the key symbol disappears from the display. 3. Turn selector back to “O” Off. Set the Clock – Master Chef Ovens 1. Enter the current time using the keypad. 2. Different settings can be selected by touching the control next to the appropriate option: Size of the clock display o o Time format o o Size Normal Size Large 12 hour 24 hour Clock display feature o o Clock On Clock Off (not shown in the display) 3. Touch the "OK" control to confirm the entries. 74 Technical Information Child Safety Lock – Master Chef Ovens The child safety lock can be used to prevent children from operating the oven or to conserve standby power when the oven will not be used for some time (e.g. vacation). Refer to Figure H-6. The child safety lock is located below the right side of the control panel, only visible when the door is open. Figure H-8: Child Safety Lock – Master Chef Ovens Activate Slide the lock to position "0". The clock will not be shown / the oven cannot be operated. Deactivate Slide the lock to position "I". Normal oven operation resumes. 75 Technical Information Supplementary Information – (H4000 Series Only) Unit can be connected to 208 VAC or 240VAC. Programming mode must be accessed, and voltage must be entered into electronics. Programming Mode Initial Requirements -Cancel / finish any currently programmed mode / operation -Switch off the appliance -Close the door Accessing Note The access procedure must be completed within 10 seconds. 1. 2. 3. 4. 5. Touch and hold Clear pad. Touch the On/Off pad. Release all pads. Touch the Clear pad 4 times. Touch and hold the Clear pad a 5th time. Acknowledgment Indicator The display shows the following programming modes: LANGUAGE CLOCK TEMPERATURE OVEN LIGHT TEMPERATURE More 6. Select More 7. Then select 208V/240V 8. Now you can select the voltage that you had measured at the wall outlet 9. Then select OK 10. Shut unit off to complete programming For showroom / demonstration mode refer to the Miele Service Information or contact Miele for further assistance. 76 Technical Information Speed Oven Appliance Overview (H4080BM) 1 2 3 4 5 6 Control Panel / Display Heater Element (Broiling) Cavity Light Temperature Probe Socket Cooking Levels Supports (3) Front Door Assembly Figure H4080BM-1: Overview of Appliance (Front View) 77 Technical Information Overview of Controls 1 1 7 3 1 2 3 4 5 6 7 5 4 2 6 Menu Touch Pads: used to select an option Numeric Touch Pads: used to enter times or temperatures On/Off Touch Pad: turns unit on/off Display: shows the time, oven status, or menu options Timer Touch Pad: used to set up to 2 cooking timers Clear Touch Pad: deletes the last entry or clears the menu Minute Plus: starts microwave on high power for a minute Figure H4080BM-2: Overview of Controls 78 Technical Information Microwave Energy and Safety Information Danger ! To avoid severe internal burns – never expose yourself to microwave energy under any circumstances! The Magnetron and/or microwave generator should only be serviced by qualified service personnel trained on microwave service procedures. All intake and exhaust ports, vents, flanges, gaskets and seals are in the appropriate condition and sealed where necessary. Never operate the appliance without a load (i.e. food or water present in the cavity) Never look into an open wave duct or the antenna while the appliance is in operation. Electrical Specifications Voltage Requirements 120/240 VAC Circuit Breaker Requirements 20 amp Electrical Connection 7.2 ft. cable with NEMA 14-30 Plug Table H4080BM-1: Electrical information Unit can be connected to 208 VAC or 240VAC. Programming mode must be accessed, and voltage must be entered into electronics. Plumbing Information None – not applicable 79 Technical Information Installation Procedure The appliance is designed for installation into a tall cabinet in combination with an oven, in a tall cabinet or under the countertop. To avoid preventable damage to the appliance, follow the handling instructions attached to the top of the appliance. 1. Ensure the opening in cabinet and supports allow for proper installation. 2. Ensure the electrical supply meets the appliance requirements (see data tag on the appliance for details). 3. Remove all materials from the oven. 4. Place the oven near cabinet opening. 5. Ensure power supply is off. 6. Connect the oven to the electrical supply. 7. Set the oven into the cabinet, push it all the way in and align as necessary. 8. Open the oven and attach the appliance to the cabinets using two retaining screws at the sides of the frame, as shown in Figure H4080BM-3. 9. Perform “Before Using the Appliance” procedures. Figure H4080BM-3: Installation Retaining Screw Locations 80 Technical Information Programming Mode Initial Requirements -Cancel / finish any currently programmed mode / operation -Switch off the appliance -Close the door Accessing Note The access procedure must be completed within 10 seconds. 1. 2. 3. 4. 5. Touch and hold Clear pad. Touch the On/Off pad. Release all pads. Touch the Clear pad 4 times. Touch and hold the Clear pad a 5th time. Acknowledgment Indicator The display shows the following programming modes: LANGUAGE CLOCK TEMPERATURE OVEN LIGHT TEMPERATURE More 6. Select More two times 7. Then select 208V/240V 8. Now you can select the voltage that you had measured at the wall outlet. 9. Then select OK 10. Shut unit off to complete programming For showroom / demonstration mode refer to the Miele Service Information or contact Miele for further assistance. 81 Technical Information Before Using the Appliance Note The following steps must be performed after performing the Installation Procedure To ensure proper operation the following items should be programmed appropriately for the customers needs: Language Time of Day Time Format (12/24hr format) Display Clock Option 1. Remove the protective film from the front of the appliance (if 2. 3. 4. 5. 6. present). Wipe the interior with a solution of warm water and liquid dishwashing detergent. Dry with a soft cloth. Leave the door open until the interior is completely dry. Close the oven door. Wash the accessories. Important New ovens may have a slight odor during the first use. To eliminate the odor, the oven should be operated at a high temperature for at least one hour. Before heating the oven, remove all accessories and labels from the oven and ensure the room is well ventilated during this process. 7. Touch the "On" control. 8. Select the "Bake" function. 9. Select "Convection Bake". 10. Select "Temperature". 11. Set the temperature to 435 °F (225 °C) using the keypad. 12. Select "Duration". 13. Set the duration to two hours by entering "2", "0", "0" using the keypad. 14. Touch the "OK" control. The oven will run for 2 hours, the remaining time appears in the display. 82 Technical Information Supplementary Information Replacing Door Handle The door handle can be replaced with ease if the customer has ordered a different style handle to match their other Miele kitchen appliance. 1. Open door ¼ way from closed position. 2. On the top edge of the door you will find two silver locking clips. One on the left side and right side. 3. Push both silver locking clip’s with a small flat head screwdriver untill you hear the door glass release. 4. Start to separate the glass from the door frame. Guide the metal bars that are next to the silver locking clips through the door frame. These metal bars are attached to the door glass. 5. Once the metal bars have cleared, lift the door glass straight up to release the bottom tabs. 6. Lay the door glass on a towel with the handle facing down and over the edge of a table. 7. Remove the two Torx T-20 screws holding the handle to the glass. 8. Reinstall new door handle. DO NOT OVER TIGHTEN THE TORX SCREWS. 9. Take the door glass and line up the bottom tabs first. 10. Next line up the metal bars with the holes in the door frame. 11. Once the metal bars are through the holes in the door frame, squeeze the glass and door frame together. 12. The two silver locking clips will pop back into place. 83 Technical Information ESW / Food Warming Drawer Overview – Food Warming Drawer (Typical) 1 2 3 4 5 6 Timer Temperature selector Humidity control Non-slip mat Rack Drawer ESW-1: Overview of Food Warming Drawer 84 Technical Information Technical and Safety Information ▪ ▪ ▪ ▪ ▪ Refer to the General Safety Guidelines in the General Information section of this manual. Read all operating and installation instructions for any other appliance installed in combination with this appliance. The warming drawer must be secured to cabinetry to prevent the drawer from tipping when loaded. The warming drawer should be level to prevent the drawer sliding open or closed on its own. Note: The drawer can not be leveled after it has been installed. To allow for proper ventilation of steam a minimum 2" (5 cm) gap must exist between the upper edge of the warming drawer and the cabinetry as shown in Figure ESW-2. ESW-2: Warming Drawer Installed – Side View Electrical Information 120 VAC, 60Hz., 15amp breaker. The appliance is equipped with a 5ft. long power cord equipped with a NEMA 5-15 plug for connection to a standard 120VAC 3 prong outlet. Plumbing Information None – not applicable. 85 Technical Information Installation Procedure 1. Remove the drawer from the casing as follows: Pull the drawer completely out and loosen the nuts. Carefully lift the drawer and pull it slowly out. Set the drawer down on a flat, suitable surface. 1. Push the casing in the cabinetry. 2. Secure the casing in the cabinetry with the six screws; as shown in Figure ESW-3. ESW-3: Installing the Food Warming Drawer 3. Insert the drawer back into the appliance as follows: Pull out the telescopic skies from the casing. Set the drawer on the telescopic skies. Secure the drawer with the two nuts. 86 Technical Information Integrated Installations - Models 700-25FB and 760-25FB Custom made front panels can be installed with models 700-25 FB and 760-25 FB. Model Number 700-25FB 760-25FB Panel Dimensions Additional Notes Width 27 3/8" (695 mm) Height 11" (279 mm) Width 29 13/16" (757mm) Height 11" (279 mm) All panels must be at least 3/8" (10 mm) thick and made of material resistant to temperatures up to 140 °F (60 °C). 1. Install a handle to the custom front panel using counter sunk screws. 2. Remove the drawer from the casing (see installation instructions). Note The panel attached to the warming drawer front can be used as the drilling template for the custom panel. 3. Loosen the two screws on the inner side of the drawer and remove the front panel from the drawer. 4. Place the drawer front panel on a firm surface with the adhesive tape facing up. Test fit the custom panel to ensure proper installation. 5. Remove custom panel and peel the backing from the adhesive tape. 6. Position the custom panel back in position over the adhesive. Press the panel to ensure good adhesion. 7. Screw the removed panel to the custom panel with the eight screws; as shown in Figure ESW-4. Figure ESW-4: Securing custom panel to drawer front Continued on the next page 87 Technical Information Integrated Installations - Models 700-25FB and 760-25FB (continued) Figure ESW-5: Securing the front panel assembly on the warming drawer 8. Hook the panels into the bottom on and secure at the top with two screws making sure the seal is seated correctly. 9. Insert the drawer back into the casing (see installation instructions). 88 Technical Information Combi Sets and Cooktops Appliance Overview – Combisets (KM400 Series) KM400 KM406 KM402/403 KM404 KM408 KM411 Related Accessories CSA400 Pot Rest GSGP Griddle Figure KM-1: Combisets 89 CSAW400 Scale Technical Information Appliance Overview -Cooktops KM320 KM360 KM342 KM344 KM391 KM424 KM421 KM427 KM443 KM451 KM452 Figure KM-2: Cooktops 90 Technical Information Appliance Overview – Cooktops Contined KM3464 KM3465 KM3474 KM3475 KM3484 KM3485 KM5656 KM5676 Figure KM-3: Cooktops 91 Technical Information Technical and Safety Information Refer to the General Safety Guidelines in the General Information section of this manual. There are minimum clearance dimensions from the combisets and cooktops to: adjacent cabinets and surrounding walls. THESE SPECIFICATIONS ARE IN THE OPERATING MANUAL AND SHOULD BE FOLLOWED TO ENSURE A SAFE INSTALLATION. Deep fryers should not be installed next to gas cooktops. Gas flames can ignite splattering oil. A distance of at least 12" (305 mm) should be maintained between these two appliances. Cooktops should not be installed above a dishwasher, washer, dryer, freezer or refrigerator. The heat generated by cooktops could damage these appliances. If more than one appliance is installed beneath a hood and they have different minimum safety distances, the greater distance should be adhered to. When installing more than one KM400 series combisets in a common opening a ZL400 support strip must be used between the units. Any gas supplied appliance must have a master shut off within reasonable access. This shut off must be located before the supplied regulator. Cooktops and combisets should not be permanently sealed to the countertop. If they are sealed into position, the countertop or appliance could be damaged should the appliance need and / or maintenance. Recheck all dimensions before cutting countertop openings. 92 Technical Information Electrical Information Combisets Model Number Voltage Requirements KM400 208-240 VAC KM403 208-240 VAC KM404 120 VAC KM406 120 VAC KM408 208-240 VAC KM411 208-240 VAC Table KM-1: Combisets electrical information Circuit Breaker 15 amp 15 amp 15 amp 15 amp 15 amp 15 amp Cooktops Model Number Voltage Requirements KM320 120 VAC KM342 120 VAC KM344 120 VAC KM 360 120 VAC KM 391 120 VAC KM421 208-240 VAC *(1) KM424 208-240 VAC *(1) KM427 208-240 VAC *(1) KM443 208-240 VAC *(1) KM451 208-240 VAC *(1) KM452 208-240 VAC *(1) KM3464 120 VAC KM3465 120 VAC KM3474 120 VAC KM3475 120 VAC KM3484 120 VAC KM3485 120 VAC KM5656 208-240 VAC *(1) KM5676 208-240 VAC *(1) Table KM-2: Cooktops electrical information Circuit Breaker 15 amp 15 amp 15 amp 15 amp 15 amp 30 amp 40 amp 50 amp 40 amp 50 amp 50 amp 15 amp 15 amp 15 amp 15 amp 15 amp 15 amp 40 amp 50 amp *(1) – Note: Cooktops can be special ordered for use with 208 VAC. And will be noted with an additional tag noting the electrical requirement. Do not connect these models to higher voltages. Always check data tag on the appliance and the electric supply before performing the electrical connection. 93 Technical Information Plumbing Information Water None – not applicable. Gas Ensure the correct type of appliance is being installed prior to any gas connection. Appliances are typically shipped for connection to a natural gas system. Appliances configured to operate on LP should be clearly marked with an additional label to indicate the gas requirement. The gas connection must be made in accordance with local codes or, on the absence of local codes with the National Fuel Gas Code ANSI Z223.1 / NFPA 54. In certain jurisdictions a licensed plumber / gasfitter may be required for this installation. Contact your local governing agency for details. All gas connections should be secure and checked before operating the appliance. Installation Procedure 1. Refer to the General Safety Guidelines in the General Information section. 2. Refer to the specific Operating Manual for the appliance being installed - All model information, instructions, warnings and safety guidelines found within that manual should be followed. 3. Ensure you have the correct type of appliance to be installed. (i.e. LP or gas) 4. Generally Combi Sets and Cooktops are placed into the opening and secured with the included hardware. 5. Perform the gas connection - as applicable. 6. Perform electrical connections. 7. Test and operate appliance. 8. Provide the customer with an operational overview. 94 Technical Information Ventilation Hoods Appliance Overview Wall Hood (Typical) 1. 2. 3. 4. 5. 6. 7. 8. Chimney Extension Chimney Canopy Control Panel Main Power Switch Recirculation Vent (recirculation units only) Grease Filter Overhead Lighting Figure DA-1: Overview of Typical Wall Hood Note Components and component locations vary slightly by model number. 95 Technical Information Island Hood (Typical) 1. 2. 3. 4. 5. 6. 7. Cover Plate Chimney Canopy Control Panel Grease Filters Overhead Lighting Main Power Switch Figure DA-2: Overview of Typical Island Hood Note Components and component locations vary slightly by model number. 96 Technical Information Built-In Hood (Typical) 1. 2. 3. 4. 5. Joystick Overhead Lighting Grease Filter Charcoal Filters Main Power Switch Figure DA-3: Overview of Typical Built In Hood Note Components and component locations vary slightly by model number. 97 Technical Information Hood Controls - Typical 1. 2. 3. 4. 5. Light Button On/Off Button Fan Power Level Buttons Delayed Shut Down Grease Filter Button Figure DA-4: Typical Hood Controls Technical and Safety Information For complete installation information, refer to the specific model numbers Operating Manual (Installation section) and / or the Installation Manual. Refer to the General Safety Guidelines in the General Information section of this manual. Ensure the proper structural supports are in place prior to mounting any part of the hood. Electrical Information Most hood come equipped with a 5 ft power cord, for connection to a 120 VAC, 15 amp outlet. For specific electrical information, refer to the appliance data plate. Plumbing Information None - not applicable 98 Technical Information Installation Procedure Important This manual contains general information for hood installations. Always refer to the model specific installation manual or installation section of the operating manual for specific installation instructions. Ensure proper clearance exist from surrounding cabinets and cooktops before installation. Completely protect the countertop, cabinets and cooktop areas in the installation area. Ensure that structural conditions exist to properly install and support the weight of the hood. All carpentry related work must be performed prior to the installation of the hood or brackets. Ensure the electrical connection / outlet is installed within the physical dimensions of the hood enclosure. If hood is being vented; ensure connections are within the dimensions of the hood and of the proper type. If the hood is being configured for recirculation; ensure the separate charcoal filter is installed during installation. Note Certain models hoods may require an additional “recirculation kit”, if it will not be vented. Supplementary Information Master On/Off Switch A master on/off switch is located on the underside of the canopy. Should a newly installed hood not operate, ensure the master on/off switch is in the on position. 99 Technical Information Clothes Washer - Touchtronic Appliance Overview Front of Appliance Figure W-1: Front Overview of Washer (Typical) 100 Technical Information Rear of Appliance Figure W-2: Rear Overview of Washer (Touchtronic Model Shown) 101 Technical Information Controls – Touchtronic Models Figure W-3: Overview of Controls (Typical Touchtronic Washer) Detergent Dispenser – Touchtronic Models Figure W-4: Detergent Dispenser (Typical) Touchtronic Models 102 Technical Information Technical and Safety Information Refer to the General Safety Guidelines in the General Information section of this manual. The shipping struts must be removed prior to any operation. Ensure the washer is installed on a suitable surface. Chlorine Bleach is not recommended for use in the clothes washer. Only detergent carrying an “H.E.” (High Efficiency) designation should be used. The machine comes equipped to operate using both powder and liquid detergents - to use liquid detergents the supplied detergent drawer insert must be used. Contact Miele Technical Support for details. The machine must be perfectly level to ensure safe and proper operation. To perform a stacked installation an approved Miele stacking kit that matches your model numbers must be used. The washer must be the lower appliance. Warning A laundry stand and stacking kit cannot be used together. Electrical Information Model Number Voltage Breaker Plug Style All Models 120 / 240(208) VAC 15 amp NEMA 14-30 All models are equipped with a 5 ft., (12/4 AWG) power-cord with a molded NEMA 14-30 plug. If you do not have a dedicated 15 Amp circuit for this appliance, but have a 240V, 30 Amp outlet, you can use a Miele “Easy Installation Kit”, which allows you to use this existing line to connect this appliance. For further information, refer to Electrical Information pages in the General Information section of this manual or contact Miele. Do not cutoff / remove the plug from the power cord. 103 Technical Information Plumbing Information Water Inlet (Intake) Connection Type Hose Information Cold Water Supply Blue Lined Hose Hot Water Supply Red Lined Hose Table W-1: Plumbing information Connection Type 3/4in. pipe thread 3/4in. pipe thread Each water intake hose is equipped with screen filters - do not remove the filters. Water pressure should be 15-145 psi. (1-10 bar). Note Should the water supply pressure exceeds 145 psi. (10 bar), a pressure reducer must be installed on the supply. Should the water supply pressure be less than 15 psi (1 bar), insufficient water may be available for a complete fill. Single Cold Water Supply Connection If desired the washer can be connected to a single (cold) water supply by connecting both the hot and cold intake hoses to the supply valve using a “Y” adapter. Drain Connection The appliance is equipped with a 5 ft. (1.5 m) drain hose with a maximum delivery height of 4ft. (1.2 m) for connection to a drain as follows: Directly into a sink: hook the hose over the edge of the sink and secure it firmly (i.e. by tying the hose to the water faucet etc...). To a stand pipe: place the drain hose into a 1 1/2in. (38 mm) stand pipe and secure in place. To a floor drain: The machine is equipped with an airgap/antisiphoning system so that no minimum drain height is required. Extending / Increasing the Length of the Drain Line Maximum drain height can be increased by the installation of a booster pump installation kit; and an additional booster drain pump. Maximum drain height with this kit and pump installed is 8 feet and a maximum drain length of 15 feet. Contact the Miele Technical Support Center for further information 104 Technical Information Installation Procedure 1. Check the installation site. Ensure appliance is being installed on a suitable surface, and required connections are present. 2. Lift the machine from the shipping pallet and move it to the installation site. Warning The appliance may weigh more than expected Do not lift the washer by the drum door. Movement of the machine without the shipping struts in place should be kept to a minimum. DO NOT operate the appliance with the shipping struts installed. 3. REMOVE THE SHIPPING STRUTS (See Supplemental Information). 4. Plug the two open holes with the plastic caps provided. Store the shipping struts in a safe place for future use. 5. Refer to Figure W-7. Level the appliance. Refer to the Accessories section of the Installation Manual at this time if an optional Laundry Stand is being installed. Tip the machine slightly and place a support, such as a block of wood, underneath it. Unscrew each of the four feet as much as necessary by turning both the foot and locking ring. 6. Remove the support, stand the machine on its feet and check to see if it is level. Repeat step 5 as necessary. Figure W-7: Leveling the appliance Continued on the next page… 105 Technical Information Installation Procedure (continued) 7. Figure W-8. Lock the feet by performing the following: Hold the foot (1) using a wrench; while turning the locking ring (2) to the right. Ensure each locking ring is tight against the bottom of the machine. Figure W-8: Adjusting the feet 8. Perform the necessary plumbing connections. 9. Connect the Electric supply and perform an operation check. 10. Install the Stacking Kit (if required). 11. Provide the customer with an operational overview. 106 Technical Information Supplemental Information Shipping Strut - Removal Unhook and remove the strut Protectors using a screw driver Turn shipping struts 90°: Left Strut – Counterclockwise Right Strut – Clockwise Pull out the shipping strut Stow the struts on the back of the washer Reinstall strut protectors 107 Technical Information Basic Installation Faults The water supply valve(s) is (are) not open The intake hoses are kinked No water intake / water intake fault The water pressure is too low Drain hose connection exceeds max. height and/or length The (N) neutral line is missing from the electrical supply (W1966 and W1986 only) Use a proper drain connection (within specification of the appliance) OR install a booster drain pump Have a qualified electrician perform the necessary corrections. The shipping struts have not been removed The washer is not level Remove the shipping struts Check / level the washer Not draining / drain fault The machine shakes during the spin cycle Open the water supply valve(s) Check the hoses are routed free of kinks / obstructions Increase water pressure / use an alternative supply connection Cooling of Drain Water (Suds Cooling) This optional programmed function mixes cold water with the draining water to reduce the temperature of the water exiting the drain hose. To program the washer for this function, refer to the Miele Technical Service Information, or contact the Miele Technical Support Center for assistance. 108 Technical Information Clothes Dryer Appliance Overview Front of Appliance – Vented Model Figure T-1: Front View of Vented Dryer (Typical) 109 Technical Information Front of Appliance – Condenser Model Figure T-2: Front View of Condenser Model Dryer (Typical) 110 Technical Information Controls – Touchtronic Models Figure T-3: Overview of Touchtronic Dryer Control Panel 111 Technical Information Technical and Safety Information Refer to the General Safety Guidelines in the General Information section of this manual. Do not drink the condensed water. Keep the area around the air intake (toekick) and surrounding areas free from lint, dust and dirt. This area should not be blocked (i.e. toekick) this will prevent sufficient intake of air and effect machine operation. Do not reach into the dryer if the drum is moving. The machine should be level to ensure safe and proper operation. To perform a stacked installation an approved Miele stacking kit that matches your model numbers must be used. The dryer must be the upper the appliance. Warning A laundry stand and stacking kit cannot be used together. Electrical Information Model Number Voltage 120 / 240(208) VAC Table T-1: Dryer electrical information All Models Breaker Plug Style 15 amp NEMA 14-30 All models are equipped with a 5 ft., (12/4 AWG) power-cord with a molded NEMA 14-30 plug. If you do not have a dedicated 15 Amp circuit for this appliance, but have a 240V, 30 Amp outlet, you can use a Miele “Easy Installation Kit”, which allows you to use this existing line to connect this appliance. For further information, refer to Electrical Information pages in the General Information section or contact Miele. Do not cutoff / remove the plug from the power cord. 112 Technical Information Plumbing Information Note This information applies only to condenser model dryers. On condenser model dryers the option exist to have the condensed water exit the appliance via a drain line. A suitable drain line (i.e. standpipe) would then be required. Drain Hose Length 6 ft. (can be increased to max. of 10 ft. Max. Drain Height 4 feet For further information on the optional water drain option – refer to the Condenser Dryer Installation Procedure. Installation Procedure – All Models Note If dryer is to be installed in combination with a stacking kit and clothes washer, the washer must be positioned with the stacking kit installed before installing the dryer. Note the dryer type (vented or condenser). Refer to the applicable installation procedure, on the following pages. 113 Technical Information Installation Procedure – Vented Models 1. Check the installation site. Ensure the appliance is being installed on a suitable surface, and the required connections are present. 2. Lift the machine from the shipping pallet and move it to the installation site. Warning The appliance may weigh more than expected Do not lift the dryer by the front door. 3. Level the appliance. If the dryer is being placed on a laundry stand or stacked on a washer - refer to the accessories section of this manual. 4. Tip the machine slightly and place a support, such as a block of wood, underneath it. 5. Unscrew each of the four feet as much as necessary by turning both the foot and locking ring. 6. Remove the support, stand the machine on its feet and check to see if it is level. Repeat step 5 as necessary. 7. Refer to Figure T-4. Lock the feet by performing the following: Hold the foot (1) using a wrench; while turning the locking ring (2) to the right. Ensure each locking ring is tight against the bottom of the machine. 8. Remove the appropriate venting cap from the dryer. Install the vent connector into the opening. Ensure all other vent exits are capped. 9. Connect a suitable vent to the dryer vent connector. For further information venting refer to the Supplemental Information included within this section. 10. Connect the Electric supply. Insert (a) wet/damp towel(s) into the appliance and perform an operation check. 11. Provide the customer with an operational overview. Figure T-4: Adjusting the feet 114 Technical Information Installation Procedure – Condenser Models 1. Check the installation site. Ensure appliance is being installed on a suitable surface, and required connections are present. 2. Lift the machine from the shipping pallet and move it to the installation site. Warning The appliance may weigh more than expected Do not lift the dryer by the front door. 3. Level the appliance. If the dryer is being placed on a laundry stand or stacked on a washer - refer to the Accessories section of this manual. 4. Tip the machine slightly and place a support, such as a block of wood, underneath it. 5. Unscrew each of the four feet as much as necessary by turning both the foot and locking ring. 6. Remove the support, stand the machine on its feet and check to see if it is level. Repeat step 5 as necessary. 7. Refer to Figure T-5. Lock the feet by performing the following: Hold the foot (1) using a wrench; while turning the locking ring (2) to the right. Ensure each locking ring is tight against the bottom of the machine. 8. If a drain connection for the condenser water is desired refer to the Supplemental Information included within this section. 9. Connect the Electric supply and perform an operation check. 10. Provide the customer with an operational overview. Figure T-5: Adjusting the feet 115 Technical Information Supplemental Information Venting Information Note Venting information does not apply to condenser model dryers General Information The moist air from the dryer should be vented outside using a suitable venting system. To reduce drying time and energy consumption: avoid long runs, numerous bends / angles and tight corners in the vent system. On Miele dryers there is a choice of exhaust venting ports. Install the vent connector to the appropriate connection, ensure all unused ports are capped. Important Do not vent the dryer into a chimney, wall space, ceiling, or other concealed space. Do not vent the dryer into a flue used by gas or fuel boilers or heaters Calculating the Effective Duct Length 116 Technical Information Condenser Dryers – Optional Drain Connection 1. Refer to Figure T-6. Unclip the drain hose (1), and remove it from the drawer connector (2). Figure T-6: Unclipping and disconnecting the drain hose 2. Refer to Figure T-7. Unclip the drain hose (3). Pull the entire drain hose, from the dryer (4). Figure T-11: Unclipping and fully extending the drain hose Caution Ensure the drain hose isn’t kinked / crimped. Re-attaching the drain hose to the retaining clip(s) may help in reducing sharp bends in the hose. 3. Attach the provided elbow to the hose and secure it to the sink or into the drain pipe. 117 Technical Information Laundry Products – Optional Accessories WTV Stacking Kits - Application Guide - WTV405 Installation Instructions - WTV408 Installation Instructions - WTV421 / WTV423 Installation Instructions WTS Laundry Stand - WTS420 Laundry Stand Instructions Undercounter Conversion / Installation Kit - Installation Instructions Integrated Door Panels - Installation Instructions 118 Technical Information WTS Stacking Kit – Application Guide 5 Kilogram Models 119 Technical Information 6 Kilogram Models 120 Technical Information WTV405 – Installation Instructions 121 Technical Information 122 Technical Information 123 Technical Information WTV408 – Installation Instructions 124 Technical Information 125 Technical Information 126 Technical Information WTV421 / WTV423 – Installation Instructions 127 Technical Information 128 Technical Information 129 Technical Information WTS420 - Installation Instructions 130 Technical Information 131 Technical Information 132 Technical Information Undercounter Conversion / Installation Instructions 1. Set up the appliance in accordance with the product specific installation instructions. Do not place the unit under the countertop at this time. 2. Remove the two caps from the side of the lid and loosen the Torx T20 screws as shown in Figure 1. retaining brackets Figure 1: Removing the lid from the appliance. 3. Push inward on the screws, and lift the lid from the appliance. 4. Remove the lid retaining brackets from the rear of the appliance. 5. Install the top cover in the kit on the top of the appliance, using the hardware provided in the kit, as shown in Figure 2. Figure 2: Installing the top cover on the appliance 6. Install the slide skis at the sides of the cabinet opening, as shown in Figure 3. 133 Technical Information Note The skis can be secured to the floor. Hardware to secure the slide skis is not included in the kit. Figure 3: Slide skis installed 7. Connect all site utilities (i.e. electrical, water supply, drain). 8. Slide the appliance into the opening; ensure hoses do not become kinked / crushed as the appliance is moved into position. 134 Technical Information Integrated Panel – Installation Instructions Note Due to the close tolerances all measurements are shown in millimeters (mm) unless otherwise stated. Door Panel Dimensions A Door Panel B Figure 1: Door panel dimensions A/Height B/Width Thickness 594mm 19mm Model Number Min. Max. W1119 Washer 450mm 635mm T1329 Dryer 450mm 635mm T1329 Dryer 450mm 594mm (if Stacked) Table 1: Door panel dimensions 135 Technical Information Before Getting Started 1. Refer to Table 1 (pg.1)– as necessary. Ensure the panel dimensions allow for proper installation. Make sure you know which is the top edge of the panel before proceeding to step 2. Note To avoid damage to the panel – place the door panel only on a suitable surface (blanket etc…) during this procedure. 2. Refer to Figure 2. Place the panel face (finished side) down with the top edge of the panel furthest away from you. All measurements and guide lines should only be made on the unfinished side of the panel. Top edge of door panel Figure 2 Important To prevent damaging the custom panel, when drilling pilot holes, and notches DO NOT exceed a depth of 13mm (about 5/8in). The use of a drill bit stop is highly recommended. Important Ensure you have a 35mm (about 1 3/8in.) Forstner drill bit (see figure 9) along with standard bits and a MM tape measure before starting this procedure. 136 Technical Information Custom Panel – Preparation Procedures Mounting Holes – Locations 1. Refer to Figure 3. Measure the door panel width and locate the center of the panel. Draw a centerline (A) down the panel. Figure 3 2. Refer to Figure 4. From the top edge of the panel measure down and draw horizontal lines at the following locations: B – 11mm C – 63mm D – 263mm E – 443mm Figure 4 137 Technical Information Mounting Holes – Locations (continued) 3. Refer to Figure 5. Draw two vertical lines (parallel to the centerline) as follows: F – 286mm to the left of the centerline G – 286mm to the right of the centerline Figure 5 4. Refer to Figure 5. Drill a 1.5mm (1/16in.) pilot hole 13mm (5/8in.) deep into the panel at the following intersecting lines: C and F C and G D and F D and G 138 Technical Information Mounting Holes – Locations (continued) 5. Refer to Figure 6. Draw two vertical lines (parallel to the centerline) as follows: H – 238mm to the left of the centerline I – 238mm to the right of the centerline Figure 6 6. Refer to Figure 6. Drill a 1.5mm (1/16in.) pilot hole 13mm (5/8in.) deep into the panel at the following intersecting lines: B and H B and A B and I E and H E and A E and I Proceed to “Creating Hinge Notches”. 139 Technical Information Creating Hinge Notches 1. Refer to Figure 7. Draw a vertical line (parallel to the centerline) as follows: For installation on the W1119 Clothes Washer J– 275mm to the left of the centerline For installation on the T1329 Clothes Dryer K – 275mm to the right of the centerline Figure 7 2. Refer to Figure 8. From the top edge of the panel measure down and draw horizontal lines at following locations: L – 94m M – 418mm Figure 8 140 Technical Information Creating Hinge Notches (continued) 3. Refer to Figure 8. Mark the panel as follows: For installation on the W1119 Clothes Washer L and J M and J For installation on the T1329 Clothes Dryer L and K M and K 4. Use a 35mm (about 1 3/8in.) Forstner drill bit to create the notches by using the positions marked in step 3 as the centerpoints. DO NOT exceed a depth of 13mm. (5/8in.). Figure 9 Proceed to “Creating Hardware Notches”. 141 Technical Information Creating Hardware Notches 1. Refer to Figure 10. Draw a vertical line (parallel to the centerline) as follows: For installation on the W1119 Clothes Washer N– 269mm to the left of the centerline For installation on the T1329 Clothes Dryer O – 269mm to the right of the centerline Figure 10 142 Technical Information Creating Hardware Notches (continued) 2. Refer to Figure 11. From the top edge of the panel measure down and draw horizontal lines at following locations: P – 68mm Q – 120mm R – 392mm E – 444mm Figure 11 3. Refer to Figure 11. Drill a 5mm (1/4in.) hole 13mm (5/8in.) deep into the panel at the following intersecting lines: For installation on the W1119 Clothes Washer P and N Q and N R and N S and N For installation on the T1329 Clothes Dryer P and O Q and O R and O S and O Proceed to “Installing the Door Panel on the Appliance”. 143 Technical Information Installing the Door Panel on the Appliance 1. Refer to Figure 12. Ensure the pilot holes (for mounting), the hinge notches and the hardware notches are present in the panel. Washer Panel Dryer Panel Figure 12 2. Open the front door of the appliance. 3. Refer to Figure 13. Remove the ten (10) screws from the inside of the door and remove the existing door panel from the metal door of the appliance. 4. Position the custom door panel on the appliance. 5. Support (or clamp the custom panel to the metal door – as necessary) the panel and reinstall the screws removed in step 3. 6. Check door alignment and operation. Figure 13 144 Technical Information Clothes Washer- Super Large Capacity Appliance Overview Front of Appliance Figure SLC-W-1: Front view of appliance 1. 2. 3. 4-7 8. 9. 10. 11. 12. Figure SLC-W-2: Drain options High pressure intake hose: red mark (hot water) High pressure intake hose: blue mark (cold water). Power Cord. Flexible drain hose with detachable swivel elbow (Drain options shown). Control Panel. Detergent dispenser drawer and door opener in case of power failure. Drum door. Access panel to lint trap and drain pump. Four height-adjustable feet. 145 Technical Information Appliance Overview - Rear View Figure SLC-W-3: Rear view of appliance 1. 2. 3. 4. 5. 6. 7. 8. Electrical Connection. W-LAN Communication Module. Rear access with grip for transportation. High pressure intake hose: blue mark (cold water). High pressure intake hose: red mark (hot water). Drain hose. Shipping struts. Storage bracket for intake and drain hoses. 146 Technical Information Controls – SLC W4800 Models Figure SLC—W-4: Overview of Controls (SLC W4800 Model) 1. 2. 3. 4. 5. 6. 7. 8. 9. 10. Programs buttons ÐÏ to select a wash program. Options buttons: special features to enhance a wash program. Temp button: select the wash temperature. Spin speed button: select the spin speed. PC indicator: allows a service technician to check and update the wash programs. Status indicators: shows the current cycle of the wash program. Buzzer button: turns the buzzer on and off. Fault indicators: indicates errors and shows activated Child Lock. Start button: starts the selected wash program. Pause/Hold to cancel button: pauses or cancels a pr Controls – SLC W4840 Models Figure SLC-W-5: Overview of Controls (SLC W4800 Model) 1. 2. 3. 4. 5. 6. 7. Program buttons: to select a wash program Option buttons: special feature to enhance a wash program. PC Indicator: allows a service technician to check and update the wash programs. Delay Start button: to delay the start of a program. Display with menu buttons: for display functions. Start: starts the selected wash program Pause button: pauses or cancels a program 147 Technical Information Detergent Dispenser – Super Large Capacity Models Figure SLC-W-6: Detergent dispenser 148 Technical Information Technical and Safety Information Refer to the General Safety Guidelines in the General Information section of this manual. The shipping struts must be removed prior to any operation. Ensure the washer is installed on a suitable surface. Only detergent carrying an “H.E.” (High Efficiency) designation should be used. The machine comes equipped to operate using both powder and liquid detergents - to use liquid detergents the supplied detergent drawer insert must be used. Contact Miele Technical Support for details. The machine must be perfectly level to ensure safe and proper operation. Warning The Super Large Capacity laundry units cannot be stacked Electrical Information Model Number Voltage Breaker Plug Style All Models 120 VAC 15 amp NEMA 5-15 Table SLC-W-1: Electrical information All models are equipped with a 5 ft., power-cord with a molded NEMA 5-15 plug. Do not cutoff / remove or modify the plug from the power cord. 149 Technical Information Plumbing Information Water Inlet (Intake) Connection Type Cold Water Supply Hot Water Supply Hose Information Blue Lined Hose Red Lined Hose Connection Type 3/4in. pipe thread 3/4in. pipe thread Each water intake hose is equipped with screen filters - do not remove the filters. Water pressure should be 15-145 psi. (1-10 bar). Note Should the water supply pressure exceeds 145 psi. (10 bar), a pressure reducer must be installed on the supply. Should the water supply pressure be less than 15 psi (1 bar), insufficient water may be available for a complete fill. Hot Water Connection The hot water temperature must not exceed 140º F (60º C). The ideal temperature is approximately 130º F (55º C). Note Do not connect the washer to hot water only. The washer can be connected to a single (cold) water supply by connecting both the hot and cold intake hoses to the supply valve using a “Y” adapter. Both hoses must be connected for the machine to work properly Drain Connection The appliance is equipped with a 5 ft. (1.5 m) drain hose with a maximum delivery height of 4ft. (1.2 m) for connection to a drain as follows: Directly into a sink: hook the hose over the edge of the sink and secure it firmly (i.e. by tying the hose to the water faucet etc...). To a stand pipe: place the drain hose into a 1 1/2in. (38 mm) stand pipe and secure in place. To a floor drain: The machine is equipped with an airgap/antisiphoning system so that no minimum drain height is required. The drain hose may be extended to run a maximum of 16 feet as along as the 4 ft maximum height is not exceeded. Contact Miele Technical Support for more information 150 Technical Information Installation Procedure 1. Check the installation site. Ensure appliance is being installed on a suitable surface, and required connections are present. Note A concrete or reinforced floor is the most suitable surface for the washer. If installation must be on a wooden joist floor the corner of a room is the best place to install the washer. 1) The washer must be leveled and securely positioned. Install the appliance on a 1 ¼” thick plywood base 2) The base should be large enough to span several joists and anchored to the joists below and not just the floor boards. 3) Caution should be taken if this appliance is mounted on a raised platform. It must be secured with retaining clips available from your Miele Dealer 4) If installed on a concrete or masonry base, the surrounding area surrounding the base should have a ½ “ high rim to prevent the washer from vibrating off the base during the spin cycle DO NOT operate the appliance with the shipping struts installed. 2. Lift the machine from the shipping pallet and move it to the installation site. Warning The appliance may weigh more than expected Do not lift the washer by the drum door. Movement of the machine without the shipping struts in place should be kept to a minimum. DO NOT operate the appliance with the shipping struts installed. 3. REMOVE THE SHIPPING STRUTS (See Supplemental Information). 4. Plug the two open holes with the plastic caps provided. Store the shipping struts in a safe place for future use. 5. Refer to Figure W-7. Level the appliance. Refer to the Accessories section of the Installation Manual at this time if an optional Laundry Stand is being installed. Tip the machine slightly and place a support, such as a block of wood, underneath it. Unscrew each of the four feet as much as necessary by turning both the foot and locking ring. 6. Remove the support, stand the machine on its feet and check to see if it is level. Repeat step 5 as necessary. 151 Technical Information Installation Procedure (continued) Figure SLC-W-7: Leveling the appliance 7. Figure W-8. Lock the feet by performing the following: Hold the foot (1) using a wrench; while turning the locking ring (2) to the right. Ensure each locking ring is tight against the bottom of the machine. Figure SLC-W-8: Adjusting the feet 8. Perform the necessary plumbing connections. 9. Connect the Electric supply and perform an operation check. 10. Provide the customer with an operational overview. 152 Technical Information Supplemental Information Shipping Strut – Removal 1. 2. 3. 4. 5. Turn the left Shipping Strut Counter-Clockwise 90° to Unlock ref to Fig 9. Turn the right Shipping Strut Counter- Clockwise 90° to Unlock. Pull out the Shipping Strut from the washer ref to Fig 10. Cover the Holes with supplied Cover Plates ref to Fig 11. Give the Shipping Struts to the customer to store for future use. Figure SLC-W-9: Shipping strut unlocking Figure SLC-W-10: Shipping strut removal 153 Technical Information Figure SLC-W-11: Installing cover plate 154 Technical Information Clothes Dryer- Super Large Capacity Appliance Overview Front of Appliance Figure SLC-T-1: T98XX Dryer Front View 1. 2. 3. 4. 5. Exhaust connection. Power cord with plug. Control Panel. Door. Four (4) height adjustable screw feet. 155 Technical Information Rear of Appliance Figure SLC-T-2: T98XX Dryer Rear View 1. 2. 3. 4. 5. 6. Handle for transportation (arrows) Power cord with plug Slot for W-LAN Communication Module. Air intake Gas connection (Not present on electric models) Vent connection with restriction insert- Gas Models Only 156 Technical Information Controls – Super Large Capacity Dryer Figure SLC-T-3: Overview of Dryer Control Panel Technical and Safety Information Refer to the General Safety Guidelines in the General Information section of this manual. Keep the area around the air intake (toe-kick) and surrounding areas free from lint, dust and dirt. This area should not be blocked (i.e. toekick) this will prevent sufficient intake of air and effect machine operation. Do not reach into the dryer if the drum is moving. The machine should be level to ensure safe and proper operation. 157 Technical Information Technical and Safety Information Cont Warning Danger of Toxic Fumes. The exhaust gases from the dryer must only be vented outside the building. Do not terminate the exhaust ducts in a chimney, fireplace ducting, a combustion appliance flue, or enclosed unventilated area such as an attic, garage, crawlspace, wall, ceiling or concealed space of the building. To reduce the risk of fire, only use metal ductwork. Confined Space Installation Figure SLC-T-4: Confined space installation If the dryer is installed in a space that is less than 122 square feet, the minimum clearance must be adhered to for proper ventilation. Never install other fuel-burning appliances in the same area as the dryer. Doors must be louvered or otherwise ventilated a minimum of 200 square inches of open area is required. It must be equally divided within 12” of the top and 12” of the bottom of the door ref SLC-T-4. Sides 0” Top 12” Rear * 0” Table SLC-T-1: Ventilation requirements * The rear clearance is as close to the wall still allowing for the gas connection (if applicable) and venting Note Make sure the dryer door can be fully opened once installed 158 Technical Information Electrical Information Model Number Voltage Breaker Plug Style Electric Models 120 / 240(208) VAC 30 amp NEMA 14-30 Gas Models 120 VAC 15 amp NEMA 5-15 Table SLC-T-2: Electrical requirements The electric models are equipped with a 5 ft. cord. The gas models are equipped with a 5’ 7’’ cord. Do not cutoff / remove the plug from the power cord. Warning The Super Large Capacity laundry units cannot be stacked Installation Procedure – All Models Note the dryer type (electric or gas). Refer to the applicable installation procedure, on the following pages. 159 Technical Information General Installation Procedure – Electric Models 1. Check the installation site. Ensure the appliance is being installed on a suitable surface, and the required connections are present. 2. Lift the machine from the shipping pallet and move it to the installation site. Warning The appliance may weigh more than expected Do not lift the dryer by the front door. 3. Level the appliance. If the dryer is being placed on a laundry stand - refer to the accessories section of this manual. 4. Tip the machine slightly and place a support, such as a block of wood, underneath it. 5. Unscrew each of the four feet as much as necessary by turning both the foot and locking ring. 6. Remove the support, stand the machine on its feet and check to see if it is level. Repeat step 5 as necessary. 7. Refer to Figure SLC-T-7. Lock the feet by performing the following: Hold the foot (1) using a wrench; while turning the locking ring (2) to the right. Ensure each locking ring is tight against the bottom of the machine. 8. Remove the appropriate venting cap from the dryer. Install the vent connector into the opening 9. Connect a suitable vent to the dryer vent connector. For further information venting refer to the Supplemental Information included within this section. 10. Connect the Electric supply. Insert (a) wet/damp towel(s) into the appliance and perform an operation check. 11. Provide the customer with an operational overview. 160 Technical Information Installation Procedure – Electric Models Electrical Plug Figure SLC-T-5: Electrical plug modification 1. 2. 3. 4. Available for the Super Large Capacity Dryer machine 4 Prong Adapter cord to fit into 3 Prong Receptacle. Must be connected to local ground (green ground wire). Part # 94012900USA NOTE: This adapter should only be installed by trained personnel or a qualified electrician in compliance with all local and national codes. T9800 Dryer must be properly grounded. For assistance or additional information, please call the Miele Technical Support Department at 800-999-1360. 161 Technical Information Installation Procedure – Leveling Dryer All Models Figure SLC-T-6: Leveling the appliance Figure SLC-T-7: Adjusting the feet 162 Technical Information General Installation Procedure – Gas Models 1. Check the installation site. Ensure the appliance is being installed on a suitable surface, and the required connections are present. 2. Lift the machine from the shipping pallet and move it to the installation site. Warning The appliance may weigh more than expected Do not lift the dryer by the front door. 3. Level the appliance. If the dryer is being placed on a laundry stand - refer to the accessories section of this manual. 4. Tip the machine slightly and place a support, such as a block of wood, underneath it. 5, Unscrew each of the four feet as much as necessary by turning both the foot and locking ring. 6. Remove the support, stand the machine on its feet and check to see if it is level. Repeat step 5 as necessary. 7. Refer to Figure SLC-T-7. Lock the feet by performing the following: Hold the foot (1) using a wrench; while turning the locking ring (2) to the right. Ensure each locking ring is tight against the bottom of the machine. 8. Remove the appropriate venting cap from the dryer. Install the vent connector into the opening.. 9. Connect a suitable vent to the dryer vent connector. For further information venting refer to the Supplemental Information included within this section. 10. Connect the gas refer to the gas connection instructions below 11. Connect the Electric supply. Insert (a) wet/damp towel(s) into the appliance and perform an operation check. 12. Provide the customer with an operational overview 163 Technical Information Specific Installation Procedure – Gas Models 164 Technical Information Specific Installation Procedure – Gas Connections Figure SLC-T-8: Gas dryer dimensions and clearances Figure SLC-T-9: Gas dryer supply line 1. 2. 3. Flare union adapter 1/8 “NPT pressure tapping plug Gas shut-off valve The gas supply line should be made of ½” rigid pipe is recommended. However, if allowed by code, an AGA or CGA approved flexible stainless steel gas hose may be used between the gas source and the dryer. This appliance must be installed with its own shut off valve on the gas supply line and must be within 6 ft. and in the same room of the dryer. A ⅛” NPT pressure tapping plug must be installed immediately upstream of the gas supply connection. This allows the gas inlet pressure to be checked regularly. (Fig SLT- 8) 165 Technical Information Specific Installation Procedure – Gas Connections Cont. Warning Make sure that nothing rubs against the gas hose. Figure SLC-T-10: Elbow installation Figure SLC-T-11: Adapter installation Figure SLC-T-12: Supply line connection 166 Technical Information Specific Installation Procedure – Gas Connections Cont. Note Secure all connections use appropriate Teflon tape or thread compound. Note: All installations must be in strict accordance with national, state and local codes, safety regulations and standards. Some localities require a licensed plumber/gas fitter, to complete the installation. 1. 2. 3. 4. 5. Install a female ⅜ “NPT elbow at the end of the dryer gas connection ref to Fig SLC-T-10 Install a ⅜” flare union adapter, # 1 to the female elbow ref to Fig SLC-T-11 Install the flexible metal gas line (hose) connector to the adapter ref to Fig SLC-T-12 Using (2) two adjustable wrenches tighten the flexible gas line connections ref to Fig SLC-T-12 After connecting the appliance check all fittings for gas leaks e.g. with soapy water or an equivalent type test substance. Warning! Never use an open flame to test for gas leaks. 167 Technical Information Supplemental Information Venting Information General Information The moist air from the dryer should be vented outside using a suitable venting system. To reduce drying time and energy consumption: avoid long runs, numerous bends / angles and tight corners in the vent system. Important Do not vent the dryer into a chimney, wall space, ceiling, or other concealed space. Do not vent the dryer into a flue used by gas or fuel boilers or heaters Calculating Effective Duct Length The overall effective duct length will determine the duct diameter. Measure the actual total length needed from the dryer’s exhaust connection to the vents outlet. Establish the number of elbows or bends necessary, noting the type of bends, angles and radius involved. Add the additional duct length to the actual duct length to get the effective length. Reference table 2 for additional duct lengths. 168 Technical Information Calculating Additional Duct Lengths Table SLC-T-3: Calculating Effective duct length Maximum effective duct lengths Diameter of ducting Maximum effective duct length 4” (100mm) 66ft. 5” (125mm) 131ft. 6” (150mm) 328ft. Table SLC-T-4: Maximum effective duct length 169 Technical Information Types of Ducting Figure SLC-T-13 Types of Ducting Material Standard – Flexible duct Better – Flexible aluminum duct Best – Rigid duct Note: To reduce drying time and energy consumption, avoid long runs, numerous angles and tight bends in the ducting system. Rigid Ducting – solid type will give the customer the most optimum drying results, quicker drying, and the least amount of noise. Warning DO NOT use vinyl ducting with Miele appliances. 170 Technical Information Laundry Stands – Installation Procedures Note Always refer to the installation instructions that are shipped with the laundry stands as they will have any changes that may have occurred since the publication of this manual 1. Unpack the WTS 430 Stands and remove the drawer from the Stand. Ref to Fig SLC-LS-2 Note Stands have a release clip at the bottom of the drawer, or on some Stands; the drawer can be lifted off the rails that the drawer slides in and out on. 2. 3. 4. 5. 6. Remove the Detergent Drawer and empty any water from the washer. If this is a new installation, leave the Shipping Struts in place. If this is an install of the Stand to an existing appliance, re-install the Shipping Struts Remove the rear panel from the Stand. Remove all the Torx T-20 screws from the cover ref to Fig SLC-LS-3. Place the appliances down on a soft mat, rug or carpet to prevent damage to the appliances. Place the washer on its left side and dryer on its right side ref to Fig SLC-LS-4. Remove all four (4) feet from the appliance. Join the stands together to the washer/dryer and fasten together with bolts ref to Fig SLC-LS-4. Note Place (2) two flat washers onto set screws opposite end of the feet between the stand and appliance. Failure to install the washers will cause the drawer to jam ref to Fig SLC-LS-4. 7. 8. 9. 10. 11. 12. Screw the four feet to the laundry stand. Fasten the set screws and tighten with 17mm wrench from inside the stand ref to Fig SLC-LS-4. Stand the appliance back to the upright position. Reinstall the rear panel cover and tighten all T-20 screws Fig SLC-LS-3. Level the appliance and lock the feet with the locknut on the feet Fig SLCLS-5. Reinstall the drawers. Note If the Stand installation is on both a washer and dryer, make sure both appliances have been leveled to the same height 171 Technical Information Laundry Stands – Installation Procedures Cont. 13. Snap both locking clips into one Stand Fig SLC-LS-6. Note The locking clips can also be unlocked using the special tool provided with the kit ref to Fig SLC-LS-6 14. 15. 16. 17. Slide the machines together in the final installation location ref to Fig SLC-LS-7 Listen for an audible snap when the locking clips are inserted into the opposite Stand ref to Fig SLC-LS-6 and 7 Install plugs on the outside of the Stands to cover holes if applicable ref to Fig SLC-LS-8 Install the Stand drawer dividers and close drawer ref to Fig SLC-LS-9 Note The drawer can be leveled by adjusting screws located on the sides of the drawer ref to ref to Fig SLC-LS-10. Remove the screw cover cap and loosen the retaining screws on the side of the drawer, do not remove them completely. Adjust the panel on the drawer and tighten the retaining screws on the side of the drawer ref to Fig 4. SLC-LS-1: Stand Side by Side Installation 172 Technical Information SLC-LS-2: Drawer removal SLC-LS-3: Rear panel removal 173 Technical Information SLC-LS-4: Mounting stand to washer SLC-LS-5: Adjusting the feet of the stands 174 Technical Information SLC-LS-6: Locking clips and special tool provided SLC-LS-7: Locking clips 175 Technical Information SLC-LS-8: Locking clips SLC-LS-9: Drawer dividers 176 Technical Information SLC-LS-10: Drawer front cover adjustment 177 Technical Information Dishwashers G1000-G2000 Series Dishwasher Types Pre-Finished (U Model) Pre-finished model dishwashers come with an assembled door and control panel directly from Miele. Integrated (I Model) Dishwasher is shipped with separate control, fascia, and optional GDU panel. The separate components are then installed to the appliance at the same time the dishwasher is installed. A separate bracket for installing a customer supplied cabinet panel is shipped with the appliance for integrating into surrounding cabinets. Integrated (I Model) Dishwasher is shipped with control panel and fascia installed. An optional GDU panel or custom cabinet panel can be installed on the front. A separate bracket for installing a customer supplied cabinet panel is shipped with the appliance for integrating into surrounding cabinets. Fully Integrated (VI Model) Dishwasher is designed to be installed fully integrated (hidden) into cabinets. A customer supplied cabinet panel or optional Miele stainless steel SCVI panel is required for installation. The dishwasher is shipped with necessary brackets to attach panel to the appliance. The optional fully integrated stainless steel panel is available for all fully integrated models. The panel is available with / without a finished handle. Operator controls are only available when door is opened. 178 Technical Information Four-digit model designations* G 2 Product Group Generation/ Height G: Dishwasher 1: Gen. 1 / 81 cm 2: Gen. 1 / 85 cm 3: 55 cmwide 4: Gen. 2 / 81 cm 5: Gen. 2 / 85 cm 6: Gen. 3 / 81 cm 7: Gen. 3 / 85 cm 8 3 Category Width/Vi/ Fascia Modification index 0-3:Entry line 4-6:Mid-range 7: High-end 8-9:Top-of-range 0: 45 cm 1: 45 cmangled control panel 2 / 4: 60 cm 3 / 5: 60 cm angled control panel 6: 45 cmVi 7 / 8: 60 cmVi 9: Special distributionchannel models 0: No modification index 1: Countrified / No modification index 2: Modification index 1 3: Countrified / No modification index ... * Some model designations in the entry-level range represent exceptions to this rule! 179 0 Technical Information Dishwasher – Overview (G1000-G2000) Integrated 1 Upper spray arm (not visible) 2 Cutlery tray (depending on model) 8 Data plate 9 Child Safety Lock 3 Upper basket 10 Rinse aid reservoir 4 Middle spray arm 11. Detergent Dispenser 5 Air inlet for drying (model specific) 12. Salt container 6 Lower spray arm 7 Filter combination Figure G1/2 – 1: Appliance Overview – Typical Integrated Model 180 Technical Information Dishwasher – Overview (G1000-G2000) Fully integrated Figure G1/2 – 2: Appliance Overview – Typical Fully Integrated (Vi) Model 1. Upper spray arm (not visible) 8. Data plate 2. Cutlery tray (depending on model) 9. Optical interface 3. Upper basket 10. Rinse aid reservoir 4. Middle spray arm 11. Detergent Dispenser 5. Air inlet for drying (model specific) 12. Salt container (location varies) 6. Lower spray arm 7..Filter combination 181 Technical Information Data Tag The Data Tag is located on the right side edge of the door – as shown. Figure G1/2 – 3: Data tag location 182 Technical Information Controls Overview Miele dishwashers are currently categorized into four (4) product series, based on the type of controls. Knob Controlled Each Knob Controlled model dishwasher can be operated with a single knob. Surface mounted design technology (SMD) allows Miele components to be extremely durable and reliable. These controls are capable of performing hundreds of tasks, which cannot be handled by mechanical components. G2020 SC Touch Controlled This series of Miele dishwashers is operated by pushing a single button – no separate temperature or drying selections – just turn the machine on, select a program and Miele does the rest. All models include a diverse group of wash programs for multiple cleaning needs. Models are designed to maximize cleaning results and optimize water and energy conservation. G2140 Sci G2150 SC Diamante G2630 SCi 183 Technical Information Fully Integrated The Fully Integrated series dishwashers have the program controls located on the top edge of the door; and are accessed while the door is open. Neither seen nor heard, the Miele Fully Integrated Series dishwashers OCI (Optical cycle Indicator) allows you to see the progress of the dishwasher cycle by way of a red light, which is steady or flashing depending on the status of the cycle. 1. 2. 3. 4. Delay start pad Tab 2in1/3in1 pad Intake/Drain LED Rinse aid LED 5. 6. 7. 8. Salt LED Program selection LEDs Program selection pad On switch 9. Off switch 10. Optical function check Control Panel Gx27x 1. 2. 3. 4. Delay start pad Tab 2in1/3in1 pad Intake/Drain LED Rinse aid LED 5. 6. 7. 8. Glass care LED Salt LED Program selection LEDs Program selection pad 9. On switch 10. Off switch 11. Optical function check Control Panel Gx47X 1. 2. 3. 4. 5. Delay start pad Tab 2in1/3in1 pad Intake/Drain LED Rinse aid LED Salt LED 6. 7. 8. 9. 10. Glass care LED Filter control LED Spray arm control LED Program selection LEDs Program selection pad Control Panel Gx57x 184 11. On switch 12. Off switch 13. Optical function check Technical Information Navitronic The Navitronic Touch Display consists of two electronic boards located behind the control panel. The front program electronic board contains pad sensors, which respond to finger contact. Three touch pad sensors are present on each side of the display to control the menu items displayed next to them (indicated by a small arrow) within the display area. During operation the display will show: The program name The current time of day The program sequence The approximate remaining time Faults and messages LaPerla Child Safety Lock Figure G1/2 – 4: Child Safety Lock 1. To lock the door, push the slider below the door grip to the right 2. To unlock the door, push the slider to the left. 185 Technical Information Electrical Information Power Requirements: 120 VAC, 60 Hz Rated Load: 2110 W Circuit breaker: 15 AMPS The appliance is equipped with a 4 ft power cord and molded NEMA 515 plug; for connection to a NEMA 5-15R receptacle (120 VAC, 15 Amp, 3 prong, grounded outlet). It is recommended that the power outlet for the appliance be installed on the wall (within the cabinets), adjacent to under counter space where the appliance is installed. Ensure the cabinets contain no rough edges that could damage the power cord water intake or drain hose. If metal cabinets are used, ensure a rubber grommet is installed around the opening. Always exercise care when sliding the dishwasher in or out, to prevent damaging the power cord and / or hoses Hard Wire Electrical Connection Connections: L1 (Black) to L on terminal block, N (White) to N on terminal block, GND to ground connector Hard wiring the dishwasher should only be done if required by electrical code. Do not cut the plug off the power supply cord / plug and connect it directly to the house wiring under any circumstances. This will void the warranty. For hard wiring, the power cord must be removed from the appliance by disconnecting the cord from the terminal box located at the lower center of the dishwasher, behind the Toe kick and Service Panel. Pass the permanent power supply cable through the existing strain relief and secure directly to the terminal box. 186 Technical Information Plumbing Connection Intake Connection The appliance is equipped with a five (5) foot long Double WaterProof System Intake Hose; equipped with a ¾ inch female hose connection; for connection to a ¾ inch male hose thread water supply valve. All Miele dishwashers heat water internally to the temperatures required by the wash program. This capability offers the option of connecting the machine to either a hot or cold water supply. • For lowest energy consumption connect the dishwasher to cold water (recommended for dishwashers with China & Crystal programs) • For fastest possible wash times, with slightly higher energy consumption, connect the dishwasher to hot water A 2" x 4" (60 x 115 mm) may be required in either the side or bottom of the cabinet adjacent to the dishwasher. This is necessary to accommodate the water valve box located at the end of the WaterProof System (WPS) near the plumbing connection Water-Proof System Mounting Positions The Water-Proof System should be connected and mounted only as shown: UP Figure G1/2 – 6: Approved Water-Proof System Mounting Positions 187 Technical Information Connecting to Existing 3/8” Plumbing Line An existing 3/8" copper water line can be used as follows: 1. Cut the 3/8" copper tubing after the shut off valve. 2, Install the 3/8" compression to 3/4" MHT (Male Hose Thread) adapter (supplied with the machine) as shown. 3. Connect the inlet hose to the existing valve/adapter assembly. 4. The valve box at the water connection should be installed so that it is at least 10" (24 cm) above the floor (or base of the cabinet) to ensure any coiled hose remains lower than the valve box. 3/8 Adapter Figure G1/2 – 7: WaterProof System Connection to 3/8 copper line Danger Do NOT cut or modify the WaterProof System! Cutting or modifying the WaterProof System will result in damage to the dishwasher and uncontrolled water flow! Typical Plumbing Connections / Hose Routing Water Inlet (WPS) Drain Connection Dishwasher 2x4” opening for plumbing and electrical pass-through Figure G1/2 – 8: Typical plumbing connections 188 Technical Information Drain Connection The appliance is equipped with a five (5) foot long Drain Hose for connection to a ¾ inch drain nipple. The dishwasher drain system also utilizes: A built in non-return valve to prevent waste water from flowing back into the dishwasher. A built in odor trap (on the discharge side) to prevent odors from re-entering the kitchen. Maximum drain height Maximum drain hose length 3 ft (1 m) 12 ft (3.5 m) Note Do not cut and / or attempt to shorten the drain hose. If the drain hose is too long loop the drain hose behind the appliance. The drain line should be connected to the homes drain system as follows: Above the trap using the clamp provided OR To the dishwasher drain connector on the garbage disposal* *Note When connecting the drain hose to a garbage disposal, ensure the knockout is fully removed! (Refer to the disposal manufacturer’s instructions for the exact procedure to perform this step) Important If the drain line is connection is below the level of the machines legs (i.e. into a crawlspace under the floor) - see the Supplementary Information section for venting the drain system. 189 Technical Information Installation Tip An installation summary (checklist) is included with the Supplemental Information on page 170 of this manual Steam Deflector - Information The Steam Deflector is used to protect the underside of the countertop against steam rising from the dishwasher when the door is opened. If the countertop is made of Corian®, granite, marble or other solid, waterproof material, the steam deflector is not required. Steam Deflector - Installation Squeeze a bead of sealant from the supplied tube into the angle formed by the curved edge of the coverplate. Align the plate with the lower front edge of the worktop (see illustration) and use the supplied tacks to nail it in place. Certain installations may require an adhesive be used in place of nails – always check with countertop manufacturer to ensure the proper type of adhesive is used. Figure G1/2 – 9: Dishwasher Steam Deflector Installation Installing the Dishwasher Under The Countertop For ease of service and quick disconnection, it’s best to install the dishwasher so that the water and electrical supplies can easily be accessed through an adjacent cabinet; rather than behind the appliance. If the electrical and water supplies are located behind the machine the dishwasher will have to be removed from the cabinet for service. See the “Plumbing” and “Electrical” sections for proper connection procedures before continuing. 190 Technical Information Install Control Panel and / or Door Panel to Dishwasher Refer to the appropriate section for the dishwasher type and options being installed: Knob and Touch Controlled w/ Customer Supplied Panel Knob and Touch Controlled Models w/ GDU panel Fully Integrated Models Note - Pre-Finished Dishwashers Pre-Finished models are equipped with a control panel and door assembly built into the design of the dishwasher - proceed directly to Securing the Dishwasher Knob Controlled Models (dishwashers with selector knob) 1. 2. 3. 4. Refer to the figure below. Place the cover (1) over the push button. Position the control panel (2) over the backing plate, fasten it from the inside of the door (3) using the six screws provided. Align and press the knob (4) on its shaft. Figure G1/2 – 10: Knob Controlled Control Panel Installation 191 Technical Information Knob Controlled (w/ Selector Knob & Turbothermic Fan) 1. 2. 3. 4. 5. Refer to the Figure below. Place the cover (1) over the push button. Push the ventilation grill (2) into the metal backing plate. Position the control panel (3) over the backing plate and fasten it from the inside of the door (4) using the six screws provided. Align and press the knob (5) onto its shaft. Figure G-1/2 - 11: Knob Controlled (w/ Turbothermic Fan) Control Panel Installation Touch Controlled Models 1. 2. 3. 4. Refer to the figure below. Place the cover (1) over the push button. Push the ventilation grill (2) into the metal backing plate. Position the control panel (3) over the backing plate and fasten it from the inside of the door (4) using the six screws provided. Figure G-1/2 - 12: Touch Controlled Control Panel Installation 192 Technical Information Adjusting Dishwasher Height Rear Foot Adjustment Front Foot Adjustment Figure G1/2 – 13 Height adjustment Note : Do not use power controlled drivers on any adjustment screws in the following procedures Slide unit into opening. Check for clearance on the Waterproof System, drain hose, and electrical connections. (See Electrical and Plumbing section for details). Once the unit is positioned correctly, raise the rear feet. The unit should be raised to just reach the underside of the countertop (about 1/8 “). Use a Torx T-20 screwdriver to adjust the rear feet. Turn to the right to raise the unit, turn to the left to lower the unit. Turn both adjustment screws equally. Then adjust the front feet to level out the dishwasher. Insert a large flathead screwdriver into one of the slots on the base of the foot. Turn to the left to raise the unit, turn to the right to lower the unit. After the foot adjustments check that the dishwasher is leveled from front to back, and side to side. 193 Technical Information Filler Strip Installation Figure G1/2 – 14 Filler Strip Installation Each unit is supplied with 4 filler strips that can be installed if required. The filler strips do not have to be installed. Filler strips can be installed to match adjacent drawer fronts with the control panel. This also keeps the dishwasher custom door panel the same height as the adjacent cabinet panels. The filler strips snap upward into the control panel bottom as shown in above drawing. Install them as a set of four. Note: Watch this area to match up filler strips Figure G1/2: – 15 Filler Strip Alignment When the four filler strips are in place, it will be seen how many need to be removed (if any) to match the adjacent drawer front. To remove filler strip just pull down on them individually. 194 Technical Information Custom Panel Install (Fully integrated - VI Models only) Bracket Templates Bracket with Templates Figure G1/2: – 16 & 17 Custom Door Panel Bracket and Template The bracket will be attached to the front of the unit when unpacked from the box. Lift the bracket up to release it from the machine. Take both templates from the install package and place them onto the bracket supplied with the unit. The templates have markings to show how to install them onto the bracket correctly. Once the templates are positioned correctly on the bracket, install the bracket back onto the front of the dishwasher. The bracket has four (4) hooks that slip into the slots on the front of the unit. Line Up Oval Markings Top of Adjacent Cabinetry Door Figure: G1/2 – 18 & 19 Aligning and Marking Template When the bracket is on the front of the unit, line up the oval marking on the template with the oval slot on the unit. This will assure the bracket is positioned correctly on the dishwasher. Take a pencil and mark the top of each template where the adjacent cabinet door top is located. This will assure the custom door panel on the dishwasher is lined up with the adjacent cabinetry. 195 Technical Information Custom Panel Install (Fully Integrated - VI Models only) Con’t Centerline Bracket Notches Figure: G1/2 – 20 Aligning Door Bracket Mark a center line down the inside (back) of the custom panel. Take the bracket and templates off the dishwasher and lay down onto the inside of the custom panel. Match up the center line marks on the bracket (notches) with the drawn center line on the panel. The notches represent the center of the bracket. Also, match up the marks that were drawn on the templates with the top of the custom panel. Tape down the bracket to the panel in several locations to ensure it does not move. Figure: G1/2 – 21 Securing Door Bracket Mark all the mounting screw positions on the panel (10 screws total). Remove bracket after marking screw locations. Drill 1/16” pilot holes at each marked location. Reinstall bracket with templates and line up accordingly. Use only the supplied flat-head countersunk T-20 Torx wood screws to secure the bracket to the panel. Remove the templates; they will no longer be needed. 196 Technical Information Custom Panel Install (Fully Integrated - VI Models only) Con’t Figure: G1/2 – 22 Toe kick securing Open the door of dishwasher about 1/4 of the way open. Put panel against the front of the dishwasher and insert bracket onto the door. The four (4) hooks on the bracket will hold the door in place. Note: Do not use powered drivers Figure: G1/2 – 23 & 24 Door Adjusting and Securing Make sure the custom panel is flush with the cabinetry and the bottom of the panel lines up with the adjacent cabinet panels. To secure the custom panel, 4 securing screws need to be tightened. They are located on the left and right sides of the door; 2 per side T-20 Torx. DO NOT OVER TIGHTEN THE SECURING SCREWS, DAMAGE CAN OCCUR. Once the panel is secure, install the caps over the screws. Adjust door spring tension after panel install is complete. (See Door Spring Adjustment procedure on page 203) 197 Technical Information Custom Panel Install (Knob and Touch Controlled) Bracket Templates Bracket with Templates Figure: G1/2 – 25 & 26 Custom Door Panel Bracket and Template The bracket will be attached to the front of the unit when unpacked from the box. Lift the bracket up to release it from the machine. Take both templates from the install package and place them onto the bracket supplied with the unit. The templates have markings to show how to install them onto the bracket correctly. Once the templates are positioned correctly on the bracket, install the bracket back onto the front of the dishwasher. The bracket has hooks that slip into the slots on the front of the unit. Line Up Oval Markings Top of Adjacent Cabinetry Door Figure: G1/2 – 27 & 28 Aligning and Marking Template When the bracket is on the front of the unit, line up the oval marking on the template with the oval slot on the unit. This will assure the bracket is positioned correctly on the dishwasher. Take a pencil and mark the top of each template where the adjacent cabinet door top is located. This will assure the custom door panel on the dishwasher is lined up with the adjacent cabinetry. It is acceptable to leave a gap between the marking from the cabinetry and the bottom of the control panel. Filler strips can be added to fill the gap. 198 Technical Information Custom Panel Install (Knob and Touch Controlled) Con’t Centerline Diamond Slot Figure: G1/2 – 29 Aligning and Marking Template Mark a center line down the inside (back) of the custom panel. Take the bracket and templates off the dishwasher and lay down onto the inside of the custom panel. Match up the center line marks on the bracket (diamond slot) with the drawn center line on the panel. The diamond slot represents the center of the bracket. Also, match up the marks that were drawn on the templates with the top of the custom panel. Tape down the bracket to the panel in several locations to ensure it does not move. Figure: G1/2 – 30 Securing Template Mark off all the mounting screw positions on panel (6 screws total). Remove bracket after marking screw locations. Drill 1/16” pilot holes at each marked location. Reinstall bracket with templates and line up accordingly. Use only the supplied flat-head countersunk T-20 Torx wood screws to secure the bracket to the panel. Remove the templates; they will no longer be needed. 199 Technical Information Custom Panel Install (Integrated - I Models only) Con’t Note Filler strips must be installed before attaching custom panel. (See Filler Strip Installation) Figure G1/2 – 31 Attaching the Door Panel Open the door of dishwasher about 1/4 of the way open. Put the panel against the front of the dishwasher and insert the bracket onto the door. The hooks on the bracket will hold the door in place. Note: Do not use powered drivers Figure G1/2 – 32 & 33 Aligning and Securing Door Panel Make sure the custom panel is flush with the cabinetry and the bottom of the panel lines up with the adjacent cabinet panels. To secure the custom panel, the 4 securing screws need to be tightened. They are located on the left and right sides of the door; 2 per side T-20 Torx. DO NOT OVER TIGHTEN THE SECURING SCREWS, DAMAGE CAN OCCUR. Once the panel is secure, install the caps over the screws. Adjust door spring tension after panel install is complete. (See Door Spring Adjustment procedure page 203) 200 Technical Information Custom Panel Specifications Fully Integrated / VI-Model Dishwasher Figure: G1/2 – 34 Fully Integrated Panel Specifics The Z measurement (thickness of panel) will always be 5/8”. The Y measurement (width of panel) will always be 23 7/16”. The X measurement (height of panel) will have to be taken from the install site. Take a tape measure or ruler and measure the distance from the underside of the countertop to the bottom of the cabinetry already in place. This will give the X dimension (see above drawing for reference). VI model units must always have some type of handle to pull the door open. The A measurement is for the placement of the handle on the custom panel. Take the next measurement on the drawer next to the dishwasher. Measure from the underside of the countertop to the centerline of the handle. This will show placement of where to drill the mounting holes for the handle. The screws that hold the handle on must be countersunk. They cannot protrude past the surface of the panel because it will make securing the panel to the unit an issue. Custom cabinets or countertops may require customized specifications. These dimensions are for reference only. 201 Technical Information Custom Panel Specifications Knob and Touch Controlled-Model Dishwashers Figure: G1/2 – 35 Knob and Touch Controlled Panel Specifics The Z measurement (thickness of panel) will always be 5/8”. The Y measurement (width of panel) will always be 23 7/16”. The X measurement (height of panel) will have to be taken from the install site. Take a tape measure or ruler and measure the cabinet door next to the unit from the top to the bottom (height of cabinet door). This will give the X dimension (see above drawing for reference). Custom cabinets or countertops may require customized specifications. These dimensions are for reference only. 202 Technical Information Secure unit Screw Cap Install Screw’s W/ Bushings Note: Do not use powered drivers Figure: G1/2 – 36 Securing the unit Using the 4 supplied screws shown, secure the unit to the adjacent cabinetry. The screws are T-20 Torx with a round plastic bushing pre-installed. The screws will be inserted into the 4 holes on the left and right side of the inner cabinet (in front of door seal). Tighten until the bushing is seated. DO NOT OVER TIGHTEN THE SCREWS. Install screw cap on all 4 holes. Door Spring Adjustment Note: Do not use powered drivers Door Spring Adjustment Screw Figure: G1/2 – 37 Door Spring Adjustment Adjust the door spring tension springs only when the control panel and door panel are fully installed. These screws are located behind where the toe kick would mount. There is an adjustment for the left and right door spring. Adjust them equally. Turn the T-20 Torx screw to the right to increase tension, turn to the left to decrease tension. 203 Technical Information Toe Kick Brackets Tab Bracket Figure: G1/2 – 38 Toe Kick Brackets Installation The dishwasher comes with 2 brackets for mounting the toe kick. There are slots that the brackets slide into, but there is a tab that must be pulled towards the outside of the unit. Once the tab is pulled to the side, the bracket can be inserted and adjusted. Install both toe kick brackets all the way inside the unit. Adjusting will be done after the toe kick is installed. Figure: G1/2 – 39 Toe Kick Brackets Options The toe kick brackets can be installed for different heights. If the feet are adjusted in a low position, the front of the toe kick brackets will face upward. If the feet are adjusted in a high position, then the front of the toe kick brackets will face downward. This can be done by flipping the bracket over and switching it to the opposite side. 204 Technical Information Toe Kick (plinth) Figure: G1/2 – 40 & 41 Toe kick adjustment Take the toe kick and install it onto the toe kick brackets with the hardware provided. Check for clearance with the door open. If the door is hitting the toe kick, the toe kick needs to be trimmed. Take a pencil and draw a line across the toe kick using the door as a guide line. [If the door clears, then proceed to install toe kick.] Once the line is drawn on the toe kick it can be removed and trimmed for clearance. The back of the toe kick has scoring marks that can be used as a guide. Use a razor knife or saw to cut the toe kick, clean up any rough edges after its cut down. Figure: G1/2 – 42 & 43 Toe Kick Alignment and Securing Once the toe kick brackets are installed and secured pushed into the unit all the way, install the toe kick. Secure the toe kick with the screws provided. The toe kick can now be pulled out to match the existing toe kick in the kitchen. After the toe kick is installed and adjusted, caps are provided to install over the screws to conceal them. 205 Technical Information Water Softener If the Water Softener is needed: The water softener sets automatically to the local water hardness. May use 3 in 1 tabs (these tabs contain detergent, rinse aid, and water softener salt). When selecting the “3 in 1” detergent setting, the salt consumption of the machine is greatly reduced to between a quarter and third of normal amounts. The Water Softener reservoir is filled with softener salt. The water hardness level can be programmed manually. If the Water Softener is not needed: The “insufficient salt” message will turn off automatically. Salt is not needed and should not be installed. Water Softener Salt Only use water softener salt specially formulated for dishwashers. Other salts may contain insoluble additives that impair the Water Softener. The proper salt can be purchased from Miele Technical Service Department. If located in bottom cabinet To add salt: 1. Remove the Lower Basket. 2. Unscrew and remove the Salt Reservoir Cap located on the floor of the Wash Cabinet. 3. If this is the first time salt is installed; add 2 quarts water. 4. Place a funnel over the Salt Reservoir. Carefully fill with salt. Note The Salt Reservoir holds approximately 4.5 lbs (2 kg) of salt 5. Clean any excess salt from the threads of the reservoir opening; and screw the cap on firmly. 6. Run the” Rinse & Hold” program to remove any traces of salt from inside the Wash Cabinet. 206 Technical Information If located on inner door To add salt: 1. Open door and hold at an angle, so that the salt container can be completely filled. 2. Open salt container by pressing the button in the direction of the arrow until the flap springs open. Figure: G1/2 – 44 Salt Container Figure: G1/2 – 45 Salt Container Door Funnel Open the funnel. 3. Carefully fill with salt until water runs out. The salt container holds approx. 2.2 lbs. (1 Kg) of salt. Note As the salt container is filled, water will run out. Figure G1/2 – 46 Salt Container Service 4. Clean any excess salt from the threads of the container opening. 5. Close the lid firmly. 6. If the dishwasher will not be used immediately, run the “Short” program. This will remove any traces of salt from inside the wash cabinet. 7. When the display shows “Insufficient salt”, refill the salt after the program has finished. 8. Confirm with “OK”. The message will clear from the display. 207 Technical Information Water Softener- Manually Turning the Water Softener Off All dishwasher’s equipped with a water softener also has a softener sensor which automatically sets the water hardness during operation of the machine. On dishwashers where the customer wishes not to use the Water Softening system, the Water Softener can be manually programmed to “without water softener” (softener off). Note With the dishwasher programmed to “without water softener” (softener off) the Salt LED will be always off with the salt reservoir empty. Salt should not be added to any dishwasher that is programmed “without water softener” (softener off). Important Ensure any current running program is cancelled and the dishwasher power is turned off via the ON/OFF button before attempting to access any programming modes. Note The following models sold in the U.S. do not have water softener’s installed, therefore do not require programming: G1180, G2020, G2170, G2140, G2150, and G2180. 208 Technical Information Water Softener- Manually Turning the Water Softener Off Cont Touch Controlled Models Optima Series 1. Close the door and switch off the machine. 2. Press and hold the Start/Stop button while turning the dishwasher on. 3. Wait until the Start/Stop LED lights up and stays lit. 4. Release the Start/Stop button 5. Press the Delay start button 2 times. The Delay start LED flashes 2 times rapidly intermittently and P0 will appear in the display. 6. Press the Start/Stop button once. The Rinse LED will flash one time intermittently and P1 appears in the display. 7. To save and quit, turn off the machine. Excella Series 1. Close the door and switch off the machine. 2. Press and hold the Start button, then turn on the machine 3. Immediately press and release the Start button 5 times and at the 5th time hold it pressed in until the Start LED switches off and the setting options is shown in the display. 4. Use the cursor buttons as appropriate to select Water hardness, then press the OK button. Use the cursor buttons to select P1 = without water softener, then press the OK button. 5. Switch off the machine. Fully Integrated Models Optima Series 1. Open the door and switch off the machine 2. Press and hold the Program button, then switch on the machine. 3. Wait until the Rinse & Hold LED lights up, then release the Program button. 4. If the Rinse & Hold LED does not light up within approx. 4 sec., repeat steps 1 thru 3. 5. When the decimal point in the display has switched off after approx. 6 sec., press the Gel button 2 times. The Gel LED will flash 2 times rapidly intermittently. 6. Press the Program button 1 time or until P1 is in the display. 7. To save and quit, switch off the machine. 209 Technical Information Water Softener- Manually Turning the Water Softener Off Cont Fully Integrated Models Continued Excella Series 1. Open the door and switch off the machine. 2. Press and hold the C (Clear) button, while turning on the machine. 3. When the display lights up, release the C (Clear) button, then immediately press and release the C (Clear) button 5 times and at the 5th time hold until the Service Programming is indicated in the display. 4. Use the cursor buttons as appropriate to select Water hardness, then press the OK button. 5. Use the cursor buttons to select P1 = without water softener, then press the OK button. 6. To save and quit, switch off the machine. Knob Controlled Models La Perla Series 1. Close the door and switch off the machine 2. Press and hold the C (Clear) touchpad, while turning on the machine. 3. When the display lights up, release the C (Clear) touchpad, then immediately press and release the C (Clear) touchpad 5 times and at the 5th time hold for 4 sec. or until Service programming is indicated in the display. 4. Use the cursor touchpad as appropriate to select Water hardness, then press the OK button. 5. Use the cursor touchpad to select P1 = without water softener, then press the OK touchpad. 6. To save and quit, switch off the machine. 210 Technical Information Water Softener – Programming the Water Hardness If the tap water hardness is above 4°d (8 gr/gal [140 ppm]), the water should be softened. This takes place automatically in the unit’s integrated water softener. The water softener automatically sets to the local water hardness. If the hardness of the local water supply is constantly lower than 4°d (8 gr/gal [140 ppm]), the message to refill salt will turn off automatically. Water Hardness Settings Water hardness (°d, degree of German hardness) Grains per Gallon Gr/Gl Display -- P0 1 2 3 *** *** 36 37 50 51 60 61 7 P1 P2 P3 *** *** P36 P50 P60 P70 Sensor softener active (on certain models) Without softener 1°d 2°d 3°d *** *** 36°d 37 - 50°d 51 - 60°d 61 - 70°d Table G1/2 – 1 Water Hardness Settings Note Programming the dishwasher below 8 gr/gal or P4 will turn off the water softener Note Degrees of German Hardness is the same as Gr/Gal 211 Technical Information Detergent – Usage Only use detergents formulated for residential dishwashers. Do NOT overfill the detergent dispenser *Filling the Detergent Dispenser 1. Open the dispenser by pressing the latch on the detergent dispenser. 2. Fill compartment II with detergent. 3. Close the detergent dispenser. The horizontal marks in detergent dispenser compartment indicate levels of approximately 1 ¼, 1 ¾ and 2 tablespoons (20, 25 and 30 ml) respectively. Figure G1/2 – 47 Salt Container Service For Heavily Soiled Loads Use a program that includes a pre-wash (refer to the model specific operating manual for details on specific programs). Add an extra tablespoon (15 ml) of detergent to compartment I. For Areas with Soft Water Less detergent is needed in homes with very soft water and when washing lightly soiled dishes. Rinse Aid - Usage Rinse aid is required to prevent spotting and optimize the drying results of glassware and dishes. Add rinse aid before the first use and whenever the “Rise aid” indicator lights. Filling the Rinse Aid Dispenser 1. Open the dispenser by pressing the latch on the rinse aid dispenser. 2. Pour rinse aid into the reservoir until visible on the screen. 3. Press the flap until it clicks shut to close the dispenser. * Refer to the detergent package for detailed information on usage amounts suggested by the detergent manufacturer. 212 Technical Information Supplemental Information Installation Summary (Checklist) This list is provided as convenient checklist to be used while performing a dishwasher installation. Always refer to the detailed installation procedures in this manual during installation. Install the Steam Deflector (as necessary) Adjust the dishwasher height / Install the Slides / Skis Install the Control Panel (if applicable) Install the Door Panel or GDU Panel (if applicable) Route plumbing and power cord / position the dishwasher into the cabinet opening Adjust the legs / height of the dishwasher Secure the dishwasher to the countertop OR cabinets Adjust the front door tension Perform the plumbing connections Install the toekick Connect the power Remove all materials from inside the dishwasher (packing materials and operating manual etc…) Manually turn off the water softener (if requested by the customer) Recheck front door tension Perform an operation check of the appliance Provide the customer with an operational overview 213 Technical Information General Operation – Knob Controlled Series Make sure the Spray Arms are not blocked. 1. Close the door. 2. Turn on the dishwasher. The “Start” Indicator will flash. 3. Select a wash program by turning the Program Selector to the left or right. 4. Press the “Start” button. Fully Integrated Series 1. Make sure the Spray Arms are not blocked. 2. Turn the dishwasher on. The main menu shows in the display. Program Display Fully Integrated (Main Menu) 3. Select the desired program. Choose your program according to the type of load and soiling. The display changes to the program menu. Program Display Fully Integrated (Selected Program) 4. Options can be added to the selected program. Select the desired options; a √ check will appear next to the option selected. Options Display Fully Integrated 5. When finished customizing the program, confirm with OK. 6. Select Start. 7. Close the door. 214 Technical Information Touch Controlled / Navitronic Series 1. Make sure the Spray Arms are not blocked. 2. Close the door 3. Turn on the dishwasher The main menu shows in the display. If the memory function is selected, the last selected program is displayed. Program Display (Main menu) Note Information about the selected program can be displayed by touching the i control. 4. Select the desired program. 5. Choose your program according to the type of load and soiling. 6. The display changes to the program menu. Program Display (Selected Program) 7. Options can be added to the selected program. 8. Select the desired options; a √ check will appear next to the option selected. Options Display 9. When finished customizing the program, confirm with OK. 10. Select Start. 215 Technical Information For further information and/or assistance, please contact The Miele Technical Support Center at: 1-800-999-1360 For Technical Assistance While In a Customers Home: 1-888-529-8790 Revised 06/07 End of document 216