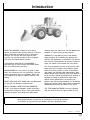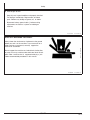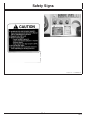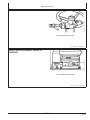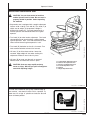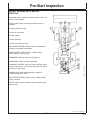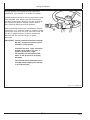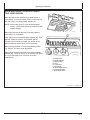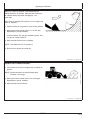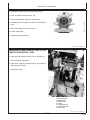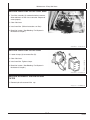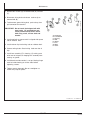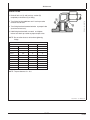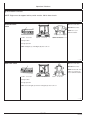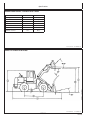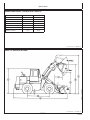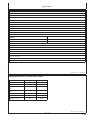
1
D C O 544G, 544G LL, and 544G TC Loaders 624G Loader 644G Loader (Serial No. 557739-) OPERATORS MANUAL 544G, 544G LL, and 544G TC Loaders 624G Loader 644G Loader (Serial No. 557739-) English John Deere Dubuque Works OMT159816 Issue G6 (Mark old manual OMT154907 L4 for machines up to Serial No. 557738) LITHO IN U.S.A. ENGLISH O M T 1 5 9 8 1 6 G 6 OMT159816 Issue G6 T7773CX -UN-08SEP92 Introduction READ THIS MANUAL carefully to learn how to operate and service your machine correctly. Failure to do so could result in personal injury or equipment damage. This manual and safety signs on your machine may also be available in other languages. (See your John Deere dealer to order.) THIS MANUAL SHOULD BE CONSIDERED a permanent part of your machine and should remain with the machine when you sell it. MEASUREMENTS in this manual are given in both metric and customary U.S. unit equivalents. Use only correct replacement parts and fasteners. Metric and inch fasteners may require a specific metric or inch wrench. RIGHT-HAND AND LEFT-HAND sides are determined by facing in the direction of forward travel. WRITE PRODUCT IDENTIFICATION NUMBERS (P.I.N.) in the Machine Numbers section. Accurately record all the numbers to help in tracing the machine should it be stolen. Your dealer also needs these numbers when you order parts. File the identification numbers in a secure place off the machine. WARRANTY is provided as part of John Deere’s support program for customers who operate and maintain their equipment as described in this manual. The warranty is explained on the warranty certificate which you should have received from your dealer. This warranty provides you the assurance that John Deere will back its products where defects appear within the warranty period. In some circumstances, John Deere also provides field improvements, often without charge to the customer, even if the product is out of warranty. Should the equipment be abused, or modified to change its performance beyond the original factory specifications, the warranty will become void and field improvements may be denied. Setting fuel delivery above specifications or otherwise overpowering machines will result in such action. THE TIRE MANUFACTURER’S warranty supplied with your machine may not apply outside the U.S. CALIFORNIA PROPOSITION 65 WARNING Diesel engine exhaust and some of its constituents are known to the State of California to cause cancer, birth defects and other reproductive harm. TX,DH2120 -19-13DEC95 170696 PN=5 T100255 -19-14FEB96 Introduction TX,DY549 -19-08JUN96 170696 PN=6 Introduction 170696 PN=7 TX,DH2121 -19-08JUN96 PN=8 170696 T7773CZ -UN-08SEP92 T7773CY -UN-08SEP92 TX,DH2283 -19-02OCT92 PN=9 170696 T7799CZ -UN-06OCT92 T7799CY -UN-06OCT92 HELP!! HELP!! HELP!! HELP!! We need your help to continually improve our Operator’s Manuals. Please FAX or mail your comments, ideas and improvements on this comment sheet. SEND TO: John Deere Dubuque Works P.O. Box 538 Dubuque, Iowa 52004-0538 Dept. 304 Attn: Publications Supervisor FAX NUMBER: 319-589-5800 OMT159816 544G, 624G and 644G Loader Operator’s Manual Ideas, Comments, (Please state Page Number): OVERALL, how would you rate the quality of “ALL” Operator’s Manuals provided to you? (Check one) Poor 1 Fair 2 3 Good 4 5 Very Good 6 7 Excellent 8 9 10 Company Name Address Phone FAX No. Dealer Acct. No. THANK YOU! TX,FAX,JC544G -19-08JUN96 170696 PN=10 170696 PN=11 Contents Page Page Safety . . . . . . . . . . . . . . . . . . . . . . . . . . . . . . . . 05-1 Safety Signs . . . . . . . . . . . . . . . . . . . . . . . . . . . 06-1 Operator’s Station Gauges, Indicators, Switches, and Accessories . . . . . . . . . . . . . . . . . . . . . . . . . . 10-1 Stop Indicator and Alarm . . . . . . . . . . . . . . . . . . 10-3 Service Required Indicator (Yellow) . . . . . . . . . . 10-4 Digital Display . . . . . . . . . . . . . . . . . . . . . . . . . . 10-4 Engine Coolant Temperature Gauge . . . . . . . . . 10-5 Fuel Gauge . . . . . . . . . . . . . . . . . . . . . . . . . . . . 10-5 Transmission Oil Temperature Gauge . . . . . . . . 10-5 Engine Oil Pressure Indicator . . . . . . . . . . . . . . . 10-6 Alternator Voltage Indicator . . . . . . . . . . . . . . . . 10-6 Engine Air Filter Restriction Indicator . . . . . . . . . 10-6 Engine Coolant Level Indicator . . . . . . . . . . . . . . 10-7 Transmission Oil Pressure Indicator—If Equipped . . . . . . . . . . . . . . . . . . . . . . . . . . . . 10-7 Hydraulic Oil Filter Restriction Indicator . . . . . . . 10-7 Right Turn Signal Indicator . . . . . . . . . . . . . . . . . 10-8 Brake Oil Pressure Indicator. . . . . . . . . . . . . . . . 10-8 Park Brake Indicator. . . . . . . . . . . . . . . . . . . . . . 10-8 Fasten Seat Belt Indicator . . . . . . . . . . . . . . . . . 10-9 Ether Injection Indicator . . . . . . . . . . . . . . . . . . . 10-9 Steering Pressure Indicator—If Equipped . . . . . . 10-9 Left Turn Signal Indicator . . . . . . . . . . . . . . . . . 10-10 Levers . . . . . . . . . . . . . . . . . . . . . . . . . . . . . . . 10-10 Front Axle Disconnect Lever—If Equipped . . . . 10-11 Pedals . . . . . . . . . . . . . . . . . . . . . . . . . . . . . . . 10-12 Park Brake Switch . . . . . . . . . . . . . . . . . . . . . . 10-12 Neutral Lock . . . . . . . . . . . . . . . . . . . . . . . . . . . 10-13 Horn Button . . . . . . . . . . . . . . . . . . . . . . . . . . . 10-13 Turn Signal Switch . . . . . . . . . . . . . . . . . . . . . . 10-14 Dome Light and Swivel Light—If Equipped . . . . 10-14 Vandal Shield—If Equipped . . . . . . . . . . . . . . . 10-14 Operating Windshield Wipers and Washers—If Equipped . . . . . . . . . . . . . . . . . 10-15 Adjusting Steering Wheel Tilt . . . . . . . . . . . . . . 10-15 Opening Side Window . . . . . . . . . . . . . . . . . . . 10-15 Opening Sliding Side Window—If Equipped . . . 10-16 Cab Door Release . . . . . . . . . . . . . . . . . . . . . . 10-16 Operating Lights . . . . . . . . . . . . . . . . . . . . . . . . 10-17 Heating and Air Conditioning Controls . . . . . . . Adjusting Suspension Seat . . . . . . . . . . . . . . . . Seat Belt . . . . . . . . . . . . . . . . . . . . . . . . . . . . . Storage Compartment . . . . . . . . . . . . . . . . . . . 10-18 10-19 10-20 10-20 Break-in Engine Break-In Oil . . . . . . . . . . . Every 10 Hours or Daily . . . . . . . . After First 10 and First 50 Hours . After the First 100 Hours . . . . . . . . 15-1 . 15-1 . 15-2 . 15-2 .. .. .. .. .. .. .. .. .. .. .. .. .. .. .. .. .. .. .. .. Pre-Start Inspection Inspect Machine Daily Before Starting . . . . . . . . 20-1 Operating the Engine Check Instruments Before Starting . . . . . . . . . . . 25-1 Brake Pressure Indicator . . . . . . . . . . . . . . . . . . 25-1 Starting the Engine . . . . . . . . . . . . . . . . . . . . . . . 25-1 Starting Fluid—If Equipped (Cold Weather Starting Aid) . . . . . . . . . . . . . . . . . . . . . . . . . . 25-4 Using Coolant Heater—If Equipped . . . . . . . . . . 25-5 Using Booster Batteries—12 Volt System. . . . . . 25-6 Check Instruments After Starting . . . . . . . . . . . . 25-7 Warm-Up . . . . . . . . . . . . . . . . . . . . . . . . . . . . . . 25-7 Cold Weather Warm-Up . . . . . . . . . . . . . . . . . . . 25-8 Stopping the Engine . . . . . . . . . . . . . . . . . . . . . . 25-8 Driving the Machine Driving on Public Roads . . . . . . . . . . General Driving Precautions . . . . . . . Front Axle Disconnect—If Equipped . Neutral Lock . . . . . . . . . . . . . . . . . . . Shifting the Transmission . . . . . . . . . Travel Speeds . . . . . . . . . . . . . . . . . Ride Control Switch—If Equipped. . . Stopping the Machine. . . . . . . . . . . . Park Brake Switch . . . . . . . . . . . . . . Parking the Machine. . . . . . . . . . . . . .. .. .. .. .. .. .. .. .. .. .. .. .. .. .. .. .. .. .. .. .. .. .. .. .. .. .. .. .. .. .. .. .. .. .. .. .. .. .. .. . 30-1 . 30-2 . 30-2 . 30-3 . 30-3 . 30-5 . 30-6 . 30-6 . 30-7 . 30-7 Operating the Machine Continued on next page All information, illustrations and specifications in this manual are based on the latest information available at the time of publication. The right is reserved to make changes at any time without notice. COPYRIGHT 1996 DEERE & COMPANY Moline, Illinois All rights reserved A John Deere ILLUSTRATION Manual i 040596 PN=1 Contents Page Page Boom and Bucket Control Lever—One Lever Design . . . . . . . . . . . . . . . . . . . . . . . . . 35-1 Boom and Bucket Control Lever—Two Lever Design . . . . . . . . . . . . . . . . . . . . . . . . . 35-2 Quick Shift Switch . . . . . . . . . . . . . . . . . . . . . . . 35-3 Quick Coupler Operation—544G TC . . . . . . . . . 35-4 Pin Disconnect Switch—544G TC . . . . . . . . . . . 35-5 Boom Down Switch . . . . . . . . . . . . . . . . . . . . . . 35-5 Clutch Cut-Off Switch—If Equipped . . . . . . . . . . 35-5 Secondary Steering—If Equipped. . . . . . . . . . . . 35-6 Differential Lock Pedal—If Equipped . . . . . . . . . 35-6 Adjusting Boom Height Kickout—If Equipped . . . . . . . . . . . . . . . . . . . . . . . . . . . . 35-7 Adjusting Return-to-Dig . . . . . . . . . . . . . . . . . . . 35-8 General Operating Tips . . . . . . . . . . . . . . . . . . . 35-9 Excavating Banks or Stockpiles . . . . . . . . . . . . . 35-9 Using the Loader Bucket . . . . . . . . . . . . . . . . . 35-10 Backdragging . . . . . . . . . . . . . . . . . . . . . . . . . . 35-12 Backfilling . . . . . . . . . . . . . . . . . . . . . . . . . . . . . 35-12 Truck Loading . . . . . . . . . . . . . . . . . . . . . . . . . 35-13 Check Windshield Washer Fluid Level . . . . . . . . 50-5 Maintenance and Repair Record Keeping System. . . . . . . . . . . . . . . . . . . . . . . . . . . . . . 50-6 OILSCAN . . . . . . . . . . . . . . . . . . . . . . . . . . . . 50-7 Maintenance Record Keeping. . . . . . . . . . . . . . . 50-8 . . . . . . . . . . . . . . . . . . . . . . . . . . . . . . . . . . . . . . 50-9 Maintenance—As Required Check Tire Pressure. . . . . . . . . . . . . . . . . . . . . . 55-1 Tire Pressures . . . . . . . . . . . . . . . . . . . . . . . . . . 55-2 . . . . . . . . . . . . . . . . . . . . . . . . . . . . . . . . . . . . . . 55-3 . . . . . . . . . . . . . . . . . . . . . . . . . . . . . . . . . . . . . . 55-4 . . . . . . . . . . . . . . . . . . . . . . . . . . . . . . . . . . . . . . 55-5 Tighten Wheel Retainer Cap Screws . . . . . . . . . 55-5 Clean or Replace Air Cleaner Elements . . . . . . . 55-6 Clean Dusty Primary Element. . . . . . . . . . . . . . . 55-7 Clean Oily or Sooty Primary Element . . . . . . . . . 55-7 Inspect Element . . . . . . . . . . . . . . . . . . . . . . . . . 55-8 Check Air Inlet Cover . . . . . . . . . . . . . . . . . . . . . 55-9 Check and Adjust Belt Tension—544G, 624G . . . . . . . . . . . . . . . . . . . . . . . . . . . . . . 55-10 Inspect Serpentine Belt—644G. . . . . . . . . . . . . 55-11 Drain Fuel Tank . . . . . . . . . . . . . . . . . . . . . . . . 55-11 Drain and Clean Primary Fuel Filter (Water Separator)—544G, 624G . . . . . . . . . . . . . . 55-12 Drain and Clean Primary Fuel Filter (Water Separator)—644G . . . . . . . . . . . . . . . . . . . . 55-13 Check Cab Recirculating Air Filter . . . . . . . . . . 55-14 Transporting Transporting Precautions . . . . . . . . . . . . . . . . . . 40-1 Loading Machine on a Trailer . . . . . . . . . . . . . . . 40-1 Towing Procedure—Engine Operational . . . . . . . 40-3 Towing Procedure—Engine NonOperational. . . . . . . . . . . . . . . . . . . . . . . . . . . 40-4 Lifting the Machine . . . . . . . . . . . . . . . . . . . . . . . 40-7 Fuels and Lubricants Diesel Fuel . . . . . . . . . . . . . . . . . . . . . . . . . . . Low Sulfur Diesel Fuel Conditioner. . . . . . . . . Handling and Storing Diesel Fuel . . . . . . . . . . Do Not Use Galvanized Containers . . . . . . . . Fuel Tank . . . . . . . . . . . . . . . . . . . . . . . . . . . . Diesel Engine Oil . . . . . . . . . . . . . . . . . . . . . . Transmission Oil, Hydraulic System Oil and Differential Oil. . . . . . . . . . . . . . . . . . . . . . . Grease . . . . . . . . . . . . . . . . . . . . . . . . . . . . . . Alternative and Synthetic Lubricants . . . . . . . . Lubricant Storage . . . . . . . . . . . . . . . . . . . . . . Mixing of Lubricants . . . . . . . . . . . . . . . . . . . . .. .. .. .. .. .. 45-1 45-2 45-2 45-3 45-3 45-4 .. .. .. .. .. 45-5 45-6 45-6 45-7 45-7 Maintenance—Every 10 Hours or Daily Lubricate Pivots . . . . . . . . . . . . . . . . . . . . Clean Air Cleaner Dust Unloader Valve . . Check Engine Oil Level . . . . . . . . . . . . . . Check Recovery Tank Coolant Level . . . . Check Hydraulic Oil Level . . . . . . . . . . . . Check Transmission Oil Level . . . . . . . . . .. .. .. .. .. .. .. .. .. .. .. .. . 60-1 . 60-1 . 60-1 . 60-3 . 60-3 . 60-5 Maintenance—Every 100 Hours Lubricant Boom, Bucket, and Cylinder Pivots. . . . . . . . . . . . . . . . . . . . . . . . . . . . . . . 70-1 Lubricate Boom, Bucket, and Cylinder Pivots—544G TC . . . . . . . . . . . . . . . . . . . . . . 70-2 Lubricate Steering Cylinder Pivots . . . . . . . . . . . 70-4 Lubricate Oscillating Rear Axle. . . . . . . . . . . . . . 70-5 Check Cab Fresh Air Filter—If Equipped . . . . . . 70-5 Periodic Maintenance Service Your Machine at Specified Intervals. . . . 50-1 Check the Hour Meter Regularly . . . . . . . . . . . . 50-1 Use Correct Fuels and Lubricants . . . . . . . . . . . 50-1 Prepare Machine for Maintenance . . . . . . . . . . . 50-2 Locking Machine Frame . . . . . . . . . . . . . . . . . . . 50-3 Boom Lock . . . . . . . . . . . . . . . . . . . . . . . . . . . . . 50-4 Opening Engine Side Shields and Service Doors . . . . . . . . . . . . . . . . . . . . . . . . . . . . . . . 50-4 Opening Grille Door . . . . . . . . . . . . . . . . . . . . . . 50-5 Maintenance—Every 250 Hours Check Receiver Dryer Moisture Indicator . . . . . . 75-1 Change Engine Oil and Replace Filter . . . . . . . . 75-2 Check Radiator Coolant Level . . . . . . . . . . . . . . 75-5 Continued on next page ii PN=2 Contents Page Page Maintenance—Every 500 Hours Lubricant Front Driveline. . . . . . . . . . . . . . . . . . . 80-1 Check Air Intake Hoses . . . . . . . . . . . . . . . . . . . 80-1 Check Battery Electrolyte Level and Terminals . . . . . . . . . . . . . . . . . . . . . . . . . . . . 80-2 Check Coolant . . . . . . . . . . . . . . . . . . . . . . . . . . 80-5 Replace Primary Fuel Filter (Water Separator) . . . . . . . . . . . . . . . . . . . . . . . . . . . 80-6 Replace Final Fuel Filter—544G, 624G . . . . . . . 80-7 Replace Final Fuel Filter—644G. . . . . . . . . . . . . 80-7 Replace Hydraulic System Return Filter . . . . . . . 80-7 Replace Hydraulic Reservoir Breather Filter . . . . 80-8 Check Front and Rear Differential Oil Level—If Equipped with Standard Axle . . . . . 80-9 Check Front and Rear Differential Oil Level—If Equipped with Differential Lock Axle . . . . . . . . . . . . . . . . . . . . . . . . . . . . . . . 80-10 Cleaning Fuel Tank Outlet Screen . . . . . . . . . . . 90-5 Bleeding Fuel System—544G, 624G . . . . . . . . . 90-7 Bleeding Fuel System—644G. . . . . . . . . . . . . . . 90-8 Adjusting Fuel Shut-Off Solenoid—644G . . . . . . 90-8 Precautions for Alternator and Regulator . . . . . . 90-9 Service Batteries Carefully . . . . . . . . . . . . . . . . 90-10 Checking Electrolyte Specific Gravity . . . . . . . . 90-12 Using Battery Charger . . . . . . . . . . . . . . . . . . . 90-14 Replacing Batteries . . . . . . . . . . . . . . . . . . . . . 90-14 Removing Batteries . . . . . . . . . . . . . . . . . . . . . 90-15 Replacing Fuses. . . . . . . . . . . . . . . . . . . . . . . . 90-15 Fuse (Blade-Type) Color Codes . . . . . . . . . . . . 90-15 Resetting Circuit Breakers . . . . . . . . . . . . . . . . 90-16 Replacing Halogen Bulbs . . . . . . . . . . . . . . . . . 90-16 Changing Reverse Warning Alarm Volume. . . . 90-18 Checking Neutral Start System. . . . . . . . . . . . . 90-18 Adding Attachments/Accessories to RollOver Protective Structure (ROPS) . . . . . . . . 90-19 Servicing Air Conditioning System . . . . . . . . . . 90-19 Checking and Adjusting Compressor Belt Tension—If Equipped . . . . . . . . . . . . . . . . . . 90-20 Welding on Machine. . . . . . . . . . . . . . . . . . . . . 90-20 Inspecting Park Brake Pads . . . . . . . . . . . . . . . 90-21 External Service Brake Inspection . . . . . . . . . . 90-22 Checking Brake Accumulator . . . . . . . . . . . . . . 90-24 Checking Ride Control Accumulator—If Equipped . . . . . . . . . . . . . . . . . . . . . . . . . . . 90-25 Bleeding Brakes . . . . . . . . . . . . . . . . . . . . . . . . 90-26 Checking Secondary Steering System—If Equipped . . . . . . . . . . . . . . . . . . . . . . . . . . . 90-28 Clutch Cut-Off Adjustment . . . . . . . . . . . . . . . . 90-28 Do Not Service Control Valves, Cylinders, Pumps or Motors . . . . . . . . . . . . . . . . . . . . . 90-29 Hardware Torque Specifications . . . . . . . . . . . . 90-30 Keep ROPS Installed Properly . . . . . . . . . . . . . 90-30 Metric Bolt and Cap Screw Torque Values . . . . 90-31 Additional Metric Cap Screw Torque Values. . . 90-33 Unified Inch Bolt and Cap Screw Torque Values . . . . . . . . . . . . . . . . . . . . . . . . . . . . . 90-34 Check Oil Lines and Fittings. . . . . . . . . . . . . . . 90-36 Service Recommendations for O-Ring Boss Fittings . . . . . . . . . . . . . . . . . . . . . . . . . . . . . 90-37 Service Recommendations for Flat Face ORing Seal Fittings . . . . . . . . . . . . . . . . . . . . . 90-39 Service Recommendations for Metric Series Four Bolt Flange Fitting . . . . . . . . . . . . . . . . 90-40 Service Recommendations for Inch Series Four Bolt Flange Fittings . . . . . . . . . . . . . . . 90-41 Maintenance—Every 1000 Hours Lubricate Rear Driveline . . . . . . . . . . . . . . . . . . . 85-1 Check Engine Speeds . . . . . . . . . . . . . . . . . . . . 85-1 Adjust Engine Speed Control Linkage . . . . . . . . 85-2 Replace Air Cleaner Dust Unloader Valve . . . . . 85-3 Replace Air Cleaner Elements . . . . . . . . . . . . . . 85-3 Clean Engine Crankcase Vent Tube (A). . . . . . . 85-4 Change Transmission Oil and Replace Filter. . . . . . . . . . . . . . . . . . . . . . . . . . . . . . . . 85-5 Check Park Brake . . . . . . . . . . . . . . . . . . . . . . . 85-7 Adjust Park Brake. . . . . . . . . . . . . . . . . . . . . . . . 85-8 Lubricate Frame Hinge Pivots . . . . . . . . . . . . . 85-10 Maintenance—Every 2000 Hours Measure and Adjust Engine Valve Lash (Clearance)—544G, LL, TC, 624G . . . . . . . . 86-1 Adjust Engine Valve Lash (Clearance)— 644G . . . . . . . . . . . . . . . . . . . . . . . . . . . . . . . 86-3 Lubricate Front Driveline Support Bearing . . . . . 86-5 Maintenance—Every 3000 Hours Change Hydraulic System Oil . . . . . . . . . . . . . . . 87-1 Clean Hydraulic Suction Strainer . . . . . . . . . . . . 87-2 Replace Differential Lock Return Filter(s)— If Equipped. . . . . . . . . . . . . . . . . . . . . . . . . . . 87-2 Change Front and Rear Differential Oil. . . . . . . . 87-3 Maintenance Draining the Cooling System . . . . . . . . . . . . . . . 90-1 Diesel Engine Coolant . . . . . . . . . . . . . . . . . . . . 90-3 Coolant drain intervals . . . . . . . . . . . . . . . . . . . . 90-3 Filling the Cooling System . . . . . . . . . . . . . . . . . 90-4 Test the Coolant Freeze—Protection Level . . . . 90-4 Do Not Service Injection Nozzles . . . . . . . . . . . . 90-5 Do Not Adjust Injection Pump. . . . . . . . . . . . . . . 90-5 Operational Checkout Operational Checkout . . . . . . . . . . . . . . . . . . . . . 95-1 Continued on next page iii PN=3 Contents Page Page Monitor Indicator and Gauge Checks— Engine Off . . . . . . . . . . . . . . . . . . . . . . . . . . . 95-2 Hourmeter And Gauge Check . . . . . . . . . . . . . . 95-2 Battery Check. . . . . . . . . . . . . . . . . . . . . . . . . . . 95-2 Monitor Indicator Circuit And Key Switch Check. . . . . . . . . . . . . . . . . . . . . . . . . . . . . . . 95-3 Monitor Turn Signals And Hazard Warning Indicator Checks . . . . . . . . . . . . . . . . . . . . . . 95-4 Transmission Controls, Axle and Engine Linkages, Neutral Start Switch, and Reverse Warning Alarm Switch Checks . . . . . 95-4 Neutral Start And Reverse Warning Alarm Circuit checks . . . . . . . . . . . . . . . . . . . . . . . . . 95-4 Engine Speed Control Linkage Check— 544G, 624G . . . . . . . . . . . . . . . . . . . . . . . . . . 95-5 Engine Speed Control Linkage Check— 644G . . . . . . . . . . . . . . . . . . . . . . . . . . . . . . . 95-5 Engine Speed Control Linkage Check— 644G (Continued). . . . . . . . . . . . . . . . . . . . . . 95-5 Fuel Shut-off Solenoid Linkage Check— 644G . . . . . . . . . . . . . . . . . . . . . . . . . . . . . . . 95-6 Front Axle Disconnect Check—If Equipped . . . . 95-6 Monitor Indicator and Gauge Checks (Engine Running) . . . . . . . . . . . . . . . . . . . . . . 95-7 Monitor Display And Alternator Output Check. . . . . . . . . . . . . . . . . . . . . . . . . . . . . . . 95-7 Monitor Indicator Circuit Bypass And Seat Belt Indicator Check . . . . . . . . . . . . . . . . . . . . 95-9 Monitor Primary And Secondary Level Checks . . . . . . . . . . . . . . . . . . . . . . . . . . . . . . 95-9 Transmission Temperature Gauge Check. . . . . 95-10 Brake System, Clutch Cut-Off, and Differential Lock Checks. . . . . . . . . . . . . . . . 95-10 Park Brake Transmission Lockout Check . . . . . 95-10 Service Brake Pump Flow Check . . . . . . . . . . . 95-11 Service Brake Check . . . . . . . . . . . . . . . . . . . . 95-12 Brake Accumulator Precharge Check . . . . . . . . 95-12 Brake System Leakage Check . . . . . . . . . . . . . 95-13 Service Brake Pedal Check . . . . . . . . . . . . . . . 95-13 Service And Park Brake System Drag Checks . . . . . . . . . . . . . . . . . . . . . . . . . . . . . 95-13 Differential Lock Check. . . . . . . . . . . . . . . . . . . 95-14 Clutch Cut-Off Check . . . . . . . . . . . . . . . . . . . . 95-14 Driving Checks . . . . . . . . . . . . . . . . . . . . . . . . . 95-15 Transmission Noise Check . . . . . . . . . . . . . . . . 95-15 Automatic Shift and Speedometer Check . . . . . 95-16 Transmission Quickshift Check. . . . . . . . . . . . . 95-17 Transmission Pressure, Pump Flow, and Leakage Check . . . . . . . . . . . . . . . . . . . . . . 95-17 Transmission Shift Modulation Check. . . . . . . . 95-18 Hydraulic System Checks. . . . . . . . . . . . . . . . . 95-18 Hydraulic System Warm-Up Procedure . . . . . . 95-18 Boom Down Solenoid Valve Check . . . . . . . . . 95-18 Control Valve Lift Check . . . . . . . . . . . . . . . . . . Bucket Rollback Circuit Relief Valve Check . . . Bucket Dump Circuit Relief Valve Pressure Check. . . . . . . . . . . . . . . . . . . . . . . . . . . . . . Boom and Bucket Cylinder Drift . . . . . . . . . . . . Boom Down Check Valve Leakage Check . . . . Pilot Controller Check. . . . . . . . . . . . . . . . . . . . Return-To-Dig Check . . . . . . . . . . . . . . . . . . . . Boom Height Kickout Check—If Equipped . . . . Pin Disconnect Cylinder Check (544G-TC Only) . . . . . . . . . . . . . . . . . . . . . . . . . . . . . . Ride Control Accumulator Check—If Equipped . . . . . . . . . . . . . . . . . . . . . . . . . . . Steering System Checks . . . . . . . . . . . . . . . . . Steering Valve Check. . . . . . . . . . . . . . . . . . . . Steering System Leakage Check . . . . . . . . . . . Priority Valve Low Pressure Check. . . . . . . . . . Priority Valve High Pressure Check . . . . . . . . . Secondary Steering System Check—If Equipped . . . . . . . . . . . . . . . . . . . . . . . . . . . Secondary Steering System Primary Check Valve Check. . . . . . . . . . . . . . . . . . . . . . . . . Accessory Checks . . . . . . . . . . . . . . . . . . . . . . Operating Lights Check . . . . . . . . . . . . . . . . . . Work Light Check . . . . . . . . . . . . . . . . . . . . . . . Brake Light Check . . . . . . . . . . . . . . . . . . . . . . Horn Circuit Check . . . . . . . . . . . . . . . . . . . . . . Windshield Washer and Wiper Check—If Equipped . . . . . . . . . . . . . . . . . . . . . . . . . . . Defroster Blower Check . . . . . . . . . . . . . . . . . . Heater/Air Conditioner Blower Check . . . . . . . . Heater Functional Check . . . . . . . . . . . . . . . . . Air Conditioner Functional Check . . . . . . . . . . . Start Aid System Check . . . . . . . . . . . . . . . . . . Cab Component and Vandal Protection Checks. . . . . . . . . . . . . . . . . . . . . . . . . . . . . Cab Door and Window Hold-Open Latch Check. . . . . . . . . . . . . . . . . . . . . . . . . . . . . . Cab Door Release Button. . . . . . . . . . . . . . . . . Cab Door Lock Check . . . . . . . . . . . . . . . . . . . Dome Light Check . . . . . . . . . . . . . . . . . . . . . . Cab Window Latch Check . . . . . . . . . . . . . . . . Cab Door Window Check . . . . . . . . . . . . . . . . . Steering Column Adjustment Check . . . . . . . . . Seat And Seat Belt Check . . . . . . . . . . . . . . . . Toolbox Door Check. . . . . . . . . . . . . . . . . . . . . Air Intake Filter Door Check . . . . . . . . . . . . . . . Load Center Door Check . . . . . . . . . . . . . . . . . Engine Side Panels Check . . . . . . . . . . . . . . . . Radiator Cap Access Door Check . . . . . . . . . . Frame Locking Bar Check . . . . . . . . . . . . . . . . 95-19 95-19 95-19 95-19 95-20 95-20 95-20 95-21 95-21 95-21 95-22 95-22 95-22 95-23 95-23 95-24 95-24 95-25 95-25 95-25 95-26 95-26 95-27 95-27 95-28 95-28 95-28 95-29 95-29 95-29 95-30 95-30 95-30 95-31 95-31 95-31 95-32 95-32 95-33 95-33 95-33 95-34 95-34 Continued on next page iv PN=4 Contents Page Boom Lock Check . . . . . . . . . . . . . . . . . . . . . . 95-34 Service Decal Check . . . . . . . . . . . . . . . . . . . . 95-34 Troubleshooting Using Troubleshooting Charts . . . . . . . . . . . . . 100-1 Engine . . . . . . . . . . . . . . . . . . . . . . . . . . . . . . . 100-2 Electrical System . . . . . . . . . . . . . . . . . . . . . . 100-14 Hydraulic System . . . . . . . . . . . . . . . . . . . . . . 100-22 Power Train . . . . . . . . . . . . . . . . . . . . . . . . . . 100-29 Service Brakes . . . . . . . . . . . . . . . . . . . . . . . . 100-35 Differential Axle . . . . . . . . . . . . . . . . . . . . . . . 100-37 Driveline . . . . . . . . . . . . . . . . . . . . . . . . . . . . . 100-39 Park Brake . . . . . . . . . . . . . . . . . . . . . . . . . . . 100-40 Air Conditioning . . . . . . . . . . . . . . . . . . . . . . . 100-41 Storage Prepare Machine for Storage . . . . . . . . . . . . . . 105-1 Monthly Storage Procedure . . . . . . . . . . . . . . . 105-2 Machine Numbers Record Product Identification Number (PIN) . . . Record Engine Serial Number—544G . . . . . . . Record Engine Serial Number—624G . . . . . . . Record Engine Serial Number—644G . . . . . . . Record Transmission Serial Number . . . . . . . . Record Hydraulic Pump Serial Number . . . . . . Specifications 544G Specifications . . . . . . . . . . . . . . 544G Specifications . . . . . . . . . . . . . . Drain and Refill Capacities—544G . . . 544G LL Specifications. . . . . . . . . . . . 544G LL Specifications. . . . . . . . . . . . Drain and Refill Capacities—544G LL 544G TC Specifications . . . . . . . . . . . 544G TC Specifications . . . . . . . . . . . Drain and Refill Capacities—544G TC 624G Specifications . . . . . . . . . . . . . . 624G Specifications . . . . . . . . . . . . . . Drain and Refill Capacities—624G . . . 644G Specifications . . . . . . . . . . . . . . 644G Specifications . . . . . . . . . . . . . . Drain and Refill Capacities—644G . . . .. .. .. .. .. .. .. .. .. .. .. .. .. .. .. .. .. .. .. .. .. .. .. .. .. .. .. .. .. .. .. .. .. .. .. .. .. .. .. .. .. .. .. .. .. 110-1 110-1 110-1 110-1 110-2 110-2 . 115-1 . 115-3 . 115-5 . 115-5 . 115-7 . 115-9 . 115-9 115-11 115-13 115-13 115-15 115-17 115-17 115-19 115-20 Crime Prevention Tips . . . . . . . . . . . . . . . . . . 120-1 Index v PN=5 TX,05,JC1054 –19–22JAN96–1/1 T100127 –19–21FEB96 Safety 05–1 PN=1 Safety RECOGNIZE SAFETY INFORMATION –UN–07DEC88 This is the safety-alert symbol. When you see this symbol on your machine or in this manual, be alert to the potential for personal injury. T81389 Follow recommended precautions and safe operating practices. DX,ALERT –19–03MAR93–1/1 UNDERSTAND SIGNAL WORDS TS187 DANGER or WARNING safety signs are located near specific hazards. General precautions are listed on CAUTION safety signs. CAUTION also calls attention to safety messages in this manual. –19–30SEP88 A signal word—DANGER, WARNING, or CAUTION—is used with the safety-alert symbol. DANGER identifies the most serious hazards. DX,SIGNAL –19–03MAR93–1/1 Carefully read all safety messages in this manual and on your machine safety signs. Keep safety signs in good condition. Replace missing or damaged safety signs. Be sure new equipment components and repair parts include the current safety signs. Replacement safety signs are available from your John Deere dealer. TS201 Learn how to operate the machine and how to use controls properly. Do not let anyone operate without instruction. –UN–23AUG88 FOLLOW SAFETY INSTRUCTIONS Keep your machine in proper working condition. Unauthorized modifications to the machine may impair the function and/or safety and affect machine life. If you do not understand any part of this manual and need assistance, contact your John Deere dealer. DX,READ –19–03MAR93–1/1 05–2 PN=2 Safety AVOID INJURY FROM ROLLOVER ACCIDENTS -------------------------------WEAR YOUR SEAT BELT -------------------------------DO NOT ATTEMPT TO JUMP CLEAR OF TIPPING MACHINE—SERIOUS OR FATAL CRUSHING INJURIES WILL RESULT -------------------------------MACHINE WILL TIP OVER FASTER THAN YOU CAN JUMP FREE To avoid rollovers: Be careful when operating on a slope. Carry tools and loads close to the ground to aid visibility and lower center of gravity. Reduce speed before turning or swinging load. T7242EA Balance loads so weight is evenly distributed and load is stable. –19–22FEB90 Avoid sharp turns. Know capacity of machine. Do not overload. Be careful when operating at the edge of an excavation, trench, or drop-off, and loading or unloading from a trailer. Read and understand the operating instructions in this operator’s manual. TX,05,DH1525 –19–21JUN91–1/1 05–3 PN=3 T7241AY AVOID INJURY FROM BACKOVER ACCIDENTS -----------------------------------BEFORE MOVING MACHINE, BE SURE ALL PERSONS ARE CLEAR OF AREA -----------------------------------ALWAYS BE ALERT FOR BYSTANDERS MOVING INTO THE WORK AREA. USE HORN OR OTHER SIGNAL TO WARN BYSTANDERS BEFORE MOVING MACHINE -----------------------------------WHEN USING A SIGNAL PERSON, KEEP PERSON IN VIEW AT ALL TIMES. BE SURE SIGNAL PERSON IS CLEAR BEFORE BACKING UP –UN–21FEB90 Safety To avoid backover accidents: Always look around before you back up. Be sure that everyone is in the clear. Keep bystanders away from pivot area of an articulated machine. Keep reverse warning alarm in working condition, if equipped. Use a signal person when backing up if view is obstructed. Always keep signal person in view. Learn the meaning of all flags, signs, and markings used on the job, and who has the responsibility for signaling. Keep windows, mirrors, and lights clean and in good condition. Dust, heavy rain, fog, etc., can reduce visibility. As visibility decreases, reduce speed and use proper lighting. Read and understand the operating instructions in this operator’s manual. TX,05,DH1573 –19–18MAR91–1/1 05–4 PN=4 T7241AZ AVOID INJURY FROM ROLLAWAY ACCIDENTS -----------------------------------TO PREVENT ROLLAWAY, ALWAYS MAKE SURE MACHINE IS PROPERLY SECURED BEFORE LEAVING OPERATOR’S SEAT -----------------------------------DEATH OR SERIOUS INJURY MAY RESULT IF YOU ATTEMPT TO MOUNT OR STOP A MOVING MACHINE ------------------------------------ –UN–21FEB90 Safety To avoid rollaways: Select level ground when possible to park machine. Move transmission control lever to neutral "N", engage neutral lock, and engage park brake. Lower all equipment to ground. Stop the engine. Block all wheels if you must park on a grade. Position machine to prevent rolling. Park a reasonable distance from other machines. Read and understand the operating instructions in this operator’s manual. TX,05,DH2478 –19–26SEP92–1/1 INSPECT MACHINE T6607AQ –UN–18OCT88 Inspect your machine carefully each day by walking around it before you start it. (See Pre-Start Inspection Chapter.) T82,BHSA,CL –19–14MAR90–1/1 05–5 PN=5 Safety USE HANDHOLDS AND STEPS When you get on and off the machine, always maintain a three point contact with the steps and handrails, and face the machine. Do not use the steering wheel or any controls as handholds. T6981AN Never jump on or off the machine. Never mount or dismount a moving machine. –UN–15JUN89 Falling is one of the major causes of personal injury. Be careful of slippery conditions on platforms, steps, and handrails when leaving the machine. TX,05,DH553 –19–18MAR91–1/1 PREVENT MACHINE RUNAWAY Never start engine while standing on ground. Start engine only from operator’s seat with transmission control lever locked in neutral and park brake engaged. T6642EB DO NOT start engine by shorting across starter terminals. Machine will start in gear if normal circuitry is bypassed. –UN–20OCT88 Avoid possible injury or death from a runaway machine. TX,05,DH2281 –19–06OCT92–1/1 USE SEAT BELT PROPERLY Overturns may occur if proper operating instructions are not followed. TS175 –UN–23AUG88 Use your seat belt. TX,05,JC1044 –19–12JAN96–1/1 05–6 PN=6 Safety MAINTAIN SEAT BELT It is important to use the seat belt on ROPS equipped machines to minimize the chance of injury from an accident such as an overturn. Keep the seat belt in good condition. The complete seat belt assembly should be replaced after three years of usage, regardless of appearance. Between replacement intervals: Carefully examine buckle, webbing, and attaching hardware. Be sure that the retractor, if equipped, locks to prevent belt extension after latching buckle. Be sure that attaching hardware is in place. Tighten, if necessary. Replace the seat belt if it does not operate properly, or if it is damaged, worn, or deteriorated. TX,05,JC242 –19–03MAR95–1/1 SECONDARY EXITS Machines equipped with cabs are equipped with secondary exits. For additional secondary exit information, see “Windows” in Operator’s Station, chapter 10 of this manual. TX,05,JC1051 –19–18JAN96–1/1 05–7 PN=7 Safety TRAVEL SAFELY Know the location of bystanders before moving the machine. Use a signal person when moving the machine in congested areas. Coordinate hand signals before starting the machine. T6964AD –UN–20DEC88 Always keep the reverse warning alarm in working condition. It warns people when the machine starts to move in reverse. TX,05,DH496 –19–02AUG89–1/1 DRIVE MACHINE SAFELY Walk around machine to clear all persons from area of operation and machine movement. –UN–25OCT88 Always check area to rear before shifting to reverse. T6582AS Drive carefully in congested areas, over rough ground, near ditches for excavations, and on slopes or curves. Keep machine in gear when going down hills. Use accessory lights and devices to warn operators of other vehicles. TX,05,DH1931 –19–21JUN91–1/1 05–8 PN=8 Safety OPERATE MACHINE WITH CAUTION Never lower a loaded bucket with the boom and bucket control lever in the float position. Increase the power gradually when pulling a heavy load or when driving out of a ditch or excavation. T6642EF Keep loading area smooth. –UN–18OCT88 Check location of cables, gas lines, and water mains before digging. TX,05,DH1932 –19–06JUN91–1/1 OPERATING ON SLOPES Avoid sideslope travel whenever possible. Drive up slope in forward and down in reverse. The danger of tipping is always present. In steep slope operation, do not allow engine to overspeed. Select low gear speed before starting down slope. T7050AB –UN–03AUG89 The grade of the slope you should attempt will be limited by such factors as ground condition, and load being handled. TX,05,RR,171 –19–27APR89–1/1 05–9 PN=9 Safety CARRYING LOADS Do not start, stop, or turn quickly when transporting a load. Do not change forward or reverse directions quickly when carrying a load. T7050AA Handle only those loads which are properly arranged. Do not overload. –UN–03AUG89 Carry loader bucket as low as possible for better stability and visibility. TX,05,RR,172 –19–03JUN92–1/1 AVOID POWER LINES T6642EG Never move any part of the machine or load closer to electric line than 3 m (10 ft) plus twice the line insulator length. –UN–20JUN89 Serious injury or death can result from contact with electric lines. 02T,05,J18 –19–06JUN91–1/1 BEWARE OF EXHAUST FUMES T6458AO If you must operate in a building, be sure there is adequate ventilation. Either use an exhaust pipe extension to remove the exhaust fumes or open doors and windows to bring enough outside air into the area. –UN–18OCT88 Prevent asphyxiation. Engine exhaust fumes can cause sickness or death. TX,DH,2 –19–09FEB89–1/1 05–10 PN=10 Safety KEEP RIDERS OFF MACHINE Only allow the operator on the machine. Keep riders off. TS290 –UN–23AUG88 Riders on machine are subject to injury such as being struck by foreign objects and being thrown off of the machine. Riders also obstruct the operator’s view resulting in the machine being operated in an unsafe manner. DX,RIDER –19–03MAR93–1/1 HANDLE FUEL SAFELY—AVOID FIRES Prevent fires by keeping machine clean of accumulated trash, grease, and debris. Always clean up spilled fuel. TS202 Always stop engine before refueling machine. Fill fuel tank outdoors. –UN–23AUG88 Handle fuel with care: it is highly flammable. Do not refuel the machine while smoking or when near open flame or sparks. DX,FIRE1 –19–03MAR93–1/1 PREPARE FOR EMERGENCIES Be prepared if a fire starts. TS291 Keep emergency numbers for doctors, ambulance service, hospital, and fire department near your telephone. –UN–23AUG88 Keep a first aid kit and fire extinguisher handy. DX,FIRE2 –19–03MAR93–1/1 05–11 PN=11 Safety HANDLE STARTING FLUID SAFELY Keep all sparks and flame away when using it. Keep starting fluid away from batteries and cables. T6464AV Remove container from machine if engine does not need starting fluid. –UN–18OCT88 Starting fluid is highly flammable. To prevent accidental discharge when storing the pressurized can, keep the cap on the container, and store in a cool, protected location. Do not incinerate or puncture a starting fluid container. TX,05,FF2281 –19–22FEB91–1/1 CLEAN TRASH FROM MACHINE Keep engine compartment, radiator, batteries, hydraulic lines, fuel tank, and operator’s station clean. Open access door(s) to cool the engine faster, and clean engine compartment. T6669AG –UN–18OCT88 Temperature in engine compartment may go up immediately after engine is stopped. BE ON GUARD FOR FIRES DURING THIS PERIOD. 02T,05,J33 –19–14MAR90–1/1 PROTECT AGAINST FLYING DEBRIS T6642DK –UN–18OCT88 When you drive connecting pins in or out, guard against injury from flying pieces of metal or debris; wear goggles or safety glasses. 02T,05,J45 –19–30MAY90–1/1 05–12 PN=12 Safety WEAR PROTECTIVE CLOTHING TS206 Operating equipment safely requires the full attention of the operator. Do not wear radio or music headphones while operating machine. –UN–23AUG88 Wear close fitting clothing and safety equipment appropriate to the job. DX,WEAR2 –19–03MAR93–1/1 PROTECT AGAINST NOISE TS207 Wear a suitable hearing protective device such as earmuffs or earplugs to protect against objectionable or uncomfortable loud noises. –UN–23AUG88 Prolonged exposure to loud noise can cause impairment or loss of hearing. DX,NOISE –19–03MAR93–1/1 HANDLE CHEMICAL PRODUCTS SAFELY TS1132 A Material Safety Data Sheet (MSDS) provides specific details on chemical products: physical and health hazards, safety procedures, and emergency response techniques. –UN–26NOV90 Direct exposure to hazardous chemicals can cause serious injury. Potentially hazardous chemicals used with your machine include such items as lubricants, coolants, paints, and adhesives. Check the MSDS before you start any job using a hazardous chemical. That way you will know exactly what the risks are and how to do the job safely. Then follow procedures and recommended equipment. See your authorized dealer for MSDS’s on chemical products used with your machine. TX,05,DH2500 –19–02OCT92–1/1 05–13 PN=13 Safety USE SAFETY LIGHTS AND DEVICES –UN–10FEB89 Operators of machines that travel below normal highway speeds should take special precautions to avoid collision with other vehicles. Install and use all safety lights and devices necessary to assure safe operation and local compliance. Keep these safety items in good condition. Replace missing or damaged parts immediately. N36564 Before driving on public roads, check state and local laws that may apply to tractors, self-propelled machines, and towed equipment. Additional lights, mirrors, SMV emblems, or reflectors may be required. A—Lights B—Slow Moving Vehicle Emblem C—Reflector Tape D—Reflectors TX,05,DH1729 –19–26JAN91–1/1 KEEP ROPS INSTALLED PROPERLY A damaged roll-over protective structure (ROPS) should be replaced, not reused. The protection offered by ROPS will be impaired if ROPS is subjected to structural damage, is involved in an overturn incident, or is in any way altered by welding, bending, drilling, or cutting. If ROPS was loosened or removed for any reason, inspect it carefully before operating the machine again. To maintain the ROPS: • Replace missing hardware using correct grade hardware. • Check hardware torque. • Check isolation mounts for damage, looseness or wear; replace them if necessary. • Check ROPS for cracks or physical damage. TX,05,DH1846 –19–14MAY91–1/1 05–14 PN=14 Safety KEEP THE OPERATOR PROTECTIVE STRUCTURE (OPS) IN PLACE It is important to keep the operator protective structure (OPS) in place (doors, screens, windows, windshield, etc.) to minimize hazards from whipping or intruding objects. To maintain OPS protection, replace damaged parts immediately. Replace 3–piece hard-coated polycarbonate windshield with only Lexan Margard 5000 or equivalent. The protection offered by OPS will be impaired if OPS is subjected to structural damage, is involved in an overturn incident, or is altered by welding, bending, drilling, or cutting. Damaged OPS components should be replaced, not reused. Keep all bolts and attaching hardware tight. TX,05,JC1068 –19–21FEB96–1/1 WARN OTHERS OF SERVICE WORK Unexpected machine movement can cause serious injury. T7447AO –19–22APR91 Before performing any work on the machine, attach a "DO NOT OPERATE" tag to the steering wheel. TX,05,DH1820 –19–14MAY91–1/1 05–15 PN=15 Safety PRACTICE SAFE MAINTENANCE If maintenance procedure must be performed with engine running, DO NOT leave machine unattended. Securely support any machine elements that must be raised for service work. Understand service procedure before doing work. Keep area clean and dry. Never lubricate or service machine while it is moving. Keep hands, feet, and clothing from power-driven parts. Before servicing machine and before leaving the operator’s seat: 1. Park machine on a level surface. 3. Move transmission control lever to neutral "N". Engage neutral lock. Ö CAUTION: Prevent possible injury from unexpected machine movement. Never rely on transmission control lever alone to keep machine from moving. Machine can unexpectedly roll or move under power, resulting in death or serious injury. Always engage park brake to hold machine. TS218 –UN–23AUG88 2. Lower all equipment to ground. 4. Engage park brake. 5. Install the frame locking bar before working in the frame hinge pivot area. 6. Turn key switch to STOP. 7. Turn battery disconnect switch OFF, if equipped. TX,05,DH2122 –19–31JUL92–1/2 05–16 PN=16 Safety 8. Allow engine to cool. Keep all parts in good condition and properly installed. Fix damage immediately. Replace worn or broken parts. Remove any buildup of grease, oil, or debris. Disconnect battery ground cable (-) before making adjustments on electrical systems or welding on machine. TX,05,DH2122 –19–31JUL92–2/2 SUPPORT MACHINE PROPERLY TS229 Do not support the machine on cinder blocks, hollow tiles, or props that may crumble under continuous load. Do not work under a machine that is supported solely by a jack. Follow recommended procedures in this manual. –UN–23AUG88 Always lower the attachment or implement to the ground before you work on the machine. If you must work on a lifted machine or attachment, securely support the machine or attachment. DX,LOWER –19–04JUN90–1/1 05–17 PN=17 Safety REMOVE PAINT BEFORE WELDING OR HEATING Avoid potentially toxic fumes and dust. –UN–23AUG88 Hazardous fumes can be generated when paint is heated by welding, soldering, or using a torch. TS220 Do all work outside or in a well ventilated area. Dispose of paint and solvent properly. Remove paint before welding or heating: • If you sand or grind paint, avoid breathing the dust. Wear an approved respirator. • If you use solvent or paint stripper, remove stripper with soap and water before welding. Remove solvent or paint stripper containers and other flammable material from area. Allow fumes to disperse at least 15 minutes before welding or heating. DX,PAINT –19–03MAR93–1/1 AVOID HEATING NEAR PRESSURIZED FLUID LINES TS953 –UN–15MAY90 Flammable spray can be generated by heating near pressurized fluid lines, resulting in severe burns to yourself and bystanders. Do not heat by welding, soldering, or using a torch near pressurized fluid lines or other flammable materials. Pressurized lines can be accidentally cut when heat goes beyond the immediate flame area. DX,TORCH –19–03MAR93–1/1 05–18 PN=18 Safety AVOID HIGH-PRESSURE FLUIDS Search for leaks with a piece of cardboard. Protect hands and body from high pressure fluids. X9811 Avoid the hazard by relieving pressure before disconnecting hydraulic or other lines. Tighten all connections before applying pressure. –UN–23AUG88 Escaping fluid under pressure can penetrate the skin causing serious injury. If an accident occurs, see a doctor immediately. Any fluid injected into the skin must be surgically removed within a few hours or gangrene may result. Doctors unfamiliar with this type of injury should reference a knowledgeable medical source. Such information is available from Deere & Company Medical Department in Moline, Illinois, U.S.A. DX,FLUID –19–03MAR93–1/1 CLEAN THE MACHINE REGULARLY T6642EJ High pressure washing [greater than 1379 kpa (13.8 bar) (200 psi)] can damage freshly painted finishes. Paint should be allowed to air dry for 30 days minimum after receipt of machine before cleaning with high pressure. Use low pressure wash operations until 30 days have elapsed. –UN–18OCT88 Remove any grease, oil, fuel, or debris build-up to avoid possible injury or machine damage. Do not spray oil cooler fins at an angle. Fins may bend. TX,05,FF2787 –19–27JUL94–1/1 05–19 PN=19 Safety SERVICE COOLING SYSTEM SAFELY TS281 Shut off engine. Only remove filler cap when cool enough to touch with bare hands. Slowly loosen cap to first stop to relieve pressure before removing completely. –UN–23AUG88 Explosive release of fluids from pressurized cooling system can cause serious burns. DX,RCAP –19–04JUN90–1/1 STORE ATTACHMENTS SAFELY TS219 Securely store attachments and implements to prevent falling. Keep playing children and bystanders away from storage area. –UN–23AUG88 Stored attachments such as dual wheels, cage wheels, and loaders can fall and cause serious injury or death. DX,STORE –19–03MAR93–1/1 DISPOSE OF WASTE PROPERLY Do not pour waste onto the ground, down a drain, or into any water source. TS1133 Use leakproof containers when draining fluids. Do not use food or beverage containers that may mislead someone into drinking from them. –UN–26NOV90 Improperly disposing of waste can threaten the environment and ecology. Potentially harmful waste used with your machine include such items as oil, fuel, coolant, brake fluid, filters, and batteries. Air conditioning refrigerants escaping into the air can damage the Earth’s atmosphere. Government regulations may require a certified air conditioning service center to recover and recycle used air conditioning refrigerants. Inquire on the proper way to recycle or dispose of waste from your local environmental or recycling center, or from your authorized dealer. TX,05,DH2502 –19–26AUG92–1/1 05–20 PN=20 T7967AK –19–22MAR93 T7829AA –UN–31AUG92 Safety Signs TX,06,JC1102 –19–18MAR96–1/12 06–1 PN=21 T7773CV –UN–31AUG92 Safety Signs T7939AI –19–22MAR93 A-Warning Decal TX,06,JC1102 –19–18MAR96–2/12 06–2 PN=22 T100704 T8417AD –19–09FEB95 –UN–22MAR96 Safety Signs TX,06,JC1102 –19–18MAR96–3/12 06–3 PN=23 T6976AE –UN–30JAN89 T7593AC –19–30AUG91 Safety Signs TX,06,JC1102 –19–18MAR96–4/12 06–4 PN=24 –UN–15JUN93 T8029AF T7939AK –19–22MAR93 Safety Signs TX,06,JC1102 –19–18MAR96–5/12 06–5 PN=25 T7934AM –19–01FEB93 Safety Signs T100703 –UN–22MAR96 A-Warning Decal Left Side Shown TX,06,JC1102 –19–18MAR96–6/12 06–6 PN=26 T8029AQ –UN–21JUN93 T8029AR –19–16JUN93 Safety Signs TX,06,JC1102 –19–18MAR96–7/12 06–7 PN=27 T7829AT –19–17SEP92 T7853AF –UN–08OCT92 Safety Signs T8029AH –UN–15JUN93 A-Warning Decal, If Equipped Right Side of Machine TX,06,JC1102 –19–18MAR96–8/12 06–8 PN=28 T7773AZ T7916AC –19–06JAN93 –UN–10AUG92 Safety Signs –UN–10AUG92 T7773CA T7748CU –19–14OCT92 TX,06,JC1102 –19–18MAR96–9/12 TX,06,JC1102 –19–18MAR96–10/12 06–9 PN=29 T100702 T7829AQ –19–31AUG92 –UN–22MAR96 Safety Signs TX,06,JC1102 –19–18MAR96–11/12 06–10 PN=30 T101279 –19–14MAY96 T7829AU –19–17SEP92 T7839BB –UN–17SEP92 Safety Signs Located on top of radiator cap TX,06,JC1102 –19–18MAR96–12/12 06–11 PN=31 Operator’s Station T7773AP –UN–11JUN92 GAUGES, INDICATORS, SWITCHES, AND ACCESSORIES A—SELECT Switch B—Digital Display C—Engine Coolant Temperature Gauge D—Fuel Gauge E—Transmission Oil Temperature Gauge F—Hydraulic Oil Filter Restriction Indicator G—Transmission Oil Pressure Indicator—If Equipped H—Engine Coolant Level Indicator I—Engine Air Filter Restriction Indicator J—Engine Alternator Voltage Indicator K—Engine Oil Pressure Indicator L—STOP Indicator M—Service Required Indicator N—Left Turn Signal Indicator O—Steering Pressure Indicator—If Equipped With Secondary Steering P—Ether Injection Indicator Q—Fasten Seat Belt Indicator R—Park Brake Indicator S—Brake Pressure Indicator T—Right Turn Signal Indicator TX,10,JC1046 –19–16JAN96–1/2 10–1 PN=32 T8375AN –UN–02DEC94 Operator’s Station A—Front Wiper Switch B—Drive Light Switch C—Work Light Switch D—Clutch Cut-off Switch E—Warning Light Switch F—Boom Down Switch G—Rear Wiper Switch H—Air Conditioner Control Switch—If Equipped I—Pin Disconnect Switch— 544G TC J—Ride Control Switch—If Equipped K—Blower Knob L—Air Conditioner Defroster Blower Knob M—Temperature Control Knob TX,10,JC1046 –19–16JAN96–2/2 10–2 PN=33 Operator’s Station Ö CAUTION: Prevent possible injury, or machine damage. If STOP indicator light flashes and alarm sounds, stop immediately and investigate cause of problem. The STOP indicator light flashes and alarm sounds when: T7673AM Engine oil pressure is low. STOP ENGINE IMMEDIATELY. –UN–06JAN92 STOP INDICATOR AND ALARM Engine coolant temperature is excessively high. Stop machine and allow engine to cool. Shut off engine and take corrective action. Engine coolant level is low. Stop machine and allow engine to cool. Shut off engine and take corrective action. Transmission oil temperature is excessively high. Stop machine and take corrective action. Transmission oil pressure is low. Stop machine and take corrective action. Transmission is shifted into gear with park brake engaged. Disengage park brake. Brake pressure is low. Stop machine and take corrective action. Steering system pressure is low, and secondary steering is activated. Stop machine and take corrective action. If indicators do not function correctly, see Troubleshooting chapter. TX,10,DH2165 –19–02OCT92–1/1 10–3 PN=34 Operator’s Station SERVICE REQUIRED INDICATOR (YELLOW) –UN–18OCT88 If service required indicator lights, a problem is developing. It is not necessary to stop the engine immediately, but the cause should be investigated as soon as possible. The service required indicator lights when: T6201BL • Alternator voltage is low. • Engine air filter is restricted. • Hydraulic oil filter is restricted. NOTE: Cold oil may cause hydraulic oil filter restriction indicator to light temporarily. TX,10,DH2282 –19–12MAY93–1/1 DIGITAL DISPLAY T7747AT Press the SELECT switch to change information on the digital display. Information sequences from the tachometer, to the speedometer (in mph), to the speedometer (in km/h), to the hourmeter, to the voltmeter, and then back to the tachometer. If the switch is pressed continuously, the information will sequence every 4 seconds. –UN–19MAY92 Engine running: Engine not running, key switch in OFF position: Press the SELECT switch to show hour meter information, engine coolant temperature information, fuel tank level information, and transmission oil temperature information on the digital display. If switch is held down for more than 4 seconds, the hourmeter will change to display battery voltage. TX,10,DH2347 –19–19MAY93–1/1 10–4 PN=35 Operator’s Station ENGINE COOLANT TEMPERATURE GAUGE T7747AU All the arrows will flash, STOP indicator light will flash, and audible alarm will sound when temperature reaches above 110°C (230°F). If all 9 arrows are ON but not flashing, system has a malfunction. Stop machine and allow engine to cool. Shut off engine and take corrective action. –UN–19MAY92 The first arrow will flash until engine temperature warms to 38°C (100°F). TX,10,JC1063 –19–14FEB96–1/1 FUEL GAUGE First arrow will flash if fuel is low or system has a malfunction. T7747AV –UN–19MAY92 Always fill fuel tank at the end of the day to eliminate condensation in fuel tank. TX,10,DH2164 –19–29NOV94–1/1 TRANSMISSION OIL TEMPERATURE GAUGE T7747AW All arrows will flash, STOP indicator light will flash, and audible alarm will sound when temperature reaches above 133°C (271°F), If all 9 arrows are ON but not flashing, system has a malfunction. Stop machine and allow engine to cool. Shut off engine and take corrective action. –UN–19MAY92 Audible alarm will sound once when temperature first reaches 127-132°C (260-270°F). TX,10,JC245 –19–29NOV94–1/1 10–5 PN=36 Operator’s Station Indicator light will light, STOP indicator will flash, and alarm will sound when engine oil pressure is low. Stop machine. STOP ENGINE IMMEDIATELY. NOTE: Cold oil or extreme off level operation may cause indicator to light. T7747AA IMPORTANT: Prevent possible engine damage. If engine oil pressure indicator light comes on while operating, stop machine. STOP ENGINE IMMEDIATELY. –UN–19MAY92 ENGINE OIL PRESSURE INDICATOR TX,10,DH2153 –19–29NOV94–1/1 ALTERNATOR VOLTAGE INDICATOR T6201BD –UN–18OCT88 Indicator light will light and service required indicator light will light when alternator output is low. Check battery charge by selecting battery voltage on digital display. TX,10,DH2549 –19–02OCT92–1/1 T7747AB Indicator will light and service required indicator will light when air filter elements are restricted. Clean or change filter elements. –UN–19MAY92 ENGINE AIR FILTER RESTRICTION INDICATOR TX,10,DH2154 –19–08FEB93–1/1 10–6 PN=37 Operator’s Station ENGINE COOLANT LEVEL INDICATOR T7747AC Indicator light will light, STOP indicator light will flash, and alarm will sound when engine coolant level is low. Stop machine and allow engine to cool. Shut off engine and take corrective action. –UN–19MAY92 IMPORTANT: Prevent machine damage. Low coolant will result in engine or radiator damage. TX,10,DH2152 –19–02OCT92–1/1 T7747AD Indicator light will light and STOP indicator light will light when transmission oil pressure is low. Stop machine and allow engine to cool. Shut off engine and take corrective action. –UN–19MAY92 TRANSMISSION OIL PRESSURE INDICATOR—IF EQUIPPED TX,10,JC1048 –19–16JAN96–1/1 Indicator light will light and service required indicator light will light when hydraulic filter element is restricted. NOTE: Cold oil may cause hydraulic oil filter restriction indicator light to light until oil is warm. T7747AE IMPORTANT: Prevent possible hydraulic pump damage. Change hydraulic oil filter as soon as possible when a problem occurs. –UN–19MAY92 HYDRAULIC OIL FILTER RESTRICTION INDICATOR TX,10,DH2158 –19–13SEP94–1/1 10–7 PN=38 Operator’s Station RIGHT TURN SIGNAL INDICATOR T6201BK –UN–18OCT88 Indicator light will light when right turn signal switch is engaged. TX,DH,39 –19–12APR93–1/1 BRAKE OIL PRESSURE INDICATOR Indicator light will light, STOP indicator light will flash, and alarm will sound when brake oil pressure is low, or brake accumulator has lost its charge. Stop machine immediately and engage park brake. Take corrective action. –UN–19MAY92 CAUTION: Prevent possible injury or machine damage. If brake pressure indicator light comes on while operating, stop machine immediately. T7747AF Ö TX,10,DH2157 –19–05OCT92–1/1 PARK BRAKE INDICATOR T7747AG If park brake is engaged and transmission control lever is in forward "F" or reverse "R", the STOP indicator light will flash and alarm will sound. Disengage park brake. –UN–19MAY92 Indicator light will light when park brake is engaged and transmission control lever is in neutral "N". TX,10,DH2156 –19–05OCT92–1/1 10–8 PN=39 Operator’s Station FASTEN SEAT BELT INDICATOR T7747AH –UN–19MAY92 Indicator light will light for the first 5 seconds after the engine is started to warn the operator to fasten seat belt. TX,10,DH2344 –19–31JUL92–1/1 ETHER INJECTION INDICATOR T7747AI –UN–19MAY92 Indicator light will light when the ether injection button is pressed by the operator. TX,10,DH2345 –19–31JUL92–1/1 Indicator light will light, STOP indicator light will flash and alarm will sound when secondary steering system is activated. Stop machine immediately and take corrective action. The secondary steering system is not intended for continuous use. T7747AJ IMPORTANT: Prevent possible damage to secondary steering system. Stop machine immediately if secondary steering indicator light and alarm come on while operating. THE SECONDARY STEERING SYSTEM IS NOT INTENDED FOR CONTINUOUS USE. –UN–19MAY92 STEERING PRESSURE INDICATOR—IF EQUIPPED TX,10,DH2159 –19–02OCT92–1/1 10–9 PN=40 Operator’s Station LEFT TURN SIGNAL INDICATOR T6201BG –UN–18OCT88 Indicator light will light when left turn signal switch is engaged. TX,DH,38 –19–12APR93–1/1 T7747BO –UN–11JUN92 LEVERS A—Loader Control Lever—One Lever Design T7747BN –UN–11JUN92 TX,10,DH2133 –19–31JUL92–1/3 A—Loader Control Levers—Two Lever Design TX,10,DH2133 –19–31JUL92–2/3 10–10 PN=41 T7747AM –UN–19MAY92 Operator’s Station A—Transmission Control Lever TX,10,DH2133 –19–31JUL92–3/3 T7747AN –UN–19MAY92 FRONT AXLE DISCONNECT LEVER—IF EQUIPPED A—Front Axle Disconnect Lever TX,10,DH2137 –19–31JUL92–1/1 10–11 PN=42 Operator’s Station T7747AO –UN–19MAY92 PEDALS A—Accelerator Pedal B—Right Brake Pedal C—Steering Column Tilt Pedal D—Left Brake/Clutch Cut-off Pedal E—Differential Lock Pedal—If Equipped TX,10,DH2136 –19–07OCT92–1/1 T7773AG –UN–11JUN92 PARK BRAKE SWITCH A—Park Brake Switch TX,10,DH2285 –19–18SEP92–1/1 10–12 PN=43 Operator’s Station T7747BI –UN–19MAY92 NEUTRAL LOCK A—Neutral Lock TX,10,DH2138 –19–02OCT92–1/1 T7747BJ –UN–19MAY92 HORN BUTTON A—Horn Button TX,10,DH2279 –19–18SEP92–1/1 10–13 PN=44 Operator’s Station T7747BK –UN–19MAY92 TURN SIGNAL SWITCH A—Turn Signal Switch TX,10,DH2280 –19–31JUL92–1/1 DOME LIGHT AND SWIVEL LIGHT—IF EQUIPPED Push switch (A) to light dome light. T7773AU –UN–10AUG92 Push switch (B) to light swivel light. A—Dome Light B—Swivel Light TX,10,DH2139 –19–31JUL92–1/1 VANDAL SHIELD—IF EQUIPPED T7853AG –UN–08OCT92 A vandal shield (A) is available for canopy equipped machines. Shield covers the side instrument panel and locks with the ignition key. TX,10,DH2140 –19–02OCT92–1/1 10–14 PN=45 Operator’s Station OPERATING WINDSHIELD WIPERS AND WASHERS—IF EQUIPPED –UN–02DEC94 Turn front windshield wiper knob (A) clockwise to first position for low speed. Turn windshield wiper knob clockwise to second position for high speed. Push windshield wiper knob in to wash window. T8375AO Press rear windshield wiper switch (B) to operate rear wiper. Hold switch down to wash window A—Front Wiper and Washer Switch B—Rear Wiper and Washer Switch TX,10,JC271 –19–29NOV94–1/1 ADJUSTING STEERING WHEEL TILT T7747BH –UN–19MAY92 Depress pedal (A) to adjust steering column to desired tilt. Release pedal. TX,10,DH2143 –19–31JUL92–1/1 OPENING SIDE WINDOW Pull in (B) on latch handle, positioning inner notch over catch, to close window. Position outer notch over catch to hold window slightly open. T6783AC Push out (A) on latch handle to open window. –UN–19OCT88 NOTE: The side window can be used as a secondary exit. TX,10,JC1052 –19–18JAN96–1/1 10–15 PN=46 Operator’s Station OPENING SLIDING SIDE WINDOW—IF EQUIPPED T6603AQ1 –UN–20OCT88 Squeeze latch tabs (A) together and slide window down to desired position. Release tabs. 02T,10,MM27 –19–31JUL92–1/1 CAB DOOR RELEASE T8029AI –UN–15JUN93 Push lever (A) to release cab door. TX,10,DH2960 –19–16JUN93–1/2 T8029AJ –UN–15JUN93 Push button (B) to release opened cab door from inside the cab or on the ground. TX,10,DH2960 –19–16JUN93–2/2 10–16 PN=47 Operator’s Station OPERATING LIGHTS Press light switch (A). Lights (E and I) will come on. –UN–02DEC94 Press light switch (B). Lights (D and G) will come on. T8373BD Press turn signal switch to left or right position. One turn indicator light on monitor, if equipped, will be on. One front amber light (F) and one rear amber light (H) will be flashing. T7773AY –UN–10AUG92 T7773AX –UN–10AUG92 Press hazard light switch (C). Both front amber lights (F) and both rear amber lights (H) will be flashing. A—Operating Light Switch B—Work Light Switch C—Hazard Light Switch D—Front Work Lights—If Equipped E—Headlights F—Turn Signals/Hazard Lights G—Rear Work Lights—If Equipped H—Turn Signals/Hazard Lights I—Tail Lights/Brake Lights TX,10,DH2144 –19–29NOV94–1/1 10–17 PN=48 Operator’s Station HEATING AND AIR CONDITIONING CONTROLS NOTE: Open valve (E) before operating heater. –UN–02DEC94 Turn temperature control knob (A) clockwise to increase temperature. T8373AY Turn defroster blower knob (B) clockwise to increase blower speed. (Knob also turns on heater blower.) Blower has three speeds. IMPORTANT: Before you start air conditioner first time in the season, check filters and condenser. Clean them if necessary. Check refrigerant level. (See Maintenance chapter.) T100706 –UN–22MAR96 Press air conditioning switch (D) and turn blower knob (C) clockwise to increase blower speed in rear vents to operate air conditioning. Blower has three speeds. 544G Shown A—Temperature Control Knob B—Defroster Blower Knob C—Blower Knob D—Air Conditioning Switch E—Heater Valve TX,10,JC1103 –19–18MAR96–1/1 10–18 PN=49 Operator’s Station ADJUSTING SUSPENSION SEAT Ö CAUTION: You can lose control of machine and be injured if seat is loose. Be sure seat is properly locked in position before operating the machine. • Suspension seat is equipped with a weight adjustment feature of 50—130 kg (110—285 lb). Turn knob (F) to adjust seat to weight of the operator. Weight is displayed in window (E). Turn knob clockwise for a heavier operator and counterclockwise for a lighter operator. • Turn knob (A) to make lumbar adjustment. Turn knob counterclockwise to move backrest cushion forward against operator’s back. Turn knob clockwise to move lower cushion forward against operator’s back. –UN–31AUG92 • Turn knob (B) clockwise to raise tilt of armrest. Turn knob counterclockwise to lower tilt of armrest. T7829AP • Lift lever (C) to tilt backrest cushion forward or rearward. Keep weight off seat when making this adjustment. Release lever to lock in place. • Lift lever (D) to move seat forward or rearward. Release lever and slide seat to lock in place. Ö CAUTION: Seat can move rapidly and may cause an injury. DO NOT put your full weight on seat while adjusting height. A—Lumbar Depth Adjustment Knob B—Armrest Tilt Adjustment Knob C—Backrest Tilt Adjustment Knob D—Fore-Aft Adjustment Lever E—Window F—Weight Adjustment Knob TX,10,JC246 –19–29NOV94–1/2 T6782AF –UN–19OCT88 To raise seat, stand over seat, grasp at bottom edge of seat cushion, and slowly lift; each click is a position. To lower seat, lift as high as possible and release. Seat will return to lowest position. TX,10,JC246 –19–29NOV94–2/2 10–19 PN=50 Operator’s Station T8415AA –UN–09FEB95 SEAT BELT Seat belt and mounting hardware must be inspected for wear or damage before operating the machine. Replace the belt or mounting hardware if worn or damaged. Replace the complete seat belt assembly every three years regardless of appearance. A date label, to determine the age of the belt, is attached to each belt. MODTX10DH3548 –19–07FEB95–1/1 STORAGE COMPARTMENT T8029AK –UN–15JUN93 Store operator’s manual and tools in storage compartment (A) (located under seat). Door can be locked with the ignition key. TX,10,DH2961 –19–18JUN93–1/1 10–20 PN=51 Break-in ENGINE BREAK-IN OIL New engines are filled at the factory with John Deere ENGINE BREAK-IN OIL. During the break-in period, add John Deere ENGINE BREAK-IN OIL as needed to maintain the specified oil level. Change the oil and filter after the first 100 hours of operation of a new or rebuilt engine. After engine overhaul, fill the engine with John Deere ENGINE BREAK-IN OIL. If John Deere ENGINE BREAK-IN OIL is not available, use a diesel engine oil with oil viscosity based on the expected air temperature range, and meeting one of the following, during the first 100 hours of operation: • API Service Classification CE • CCMC Specification D4 After the break-in period, use John DeerePLUS-50 oil or other diesel engine oil as recommended in this manual. IMPORTANT: Do not use John Deere PLUS-50 oil or engine oils meeting API CG4, API CF4, or CCMC D5 performance levels during the first 100 hours of operation of a new or rebuilt engine. These oils will not allow the engine to break-in properly. TX,15,JC1131 –19–21MAY96–1/1 EVERY 10 HOURS OR DAILY 1. Perform 10 hour or daily service. (See Maintenance— Every 10 Hours or Daily chapter.) 2. Watch for fluid leaks. 3. Lubricate working tool pivots every 10 hours for first 100 hours and when working in mud and water. TX,15,DH1800 –19–06JUN91–1/1 15–1 PN=52 Break-in AFTER FIRST 10 AND FIRST 50 HOURS Tighten wheel retainer cap screws to 542 N•m (400 lb-ft). TX,15,DH1828 –19–16JUN93–1/1 AFTER THE FIRST 100 HOURS 1. Check hardware torque. (See Hardware Torque Specifications in Maintenance chapter.) 2. Perform 100 hours service. (See Maintenance—Every 100 Hours chapter.) 3. Change engine oil and filter. (See Maintenance— Every 250 Hours chapter.) 4. Change hydraulic reservoir return filter. (See Maintenance—Every 500 Hours chapter.) 5. Change transmission oil and filter. (See Maintenance—Every 1000 Hours chapter.) 6. Change differential oil. (See Maintenance—Every 3000 Hours chapter.) 7. Change differential lock return filter(s)—if equipped. (See Maintenance—Every 3000 Hours chapter.) TX,15,DH2147 –19–16JUN93–1/1 15–2 PN=53 Pre-Start Inspection INSPECT MACHINE DAILY BEFORE STARTING Do periodic service checks in the Maintenance—Every 10 Hours or Daily chapter. A-Check wheels (front and rear) for loose or missing hardware. B-Clean operator’s station. C-Check air inlet cover. D-Clean radiator. E-Check fuel level. F-Check tires (front and rear). ELECTRICAL SYSTEM: Check for worn or frayed wires and loose or corroded connections. BOOM, BUCKET, SHEET METAL: Check for bent, broken, loose, or missing parts. HARDWARE: Check for loose or missing parts. LUBRICATION: Check lubrication points shown on Periodic Maintenance Chart. PROTECTIVE DEVICES: Check guards, shields, ROPS, covers, seat belt. T8374AB HYDRAULIC SYSTEM: Check for leaks, missing or loose clamps, kinked hoses, and lines or hoses that rub against each other or other parts. –UN–02DEC94 PARK BRAKE: Check for correct operation. SAFETY: Walk around machine to clear all persons from machine area. TX,20,JC273 –19–29NOV94–1/1 20–1 PN=54 Operating the Engine CHECK INSTRUMENTS BEFORE STARTING Turn key switch clockwise to ON position. All indicator lights must light. If any indicator light fails to light, the bulb may be burned out. If bulb is not burned out, but indicator light still fails to light, see your authorized dealer. TX,25,DH2148 –19–22JUN93–1/1 BRAKE PRESSURE INDICATOR T7739AJ –UN–30JUL92 The brake pressure indicator light (A), STOP indicator light (B), and audible alarm may come on during initial start-up, but must be off during normal operation. DO NOT operate machine if the lights remain on. See your authorized dealer. TX,25,DH2149 –19–22JUN93–1/1 STARTING THE ENGINE DO NOT start engine by shorting across starter terminals. Machine will start in gear if normal circuitry is bypassed. NEVER start engine while standing on ground. Start engine only from operator’s seat, with transmission control lever in neutral "N". Engage park brake. –UN–11JAN89 CAUTION: Avoid possible injury or death from a runaway machine. TS177 Ö Use of seat belt with roll-over protective structure (ROPS) is recommended under all operating conditions. 1. Fasten seat belt. 2. Sound the horn. TX,25,DH2284 –19–31JUL92–1/3 25–1 PN=55 Operating the Engine T7747BR –UN–19MAY92 3. Move transmission control lever (A) to neutral "N". Engage neutral lock (B). TX,25,DH2284 –19–31JUL92–2/3 25–2 PN=56 Operating the Engine 4. Hold accelerator pedal (C) down 1/3 of the way to the floor. T7747BU IMPORTANT: Never operate starter motor for more than 20 seconds at a time. If engine fails to start after two or three tries, return key switch to STOP position. Wait for about 2 minutes, then try again. –UN–19MAY92 5. Turn key switch to ON position. Push horn button to sound horn. After a false start, DO NOT turn key switch until engine stops or starter may be damaged. Engine will not start by towing or pushing. Permanent damage to transmission will result. 6. Turn key switch to START position. DO NOT crank engine more than 20 seconds. Wait 2 minutes before trying again. Release key when engine starts. IMPORTANT: If STOP indicator light does not go out within 10 seconds after starting engine, STOP THE ENGINE. Find and correct the cause. 7. Operate machine at less than normal loads and at slow idle speed until engine warms up. IMPORTANT: If engine stops when operating under load, remove load. Restart engine immediately. Run 30 seconds at 1/2 speed before adding load. TX,25,DH2284 –19–31JUL92–3/3 25–3 PN=57 Operating the Engine STARTING FLUID—IF EQUIPPED (COLD WEATHER STARTING AID) CAUTION: Prevent possible injury from exploding container. Starting fluid is highly flammable. Keep container away from heat, sparks, and open flame. Contents are pressurized. DO NOT puncture or incinerate container. Remove container from machine if engine does not need starting fluid. TS281 Ö –UN–23AUG88 USE STARTING FLUID IMPORTANT: Prevent damage to engine. Use starting aid when temperatures are below 4°C (40°F) and only when engine is COLD. 1. Turn key switch clockwise to START position. TX,25,JC1155 –19–03JUN96–1/2 25–4 PN=58 Operating the Engine REPLACING STARTING AID CAN T7747BT 2. After one or two revolutions of engine crankshaft, press starting aid button (A) at short intervals. Crank engine for 20 seconds maximum, then allow 2 minutes between cranking periods. –UN–19MAY92 IMPORTANT: Excess starting fluid could damage engine; press starting aid button only when engine is cold and cranking. Starting aid fluid is being injected into engine as long as you press button. 1. Turn container (B) counterclockwise to remove the container and starting aid can. 2. Remove safety cap and spray button from new can. 4. Turn container clockwise in starting aid base (C) to install starting aid can. OPERATING MACHINE WITHOUT STARTING AID CAN INSTALLED T7527EF –UN–01AUG91 3. Place new can in container. IMPORTANT: Protect starting aid components from possible damage. Install the starting aid can container upside down. Remove container from base, turn upside down, and reinstall. TX,25,JC1155 –19–03JUN96–2/2 USING COOLANT HEATER—IF EQUIPPED Ö CAUTION: Prevent possible injury from fire from an overheated electrical cord. Use a heavy-duty, grounded cord to connect heater to electrical power. Connect the coolant heater to 115-volt electrical power 10 hours before you start the engine. T82,25,C53 –19–03DEC91–1/1 25–5 PN=59 Operating the Engine USING BOOSTER BATTERIES—12 VOLT SYSTEM Before boost starting, machine must be properly shut down and secured to prevent unexpected machine movement when engine starts. Ö CAUTION: An explosive gas is produced while batteries are in use or being charged. Keep flames or sparks away from the battery area. Make sure the batteries are charged in a well ventilated area. IMPORTANT: The machine electrical system is a 12volt negative (-) ground. Use only 12volt booster batteries. –UN–24OCT91 NOTE: Machine can be equipped with one or two 12-volt batteries. 1. Turn battery disconnect switch OFF, if equipped. T6508AE1 2. Connect booster batteries as shown. Make ground connection to frame last. 3. Turn battery disconnect switch ON, if equipped. T6713AI1 –UN–24OCT91 A—Machine Battery (12-volt) B—Booster Battery (12-volt) TX,25,DH2166 –19–12SEP92–1/1 25–6 PN=60 Operating the Engine CHECK INSTRUMENTS AFTER STARTING Ö CAUTION: Prevent possible injury, or machine damage. If STOP indicator light does not go out within 10 seconds after starting engine, STOP THE ENGINE. Find and correct the cause. Cold oil may cause hydraulic oil filter restriction indicator light to come on temporarily. Turn signal and park brake lights will come on if the function is engaged. Engine coolant temperature gauge will flash until temperature reaches 38°C (100°F). Fuel gauge first arrow will flash if fuel is low. TX,25,DH2550 –19–12MAY93–1/1 WARM-UP Operate machine at less-than-normal loads and speeds for first few minutes until temperatures and pressures reach normal operating range. TX,25,JC247 –19–29NOV94–1/1 25–7 PN=61 Operating the Engine COLD WEATHER WARM-UP IMPORTANT: If hydraulic oil is cold, hydraulic functions move slowly. Do not attempt normal loader operation until hydraulic functions move at close-to-normal cycle times. 1. Run engine at 1/2 speed for 5 minutes. 2. Cycle boom and bucket functions until functions move at normal speed. TX,DH,40 –19–17JUN91–1/1 STOPPING THE ENGINE IMPORTANT: Prevent possible engine damage. If engine stops when operating under load, remove load. Restart engine immediately. Run 30 seconds at 1/2 speed before adding load. 1. Park machine on level surface. 2. Lower bucket to ground. TX,25,DH2168 –19–16JUN93–1/2 25–8 PN=62 Operating the Engine CAUTION: Prevent possible injury from unexpected machine movement. Never rely on transmission control lever alone to keep machine from moving. Machine can unexpectedly roll or move under power, resulting in death or serious injury. Always engage park brake to hold machine. 4. Engage park brake. T7747BR Ö –UN–19MAY92 3. Move transmission control lever (A) to neutral "N". Engage neutral lock (B). IMPORTANT: Turbocharger may be damaged if engine is not properly shut down. 5. Run engine at 1/2 speed for 2 minutes before stopping, to avoid damage to turbocharger. Release accelerator pedal to slow idle. 6. Turn key switch to STOP. 7. Turn battery disconnect switch OFF, if equipped. TX,25,DH2168 –19–16JUN93–2/2 25–9 PN=63 Driving the Machine DRIVING ON PUBLIC ROADS Before driving on public roads, check state and local laws that may apply to tractors, self-propelled machines, and towed equipment. Additional lights, mirrors, SMV emblems, or reflectors may be required. TX,30,DH2123 –19–31JUL92–1/2 T6458AN1 –UN–25OCT88 For best visibility and stability, raise bucket approximately 406 mm (16 in.) (A) and tilt it back completely. TX,30,DH2123 –19–31JUL92–2/2 30–1 PN=64 Driving the Machine GENERAL DRIVING PRECAUTIONS Ö CAUTION: Riders on machine are subject to injury. Never allow riders on the machine. In general observe all safe driving rules such as: • Slowing down for curves • Avoiding rapid steering or braking • Slowly stopping machine with flat tire • Watching out for bystanders • Watching out for other operators • Driving up a slope in forward and backing down in reverse • Looking behind before backing up When carrying loads up or down a steep hill, use extreme caution. Use a safe speed. Keep bucket in low position. Use right brake for stopping. 02T,30,C47 –19–31JUL92–1/1 FRONT AXLE DISCONNECT—IF EQUIPPED IMPORTANT: Prevent possible axle or transmission damage. DO NOT connect or disconnect front axle with machine in motion. Start the engine. Turn steering wheel slowly back and forth to connect or disconnect. Disconnect the front axle before driving on hard surface roads. TX,30,DH2169 –19–31JUL92–1/2 30–2 PN=65 Driving the Machine Pull up lever (A) to disconnect front axle. T7747AN –UN–19MAY92 Push down lever to connect front axle. TX,30,DH2169 –19–31JUL92–2/2 Ö CAUTION: Prevent possible injury from unexpected machine movement. Always move transmission control lever to neutral "N", and engage neutral lock before starting or dismounting. T7747BI Move neutral lock (A) to the locked position to engage neutral lock. Move lock to the unlocked position to disengage neutral lock. –UN–19MAY92 NEUTRAL LOCK TX,30,DH2170 –19–02OCT92–1/1 SHIFTING THE TRANSMISSION Unlock neutral lock. TX,30,JC248 –19–29NOV94–1/2 30–3 PN=66 Driving the Machine When transmission control lever is positioned in 4th gear, transmission is in "automatic" mode. In "automatic" mode, transmission starts out in 2nd gear, then shifts to 3rd and 4th gear as speed increases. It will also automatically downshift from 4th to 3rd to 2nd gear as speed decreases. T7747AM Change speed of machine by moving transmission control lever to desired gear. Machine has four forward gears and three reverse gears. Shifting to 4th gear reverse will give same travel speed as 3rd gear reverse. Select a gear suitable to operating and road conditions. –UN–19MAY92 Change direction of machine by moving transmission control lever (A) to forward "F" or reverse "R" position. IMPORTANT: Prevent possible transmission damage. DO NOT change forward and reverse directions at high speeds. If speed is less than 7 mph, a direction change can be made in any gear. If speed is greater than 7 mph, transmission will automatically shift down to 2nd gear prior to changing directions. Forward and reverse directions can be changed without stopping the machine in 1st and 2nd gears. TX,30,JC248 –19–29NOV94–2/2 30–4 PN=67 Driving the Machine TRAVEL SPEEDS NOTE: Km/h and mph will only display in full increments on digital display. 544G, LL, TC: Forward Speeds km/h mph Reverse Speeds km/h mph 1 0—7.4 0—4.6 1 0—7.4 0—4.6 2 0—12.3 0—7.7 2 0—12.3 0—7.7 3 0—27.2 0—16.9 3 0—27.2 0—16.9 4 0—38.4 0—23.8 624G: Forward Speeds km/h mph Reverse Speeds km/h mph 1 0—7.3 0—4.5 1 0—7.3 0—4.5 2 0—11.6 0—7.2 2 0—11.6 0—7.2 3 0—24.5 0—15.2 3 0—24.5 0—15.2 4 0—37.3 0—23.0 644G: Forward Speeds km/h mph Reverse Speeds km/h mph 1 0—7.0 0—4.4 1 0—7.0 0—4.4 2 0—11.2 0—7.0 2 0—11.2 0—7.0 3 0—22.0 0—13.7 3 0—22.0 0—13.7 4 0—34.6 0—21.5 TX,30,DH2172 –19–02OCT92–1/1 30–5 PN=68 Driving the Machine CAUTION: Prevent possible injury from unexpected boom movement. The bucket may "jump up" when ride control switch is turned ON. Turn ride control switch ON to improve machine ride and reduce tire flexing when traveling over rough terrain at a high speed with loaded bucket. If engine is stopped with ride control switch in ON position, ride control is automatically disengaged. Start the engine, press switch to OFF and then back to ON to engage ride control. Switch will be backlit when engaged (ON). T7829AV Ö –UN–08SEP92 RIDE CONTROL SWITCH—IF EQUIPPED To discharge the energy in the ride control accumulator, do the following: 1. Make sure area around bucket is clear. 2. Lower bucket to ground. 3. Stop engine. 4. Turn key switch to ON. 5. Move hydraulic control lever to float detent position. 6. Cycle ride control switch from OFF to ON. 7. Push boom down switch to release accumulator pressure. TX,30,DH2505 –19–16JUN93–1/1 STOPPING THE MACHINE Depress left brake pedal (A) or right brake pedal (B) to stop the machine. T7747BS –UN–19MAY92 Left brake pedal also serves as a clutch cut-off pedal when clutch cut-off switch is in "clutch disengaged" position. TX,30,DH2173 –19–31JUL92–1/1 30–6 PN=69 Driving the Machine Ö CAUTION: Prevent possible injury or death from machine runaway. Before disengaging park brake, be sure engine is running and service brakes are operational. T7773AG NOTE: Transmission clutches are disengaged when park brake is applied. –UN–11JUN92 PARK BRAKE SWITCH Press park brake switch (A) to ON position to engage park brake. Press park brake switch to OFF position to disengage park brake. NOTE: If park brake is engaged when engine is running and transmission control lever is in neutral "N", park brake indicator light will light. If park brake is engaged when engine is running and transmission control lever is moved to forward "F", or reverse "R", park brake indicator light will light, STOP indicator light will light, and alarm will sound. If engine is stopped with park brake switch in OFF position, park brake is automatically applied. Press park brake switch to ON and then back to OFF to release park brake after starting engine. TX,30,DH2174 –19–06OCT92–1/1 PARKING THE MACHINE 1. Park machine on a level surface. 2. Lower bucket to ground. TX,30,DH2176 –19–16JUN93–1/2 30–7 PN=70 Driving the Machine CAUTION: Prevent possible injury from unexpected machine movement. Never rely on transmission control lever alone to keep machine from moving. Machine can unexpectedly roll or move under power, resulting in death or serious injury. Always engage park brake to hold machine. 4. Engage park brake. T7747BR Ö –UN–19MAY92 3. Move transmission control lever (A) to neutral "N". Engage neutral lock (B). IMPORTANT: Turbocharger may be damaged if engine is not properly shut down. 5. Run engine at 1/2 speed without load for 2 minutes before stopping, to avoid damage to turbocharger. Release accelerator pedal to slow idle. 6. Turn key switch to STOP. 7. Turn battery disconnect switch OFF, if equipped. TX,30,DH2176 –19–16JUN93–2/2 30–8 PN=71 Operating the Machine BOOM AND BUCKET CONTROL LEVER— ONE LEVER DESIGN –UN–11JUN92 Move control lever forward (A) to lower boom, or rearward (D) to raise boom. T7773AC NOTE: Boom down switch (I) must be pushed while moving control lever forward to lower boom with engine stopped. Move control lever left (F) to roll back bucket, or right (C) to dump bucket. 544G LL and 544G TC will also have a fast dump bucket position (H). –UN–02DEC94 Float (lever in full forward detent position [B]): This position allows oil to flow in and out both ends of cylinders so the bucket can follow the contour of the ground. Manually release lever from this position. Return-to-Dig (lever in full left detent position [G]): Bucket will return to set dig position. Boom and bucket functions can be operated simultaneously by moving lever between positions. For example, to raise boom and roll back bucket, move lever between positions (D) and (F). T8373BA Boom Height Kickout (lever in full rear detent position [E]): Lever will remain in this position until boom is at a pre-set height, then will return to neutral automatically. A—Lower Boom B—Float C—Dump Bucket D—Raise Boom E—Boom Height Kickout F—Rollback Bucket G—Return-to-Dig H—Fast Bucket Dump I—Boom Down Switch TX,35,DH2177 –19–29NOV94–1/1 35–1 PN=72 Operating the Machine BOOM AND BUCKET CONTROL LEVER— TWO LEVER DESIGN –UN–11JUN92 Move left control lever forward (A) to dump bucket, or rearward (B) to roll back bucket. 544G LL and 544G TC will also have a fast dump bucket position (H). T7773AE NOTE: Boom down switch (I) must be pushed while moving control lever forward to lower boom with engine stopped. Move right control lever forward (E) to lower boom or rearward (F) to raise boom. –UN–02DEC94 Float (right lever in full forward detent position [D]): This position allows oil to flow in and out both ends of cylinders so the bucket can follow the contour of the ground. Manually release lever from this position. Return-to-Dig (left lever in full rearward detent position [C]): Bucket will return to set dig position. T8373BA Boom Height Kickout (right lever in full rearward detent position [G]): Lever will remain in this position until boom is at a pre-set height, then will return to neutral automatically. A—Dump bucket B—Rollback Bucket C—Return-to-Dig D—Float E—Lower Boom F—Raise Boom G—Boom Height Kickout H—Fast Bucket Dump I—Boom Down Switch TX,35,DH2178 –19–29NOV94–1/1 35–2 PN=73 Operating the Machine QUICK SHIFT SWITCH T7773CE Press down on switch to downshift from 2nd gear to 1st gear when transmission control lever is positioned in 2nd gear. Press again to return to 2nd gear. –UN–21AUG92 Press down on switch (A) to downshift from 3rd gear to 2nd gear when transmission control lever is positioned in 3rd gear. Press again to return to 3rd gear. Quick shift will not function in 4th gear. TX,35,DH2490 –19–08OCT92–1/1 35–3 PN=74 Operating the Machine QUICK COUPLER OPERATION—544G TC Move control lever left (D) to tilt coupler rearward. Move it right (C) to tilt coupler forward. T7773AF NOTE: Boom down switch must be pushed while moving control lever forward to lower boom with engine stopped. –UN–11JUN92 Move control lever forward (A) to lower boom, or rearward (B) to raise boom. 1. Align equipment to be used so hooks fit over coupler and eyelet is centered. Boom and tilt functions can be operated simultaneously by moving lever between positions. For example, to raise boom and tilt coupler rearward move lever between positions (B and D). T8373AV 3. Roll coupler back to align pins with attachment. Release switch to lock pins in place. –UN–02DEC94 2. Push down and hold pin disconnect switch (E) to retract connecting pins when engaging equipment. T6975AF –UN–29MAR89 A—Lower Boom B—Raise Boom C—Tilt Forward D—Tilt Rearward E—Pin Disconnect Switch TX,35,DH2286 –19–29NOV94–1/1 35–4 PN=75 Operating the Machine PIN DISCONNECT SWITCH—544G TC Use the pin disconnect switch (A) when adding or changing equipment. –UN–02DEC94 Hold down switch to retract pins on coupler. T8373AW Release switch to extend and lock pins in place. TX,35,DH2287 –19–29NOV94–1/1 BOOM DOWN SWITCH T8373AX –UN–02DEC94 Push boom down switch (A) while moving control lever forward to lower boom with the engine stopped. TX,35,DH2179 –19–29NOV94–1/1 CAUTION: Prevent possible injury from unexpected machine movement. When stopping on inclines, push clutch cut-off switch to engaged position before releasing left service brake. This will prevent the machine from rolling downhill during transmission reengagement cycle. The clutch cut-off switch (A) must be in clutch disengaged position before left brake pedal (B) can be used to disengage transmission clutches. Move switch up to clutch disengaged position. T8373AZ Ö –UN–02DEC94 CLUTCH CUT-OFF SWITCH—IF EQUIPPED T7747BY NOTE: The park brake will also disengage the transmission clutches. Release park brake before operating. –UN–19MAY92 Use the clutch cut-off switch in situations such as truck loading where machine positioning and maximum hydraulics are needed. TX,35,DH2180 –19–29NOV94–1/1 35–5 PN=76 Operating the Machine Steering pressure indicator light (A) will light, STOP indicator light (B) will flash, and audible alarm will sound when secondary steering system is activated. The light indicates low hydraulic pressure resulting from mechanical malfunction, such as loss of engine power. An electrically driven pump will actuate to provide steering T7773AT IMPORTANT: Prevent possible damage to secondary steering system. Stop machine immediately if steering pressure indicator light and audible alarm come on while operating. THE SECONDARY STEERING SYSTEM IS NOT INTENDED FOR CONTINUOUS USE. –UN–30JUL92 SECONDARY STEERING—IF EQUIPPED The secondary steering system will function only when key switch is on. NOTE: Secondary steering is activated if you try to start the machine unsuccessfully. Turn key switch off to stop secondary steering motor. TX,35,DH2181 –19–02OCT92–1/1 DIFFERENTIAL LOCK PEDAL—IF EQUIPPED Hold pedal (A) down to lock front axle differential. T100664 NOTE: Use differential lock only when conditions require traction. Avoid using differential lock when steering. –UN–12MAR96 Release pedal to unlock differential. TX,35,DH2182 –19–02OCT92–1/1 35–6 PN=77 Operating the Machine ADJUSTING BOOM HEIGHT KICKOUT—IF EQUIPPED 1. Start engine. 2. Move control lever to boom raise detent position and release. TX,35,DH2183 –19–31JUL92–1/2 3. After control lever returns to neutral, make a mark (D) on the magnet and the boom height kickout switch. 4. Position the boom in the desired boom height kickout position. Stop engine. 5. Loosen cap screws (B) and slide bracket to align marks on magnet and boom kickout switch. 6. Loosen cap screws (C) and adjust clearance (A) between magnet and boom height kickout switch to 9 ± 3 mm (0.35 ± 0.12 in.). T6601AI –UN–21OCT88 7. Check boom height kickout for correct adjustment. A—Clearance B—Cap Screws C—Cap Screws D—Mark TX,35,DH2183 –19–31JUL92–2/2 35–7 PN=78 Operating the Machine ADJUSTING RETURN-TO-DIG 1. Start engine. 2. Move control lever to return-to-dig detent position and release. TX,35,DH2184 –19–02OCT92–1/2 NOTE: On 544G LL and 544G TC, the return-to-dig switch and magnet are located below the cylinder. –UN–21OCT88 3. After control lever returns to neutral, make a mark (B) on magnet and return-to-dig switch. T6599AD 4. Position the boom and bucket in the desired return-todig position. Stop engine. 5. Loosen cap screws (D) and slide bar to align marks on magnet and return-to-dig switch. 6. Loosen cap screws (C) and adjust clearance (A) between magnet and return-to-dig switch to 9 ± 3 mm (0.35 ± 0.12 in.). A—Clearance B—Mark C—Cap Screws D—Cap Screws 7. Raise boom. Cycle bucket from full rollback to dump. Check return-to-dig for correct adjustment. TX,35,DH2184 –19–02OCT92–2/2 35–8 PN=79 Operating the Machine GENERAL OPERATING TIPS Carry loaded bucket low to the ground for a better view and to improve machine stability. Keep the bottom of the bucket parallel to the ground when dozing. DO NOT doze with the bucket in dump position. Use bucket teeth when digging in hard material. When bucket digs in, decreasing traction, roll bucket back slightly. In float position, the bucket will follow the contour of the ground. Use float position to back drag. Clean and level the work area while waiting for truck. If possible, keep wind at your back while dumping load, for improved viewing and to keep dust away from engine. TX,DH,49 –19–06JUN91–1/1 EXCAVATING BANKS OR STOCKPILES CAUTION: Prevent possible injury from falling material. Remove overhanging material first from top of bank or stockpile . T7747BE Remove any overhang before starting to dig at the base of a bank or stockpile. This can be done with the bucket. –UN–19MAY92 Ö TX,35,DH2276 –19–02OCT92–1/3 T7747BF –UN–19MAY92 Reduce bucket breakout force required when digging into a bank or stockpile of hard, dense, or tightly-packed material by working from the top of bank or stockpile to the bottom. TX,35,DH2276 –19–02OCT92–2/3 35–9 PN=80 Operating the Machine Work bank or stockpile with machine at a 90° angle to the bank or stockpile. T7208AV 1. Position bucket on the ground in return-to-dig position. –UN–30JAN90 Normally, a bank or stockpile is excavated from the bottom and then up the side. Work the face of the bank or stockpile evenly to prevent outcroppings and overhangs. 2. Move transmission control lever to 1st or 2nd gear depending on ground conditions. In loose material, use 2nd gear for better traction. Use 1st gear for better bucket fill. 3. Move forward into the bank or stockpile. NOTE: Use differential lock as necessary. 4. Raise and curl bucket as bucket fills. TX,35,DH2276 –19–02OCT92–3/3 USING THE LOADER BUCKET 1. Place bucket in the return-to-dig position and lower to ground. –UN–19MAY92 NOTE: Bucket and boom can be positioned while machine is on-the-go. T7747BB 2. Move transmission control lever to 1st or 2nd gear depending on ground condition. 3. Move forward into the material. TX,35,JC1049 –19–17JAN96–1/4 35–10 PN=81 Operating the Machine T7747BC –UN–19MAY92 4. Raise and curl bucket to hold load. TX,35,JC1049 –19–17JAN96–2/4 T7208AR –UN–30JAN90 EXCAVATING ON THE LEVEL: Position bucket at a slightly downward angle on ground (use bucket teeth for this type of digging). TX,35,JC1049 –19–17JAN96–3/4 USING BOOM IN FLOAT POSITION: Place the boom in float position and bucket in return-to-dig position to prevent gouging the surface, as in cleaning concrete and snow removal. Also use float position to avoid mixing surface material with stockpile material. T7747BD DOZING: With bucket parallel to ground, remove as little dirt as possible from the top surface. Let dirt spill from partially dumped bucket to fill in low spots. –UN–19MAY92 IMPORTANT: Prevent possible damage to the bellcrank linkage. DO NOT bulldoze with bucket in dump position. When dozing, keep bucket bottom parallel to the ground. DIGGING IN HARD, DENSE, OR TIGHTLY-PACKED MATERIAL: To break material loose, use a gentle upand-down motion of the bucket. TX,35,JC1049 –19–17JAN96–4/4 35–11 PN=82 Operating the Machine T7747BG Leveling and grading can be done with the boom in the float position by backdragging the loader bucket while traveling in reverse. (Float position allows the bucket to follow contour of the ground.) –UN–19MAY92 BACKDRAGGING TX,35,DH2278 –19–31JUL92–1/1 BACKFILLING 1. Use loader bucket as a dozer. As bucket approaches the trench, material being pushed will fall into the trench. Reverse direction and reposition loader to maintain a 90° angle to the trench line. T6603AO IMPORTANT: DO NOT bulldoze with bucket in the dump position, as damage could result to the bellcrank linkage. When dozing, keep bucket bottom parallel to the ground. –UN–20OCT88 There are two effective methods of backfilling. 2. Push material to the trench as in method 1. Use clutch cut-off to maintain high engine rpm. Dump material into the trench while placing direction selector lever in neutral. When bucket is dumped, release clutch cut-off and reposition loader for a 90° angle to the trench line. If filling, spread material in thin layers. Operate at nearly full rpm and dump material on-the-go. Reverse direction just prior to emptying bucket. Loader will compact fill material as it works. TX,35,JC1064 –19–14FEB96–1/1 35–12 PN=83 Operating the Machine TRUCK LOADING The most efficient technique for truck loading is the "V" method. 2. Run engine near fast idle to penetrate material. 3. Increase engine speed to fast idle and crowd into the pile. T7511CN –UN–27JUN91 1. Level bucket and lower to the ground. 4. As engine rpm starts to decrease, pull loader control lever back and to the left. 5. Feather hydraulics to obtain a smooth combination of bucket rollback and boom lift. 6. After filling the bucket, reverse loader and articulate 35—40 degrees. If truck is positioned close to the stockpile, raise boom to level position while reversing. 7. Travel forward to the truck while raising the boom to clear truck sideboards. Dump load. 8. Reverse direction and lower bucket to several inches above ground level. 02T,35,J8 –19–25JUN91–1/1 35–13 PN=84 Transporting TRANSPORTING PRECAUTIONS If machine is transported, check route for road width and overhead clearance. Check any bridges for weight limits. (See Specifications chapter.) TX,40,FF3416 –19–27MAY93–1/1 LOADING MACHINE ON A TRAILER 3. Fasten seat belt before starting engine. Ö CAUTION: Position the machine so that its centerline is over the centerline of the truck bed. NEVER steer the machine while on the ramp. If changing direction is required on the ramp, unload the machine from the ramp, reposition the machine on the ground, then try loading again. T8301AK 2. Use a ramp or loading dock. Ramps must be strong enough, have a low angle, and correct height. –UN–17AUG94 1. Keep the trailer bed clean. Put chock blocks against trailer wheels. 4. Drive the machine onto the ramp slowly. The centerline of the machine should be over the centerline of the trailer. 5. Lower all equipment onto blocks or trailer bed. TX,40,JC274 –19–29NOV94–1/2 40–1 PN=85 Transporting CAUTION: Prevent possible injury from unexpected machine movement. Never rely on transmission control lever alone to keep machine from moving. Machine can unexpectedly roll or move under power, resulting in death or serious injury. Always engage park brake to hold machine. 7. Engage park brake. T7747BR Ö –UN–19MAY92 6. Move transmission control lever (A) to neutral "N". Engage neutral lock (B). 8. Connect frame locking bar. 9. Turn key switch to STOP. 10. Turn battery disconnect switch OFF, if equipped. 11. Cover exhaust opening to prevent entry of debris and water. 12. Fasten each corner of the machine to the trailer with a chain or cable with appropriate load binder. 13. Place blocks in front of and behind tires. TX,40,JC274 –19–29NOV94–2/2 40–2 PN=86 Transporting CAUTION: Use flashing warning lights and turn signals when towing this equipment on public roads unless prohibited by state or local regulations. An implement safety lighting kit is available from your John Deere dealer. Keep safety items in good condition. Replace missing or damaged items. IMPORTANT: Engine cannot be started by towing because machine is equipped with a torque converter. T6629AM Ö –UN–20OCT88 TOWING PROCEDURE—ENGINE OPERATIONAL For towing distances longer than 460 m (500 yd), drive shafts must be disconnected or transmission will be damaged due to a lack of lubrication. For towing short distances at slow speed, park brake is manually released. A rigid tow bar must be used so towing machine can stop machine being towed. Towing machine must be of sufficient size to adequately handle or stop load being towed. Never tow machine faster than 10 km/h (6.2 mph). NOTE: For towing distances longer than 460 m (500 yd), use Steps 1—9. For towing short distances at slow speed, use Steps 10—19. Steps for towing machine more than 460 m (500 yd): 1. Connect a rigid tow bar to drawbar pin (A) of machine being towed. 2. Start engine. 3. Install frame locking bar. NOTE: Frame locking bar is installed to prevent weaving as machine is towed. TX,40,DH2288 –19–12MAY93–1/2 40–3 PN=87 Transporting 4. Move transmission control lever to neutral. Engage neutral lock. 5. Raise boom, and support so bucket is off ground. 6. Stop engine. TX,40,DH2288 –19–12MAY93–2/2 TOWING PROCEDURE—ENGINE NONOPERATIONAL Ö CAUTION: Prevent possible injury from unexpected machine movement. Always install frame locking bar, and block wheels to hold machine when working on park brake. 1. Install frame locking bar. Put blocks at front and rear of tires. TX,40,JC1101 –19–18MAR96–1/4 40–4 PN=88 Transporting 2. Manually release park brake: Remove (3) screws and remove sheet metal cover from brake. Loosen lock nut (A). 3. Back out adjustment screw (B) to release park brake. 4. Remove blocks. Slowly tow machine. Ö CAUTION: Prevent possible injury from unexpected machine movement. Always apply park brake to hold machine if drive shafts are connected. 5. When towing is completed, adjust park brake to hold machine. (See Adjust Park Brake in Maintenance— Every 1000 Hours chapter.) 6. Install sheet metal cover. Tighten cover screws. CAUTION: Machine may roll when drive shafts are disconnected. Use blocks at front and rear of tires to prevent machine from rolling. –UN–22MAR96 Ö T100701 7. Put blocks at front and rear of tires. 644G Show TX,40,JC1101 –19–18MAR96–2/4 8. Remove front (B) and rear (C) drive shafts so transmission output shaft does not turn. 9. Remove blocks. Slowly tow machine. T6518BM6 –UN–20OCT88 Steps for towing machine less than 460 m (500 yd): TX,40,JC1101 –19–18MAR96–3/4 40–5 PN=89 Transporting 10. Connect a rigid tow bar to drawbar pin (A) of machine being towed. NOTE: Frame locking bar is installed to prevent weaving as machine is towed. 13. Move transmission control lever to neutral. Engage neutral lock. T6629AM 12. Install frame locking bar. –UN–20OCT88 11. Start engine. 14. Raise boom, and support so bucket is off ground. 15. Stop engine. 16. Put blocks at front and rear of tires. Ö CAUTION: Machine may roll when park brake is released. Use blocks at front and rear of tires to prevent machine from rolling. 17. Release park brake. 18. Remove blocks. Slowly tow machine. 19. Engage park brake when towing is completed. TX,40,JC1101 –19–18MAR96–4/4 40–6 PN=90 Transporting LIFTING THE MACHINE Ö CAUTION: Prevent possible injury from unexpected machine movement. Clear all bystanders from lifting area. Select correct lifting cable strength for weight of machine. Test lift by raising machine 0.3 m (1 ft) off the ground. 10 262 kg (22,624 lb) Approximate machine weight (LL) 10 377 kg (22,881 lb) Approximate machine weight (TC) 10 466 kg (23,078 lb) Approximate machine weight (624G) 12 398 kg (27,338 lb) Approximate machine weight (644G) 15 666 kg (34,538 lb) 1. Attach cables (A) to machine so cables do not rub machine. 2. Attach a tether cable to machine to control machine as it is lifted. T7477AV Approximate machine weight (544G) –UN–19MAR91 SPECIFICATIONS 3. Test lift by raising machine 0.3 m (1 ft) off the ground. 4. Lift machine and swing to unloading area. TX,40,DH2187 –19–12SEP92–1/1 40–7 PN=91 Fuels and Lubricants DIESEL FUEL Consult your local fuel distributor for properties of the diesel fuel available in your area. gram load level as measured by the BOCLE scuffing test. In general, diesel fuels are blended to satisfy the low temperature requirements of the geographical area in which they are marketed. • Sulfur content: 1. Sulfur content should not exceed 0.5% Sulfur content less than 0.05% is preferred. Diesel fuels specified to EN 590 or ASTM D975 are recommended. 2. If diesel fuel with sulfur content greater than 0.5% sulfur content is used, reduce the service interval for engine oil and filter by 50% In all cases, the fuel shall meet the following properties: • Cetane Number 40 minimum. Cetane number greater than 50 is preferred, especially for temperatures below -20°C (-4°F) or elevations above 1500 m (5000 ft). • Cold Filter Plugging Point (CFPP) below the expected low temperature OR Cloud Point at least 5°C (9°F) below the expected low temperature 3. DO NOT use diesel fuel with sulfur content greater than 1.0% Bio-diesel fuels with properties and meeting DIN 51606 or equivalent specifications may be used. DO NOT mix used engine oil or any other type of lubricant with diesel fuel. • Fuel Lubricity should pass a minimum of 3100 TX,45,JC1132 –19–22MAY96–1/1 45–1 PN=92 Fuels and Lubricants LOW SULFUR DIESEL FUEL CONDITIONER When possible, use existing fuel formulations for engines used off-highway. This fuel will not require any additives to provide good performance and engine reliability. However, many local fuel distributors will not carry both low and regular sulfur diesel fuels. If the local fuel distributor will supply only low sulfur fuel, order and use John Deere TY22030 Diesel Fuel Conditioner. It provides lubricating properties along with other useful benefits, such as cetane improver, antioxidant, fuel stabilizer, corrosion inhibitor and others. TY22030 is specifically for use with low sulfur fuels. Nearly all other diesel fuel conditioners only improve cold weather flow and stabilize long-term fuel storage. They do not contain the lubrication additives needed by rotary fuel injection pumps. TX,45,DH3124 –19–20OCT93–1/1 HANDLING AND STORING DIESEL FUEL Ö CAUTION: Handle fuel carefully. Do not fill the fuel tank when engine is running. Ö DO NOT smoke while you fill the fuel tank or service the fuel system. Fill the fuel tank at the end of each day’s operation to prevent condensation and freezing during cold weather. CAUTION: The fuel tank is vented through the filler cap. If a new filler cap is required, always replace it with an original vented cap. When fuel is stored for an extended period of time or if there is a slow turnover of fuel, add a fuel conditioner to stabilize the fuel and prevent water condensation. Contact your fuel supplier for recommendations. TX,45,JC1156 –19–03JUN96–1/1 45–2 PN=93 Fuels and Lubricants DO NOT USE GALVANIZED CONTAINERS IMPORTANT: Diesel fuel stored in galvanized containers reacts with zinc coating on the container to form zinc flakes. If fuel contains water, a zinc gel will also form. The gel and flakes will quickly plug fuel filters and damage fuel injectors and fuel pumps. DO NOT USE a galvanized container to store diesel fuel. Store fuel in: • plastic containers. • aluminum containers. • specially coated steel containers made for diesel fuel. DO NOT USE brass-coated containers: brass is an alloy of copper and zinc. MX,FLBT,C –19–04JUN90–1/1 FUEL TANK Ö CAUTION: Handle fuel carefully. If the engine is hot or running, DO NOT fill the fuel tank. DO NOT smoke while you fill fuel tank or work on fuel system. FUEL TANK CAPACITY 544G, LL, TC, 218 L (58 gal) 624G 249 L (66 gal) 644G 284 L (75 gal) To avoid condensation, fill the fuel tank at the end of each day’s operation. Shut off engine before filling. TX,45,DH2188 –19–17AUG92–1/1 45–3 PN=94 Fuels and Lubricants T101239 –19–22MAY96 DIESEL ENGINE OIL • John Deere UNI-GARD Use oil viscosity based on the expected air temperature range during the period between oil changes. • API Service Classification CG-4 The following oil is preferred: • API Service Classification CF-4 • John Deere PLUS-50 • ACEA Specification E3 If John Deere PLUS-50 engine oil and a John Deere oil filter are used, the service interval for oil and filter changes may be extended by 50 hours. • ACEA specification E2 The following oil is also recommended: • CCMC Specification D4 • John Deere TORQ-GARD SUPREME Other oils may be used if they meet one or more of the following: • CCMC Specification D5 Multi-viscosity diesel engine oils are preferred. If diesel fuel with sulfur content greater than 0.5% is used, reduce the service interval by 50%. TX,45,JC1133 –19–22MAY96–1/1 45–4 PN=95 Fuels and Lubricants T100663 –19–10MAY96 TRANSMISSION OIL, HYDRAULIC SYSTEM OIL AND DIFFERENTIAL OIL Use oil viscosity based on the expected air temperature range during the period between oil changes. • John Deere Standard JDM J20D The following oils are preferred: Use the following oil when a biodegradable fluid is required: • JOHN DEERE HY-GARD • John Deere Standard JDM J27A • John Deere Low Viscosity HY-GARD • John DeereBIO-HY-GARD 1 1 BIO-HY-GARD meets or exceeds the minimum biodegradability of 80% within 21 days according to CEC-L-33–T-82 test method.BIO-HY-GARD should not be mixed with mineral oils because this reduces the biodegradability and makes proper oil recycling impossible. The following oil is also recommended: • John Deere UNI-GARD Other oils may be used if they meet one of the following: • John Deere Standard JDM J20C TX,45,JC1050 –19–18JAN96–1/1 45–5 PN=96 Fuels and Lubricants T8358AI –19–27MAR95 GREASE Use grease based on NLGI consistency numbers and the expected air temperature range during the service interval. • John Deere HIGH TEMPERATURE EP GREASE The following greases are preferred: Other greases may be used if they meet one of the following: • John Deere GREASE-GARD • John Deere MOLY HIGH TEMPERATURE EP GREASE • NLGI Performance Classification GC-LB TX,45,JC1134 –19–22MAY96–1/1 ALTERNATIVE AND SYNTHETIC LUBRICANTS Conditions in certain geographical areas may require lubricant recommendations different from those printed in this manual. Some John Deere lubricants may not be available in your location. Consult your John Deere dealer to obtain information and recommendations. The temperature limits and service intervals shown in this manual apply to both conventional and synthetic oils. Re-refined base stock products may be used if the finished lubricant meets the performance requirements. Synthetic lubricants may be used if they meet the performance requirements listed in this manual. DX,ALTER –19–01FEB94–1/1 45–6 PN=97 Fuels and Lubricants LUBRICANT STORAGE Your equipment can operate at top efficiency only if clean lubricants are used. Make certain that all containers are properly marked to identify their contents. Use clean containers to handle all lubricants. Properly dispose of all old containers and any residual lubricant they may contain. Store lubricants and containers in an area protected from dust, moisture, and other contamination. Store containers on their side to avoid water and dirt accumulation. TX,45,JC1135 –19–22MAY96–1/1 MIXING OF LUBRICANTS In general, avoid mixing different brands or types of oil. Oil manufacturers blend additives in their oils to meet certain specifications and performance requirements. Mixing different oils can interfere with the proper functioning of these additives and degrade lubricant performance. Consult your John Deere dealer to obtain specific information and recommentations. TX,45,JC1136 –19–22MAY96–1/1 45–7 PN=98 Periodic Maintenance SERVICE YOUR MACHINE AT SPECIFIED INTERVALS T100700 Service items at multiples of the original requirement. For example, at 500 hours also service those items (if applicable) listed under 250 hours, 100 hours, 50 hours and 10 hours or daily. –UN–22MAR96 Lubricate, make service checks and adjustments at intervals shown on the periodic maintenance chart (A) and on the following pages. TX,50,JC1104 –19–18MAR96–1/1 CHECK THE HOUR METER REGULARLY –UN–19MAY92 Press the SELECT switch to display the hour meter on the digital display, to determine when your machine needs periodic maintenance. T7747AT Intervals on the periodic maintenance chart are for operating in normal conditions. If you operate your machine in severe conditions, you should service it at SHORTER INTERVALS. TX,50,DH2193 –19–02OCT92–1/1 USE CORRECT FUELS AND LUBRICANTS IMPORTANT: To prevent machine damage when servicing your machine, use only recommended fuels and lubricants. (See Fuels and Lubricants chapter.) TX,50,DH1964 –19–03JAN92–1/1 50–1 PN=99 Periodic Maintenance PREPARE MACHINE FOR MAINTENANCE Before performing maintenance procedures given in the following chapters, and before leaving the operator’s seat, park the machine as described below unless another position is specified in the procedure. 1. Park machine on a level surface. 2. Lower bucket to ground. TX,50,DH2194 –19–29NOV94–1/2 Ö CAUTION: Prevent possible injury from unexpected machine movement. Never rely on transmission control lever alone to keep machine from moving. Machine can unexpectedly roll or move under power, resulting in death or serious injury. Always engage park brake to hold machine. T7747BR 3. Move transmission control lever (A) to neutral "N". Engage neutral lock (B). –UN–19MAY92 NOTE: Boom down switch (C) must be pushed while moving control lever forward to lower boom with engine stopped. 5. Turn key switch to STOP. If maintenance must be performed with engine running, do not leave machine unattended. T8375AM 6. Turn battery disconnect switch OFF, if equipped. –UN–02DEC94 4. Engage park brake. TX,50,DH2194 –19–29NOV94–2/2 50–2 PN=100 Periodic Maintenance LOCKING MACHINE FRAME Ö CAUTION: Prevent possible injury from unexpected machine movement. Connect frame locking bar to both frames before you work in frame pivot area. 1. Align machine frames. TX,50,DH2199 –19–17AUG92–1/2 2. Remove pin (A), and move locking bar forward. T7773CL –UN–21AUG92 3. Install pin through holes in machine frame (B) and end of locking bar. T7773CM –UN–21AUG92 624G Shown TX,50,DH2199 –19–17AUG92–2/2 50–3 PN=101 Periodic Maintenance BOOM LOCK CAUTION: Always install boom lock before working on or around this machine with the boom raised. –UN–17SEP92 Ö Empty bucket and place in dump position before installing boom lock. T7839BB 1. Raise boom. Empty bucket and place in dump position before installing boom lock. 2. Remove boom lock from side of machine by turning lock lever counterclockwise. –UN–22MAR96 3. Install boom lock on boom cylinder with lock lever facing to the outside of machine. Lower boom onto boom lock. 4. Tighten boom lock lever. T100699 5. Store boom lock on side of machine when not in use. 644G Shown TX,50,JC255 –19–29NOV94–1/1 OPENING ENGINE SIDE SHIELDS AND SERVICE DOORS T100697 –UN–22MAR96 3. To open lower side shield, remove cotter pin and washers from engine service door. Open door to its full extent. Pull lower side shield outward. T7773CJ 2. Position rod in notch (B) to hold door open. –UN–21AUG92 1. Pull out on latch (A) to open engine service door. TX,50,JC269 –19–29NOV94–1/1 50–4 PN=102 Periodic Maintenance OPENING GRILLE DOOR Push down on latch (A) to open grille door. T7773CD –UN–10AUG92 T6785CD –UN–19OCT88 Rotate stop (B) 180° to hold door open. TX,50,DH2198 –19–31JUL92–1/1 CHECK WINDSHIELD WASHER FLUID LEVEL Check fluid in windshield washer bottle (A). T7829AD –UN–31AUG92 During winter season, use all season windshield washer fluid which will not freeze. 544G Shown TX,50,DH2200 –19–26AUG92–1/1 50–5 PN=103 Periodic Maintenance MAINTENANCE AND REPAIR RECORD KEEPING SYSTEM The checklist on the following page summarizes scheduled maintenance, and parts and oil required at each maintenance interval. Use the checklist to: • Remind you to perform machine maintenance at specified intervals to minimize downtime. • Calculate cost of machine operation and ownership allowing you to make better job estimates. • Place yourself in a stronger position at trade-in time. Do not tear out or mark on Checklist in the Periodic Maintenance chapter; keep it to make extra copies. T7511CO As maintenance is performed, check off each item on the list and record date and hour meter reading. Use the second (perforated) copy of this form (immediately preceding the Service Literature order form inside the back cover). –UN–27JUN91 • Satisfy your SECURE contract requirements. TX,50,FF2898 –19–09JUL93–1/1 50–6 PN=104 Periodic Maintenance OILSCAN Oil samples should be taken from each system prior to its recommended oil change interval. T6829AB –UN–18OCT88 T6828AB OILSCAN kits are available from your dealer. –UN–15JUN89 OILSCAN is a John Deere oil sampling program to help you monitor machine performance and identify potential problems before they cause serious damage. TX,50,JC1061 –19–12FEB96–1/1 50–7 PN=105 Periodic Maintenance MAINTENANCE AND REPAIR RECORD KEEPING SYSTEM SERVICE INTERVALS Service your machine at intervals shown on this chart. Also, perform service on items at multiples of the original requirement. For example, at 500 hours also service those items (if applicable) listed under 250 hours, 100 hours, 50 hours and 10 hours or daily. As Required • Inspect tires and check pressure • Inspect belts and check tension • Check wheel retainer cap screws • Drain water and clean fuel tank strainer • Clean or replace air cleaner elements • Drain and clean primary fuel filter • Check and clean air inlet cover • Check and clean cab recirculating air filter Every 10 Hours or Daily • Lubricate pivots • Check recovery tank coolant level • Clean air cleaner dust unloader valve • Check hydraulic system oil level • Check engine oil level • Check transmission oil level Every 100 Hours • Lubricate loader boom and cylinder pivots • Check cab recirculating air filter • Lubricate front steering cylinder pivots • Lubricate oscillating rear axle • Check cab fresh air filter • Lubricate rear steering cylinder pivots REQUIRED PARTS Insure machine performance and availability; use only genuine John Deere parts. Verify part numbers are current and that any associated parts are also on hand i.e. filters, O-rings. Engine Oil Filter Part Number 250 HOURS 500 HOURS 1000 HOURS 3000 HOURS *544G, 624G T19044 1 1 1 1 644G RE57394 1 1 1 1 Primary Fuel Filter All RE63136 1 1 1 Final Fuel Filter *544G, 624G RE62419 1 1 1 644G RE62419 1 1 1 Hydraulic System Return Filter *544G AT144879 1 1 1 624G, 644G AT140315 1 1 1 Hydraulic Reservoir Breather Filter All AM39653 1 1 1 Transmission Filter All AT168989 1 1 Air Filter Primary *544G, 624G AR79679 1 1 644G AR80652 1 1 Air Filter Secondary *544G, 624G AR79680 1 1 644G AR80653 1 Differential Lock Return Filter(s) All T19044 TORQ-GARD SUPREME PLUS 50 Oil *544G, 624G 19 L (20 qt) 19 L (20 qt) 644G 24 L (25 qt) 24 L (25 qt) 24 L (25 qt) 24 L 25 qt) HY-GARD Transmission and Hydraulic Oil *544G 9.5 L (10 qt) 117 L (31 gal) 624G 11 L (12 qt) 151 L (40 gal) 644G Coolant Conditioner TY16004 OILSCAN Kit IPSKIT1 COOLSCAN Kit DSO251 1 1 or 2 1 *includes 544G LL and 544G TC 19 L (20 qt) 19 L 20 qt) 14 L (15 qt) 174 L (46 gal) 1 1 1 1 2 5 TX,50,JC1137 –19–22MAY96–1/1 50–8 PN=106 Periodic Maintenance MAINTENANCE AND REPAIR RECORD KEEPING SYSTEM Model: ❒ 544G ❒ 544G LL PIN/Serial Number: ❒ 544G TC ❒ 624G Delivery Date: ❒ 644G Customer: Hour Meter Reading: Oil Sampling Oil samples should be taken from each system prior to its recommended drain/change interval indicated on this form. Maintenance recommendations supplied by OILSCAN will be provided based upon the oil analysis and operating information you supply. Regular oil sampling will extend the operational life of your machine’s systems. Every 250 Hours ❒ Check receiver dryer moisture indicator ❒ Replace engine oil filter ❒ Drain and refill engine oil ❒ Check radiator coolant level Comments: Date: Hour Meter Reading: Maintenance Performed By: Every 500 Hours ❒ Lubricate front drive line ❒ Replace final fuel filter ❒ Check air intake hoses ❒ Replace hydraulic system return filter ❒ Check battery water level ❒ Replace hydraulic reservoir breather filter ❒ Add rust inhibitor to radiator ❒ Check front and rear differential oil level ❒ Replace primary fuel filter Comments: Date: Hour Meter Reading: Maintenance Performed By: Every 1000 Hours ❒ Lubricate rear drive line ❒ Change transmission oil ❒ Check and adjust engine speed linkage ❒ Replace transmission filter ❒ Replace air cleaner dust unloader valve ❒ Inspect and adjust park brake ❒ Replace air cleaner elements ❒ Lubricate frame hinge pivots ❒ Remove and clean engine crankcase vent tube Comments: Date: Hour Meter Reading: Maintenance Performed By: Every 2000 Hours ❒ Adjust engine valve lash ❒ Lubricate front driveline support bearing Comments: Date: Hour Meter Reading: Maintenance Performed By: Every 3000 Hours ❒ Change hydraulic system oil ❒ Replace differential lock return filters ❒ Clean hydraulic system suction strainer ❒ Change front and rear differential oil Comments Date: Hour Meter Reading: Maintenance Performed By: TX,50,JC1160 –19–03JUN96–1/1 50–9 PN=107 Maintenance—As Required CHECK TIRE PRESSURE Ö CAUTION: Explosive separation of a tire and rim parts can cause serious injury or death. Always maintain the correct tire pressure. DO NOT inflate tires above the recommended pressure. Inspect tires and wheels daily. DO NOT operate with low pressure, cuts, bubbles, damaged rims, or missing lug bolts. TS211 When inflating tires, use a clip-on chuck and extension hose long enough to allow you to stand to one side and NOT in front of or over the tire assembly. Use a safety cage if available. –UN–23AUG88 Carefully inspect any tire and rim assembly that has been run flat or severely underinflated before reinflating the tire. Damage to the rim and tire may have developed. Call your authorized dealer or a qualified repair service to inspect the rim and tire assembly and make necessary repairs. T87502 Do not attempt to mount a tire if you do not have the proper equipment and experience to perform the job. Have it done by your authorized dealer or a qualified repair service. –UN–21OCT88 NEVER cut or weld on an inflated tire or rim assembly. Heat from welding could cause an increase in pressure and may result in tire explosion. Check tire pressure with an accurate gauge having 7.0 kPa (0.07 bar) (1 psi) graduations. 1. Shut off air supply to hose. 2. Move gauge hand to correct pressure. 3. Lock air chuck on tire valve. TX,55,FF2820 –19–25OCT94–1/2 55–1 PN=108 Maintenance—As Required 4. Turn on air supply. Stand to front or rear of tire when you add air to tire. 5. After tire is at correct pressure, shut off air supply. Release chuck. (See following Tire Pressure chart.) 6. Inspect tire for damage. TX,55,FF2820 –19–25OCT94–2/2 TIRE PRESSURES 544G, 544G TC Operating Pressure* Tire Size Type Ply Rating kPa bar psi 14 x 24 G2 10 300 3.8 55 15.5 x 25 L2 12 380 3.8 55 15.5R x 25 L2 or L3 Equiv (1) Star **Front 415 4.1 60 **Rear 205 2.0 30 Rear, alternate 310 3.1 45 17.5 x 25 L2 12 345 3.4 50 17.5 x 25 L3 12 345 3.4 50 17.5R x 25 L2 or L3 Equiv (1) Star **Front 345 3.4 50 **Rear 170 1.7 25 Rear, alternate 275 2.8 40 20.5 x 25 L2 12 275 2.8 40 20.5 x 25 L3 12 275 2.8 40 20.5 x 25 L3 16 345 3.4 50 20.5R x 25 L2 or L3 Equiv (1) Star **Front 205 2.0 30 **Rear 170 1.7 25 Rear, alternate 205 2.0 30 23.1 x 26 LS-2 10 140 1.4 20 28L x 26 LS-2 14 170 1.7 25 *Shipping pressure may vary from operating pressure. **These radial tire pressures are recommended for optimum traction and tire wear under typical conditions. If a higher rear tire pressure is used, it should not exceed the alternator pressure listed. TX,55,JC248 –19–29NOV94–1/1 55–2 PN=109 Maintenance—As Required 544G LL Operating Pressure* Tire Size Type Ply Rating kPa bar psi 17.5 x 25 L2 12 345 3.4 50 17.5 x 25 L3 12 345 3.4 50 17.5R x 25 L2 or L3 Equiv (1) Star **Front 345 3.4 50 **Rear 170 1.7 25 Rear, alternate 275 2.8 40 20.5 x 25 L2 12 275 2.8 40 20.5 x 25 L3 12 275 2.8 40 20.5 x 25 L3 16 345 3.4 50 23.1 x 26 LS-2 10 140 1.4 20 28L x 26 LS-2 14 170 1.7 25 *Shipping pressure may vary from operating pressure. **These radial tire pressures are recommended for optimum traction and tire wear under typical conditions. If a higher rear tire pressure is used, it should not exceed the alternator pressure listed. TX,55,JC1157 –19–03JUN96–1/1 55–3 PN=110 Maintenance—As Required 624G Ply Tire Size Type Operating Pressure* Rating kPa bar psi 14 x 24 G2 10 380 3.8 55 17.5 x 25 L3 12 345 3.4 50 17.5 x 25 L2 12 345 3.4 50 17.5 R25 L2 or L3 Equiv (1) Star **Front 450 4.5 65 **Rear 205 2.0 30 Rear, alternate 310 3.1 45 20.5 x 25 L3 12 275 2.8 40 20.5 x 25 L3 16 345 3.4 50 20.5 x 25 L2 12 275 2.8 40 20.5R x 25 L2 or L3 Equiv (1) Star **Front 310 3.1 45 **Rear 170 1.7 25 Rear, alternate 275 2.8 40 23.1 x 26 LS-2 10 140 1.4 20 28L x 26 LS-2 14 170 1.7 25 *Shipping pressure may vary from operating pressure. **These radial tire pressures are recommended for optimum traction and tire wear under typical conditions. If a higher rear tire pressure is used, it should not exceed the alternator pressure listed. TX,55,JC1158 –19–03JUN96–1/1 55–4 PN=111 Maintenance—As Required 644G Ply Tire Size Type Operating Pressure* Rating kPa bar psi 16.0 X 24 G2 12 380 3.8 55 20.5 X 25 L2 12 275 2.8 40 20.5 x 25 L2 16 345 3.4 50 20.5 x 25 L3 16 345 3.4 50 20.5R x 25 L2 or L3 Equiv (I) Star **Front 415 4.1 60 **Rear 205 2.0 30 Rear, alternate 310 3.1 45 23.5 x 25 L2 12 240 2.4 35 23.5 x 25 L3 16 310 3.1 45 23.5 x 25 L3 20 380 3.8 55 23.5R x 25 L2 or L3 Equiv (1) Star **Front 275 2.8 40 **Rear 205 2.0 30 28L x 26 LS-2 14 Rear, alternate 240 2.4 35 170 1.7 25 *Shipping pressure may vary from operating pressure. **These radial tire pressures are recommended for optimum traction and tire wear under typical conditions. If a higher rear tire pressure is used, it should not exceed the alternator pressure listed. TX,55,JC1159 –19–03JUN96–1/1 TIGHTEN WHEEL RETAINER CAP SCREWS NOTE: Tighten cap screws after first 10 hours, then again after first 50 hours of loaded operation. After that, tighten as required. Tighten wheel cap screws to 542 N•m (400 lb-ft). TX,55,DH2551 –19–16JUN93–1/1 55–5 PN=112 Maintenance—As Required CLEAN OR REPLACE AIR CLEANER ELEMENTS 1. Open left service door. 2. Loosen wing nut to remove cover. TX,55,DH2226 –19–31JUL92–1/3 T6119AF –UN–01NOV88 3. Remove wing nut and primary element (A). TX,55,DH2226 –19–31JUL92–2/3 T6119AG –UN–01NOV88 4. Remove wing nut from 544G, LL, TC, and 644G, or hex nut from 624G, and remove secondary element (B). TX,55,DH2226 –19–31JUL92–3/3 55–6 PN=113 Maintenance—As Required Ö CAUTION: Prevent possible injury from flying chips if compressed air is more than 210 kPa (2.1 bar) (30 psi). Reduce compressed air to less than 210 kPa (2.1 bar) (30 psi) when using for cleaning purposes. Clear area of bystanders, guard against flying chips, and wear personal protection equipment including eye protection. T47764 1. Tap element with the palm of your hand, NOT ON A HARD SURFACE. –UN–09NOV88 CLEAN DUSTY PRIMARY ELEMENT 2. If this does not remove dust, use compressed air under 210 kPa (2.1 bar) (30 psi). 3. Direct air up and down the pleats from inside to outside. Be careful not to make a break in the element. 03T,55,MM11 –19–18NOV92–1/1 CLEAN OILY OR SOOTY PRIMARY ELEMENT 2. Flush with clean water. Use water pressure under 280 kPa (2.8 bar) (40 psi). T90673 1. Wash element in warm water and John Deere R36757 Filter Element Cleaner or equivalent non-sudsing detergent. –UN–10NOV88 IMPORTANT: You can damage element. DO NOT wash element in fuel oil, oil, gasoline, or solvent. DO NOT use compressed air to remove water from an element. 3. Shake the element to remove water. Do not install element unless it is dry. 03T,55,C19 –19–24JUL91–1/1 55–7 PN=114 Maintenance—As Required INSPECT ELEMENT IMPORTANT: A damaged or dirty element may cause engine damage. • If the element shows damage. • If element will not clean. • After 1000 hours service or annually. T90684 –UN–10NOV88 Install a new primary element: Install a new secondary element: • If the primary element is damaged and needs to be replaced. • If the element is visibly dirty. • After 1000 hours service or annually. DO NOT clean a secondary element. Install a new element carefully centering it in the canister. 1. Inspect element and gasket for damage. 2. Air restriction indicator will not signal correctly if an element has a break or is not correctly sealed in air cleaner housing. Throw away element that has the slightest damage. If gasket is broken or missing, install a new element. 03T,55,C67 –19–24JUL91–1/1 55–8 PN=115 Maintenance—As Required CHECK AIR INLET COVER 1. Loosen clamp and slide strap (B) down stack. CAUTION: Prevent possible injury from flying chips if compressed air is more than 210 kPa (2.1 bar) (30 psi). Reduce compressed air to less than 210 kPa (2.1 bar) (30 psi) when using for cleaning purposes. Clear area of bystanders, guard against flying chips, and wear personal protection equipment including eye protection. T6779BQ Ö –UN–19OCT88 2. Remove air inlet cover (A). 3. Clean cover with compressed air or soapy water. Dry cover. 4. Install cover on stack. Tighten clamp. TX,55,DH2206 –19–31JUL92–1/1 55–9 PN=116 Maintenance—As Required CHECK AND ADJUST BELT TENSION—544G, 624G 1. Check belt regularly for wear. Replace if necessary. –UN–18OCT88 2. Check belt tension of belt closest to fan midway between pulleys. 544G, LL, TC, 624G: right side of engine. 644G: left side of engine. T6603AK SPECIFICATIONS 544G, LL, TC, 624G: Force: 67 N (15 lb) Deflection: 19 mm (0.75 in.) 544G, 624G Shown 3. If deflection is not within specifications, loosen alternator mounting cap screws. –UN–30NOV94 4. Apply force to FRONT alternator housing only (near the belt) until tension is correct. T8372BK 5. Tighten cap screws to 57 N•m (40 lb-ft). 544G Shown A—Alternator Pulley B—Fan Pulley C—Crankshaft Pulley D—Straight Edge E—Belt Deflection Gauge F—Cap Screws TX,55,JC1138 –19–22MAY96–1/1 55–10 PN=117 Maintenance—As Required INSPECT SERPENTINE BELT—644G 1. Check belt regularly for wear, especially for cracks at the bottom of grooves and for frayed edges. 2. If necessary, replace belt. 3. Place the drive of a 1/2 in. drive ratchet in square hole. Turn ratchet counterclockwise to pull tension adjuster assembly away from belt, releasing belt tension. 4. Hold tension adjuster assembly away from belt while removing old belt and installing new belt. 5. Slowly turn ratchet clockwise to place tension adjuster assembly against new belt. Tension is automatically adjusted. T7405BG –UN–15NOV90 6. Remove ratchet from assembly. TX,55,JC1118 –19–20MAR96–1/1 DRAIN FUEL TANK 1. Remove fuel tank filler cap. TX,55,DH2491 –19–16MAY95–1/2 NOTE: Petcock located at left front of machine frame bottom guard. 2. Loosen petcock (A). 3. Drain water and sediment into a container. 4. Tighten petcock. T7773CN –UN–21AUG92 5. Install filler cap. TX,55,DH2491 –19–16MAY95–2/2 55–11 PN=118 Maintenance—As Required DRAIN AND CLEAN PRIMARY FUEL FILTER (WATER SEPARATOR)—544G, 624G 1. Open left side shield to access primary fuel filter (water separator). TX,55,JC283 –19–16MAY95–1/3 2. Put container under drain valves (D and F). –UN–10SEP92 3. Rotate retaining ring around filter element counterclockwise 1/4 turn. Lifting ring as it is rotated helps get it past retaining detent. Ring should drop down and release filter from base. T8387AE –UN–17DEC94 T7833AJ 4. Remove hand primer (B) from fuel filter base. Disassemble hand primer assembly and clean out any debris. A—Bleed Screw (Final Fuel Filter) B—Pump C—Primary Fuel Filter (Water Separator) D—Drain Valve (Primary Fuel Filter) E—Bleed Screw (Primary Fuel Filter) F—Drain Valve G—Final Fuel Filter TX,55,JC283 –19–16MAY95–2/3 55–12 PN=119 Maintenance—As Required 5. Remove fuel inlet line (A) and fuel drain plug (C). 6. Flush any debris from filter base (B). –UN–17DEC94 7. Install fuel inlet drain plug and fuel inlet line. 8. Assemble primer assembly and install onto fuel filter base. T8387AD 9. Install filter element to fuel filter base. 10. Close side shield. 11. Dispose of waste properly. TX,55,JC283 –19–16MAY95–3/3 DRAIN AND CLEAN PRIMARY FUEL FILTER (WATER SEPARATOR)—644G 1. Open left side shield to access primary fuel filter (F). 2. Place container under filter. 3. Open drain valve (G) and press pump (D) to extract water from fuel system. T100696 –UN–22MAR96 4. Close drain valve. A—Final Fuel Filter B—Bleed Screw C—Bleed Screw D—Pump E—Fuel Supply Line F—Primary Fuel Filter G—Drain Valve TX,55,JC1105 –19–18MAR96–1/1 55–13 PN=120 Maintenance—As Required CHECK CAB RECIRCULATING AIR FILTER 2. Remove filter. Ö CAUTION: Reduce compressed air to less than 210 kPa (2 bar) (30 psi) when using for cleaning purposes. Clear area of bystanders, guard against flying chips, and wear personal protection equipment, including eye protection. T8295AA 1. Loosen two thumbscrews (A) holding grille. Remove grille. –UN–10AUG94 NOTE: The cab recirculating air filter is located behind the seat. 3. Clean filter in one of these ways: • Tap it on a flat surface with the dirty side down. • Use compressed air opposite to the normal air flow. • Wash the filter in warm, soapy water. Flush the filter and let it dry before using the air conditioner. 4. Replace filter and grille. 5. Tighten thumbscrews. TX,55,JC1122 –19–16APR96–1/1 55–14 PN=121 Maintenance—Every 10 Hours or Daily LUBRICATE PIVOTS Lubricate working tool pivots every 10 hours or daily when operating in deep mud, water, or snow. TX,60,DH2560 –19–02OCT92–1/1 IMPORTANT: A missing, damaged, or hardened dust unloader valve will make the dust cup precleaner ineffective, causing very short element life. Valve should suck closed above 1/3 engine speed. T7773CQ Squeeze dust valve (A) to remove dust from the air cleaner. –UN–21AUG92 CLEAN AIR CLEANER DUST UNLOADER VALVE If operating in high dust conditions, squeeze dust valve every couple of hours of operation to release dust. TX,60,DH2210 –19–17AUG92–1/1 CHECK ENGINE OIL LEVEL IMPORTANT: If oil level is low, the engine can be damaged. DO NOT operate the engine when oil level is below the ADD mark. The most accurate oil level reading is obtained when the engine is cold, before starting the engine for the day’s operation. 1. Park machine on a level surface. 2. Engage park brake. TX,60,JC1106 –19–18MAR96–1/2 60–1 PN=122 Maintenance—Every 10 Hours or Daily 3. 544G, 624G: Make sure dipstick (A) is fully seated. 4. 544G, 624G: Remove dipstick to check oil level. –UN–31AUG92 644G: Tighten filler cap (B) to fully seat. Remove filler cap to check oil level. AFTER THE ENGINE HAS BEEN RUN: Allow the oil to drain into the oil pan for 10 minutes before checking the oil level. Ten minutes after shutdown the engine oil level must be above the ADD mark. T7829AE BEFORE THE ENGINE IS STARTED: The engine is full when oil level is in the cross hatched area. It is acceptable to run the engine when the oil level is above the ADD mark. 544G Shown T7829AF –UN–31AUG92 5. If necessary, remove filler cap (B) to add oil. (See Fuels and Lubricants chapter.) T100695 –UN–22MAR96 624G Shown 644G Shown TX,60,JC1106 –19–18MAR96–2/2 60–2 PN=123 Maintenance—Every 10 Hours or Daily CHECK RECOVERY TANK COOLANT LEVEL Ö CAUTION: Prevent possible injury from hot spraying water. DO NOT remove radiator filler cap unless engine is cool. Then turn cap slowly to the stop. Release all pressure before you remove cap. T8385AE If coolant is below the COLD mark, add coolant to the recovery tank. –UN–15DEC94 With the engine cold, coolant level must be between HOT and COLD marks on the recovery tank. If recovery tank is full and radiator is low, check for leaks in radiator cap and hose connections between radiator and coolant recovery tank. T6274AQ Coolant level must be at bottom of the filler neck. –UN–18OCT88 If recovery tank is empty, check for leaks. Repair as required. Add coolant to the radiator and the recovery tank. TX,60,JC280 –19–16MAY95–1/1 CHECK HYDRAULIC OIL LEVEL IMPORTANT: Prevent possible hydraulic pump damage. DO NOT operate engine without oil in the hydraulic reservoir. 1. Park machine on a level surface. 2. Lower equipment to the ground. TX,60,DH2213 –19–16JUN93–1/3 60–3 PN=124 Maintenance—Every 10 Hours or Daily T7773CB –UN–10AUG92 3. When oil is cold, oil level must be in FULL range on sight glass (A). TX,60,DH2213 –19–16JUN93–2/3 4. If necessary, add oil to filler cap (B). (See Fuels and Lubricants chapter.) T8029AM –UN–15JUN93 5. Install filler cap. TX,60,DH2213 –19–16JUN93–3/3 60–4 PN=125 Maintenance—Every 10 Hours or Daily CHECK TRANSMISSION OIL LEVEL IMPORTANT: Prevent possible transmission damage. DO NOT operate engine when transmission oil level is low. 1. Before starting engine, check oil level on dipstick (A). If oil is to upper mark when oil is cold, there is sufficient oil to start the engine. 2. If necessary, add oil to filler tube. (See Fuels and Lubricants chapter.) 3. Install dipstick. –UN–21AUG92 4. Start engine. T7773CP 5. Engage service brakes. Move clutch cut-off switch up, to disengaged position. 6. Release park brake. 7. Move transmission control lever to 3rd speed forward "F" position. 624G Shown Operate engine at fast idle for 30 seconds. Reduce engine speed to slow idle and place transmission control lever in neutral "N", for 15 seconds. Repeat this step until transmission oil reaches normal operating temperature. 8. Move transmission control lever to neutral "N", and engage neutral lock. Lower all equipment to ground. 9. Engage park brake. 10. Release service brakes. 11. Check oil level with engine at slow idle. Oil must be between marks on dipstick. TX,60,DH2214 –19–02OCT92–1/1 60–5 PN=126 Maintenance—Every 100 Hours LUBRICANT BOOM, BUCKET, AND CYLINDER PIVOTS Ö CAUTION: Prevent possible injury from unexpected machine movement. Install frame locking bar before lubricating. Lower bucket flat on ground. Lubricate following 13 points until grease escapes around seals. (See Fuels and Lubricants chapter.) T6523CP1 –UN–20OCT88 Lubricate every 10 hours or daily when operating in deep mud, water, or snow. T8029AS –UN–21JUN93 Six Points, 544G Shown T6570AR1 –UN–25OCT88 Four Points, 544G Shown Three Points, 644G Shown TX,70,DH2215 –19–16JUN93–1/1 70–1 PN=127 Maintenance—Every 100 Hours LUBRICATE BOOM, BUCKET, AND CYLINDER PIVOTS—544G TC CAUTION: Prevent possible injury from unexpected machine movement. Install frame locking bar before lubricating. –UN–17SEP92 Ö Lower equipment to ground. T7829BF Lubricate following 17 points until grease escapes around seals. (See Fuels and Lubricants chapter.) T7829BG –UN–17SEP92 Four Points, Right Side Shown Eight Points TX,70,DH2290 –19–02OCT92–1/2 70–2 PN=128 Maintenance—Every 100 Hours T7829BH –UN–17SEP92 Lubricate every 10 hours or daily when operating in deep mud, water, or snow. Five Points TX,70,DH2290 –19–02OCT92–2/2 70–3 PN=129 Maintenance—Every 100 Hours LUBRICATE STEERING CYLINDER PIVOTS CAUTION: Prevent possible injury from unexpected machine movement. Install frame locking bar before lubricating. –UN–22MAR96 Ö T100694 Lubricate each point with three shots of grease. (See Fuels and Lubricants chapter.) T6597AB1 –UN–25OCT88 Four Points, 644G Left Side Shown A—Right Steering Cylinder (Head End) B—Left Steering Cylinder (Head End) TX,70,JC1107 –19–18MAR96–1/1 70–4 PN=130 Maintenance—Every 100 Hours LUBRICATE OSCILLATING REAR AXLE CAUTION: Prevent possible injury from unexpected machine movement. Install frame locking bar before lubricating. –UN–22MAR96 Ö T100693 Lubricate each point with 10 shots of grease. (See Fuels and Lubricants chapter.) Grease daily when operating in deep mud, water, or snow. T6597AB –UN–25OCT88 Two Points, 644G Shown A—Rear Axle Front Oscillating Pivot B—Rear Axle Rear Oscillating Pivot TX,70,JC1108 –19–18MAR96–1/1 CHECK CAB FRESH AIR FILTER—IF EQUIPPED T6629AK –UN–20OCT88 1. Open door (A). TX,70,JC1056 –19–24JAN96–1/2 70–5 PN=131 Maintenance—Every 100 Hours NOTE: If operating in dusty conditions, cab fresh air filter should be checked and cleaned as required. Ö CAUTION: Prevent possible injury from flying chips if compressed air is more than 210 kPa (2.1 bar) (30 psi). Reduce compressed air to less than 210 kPa (2.1 bar) (30 psi) when using for cleaning purposes. Clear area of bystanders, guard against flying chips, and wear personal protection equipment including eye protection. T7829AC 3. Clean filter in one of these ways: –UN–31AUG92 2. Remove filter (B). Replace if damaged. • Tap filter on a flat surface with the dirty side down. • Use compressed air opposite to the normal air flow. • Wash the filter in warm, soapy water. Flush the filter. Let it dry before using the heater, defroster, or air conditioner. 4. Replace filter. Close door. TX,70,JC1056 –19–24JAN96–2/2 70–6 PN=132 Maintenance—Every 250 Hours 1. Remove rubber plug (A) on right front panel. T8372BH IMPORTANT: Prevent possible compressor damage. If receiver dryer moisture eye color indicates "WET" (yellow), dryer is saturated and should be changed within the next 100 machine hours to prevent further buildup of moisture in the refrigerant. –UN–30NOV94 CHECK RECEIVER DRYER MOISTURE INDICATOR TX,75,JC260 –19–16MAY95–1/2 3. If wet (yellow), see your authorized dealer within the next 100 machine hours to service the receiver dryer. T8372BG 4. Install plug. –UN–30NOV94 2. Check sight glass (B) with engine running and air conditioning turned ON to determine if color indicates dryer is dry (green) or wet (yellow). TX,75,JC260 –19–16MAY95–2/2 75–1 PN=133 Maintenance—Every 250 Hours CHANGE ENGINE OIL AND REPLACE FILTER IMPORTANT: If fuel sulphur content exceeds 0.5 percent, change engine oil at 1/2 the normal interval. NOTE: If engine has not run 250 hours before the season changes, change oil. 1. Run engine to warm oil. 2. Park machine on a level surface. 3. Lower bucket to ground. 4. Move transmission control lever to neutral "N". Engage neutral lock. Ö CAUTION: Prevent possible injury from unexpected machine movement. Never rely on transmission control lever alone to keep machine from moving. Machine can unexpectedly roll or move under power, resulting in death or serious injury. Always engage park brake to hold machine. 5. Engage park brake. 6. Turn key switch to STOP. TX,75,JC1109 –19–18MAR96–1/4 75–2 PN=134 Maintenance—Every 250 Hours T7853AI –UN–08OCT92 7. Install hose on drain valve (A). Turn valve counterclockwise with a 1/4 in. hex key wrench. Allow oil to drain into a container. Dispose of waste oil properly. 624G Shown TX,75,JC1109 –19–18MAR96–2/4 75–3 PN=135 Maintenance—Every 250 Hours 8. Turn filter (A) counterclockwise to remove. 9. Clean mounting surface. Apply thin film of oil to gasket of new filter. –UN–31AUG92 10. Install new filter. Turn filter clockwise by hand until gasket touches mounting surface. T7829AH 11. Tighten 1/2—3/4 turn more. 12. Tighten drain valve. 544G Shown 13. Remove filler cap (B). 14. Fill engine with oil. (See Fuels and Lubricants chapter.) SPECIFICATION 544G, LL, TC, 624G 19 L (20 qt) 644G 24 L (25 qt) –UN–31AUG92 Includes filter change: IMPORTANT: Before starting engine after a filter change, crank engine for 10 seconds without starting to refill filter and prelubricate turbocharger. T7829AI 15. Install filler cap. 624G Shown 16. Remove engine shut-off fuse. Crank engine for 10 seconds using starting motor. Install engine shut-off fuse. 17. Start engine and run at slow idle. –UN–22MAR96 18. Check that engine oil pressure light on monitor goes out and audible alarm stops immediately. If not, stop engine immediately and find cause. T100692 19. Stop the engine. Check oil level. The engine is full when oil level is in the cross hatched area on the dipstick. 644G Shown TX,75,JC1109 –19–18MAR96–3/4 75–4 PN=136 Maintenance—Every 250 Hours 20. Check for any leakage at filter. Tighten filter only enough to stop leakage. TX,75,JC1109 –19–18MAR96–4/4 CAUTION: Prevent possible injury from hot spraying water. DO NOT remove radiator filler cap unless engine is cool. Then turn cap slowly to the stop. Release air to relieve all pressure before you remove cap. 1. Slowly remove cap. Coolant level must be at bottom of the filler neck. NOTE: If radiator coolant level is low, check for leaks on radiator cap, and hose connections between radiator and coolant recovery tank. T6642EK Ö –UN–01NOV88 CHECK RADIATOR COOLANT LEVEL 2. Add coolant, if necessary. 3. Install filler cap. TX,75,DH3501 –19–29NOV94–1/1 75–5 PN=137 Maintenance—Every 500 Hours LUBRICANT FRONT DRIVELINE CAUTION: Prevent possible injury from unexpected machine movement. Install frame locking bar before lubricating. –UN–08OCT92 Ö T7853AJ NOTE: To prevent plug loss, lubricate the machine when it is fully articulated or half articulated and NOT in the straight position. Lubricate until grease escapes around vent holes in drive shaft end. (See Fuels and Lubricants chapter.) One Point NOTE: Grease daily when operating in deep mud, water, or snow. TX,80,JC1139 –19–23MAY96–1/1 CHECK AIR INTAKE HOSES Check hoses for cracks (A). T7829BD –UN–17SEP92 Tighten hose clamps. T100707 –UN–22MAR96 544G Shown 644G Shown TX,80,JC1110 –19–18MAR96–1/1 80–1 PN=138 Maintenance—Every 500 Hours CHECK BATTERY ELECTROLYTE LEVEL AND TERMINALS CAUTION: Battery gas can explode. Keep sparks and flames away from batteries. Use a flashlight to check battery electrolyte level. NEVER check battery charge by placing a metal object across the posts. Use a voltmeter or hydrometer. ALWAYS remove grounded (-) battery clamp first and replace it last. Sulfuric acid in battery electrolyte is poisonous. It is strong enough to burn skin, eat holes in clothing, and cause blindness if splashed into eyes. –UN–23AUG88 Avoid the hazard by: • Filling batteries in a well-ventilated area. • Wearing eye protection and rubber gloves. • Avoiding breathing fumes when electrolyte is added. TS203 Ö • Avoiding spilling or dripping electrolyte. • Use proper jump start procedure. If you spill acid on yourself: • Flush your skin with water. • Apply baking soda or lime to help neutralize the acid. • Flush your eyes with water for 15—30 minutes. Get medical attention immediately. If acid is swallowed: • Do not induce vomiting. TX,75,DH1574 –19–28APR93–1/4 80–2 PN=139 Maintenance—Every 500 Hours • Drink large amounts of water or milk, but do not exceed 1.9 L (2 quarts). • Get medical attention immediately. 1. Remove battery box cover. TX,75,DH1574 –19–28APR93–2/4 –UN–10FEB89 IMPORTANT: If water is added to batteries during freezing weather, batteries must be charged after water is added to prevent batteries from freezing. Charge battery using a battery charger or by running the engine. Ö T6996DB 2. Fill each cell to within specified range with distilled water. DO NOT overfill. CAUTION: Prevent possible injury. ALWAYS remove grounded (-) battery clamp first and replace it last. T6996DA –UN–10FEB89 3. Disconnect battery clamps, grounded clamp first. A—Battery Post B—Fill Tube C—Electrolyte Level Range TX,75,DH1574 –19–28APR93–3/4 80–3 PN=140 Maintenance—Every 500 Hours 4. Clean battery terminals (A) and clamps with a stiff brush. –UN–21OCT88 5. Apply lubricating grease (B) around battery terminal base only. T6758AA 6. Install and tighten clamps, grounded clamp last. TX,75,DH1574 –19–28APR93–4/4 80–4 PN=141 Maintenance—Every 500 Hours CAUTION: Prevent possible injury from hot spraying water. DO NOT remove radiator cap unless the engine is cool. Then loosen cap slowly to the stop. Release all pressure before removing cap. 1. Turn cap slowly to the stop to release pressure. Then remove cap. NOTE: A coolant strip test, available from your dealer, provides a simple, effective way to check freeze point and molybdate/nitrite levels. These results can be compared to the SCA chart to determine the amount of coolant conditioner in your system. –UN–23AUG88 2. Add TY16004 John Deere Coolant Conditioner or equivalent non-chromate conditioner/rust inhibitor, following instructions on container. Drain enough coolant from the radiator to allow room for the conditioner. Approx. 24 L (25 qt) 624G Cooling system capacity Approx. 25 L (26 qt) 644G Cooling system capacity Approx. 28 .5 L (30 qt) TS281 SPECIFICATIONS 544G Cooling system capacity T101279 Ö –19–14MAY96 CHECK COOLANT NOTE: Add conditioner every 500 hours or 6 months, or if you replace 1/3 or more of coolant. John Deere Liquid Coolant Conditioner does not protect against freezing. DO NOT add John Deere liquid coolant conditioner to a cooling system already equipped with an operational filter conditioner system. Too much conditioner in a cooling system may cause silicate-dropout. When this happens, a gel-type despot is created which can restrict coolant passages in the radiator and engine, resulting in engine overheating. TX,80,JC1140 –19–23MAY96–1/1 80–5 PN=142 Maintenance—Every 500 Hours REPLACE PRIMARY FUEL FILTER (WATER SEPARATOR) –UN–31AUG92 1. Turn filter assembly (A) counterclockwise to remove. Allow sediment to drain into a container. Dispose of waste properly. 3. Rotate retaining ring around filter element counterclockwise 1/4 turn. Lifting ring as it is rotated helps get it past retaining detent. Ring should drop down and release filter from base. T7829AR 2. Turn sediment bowl (B) counterclockwise to remove from filter assembly. 624G Shown T8387AE –UN–17DEC94 4. Remove hand primer from fuel filter base. Disassemble hand primer assembly and clean out any debris. TX,80,JC427 –19–18JAN96–1/2 5. Remove fuel inlet line (A) and drain plug (C). 6. Flush any debris from filter base (B). 8. Assemble primer assembly and install onto new fuel filter base. T8387AD 9. Install new filter. (Follow instructions on filter.) –UN–17DEC94 7. Install fuel inlet drain plug and fuel inlet line. 10. Bleed fuel system. (See Bleeding Fuel System in Maintenance chapter.) TX,80,JC427 –19–18JAN96–2/2 80–6 PN=143 Maintenance—Every 500 Hours REPLACE FINAL FUEL FILTER—544G, 624G –UN–31AUG92 1. Turn filter assembly (A) counterclockwise to remove. Allow sediment to drain into a container. Dispose of waste properly. 2. Clean filter base. T7829AS 3. Install new filter. (Follow instructions on filter.) 4. Bleed fuel system. (See Bleeding Fuel System in Maintenance chapter.) 544G Shown TX,80,DH2506 –19–02OCT92–1/1 REPLACE FINAL FUEL FILTER—644G 1. Loosen clamps (A) to remove filter (B). –UN–01MAY89 2. Clean filter base. 3. Install new filter. Tighten clamps. T7034AH 4. Bleed fuel system. (See Bleeding Fuel System in Maintenance chapter.) TX,80,DH2225 –19–29AUG92–1/1 REPLACE HYDRAULIC SYSTEM RETURN FILTER 1. Remove hydraulic reservoir filler cap. TX,80,JC1111 –19–18MAR96–1/2 80–7 PN=144 Maintenance—Every 500 Hours 2. Turn filter (A) counterclockwise to remove. 3. Clean mounting surface. Apply thin film of oil to gasket of new filter. 4. Install new filter. Tighten filter 3/4—1 full turn after seal contacts mounting base. 5. Fully loosen filter element. Repeat step 4. 6. Start engine. Check for leaks around the filter base. Tighten filter only enough to stop leaks. T100705 –UN–22MAR96 7. Stop engine. Check oil level. 644G Shown TX,80,JC1111 –19–18MAR96–2/2 REPLACE HYDRAULIC RESERVOIR BREATHER FILTER Hydraulic reservoir breather filter is located on back side of reservoir under the hood. TX,80,JC1112 –19–18MAR96–1/2 80–8 PN=145 Maintenance—Every 500 Hours 1. Turn filter (A) counterclockwise to remove. T7829BE –UN–17SEP92 2. Install new filter. T100708 –UN–22MAR96 544G Shown 644G Shown TX,80,JC1112 –19–18MAR96–2/2 CHECK FRONT AND REAR DIFFERENTIAL OIL LEVEL—IF EQUIPPED WITH STANDARD AXLE –UN–08OCT92 NOTE: Each differential housing has three sumps. Fill center housing slowly to let oil drain into all sumps. 2. Oil must be to bottom of opening. T7853AK 1. Loosen plugs (A). If oil seeps from plugs, differential oil level is OK. If not, remove plugs. Front Differential Shown 3. If necessary, add oil. (See Fuels and Lubricants chapter.) T6570AC2 –UN–20OCT88 4. Install or tighten plugs. Rear Differential Shown TX,80,DH2552 –19–23JUN93–1/1 80–9 PN=146 Maintenance—Every 500 Hours CHECK FRONT AND REAR DIFFERENTIAL OIL LEVEL—IF EQUIPPED WITH DIFFERENTIAL LOCK AXLE CAUTION: Prevent possible injury from hot spraying oil. Slowly loosen plugs to relieve any air pressure. –UN–08OCT92 Ö 2. Start engine. T7853AK 1. Remove plugs (A). Oil must be to bottom of opening. If not, install plugs. Front Differential Shown 3. Hold down differential lock pedal for 1 minute with engine running at slow idle. 4. Stop engine. –UN–20OCT88 5. Slowly remove plugs. Oil must be to bottom of opening. If not, install plugs and repeat steps 2—4 until oil seeps from opening. T6570AC2 6. If necessary, add oil to hydraulic reservoir. (See Fuels and Lubricants chapter.) Rear Differential Shown TX,80,DH2965 –19–23JUN93–1/1 80–10 PN=147 Maintenance—Every 1000 Hours LUBRICATE REAR DRIVELINE CAUTION: Prevent possible injury from unexpected machine movement. Install frame locking bar before lubricating. –UN–11JUN91 Ö T7516BG NOTE: To prevent plug loss, lubricate the machine when it is fully articulated or half articulated and NOT in the straight position. Lubricate until grease escapes around vent holes in drive shaft end. (See Fuels and Lubricants chapter.) One Point NOTE: Grease daily when operating in deep mud, water, or snow. TX,85,DH2477 –19–31JUL92–1/1 CHECK ENGINE SPEEDS 1. Warm engine to normal operating temperature. 2. Connect a tachometer and check engine speeds. SPECIFICATIONS SLOW IDLE 544G, LL, TC 624G 825—875 rpm 825—875 rpm 644G 775—825 rpm (S.N. -544523) 875—925 rpm (S.N. 544524- ) FAST IDLE 2350—2400 rpm 2300—2350 rpm 2300—2350 rpm If engine speeds need adjustment, check engine speed linkage. If speeds still need adjusting, see your authorized dealer. TX,85,JC254 –19–29NOV94–1/1 85–1 PN=148 Maintenance—Every 1000 Hours T7853AB –UN–06OCT92 ADJUST ENGINE SPEED CONTROL LINKAGE A—Swivel B—Cable C—Lever 1. With accelerator pedal at slow idle, disconnect swivel (A) on speed control cable (B) and adjust until: D—Stop Screw 2. Depress accelerator pedal until injection pump lever is against fast idle stop and hold. 3. Adjust pedal stop screw (D) until it makes contact with the pedal. Release pedal. 544G, LL, TC, and 624G: Injection pump lever (C) has 2—4 mm (0.08—0.16 in.) of override at the slow idle position. Connect cable to injection pump lever. 4. 544G, LL, TC, and 624G: Shorten pedal stop screw until 2—4 mm (0.09—0.16 in.) override is obtained at the pump. 644G: Hole in injection pump lever just lines up with swivel at the slow idle position. Lengthen cable two turns. Connect to injection pump lever. 644G: Tighten lock nut. TX,85,DH2229 –19–02OCT92–1/1 85–2 PN=149 Maintenance—Every 1000 Hours REPLACE AIR CLEANER DUST UNLOADER VALVE –UN–21AUG92 NOTE: A missing, damaged, or hardened dust valve will cause the air filter elements to be ineffective. T7773CQ Replace dust valve (A). 624G Shown TX,85,DH2246 –19–26AUG92–1/1 REPLACE AIR CLEANER ELEMENTS 1. Remove cover. TX,85,DH2245 –19–31JUL92–1/3 T6119AF –UN–01NOV88 2. Remove wing nut to remove primary element (A). TX,85,DH2245 –19–31JUL92–2/3 3. Remove wing nut from 544G and 644G, or hex nut from 624G to remove secondary element (B). 5. Install new elements making sure secondary element is centered in canister. T6119AG 6. Install cover. –UN–01NOV88 4. Clean air cleaner canister. TX,85,DH2245 –19–31JUL92–3/3 85–3 PN=150 Maintenance—Every 1000 Hours T7829AK –UN–31AUG92 CLEAN ENGINE CRANKCASE VENT TUBE (A) T7829AL –UN–31AUG92 544G Shown T100691 –UN–22MAR96 624G Shown 644G Shown TX,85,DH2230 –19–02OCT92–1/1 85–4 PN=151 Maintenance—Every 1000 Hours CHANGE TRANSMISSION OIL AND REPLACE FILTER 1. Operate machine under load until transmission oil reaches normal operating temperature. 2. Park machine on a level surface. 3. Lower bucket to ground. 4. Move transmission control lever to neutral "N". Engage neutral lock. Ö CAUTION: Prevent possible injury from unexpected machine movement. Never rely on transmission control lever alone to keep machine from moving. Machine can unexpectedly roll or move under power, resulting in death or serious injury. Always engage park brake to hold machine. 5. Engage park brake. Ö CAUTION: Prevent possible injury from unexpected machine movement. Install frame locking bar before changing oil. 6. Install frame locking bar. IMPORTANT: Turbocharger may be damaged if engine is not properly shut down. 7. Run engine at 1/2 speed for 2 minutes before stopping to avoid damage to turbocharger. Release accelerator pedal to slow idle. 8. Turn key switch to STOP. Let machine sit for approximately 10 minutes. TX,85,JC1057 –19–24JAN96–1/4 85–5 PN=152 Maintenance—Every 1000 Hours T7853AA –UN–23SEP92 9. Remove plug (A), located inside hole in bottom guard, to drain oil. Allow oil to drain into a container. Dispose of waste oil properly. TX,85,JC1057 –19–24JAN96–2/4 11. Clean mounting surface. Apply thin film of oil to gasket of new filter. T7853AC 12. Install new filter. Turn filter clockwise by hand until gasket touches mounting surface. –UN–06OCT92 10. Remove right panel under cab to gain access to transmission filter (A). Clear area around filter before removing. Turn filter counterclockwise to remove. 13. Tighten 1/2 to 3/4 turn more. 14. Apply pipe sealant with TEFLON to threads of transmission drain plug. Install drain plug. TX,85,JC1057 –19–24JAN96–3/4 85–6 PN=153 Maintenance—Every 1000 Hours 15. Remove transmission dipstick (A). 16. Fill transmission with oil. (See Fuels and Lubricants chapter.) SPECIFICATIONS Includes filter change 544G, LL, TC, 9.5 L (10 qt) 624G 11 L (12 qt) 644G 14 L (15 qt) 17. Start engine and run for 2 minutes. –UN–21AUG92 18. Move transmission control lever to neutral "N", and engage neutral lock. T7773CP 19. Check oil level. Oil must be between marks on dipstick. 20. Check for leaks around the filter base. Tighten filter only enough to stop leaks. 624G Shown TEFLON is a trademark of the DuPont Company. TX,85,JC1057 –19–24JAN96–4/4 CHECK PARK BRAKE IMPORTANT: The park brake is also designed to function as the secondary braking system. The park brake must be properly maintained and adjusted. 1. Start engine. Ö CAUTION: Prevent possible injury from sudden machine stop. Fasten seat belt for this check. 2. Fasten seat belt. 3. Press the SELECT switch until MPH reading is displayed. TX,85,DH2561 –19–09OCT92–1/2 85–7 PN=154 Maintenance—Every 1000 Hours 5. Drive machine at 5 mph and move park brake switch to ON. Machine must stop within 2 m (6 ft), and transmission must shift to neutral. T7773AG 6. If necessary, adjust park brake. –UN–11JUN92 4. Move park brake switch (A) to OFF, and move transmission control lever to 2nd gear forward. TX,85,DH2561 –19–09OCT92–2/2 ADJUST PARK BRAKE 1. Park machine on a level surface. 2. Lower bucket to ground. TX,85,JC1141 –19–23MAY96–1/3 CAUTION: Prevent possible injury from unexpected machine movement. Never rely on loader bucket to keep machine from moving. Machine can unexpectedly roll or move under power, resulting in death or serious injury. Always block wheels to hold machine when working on park brake. 4. Install frame locking bar. T7747BR Ö –UN–19MAY92 3. Move transmission control lever (A) to neutral "N". Engage neutral lock (B). 5. Stop engine; this will engage park brake. 6. Place blocks in front of and behind tires. TX,85,JC1141 –19–23MAY96–2/3 85–8 PN=155 Maintenance—Every 1000 Hours 7. Remove screws and remove sheet metal cover from brake. Loosen lock nut (A). 8. Loosen the 4 mounting capscrews that hold the park brake to the mounting bracket. 9. Tighten adjustment screw (B) to 100 N•m (75 lb-ft). 10. Tighten the 4 mounting capscrews to 70 N•m (50 lbft). 11. Back the adjustment screw off 180° (1/2 turn). (This will give approximately 0.5 mm (.02 in.) pad to disk clearance with park brake released and engine running.) 12. While holding the adjustment screw in place, tighten the lock nut. T100701 –UN–22MAR96 13. Install sheet metal cover. Tighten cover screws. TX,85,JC1141 –19–23MAY96–3/3 85–9 PN=156 Maintenance—Every 1000 Hours LUBRICATE FRAME HINGE PIVOTS Ö CAUTION: Prevent possible injury from unexpected machine movement. Install frame locking bar before lubricating. T100690 –UN–22MAR96 Lubricate each point with three shots of grease. (See Fuels and Lubricants chapter.) 644G Shown TX,85,JC1113 –19–18MAR96–1/1 85–10 PN=157 Maintenance—Every 2000 Hours MEASURE AND ADJUST ENGINE VALVE LASH (CLEARANCE)—544G, LL, TC, 624G 1. Remove precleaner or air intake cover, hood, air cleaner bracket with air cleaner intake manifold, and engine crankcase vent tube. 2. Plug all openings. 3. Check crankcase ventilation tube for restriction. Clean with solvent or diesel fuel. 4. Remove rocker arm cover. TX,85,DH2239 –19–31JUL92–1/5 5. Install JDE-81-1 Flywheel Turning Tool (A). T6129AJ 7. Try to move both pushrods at number one cylinder. If both are loose, proceed with adjustment per chart on No. 1 TDC. If both pushrods at number six are loose, proceed with adjustment per chart on No. 6 TDC. –UN–27OCT88 6. Turn flywheel until JDE-81-4 Timing Pin (B) goes into hole in flywheel. TX,85,DH2239 –19–31JUL92–2/5 T6119AI 8. Measure and adjust valve clearance with No. 1 piston or No. 6 at TDC. To change piston position, pull timing pin out of flywheel, rotate flywheel 360°, and insert timing pin. –UN–13MAR89 NOTE: Valve clearance can be adjusted whether engine is hot or cold. TX,85,DH2239 –19–31JUL92–3/5 86–1 PN=158 Maintenance—Every 2000 Hours 9. Remove turning tool and timing pin. 544G, LL, TC, 624G VALVE CLEARANCE SPECIFICATIONS 0.36 mm (0.014 in.) Exhaust Valve (E) 0.46 mm (0.018 in.) T6233AG –19–27JAN89 Intake Valves (I) TX,85,DH2239 –19–31JUL92–4/5 0.36 mm (0.014 in.) Exhaust Valve (E) 0.46 mm (0.018 in.) 10. Clean cylinder head and rocker arm cover mating surfaces. 11. Install rocker arm cover gasket. Do not use sealant on the gasket. 12. Install rocker arm cover. Tighten screws to 10.8 N•m (96 lb-in.). Do not overtighten cap screws. T6233AH Intake Valves (I) –19–27JAN89 544G, LL, TC, 624G VALVE CLEARANCE SPECIFICATIONS 13. Install parts. TX,85,DH2239 –19–31JUL92–5/5 86–2 PN=159 Maintenance—Every 2000 Hours ADJUST ENGINE VALVE LASH (CLEARANCE)—644G 1. Remove precleaner, hood, air cleaner support with starting aid and air cleaner, engine crankcase vent tube. 2. Plug all openings. 3. Check crankcase ventilation tube for restriction. Clean with solvent or diesel fuel. 4. Remove rocker arm cover. 5. Remove plugs. Install JDE-81-I Flywheel Turning Tool (A) and JDE-81-4 Timing Pin (B). 6. Rotate flywheel until timing pin fits into hole in flywheel. 7. Try to move both pushrods at number one cylinder. If both are loose, proceed with adjustment per chart on No. 1 TDC. If both pushrods at number six are loose, proceed with adjustment per chart on No. 6 TDC. TX,86,JC1142 –19–23MAY96–1/4 NOTE: Valve clearance can be adjusted whether engine is hot or cold. T6105BF 9. Loosen hex nut. –UN–24FEB89 8. Measure and adjust valve clearance with No. 1 piston or No. 6 at TDC. To change piston position, pull timing pin out of flywheel, rotate flywheel 360°, and insert timing pin. 10. Use screwdriver to adjust valve clearance. 11. Tighten hex nut and torque to 9.5 ± 4 N•m (84 ± 36 lb-in.). TX,86,JC1142 –19–23MAY96–2/4 86–3 PN=160 Maintenance—Every 2000 Hours 12. Remove flywheel turning tool and timing pin. Install plugs. 644G VALVE CLEARANCE SPECIFICATIONS 0.38 mm (0.015 in.) Exhaust Valve (E) 0.71 mm (0.028 in.) T6233AI –19–27JAN89 Intake Valves (I) TX,86,JC1142 –19–23MAY96–3/4 Intake Valves (I) 0.38 mm (0.015 in.) Exhaust Valve (E) 0.71 mm (0.028 in.) 13. Clean cylinder head and rocker arm cover mating surfaces. Apply gasket cement to rocker arm cover. T6233AJ 14. Install rocker arm cover. Tighten cap screws to 10.8 N•m (96 lb-in). –19–27JAN89 644G VALVE CLEARANCE SPECIFICATIONS 15. Install parts. 16. Remove flywheel turning tool and timing pin. Install plugs. TX,86,JC1142 –19–23MAY96–4/4 86–4 PN=161 Maintenance—Every 2000 Hours LUBRICATE FRONT DRIVELINE SUPPORT BEARING CAUTION: Prevent possible injury from unexpected machine movement. Install frame locking bar before lubricating. –UN–23AUG89 Ö T7114AS Lubricate until grease escapes around seal. (See Fuels and Lubricants chapter.) NOTE: Grease every 250 hours if operating in deep mud or water. One Point TX,86,JC1143 –19–23MAY96–1/1 86–5 PN=162 Maintenance—Every 3000 Hours CHANGE HYDRAULIC SYSTEM OIL T8029AN –UN–15JUN93 1. Remove hydraulic reservoir filler cap (A). TX,86,JC281 –19–16MAY95–1/3 2. Install hose on hydraulic reservoir drain valve (B). Loosen valve with a 1/4 in. hex key wrench. Allow oil to drain into a container. Dispose of waste oil properly. –UN–15DEC94 3. Flush reservoir with diesel fuel. 4. Tighten drain valve. T8385AF 5. Fill reservoir. (See Fuels and Lubricants chapter.) SPECIFICATIONS 544G, LL, TC Approx. 76 L (80 qt) 624G Approx. 102 L (108 qt) 644G Approx. 115 L (122 qt) 6. Install filler cap. TX,86,JC281 –19–16MAY95–2/3 T7773CC –UN–10AUG92 7. Check oil level in sight glass (C). Oil should be in FULL range. TX,86,JC281 –19–16MAY95–3/3 87–1 PN=163 Maintenance—Every 3000 Hours CLEAN HYDRAULIC SUCTION STRAINER 1. Remove hydraulic reservoir filler cap (A). –UN–15JUN93 2. Remove cap screws and cover (B). T8029AO 3. Inspect gasket and replace if necessary. TX,86,DH2963 –19–16JUN93–1/1 REPLACE DIFFERENTIAL LOCK RETURN FILTER(S)—IF EQUIPPED 1. Remove hydraulic reservoir filler cap (A). –UN–15JUN93 2. Remove cap screws and cover (B). T8029AO 3. Inspect gasket and replace if necessary. TX,86,DH2250 –19–16JUN93–1/2 4. Turn filter(s) (C) counterclockwise to remove. 5. Clean mounting surface. Apply thin film of oil to gasket of new filter(s). –UN–21SEP92 6. Install new filter(s). Turn filter(s) clockwise by hand until tight. T7829BI 7. Install cover, cap screws, and filler cap. TX,86,DH2250 –19–16JUN93–2/2 87–2 PN=164 Maintenance—Every 3000 Hours CHANGE FRONT AND REAR DIFFERENTIAL OIL –UN–08OCT92 1. Remove drain plug (A). Allow oil to drain into a container. Dispose of waste oil properly. NOTE: It is normal for differential lock axles to be filled approximately 1—2 L (1—2 qt) above level plug. Approx. 19 L (20 qt) 624G Front Approx. 28 L (30 qt) 624G Rear Approx. 19 L (20 qt) 644G Front and Rear, each Approx. 28 L (30 qt) T7853AO SPECIFICATIONS 544G Front and Rear, each Front Differential Shown T7853AP –UN–08OCT92 2. Install drain plug. Rear Differential Shown TX,87,JC1058 –19–24JAN96–1/5 T6523CY –UN–20OCT88 3. Open service door (A). TX,87,JC1058 –19–24JAN96–2/5 T7853AQ –UN–08OCT92 4. Remove fill plug (B) from front differential. TX,87,JC1058 –19–24JAN96–3/5 87–3 PN=165 Maintenance—Every 3000 Hours T7853AR –UN–08OCT92 5. Open left service door. Remove fill plug (A) from rear differential. TX,87,JC1058 –19–24JAN96–4/5 NOTE: Each differential housing has three sumps. Fill center housing slowly so oil drains into all sumps. –UN–08OCT92 6. Add oil slowly until it appears in the bottom of the check level plugs (A). (See Fuels and Lubricants chapter.) T7853AK 7. Install fill plugs. T6570AC2 –UN–20OCT88 Front Differential Shown Rear Differential Shown TX,87,JC1058 –19–24JAN96–5/5 87–4 PN=166 Maintenance DRAINING THE COOLING SYSTEM CAUTION: Explosive release of fluids from pressurized cooling system can cause serious burns TS281 Shut off engine. Only remove filler cap when cool enough to touch with bare hands. Slowly loosen cap to first stop to relieve pressure before removing completely. –UN–23AUG88 Ö 1. Check hoses (A) for cracks and leaks. Replace, if necessary. 2. Tighten clamps. T6523CC –UN–20OCT88 3. Check radiator and oil cooler for dirt, damage, leaks, and loose or broken mountings. Clean radiator and oil cooler fins. TX,90,JC1114 –19–18MAR96–1/4 4. Connect a hose to draincock (A) on radiator. T6518BN –UN–10FEB89 5. Turn draincock counterclockwise to open. Allow coolant to drain into a container. Dispose of used coolant properly. TX,90,JC1114 –19–18MAR96–2/4 90–1 PN=167 Maintenance T7829AN –UN–31AUG92 6. 544G, 624G: Remove plug (A) to drain engine block. Allow coolant to drain into a container. Dispose of used coolant properly. 544G, 624G Shown TX,90,JC1114 –19–18MAR96–3/4 644G: Turn draincock (B) counterclockwise to drain engine block. Allow coolant to drain into a container. Dispose of used coolant properly. T100709 –UN–22MAR96 7. Disconnect hose from recovery tank to drain the tank. 644G Shown TX,90,JC1114 –19–18MAR96–4/4 90–2 PN=168 Maintenance DIESEL ENGINE COOLANT The engine cooling system is filled to provide yearround protection against corrosion and cylinder liner pitting, and winter freeze protection to -37°C (-34°F). The following engine coolant is preferred for service: • John Deere PREDILUTED ANTIFREEZE/SUMMER COOLANT The following engine coolant is also recommended: • John Deere ANTIFREEZE/SUMMER COOLANT CONCENTRATE in a 40 to 60 percent mixture of concentrate and quality water. Other low silicate ethylene glycol base coolants for heavy-duty diesel engines may be used if they meet one of the following specifications: • ASTM D5345 (prediluted coolant) • ASTM D4985 (coolant concentrate) in a 40 to 60 percent mixture of concentrate with quality water Coolants meetings these specifications require use of supplemental coolant additives, formulated for heavy- duty diesel engines, for protection against corrosion and cylinder liner erosion and pitting. A 50 percent mixture of ethylene glycol engine coolant in water provides freeze protection to -37°C (-34°F). If protection at lower temperatures is required, consult your John Deere dealer for recommendations. Water quality is important to the performance of the cooling system. Distilled, deionized, or demineralized water is recommended for mixing with ethylene glycol base engine coolant concentrate. IMPORTANT: Do not use cooling system sealing additives or antifreeze that contains sealing additives. COOLANT DRAIN INTERVALS Drain and flush the cooling system and refill with fresh coolant every 24 months or 2000 hours of operation. When John Deere PREDILUTED ANTIFREEZE/ SUMMER COOLANT is used, the service interval may be extended to 36 months or 3000 hours of operation. TX,90,JC1144 –19–23MAY96–1/1 90–3 PN=169 Maintenance FILLING THE COOLING SYSTEM SPECIFICATIONS 544G Cooling system capacity Approx. 24 L (25 qt) 624G Cooling system capacity Approx. 25 L (26 qt) 644G Cooling system capacity Approx. 28.5 L (30 qt) IMPORTANT: After filling radiator, operate engine to purge air from the engine block. When air is purged, the coolant level sensor in the radiator will turn warning alarm on, STOP indicator will flash, and engine coolant indicator will light. Shut off engine and add coolant immediately. Start engine and run until engine is at normal operating temperature. Stop engine and verify that radiator is completely full, and that surge tank is at normal level. HOT WEATHER (above 95°C [35°F]): Antifreeze reduces cooling system efficiency. When maximum cooling system efficiency is required, completely drain and flush system. Refill with clean, soft water, and add RE23182 John Deere Coolant Conditioner or equivalent. IMPORTANT: Use only permanent-type, low silicate, ethylene glycol base antifreeze in coolant solution. Other types of antifreeze may damage cylinder seals. NOTE: All machines are shipped from the factory with a 50-50 mixture for protection to -37°C (-34°F). Adjust mixture accordingly to provide freeze protection for your machine. FREEZING TEMPERATURES: Fill with permanenttype, low silicate, ethylene glycol antifreeze (without stop-leak additive) and clean, soft water. Add RE23182 John Deere Coolant Conditioner or equivalent. TX,90,JC1145 –19–23MAY96–1/1 If you operate your engine in extremely cold temperatures, see your John Deere dealer for information on arctic operation. T85402 See your John Deere dealer for JT05460 SERVICEGARD coolant and battery tester. Follow directions included with the tester. –UN–10NOV88 TEST THE COOLANT FREEZE— PROTECTION LEVEL TX,90,JC1117 –19–18MAR96–1/1 90–4 PN=170 Maintenance DO NOT SERVICE INJECTION NOZZLES IMPORTANT: Do not service or remove injection nozzles. The service life of the injection nozzles may be shortened by: • Overheating • Improper operation • Poor quality fuel • Excessive idling If injection nozzles are not working correctly or are dirty, the engine will not run normally. (See your authorized dealer for service.) T82,SKMA,A –19–28JUL94–1/1 DO NOT ADJUST INJECTION PUMP IMPORTANT: Never steam clean or pour cold water on an injection pump while the engine is running, or while injection pump is still warm. To do so may cause seizure of pump. Clean trash regularly from injection pump. Adjusting the injection pump in any way not approved by the manufacturer will end the warranty. (See your copy of the John Deere warranty on this machine.) Do not attempt to service an injection pump that is not operating correctly. (See your authorized injection pump service center.) TX,DH,236 –19–06JUN91–1/1 CLEANING FUEL TANK OUTLET SCREEN If fuel screen is plugged, debris must be removed and screen cleaned. TX,90,DH2259 –19–12MAY93–1/2 90–5 PN=171 Maintenance 1. Connect hose to fuel tank draincock (B). 2. Remove fuel tank cap. 4. Disconnect fuel hose. Remove hose clamp (A). T6523BW1 5. Remove fitting to remove screen from inside fuel tank. –UN–20OCT88 3. Drain fuel from tank. 6. Remove debris from screen with clean solvent or diesel fuel, or install a new screen. 7. Flush debris out of fuel tank. 8. Clean fitting threads and threads in fuel tank with clean and cure primer. 9. Apply thread lock and sealer (maximum strength) on threads and shoulder of fitting. Apply a band of flexible sealant on threads and shoulder of fitting. 10. Install fitting in fuel tank until shoulder is tight against tank. Tighten hose clamp. IMPORTANT: Wait 20 minutes before filling fuel tank to allow sealant to dry. 11. Fill fuel tank. TX,90,DH2259 –19–12MAY93–2/2 90–6 PN=172 Maintenance BLEEDING FUEL SYSTEM—544G, 624G 1. Place container under filters (C and G). –UN–10SEP92 2. Loosen bleed screw (E). 3. Pump hand primer (B) until bleed screw (E) has solid stream of fuel. T7833AJ 4. Open bleed screw (A). Pump hand primer until bleed screw has solid stream of fuel coming from it. Tighten bleed screw on final fuel filter. A—Bleed Screw (Final Fuel Filter) B—Hand Primer C—Primary Fuel Filter (Water Separator) D—Drain Valve (Primary Fuel Filter) E—Bleed Screw (Primary Fuel Filter) F—Drain Valve G—Final Fuel Filter TX,90,JC285 –19–16MAY95–1/1 90–7 PN=173 Maintenance BLEEDING FUEL SYSTEM—644G 1. Place container under primary fuel filter (F). 2. Loosen bleed screw (C), and push pump (D) until fuel free of bubbles flows from around bleed screw. 3. Tighten bleed screw. T100696 –UN–22MAR96 4. Loosen bleed screw (B) from final fuel filter (A), and push pump (D) until fuel free of bubbles flows from around bleed screw. A—Final Fuel Filter B—Bleed Screw C—Bleed Screw D—Pump E—Fuel Supply Line F—Primary Fuel Filter G—Drain Valve TX,90,JC1115 –19–18MAR96–1/1 ADJUSTING FUEL SHUT-OFF SOLENOID— 644G 1. Disconnect linkage (A) from fuel shut-off lever (B). –UN–21JUN93 2. Hold shut-off lever against lower position stop. T8030AM 3. Adjust linkage so linkage aligns with hole in shut-off lever, and turn out two complete turns. NOTE: Failure to have the shut-off lever against upper position stop can result in low engine horsepower. A—Linkage B—Shut-off Lever 4. Start engine and make sure shut-off lever is tight against upper position stop. TX,90,DH2534 –19–16JUN93–1/1 90–8 PN=174 Maintenance PRECAUTIONS FOR ALTERNATOR AND REGULATOR When batteries are connected, follow these rules: 1. Disconnect negative (-) battery cable when you work on or near alternator or regulator. 2. DO NOT TRY TO POLARIZE ALTERNATOR OR REGULATOR. 3. Be sure alternator wires are correctly connected BEFORE you connect batteries. 6. Connect batteries or a booster battery in the correct polarity (positive [+] to positive [+] and negative [-] to negative [-]). 7. Do not disconnect the batteries when engine is running and alternator is charging. 8. Disconnect battery cables before you connect battery charger to the batteries. If machine has more than one battery, each battery must be charged separately. 4. Do not ground alternator output terminal. 5. Do not disconnect or connect any alternator or regulator wires while batteries are connected or while alternator is operating. 04T,90,C151 –19–20JUL92–1/1 90–9 PN=175 Maintenance SERVICE BATTERIES CAREFULLY Always remove grounded (-) battery clamp first and replace it last. TS204 Never check battery charge by placing a metal object across the posts. Use a voltmeter or hydrometer. –UN–23AUG88 CAUTION: Battery gas can explode. Keep sparks and flames away from batteries. Use a flashlight to check battery electrolyte level. Sulfuric acid in battery electrolyte is poisonous. It is strong enough to burn skin, eat holes in clothing, and cause blindness if splashed into eyes. Avoid the hazard by: • Filling batteries in a well-ventilated area. • Wearing eye protection and rubber gloves. • Avoiding breathing fumes when electrolyte is added. • Avoiding spilling or dripping electrolyte. • Use proper jump start procedure. • Flush your skin with water. • Apply baking soda or lime to help neutralize the acid. • Flush your eyes with water for 15—30 minutes. Get medical attention immediately. –UN–23AUG88 If you spill acid on yourself: TS203 Ö If acid is swallowed: • Do not induce vomiting. • Drink large amounts of water or milk, but do not exceed 1.9 L (2 quarts). TX,90,DH1018 –19–30APR94–1/2 90–10 PN=176 Maintenance • Get medical attention immediately. If electrolyte spills on the floor, use one of the following mixtures to neutralize the acid: 0.5 kg (1 lb) baking soda in 4 L (1 gal) water, or 0.47 L (1 pt) household ammonia in 4 L (1 gal) water. IMPORTANT: Electrolyte can damage paint and metal surfaces of your machine. Do not overfill the battery cells. TX,90,DH1018 –19–30APR94–2/2 90–11 PN=177 Maintenance CHECKING ELECTROLYTE SPECIFIC GRAVITY Always remove grounded (-) battery clamp first and replace it last. TS204 Never check battery charge by placing a metal object across the posts. Use a voltmeter or hydrometer. –UN–23AUG88 CAUTION: Battery gas can explode. Keep sparks and flames away from batteries. Use a flashlight to check battery electrolyte level. Sulfuric acid in battery electrolyte is poisonous. It is strong enough to burn skin, eat holes in clothing, and cause blindness if splashed into eyes. Avoid the hazard by: • Filling batteries in a well-ventilated area. • Wearing eye protection and rubber gloves. • Avoiding breathing fumes when electrolyte is added. • Avoiding spilling or dripping electrolyte. • Use proper jump start procedure. • Flush your skin with water. • Apply baking soda or lime to help neutralize the acid. • Flush your eyes with water for 15—30 minutes. Get medical attention immediately. –UN–23AUG88 If you spill acid on yourself: TS203 Ö If acid is swallowed: • Do not induce vomiting. 04T,90,FF20 –19–12MAY93–1/3 90–12 PN=178 Maintenance • Drink large amounts of water or milk, but do not exceed 1.9 L (2 quarts). • Get medical attention immediately. Check the specific gravity of electrolyte in each battery cell. 04T,90,FF20 –19–12MAY93–2/3 A fully charged battery will have a corrected specific gravity reading of 1.260. If the reading is below 1.200, charge the battery. T85402 NOTE: In tropical areas, use 1.225 for the full charge reading. In cold areas, use 1.280 for the fullcharge reading. –UN–10NOV88 See your John Deere dealer for JT05460 SERVICEGARD battery and coolant tester. Follow directions included with the tester. 04T,90,FF20 –19–12MAY93–3/3 90–13 PN=179 Maintenance CAUTION: Prevent possible injury from exploding battery. Do not charge a battery if the battery is frozen or it may explode. Warm battery to 16°C (60°F). Disconnect battery ground (—) clamp before you charge batteries in the machine to prevent damage to electrical components. IMPORTANT: Do not use a battery charger as a booster if a battery has a 1.150 specific gravity reading or lower. Turn off charger before connecting or disconnecting it. TS204 Ö –UN–23AUG88 USING BATTERY CHARGER A battery charger may be used as a booster to start engine. TX,FF,121 –19–15MAR93–1/1 REPLACING BATTERIES Your machine is equipped with a negative ground electrical system. It uses one or two 12-volt batteries. If one of the two batteries fails, both batteries must be replaced. Use only batteries meeting following specifications. BCI Group Size: 27 544G, 624G: 625 cold cranking amps at -18°C (0°F) 160 minutes reserve capacity at 25 amps 644G: 950 cold cranking amps at -18°C (0°F) 180 minutes reserve capacity at 25 amps TX,90,JC1146 –19–23MAY96–1/1 90–14 PN=180 Maintenance REMOVING BATTERIES 1. Remove battery cover. TX,90,DH1768 –19–06JUN91–1/2 2. Disconnect negative (-) battery cable (A) first, then positive (+) cable (B). 3. Remove nuts and washers (C) and hold down bracket. T6570AD2 –UN–20OCT88 4. Lift battery out of compartment. TX,90,DH1768 –19–06JUN91–2/2 REPLACING FUSES –UN–08OCT92 IMPORTANT: Install fuses with correct amperage rating to prevent electrical system damage from overload. T7853AS The fuse box (A) is in the electrical load center on the right side (outside) of the cab. Both fuses and circuit breakers are located in the load center. TX,90,DH2266 –19–02OCT92–1/1 FUSE (BLADE-TYPE) COLOR CODES Amperage Rating Color 1 Black 3 Violet 4 Pink 5 Tan 7-1/2 Brown 10 Red 15 Light Blue 20 Yellow 25 Natural (White) 30 Light Green 04T,90,J22 –19–28SEP92–1/1 90–15 PN=181 Maintenance RESETTING CIRCUIT BREAKERS Air conditioning system contains two circuit breakers. If circuit breakers open because of a short circuit or overloading, air conditioner will shut off. Turn off air conditioning switch. Wait a couple of minutes before restarting, to allow a cooling off period. Circuit breaker will reset itself. If circuit breaker opens repeatedly, see your John Deere dealer. 04T,90,C155 –19–06JUN91–1/1 T5894AI1 –UN–20OCT88 Before disassembling, remember how bezel and lens are installed with respect to mounting stud. T5894AG1 IMPORTANT: To get the correct lighting pattern, lens must be installed so the word "TOP" is on top when lamp is installed so wider section is on top when lamp is installed. –UN–17APR89 REPLACING HALOGEN BULBS TX,90,RR,1725 –19–11MAR94–1/2 90–16 PN=182 Maintenance 1. Remove four screws (H) to remove bezel (G) and lens (F). –UN–19OCT88 2. Disconnect wiring lead and release retainer clip to remove bulb (D). 3. To disconnect ground wiring lead, push tab up, then pull connector from terminal. T6249AU IMPORTANT: Do not touch the halogen bulb with bare hands. Oil and moisture may cause premature bulb failure. Clean bulb using a soft, oil-free cloth and alcohol. 4. Install new bulb so square notch is aligned with square tab on reflector back. 5. Install retainer clip into locking tabs on reflector back. A—Flange Nut B—Lock Washer C—Housing D—Bulb E—Gasket F—Lens G—Bezel H—Screw 6. Connect wiring leads. Check wiring leads are free of clip. 7. Install lens assembly (F) in housing (C) making sure wires are not crimped, or keeping lens assembly from seating on gasket. 8. Install bezel so wider section is on top. Sealing flange must be inside housing on all four sides before tightening screws. 9. Tighten screws alternately. Do not overtighten as screws may strip out plastic. TX,90,RR,1725 –19–11MAR94–2/2 90–17 PN=183 Maintenance IMPORTANT: The reverse warning alarm is set on high volume at the factory. It may be necessary to adjust the volume to meet local regulations. T7853AT NOTE: Alarm removed from machine for clarity of photograph. –UN–08OCT92 CHANGING REVERSE WARNING ALARM VOLUME To change alarm volume, move switch (A) to desired position. TX,90,DH2566 –19–03FEB95–1/1 CHECKING NEUTRAL START SYSTEM Ö CAUTION: Avoid possible injury or death. DO NOT attempt to start machine unless you are sitting in operator’s seat with the transmission control lever in neutral "N" position. DO NOT bypass or disable any of the starting system parts. Engage park brake before attempting to start engine. This machine has a neutral start switch that is activated by the transmission control lever. Check the neutral start system to ENSURE that the machine: 1. WILL start with the transmission control lever in neutral "N" position. 2. WILL NOT start with the transmission control lever in forward "F" or reverse "R" position. If starting system fails to operate correctly, have your John Deere dealer repair the system immediately. TX,90,DH2556 –19–02OCT92–1/1 90–18 PN=184 Maintenance ADDING ATTACHMENTS/ACCESSORIES TO ROLL-OVER PROTECTIVE STRUCTURE (ROPS) Do not add attachments or accessories to the ROPS without contacting your John Deere dealer for information. Improper attachment may impair the protection offered by the ROPS. 04T,90,K117 –19–16MAR88–1/1 SERVICING AIR CONDITIONING SYSTEM 1. Check and adjust compressor belt tension. 2. Check compressor clutch engagement. 3. Check evaporator core for clogging. 4. Check air intake filters for clogging. 5. Check blowers for proper operation. 6. Check the condenser core to see that it is not partially or completely plugged with dirt or trash. Clean with compressed air or water when needed. 7. Run air conditioning system for several minutes. TX,90,DH2539 –19–12MAY93–1/2 T7829BL 8. Check sight glass (A) on receiver dryer (from outside of cab). Bubbles must not be present in sight glass. If bubbles are present, see your authorized dealer for charging the air conditioning system. –UN–21SEP92 NOTE: Access door on right side of cab opened for clarity of drawing. Door must be closed to check air conditioning operation. Remove sight glass plug from door. TX,90,DH2539 –19–12MAY93–2/2 90–19 PN=185 Maintenance CHECKING AND ADJUSTING COMPRESSOR BELT TENSION—IF EQUIPPED 1. A force of 111 N (25 lb force) halfway between pulleys must move belt 13 mm (0.5 in.). 2. To adjust tension, loosen mounting cap screws. 3. Apply force to FRONT compressor housing only (near the belt) until tension is correct. 4. Tighten cap screws. TX,90,DH1756 –19–31JUL92–1/1 WELDING ON MACHINE IMPORTANT: Disconnect battery ground strap or turn battery disconnect switch to "OFF" to prevent voltage spikes through alternator or monitor. If machine is equipped with a controller (microprocessor) like Engine Controller (EC), Pump and Valve Controller (PVC) or Transmsision Controller disconnect harness connector from controller to prevent voltage spikes through microprocessor. Connect welder ground clamp close to each weld area so electrical current does not arc inside any bearings, bushings or pins. TX,90,JC1060 –19–25JAN96–1/1 90–20 PN=186 Maintenance INSPECTING PARK BRAKE PADS 1. Park machine on a level surface. 2. Lower bucket to ground. TX,90,DH2348 –19–19MAY93–1/3 CAUTION: Prevent possible injury from unexpected machine movement. Never rely on transmission control lever alone to keep machine from moving. Machine can unexpectedly roll or move under power, resulting in death or serious injury. Always engage park brake to hold machine. 4. Install frame locking bar. T7747BR Ö –UN–19MAY92 3. Move transmission control lever (A) to neutral "N". Engage neutral lock (B). 5. Stop engine. TX,90,DH2348 –19–19MAY93–2/3 90–21 PN=187 Maintenance T7853AU –UN–08OCT92 6. Check the combined thickness of backing plates, brake pads (C), (2nd pad not shown) and disk (D). If thickness of backing plates, pads, and disk is less than 29.0 mm (1.20 in.) or if grooves are worn off pads, replace pads. New backing plates, pads and disk measure 35.0 mm (1.40 in). (See your authorized dealer.) TX,90,DH2348 –19–19MAY93–3/3 EXTERNAL SERVICE BRAKE INSPECTION Ö CAUTION: Prevent possible injury from hot spraying oil. Slowly loosen plug to relieve any air pressure. Do first inspection at 5000 hours followed by 1000 hours inspection intervals after the first 5000 hours inspection. If the service brakes are subjected to severe duty, inspect more frequently. TX,90,JC263 –19–29NOV94–1/4 90–22 PN=188 Maintenance T6523BZ –UN–25OCT88 1. Remove brake inspection port plug (A). TX,90,JC263 –19–29NOV94–2/4 T6138AZ –UN–25OCT88 2. Inspect the brake linings (A) on brake disk. TX,90,JC263 –19–29NOV94–3/4 3. Remove axle housing and replace brake disc if oil grooves (B) on facing material are no longer visible. T8137AC –UN–03DEC93 4. If further inspection of brake elements or replacement of brake linings is necessary, see your authorized dealer. TX,90,JC263 –19–29NOV94–4/4 90–23 PN=189 Maintenance CHECKING BRAKE ACCUMULATOR 1. Start engine. 2. Run engine for 1 minute at slow idle. TX,90,JC1116 –19–18MAR96–1/2 3. Quickly apply brake pedal as hard as possible, and hold down. If brake low pressure indicator light comes on, brake accumulator (A) pressure is low. T100704 –UN–22MAR96 4. Replace brake accumulator. TX,90,JC1116 –19–18MAR96–2/2 90–24 PN=190 Maintenance CAUTION: The boom will jump upward during this check. Make sure area around bucket is clear. 1. Start engine. 2. Push ride control switch to OFF position. 3. Raise boom to maximum height and hold control lever over relief for 2 seconds. T7829AV Ö –UN–08SEP92 CHECKING RIDE CONTROL ACCUMULATOR—IF EQUIPPED 4. Lower boom and bucket to ground and stop engine. TX,90,DH2560 –19–12MAY93–1/2 T7853AV 6. If ride control accumulator has lost gas charge, go to your authorized dealer. –UN–08OCT92 5. Turn key switch to ON position. Turn ride control switch to ON. Boom will jump upward, approximately 200 mm (8.0 in.) as accumulator (A) pressure is released. TX,90,DH2560 –19–12MAY93–2/2 90–25 PN=191 Maintenance CAUTION: Escaping fluid under pressure can penetrate skin causing serious injury. Relieve pressure before disconnecting hydraulic or other lines. Tighten all connections before applying pressure. Keep hands and body away from pinholes and nozzles which eject fluids under high pressure. Use a piece of cardboard or paper to search for leaks. Do not use your hand. X9811 Ö –UN–23AUG88 BLEEDING BRAKES If ANY fluid is injected into skin, it must be surgically removed within a few hours by a doctor familiar with this type of injury or gangrene may result. NOTE: Two people are required to bleed brake system oil, one to operate brake valve and the other to open and close bleed screws. 1. Install frame locking bar. 2. Start engine and run at slow idle. 3. Push and hold brake pedal down until brake bleeding procedure is complete. TX,DH,114 –19–06JUN91–1/2 90–26 PN=192 Maintenance 4. Put a clear plastic tube on bleed screw (B) to route flow to hydraulic reservoir filler tube (A) or to a container. 5. Open one bleed screw on differential and axle assembly until hydraulic oil starts to flow. Close bleed screw when oil is free of air. 6. Repeat steps 2—4 for each bleed screw (two bleed screws on each differential). 7. Release brake pedal and stop engine. T6522BR –UN–20OCT88 8. Check hydraulic oil level. (See Maintenance—Every 10 Hours or Daily chapter.) TX,DH,114 –19–06JUN91–2/2 90–27 PN=193 Maintenance CHECKING SECONDARY STEERING SYSTEM—IF EQUIPPED 1. Park machine on a level surface. 2. Shut off engine. Release brakes. 3. Momentarily turn key switch to START but DO NOT start the engine. Release key to ON. 4. The secondary steering motor must be heard running. Secondary steering indicator must light and alarm must sound. 5. Turn steering wheel; Machine should turn partway. Machine will not turn fully when machine is stopped. 6. Start engine. Secondary steering motor, secondary steering indicator and alarm must be off within 3 seconds. TX,DH,115 –19–06JUN91–1/1 CLUTCH CUT-OFF ADJUSTMENT The clutch cut-off switch assembly is easily adjustable to suit operators preference. Adjusting it can increase or decrease the braking action prior to disconnecting the transmission. TX,90,DH2541 –19–02OCT92–1/2 90–28 PN=194 Maintenance 1. Loosen nut (A). 2. Rotate switch assembly (C) to desired gap (D) between lever (B) and bottom of pedal. NOTE: Increasing gap (D) increases the amount of braking applied prior to disengaging the transmission. 3. Tighten nut (A). T7817AL –UN–08SEP92 4. Operate machine with clutch cut-off ON to check if adjustment is to operator’s preference for his work application. Adjust as required. A—Nut B—Lever C—Switch Assembly D—Gap TX,90,DH2541 –19–02OCT92–2/2 DO NOT SERVICE CONTROL VALVES, CYLINDERS, PUMPS OR MOTORS Special tools and information are needed to service control valves, cylinders, pumps, or motors. If these parts need service, see your authorized dealer. TX,90,DH2537 –19–03SEP92–1/1 90–29 PN=195 Maintenance HARDWARE TORQUE SPECIFICATIONS Check cap screws and nuts to be sure they are tight. If hardware is loose, tighten to torque shown on the following charts unless a special torque is specified. T82,SKMA,AT –19–01AUG94–1/1 KEEP ROPS INSTALLED PROPERLY The protection offered by ROPS will be impaired if ROPS is subjected to structural damage, is involved in an overturn incident, or is in any way altered. A damaged ROPS should be replaced, not reused. –UN–23AUG88 CAUTION: Make certain all parts are reinstalled correctly if the roll-over protective structure (ROPS) is loosened or removed for any reason. Tighten mounting bolts to proper torque. TS176 Ö When installation of equipment on a machine necessitates loosening or removing ROPS, mounting bolts must be tightened to 620 ± 120 N•m (457 ± 88 lb-ft). 04T,90,MM8 –19–25JUN91–1/1 90–30 PN=196 Maintenance TS1163 –19–04MAR91 METRIC BOLT AND CAP SCREW TORQUE VALUES Class 4.8 Size Lubricated a N•m lb-ft M6 4.8 M8 12 M10 M12 Class 8.8 or 9.8 Dry a a Lubricated N•m lb-ft 4.5 9 11 22 29 21 50 37 Class 10.9 Dry a a Lubricated N•m lb-ft 6.5 11 16 28 43 32 55 75 55 95 Class 12.9 Dry N•m lb-ft N•m 8.5 13 9.5 17 20 32 24 40 40 63 47 80 70 110 80 140 a Lubricateda lb-ft Drya N•m lb-ft N•m lb-ft N•m lb-ft 3.5 6 8.5 15 12 15 30 37 11.5 19 14.5 28 47 35 23 17 40 29 60 75 55 95 70 105 130 95 165 120 M14 63 47 80 60 120 88 150 110 175 130 225 165 205 150 260 190 M16 100 73 125 92 190 140 240 175 275 200 350 255 320 240 400 300 M18 135 100 175 125 260 195 330 250 375 275 475 350 440 325 560 410 M20 190 140 240 180 375 275 475 350 530 400 675 500 625 460 800 580 M22 260 190 330 250 510 375 650 475 725 540 925 675 850 625 1075 800 M24 330 250 425 310 650 475 825 600 925 675 1150 850 1075 800 1350 1000 M27 490 360 625 450 950 700 1200 875 1350 1000 1700 1250 1600 1150 2000 1500 M30 675 490 850 625 1300 950 1650 1200 1850 1350 2300 1700 2150 1600 2700 2000 M33 900 675 1150 850 1750 1300 2200 1650 2500 1850 3150 2350 2900 2150 3700 2750 M36 1150 850 1450 1075 2250 1650 2850 2100 3200 2350 4050 3000 3750 2750 4750 3500 DX,TORQ2 –19–20JUL94–1/2 90–31 PN=197 Maintenance DO NOT use these values if a different torque value or tightening procedure is given for a specific application. Torque values listed are for general use only. Check tightness of fasteners periodically. Shear bolts are designed to fail under predetermined loads. Always replace shear bolts with identical property class. Fasteners should be replaced with the same or higher property class. If higher property class fasteners are used, these should only be tightened to the strength of the original. properly start thread engagement. This will prevent them from failing when tightening. Tighten plastic insert or crimped steel-type lock nuts to approximately 50 percent of the dry torque shown in the chart, applied to the nut, not to the bolt head. Tighten toothed or serrated-type lock nuts to the full torque value. a ”Lubricated” means coated with a lubricant such as engine oil, or fasteners with phosphate and oil coatings. “Dry” means plane or zinc plated without any lubrication. Make sure fasteners threads are clean and that you DX,TORQ2 –19–20JUL94–2/2 90–32 PN=198 Maintenance Check tightness of cap screws periodically. Torque values listed are for general use only. Do not use these values if a different torque value or tightening procedure is listed for a specific application. T6873AA CAUTION: Use only metric tools on metric hardware. Other tools may not fit properly. They may slip and cause injury. T-Bolt –UN–18OCT88 Ö –UN–18OCT88 ADDITIONAL METRIC CAP SCREW TORQUE VALUES Shear bolts are designed to fail under predetermined loads. Always replace shear bolts with identical grade. T6873AB Fasteners should be replaced with the same or higher grade. If higher grade fasteners are used, these should only be tightened to the strength of the original. H-Bolt –UN–18OCT88 Make sure fastener threads are clean and you properly start thread engagement. This will prevent them from failing when tightening. T6873AC Tighten cap screws having lock nuts to approximately 50 percent of amount shown in chart. METRIC CAP SCREW TORQUE VALUES Nominal Dia 8 T-Bolt H-Bolt N•m lb-ft 29 21 N•m lb-ft M-Bolt N•m lb-ft 20 15 10 7 10 63 46 45 33 20 15 12 108 80 88 65 34 25 14 176 130 137 101 54 40 16 265 195 206 152 78 58 18 392 289 294 217 118 87 20 539 398 392 289 167 125 22 735 542 539 398 216 159 24 931 687 686 506 274 202 27 1372 1012 1029 759 392 289 30 1911 1410 1421 1049 539 398 33 2548 1890 1911 1410 735 542 36 3136 2314 2401 1772 931 687 M-Bolt *Torque tolerance is ± 10%. 04T,90,M170 –19–01AUG94–1/2 90–33 PN=199 Maintenance TS1162 –19–04MAR91 UNIFIED INCH BOLT AND CAP SCREW TORQUE VALUES Grade 2b Grade 1 Size Lubricated a Dry a a Lubricated N•m lb-ft N•m lb-ft Grade 5, 5.1, or 5.2 Dry a Lubricateds N•m lb-ft N•m lb-ft N•m a lb-ft Dry N•m Grade 8 or 8.2 a Lubricateda lb-ft N•m lb-ft Drya N•m lb-ft 1/4 3.7 2.8 4.7 3.5 6 4.5 7.5 5.5 9.5 7 12 9 13.5 10 17 12.5 5/16 7.7 5.5 10 7 12 9 15 11 20 15 25 18 28 21 35 26 3/8 14 10 17 13 22 16 27 20 35 26 44 33 50 36 63 46 7/16 22 16 28 20 35 26 44 32 55 41 70 52 80 58 100 75 1/2 33 25 42 31 53 39 67 50 85 63 110 80 120 90 150 115 9/16 48 36 60 45 75 56 95 70 125 90 155 115 175 130 225 160 5/8 67 50 85 62 105 78 135 100 170 125 215 160 240 175 300 225 3/4 120 87 150 110 190 140 240 175 300 225 375 280 425 310 550 400 7/8 190 140 240 175 190 140 240 175 490 360 625 450 700 500 875 650 1 290 210 360 270 290 210 360 270 725 540 925 675 1050 750 1300 975 1-1/8 400 300 510 375 400 300 510 375 900 675 1150 850 1450 1075 1850 1350 1-1/4 570 425 725 530 570 425 725 530 1300 950 1650 1200 2050 1500 2600 1950 1-3/8 750 550 950 700 750 550 950 700 1700 1250 2150 1550 2700 2000 3400 2550 1-1/2 1000 725 1250 925 990 725 1250 930 2250 1650 2850 2100 3600 2650 4550 3350 DO NOT use these values if a different torque value or tightening procedure is given for a specific application. Torque values listed are for general use only. Check tightness of fasteners periodically. Shear bolts are designed to fail under predetermined loads. Always replace shear bolts with identical grade. DX,TORQ1 –19–20JUL94–1/2 90–34 PN=200 Maintenance a Fasteners should be replaced with the same or higher grade. If higher grade fasteners are used, these should only be tightened to the strength of the original. ”Lubricated” means coated with a lubricant such as engine oil, or fasteners with phosphate and oil coatings. “Dry” means plain or zinc plated without any lubrication. Make sure fasteners threads are clean and that you properly start thread engagement. This will prevent them from failing when tightening. b Grade 2 applies for hex cap screws (not hex bolts) up to 152 mm (6 in.) long. Grade 1 applies for hex cap screws over 152 mm (6 in.) long and for all other types of bolts and screws of any length. Tighten plastic insert or crimped steel-type lock nuts to approximately 50 percent of the dry torque shown in the chart, applied to the nut, not to the bolt head. Tighten toothed or serrated-type lock nuts to the full torque value. DX,TORQ1 –19–20JUL94–2/2 90–35 PN=201 Maintenance Check all oil lines, hoses, and fittings regularly for leaks or damage. Make sure all clamps are in position and tight. Make sure hoses are not twisted or touching moving machine parts. If abrasion or wear occurs, replace immediately. X9811 If an accident occurs, see a doctor immediately. Any fluid injected into the skin must be surgically removed within a few hours or gangrene may result. Doctors unfamiliar with this type of injury may call the Deere & Company Medical Department in Moline, Illinois, or other knowledgeable medical source. –UN–24JAN89 CAUTION: Escaping fluid under pressure can penetrate the skin causing serious injury. Avoid the hazard by relieving pressure before disconnecting hydraulic or other lines. Tighten all connections before applying pressure. Search for leaks with a piece of cardboard. Protect hands and body from high pressure fluids. T85401 Ö –UN–23AUG88 CHECK OIL LINES AND FITTINGS Tubing with dents may cause the oil to overheat. If you find tubing with dents, install new tubing immediately. IMPORTANT: Tighten fittings as specified in torque chart. When you tighten connections, use two wrenches to prevent bending or breaking tubing and fittings. TX,90,DH1559 –19–01AUG94–1/1 90–36 PN=202 Maintenance SERVICE RECOMMENDATIONS FOR O-RING BOSS FITTINGS 2. Lubricate O-ring with petroleum jelly. Place electrical tape over threads to protect O-ring. Slide O-ring over tape and into O-ring groove of fitting. Remove tape. 3. Tighten fitting to torque value shown on chart. T6243AE 1. Inspect O-ring boss seat for dirt or defects. –UN–18OCT88 STRAIGHT FITTING TX,90,DY323 –19– 2MAY96–1/2 90–37 PN=203 Maintenance ANGLE FITTING 3. Turn fitting head-end counterclockwise to proper index (maximum of one turn). 4. Hold fitting head-end with a wrench and tighten locknut and back-up washer to proper torque value. T6520AB 2. Turn fitting into threaded boss until back-up washer contacts face of boss. –UN–18OCT88 1. Back-off lock nut (A) and back-up washer (B) completely to head-end (C) of fitting. NOTE: Do not allow hoses to twist when tightening fittings. TORQUE VALUE Thread Size 3/8-24 N•m lb-ft UNF 8 6 7/16-20 UNF 12 9 1/2-20 UNF 16 12 9/16-18 UNF 24 18 3/4-16 UNF 46 34 7/8-14 UNF 62 46 1-1/16-12 UN 102 75 1-3/16-12 UN 122 90 1-5/16-12 UN 142 105 1-5/8-12 UN 190 140 1-7/8-12 UN 217 160 NOTE: Torque tolerance is ± 10%. TX,90,DY323 –19– 2MAY96–2/2 90–38 PN=204 Maintenance SERVICE RECOMMENDATIONS FOR FLAT FACE O-RING SEAL FITTINGS –UN–18OCT88 1. Inspect the fitting sealing surfaces. They must be free of dirt or defects. 2. Inspect the O-ring. It must be free of damage or defects. T6243AD 3. Lubricate O-rings and install into groove using petroleum jelly to hold in place. 4. Push O-ring into the groove with plenty of petroleum jelly so O-ring is not displaced during assembly. 5. Index angle fittings and tighten by hand pressing joint together to insure O-ring remains in place. 6. Tighten fitting or nut to torque value shown on the chart per dash size stamped on the fitting. Do not allow hoses to twist when tightening fittings. FLAT FACE O-RING SEAL FITTING TORQUE Nominal Tube O.D. mm in. Swivel Nut Dash Size Thread Size in. Bulkhead Nut N•m lb-ft N•m lb-ft 6.35 0.250 -4 9/16-18 16 12 5.0 3.5 9.52 0.375 -6 11/16-16 24 18 9.0 6.5 12.70 0.500 -8 13/16-16 50 37 17.0 12.5 15.88 0.625 -10 1-14 69 51 17.0 12.5 19.05 0.750 -12 1 3/16-12 102 75 17.0 12.5 22.22 0.875 -14 1 3/16-12 102 75 17.0 12.5 25.40 1.000 -16 1 7/16-12 142 105 17.0 12.5 31.75 1.250 -20 1 11/16-12 190 140 17.0 12.5 38.10 1.500 -24 2-12 217 160 17.0 12.5 NOTE: Torque tolerance is +15 -20%. 04T,90,K67 –19–01AUG94–1/2 90–39 PN=205 Maintenance T6890BB –UN–01MAR90 SERVICE RECOMMENDATIONS FOR METRIC SERIES FOUR BOLT FLANGE FITTING A—Sealing Surface B—Split Flange C—Pinched O-Ring 1. Clean sealing surfaces (A). Inspect. Scratches cause leaks. Roughness causes seal wear. Out-of-flat causes seal extrusion. If defects cannot be polished out, replace component. D—Single Piece Flange DO NOT use air wrenches. DO NOT tighten one cap screw fully before tightening the others. DO NOT over tighten. TORQUE CHART* 2. Install the correct O-ring (and backup washer if required) into groove using petroleum jelly to hold it in place. 3. Split flange: Loosely assemble split flange (B) halves. Make sure split is centrally located and perpendicular to the port. Hand tighten cap screws to hold parts in place. Do not pinch Oring (C). 4. Single piece flange (D): Place hydraulic line in center of flange and install four cap screws. Flange must be centrally located on port. Hand tighten cap screws to hold flange in place. Do not pinch O-ring. Thread** N•m lb-ft M6 12 9 M8 30 22 M10 57 42 M12 95 70 M14 157 116 M16 217 160 M18 334 246 M20 421 318 *Tolerance ±10%. The torques given are enough for the given size connection with the recommended working pressure. Increasing cap screw torque beyond these amounts will result in flange and cap screw bending and connection failures. 5. After components are properly positioned and cap screws are hand tightened, tighten one cap screw, then tighten the diagonally opposite cap screw. Tighten two remaining cap screws. Tighten all cap screws as specified in the chart below. **Metric standard thread. 04T,90,K175 –19–01AUG94–1/1 90–40 PN=206 Maintenance T6890BB –UN–01MAR90 SERVICE RECOMMENDATIONS FOR INCH SERIES FOUR BOLT FLANGE FITTINGS A—Sealing Surface B—Split Flange C—Pinched O-Ring 1. Clean sealing surfaces (A). Inspect. Scratches cause leaks. Roughness causes seal wear. Out-of-flat causes seal extrusion. If defects cannot be polished out, replace component. D—Single Piece Flange must be centrally located on port. Hand tighten cap screws to hold flange in place. Do not pinch O-ring. 5. Tighten one cap screw, then tighten the diagonally opposite cap screw. Tighten two remaining cap screws. Tighten all cap screws as specified in the chart below. 2. Install O-ring (and backup washer if required) into groove using petroleum jelly to hold it in place. 3. Split flange: Loosely assemble split flange (B) halves. Make sure split is centrally located and perpendicular to port. Hand tighten cap screws to hold parts in place. Do not pinch O-ring (C). DO NOT use air wrenches. DO NOT tighten one cap screw fully before tightening the others. DO NOT over tighten. 4. Single piece flange (D): Place hydraulic line in center of flange and install cap screws. Flange 04T,90,K174 –19–01AUG94–1/2 90–41 PN=207 Maintenance TORQUE CHART* N•m Nominal Flange Size lb-ft Cap Screw Size Min Max Min 1/2 5/16-18 UNC 20 31 15 23 3/4 3/8-16 UNC 28 54 21 40 1 3/8-16 UNC 37 54 27 40 1-1/4 7/16-14 UNC 47 85 35 63 1-1/2 1/2-13 UNC 62 131 46 97 2 1/2-13 UNC 73 131 54 97 2-1/2 1/2-13 UNC 107 131 79 97 3 5/8-11 UNC 158 264 117 195 3-1/2 5/8-11 UNC 158 264 117 195 4 5/8-11 UNC 158 264 117 195 5 5/8-11 UNC 158 264 117 195 *Tolerance ± 10%. The torques given are enough for the given size connection with the recommended working pressure. Torques can be increased to the maximum shown for each cap screw size if desired. Max Increasing cap screw torque beyond this maximum will result in flange and cap screw bending and connection failures. 04T,90,K174 –19–01AUG94–2/2 90–42 PN=208 Operational Checkout OPERATIONAL CHECKOUT Use this procedure to check all systems and functions on the machine. It is designed so you can make a quick check of the operation of the machine while doing a walk around inspection and performing specific checks from the operator’s seat. Should you experience a problem with your machine, you will find helpful diagnostic information in this checkout that will pinpoint the cause. This information may allow you to perform a simple adjustment which will reduce the downtime of your machine. Use the table of contents to help find adjustment procedures. The information you provide after completing the operational checkout will allow you or your authorized dealer to pinpoint the specific test or repair work needed to restore the machine to design specifications. A location will be required which is level and has adequate space to complete the checks. No tools or equipment are needed to perform the checkout. Complete the necessary visual checks (oil levels, oil condition, external leaks, loose hardware, linkage, wiring, etc.) prior to doing the checkout. The machine must be at operating temperature for many of the checks. Start at the top of the left column and read completely down column before performing check, follow this sequence from left to right. In the far right column, if no problem is found (OK), you will be instructed to go to next check. If a problem is indicated (NOT OK), you will be referred to either a section in this manual or to your authorized dealer. TX,95,DH2538 –19–03SEP92–1/1 95–1 PN=209 Operational Checkout ' MONITOR INDICATOR AND GAUGE CHECKS—ENGINE OFF – – –1/1 HOURMETER AND GAUGE CHECK OK: Go to next check NOT OK: Temperature gauge is solid, 9 arrows showing, circuit is open or shorted. Go to your authorized dealer. Key switch OFF. T7773BC –UN–05AUG92 Press SELECT button. LOOK: Hourmeter reading must be displayed. The Engine Temperature, Fuel, and Transmission Temperature gauges must have single arrow pointing to correct reading. Backlighting of gauges must be ON. NOT OK: One arrow blinking on fuel gauge. Add fuel. If still blinking, circuit is open or shorted. Go to your authorized dealer. NOTE: Hourmeter only displays in hours, not in tenths of hour. – – –1/1 BATTERY CHECK Press SELECT button and hold until battery volts are displayed. Key switch OFF. LOOK: Battery volts must read a minimum of 12.3 volts. OK: Go to next check. NOT OK: See Monitor Display and Alternator Output Check in this group. IF OK: Check and recharge batteries. T7825BC –UN–21AUG92 – – –1/1 95–2 PN=210 Operational Checkout MONITOR INDICATOR CIRCUIT AND KEY SWITCH CHECK OK: Go to next check NOT OK: Check monitor ACC fuse. NOT OK: If brake pressure stays off after 10 pumps, see Brake Accumulator Precharge check. IF OK: Go to your authorized dealer. T7773BA –UN–05AUG92 Apply brake pedal 10 times. Turn key switch to accessory position. LISTEN: Accessory relay must click. LOOK & LISTEN: All monitor indicators and functions, including the alarm, must come ON after 1 second and remain ON for 5 seconds. After 5 seconds: LOOK: Hourmeter and gauges must display a reading and backlighting must be ON. LOOK & LISTEN: The following indicators must be ON: STOP, Engine Oil Pressure, Engine Alternator Volts, Transmission Pressure, Steering Pressure (If equipped) and Brake Pressure. Turn key switch to ON. LISTEN: Accessory relay must click. All monitor indicators and functions must come ON after 1 second and remain ON for 5 seconds. After 5 seconds: LOOK: Hourmeter and gauges must display a reading and backlighting must be ON. LOOK & LISTEN: The following indicators must be ON: STOP, Engine Oil Pressure, Engine Alternator Volts, Transmission Pressure, Steering Pressure (If equipped), Park Brake and Brake Pressure. – – –1/1 95–3 PN=211 Operational Checkout MONITOR TURN SIGNALS AND HAZARD WARNING INDICATOR CHECKS OK: Go to next check NOT OK: Check fuse. IF OK: Check bulbs and wiring. Go to your authorized dealer. T7773BB –UN–21AUG92 T6564OL –UN–19OCT88 T6633AB2 –UN–18OCT88 Move turn signal switch left, then right. Move hazard warning switch to ON. LOOK: Left, right, and then both turn signal indicators must be flashing. Front and rear lights (A and B) must flash as indicated by monitor lights. – – –1/1 ( TRANSMISSION CONTROLS, AXLE AND ENGINE LINKAGES, NEUTRAL START SWITCH, AND REVERSE WARNING ALARM SWITCH CHECKS – – –1/1 NEUTRAL START AND REVERSE WARNING ALARM CIRCUIT CHECKS Turn key switch to ON position and wait 5 seconds. OK: Go to next check With transmission control lever in reverse "R", forward "F", and neutral "N" positions, turn key switch to START . NOT OK: Check fuse. IF OK: Go to your authorized dealer. LISTEN: Starting motor must run while lever is in neutral "N" position only. T7773BI1 –UN–05AUG92 LISTEN: Reverse warning alarm must sound with lever in reverse "R". – – –1/1 95–4 PN=212 Operational Checkout ENGINE SPEED CONTROL LINKAGE CHECK—544G, 624G OK: Go to next check NOT OK: Adjust linkage. See Adjust Engine Speed Control Linkage in Maintenance—Every 1000 Hours chapter. Engine OFF. Right engine service door open. T6564NL –UN–19OCT88 T6564NM –UN–19OCT88 Check injection pump lever with accelerator pedal up. LOOK: Slow idle stop screw (A) must contact injection pump housing. Have someone fully depress accelerator pedal (or use a weight). Check injection pump lever position. LOOK: Long lever must slightly over-travel short lever (B). FEEL: Accelerator pedal must contact stop bolt (C). – – –1/1 ENGINE SPEED CONTROL LINKAGE CHECK—644G Release accelerator pedal. OK: Continue. Push up on injection pump lever. LOOK: Lever MUST NOT move up. T8030AN –UN–21JUN93 – – –1/1 ENGINE SPEED CONTROL LINKAGE CHECK—644G (CONTINUED) Have someone fully depress accelerator pedal (or use a weight). OK: Go to next check. LOOK: Injection pump lever must be against fast idle stop. NOT OK: Adjust speed control linkage. See Adjust Engine Speed Control Linkage in Maintenance—Every 1000 Hours chapter. – – –1/1 95–5 PN=213 Operational Checkout FUEL SHUT-OFF SOLENOID LINKAGE CHECK—644G Open right engine side shield and inspect linkage. OK: Go to next check LOOK: Fuel shut-off cam must be tight against the lower stop. NOT OK: Adjust fuel shut-off solenoid linkage. See Adjusting Fuel ShutOff Solenoid in Maintenance chapter. Start engine and engage park brake. Open right engine side shield and inspect linkage. T8030AN –UN–21JUN93 LOOK: Fuel shut-off cam must be tight against the upper stop. – – –1/1 FRONT AXLE DISCONNECT CHECK— IF EQUIPPED Move front axle disconnect lever (A) up, to disconnect axle. Start engine. OK: Go to next check. NOT OK: Inspect cable linkage to axle, repair as required. Lower boom to raise front wheels off ground. Move transmission control lever to reverse “R”. T7747AN1 –UN–21AUG92 IF OK: Go to your authorized dealer. Back drag with bucket. Observe front wheels. LOOK: Front wheels MUST NOT turn. Push lever down to reconnect axle. Observe front wheels when back dragging LOOK: Front wheels must turn. – – –1/1 95–6 PN=214 Operational Checkout ) MONITOR INDICATOR AND GAUGE CHECKS (ENGINE RUNNING) – – –1/1 MONITOR DISPLAY AND ALTERNATOR OUTPUT CHECK Turn key switch to on and wait 5 seconds. LOOK: Hourmeter reading must appear. T7825BD –UN–21AUG92 Press SELECT button once. LOOK: Battery volts reading must be 12.3—13.8. T7825BC –UN–21AUG92 Press SELECT button once. LOOK: Engine rpm must read 0. Press SELECT button once. LOOK: MPH reading must be 0. T7825BF1 –UN–24AUG92 Press SELECT button once. LOOK: km/H reading must be 0. Start engine and run at slow idle. Observe monitor display. LOOK: The following engine rpm readings must be displayed. 544G/624G: 825—875 rpm 644G: 775—825 rpm (SN -544523) 875—925 rpm (SN 544524- ) T8368BP –UN–02JAN94 – – –1/1 95–7 PN=215 Operational Checkout Increase engine speed to fast idle andobserve monitor display. OK: Go to next check LOOK: The following engine rpm readings must be displayed. 544G: 2350—2400 rpm 624G/644G: 2300—2350 rpm NOT OK: No monitor reading displayed. Check ACC fuse to monitor. Press SELECT button until hourmeter icon is displayed. IF OK: Go to your authorized dealer. LOOK: Hourmeter icon must be flashing and hourmeter reading must be displayed. NOT OK: Check speed control linkage. T7825BB –UN–21AUG92 T7825BD –UN–21AUG92 Reduce engine speed to slow idle and press select button until battery voltage is displayed. LOOK: Battery voltage should be higher than in step 5 and should be approximately 13.6—14.5 volts. T7825BE –UN–21AUG92 IF OK: See Adjust Engine Speed Control Linkage in Maintenance— Every 1000 Hours chapter. NOT OK: Check alternator circuit output. Go to your authorized dealer. – – –1/1 95–8 PN=216 Operational Checkout MONITOR INDICATOR CIRCUIT BYPASS AND SEAT BELT INDICATOR CHECK In a single motion, turn key and start engine. OK: Go to next check LOOK & LISTEN: Engine should start and bypass the bulb check mode. NOT OK: Check for an unhooked wiring connecter. Depress service brake pedal 10 times. Lock transmission control lever in neutral "N". IF OK: Go to your authorized dealer. T7773BH1 –UN–05AUG92 T7747AH1 –UN–24AUG92 T7773BB –UN–21AUG92 LOOK: Seat belt indicator must go out after 5 seconds after engine starts. LOOK: Monitor must display engine rpm and gauges must indicate only one reading. Release park brake. LOOK: Park brake indicator must go out. NOTE: It is normal for Engine Oil Pressure, Brake Pressure, and Transmission Pressure indicators to stay on 4—6 seconds after engine starts. – – –1/1 MONITOR PRIMARY AND SECONDARY LEVEL CHECKS Engage park brake OK: Go to next check LOOK: Park brake indicator must come ON. NOT OK: Go to your authorized dealer. Engine running. Move transmission control lever to forward "F". LOOK: Park brake indicator must remain ON and STOP indicator must come ON and flash at 1 second intervals. T7747AG1 –UN–24AUG92 Engage park brake. – – –1/1 95–9 PN=217 Operational Checkout TRANSMISSION TEMPERATURE GAUGE CHECK OK: Go to next check. NOT OK: If gauge shows solid arrows, check connector at sender. Engine running. IF OK: Go to your authorized dealer. T7773BO2 –UN–05AUG92 T7773BF –UN–05AUG92 Release park brake. Move clutch cut-off switch to the ON position. Apply service brakes. Move transmission control lever to 3rd gear forward. Increase engine speed to fast idle for 30 seconds. LOOK: Transmission temperature indicator arrow must move to the right. – – –1/1 * BRAKE SYSTEM, CLUTCH CUT-OFF, AND DIFFERENTIAL LOCK CHECKS – – –1/1 PARK BRAKE TRANSMISSION LOCKOUT CHECK OK: Go to next check NOT OK: Do not operate machine without interlock working. Go to your authorized dealer. Engine running. T7773BM –UN–05AUG92 T7773BN –UN–05AUG92 Move park brake switch to ON. Move transmission control lever to 1st gear forward. Slowly increase engine speed to fast idle. LOOK: Machine MUST NOT move. – – –1/1 95–10 PN=218 Operational Checkout SERVICE BRAKE PUMP FLOW CHECK OK: Go to next check NOT OK: Check for brake circuit leakage. Go to your authorized dealer. NOTE: Hydraulic oil must be at operating temperature for this check. Engine OFF. T7747AF1 –UN–24AUG92 T7773BQ3 –UN–21AUG92 Stop engine. Operate brake pedal approximately 15 times. Start engine and run at slow idle. Record number of seconds required for low brake pressure indicator light to go out. LOOK: Indicator light must go out in less than 10 seconds from time engine starts. NOTE: Indicator light will not come on for approximately 1 second after starting engine. – – –1/1 95–11 PN=219 Operational Checkout SERVICE BRAKE CHECK OK: Go to next check Engine running. NOT OK: Go to your authorized dealer. T7773BO2 –UN–05AUG92 T7773BQ3 –UN–21AUG92 Move clutch disconnect switch to OFF. Apply service brakes, release park brake, and move transmission control lever to 2nd gear forward. Increase engine speed to fast idle. LOOK: Machine MUST NOT move or move at a very slow speed. Repeat check three times to ensure accurate results. – – –1/1 BRAKE ACCUMULATOR PRECHARGE CHECK NOTE: The axles and hydraulic oil must be at operating temperature for this check. Start engine and run engine for 30 seconds. OK: Go to next check Stop engine. Turn key switch to ON and wait 5 seconds. NOT OK: Make sure brake pedal is not binding and keeping brakes partially engaged. NOTE: STOP indicator light will be on due to no engine oil pressure. Count the number of times the brake pedal can be fully depressed before the low brake pressure warning light comes ON. LOOK: Warning light must come ON in 1—5 applications. Start engine and operate at slow idle. Observe monitor while applying brake pedal with maximum force. T7747AF1 –UN–24AUG92 IF OK: Bleed brakes. See Bleeding Brakes in Maintenance chapter. NOT OK: If light comes ON with engine running, accumulator not charged. Go to your authorized dealer. LOOK & LISTEN: Brake pressure indicator MUST NOT come ON. – – –1/1 95–12 PN=220 Operational Checkout BRAKE SYSTEM LEAKAGE CHECK OK: Go to next check NOT OK: Go to your authorized dealer. T7773BI1 –UN–05AUG92 T7747AF1 –UN–24AUG92 Start engine and wait 30 seconds. Stop engine. Wait 2 minutes. Turn key switch to ON and wait 5 seconds. LOOK: Brake low pressure warning light MUST NOT come ON within 2 minutes after stopping engine. – – –1/1 SERVICE BRAKE PEDAL CHECK Slowly depress each brake pedal one at a time. OK: Go to next check Listen for a hissing noise that indicates oil is flowing to brake pistons. NOT OK: Inspect for debris under brake pedal. Inspect clutch cut-off linkage. Engine OFF. LISTEN & FEEL: A hissing noise must be heard when pedal is depressed approximately 6 mm (1/4 in.) – – –1/1 SERVICE AND PARK BRAKE SYSTEM DRAG CHECKS Position machine on a gradual slope. OK: Go to next check Lower bucket approximately 50 mm (2 in.) from ground. Engine running. Release park and service brakes. NOT OK: Adjust park brake. See Adjusting Park Brake in Maintenance chapter. LOOK: Machine must move or coast. T6522CH –UN–19OCT88 NOTE: If machine does not move, check brake pedals to be sure they fully release when feet are removed from pedals. Drive machine at high speed for about 5 minutes. Brake drag is indicated if brake areas in differential case are hot. NOTE: Observe park brake. If disk is hot, park brake drag is indicated. – – –1/1 95–13 PN=221 Operational Checkout DIFFERENTIAL LOCK CHECK Park machine on a hard surface. OK: Go to next check Release brakes. NOT OK: See Differential Axle in Troubleshooting chapter. Engage differential lock. Steer machine back and forth. LOOK: Front wheels MUST NOT turn in opposite direction. NOTE: It is normal to get a "clunk" sound when you release pedal. T7773BQ1 –UN–21AUG92 – – –1/1 CLUTCH CUT-OFF CHECK OK: Go to next check NOT OK: Adjust clutch cut-off switch. See Adjusting Clutch Cut-Off Switch in Maintenance chapter. T7773BO2 –UN–05AUG92 T7773BQ2 –UN–21AUG92 Move clutch cut-off switch to ON position. Release park brake. Run engine at 1/2 speed in 1st gear forward. Firmly depress left brake pedal. FEEL: Transmission must disengage when left brake pedal is depressed. NOTE: Clutch cut-off switch on left brake pedal can be adjusted to operator preference to match your loading needs. – – –1/1 95–14 PN=222 Operational Checkout + DRIVING CHECKS NOTE: Transmission oil must be at operating temperature for these checks. – – –1/1 OK: Go to next check TRANSMISSION NOISE CHECK NOT OK: Go to Transmission Makes Excessive Noise in Troubleshooting chapter. Engine running. T7825BH –UN–21AUG92 T7773BN –UN–05AUG92 Run engine at approximately 1600 rpm. Drive machine with transmission in each forward and reverse gear. LISTEN: Transmission MUST NOT make excessive noise in any range. Engine rpm MUST NOT "lug down" as transmission is shifted between gears. – – –1/1 95–15 PN=223 Operational Checkout AUTOMATIC SHIFT AND SPEEDOMETER CHECK Press SELECT button on monitor until MPH or Km/H is displayed. Engine running. Release park brake and move transmission control lever to 4th gear forward. T7825BG –UN–21AUG92 Drive machine on level ground and slowly accelerate to fast idle speed. Note speed when shifts are made until 4th gear. Reduce engine rpm to idle and note speed when transmission makes each downshift. OK: Go to next check. NOT OK: Monitor is programmed for wrong machine model. Go to your authorized dealer. NOT OK: Transmission controller does not match machine model. Go to your authorized dealer. LOOK: Transmission should shift at following speeds: 544G 624G 644G Shift MPH Km/ H MPH Km/ H MPH Km/H 2nd3rd 6 9 6 9 6 9 3rd4th 13 21 12 18 11 17 4th3rd 12 18 11 17 10 16 3rd2nd 5 7 5 7 5 7 NOTE: In 4th gear automatic the transmission starts out in 2nd gear. – – –1/1 95–16 PN=224 Operational Checkout TRANSMISSION QUICKSHIFT CHECK Release park brake and move transmission control lever to 2nd gear forward. Engine running. Drive machine at approximately 1600 rpm and press boom control lever switch once. LOOK & FEEL: Transmission must shift to 1st gear. T7825BL1 –UN–31AUG92 OK: Go to next check. NOT OK: Check connector at base of control valve. IF OK: Go to your authorized dealer. Press boom control lever switch once. LOOK & FEEL: Transmission must shift back to 2nd gear. Shift to (4th) gear and press boom control lever switch once. LOOK & FEEL: Transmission must not shift down. NOTE: If boom lever switch is pressed twice, transmission will shift down, then immediately back to 2nd. Transmission will also quickshift from 3rd gear, but quickshift will not work in any gear when in 4th gear "automatic" mode. – – –1/1 TRANSMISSION PRESSURE, PUMP FLOW, AND LEAKAGE CHECK Engine running. Run engine at slow idle. OK: Go to next check Release park brake. NOT OK: Go to your authorized dealer. Shift transmission control lever to reverse, then forward, and then to 1st, 2nd, 3rd and 4th gears. Wait 5 seconds after each shift and observe transmission pressure indicator light. LOOK: Indicator light MUST NOT come ON. NOTE: If light comes ON in one gear only, leakage is indicated on that gear. If light comes ON in all gears, low pump flow or pressure is indicated. T7747AD1 –UN–24AUG92 – – –1/1 95–17 PN=225 Operational Checkout TRANSMISSION SHIFT MODULATION CHECK OK: Go to next check NOT OK: See Machine Shifts Too Fast in Troubleshooting chapter. Engine running. T7825BH –UN–21AUG92 T7773BN –UN–05AUG92 Run engine at approximately 1600 rpm. Move transmission control lever to 1st gear forward. Shift several times from forward to reverse and reverse to forward. Repeat check in 2nd gear. LOOK: Machine must slow down and change direction without excessive delay. – – –1/1 , HYDRAULIC SYSTEM CHECKS – – –1/1 HYDRAULIC SYSTEM WARM-UP PROCEDURE Run engine at fast idle. OK: Go to next check. Hold a hydraulic function over relief to heat oil. Engine running. Periodically cycle all hydraulic functions to distribute warm oil. Repeat procedure until oil is at operating temperature. FEEL: Hydraulic reservoir must be uncomfortable to hold your hand against (approximately 50°C [120°F]). – – –1/1 BOOM DOWN SOLENOID VALVE CHECK Raise boom to full height. Roll bucket back. OK: Go to next check Stop engine. NOT OK: Check fuse. Hold boom down switch down. IF OK: Go to your authorized dealer. Engine running. Move control lever to bucket dump position. T7773BO1 –UN–05AUG92 Move control lever to boom lower position. LOOK: Bucket must dump and boom must lower. – – –1/1 95–18 PN=226 Operational Checkout CONTROL VALVE LIFT CHECK With bucket partially dumped, lower boom to raise front of machine. Run engine at slow idle. Slowly move boom control lever to boom lower position. Slowly move bucket control lever to bucket dump position. T6601AA –UN–19OCT88 OK: Go to next check. NOT OK: Repair lift checks in loader control valve. Go to your authorized dealer. LOOK: Boom MUST NOT raise before moving down. Bucket MUST NOT rollback before dumping. – – –1/1 BUCKET ROLLBACK CIRCUIT RELIEF VALVE CHECK Position bucket at a 45° angle against an immovable object. Move transmission control lever to 3rd gear forward. LOOK: Bucket angle MUST NOT change. OK: Go to next check. NOT OK: Check loader system and circuit relief valve pressures. Go to your authorized dealer. T6564OD –UN–19OCT88 – – –1/1 BUCKET DUMP CIRCUIT RELIEF VALVE PRESSURE CHECK Raise front of machine with bucket at 45° angle. OK: Go to next check. Backdrag with bucket while observing bucket angle. NOT OK: Check loader system and circuit relief valve pressure. Go to your authorized dealer. LOOK: Bucket MUST NOT rollback. T6601AA –UN–19OCT88 – – –1/1 BOOM AND BUCKET CYLINDER DRIFT Raise bucket about 50 mm (2 in.) off ground with bucket level. Stop engine. Wait 1 minute. OK: Go to next check. NOT OK: Go to your authorized dealer. LOOK: Bucket MUST NOT touch ground. T6564NZ –UN–19OCT88 NOTE: Use good judgement to determine if the amount of drift is objectionable for your loader application. – – –1/1 95–19 PN=227 Operational Checkout BOOM DOWN CHECK VALVE LEAKAGE CHECK Position bucket flat on ground. OK: Go to next check Run engine at slow idle for 2 minutes. Heat hydraulic oil to operating temperature. (See Hydraulic System Warm-up Procedure in this group.) LOOK: Bucket MUST NOT drift up. NOT OK: Replace boom lower check valve. Go to your authorized dealer. T7010AO –UN–15MAR89 – – –1/1 PILOT CONTROLLER CHECK OK: Go to next check. NOT OK: Repair pilot controllers. Go to your authorized dealer. T7827AI2 –UN–24AUG92 T7827AD –UN–24AUG92 Stop engine. Turn key switch to OFF position. Move control lever to all positions and then release. LOOK: Lever must return to neutral when released from all positions. – – –1/1 RETURN-TO-DIG CHECK Position bucket fully dumped just above ground level. OK: Go to next check Run engine at slow idle. Move control lever to return-to-dig detent position and release. NOT OK: Check fuse. LOOK: Bucket must rollback to the level position and control lever must return to neutral. T7827AI3 –UN–24AUG92 IF OK: Adjust switch. See Adjusting Return-ToDig in Operating the Machine chapter. NOTE: If bucket is in a rolled back position when key switch is turned ON, control lever must be returned to neutral manually if placed in the return-to-dig detent position. After bucket is dumped once, return-to-dig will work normally. – – –1/1 95–20 PN=228 Operational Checkout BOOM HEIGHT KICKOUT CHECK—IF EQUIPPED Run engine at slow idle. Position bucket flat on ground. OK: Go to next check Move control lever to boom raise detent position and release. NOT OK: Check fuse. LOOK: Boom must raise to the set height and stop. Control lever must return to neutral. IF OK: See Adjusting Boom Height Kickout in Operating the Machine chapter. T7825BL –UN–24AUG92 – – –1/1 PIN DISCONNECT CYLINDER CHECK (544G-TC ONLY) Run engine at slow idle. OK: Go to next check. Lower boom to ground. Engine running. Push and hold down pin disconnect switch. NOT OK: Hold a screwdriver blade against the end of the solenoid valve and check for magnetism with the switch pushed. LOOK: Pin disconnect cylinder must retract both pins, while switch is depressed. If the problem is electrical, check fuse. IF OK: Go to your authorized dealer. If the problem is hydraulic, go to your authorized dealer. – – –1/1 RIDE CONTROL ACCUMULATOR CHECK—IF EQUIPPED Start engine. OK: Go to next check. Push ride control switch to OFF position. CAUTION: The boom will jump upward during this check. Make sure area around bucket is clear. Raise boom to maximum height and hold control lever over relief for 2 seconds. NOT OK: Check ride control fuse. IF OK: Ride control accumulator has lost gas charge. Go to your authorized dealer. Lower boom and bucket to ground and stop engine. T7010AO –UN–15MAR89 Turn key switch to ON position. Observe loader boom as ride control switch is switched to ON. LOOK & FEEL: Boom will jump upward, approximately 200 mm (8.0 in.) as accumulator pressure is released. – – –1/1 95–21 PN=229 Operational Checkout - STEERING SYSTEM CHECKS – – –1/1 STEERING VALVE CHECK Run engine at slow idle. OK: Go to next check. Turn steering wheel until frames are at maximum right (A) and then left (B) positions. NOT OK: Go to next check. LOOK: Frames must move smoothly in both directions. T6471AQ –UN–19OCT88 NOTE: It is normal for steering to drift away from steering stops when steering wheel is released. When steering wheel is stopped, frames must stop. FEEL: Excessive effort must not be required to turn steering wheel. – – –1/1 STEERING SYSTEM LEAKAGE CHECK Turn steering wheel rapidly until frames are against stops. Hold approximately 22 N (5 lb force) pressure on steering wheel. Heat hydraulic oil to operating temperature. (See Hydraulic System Warm-Up Procedure in this group.) Run engine at fast idle. OK: Go to next check. NOT OK: Go to your authorized dealer. Count steering wheel revolutions for 1 minute. Repeat test in opposite direction. LOOK: Steering wheel must rotate less than 5 rpm. T6601AC –UN–19OCT88 NOTE: Use good judgement; excessive steering wheel rpm does not mean steering will be affected. Note: Cold oil may give increased RPM’s during this check. – – –1/1 95–22 PN=230 Operational Checkout PRIORITY VALVE LOW PRESSURE CHECK Park machine on a hard surface. Hold brake pedal down. OK: Go to next check. Steer machine to the right and left as far as possible. NOT OK: Adjust priority valve pressure. Go to your authorized dealer. LOOK: machine must turn at least 1/2 way to the right and left stops. Run engine at fast idle. – – –1/1 PRIORITY VALVE HIGH PRESSURE CHECK OK: Go to next check. NOT OK: Priority pressure is set too high. Go to your authorized dealer. Run engine at fast idle. T7827AI3 –UN–24AUG92 T7825BJ –UN–21AUG92 Steer to steering stop and release wheel. Roll bucket back and hold over relief and observe engine rpm. Turn wheel to steering stop and hold. Observe engine rpm. LOOK: Steering stall engine rpm must be higher than hydraulic stall rpm. – – –1/1 95–23 PN=231 Operational Checkout SECONDARY STEERING SYSTEM CHECK—IF EQUIPPED IMPORTANT: DO NOT operate secondary steering pump for more than 15 seconds with the steering in neutral or damage to the pump and motor can occur. OK: Go to next check. NOT OK: If secondary steering pump and motor do not operate, go to your authorized dealer. T7773BH1 –UN–05AUG92 T6601AC –UN–19OCT88 Park machine on a hard level surface with bucket off of ground and steering straight ahead. Stop engine. If secondary steering pump and motor operate but machine does not steer, go to your authorized dealer. Without starting engine, turn key switch to START position and release. Steer machine to right and left. LOOK: Machine must steer approximately 1/2 way to stops in both directions. Light in monitor must come ON and stay ON until key switch is turned to STOP. T7747AJ1 –UN–24AUG92 – – –1/1 SECONDARY STEERING SYSTEM PRIMARY CHECK VALVE CHECK Turn steering wheel rapidly until frames are against stops. Hold approximately 22 N (5 lb force) pressure on steering wheel. Actuate a hydraulic function and hold over relief. Return control lever to neutral. OK: Go to next check NOT OK: Go to your authorized dealer. Run engine at fast idle. FEEL: Steering wheel MUST NOT "kick back" as hydraulic function is released. NOTE: Steering wheel "kickback" is normal on machines without secondary steering. – – –1/1 95–24 PN=232 Operational Checkout . ACCESSORY CHECKS NOTE: Engine must be stopped and key switch must be ON for these checks – – –1/1 OPERATING LIGHTS CHECK OK: Go to next check NOT OK: Check fuse. IF OK: Go to your authorized dealer. T7773BO3 –UN–05AUG92 T6633AB –UN–18OCT88 T6637AA –UN–18OCT88 Push light switch. Note light operation. LOOK: Headlights (C), and taillights (D) must come on. – – –1/1 WORK LIGHT CHECK OK: Go to next check NOT OK: Check fuse. IF OK: Check bulbs and replace as required. Go to your authorized dealer. T7773BO4 –UN–05AUG92 T6633AB1 –UN–18OCT88 T6564OI –UN–19OCT88 Push light switch. Note light operation. LOOK: Front work lights (C) and rear work lights (D) must come on. – – –1/1 95–25 PN=233 Operational Checkout BRAKE LIGHT CHECK Depress brake pedal and observe brake lights (A). OK: Go to next check. LOOK: Brake lights must come on. NOT OK: Check brake light fuse. NOTE: Brake light switch is a pressure switch. If accumulator is empty, engine may need to be started for brake lights to come on. IF OK: Check bulbs, replace as required. Go to your authorized dealer. T6633AB3 –UN–18OCT88 – – –1/1 HORN CIRCUIT CHECK Push horn button (A). OK: Go to next check LISTEN: Horn must sound. NOT OK: Check fuse IF OK: Check wiring and ground at horn. Go to your authorized dealer. T7747BJ1 –UN–21AUG92 – – –1/1 95–26 PN=234 Operational Checkout WINDSHIELD WASHER AND WIPER CHECK—IF EQUIPPED Turn front wiper switch knob clockwise to first detent, then to second position. LOOK: Front wiper must operate at slow speed with switch in first detent, and fast speed with switch in second position. Push knob in to turn front washer on. T7773AN –UN–05AUG92 OK: Go to next check. NOT OK: If wiper and washer do not work, check fuses. IF OK: Check wiring. Go to your authorized dealer. LOOK: Washer must spray water on windshield. Turn wiper off. LOOK: Front wiper must park at side of windshield. Push rear wiper switch down to first detent position. LOOK: Rear wiper must operate at one speed with switch in first detent. Push rear wiper switch past detent to turn rear washer on. LOOK: Washer must spray water on rear window. Turn wiper off. LOOK: Rear wiper must park at side of rear window. – – –1/1 DEFROSTER BLOWER CHECK Turn defroster blower switch knob to low, medium and high speeds. (Heater blower will also come on automatically.) OK: Go to next check FEEL & LISTEN: Blower must have three speeds and OFF. IF OK: Go to your authorized dealer. NOT OK: Check fuse. T7773BP2 –UN–05AUG92 – – –1/1 95–27 PN=235 Operational Checkout HEATER/AIR CONDITIONER BLOWER CHECK Turn blower switch knob to low, medium and high speeds. OK: Go to next check NOT OK: Check fuse. FEEL & LISTEN: Blower must have three speeds and OFF. IF OK: Go to your authorized dealer. T7773BP3 –UN–05AUG92 – – –1/1 HEATER FUNCTIONAL CHECK Open heater shut-off valve on water pump. OK: Go to next check Start engine. Run at fast idle. NOT OK: Go to your authorized dealer. Wait 2 minutes. Turn temperature control knob to maximum heat position. T7773BP1 –UN–05AUG92 FEEL: Air from ducts must be warm. – – –1/1 AIR CONDITIONER FUNCTIONAL CHECK Start engine and run at fast idle. OK: Go to next check Turn air conditioner switch to maximum COOL setting. NOT OK: Check fuse. Wait for any warm air in duct system to dissipate. IF OK: Go to your authorized dealer. FEEL: Air from ducts must be cool. T7773BP1 –UN–05AUG92 – – –1/1 95–28 PN=236 Operational Checkout START AID SYSTEM CHECK OK: Go to next check. NOT OK: Check for empty start aid can (A). IF OK: Check fuse. Replace. T7747AI1 –UN–14SEP92 NOT OK: If light does not come ON, go to your authorized dealer. T6477AP –UN–19OCT88 Start engine and run at slow idle. Momentarily push start aid button. LISTEN: Engine speed must increase slightly. LOOK: Light in monitor must come ON when button is pushed. – – –1/1 / CAB COMPONENT AND VANDAL PROTECTION CHECKS – – –1/1 CAB DOOR AND WINDOW HOLD-OPEN LATCH CHECK OK: Go to next check NOT OK: Adjust rubber stop. Repair latch. T6633AK –UN–18OCT88 T6633AN –UN–18OCT88 T6633AJ –UN–18OCT88 Push window and door to full open position. Release window and door by turning lever (D) clockwise. LOOK: Pin (B) must fit into latch notch (A). Latch must retain door and window against rubber stops (C). – – –1/1 95–29 PN=237 Operational Checkout CAB DOOR RELEASE BUTTON Press door release button. OK: Go to next check LOOK & LISTEN: Latch must click and release door. NOT OK: If latch does not release, check fuse. IF OK: Go to your authorized dealer. NOT OK: If door does not latch tightly, adjust latch assembly. T7832AJ –UN–27AUG92 – – –1/1 CAB DOOR LOCK CHECK Lock cab door. OK: Go to next check. LOOK: Cab door handle MUST NOT move. NOT OK: Lubricate or repair lock. FEEL: Lock must operate freely and key must not stick in lock. T6564PB –UN–19OCT88 – – –1/1 DOME LIGHT CHECK Move each dome light toggle switch to ON position. OK: Go to next check. Key switch OFF. LOOK: Dome lights must come on. NOT OK: Check fuse and bulb. Turn both switches OFF. T7832AI –UN–24AUG92 – – –1/1 95–30 PN=238 Operational Checkout CAB WINDOW LATCH CHECK Inspect window seals. OK: Go to next check Open right side cab window. Pull window closed. NOT OK: Lubricate latch. Replace window seals if necessary. LOOK: Latch must hold window tightly closed. LOOK: Window seals MUST NOT have gaps between seals and window frames. T6633AO –UN–18OCT88 Position latch outer notch (A) over catch. Open latch. LOOK: When window latch is in outer notch position, window must be held slightly open. – – –1/1 CAB DOOR WINDOW CHECK Inspect window seals. OK: Go to next check Open sliding window to maximum open position and back to 1/2 open notch and release latches (A). NOT OK: Oil latch. Replace window seals if necessary. Close sliding window. T7409AQ –UN–27NOV90 LOOK: Latches must hold window tightly closed, and hold in any notched position. LOOK: Window seals must not have gaps between seals and window frames. – – –1/1 STEERING COLUMN ADJUSTMENT CHECK Depress pedal (A) and move steering wheel column to all positions. Release pedal at each position. OK: Go to next check. NOT OK: Check and adjust pedal linkage. LOOK: When pedal is released, steering column must lock securely in that position. T7773BQ –UN–05AUG92 – – –1/1 95–31 PN=239 Operational Checkout SEAT AND SEAT BELT CHECK IMPORTANT: Replace the complete seat belt assembly every three years regardless of appearance. A date label, to determine the age of the belt, is attached to each seat belt. Standing over seat reach down and lift seat assembly to top of travel then let go. Lift seat slowly until latch " clicks", and release seat. Repeat for upper latch. LOOK & FEEL: Seat must have 3 positions and must latch in 2 upper positions. T7747AP –UN–21AUG92 Inspect seat shell and suspension for cracks, broken welds or looseness. OK: Go to next check NOT OK: Replace any worn or broken parts. Lubricate moving parts of suspension and seat adjusters. Go to your authorized dealer. LOOK: Seat must be in safe condition. Check seat adjustment functions (A, B, C, E, F). LOOK: Seat must adjust freely and remain in locked position. Bounce on seat to check suspension operation. FEEL: Seat suspension must not bottom out and must support operator’s weight. Inspect seat belt (D) for damage. LOOK: Seat belt must lock and not be damaged or worn. FEEL: Seat belt must stay adjusted snugly and not slip in adjuster. – – –1/1 TOOLBOX DOOR CHECK Unlock and open toolbox door under seat in operator’s station. OK: Go to next check. Close and lock door. NOT OK: Lubricate hinges. Lubricate or repair lock. LOOK: Door must open and close smoothly. FEEL: Lock must operate freely and key MUST NOT stick in lock. – – –1/1 95–32 PN=240 Operational Checkout AIR INTAKE FILTER DOOR CHECK Unlock and open door on left side of operator’s station. OK: Go to next check. Close and lock door. NOT OK: Lubricate hinges. Lubricate or repair lock. LOOK: Door must open and close smoothly. FEEL: Lock must operate freely and key MUST NOT stick in lock. T6633AW –UN–18OCT88 – – –1/1 LOAD CENTER DOOR CHECK Unlock and open door on right side of operator’s station. OK: Go to next check. Close and lock door. NOT OK: Lubricate hinges. Lubricate or repair lock. LOOK: Door must open and close smoothly. FEEL: Lock must operate freely and key MUST NOT stick in lock. T7832AK –UN–27AUG92 – – –1/1 ENGINE SIDE PANELS CHECK Unlock and open side panel (A). OK: Go to next check. Latch side panel in open position. NOT OK: Lubricate hinges. Repair latch. Pull rear of panel up and slide out side panel (B). Install side panel (B). T6633AS –UN–18OCT88 Close panel (A). LOOK: Panels must open and close smoothly. FEEL: Latch must operate freely and locking tab must be able to accept a padlock. Repeat with other side. – – –1/1 95–33 PN=241 Operational Checkout RADIATOR CAP ACCESS DOOR CHECK Open and close access door on top of grille housing. OK: Go to next check. LOOK: Door must move freely. Locking pin for padlock MUST NOT be bent. NOT OK: Lubricate hinges. Repair door. T6633AY –UN–18OCT88 – – –1/1 LOOK: Red frame locking bar must be pinned to engine frame below left side cab step. FRAME LOCKING BAR CHECK OK: Go to next check. NOT OK: Order new parts and install new locking bar and pins. T7799CX –UN–23SEP92 – – –1/1 BOOM LOCK CHECK LOOK: Red boom lock must be fastened to front frame at hinge in vertical position. OK: Go to next check. NOT OK: Order new parts and install new boom lock. – – –1/1 SERVICE DECAL CHECK Check service decal (A) above left side battery compartment. OK: Operational Checkout completed. LOOK: Service decal must be legible. NOT OK: Replace service decal. T8385AC –UN–15DEC94 – – –1/1 95–34 PN=242 Troubleshooting USING TROUBLESHOOTING CHARTS NOTE: Troubleshooting charts are arranged from the simplest to verify, to least likely, more difficult to verify. When diagnosing a problem, use all possible means to isolate the problem to a single component or system. Use the following steps to diagnose problems: Step 1. Operational Checkout Procedure. Step 2. Troubleshooting charts. Step 3. Adjustments. Step 4. See your authorized dealer. TX,FF,105 –19–15JUL94–1/1 100–1 PN=243 Troubleshooting ENGINE Symptom Problem Solution Engine Will Not Start Or Starts Hard Fuel tank empty. Check fuel quantity. Fuel tank vent hose clogged. Loosen cap and listen for air rushing into tank. Clean or replace hose. Water in fuel or water frozen in line. Drain water from fuel tank. Inspect fuel filter(s) for water. Change filter(s). Fuel shut-off fuse. Replace fuse. Fuel filter(s) clogged. Inspect and replace fuel filter(s). Incorrect grade of fuel. Drain fuel tank and add correct fuel. Air leak on suction side of fuel system. Check and tighten connection. Check fuel lines for damage. 644G—Fuel shut-off solenoid incorrectly adjusted. Adjust so fuel shut-off lever is against run stop on injection pump. 544G, LL, TC, 624G—Injection pump metering valve sticking. Lightly tap injection pump housing. If engine starts, see your authorized dealer. 544G, LL, TC, 624G—Electric shutoff. See your authorized dealer. Fuel pump. See your authorized dealer. Slow cranking speed. Check batteries and connections. Restricted air filter(s). Check air filter restriction indicator and air filter(s). Incorrect injection pump timing. See your authorized dealer. 644G—Fuel drains from filter(s) with engine stopped, due to leakage in check valve. Disconnect filter inlet line from check valve. Inspect for leakage. Continued on next page TX,100,DH2481 –19–02OCT92–1/12 100–2 PN=244 Troubleshooting Symptom Engine Surges Or Stalls Frequently Problem Solution Injection nozzle(s). See your authorized dealer. Low compression or blown head gasket. 544G, LL, TC, 624G—Remove fuel shut-off fuse. Crank engine and listen for air leaking past valves or an uneven starter speed. Start engine and observe blow-by from vent tube. See your authorized dealer. Fuel injection pump. See your authorized dealer. Fuel tank vent hose clogged. Loosen cap and listen for air rushing into tank. Clean or replace hose. Incorrect grade of fuel. Drain fuel tank and add correct fuel. Water in fuel or water frozen in line. Drain water from fuel tank trap. Inspect fuel filter(s) for water. Change filter(s). Fuel filter(s) clogged. Replace filter(s). Air leak on suction side of fuel system. Check and tighten connections. Check fuel lines for damages. Fuel pump. See your authorized dealer. Fuel return line from injection pump to tank restricted. Disconnect fuel return line from injection pump. Connect a hose to pump and route fuel into a container. If engine runs normally, return hose is restricted. 644G—Clogged overflow valve in injection pump. See your authorized dealer. Restrictor fitting on top fitting in injection pump clogged. Remove, inspect and clean. Continued on next page TX,100,DH2481 –19–02OCT92–2/12 100–3 PN=245 Troubleshooting Symptom Engine Misses Problem Solution 544G, LL, TC, 624G—Injection pump metering valve sticking. Lightly tap injection pump housing. If engine starts, see your authorized dealer. Fuel injection pump out of time. See your authorized dealer. Engine overheating. See your authorized dealer. 644G—Incorrect slow idle, or supplementary idling screw adjustment. Check and adjust slow idle. See your authorized dealer. Incorrect valve clearance. Check and adjust valve clearance. (See Maintenance—Every 1000 Hours chapter.) Valves sticking or burned. Remove fuel shut-off fuse. Crank engine and listen for air leaking past valves or an uneven starter speed. See your authorized dealer. Worn or broken compression rings or cylinder head gasket leaking. Start engine and observe blow-by from vent tube. See your authorized dealer. Injection nozzle(s). See your authorized dealer. Injection pump. See your authorized dealer. Air in fuel. Disconnect return hose from leak-off lines. Crank engine and check for air in fuel at leak-off lines. Tighten connections. Check fuel lines for damage. Incorrect grade of fuel. Drain fuel tank and add correct fuel. Fuel injection pump out of time. See your authorized dealer. Continued on next page TX,100,DH2481 –19–02OCT92–3/12 100–4 PN=246 Troubleshooting Symptom Engine Does Not Develop Full Power Problem Solution Slow idle speed too low. Check slow idle speed. (See Maintenance—Every 1000 Hours chapter.) See your authorized dealer. Fuel pump. See your authorized dealer. Engine overheats. See your authorized dealer. Incorrect valve clearance. Check and adjust valve clearance. (See Maintenance—Every 1000 hours chapter.) Bent push rods. See your authorized dealer. Valve sticking or burned. Remove fuel shut-off fuse. Crank engine and listen for air leaking past valves or an uneven starter speed. See your authorized dealer. Cylinder head gasket leaking. See your authorized dealer. Worn or broken compression rings. See your authorized dealer. Injection nozzle(s). See your authorized dealer. Injection pump. See your authorized dealer. Fuel tank vent hose clogged. Loosen fuel cap and listen for air rushing into tank. Clean or replace hose. Fuel shut-off solenoid lever not against stop on injection pump. Adjust solenoid. (See Adjusting Fuel Shut-Off Solenoid in Maintenance chapter.) Air intake system restricted. Check air filter elements and air filter restriction indicator switch. (See Maintenance—As Required chapter.) Incorrect grade of fuel. Drain fuel tank and add correct fuel. (See Fuels and Lubricants chapter.) Continued on next page TX,100,DH2481 –19–02OCT92–4/12 100–5 PN=247 Troubleshooting Symptom Problem Solution Excess drag in transmission. See your authorized dealer. Excess drag in brakes. Check service and park brake drag. See your authorized dealer. Fast idle speed set too low. Check and adjust fast idle. See your authorized dealer. Fuel filter(s) clogged. Change filter(s). Fuel line restricted. Check for pinched or kinked lines or debris in lines. Route return line into separate container. If engine operation returns to normal, repair fuel return system lines. Fuel pump. See your authorized dealer. Clogged overflow valve in injection pump. See your authorized dealer. 544G, LL, TC, 624G—Restrictor fitting on top fitting in injection pump clogged. Remove, inspect and clean. 544G, LL, TC, 624G—Injection pump metering valve sticking. Lightly tap injection pump housing. If engine starts, see your authorized dealer. Incorrect injection pump timing. See your authorized dealer. Air leak in intake manifold. See your authorized dealer. Incorrect valve clearance. Check and adjust valve clearance. (See Maintenance—Every 1000 Hours chapter.) Worn camshaft. See your authorized dealer. Continued on next page TX,100,DH2481 –19–02OCT92–5/12 100–6 PN=248 Troubleshooting Symptom Engine Emits Excessive Black Or Gray Exhaust Smoke Problem Solution Turbocharger. Remove air intake hose and exhaust elbow. Leading edge of compressor vanes must be sharp and straight. Spin compressor wheel and listen for noisy bearings. Turbine and compressor wheels must not rub in housing. Muffler restricted. Run engine without muffler. If engine operation is now normal, install a new muffler. Low compression. Remove fuel shut-off fuse. Crank engine and listen for air leaking past valves or an uneven starter speed. Start engine and observe blow-by from vent tube. See your authorized dealer. Injection nozzle(s). See your authorized dealer. Incorrect camshaft timing. See your authorized dealer. Injection pump. See your authorized dealer. Restricted air filter. Check air filter restriction indicator and air filter(s). (See Maintenance— As Required chapter.) Replace. Incorrect grade of fuel. Drain fuel tank and add correct fuel. (See Fuels and Lubricants chapter.) Incorrect injection pump timing. See your authorized dealer. Air leak between turbo and manifold. See your authorized dealer. Excessive fuel delivery. See your authorized dealer. Injection nozzle(s). See your authorized dealer. Continued on next page TX,100,DH2481 –19–02OCT92–6/12 100–7 PN=249 Troubleshooting Symptom Engine Emits Excessive Blue Or White Smoke Slow Acceleration. Detonation Problem Solution Turbocharger. Remove air intake hose and exhaust elbow. Leading edge of compressor vanes must be sharp and straight. Spin compressor wheel and listen for noisy bearings. Turbine and compressor wheels must not rub in housing. Cranking speed too low. Check batteries and connections. Incorrect grade of fuel. Drain fuel tank and add correct fuel. (See Fuel and Lubricants chapter.) Injection pump out of time. See your authorized dealer. Engine running too cold. See your authorized dealer. Injection nozzle(s). See your authorized dealer. Low compression. Remove injection pump fuse. Crank engine and listen for air leaking past valves. Start engine and observe blow-by from vent tube. See your authorized dealer. Excessive wear in liners and/or piston rings stuck. See your authorized dealer. Worn valve guides. See your authorized dealer. Incorrect grade of fuel. Drain fuel tank and add correct fuel. Fuel injection pump. See your authorized dealer. Injection nozzle(s). See your authorized dealer. Starting aid solenoid stuck open. See your authorized dealer. Incorrect injection pump timing. See your authorized dealer. Incorrect injection pump advance. See your authorized dealer. Continued on next page TX,100,DH2481 –19–02OCT92–7/12 100–8 PN=250 Troubleshooting Symptom Problem Solution Abnormal Engine Noise Low or incorrect engine oil. Add correct oil. Loose or worn dampener drive. See your authorized dealer. Engine oil diluted with fuel. Inspect engine oil. Inspect fuel pump spindle, seal, and housing. Clean and use or replace. Incorrect fuel injection pump timing. See your authorized dealer. Turbocharger. See your authorized dealer. Excessive valve clearance. Adjust valve clearance. (See Maintenance—Every 1000 Hours chapter.) Bent push rods. See your authorized dealer. Worn rocker arm shafts. See your authorized dealer. Loose connecting rod caps. See your authorized dealer. Loose main bearing caps. See your authorized dealer. Worn main bearing. See your authorized dealer. Worn connecting rod bearings. See your authorized dealer. Incorrect camshaft timing. See your authorized dealer. Scored piston. See your authorized dealer. Worn piston pin bushings and pins. See your authorized dealer. Low oil level. Add oil. Wrong viscosity oil or oil diluted with diesel fuel. Change oil. 644G—inspect fuel pump spindle, seal, and housing. 544G, LL, TC, 624G,—inspect fuel pump diaphragm. Clean and use or replace. Low Oil Pressure Continued on next page TX,100,DH2481 –19–02OCT92–8/12 100–9 PN=251 Troubleshooting Symptom High Oil Pressure Engine Overheats Problem Solution Oil pressure gauge or sensor. See your authorized dealer. Oil pressure regulating valve. See your authorized dealer. Turbocharger shaft seal leaking. See your authorized dealer. Clogged oil pump intake screen. See your authorized dealer. Loose oil pump drive gear. See your authorized dealer. Worn oil pump gear or housing. See your authorized dealer. Excessive main bearing clearance. See your authorized dealer. Excessive connecting rod bearing clearance. See your authorized dealer. Cracked cylinder block. See your authorized dealer. Piston cooling orifice missing. See your authorized dealer. Leakage at internal oil passage. See your authorized dealer. Wrong viscosity oil (too thick). Check for antifreeze in oil. Change oil. Oil pressure gauge or sender. See your authorized dealer. Oil pressure regulating valve. See your authorized dealer. Low coolant level. Fill cooling system and check for leaks. Low engine oil level. Add oil. Loose or broken fan belt. Tighten or replace belt. Fan on backwards, damaged, or wrong fan installed. Check for correct fan installation. Radiator dirty, clogged, or fins damaged. Check air flow. Clean radiator. Straighten fins. Continued on next page TX,100,DH2481 –19–02OCT92–9/12 100–10 PN=252 Troubleshooting Symptom Engine Runs Cold Oil In Coolant Or Coolant In Oil Problem Solution Radiator shroud missing, damaged, or baffles missing. Inspect. Repair or replace. Engine overloaded. Reduce load. Incorrect grade of fuel. Drain fuel tank and add correct fuel. Radiator cap. Replace cap. Faulty gauge or sender. See your authorized dealer. Incorrect injection pump timing. See your authorized dealer. Faulty thermostats (stuck). See your authorized dealer. Thermostats missing. See your authorized dealer. Cooling system coated with lime deposits. Flush cooling system. Excessive brake drag. See your authorized dealer. Excessive transmission drag. See your authorized dealer. Water pump. See your authorized dealer. Excessive fuel delivery. See your authorized dealer. Scored piston. See your authorized dealer. Combustion leak into cooling system. Remove radiator cap. Start engine and check for bubbles in radiator. Temperature gauge or sender. See your authorized dealer. Thermostat (stuck open). See your authorized dealer. Leaking heat exchanger. See your authorized dealer. Leaking cylinder head gasket. See your authorized dealer. Leaking cylinder liner packings. See your authorized dealer. Continued on next page TX,100,DH2481 –19–02OCT92–10/12 100–11 PN=253 Troubleshooting Symptom Excessive Fuel Consumption Turbocharger Excessively Noisy Or Vibrates Oil Dripping From Turbocharger Adapter Problem Solution Cracked cylinder liner. See your authorized dealer. Cracked cylinder block. See your authorized dealer. Air system restricted. Check filter restriction indicator and air filters. Replace. (See Maintenance—As Required chapter.) Leakage in fuel system. Inspect and repair. Incorrect grade of fuel. Drain and refill with correct fuel. Incorrect injection pump timing. See your authorized dealer. Turbocharger. Remove air intake hose and exhaust elbow. Leading edge of compressor vanes must be sharp and straight. Spin compressor wheel to check for rough bearings. Turbine and compressor wheels must not rub in housing. Faulty injection nozzle(s). See your authorized dealer. Bearings not lubricated. Insufficient oil pressure. Check for restricted turbocharger oil line. Air leak in engine, intake or exhaust manifold. See your authorized dealer. Incorrect clearance between turbine wheel and turbine housing. Remove exhaust elbow and air inlet hose. Inspect and repair. Broken blades on turbine. Remove exhaust elbow and air inlet hose. Inspect and repair. Damaged or worn bearings and/or worn seals. Inspect compressor and turbine wheel for damaged blades. Check for proper engine service intervals or dirt entering engine. Excessive crankcase pressure. Check for clogged vent tube. Clean. Continued on next page TX,100,DH2481 –19–02OCT92–11/12 100–12 PN=254 Troubleshooting Symptom Excessive Drag In Turbocharger Rotating Members Problem Solution Carbon build-up in turbocharger oil return line where line passes exhaust manifold. Remove line. Inspect and clean. Carbon build-up behind turbine wheel caused by combustion deposits. See your authorized dealer. Dirt build-up behind compressor wheel caused by air intake leaks. See your authorized dealer. Bearing seizure of dirty or worn bearings caused by excessive temperature, unbalanced wheel, dirty oil, oil starvation, or insufficient lubrication. Check for clogged air filters. TX,100,DH2481 –19–02OCT92–12/12 100–13 PN=255 Troubleshooting ELECTRICAL SYSTEM Symptom Problem Solution Nothing Works Power circuit components. See your authorized dealer. Battery undercharged or dead. See your authorized dealer. Battery cables making poor connections. Clean cable connections at battery and starter solenoid. Neutral start fuse. Replace fuse. Battery undercharged or dead. See your authorized dealer. Battery cables making poor connections. Clean connections at battery, starter, and ground to frame. Start relay. See your authorized dealer. Starter solenoid. See your authorized dealer. Fuel shut-off solenoid. See your authorized dealer. Starter motor. See your authorized dealer. Starter motor pinion "jammed" in flywheel gear. See your authorized dealer. Key switch. See your authorized dealer. Transmission control lever. See your authorized dealer. Engine. See your authorized dealer. Batteries undercharged. See your authorized dealer. Starter armature bearings worn, causing starter "drag". See your authorized dealer. Battery cable connections loose or corroded. Clean and/or tighten connections. Starter Will Not Crank Engine Engine Cranks Slowly Continued on next page TX,100,DH2482 –19–02OCT92–1/8 100–14 PN=256 Troubleshooting Symptom Problem Solution Starting Motor Turns, But Engine Will Not Crank Starter pinion not engaging flywheel ring gear. See your authorized dealer. Starter pinion or flywheel gear teeth broken. See your authorized dealer. Starter solenoid stuck. See your authorized dealer. Starter not disengaging. See your authorized dealer. Starter relay stuck. See your authorized dealer. Key switch. See your authorized dealer. Wiring harness shorted. See your authorized dealer. Battery being overcharged. See your authorized dealer. High ambient temperature. Refill with distilled water. Cracked battery case. Replace battery. Install hold down correctly. Low water level. (See "Battery Using Too Much Water" and "Cracked Battery Case" in this group.) Dirty or wet battery top, causing discharge. Clean battery and wipe dry. Corroded or loose battery cable ends. Clean and tighten cable end clamps. Recharge battery. If unit has two batteries, recharge separately. Broken or loose battery posts. Move posts by hand. If posts are loose or will turn, replace battery. If unit has two batteries, replace both batteries. Loose fan/alternator belt, or worn pulleys. Inspect belt or pulley. Adjust or replace as necessary. Starting Motor Continues To Run After Engine Starts Battery Using Too Much Water Low Battery Output Continued on next page TX,100,DH2482 –19–02OCT92–2/8 100–15 PN=257 Troubleshooting Symptom Problem Solution Starter Solenoid Chatters Poor connections at batteries or starter. Clean connections. Low battery charge. Recharge or replace batteries. Starter solenoid "hold-in" windings open. See your authorized dealer. Fuel shut-off solenoid. See your authorized dealer. Key switch. See your authorized dealer. Wiring harness. See your authorized dealer. Empty start aid can. Replace start aid can. Start aid switch. See your authorized dealer. Start aid solenoid. See your authorized dealer. Worn drive belt. Inspect and replace. Pulley misaligned. Adjust alternator mount. Alternator bearing. Loosen alternator belts. Turn pulley by hand. If any roughness is felt, repair alternator. Internal alternator. See your authorized dealer. Loose or glazed alternator belt. Check belt. Replace if glazed, tighten if loose. Engine rpm low. Raise engine rpm. If light remains on, see your authorized dealer. Excessive electrical load from added accessories. Remove accessories or install higher output alternator. Loose or corroded electrical connections on battery, ground strap, starter, or alternator. Inspect, clean, or tighten electrical connections. Engine Cranks But Does Not Start Start Aid Does Not Work Noisy Alternator Charging Indicator Light Remains ON Continued on next page TX,100,DH2482 –19–02OCT92–3/8 100–16 PN=258 Troubleshooting Symptom Hour Meter Does Not Work Fuel Gauge Displays One Flashing Arrow Transmission Temperature Gauge Displays Nine (9) Arrows No Display Monitor Functions Individual Light In Monitor Panel Is Inoperative (Not During Bulb Check) Individual Light In Monitor Panel Is Inoperative (During Normal Operation And Bulb Check) Problem Solution Alternator. See your authorized dealer. Display monitor. See your authorized dealer. Key switch. See your authorized dealer. Hour meter. See your authorized dealer. Wiring harness. See your authorized dealer. Fuel gauge. See your authorized dealer. Fuel gauge sender. See your authorized dealer. Wiring harness. See your authorized dealer. Gauge. See your authorized dealer. Gauge sender. See your authorized dealer. Wiring harness. See your authorized dealer. Key switch. See your authorized dealer. Display monitor. See your authorized dealer. Logic module. See your authorized dealer. Wiring harness. See your authorized dealer. Sending unit for that function. See your authorized dealer. Wiring harness. See your authorized dealer. Monitor panel. See your authorized dealer. Bulb. Inspect and replace. Display monitor. See your authorized dealer. Continued on next page TX,100,DH2482 –19–02OCT92–4/8 100–17 PN=259 Troubleshooting Symptom Problem Solution Horn Inoperative Fuse. Replace fuse. Horn. See your authorized dealer. Horn switch. See your authorized dealer. Wiring harness. See your authorized dealer. Fuse. Replace fuse. Reverse alarm. See your authorized dealer. Reverse alarm switch. See your authorized dealer. Wiring harness. See your authorized dealer. Fuse. Replace fuse. Proximity switch. See your authorized dealer. Solenoid. See your authorized dealer. Accessory relay. See your authorized dealer. Wiring harness. See your authorized dealer. Wiper fuse. Replace fuse. Wiper switch. See your authorized dealer. Wiper motor. See your authorized dealer. Wiring harness. See your authorized dealer. Fuse. Replace fan fuse. Fan switch. See your authorized dealer. Fan motor resistor. See your authorized dealer. Wiring harness. See your authorized dealer. Reverse Alarm Does Not Work Return-To-Dig Does Not Work Front Or Rear Wiper Does Not Work Defrost Fan Motor Does Not Work Continued on next page TX,100,DH2482 –19–02OCT92–5/8 100–18 PN=260 Troubleshooting Symptom Problem Solution Defrost Fan Motor Does Not Work In All Speeds Fan motor switch. See your authorized dealer. Fan motor resistor. See your authorized dealer. Wiring harness. See your authorized dealer. Fuse. Replace fuse. Fan motor switch. See your authorized dealer. Fan motor resistor. See your authorized dealer. Wiring harness. See your authorized dealer. Fuse. Replace fuse. Light switch. See your authorized dealer. Cab work light relay. See your authorized dealer. Wiring harness. See your authorized dealer. Fuse. Replace fuse. Driving light switch. See your authorized dealer. Wiring harness. See your authorized dealer. Bulb. Replace bulb. Fuse. Replace fuse. Dome light switch. See your authorized dealer. Wiring harness. See your authorized dealer. Accessory relay. See your authorized dealer. Fuse. Replace fuse. Turn signal flasher. See your authorized dealer. Pressurizer Fan Motor Does Not Work Cab Work Lights Do Not Operate Driving Lights Do Not Work Dome Light Does Not Work Turn Signals Do Not Operate Continued on next page TX,100,DH2482 –19–02OCT92–6/8 100–19 PN=261 Troubleshooting Symptom Brake Lights Do Not Operate Differential Lock Does Not Work Secondary Steering Does Not Operate Secondary Steering Indicator Light Does Not Operate Problem Solution Turn signal switch. See your authorized dealer. Wiring harness. See your authorized dealer. Fuse. Replace fuse. Brake light switch. See your authorized dealer. Wiring harness. See your authorized dealer. Key switch. See your authorized dealer. Accessory relay. See your authorized dealer. Fuse. Replace fuse. Differential lock switch. See your authorized dealer. Differential lock solenoid. See your authorized dealer. Wiring harness. See your authorized dealer. Key switch. See your authorized dealer. Fuse. Replace fuse. Neutral start switch. See your authorized dealer. Start circuit relay. See your authorized dealer. Secondary steering controller. See your authorized dealer. Secondary steering switch. See your authorized dealer. Secondary steering motor solenoid. See your authorized dealer. Secondary steering pump motor. See your authorized dealer. Wiring harness. See your authorized dealer. Secondary steering controller. See your authorized dealer. Continued on next page TX,100,DH2482 –19–02OCT92–7/8 100–20 PN=262 Troubleshooting Symptom Problem Solution Indicator light bulb. Replace bulb. Secondary steering light relay. See your authorized dealer. Wiring harness. See your authorized dealer. TX,100,DH2482 –19–02OCT92–8/8 100–21 PN=263 Troubleshooting HYDRAULIC SYSTEM Symptom Problem Solution Noisy Hydraulic Pump Low oil supply or wrong viscosity. Fill reservoir with proper oil. Suction line clogged or pinched. Clean or replace line. Air in oil. Check for foamy oil. Tighten connections. Replace O-rings and/ or lines. Clogged suction strainer. Inspect and clean strainer in reservoir. Loose or missing hydraulic line clamps. Tighten or replace clamps. Hydraulic lines in contact with frame. Inspect and repair. Worn or damaged pump. See your authorized dealer. Cold oil. Warm the oil. Suction line air leak. Check for foamy oil. Low oil supply. Fill reservoir with recommended oil. Wrong oil viscosity. Use recommended oil. Slow engine speed. Adjust engine speed control linkage. Check fast idle speed. (See Maintenance—Every 1000 Hours chapter.) Oil leaking past cylinders or control valve. See your authorized dealer. Blocked or damaged line. Inspect lines. Misadjusted pressure reducing valve. See your authorized dealer. Pilot control valve. See your authorized dealer. Slow Hydraulic Functions Continued on next page TX,100,DH2483 –19–09SEP92–1/7 100–22 PN=264 Troubleshooting Symptom No Steering Or Hydraulic Functions No Hydraulic Functions, Steering Normal Boom Float Function Does Not Work Boom Down Does Not Work— Engine Off One Hydraulic Function Does Not Work Problem Solution Binding loader control valve spool. See your authorized dealer. Secondary steering check valve leaking. See your authorized dealer. Steering valve leaking. See your authorized dealer. Low oil level. Check oil level. Clogged suction strainer. Clean strainer in reservoir. Hydraulic pump. See your authorized dealer. Main hydraulic pump dampener drive. See your authorized dealer. Main hydraulic pump drive. See your authorized dealer. Boom lower solenoid valve ground wire shorted or wrong ground wire connected to solenoid. See your authorized dealer. Boom lower solenoid valve stuck in actuated position. See your authorized dealer. Misadjusted pressure reducing valve. See your authorized dealer. System relief valve. See your authorized dealer. Pilot control pressure low. See your authorized dealer. Loader control valve spool binding in bore. See your authorized dealer. Pilot control valve. See your authorized dealer. Boom down switch not pushed. Push switch. Electrical problem See your authorized dealer. Pilot control valve. See your authorized dealer. Continued on next page TX,100,DH2483 –19–09SEP92–2/7 100–23 PN=265 Troubleshooting Symptom Problem Solution Circuit relief valve. See your authorized dealer. Oil leaking past cylinder packings. See your authorized dealer. Blockage in oil lines or valve. See your authorized dealer. Loader control valve spool stuck in bore. See your authorized dealer. Leakage within work circuit. See your authorized dealer. Low system relief valve setting. See your authorized dealer. Low circuit relief valve setting. See your authorized dealer. Misadjusted pressure reducing valve. See your authorized dealer. Leaking system relief valve. See your authorized dealer. Worn hydraulic pump. See your authorized dealer. Pilot control valve. See your authorized dealer. Leaking cylinders. See your authorized dealer. Leaking seals in circuit relief valve or valve stuck open. See your authorized dealer. Leaking loader control valve. See your authorized dealer. Boom Drifts Up Leakage in boom lower solenoid valve, or O-rings. See your authorized dealer. Oil Overheats Low oil viscosity in hot weather. Use recommended oil. (See Fuels and Lubricants chapter.) Excessive load. Reduce load. Holding hydraulic system over relief. Reduce load. Leakage in work circuit. See your authorized dealer. Clogged fins in oil cooler. Inspect and clean oil cooler. Low Hydraulic Power Functions Drift Down Continued on next page TX,100,DH2483 –19–09SEP92–3/7 100–24 PN=266 Troubleshooting Symptom Problem Solution Oil cooler clogged internally. See your authorized dealer. Incorrect system or circuit relief valve setting. See your authorized dealer. Restriction in oil lines or loader valve. See your authorized dealer. Pinched or restricted priority valve "LS" line. See your authorized dealer. Priority valve. See your authorized dealer. Leaking system relief valve. See your authorized dealer. Worn hydraulic pump (internal leakage). See your authorized dealer. Function Drops Before Raising When Valve Is Activated Stuck open lift check. See your authorized dealer. Hydraulic Oil Foams Low oil level. Fill to correct level. (See Maintenance—Every 10 Hours or Daily chapter.) Wrong oil. Change to recommended oil. (See Fuels and Lubricants chapter.) Water in oil. Change oil. (See Maintenance— Every 3000 Hours chapter.) Loose or faulty suction lines (air leak in system). Tighten or install new lines. Cold oil. Warm the hydraulic oil. Low priority valve pressure setting. See your authorized dealer. Worn hydraulic pump. See your authorized dealer. Sticking priority valve spool. See your authorized dealer. Broken priority valve spring. See your authorized dealer. Pinched or restricted "LS" line. See your authorized dealer. Slow Or Hard Steering Continued on next page TX,100,DH2483 –19–09SEP92–4/7 100–25 PN=267 Troubleshooting Symptom No Steering Constant Steering To Maintain Straight Travel Slow Steering Wheel Movement Will Not Cause Any Frame Movement Steering Wheel Can Be Turned With Frames Against Steering Stop Steering Wheel Turns With No Resistance And Causes No Frame Movement Erratic Steering Problem Solution Secondary steering check valve leakage. See your authorized dealer. Stuck priority valve spool. See your authorized dealer. Broken priority valve spring. See your authorized dealer. Relief valve in priority valve stuck open. See your authorized dealer. Air in system. Check for foamy oil. Leakage in steering system. See your authorized dealer. Worn steering valve. See your authorized dealer. Broken centering springs in steering valve. See your authorized dealer. Leakage in steering system. See your authorized dealer. Worn steering valve gerotor. See your authorized dealer. Leakage in steering system. See your authorized dealer. Low crossover relief valve pressure setting. See your authorized dealer. Broken steering column or splined coupling. See your authorized dealer. Lack of oil in steering valve. Start engine and check steering operation. Leakage in steering system. See your authorized dealer. Steering valve malfunction. See your authorized dealer. Air in oil. Check for foamy oil. Continued on next page TX,100,DH2483 –19–09SEP92–5/7 100–26 PN=268 Troubleshooting Symptom Spongy Or Soft Steering Free Play At Steering Wheel Steering Valve Binding Or Steering Wheel Does Not Immediately Return To Neutral When Released Steering Valve Locks Up Problem Solution Low oil level. Add oil. Sticking priority valve spool. See your authorized dealer. Loose cylinder piston. See your authorized dealer. Damaged steering valve. See your authorized dealer. Air in oil. Check for foamy oil. Low oil level. Add oil. Loose steering wheel nut. Tighten. Worn or damaged splines on steering column or valve. See your authorized dealer. Binding in steering column or misalignment of column. See your authorized dealer. High return pressure. Check for a pinched or damaged return line. Contamination in steering valve. Inspect hydraulic filter for contamination. Repair cause of contamination. Flush hydraulic system. (See Maintenance—Every 3000 Hours chapter.) Large particles of contamination in steering valve. Inspect hydraulic filter for contamination. Repair cause of contamination. Flush hydraulic system. (See Maintenance—Every 3000 Hours chapter.) *Thermal shock See your authorized dealer. Worn or damaged steering valve. See your authorized dealer. Continued on next page TX,100,DH2483 –19–09SEP92–6/7 100–27 PN=269 Troubleshooting Symptom Problem Solution Abrupt Steering Wheel Oscillation Gerotor gear in steering valve not properly timed. See your authorized dealer. Steering Wheel Turns By Itself Lines connected to wrong port. Reconnect lines. Vibration In Steering System Or Hoses Jump High priority valve setting. See your authorized dealer. Low crossover relief valve pressure setting. See your authorized dealer. Machine Turns In Opposite Direction Lines to cylinders connected to wrong ports at steering valve or crossover relief valve. See your authorized dealer. Machine Turns When Steering Valve Is In Neutral Steering valve leakage. See your authorized dealer. Steering Wheel Kickback Failed check valve in secondary steering manifold block. See your authorized dealer. Secondary Steering Motor Will Not Run Electrical problem. See your authorized dealer. Pump seized up. See your authorized dealer. Secondary steering manifold block primary check valve stuck open. See your authorized dealer. Low relief valve setting. See your authorized dealer. Pump or pump coupling. See your authorized dealer. Priority valve. See your authorized dealer Secondary Steering Pump Runs But Will Not Steer Machine "Jerky" Steering *Thermal shock is caused by a large temperature differential (approximately 30°C (50°F)) between the steering valve and hydraulic oil. If the steering is not operated for a long period of time and the orifice in the bottom of the priority valve spool is clogged, the steering valve may bind up when the steering is operated if the hydraulic oil is hot enough. TX,100,DH2483 –19–09SEP92–7/7 100–28 PN=270 Troubleshooting POWER TRAIN Symptom Problem Solution Transmission Slippage Low oil level. Check and add oil. Wrong oil grade. Check oil grade. (See Fuels and Lubricants chapter.) Weak or broken pressure regulating valve spring. See your authorized dealer. Transmission pump suction screen restricted. See your authorized dealer. Low transmission pump flow due to worn pump. See your authorized dealer. Transmission control valve or gasket leakage. See your authorized dealer. Clutch cut-off switch sticking. See your authorized dealer. Restricted modulation orifice. See your authorized dealer. Excessive transmission element leakage. See your authorized dealer. Worn clutch disks. See your authorized dealer. Applied park brake. See your authorized dealer. Low or no transmission pressure. See Transmission Pressure Is Low, this group. Service brakes will not release. See your authorized dealer. Stuck control valve spool. See your authorized dealer. Broken shafts or gears. Drain transmission oil to determine if large pieces of metal contamination are present. Broken drive shafts. See your authorized dealer. Machine Will Not Move Continued on next page TX,100,DH2484 –19–27OCT92–1/6 100–29 PN=271 Troubleshooting Symptom Machine Does Not Engage In Low Gear Transmission Will Not Shift Correctly Transmission Pressure Is Low (All Gears) Problem Solution Broken ring or pinion gear. See your authorized dealer. Transmission control solenoid valve. See your authorized dealer. Stuck spool in transmission control valve. See your authorized dealer. Stuck modulation valve. See your authorized dealer. Transmission shifts fast in 4th gear automatic. Wrong transmission controller for machine model number. See your authorized dealer. Transmission will not shift out of 2nd gear in automatic mode. Wrong transmission controller for machine model number. See your authorized dealer. Low oil level. Check transmission oil level and refill if necessary. Switch. See your authorized dealer. Suction strainer is clogged. Transmission pump may be noisy if transmission suction screen is clogged. Drain transmission. Remove and clean suction screen. Also, check condition of transmission filter. Transmission pressure regulating valve is stuck, or spring is broken. See your authorized dealer. Control valve gasket. Inspect transmission control valve for external leakage. Remove control valve. Inspect and replace gasket, if necessary. Pressure regulating valve. See your authorized dealer. Modulation valve. See your authorized dealer. Transmission pump. See your authorized dealer. Continued on next page TX,100,DH2484 –19–27OCT92–2/6 100–30 PN=272 Troubleshooting Symptom Problem Solution Transmission System Pressure Is Low (One Or Two Gears) Transmission control valve gasket. Inspect transmission control valve for external leakage. Remove control valve. Inspect and replace gasket, if necessary. Clutch piston or seal ring leakage. See your authorized dealer. Low oil level (aeration of oil). Check and add oil. (See Maintenance—Every 10 Hours or Daily chapter.) Low transmission pressure. See your authorized dealer. Transmission pump suction screen restricted. See your authorized dealer. Low transmission pump flow. See your authorized dealer. Excessive transmission element leakage. See your authorized dealer. Modulation valve. See your authorized dealer. Two-stage piston. See your authorized dealer. Oil passages restricted between control valve and transmission elements. See your authorized dealer. System pressure too high. See your authorized dealer. Stuck modulation valve. See your authorized dealer. Stuck or missing check valves. See your authorized dealer. Damaged or missing orifice seal in control valve. See your authorized dealer. Broken piston return spring. See your authorized dealer. Transmission Shifts Too Slow Transmission Shifts Too Fast Continued on next page TX,100,DH2484 –19–27OCT92–3/6 100–31 PN=273 Troubleshooting Symptom Problem Solution Machine "Creeps" In Neutral Warped disks and plates in transmission. See your authorized dealer. Transmission Hydraulic System Overheats High oil level. Check and adjust. Low oil level. Check and correct. (See Fuels and Lubricants Chapter.) Wrong oil grade. Check oil grade. (See Fuels and Lubricants Chapter.) Park brake engaged. Release park brake. Lube lines pinched, restricted, or leaking. Check cooler lines. Machine operated in too high gear range. Operate machine in correct gear range. Temperature gauge or sender. See your authorized dealer. Air flow through oil cooler or radiator restricted. See your authorized dealer. Oil cooler thermal relief bypass valve stuck. See your authorized dealer. Oil cooler internally restricted. See your authorized dealer. Warped disks and plates in transmission. See your authorized dealer. Leakage in transmission hydraulic system. See your authorized dealer. Low transmission pump output. See your authorized dealer. Engine low idle too low. Adjust. (See Adjust Engine Speed Linkage in Maintenance—Every 1000 Hours chapter.) Excessive Transmission Noise (Under Load Or No Load) Continued on next page TX,100,DH2484 –19–27OCT92–4/6 100–32 PN=274 Troubleshooting Symptom Foaming Oil Machine Vibrates Machine Lacks Power And Acceleration Problem Solution Parts worn or damaged in transmission. Remove transmission suction screen. Inspect for metal particles. Repair or replace as necessary. Low or no lube. See your authorized dealer. Incorrect type of oil. Change oil. High oil level. Drain some oil. Low oil level. Add oil. Air leak on suction side of pump. Check oil pickup tube on side of transmission. Aerated oil. Check and add oil. Universal joints on transmission drive shaft or differential drive shafts. Check universal joints. Engine fast idle speed set too low. Check fast idle adjustment. (See Adjust Engine Speed Linkage in Maintenance—Every 1000 Hours chapter.) Incorrect transmission oil. Check oil. (See Fuels and Lubricants chapter.) Aerated oil. Check and add oil. Low transmission pressure. See your authorized dealer. Torque converter freewheel clutch. See your authorized dealer. Warped transmission clutch. See your authorized dealer. Brake drag. See your authorized dealer. Clutch cut-off valve sticking. See your authorized dealer. Low engine power. See your authorized dealer. Continued on next page TX,100,DH2484 –19–27OCT92–5/6 100–33 PN=275 Troubleshooting Symptom Problem Solution Torque Converter Stall RPM Too High Aerated oil. See your authorized dealer. Converter relief valve stuck open. See your authorized dealer. Torque converter seal leakage. See your authorized dealer. Torque converter not transferring power (bent fins, broken stator). See your authorized dealer. Low engine power. See your authorized dealer. Mechanical malfunction. See your authorized dealer. Low oil level. Add oil. Cold oil. Warm oil. Leak in reverse pack See your authorized dealer. Cold oil. Warm oil. No time delay in module. See your authorized dealer. Shorted sensor. See your authorized dealer. Stuck modulation valve. See your authorized dealer. Low transmission pressure. See your authorized dealer. Leak in transmission pressure circuit. See your authorized dealer. Transmission pump. See your authorized dealer. Clogged filter. Inspect filter. Replace if necessary. Torque Converter Stall RPM Too Low Transmission Pressure Light Comes On When Shifting From Forward To Reverse (All Other Gears OK) Transmission Pressure Light Comes On For Each Shift TX,100,DH2484 –19–27OCT92–6/6 100–34 PN=276 Troubleshooting SERVICE BRAKES Symptom Problem Solution Poor Or No Brakes Brake accumulator charge low. See your authorized dealer. Brake pump standby pressure low. See your authorized dealer. Low brake pressure. See your authorized dealer. Air in system. Bleed brakes. (See Bleeding Brakes in Maintenance chapter.) Worn brake pads. Inspect brake pads. Brake valve leakage. See your authorized dealer. Brake piston seal leakage. Check for an overfilled differential. Remove differential check plug. Apply brakes and check for leakage from check plug. Internal restriction in circuit. Remove lines and components. Clutch cut-off switch out of adjustment. Adjust switch. (See Adjusting Clutch Cut-Off Switch in Maintenance chapter.) Brake valve. See your authorized dealer. Low oil level. Check oil level. Brake pedal not returning properly. Inspect. Stuck brake piston. See your authorized dealer. Debris holding spool down in brake valve. See your authorized dealer. Warped brake disk. Inspect brake pads. (See Inspecting Brake Pads in Maintenance chapter.) Brake valve. See your authorized dealer. Aggressive Brakes Brakes Drag Continued on next page TX,100,DH2485 –19–18SEP92–1/2 100–35 PN=277 Troubleshooting Symptom Problem Solution Brakes Lock Up Air in brake system. Bleed brakes. (See Bleeding Brakes in Maintenance chapter.) Brake valve. See your authorized dealer. Air in brake system. Bleed brakes. (See Bleeding Brakes in Maintenance chapter.) Worn brake pads. Inspect brake pads. (See Inspecting Brake Pads in Maintenance chapter.) Wrong oil in differential. Drain. Refill. (See Fuels and Lubricants chapter.) Loose brake pads. See your authorized dealer. Hissing Noise When Brake Pedal Is Depressed With Engine Stopped Brake valve, or brake piston leakage. See your authorized dealer. Brake Pressure Warning Light Will Not Go Out Brake pressure warning switch. See your authorized dealer. Brake accumulator pressure too low. See your authorized dealer. Low brake pump standby pressure setting. See your authorized dealer. Leakage in pressure reducing manifold block. See your authorized dealer. Leakage in differential lock circuit. See your authorized dealer. Leakage in brake system. See your authorized dealer. Worn brake pump. See your authorized dealer. 544G TC only—Leakage in pin disconnect valve or cylinder. See your authorized dealer. Brakes Chatter TX,100,DH2485 –19–18SEP92–2/2 100–36 PN=278 Troubleshooting DIFFERENTIAL AXLE Symptom Problem Solution No Differential Lock Operation Electrical circuit. See your authorized dealer. Differential lock solenoid valves stuck. See your authorized dealer. Pressure reducing valve malfunction or setting low. See your authorized dealer. Excessive differential lock sealing ring leakage. See your authorized dealer. Seals on differential lock solenoid valve or regulating valve. Remove and inspect seals. Differential lock piston stuck in bore. See your authorized dealer. Excessive wear on differential lock disks and plates. See your authorized dealer. Pressure reducing valve malfunction or setting low. See your authorized dealer. Excessive differential lock sealing ring leakage. See your authorized dealer. Seals on differential lock solenoid valve or regulating valve. See your authorized dealer. Differential lock piston stuck in bore. See your authorized dealer. Excessive wear of differential lock disks and plates. See your authorized dealer. Warped differential lock disks and plates. See your authorized dealer. Differential lock piston stuck in bore. See your authorized dealer. Foot switch. Inspect. Differential Lock Slips Or Chatters When Engaged Differential Lock Will Not Release Continued on next page TX,100,DH2486 –19–07OCT92–1/3 100–37 PN=279 Troubleshooting Symptom Problem Solution Electrical circuit. See your authorized dealer. Differential lock solenoid valve stuck. See your authorized dealer. Differential lock piston stuck in bore. See your authorized dealer. Warped differential lock disks and plates. See your authorized dealer. Leak in brake piston seals. See your authorized dealer. Incorrect breather tube. See your authorized dealer. Not operating engine at full load. Release differential lock pedal and operate engine at full load. Turbo boost line. See your authorized dealer. Clogged reservoir differential filter. Remove filter and check for debris. Low engine power, or turbocharger. See your authorized dealer. Differential Low On oil. External leakage. See your authorized dealer. Excessive Differential And/Or Axle Noise Low oil level in differential. See your authorized dealer. Brakes dragging. See your authorized dealer. Engaged differential lock. Release lock. Pinion bearing. See your authorized dealer. Gear mesh pattern between ring and pinion gear incorrect. See your authorized dealer. Differential pinion gears and/or cross shafts. See your authorized dealer. Axle bearing. See your authorized dealer. Axle planetary. See your authorized dealer. Excessive axle end play. See your authorized dealer. Differential Overfilled With Oil On Standard Axles Differential Overfilled With Oil On Differential Lock Axles Oil Seeping From Outer Axle Seal Continued on next page TX,100,DH2486 –19–07OCT92–2/3 100–38 PN=280 Troubleshooting Symptom Axle Overheats Problem Solution Worn outer bearing and/or cup. See your authorized dealer. Differential overfilled with oil. See your authorized dealer. Low or high differential oil. See your authorized dealer. Turbo boost return circuit. Release differential lock pedal and operate engine at full load. Brakes drag. See your authorized dealer. TX,100,DH2486 –19–07OCT92–3/3 DRIVELINE Symptom Problem Solution Excessive Driveline Vibration Or Noise Yokes not in line on drive shafts. Inspect. Align drive shaft yokes. Worn rear driveline support bearing. See your authorized dealer. Bent drive shaft. See your authorized dealer. Loose yoke retaining nuts (drive shafts wobble at high speed). See your authorized dealer. Rear axle oscillating support. See your authorized dealer. Lack of lubrication. Lubricate with proper grade of grease. (See Fuels and Lubricants chapter.) TX,100,DH2487 –19–09SEP92–1/1 100–39 PN=281 Troubleshooting PARK BRAKE Symptom Problem Solution Brake Will Not Hold Not adjusted correctly. Adjust park brake. (See Adjust Park Brake in Maintenance—Every 1000 Hours chapter.) Park brake solenoid. See your authorized dealer. Brake disk and/or brake pads worn. See your authorized dealer. Brake piston. See your authorized dealer. Brake pads out of adjustment. Adjust park brake. (See Adjust Park Brake in Maintenance—Every 1000 Hours chapter.) Brake not released. Release park brake. Park Brake Indicator In Monitor Does Not Come On When Brake Applied Wiring or switch. See your authorized dealer. Brake Will Not Apply Pads out of adjustment. Adjust park brake. (See Adjust Park Brake in Maintenance—Every 1000 Hours chapter.) Restriction between pressure reducing valve manifold and brake. See your authorized dealer. Brake Disk Overheats TX,100,DH2488 –19–02OCT92–1/1 100–40 PN=282 Troubleshooting AIR CONDITIONING Symptom Problem Solution Air Conditioning System Does Not Operate Accessory relay #2. See your authorized dealer. Fuse. Replace fuse. Fan motor switch. See your authorized dealer. Fan motor resistor. See your authorized dealer. Fan motor. See your authorized dealer. Wiring harness. See your authorized dealer. Temperature control switch. See your authorized dealer. Low pressure switch. See your authorized dealer. High pressure switch. See your authorized dealer. Compressor clutch coil. See your authorized dealer. Relay. See your authorized dealer. Circuit breaker. See your authorized dealer. Condenser fan motor. See your authorized dealer. Wiring harness. See your authorized dealer. TX,100,DH2489 –19–09SEP92–1/1 100–41 PN=283 Storage 1. Repair worn or damaged parts. Install new parts, if necessary, to avoid needless delays later. T47764 2. Loosen alternator and fan belts. –UN–09NOV88 PREPARE MACHINE FOR STORAGE 3. Clean primary air cleaner element. 4. Wash the machine. [Use low pressure wash operations (less than 1379 kpa (13.8 bar) (200 psi)) until 30 days after receipt of machine.] Paint areas to prevent rust. Replace decals, where needed. T5813AM IMPORTANT: High pressure washing [greater than 1379 kpa (13.8 bar) (200 psi)] can damage freshly painted finishes. Paint should be allowed to air dry for 30 days minimum after receipt of machine before cleaning parts or machine with high pressure. Use low pressure wash operations until 30 days have elapsed. –UN–09FEB89 TX,105,FF1190 –19–03AUG92–1/3 5. Remove seat cushion and other perishable items. IMPORTANT: LPS 3 Rust Inhibitor can destroy painted finish. DO NOT spray LPS 3 Rust Inhibitor on painted surfaces. 6. Retract all hydraulic cylinders, if possible. If not, coat exposed cylinder rods with LPS 3 Rust Inhibitor. 7. Lubricate all grease points. 8. If possible, raise machine high enough so tires do not touch the ground. If not, park on a hard surface to prevent tires from freezing to ground. 9. Store machine in a dry, protected place. If stored outside, cover with a waterproof material. TX,105,FF1190 –19–03AUG92–2/3 105–1 PN=284 Storage IMPORTANT: Prevent possible machine damage from unauthorized persons operating machine. Attach a "DO NOT OPERATE" tag to steering wheel. 10. Place a "DO NOT OPERATE" tag on the steering wheel. 11. Remove keys and lock all covers and doors. T7447AO –19–22APR91 LPS 3 Rust Inhibitor is manufactured by Holt Lloyd Corporation. TX,105,FF1190 –19–03AUG92–3/3 MONTHLY STORAGE PROCEDURE 1. Drain water and sediment from fuel tank when air temperature is above freezing. 2. Remove LPS 3 Rust Inhibitor from cylinder rods with a cleaning solvent. –UN–18OCT88 CAUTION: Engine exhaust fumes can cause sickness or death. Start engine ONLY in a wellventilated area. T6191AA Ö TX,105,FF,400 –19–06SEP94–1/2 105–2 PN=285 3. Check all fluid levels. If low, check for leaks and add oil as required. T6181AU IMPORTANT: Prevent possible engine damage. During cold temperatures, check fluidity of engine oil on dipstick. If the oil appears waxy and/or jelly-like rather than liquid, DO NOT attempt to start engine. Use external heat source to warm the crankcase until oil appears fluid. –UN–18OCT88 Storage 4. Check belts. 5. Check condition of all hoses and connections. 6. Check electrolyte level. Charge and install battery. 7. Fill fuel tank. 8. Pre-lubricate turbocharger bearings: a. Remove engine shut-off fuse. b. Crank engine for 10 seconds. c. Install engine shut-off fuse. d. Start engine. Run several minutes at 1/3 speed until engine is at normal operating temperature. 9. Bleed fuel system. If engine fails to start or runs poorly after starting, change fuel filter(s). Bleed fuel system again. 10. Operate all controls, levers, seat adjustments, etc. 11. Cycle all hydraulic functions several times. Check condition of all hoses and connections. 12. Check condition of tires. Check tire pressure. TX,105,FF,400 –19–06SEP94–2/2 105–3 PN=286 Machine Numbers RECORD PRODUCT IDENTIFICATION NUMBER (PIN) Purchase Date T7829BJ –UN–21SEP92 NOTE: Record all 13 characters of the Product Identification Number. TX,110,DH2545 –19–11DEC92–1/1 RECORD ENGINE SERIAL NUMBER—544G T7829BK –UN–21SEP92 Engine Serial Number (A) TX,110,DH2272 –19–02OCT92–1/1 RECORD ENGINE SERIAL NUMBER—624G T7853AW –UN–08OCT92 Engine Serial Number (A) TX,110,DH2273 –19–07OCT92–1/1 RECORD ENGINE SERIAL NUMBER—644G T100710 –UN–22MAR96 Engine Serial Number (A) TX,110,DH2274 –19–02OCT92–1/1 110–1 PN=287 Machine Numbers RECORD TRANSMISSION SERIAL NUMBER Transmission Serial Number Located on right side of transmission case, near lower right corner of case. 05T,120,MM9 –19–06JUN91–1/1 RECORD HYDRAULIC PUMP SERIAL NUMBER Hydraulic Pump Serial Number TX,110,DH2546 –19–16SEP92–1/1 110–2 PN=288 Specifications T6603AC –UN–20OCT88 544G SPECIFICATIONS TX,115,DH2265 –19–16JUN93–1/2 115–1 PN=289 Specifications A—Overall operating height (boom full raise) 4.83 m (15 ft 10 in.) B—Bucket hinge height 3.72 m (12 ft 3 in.) C—Dump height 2.84 m (9 ft 4 in.) D—Dump reach 0.94 m (3 ft 1 in.) E—Height to top of cab and canopy 3.17 m (10 ft 5 in.) F—Overhang 1.63 m (5 ft 4 in.) G—Wheelbase 2.90 m (9 ft 6 in.) H—Ground clearance 373 mm (1 ft 3 in.) I—Overall length 6.89 m (22 ft 7 in.) Width over tires 17.5-25 tires 2.42 m (8 ft 0 in.) 20.5-25 tires 2.46 m (8 ft 1 in.) Standard operating weight 10 262 kg (22,624 lb) Counterweight weight (1st optional counterweight) 358 kg (790 lb) (2nd optional counterweight) 434 kg (934 lb) TX,115,DH2265 –19–16JUN93–2/2 115–2 PN=290 Specifications 544G SPECIFICATIONS NOTE: Specifications and design subject to change without notice. Wherever applicable, specifications are in accordance with SAE standards. Except where otherwise noted, specifications are based on a machine equipped with all standard, 17.5— 25, 12 PR, L2 tires, one rear counterweight, ROPS cab, full fuel tank, and 79 kg (175 lb) operator. Engine: John Deere 6059T (S.N. 553285— ) 89 kW (120 hp) Piston displacement 5.884 L (359 cu in.) Air cleaner Dual stage dry type with restriction indicator Electrical system 12-volt battery with 95-amp alternator Cold cranking capacity at -18°C (0°F) 625 amps Reserve capacity 160 min. Torque Converter Single phase, single stage Transmission Countershaft, power shift, automatic Travel Speeds: Forward Speeds: km/h mph 1 0—7.4 0—4.6 2 0—12.3 0—7.7 3 0—27.2 0—16.9 4 0—38.4 0—23.8 Reverse Speeds: km/h mph 1 0—7.4 0—4.6 2 0—12.3 0—7.7 3 0—27.2 0—16.9 NOTE: All travel speeds are with 20.5—25 tires. TX,115,DH2267 –19–08DEC95–1/2 115–3 PN=291 Specifications Brakes, Service: Power-actuated, 4-wheel, inboard-mounted, wet disk Foot-operated, by either pedal Left pedal also disconnects transmission (if selected by operator) External inspection Low brake pressure warning light and buzzer in monitor Brakes, Park: Spring applied, hydraulically released parking brake is attached to the output shaft Transmission disconnects with park brake applied Warning light in monitor—Dual-level Amber lights with transmission in neutral Red STOP indicator lights, and buzzer sounds with transmission in gear Steering: Turning radius (to centerline of outside tire) 4.95 m (16 ft 3 in.) Rear axle oscillation 22 degrees, stop to stop Tires 15.5—25, 12 PR L2 17.5—25, 12 PR L2 17.5—25, 12 PR L3 20.5—25, 12 PR L2 20.5—25, 12 PR L3 17.5—25, Radial, One Star L2 Equivalent 17.5—25, Radial, One Star L3 Equivalent 20.5—25, Radial, One Star L2 Equivalent 20.5—25, Radial, One Star L3 Equivalent Maximum Lift Capacity With Standard Equipment Maximum height 5 457 kg (12,031 lb) Ground level 11 006 kg (24,264 lb) TX,115,DH2267 –19–08DEC95–2/2 115–4 PN=292 Specifications DRAIN AND REFILL CAPACITIES—544G Metric U.S. Cooling system 23.5 L 25 qt Fuel tank 218 L 58 gal Engine crankcase and filter 19 L 20 qt Transmission case and filter 9.5 L 10 qt Front differential 18 L 19 qt Rear differential 18 L 19 qt Hydraulic reservoir 76 L 80 qt TX,115,JC1149 –19–23MAY96–1/1 T7829AX –UN–10SEP92 544G LL SPECIFICATIONS TX,115,DH2291 –19–16JUN93–1/2 115–5 PN=293 Specifications A—Coupler hinge height 3.72 m (12 ft 3 in.) B—Ground to top of tine 3.53 m (11 ft 7 in.) C—Height to top of cab and canopy 3.17 m (10 ft 5 in.) D—Ground clearance 373 mm (1 ft 3 in.) E—Wheelbase 2.90 m (9 ft 6 in.) F—Overall length with 1219 mm (48 in.) tine 7.52 m (24 ft 8 in.) with 1372 mm (54 in.) tine 7.67 m (25 ft 2 in.) with 1524 mm (60 in.) tine 7.82 m (25 ft 8 in.) Width over tires 17.5-25 tires 2.42 m (8 ft 0 in.) 20.5-25 tires 2.46 m (8 ft 1 in.) 23.1-26 tires 2.77 m (9 ft 1 in.) Standard operating weight with 1219 mm (48 in.) tine 12 019 kg (26,497 lb) with 1372 mm (54 in.) tine 12 038 kg (26,544 lb) with 1524 mm (60 in.) tine 12 056 kg (26,583 lb) TX,115,DH2291 –19–16JUN93–2/2 115–6 PN=294 Specifications 544G LL SPECIFICATIONS NOTE: Specifications and design subject to change without notice. Wherever applicable, specifications are in accordance with SAE standards. Except where otherwise noted, specifications are based on a machine equipped with all standard, 17.5— 25, 12 PR, L3 tires, two rear counterweights, ROPS cab, full fuel tank, and 79 kg (175 lb) operator. Engine: John Deere 6059T (S.N. 553285— ) 89 kW (120 hp) Piston displacement 5.884 L (359 cu in.) Air cleaner Dual stage dry type with restriction indicator Electrical system 12-volt battery with 95-amp alternator Cold cranking capacity at -18°C (0°F) 625 amps Reserve capacity 160 min. Torque Converter Single phase, single stage Transmission Countershaft, power shift, automatic Travel Speeds: Forward Speeds: km/h mph 1 0—7.4 0—4.6 2 0—12.3 0—7.7 3 0—27.2 0—16.9 4 0—38.4 0—23.8 Reverse Speeds: km/h mph 1 0—7.4 0—4.6 2 0—12.3 0—7.7 3 0—27.2 0—16.9 NOTE: All travel speeds are with 20.5—25 tires. TX,115,JC1147 –19–23MAY96–1/2 115–7 PN=295 Specifications Brakes, Service: Power-actuated, 4-wheel, inboard-mounted, wet disk Foot-operated, by either pedal Left pedal also disconnects transmission (if selected by operator) External inspection Low brake pressure warning light and buzzer in monitor Brakes, Park: Spring applied, hydraulically released parking brake is attached to the output shaft Transmission disconnects with park brake applied Warning light in monitor—Dual-level Amber lights with transmission in neutral Red STOP indicator lights, and buzzer sounds with transmission in gear Steering: Turning radius (to centerline of outside tire) 4.95 m (16 ft 3 in.) Rear axle oscillation 22 degrees, stop to stop Tires: 17.5—25, 12 PR L2 17.5—25, 12 PR L3 17.5—25, Radial, One Star, L2 Equivalent 20.5—25, 12 PR L2 20.5—25, 12 PR L3 23.1—26, 10 PR LS-2 28 L—26, 14 PR LS-2 Maximum Lift Capacity Maximum height Fork level 4 649 kg (10,251 lb) Fork rolled back 4 440 kg ( 9,789 lb) Ground level Fork level 8 716 kg (19,215 lb) Fork rolled back 11 748 kg (25,900 lb) TX,115,JC1147 –19–23MAY96–2/2 115–8 PN=296 Specifications DRAIN AND REFILL CAPACITIES—544G LL Metric U.S. Cooling system 23.5 L 25 qt Fuel tank 218 L 58 gal Engine crankcase and filter 19 L 20 qt Transmission case and filter 9.5 L 10 qt Front differential 18 L 19 qt Rear differential 18 L 19 qt Hydraulic reservoir 76 L 80 qt TX,115,JC1148 –19–23MAY96–1/1 T7829AY –UN–21SEP92 544G TC SPECIFICATIONS TX,115,DH2294 –19–18JUN93–1/2 115–9 PN=297 Specifications A—Overall operating height (boom full raise) 4.83 m (15 ft 10 in.) B—Bucket hinge height 3.75 m (12 ft 4 in.) C—Dump height 2.82 m (9 ft 3 in.) D—Dump reach 1.06 m (3 ft 6 in.) E—Height to top of cab and canopy 3.17 m (10 ft 5 in.) F—Ground clearance 373 mm (1 ft 3 in.) G—Wheelbase 2.90 m (9 ft 6 in.) H—Overall length 7.10 m (23 ft 3 in.) Width over tires 15.5-25 tires 2.37 m (7 ft 9 in.) 17.5-25 tires 2.42 m (8 ft 0 in.) 20.5-25 tires 2.46 m (8 ft 1 in.) Standard operating weight with bucket 11 168 kg (24,621 lb) TX,115,DH2294 –19–18JUN93–2/2 115–10 PN=298 Specifications 544G TC SPECIFICATIONS NOTE: Specifications and design subject to change without notice. Wherever applicable, specifications are in accordance with SAE standards. Except where otherwise noted, specifications are based on a machine equipped with all standard, 17.5— 25, 12 PR, L2 tires, two rear counterweights, ROPS cab, full fuel tank, and 79 kg (175 lb) operator. Engine: John Deere 6059T (S.N. 553285— ) 89 kW (120 hp) Piston displacement 5.884 L (359 cu in.) Air cleaner Dual stage dry type with restriction indicator Electrical system 12-volt battery with 95-amp alternator Cold cranking capacity at -18°C (0°F) 625 amps Reserve capacity 160 min. Torque Converter Single phase, single stage Transmission Countershaft, power shift, automatic Travel Speeds: Forward Speeds: km/h mph 1 0—7.4 0—4.6 2 0—12.3 0—7.7 3 0—27.2 0—16.9 4 0—38.4 0—23.8 Reverse Speeds: km/h mph 1 0—7.2 0—4.5 2 0—12.2 0—7.6 3 0—27.7 0—17.2 NOTE: All travel speeds are with 20.5—25 tires. TX,115,DH2295 –19–08DEC95–1/2 115–11 PN=299 Specifications Brakes, Service: Power-actuated, 4-wheel, inboard-mounted, wet disk Foot-operated, by either pedal Left pedal also disconnects transmission (if selected by operator) External inspection Low brake pressure warning light and buzzer in monitor Brakes, Park: Spring applied, hydraulically released parking brake is attached to the output shaft Transmission disconnects with park brake applied Warning light in monitor—Dual-level Amber lights with transmission in neutral Red STOP indicator lights, and buzzer sounds with transmission in gear Steering: Turning radius (to centerline of outside tire) 4.95 m (16 ft 3 in.) Rear axle oscillation 22 degrees, stop to stop Tires: 15.5—25, 12 PR L2 17.5—25, 12 PR L2 17.5—25, 12 PR L3 17.5—25, Radial, One Star, L2 Equivalent 20.5—25, Radial, One Star, L2 Equivalent 20.5—25, 12 PR L2 20.5—25, 12 PR L3 20.5—25, 16 PR L3 Maximum Lift Capacity With Standard Equipment Maximum height 5 154 kg (11,365 lb) Ground level 9 086 kg (20,035 lb) TX,115,DH2295 –19–08DEC95–2/2 115–12 PN=300 Specifications DRAIN AND REFILL CAPACITIES—544G TC Metric U.S. Cooling system 23.5 L 25 qt Fuel tank 218 L 58 gal Engine crankcase and filter 19 L 20 qt Transmission case and filter 9.5 L 10 qt Front differential 18 L 19 qt Rear differential 18 L 19 qt Hydraulic reservoir 76 L 80 qt TX,115,JC1153 –19–23MAY96–1/1 T6603AC1 –UN–20OCT88 624G SPECIFICATIONS TX,115,DH2268 –19–16JUN93–1/2 115–13 PN=301 Specifications A—Overall operating height (boom full raise) 5.06 m (16 ft 7 in.) B—Bucket hinge height 3.89 m (12 ft 9 in.) C—Dump height 2.94 m (9 ft 8 in.) D—Dump reach 0.90 m (2 ft 11 in.) E—Height to top of cab and canopy 3.30 m (10 ft 10 in.) F—Overhang 1.94 m (6 ft 4.5 in.) G—Wheelbase 3.03 m (9 ft 11 in.) H—Ground clearance 430 mm (1 ft 5 in.) I—Overall length 7.30 m (24 ft 0 in.) Width over tires 17.5-25 tires 2.55 m (8 ft 4 in.) 20.5-25 tires 2.52 m (8 ft 3 in.) Standard operating weight 12 398 kg (27,338 lb) Counterweight weight (1st optional counterweight) 429 kg (946 lb) (2nd optional counterweight) 530 kg (1168 lb) TX,115,DH2268 –19–16JUN93–2/2 115–14 PN=302 Specifications 624G SPECIFICATIONS NOTE: Specifications and design subject to change without notice. Wherever applicable, specifications are in accordance with SAE standards. Except where otherwise noted, specifications are based on a machine equipped with all standard, 20.5— 25, 12 PR, L2 tires, one rear counterweight , ROPS cab, full fuel tank, and 79 kg (175 lb) operator. Engine: John Deere 6068T 108 kW (145 hp) Piston displacement 6.8 L (414 cu in.) Air cleaner Dual stage dry type with restriction indicator Electrical system 12-volt battery with 95-amp alternator Cold cranking capacity at -18°C (0°F) 625 amps Reserve capacity 160 min. Torque Converter Single phase, single stage Transmission Countershaft, power shift, automatic Travel Speeds: Forward Speeds: km/h mph 1 0—7.3 0—4.5 2 0—11.6 0—7.2 3 0—24.5 0—15.2 4 0—37.3 0—23.0 Reverse Speeds: km/h mph 1 0—7.3 0—4.5 2 0—11.6 0—7.2 3 0—24.5 0—15.2 TX,115,DH2269 –19–02OCT92–1/2 115–15 PN=303 Specifications Brakes, Service: Power-actuated, 4-wheel, inboard-mounted, wet disk Foot-operated, by either pedal Left pedal also disconnects transmission (if selected by operator) External inspection Low brake pressure warning light and buzzer in monitor Brakes, Park: Spring applied, hydraulically released parking brake is attached to the output shaft Transmission disconnects with park brake applied Warning light in monitor—Dual-level Amber lights with transmission in neutral Red STOP indicator lights, and buzzer sounds with transmission in gear Steering: Turning radius (to centerline of outside tire 5.14 m (16 ft 11 in.) Rear axle oscillates 26° total Tires: 17.5—25, 12 PR L2 17.5—25, 12 PR L3 17.5—25, Radial, One Star, L2 Equivalent 20.5—25, 12 PR L2 20.5—25, 12 PR L3 20.5—25, Radial, One Star, L2 Equivalent Maximum Lift Capacity With Standard Equipment Maximum height 6 414 kg (14,140 lb) Ground level 12 217 kg (26,939 lb) TX,115,DH2269 –19–02OCT92–2/2 115–16 PN=304 Specifications DRAIN AND REFILL CAPACITIES—624G Metric U.S. Cooling system 24.6 L 26 qt Fuel tank 249 L 66 gal Engine crankcase and filter 19 L 20 qt Transmission case and filter 11.4 L 12 qt Front differential 28.4 L 30 qt Rear differential 18 L 19 qt Hydraulic reservoir 102 L 108 qt TX,115,DY327 –19– 2MAY96–1/1 T6603AD1 –UN–20OCT88 644G SPECIFICATIONS TX,115,DH2270 –19–16JUN93–1/2 115–17 PN=305 Specifications A—Overall operating height (boom full raise) 5.28 m (17 ft 4 in.) B—Bucket hinge height 4.00 m (13 ft 2 in.) C—Dump height 2.99 m (9 ft 10 in.) D—Dump reach 1.01 m (3 ft 4 in.) E—Height to top of cab and canopy 3.42 m (11 ft 3 in.) F—Overhang 1.95 m (6 ft 5 in.) G—Wheelbase 3.20 m (10 ft 6 in.) H—Ground clearance 483 mm (1 ft 7 in.) I—Overall length 7.65 m (25 ft 1 in.) Width over tires 20.5-25 tires 2.73 m (8 ft 11 in.) 20.5 R25 tires 2.74 m (9 ft 0 in.) 23.5-25 tires 2.77 m (9 ft 1 in.) Standard operating weight 15 666 kg (34 544 lb) Counterweight weight (1st optional counterweight) 413 kg (910 lb) (2nd optional counterweight) 645 kg (1422 lb) TX,115,DH2270 –19–16JUN93–2/2 115–18 PN=306 Specifications 644G SPECIFICATIONS NOTE: Specifications and design subject to change without notice. Wherever applicable, specifications are in accordance with SAE standards. Except where otherwise noted, specifications are based on a machine equipped with all standard, 23.5— 25, 12 PR, L2 tires, one rear counterweight, ROPS cab, full fuel tank, and 79 kg (175 lb) operator. Engine: John Deere 6081 127 kW (170 hp) Piston displacement 8.1 L (494 cu in.) Air cleaner Dual stage dry type with restriction indicator Electrical system 12-volt battery with 95-amp alternator Cold cranking capacity at -18°C (0°F) 950 amps Reserve capacity 160 min. Torque Converter single phase, planetary Transmission Countershaft, power shift, automatic Travel Speeds: Forward Speeds: km/h mph 1 0—7.0 0—4.4 2 0—11.2 0—7.0 3 0—22.0 0—13.7 4 0—34.6 0—21.5 Reverse Speeds: km/h mph 1 0—7.0 0—4.4 2 0—11.2 0—7.0 3 0—22.0 0—13.7 TX,115,DH2271 –19–16JUN93–1/2 115–19 PN=307 Specifications Brakes, Service: Power-actuated, 4-wheel, inboard-mounted, wet disk Foot-operated, by either pedal Left pedal also disconnects transmission (if selected by operator) External inspection Low brake pressure warning light and buzzer in monitor Brakes, Park: Expanding shoe on transmission output shaft, foot-operated Transmission disconnects with park brake applied Warning light in monitor—Dual-level Amber lights with transmission in neutral Red STOP indicator lights, and buzzer sounds with transmission in gear Steering: Turning radius (to centerline of outside tire) 5.46 m (17 ft 11 in.) Rear axle oscillates 26° total Tires: 20.5—25, 12 PR L2 20.5—25, 16 PR L2 20.5—25, 16 PR L3 20.5—25, Radial, One Star, L2 equivalent 20.5—25, Radial, One Star, L3 equivalent 23.5—25, 12 PR L2 23.5—25, 20 PR L3 23.5—25, Radial, One Star, L3 equivalent TX,115,DH2271 –19–16JUN93–2/2 DRAIN AND REFILL CAPACITIES—644G Metric U.S. Cooling system 28 L 29.5 qt Fuel tank 284 L 75 gal Engine crankcase and filter 24 L 25 qt Transmission case and filter 14.2 L 15 qt Front differential 28.4 L 30 qt Rear differential 28.4 L 30 qt Hydraulic reservoir 115 L 120 qt TX,115,DY328 –19– 2MAY96–1/1 115–20 PN=308 Crime Prevention Tips HELP PREVENT CRIME TS140 –19–07OCT88 You can help take a bite out of crime by properly documenting ownership and discouraging theft. DX,CRPRV,A –19–03MAR93–1/1 RECORD IDENTIFICATION NUMBERS TS156 2. Record the Product Identification Number (PIN) of the unit and also individual component identification numbers for engines, axles, pumps, etc. Include the PIN numbers on all documentation, such as insurance, financial, and warranty papers. –UN–23MAR89 1. Mark your machines with your own unique numbering system. DX,CRPRV,H –19–04JUN90–1/1 KEEP PROOF OF OWNERSHIP 3. Keep your documented identification numbers, color photographs, and inventory in a safe, secure location. TS157 2. Maintain an up-to-date inventory of all your machines. –UN–23MAR89 1. Take color photographs from several angles of each machine. DX,CRPRV,I –19–04JUN90–1/1 120–1 PN=309 Crime Prevention Tips PARK INDOORS OUT OF SIGHT Make machines hard to move: • Park large equipment in front of exits. • Remove battery when unit is in storage. • Lock cab doors, windows, and vandal-proof devices. TS158 –UN–23MAR89 • Lower equipment to the ground. Remove key. • Lock building. DX,CRPRV,J –19–04JUN90–1/1 WHEN PARKING OUTDOORS Make machines hard to move: • Park in a well-lighted, fenced area. –UN–23AUG88 • Lower all equipment to the ground. • Remove ignition key. TS144 • Remove battery when unit is storage. • Lock cab doors, windows, and vandal-proof devices. DX,CRPRV,K –19–04JUN90–1/1 120–2 PN=310 Crime Prevention Tips REDUCE VANDALISM 3. Regularly verify that identification plates have not been removed. If they have, notify law enforcement agency. Order duplicate plates from your dealer. T7223BB 2. Participate in a neighborhood watch program. Take written notes of suspicious vehicles or persons and report your findings to law enforcement agency. –UN–22FEB90 1. Install vandal-proof devices. TX,120,DH1093 –19–16SEP92–1/1 REPORT THEFTS IMMEDIATELY 1. Immediately notify your local law enforcement agency and insurance agent. 2. Provide a complete description of the machine, all of the documented identification numbers and color photographs. 3. Request verification of the identification numbers after they have been entered with any regional or national crime information center. Double check the numbers to be sure they are correct. TS146 –UN–09JAN89 4. Notify your John Deere dealer of the theft and request that its loss be posted with full description and identification numbers. DX,CRPRV,G –19–03MAR93–1/1 120–3 PN=311 Index Page A Accessory Operational checkout . . . . . . . . . . . . . . . . . . 95-25 Accumulator Brake . . . . . . . . . . . . . . . . . . . . . . . . . . . . . . 90-24 Acid burns . . . . . . . . . . . . . . . . . . 80-2, 90-12, 90-14 Adjustment Belt tension. . . . . . . . . . . . . . . . . . . . .55-10, 55-11 Boom height control . . . . . . . . . . . . . . . . . . . . 35-7 Clutch cut-off. . . . . . . . . . . . . . . . . . . . . . . . . 90-28 Compressor belt tension . . . . . . . . . . . . . . . . 90-20 Engine speed control linkage . . . . . . . . . . . . . 85-2 Engine valve lash-544G, 624G . . . . . . . . . . . . 86-1 Engine valve lash-644G . . . . . . . . . . . . . . . . . 86-3 Park brake . . . . . . . . . . . . . . . . . . . . . . . . . . . 85-8 Return-to-dig . . . . . . . . . . . . . . . . . . . . . . . . . . 35-8 Seat . . . . . . . . . . . . . . . . . . . . . . . . . . . . . . . 10-19 Steering wheel tilt . . . . . . . . . . . . . . . . . . . . . 10-15 Air Cleaner elements clean . . . . . . . . . . . . . . . . . 55-6 Cleaner elements replace . . . . . . . . . . . . . . . . 85-3 Cleaner unloader valve . . . . . . . . . . . . . . . . . . 60-1 Conditioning control . . . . . . . . . . . . . . . . . . . 10-18 Conditioning service . . . . . . . . . . . . . . . . . . . 90-19 Conditioning troubleshooting . . . . . . . . . . . . 100-41 Filter restriction indicator . . . . . . . . . . . . . . . . . 10-6 Inlet cover . . . . . . . . . . . . . . . . . . . . . . . . . . . . 55-9 Intake hose . . . . . . . . . . . . . . . . . . . . . . . . . . . 80-1 Alarm Reverse warning . . . . . . . . . . . . . . . . . . . . . . 90-18 Stop engine . . . . . . . . . . . . . . . . . . . . . . . . . . 10-3 Alternator . . . . . . . . . . . . . . . . . . . . . . . . . . . . . . 90-9 Voltage indicator . . . . . . . . . . . . . . . . . . . . . . . 10-6 Antifreeze test . . . . . . . . . . . . . . . . . . . . . . . . . . 90-4 Axle Operational checkout . . . . . . . . . . . . . . . . . . . 95-4 B Backdragging . . . . . . . . . . . . . . . . . . . . . . . . . . 35-12 Battery Acid burns. . . . . . . . . . . . . . . . . 80-2, 90-12, 90-14 Booster . . . . . . . . . . . . . . . . . . . . . . . . . . . . . . 25-6 Charging . . . . . . . . . . . . . . . . . . . . . . . . . . . . 90-14 Electrolyte level check. . . . . . . . . . . . . . . . . . . 80-2 Explosion . . . . . . . . . . . . . . . . . 80-2, 90-12, 90-14 Removing . . . . . . . . . . . . . . . . . . . . . . . . . . . 90-15 Page Replacing . . . . . . . . . . . . . . . . . . . . . . . . . . . 90-14 Safety . . . . . . . . . . . . . . . . . . . . . . . . . . . . . . 90-10 Terminals . . . . . . . . . . . . . . . . . . . . . . . . . . . . 80-2 Belt Tension adjust . . . . . . . . . . . . . . . . . .55-10, 55-11 Bleed Brake . . . . . . . . . . . . . . . . . . . . . . . . . . . . . . 90-26 Fuel system . . . . . . . . . . . . . . . . . . . . . .90-7, 90-8 Boom Control lever-544G TC . . . . . . . . . . . . . . . . . . 35-4 Control lever-one lever design . . . . . . . . . . . . 35-1 Control lever-two lever design . . . . . . . . . . . . . 35-2 Down switch . . . . . . . . . . . . . . . . . . . . . . . . . . 35-5 Height control adjust . . . . . . . . . . . . . . . . . . . . 35-7 Booster battery . . . . . . . . . . . . . . . . . . . . . . . . . . 25-6 Brake Accumulator . . . . . . . . . . . . . . . . . . . . . . . . . 90-24 Bleed . . . . . . . . . . . . . . . . . . . . . . . . . . . . . . 90-26 Oil pressure indicator . . . . . . . . . . . . . . .10-8, 25-1 Operational checkout . . . . . . . . . . . . . . . . . . 95-10 Break-in 10 hours . . . . . . . . . . . . . . . . . . . . . . . . . . . . . 15-1 100 hours . . . . . . . . . . . . . . . . . . . . . . . . . . . . 15-2 50 hours . . . . . . . . . . . . . . . . . . . . . . . . . . . . . 15-2 Engine . . . . . . . . . . . . . . . . . . . . . . . . . . . . . . 15-1 Bucket Control lever-one lever design . . . . . . . . . . . . 35-1 Control lever-two lever design . . . . . . . . . . . . . 35-2 C Cab Fresh air filter . . . . . . . . . . . . . . . . . . . . . . . . . 70-5 Operational checkout . . . . . . . . . . . . . . . . . . 95-29 Recirculating air filter . . . . . . . . . . . . . . . . . . 55-14 Circuit breaker . . . . . . . . . . . . . . . . . . . . . . . . . 90-16 Clutch Cut-off adjust . . . . . . . . . . . . . . . . . . . . . . . . 90-28 Cut-off operational checkout . . . . . . . . . . . . . 95-10 Cut-off switch . . . . . . . . . . . . . . . . . . . . . . . . . 35-5 Compressor Belt tension adjust . . . . . . . . . . . . . . . . . . . . 90-20 Coolant, engine . . . . . . . . . . . . . . . . . . . . . . . . . 90-3 Coolant Conditioner . . . . . . . . . . . . . . . . . . . . . . . . . . . 80-5 Heater. . . . . . . . . . . . . . . . . . . . . . . . . . . . . . . 25-5 Level radiator . . . . . . . . . . . . . . . . . . . . . . . . . 75-5 Level recovery tank. . . . . . . . . . . . . . . . . . . . . 60-3 Test . . . . . . . . . . . . . . . . . . . . . . . . . . . . . . . . 90-4 Index-1 040596 PN=1 Index Page Page Cooling Drain . . . . . . . . . . . . . . . . . . . . . . . . . . . . . . . . 90-1 System fill . . . . . . . . . . . . . . . . . . . . . . . . . . . . 90-4 Cylinder . . . . . . . . . . . . . . . . . . . . . . . . . . . . . . 90-29 Operational checkout . . . . . . . . . . . . . . . . . . . 95-4 Serial number . . . . . . . . . . . . . . . . . . . . . . . . 110-1 Speed control linkage adjust . . . . . . . . . . . . . . 85-2 Speed . . . . . . . . . . . . . . . . . . . . . . . . . . . . . . . 85-1 Starting . . . . . . . . . . . . . . . . . . . . . . . . . . . . . . 25-1 Stopping . . . . . . . . . . . . . . . . . . . . . . . . . . . . . 25-8 Troubleshooting . . . . . . . . . . . . . . . . . . . . . . 100-2 Valve lash adjust. . . . . . . . . . . . . . . . . . .86-1, 86-3 Vent tube . . . . . . . . . . . . . . . . . . . . . . . . . . . . 85-4 Ether injection Indicator . . . . . . . . . . . . . . . . . . . . . . . . . . . . . 10-9 D Daily inspection . . . . . . . . . . . . . . . . . . . . . . . . . 20-1 Diesel engine oil. . . . . . . . . . . . . . . . . . . . . . . . . 45-4 Diesel fuel . . . . . . . . . . . . . . . . . . . . . . . . . . . . . 45-1 Differential Axle troubleshooting . . . . . . . . . . . . . . . . . . 100-37 Lock operational checkout. . . . . . . . . . . . . . . 95-10 Lock pedal . . . . . . . . . . . . . . . . . . . . . . . . . . . 35-6 Lock turbo boost return filter(s) . . . . . . . . . . . . 87-2 Oil change . . . . . . . . . . . . . . . . . . . . . . . . . . . 87-3 Oil level. . . . . . . . . . . . . . . . . . . . . . . . .80-9, 80-10 Oil specification. . . . . . . . . . . . . . . . . . . . . . . . 45-5 Digging Loader bucket . . . . . . . . . . . . . . . . . . . . . . . . 35-10 Digital display . . . . . . . . . . . . . . . . . . . . . . . . . . . 10-4 Dome light . . . . . . . . . . . . . . . . . . . . . . . . . . . . 10-14 Door Grille . . . . . . . . . . . . . . . . . . . . . . . . . . . . . . . . 50-5 Driveline Troubleshooting . . . . . . . . . . . . . . . . . . . . . 100-39 Driving Operational checkout . . . . . . . . . . . . . . . . . . 95-15 Precautions. . . . . . . . . . . . . . . . . . . . . . . . . . . 30-2 Dust valve . . . . . . . . . . . . . . . . . . . . . . . . . . . . . 85-3 E Electrical Troubleshooting . . . . . . . . . . . . . . . . . . . . . 100-14 Electrolyte Specifications . . . . . . . . . . . . . . . . . . . . . . . . 90-12 Engine oil Diesel . . . . . . . . . . . . . . . . . . . . . . . . . . . . . . . 45-4 Engine Air filter restriction indicator . . . . . . . . . . . . . . . 10-6 Break-in . . . . . . . . . . . . . . . . . . . . . . . . . . . . . 15-1 Cold weather warm-up . . . . . . . . . . . . . . . . . . 25-8 Coolant level indicator. . . . . . . . . . . . . . . . . . . 10-7 Coolant temperature gauge. . . . . . . . . . . . . . . 10-5 Coolant . . . . . . . . . . . . . . . . . . . . . . . . . . . . . . 90-3 Oil change . . . . . . . . . . . . . . . . . . . . . . . . . . . 75-2 Oil level. . . . . . . . . . . . . . . . . . . . . . . . . . . . . . 60-1 Oil pressure indicator . . . . . . . . . . . . . . . . . . . 10-6 F Fasten seat belt Indicator . . . . . . . . . . . . . . . . . . . . . . . . . . . . . 10-9 Filter Cab air recirculating . . . . . . . . . . . . . . . . . . . 55-14 Cab fresh air . . . . . . . . . . . . . . . . . . . . . . . . . . 70-5 Differential lock turbo boost. . . . . . . . . . . . . . . 87-2 Engine oil . . . . . . . . . . . . . . . . . . . . . . . . . . . . 75-2 Fuel . . . . . . . . . . . . . . . . . . . . . . . . . . . . . . . . 80-6 Hydraulic reservoir breather . . . . . . . . . . . . . . 80-8 Hydraulic return. . . . . . . . . . . . . . . . . . . . . . . . 80-7 Transmission oil . . . . . . . . . . . . . . . . . . . . . . . 85-5 Front axle Disconnect lever . . . . . . . . . . . . . . . . . . . . . . 10-11 Disconnect . . . . . . . . . . . . . . . . . . . . . . . . . . . 30-2 Fuel Diesel . . . . . . . . . . . . . . . . . . . . . . . . . . . . . . . 45-1 Filter change . . . . . . . . . . . . . . . . . . . . . . . . . . 80-6 Gauge. . . . . . . . . . . . . . . . . . . . . . . . . . . . . . . 10-5 Injection pump . . . . . . . . . . . . . . . . . . . . . . . . 90-5 Storage . . . . . . . . . . . . . . . . . . . . . . . . . . . . . . 45-2 System bleed . . . . . . . . . . . . . . . . . . . . .90-7, 90-8 Tank capacity . . . . . . . . . . . . . . . . . . . . . . . . . 45-3 Tank drain. . . . . . . . . . . . . . . . . . . . . . . . . . . 55-11 Tank outlet screen . . . . . . . . . . . . . . . . . . . . . 90-5 Fuse. . . . . . . . . . . . . . . . . . . . . . . . . . . . . . . . . 90-15 Color codes . . . . . . . . . . . . . . . . . . . . . . . . . 90-16 G Gauge checks Operational checkout . . . . . . Gauge Engine coolant temperature . Fuel . . . . . . . . . . . . . . . . . . . Operational checkout . . . . . . . . . . . . . . . . . . . 95-7 . . . . . . . . .10-1, 10-5 . . . . . . . . .10-1, 10-5 . . . . . . . . . . . . . 95-2 Index-2 PN=2 Index Page Page Transmission oil temperature . . . . . . . . .10-1, 10-5 Grease Boom and cylinder pivots-544G . . . . . . . . . . . 70-2 Boom and cylinder pivots . . . . . . . . . . . . . . . . 70-1 Extreme pressure and multipurpose . . . . . . . . 45-6 Frame hinge pivots . . . . . . . . . . . . . . . . . . . . 85-10 Front driveline support bearing . . . . . . . . . . . . 86-5 Front driveline . . . . . . . . . . . . . . . . . . . . . . . . . 80-1 Oscillating rear axle . . . . . . . . . . . . . . . . . . . . 70-5 Rear driveline . . . . . . . . . . . . . . . . . . . . . . . . . 85-1 Steering cylinder pivots . . . . . . . . . . . . . . . . . . 70-4 Grille door . . . . . . . . . . . . . . . . . . . . . . . . . . . . . 50-5 Location . . . . . . . . . . . . . . . . . . . . . . . . . . . . . 10-1 Operational checkout . . . . . . . . . . . . . . . . . . . 95-2 Park brake . . . . . . . . . . . . . . . . . . . . . . . . . . . 10-8 Receiver dryer . . . . . . . . . . . . . . . . . . . . . . . . 75-1 Right turn signal . . . . . . . . . . . . . . . . . . . . . . . 10-8 STOP . . . . . . . . . . . . . . . . . . . . . . . . . . . . . . . 10-3 Secondary steering . . . . . . . . . . . . . . . . . . . . . 35-6 Service required . . . . . . . . . . . . . . . . . . . . . . . 10-4 Steering pressure . . . . . . . . . . . . . . . . . . . . . . 10-9 Transmission oil pressure . . . . . . . . . . . . . . . . 10-7 Injection Nozzles. . . . . . . . . . . . . . . . . . . . . . . . . . . . . . 90-5 Pump . . . . . . . . . . . . . . . . . . . . . . . . . . . . . . . 90-5 Instruments Check after starting. . . . . . . . . . . . . . . . . . . . . 25-7 Check before starting . . . . . . . . . . . . . . . . . . . 25-1 H Halogen bulbs . . . . . . . . . . . . . . . . . . . . . . . . . 90-16 Heater Control . . . . . . . . . . . . . . . . . . . . . . . . . . . . . 10-18 Coolant . . . . . . . . . . . . . . . . . . . . . . . . . . . . . . 25-5 Horn button . . . . . . . . . . . . . . . . . . . . . . . . . . . 10-13 Hose Air intake. . . . . . . . . . . . . . . . . . . . . . . . . . . . . 80-1 Coolant . . . . . . . . . . . . . . . . . . . . . . . . . . . . . . 90-1 Hour meter . . . . . . . . . . . . . . . . . . . . . . . . . . . . . 50-1 Hydraulic Oil change . . . . . . . . . . . . . . . . . . . . . . . . . . . 87-1 Oil filter restriction indicator . . . . . . . . . . . . . . . 10-7 Oil level. . . . . . . . . . . . . . . . . . . . . . . . . . . . . . 60-3 Oil specification. . . . . . . . . . . . . . . . . . . . . . . . 45-5 Pump serial number . . . . . . . . . . . . . . . . . . . 110-2 Reservoir breather filter. . . . . . . . . . . . . . . . . . 80-8 Return filter . . . . . . . . . . . . . . . . . . . . . . . . . . . 80-7 Suction strainer . . . . . . . . . . . . . . . . . . . . . . . . 87-2 System operational checkout . . . . . . . . . . . . 95-18 System troubleshooting. . . . . . . . . . . . . . . . 100-22 I Inch torque values . . . . . . . . . Indicator Air filter restriction . . . . . . . . Alternator voltage . . . . . . . . Brake oil pressure . . . . . . . . Engine coolant level . . . . . . Engine oil pressure . . . . . . . Ether injection . . . . . . . . . . . Fasten seat belt . . . . . . . . . Hydraulic oil filter restriction Left turn signal . . . . . . . . . . . . . . . . . . . . . . . 90-34 .. .. .. .. .. .. .. .. .. .. .. .. .. .. .. .. .. .. .. .. .. .. .. .. .. .. .. .. .. .. .. .. .. .. .. .. . . . . . . 10-6 . . . . . . 10-6 . .10-8, 25-1 . . . . . . 10-7 . . . . . . 10-6 . . . . . . 10-9 . . . . . . 10-9 . . . . . . 10-7 . . . . . 10-10 L Lamps . . . . . . . . . . . . . . . . . . . . . . . . . . . . . . . 90-16 Left turn signal Indicator . . . . . . . . . . . . . . . . . . . . . . . . . . . . 10-10 Lever Boom control-544G TC . . . . . . . . . . . . . . . . . . 35-4 Boom control-one lever design . . . . . . . . . . . . 35-1 Boom control-two lever design . . . . . . . . . . . . 35-2 Bucket control-one lever design . . . . . . . . . . . 35-1 Bucket control-two lever design. . . . . . . . . . . . 35-2 Front axle disconnect . . . . . . . . . . . . . . . . . . 10-11 Loader control-one lever design . . . . . . . . . . 10-10 Lifting Machine . . . . . . . . . . . . . . . . . . . . . . . . . . . . . 40-7 Light Dome . . . . . . . . . . . . . . . . . . . . . . . . . . . . . . 10-14 Operating . . . . . . . . . . . . . . . . . . . . . . . . . . . 10-17 Swivel . . . . . . . . . . . . . . . . . . . . . . . . . . . . . . 10-14 Lock Neutral . . . . . . . . . . . . . . . . . . . . . . . . . . . . . . 30-3 Locking bar Machine frame . . . . . . . . . . . . . . . . . . . . . . . . 50-3 Lubricant Alternative. . . . . . . . . . . . . . . . . . . . . . . . . . . . 45-6 Mixing . . . . . . . . . . . . . . . . . . . . . . . . . . . . . . . 45-7 Storage . . . . . . . . . . . . . . . . . . . . . . . . . . . . . . 45-7 Synthetic . . . . . . . . . . . . . . . . . . . . . . . . . . . . . 45-6 Lubricate Boom and cylinder pivots-544G TC. . . . . . . . . 70-2 Boom and cylinder pivots . . . . . . . . . . . . . . . . 70-1 Frame hinge pivots . . . . . . . . . . . . . . . . . . . . 85-10 Front driveline support bearing . . . . . . . . . . . . 86-5 Index-3 PN=3 Index Page Page Front driveline . . . . . . . . . . . . . . . . . . . . . . . . . 80-1 Oscillating rear axle . . . . . . . . . . . . . . . . . . . . 70-5 Rear driveline . . . . . . . . . . . . . . . . . . . . . . . . . 85-1 Steering cylinder pivots . . . . . . . . . . . . . . . . . . 70-4 Operational checkout Accessory . . . . . . . . . . . . . . . . . . . . . . . . . . . 95-25 Axle . . . . . . . . . . . . . . . . . . . . . . . . . . . . . . . . 95-4 Brake . . . . . . . . . . . . . . . . . . . . . . . . . . . . . . 95-10 Cab and vandal protection . . . . . . . . . . . . . . 95-29 Clutch cut-off. . . . . . . . . . . . . . . . . . . . . . . . . 95-10 Differential. . . . . . . . . . . . . . . . . . . . . . . . . . . 95-10 Driving . . . . . . . . . . . . . . . . . . . . . . . . . . . . . 95-15 Engine . . . . . . . . . . . . . . . . . . . . . . . . . . . . . . 95-4 Front axle disconnect . . . . . . . . . . . . . . . . . . . 95-6 Gauge checks . . . . . . . . . . . . . . . . . . . . . . . . . 95-7 Hydraulic system. . . . . . . . . . . . . . . . . . . . . . 95-18 Monitor indicator and gauge . . . . . . . . . . . . . . 95-2 Monitor indicator . . . . . . . . . . . . . . . . . . . . . . . 95-7 Neutral start and warning alarm . . . . . . . . . . . 95-4 Steering system . . . . . . . . . . . . . . . . . . . . . . 95-22 Transmission. . . . . . . . . . . . . . . . . . . . . . . . . . 95-4 Outlet screen Fuel tank. . . . . . . . . . . . . . . . . . . . . . . . . . . . . 90-5 M Machine Frame locking bar . . . . Storage . . . . . . . . . . . . Maintenance Record Keeping . . . . . Record keeping. . . . . . Metric torque values . . . . Mixing lubricants. . . . . . . Monitor Indicator Operational checkout . Motor . . . . . . . . . . . . . . . . . . . . . . . . . . . . . . . . . 50-3 . . . . . . . . . . . . . . . . . 105-1 .50-8, 50-8, CLIS-1, CLIS-1 . . . . . . . . . . . . . . . . . . 50-6 . . . . . . . . . . . . . . . . . 90-31 . . . . . . . . . . . . . . . . . . 45-7 . . . . . . . . . . . . . . . . . . 95-7 . . . . . . . . . . . . . . . . . 90-29 P N Neutral Lock . . . . . . . . . . . . . . . . . . . . . . . . . . .10-13, 30-3 Start operational checkout. . . . . . . . . . . . . . . . 95-4 Start system check . . . . . . . . . . . . . . . . . . . . 90-18 O O-ring boss fittings . . . . . . . . . . . . . . . . . . . . . . 90-37 Oil lines and fittings . . . . . . . . . . . . . . . . . . . . . 90-36 Oil Change differential . . . . . . . . . . . . . . . . . . . . . 87-3 Change engine . . . . . . . . . . . . . . . . . . . . . . . . 75-2 Change hydraulic . . . . . . . . . . . . . . . . . . . . . . 87-1 Change transmission . . . . . . . . . . . . . . . . . . . 85-5 Level differential . . . . . . . . . . . . . . . . . .80-9, 80-10 Level engine . . . . . . . . . . . . . . . . . . . . . . . . . . 60-1 Level hydraulic system . . . . . . . . . . . . . . . . . . 60-3 Level transmission . . . . . . . . . . . . . . . . . . . . . 60-5 Lines and fittings. . . . . . . . . . . . . . . . . . . . . . 90-36 Specification differential . . . . . . . . . . . . . . . . . 45-5 Specification hydraulic system . . . . . . . . . . . . 45-5 Oilscan . . . . . . . . . . . . . . . . . . . . . . . . . . . . . . . . 50-7 Operating Light . . . . . . . . . . . . . . . . . . . . . . . . . . . . . . . 10-17 Tips. . . . . . . . . . . . . . . . . . . . . . . . . . . . . . . . . 35-9 Park brake Adjust . . . . . . . . . . . . . . . . . . . . . . . . . . . . . . . 85-8 Check . . . . . . . . . . . . . . . . . . . . . . . . . . . . . . . 85-7 Indicator . . . . . . . . . . . . . . . . . . . . . . . . . . . . . 10-8 Operation . . . . . . . . . . . . . . . . . . . . . . . . . . . . 30-7 Switch . . . . . . . . . . . . . . . . . . . . . . . . . .10-12, 30-7 Troubleshooting . . . . . . . . . . . . . . . . . . . . . 100-40 Pedal Differential lock . . . . . . . . . . . . . . . . . . . . . . . . 35-6 Location . . . . . . . . . . . . . . . . . . . . . . . . . . . . 10-12 Pin disconnect Switch . . . . . . . . . . . . . . . . . . . . . . . . . . . . . . . 35-5 Power train Troubleshooting . . . . . . . . . . . . . . . . . . . . . 100-29 Product Identification Number. . . . . . . . . . . . . . 110-1 Pump Service . . . . . . . . . . . . . . . . . . . . . . . . . . . . . 90-29 Q Quick shift Switch . . . . . . . . . . . . . . . . . . . . . . . . . . . . . . . 35-3 R Radiator Coolant level . . . . . . . . . . . . . . . . . . . . . . . . . . 75-5 Index-4 PN=4 Index Page Page Receiver dryer Indicator . . . . . . . . . . . . . . . . . . . . . . . . . . . . . 75-1 Recovery tank Coolant level . . . . . . . . . . . . . . . . . . . . . . . . . . 60-3 Regulator . . . . . . . . . . . . . . . . . . . . . . . . . . . . . . 90-9 Return-to-dig Adjustment . . . . . . . . . . . . . . . . . . . . . . . . . . . 35-8 Reverse Warning alarm . . . . . . . . . . . . . . . . . . . . . . . 90-18 Ride control Accumulator . . . . . . . . . . . . . . . . . . . . . . . . . 90-25 Switch . . . . . . . . . . . . . . . . . . . . . . . . . . . . . . . 30-6 Right turn signal Indicator . . . . . . . . . . . . . . . . . . . . . . . . . . . . . 10-8 Roll-over protective structure Torque values . . . . . . . . . . . . . . . . . . . . . . . . 90-30 The machine . . . . . . . . . . . . . . . . . . . . . . . . . . 30-6 Storage Compartment . . . . . . . . . . . . . . . . . . . . . . . . 10-20 Machine . . . . . . . . . . . . . . . . . . . . . . . . . . . . 105-1 Monthly . . . . . . . . . . . . . . . . . . . . . . . . . . . . . 105-2 Storing lubricants . . . . . . . . . . . . . . . . . . . . . . . . 45-7 Suction strainer Hydraulic. . . . . . . . . . . . . . . . . . . . . . . . . . . . . 87-2 Switch Boom down. . . . . . . . . . . . . . . . . . . . . . . . . . . 35-5 Clutch cut-off. . . . . . . . . . . . . . . . . . . . . . . . . . 35-5 Light . . . . . . . . . . . . . . . . . . . . . . . . . . . . . . . 10-17 Park brake . . . . . . . . . . . . . . . . . . . . . .10-12, 30-7 Pin disconnect-544G TC . . . . . . . . . . . . . . . . . 35-5 Quick shift. . . . . . . . . . . . . . . . . . . . . . . . . . . . 35-3 Ride control . . . . . . . . . . . . . . . . . . . . . . . . . . 30-6 Swivel light . . . . . . . . . . . . . . . . . . . . . . . . . . . . 10-14 Synthetic Lubricants . . . . . . . . . . . . . . . . . . . . . . 45-6 S STOP Indicator . . . . . . . . . . . . . . . . . . . . . . . . . . . . . 10-3 Seat belt. . . . . . . . . . . . . . . . . . . . . . . . . . . . . . 10-20 Seat Adjust . . . . . . . . . . . . . . . . . . . . . . . . . . . . . . 10-19 Secondary steering Check . . . . . . . . . . . . . . . . . . . . . . . . . . . . . . 90-28 Operation . . . . . . . . . . . . . . . . . . . . . . . . . . . . 35-6 Serial number Engine . . . . . . . . . . . . . . . . . . . . . . . . . . . . . 110-1 Hydraulic pump . . . . . . . . . . . . . . . . . . . . . . . 110-2 Transmission. . . . . . . . . . . . . . . . . . . . . . . . . 110-2 Service Brake troubleshooting . . . . . . . . . . . . . . . . . 100-35 Interval . . . . . . . . . . . . . . . . . . . 50-1, 55-1, SLIT-1 Required indicator. . . . . . . . . . . . . . . . . . . . . . 10-4 Specification Battery electrolyte . . . . . . . . . . . . . . . . . . . . . 90-12 Differential oil . . . . . . . . . . . . . . . . . . . . . . . . . 45-5 Hydraulic oil . . . . . . . . . . . . . . . . . . . . . . . . . . 45-5 Speed Engine . . . . . . . . . . . . . . . . . . . . . . . . . . . . . . 85-1 Travel . . . . . . . . . . . . . . . . . . . . . . . . . . . . . . . 30-5 Starting The engine . . . . . . . . . . . . . . . . . . . . . . . . . . . 25-1 Steering Pressure indicator . . . . . . . . . . . . . . . . . . . . . . 10-9 System, operational checkout . . . . . . . . . . . . 95-22 Wheel tilt adjust . . . . . . . . . . . . . . . . . . . . . . 10-15 Stopping Engine . . . . . . . . . . . . . . . . . . . . . . . . . . . . . . 25-8 T Tire Pressure check . . . . . . . . . . . . . . . . . . . . . . . . 55-1 Torque value Flat face O-ring seal fitting . . . . . . . . . . . . . . 90-39 Inch SAE four bolt flange fitting. . . . . . . . . . . 90-41 Metric cap screw . . . . . . . . . . . . . . . . . . . . . . 90-33 Metric four bolt flange fitting . . . . . . . . . . . . . 90-40 O-Ring boss fitting . . . . . . . . . . . . . . . . . . . . 90-37 Wheel retaining cap screw . . . . . . . . . . . . . . . 55-5 Torque values Inch. . . . . . . . . . . . . . . . . . . . . . . . . . . . . . . . 90-34 Metric . . . . . . . . . . . . . . . . . . . . . . . . . . . . . . 90-31 Roll-over protective structure. . . . . . . . . . . . . 90-30 Towing procedure. . . . . . . . . . . . . . . . . . . . . . . . 40-3 Transmission Oil change . . . . . . . . . . . . . . . . . . . . . . . . . . . 85-5 Oil filter change. . . . . . . . . . . . . . . . . . . . . . . . 85-5 Oil level. . . . . . . . . . . . . . . . . . . . . . . . . . . . . . 60-5 Oil pressure indicator . . . . . . . . . . . . . . . . . . . 10-7 Oil temperature gauge . . . . . . . . . . . . . . . . . . 10-5 Operational checkout . . . . . . . . . . . . . . . . . . . 95-4 Serial number . . . . . . . . . . . . . . . . . . . . . . . . 110-2 Travel speed . . . . . . . . . . . . . . . . . . . . . . . . . . . 30-5 Troubleshooting Air conditioning . . . . . . . . . . . . . . . . . . . . . . 100-41 Differential axle . . . . . . . . . . . . . . . . . . . . . . 100-37 Driveline . . . . . . . . . . . . . . . . . . . . . . . . . . . 100-39 Electrical . . . . . . . . . . . . . . . . . . . . . . . . . . . 100-14 Engine . . . . . . . . . . . . . . . . . . . . . . . . . . . . . 100-2 Index-5 PN=5 Index Page Hydraulic system. . . . . . . . . . . . . . . . . . . . . 100-22 Park brake . . . . . . . . . . . . . . . . . . . . . . . . . 100-40 Power train . . . . . . . . . . . . . . . . . . . . . . . . . 100-29 Service brake . . . . . . . . . . . . . . . . . . . . . . . 100-35 Truck loading . . . . . . . . . . . . . . . . . . . . . . . . . . 35-13 U Unloader valve Air cleaner . . . . . . . . . . . . . . . . . . . . . . . . . . . 60-1 V Valve Air cleaner dust unloader Control . . . . . . . . . . . . . . Dust unloader . . . . . . . . . Lash adjust . . . . . . . . . . . Vandal Shield . . . . . . . . . . . . . . . Vent tube Engine crankcase . . . . . . .. .. .. .. .. .. .. .. .. .. .. .. .. .. .. .. .. .. .. .. . . . . . . 60-1 . . . . . 90-29 . . . . . . 85-3 . .86-1, 86-3 . . . . . . . . . . . . . . . 10-14 . . . . . . . . . . . . . . . . 85-4 W Warm-up Engine, cold weather . Warning alarm Operational checkout . Washer Windshield fluid level . Windshield . . . . . . . . . Welding . . . . . . . . . . . . . Wheel Cap screw torque . . . . Window Opening . . . . . . . . . . . Sliding. . . . . . . . . . . . . Windshield Washer fluid . . . . . . . . Wiper and washer. . . . Wiper Windshield . . . . . . . . . . . . . . . . . . . . . . . . . . . 25-8 . . . . . . . . . . . . . . . . . . 95-4 . . . . . . . . . . . . . . . . . . 50-5 . . . . . . . . . . . . . . . . . 10-15 . . . . . . . . . . . . . . . . . 90-20 . . . . . . . . . . . . . . . . . . 55-5 . . . . . . . . . . . . . . . . . 10-15 . . . . . . . . . . . . . . . . . 10-16 . . . . . . . . . . . . . . . . . . 50-5 . . . . . . . . . . . . . . . . . 10-15 . . . . . . . . . . . . . . . . . 10-15 Index-6 PN=6 Checklists MAINTENANCE AND REPAIR RECORD KEEPING SYSTEM SERVICE INTERVALS Service your machine at intervals shown on this chart. Also, perform service on items at multiples of the original requirement. For example, at 500 hours also service those items (if applicable) listed under 250 hours, 100 hours, 50 hours and 10 hours or daily. As Required • Inspect tires and check pressure • Inspect belts and check tension • Check wheel retainer cap screws • Drain water and clean fuel tank strainer • Clean or replace air cleaner elements • Drain and clean primary fuel filter • Check and clean air inlet cover • Check and clean cab recirculating air filter Every 10 Hours or Daily • Lubricate pivots • Check recovery tank coolant level • Clean air cleaner dust unloader valve • Check hydraulic system oil level • Check engine oil level • Check transmission oil level Every 100 Hours • Lubricate loader boom and cylinder pivots • Check cab recirculating air filter • Lubricate front steering cylinder pivots • Lubricate oscillating rear axle • Check cab fresh air filter • Lubricate rear steering cylinder pivots REQUIRED PARTS Insure machine performance and availability; use only genuine John Deere parts. Verify part numbers are current and that any associated parts are also on hand i.e. filters, O-rings. Engine Oil Filter Part Number 250 HOURS 500 HOURS 1000 HOURS 3000 HOURS *544G, 624G T19044 1 1 1 1 644G RE57394 1 1 1 1 Primary Fuel Filter All RE63136 1 1 1 Final Fuel Filter *544G, 624G RE62419 1 1 1 644G RE62419 1 1 1 Hydraulic System Return Filter *544G AT144879 1 1 1 624G, 644G AT140315 1 1 1 Hydraulic Reservoir Breather Filter All AM39653 1 1 1 Transmission Filter All AT168989 1 1 Air Filter Primary *544G, 624G AR79679 1 1 644G AR80652 1 1 Air Filter Secondary *544G, 624G AR79680 1 1 644G AR80653 1 Differential Lock Return Filter(s) All T19044 TORQ-GARD SUPREME PLUS 50 Oil *544G, 624G 19 L (20 qt) 19 L (20 qt) 644G 24 L (25 qt) 24 L (25 qt) 24 L (25 qt) 24 L 25 qt) HY-GARD Transmission and Hydraulic Oil *544G 9.5 L (10 qt) 117 L (31 gal) 624G 11 L (12 qt) 151 L (40 gal) 644G Coolant Conditioner TY16004 OILSCAN Kit IPSKIT1 COOLSCAN Kit DSO251 1 1 or 2 1 *includes 544G LL and 544G TC 19 L (20 qt) 19 L 20 qt) 14 L (15 qt) 174 L (46 gal) 1 1 1 1 2 5 TX,50,JC1137 –19–22MAY96–1/1 CLIS–1 PN=312 Checklists MAINTENANCE AND REPAIR RECORD KEEPING SYSTEM Model: ❒ 544G ❒ 544G LL PIN/Serial Number: ❒ 544G TC ❒ 624G Delivery Date: ❒ 644G Customer: Hour Meter Reading: Oil Sampling Oil samples should be taken from each system prior to its recommended drain/change interval indicated on this form. Maintenance recommendations supplied by OILSCAN will be provided based upon the oil analysis and operating information you supply. Regular oil sampling will extend the operational life of your machine’s systems. Every 250 Hours ❒ Check receiver dryer moisture indicator ❒ Replace engine oil filter ❒ Drain and refill engine oil ❒ Check radiator coolant level Comments: Date: Hour Meter Reading: Maintenance Performed By: Every 500 Hours ❒ Lubricate front drive line ❒ Replace final fuel filter ❒ Check air intake hoses ❒ Replace hydraulic system return filter ❒ Check battery water level ❒ Replace hydraulic reservoir breather filter ❒ Add rust inhibitor to radiator ❒ Check front and rear differential oil level ❒ Replace primary fuel filter Comments: Date: Hour Meter Reading: Maintenance Performed By: Every 1000 Hours ❒ Lubricate rear drive line ❒ Change transmission oil ❒ Check and adjust engine speed linkage ❒ Replace transmission filter ❒ Replace air cleaner dust unloader valve ❒ Inspect and adjust park brake ❒ Replace air cleaner elements ❒ Lubricate frame hinge pivots ❒ Remove and clean engine crankcase vent tube Comments: Date: Hour Meter Reading: Maintenance Performed By: Every 2000 Hours ❒ Adjust engine valve lash ❒ Lubricate front driveline support bearing Comments: Date: Hour Meter Reading: Maintenance Performed By: Every 3000 Hours ❒ Change hydraulic system oil ❒ Replace differential lock return filters ❒ Clean hydraulic system suction strainer ❒ Change front and rear differential oil Comments Date: Hour Meter Reading: Maintenance Performed By: TX,50,JC1160 –19–03JUN96–1/1 CLIS–2 PN=313 John Deere Service Literature Available PARTS CATALOG TS189 -UN-17JAN89 The parts catalog lists service parts available for your machine with exploded view illustrations to help you identify the correct parts. It is also useful in assembling and disassembling. DX,PARTS -19-03MAR93 DX,INDOM -19-17SEP92 OPERATOR’S MANUAL -UN-02DEC88 The operator’s manual provides safety, operating, maintenance, and service information about John Deere machines. TS191 An extra copy of the operator’s manual is available. The operator’s manual and safety signs on your machine may also be available in other languages. (See your John Deere dealer to order.) TECHNICAL AND SERVICE MANUALS -UN-17JAN89 Technical and service manuals are service guides for your machine. Included in the manual are specifications, diagnosis, and adjustments. Also illustrations of assembly and disassembly procedures, hydraulic oil flows, and wiring diagrams. TS224 Component technical manuals are required for some products. These supplemental manuals cover specific components. DX,TM -19-03MAR93 DX,FOS -19-04JUN90 FUNDAMENTALS OF SERVICE MANUALS TS193 -UN-02DEC88 These basic manuals cover most makes and types of machines. FOS manuals tell you how to SERVICE machine systems. Each manual starts with basic theory and is fully illustrated with colorful diagrams and photographs. Both the “whys” and “hows” of adjustments and repairs are covered in this reference library. 170696 PN=12 John Deere Service Literature Available Name John Deere Distribution Service Center Service Publications Department P.O. Box 186, Moline, IL. 61266-0186 Address To order, fill out this form and mail it to the address above. Check forCity prices with your John Deere dealer or call 1-800-522-7448. You may State also place credit card orders by calling this number. Make checks payable to Deere & Co. Service Publications. Allow three weeks for delivery. No COD orders. Do not send cash or stamps. If you want Phone ( manuals or catalogs for equipment not shown on this list, provide the model number, serial number, and name of the product. Title Order Number 544G, LL, TC, 624G, 644G Loader Parts Catalog—544G, LL, TC, 624G Parts Catalog—644G Operator’s Manual Technical Manual-Operation and Test Technical Manual-Repair Component Manual-Engine (6059 and 6068) Component Manual-Engine (6076) Component Manual-Engine Accessories Component Manual-TeamMate™II Axles (1200 and 1400 series) Loader Safety Manual Tire Manual FOS Manual—Hydraulics FOS Manual—Electronic and Electrical Systems FOS Manual—Engines FOS Manual—Power Trains FOS Manual—Shop Tools FOS Manual—Welding FOS Manual—Belts and Chains FOS Manual—Bearings and Seals FOS Manual—Tires and Tracks FOS Manual—Air Conditioning FOS Manual—Fuels, Lubricants & Coolants FOS Manual—Fasteners FOS Manual—Iden. of Parts Failures 1-in. 3-Ring Binder (400 pages max.) 1-1/2-in. 3-Ring Binder (600 pages max.) 1—1-1/2-in. 3-Post Binder (600 pages max.) 2—3-1/2-in. 3-Post Binder (1400 pages max.) 2—4-in. 4-Post Expandable (2000 pages max.) ¼ ¼ ¼ ¼ Method of Payment Check or Money Order enclosed John Deere ¼ Farm Plan MasterCard ¼ Discover Visa ¼ American Express Your Signature ) x Quantity = Total PC-2364 PC-2365 OMT159816 TM-1529 TM-1530 CTM8 CTM42 CTM11 x x x x x x x x = = = = = = = = CTM43 DB1228 DB1009 x x x x x x x x x x x x x x x x x x x x x x x x x x x x x x = = = = = = = = = = = = = = = = = = = = = = = = = = = = = = FOS1005B FOS2007B FOS3007B FOS4006B FOS5105B FOS5207B FOS5305B FOS5405B FOS5507B FOS5708B FOS5807B FOS6004B FOS6104B SX2062 SX2063 SX2066 SX2064 SX2056 Subtotal $ 0.50 to $ 24.99 25.00 to 49.99 50.00 to 99.99 100.00 to 199.99 200.00 and over Shipping & Handling . . . $ 3.50 . . . . . 5.00 . . . . . 6.50 . . . . 9.00 . . 4.5% of subtotal Credit Card Acct. No. (13 or 16 digits) Expiration date: Zip Optional shipping available. Please check and add cost to normal shipping above. ¼ 1 day air . . . . . . . $15.00 ¼ 2 day air . . . . . . . $10.00 Price Each Subtotal Illinois state residents add 6.25% and Iowa state residents add 5% for Retail Occupation Tax or show tax exemption number. Other states excluded. Total Shipping & Handling Amount Due in U.S. Dollars (Prices subject to change without notice. SEP-95) TX,LIT1 -19-08JUN96 170696 PN=13 John Deere Service Keeps You On The Job TS1643 -UN-12SEP95 JOHN DEERE IS AT YOUR SERVICE WHEN YOU NEED IT Division 1—Calgary John Deere Industrial Equipment Co. 6715 8th Street NE, Suite 218 Calgary, AB T2E 7H7 Canada 403-531-5731; fax: 403-531-5739 Division 2—Denver John Deere Industrial Equipment Co. 6101 Stapleton North Drive, Suite A Denver, CO 80216 303-336-1204; fax: 303-336-1208 Division 3—Dallas John Deere Industrial Equipment Co. P.O. Box 999 Lewisville, TX 75029-2610 214-355-4513; fax: 214-355-4508 Division 4—Moline John Deere Industrial Equipment Co. 400 19th Street Moline, IL 61265 309-765-3316; fax: 309-765-3357 Division 5—Grimsby John Deere Industrial Equipment Co. P.O. Box 999 Grimsby, ON L3M 4S9 Canada 905-945-7389; fax: 905-945-7470 Division 6—Baltimore John Deere Industrial Equipment Co. 72 Loveton Circle, Suite 101 Sparks, MD 21152 410-785-4118; fax: 410-785-4145 CUSTOMER SATISFACTION is important to John Deere. We take pride in providing superior service. We’ll be around when you need us: • We maintain a large and varied parts inventory to help minimize downtime. • Precision tools and testing equipment enable technicians to locate and correct troubles. • We hold regular training schools for service technicians so they know your equipment and how to maintain it. • Our goal is to provide prompt, efficient service through competent dealerships. Division 8—Atlanta John Deere Industrial Equipment Co. 1201 Roberts Blvd., Suite 230 Kennesaw, GA 30144 404-423-2400; fax: 404-423-2411 a—John Deere Intercontinental Limited Overseas Industrial Division P.O. Box 2000 Moline, IL 61265 U.S.A. 309-765-3316; fax: 309-765-3279 COMPLAINT-RESOLUTION PROCEDURE Your dealer is the best and fastest source to solving any problems you may experience with your product. 1. Be prepared with the following information: —Machine model and product identification number —Date of purchase —Nature of problem 2. Discuss problem with dealer service manager. 3. If unable to resolve, see the dealership manager. Explain the problem and request assistance. 4. If you have a persistent problem your dealership is unable to satisfy, ask your dealer to contact the John Deere area manager product support for resolution. 5. If a problem is not resolved to your satisfaction, contact the appropriate John Deere marketing division office for your area and ask to speak with the division product support manager. (See map.) DX,IBC,4 -19-12SEP95 170696 PN=14