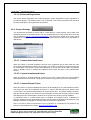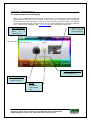
1
VIRDI 6000 TM Configuration Manual
Draft version eng-1.01
Copyright 2006 By UNION COMMUNITY Co., Ltd.
VIRDI 6000 TM Administrator Manual
Disclaimers
Information in this document is provided in connection with UNION COMMUNITY
products. No license, express or implied, by estoppels or otherwise, to any
intellectual property rights is granted by this document. Except as provided in UNION
COMMUNITY’s Terms and Conditions of Sale for such products, UNION
COMMUNITY assumes no liability whatsoever, and UNION COMMUNITY disclaims
any express or implied warranty, relating to sale and/or use of UNION COMMUNITY
products including liability or warranties relating to fitness for a particular purpose,
merchantability, or infringement of any patent, copyright or other intellectual property
right.
UNION COMMUNITY products are not intended for use in medical, life saving, life
sustaining applications, or other applications in which the failure of the UNION
COMMUNITY product could create a situation where personal injury or death may
occur. Should Buyer purchase or use UNION COMMUNITY products for any such
unintended or unauthorized application, Buyer shall indemnify and hold UNION
COMMUNITY and its officers, employees, subsidiaries, affiliates, and distributors
harmless against all claims, costs, damages, and expenses, and reasonable
attorney fees arising out of, directly or indirectly, any claim of personal injury or death
associated with such unintended or unauthorized use, even if such claim alleges that
UNION COMMUNITY was negligent regarding the design or manufacture of the part.
UNION COMMUNITY reserves the right to make changes to specifications and
product descriptions at any time without notice to improve reliability, function, or
design. Designers must not rely on the absence or characteristics of any features or
instructions marked "reserved" or "undefined." UNION COMMUNITY reserves these
for future definition and shall have no responsibility whatsoever for conflicts or
incompatibilities arising from future changes to them.
Please contact UNION COMMUNITY, local UNION COMMUNITY sales
representatives or local distributors to obtain the latest specifications and before
placing your product order.
About UNION COMMUNITY
With regard to any fingerprint-related issues, UNION COMMUNITY is always in
readiness to find out well fitted solutions, depending on customers’ requirements and
needs.
As a leading provider of fingerprint core technology, UNION COMMUNITY has set up
wide variety of fingerprint product lines from fingerprint OEM modules to several
choices of fingerprint finished products including access control, time & attendance,
door lock, PC peripherals, safety box, etc, that incorporate UNION COMMUNITY’s
groundbreaking biometrics technology. Based on its proprietary algorithm, its own
UNION COMMUNITY Co., Ltd. 44-3 Hyundai Topics Building, Bangi-dong,
Songpa-gu, Seoul, Korea 138-050, Tel: 82-2-6488-3000, Fax: 82-2-6488-3099,
E-Mail:[email protected], http://www.unioncomm.co.kr/eng
VIRDI 6000 TM Administrator Manual
sensor and in-house one-stop processing capability regarding hardware, software,
product design, etc., our services to government sector and various commercial
sectors like security, construction and enterprise are in full swing through fast
problem-solving approach to meet market trends or demands. As a result, UNION
COMMUNITY exports its market-proven fingerprint products to over 40 countries
including Japan, USA, Europe and China.
As the biggest and the most promising company in the commercial sector of
biometrics industry in Korea, UNION COMMUNITY was awarded “Korean Worldclass Product Award” for its excellent performance by Minister of Commerce,
Industry and Energy in December 2005.
To be the world-class company in biometrics field, UNION COMMUNITY and all the
members continue to do all-out efforts for the world-best quality product, creation of
new paradigm and customers’ satisfaction through accumulated expertise and
working experience from various reference sites and versatile hardware & software
development.
About This Manual
This is an introduction to operation of VIRDI 6000 series supplied by UNION
COMMUNITY. This manual describes how to do user registration in local terminal,
terminal settings, network settings, etc. The purpose of this manual is to provide
instructions on using VIRDI 6000 series and troubleshooting minor problems.
UNION COMMUNITY Co., Ltd. 44-3 Hyundai Topics Building, Bangi-dong,
Songpa-gu, Seoul, Korea 138-050, Tel: 82-2-6488-3000, Fax: 82-2-6488-3099,
E-Mail:[email protected], http://www.unioncomm.co.kr/eng
VIRDI 6000 TM Administrator Manual
< Glossary>
l Admin, Administrator
- As a user who can enter into the terminal menu mode, he can
register/modify/delete terminal users and change the operating environment
by changing settings.
- If there is no administrator for a terminal, anyone can change the settings. In
this regard, it is recommended to register at least one administrator.
- Caution is required with registration and operation because an administrator
has the right to change critical environmental settings of the terminal.
l 1 to 1 Verification
- A user’s verification fingerprint (template) is compared to the user’s enrollment
fingerprint (template) previously registered. The terminal performs 1:1
matches against the user’s enrolled template until a match is found.
- It is called 1 to 1 Verification because only the fingerprint registered in the
user’s ID or card is used for comparison.
l 1 to N Identification
- The terminal performs matches against multiple fingerprints (templates) based
solely on fingerprint information.
- Without the user’s ID or card, the user’s fingerprint is compared to fingerprints
previously registered.
l I-Capture (Intelligent Capture)
- Reinforces detection capability for residual fingerprints (fingerprints left on a
sensor window due to sweat or contaminants on a finger) and automatically
adjusts sensor settings to detect good-quality fingerprints regardless of the
conditions (dry or wet) of the fingerprints.
l Authentication level
- Depending on the fingerprint match rate, it is displayed from 1 to 9.
Authentication is successful only if the match rate is higher than the set level.
- The higher the Authentication level, the higher the security. However, it
requires a relatively high match rate, so Authentication is vulnerable to failure.
- 1:1 Level: Authentication level used for 1:1 verification
- 1:N Level: Authentication level used for 1:N identification
l Authentication Method
- Various kinds of authentication including FP (fingerprint) authentication, PW
(password) authentication, RF (card) authentication, or a combination of these
methods
- Ex) FP|PW: fingerprint or password authentication; password is used for
authentication if fingerprint authentication fails
UNION COMMUNITY Co., Ltd. 44-3 Hyundai Topics Building, Bangi-dong,
Songpa-gu, Seoul, Korea 138-050, Tel: 82-2-6488-3000, Fax: 82-2-6488-3099,
E-Mail:[email protected], http://www.unioncomm.co.kr/eng
VIRDI 6000 TM Administrator Manual
l Function keys
[F1], [F2], [F3], [F4], [ENTER] are used, and they are used for direct authentication
and each key represents each authentication mode.
UNION COMMUNITY Co., Ltd. 44-3 Hyundai Topics Building, Bangi-dong,
Songpa-gu, Seoul, Korea 138-050, Tel: 82-2-6488-3000, Fax: 82-2-6488-3099,
E-Mail:[email protected], http://www.unioncomm.co.kr/eng
VIRDI 6000 TM Administrator Manual
Table of Contents
UNION COMMUNITY Co., Ltd. 44-3 Hyundai Topics Building, Bangi-dong,
Songpa-gu, Seoul, Korea 138-050, Tel: 82-2-6488-3000, Fax: 82-2-6488-3099,
E-Mail:[email protected], http://www.unioncomm.co.kr/eng
VIRDI 6000 TM Administrator Manual
.....................................................................................................................................
< Glossary>................................................................................................................ 4
Table of Contents ....................................................................................................... 6
1. Before use............................................................................................................ 11
1.1.0. Safety precautions ................................................................................. 11
1.1.1. Terminal description .............................................................................. 12
1.1.2. List of Icons ............................................................................................ 13
1.1.3. Voice Operation ...................................................................................... 16
1.1.4. Sound Operation .................................................................................... 16
1.1.5. LED operation......................................................................................... 16
1.1.6. Touchscreen Usage................................................................................ 16
1.1.7. Correct fingerprint registration and input methods ............................ 18
2. Introduction .......................................................................................................... 20
2.1. Features ..................................................................................................... 20
2.2. Configuration............................................................................................. 23
2.2.1. Network configuration ........................................................................... 23
2.2.2. Standalone configuration ...................................................................... 23
2.3. Specifications ............................................................................................ 24
3. Device configuration settings ............................................................................... 25
3.1. Terminal Setup........................................................................................... 25
3.1.1. Entering Administrator Programming .................................................. 25
3.1.2. Administrator Main Screen.................................................................... 26
3.1.3. Programming Reference Chart ............................................................. 27
3.2. User Management
..................................................................... 30
3.2.1. Registering a User
.................................................................. 30
3.2.1.0. User Registration Window.................................................................. 32
3.2.1.1. Registering a Fingerprint
3.2.1.2. Registering a Card
3.2.1.3. Registering a Password
3.2.1.4. Authentication Type
3.2.1.5. User Fingerprint Options
.................................................... 33
............................................................... 34
...................................................... 35
............................................................ 36
.................................................... 38
UNION COMMUNITY Co., Ltd. 44-3 Hyundai Topics Building, Bangi-dong,
Songpa-gu, Seoul, Korea 138-050, Tel: 82-2-6488-3000, Fax: 82-2-6488-3099,
E-Mail:[email protected], http://www.unioncomm.co.kr/eng
VIRDI 6000 TM Administrator Manual
3.2.1.6. User Picture Registration
................................................... 39
3.2.1.7. User Type (Normal/Administrator) ..................................................... 39
3.2.2. Deleting a User
................................................................... 40
3.2.3. Modifying a User
..................................................................... 41
3.2.4. Viewing Users
................................................................... 42
3.3. Network Settings
..................................................................... 44
3.4. Time/Attendance Settings
3.4.1. Access Control Mode
3.4.2. Time & Attendance
.......................................................... 45
................................................................. 45
...................................................................... 45
3.4.2.1 Time & Attendance Schedules
3.4.3. Meal Application
3.4.3.1 Meal Mode Schedules
................................................. 46
.......................................................................... 46
............................................................... 47
3.4.4. Function Key Programming
.................................................. 48
3.4.4.1. Extended Function Keys.................................................................. 48
3.5. Terminal Settings
................................................................... 50
3.5.1. System Settings
...................................... 51
3.5.1.1. User ID Length..................................................................................... 51
3.5.1.2. Terminal ID Number............................................................................. 51
3.5.1.3. Authentication Mode ........................................................................... 51
3.5.1.4. Case Tamper ........................................................................................ 52
3.5.2. Display Settings
...................................... 52
3.5.2.1. Language ............................................................................................. 52
3.5.2.2. Screen Saver........................................................................................ 52
3.5.3. Sound Settings
............................................. 53
3.5.3.1. Voice Volume ....................................................................................... 53
UNION COMMUNITY Co., Ltd. 44-3 Hyundai Topics Building, Bangi-dong,
Songpa-gu, Seoul, Korea 138-050, Tel: 82-2-6488-3000, Fax: 82-2-6488-3099,
E-Mail:[email protected], http://www.unioncomm.co.kr/eng
VIRDI 6000 TM Administrator Manual
3.5.3.2. Sound Volume ..................................................................................... 53
3.5.4. Date/Time Settings
.................................... 54
3.5.3.2. Display Format .................................................................................... 54
3.5.3.2. Set Current Date .................................................................................. 55
3.5.3.3. Set Current Time ................................................................................. 56
3.5.5. Database Options
.................................... 57
3.5.5.1. Compress User Data ........................................................................... 57
3.5.5.2. Compress Log Data............................................................................. 57
3.5.5.3. Clear Settings ...................................................................................... 57
3.5.5.4. Clear Log Data ..................................................................................... 57
3.5.5.5. Clear Picture Logs............................................................................... 57
3.5.5.6. Delete All .............................................................................................. 58
3.5.6. Authentication Settings
........................... 59
3.5.6.1. User Group ID ...................................................................................... 59
3.5.6.2. User Display Option ............................................................................ 59
3.5.6.3. 1:N Matching........................................................................................ 60
3.5.6.4. Card Only ............................................................................................. 60
3.6. External Devices
................................................................... 61
3.6.1. Fingerprint Sensor Settings
..................... 62
3.6.1.1. 1:N Level .............................................................................................. 62
3.6.1.2. 1:1 Level ............................................................................................... 62
3.6.1.3. Fake Finger Detection ......................................................................... 62
3.6.1.4. Enhanced Registration ....................................................................... 63
3.6.2. Camera Settings
...................................... 63
3.6.2.1. Camera Authorized Users................................................................... 63
3.6.2.2. Camera Unauthorized Users .............................................................. 63
3.6.2.3. Camera Display Picture ...................................................................... 63
3.6.3. Wiegand Settings
...................................... 64
3.6.3.1. Site Code.............................................................................................. 64
3.6.3.2. Format .................................................................................................. 64
3.6.4. Terminal Locking
.................................... 65
3.6.4. Door Option Settings
............................... 65
3.6.4.1. Door Monitor........................................................................................ 66
3.6.4.2. Lock Type............................................................................................. 66
3.6.4.3. Warn Time ............................................................................................ 66
3.6.4.4. Open Time............................................................................................ 66
UNION COMMUNITY Co., Ltd. 44-3 Hyundai Topics Building, Bangi-dong,
Songpa-gu, Seoul, Korea 138-050, Tel: 82-2-6488-3000, Fax: 82-2-6488-3099,
E-Mail:[email protected], http://www.unioncomm.co.kr/eng
VIRDI 6000 TM Administrator Manual
3.7. Theme Settings
.......................................................................... 67
3.7.1. Main Background ................................................................................... 67
3.7.2. Daily Background Update...................................................................... 67
3.7.3. Arrange Icons ......................................................................................... 68
3.8. Terminal Information
................................................................. 69
3.8.1. System Information
...................................... 69
3.8.2. Terminal Information
.................................... 70
3.8.3. Ethernet Information
.................................... 70
3.8.4. User Information
........................................... 71
3.8.5. Log Data Information
................................... 71
3.8.6. View Log Information
................................... 72
3.9. USB Options
.......................................................................... 73
3.9.1. Database Export ..................................................................................... 74
3.9.1. Database Import ..................................................................................... 75
3.9.2. Firmware Upgrading .............................................................................. 75
4. How to use the terminal........................................................................................ 76
4.1. Main Screen ............................................................................................... 76
4.2. ID Entry Screen.......................................................................................... 78
4.3. Authentication Result Display.................................................................. 79
4.4. Application Modes..................................................................................... 81
4.4.1. Access Control Application................................................................... 81
4.4.2. Time & Attendance Application............................................................. 82
4.4.3. Cafeteria Application.............................................................................. 83
5. Troubleshooting Guide ......................................................................................... 84
UNION COMMUNITY Co., Ltd. 44-3 Hyundai Topics Building, Bangi-dong,
Songpa-gu, Seoul, Korea 138-050, Tel: 82-2-6488-3000, Fax: 82-2-6488-3099,
E-Mail:[email protected], http://www.unioncomm.co.kr/eng
VIRDI 6000 TM Administrator Manual
1. Before use
1.1.0. Safety precautions
l Warning
Handling with wet hands or
allowing liquid to flow into it
is prohibited.
-> It may cause an
electric shock or damage.
Do not place a fire source
near the terminal.
-> It may cause a fire.
Do not disassemble, repair,
or modify the terminal at
discretion.
-> It may cause an electric
shock, fire or damage.
Keep out of reach of
children.
-> It may cause an
accident or damage.
- If the above warning is ignored, it may result in death or serious injury.
l Cautions
Keep away from direct
sunlight
->
It
may
cause
deformation
or
color
change.
Avoid high humidity or
dust
-> The terminal may be
damaged.
Avoid
using
water,
benzene,
thinner,
or
alcohol for cleaning
-> It may cause an electric
shock or fire.
Do not place a magnet
close to the terminal.
-> The terminal may
break
down
or
malfunction.
Do not contaminate the
fingerprint input area.
-> Fingerprints may not be
well recognized.
Avoid using insecticide or
flammable spray near the
terminal.
-> It may result in
deformation
or
color
change.
Avoid impacts or using
sharp objects on the
terminal.
-> The terminal may be
damaged and broken.
Avoid severe temperature
changes
-> The terminal may be
broken.
- If the above cautions are ignored, it may result in property loss or human injury.
※ Under no circumstances will UNION COMMUNITY be responsible for
accidents or damages caused by inappropriate use of the product without
referring to the user manual.
UNION COMMUNITY Co., Ltd. 44-3 Hyundai Topics Building, Bangi-dong,
Songpa-gu, Seoul, Korea 138-050, Tel: 82-2-6488-3000, Fax: 82-2-6488-3099,
E-Mail:[email protected], http://www.unioncomm.co.kr/eng
VIRDI 6000 TM Administrator Manual
1.1.1. Terminal description
1
12
2
11
3
10
4
9
5
No.
1
2
3
4
item
Camera Sensor
Touchscreen LCD
LED indicator
Approach Sensor
IRED sensor
5
6
7
8
9
Function Keys
USB
Call Button
Speaker
Card Sensor
10
Finger Sliding Door
11
Finger Sensor Window
12
UV Sensor
6
7
8
description
Picture image taken during authentication
Color LCD with Touchscreen
LED Power(RED), Card(Blue), Door(Green)
User approach turns on the LCD
Person's approach makes it automatically turn
on button LED and LCD window with ID input
screen.
Function Keys (see function key section)
USB for memory stick, or computer (mini)
Used for applications with a door phone.
Speaker for voice or sound output.
Card Sensor area, scan card in this area.
Door for finger sensor for environmental
protection
Finger input area, place finger here during
fingerprint entry.
UV Sensor used for cleaning bacteria from
sensor window
UNION COMMUNITY Co., Ltd. 44-3 Hyundai Topics Building, Bangi-dong,
Songpa-gu, Seoul, Korea 138-050, Tel: 82-2-6488-3000, Fax: 82-2-6488-3099,
E-Mail:[email protected], http://www.unioncomm.co.kr/eng
VIRDI 6000 TM Administrator Manual
1.1.2. List of Icons
During normal operation or when a new event occurs an icon will appear on the current display.
Each icon is a symbol representing the event that has just occurred. Below is a list of possible
icons that can appear on the display.
Icon
Description
ID Icon – displayed when an id number is used to
access the terminal.
Password Icon – displayed when a password is used to
access the terminal.
Card Icon – displayed when a card is used to access the
terminal.
Fingerprint – when a fingerprint is used to access the
terminal the user’s fingerprint will be displayed on the
lcd. This can assist the user when entering their
fingerprint.
Picture – depending on the configuration options when
any user accesses the terminal a picture will be taken
and displayed on the lcd.
Fail Icon – displayed when authentication is invalid from
an unregistered user
Success Icon – displayed when a registered user is
successfully authenticated.
UV Status Icon ON – when the UV protection is ON an
animation picture will appear.
UV Status Icon OFF – when the UV protection is OFF a
grayed out picture will appear.
Network Status Icon SERVER ON – when the server is
actively communicating with the terminal an animation
picture will appear.
Network Status Icon NO LINK – when the server
program is not communicating with the terminal and an
Ethernet link is not present a grayed out network picture
will appear.
Network Status Icon LINK PRESENT – when the
Ethernet link is active and the server program is not
communicating with the terminal a white network picture
will appear.
Trouble Status Icon ON – when there is a terminal
trouble, case tamper, this picture will appear. If no
trouble is present i.e. case tamper, this icon will
disappear.
UNION COMMUNITY Co., Ltd. 44-3 Hyundai Topics Building, Bangi-dong,
Songpa-gu, Seoul, Korea 138-050, Tel: 82-2-6488-3000, Fax: 82-2-6488-3099,
E-Mail:[email protected], http://www.unioncomm.co.kr/eng
VIRDI 6000 TM Administrator Manual
Fire Status Icon ON – when the terminal is notified of an
external fire event this picture will appear. If there is no
fire trouble no icon will appear.
Door Status Icon OPEN – when the door connected to
the terminal is opened this picture will appear.
Door Status Icon CLOSE – when the door connected to
the terminal is closed and normal status this picture will
appear.
Proximity Status Icon ON – when a person is near the
terminal this picture will appear
Proximity Status Icon OFF – when there is no activity in
the area of the terminal a grayed out picture will appear.
Access Buttons – these buttons are used to reset the
current mode of operation. This button is used with
Function keys, Time/Attendance or Cafeteria Mode. If
the current mode is attend, leave, in, or out touching this
button will return to normal access mode. Both of these
icons perform the same function.
ID Button – this button is used when the user needs to
input their ID number for authentication. When this
button is touched a number pad window will appear.
Function Key Attend – this button is used for time &
attendance mode. It will change the current mode to
Attend Mode. If the user is arriving at the office that day
they will touch this button.
Function Key Leave – this button is used for Time &
attendance mode. It will change the current mode to
Leaving mode. If the user is leaving the office for the
day they will touch this button.
Function Key In – this button is used for Time &
Attendance mode. It will change the current mode to IN
mode. If the user is arriving to the office from lunch or a
break they will touch this button.
Function Key Out – this button is used for Time &
Attendance mode. It will change the current mode to
OUT mode. If the user is leaving the office for lunch or a
break they will touch this button.
Function Key Extension – this button is mainly used in
Time & Attendance mode. If the four function keys
(Attend, Leave, In, Out) are not enough for the
application this button can be used to extend the
amount of function keys. A new window will appear with
a selection of function keys.
Function Key Meal – this button is used in Cafeteria
meal mode. When the meal is breakfast, lunch, snack or
dinner the user will touch this button.
Close/Cancel Button – this button will close the current
window without saving any changes
UNION COMMUNITY Co., Ltd. 44-3 Hyundai Topics Building, Bangi-dong,
Songpa-gu, Seoul, Korea 138-050, Tel: 82-2-6488-3000, Fax: 82-2-6488-3099,
E-Mail:[email protected], http://www.unioncomm.co.kr/eng
VIRDI 6000 TM Administrator Manual
Configuration Button – when terminal setup and
configuration is needed touching this button will enter
terminal configuration mode. See configuration manual
for setup details.
Status Bar – all status items will appear in this bar. The
text item in the center will show the current status of the
terminal. Access; Attend, Leave, In, Out, Meal etc.
UNION COMMUNITY Co., Ltd. 44-3 Hyundai Topics Building, Bangi-dong,
Songpa-gu, Seoul, Korea 138-050, Tel: 82-2-6488-3000, Fax: 82-2-6488-3099,
E-Mail:[email protected], http://www.unioncomm.co.kr/eng
VIRDI 6000 TM Administrator Manual
1.1.3. Voice Operation
Voices are played during certain events. Below is a list of possible voices that will be played.
Voice volume can be controlled separately from the sound volume. The voice feedback can be
turned off if needed.
“Please enter your fingerprint”
Enter fingerprint using the fingerprint input
window
“You are authorized”
Successful authentication
“Please try again”
Authentication failed
“Input your ID”
When a user ID is required
1.1.4. Sound Operation
Sounds are played during events or interaction with the Touchscreen. Button presses, message
popup, correct and incorrect entries, failed or success authentication will produce a single sound
tone. Sound volume can be controlled separately from the voice volume. Sounds can be turned
off if needed.
1.1.5. LED operation
On the front of the terminal on the bottom left corner there is a Virdi logo. When power is applied
to the unit and during normal operation this will light up as red When a card is used to access
the terminal the color will turn green for half a second then back to red.
When the door is opened the color will turn green for the duration of the door open period, then
turn back to red when the door is closed.
1.1.6. Touchscreen Usage
To use the Touchscreen correctly it is recommended to use your finger only. For cleaning use a
dry cloth to wipe the surface. You can use a stylus pen if you wish. Do not use sharp objects.
Almost anywhere on the screen is touch interactive. For example, if a popup window is displayed,
touching the window will make the window disappear. Firmly touch the icon that you wish to use.
The icon color will change and a sound should be heard.
In the administrator programming area, if a number entry is needed just touch the number field or
text you wish to change, a number pad will appear for you to enter the data.
UNION COMMUNITY Co., Ltd. 44-3 Hyundai Topics Building, Bangi-dong,
Songpa-gu, Seoul, Korea 138-050, Tel: 82-2-6488-3000, Fax: 82-2-6488-3099,
E-Mail:[email protected], http://www.unioncomm.co.kr/eng
VIRDI 6000 TM Administrator Manual
The example windows show the red areas that are interactive. When touching the number field
entry area a number pad will appear for you to enter data. When touching a button the image will
change. When touching a combo box, a list of items will appear, while your finger is down slide
your finger to the selection and release. For Dialog Buttons and Check Boxes just touch the area
and the option will change to a new icon.
Dialog
Buttons
Number
Field
Area
Number
Field
Area
Standard
Icon
Buttons
Check
Boxes
Combo
Boxes
UNION COMMUNITY Co., Ltd. 44-3 Hyundai Topics Building, Bangi-dong,
Songpa-gu, Seoul, Korea 138-050, Tel: 82-2-6488-3000, Fax: 82-2-6488-3099,
E-Mail:[email protected], http://www.unioncomm.co.kr/eng
VIRDI 6000 TM Administrator Manual
1.1.7. Correct fingerprint registration and input methods
The AC6000 makes it easy for scanning fingerprints. The color LCD will show a picture of the
fingerprint on the display, this picture is not saved, only displayed. This can be used as a guide when
scanning your finger. When registering or scanning a fingerprint, the user should see their fingerprint
on the LCD; they should check the alignment and placement of their finger on the sensor window.
Below are examples of fingerprints during various conditions. If the user’s finger is too dry or too wet
the image will not appear properly.
Good
Bad (fingertip)
Good
OK
(Dry)
OK
(wet/moist)
l Correct fingerprint registration methods
Place your index finger on the window just as you do with a finger stamp.
Do not use the tip of the finger.
Make sure the center of your finger touches the window.
l Use your index finger if possible, it is the easiest for orientation and
guarantees a stable input method. Using the thumb or baby finger can be
awkward and may result in a bad image.
l Check if your fingerprint is unclear or damaged.
It is tricky to recognize fingerprints on dry, wet, unclear, or injured fingers.
Use another finger in this case.
UNION COMMUNITY Co., Ltd. 44-3 Hyundai Topics Building, Bangi-dong,
Songpa-gu, Seoul, Korea 138-050, Tel: 82-2-6488-3000, Fax: 82-2-6488-3099,
E-Mail:[email protected], http://www.unioncomm.co.kr/eng
VIRDI 6000 TM Administrator Manual
l Be aware of certain fingerprint conditions
Depending on the user’s fingerprint condition, some fingerprints may not be
used or may cause an inconvenience.
Ø If the fingerprint is damaged or very unclear, then it cannot be recognized.
Please use a password instead in this case.
Ø When a finger is dry, breathe on the finger for smooth operation.
Ø For kids, it may be tricky or impossible to use the terminal because their
fingerprints are too small or very unclear. It is recommended to register
their fingerprints every six months.
Ø For the elderly, it may not be possible to register their fingerprints if there
are too many fine lines on the fingerprints.
Ø If fingerprints are very unclear, it may be convenient if you register 2~3
fingerprints.
Ø
It is recommended that you register more than 2 fingerprints.
UNION COMMUNITY Co., Ltd. 44-3 Hyundai Topics Building, Bangi-dong,
Songpa-gu, Seoul, Korea 138-050, Tel: 82-2-6488-3000, Fax: 82-2-6488-3099,
E-Mail:[email protected], http://www.unioncomm.co.kr/eng
VIRDI 6000 TM Administrator Manual
2. Introduction
2.1. Features
l Access control system using LAN
- Communication between the unit and the authentication server
is done through a UTP cable and TCP/IP protocol, so an
existing LAN can be used. This guarantees network-based
administration and monitoring as well as easy expansion, high
reliability, and higher speed. The AC6000 can work on 10 or
100mb LAN.
l Convenient Auto Sensing function
- Simple authentication process without any key input; simple
fingerprint touching is sufficient.
l Camera Sensor
- Camera options are available to take a picture of authorized or
unauthorized users. Capable of 12,500 pictures used for user
pictures and/or log data pictures.
l USB Operation
- USB 2.0 Host (memory stick) or USB Client (to computer). The USB
operation allows import of firmware upgrading, user background images,
languages, pictures or information from another terminal. The USB can
export log data, picture data or terminal information to be transferred
from terminal to terminal or terminal to computer.
l Simple authentication using fingerprints
- Fingerprint authentication technology prevents users from
forgetting passwords, cards or stolen keys or cards, etc. This is
a good way to improve security level.
l High processing capacity of terminal and server
- When a server is used there is no limitation on user information.
Even in standalone operation by using local terminal, it is
possible to manage fingerprint authentication of more than
8,000 users (in optional case).
l Color LCD Touchscreen
- A colorful 16bit LCD ensures easy operation for the user. The
display will show various windows during the authentication
process and registration to ensure the user of correct operation.
In order to conserve the life of the LCD, the LCD will turn off
during no operation conditions. When any message or popup
window is displayed touching anywhere will close or cancel the
UNION COMMUNITY Co., Ltd. 44-3 Hyundai Topics Building, Bangi-dong,
Songpa-gu, Seoul, Korea 138-050, Tel: 82-2-6488-3000, Fax: 82-2-6488-3099,
E-Mail:[email protected], http://www.unioncomm.co.kr/eng
VIRDI 6000 TM Administrator Manual
window.
l Touchless Buttons
- The function keys and call button are specially designed for
easy operation. The buttons will sense the finger before the
finger touches, which does not require the button to be touched.
l Customized Look
- The main screen can be customized by adding any background
(customer logo), and also can be programmed to automatically
change everyday at midnight. The time and date can also be
moved anywhere on the screen.
l Door phone
- Easy visitor identification and convenient response.
l Various and flexible access controls
- No risk of rent, forgery, or loss of keys or cards
- Perfect control by assigning different security clearances to
each user or group
- Flexibility provided by allowing limited time for entry/exit
- Low maintenance
- No need to issue visitor card for visitor
l Various applications
- Time & Attendance
- Meal/Cafeteria
- Access Control
- Various operation modes depending on the terminal menu
settings
l Enhanced security with detection of fake finger
- Adopted detection technology of fake finger enhances security
level
l Various registration and authentication methods
- There are a total of 11 registration and authentication methods
(4 methods if the card reader is not installed), so you are
required to select one method before registering users and an
administrator.
FP
Fingerprint registration
Fingerprint authentication
ID&PW
Password registration
Password authentication after ID input
UNION COMMUNITY Co., Ltd. 44-3 Hyundai Topics Building, Bangi-dong,
Songpa-gu, Seoul, Korea 138-050, Tel: 82-2-6488-3000, Fax: 82-2-6488-3099,
E-Mail:[email protected], http://www.unioncomm.co.kr/eng
VIRDI 6000 TM Administrator Manual
FP|PW
Fingerprint and password registration
Fingerprint or password authentication
FP&PW
Fingerprint and password registration
Password authentication after fingerprint authentication
RF
Card registration
Card authentication
RF|FP
Card or fingerprint authentication
RF&FP
Card and fingerprint registration
Fingerprint authentication after card authentication
RF|PW
Card and password registration
Card or password authentication
RF&PW
Card and password registration
Password authentication after card authentication
ID&FP|RF&FP
Card and fingerprint registration
Fingerprint authentication after ID input or fingerprint
authentication after card authentication
ID&PW|RF&PW Card and password registration
Password authentication after ID input or password
authentication after card authentication
UNION COMMUNITY Co., Ltd. 44-3 Hyundai Topics Building, Bangi-dong,
Songpa-gu, Seoul, Korea 138-050, Tel: 82-2-6488-3000, Fax: 82-2-6488-3099,
E-Mail:[email protected], http://www.unioncomm.co.kr/eng
VIRDI 6000 TM Administrator Manual
2.2. Configuration
2.2.1. Network configuration
Network Server
(authentication server)
UTP
Switch Hub
UTP
UTP
UTP
LET
36
6410 Tx Rx
641
Tx Rx
1
Tx Rx
1
3
Tx Rx
2
Tx Rx
1
2
4
Tx Rx
1
Tx Rx
Tx Rx
1
2
1 2 3
2
6423 1 2
2
1
643
8
641
0
2
3
4
5
6
7
8
9
10
11
12
2
2
643
7
3
4
5
6
2
Tx Rx
1
1
2
Tx
3
Rx
2
4
5
7
6
8
9
10
11
12
1
3
4
WAN
TCP/IP
UTP
2.2.2. Standalone configuration
door lock system
doorphone
VIRDI 6000
UNION COMMUNITY Co., Ltd. 44-3 Hyundai Topics Building, Bangi-dong,
Songpa-gu, Seoul, Korea 138-050, Tel: 82-2-6488-3000, Fax: 82-2-6488-3099,
E-Mail:[email protected], http://www.unioncomm.co.kr/eng
VIRDI 6000 TM Administrator Manual
2.3. Specifications
ITEM
SPEC
CPU
32Bit RISC CPU
REMARK
128M DDRAM
MEMORY
256M FLASH (Default)
512M FLASH (Option)
Fingerprint sensor
Optical
Authentication speed
<1 sec.
Scan Area / Resolution
12.9 * 15.2mm / 500 DPI
FRR / FAR
0.1% / 0.001%
Communication Port
TCP/IP, RS-232, Wiegand
RS-485 (Option)
Temperature / Humidity
-10 ~ 50 /
Lower than 90% RH
LCD
800x480 TFT LCD
Display Area
103.8 x 62.28 mm
AC / DC Adapter
INPUT : Universal AC 100 ~ 250V
OUTPUT : DC 12V (Option : DC
24V)
UL, CSA, CE Approved
Option
100,000
fingerprints
200,000
fingerprints
RF Card Reader
EM Card,
125kHz
Smart Card Reader
A-type,
13.56MHz
Door phone
UV
UNION COMMUNITY Co., Ltd. 44-3 Hyundai Topics Building, Bangi-dong,
Songpa-gu, Seoul, Korea 138-050, Tel: 82-2-6488-3000, Fax: 82-2-6488-3099,
E-Mail:[email protected], http://www.unioncomm.co.kr/eng
VIRDI 6000 TM Administrator Manual
3. Device configuration settings
3.1. Terminal Setup
The terminal should be setup by the administrator prior to using. The terminal configurations
allow different setup options for the fingerprint sensor, card reader, add/delete modify users, view
log information, set time/date, change languages etc. It is important the administrator setup the
terminal to the desired settings before using. This section will describe each setting and show a
picture of the required window when setting the option(s).
3.1.1. Entering Administrator Programming
From the Main Screen touch the
icon to enter administrator mode. If there is an
administrator programmed they will be required to authenticate with a fingerprint, card or
password. Before starting the administration programming it is recommend you read section 1.1.6.
Touchscreen Usage
UNION COMMUNITY Co., Ltd. 44-3 Hyundai Topics Building, Bangi-dong,
Songpa-gu, Seoul, Korea 138-050, Tel: 82-2-6488-3000, Fax: 82-2-6488-3099,
E-Mail:[email protected], http://www.unioncomm.co.kr/eng
VIRDI 6000 TM Administrator Manual
3.1.2. Administrator Main Screen
UNION COMMUNITY Co., Ltd. 44-3 Hyundai Topics Building, Bangi-dong,
Songpa-gu, Seoul, Korea 138-050, Tel: 82-2-6488-3000, Fax: 82-2-6488-3099,
E-Mail:[email protected], http://www.unioncomm.co.kr/eng
VIRDI 6000 TM Administrator Manual
3.1.3. Programming Reference Chart
This chart is a summary of each programming option available; it will help you quickly locate the
option you need to program. Use this chart as a reference.
Operation Icon
Description
User Management
Add User
Delete User
Modify User
View User
Network Settings
Server IP address
Terminal IP address
Server Port
Gateway
Subnet Mask
DHCP or Static
Application Mode
Time & Attendance mode
Access control mode
Cafeteria mode
Function key settings
Time schedules
UNION COMMUNITY Co., Ltd. 44-3 Hyundai Topics Building, Bangi-dong,
Songpa-gu, Seoul, Korea 138-050, Tel: 82-2-6488-3000, Fax: 82-2-6488-3099,
E-Mail:[email protected], http://www.unioncomm.co.kr/eng
VIRDI 6000 TM Administrator Manual
Terminal Settings
User ID Length
Terminal ID Number
Authentication Method
- terminal/server
- server/terminal
- server only
Case Tamper Enable/Disable
Language Change
Screen Saver Timeout
Sound Settings
Date/Time Settings
Authentication
- user ID/Group ID
- user display option
- 1:N matching
- Card only
Database control
- compress user data
- compress log data
- clear settings
- clear log data
- clear picture data
- delete all
External Devices
Fingerprint Sensor
-
1:N level
1:1 level
Fake finger level
Enhanced registration
Camera
- authorized users
- unauthorized users
- display picture
Wiegand
- Site Code
- Format (26/34bit)
Lock Terminal
- lock/unlock terminal
Door Options
- Door monitor
(enable/disable)
- Normal open/close
- Lock type (motor/strike)
- Open warning time
- Open Time
UNION COMMUNITY Co., Ltd. 44-3 Hyundai Topics Building, Bangi-dong,
Songpa-gu, Seoul, Korea 138-050, Tel: 82-2-6488-3000, Fax: 82-2-6488-3099,
E-Mail:[email protected], http://www.unioncomm.co.kr/eng
VIRDI 6000 TM Administrator Manual
Theme Setup
Main window background selection
Daily update background
Main window icon move
Terminal Information
System Information
Terminal Information
Ethernet Information
User Capacity Summary
Log Data Summary
View Log Data
USB Operation
Import to AC6000 from USB
- system options
- user data
- background
images/languages
- firmware upgrade
Export from AC6000 to USB
- User data
- Event Log
- System Options
- Picture Data
- All
UNION COMMUNITY Co., Ltd. 44-3 Hyundai Topics Building, Bangi-dong,
Songpa-gu, Seoul, Korea 138-050, Tel: 82-2-6488-3000, Fax: 82-2-6488-3099,
E-Mail:[email protected], http://www.unioncomm.co.kr/eng
VIRDI 6000 TM Administrator Manual
3.2. User Management
In the user management section you can add, delete, modify or view all users in the terminal. This
window will show you how many registered users are in the terminal.
Touch the
icon to enter the user management area.
3.2.1. Registering a User
When registering a user the following steps are necessary.
1) Assign a user ID number for the user. The terminal will automatically choose the next
available number, if you do not want this number; enter your own pre-assigned value.
2) Determine how the user will be authenticated. Fingerprint, card, ID, password or combination.
3) Register the user’s fingerprint, card or password first.
4) Choose the authentication type for this user. i.e. fingerprint only, fingerprint with card, id and
password, etc. ( See section 3.2.1.4. for authentication types)
5) If a user picture is required for the database, take the user picture.
6) Select the user as an administrator or regular user.
UNION COMMUNITY Co., Ltd. 44-3 Hyundai Topics Building, Bangi-dong,
Songpa-gu, Seoul, Korea 138-050, Tel: 82-2-6488-3000, Fax: 82-2-6488-3099,
E-Mail:[email protected], http://www.unioncomm.co.kr/eng
VIRDI 6000 TM Administrator Manual
The following is a step by step guide on registering a user.
Touch the
icon to register a new user.
A window will appear to enter a user ID. This is an identification number that uniquely identifies
the user in the system. This window will always show the next available user ID number.
Touch
to use the current displayed number. OR
To enter a new ID number touch the
number you wish to use
until the id is blank, then enter the user ID
When finished entering the user ID number touch
If the user ID is already used in the terminal you will hear an error sound and a message will show.
UNION COMMUNITY Co., Ltd. 44-3 Hyundai Topics Building, Bangi-dong,
Songpa-gu, Seoul, Korea 138-050, Tel: 82-2-6488-3000, Fax: 82-2-6488-3099,
E-Mail:[email protected], http://www.unioncomm.co.kr/eng
VIRDI 6000 TM Administrator Manual
3.2.1.0. User Registration Window
After the OK button is touched a window will be displayed with all the user information. If some
options are not programmed for the user they will not show until they are programmed.
Status area displays
number of fingerprints,
cards or if password is
enrolled.
Authentication type is
also displayed.
User database picture
if picture is taken. Use
Picture Button
Select the user
Administrator
Regular User
as
or
Save
the
information
finished.
user
when
Touch these buttons
to
cancel
without
saving any changes
Once your user settings are finished touch the SAVE icon to save the user information. If you
touch the Cancel or X icon your user settings will not be saved.
UNION COMMUNITY Co., Ltd. 44-3 Hyundai Topics Building, Bangi-dong,
Songpa-gu, Seoul, Korea 138-050, Tel: 82-2-6488-3000, Fax: 82-2-6488-3099,
E-Mail:[email protected], http://www.unioncomm.co.kr/eng
VIRDI 6000 TM Administrator Manual
3.2.1.1. Registering a Fingerprint
Touch the finger registration button. You will have 30 seconds to complete this process
before the window automatically closes. When registering a fingerprint you are required to enter
the finger two times for verification. If more than 5 fingerprints are already registered for a user
this icon will not appear, to cancel the process at anytime just touch the fingerprint registration
window.
1) Place Finger on fingerprint sensor window
2) Remove finger from fingerprint sensor window
3) Place same finger on fingerprint sensor window
4) Finished, Successful
If successful the window will close automatically or you can touch the window to close it, to
register another fingerprint touch the finger register icon again. In the status area of the user
window the fingerprint icon will appear with the number of fingerprints for that user.
UNION COMMUNITY Co., Ltd. 44-3 Hyundai Topics Building, Bangi-dong,
Songpa-gu, Seoul, Korea 138-050, Tel: 82-2-6488-3000, Fax: 82-2-6488-3099,
E-Mail:[email protected], http://www.unioncomm.co.kr/eng
VIRDI 6000 TM Administrator Manual
If unsuccessful you can enter your finger again and repeat steps 1-5, or touch the window to finish.
3.2.1.2. Registering a Card
Touch the card registration icon. You will have 30 seconds to scan your card to register it before
the window automatically closes. Follow the messages that are displayed on the window. If more
than 5 cards are registered for the user this icon will not appear.
1) Scan your card
2) Successful card registration.
If successful the window will close automatically or you can touch the window to close it, to
register another card repeat steps touch the card register icon again. A success sound will be
heard and a card icon with the number of cards will appear in the status area of the user window.
UNION COMMUNITY Co., Ltd. 44-3 Hyundai Topics Building, Bangi-dong,
Songpa-gu, Seoul, Korea 138-050, Tel: 82-2-6488-3000, Fax: 82-2-6488-3099,
E-Mail:[email protected], http://www.unioncomm.co.kr/eng
VIRDI 6000 TM Administrator Manual
3.2.1.3. Registering a Password
Touch the password registration icon. When registering a password you must enter a unique 1-8
digit number. You must re-enter the number to confirm the password. After 10 seconds the
window will close automatically.
1) Password screen will appear, touch
anytime to cancel.
2) Enter your password.
3) Touch OK when finished.
4) Re-enter the same password to confirm, touch OK to finish
If a mistake is entered when confirming, a popup window will appear and you will hear an error
tone sound. Repeat the process again. If successful you will hear a success sound and the
password icon will appear in the status area of the user window.
UNION COMMUNITY Co., Ltd. 44-3 Hyundai Topics Building, Bangi-dong,
Songpa-gu, Seoul, Korea 138-050, Tel: 82-2-6488-3000, Fax: 82-2-6488-3099,
E-Mail:[email protected], http://www.unioncomm.co.kr/eng
VIRDI 6000 TM Administrator Manual
3.2.1.4. Authentication Type
There are up to 11 different ways a user can be authenticated at the terminal, this provides
flexibility for users who do not have a card, or have an unreadable fingerprint, or where extra
verification is needed for authentication. This depends on the setup by the administrator.
The four basic authentication methods are:
Fingerprint
Card
ID
Password
Combinations of the four basic methods are available.
1) Fingerprint Only – the user can enter their fingerprint on the fingerprint sensor and the
terminal will authenticate the result.
2) Card Only – the user can swipe their card at the terminal and the terminal will authenticate the
result
3) ID & Password – the user enters their ID, the terminal will request the user to then enter their
password.
4) Card & Fingerprint – the user swipes their card at the terminal then the terminal will request
the user to enter their fingerprint.
5) Fingerprint & Password – the user enters their fingerprint on the fingerprint sensor and then
the terminal will request the user to enter their password.
6) Fingerprint OR Password – the user can either enter their fingerprint only, OR the user can
enter their ID followed by their password.
7) Fingerprint OR Card – the user can either enter their fingerprint only OR swipe their card only.
8) Card OR Password – the user can either swipe their card OR enter their ID followed by their
password.
9) Card & Password – after the user swipes their card the terminal will request the user to enter
their password.
10) ID & Fingerprint OR Card & Fingerprint – after the user enters their ID the terminal will
request the user to enter their fingerprint OR the user can swipe their card, then the terminal will
request their fingerprint.
11) ID & Password OR Card & Password – this is a combination of #3 or #9. The user can
enter their ID followed by their password OR swipe their card first then enter their password.
Note: For password authentication the user must always first enter their ID.
UNION COMMUNITY Co., Ltd. 44-3 Hyundai Topics Building, Bangi-dong,
Songpa-gu, Seoul, Korea 138-050, Tel: 82-2-6488-3000, Fax: 82-2-6488-3099,
E-Mail:[email protected], http://www.unioncomm.co.kr/eng
VIRDI 6000 TM Administrator Manual
Touch the auth type icon to select the authentication type for the user. A window with different
options will appear. Just touch the appropriate authentication type icon for the user.
Touch
to cancel and close the window at anytime.
After you have touched the appropriate authentication button type the window will close and the
authentication type you selected will be displayed in the status area of the user window.
Note: The authentication type should only be programmed after a fingerprint; card or password
has been registered. If they have not been registered you cannot select any options for
authentication.
UNION COMMUNITY Co., Ltd. 44-3 Hyundai Topics Building, Bangi-dong,
Songpa-gu, Seoul, Korea 138-050, Tel: 82-2-6488-3000, Fax: 82-2-6488-3099,
E-Mail:[email protected], http://www.unioncomm.co.kr/eng
VIRDI 6000 TM Administrator Manual
3.2.1.5. User Fingerprint Options
User fingerprint options only apply if a fingerprint has been registered. These options are
advanced features, and should only be set if needed. If no fingerprint is registered this icon will
not be visible.
There are two options available
1) 1:1 Verification Level – this is the ‘security level’ of the registered fingerprint. The higher the
number, the higher the security level. There is a higher chance of authentication failing if the
security level is too high.
2) 1:N Enabled/Disabled – 1:N means One to many. This means the user’s fingerprint is
matched only by comparing fingerprint information. If this option is disabled the user is then
1:1, the user will be required to enter their ID number first then enter their fingerprint for
authentication. If this option is disabled and an attempt is made to enter a fingerprint only, the
terminal will not allow access.
Touch the finger options icon and a window will appear with the current 1:1 level. Enter a value
from 0-5. 0 = low security level, 5 = higher security level.
Touch
to cancel and close the window at anytime.
Enter the value, the touch OK.
The next window will appear. Touch OK to enable 1:N or Cancel to disable 1:N.
UNION COMMUNITY Co., Ltd. 44-3 Hyundai Topics Building, Bangi-dong,
Songpa-gu, Seoul, Korea 138-050, Tel: 82-2-6488-3000, Fax: 82-2-6488-3099,
E-Mail:[email protected], http://www.unioncomm.co.kr/eng
VIRDI 6000 TM Administrator Manual
3.2.1.6. User Picture Registration
A user database picture is not required for authentication. It is used for displaying on the LCD
when the user is authenticated at the terminal or displaying on the server. It is a quick and easy
way to identify the users in the terminal without having to know their ID number.
Registering a picture is easy; just touch the camera icon. The picture should show in the center of
the user information window. You can touch the camera icon as many times as you wish until you
are satisfied with the picture. The picture will not be saved until you touch the save icon when
exiting the user area.
Note: You must enable the display picture option see section 3.6.2.3. Camera Display
Picture in order to take the user picture in the user registration area. If you do not enable
this function the user picture will not be taken when you touch the camera icon button.
This is to ensure unnecessary pictures are not added to the database.
3.2.1.7. User Type (Normal/Administrator)
A normal ‘User’ has standard privileges in the terminal. An administrator can change terminal
options, add/delete/modify users, view log reports, etc.
1) Touch the appropriate dialog button for the user type. Touching the
button or the text will select the option.
UNION COMMUNITY Co., Ltd. 44-3 Hyundai Topics Building, Bangi-dong,
Songpa-gu, Seoul, Korea 138-050, Tel: 82-2-6488-3000, Fax: 82-2-6488-3099,
E-Mail:[email protected], http://www.unioncomm.co.kr/eng
VIRDI 6000 TM Administrator Manual
3.2.2. Deleting a User
The deleting user option will allow you to delete all users or a single user. If you delete a single
user you must know the user ID of the user you would like to delete.
Touch the
icon
1)
Touch CANCEL if you only want to delete a single user
2)
If CANCEL is touched a user ID entry window will appear. At this time you can
enter the user ID number of the user you wish to delete. Touch OK when
finished. At anytime touch the X icon to cancel.
3)
If OK is touched when deleting all users a message will ask you to confirm your
selection, touch OK to continue to delete all users or cancel.
UNION COMMUNITY Co., Ltd. 44-3 Hyundai Topics Building, Bangi-dong,
Songpa-gu, Seoul, Korea 138-050, Tel: 82-2-6488-3000, Fax: 82-2-6488-3099,
E-Mail:[email protected], http://www.unioncomm.co.kr/eng
VIRDI 6000 TM Administrator Manual
3.2.3. Modifying a User
Modifying an existing user requires that you know the user ID of the user you wish to change. You
must enter the user ID to change the user settings.
Touch the
icon to modify an existing user.
A window will appear to enter a user ID. Enter the user ID you wish to change.
Touch
icon if you have made a mistake when entering a number
When finished entering the user ID number touch
If the user does not exist you will hear an error sound and a message window will show.
If successful you will see a user information window, See 3.2.1.0. User Registration Window.
Repeat any steps in section 3.2.1.X to add a new fingerprint, card, and password or change other
options. Touch the save icon when finished.
UNION COMMUNITY Co., Ltd. 44-3 Hyundai Topics Building, Bangi-dong,
Songpa-gu, Seoul, Korea 138-050, Tel: 82-2-6488-3000, Fax: 82-2-6488-3099,
E-Mail:[email protected], http://www.unioncomm.co.kr/eng
VIRDI 6000 TM Administrator Manual
3.2.4. Viewing Users
The viewing users screen is an interactive screen. There are areas in which you can touch to
select to delete users, or select an individual user for modifying. A maximum of six users can be
displayed on one window at a time. The areas marked in red are interactive and can be touched
for selection.
12
11
10
9
8
7
1
2
6
3
4
5
Number
Description
1
Delete Column Title. This area is interactive.
If this title is touched you will be asked to
delete the selected users you have checked.
(using #2)
2
Delete Row Selection Box. Select the users
you wish to delete. If a user exists on this row
touch the box in the column beside the user
picture, a check mark will appear. Touch
again and the check mark will disappear.
3
Up Icon. Similar to scrolling backward.
Touching this will go to the previous page of
six users.
UNION COMMUNITY Co., Ltd. 44-3 Hyundai Topics Building, Bangi-dong,
Songpa-gu, Seoul, Korea 138-050, Tel: 82-2-6488-3000, Fax: 82-2-6488-3099,
E-Mail:[email protected], http://www.unioncomm.co.kr/eng
VIRDI 6000 TM Administrator Manual
4
Down Icon. Similar to scrolling forward.
Touching this will go forward through the list
of users. If you have reached the maximum
users this button will not do anything
5
Back Icon. Touch this to exit
6
Card Number Column. If the registered user
has a card, the card number will be
displayed.
7
Close Icon. Same as #5. Touch this to exit.
8
Password Column. If the registered user has
a password, an
icon will show.
9
Fingerprint Column. This area will show the
number of registered fingerprints for the user.
10
Administrator Column. If the registered user
is an administrator, an
icon will show.
11
ID Column. This column is interactive. It will
show the user id of the registered user. If you
touch the user ID number (for example, 6, 7,
8 ,9 or 10) you can automatically go to the
user modify area for the user ID you have
touched.
12
Picture Column. If the user has a registered
picture it will appear in this column.
UNION COMMUNITY Co., Ltd. 44-3 Hyundai Topics Building, Bangi-dong,
Songpa-gu, Seoul, Korea 138-050, Tel: 82-2-6488-3000, Fax: 82-2-6488-3099,
E-Mail:[email protected], http://www.unioncomm.co.kr/eng
VIRDI 6000 TM Administrator Manual
3.3. Network Settings
The networks settings area allows you to setup IP addresses, gateways, subnet mask, dhcp or static
settings. See section 1.1.6. Touchscreen Usage.
For static IP usage you must program the Terminal IP, Subnet Mask and Default Gateway. If DHCP is
selected, these values cannot be programmed and will be grayed out. The port number must match
the port number that is programmed in the Authentication Server.
1) Touch the field you wish to change
2) A number pad will appear, and the field will be highlighted of the data you
wish to change.
3) Touching the number will erase the current data. Just enter the number you
wish to use. Touch OK when finished, or arrow key to re-enter the data.
Touch
to cancel and close the window at anytime, any data that was entered will not
be saved. To save the data touch ‘Done’.
UNION COMMUNITY Co., Ltd. 44-3 Hyundai Topics Building, Bangi-dong,
Songpa-gu, Seoul, Korea 138-050, Tel: 82-2-6488-3000, Fax: 82-2-6488-3099,
E-Mail:[email protected], http://www.unioncomm.co.kr/eng
VIRDI 6000 TM Administrator Manual
3.4. Time/Attendance Settings
In the Time & Attendance programming area you can setup the terminal in 1 of 3 Application
Modes. The terminal can only operate in one mode. The top status bar will show the current mode
of operation and the icon will be highlighted.
3.4.1. Access Control Mode
Time schedules are not programmable in this mode. An Access Control application is
normally used for providing access to a secure area, function keys are not needed unless
extra tracking of the user is needed. If the system is setup for Access Control and Function
keys are used for authentication the user is required to touch the mode function key before
entering their ID, Card or Fingerprint. See Section 4.4.1. Access Control Application
Touch the
icon to change to this mode.
3.4.2. Time & Attendance
Time schedules should be programmed when using this mode. Time and Attendance
Application is for systems that require tracking of employee’s work time. If the system is setup
for Time and Attendance, for authentication the user is required to touch the function key
before entering their ID, Card or Fingerprint. See Section 4.4.2. Time & Attendance
Application
Touch the
icon to change to this mode. A time schedule icon will appear.
UNION COMMUNITY Co., Ltd. 44-3 Hyundai Topics Building, Bangi-dong,
Songpa-gu, Seoul, Korea 138-050, Tel: 82-2-6488-3000, Fax: 82-2-6488-3099,
E-Mail:[email protected], http://www.unioncomm.co.kr/eng
VIRDI 6000 TM Administrator Manual
3.4.2.1 Time & Attendance Schedules
Touch the
icon to change the start time, normal time and finish time. For
programming the times see section 1.1.6. Touchscreen Usage. Touch the area you wish
to change and a number pad will appear for you to enter your data. Touch ‘Done’ to save
and finish. For each area enter a time range that best represents that time.
Each field requires two time entries; this is a range for example start time is from 08:00
to 10:00
Start Time: This is the time that represents the start of the day, a normal time range of
when the employees arrive at the office for that day.
Normal Time: This is the time between the start time and finish time, the time of normal
working hours.
Finish Time: This is the time that represents the end of the work day, normally when
employees begin to leave the office for the day.
3.4.3. Meal Application
Meal Application is for systems that require tracking of user’s meal time. If the system is
setup for Meal mode; for authentication the user is required to touch the mode function
key before entering their ID, Card or Fingerprint. See Section 4.4.3. Cafeteria
Application
UNION COMMUNITY Co., Ltd. 44-3 Hyundai Topics Building, Bangi-dong,
Songpa-gu, Seoul, Korea 138-050, Tel: 82-2-6488-3000, Fax: 82-2-6488-3099,
E-Mail:[email protected], http://www.unioncomm.co.kr/eng
VIRDI 6000 TM Administrator Manual
Touch the
icon to change to this mode. A time schedule icon will appear.
3.4.3.1 Meal Mode Schedules
Touch the
icon to change the start time, normal time and finish time. See
section 1.1.6. Touchscreen Usage. Touch the area you wish to change and a number
pad will appear for you to enter your data. Touch ‘Done’ to save and finish. Each
programmable time area is self explanatory. For each area enter a time range that best
represents that time. Each field requires two time entries, this is a range for example
Breakfast Time is from 08:00 to 10:00.
Ticket Print Check Box: Touch this area to enable/disable the ticket print. This option will
enable the option to print a record at each transaction.
UNION COMMUNITY Co., Ltd. 44-3 Hyundai Topics Building, Bangi-dong,
Songpa-gu, Seoul, Korea 138-050, Tel: 82-2-6488-3000, Fax: 82-2-6488-3099,
E-Mail:[email protected], http://www.unioncomm.co.kr/eng
VIRDI 6000 TM Administrator Manual
3.4.4. Function Key Programming
Function Keys can be used for a variety of different applications. They are used to
identify the current mode of operation by the user. When using function keys the user is
required to touch the function key, then authenticate their fingerprint, card, ID number or
password. Function Keys are grouped together as a set of four keys. On the main
terminal case there are four function keys. These keys are ‘touch less’, meaning that
your finger does not need to touch down on the key, they will sense your finger when it
is close to the key. These four buttons are the same function keys that are displayed on
the main screen; the operation is the same. The function keys on the main screen will
have different names depending on the system setup.
Application Mode Function Keys – F1, F2, F3, F4
Time and Attendance Function Keys – Attend, Leave, In, Out
Cafeteria/Meal Mode Function Keys – Breakfast, Lunch, Snack, Dinner
See the ICON list for a description of each function key.
3.4.4.1. Extended Function Keys
In some cases additional function keys are needed in addition to the four main function
keys. The administrator will setup the terminal for this operation. Up to 60 additional
function keys are available. Five pages of 12 function keys can be used.
On the main screen touching this button
will show the extension window.
The window will close after 3 seconds of no activity. Next, touch the number key
assigned to you by your administrator, this can be any number from 1 – 60.
If your number is not displayed then touch the
number is displayed in the window.
or
until your
Function
Key #
Previous
Page
Page
Number
Next
Page
UNION COMMUNITY Co., Ltd. 44-3 Hyundai Topics Building, Bangi-dong,
Songpa-gu, Seoul, Korea 138-050, Tel: 82-2-6488-3000, Fax: 82-2-6488-3099,
E-Mail:[email protected], http://www.unioncomm.co.kr/eng
VIRDI 6000 TM Administrator Manual
Touch the
icon to change the function key settings.
The four function keys on the terminal case are the same four function keys that can be
displayed on the LCD. To change options just touch the area.
‘F1, F2, F3, F4 Enabled/Disabled’ – if a check mark appears in the box next to the
option the function key is enabled. This also controls the function keys on the terminal
case. A function key that is disabled will not produce any action, sound or display on the
LCD.
‘Display on LCD’ – if checked then the four function keys will appear on the main LCD.
See Section 1.1.7. Main Screen for the main screen window.
Note: If the function key is not enabled, it will not show on the main screen.
‘Extended Key’ – if checked then the extended function key can be used. In some
cases additional function keys are needed in addition to the four main function keys.
This icon will appear on the main screen now
Note: If ‘Display on LCD’ is disabled the Extended Key will not show on the main screen.
‘# of Extended Keys’ – this is a selection box, you can select up to 60 additional
function keys. Touch the number box and slide your finger down until the number is
selected. The box will close with your number displayed.
UNION COMMUNITY Co., Ltd. 44-3 Hyundai Topics Building, Bangi-dong,
Songpa-gu, Seoul, Korea 138-050, Tel: 82-2-6488-3000, Fax: 82-2-6488-3099,
E-Mail:[email protected], http://www.unioncomm.co.kr/eng
VIRDI 6000 TM Administrator Manual
3.5. Terminal Settings
Terminal settings control details about the terminal. In this screen all you need to do is to touch the
icon button on the left (system/display/sound/Date/time/Database/Authentication) and a window with
the options will appear on the right. Touching the Done button will close and save the changes. The
following options are available in this section.
Ø
Ø
Ø
Ø
User ID Length
Terminal ID Number
Authentication Method
§ terminal/server
§ server/terminal
§ server only
Case Tamper Enable/Disable
Ø
Ø
Language Change
Screen Saver Timeout
Ø
Sound Settings
Ø
Date/Time Settings
Ø
Database control
§ compress user data
§ compress log data
§ clear settings
§ clear log data
§ clear picture data
§ delete all
Ø
Authentication
§ user ID/Group ID
§ user display option
§ 1:N matching
§ Auto-enter key
§ Card only
UNION COMMUNITY Co., Ltd. 44-3 Hyundai Topics Building, Bangi-dong,
Songpa-gu, Seoul, Korea 138-050, Tel: 82-2-6488-3000, Fax: 82-2-6488-3099,
E-Mail:[email protected], http://www.unioncomm.co.kr/eng
VIRDI 6000 TM Administrator Manual
3.5.1. System Settings
Touch the system icon. Then touch the area which you would like to change.
3.5.1.1. User ID Length
The user ID length can be 2 to 8 digits in length. It should be programmed as the same value in
the server program. The user ID length will be the length of the user ID required to authenticate.
Any place that requires the entry of a user ID will be restricted to the length that is programmed in
this area. This value should reflect the amount of users in your terminal. For example, if you have
fewer than 100 users than enter 3. If your have more than 10000 users, then program a 6 digit
length.
Note: When changing the ID length shorter than the previous programmed value; be aware
that an administrator may not be authenticated properly to enter administrator
programming if their ID length was longer than the current length. It is recommended this
value be changed at the time of setting up the terminal, and not during regular usage.
3.5.1.2. Terminal ID Number
The terminal ID number uniquely identifies the terminal on the server program network. For every
terminal on the server network you should program a different terminal number. This value should
be 1-8 digits in length.
3.5.1.3. Authentication Mode
One of three options is available for the authentication mode. This setting determines where the
user authentication is done, in the server or locally at the terminal, or both. Change this setting
when there is high network traffic, many users, or authentication is too slow. The default setting is
Server/Terminal.
·
Server/Terminal - If the local terminal is properly connected to the network server,
authentication is done in the server. If there is a disconnection or communication trouble
between the server and terminal the authentication is done at the terminal.
·
Terminal/Server – If the local terminal is properly connected to the network server, the
authentication is done at the local terminal and the result is sent to the server in real time.
However, if the user ID entered does not exist in the local terminal the authentication is
requested at the server.
UNION COMMUNITY Co., Ltd. 44-3 Hyundai Topics Building, Bangi-dong,
Songpa-gu, Seoul, Korea 138-050, Tel: 82-2-6488-3000, Fax: 82-2-6488-3099,
E-Mail:[email protected], http://www.unioncomm.co.kr/eng
VIRDI 6000 TM Administrator Manual
·
Server Only – The authentication is done only at the network server.
3.5.1.4. Case Tamper
If this option is enabled and the case tamper on the back of the terminal is ‘opened’ (terminal
removed from the wall), an error sound will be heard every 5 seconds when the main window is
displayed. During administrator programming this sound does not occur. Also, if a case tamper
occurs the status icon for ‘trouble’ will be on. See Icon list for details.
If this option is disabled the error sound will not occur, however the trouble icon will still appear on
the main screen.
3.5.2. Display Settings
Touch the Display icon. Then touch the area which you would like to change.
3.5.2.1. Language
The language can be dynamically changed. This means when the new language is selected, the
text and font will change immediately without the need to repower the system. The default
languages available are English and Korean. If you require another language you should contact
your local sales representative for this request. Languages can be easily imported via the USB
device.
3.5.2.2. Screen Saver
The screen saver option will allow you to select the timeout value of the LCD after no activity; the
LCD will appear black during this time. This will conserve the lifetime of the LCD. The default is 1
minute. Selectable values are 1, 5, 10, 15, 20, 25, and 30 minutes. If the approach sensor,
function key, fingerprint cover, card scan or fingerprint scan is activated the LCD will automatically
turn back on.
UNION COMMUNITY Co., Ltd. 44-3 Hyundai Topics Building, Bangi-dong,
Songpa-gu, Seoul, Korea 138-050, Tel: 82-2-6488-3000, Fax: 82-2-6488-3099,
E-Mail:[email protected], http://www.unioncomm.co.kr/eng
VIRDI 6000 TM Administrator Manual
3.5.3. Sound Settings
Touch the Sound icon. Then touch the area which you would like to change.
3.5.3.1. Voice Volume
The voice volume controls the volume of the voice prompts in the terminal. This volume is
separate from the sound volume. If you do not want any voice prompts put the slider all the way to
the left, off. For maximum volume put the slider all the way to the right. A simple sound file will
play when sliding the button from the left to the right to give you indication of the volume you have
selected.
3.5.3.2. Sound Volume
The sound volume controls the volume of the sounds in the terminal. These sounds are short tone
sounds (button presses, window popup, error, success tones, etc). This volume is separate from
the voice volume. If you do not want any system sounds put the slider all the way to the left, off.
For maximum sound volume put the slider all the way to the right. A simple sound file will play
when sliding the button from left to right to give you indication of the volume you have selected.
Note: A sound tone and a voice cannot play at the same time. For example when the voice
says ‘You are authorized’, you will not hear any sound tones.
UNION COMMUNITY Co., Ltd. 44-3 Hyundai Topics Building, Bangi-dong,
Songpa-gu, Seoul, Korea 138-050, Tel: 82-2-6488-3000, Fax: 82-2-6488-3099,
E-Mail:[email protected], http://www.unioncomm.co.kr/eng
VIRDI 6000 TM Administrator Manual
3.5.4. Date/Time Settings
Touch the Date/Time icon. Then touch the area which you would like to change.
3.5.3.2. Display Format
The Date/Time Display Format will change the way the date and time is displayed on the main
screen. There are six choices:
·
Short form day (three letters), Short form month (three letters), DD, YYYY, HH:MM
AM/PM (Thu, Mar 24 2009 08:19AM)
·
Short form day(three letters), Short form month (three letters), DD, YYYY, HH:MM
(24 hour time) (Thu, Mar 24 2009 23:44)
·
MM-DD-YY HH:MM AM/PM (03-24-09 08:19AM)
·
MM-DD-YY HH:MM (24 hour time) (03-24-09 23:44)
·
YYYY-MM-DD HH:MM AM/PM (2009-04-24 08:19AM)
·
YYYY-MM-DD HH:MM (24 hour time) (2009-04-24 23:44)
UNION COMMUNITY Co., Ltd. 44-3 Hyundai Topics Building, Bangi-dong,
Songpa-gu, Seoul, Korea 138-050, Tel: 82-2-6488-3000, Fax: 82-2-6488-3099,
E-Mail:[email protected], http://www.unioncomm.co.kr/eng
VIRDI 6000 TM Administrator Manual
3.5.3.2. Set Current Date
Touch the current date that is displayed in the edit box, a calendar will appear.
Month: You can either; touch the ‘Next Month’ or ‘Previous Month’ arrow icons and scroll to the
month you want or you can touch the Month Name and directly select the month you want.
Year: Touch the year number and then an arrow up/down icon will appear. Touch the up or down
button until the number you want appears.
Date: Touch the calendar number of the date you want. The date will appear in yellow. Press OK
when finished. Note: The date should always be the last item you program.
Month
Menu
Year
Select
Previous
Month
Next
Month
Date
Selector
Month
Selector
UNION COMMUNITY Co., Ltd. 44-3 Hyundai Topics Building, Bangi-dong,
Songpa-gu, Seoul, Korea 138-050, Tel: 82-2-6488-3000, Fax: 82-2-6488-3099,
E-Mail:[email protected], http://www.unioncomm.co.kr/eng
VIRDI 6000 TM Administrator Manual
3.5.3.3. Set Current Time
Touch the area where the time is displayed. A number pad will appear. Enter the time in the
format HH:MM: SS. For example current time is 11:14:00pm, enter 2,3,1,4,0,0, and then press OK
when finished. If a number is invalid or there is no entry, pressing OK will do nothing.
UNION COMMUNITY Co., Ltd. 44-3 Hyundai Topics Building, Bangi-dong,
Songpa-gu, Seoul, Korea 138-050, Tel: 82-2-6488-3000, Fax: 82-2-6488-3099,
E-Mail:[email protected], http://www.unioncomm.co.kr/eng
VIRDI 6000 TM Administrator Manual
3.5.5. Database Options
When any of the options are selected a popup window will show and ask you to confirm what
you are about to do.
3.5.5.1. Compress User Data
When users are deleted from the system they are marked for deletion in the database, from
the server and the terminal. When a new user is added to the system it will not overwrite the
users marked for deletion. When you use this option it will delete the marked users in the system
and reorder the database. Use this option if you frequently add and delete users from the system.
In larger systems this can help speed up the authentication times and provide more space for
adding new users.
3.5.5.2. Compress Log Data
This option is similar to 3.5.5.1, but it is related to the log data. The server can delete log
data. Using this option will reformat the log database and provide some speed improvement when
searching through log data. Use this option if you are continually adding and removing log data
from the system.
3.5.5.3. Clear Settings
This option will clear/delete all the terminal settings. The factory settings will be used. User,
log data and pictures will not be deleted.
3.5.5.4. Clear Log Data
This option will clear/delete all the log data in the terminal. This will not delete picture log
data or terminal settings. Note: Log Data can be exported to a USB device, before clearing
the log data see section 3.9.1. Database Export
3.5.5.5. Clear Picture Logs
This option will clear/delete all the picture log data. The terminal can hold up to 12,500
pictures (user pictures + log pictures). If you need more user database pictures you can delete the
picture logs. Note: Picture log data can be exported to a USB device, see section 3.9.1.
UNION COMMUNITY Co., Ltd. 44-3 Hyundai Topics Building, Bangi-dong,
Songpa-gu, Seoul, Korea 138-050, Tel: 82-2-6488-3000, Fax: 82-2-6488-3099,
E-Mail:[email protected], http://www.unioncomm.co.kr/eng
VIRDI 6000 TM Administrator Manual
Database Export.
3.5.5.6. Delete All
This option will reset the terminal settings, delete all the picture logs, delete all users and all
log information.
UNION COMMUNITY Co., Ltd. 44-3 Hyundai Topics Building, Bangi-dong,
Songpa-gu, Seoul, Korea 138-050, Tel: 82-2-6488-3000, Fax: 82-2-6488-3099,
E-Mail:[email protected], http://www.unioncomm.co.kr/eng
VIRDI 6000 TM Administrator Manual
3.5.6. Authentication Settings
3.5.6.1. User Group ID
If User ID is selected for this option then normal authentication is performed when the user
enters their ID number. If Group ID is selected authentication is performed among users with the
same first digit and/or less than the user ID number. For example, if the user ID is ‘1234’, the user
would enter ‘12’ only for their authentication. The matching is performed with user IDs from 1200
– 1299. If the ID is ‘0012’, enter ‘0012’ or ‘00’ for authentication. This option is particularly useful in
situations where there are many users in the system and the matching time for 1: N is too long. In
the example the matching comparison is only done for 100 users (1299-1200) compared to all
1200 users.
3.5.6.2. User Display Option
This option controls what is displayed on the main screen when a registered user is
authenticated. On the response window you will see the top area change. The Key ID and the
User Name can be programmed in the server program.
User Display Option = None
User Display Option = User ID
UNION COMMUNITY Co., Ltd. 44-3 Hyundai Topics Building, Bangi-dong,
Songpa-gu, Seoul, Korea 138-050, Tel: 82-2-6488-3000, Fax: 82-2-6488-3099,
E-Mail:[email protected], http://www.unioncomm.co.kr/eng
VIRDI 6000 TM Administrator Manual
User Display Option = Key ID
User Display Option = User Name
3.5.6.3. 1:N Matching
When this option is checked, it is possible for the user to authenticate with a fingerprint only. A
user ID or card is NOT required. If this option is not checked then 1:1 authentication is performed.
The default setting is 1: N Matching. See Glossary of Terms for 1:1 and 1:N.
Note: If the user is registered for 1:N authentication, only 1:1 is allowed if this option is disabled
(1:1 authentication) See section 3.2.1.5. User Fingerprint Options
3.5.6.4. Card Only
When this option is checked and the user is registered with a card & fingerprint, or a card &
password, only a card is required for access to an area. When this option is not check the user’s
registered authentication method is used. This option is useful in situations where the terminal is
located near a frequently used entrance or exit and no need for a high security level.
UNION COMMUNITY Co., Ltd. 44-3 Hyundai Topics Building, Bangi-dong,
Songpa-gu, Seoul, Korea 138-050, Tel: 82-2-6488-3000, Fax: 82-2-6488-3099,
E-Mail:[email protected], http://www.unioncomm.co.kr/eng
VIRDI 6000 TM Administrator Manual
3.6. External Devices
External Devices settings control details about the devices separated from the terminal (Fingerprint
Sensor, Camera, Wiegand IN/OUT, Locking and Door Options). In this screen all you need to do is to
touch the icon button on the left (Fingerprint Sensor, Camera, Wiegand, Lock Terminal, Door Options)
and a window with the options will appear on the right. Touching the Done button will close and save
the changes. The following options are available in this section.
Ø
Ø
Ø
Ø
Ø
1:N Level
1:1 Level
Fake Detection Level
Enhanced Registration
Intelligent Capture
Ø
Ø
Ø
Authorized Users
Unauthorized Users
Display Picture
Ø
Ø
Site Code
Format
Ø
Lock or Unlock Terminal
Ø
Ø
Ø
Ø
Door Monitor
Lock Type
Warning Time
Open Time
UNION COMMUNITY Co., Ltd. 44-3 Hyundai Topics Building, Bangi-dong,
Songpa-gu, Seoul, Korea 138-050, Tel: 82-2-6488-3000, Fax: 82-2-6488-3099,
E-Mail:[email protected], http://www.unioncomm.co.kr/eng
VIRDI 6000 TM Administrator Manual
3.6.1. Fingerprint Sensor Settings
3.6.1.1. 1:N Level
This option represents the security level between the captured fingerprint (from the sensor
window), and the fingerprints stored in the terminal that are marked for 1:N authentication. This
level represents the terminal level, not individual users. Possible values are from 3-9. The default
value is 5. The higher the value, the higher the security level, which means more comparisons are
done on the fingerprint data. If your user’s fingerprints have a difficult time during authentication
you should lower this value. If you are protecting a high security area then you may want to
increase this value. This setting is an advanced setting and normally doesn’t need to be changed.
3.6.1.2. 1:1 Level
This option represents the matching security level in the terminal between the captured fingerprint
(from the sensor window) and the stored fingerprint in the database for that user. Possible values
are from 1-9. The default value is 4. The higher the value level, the higher the security level;
however authentication matching may fail since more matching is done on the fingerprint data.
For example if a user registered as user ID 1234 and they have also registered a fingerprint,
when the fingerprint is captured from the sensor, the terminal will compare the fingerprint data
stored in the database for user ID 1234. If you are protecting a high security area then you may
want to increase this value. This setting is an advanced setting and normally doesn’t need to be
changed.
3.6.1.3. Fake Finger Detection
This option represents the detection level of fake fingerprints. This is a combo box, you can select
one of four options. The default value is Medium. You should only need to adjust this value in
higher security situations.
- Disable (the terminal will not have any protection against fake fingerprints)
- Low
- Medium
- High
UNION COMMUNITY Co., Ltd. 44-3 Hyundai Topics Building, Bangi-dong,
Songpa-gu, Seoul, Korea 138-050, Tel: 82-2-6488-3000, Fax: 82-2-6488-3099,
E-Mail:[email protected], http://www.unioncomm.co.kr/eng
VIRDI 6000 TM Administrator Manual
3.6.1.4. Enhanced Registration
This option allows registration of the same fingerprint. Some applications require registration of
the same fingerprint. The default value is off, unchecked. This means the terminal will not allow
the same fingerprint to be registered in the terminal.
3.6.2. Camera Settings
The terminal has the ability to store a total of 12,500 pictures. These pictures can be either user
registered pictures or log data pictures. The user registered picture is the picture taken when the
user is registered 3.2.1.6. User Picture Registration. Log pictures are stored when a user (either
registered or unregistered) attempts to access the terminal. All picture data can be exported to a
USB device.
3.6.2.1. Camera Authorized Users
When this option is checked (enabled) a picture of the registered user is taken when the user
successfully authenticates/accesses the terminal. The picture is stored as a log picture and can
be viewed later. If this option is unchecked (disabled), no new picture will be taken of registered
users. If ‘Display Picture’ is enabled the registered user picture will show on the authentication
window.
3.6.2.2. Camera Unauthorized Users
When this option is checked (enabled) a picture of the user is taken when they unsuccessfully
authenticate/access the terminal. The picture is stored as a log picture and can be viewed later.
3.6.2.3. Camera Display Picture
When this option is checked (enabled) the picture will be displayed on the authentication window.
This picture can either be a registered user picture or a picture that was taken (new picture) when
a successful or unsuccessful authentication at the terminal is done. The default setting is enabled.
With the default settings of the camera if anyone attempts access to the terminal a picture is taken
and displayed on the authentication window, but no pictures are stored in the log database.
If ‘Authorized Users’ or ‘Unauthorized Users’ is enabled, and ‘Display Picture’ is disabled no
picture is displayed on the authentication window, but the picture is still taken and stored in the log
database. Pictures are capable of showing real-time on the server application.
Note: From time to time you should export your log pictures to a USB device and delete the log
pictures in the database. See Section 3.5.5.5. Clear Picture Logs
UNION COMMUNITY Co., Ltd. 44-3 Hyundai Topics Building, Bangi-dong,
Songpa-gu, Seoul, Korea 138-050, Tel: 82-2-6488-3000, Fax: 82-2-6488-3099,
E-Mail:[email protected], http://www.unioncomm.co.kr/eng
VIRDI 6000 TM Administrator Manual
3.6.3. Wiegand Settings
Wiegand support is available in the terminal. In the back of the AC6000 there are terminals for
Wiegand IN0 and Wiegand IN1, Wiegand OUT0 and Wiegand OUT1.
Wiegand Connection Option 1
When using an external reader that supports wiegand you can connect the reader to Wiegand IN0
and Wiegand IN1. This will allow the reader data to be sent to the AC6000 terminal.
IN0 = Data0
IN1 = Data1
Wiegand Connection Option 2
When using an external controller that supports wiegand, you can use the AC6000 as a dummy
reader. The AC6000 will send the site code and user id to the external controller.
OUT0 = Data0
OUT1 = Data1
3.6.3.1. Site Code
The site code is a unique three digit value that should be different for every terminal. Values are
from 0-255. To program this value just touch the number field and a number pad will appear, enter
the value and press OK.
3.6.3.2. Format
There are many different formats for wiegand. Select the appropriate format that your external
controller or reader supports.
UNION COMMUNITY Co., Ltd. 44-3 Hyundai Topics Building, Bangi-dong,
Songpa-gu, Seoul, Korea 138-050, Tel: 82-2-6488-3000, Fax: 82-2-6488-3099,
E-Mail:[email protected], http://www.unioncomm.co.kr/eng
VIRDI 6000 TM Administrator Manual
3.6.4. Terminal Locking
The purpose of terminal locking is to prevent access to the terminal.. This feature can be used
when you do not want any users to access the terminal. No functions on the main window are
available, only entering configuration mode is possible. You should have an administrator
programmed to allow unlocking and locking. The server program can also lock out the terminal.
Just touch the button on the right of the window, the button will change from ‘Terminal Locked’ to
‘Terminal Unlocked’’. For this setting make sure the server program configuration ‘Allow admin to
Access’ is set.
3.6.4. Door Option Settings
Door option settings control the period of time the locks are unlocked for and the warning time
when the locks are open too long. You can set the details of the lock type for normally closed,
normally open or disabled. See lock installation instructions on setting up the door locks for
different lock types.
UNION COMMUNITY Co., Ltd. 44-3 Hyundai Topics Building, Bangi-dong,
Songpa-gu, Seoul, Korea 138-050, Tel: 82-2-6488-3000, Fax: 82-2-6488-3099,
E-Mail:[email protected], http://www.unioncomm.co.kr/eng
VIRDI 6000 TM Administrator Manual
3.6.4.1. Door Monitor
This option is a combo selection box; you have three choices, disabled, normal open or normal
closed. Select the appropriate value depending on your lock type.
3.6.4.2. Lock Type
This option is a combo selection box; the choices are Motor type or strike/auto door type. Select
the appropriate value depending on your lock type application.
3.6.4.3. Warn Time
The Door Warning Time is programmable from 00-99 seconds. The default value is 20 seconds. If
your system is properly connected to the door monitoring inputs on the terminal; and if the door
lock is opened longer than this time a warning alarm will sound.
3.6.4.4. Open Time
The Door Open Time is programmable from 00-99 seconds. The default value is 5 seconds. This
time represents how long the door lock will be opened for after a successful authentication.
UNION COMMUNITY Co., Ltd. 44-3 Hyundai Topics Building, Bangi-dong,
Songpa-gu, Seoul, Korea 138-050, Tel: 82-2-6488-3000, Fax: 82-2-6488-3099,
E-Mail:[email protected], http://www.unioncomm.co.kr/eng
VIRDI 6000 TM Administrator Manual
3.7. Theme Settings
The Theme Settings area allows you to customize the look of the main window. You can change
the background, move icons or automatically change the background everyday.
3.7.1. Main Background
The terminal has 15 preset images to choose from. The image names are background1background15.jpg. The terminal is also capable of importing new images with the USB device.
See 3.9.1. Database Import If a background image is imported with the USB device the name
will show as User1-User9.jpg. Touching the combo box will show a list to choose from, you can
scroll up/down with the slider bar on the right of the box. After selecting the image name, a
preview will appear on the left side of the window. A maximum of 24 background images can be
used, 15 system and 9 user.
Scroll
up/down
3.7.2. Daily Background Update
If this option is checked (enabled) the terminal will automatically change the background
image every day at midnight. The terminal will use the list of images that are displayed in the
combo box and cycle through them.
UNION COMMUNITY Co., Ltd. 44-3 Hyundai Topics Building, Bangi-dong,
Songpa-gu, Seoul, Korea 138-050, Tel: 82-2-6488-3000, Fax: 82-2-6488-3099,
E-Mail:[email protected], http://www.unioncomm.co.kr/eng
VIRDI 6000 TM Administrator Manual
3.7.3. Arrange Icons
If this option is checked (enabled) you will be able to move the time and date icons, ID and
Access Icons on the main screen to any location you want. When you are finished arranging your
icons on the main screen it is recommended to turn this option off, or else any user can change
the location of the images. Turning the option off will ‘lock’ the positions and not allow any
movement.
Note: If the system if repowered the icons will return to the factory set positions.
Icon position moved.
Moveable
Icons
Moveable
Icons
Factory set Icon positions.
UNION COMMUNITY Co., Ltd. 44-3 Hyundai Topics Building, Bangi-dong,
Songpa-gu, Seoul, Korea 138-050, Tel: 82-2-6488-3000, Fax: 82-2-6488-3099,
E-Mail:[email protected], http://www.unioncomm.co.kr/eng
VIRDI 6000 TM Administrator Manual
3.8. Terminal Information
In the terminal information section system, event, picture, network information can be viewed here.
Nothing is programmable in this section; this section provides the status of the system and a summary
of some key settings. Touch the Done icon when finished.
3.8.1. System Information
This area provides important information about the terminal. The firmware version, ram usage and
harddisk usage is in this area. These can be important for troubleshooting and determining the
terminal’s limit. The harddisk is the amount of memory being used for user data, log events,
pictures and system settings.
UNION COMMUNITY Co., Ltd. 44-3 Hyundai Topics Building, Bangi-dong,
Songpa-gu, Seoul, Korea 138-050, Tel: 82-2-6488-3000, Fax: 82-2-6488-3099,
E-Mail:[email protected], http://www.unioncomm.co.kr/eng
VIRDI 6000 TM Administrator Manual
3.8.2. Terminal Information
This area provides an overview of the key terminal settings.
3.8.3. Ethernet Information
This area provides an overview of the Ethernet settings.
UNION COMMUNITY Co., Ltd. 44-3 Hyundai Topics Building, Bangi-dong,
Songpa-gu, Seoul, Korea 138-050, Tel: 82-2-6488-3000, Fax: 82-2-6488-3099,
E-Mail:[email protected], http://www.unioncomm.co.kr/eng
VIRDI 6000 TM Administrator Manual
3.8.4. User Information
This area provides an overview about the registered users in the terminal. This will show you the
limits for the users, fingerprints and cards and what the current limit is at. This can be helpful in
determining how much storage space is remaining for your terminal setup.
3.8.5. Log Data Information
This area provides an overview of the log events in the terminal. This will show you how many log
events are in the system, picture for users and log pictures.
UNION COMMUNITY Co., Ltd. 44-3 Hyundai Topics Building, Bangi-dong,
Songpa-gu, Seoul, Korea 138-050, Tel: 82-2-6488-3000, Fax: 82-2-6488-3099,
E-Mail:[email protected], http://www.unioncomm.co.kr/eng
VIRDI 6000 TM Administrator Manual
3.8.6. View Log Information
This area allows you to view the key log information in the terminal, such as authorized,
unauthorized access. If more details are required it is recommended to use the server program.
Log Type: This is a combo box, you can select; All, Authorized Access, Unauthorized Access.
Event Information: This is a text area that will give you the time/date of the event, user ID,
access type and mode.
Picture: If there was a picture taken during the event it will be displayed in this area.
Scroll Keys: Use these keys to scroll forward or backward through the events. You can hold
down the button for faster access.
Log Type
Picture
Event
Information
Scroll
forward/backward
UNION COMMUNITY Co., Ltd. 44-3 Hyundai Topics Building, Bangi-dong,
Songpa-gu, Seoul, Korea 138-050, Tel: 82-2-6488-3000, Fax: 82-2-6488-3099,
E-Mail:[email protected], http://www.unioncomm.co.kr/eng
VIRDI 6000 TM Administrator Manual
3.9. USB Options
The USB options area will allow you to import and export files to and from the terminal. User data,
log data, pictures, images and firmware upgrading can be performed. It is recommended that your
USB have at least 250mbytes available for storage. You cannot select any options in this area
until a USB device is connected. The USB device can be connected at anytime before or after
entering this area. Once you connect your device you must wait up to 10 seconds before the
terminal will recognize it and a ‘detected’ message will appear.
NOTE: AT ANYTIME DURING FIRMWARE UPGRADE OR IMPORTING/EXPORT DO NOT
REMOVE THE USB DEVICE. THE SYSTEM MAY BECOME UNUSABLE IF YOU REMOVE THE
USB DEVICE DURING A FIRMWARE UPGRADE.
If the USB device is not connected this message will appear. Touching Cancel will close the
window, or you can insert the USB device.
Once the USB device is connected a message will appear indicating the USB type.
If the USB is connected properly you will see this window and you can now select the
options you want.
UNION COMMUNITY Co., Ltd. 44-3 Hyundai Topics Building, Bangi-dong,
Songpa-gu, Seoul, Korea 138-050, Tel: 82-2-6488-3000, Fax: 82-2-6488-3099,
E-Mail:[email protected], http://www.unioncomm.co.kr/eng
VIRDI 6000 TM Administrator Manual
In order to import files (System Options, User Data, Theme/Images and firmware upgrading) your
USB device should be formatted as follows. Create a directory called ac6000/, then create
subdirectories called firmware, languages, and backgrounds.
Languages directory – put language files in this folder. If you have a language file
AC6000_en_US.qm. (For example English), put it in this directory for importing. A separate
program is required to produce the .qm language files. See your local sales representative for
details. If successful you will be able to select the new language see section 3.5.2.1. Language.
Firmware directory – put all firmware files needed for upgrade in this folder. From time to time
the factory will release new firmware versions for bug fixing or feature enhancements. These
binary images can be upgraded from this folder. There can be up to 5 files for upgrading. Only put
the files that should be upgraded in this folder. Do not keep old firmware versions here.
Data directory – – this directory will be created by the terminal when inserting the usb device.
This directory will contain data that will be exported to the usb device. (User data, log data,
system options, picture data)
Background directory – this should contain all .jpg, .bmp images you would like to copy to the
terminal. The name of the file must be called user1 – user9.jpg or .bmp. For example if copying
four image files to the terminal you should call the image files user1.jpg, user2.jpg, user3.jpg and
user4.jpg. In order to ensure a quality background image you should use the same size as the lcd
device, 800 x 480. After successfully copying you will be able to select a new background, see
section 3.7.1. Main Background.
/data/Logpicture directory – this directory will be created by the terminal when exporting picture
data to the usb device. Log pictures will be put by the terminal in this directory.
3.9.1. Database Export
Exporting means files will be copied from the terminal to the USB device. User data, event log
data, system options or picture log data can be exported. Choose the appropriate option. When
first touching the icon a message will popup indicating the status and a sound will be heard. Some
files may be larger than others, so copying time may take longer in some cases, usually during
(User data, picture logs or event log data). When the copying process is finished another popup
message and sound will be heard indicating success and/or the amount of files copied. Please do
not remove the usb device during this operation.
UNION COMMUNITY Co., Ltd. 44-3 Hyundai Topics Building, Bangi-dong,
Songpa-gu, Seoul, Korea 138-050, Tel: 82-2-6488-3000, Fax: 82-2-6488-3099,
E-Mail:[email protected], http://www.unioncomm.co.kr/eng
VIRDI 6000 TM Administrator Manual
3.9.1. Database Import
Importing means files will be copied from the USB device to the terminal. User background
images, user data, system options and languages can be imported.
3.9.2. Firmware Upgrading
If a new firmware version is released from the factory you can update your firmware from the USB
device. Make sure you put the binary image in the firmware directory. Do not keep old firmware
files in this directory. The firmware upgrade process may take up to 1 minute or longer. You will
see a popup message and hear a sound when the process is finished. DO NOT REMOVE THE
USB DURING THIS PROCESS. The system must be repowered after the firmware upgrade. OR
if you press and hold down the F1, F4 and CALL button at the same time the system will
automatically reboot.
UNION COMMUNITY Co., Ltd. 44-3 Hyundai Topics Building, Bangi-dong,
Songpa-gu, Seoul, Korea 138-050, Tel: 82-2-6488-3000, Fax: 82-2-6488-3099,
E-Mail:[email protected], http://www.unioncomm.co.kr/eng
VIRDI 6000 TM Administrator Manual
4. How to use the terminal
4.1. Main Screen
The appearance of the main screen is highly configurable and can change appearance depending
on the setup by the administrator. When no activity has occurred for a programmed number of
minutes set by the administrator the LCD will turn off and the display will be blank. When a user
approaches the terminal, touches the screen, scans a card, or enters a fingerprint the screen will
show again.
5
1
6
2
7
3
8
4
Number
Item
Description
1
Configuration Button
For entering terminal configuration mode
2
ID Input Button
For entering a user id number for authentication
3
Time/Date
Time/Date display. Different display options
available in configuration mode.
4
Function Keys
These keys are used for changing authentication
modes. Same function as the F1-F4 Buttons on
the terminal.
5
Status
Status text indicating the current mode of
authentication. (access/leave/attend/in/out)
6
Status Icons
Status icons (fire, trouble, proximity, door, network
and UV)
7
Access Button
To change the current authentication mode to
‘normal mode’
UNION COMMUNITY Co., Ltd. 44-3 Hyundai Topics Building, Bangi-dong,
Songpa-gu, Seoul, Korea 138-050, Tel: 82-2-6488-3000, Fax: 82-2-6488-3099,
E-Mail:[email protected], http://www.unioncomm.co.kr/eng
VIRDI 6000 TM Administrator Manual
8
Extension Button
If more than four functions keys are needed this
button is used for extending the number of
function keys
Below are some different pictures of the main screen when configured with Access Control,
Function keys, or Time and Attendance.
Window#1
Time and Attendance with Function Keys
Window#3
Time and Attendance with Function Keys
and Extension Key
Window#2
No Function Keys
Window#4
Access Control with Function Keys No
extension key
Note: The Access Icon
and
perform the same function. When the
extension button is used the larger icon will appear, if not the smaller icon will appear on
the bottom.
UNION COMMUNITY Co., Ltd. 44-3 Hyundai Topics Building, Bangi-dong,
Songpa-gu, Seoul, Korea 138-050, Tel: 82-2-6488-3000, Fax: 82-2-6488-3099,
E-Mail:[email protected], http://www.unioncomm.co.kr/eng
VIRDI 6000 TM Administrator Manual
4.2. ID Entry Screen
When the ID Button
is touched a window will appear for the user to enter their ID
number. The user must input their ID number then touch the OK button. If a mistake is made
when entering the number touching arrow will erase the number one digit at a time. The window
will close after 10 seconds of no activity.
•
Touch
•
Touch
•
Touch
button to cancel and close the window.
button to backspace to the previous digit entered (erase).
button when you finished entering the id number.
UNION COMMUNITY Co., Ltd. 44-3 Hyundai Topics Building, Bangi-dong,
Songpa-gu, Seoul, Korea 138-050, Tel: 82-2-6488-3000, Fax: 82-2-6488-3099,
E-Mail:[email protected], http://www.unioncomm.co.kr/eng
VIRDI 6000 TM Administrator Manual
4.3. Authentication Result Display
After a user is authenticated as authorized, unauthorized or not registered a result window will
appear with the result and a voice or sound can be heard. The result window may have different
icons, pictures or words depending on how the terminal is setup by the administrator. This window
will close automatically after a few seconds or can be closed immediately by touching the window
area. See below for examples. See 1.1.2. List of Icons for a description of each icon.
User Information
ID#, User Name or
Key#
of
a
registered user
Picture of the
user if setup by
the administrator
Authentication Result
Authorized, Unauthorized
or Not Registered
Authentication Type
Fingerprint, Card,
Password, ID icon
Result
Successful/
Unsuccessful
Icon
UNION COMMUNITY Co., Ltd. 44-3 Hyundai Topics Building, Bangi-dong,
Songpa-gu, Seoul, Korea 138-050, Tel: 82-2-6488-3000, Fax: 82-2-6488-3099,
E-Mail:[email protected], http://www.unioncomm.co.kr/eng
VIRDI 6000 TM Administrator Manual
Here are some examples of different authentication result windows. See the Icon list 1.1.2.
List of Icons
Unauthorized fingerprint with picture
Authorized fingerprint UserID#1 No picture
Unregistered card with picture
Unregistered card with no picture
Unregistered ID with picture
Authorized password, userID #3 with picture
UNION COMMUNITY Co., Ltd. 44-3 Hyundai Topics Building, Bangi-dong,
Songpa-gu, Seoul, Korea 138-050, Tel: 82-2-6488-3000, Fax: 82-2-6488-3099,
E-Mail:[email protected], http://www.unioncomm.co.kr/eng
VIRDI 6000 TM Administrator Manual
4.4. Application Modes
4.4.1. Access Control Application
An Access Control application is normally used for providing access to a secure area, function
keys are not needed unless extra tracking of the user is needed. If the system is setup for Access
Control and Function keys are used for authentication the user is required to press the mode
function button before entering their ID, Card or Fingerprint. Anytime the mode is changed the top
status bar will show the current mode. (F1, F2, F3, F4 or Normal). Once the user is authenticated
as successful the door will open.
Normal Mode – Touch the
ID, password or fingerprint.
or the
button then authenticate with card,
F1 Mode – Touch the
then authenticate with card, ID, password or fingerprint.
F2 Mode – Touch the
then authenticate with card, ID, password or fingerprint
F3 Mode – Touch the
then authenticate with card, ID, password or fingerprint
F4 Mode – Press the
then authenticate with card, ID, password or fingerprint
UNION COMMUNITY Co., Ltd. 44-3 Hyundai Topics Building, Bangi-dong,
Songpa-gu, Seoul, Korea 138-050, Tel: 82-2-6488-3000, Fax: 82-2-6488-3099,
E-Mail:[email protected], http://www.unioncomm.co.kr/eng
VIRDI 6000 TM Administrator Manual
4.4.2. Time & Attendance Application
Time and Attendance Application is for systems that require tracking of employee’s work time. If
the system is setup for Time and Attendance, for authentication the user is required to press the
mode function key before entering their ID, Card or Fingerprint. Anytime the mode is changed the
top status bar will show the current mode. (Attend, Leave, In, Out, Access).
Attend – when the user is attending the office the first time that day.
Leave – when the user is leaving the office for the day and will not return until the next day.
In – when the user is returning to the office from a break or lunch.
Out – when the user is leaving the office during normal work hours for a break or such.
Access Mode – Touch the
or the
ID, password or fingerprint. This is normal Access Mode.
Attend Mode – Touch the
Leave Mode – Touch the
In Mode – Touch the
Out Mode – Touch the
•
button then authenticate with card,
then authenticate with card, ID, password or fingerprint.
then authenticate with card, ID, password or fingerprint
then authenticate with card, ID, password or fingerprint
then authenticate with card, ID, password or fingerprint
Note: Start Time, Normal Time and Leaving time can be fixed by the administrator in the
terminal programming. The system will automatically change to Start, Normal or Leaving
mode when these times are setup.
UNION COMMUNITY Co., Ltd. 44-3 Hyundai Topics Building, Bangi-dong,
Songpa-gu, Seoul, Korea 138-050, Tel: 82-2-6488-3000, Fax: 82-2-6488-3099,
E-Mail:[email protected], http://www.unioncomm.co.kr/eng
VIRDI 6000 TM Administrator Manual
4.4.3. Cafeteria Application
Cafeteria or Meal Application is for systems that require tracking of user’s meal time. If the
system is setup for
Time and Attendance, for authentication the user is required to press the mode function key
before entering their
ID, Card or Fingerprint. Anytime the mode is changed the top status bar will show the current
mode. (Breakfast,
Lunch, Dinner, Snack, Normal).
Access Mode – Touch the
or the
password or fingerprint. This is normal Access Mode.
button then authenticate with card, ID,
Meal 1 Mode – Touch the
then authenticate with card, ID, password or fingerprint.
Meal 2 Mode – Touch the
then authenticate with card, ID, password or fingerprint
Meal 3 Mode – Touch the
Meal 4 Mode – Touch the
then authenticate with card, ID, password or fingerprint
then authenticate with card, ID, password or fingerprint
Note: Meal times can be fixed depending on the programming of the administrator for Breakfast,
Lunch, Dinner, Snack or supper.
UNION COMMUNITY Co., Ltd. 44-3 Hyundai Topics Building, Bangi-dong,
Songpa-gu, Seoul, Korea 138-050, Tel: 82-2-6488-3000, Fax: 82-2-6488-3099,
E-Mail:[email protected], http://www.unioncomm.co.kr/eng
VIRDI 6000 TM Administrator Manual
5. Troubleshooting Guide
This is a general guide on troubleshooting. Follow these guidelines if you are
having troubles with using the terminal.
Problem
LCD is blank or black.
Cannot hear voices
Solution
·
Ensure the RED power LED is on
·
Check LCD timeout, LCD will turn
off after a programmed period of
time.
Ensure the voice volume is turned on.
See 3.5.3.1. Voice Volume
Cannot hear sounds when keys are Ensure the sound volume is turned on.
touched
See 3.5.3.2. Sound Volume
Picture not showing.
Card not working.
Fingerprint not registering
·
Ensure the picture options are
enabled. See 3.6.2. Camera
Settings
·
Check
terminal
information
(system). Ensure the ‘Camera
Sensor OK’ is shown.
·
When scanning the card make
sure the BLUE LED lights up for
half a second. A sound should be
heard also.
·
Ensure the card is registered.
·
Ensure the authentication type for
the user is correct. See 3.2.1.4.
Authentication Type
·
Check
terminal
information
(system). Ensure the ‘Card OK’ is
shown.
·
See
section
1.1.7.
Correct
fingerprint registration and input
methods
·
Ensure the auto sense LED (red
led on sensor window) appears
when the finger is on the sensor
window.
UNION COMMUNITY Co., Ltd. 44-3 Hyundai Topics Building, Bangi-dong,
Songpa-gu, Seoul, Korea 138-050, Tel: 82-2-6488-3000, Fax: 82-2-6488-3099,
E-Mail:[email protected], http://www.unioncomm.co.kr/eng
VIRDI 6000 TM Administrator Manual
User not authenticating after registration.
Door Not Opening
Cannot connect to Server
·
See
section
1.1.7.
Correct
fingerprint registration and input
methods
·
Ensure the auto sense LED (red
led on sensor window) appears
when the finger is on the sensor
window.
·
If using the server, make sure the
authentication method is correct.
See 3.5.1.3. Authentication Mode
·
Check user authentication type.
·
Ensure lock is properly connected
to terminal. See installation
instructions.
·
Ensure the Door Option section is
correctly programmed. 3.6.4. Door
Option Settings
·
Ensure the GREED LED is on
when
the
authentication
is
successful.
·
Ensure the LEDs near
Ethernet plug are ON.
·
Ensure the network ICON is
shown on the main screen. See
ICON list. If Ethernet LINK is good
the ICON will be white, if
connected to the server the icon
will be animated.
·
Ensure the terminal ID is correct in
the server program and the
terminal. 3.5.1.2. Terminal ID
Number
·
Ensure the network settings are
correct. 3.3. Network Settings
UNION COMMUNITY Co., Ltd. 44-3 Hyundai Topics Building, Bangi-dong,
Songpa-gu, Seoul, Korea 138-050, Tel: 82-2-6488-3000, Fax: 82-2-6488-3099,
E-Mail:[email protected], http://www.unioncomm.co.kr/eng
the