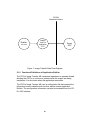
1
CR-Pro Computed Radiology Imaging Device Setup and Installation Guide April 2010 Radlink, Inc. 2400 Marine Ave. Redondo Beach, CA 90278 310-643-6900 310-643-6906 (fax) 00.09-002A © Copyright 2008 by Radlink, Inc All rights reserved Printed in USA Specifications and product and/or service offerings are subject to change without notice. The information in this book is provided for informational proposes only. It is subject to change without notice. Radlink, Inc. assumes no liability for any errors or inaccuracies that may appear in this book. No part of this publication may be reproduced, stored in a retrieval system, or transmitted, in any form or by any means, electronic, mechanical, photocopying, recording or otherwise, without the prior written permission of Radlink, Inc. Radlink Inc. 2400 Marine Ave Redondo Beach, CA 90278 310-643-6900 310-643-6906 (fax) www.radlink.com 1 Preface • THANK YOU – For purchasing the Radlink CR-Pro Computed Radiology Imaging Device. This manual will assist you in learning all the functions of your CR-Pro, from installation through operation. Please read each section carefully. • SAFETY - Read and follow all warning and safety instructions in this User’s Manual and marked on the product. Not following the instructions may be hazardous or illegal. • INSTALLATION – Follow the Installation Instructions in this manual carefully. Use only the supplied accessories. If parts are missing, contact Radlink before proceeding. • PRESCRIPTION USE STATEMENT • • CAUTION: FEDERAL LAW RESTRICTS THIS DEVICE TO SALE BY OR ON THE ORDER OF A PHYSICIAN, RADIOLOGIST, DENTIST, VETERINARIAN, CHIROPRACTOR OR ANY OTHER PRACTIONER LICENSED BY THE LAW OF THE STATE IN WHICH HE PRACTICES TO USE OR ORDER THE USE OF THE DEVICE. Furthermore, Federal law restricts the possession of this device to: A person, or his agents or employees, regularly and lawfully engaged in the manufacture, transportation, storage, or wholesale or retail distribution of such device. 2 • SAFETY – Read and follow all warning and safety instructions in this User’s Manual and marked on the product. Not following the instructions may be hazardous or illegal. • LIFTING HAZARD – The CR-Pro weighs 198 lbs (90 kg) Do not attempt to lift the unit by one person. Always seek help from two additional able bodied persons. Lifting heavy equipment may result in serious injury to personnel or damage to equipment and possibly adjacent surroundings. • LASER SAFETY – The CR-Pro is a Class 1 Laser Device which utilizes a 125 mW solid state laser. The covers on the CR-Pro and the enclosed inner housing protect the user from direct and indirect exposure when the unit is operating. Under no circumstances are the covers to be removed while the unit has power applied. Removing of the covers should be done only by a qualified technician for servicing. • FCC NOTICE “Declaration of Conformity Information” – This equipment has been tested and found to comply with the limits for a Class A digital device, pursuant to Part 15 of the FCC Rules. These limits are designed to provide reasonable protection against harmful interference in a commercial installation. This equipment generates, uses, and can radiate radio frequency energy and, if not installed and used in accordance with the instructions, may cause interference to radio communications. Electromagnetic Compatibility (EMC) is the ability of items of electronic equipment to function properly together in the electronic environment. 3 Electromagnetic Interference (EMI) is any signal or emission, radiated in free space or conducted along power or signal leads, that endangers the functioning of a radio navigation or other safety service or seriously degrades, obstructs, or repeatedly interrupts a licensed radio communications service. Radio communication services include, but are not limited to, AM/FM commercial broadcast, television, cellular services, radar, air-traffic control, pager and Personal Communication Services (PCS). These licensed services, along with unintentional radiators such as digital devices, including computers, contribute to the electromagnetic environment. While this device has been designed and determined to be compliant with regulatory agency limits for EMI, there is no guarantee that interference will not occur in a particular installation. If this equipment does cause interference with radio communication services, which can be determined by turning the device off and on, you are encouraged to correct the interference by one or more of the following measures: • Re-orient or relocate the receiving antenna. • Relocate the device with respect to the receiver. • Increase the separation between the equipment and receiver. • Connect the equipment to an outlet on a circuit different than that to which the receiver is connected. • QUALIFIED SERVICE – All service must be performed by the factory or an authorized service technician. There are no user replaceable parts inside the CR Pro. DO NOT remove the covers as internal parts may be damaged, the warranty will be voided and it may be hazardous to your health. • SPACE REQUIREMENTS – The CR-Pro utilizes 36in (91.4cm)(w) x 24in( 61cm)(d) x 58in(147.3cm) (h) minimum. • POWER REQUIREMENTS – Domestic (U.S.): AC outlet 100V – 120VAC, 60 Hz, 5A European: AC outlet 200V – 240VAC, 50Hz, 3A 4 The AC outlet should be dedicated to the CR-Pro (no other devices connected to this circuit) to prevent the possibility of injected line “noise “by other devices. FUSE – The input power is fused at the AC power input connector at the bottom, right rear of the CR-Pro cabinet. The fuses are located in a box directly above the input connector and are an integral part of the connector assembly. • Inside the box are two (2) fuses as follows: Domestic 100 – 120VAC European 200 – 240VAC 5A Fuses (standard) 3A Fuses (standard) • ENVIRONMENT – Temperature – 60ºF (19ºC) to 80ºF (32ºC) Operating 40ºF (4ºC) to 90ºF (33ºC) Non-operating Relative Humidity – 20% to 80% non-condensing Light – Phosphor plates are light sensitive and are erased if exposed to light. The CR-Pro cassettes are light protected. However, light can penetrate the CR-Pro light seal if bright light or sunlight is directed to the cassette slot on top of the CR-Pro. Ambient light in the proximity of the CR-Pro should be kept to a minimum. • • • SHIPPING AND UNPACKING THE CR-PRO – The CR-Pro is shipped in a custom designed box that protects the unit from shipping damage. When the unit is returned for any reason, it must be package in the original container. Retain all Interior protective parts and hardware for reuse. NOTE – Unit shall be unpacked and installed by authorized service provider. CAUTION – The packing crate can be tipped when shipping and moving and should be tethered to avoid tipping. The CR-Pro weighs 198 pounds and, even with attached casters, to avoid injury, it should not be moved by less than two people. If lifted, such lifting should be performed by professional movers or installers. 5 TABLE OF CONTENTS Chapter 1: Hardware Installation Chapter 2: Setup and Configuration Chapter 3: Test Scan Guide Chapter 4: Troubleshooting Guide Chapter 5: Maintenance Procedures Appendix Hardware Specifications Error Conditions and Actions User Quality Assurance & Maintenance Program DICOM Conformance Statement 6 Introduction The Radlink CR-Pro is a radiological device, which digitizes erasable phosphor plates and transmits the image to an onboard computer for review, archiving or forwarding to other facilities for further evaluation and archiving. The CR Pro only utilizes cassettes manufactured by Radlink. The CR Pro’s unique design makes it virtually maintenance free, as there are no mirrors or galvanometers, which are subject to frequent adjustment. Additionally, the CR Pro mechanism is shock mounted to allow for more reliable operation. Multiple images may be sent simultaneously to the PACS hosts and the DICOM Spooler handles multiple destinations and a DICOM broadcast capability. The system also supports the opening of DICOM 3.0 files. The CR Pro has relatively few controls and connections making the installation process a quick and efficient procedure. Operating over the Ethernet port requires the easy attachment of a CAT5/6 cable. The software completes the remainder of the installation. 7 Chapter 1 Hardware Installation 8 Hardware Installation 1. Place the CR-Pro on a solid flat, leveled surface. 2. Plug the power cord to the AC Power Adapter located on the back of the CR-Pro. (Figure 1) 3. Plug the end of the power cord to an available power outlet. A UPS/Line conditioner is recommended. It is desirable to have the CR-Pro on an isolated circuit to avoid conducted noise from other devices affecting the quality of operation. 4. Plug one end of the Ethernet cable (Cat5/6) into the CR-Pro Ethernet port (see Figure 1). Note: Do not route the Ethernet cable and the power cable in close proximity as power cable radiation may affect transmission of data. 6. Turn the Power ON/OFF switch on the back of the CR Pro to ON (see Figure 1) . USB Port Ethernet Port Power ON/OFF Switch AC Power Adapter 9 Chapter 2 Setup Guide and Configuration 10 STEP 1: Application Start Up 1. To start the application double click the Radlink Icon located on your desktop. (Figure 1) Figure 1 11 2. Image Pro software home screen will appear as Figure 2. Figure 2 12 3. Verify that Scanner Status is lit green with READY. (Figure 3) Figure 3 13 STEP 2: Calibration Procedure Calibration of the CR PRO is required to compensate for any hardware differences and should be performed at least once a month, depending on usage. Recommended: A 14x17 inch cassette must be used for calibration. If a smaller size cassette is used, banding will be apparent at the both sides of scanned images when a larger cassette is used. Remove any grid that might be present. 1. Expose Plate to Xray Note: Expose the cassette on the side without the Radlink Label) If distance is: o 72” (measured from bottom of X-ray unit) at 70 Kvp, 30 MAs o 40” (measured from bottom of X-ray unit) at 70 Kvp, 9 MAs 2. Rotate the cassette 180 degrees and expose with the same technique used above. 3. Load Cassette Scan Insert the exposed cassette in the CR Pro machine. (Figure 4) Figure 4 14 4. Start Calibration From the application Click Manage CR Setup Calibrate. (Figure 5) The calibration process should take 3-4 minutes to complete. Figure 5 5. Calibration - The CR Pro will scan the exposed plate in order to calibrate the intensity to allow for the best possible images to be acquired from the plate. Once scanned, the system will then go through a second pass and erase the plate to normal levels. The calibration process will take approximately 4 minutes. Do not remove the cassette until calibration has been completed. Note that if the cassette has not been exposed correctly an error message will display (Figure 6). Figure 6 6. Finished – The CR Pro is now calibrated and you can begin using it for processing exposed plates. (To verify that the calibration has completed a message will display in lower left hand corner. Scanner status bar will display Scanner ready and turn green.) 15 Chapter 3 Test Scan Procedure 16 STEP 1: Expose an Image You are now ready to scan your first cassette. Expose an image using one of the cassette(s) that you purchased. Insert the exposed cassette in the slot on top of the CR-Pro. (Figure 1) If you are using the small (10” x 12”) cassette be sure to close the guides snuggly around the cassette. Figure 1 STEP 2: Startup Window Launch the imaging software: Double Click the Radlink Pro Imaging icon (Figure 2). Figure 2 17 STEP 3: Scan Cassette Select New Patient to add or New Study to add an existing patient. For detailed description of the functions and operations of the software and system, please refer to the CR Pro Software Guide for Radiological Imaging or CR Pro Guide for Veterinary Imaging. Figure 3 18 STEP 4: Patient Info Window Patient Information window will display, input the following: ID, Sex, Last Name, First Name, Middle Name and Birthday (MM/DD/YYYY format) Then click Next button to continue. Figure 4 19 20 STEP 5: Selecting Body Part Figure 5 1. Input the same technique used when you expose the cassette. 2. Click Save 3. Click Scan CR button 21 STEP 6: Scan Cassette The CR Pro will now begin digitizing your exposed image. Figure 6 STEP 7: Auto Erasing After the image has been processed the CR Pro will automatically begin the erasing procedures. Figure 5 Figure 7 22 STEP 8: Complete Study A sample scan of a knee phantom is shown below. Figure 8 For detailed description of the functions and operations of the software and system, please refer to the CR Pro Software Guide for Radiological Imaging or CR Pro Guide for Veterinary Imaging. 23 Chapter 4 Troubleshooting Guide 24 General Troubleshooting Problem Action No power to the CR Pro Ensure the monitor power is on. Check that the Power Switch on the back of the CR Pro is “ON” and unit is plugged into the surge protector or wall receptacle. If problem persists contact your authorized service provider. Cassette Jam From the Acquisition Software Select “Manage” “CR Setup” “Reset Plate”. If not resolved power off the CR Pro and power back on. If problem persists please contact your authorized service provider. “Cassette not Detected” Make certain that the cassette guides on the top cover are firmly pressed against the cassette. “Unable to unload Cassette” From the Acquisition Software Select “Manage” “CR Setup” “Reset Plate”. Examine the cassette clip on the bottom of the cassette. If loose or bent contact your authorized your authorized service provider. Horizontal Lines Make certain that there are no overhead lights above the CR Pro. Artifacts on Images Confirm that artifacts are consistently appearing with the same cassette. If so follow cassette cleaning procedure in Chapter 5. Grainy Images Has system been calibrated in the past 30 days? If not please follow calibration instructions on Chapter 2 Setup and Configuration. Noise during scanning Contact your authorized service provider. Note: For additional troubleshooting tips please refer to the CR Pro Software Guide for Radiological Imaging or CR Pro Guide for Veterinary Imaging. 25 Cassette Related Problems Troubleshooting Symptom Damage to outer enclosure Possible Causes • Rough handling by technicians • Patient contact during x-ray exposure • • • Plate is not retained in • Bent or damaged the outer enclosure when Snap-Lock clip cassette is out of the unit, or the plate is not extracted from or returned to the cassette. Problem is localized to one cassette. Damage to phosphor • Damage to outer plate enclosure (see above) • Damaged during cleaning procedure Image artifacts (spots • Contaminated steaks, fingerprints etc.) phosphor plate • Scratched phosphor are observed in the plate scanned images. Artifacts are localized to one cassette. Plate is not extracted • Possible problem with from or returned to the CR Pro internal cassette. Problem is components observed with several different cassettes. Vertical bands of varying • CR Pro is out of density observed in the calibration scanned image. Problem • Contaminated scanner is observed with several optics different cassettes. “Crackling” sound emitted • Noise is generated from the upper portion of when the edge of the the cassette when the plate contacts a plate is returned to the retaining spring inside cassette. of the cassette. 26 • What To Do Retrain technicians Use a Cassette Protector to protect the cassette during the exposure process. Return cassette to Radlink for repair Contact Radlink Customer Support for repair information • • Retrain technicians Return cassette to Radlink for repair • • Clean phosphor plate Return cassette to Radlink for repair • Contact Radlink Customer Support for repair information Perform a calibration procedure • Contact Radlink Customer Support for repair information • The sound may be heard when a new cassette is first used. The sound is not indicative of a problem with the cassette and will diminish with use. • Chapter 5 Maintenance Procedures 27 CR ProTM Phosphor Plate Cassette Maintenance Procedure The Phosphor Plate Imaging Cassette is a key component in the CR ProTM Computed Radiography System. The CR Pro’s cassette is comprised of the outer enclosure and the phosphor plate. The outer enclosure provides protection to the phosphor plate to prevent physical damage and contamination. It also prevents ambient light from reaching the phosphor plate. A small spring-steel clip called a “Snap-Lock” is used to retain the phosphor plate within the cassette when it is not being used. The phosphor plate is comprised of a metal plate to which a plastic film has been adhered. The outer layer of the plastic film is coated with a specially formulated phosphor material. A white plastic strip is attached to the rear-side of the phosphor plate. The white strip is used, in conjunction with light sensors installed in the CR Pro unit, to monitor the location of the plate as it is transported through the scanning and erase processes. The following cassette handling and care guidelines should be followed to ensure peak performance of the CR Pro system: Storage and Handling • • • • • • • • Always store cassettes in an area away from possible stray X-Ray radiation. Store cassettes in an area away from ambient sunlight and bright artificial light. Always store the cassettes in an area that protects them from possible physical damage. Cassettes should be stored resting on their long edge. Do not store cassettes by stacking them on top of each other as this may result in damage to the phosphor plate. Always use care when handling the cassettes to prevent damage to the outer enclosure and the phosphor plate. To prevent damage to the internal components of the CR Pro system, always gently insert the cassette into the CR Pro. Never drop or slam the cassette into the CR Pro unit. While exposing a cassette, do not allow the patient to come into direct contact with the cassette as this may cause damage to the outer enclosure or the phosphor plate. 28 Care and Cleaning To ensure optimum performance from the cassettes and to eliminate potential image artifacts, it is recommended that the cassettes be cleaned and inspected once a month. It may be necessary to clean the cassettes more frequently if the unit is used frequently or if it is installed in an unusually dusty environment such as a veterinary clinic. The following procedure should be followed to clean and inspect the cassette: 1. Inspect the outside of the cassette for physical damage. If damage is observed, contact Radlink Customer Support at (310) 643-6900 for information regarding available repair services. 2. Place the cassette on a flat surface with the Snap-Lock retaining clip facing upward (see photo #1). Snap-Lock Clip Photo 1 3. Use the thumb on one hand to slightly lift the Snap-Lock while inserting a small flat-bladed screwdriver between the cassette and the phosphor plate (see photo #1). 29 4. Twist the screwdriver to extract the phosphor plate (see photo #2). To prevent damaging the phosphor plate, do not apply pressure to the center of the cassette while removing the plate. Photo 2 Caution: In the next few steps, use caution when handling the exposed plate. Handle the plate by the edges to prevent getting finger prints on the surface of the phosphor plate. 5. Extract the phosphor plate from the cassette and place it face up on a flat surface with the metal edge positioned beyond the edge of the work surface. This orientation of the plate will prevent bending of the plate during the cleaning process. 6. Dampen a lint-free cloth with either denatured or industrial grade isopropyl alcohol. 30 7. Wipe the long edges of the plate to remove any accumulated residue (see photo #3). Cleaning the edges of the plate will reduce the possibility of dragging contamination from the edges of the plate onto the phosphor surface when it is cleaned. 8. Dispose the dirty cleaning cloth after use. Photo 3 9. Dampen a new lint-free cloth with either denatured or industrial grade isopropyl alcohol. 31 10. Wipe the surface of the phosphor plate in the long direction with overlapping stokes. Rotate the cleaning cloth to use a clean section as you progress across the plate (see photo #4). NOTE: do not use a circular motion when cleaning the plate as this may drag contamination from the un-cleaned area of the plate back on to the surfaces that have just been cleaned. Wipe in this direction Photo 4 11. Inspect the phosphor plate for any remaining foreign material; repeat the cleaning process as necessary. 12. Inspect the phosphor plate for damage such as deep scratches, dents, etc. If physical damage is observed, contact Radlink Customer Support. 13. Carefully reinsert the phosphor plate into the cassette. 14. Inspect the “Snap-Lock” retaining clip on the cassette. The clip should retain the plate firmly. If the clip is bent or does not properly retain the plate, contact Radlink Customer Support. 32 15. Turn the cassette over and clean the lower corners where the side and bottom edges of the cassette join together (see photo #5). Clean Here Photo 5 16. This completes the cleaning and inspection procedure, the cassette can now be returned to service. 33 Appendix 34 CR-Pro Specifications . Table 1 –System Hardware Specifications 2100 Series Specification Internal Computer Processor Memory Storage Display Touchscreen Monitor Input/Output USB2 USB2 Comm Port Comm Port Intel Pentium 2.6GHz 1GB DIMM 500 Gb hard drive 19 inch 1280x1024 display DVD-RW Keyboard 77 Key Ethernet 10/100/1000 Base T USB2 2200 Series Specification Internal Computer Processor Memory Storage Display Touchscreen Monitor Input/Output USB2 USB2 Comm Port Comm Port Intel Pentium 2.6GHz 2Gb DIMM 2 X 1 TB hard drive (RAID-1) 19 inch 1280x1024 display DVD-RW Keyboard 77 Key Ethernet 10/100/1000 Base T USB2 35 Table 2 – Hardware Specifications Phosphor Plate Scan time 8” x 10” 10” x 12” 14” x 17” Plate Interface Dimensions Weight Power Phosphor Plate 8” X 10” (203.2mm X 254.0mm) 10” X 12” (254.0mm X 304.8mm) 14” X 17” (355.6mm X 431.8mm) 14” X 34” (355.6mm X 870.4mm) Cassette 9” x 11” (228.6mm X 279.4mm) Scan 12.24 seconds 18.36 seconds 26 seconds USB or Ethernet 22”(w) x 21”(d) x 40”(h) 198 lbs. Input voltage Scan and Erase 24.48 seconds 37. 12 seconds 52 seconds Input current Internal voltage/current Laser Resolution Type Power Spatial Grayscale Optical Density range Signal-to–noise ratio 16 bits 0.00 to 4.00 Transition of density 4 to 1 at 0 to 4.0 Optical Density 15” x 18” (381.0mm X430.8mm) 15” x 35.5 (381.0mm X 901.7mm) 100 to 120 VAC, 57 to 64Hz or 200 to 230 VAC, 47 to 54Hz 3.2A for 115 VAC 60 Hz 0.9A for 230 VAC 50 Hz +5 V at 10A max +12 V at 1A max -12 V at 1A max +24 V at 5A max Solid State 125 mw 2800 pixels over a 14.2 inch scan line 5 pixels or less 0.001 O.D. at density 1.5 O.D. 0.01 O.D. at density 2.5 O.D. 0.1 O.D. at density 3.5 O.D. one pixel of true position over entire film 16 bit (65535 grayscale) max Geometry Output format 11” x 13“ (279.4mm X 330.2mm) (All scan modes) 36 USER QUALITY ASSURANCE & MAINTENANCE PROGRAM FOR THE CR-PRO INTRODUCTION: Understanding the basic fundamentals and automating the decisions involved in obtaining good results of x-ray imaging is the foundation of the approach Radlink has taken in the development of the CR Pro. GENERAL: The x-ray tube is essentially a point source of a cone-shaped beam of x-rays. The “xrays” themselves are composed of streams of “light” particles called photons, the same photons that make up visible light, as from a flash light or ordinary light bulb. The difference is the wavelength of the photons; x-ray photons are a thousand times shorter wavelength than visible light. It is this short wavelength that allows x-rays to penetrate objects. The shorter the wavelength, the easier it is for x-rays to penetrate more and more dense objects. For example, longer wavelength x-rays can only go through flesh and not bone, but shorter wavelengths can go through bone easily and create the images necessary to “see” skeletal bone structure, etc. CONSIDERATIONS THAT AFFECT CR IMAGES: There are several factors that contribute to the latent image the x-rays leave on the CR plate: 1. Distance from the x-ray source point to the imaging CR plate (SID). 2. Kilovolts applied to the x-ray tube determine maximum shortest wavelength for penetration (kVp) 3. Product of the x-ray tube current and the time of exposure (mAs). 4. Filtration of the x-rays at the x-ray tube source, usually 1.5mm to 2.5mm of aluminum, and sometimes copper on the order of 0.5mm thick. This filtration removes a large part of the longest wavelengths. 5. Whether or not a “grid” is used to cut down scattered x-rays produced by thick body parts that have the effect of “fogging” or reducing contrast in the image. 6. Thickness of the body part being x-rayed. 7. The sensitivity of the CR plate itself to the x-rays interacting with the phosphor coating which stores the latent image. These are the seven factors that the x-ray radiology technician (XRT) considers when taking an x-ray of a patient. The table of these factors, developed by the XRT is known as the “Techniques Chart.” RADLINK’S APPROACH Recognizing that no two XRTs will use the exact same Techniques Chart, and no two sites will use the same techniques, Radlink has developed a proprietary techniques algorithm that can store a generic Techniques Chart by body part. This Techniques Chart takes into account the above factors. The XRT simply uses the generic Techniques 37 Chart to define the variables for each X-Ray. Or, better yet, if the site’s Techniques Chart is known by Radlink prior to shipment, a customized Techniques Chart can be loaded prior to the unit’s installation at the site. The XRT can then use the installed Techniques Chart or expand it as required. This user-friendly approach simplifies the XRay set up and provides for flexibility to tailor the image results. 38 Radlink Inc. CR-Pro Computed Radiology Imaging Device DICOM Conformance Statement 1. Introduction This document provides conformance by the Radlink CR Pro Computed Radiology Imaging Device to the DICOM 3.0 standard as structured according to the specification set forth in DICOM Part 2. 1.1 References (1) ACR-NEMA V3.0 – Digital Imaging and Communications in Medicine (DICOM) v3.0 Final Draft 1993 Parts 1 through 9. 1.2 Acronyms and Abbreviations The following symbols and abbreviations are used in this conformance specification: ACR AE CR DICOM DIMSE DIMSE-C DIMSE-N HIS IOD LUT MDIS NEMA OSI PACS PDU RSI SCP SCU SOP TCP/IP UCP UID VR American College of Radiology Application Entity Computed Radiography Digital Imaging and Communications in Medicine DICOM Message Service Element DICOM Message Service Element-Composite DICOM Message Service Element-Normalized Hospital Information System Information Object Definition Look-up Table Medical Diagnostic Imaging Support National Electrical Manufacturers Association Open Systems Interconnection Picture Archive and Communication System Protocol Data Unit Radiology Information System Service Class Provider Service Class User Service-Object Pair Transmission Control Protocol/Internet Protocol User Conformance Profile Unique Identifier Value Representation 39 2. Implementation Model The CR Pro is a medical acquisition system that supports Computed Radiography (CR). The CR Pro encompasses the following DICOM Application Entities: • CR Pro Image Transfer AE – to exchange images with other Application Entities by the means of DICOM network exchange. It implements the following Service Class: o Storage SCU • CR Pro MWL AE – to fetch modality worklist from a worklist manager. It implements the following Service Class: o DICOM Modality Worklist SCU 2.1 Image Transfer The CR Pro, acting as a single Application Entity, digitizes an x-ray phosphor plate image as a Computed Radiography Image and transmits the image to a Server. 2.1.1 Application Data Flow Model Figure 1 illustrates the following scenarios: • Send a STORE Request to a remote DICOM AE when a study is completed. 40 DICOM Standard Interface Radlink CR Pro Radlink View Pro Application SCU Server SCP Figure 1: Image Transfer Data Flow Diagram 2.1.2 Functional Definitions of Application Entities The CR Pro Image Transfer AE component operates in a separate thread, allowing the CR Pro to continue to operate while the images are being transferred. It is shut down when the application terminates. The CR Pro Image Transfer AE uses a configuration file that contains the information used to describe both local as well as remote Application Entities. The configuration information can also be accessed from the CR Pro GUI interface. 41 2.2 Modality Worklist 2.2.1 Application Data Flow DICOM Standard Interface Radlink CR Pro Radlink View Pro MWL AE Modality Worklist SCP Figure 2: Modality Worklist Data Flow Diagram 2.2.2 Functional Definitions of Application Entities CR Pro MWL AE is used to query modality worklist information from a remote DICOM device. It therefore performs the following tasks: • Establish a DICOM Association with a remote DICOM device. • Issues a request for a worklist to a remote DICOM device. • Retrieves Modality Worklist from a remote DICOM device. CR Pro MWL AE component operates as part of the Radlink View Pro Application. It is shut down when the application terminates. 42 3. Radlink CR Pro Image Transfer AE Specifications 3.1 CR Pro Specifications 3.1.1 SCU Verification This AE provides standard conformance as an SCU to the DICOM V3.0 SOP class for Verification as shown in Table 1. Table 1: SOP Verification Classes SOP Class SOP Class UID Verification 1.2.840.10008.1.1 3.1.2 SCU Storage This AE provides standard conformance as an SCU to the DICOM V3.0 SOP class for Computed Radiography Image Storage as shown in Table 2. Table 2: SOP Storage Classes SOP Class SOP Class UID Computed Radiography Image 1.2.840.10008.5.1.4.1.1.1 Storage 3.2 Association Establishment Policies 3.2.1 General The CR Pro creates Association Establishment Request for the server when a Computed Radiography Image is to be sent. Maximum PDU size is 16K Bytes. 3.2.2 Number of Associations The CR Pro, acting as an Application Entity, can initiate one association concurrently. 3.2.3 Asynchronous Nature The default Synchronous Mode of operation is used on all Associations. Asynchronous Mode is not supported. 43 3.2.4 Implementation Identifying Information The CR Pro Image Transfer AE is identified by the following ids: Implementation Class UID: 1.2.250.1.59.2.43.86.243 Implementation Version Name: Radlink CR Pro 3.3 Association Initiation by Real World Activity Related Real World Activity is the issuance of an Association with a remote server when a Computed Radiograph Image is to be sent. 3.3.1 SOP Specific Conformance – Verification This AE provides standard conformance as an SCU to the DICOM V3.0 SOP class for SOP Verification Classes as shown in Table 3. Table 3: SOP Verification Classes Transfer Syntax Abstract Syntax SOP SOP Class UID Name UID Class Verification 1.2.840.10008.1.1 DICOM 1.2.840.10008.1 Implicit .2 VR Little Endian Role Extended Negotiati on SC U None 3.3.2 Storage This AE provides standard conformance as an SCU to the DICOM V3.0 SOP class for Computed Radiography Image Storage Classes as shown in Table 4. Table 4: SOP Storage Classes Abstract Syntax Transfer Syntax Role Extended Negotiati SOP SOP Class UID Name UID on Class Secondary 1.2.840.10008.5.1.4.1.1.7 Implicit 1.2.840.10008.1 SC None Capture VR .2 U Image Little Storage Endian 44 3.3.3 SOP Specific Conformance for Non-Compressed Image Storage Table 5 illustrates the encoding for a Non-Compressed Image. Table 5: Non-Compressed Image Values Attribute Tag VR Value Specific Character (0008,0005) CS ISO_IR 100 Set SOP Class UID (0008,0016) UI 1.2.840.10008.5.1.4.1.1.1 SOP Instance UID (0008,0018) UI 1.2.392.12345.( serial #).(year). (month).(day).(hour).(min).(sec). (millisec) Study Date (0008,0020) DA yyyymmdd Study Time (0008,0030) TM hhmm Accession (0008,0050) SH nnnnnn Number Modality (0008,0060) CS CR Conversion Type (0008,0064) CS Manufacturer (0008,0070) LO Radlink Institution Name (0008,0080) LO Institution Address (0008,0081) ST Referring (0008,0090) PN Last^First Physician Name Study Description (0008,1030) LO Manufacturer’s (0008,1090) LO Radlink CRPro Model Name Patient Name (0010,0010) PN Last^First^M Patient ID (0010,0020) LO nnnnnn Patient Birth Date (0010,0030) DA yyyymmdd Patient Sex (0010,0040) CS F, M, or O Other Patient IDs (0010,1000) LO Additional Patient (0010,21B0) LT History Date of Secondary (0018,1012) DA yyyymmdd Capture Time of (0018,1014) TM hhmm Secondary Capture Study Instance (0020,000D) UI 1.2.392.12345.( serial #.(year). UID (month).(day).(hour).(min).(sec). (millisec) Series Instance (0020,000E) UI 1.2.392.12345.( serial #.(year). UID (month).(day).(hour).(min).(sec). (millisec) Study ID (0020,0010) SH nnnnnnn 45 Series Number Image Number Samples per Pixel Photometric Interpretation Rows Columns Bits Allocated Bits Stored High Bit Pixel Representation Pixel Data (0020,0010) (0020,0013) (0028,0002) (0028,0004) IS IS US CS nnnnn nnnnn 1 MONOCHROME2 (0028,0010) (0028,0011) (0028,0100) (0028,0101) (0028,0102) (0028,0103) US US US US US US 8 or 16 8,16 7, 12, 15, or 16 0 (7FE0,0010) OW 3.3.4 TRANSFER Syntax Selection Policies Only the DICOM Implicit Little Endian Transfer Syntax is supported. 3.4 Association Acceptance Policy The Radlink CR Pro Image Transfer AE does not accept association requests. 4 Radlink CR Pro MWL AE Specification The Radlink CR Pro MWL AE provides Standard Conformance to the following DICOM V3.0 SOP Classes. Table 6: Supported Meta SOP Classes SOP Class SOP Class UID Role Modality Worklist Query Find 1.2.840.10008.5.1.4.31 SCU 4.1 Association Establishment Policies 4.1.1 General The Radlink CR Pro View Pro application issues a request to retrieve Modality Worklist. It initiates an association to the Modality Worklist SCP through Radlink CR Pro MWL AE component. The maximum PDU size allowed is 16KB. 46 4.1.2 Number of Associations The Radlink CR Pro MWL AE initiates one association with the default remote Modality Worklist SCP. The association is released once the Worklist has been fetched. 4.1.3 Asynchronous Nature This release does not support asynchronous operations and will not perform asynchronous window negotiation. 4.1.4 Implementation Identifying Information The CR Pro Image Transfer AE is identified by the following ids: Implementation Class UID: 1.2.276.0.7230010.3.0.4.0 Implementation Version Name: RadlinkRouter 4.2 Association Initiation by Real World Activity Related Real World Activity is the issuance of an Association with a remote server when the user of CR Pro clicks on the Select button on the Worklist screen of the user interface. 4.2.1 Proposed Presentation Contexts This AE provides standard conformance as an SCU to the DICOM V3.0 SOP class for SOP Verification Classes as shown in Table 3. Table 7: Proposed Presentation Context Role Extended Abstract Syntax Transfer Syntax Negotiati on SOP SOP Class UID Name UID Class Modality 1.2.840.10008.5.1 DICOM 1.2.840.10008.1 SC None Worklist .4.31 Implicit .2 U Query Find VR SOP Class Little Endian 47 4.2.2 SOP Specific Conformance If the Radlink View Pro Modality Worklist component is unable to open an association with the selected destination AE, an error message is printed in the console window. The View Pro Modality Worklist component does not attempt any extended negotiation. The following optional attributes are included in the Query Find message: Table 8: Optional Matching Key Attributes for Basic Modality Worklist SOP Class Tag Name (0008,0050) Accession Number (0010,0010) Patient’s Name (0010,0020) Patient ID (0040,0100) Scheduled Procedure Step Sequence > (0008.0060) Modality > (0040,0002) Scheduled Procedure Step Start Date Table 9: Optional Return Key Attributes for Basic Modality Worklist SOP Class Tag Name (0008,0050) Accession Number (0008,0090) Referring Physician’s Name (0010,0010) Patient’s Name (0010,0020) Patient ID (0010,0030) Patient’s Birth Date (0010,0040) Patient’s Sex (0010,21b0) Additional Patient History (0020,000d) Study Instance UID (0032,1060) Requested Procedure Description (0040,0100) Scheduled Procedure Step Sequence > (0008.0060) Modality > (0040,0002) Scheduled Procedure Step Start Date > (0040,0003) Scheduled Procedure Step Start Time > (0040,0006) Scheduled Performing Physician > (0040,0007) Scheduled Procedure Step Description (0040,1001) Requested Procedure ID (0040,1002) Reason for the Requested Procedure 48 4.3 Association Acceptance Policy The Radlink View Pro DICOM Modality Worklist Component does not accept associations. 5 Communication Profile 5.1 TCP/IP Stack The CR Pro conforms to DICOM V3.0 TCP/IP Network Communications as specified in Part 8 of the DICOM 3.0 Standard. 5.2 Physical Media Support The CR Pro application supports the following: Local Area Network (LAN); Wide Area Network (WAN); Ethernet 10BASE-T, 100BASE-T; Internet, DSL; and CD-RW. 6 Extensions/Specializations/Privatizations Not currently applicable. 7 Configuration 7.1 AE Title/Presentation Address Mapping No title/presentation mapping information is required to be set for the AE address mapping. 7.2 Configurable Parameters The following fields are configurable for this AE: PACS AE Title; PACS IP Address; PACS Port; Client AET. 8 Support for Extended Character Sets No extended character sets are currently supported. 49 9 Abbreviations used in the Value Representation (VR) Column of Supported DICOM Data Elements Code Meaning* Name AE AS Application entity A string with the application name. Age string A string with an age in days, weeks, months or years. AT Attribute tag Two binary 16-bit unsigned integers denoting the group and element. CS Code string A string of 16 characters at most to be used for codes. DA Date An 8-character date yyyymmdd. DS Decimal string A string representing a fixed-point or floating point number. DT Date/time A string concatenation of DA (date) and TM (time) with optionally appended offset from coordinated universal time. FL Floating point 32-bit binary floating point number. single FD Floating point 64-bit binary floating point number. double IS Integer string A string representing a signed integer. At most 12 characters. LO Long string A general purpose string of at most 64 characters. LT Long text A text of at most 10240 characters. OB Other byte string Byte data according to negotiated encoding. OW Other word string 16-bit word data according to negotiated encoding. PN Person name A string with a person's name according to a 5-component convention. SH Short string A general purpose string of at most 16 characters. SL Signed long 32-bit binary signed integer. SQ Sequence of A special value representation to support items nested data sets. SS Signed short 16-bit binary signed integer ST Short text A text of at most 1024 characters 50 Length 16 Bytes Maximum 4 Bytes Fixed 4 Bytes Fixed 16 Bytes Maximum 8 Bytes Fixed 16 Bytes Maximum 26 Bytes Maximum 4 Bytes Fixed 8 Bytes Fixed 12 Bytes Maximum 64 Chars Maximum 10240Chars Maximum See Transfer Syntax Definition See Transfer Syntax Definition 64 Chars Maximum 16 Chars Maximum 4 Bytes Fixed Not Applicable 2 Bytes Fixed 1024 Chars Max. TM Time UI Unique identifier UL Unsigned Long UN Unknown US Unsigned Short UT Unlimited Text A time string hhmmss.ffffff with shortcut possibilities A string with one identifier consisting of Vseparated numbers. It can identify a variety of items. At most 64 characters. 32 bit binary unsigned integer A string of bytes where encoding of contents is unknown 16 bit binary unsigned integer A string of graphic & control characters 16 Bytes Maximum 64 Bytes Maximum 4Bytes Fixed Any length valid for any other VR 2 Bytes Fixed 232-2 Characters Max 1. Description of the information per column The definitions used are in accordance with the Dicom standard. Column 1 specifies the requirement type RT as follows. Refer to [1], part 4 for a detailed description. Only data elements for information object modules that are mandatory for CT images are included. Refer to [1], part 3, table A.1.4. Column 1 Requirement Type 1 Meaning Required element, and null values are not allowed. The CTX always provides this element. 2 Required element, but null values are allowed. The CTX always provides this element, possibly with a null value. 3 Optional element. The CTX provides this element if this is configured. Even if configured a null value may be provided. 1C, 2C, 3C Conditional versions of 1, 2, 3. It is specified which conditions must be met in order to provide the element. Column 2 TAG Group and Element Number Group and Element Number Group and Element Number Group and Element Number Column 3 Column 4 Element VR* Name Element VR Name Element Name VR Element Name VR Element Name VR * Refer to [1], part 5 for a more detailed description. 51