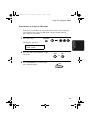
1
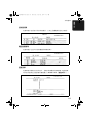
FO-2950M
MODEL
FO-2950M
FACSIMILE
FACSIMILE
OPERATION MANUAL
1.
2.
3.
4.
5.
6.
7.
8.
9.
10.
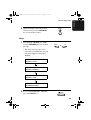
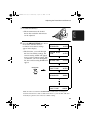
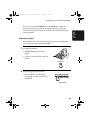
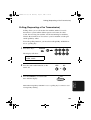
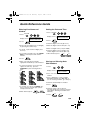
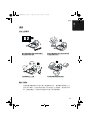
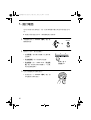
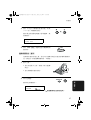
1. Installation
2. Sending Documents
3. Receiving Documents
4. Making Copies
5. Making Telephone Calls
6. Answering Machine Hookup
7. Special Functions
8. Printing Lists
9. Maintenance
10. Troubleshooting
all-fo2950hk.book Page 1 Wednesday, August 9, 2000
11:13 AM
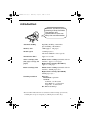
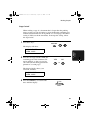
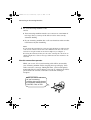
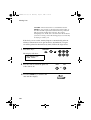
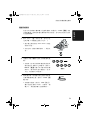
Introduction
Welcome, and thank you for
choosing a Sharp facsimile!
The features and
specifications of your new
Sharp fax are shown below.
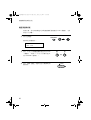
Automatic dialling
Rapid Key Dialling: 20 numbers
Speed Dialling: 100 numbers
Memory size*
2 MB (approx. 130 pages)
Modem speed
14,400 bps (max.)
Automatic fallback to lower speeds.
Transmission time*
Approx. 6 seconds
Toner cartridge yield
(4% page coverage, A4
paper)
Initial starter cartridge (included with fax
machine): Approx. 1,875 pages
Replacement cartridge (FO-29DC):
Approx. 3,750 pages
Drum cartridge yield
Initial starter cartridge (included with fax
machine): 20,000 pages (ave.)
Replacement cartridge (FO-29DR):
20,000 pages (ave.)
Scanning resolution
Fax/copy:
Horizontal: 8 pels/mm
Vertical:
Standard: 3.85 lines/mm
Fine /Halftone: 7.7 lines/mm
Super fine: 15.4 lines/mm
PC: Enhanced 600 dpi
*Based on ITU-T Test Chart #1 at standard resolution in Sharp special mode,
excluding time for protocol signals (i.e., ITU-T phase C time only).
1
all-fo2950hk.book Page 2 Wednesday, August 9, 2000
11:13 AM
Automatic document
feeder
20 pages max. (80 g/m2 A4 paper)
Halftone (grayscale)
64 levels (PC scan: 256 levels)
Paper tray capacity
200 sheets (80 g/m2 A4 paper)
Compression scheme
MMR, MR, MH, Sharp (H2)
Applicable telephone line Public switched telephone network
Compatibility
ITU-T (CCITT) G3 mode
Printing resolution
Horizontal: 16 lines/mm
Vertical: 15.4 lines/mm
PC Printing: 600 dpi (enhanced 1,800 dpi)
Input document size
Automatic feeding:
Width: 148 to 216 mm
Length: 140 to 297 mm
Manual feeding:
Width: 148 to 216 mm
Length: 140 to 1,000 mm
Effective Scanning width 210 mm max.
2
Effective Printing width
202 mm max.
Reception modes
Fax, Tel, Tel/Fax, A.M.
Scanning speed
8 ppm (A4 paper)
Full Dual Access
Yes
Copy function
Single/Multi/Sort (99 copies/page)
Power requirements
220-240 V AC, 50/60 Hz
Operating temperature
10 - 30°C
Humidity
20 to 85% RH
Power consumption
Standby: 9.0 W
Maximum: 840 W
all-fo2950hk.book Page 3 Wednesday, August 9, 2000
11:13 AM
Dimensions
Width: 386 mm
Depth: 398 mm
Height: 169 mm
Weight
Approx. 6.3 kg
As a part of our policy of continuous improvement, SHARP reserves the right to
make design and specification changes for product improvement without prior notice.
The performance specification figures indicated are nominal values of production
units. There may be some deviations from these values in individual units.
Important safety information
Be sure to save these instructions!
When using your facsimile equipment, basic safety precautions
should always be followed to reduce the risk of fire, electric shock and
injury to persons, including the following:
• Do not disassemble this machine or attempt any procedures not
described in this manual. Refer all servicing to qualified service
personnel.
• This machine must only be connected to a 220-240 V, 50/60 Hz,
earthed (3-prong) outlet. Connecting it to any other kind of outlet
will damage the machine and invalidate the warranty.
• Do not install or use the machine near water, or when you are wet.
For example, do not use the machine near a bath tub, wash bowl,
kitchen sink or laundry tub, in a wet basement, or near a swimming
pool. Take care not to spill any liquids on the machine.
• Unplug the machine from the telephone socket and then the power
outlet and consult a qualified service representative if any of the
following situations occur:
- Liquid has been spilled into the machine or the machine has been
exposed to rain or water.
- The machine produces odors, smoke, or unusual noises.
- The power cord is frayed or damaged.
- The machine has been dropped or the housing damaged.
3
all-fo2950hk.book Page 4 Wednesday, August 9, 2000
11:13 AM
• Do not allow anything to rest on the power cord, and do not install
the machine where people may walk on the power cord.
• Never insert objects of any kind into slots or openings on the
machine. This could create a risk of fire or electric shock. If an
object falls into the machine that you cannot safely remove, unplug
the machine and consult a qualified service representative.
• Do not place this machine on an unstable cart, stand or table. The
machine could be seriously damaged if it falls.
• Avoid using a telephone (other than a cordless type) during an
electrical storm. There may be a remote risk of electric shock from
lightning.
• Do not use a telephone to report a gas leak in the vicinity of the
leak.
• The socket-outlet must be installed near the equipment and must be
easily accessible.
Important:
• This facsimile machine is not designed for use on a line which has
call waiting, call forwarding, or certain other special services
offered by your telephone company. If you attempt to use the fax
machine in conjunction with any of these services, you may
experience errors during transmission and reception of facsimile
messages.
• This facsimile machine is not compatible with digital telephone
systems.
4
all-fo2950hk.book Page 5 Wednesday, August 9, 2000
11:13 AM
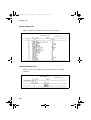
Table of Contents
Introduction
1
Important safety information . . . . . . . . . . . . . . . . . . . . . . . . . . . . . . . . 3
Table of Contents
5
A Look at the Operation Panel
7
1. Installation
Unpacking Checklist . . . . . . . . . . . . . . . . . . . . . . . . . . . . . . . . . . . . .
Connections . . . . . . . . . . . . . . . . . . . . . . . . . . . . . . . . . . . . . . . . . . .
Installing the Toner Cartridge . . . . . . . . . . . . . . . . . . . . . . . . . . . . . .
Loading Printing Paper . . . . . . . . . . . . . . . . . . . . . . . . . . . . . . . . . . .
Setting Up the Multifunction Interface. . . . . . . . . . . . . . . . . . . . . . . .
Entering Your Name and Fax Number . . . . . . . . . . . . . . . . . . . . . . .
Setting the Date and Time . . . . . . . . . . . . . . . . . . . . . . . . . . . . . . . .
Setting the Reception Mode . . . . . . . . . . . . . . . . . . . . . . . . . . . . . . .
Volume Adjustment . . . . . . . . . . . . . . . . . . . . . . . . . . . . . . . . . . . . .
2. Sending Documents
Transmittable Documents. . . . . . . . . . . . . . . . . . . . . . . . . . . . . . . . .
Loading the Document . . . . . . . . . . . . . . . . . . . . . . . . . . . . . . . . . . .
Adjusting the Resolution and Contrast . . . . . . . . . . . . . . . . . . . . . . .
Sending a Fax by Normal Dialling . . . . . . . . . . . . . . . . . . . . . . . . . .
Sending a Fax by Automatic Dialling . . . . . . . . . . . . . . . . . . . . . . . .
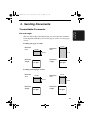
3. Receiving Documents
Using TEL/FAX Mode. . . . . . . . . . . . . . . . . . . . . . . . . . . . . . . . . . . .
Using FAX Mode . . . . . . . . . . . . . . . . . . . . . . . . . . . . . . . . . . . . . . .
Using A.M. Mode . . . . . . . . . . . . . . . . . . . . . . . . . . . . . . . . . . . . . . .
Using TEL Reception Mode . . . . . . . . . . . . . . . . . . . . . . . . . . . . . . .
Substitute Reception to Memory . . . . . . . . . . . . . . . . . . . . . . . . . . .
4. Making Copies
10
10
11
17
21
23
27
31
34
38
41
41
43
46
49
51
66
66
68
70
71
78
79
5
all-fo2950hk.book Page 6 Wednesday, August 9, 2000
11:13 AM
Table of Contents
5. Making Telephone Calls
82
6. Answering Machine Connection
84
Connecting an Answering Machine . . . . . . . . . . . . . . . . . . . . . . . . . 84
Optional A.M. Mode Settings . . . . . . . . . . . . . . . . . . . . . . . . . . . . . . 87
7. Special Functions
89
Broadcasting . . . . . . . . . . . . . . . . . . . . . . . . . . . . . . . . . . . . . . . . . . . 89
Duplex Ringing (Requires Subscription to Service) . . . . . . . . . . . . . 94
Cover Sheet . . . . . . . . . . . . . . . . . . . . . . . . . . . . . . . . . . . . . . . . . . . 96
Batch Page Numbering . . . . . . . . . . . . . . . . . . . . . . . . . . . . . . . . . . . 99
Blocking Reception of Unwanted Faxes . . . . . . . . . . . . . . . . . . . . . 101
Polling (Requesting a Fax Transmission) . . . . . . . . . . . . . . . . . . . . 103
Timer Operations . . . . . . . . . . . . . . . . . . . . . . . . . . . . . . . . . . . . . . 109
8. Printing Lists
112
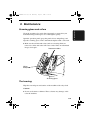
9. Maintenance
119
Scanning glass and rollers . . . . . . . . . . . . . . . . . . . . . . . . . . . . . . . 119
The housing . . . . . . . . . . . . . . . . . . . . . . . . . . . . . . . . . . . . . . . . . . 119
Replacing the toner cartridge . . . . . . . . . . . . . . . . . . . . . . . . . . . . . 120
Replacing the drum cartridge . . . . . . . . . . . . . . . . . . . . . . . . . . . . . 121
Cleaning the drum cartridge . . . . . . . . . . . . . . . . . . . . . . . . . . . . . . 124
10. Troubleshooting
126
Problems and Solutions . . . . . . . . . . . . . . . . . . . . . . . . . . . . . . . . . 126
Messages and Signals . . . . . . . . . . . . . . . . . . . . . . . . . . . . . . . . . . 132
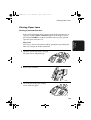
Clearing Paper Jams . . . . . . . . . . . . . . . . . . . . . . . . . . . . . . . . . . . 135
Quick Reference Guide
139
Index
141
6
all-fo2950hk.book Page 7 Wednesday, August 9, 2000
11:13 AM
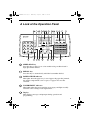
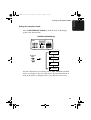
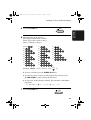
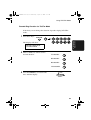
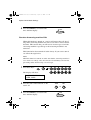
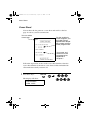
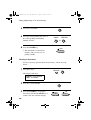
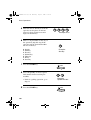
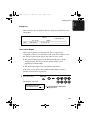
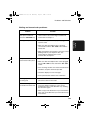
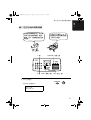
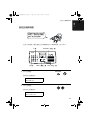
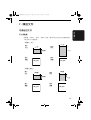
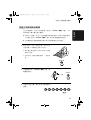
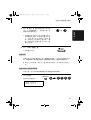
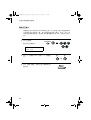
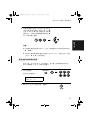
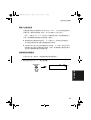
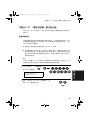
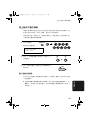
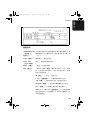
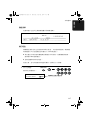
A Look at the Operation Panel
1
2
3
4
5
6
7
8
9
10 11
12
13
TEL FAX
A.M.
FUNCTION
VOLUME
DOWN
ABC
1
GHI
DEF
2
JKL
4
PQRS
5
PC
IN USE
LINE
IN USE
6
HOLD/
SEARCH
9
SPEAKER
0
22
TONER
EMPTY
01
02
03
04
05
06
07
08
09
10
11
12
13
14
15
16/POLL
17/G1
18/G2
19/G3
20/G4
REDIAL
WXYZ
8
PAPER
CHECK
UP
RECEPTION
RESOLUTION BROADCAST
MODE
3
MNO
TUV
7
SPEED
DIAL
21
20 19
COPY/HELP
REDUCTION/
ENLARGEMENT
START
STOP
18
17
16 15
14
1
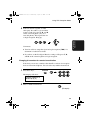
SPEED DIAL key
Press this key to dial a fax or voice number using an abbreviated 2digit Speed Dial number.
2
REDIAL key
Press this key to automatically redial the last number dialled.
3
PAPER CHECK indicator
This lights when the paper tray is out of paper, the paper has jammed,
the printer compartment cover is open, or a paper size error has
occurred.
4
TONER EMPTY indicator
This blinks when the toner cartridge nears empty and lights steadily
when the toner cartridge needs replacement.
5
Display
This displays messages and prompts during operation and
programming.
7
all-fo2950hk.book Page 8 Wednesday, August 9, 2000
11:13 AM
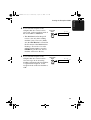
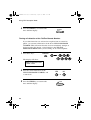
6
Panel release
Grasp this release and pull toward you to open the operation panel.
7
PC IN USE light
This blinks when data is being sent to or from the computer connected
to the fax machine.
8
LINE IN USE light
This lights when the fax machine is using the telephone line.
9
RECEPTION MODE key
Press this key to select the reception mode. An arrow in the display
will point to the currently selected reception mode.
10 FUNCTION key
Press this key to select special functions and settings.
11 RESOLUTION key
Press this key to adjust the resolution for faxing or copying.
12 VOLUME (UP/DOWN) keys
Press these keys to adjust the volume of the speaker when the
SPEAKER key has been pressed, or the volume of the ringer at all
other times. The keys can also be used to scroll through FUNCTION
key settings.
13 BROADCAST key
Press this key to send a document to a group of receiving fax
machines.
14
Rapid Dial Keys
Press one of these keys to dial a fax number automatically, or send a
document as an E-mail attachment to a preset E-mail address.
15
E-MAIL key
Press this key to send a document as an E-mail attachment. After you
press the key, your specified E-mail program will open to let you enter
the E-mail address, a subject, and a message if desired. (For details on
setting up and using this function, see Setting Up the E-mail Key in
Chapter 5 of the Online Guide.)
8
11:13 AM
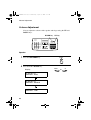
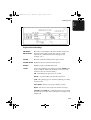
16
REDUCTION/ENLARGEMENT key
Press this key to select an enlargement or reduction setting when
making a copy of a document.
17
STOP key
Press this key to cancel an operation before it is completed.
18
START key
Press this key to begin transmission when using Speed Dialling,
Direct Keypad Dialling, or Normal Dialling.
19
COPY/HELP key
When a document is in the feeder, press this key to make a copy of a
document. At any other time, press this key to print out the Help List,
a quick reference guide to the operation of your fax machine.
20
HOLD/SEARCH key
When dialling, press this key to search for an auto-dial fax number.
During a phone conversation, press this key to put the other party on
hold.
21
SPEAKER key
Press this key to listen to the line and fax tones through the speaker
when faxing a document.
Note: This is not a speakerphone. You must pick up the handset to
talk with the other party.
22
Number keys
Use these keys to dial numbers, and enter numbers and letters when
storing auto-dial numbers.
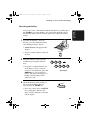
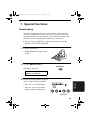
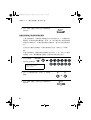
1. Installation
all-fo2950hk.book Page 9 Wednesday, August 9, 2000
9
all-fo2950hk.book Page 10 Wednesday, August 9, 2000
11:13 AM
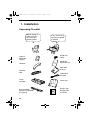
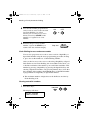
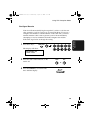
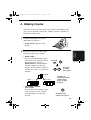
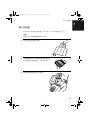
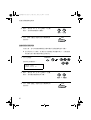
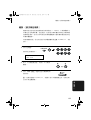
1. Installation
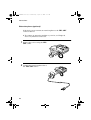
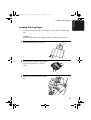
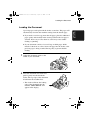
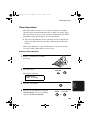
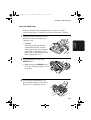
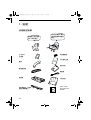
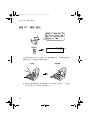
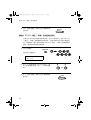
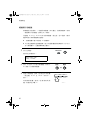
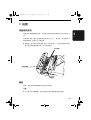
Unpacking Checklist
Before setting up,
make sure you
have all of the
following items.
Original
document
support
Handset
Handset
cord
If any are missing,
contact your dealer
or retailer.
Rapid Key
labels
Received
document tray
Operation
manual
Telephone
line cord
Toner
cartridge
Paper tray
Drum cartridge
(comes pre-installed
in machine)
Sharp Laser
Multifunction
CD-ROM
10
11:13 AM
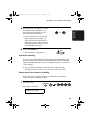
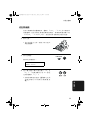
Connections
Connections
Points to keep in mind when setting up
Do not place the machine or
the drum cartridge in direct
sunlight.
Do not place the machine near
heaters or air conditioners.
Keep dust away from the
machine.
Keep the area around the
machine clear.
About condensation
If the machine is moved from a cold to a warm place, it is possible
that condensation may form on the scanning glass, preventing proper
scanning of documents for transmission. To remove the condensation,
turn on the power and wait approximately two hours before using the
machine.
11
1. Installation
all-fo2950hk.book Page 11 Wednesday, August 9, 2000
all-fo2950hk.book Page 12 Wednesday, August 9, 2000
11:13 AM
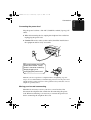
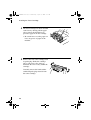
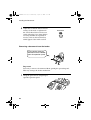
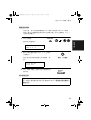
Connections
Connecting the Handset
Connect the handset as shown and place it on the handset rest.
♦ The ends of the handset cord are identical, so they will go into
either socket.
Make sure the handset
cord goes into the
socket marked with a
handset symbol on the
side of the machine!
Use the handset to
make ordinary phone
calls, or to transmit and
receive faxes manually.
12
11:13 AM
Connections
Connecting the power lead
Plug the power lead into a 220-240 V, 50/60 Hz, earthed (3-prong) AC
outlet.
♦ When disconnecting the fax, unplug the telephone line cord before
unplugging the power lead.
♦ Caution: The mains outlet (socket outlet) should be installed near
the equipment and be easily accessable.
The machine does not have a
power on/off switch, so the
power is turned on and off by
simply plugging in or
unplugging the power cord.
Note: If your area experiences a high incidence of lightning or power
surges, we recommend that you install surge protectors for the power and
telephone lines. Surge protectors can be purchased at your dealer or most
telephone specialty stores.
Moving your fax and reconnecting
Should it be necessary to move your fax to a new location, first
disconnect the telephone line cord before disconnecting the power
lead. When reconnecting, it is necessary to connect the power lead
before connecting the telephone line cord.
13
1. Installation
all-fo2950hk.book Page 13 Wednesday, August 9, 2000
all-fo2950hk.book Page 14 Wednesday, August 9, 2000
11:13 AM
Connections
Connecting the telephone line cord
Insert one end of the line cord into the socket on the left side of the
machine marked TEL. LINE. Insert the other end into a wall
telephone socket.
Be sure to insert the
line into the TEL.
LINE socket. Do
not insert it into the
TEL. SET socket.
Note: Your fax is set for tone dialling. If you are on a pulse dial line,
you must set your fax for pulse dialling. Press the keys on the
operation panel as follows:
1
Press these keys:
FUNCTION
4
The display will show:
DIAL MODE
1=TONE, 2=PULSE
2
3
14
Press 1 to select tone dialling, or 2 to
select pulse dialling.
Press the STOP key to return to the
date and time display.
TONE
1
PULSE
or
STOP
2
11:13 AM
Connections
Attaching the paper tray and document supports
Attach the paper tray.
Attach the received document tray.
Attach the original document support.
♦ Make sure the front side of the support faces you (the support
should curve slightly toward you).
15
1. Installation
all-fo2950hk.book Page 15 Wednesday, August 9, 2000
all-fo2950hk.book Page 16 Wednesday, August 9, 2000
11:13 AM
Connections
Extension phone (optional)
If desired, you can connect an extension phone to the TEL. SET
socket on the fax.
♦ To connect an answering machine to your fax, see Chapter 6,
Answering Machine Connection.
16
1
Remove the seal covering the TEL.
SET socket.
2
Connect the extension phone line to
the TEL. SET socket.
11:13 AM
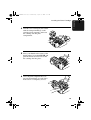
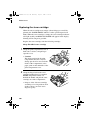
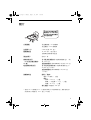
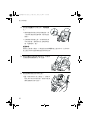
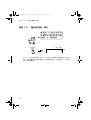
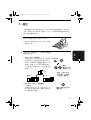
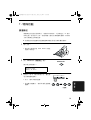
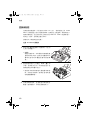
Installing the Toner Cartridge
Installing the Toner Cartridge
The laser printer in your fax machine uses a toner cartridge and a
drum cartridge. The drum cartridge comes pre-installed, and the toner
cartridge must be installed.
The starter toner cartridge
included with your fax can
print approximately 1,875
A4-size pages at 4% page
coverage.
When replacing the toner
cartridge, use a Sharp
FO-29DC toner cartridge.
One cartridge can print about
3,750 A4-size pages.
♦ The drum cartridge can print approximately 20,000 A4-size pages.
When replacing the drum cartridge, use a Sharp FO-29DR drum
cartridge.
Follow the steps below to install the toner cartridge and prepare the
drum cartridge.
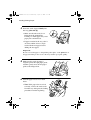
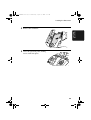
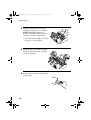
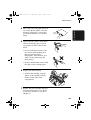
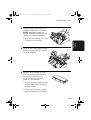
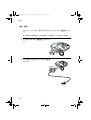
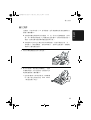
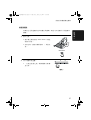
1
Grasp the print compartment cover at
both sides as shown, and pull up to
open the cover.
• Caution!
The fusing unit inside the print
compartment becomes very hot
during operation. Do not touch the
inside of the compartment or the
paper guide on the underside of the
print compartment cover.
17
1. Installation
all-fo2950hk.book Page 17 Wednesday, August 9, 2000
all-fo2950hk.book Page 18 Wednesday, August 9, 2000
11:13 AM
Installing the Toner Cartridge
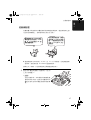
2
The drum cartridge has been installed
at the factory. Gently pull the paper
tab to remove the black sheet of
protective paper from the cartridge.
• Be careful not to tear the paper nor
leave any pieces of paper in the
machine.
3
Remove the new toner cartridge from
its packaging. Shake the cartridge
side to side four or five times to
distribute the toner evenly within the
cartridge.
Carefully remove the band and the
cardboard packaging material from
the toner cartridge.
18
11:13 AM
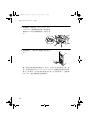
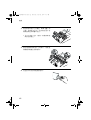
Installing the Toner Cartridge
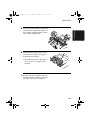
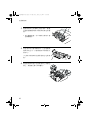
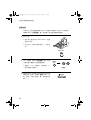
4
Hold the toner cartridge by the handle
with the stamped markings on the
cartridge facing upwards, and insert
the cartridge into the print
compartment.
5
Place your thumb on the centre of the
handle where it is marked PUSH, and
push the handle down and in so that
the cartridge fits into place.
6
Close the print compartment cover,
pressing down firmly on each side to
make sure it is completely closed.
19
1. Installation
all-fo2950hk.book Page 19 Wednesday, August 9, 2000
all-fo2950hk.book Page 20 Wednesday, August 9, 2000
11:13 AM
Installing the Toner Cartridge
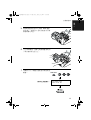
7
Reset the toner counter by pressing
the following keys:
Display shows:
FUNCTION
9
CLR TONER COUNT
PRESS START KEY
START
8
Reset the drum counter by pressing
the following keys:
• Note: This setting is only necessary
after you have replaced the drum
cartridge (not after replacing the
toner cartridge).
Display shows:
FUNCTION
9
CLR DRUM COUNT
PRESS START KEY
START
20
11:13 AM
Loading Printing Paper
Loading Printing Paper
You can load up to 200 sheets of A4 paper (max. 80 g/m2) in the paper
tray.
Caution!
Do not use the blank side of paper that has already been printed on.
1
Pull out the paper tray extension.
2
Fan the paper, and then tap the edge
against a flat surface to even the
stack.
3
Pull the paper release lever toward
you.
21
1. Installation
all-fo2950hk.book Page 21 Wednesday, August 9, 2000
all-fo2950hk.book Page 22 Wednesday, August 9, 2000
11:13 AM
Loading Printing Paper
4
Insert the stack of paper firmly into
the tray, print side up.
• Make sure that the stack is not
higher than the marked line.
Loading too much paper may cause
paper jams and misfeeds.
• If paper remains in the tray, take it
out and combine it into a single
stack with the new paper before
adding the new paper.
Important:
Be sure to load the paper so that printing takes place on the print side of
the paper. Printing on the reverse side may result in poor print quality.
5
Make sure the stack of paper is
aligned against the right paper guide,
and then gently move the left paper
guide to the A4 position.
6
Push the paper release lever back
down.
• Note: If the paper does not feed
correctly, remove the entire stack
from the tray and repeat the loading
procedure from the beginning.
22
11:13 AM
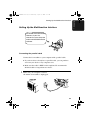
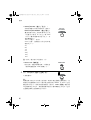
Setting Up the Multifunction Interface
Setting Up the Multifunction Interface
To enable the multifunction
features of your fax,
connect it to your computer
and install the Multifunction
software.
Connecting the parallel cable
Connect the fax machine to your computer with a parallel cable.
♦ If you do not have already have a parallel cable, you can purchase
one from your dealer or any computer store.
♦ Make sure the cable is IEEE 1284-compliant. We recommend a
shielded cable no longer than two meters.
1
Make sure your computer is turned
off and the fax machine is unplugged.
23
1. Installation
all-fo2950hk.book Page 23 Wednesday, August 9, 2000
all-fo2950hk.book Page 24 Wednesday, August 9, 2000
11:13 AM
Setting Up the Multifunction Interface
2
Connect one end of the cable to the
port on the Sharp Laser Multifunction
fax. Snap the clips on each side of the
port onto the cable connector to
secure it.
3
Connect the other end of the cable to
the parallel port on the back of your
computer.
Note: There is normally no need to change the parallel port setting in
your computer's setup (BIOS) program. However, if you find that the
Sharp Laser Multifunction fax does not operate well when scanning or
printing, you may need to change the setting. In this case select ECP,
PS2, Bi-directional, or an equivalent parallel port mode.
24
11:13 AM
Setting Up the Multifunction Interface
Installing the Multifunction software
Minimum system requirements
Processor:
Pentium 90 MHz or higher
Operating system:
Windows 95/98, Windows NT 4.0
(Service Pack 3 or later), English version
Physical RAM:
Windows 95/98: 16 MB
Windows NT 4.0: 32 MB
Free hard-disk space:
Windows 95/98: 30 MB
Windows NT 4.0: 35MB
♦ The Sharp Laser Multifunction software cannot be installed by Plug
and Play. If the New Hardware Found box appears when you turn
on your computer, click the Cancel button to exit the dialog box.
♦ If you have other multifunction device software installed in your
computer, uninstall that software before installing the Sharp Laser
Multifunction software. Otherwise, the Sharp Laser Multifunction
software may not function correctly.
1. Insert the Sharp Laser Multifunction CD into your computer’s CDROM drive.
2. If the Sharp Laser Multifunction Setup window appears, click Next
in the window and go to step 4. If the window doesn’t appear, click
the Start button on the Windows taskbar and select the Run...
command.
3. Type e:\setup in the Open text box, where e is the letter of your CDROM drive, and then click OK.
4. Follow the instructions that appear on the screen.
5. When installation is completed, restart your computer.
25
1. Installation
all-fo2950hk.book Page 25 Wednesday, August 9, 2000
all-fo2950hk.book Page 26 Wednesday, August 9, 2000
11:13 AM
Setting Up the Multifunction Interface
Online Operation Guide
Detailed instructions for using the Sharp Laser Multifunction software
can be found in the Online Guide on the CD. To open the guide,
follow these steps:
1. Insert the Sharp Laser Multifunction CD into your CD-ROM drive. (If
the Sharp Laser Multifunction Setup window appears, click Cancel
and then Exit Setup to close the window.)
2. Click the Start button on the Windows taskbar, point to Programs,
and then point to Sharp Laser Multifunction. Click Online Guide.
26
11:13 AM
Entering Your Name and Fax Number
Entering Your Name and Fax Number
Before you can begin using
your fax machine, you
must enter your name and
fax (telephone) number.
You also need to set the
date and time.
3 key
1
2
3
4
5
6
7
8
9
Once you enter this
information, it will
automatically appear
at the top of each fax
page you send.
FUNCTION key
0
# key START key
1
Press these keys:
The display will show:
STOP key
FUNCTION
3
ENTRY MODE
PRESS * OR #
27
1. Installation
all-fo2950hk.book Page 27 Wednesday, August 9, 2000
all-fo2950hk.book Page 28 Wednesday, August 9, 2000
11:13 AM
Entering Your Name and Fax Number
2
Press the # key twice.
(Or the UP key twice.)
The display will show:
OWN NUMBER SET
PRESS START KEY
3
Note: When scrolling through the
settings, you can press the UP key
in place of the # key, and the
DOWN key in place of the * key.
Press the START key.
START
The display will show:
ENTER FAX #
4
Enter your fax number by pressing
the number keys (max. of 20 digits).
• To insert a space between digits, press
the # key. To enter a “+”, press the *
key.
• If you make a mistake, press the
SPEED DIAL key to backspace and
clear the mistake.
5
Press the START key to enter the fax
number in memory.
The display will show:
ENTER YOUR NAME
28
4
4
2
4
4
1
1
(Example)
START
11:13 AM
Entering Your Name and Fax Number
6
Enter your name by pressing number
keys for each letter as shown in the
chart below. Up to 24 characters can
be entered.
Example: SHARP = 77777 444 22 7777
SPEAKER
SPACE =
J=
T=
A=
K=
U=
B=
L=
V=
M=
W=
N=
X=
O=
Y=
P=
Z=
C=
D=
E=
F=
G=
77
Q=
H=
R=
I=
S=
♦ To enter two letters in succession that require the same key, press
the SPEAKER key after entering the first letter.
(The SPEAKER key moves the cursor forward, and the HOLD/
SEARCH key moves the cursor backward.)
♦ To clear a mistake, press the SPEED DIAL key.
♦ To change case, press the REDIAL key.
♦ To select one of the following symbols, press the # key or the * key
repeatedly:
./!"#$%&’()++,-:;<=>?@[]^_'{|}
Cursor: A dark square mark in the display that indicates where a
number or letter will be entered.
29
1. Installation
all-fo2950hk.book Page 29 Wednesday, August 9, 2000
all-fo2950hk.book Page 30 Wednesday, August 9, 2000
11:13 AM
Entering Your Name and Fax Number
7
Press the START key.
START
The display will show:
SECURITY SELECT
1=ON, 2=OFF
8
30
Press the STOP key to return to the
date and time display.
STOP
11:13 AM
Setting the Date and Time
Setting the Date and Time
The date and time
appear in the display and
are printed at the top of
every page you fax.
Set the date and time by pressing the keys on the operation panel as
shown below.
3 key
FUNCTION key
1
2
3
4
5
6
7
8
9
0
* key
1
START key
Press these keys:
STOP key
FUNCTION
3
The display will show:
ENTRY MODE
PRESS * OR #
2
Press these keys:
The display will show:
DATE & TIME SET
PRESS START KEY
31
1. Installation
all-fo2950hk.book Page 31 Wednesday, August 9, 2000
all-fo2950hk.book Page 32 Wednesday, August 9, 2000
11:13 AM
Setting the Date and Time
3
Press the START key.
START
• The currently set date will appear in
the display.
4
Enter a two-digit number for the day
(“01” to “31”).
0
• To correct a mistake, press the
SPEED DIAL key to move the cursor
back to the mistake and then enter the
correct number.
5
5
Example: the 5th
Enter a two-digit number for the
month (“01” for January, “02” for
February, “12” for December, etc.).
0
1
Example: January
6
Enter the year (four digits).
2
0
0
0
Example: 2000
7
Enter a two-digit number for the hour
(“00” to “23”) and a two-digit number
for the minute (“00” to “59”).
0
9
2
5
Example: 9:25
32
11:13 AM
Setting the Date and Time
8
Press the START key to start the
clock.
START
The display will show:
STORE JUNK FAX #
1=SET, 2=CLEAR
9
Press the STOP key to return to the
date and time display.
STOP
33
1. Installation
all-fo2950hk.book Page 33 Wednesday, August 9, 2000
all-fo2950hk.book Page 34 Wednesday, August 9, 2000
11:13 AM
Setting the Reception Mode
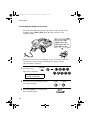
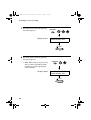
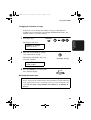
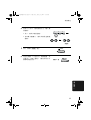
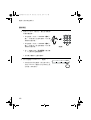
Setting the Reception Mode
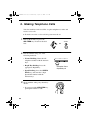
Your fax machine has four modes for receiving incoming calls and
faxes:
TEL mode:
This is the most convenient mode for receiving phone calls. You can
also receive faxes; however, all calls must first be answered by
picking up the fax's handset or an extension phone connected to the
same line.
FAX mode:
Select this mode when you only want to receive faxes on your line.
The fax machine will automatically answer all calls and receive
incoming faxes.
TEL/FAX mode:
This mode is convenient for receiving both faxes and voice calls.
When a call comes in, the fax will detect whether it is a voice call
(including manually dialled fax transmissions), or an automatically
dialled fax. If it is a voice call, the fax will make a special ringing
sound to alert you to answer. If it is an automatically dialled fax
transmission, reception will begin automatically.
A.M. mode:
Use this mode only if you have connected an answering machine to
the fax (see Chapter 6). Select this mode when you go out to receive
voice messages in your answering machine and faxes on your fax
machine.
34
11:13 AM
Setting the Reception Mode
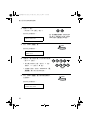
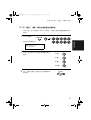
Setting the reception mode
Press the RECEPTION MODE key until the arrow in the display
points to the desired mode.
RECEPTION MODE key
1
2
3
4
5
6
7
8
9
0
TEL FAX
01 FEB 10:30
M:00% STAND-BY
RECEPTION
MODE
A.M.
TEL FAX
01 FEB 10:30
M:00% STAND-BY
A.M.
TEL FAX
01 FEB 10:30
M:00% STAND-BY
A.M.
TEL FAX
01 FEB 10:30
M:00% STAND-BY
A.M.
For more information on receiving faxes in TEL, TEL/FAX and FAX
modes, see Chapter 3, Receiving Documents. For more information on
using A.M. mode, see Chapter 6, Answering Machine Connection.
35
1. Installation
all-fo2950hk.book Page 35 Wednesday, August 9, 2000
all-fo2950hk.book Page 36 Wednesday, August 9, 2000
11:13 AM
Setting the Reception Mode
Selecting the receiving unit
If you have connected the fax machine to a computer and installed the
Multifunction software, you can choose whether to have incoming
faxes received to the fax machine or the computer.
♦ The initial setting is FAX (reception to the fax machine).
1
Press these keys:
FUNCTION
The display will show:
RECEIVE UNIT
1=FAX, 2=PC
2
Press 1 (FAX) to select the fax
machine, or 2 (PC) to select the
computer.
FAX
1
PC
or
2
• The display briefly shows your
selection and then reverts to the
date and time display.
3
If you selected reception to the
computer and want the computer to RECEPTION
MODE
answer all calls automatically, set the
reception mode of the fax machine to
FAX.
• Make sure the Multifunction
Desktop software is running and
Fax Receive is selected (a
checkmark appears next to it) in the
Fax menu of the Multifunction
Desktop. (If not, the fax machine
will receive faxes.)
36
TEL
FAX
A.M.
11:13 AM
Setting the Reception Mode
4
If you selected reception to the
computer but also want to receive
voice calls, set the reception mode of
the fax machine to TEL/FAX.
RECEPTION
MODE
TEL
RECEPTION
MODE
TEL
FAX
A.M.
• The Multifunction Desktop will
receive a fax only if the sending
machine issues a fax tone. (Make
sure that Fax Receive is selected in
the Fax menu of the Multifunction
Desktop.) To receive a fax after
picking up the handset, press the
START key (in this case, the fax
machine will receive the fax).
5
If you selected reception to the
computer but also want to receive
voice messages in an answering
machine connected to the fax machine
as explained in Chapter 6, set the
reception mode of the fax machine to
A.M.
FAX
A.M.
37
1. Installation
all-fo2950hk.book Page 37 Wednesday, August 9, 2000
all-fo2950hk.book Page 38 Wednesday, August 9, 2000
11:13 AM
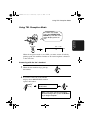
Volume Adjustment
Volume Adjustment
You can adjust the volume of the speaker and ringer using the UP and
DOWN keys.
DOWN key UP key
1
2
3
4
5
6
7
8
9
0
Speaker
1
Press the SPEAKER key.
2
Press the UP or DOWN key.
Display:
29-JAN 01:44
SPEAKER : HIGH
29-JAN 01:44
SPEAKER : MIDDLE
29-JAN 01:44
SPEAKER : LOW
38
SPEAKER
UP
DOWN
or
11:13 AM
Volume Adjustment
3
When the display shows the desired
volume level, press the SPEAKER
key to turn off the speaker.
SPEAKER
Ringer
1
Press the UP or DOWN key. (Make
sure the SPEAKER key has not been
pressed.)
UP
DOWN
or
• The ringer will ring once at the
selected level, and then the date and
time will reappear in the display.
Display:
29-JAN 01:44
RINGER : HIGH
29-JAN 01:44
RINGER : MIDDLE
29-JAN 01:44
RINGER : LOW
RINGER : OFF OK ?
OK:PRESS START
2
If you selected RINGER : OFF OK?,
press the START key.
START
39
1. Installation
all-fo2950hk.book Page 39 Wednesday, August 9, 2000
all-fo2950hk.book Page 40 Wednesday, August 9, 2000
11:13 AM
Volume Adjustment
Beep length
Your fax normally signals the end of transmission, reception, or
copying with a 3-second beep. If desired, you can change the duration
of the beep to 1 second or turn the beep off.
1
Press these keys:
FUNCTION
4
The display will alternately show:
BEEP LENGTH
1=3 SEC, 2=1 SEC
BEEP LENGTH
3=NO BEEP
2
Press 1 for 3 seconds, 2 for 1 second,
or 3 for no beep.
3
Example:
No beep
3
40
Press the STOP key to return to the
date and time display.
STOP
all-fo2950hk.book Page 41 Wednesday, August 9, 2000
11:13 AM
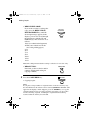
2. Sending Documents
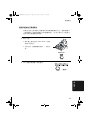
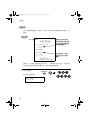
Size and weight
The size and weight of documents that you can load in the document
feeder depend on whether you load one page at a time or several pages
at once.
Loading one page at a time:
Minimum
size
216 mm
Maximum
size
148 mm
140 mm
Minimum
weight
1.0 m
Maximum
weight
157 g/m²
52 g/m²
Loading several pages at once:
Minimum
size
Maximum
size
148 mm
216 mm
140 mm
Minimum
weight
297 mm
Maximum
weight
52 g/m²
80 g/m²
41
2. Sending
Documents
Transmittable Documents
all-fo2950hk.book Page 42 Wednesday, August 9, 2000
11:13 AM
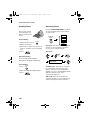
Transmittable Documents
Note: Letters or graphics on the edges of a document will not be
scanned.
Letters in the
shaded area will
not be scanned.
5 mm
4 mm
4 mm
5 mm
Other restrictions
♦ The scanner cannot recognise yellow, greenish yellow, or light blue
ink.
♦ Ink, glue, and correcting fluid on documents must be dry before
they pass through the document feeder.
♦ All clips, staples, and pins must be removed from documents before
loading in the feeder. If these are not removed, they may damage
the machine.
♦ Documents which are patched, taped, torn, smaller than the
minimum size, carbon backed, easily smudged, or have a slick
coated surface should be photocopied, and the copy loaded in the
feeder.
42
all-fo2950hk.book Page 43 Wednesday, August 9, 2000
11:13 AM
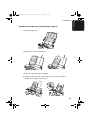
Loading the Document
Up to 20 pages can be placed in the feeder at one time. The pages will
automatically feed into the machine starting from the bottom page.
♦ If you need to send or copy more than 20 pages, place the additional
pages gently and carefully in the feeder just before the last page is
scanned. Do not try to force them in, as this may cause doublefeeding or jamming.
♦ If your document consists of several large or thick pages which
must be loaded one at a time, insert each page into the feeder as the
previous page is being scanned. Insert gently to prevent doublefeeding.
1
Adjust the document guides to the
width of your document.
2
Place the document face down and
push it gently into the document
feeder. The top edge of the document
should enter the machine first.
• The feeder will draw the leading
edge of the document into the
machine. SEND READY will
appear in the display.
43
2. Sending
Documents
Loading the Document
all-fo2950hk.book Page 44 Wednesday, August 9, 2000
11:13 AM
Loading the Document
3
Adjust the resolution and/or contrast
settings (if desired) as explained in
the section Resolution and Contrast
on the following pages, then dial the
receiving machine as explained in
Sending a Fax by Normal Dialling
which appears later in this section.
RESOLUTION
Removing a document from the feeder
If you need to remove a
document from the feeder,
open the operation panel.
Important!
Do not try to remove a document without opening the operation panel.
This may damage the feeder mechanism.
1
44
Grasp the panel release and pull up to
open the operation panel.
all-fo2950hk.book Page 45 Wednesday, August 9, 2000
11:13 AM
Loading the Document
Remove the document.
3
Close the operation panel, making
sure it clicks into place.
2. Sending
Documents
2
45
all-fo2950hk.book Page 46 Wednesday, August 9, 2000
11:13 AM
Adjusting the Resolution and Contrast
Adjusting the Resolution and Contrast
If desired, you can adjust the resolution and contrast before sending a
document.
The default resolution
setting is STANDARD
and the default contrast
setting is AUTO.
You must adjust the
settings each time you
don’t want to use the
default settings.
Note: The resolution and contrast settings are only effective for sending and
copying a document. They are not effective for receiving a document.
Resolution settings
STANDARD
Use STANDARD for ordinary documents.
This setting gives you the fastest and most
economical transmission.
FINE
Use FINE for documents containing small
letters or fine drawings.
SUPER FINE
Use SUPER FINE for documents containing
very small letters or very fine drawings.
HALF TONE
Use HALF TONE for photographs and
illustrations. The original will be reproduced
in 64 shades of gray.
Contrast settings
46
AUTO
Use AUTO for normal documents.
DARK
Use DARK for faint documents.
all-fo2950hk.book Page 47 Wednesday, August 9, 2000
11:13 AM
Adjusting the Resolution and Contrast
1
Load the document(s).
2
Press the RESOLUTION key one or
more times until the desired
resolution and contrast settings
appear in the display.
• The first time you scroll through
the list of resolution settings, the
contrast setting AUTO will appear
next to each resolution setting. The
second time you move through the
list, the contrast setting DARK will
appear.
RESOLUTION
2. Sending
Documents
• The document must be loaded
before the resolution and contrast
can be adjusted.
29-JAN 01:44
STANDARD
:AUTO
29-JAN 01:44
FINE
:AUTO
29-JAN 01:44
SUPER FINE
:AUTO
29-JAN 01:44
HALF TONE
:AUTO
29-JAN 01:44
STANDARD
:DARK
29-JAN 01:44
HALF TONE
:DARK
Note: In order to transmit in SUPER FINE resolution, the receiving fax
machine must also have that resolution. If it doesn’t, your machine will automatically step down to the next best available setting.
47
all-fo2950hk.book Page 48 Wednesday, August 9, 2000
11:13 AM
Adjusting the Resolution and Contrast
Changing the default resolution
If desired, you can change the default resolution for faxing documents
to FINE. Follow the steps below.
1
Press these keys:
FUNCTION
4
The display will show:
FINE PRIORITY
1=YES, 2=NO
2
3
48
Press 1 (YES) to set the default
resolution to FINE, or 2 (NO) to set it
to STANDARD.
Press the STOP key to return to the
date and time display.
YES
1
NO
or
STOP
2
all-fo2950hk.book Page 49 Wednesday, August 9, 2000
11:13 AM
Sending a Fax by Normal Dialling
Sending a Fax by Normal Dialling
2. Sending
Documents
With Normal Dialling, you pick up the handset (or press the
SPEAKER key) and dial by pressing the number keys.
♦ If a person answers, you can talk with them through the handset
before sending the fax. (If you pressed the SPEAKER key, you
must pick up the handset to talk.)
♦ Normal Dialling allows you to listen to the line and make sure the
other fax machine is responding.
1
Load the document(s). (Note: If
desired, you can load the document
after dialling in Step 3, below.)
• SEND READY appears in the
display.
• Set the resolution and/or contrast if
desired.
2
3
RESOLUTION
Pick up the handset or press the
SPEAKER key. Listen for the dial
tone.
SPEAKER
or
Dial the number of the receiving
machine by pressing the number keys.
2
3
2
4
5
6
7
(Example)
49
all-fo2950hk.book Page 50 Wednesday, August 9, 2000
11:13 AM
Sending a Fax by Normal Dialling
4
Wait for the connection. Depending
on the setting of the receiving
machine, you will either hear a
facsimile reception tone or the other
person will answer.
Beep
• If the other party answers, ask them
to press their Start key (if you
pressed the SPEAKER key, pick
up the handset to speak with them).
This causes the receiving machine
to issue a reception tone.
5
When you hear the reception tone,
press the START key. Replace the
handset if you used it.
START
• When transmission is completed,
the fax will beep once.
Using the REDIAL key
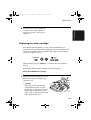
You can press the REDIAL key to redial the last number dialled. To
send a document, press the START key when you hear the fax tone
after the connection is established. Note that the speaker is
automatically activated when you press the REDIAL key.
50
all-fo2950hk.book Page 51 Wednesday, August 9, 2000
11:13 AM
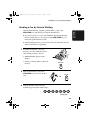
Sending a Fax by Automatic Dialling
You can dial a fax or telephone number by simply pressing a Rapid
Key, or by pressing the SPEED DIAL key and entering a two-digit
number.
To use a Rapid Key or Speed Dial number, you must first program the
full fax number in the Rapid Key or Speed Dial number. It is usually
convenient to program your most frequently dialled numbers in Rapid
Keys.
♦ 20 Rapid Keys and 100 Speed Dial numbers are available.
♦ You can also store an area code or access code in a Rapid Key or
Speed Dial number.
♦ You can use a Rapid Key or Speed Dial number to send a fax as an
E-mail attachment to an E-mail address. To program a Rapid Key or
Speed Dial number for E-mail, see Chapter 5, Using the Multifunction Control Panel, of your online operation guide.
SPEED DIAL key
1
2
3
4
5
6
7
8
9
0
Rapid Keys
Attach the Rapid Key labels above the Rapid Keys
as shown here. When you store a number in a
Rapid Key, write the name of the party on the label.
51
2. Sending
Documents
Sending a Fax by Automatic Dialling
all-fo2950hk.book Page 52 Wednesday, August 9, 2000
11:13 AM
Sending a Fax by Automatic Dialling
Storing fax and telephone numbers for Automatic Dialling
1
Press these keys:
FUNCTION
3
The display will show:
FAX/TEL # MODE
1=SET,2=CLEAR
2
Press the 1 key to select SET.
1
The display will show:
FAX/TEL # SET
SPEED # OR RAPID
3
To store a number in a Rapid Key,
press the desired Rapid Key.
01
To store a Speed Dial number, enter
the desired 2-digit number (from 00
to 99) by pressing the number keys.
4
Enter the fax or voice number by
pressing the number keys.
• To clear a mistake, press the
SPEED DIAL key.
Example:
Rapid Key 01
0
2
1
Example:
Speed Dial 01
3
2
4
5
6
7
(Example)
♦ If a pause is required between any of the digits to access a special
service or an outside line, press the REDIAL key. The pause will
appear as a hyphen. Several pauses can be entered in a row.
52
all-fo2950hk.book Page 53 Wednesday, August 9, 2000
11:13 AM
Sending a Fax by Automatic Dialling
5
Press the START key.
6
Enter the name of the party by
pressing the number keys as shown
below. (If you don’t want to enter a
name, go directly to Step 7.)
2. Sending
Documents
START
SPACE =
J=
T=
A=
K=
U=
B=
L=
V=
M=
W=
N=
X=
O=
Y=
P=
Z=
C=
D=
E=
F=
G=
Q=
H=
R=
I=
S=
Example: SHARP = 77777 444 22 7777
SPEAKER
77
♦ To clear a mistake, press the SPEED DIAL key.
♦ To enter two letters in succession that require the same key, press
the SPEAKER key after entering the first letter.
♦ To select one of the following symbols, press the # key or the * key
repeatedly:
./!"#$%&’()++,-:;<=>?@[]^_'{|}
7
Press the START key.
START
53
all-fo2950hk.book Page 54 Wednesday, August 9, 2000
11:13 AM
Sending a Fax by Automatic Dialling
8
9
Press 1 if the number programmed is
an area code or access code to be used
for Chain Dialling (see Chain
Dialling for area and access codes
below). Press 2 (or START) if the
number is a regular fax or voice
number.
Return to Step 3 to store another
number, or press the STOP key to
return to the date and time display.
ON
1
OFF
2
or
STOP
Step 3 or
Chain Dialling for area and access codes
You can also program an area code or access code in a Rapid Key or
Speed Dial number using the above programming procedure. In Step
8, press 1 to set the number as a Chain Dialling number.
After you dial an area code or access code using a Rapid Key or Speed
Dial number set for Chain Dialling, the fax machine will wait for you
to dial the remainder of the number (you can dial the remainder of the
number by pressing a Rapid Key, by pressing the Speed Dial key and
entering a Speed Dial number, or by pressing numeric keys). Note that
the remainder of the number should not be set as a Chain Dial number
if programmed in a Rapid Key or Speed Dial number.
♦ The maximum number of digits that can be dialled at one time by
Chain Dialling is 50.
Clearing auto-dial numbers
1
Press these keys:
The display will show:
FAX/TEL # MODE
1=SET,2=CLEAR
54
FUNCTION
3
all-fo2950hk.book Page 55 Wednesday, August 9, 2000
11:13 AM
Sending a Fax by Automatic Dialling
Press 2 to select CLEAR.
3
Press the Rapid Key or enter the
Speed Dial number (press the number
keys) that you want to clear.
4
Press the START key.
5
Return to Step 3 to clear another
number, or press the STOP key to
return to the date and time display.
2
0
2. Sending
Documents
2
1
Example:
Speed Dial 01
START
Step 3 or
STOP
Note: You cannot clear a number if it is used in a timer operation or is
included in a Group Key. First clear the number from the operation or
group, then clear the Rapid Key or Speed Dial number. To check where
the number is used, print out the Group List or the Timer List as
explained in Chapter 8.
Making changes
To make changes in a number previously stored, repeat the
programming procedure. Select the Rapid Key or Speed Dial number
for which you want to make changes in Step 3, and then change the
number and/or name when they appear in the display in Steps 4 and 6.
Note: The fax machine uses a lithium battery to keep automatic dialling
numbers and other programmed data in memory when the power is
turned off. Battery power is consumed primarily when the power is off.
With the power kept continuously off, the life of the battery is about 5
years. If the battery dies, have your dealer or retailer replace it. Do not try
to replace it yourself.
55
all-fo2950hk.book Page 56 Wednesday, August 9, 2000
11:13 AM
Sending a Fax by Automatic Dialling
Dual Access
The fax machine features full dual access, which means that you can
load a document and dial by automatic dialling even when the fax
machine is occupied with another operation. After you dial, your
document will be immediately scanned into memory and then
transmitted once all previously set operations have been completed.
If more than one document has been scanned into memory for
transmission, the documents will be transmitted in the order in which
they were scanned.
♦ The fax machine can hold approximately 110 pages of average
content in memory. Less pages can be held if any pages are scanned
using fine or halftone resolution.
♦ The maximum number of transmission jobs that can be held at once
is 30.
♦ The amount of memory currently occupied appears as a percentage
(M:00%) in the display.
If the memory becomes full...
If the memory becomes full while a document is being scanned,
MEMORY FULL will appear in the display. Press the START key or
the STOP key as follows:
♦ Press the START key if you want to transmit the pages which have
been stored up to that point in memory. The remaining pages will be
ejected from the feeder. After transmission, the memory will be
cleared and you can transmit the remaining pages. You will also
need to transmit the page which was being scanned when the
memory filled up.
♦ Press the STOP key if you want to cancel the entire transmission.
56
all-fo2950hk.book Page 57 Wednesday, August 9, 2000
11:13 AM
Sending a Fax by Automatic Dialling
2. Sending
Documents
If you do not press the START key or the STOP key within one
minute, the transmission will be cancelled and the pages already
scanned cleared from memory. You will need to retransmit all pages
of the document.
Rapid Key Dialling
If the number you want to dial has been programmed in a Rapid Key,
you can dial it by pressing the Rapid Key.
1
Load the document(s).
• SEND READY appears in the
display.
• Set the resolution and/or contrast if
desired.
RESOLUTION
2
Press the appropriate Rapid Key.
• The document is automatically
transmitted once the connection is
established.
01
02
03
(Example)
57
all-fo2950hk.book Page 58 Wednesday, August 9, 2000
11:13 AM
Sending a Fax by Automatic Dialling
Speed Dialling
If the number you want to dial has been programmed in a Speed Dial
number, you can dial it by pressing the SPEED DIAL key and then
entering the Speed Dial number.
1
Load the document(s).
• SEND READY appears in the
display.
• Set the resolution and/or contrast if
desired.
RESOLUTION
2
Press the SPEED DIAL key and then
enter the Speed Dial number by
pressing the numeric keys.
• To enter numbers 1 through 9, first
enter 0 and then the number.
3
58
Check the display. If the name or
number shown is correct, press the
START key. (If not, press the STOP
key and then repeat Step 2.)
SPEED
DIAL
0
9
(Example)
START
all-fo2950hk.book Page 59 Wednesday, August 9, 2000
11:13 AM
Sending a Fax by Automatic Dialling
You can also enter a full number with the number keys and then press
the START key to begin dialling. You can use this method to dial a
full number when you don’t need to speak to the other party before
faxing.
1
Load the document(s). (Note: If
desired, you can load the document
after dialling in Step 2, below.)
• SEND READY will appear in the
display.
• Set the resolution and/or contrast if
desired.
2
Enter the number of the receiving
machine by pressing the numeric
keys.
• If a pause is required between any
of the digits to access a special
service or an outside line, press the
REDIAL key (two seconds per
pause). The pause will appear as a
hyphen. Several pauses can be
entered in a row.
3
Check the display. If the number of
the receiving machine shown is
correct, press the START key.
RESOLUTION
2
3
2
4
5
6
7
(Example)
START
• If it is not correct, press the STOP
key to backspace and clear one
digit at a time, and then re-enter the
correct digit(s).
59
2. Sending
Documents
Direct Keypad Dialling
all-fo2950hk.book Page 60 Wednesday, August 9, 2000
11:13 AM
Sending a Fax by Automatic Dialling
Searching for an auto-dial number
If you don’t remember the Rapid Key or Speed Dial number in which
you have programmed a particular fax number or E-mail recipient,
you can search for the number by following the steps below. Once you
have found the number, you can dial and transmit the loaded
document by simply pressing the START key. (Note: To search for an
E-mail recipient, your fax must be connected to your computer.)
1
Load the document(s).
• SEND READY will appear in the
display.
• Set the resolution and/or contrast if
desired.
2
Press the HOLD/SEARCH key.
3
Press 1 to search for an auto-dial
number, or 2 to search for an E-mail
recipient.
4
RESOLUTION
HOLD/
SEARCH
AUTO-DIAL
1
or
ABC
Enter the first letter of the stored
name by pressing the appropriate
number key (the key below the
marked letter) one or more times until
the letter appears in the display. If the
name begins with a special character
or number, press 1 (only for auto-dial
numbers).
1
GHI
4
DEF
3
MNO
5
TUV
7
2
2
JKL
PQRS
E-MAIL
6
WXYZ
8
9
0
♦ If you don’t remember the first letter, go to Step 5 (you will scroll
through the list from the beginning).
♦ If a name wasn’t stored (for an auto-dial number), press 0. This will
cause numbers, not names, to appear when you scroll.
60
all-fo2950hk.book Page 61 Wednesday, August 9, 2000
11:13 AM
Sending a Fax by Automatic Dialling
Press the # key or the * key to scroll
through the names (numbers if you
pressed 0). Stop when the desired
name appears in the display.
or
2. Sending
Documents
5
• If no names have been stored that
begin with the entered letter, you
will scroll from the next name, in
alphabetical order, in the list. If no
names/numbers have been stored at
all, NO DATA will appear.
6
Press the START key.
START
• The document is transmitted.
Automatic redialling
If you use automatic dialling (including Direct Keypad Dialling) and
the line is busy, the fax machine will automatically redial the number.
The fax machine will make up to two redialling attempts at an interval
of five minutes.
♦ To stop automatic dialling, cancel the job as explained in the
following section, Checking and cancelling transmission jobs.
Recall Interval for automatic redialling
If desired, you can change the interval at which the fax machine
makes automatic redialling attempts.
1
Press these keys:
The display will show:
FUNCTION
4
RECALL INTERVAL
ENTER (01-15) 05
61
all-fo2950hk.book Page 62 Wednesday, August 9, 2000
11:13 AM
Sending a Fax by Automatic Dialling
2
3
Enter a 2-digit number from 01 to 15
for the number of minutes of the
interval.
3
0
Example:
3 minutes
Press the STOP key to return to the
date and time display.
STOP
Recall times for automatic dialling
If desired, you can change the maximum number of automatic
redialling attemps made when the line is busy.
♦ Under certain conditions (for example if a person answers the call
on a telephone), automatic redialling may stop before the set
number of redialling attempts are made.
1
Press these keys:
FUNCTION
4
The display will show:
RECALL TIMES
ENTER (00-03) 02
2
3
62
Enter a 2-digit number from 00 to 03
for the maximum number of redial
attempts.
Press the STOP key to return to the
date and time display.
3
0
Example:
3 attempts
STOP
all-fo2950hk.book Page 63 Wednesday, August 9, 2000
11:13 AM
Sending a Fax by Automatic Dialling
Checking and cancelling transmission jobs
1
Press these keys.
• The display will show ACTION
STATUS and the number of
transmission jobs, and then
information on the first job.
2
2. Sending
Documents
To display information on currently set transmission (and polling)
jobs, follow the steps below. You can also cancel a job with this
procedure.
Press the UP key or the DOWN key
to scroll through the list of jobs.
(Note: You can also scroll with the *
or # key.)
• The display will show the 2-digit
memory number assigned to the
transmission, the time the
transmission was set, and status of
the job alternating with the name
(or number) of the receiving party.
FUNCTION
0
UP
DOWN
or
• To cancel a job, press the START
key twice while the job appears in
the display.
3
When you have finished viewing the
list, press the STOP key to return to
the date and time display.
STOP
63
all-fo2950hk.book Page 64 Wednesday, August 9, 2000
11:13 AM
Sending a Fax by Automatic Dialling
Error Correction Mode
The fax machine is set to automatically correct any distortions in a
transmission due to noise on the telephone line before printing at the
receiving end. This function is called Error Correction Mode (ECM).
ECM is effective for both transmissions and receptions, and is only
effective when the other fax machine also has ECM.
1
Press these keys:
FUNCTION
4
The display will show:
ECM MODE
1=YES, 2=NO
2
Press 1 to turn on ECM or 2 to turn it
off.
YES
1
3
64
Press the STOP key to return to the
date and time display.
NO
or
STOP
2
all-fo2950hk.book Page 65 Wednesday, August 9, 2000
11:13 AM
Sending a Fax by Automatic Dialling
Quick Online
1
Press these keys:
FUNCTION
2. Sending
Documents
When you transmit a document, the fax machine normally dials the
receiving party and begins transmitting while scanning is still in
progress. This function is called Quick Online. If desired, you can
turn off Quick Online and have the fax machine wait until all pages
have been scanned before dialling.
4
The display will show:
QUICK ON-LINE
1=YES, 2=NO
2
Press 1 to turn on Quick Online or 2
to turn it off.
YES
1
3
Press the STOP key to return to the
date and time display.
NO
or
2
STOP
65
all-fo2950hk.book Page 66 Wednesday, August 9, 2000
11:13 AM
3. Receiving Documents
Using TEL/FAX Mode
To select TEL/FAX mode,
press the RECEPTION
MODE key until the arrow
in the display points to
TEL and FAX.
RECEPTION
MODE
TEL
FAX
A.M.
When the reception mode is set to TEL/FAX, your fax machine
automatically answers all calls on one ring. After answering, your fax
monitors the line for about five seconds to see if a fax tone is being
sent.
♦ If your fax machine detects a fax tone (this means that the call is an
automatically dialled fax), it will automatically begin reception of
the incoming document.
♦ If your fax machine doesn’t detect a fax tone (this means that the
call is a voice call or manually dialled fax), it will make a ringing
sound (called pseudo ringing) for 15 seconds to alert you to answer.
If you don’t answer within this time, your fax will send a fax tone to
the other machine to allow the calling party to send a fax manually
if they desire.
Note: Only the fax will alert you to voice calls or manually dialled faxes
by pseudo ringing. An extension phone connected to the same line will
not ring after the connection has been established.
66
all-fo2950hk.book Page 67 Wednesday, August 9, 2000
11:13 AM
Using TEL/FAX Mode
Pseudo Ring Duration for Tel/Fax Mode
If desired, you can change the duration of pseudo ringing in Tel/Fax
mode.
Press these keys:
FUNCTION
4
3. Receiving
Documents
1
The display will show:
PSEUDO RING DUR.
1=15 SECONDS
2
3
Enter a number as follows for the
desired duration:
Press the STOP key to return to the
date and time display.
15 seconds:
1
30 seconds:
2
60 seconds:
3
120 seconds:
4
STOP
67
all-fo2950hk.book Page 68 Wednesday, August 9, 2000
11:13 AM
Using FAX Mode
Using FAX Mode
To select FAX mode,
press the RECEPTION
MODE key until the arrow
in the display points to
FAX.
RECEPTION
MODE
TEL
FAX
A.M.
When the reception mode is set to FAX, the fax machine will
automatically answer all calls on one ring and receive incoming faxes.
1 ring
Fax reception
♦ If you pick up the handset before the machine answers, you can talk
to the other party and/or receive a document as explained in Using
TEL mode.
68
all-fo2950hk.book Page 69 Wednesday, August 9, 2000
11:13 AM
Using FAX Mode
Changing the number of rings
If desired, you can change the number of rings on which the fax
machine answers incoming calls in FAX and TEL/FAX modes. Any
number from 1 to 5 can be selected.
Press these keys:
FUNCTION
4
3. Receiving
Documents
1
The display will show:
NUMBER OF RINGS
ENTER (1-5) (1)
2
Enter the desired number of rings
(any number from 1 to 5).
The display will briefly show your
selection, and then:
3
Example: 3 rings
5 RING TEL ANS.
1=YES, 2=NO
3
Press the STOP key to return to the
date and time display.
STOP
Received document tray
Note: The received document outlet has a maximum capacity of 100
sheets. To prevent the outlet from becoming obstructed, which will in turn
cause paper jams, be sure to frequently remove received documents and
copies. Do not allow a large number of documents to accumulate in
the tray.
69
all-fo2950hk.book Page 70 Wednesday, August 9, 2000
11:13 AM
Using A.M. Mode
Using A.M. Mode
To select A.M. mode,
press the RECEPTION
MODE key until the arrow
in the display points to
A.M.
RECEPTION
MODE
TEL
FAX
A.M.
In A.M. mode, your fax will automatically receive voice and fax
messages if you have connected an answering machine to the fax
machine. See Chapter 6 for more details.
70
all-fo2950hk.book Page 71 Wednesday, August 9, 2000
11:13 AM
Using TEL Reception Mode
Using TEL Reception Mode
RECEPTION
MODE
TEL
3. Receiving
Documents
To select TEL mode,
press the RECEPTION
MODE key until the arrow
in the display points to
TEL.
FAX
A.M.
When the reception mode is set to TEL, you must answer all calls by
picking up the fax machine’s handset or an extension phone connected
to the same line.
Answering with the fax’s handset
1
When the fax machine rings, pick up
the handset.
2
If you hear a fax tone, wait until the
display shows RECEIVING and then
replace the handset.
Beep
RECEIVING
Note: If you have set the Fax Signal
Receive setting to NO, press the START
key to begin reception.
71
all-fo2950hk.book Page 72 Wednesday, August 9, 2000
11:13 AM
Using TEL Reception Mode
3
If the other party first speaks with you
and then wants to send a fax, press the
START key after speaking. (Press
your START key before the sender
presses their Start key.)
• When RECEIVING appears in the
display, hang up.
START
RECEIVING
Answering with an extension phone
1
Answer the extension phone when it
rings.
2
If you hear a soft fax tone, wait until
your fax responds (the extension
phone will go dead), then hang up.
Beep
Phone goes dead
72
all-fo2950hk.book Page 73 Wednesday, August 9, 2000
11:13 AM
Using TEL Reception Mode
3
If the fax doesn't respond, or if the
other party first talks to you and then
wants to send a fax, press 5, *, and *
on the extension phone (only on a
tone dial phone). This signals the fax
to begin reception. Hang up.
3. Receiving
Documents
5
Comments:
♦ Your fax will not accept the signal to begin reception (5**) if a
document is loaded in its feeder.
♦ If you have set the Fax Signal Receive setting to NO, press 5, *,
and * on the extension phone to begin reception.
Changing the number for remote fax activation
If desired, you can use a number other than 5 to activate fax reception
from an extension telephone. You can select any number from 0 to 9.
1
Press these keys:
FUNCTION
4
The display will show:
TEL/FAX REMOTE #
ENTER (0-9) (5)
2
Enter a number from 0 to 9.
1
(Example)
73
all-fo2950hk.book Page 74 Wednesday, August 9, 2000
11:13 AM
Using TEL Reception Mode
3
Press the STOP key to return to the
date and time display.
STOP
Turning off detection of the Tel/Fax Remote Number
If you don't intend to ever activate fax reception from an extension
phone, you can turn off detection of the above TEL/FAX REMOTE
NUMBER. This will ensure that the fax never mistakenly attempts to
begin reception if it detects a signal similar to the TEL/FAX
REMOTE NUMBER while you are talking on an extension phone.
1
Press these keys:
FUNCTION
4
The display will show:
REMOTE RECEPTION
1=YES, 2=NO
2
3
74
Press 1 to turn on detection of the
TEL/FAX REMOTE NUMBER, or 2
to turn it off.
Press the STOP key to return to the
date and time display.
YES
1
NO
or
STOP
2
all-fo2950hk.book Page 75 Wednesday, August 9, 2000
11:13 AM
Using TEL Reception Mode
Fax Signal Receive
1
Press these keys:
FUNCTION
3. Receiving
Documents
Your fax will automatically begin reception if you hear a soft fax tone
after answering a call on your fax or an extension phone. If you use a
computer fax modem to send documents on the same line, you must
turn this function off in order to prevent your fax from mistakenly
attempting to receive documents from the computer fax modem.
Follow the steps below to change the setting.
4
The display will show:
FAX SIGNAL RX
1=YES, 2=NO
2
3
Press 1 to turn on the function, or 2 to
turn it off.
Press the STOP key to return to the
date and time display.
YES
1
NO
or
2
STOP
75
all-fo2950hk.book Page 76 Wednesday, August 9, 2000
11:13 AM
Using TEL Reception Mode
Reception Ratio
The fax has been set at the factory to automatically reduce the size of
received documents to fit the size of the printing paper. This ensures
that data on the edges of the document are not cut off. If desired, you
can turn this function off and have received documents printed at full
size.
♦ If a document is too long to fit on the printing paper, the remainder
will be printed on a second page. In this case, the cut-off point may
occur in the middle of a line.
♦ Automatic reduction may not be possible if the received document
is too large, contains too many fine graphics or images, or is sent at
high resolution. In this case, the remainder of the document will be
printed on a second page.
1
Press these keys:
FUNCTION
The display will show:
4
RECEPTION RATIO
1=AUTO, 2=100%
2
Press 1 to turn on automatic
reduction, or 2 to turn it off.
AUTO
1
3
76
Press the STOP key to return to the
date and time display.
100%
or
STOP
2
all-fo2950hk.book Page 77 Wednesday, August 9, 2000
11:13 AM
Using TEL Reception Mode
Auto answer on 5 rings in TEL mode
If desired, you can have the fax automatically answer calls and begin
fax reception after 5 rings in TEL mode. To turn on this function,
press the keys as follows:
Press these keys:
FUNCTION
4
3. Receiving
Documents
1
The display will show:
5 RING TEL ANS.
1=YES, 2=NO
2
3
Press 1 to turn on the function, or 2 to
turn it off.
Press the STOP key to return to the
date and time display.
YES
1
NO
or
2
STOP
77
all-fo2950hk.book Page 78 Wednesday, August 9, 2000
11:13 AM
Substitute Reception to Memory
Substitute Reception to Memory
In situations where printing is not possible, such as when your fax
runs out of paper, the toner cartridge needs replacement, or the paper
jams, incoming faxes will be received to memory.
When you have received a document in memory, CAN’T PRINT
DATA will appear in the display, alternating with a message indicating
the problem. When you correct the problem, the stored documents
will automatically print out.
If you received documents in memory because the fax ran out of
paper, be sure to add paper which is the same size as the paper
previously used. If not, the document print-out size may not match the
size of the printing paper.
Caution!
♦ When documents are stored in memory, do not turn the power off.
This will erase all of the contents.
♦ If documents received in memory are lost due to a power failure or
other interruption in the power supply, a CLEAR REPORT will be
printed out when the power is restored. This gives information
about the receptions lost, including the fax numbers of the transmitting machines if they are available.
78
all-fo2950hk.book Page 79 Wednesday, August 9, 2000
11:13 AM
4. Making Copies
Your fax can also be used to make copies. Single and multiple copies
(up to 99 per original) can be made, enabling your fax to double as a
convenience office copier.
1
Load the document(s) face down.
(Maximum of 20 pages.)
• SEND READY appears in the
display.
If desired, select one or more of the
following optional copy settings:
4. Making
Copies
2
• SORT COPY:
If you are making multiple copies
of more than one original and want
the copies sorted, press the
FUNCTION key and 6, and then
enter the number of copies per
original. (If the number of copies is
less than ten, enter a “0” before the
number.)
A
B
0
C
A
B C
A
B
C
6
Example:
3 copies
per original
3
Originals
Not sorted
Sorted
A
B C
FUNCTION
A
A
A
B
• MULTIPLE COPIES
(Not sorted):
If you want to make multiple copies
of the original (or each original),
enter the number of copies per
original.
B
B
C
C C
Example of
sorted/not-sorted
copies (three
each) of three
originals
9
Example: Nine
copies per original
79
all-fo2950hk.book Page 80 Wednesday, August 9, 2000
11:13 AM
Making Copies
• REDUCE/ENLARGE:
If you want to reduce or enlarge the
copy, press the REDUCTION/
ENLARGEMENT key until the
desired percentage appears in the
display (you can also scroll through
the percentages with the UP and
DOWN keys). The selections are as
follows:
100% (no reduction/enlargement)
AUTO (auto reduction to fit the
size of the printing paper.)
94%
88%
73%
50%
200%
150%
125%
REDUCTION/
ENLARGEMENT
Note: The enlargement/reduction setting is effective for one time only.
• RESOLUTION:
If desired, set the resolution and/or
contrast. (The default setting for
copying is FINE.)
3
Press the COPY/HELP key.
RESOLUTION
COPY/HELP
• Copying begins.
Note:
If you place a large number of originals in the feeder, the memory may
become full before all of them can be scanned (MEMORY IS FULL will
appear in the display). If this happens, press the START key to copy the
originals which have been scanned, and then repeat the copy procedure
for the remaining originals, including the original which was being
scanned when the memory became full.
80
all-fo2950hk.book Page 81 Wednesday, August 9, 2000
11:13 AM
Making Copies
Copy Cut-off
When making a copy of a document that is longer than the printing
paper, use the copy cut-off setting to select whether the remaining part
of the document will be cut off or printed on a second page. The initial
setting is YES (cut off the remainder). To change the setting, follow
the steps below.
1
Press these keys:
FUNCTION
The display will show:
4
2
Press 1 to set copy cut-off to YES (the
remaining part of the document will
not be printed), or 2 to set copy cutoff to NO (the remaining part will be
printed on a second page).
4. Making
Copies
COPY CUT-OFF
1=YES, 2=NO
YES
1
NO
or
2
The display briefly shows your
selection, and then:
FINE PRIORITY
1=YES, 2=NO
3
Press the STOP key to return to the
date and time display.
STOP
81
all-fo2950hk.book Page 82 Wednesday, August 9, 2000
11:13 AM
5. Making Telephone Calls
Your fax machine can be used like a regular telephone to make and
receive voice calls.
♦ To make or receive a voice call, the power must be on.
1
2
Pick up the handset or press the
SPEAKER key. Listen for the dial
tone.
Dial the number using one of the
following methods:
• Normal Dialling: Enter the full
telephone number with the numeric
keys.
• Rapid Key Dialling: Press the
appropriate Rapid Key.
• Speed Dialling: Press the SPEED
DIAL key, and enter the 2-digit
Speed Dial number with the
numeric keys.
3
Speak with the other party when they
answer.
• If you pressed the SPEAKER key,
pick up the handset to talk.
82
SPEAKER
or
01
02
03
Example: Press
Rapid Key 01
all-fo2950hk.book Page 83 Wednesday, August 9, 2000
11:13 AM
Making Telephone Calls
Comments:
♦ While the handset of the fax is lifted (off hook), an extension phone
connected directly to the fax cannot be used to speak with the other
party.
♦ The fax may interrupt a voice call received on an extension phone if
the reception mode is set to A.M. and there is a period of silence
during the conversation. If you are on a touch-tone phone, you can
prevent this by pressing any three keys on the phone immediately
after you answer. (Note: Do not enter the code to activate fax reception: 5, *, *.)
You can use the HOLD/SEARCH key to search for a Rapid Key or
Speed Dial number. First search for the number as described in
Searching for an auto-dial number in Sending a Fax by Automatic
Dialling in Chapter 2, then pick up the handset or press the
SPEAKER key. The number will be dialled automatically (do not
press the START key).
Redial
The last number dialled can be redialled by pressing the REDIAL key
(it is not necessary to pick up the handset or press the SPEAKER
key). When the other party answers, pick up the handset to talk.
Hold
You can put the other party on hold during a conversation by pressing
the HOLD/SEARCH key. When this is done, they cannot hear you.
You can put the handset back in the cradle without breaking the
connection. When you are ready to speak with them again, pick up the
handset. If you did not put the handset back in the cradle, press the
HOLD/SEARCH key again to resume conversation.
83
5. Making
Phone Calls
Searching for an auto-dial number
all-fo2950hk.book Page 84 Wednesday, August 9, 2000
11:13 AM
6. Answering Machine Connection
Connecting an Answering Machine
If desired, you can connect an answering machine to your fax
machine's TEL. SET socket. This will allow you to receive both
voice messages and faxes when you are out.
1
Remove the seal covering the TEL.
SET socket.
2
Connect the answering machine's
telephone line socket to the TEL.
SET socket.
• If desired, you can connect an
extension phone to your answering
machine's extension phone socket.
Make sure the
TEL. LINE
socket is
connected to
the wall socket.
To answering
machine's
telephone
line socket.
84
all-fo2950hk.book Page 85 Wednesday, August 9, 2000
11:13 AM
Connecting an Answering Machine
Changing the outgoing message
The outgoing message (OGM) of your answering machine should be
changed to inform callers who want to send a fax to press their Start
key. For example, your message might go as follows:
“Hello. You've reached the ABC company. No one is available to take
your call right now. Please leave a message after the beep or press
your facsimile Start key to send a fax. Thank you for calling.”
♦ It is advisable to keep the length of the message under 10 seconds.
If it is too long, you may have difficulty receiving faxes sent by
automatic dialling.
♦ If your outgoing message must be longer than 10 seconds, leave a
pause of about four seconds at the beginning of the message. This
will give your fax a chance to detect fax tones sent when automatic
dialling is used.
Activating the answering machine connection
Before you go out, activate the answering machine connection as
follows:
Set the reception mode to A.M.
RECEPTION
MODE
TEL
6. Answering
Machine
1
FAX
A.M.
85
all-fo2950hk.book Page 86 Wednesday, August 9, 2000
11:13 AM
Connecting an Answering Machine
2
Set your answering machine to auto
answer.
♦ Your answering machine must be set to answer on a maximum of
two rings. If not, you may not be able to receive faxes sent by
automatic dialling.
♦ If your answering machine has a toll saver function, make sure that
it will answer by the fourth ring.
Note:
If your answering machine has a remote retrieval function, make sure the
code used to activate remote retrieval is different from the code used to
activate fax reception with an extension telephone (see Chapter 3,
Receiving Documents). If they are the same, entering the code from an
outside telephone to retrieve messages will cause the fax machine to be
activated.
How the connection operates
While you are out, all of your incoming calls will be answered by
your answering machine and its outgoing message will play. Voice
callers can leave a message. During this time, your fax will quietly
monitor the line. If your fax detects a fax tone or a duration of silence
greater than four seconds, it will take over the line and begin
reception.
When you return and turn
off your answering
machine, be sure to change
the reception mode back to
FAX/TEL, FAX, or TEL!
86
all-fo2950hk.book Page 87 Wednesday, August 9, 2000
11:13 AM
Optional A.M. Mode Settings
Optional A.M. Mode Settings
If necessary, you can use the following settings to improve the
response of the answering machine connection to incoming calls.
Quiet Detect Time
The fax machine is set to take over the line and begin reception if it
detects 4 seconds of silence after the answering machine answers. If
needed, you can change this setting to any number of seconds from 1
to 10.
♦ We recommend that you do not set Quiet Detect Time under 3
seconds.
♦ If the fax machine is interrupting callers before they can leave a
message, try a longer Quiet Detect Time setting. If your outgoing
message includes a period of silence, make sure that the setting is
longer than that period of silence, or re-record your outgoing
message to shorten the silence.
1
Press these keys:
FUNCTION
6. Answering
Machine
Note:
Quiet Detect Time can be turned off by entering “00” for the time. Note,
however, that the fax machine may not be able to receive manually-sent
faxes from some older fax machines.
4
The display will show:
QUIET DETECT TM.
ENTER (00-10) 04
2
Enter a number from 01 to 10, or
enter 00 to turn off the function.
0
4
(Example)
87
all-fo2950hk.book Page 88 Wednesday, August 9, 2000
11:13 AM
Optional A.M. Mode Settings
3
Press the STOP key to return to the
date and time display.
STOP
Fax when Answering machine Fails
When this function is turned on, your fax will answer the call after 5
rings if the answering machine for some reason fails to answer before
that time. This ensures that you will receive fax messages even if the
answering machine’s tape fills up or the answering machine is not
turned on.
This function has been turned off at the factory. If you want to turn it
on, follow the steps below:
Note:
When this function is turned on, make sure that the answering machine is
set to answer on 4 rings or less. If it isn’t, the fax will always answer first,
preventing callers from leaving voice messages.
1
Press these keys: FUNCTION
4
The display will show:
FAX RX ANS. FAILS
1=YES, 2=NO
2
3
88
Press 1 to turn on the function, or 2 to
turn it off.
Press the STOP key to return to the
date and time display.
YES
1
NO
or
STOP
2
all-fo2950hk.book Page 89 Wednesday, August 9, 2000
11:13 AM
7. Special Functions
Broadcasting
The Broadcasting function allows you to send the same document to
as many as 30 different locations with just one operation. First load
the document, then enter the numbers of the receiving machines. The
document will be automatically transmitted to each location.
♦ You can only use Rapid Keys or Speed Dial numbers to dial the
numbers of the receiving machines.
1
Load the document (s).
• SEND READY will appear in the
display.
2
Press the BROADCAST key.
BROADCAST
The display will show:
BROADCAST MODE
SPEED # OR RAPID
Dial the receiving machines using one
or more of the following methods:
01
02
03
7. Special
Functions
3
• Press one or more Rapid Keys.
• Enter one or more Speed Dial
numbers with the numeric keys.
0
1
2
3
(Example)
89
all-fo2950hk.book Page 90 Wednesday, August 9, 2000
11:13 AM
Broadcasting
4
Press the START key.
START
The display will show:
SET RESOLUTION
PRESS RESO. KEY
• If desired, adjust the resolution and/
or contrast.
5
Press the START key. Transmission
begins.
• A Transaction Report is
automatically printed out after
Broadcasting is completed. Check
the “Note” column of the report to
see if any of the locations are
marked “Busy” or have a
communication error code. If so,
send the document to those
locations again.
90
RESOLUTION
START
all-fo2950hk.book Page 91 Wednesday, August 9, 2000
11:13 AM
Broadcasting
Broadcasting using a Group Key
If the fax machines to which you want to broadcast have all been
programmed into one Group Key (see Storing numbers in Group Keys
which follows), you can perform the broadcasting operation using the
following simplified procedure:
1
Load the document(s).
• SEND READY will appear in the
display.
• If desired, adjust the resolution and/
or contrast.
RESOLUTION
Press the appropriate Group Key.
Transmission will begin.
17/G1
18/G2
19/G3
(Example)
7. Special
Functions
2
91
all-fo2950hk.book Page 92 Wednesday, August 9, 2000
11:13 AM
Broadcasting
Storing numbers in Group Keys
Group Keys allow you to dial a group of fax numbers by simply
pressing the appropriate Group Key once. To store a group of numbers
in a Group Key, follow the steps below.
Rapid Keys 17/G1 through 20/G4 can be used as Group Keys. Note
that one key cannot be simultaneously programmed as both a Group
Key and a Rapid Key.
♦ Up to 30 numbers can be stored in one Group Key.
♦ Only Rapid Key and Speed Dial numbers (excluding numbers set
for Chain Dialling) can be stored in a Group Key. Full numbers
cannot be stored.
1
Press these keys.
FUNCTION
The display will show:
7
GROUP ENTRY MODE
1=SET, 2=CLEAR
2
3
Press 1 (SET) to program a Group
Key, or 2 (CLEAR) to clear a Group
Key.
To program a Group Key, press the
key you want to program (one of
Rapid Keys 17/G1 to 20/G4).
To clear a Group Key, press the key
you want to clear and go to Step 5.
92
SET
CLEAR
1
or
17/G1
18/G2
2
19/G3
(Example)
all-fo2950hk.book Page 93 Wednesday, August 9, 2000
11:13 AM
Broadcasting
4
Enter fax numbers using one or both
of the following methods:
• Press one or more Rapid Keys.
02
01
03
• Enter one or more Speed Dial
numbers with the numeric keys.
0
1
2
4
(Example)
Press the START key.
6
Return to Step 3 to program another
Group Key, or press the STOP key
repeatedly until you return to the date
and time display.
START
Step 3 or
STOP
7. Special
Functions
5
93
all-fo2950hk.book Page 94 Wednesday, August 9, 2000
11:13 AM
Duplex Ringing
Duplex Ringing (Requires Subscription to Service)
If you are a subscriber to Homefax 2 or Faxline 2, services provided
by Hongkong Telecom, you will need to turn on Duplex Ringing.
When this is done, the fax machine will signal voice calls by a short
ringing cadence and fax transmissions by a long ringing cadence. In
the case of a fax transmission, the fax machine will automatically
answer the call after 2 rings (regardless of the reception mode setting)
and receive the fax. To turn on Duplex Ringing, follow the steps
below.
♦ For more information on the Homefax service, contact Hongkong
Telecom on 1000.
Important:
♦ Duplex Ringing can only be used by Homefax 2 and Faxline 2 subscribers. Do not turn on Duplex Ringing if you are on a normal line,
as the fax machine will not operate properly.
♦ If you turn on Duplex Ringing, do not set the reception mode to
TEL/FAX. If you do, the fax machine will not operate properly.
1
Press these keys:
The display will show:
OPTION SETTING
PRESS * OR #
2
Press the * key 11 times.
The display will show:
DUPLEX RINGING
1=YES, 2=NO
94
FUNCTION
4
all-fo2950hk.book Page 95 Wednesday, August 9, 2000
11:13 AM
Duplex Ringing
3
Press “1”(YES) to turn Duplex
Ringing on, or “2”(NO) to turn it off
The display will briefly show your
selection, and then:
YES
1
NO
or
2
FAX SIGNAL RX
1=YES, 2=NO
Press the STOP key to return to the
date and time display.
STOP
7. Special
Functions
4
95
all-fo2950hk.book Page 96 Wednesday, August 9, 2000
11:13 AM
Cover Sheet
Cover Sheet
You can have the fax generate a cover sheet and send it as the last
page of each of your fax transmissions.
You can select
a message.
For the recipient's
name to appear, you
must dial using a
Speed Dial or Rapid
Key number with the
name programmed.
Your name and
number must be
programmed as
explained in
Chapter 1.
Follow the steps below to turn on the cover sheet function. Once the
cover sheet function is turned on, cover sheets will be included with
all transmissions until you turn it off.
1
Press these keys:
The display will show:
COVER SHEET
1=YES, 2=NO
96
FUNCTION
4
all-fo2950hk.book Page 97 Wednesday, August 9, 2000
11:13 AM
Cover Sheet
2
Press 1 (YES) to turn on the cover
sheet function, or 2 (NO) to turn it
off.
YES
1
NO
or
2
The display will briefly show your
selection, and then:
AUTO PRINT OUT
1=YES, 2=NO
3
Press the STOP key to return to the
date and time display.
STOP
Selecting a header message (optional)
When the cover sheet function is turned on, you can also select a
message which will appear as a header at the top of the cover sheet.
Note that the message selection is only effective for one transmission.
1
Load the document(s).
• The document must be loaded
before a message can be selected.
2
Press these keys:
FUNCTION
7. Special
Functions
• The cover sheet function must be
turned on.
5
The display will show:
COVER SHEET HEAD
1=URGENT
The message selections
alternately appear here.
97
all-fo2950hk.book Page 98 Wednesday, August 9, 2000
11:13 AM
Cover Sheet
3
Select a message by entering a
number from 1 to 4:
1: URGENT
2: IMPORTANT
3: CONFIDENTIAL
4: PLS. DISTRIBUTE
4
1
(Example)
Dial the receiving machine and
transmit the document.
Note:
To cancel a header message selection, press the STOP key or remove the
document from the feeder.
98
all-fo2950hk.book Page 99 Wednesday, August 9, 2000
11:13 AM
Batch Page Numbering
Batch Page Numbering
You can change the page numbering of the fax from simple
numbering (“P.01”, “P.02”, etc.) to batch numbering, which means
that a slash and the total number of pages are added after each page
number (for example, “P. 01/05”, “P.02/05”, etc.). This allows the
recipient to check for missing pages.
1
Load the document(s).
• The document must be loaded
before batch page numbering can
be set.
2
Press these keys:
FUNCTION
The display will show:
PAGE COUNTER SET
ENTER # (01-99)
Enter the total number of pages (“01”
to “99”) by pressing the number keys.
(If the number is less than 10, enter a
“0” before the number.)
• If you are sending a cover sheet, do
not include it in the total number of
pages (the number will be adjusted
automatically).
0
8
Example:
Eight pages
7. Special
Functions
3
99
all-fo2950hk.book Page 100 Wednesday, August 9, 2000
11:13 AM
Batch Page Numbering
4
Dial the receiving machine and
transmit the document.
Comments:
♦ If you need to cancel a batch number entry, remove the document
from the feeder or press the STOP key.
♦ If the number of pages actually transmitted does not coincide with
the batch number entered, the alarm will sound and PAGE COUNT
ERROR will appear in the display. PAGE E. will also appear in the
NOTE column of the Transaction Report if it has been set to print
out.
100
all-fo2950hk.book Page 101 Wednesday, August 9, 2000
11:13 AM
Blocking Reception of Unwanted Faxes
Blocking Reception of Unwanted Faxes
The Anti Junk Fax function allows you to block reception of faxes
from parties which you specify. This saves paper by not printing out
unwanted “junk” faxes.
To use this function, follow the steps below to turn it on, and then
enter the fax numbers from which you do not want to receive faxes as
indicated in the procedure that follows.
1
Press these keys:
FUNCTION
4
The display will show:
JUNK FAX # CHECK
1=YES, 2=NO
2
Press 1 to turn on the Anti Junk
function, or 2 to turn it off.
YES
1
3
Press the STOP key to return to the
date and time display.
NO
or
2
STOP
Enter (or clear) a number in the Anti Junk List as shown below. Up to
five numbers can be entered.
♦ To clear a number from the Anti Junk Number List, you need to
know the 1-digit number which identifies it. If you have forgotten
this number, print out the Anti Junk Number List as explained in
Chapter 8.
101
7. Special
Functions
Entering Anti Junk numbers
all-fo2950hk.book Page 102 Wednesday, August 9, 2000
11:13 AM
Blocking Reception of Unwanted Faxes
1
Press these keys:
FUNCTION
3
The display will show:
STORE JUNK FAX #
1=SET, 2=CLEAR
2
3
Press 1 to enter a number in the Anti
Junk Number List, or 2 to clear a
number from the list.
SET
1
Entering: Enter a 1-digit number
from 1 to 5 with the numeric keys.
This number identifies the fax
number that you will enter in the next
step.
CLEAR
2
or
1
(Example)
Clearing: Enter the 1-digit number
that identifies the fax number you
want to clear, and go to Step 5.
4
Enter the fax number.
2
3
2
4
5
6
7
(Example)
5
Press the START key.
6
Return to Step 3 to enter (or clear)
another fax number, or press the
STOP key to return to the date and
time display.
102
START
Step 3 or
STOP
all-fo2950hk.book Page 103 Wednesday, August 9, 2000
11:13 AM
Polling (Requesting a Fax Transmission)
Polling (Requesting a Fax Transmission)
Polling allows you to call another fax machine and have it send a
document to your machine without operator assistance. In other
words, the receiving fax machine, not the transmitting fax machine,
initiates the transmission. You can use your fax machine to both poll
and be polled by others.
To use the polling function, you must first set Rapid Key 16/POLL for
use as a polling key.
1
Press these keys:
FUNCTION
4
The display will show:
POLLING
1=YES, 2=NO
3
Press 1 to turn on the function, or 2 to
turn it off.
Press the STOP key to return to the
date and time display.
YES
1
NO
or
2
STOP
Note: When Rapid Key 16/POLL is set as a polling key, it cannot be used
for Rapid Key dialling.
103
7 Special
Functions
2
all-fo2950hk.book Page 104 Wednesday, August 9, 2000
11:13 AM
Polling (Requesting a Fax Transmission)
Requesting transmission
1
Dial the fax machine you want to poll
using one of the following methods:
• Pick up the handset (or press the
SPEAKER key) and dial the full
number. Wait for the fax
answerback tone.
ABC
1
GHI
DEF
2
JKL
4
PQRS
5
TUV
7
3
MNO
6
WXYZ
8
0
• Pick up the handset (or press the
SPEAKER key) and press a Rapid
Dial Key. Wait for the fax
answerback tone.
(Example)
• Press the SPEED DIAL key and
enter a 2-digit Speed Dial number.
• Enter the full number using the
numeric keys.
2
Press Rapid Key 16/POLL.
13
• If you used the handset, replace it
when POLLING appears in the
display. Reception will begin.
104
14
15
16/POLL
9
all-fo2950hk.book Page 105 Wednesday, August 9, 2000
11:13 AM
Polling (Requesting a Fax Transmission)
Being polled (Memory polling)
To let another fax machine poll your fax machine, you must first store
the document in memory using the following procedure. Transmission
will take place when the other fax machine calls your fax machine and
activates polling. You can choose whether to allow polling only once,
or an unlimited number of times. In the latter case, your fax machine
can be used as an electronic "bulletin board".
♦ Only one document can be stored at a time for memory polling.
♦ If you allow polling only once, the document will be automatically
cleared from memory after polling. If you allow polling an
unlimited number of times, the document will remain in memory
until you clear it as explained in the following section, Clearing a
document.
Load the document.
2
Press the RECEPTION MODE key
to set the reception mode to FAX.
3
Press these keys:
The display will show:
RECEPTION
MODE
FUNCTION
TEL
FAX
A.M.
7 Special
Functions
1
8
MEMORY POLL MODE
1=SET, 2=CLEAR
105
all-fo2950hk.book Page 106 Wednesday, August 9, 2000
11:13 AM
Polling (Requesting a Fax Transmission)
4
Press 1 to select SET.
5
Press 1 to allow polling only once, or
2 to allow polling an unlimited
number of times.
6
1
ONCE
1
REPEAT
2
or
Press the START key.
START
• The document is scanned into
memory and your fax goes on
polling standby.
Clearing a document
To clear a memory poll document from memory, follow the steps
below:
1
Press these keys:
FUNCTION
The display will show:
8
MEMORY POLL MODE
1=SET, 2=CLEAR
2
Press 2 to select CLEAR.
2
3
106
Press the START key to clear the
document, and then the STOP key to
return to the date and time display.
START
STOP
all-fo2950hk.book Page 107 Wednesday, August 9, 2000
11:13 AM
Polling (Requesting a Fax Transmission)
Polling security
Polling Security allows you to prevent unauthorized polling of your
machine. When this function is turned on, polling will only take place
when the fax number of the polling fax machine has been entered in
your machine's list of permitted fax numbers (called "passcode
numbers"). The number of the polling fax must also be correctly
programmed into itself for identification.
To use Polling Security, follow the steps below to turn the function on,
and then enter permitted numbers as shown on the following page.
1
Press these keys:
FUNCTION
3
The display will show:
SECURITY SELECT
1=ON, 2=OFF
3
Press 1 to turn polling security on, or
2 to turn it off.
Press the START key and then the
STOP key.
ON
1
START
OFF
or
2
STOP
7 Special
Functions
2
107
all-fo2950hk.book Page 108 Wednesday, August 9, 2000
11:13 AM
Polling (Requesting a Fax Transmission)
Storing and clearing fax numbers for polling permission
You can store up to 10 fax numbers in your machine's list of permitted
numbers.
1
Press these keys:
FUNCTION
3
The display will show:
PASSCODE # MODE
1=SET, 2=CLEAR
2
3
4
Press 1 to store a number, or 2 to clear
a number.
SET
1
Storing: Enter a 2-digit number from
01 to 10. This number identifies the
fax number you will store in the next
step.
Clearing: Enter the number which
identifies the fax number you want to
clear, and go to Step 5.
Enter the fax number.
2
3
CLEAR
2
or
0
1
(Example)
2
4
5
6
(Example)
5
Press the START key.
6
Return to Step 3 to enter (or clear)
another number, or press STOP to
return to the date and time display.
108
START
STOP
Step 3 or
7
all-fo2950hk.book Page 109 Wednesday, August 9, 2000
11:13 AM
Timer Operations
Timer Operations
The Timer function allows you to set up a transmission or polling
operation to be performed automatically at a time you specify. Up to
three operations can be set at any one time, and the times they will be
performed can be specified up to one week in advance.
♦ You can use this function to take advantage of lower off-peak telephone rates without having to be there when the operation is performed.
Note: Only a Rapid Key or Speed Dial number can be used to dial the
receiving machine. Full numbers cannot be used.
Setting a timer operation
1
If this is a transmission, load the
document.
2
Press these keys:
FUNCTION
1
The display will show:
3
Press 1 to select SET.
4
Press 1 to set a transmission operation
(SEND MODE), or 2 to set a polling
operation (POLLING MODE).
7. Special
Functions
TIMER MODE
1=SET, 2=CLEAR
1
SEND
1
POLLING
or
2
109
all-fo2950hk.book Page 110 Wednesday, August 9, 2000
11:13 AM
Timer Operations
5
6
Enter the time at which you want the
operation to take place in 24-hour
format (2 digits for the hour and 2
digits for the minute).
0
0
0: Sunday
1: Monday
2: Tuesday
3: Wednesday
4: Thursday
5: Friday
6: Saturday
Press the START key.
8
Press a Rapid Key or enter a Speed
Dial number for the receiving fax
machine.
• If this is a polling operation, go to
Step 11.
9
110
Press the START key.
5
Example: 9:25
Enter a 1-digit number for the day of
the operation (skip this step if the
operation will be performed within
the next 24 hours):
7
2
9
Example:
Sunday
START
0
1
Example:
Speed Dial #01
START
all-fo2950hk.book Page 111 Wednesday, August 9, 2000
11:13 AM
Timer Operations
10
Adjust the resolution and/or contrast
if desired (skip to the next step if you
don't want to change settings).
11
Press the START key.
RESOLUTION
START
• If this is a transmission, the
document is scanned into memory.
To cancel a timer operation
If you need to cancel a timer operation after it has been set, follow the
steps below.
1
Press these keys:
FUNCTION
The display will show:
1
TIMER MODE
1=SET, 2=CLEAR
Press 2 to select CLEAR.
3
Enter the 1-digit number assigned to
the timer job you want to cancel.
2
1
• If you don’t remember the number,
print out the Timer List as
explained in Chapter 8.
4
Press the START key and then the
STOP key.
(Example)
START
STOP
111
7. Special
Functions
2
all-fo2950hk.book Page 112 Wednesday, August 9, 2000
11:13 AM
8. Printing Lists
You can print lists showing settings and information entered in the fax
machine. You can also print out reports on recent activity and
individual operations after they are completed. The lists and reports
are described on the following pages.
To print a list, follow the steps below.
1
Press the FUNCTION key and 2.
FUNCTION
2
The display will show:
LISTING MODE
PRESS * OR #
2
Press the * key or the # key until the
desired list appears in the display.
3
Press the START key to print the list.
or
START
Activity Report
This report shows information on your most recently performed send
and receive operations (a combined maximum of 30 operations can
appear). The report is divided into two parts: the TRANSMISSIONS
ACTIVITY REPORT, which shows information on transmissions,
and the RECEPTIONS ACTIVITY REPORT, which shows
information on receptions.
♦ All information is erased after a report is printed out. If automatic
print-out is turned off and the report is not printed manually for 30
operations, the information on the oldest operation will be
overwritten each time a new operation is performed.
112
all-fo2950hk.book Page 113 Wednesday, August 9, 2000
11:13 AM
8. Printing
Lists
Printing Lists
Explanation of headings
SENDER/
RECEIVER
The name or fax number of the other machine involved in
the transaction. If that machine does not have an ID
function, the communication mode will appear (for
example, “G3”).
START
The time at which transmission/reception started.
TX/RX TIME Total time taken for transmission/reception.
PAGES
Number of pages transmitted/received.
NOTE
(One of the following notes will appear under NOTE in the
report to indicate whether the transaction was successful,
and if not, the reason for the failure.)
OK - Transmission/reception was successful.
P.FAIL - A power failure prevented the transaction.
JAM - The printing paper or document jammed, preventing
the transaction.
NO PAPER - You ran out of paper during reception.
BUSY - The fax was not sent because the line was busy.
COM.E-0 to COM.E-13 - A telephone line error prevented
the transaction. See Line Error in Problems and Solutions in
Chapter 10.
113
all-fo2950hk.book Page 114 Wednesday, August 9, 2000
11:13 AM
Printing Lists
CANCEL - The transaction was cancelled because the
STOP key was pressed, no document was in the feeder, or
the other machine requested transmission using a function
which your fax machine does not have. If you were
attempting to fax, make sure a document is in the feeder. If
you were receiving, contact the faxing party to see how they
are trying to send to you.
If desired, you can set the Activity Report to automatically print out
whenever information on 30 operations has accumulated. (A report
can still be printed on demand at any time.) Follow the steps below:
1
Press these keys:
FUNCTION
4
The display will show:
AUTO PRINT OUT
1=YES, 2=NO
2
3
114
Press 1 to turn on automatic print-out,
or 2 to turn it off.
Press the STOP key to return to the
date and time display.
YES
1
NO
or
STOP
2
all-fo2950hk.book Page 115 Wednesday, August 9, 2000
11:13 AM
8. Printing
Lists
Printing Lists
Timer List
This list shows the timer operations that are currently set, and whether
the Memory Polling function is turned on.
Telephone Number List
This list shows the fax numbers that have been programmed for
automatic dialling.
Passcode List
This list shows settings made for polling security, your name and fax/
telephone number as entered in the machine, and a sample of the header
printed at the top of every page you transmit (HEADER PRINT).
115
all-fo2950hk.book Page 116 Wednesday, August 9, 2000
11:13 AM
Printing Lists
Option Setting List
This list shows the current status of the option settings.
Junk Fax Number List
This list shows the numbers that are blocked by the Anti Junk
function.
116
all-fo2950hk.book Page 117 Wednesday, August 9, 2000
11:13 AM
8. Printing
Lists
Printing Lists
Group List
This list shows the fax numbers that have been programmed into each
Group Key.
Transaction Report
This report is printed out automatically after an operation is
completed to allow you to check the result. Your fax machine is set at
the factory to print out the report only when an error occurs.
♦ The same headings appear in the Transaction Report as in the
Activity Report. See Activity Report in this chapter for an
explanation of the headings.
♦ The Transaction report cannot be printed on demand.
If desired, you can change the condition under which a report is
printed out. Follow the steps below.
1
Press these keys:
FUNCTION
4
The display will show:
TRANSACTION LIST
1:ALWAYS PRINT
The selections alternately
appear here.
117
all-fo2950hk.book Page 118 Wednesday, August 9, 2000
11:13 AM
Printing Lists
2
3
118
Press a number from 1 to 5 to select
the condition for printing.
1
ALWAYS PRINT
A report will be printed after each
transmission, reception, or error.
2
ERR/TIMER/MEM A report will be printed after an error,
timer operation, or memory
transmission.
3
SEND ONLY
A report will be printed after each
transmission.
4
NEVER PRINT
A report will never be printed.
5
ERROR ONLY
A report will be printed only when an
error occurs.
Press the STOP key to return to the
date and time display.
STOP
all-fo2950hk.book Page 119 Wednesday, August 9, 2000
11:13 AM
Scanning glass and rollers
Clean the scanning glass and rollers frequently to ensure that your
transmitted images and copies are of the highest quality.
Open the operation panel (grasp the panel release and pull up), and
wipe the scanning glass, rollers and white backplate with a soft cloth.
♦ Make sure that all dirt and stains (such as correcting fluid) are
removed, as dirts and stains will cause vertical lines on transmitted
images and copies.
Document rollers
White
backplate
Scanning glass
The housing
Wipe the external parts and surface of the machine with a dry cloth.
Caution!
♦ Do not use benzene or thinner. These solvents may damage or discolor the machine.
119
9. Maintenance
9. Maintenance
all-fo2950hk.book Page 120 Wednesday, August 9, 2000
11:13 AM
Maintenance
Replacing the toner cartridge
When the toner cartridge nears empty (about 100 pages can still be
printed), the TONER EMPTY indicator on the operation panel will
blink. When the toner cartridge is empty, the toner cartridge indicator
will light steadily and REPLACE TONER will appear in the display.
Printing will no longer be possible.
Replace the toner cartridge with the following cartridge:
Sharp FO-29DC toner cartridge
1
Grasp the print compartment cover at
both sides as shown, and pull up to
open the cover.
• Caution!
The fusing unit inside the print
compartment becomes very hot
during operation. Do not touch the
inside of the compartment or the
paper guide on the underside of the
print compartment cover.
2
Grasp the finger hold on the toner
cartridge handle where it is marked
PUSH, and pull the handle out.
Rehold the handle and pull the toner
cartridge out of the compartment.
• Dispose of the old toner cartridge
according to local regulations. If in
doubt, contact your local waste
disposal agency.
120
all-fo2950hk.book Page 121 Wednesday, August 9, 2000
11:13 AM
Maintenance
Install the new toner cartridge and
reset the toner counter. (Refer to
Installing the Toner Cartridge in
Chapter 1.)
9. Maintenance
3
Replacing the drum cartridge
To maintain excellent printing quality, we recommend that you
replace the drum cartridge about 20,000 pages have been printed. You
can view the number of pages printed in the display by pressing the
following sequence of keys:
FUNCTION
START
9
When finished, press the STOP key to return to the date and time
display.
Replace the drum cartridge with the following cartridge:
Sharp FO-29DR drum cartridge
1
Grasp the print compartment cover at
both sides as shown, and pull up to
open the cover.
• Caution!
The fusing unit inside the print
compartment becomes very hot
during operation. Do not touch the
inside of the compartment or the
paper guide on the underside of the
print compartment cover.
121
all-fo2950hk.book Page 122 Wednesday, August 9, 2000
11:13 AM
Maintenance
2
Grasp the finger hold on the toner
cartridge handle where it is marked
PUSH, and pull the handle out.
Rehold the handle and pull the toner
cartridge out of the compartment.
• Place the toner cartridge on a sheet
of paper on a level surface.
3
Grasp the tabs on the drum cartridge
handle and gently pull the cartridge
out of the machine.
4
Remove the new drum cartridge from
its packaging.
122
all-fo2950hk.book Page 123 Wednesday, August 9, 2000
11:13 AM
5
Insert the drum cartridge into the print
compartment, aligning the guides on
the cartridge with the runners on the
sides of the compartment.
6
Gently pull the paper tab to remove
the black sheet of protective paper
from the drum cartridge.
9. Maintenance
Maintenance
• Be careful not the tear the paper or
leave any pieces of paper in the
machine.
7
Replace the toner cartridge and reset
the drum counter. (Refer to Installing
the Toner Cartridge in Chapter 1.)
123
all-fo2950hk.book Page 124 Wednesday, August 9, 2000
11:13 AM
Maintenance
Cleaning the drum cartridge
If you find that characters or parts of an image are missing from your
printed pages, the drum in the drum cartridge may need cleaning.
Follow the steps below to clean the drum.
1
Grasp the print compartment cover at
both sides as shown, and pull up to
open the cover.
• Caution!
The fusing unit inside the print
compartment becomes very hot
during operation. Do not touch the
inside of the compartment or the
paper guide on the underside of the
print compartment cover.
2
Grasp the finger hold on the toner
cartridge handle where it is marked
PUSH, and pull the handle out.
Rehold the handle and pull the toner
cartridge out of the compartment.
• Place the toner cartridge on a sheet
of paper on a level surface.
3
124
Grasp the tabs on the drum cartridge
handle and gently pull the cartridge
out of the machine.
all-fo2950hk.book Page 125 Wednesday, August 9, 2000
11:13 AM
4
Take a sheet of clean paper and roll it
into a tube. Roll it tightly so that the
diameter of the holes at each end is
less than the thickness of your little
finger.
5
Gently wipe the surface of the drum
with the rolled-up paper to remove
any particles of toner caked on the
drum.
9. Maintenance
Maintenance
• Do not let the drum surface come
into contact with anything other
than the rolled-up paper.
Fingerprints, water, alcohol, and
other solvents will damage the
drum surface.
• Do not touch the drum surface with
the edges of the rolled-up paper.
6
Replace the drum cartridge.
• To insert the cartridge, align the
guides on the cartridge with the
runners on the sides of the
compartment.
7
Replace the toner cartridge and close
the print compartment cover. (Refer
to Installing the Toner Cartridge in
Chapter 1.)
125
all-fo2950hk.book Page 126 Wednesday, August 9, 2000
11:13 AM
10. Troubleshooting
Problems and Solutions
Line error
Problem
LINE ERROR appears in
the display.
Solution
Try the transaction again. If the error persists, check
the following:
• Check the connection. The cord from the TEL.
LINE socket to the wall socket should be no longer
than two meters.
• Make sure there are no modem devices sharing the
same telephone line.
• Check with the other party to make sure their fax
machine is functioning properly.
• Have your telephone line checked for line noise.
• Try connecting the fax machine to a different
telephone line.
• If the problem still occurs, your fax machine may
need service.
126
all-fo2950hk.book Page 127 Wednesday, August 9, 2000
11:13 AM
Problems and Solutions
Dialling and transmission problems
Solution
No dial tone when you
pick up the handset or
press the SPEAKER key.
• Make sure the handset cord is connected to the
correct socket. See Connecting the handset in
Connections in Chapter 1.
Dialling is not possible.
• Make sure the power cord is properly plugged into
a power outlet.
• Make sure that the telephone line is properly
connected to both the TEL. LINE socket and the
wall socket.
• Make sure that the fax machine is set to the correct
dialling mode for your telephone line. See
Connecting the telephone line cord in
Connnections in Chapter 1.
The power is on, but no
transmission takes place.
• Make sure that the receiving machine has paper.
• Make sure that the telephone line cord is plugged
into the TEL. LINE socket, and not the TEL. SET
socket.
• If the receiving machine is in manual mode with no
attendant, reception will not be possible.
• Check the display for error messages.
• Pick up the handset and check for a dial tone.
Nothing is printed at the
receiving end.
• Make sure that the document for transmission is
placed face down in the feeder.
A distorted image is
received at the other end.
• If Error Correction Mode is turned off (see Error
Correction Mode in Chapter 2), noise on the
telephone line may cause distortion. Try sending
the document again.
• Make a copy of the document on your fax machine.
If the copy is also distorted, your fax machine may
need service.
127
10. Troubleshooting
Problem
all-fo2950hk.book Page 128 Wednesday, August 9, 2000
11:13 AM
Problems and Solutions
Reception and copying problems
Problem
Solution
The power is on, but no
reception takes place.
• Make sure that the telephone line cord is plugged
into the TEL. LINE socket, and not the TEL. SET
socket.
The printing paper comes
out blank when you try to
receive a document.
• Make sure that the document is loaded properly in
the feeder of the transmitting machine. Make a
copy or print a report to confirm the printing ability
of your machine.
The received document is
faint.
• Ask the other party to send higher contrast
documents. If the contrast is still too low, your fax
machine may need service. Make a copy or print a
report to check your machine’s printing ability.
• The toner cartridge may need replacement.
Received images are
distorted.
• If the sending machine has Error Correction Mode,
make sure this feature is turned on in both fax
machines (see Error Correction Mode in Chapter
2).
• If Error Correction Mode is turned off, noise on the
telephone line may cause distortion. Have the other
party try sending the document again.
• The drum cartridge may be damaged. Try a new
drum cartridge.
• Make a copy or print a report on your fax machine.
If the copy or report is also distorted, your fax
machine may need service.
The quality of copies is
poor and/or black spots
appear.
• Any dirt or material on the scanning glass will
cause spots to appear on copies and transmitted
faxes. Clean the scanning glass as explained in
Chapter 9.
Dots appear at regular
intervals on received
documents and copies.
• The drum cartridge may be damaged. Replace the
drum cartridge.
128
all-fo2950hk.book Page 129 Wednesday, August 9, 2000
11:13 AM
Problems and Solutions
Answering machine connection
The answering machine
connection does not
operate properly.
Solution
• Make sure your fax machine's reception mode is
set to A.M.
• Make sure your fax machine's TEL. LINE socket is
connected to the wall socket. Make sure your fax
machine's TEL. SET socket is connected to your
answering machine's telephone line socket (not the
answering machine's extension phone socket).
• Make sure your answering machine's outgoing
message is under 10 seconds.
• Make sure that the Quiet Detect Time setting is set
to three or four seconds (see Chapter 6).
129
10. Troubleshooting
Problem
all-fo2950hk.book Page 130 Wednesday, August 9, 2000
11:13 AM
Problems and Solutions
General problems
Problem
Nothing appears in the
display.
Solution
• Make sure the power cord is properly plugged into
a power outlet.
• Connect another electrical appliance to the outlet to
see if it has power.
The machine does not
respond when you press
any of its keys.
• If a beep sound is not made when you press the
keys, open the printer compartment cover and use
pencil or pen to press the RESET button. (See the
following page.)
Automatic document
feeding does not work for
transmission or copying.
• Check the size and weight of the document (see
Transmittable Documents in Chapter 2).
Voice calls taken on an
extension phone are
interrupted by the fax.
• The fax may interrupt during a voice call if the
reception mode is set to A.M. To prevent
interruption on a tone dial extension phone, press
any three keys on the extension phone after
answering. (Note: Do not enter the code to activate
fax reception.)
No reception occurs when
polling is attempted.
• Make sure you have not run out of paper.
• Make sure the transmitting machine is in automatic
reception mode.
• If the transmitting machine has polling security,
make sure that your fax number has been entered
both in your machine and in the transmitting
machine.
130
all-fo2950hk.book Page 131 Wednesday, August 9, 2000
11:13 AM
Problems and Solutions
Using the RESET key
If the fax machine stops responding when you press any of the
operation panel keys, you must reset it. This can be done as follows:
Grasp the print compartment cover at
both sides as shown, and pull up to
open the cover.
10. Troubleshooting
1
• Caution!
The fusing unit inside the print
compartment becomes very hot
during operation. Do not touch the
inside of the compartment or the
paper guide on the underside of the
print compartment cover.
2
Use a ballpoint pen to press the
RESET button.
• Note: Pressing the RESET button
clears any documents that are stored
in memory.
3
Close the print compartment cover,
pressing down firmly on each side to
make sure it is completely closed.
131
all-fo2950hk.book Page 132 Wednesday, August 9, 2000
11:13 AM
Messages and Signals
Messages and Signals
Display messages
CAN’T PRINT DATA
A fax has been received to memory because printing
is not possible. This message will alternate with a
message that indicates the problem. The fax will print
out automatically when the problem is resolved.
CHECK PAPER SIZE
An incorrect size of paper has been loaded in the
paper tray. Remove the paper and load A4-size
paper.
CHECK PC
This appears if you press the E-MAIL key and your
computer is not turned on or is not correctly
connected to the fax machine.
COVER OPEN
The print compartment cover is open. Press down
firmly on both sides of the print compartment cover to
close it.
DOCUMENT JAMMED
The original document is jammed. See the following
section, Clearing Paper Jams.
FUNCTION MODE
The FUNCTION key has been pressed.
GRP. SPACE FULL
This appears if you attempt to program a Group Key
when all Group Keys have already been
programmed.
HOLD
The HOLD/SEARCH key has been pressed to put the
other party on hold during a phone conversation.
Press the HOLD/SEARCH again to take the other
party off hold.
LINE ERROR
Transmission or reception was not successful. Press
the STOP key to clear the message and then try
again. If the error persists, see Line Error in Problems
and Solutions in this chapter.
132
all-fo2950hk.book Page 133 Wednesday, August 9, 2000
11:13 AM
Messages and Signals
The memory is full. This may occur during fax
reception if too much data is received before the
pages can be printed out. If faxes have been received
to memory because printing is not possible (an
additional message will indicate the problem), resolve
the problem so that printing can continue (see
Substitue Reception to Memory in Chapter 3). If you
are attempting to transmit by automatic dialling, see If
the memory becomes full in Chapter 2.
MEMORY PRINTING
The fax is preparing to or printing out a document
from memory.
NO DATA
This appears if you attempt to search for an
automatic dialling number when none have been
stored.
NO # STORED
You have tried to dial or clear a Rapid Key or Speed
Dial number that hasn’t been programmed (a full
number hasn’t been assigned to it).
OFF HOOK
This appears if you forgot to replace the handset after
using it to dial and send a fax. Replace the handset or
press the STOP key to clear the message.
ON HOOK DIAL
The SPEAKER key has been pressed and the fax
machine is waiting for you to dial.
OUT OF PAPER
You are out of printing paper (or the paper release
lever is open). Load paper as explained in Loading
Printing Paper in Chapter 1.
PAPER JAMMED
The printing paper is jammed. See the following
section, Clearing Paper Jams.
REPLACE TONER
The toner cartridge must be replaced.
SEARCH DIAL
The HOLD/SEARCH key has been pressed. (See
Searching for an auto-dial number in Sending a Fax
by Automatic Dialling in Chapter 2.)
10. Troubleshooting
MEMORY IS FULL
133
all-fo2950hk.book Page 134 Wednesday, August 9, 2000
11:13 AM
Messages and Signals
SEND READY
A document has been loaded and the fax machine is
waiting for you to begin faxing or copying.
SIZE ERROR
This message appears if paper smaller than A4 size
has been loaded. Change the paper to A4 size paper.
TOTAL PAGE(S) 1
Number of pages transmitted, received, or copied.
TX MEMORY FULL
This message appears if you insert a document into
the document feeder when 30 transmission jobs are
already waiting in memory for transmission. You can
continue setting up the transmission job after the job
currently being sent is completed.
This message may also appear if faxes have been
received to memory due to a printing problem. In this
case, resolve the problem so that printing can take
place and free memory.
Audible signals
Continuous tone
3 seconds
Indicates the end of transmission,
reception, or copying.
Intermittent tone
(3 beeps)
5 seconds
(1 second on, 1
second off)
Indicates incomplete transmission,
reception, or copying.
Rapid intermittent
tone
Continuous
(0.7 seconds on,
0.3 seconds off)
Indicates that the handset is off hook.
134
all-fo2950hk.book Page 135 Wednesday, August 9, 2000
11:13 AM
Clearing Paper Jams
Clearing Paper Jams
Clearing a jammed document
Important:
Do not try to remove a document without opening the operation panel.
This may damage the feeder mechanism.
1
Open the operation panel by grasping
the panel release and pulling up.
2
Remove the document.
3
Close the operation panel, making
sure it clicks into place.
135
10. Troubleshooting
If the original document doesn’t feed properly during transmission or
copying, or DOCUMENT JAMMED appears in the display, first try
pressing the START key. If the document doesn't feed out, open the
operation panel and remove it.
all-fo2950hk.book Page 136 Wednesday, August 9, 2000
11:13 AM
Clearing Paper Jams
Clearing jammed printing paper
1
If most of the jammed page is
protruding from the back of the fax,
pull the paper release lever toward
you and try pulling the page out.
2
If the jammed page comes out, take
out the rest of the paper in the tray,
straighten the stack, put it back in the
paper tray, and push down the paper
release lever.
• If you are unable to clear the jam in
this way, continue with the
following steps.
3
Grasp the print compartment cover at
both sides as shown, and pull up to
open the cover.
• Caution!
The fusing unit inside the print
compartment becomes very hot
during operation. Be careful not to
touch the inside of the
compartment.
136
all-fo2950hk.book Page 137 Wednesday, August 9, 2000
11:13 AM
Clearing Paper Jams
4
Grasp the finger hold on the toner
cartridge handle where it is marked
PUSH, and pull the handle out.
Rehold the handle and pull the toner
cartridge out of the compartment.
5
Grasp the tabs on the drum cartridge
handle and gently pull the cartridge
out of the machine.
6
Wrap the drum cartridge in a large
sheet of paper as shown at right so
that the green drum section is
shielded from light, and place it
gently on a level surface.
10. Troubleshooting
• Place the toner cartridge on a sheet
of paper on a level surface.
• Do not touch the green drum in the
drum cartridge. This will damage
the drum surface.
• Do not expose the drum to direct
light. This will damage the drum.
137
all-fo2950hk.book Page 138 Wednesday, August 9, 2000
11:13 AM
Clearing Paper Jams
7
Gently pull the jammed paper out of
the machine.
• If needed, turn the wheel on the
right side of the fusing unit to eject
the paper from the machine.
• Caution!
Do not use excessive force to pull
the jammed paper out. If the paper
tears and a piece remains inside the
machine, a service call may be
necessary to remove the remaining
piece.
Fusing unit
Wheel
8
Replace the drum cartridge.
• To insert the cartridge, align the
guides on the cartridge with the
runners on the sides of the
compartment.
9
138
Replace the toner cartridge and close
the print compartment cover. (Refer
to Installing the Toner Cartridge in
Chapter 1.)
all-fo2950hk.book Page 139 Wednesday, August 9, 2000
11:13 AM
Quick Reference Guide
Entering Your Name and
Number
Setting the Date and Time
1. Press:
1. Press:
FUNCTION
3
FUNCTION
Display shows: DATE & TIME SET
PRESS START KEY
Display shows: OWN NUMBER SET
PRESS START KEY
2. Press:
3
2. Press:
START
START
3. Enter two digits for the day (01 to 31).
3. Enter your fax number (max. of 20 digits)
by pressing the number keys.
4. Enter two digits for the month (01 to 12).
• To insert
5. Enter four digits for the year (Ex: 2000)
a space between digits, press
the # key.
• If you make a mistake, press the SPEED
DIAL key to backspace and clear the
mistake.
4. Press:
• To enter two letters in succession that
require the same key, press the
SPEAKER key after entering the first
letter.
SPACE =
J=
T=
A=
K=
U=
C=
D=
E=
F=
G=
7. When finished, press:
START
STOP
START
5. Enter your name by pressing the
appropriate number keys as shown below.
B=
6. Enter two digits for the hour (00 to 23)
and two digits for the minute (00 to 59).
L=
V=
M=
W=
N=
X=
O=
Y=
P=
Z=
R=
I=
S=
1. Press:
FUNCTION
3
Display shows: FAX/TEL # MODE
1=SET, 2=CLEAR
2. Press 1 to store a number or 2 to clear a
number.
3. Press a Rapid Key or enter a 2-digit
Speed Dial number (from 00 to 99). (If
you are clearing a number, go to Step 7.)
Q=
H=
Storing and Clearing Auto
Dial Numbers
4. Enter the full fax/telephone number.
5. Press:
START
• To change case, press the REDIAL key.
Press # or * to scroll through symbols
and special characters.
6. When finished, press:
START
STOP
6. Enter the name of the location by
pressing number keys. (Refer to the letter
entry table in Entering Your Name and
Number.)
7. Press:
START
STOP
139
all-fo2950hk.book Page 140 Wednesday, August 9, 2000
11:13 AM
Quick Reference Guide
Sending Faxes
Receiving Faxes
Press the RECEPTION MODE key until the
arrow in the display points to the desired
reception mode.
Place your document
(up to 20 pages) face
down in the document
feeder.
TEL FAX
01 FEB 10:30
M:00% STAND-BY
RECEPTION
MODE
TEL FAX
01 FEB 10:30
M:00% STAND-BY
Normal Dialling
1. Lift the handset or press
A.M.
TEL FAX
01 FEB 10:30
M:00% STAND-BY
SPEAKER
2. Dial the fax number.
3. Wait for the reception tone (if a person
answers, ask them to press their Start
key).
4. Press:
A.M.
START
A.M.
TEL FAX
01 FEB 10:30
M:00% STAND-BY
A.M.
FAX mode: The fax machine automatically
answers on the set number of rings and
receives the incoming document.
TEL mode:
Beep
START
Rapid Key Dialling
Press the appropriate Rapid Key.
Transmission will begin automatically.
RECEIVING
Speed Dialling
1. Press:
SPEED
DIAL
2. Enter the 2-digit Speed Dial number.
3. Press:
START
TEL/FAX mode: This mode is convenient
for receiving both faxes and voice calls.
When a call comes in, the fax will detect
whether it is a voice call (including manually
dialled fax transmissions), or an
automatically dialled fax.
A.M. mode: Select this mode when an
answering machine is connected to the fax
and the answering machine is turned on.
140
all-fo2950hk.book Page 141 Wednesday, August 9, 2000
11:13 AM
Index
A
A.M. reception mode, 34, 85
Activity Report, 112
Auto print-out, 114
Answering machine connection
Activating, 85
Connecting, 84
Fax reception when A.M. fails, 88
Quiet Detect Time, 87
Troubleshooting, 129
Anti Junk Fax, 101 - 102
Anti Junk Number List, 116
Audible signals, 134
Auto-dial numbers, storing, 52
B
Batch page numbering, 99
Beep length, 40
Broadcasting, 89 - 91
C
Chain Dialling, 54
Contrast, 46
Copies, 79 - 81
Copy cut off setting, 81
Cover sheet, 96 - 98
D
Date, setting, 31
Dial mode, 14
Dialling
Chain, 54
Direct Keypad, 59
Normal, 49, 82
Rapid Key, 57, 82
Speed, 58, 82
Direct Keypad Dialling, 59
Display messages, 132 - 134
Document feeder, 43
Document guides, 43
Document restrictions, 42
Document sizes, 41, 130
Document, maximum scanning size, 42
Drum cartridge
Cleaning, 124 - 125
Replacing, 121 - 123
Duplex ringing, 94
E
ECM (Error Correction Mode), 64
E-MAIL, 8
Extension telephone
Connecting, 16
Using, 72
F
FAX reception mode, 34, 68
Fax Signal Receive, 75
Fine resolution priority, 48
Five rings TEL answer, 77
G
Group Keys, 92
Group List, 117
- 93
H
Halftone setting, 46
Handset, 12
Hold, 83
Housing, cleaning, 119
J
Jams, clearing, 135 - 138
141
all-fo2950hk.book Page 142 Wednesday, August 9, 2000
11:13 AM
Index
Memory
Checking documents in, 63
Sending faxes from, 56
Substitute reception to, 78
Receive unit setting, 36
Reception mode
A.M. mode, 34, 85
FAX mode, 34, 68
Setting, 34
TEL mode, 34, 71
TEL/FAX mode, 34, 66
Reception Ratio setting, 76
Redialling, 50, 61, 83
Remote reception setting, 74
Removing original document, 44
Resolution, 46
Ringer volume, 39
N
S
L
Letters, entering, 29
Line error, 126
LINE IN USE light, 8
Loading printing paper, 21
Loading the document, 43
- 22
M
Normal Dialling, 49, 82
Number of rings in FAX and TEL/FAX
reception modes, 69
O
Option Setting List, 116
Original document support, 15
P
Paper jams, clearing, 135 - 138
Paper, loading, 21 - 22
Parallel cable, connecting, 23
Passcode List, 115
Pauses in automatic dialling, 52
Polling, 103 - 108
Power lead, 13
Pseudo Ring Duration, 67
Q
Quick Online, 65
R
Rapid Key Dialling, 57, 82
Recall interval, 61
Recall times, 62
142
Scanning glass, cleaning, 119
Search Dial, 60, 83
Sender’s name and number, entering, 27
- 30
Sharp Laser Multifunction software,
installing, 25
Speaker volume, 38
Speed Dialling, 58, 82
T
TEL reception mode, 34, 71
TEL. LINE socket, 14
TEL. SET socket, 16, 84
TEL/FAX reception mode, 34, 66
Tel/Fax Remote Number, 73, 74
Telephone line cord, 14
Telephone Number List, 115
Time, setting, 31
Timer List, 115
Timer operations, 109 - 111
Toner cartridge
Installing, 17 - 20
Replacing, 120
Transaction Report, 117
Setting print-out condition, 117
1234%5678%9
124%5778%9
6:;<= >7?/
@A@77BCDEFG/
HIJKLMN2
<= OP
!"#$%
&'(
)*QRSTUV/5<
= AWXY?
+,-./012344567<=>AXY7?
89
) * Q R S T U V/5
67A777?Z[/
+, -./0123:456767A777?
Z[/
;<=>
?@AB7
CD7W\]^_`
EF7
5>aWYb^_`
cd^efg5XaXb^_`
hd5Ya@b^_`
GHIJ7ijkO77lCm
!"#$
"%&'()*+,-.&'/0
JK'L
En67?W7o^p6q@r/
MNOPQR(
O@s8tuvwx56YOs/
S'TUV
677yW7o^p6q@r/
WXYZ
::z{:z{:|{}~C|6
[H\]^
_u
_V`
..>
aA<=
BC6Ob^_`
DE6Ya@b^_`
FGHIaA6O77lCm ijkAW77lCm/
bcJKde
HIVr5
5@W6O_`
5@76X_`
IVr5
5@W6O_`
5@7A777_`
fg:;h
E67_`
fgaAh
E676_`
ijkl
RS{u{u^RS{uT
:;
WCCpq@r/
mnop
@Aqr
y^ny^?^?/
Hstu
6676@7q.Y7^O7|
vwx
7>7°.
y
67WYz|
zH
T5a7
EF5W@7
de
5>WO_`
5>W_`
5O_`
{
<= Oa>_
¡¢£¤¥¦§¨©¡ª«¬®¯°±²³´
µb!¶0·¸¹º»¼®¯½[=¾¨¿ÀG08Á¾¨¿
¸ÃGļÅÆÇÈÉ0
!"#$%&
ÊËÌ¥ÅÍÇÎÏÐÑÒ
ÓRST«Ô&ÊËÌÕÖ×ØÙÚÛÜÝÞ·ßàáâ{
ãuätåæçèéÍÇÝÞêë5
• ÊìíîØRSTïð
ñbØÐÑòÂóÃôõö0Ê÷ø
ùRSTúûüý
þÿ¯t0
• ØRST¼L6676@7Y7^O7|k>
/u
¸0÷RSTLku[T
Ó¥»0
• ÊìUùï !&ÙîïÓRST0"#$
%&{'(){*+',{'-){. /ï012U
ÓRST0Êì÷345LRST¸0
• #67¾·Æ89:Ê;<u¸=RST
>?@A<u¸=u>BCÿ¯DËE5
345FRSTGïRSTHLIïJL0
RST¨¾KL{MNï7ºOPQR0
uSTïU0
RSTVWïTXU0
• Yì÷Z4[\uS¸]$÷RSTÙîuS
^_L0
• Yì÷Z`FRST¸,ïabÍļcáâ
ïãuèé0#6ùZ`VFRSTGdef÷gÙÚhº
Êi(=RSTu>?@BCÿ¯DËE0
• Êì÷RST[\Zjkl{mnïop¸0#6RSTV
WqļrstuU0
• vwxIyzÓueSu
dcãuèé0
{/0|¤Ä¼}~u
• YìUÓu
0
• ÊËÌ÷uÙî«Ô+ô=
0
!"()*
• ØRST¼+ùqu{quïu_
ÇDËS¸0#6ð
÷RST·¸Æ
DËÆÓRVäRS"&ļL0
• ØRST½-u,0
'
,
u$ÙÚ" aaaaaaaaaaaaaaaaaaaaaaaaa>
,-
+
./0123
4
5 #6
7
í §¡ aaaaaaaaaaaaaaaaaaaaaaaaa7
aaaaaaaaaaaaaaaaaaaaaaaaaaaaa
Ù¤ aaaaaaaaaaaaaaaaaaaaaaaaaaX
îF¹¥r aaaaaaaaaaaaaaaaaaaaaaaaaa6
«$:¦§¨m©¦ª«¨m¬ª® aaaaaaaaaaaaaaaaaaa6>
¯F°ÀRS%9 aaaaaaaaaaaaaaaaaaaa6X
«$±²&' aaaaaaaaaaaaaaaaaaaaaaaa>
«$ aaaaaaaaaaaaaaaaaaaaaaaaa>@
g³R´ aaaaaaaaaaaaaaaaaaaaaaaaaaa>W
5 89:
'
ÄRVµ` aaaaaaaaaaaaaaaaaaaaaaaaa@
îFµ` aaaaaaaaaaaaaaaaaaaaaaaaaaa@>
g³§¶ aaaaaaaaaaaaaaaaaaaaaa@O
!·OP4%RVRS aaaaaaaaaaaaaaaaaaaaa@
!·HI4%RVRS aaaaaaaaaaaaaaaaaaaaaY6
5 ;<9:
==
Ó¸¹^ºq»u^RS/ aaaaaaaaaaaaaaaOO
Óºq»RS/ aaaaaaaaaaaaaaaaaaaaaOW
Óqa:auT/ aaaaaaaaaaaaaaaaaX7
Ó¸¹u/ aaaaaaaaaaaaaaaaaaaX
¼E½¾4 aaaaaaaaaaaaaaaaaaaaaaaXW
'5 >?
4@
+
¿
+5 ABCD
E
=5 F;CDG-
E'
uT aaaaaaaaaaaaaaaaaaaaaaaa W@
ÄÀqa:auT/«$Gaaaaaaaaaaaaaa WX
45 HI
E@
ÁÂRV aaaaaaaaaaaaaaaaaaaaaaaaaaa W
ÃuÄÅÆ$ÇDË/ aaaaaaaaaaaaaaaaaa @
È®? aaaaaaaaaaaaaaaaaaaaaaaaaaaa O
sÉ?Ê9 aaaaaaaaaaaaaaaaaaaaaaaaaa
ËÌ$RS aaaaaaaaaaaaaaaaaaaaa 7
ÍCÊÎRVRS/ aaaaaaaaaaaaaaaaaaaa 7>
¬&Ïý aaaaaaaaaaaaaaaaaaaaaaaaa 7
E5 J?KL
@5 MN
@
wxÐÑÒ aaaaaaaaaaaaaaaaaaaaaaaa
TX aaaaaaaaaaaaaaaaaaaaaaaaaaaa
±¢£¤ aaaaaaaaaaaaaaaaaaaaaaaaa
±ÓÔ¢£¤ aaaaaaaaaaaaaaaaaaaaaaa
¡ÕÓÔ¢£¤ aaaaaaaaaaaaaaaaaaaaaaa
75 OPQR
67
6
6@
=
Ö×f aaaaaaaaaaaaaaaaaaaaaaa 6O
""%aaaaaaaaaaaaaaaaaaaaaaaaa >6
¡ Ør aaaaaaaaaaaaaaaaaaaaaaaaaa >Y
STUVWX
@
YZ
'
=
!
./0123
1
2
3
4
5
6
7
8
9
10 11
12
13
TEL FAX
A.M.
FUNCTION
VOLUME
DOWN
ABC
1
GHI
2
JKL
4
PQRS
5
PC
IN USE
RECEPTION
RESOLUTION BROADCAST
MODE
LINE
IN USE
6
HOLD/
SEARCH
9
SPEAKER
0
22
TONER
EMPTY
01
02
03
04
05
06
07
08
09
10
11
12
13
14
15
16/POLL
17/G1
18/G2
19/G3
20/G4
REDIAL
WXYZ
8
PAPER
CHECK
3
MNO
TUV
7
SPEED
DIAL
DEF
UP
21
20 19
COPY/HELP
REDUCTION/
ENLARGEMENT
START
STOP
18
17
16 15
14
1
|}~~33&(
ÙÚ3·ÓÛÜ6-½124%%9q4ÝRSïÞR%90
2
9~3&{(
ÙÚ3·HIu4E@4Ý%90
3
}&}~94~4'
(
r¤er{Ør{¥T,ßÝaïryFàáâ&ã0
4
/~9~}z(
¢£1äå&~ædƱ¢£&÷çã0
5
Ïý«$·õÂèÏ,é"Ï0
4
"
6
êëÚìíîïI·ÝaÏý®ð0
7
}4|~FGHI(
RSTuvORVïñ&~æ0
8
~|~(
RSTÓuS&ã0
9
9~4~}//3~ijkl(
ÙÚ3·Àò0èÏó¸ô>÷Îî¿õÀ$
0
10
.4/qr(
ÙÚ3·Àòö¼«$G0
11
9~|//<=(
ÙÚ3·g³RSï÷¥0
12
/~-}?3/5 ? (5
Ùø|}~&~9¡¢(3ù@Ä!·ÙÍÇ3qg³úû
R ´ï g ³ Ä Å Z & R ´0 ü Ä · Ó Í Ç 3 q ý I
.4/qr(3«$G0
13
£9/&34&|¤¥(
ÙÚ3·÷µ`RVþÆÿRST0
14
ÙÍÇ3ÂÂÆ8·HI4ÝRS%9ï÷µ`·up`
U`RV«up`-0
15
~0&H¦§K(
ÙÚ3ÄÙup`U`RVµ`0ÙÚ3ù@Î$
up`õ÷a·¯Fup`-{ô"
#ùÌ$/0ùé«$ÓÚö¼c"Ê
S¸Î
YÂ}¨¨mªoC¨~¸pm§«$up`3/0/
E
16
9~34/?~&9¨~~X ? (
ÙÚ3·÷¥µ`&Àò[FïÛà«$G0
17
|/}©ª(
ÙÚ3·hósÏý0
18
|&9«¬(
Ó124%{34%ïOP4%&ÙÚ3·aR
V0
19
4/}?~}@A ? ®(
#6VrÂîùµ`ÙÚ3·÷¥µ`09:
ÙÚ3·¹¥ÐÑ¡ÏýRST12Î/0
20
/3?|~&94¯© ? °±(
4%&ÙÚ3·HI4%RS%90!&ÙÚ3·÷
§\+0
21
|}~&~9¡¢(
ÙÚ3·RVµ`&!·úûqSäRS"%0
[*¡¢²³´LµÌ Ò!Ä·§!0
22
¶
ÓÍÇ3·"b4%#ÅHI4%%9&¯F½$ä%µ$
&0
5 #6
@
5 #6
\]^_KL
gpqr#6st
ua),
9:
z
`abcdefg
hijklmj
no
STvwx
9:;<yz
{|}~
F;
CD
#6r
7
yz
¡¢£ ¤¢
¥¦§¨©
5 #6
F;
#6ª«()
g¬k®¯r
°±²;³´µ¶
g¬®¯r·¸¹º6¯
k»¼½tµ¶
¬{¾¿À
qÁÂÃÄÅKÆ
ÇÈÉÊË
#6÷RST<M'(M)*RSTwxиÄ
¼+s',ZÍ-.RVµ`&"bOPwx0$¡ ',
ZÊauF</8à&@!ÓRST0
F;
Ò#øÏ/÷\+Òn¸0
ÒS/0[,1}Úg2Ä·FÆ830
gÑÒpqF;
ÓÔÕ0wa
Ö×ÓØ
Ì{|ÍAB
ÎÏCDfk}Ð8
;<
5 #6
F;CÙ
÷uSF6676@7Y7^O7|k>
/
4u
0
 RST&Ê;=uS?@A=uS0
ª«*ÊËÌ÷$3/Ùî«Ô+
ô= 0
ÜaCÙÝÞ ß Ç
à Ý Çfá â ã ä Ó Ô
kåCÙæÌÝÞ
kÇàCÙ
[*#6ø56P7¾~uïu7829:=u
uSÙîu7¥;0Ä·6<=>?ïFn½u@
AB?CDLu7¥;0
ÚÐÛ!F;
#6$÷RST(EFÊ;Â uS?@A
 uS0uE&ÊËÌ;uS?@A
uS0
F;CD
÷uSÆ0FRSTGHù~·~H\](3Â
?@÷µÆ0FI¸uÂ0
gÑÒCDÓÔ
çè5éêèC D
Ó Øfë ¬ ì Ó Ô
çè5èçCD½í
ÓØ
[*RSTJ«$=RK4%0#6OÓLM4%S
Ì÷RST«$=LM4%0ÊÙ·øÃÙÏý®ð¸Ù
35
ÙÍÇ35
FUNCTION
4
èÏó¸÷èÏ5
Oq¹:PO¸
QPR¸A6QS¹}¸
Ù¸·ÀòRK4%ïÙ1
·À
òLM4%0
Ù |/}©ª(3·NK±²&'
èÏó0
'
îï
1
ðñ
k
STOP
2
5 #6
#6yz9:
z
ÙîrTn0
Ùîµ`Tn0
ÙîOص`mUn0
V¥mUnõ0íîHWmUnXYZ[î\]/0
+
ò)
#ùÌ$Ä·÷TRST¸~·|~H\¹º(
30
=
$÷uTRSTÊ
OuT0
h^ß~·|~H\¹º(3È
_0
÷TuS ~·|~H\¹
º(30
!
!"# $%& '(#) !*+,-./0
1 2 3 456 78 9:;<=>??@ 0A B C D!"#$%
&'0
"#$%& '()(((& *& +,& -./012
3456&789':;<=>&
4?!#@AB#CDE
FG$HIJKLMNOPQCR
S#TUIV
• W!XY3$HZ[\]
^_`abcdefghij$
HZkl$HImn/0o
p
"
Ù¤
ÓÔ¢£¤ºn&J6Ùîo0pp
ïryq·r¢£¤sf¥;
r0
• Yìrtry]f÷ru¦
RSTG0
<êîÂhºE¢£¤0GvwI¢
£¤xïyz·Ó¢£¤Â¢£
{[|0
à}r¢£¤êî~
ð0
'
E
êîr
ê뢣¤Ó¢£¤¸½
í¸?@÷gF¹¥,G0
5 #6
Ù¤
+
÷Î[Â}ù}|»(
-\¸?@îîGk·÷
¢£¤F$-0
=
ÿ¸¹¥,ß÷g/Hjî
Ù·V¥Úÿ¸0
4
!·Ù·Ù3·uE«$¢£¤¬
½5
FUNCTION
*
9
.¹zPR¸z.PR
Sz¸}}}qz¸
START
@
Ù¤
E
!·Ù·Ù3·uE«$ÓÔ¤¬
½5
FUNCTION
9
• [*ù±øÓÔ¢£¤d
g¢£¤/@!Æ$ñbÚ«$0
*
.¹zOz:.PR
Sz¸}}}qz¸
START
7
5 #6
îF¹¥r
6ÔJ?
EnÄ·rTnÂîF677yq@rEu= W7o^p6/0
ª«
YìÓJ¹¥·ry®0
ïºrTn
k0
qKIr?@÷r
Z®¸ppÝ·ÓZ³0
÷ry[ìíîïI0
îF¹¥r
'
÷rC¼½FrTnaA
0
¾
• V¥róº½S0î
F·nryļcrïVr
áâ0
• iEryùõ#6rTn
ÂùryÊ÷hºEr
yƳsÆ0
!"()*
ÊËÌOVîFry·¼ryaA®¸"b¹¥0g¹¥
®¸"b¹¥Ä¼cɹ¥©0
+
V¥rvHrycð§?@÷
GHrycðpp(&-\0
=
÷ry[ìkK£q-\0
• [*ry#6ùOVVFÊ<
rTnÂhºøùry?@A<>
au^ñbîFõö0
5 #6
«$:¦§¨m©¦ª«¨m¬ª®
½í ¡¢£ ¤¢0
"Þ|H
fgF;
CfÛ#6 ¡¢£ ¤¢
F;ÛJC
Ó¹u÷RSTuv0
#6ù¹uÄ·<6<=>?ïuv=B?
CDÚu0
V¥uÿ¸¸¸6W@®Ü09:Ó·/_au
0
V¥uvJé=øRS
Tu>0
«$:¦§¨m©¦ª«¨m¬ª®
÷uÆ0 }~C ¹D :¦§¨m©¦ª«¨m¬ªRST0÷
/HØÙLu>¸·÷g
$0
÷uµÆ0uv®¹
0
[*!PeÆ°±uv«$;P} õ¹«$G0
#67}~C¹D:¦§¨m©¦ª«¨m¬ªRSTwxï¹¥&
e f O P Ï ý Ä ¼ Æ $ ° ± « $ G0 Í 8 9 : Ê À ò
¸.S{S}6{Ãîï¹0
'
!
"#$ %&'(!
"#$ )* +,-./0
12345678945
:;<=
!
"#$%&'>?@
!
"#$)*+,3A@
BCDEFG
!
"#$%&'3@
!
"#$)*+,3%@
.H1/I J1$/ K;LMNOPQRCSTUVWX
YZ[\]^_`abc
T
d7efgfhijklmnTdX
YZ\S_`oWpqrstuWvK;7ewxyVWzK;7
{|}VW.H1/IJ1$/
K;X~7.H1/IJ1$/
K;BuLMX
.H1/IJ1$/
_`S
<EX
YZ !
"#
$%&'%&
%! !
"#
$%&'%&
()bc7efgoS*%+,-7{|
+XYZ p bc7efg!
"#$ S%%.
/fh7{|011123 111X
[ 4!.59Tdo -lS \
<
ES67{|fg4678X
f ¡¢bcS£¤¥X
[VW¦§a7¨©^ª_`X
«$:¦§¨m©¦ª«¨m¬ª®
./WX
Ä·.O Pª§mª¦mlS¸Î/³LùéÓ}~C
¹D:¦§¨m©¦ª«¨m¬ª¨4cÐÑ0$aÎÊñb·c
d5
5 ÷}~C¹D:¦§¨m©¦ª«¨m¬ª.O[F.OzP:§T#6|ÓÆÇÔ
ÆÕÄÇÊÑÖ×ØÊËÐÖ×ÉË|ÄÖÊÔ|ÓÆÇÔÆÕÄÇÊÑÖ×ØÊËÐÖ×ÉËÙ(®
¯ºÊÙÆ4ÆËÐÄÑpÒ(?@ÙÆ~Ú×Ö|ÄÖÊÔáâ
Ù(·é®¯/0
5 ÙÆ mªl¬¡D üý¹¸ |ÖÆÇÖ«¬(ÙªAÎî }ÇÉãÇÆäÕ
ålæ(?@Îî|ÓÆÇÔÆÕÄÇÊÑÖ×ØÊËÐÖ×ÉË0ÙÆ/ËÑ×ËÄ
¨Ê×ÈÄ0
=
!
5 #6
¯F°ÀRS%9
Ô×
rÝ {|õsfÒ!
ÔCD
×â"f#ä"½í$%
&
v
1
2
3
4
5
6
7
8
9
r Ô â % & õ fì
Ðr8
Îú9:õ
(ê¥çé©êv
0
'v çû¨çÝ
ÙÍÇ35
èÏó¸÷èÏ5
v
ç©)*+v
FUNCTION
3
¸Rz:PO¸
Sz¸}}*Pz
4
"
¯F°ÀRS%9
Ù/30
ïÙ/}(30/
èÏó¸÷èÏ5
PRR:;¸z}¸
Sz¸}}}qz¸
[*r - Ð ½ í . f Ì / ()0v12 'vfÛ/
¦©3ê0v12*v
Ù|&9«¬(30
START
èÏó¸÷èÏ5
¸R¸zºq»
'
!·Ù½$3q¯FRS%9
En67-½/0
• $½$'F¯ÊÙ 30
$¯F“´”ÊÙ*30
• #6¯FáâÊÙ|}~~33&
(3·µK¡ áâ0
+
Ù|&9«¬(3·÷RS%9¯F
½¾4Â0
èÏó¸÷èÏ5
¸R¸zPzRq:¸
E
4
4
2
4
4
1
,
START
1
=
5 #6
¯F°ÀRS%9
ÙE¶8%µ$&½$3#
øÏ/q¯F°À0EnÄ·
¯F6@8$¿0
Ü"5}|qzSQXXXXX@@@66XXXXXX
SPEAKER
SPACE =
J=
T=
A=
K=
U=
B=
L=
V=
M=
W=
N=
X=
O=
Y=
P=
Z=
C=
D=
E=
F=
G=
Q=
H=
R=
I=
S=
$ç¯FÆ$1ÆÙ3/8%µ$&ʯF·%µ$&@
Ù|}~&~9¡¢(30
|}~&~9¡¢(3Ä÷0îõ(I/3?|~&94¯© ? °
±(3Ä÷0î@(I0/
$¡
$°±$&FàÜÊÙ9~3&{(30
$Àò·ÂÆ8%Êu÷Ù
3ï*35
a^¸¹º»¼+´A½¾¿QÀÁÂÃÄÅƼÇÈÉ
áâÊÙ|}~~33&(30
çR6èÏó¸sf©Ï(÷Ú¯F½$ï%µ$
&0
@
¯F°ÀRS%9
4
Ù|&9«¬(30
START
èÏó¸÷èÏ5
}¸.z}¸¹¸.
QPRA6QPºº
E
7
Ù |/}©ª(3·NK±²&'
èÏó0
STOP
5 #6
«$±²&'
½í$%&
$%&r
fÛJ?r8
Îú9:
Ä·!·ÙÏý®ð¸Ù3q«$±²&'#øÏ0
v
1
2
3
4
5
6
7
8
9
(ê¥çé©êv
0
*v
çû¨çÝ
ÙÍÇ35
èÏó¸÷èÏ5
v ç©)*+v
FUNCTION
3
¸Rz:PO¸
Sz¸}}*Pz
ÙÍÇ35
èÏó¸÷èÏ5
Oq¸»:¸}¸
Sz¸}}}qz¸
«$±²&'
Ù|&9«¬(30
START
• ¿õ«$±²÷ºèÏó¸0
'
¯Fϱ²/-½%9Ê7Ë
Ê>Ë/0
• $±OáâÊÙ |}~~3 3&
(3·÷0(Kºáâ
-\?@¯FOV½$0
+
=
5
0
,*+$
¯FÏÍ/-½%9Ê7Ë
Ï Æ ÍÊ76Ë Ï Î ÍÊ6Ë Ï
ÏÎÍ·Úk/0
0
1
,*Î4
¯FÐx-½/0
2
0
0
0
,*7775
4
¯FÏà&/-½%9Ê77Ë
Ê6>Ë/ Ï Ì / - ½ % 9
Ê77ËÊYË/0
0
9
2
,*@+
5
E
5 #6
«$±²&'
Ù|&9«¬(3·I&Ì0
START
èÏó¸÷èÏ5
}Pz¸ÑRºq»
Q}¸A6Q.¹¸qz
@
Ù |/}©ª(3·NK±²&'
èÏó0
STOP
«$
½í;<67
RSTù·x8ÄqquRV"qR
S5
~H\(5
ÚEÒ+uÓÔ0Õ?]Ä·RSøù
ÓÔ[!· RSTï1ÆSTùÒ!Ä0
.&è>(5
#6qRSÊÀòÚ0RST÷HIøùÓÔ
RV"qRS0
~?.&èH\?>(5
ÚÖÒ+RSÞRÓÔ0×LÓÔ&RST
÷HIØYÓÔ|=ÞRÓÔêëI4%RS/ïHI
4%RS0#6ÞRÓÔRST÷7ºÅÙ·Ï
0#6HI4%RSRST÷HIa0
&··H\éê(5
ùJ÷uTRST&!ÄÓÚÊ
O/0{º&ÊÀòÚ·uT¦ÚR
STRS0
'
5 #6
«$
½í;<67
Ù9~4~}//3~ijkl(3LèÏó¸ô>Îîø$
0
¨è¥è)çé©ê©¦è;<67v
1
2
3
4
5
6
7
8
9
0
TEL FAX
01 FEB 10:30
M:00% STAND-BY
RECEPTION
MODE
A.M.
TEL FAX
01 FEB 10:30
M:00% STAND-BY
A.M.
TEL FAX
01 FEB 10:30
M:00% STAND-BY
A.M.
TEL FAX
01 FEB 10:30
M:00% STAND-BY
A.M.
$Ûf±nù鸹u/{¸¹^ºq»u ^ RS/ôºq»R
S/ÂRS"Ê
>µ`0$Ûf±n
ùéÓqa:auT/"Ê
Ou
T0
+
«$
;<6¯
#6J÷RSTuvÙîø:¦§¨m©¦ª«¨m¬ª¨4Ä
·ÀòþRSTïuvRV"qRS0
«$ºq»RST/þRST/0
ÙÍÇ35
FUNCTION
èÏó¸÷èÏ5
z¸.¸¸R
Qºq»A6QS.
Ù¸RS/·ÀòRSTïÙ1
8tuv/·Àòuv0
û8
1
• èÏó÷ÜÝèÏÀò?
@Þß=±²&'èÏó0
#6ÀòþuvRS$u
vHIøùÓÔÊ÷RST
«$=ºq»RS/0
RECEPTION
MODE
• ÊV¥:¦§¨m©¦ª«¨m¬ªOD£¨¬C¨4J
ñb:¦§¨m©¦ª«¨m¬ªOD£¨¬C
ºàR S/À  À ò ø .ÆÚ
9ÄÐÄ×ëÄ>ij( À½º
gá/|¤RST÷
RS0
=
)¥
k
2
TEL
FAX
A.M.
!
'
5 #6
«$
#6Àòøþuv1&]$
ÞRÓÔÊ÷RST
«$=¸¹^ºq»u^RS/0
RECEPTION
MODE
TEL
FAX
A.M.
• ùRVRST7ºRS"%
&:¦§¨m©¦ª«¨m¬ªOD£¨¬C !
RSÊV¥:¦§¨m©¦ª«¨m¬ª
OD£¨¬CºàRS/ÀÂÀò
ø.ÆÚ9ÄÐÄ×ëÄ>ij(/0$
Ò @ R SÊ Ù |&9« ¬(3 Í 8 9 : RST÷RS/0
+
#6Àòøþuv1&]$
RSTuT¦
Ú#OøÃ/Ê÷RST
«$=qa:auT/0
RECEPTION
MODE
TEL
FAX
A.M.
4
"
g³R´
¼9î:
Ä·Ó}(3/ (3qg³úûÄÅR
´0
¦©3ê0v
1
2
3
4
5
6
7
8
9
()0v
0
;<
Ù|}~&~9¡¢(30
Ù}(ï3/ (30
èÏó¸5
6ÑqR7½@@
}S¸q¸z½||
6ÑqR7½@@
}S¸q¸z½:OO¹¸
6ÑqR7½@@
}S¸q¸z½¹P
E
SPEAKER
DOWN
k
UP
5 #6
g³R´
èÏóèÏøÆR´â&ÊÙ
|}~&~9¡¢(3·éúû0
SPEAKER
=>?
Ù}(ï3/ (3Y
ìÙ|}~&~9¡¢(3/0
DOWN
k
UP
• ÄÅ÷ÀòR´â&ÄÅÆ
z?@èÏó¸÷uEº±²
&'0
èÏó¸5
6ÑqR7½@@
zR¸z½||
6ÑqR7½@@
zR¸z½:OO¹¸
6ÑqR7½@@
zR¸z½¹P
zR¸z½PººPÁ
P½Sz¸}}}qz
#6ÀòøzR¸z½PººPÁ|é
Ä Å ã/ÊÙ |&9« ¬(
30
START
@
g³R´
@AÁB&
RV{ï÷¥«¬&RST!P7º>PäÙ"%0#
ùÌ$Ä·÷äÙç&'°±=PïéäÙ0
ÙÍÇ35
FUNCTION
èÏó¸÷
¼èÏ5
4
;¸¸S¹¸R|
Q>}¸.A6Q}¸.
;¸¸S¹¸R|
>QRP;¸¸S
Ù¸Ïç>PÙ1Ï
çPïÙìÏ7ºäÙ0
3
,*
CD@A
Ù |/}©ª(3·NK±²&'
èÏó0
'7
STOP
5 89:
üý!:
òÀÆzîFÆ?ïÆzîFn?÷×$ĵ`VrÂî
Fµ`abu´0
Û*cÛ6
= HI
216
mm
EF
üý
EG
üý
'E HI
148
mm
'7 HI
140
mm
EF
!:
57 Hü
1.0
m
EG
!:
157 g/m²
52 g/m²
Û*cí6
EF
üý
EG
üý
'E HI
148
mm
=
216HI
mm
'7
140HI
mm
EF
!:
@4 HI
297
mm
EG
!:
52 g/m²
80 g/m²
'
5 89:
Ì89:
ÄRVµ`
[*÷wxµ`$4ï+0
N O P
QRSÄÅT
U
HI
5+ mm
HI
4 'mm
4' HI
mm
HI
5+ mm
JKLM
'
wxefåÁæf{çæèfïçéfê0
µ`VFµ`Vrùõµ`¸ê{ëì¡3Ì[
Jí!0
îFVrùõøùî+ï{ðñïðòÌ;<µ`
¸h0|¤RSTļ}Úd0
óùûô·{õë~{rt{à+Eàab{Ä÷Ü
{ö÷ïø®µ`[X;ù¥?@A÷úØîFVr
Â0
îFµ`
VrÆzEnÄîF67?ry0ÍÇry÷<lk?®aH
IîFRSTÂ0
#6$RVï÷¥µ`· 67 ?Ä·wxE@Æ?
õÆþ÷Uÿryà}p[VrÂ0Êìð
jbkF
ry}=ÍļcÃuVrïØr0
#6µ`Âêõ?FïrydÍÇryÌÆzÆ
?îFÊwxõÆ?1&÷Æ?FVrÂ0Êpp
F·vwÃuVr0
÷µ`cðg³µ`0
÷µ`®í[\RST¸÷
ppkFµ`Vr0Ê;÷µ`
û0[FRSTÂ0
• Vr÷µ`õïFRST
Â0è Ï ó ¸ ÷ º }¸RO z¸qO
RVüý/"0
'
5 89:
6Ô9:
îFµ`
# · ? §¶ k ø
Ãg³^ 臨«$G
#ùÌ$/?@#Í?Z@!·
OP4%RVRSkøÃ4Ý
RST%90
RESOLUTION
18?T9:
`V"18?T
9 :fg B Ý . /
01
!"()
Êìð
óÝaÏý®ð9:hºµ`ÍļVr
T`0
''
êë®ð[î\î¸ï·ÝaÏý
®ð0
îFµ`
îFµ`0
5 89:
ÿ¸Ïý®ðV¥F$-0
'+
g³§¶
¼9WXY_ZY
#ùÌ$Ä·RVµ`ùõ;g³§¶0
WXY½.
çûê¦û¨¦w \f_
ZY ½.û(ç©
Ð
rC[{|½
.fÒ!¼9
½í.
[*§¶«$G)Ò+RV÷¥µ`§+µ`
¤e»0
WXY½í.
}qROqzO/
§+Ƶ`ÊÓ}qROqzO/«$
G0ÍE1{E6µ`RV0
ºR¸cd/
§ + õ ù à $ 4 ï h d + µ `Ê Ó
ºR¸cd/«$G0
}S¸zºR¸hd/ §+õùÖà$4ïÖhd+µ`ÊÓ
}S¸zºR¸hd/«$G0
|q¹ºPR¸efg/§ + ,u Ê Ó |q¹º PR¸e f
g/«$G0RST÷Oص`·O@ s
ùVº0
_ZY½í.
'=
qPHI/
§+Ƶ`ÊÓqPHI/«$G0
Oqz/
§+µ$µ`ÊÓOqz/«$G0
!
g³§¶
îFµ`0
ÙÆïn 9~|//<=(
3LèÏó¸ºø$
§¶«$G0
• ÆzýI³«$G
¡ &§¶ « $ G qPH
I/÷º¶8«$G
á0ÎzýI³¡
&èÏó¸÷º§¶«$
G=Oqz/"0
RESOLUTION
5 89:
• Ì;îFµ`?@!Ä·g³
§¶0
6ÑqR7½@@
}qROqzO½qP
6ÑqR7½@@
ºR¸½qP
6ÑqR7½@@
}S¸zºR¸½qP
6ÑqR7½@@
|q¹ºPR¸½qP
6ÑqR7½@@
}qROqzO½Oqz
6ÑqR7½@@
|q¹ºPR¸½Oqz
[*#6$Ó}S¸zºR¸hd/RVµ`>
RSTüÌù,10|¤RST÷HIÓµÆ
8EÒÄÀ«$G0
'4
"
g³§¶
]½WXY
#ùÌ$Ä·÷RVµ`«°±=ºR¸cd/0Ê
ñb·cd0
ÙÍÇ35
FUNCTION
èÏó¸÷èÏ5
4
ºR¸SzPz
Q¸}A6QRP
Ù¸/·÷««$=ºR¸
c d/ïÙ 1|/· ÷ « $
=}qROqzO/0
Ù |/}©ª(3·NK±²&'
èÏó0
'E
^
1
_
k
STOP
2
!·OP4%RVRS
OP4%&Ä· ÒïÙ|}~&~9¡¢(3/?
@!·Ù½$3·"b4%0
#6ùtÄ·;!·Ò2!?@!RVRS
#6JÙ |}~&~9¡¢(3¤Ì Òq!/0
OP4%hSV$§RST|ùKX0
îFµ`05#ùÌ$Ä·
scd>4%ù@îFµ`/0
• èÏó¸÷º }¸RO z¸qORV
üý/"0
• #ùÌ$Ê«$ ^ 臨
0
RESOLUTION
ÒïÙ |}~&~9¡¢(30
4%"%0
SPEAKER
k
!·Ù½$34ÝRST
%90
2
3
2
4
5
6
7
,
'@
5 89:
`abA×8
!·OP4%RVRS
'
0h×+RST«$
G÷LRST"%ï§
÷ùt0
Beep
• #6§Ê2ÙRST
a3#6JÙ |}~&~9¡
¢(3Ê Ò2!/0
ÍÄ·ÓRST7º"
%0
+
L"%&ÊÙ|&9«
¬(30#6ÓÒÊ÷
[K£0
START
• RVsù@RST7ºÆzä
Ù0
{| ¨è¦éû!Av
Ä·Ù9~3&{(3·u4E@Æz4º%90$RVµ
`Ê s ö L R S " % &Ù |&9« ¬(30Ê
5Ù9~3&{(3@úû÷HII0
+7
!·HI4%RVRS
Æ!·Ù123ïÙ|}~~33&(3¯F/½½$(Ä4ÝRSïu%90
$Ó123ï124%%9Ì;123ï124%%9Â
«$³RS%90Ƹķ123«$EP%
9Í÷~þn³0
ù678123%9778124%%9ÄÓ0
Ú{Ä·÷59ïÅh9#Å123ï124%%9
Â0
Ä·Ó123ï124%%9÷RS·up`U`R
Vup`0$=up`«$123ï124%%9Ê
S ¸ Ó Î Y Dmªo¨~:¦§¨m©¦ª«¨m¬ª.¬ª¨¬§
Sª§Ónö¼®ð/0
)è覦éûSTA×v
1
2
3
4
5
6
7
8
9
0
STv
gSTvwxcrâdSTvr×
eÔSTvfg_¶frwx
+
5 89:
`aÐA×8
!·HI4%RVRS
CD×geÐA×
ÙÍÇ35
FUNCTION
èÏó¸÷èÏ5
3
ºq»^¸¹:PO¸
Q}¸A6Q.¹¸qz
Ù¸3·Àò«$0
1
èÏó¸÷èÏ5
ºq»^¸¹}¸
}S¸¸OPzzqSO
$÷%9ÅF123ÊÙø$1
230
$#Å124%%9Ê!·Ù½$
3·¯Fø$6-½½$<îî
22/0
'
,*
STv7
01
0
,*
STA×7
1
!·Ù½$3¯FRSïÞR%90
• $¡ áâÊÙ |}~~3 3&
(30
2
3
2
4
5
6
7
,
+
#6=øÅhDËï!{Sdƽ$ù'Ë
ÊÙ9~3&{(30Ë÷·$%èÏ0ÄƹG¯
FnzË0
!·HI4%RVRS
Ù|&9«¬(30
=
#øÏ!·Ù½$3¯F§°
À#6$¯F°ÀÊ(
cdX/0
START
5 89:
+
SPACE =
J=
T=
A=
K=
U=
B=
C=
D=
E=
F=
G=
L=
V=
M=
W=
N=
X=
O=
Y=
P=
Z=
Q=
H=
R=
I=
S=
SPEAKER
Ü"5}|qzSQXXXXX@@@66XXXXXX
4
$¡
áâÊÙ|}~~33&(30
$ç¯FÆ$1ÆÙ3/8%µ$&ʯF·%µ$&@
Ù|}~&~9¡¢(30
$Àò·ÂÆ8%Êu÷Ù
3ï*35
a^¸¹º»¼+´A½¾¿QÀÁÂÃÄÅƼÇÈÉ
Ù|&9«¬(30
START
+
!·HI4%RVRS
E
@
#6ø«$%9+ç4%5
9ïÅh9ÊÙ¸Ê
·
59Åh9ç4%k/0#
6Y%9+!RSïÞR%9
ÊÙ1ï|&9«¬(/0
NKcd > ·#ŵÆ8%9ïÙ
|/}©ª(3·NK±²&'è
Ïó0
ÝÞ
1
Çà
k
2
STOP
hi k
ÄÅe1FBA×
üÄ·Ù±·¸øë$õö123ï124%%9«$
59ïÅh90cdWÂÙ¸·÷%9«$=ç4%%
90
!·«$=ç4%123ï124%%94Ý59ïÅh
9ù@RST÷4Ý%9$4Ý%9Ä
·!·Ù123{Ù124%3¯F124%%9{ïÙ½
$3q4Ý%9/0Ê5#6J123ï124%%9
«$%9ÍÇ%9²ï¹º=ç4%%90
!·ç4%ÆzEnÄ4ÝY7-½$0
KRÐA××
ÙÍÇ35
èÏó¸÷èÏ5
ºq»^¸¹:PO¸
Q}¸A6Q.¹¸qz
+'
FUNCTION
3
!·HI4%RVRS
Ù1·Àò.¹¸qz¡
/0
Ù123ï¯F$¡
%9Ù½$3/0
124%
2
0
5 89:
1
,*
STA×7
'
Ù|&9«¬(30
+
NKcd > ·¡ µÆ8%9ïÙ
|/}©ª(3·NK±²&'è
Ïó0
START
hi k
STOP
[*ef¡ J+¬&Ïýïêëÿ3%90Ê;<¬
&Ïýïÿ¡ Y%9?@A¡ 123ï124%%90
$%9+Ê#Wøù¥ÿ¡ï¬&¡0
]×
$°±ùõ#Å%9Êu÷ñb«$õö0ÊÀò$cd>
°±123ï124%%9g2cd@äcdOº
èÏó¸&°±%9^ï°À0
[*RSTÓu2Äué&÷HI4%%9
«$ñ#Å+½¾4Â0ué&øä$u2u
¼0#6uÆé¤u2ÓF<=YÐ0#6u2u
¼JäåÊBC6<=ï=·÷±0Êìð
HW±
0
++
!·HI4%RVRS
je1
RSTùÚÃÅhö¼Í(ÓRSTO +µÆ8Ïýü
Ä·îFµ`!·HI4%q4%04%!ù@RSTi(
÷µ`wxL½¾4Âsøùùõ«$Ïýù@RV
µ`0
#6ù·Æ·¸µ`JwxL½¾4·"bRV¤RST
÷Ù±Íǵ`wxzöRV0
RST½¾4ÂZ[Ä#ÅF< 7 ?G0#6Ócdï
efgqwx?®¤Ä#Å?®÷ßà0
RSTEnÄ1&ñb>7RVüý0
¿õJ"½¾4´÷Ù#¶:½77èÏèÏó¸0
`Vklm555
#6wxµ`&½¾4^"$èÏó¸÷º:¸:Pzº¹¹
½¾4J$/"0ÊÙ·øÃÙ|&9«¬(3ï|/}
©ª(35
#6$RVJ#Ž¾4Â?®ÊÙ|&9«¬(30
%?®<Vrºµº0RV«¬@½¾4ÂG
÷^¡ (Ä&çRV%?®0Ú{üÆ$RV>Ç
'o½¾4^"$&wxL?®0
#6$h³8RVÏýÊÙ|/}©ª(30
#6ÆÌGóÙ|&9«¬(3ï|/}©ª(3¤R
VÏý÷^hdJwx·?®ü÷<½¾4¡ 0Æ$
uERVµ`øù?®0
+=
!
!·HI4%RVRS
#6J123«$$4Ý%9¤Ä·!·Ù123q
4%0
îFµ`0
• èÏó¸÷º }¸RO z¸qORV
üý/"0
• #ùÌ$Ê«$ ^ 臨
0
RESOLUTION
Ù,X1230
01
02
03
• Æ(9iù@RST÷HIR
Vµ`0
,
+4
5 89:
STvA×
"
!·HI4%RVRS
STA×
#6J124%%9«$ø$4Ý%9¤Ä·!·Ù
|}~~33&(3?@¯F124%%9q4%0
îFµ`0
• èÏó¸÷º }¸RO z¸qORV
üý/"0
• #ùÌ$Ê«$ ^ 臨
0
RESOLUTION
Ù |}~~3 3&(3?@
!·Ù½$3¯F124%%90
• $¯F½$Ê;¯F7
?@A¯FY½$0
èÏó0#6èÏó¸èÏ°Àï
%9OVÊÙ|&9«¬(30|
¤ÊÙ|/}©ª(3?@u÷c
d60/
+E
SPEED
DIAL
0
,
START
9
!·HI4%RVRS
üÄ·Ó½$3q¯F³%9?@Ù|&9«¬(3
·a4%0#6eÆRSõä§!Ä·ÓÚf4
ݳ%90
îFµ`0[*#ùÌ$Ä·
scd64%ù@îFµ`0/
• èÏó¸÷º }¸RO z¸qORV
üý/"0
• #ùÌ$Ê«$ ^ 臨
0
!·Ù½$3¯FRST%
90
• #6=øÅhDËï!{
Sdƽ$ù'ËÊÙ
9~3&{ (3¶ z Ë ÷ ç
/P/0Ë÷·$%èÏ0Ä
·Æ¹G¯FnzË0
èÏó0#6èÏó¸èÏ
RST%9OVÊÙ|&9«
¬(30
RESOLUTION
2
3
2
4
5
6
7
,
START
• #6èÏáâÊÙ |/}©ª(
3·µK¡ ¶ÙÆz¡ Æ8
½$/?@uE¯FOV½$0
+@
5 89:
vn²;A×
!·HI4%RVRS
opÐA××
#6½f=$RS%9ïup``)«$123ï12
4%%9Ä·!·ñb·cdqY%90Æ(³Lø*$
%9ÆÙ|&9«¬(3üÄ·4%RVJîFµ
`0[*$up``)Ì÷RSTuv0/
îFµ`0
• èÏó¸÷º }¸RO z¸qORV
üý/"0
• #ùÌ$Ê«$ ^ 臨
0
RESOLUTION
Ù/3?|~&94¯©?°±(30
Ù ¸ ·HI4%%9ïÙ 1
·up``)0
'
=7
!·ÙÆïn,X½$3%
µ$&Ù3/LJ#Å°À
·$&ºèÏó¸0#6Y°À·
$¿ï%9aÊÙ¸)Ò
+HI4%%9/0
#6½f·$&Ê(cd Y
÷<¡aîýI/0
#68°Àó#Å=HI4%%
9ÊÙî0Í÷ÓýI¡&
º%9dg°À/0
HOLD/
SEARCH
Cqr:
ÐA×
k
1
ABC
1
GHI
DEF
2
JKL
4
PQRS
3
MNO
5
TUV
7
2
6
WXYZ
8
0
9
!·HI4%RVRS
Ù 3ï * 3·ýI°À#6
Ùî¤ýI%9/èÏó¸º
ø$°À&ËÌ0
k
5 89:
+
• #6#Å°ÀÂù·ø¯F$
&=a°À÷<¡Â
Æ 8 ° À+ $ & , ö/a ý
I0#6Úù#Å°À ^ %
9¤èÏó¸÷ºRPOqqe
ñ/"0
=
Ù|&9«¬(30
START
• aRVµ`0
Ð!A
#6ÓHIu4ö¼êë34%/¤uS"S
&RST÷HIu4Y%90RST÷¶-yÌð
u4/z0
$ËÌHIu4Ê#·hRVüý.øÃhü
ý0
Ð!A!A&&s
#ùÌ$Ä·°±RSTð
HIu4&''-0
ÙÍÇ35
èÏó¸÷èÏ5
FUNCTION
4
z¸.q¹¹R¸zq¹
¸R¸z7Y7Y
=
!·HI4%RVRS
¯FÆ8+ðù'6-½
½$ý=&''-̽0
0
3
,* òt
Ù |/}©ª(3·NK±²&'
èÏó0
STOP
ÐA×!A÷u
#ùÌ$Ä·°±RST"S&ð
HIu4Enz½0
Ç9:"##6§!·uqqu/HIu4
ļ«$ð
u4z½ùõüËÌ0
ÙÍÇ35
FUNCTION
èÏó¸÷èÏ5
4
z¸.q¹¹:¸}
¸R¸z777>76
¯FÆ8+îîîìù'6-½
½$ý=ð
u4Enz½0
0
3
,* ÷vw
Ù |/}©ª(3·NK±²&'
èÏó0
=
STOP
!·HI4%RVRS
$èÏùé¿õ«$RVÍC/üýù"Êñb·c
d0üÄ·ÓÚõöqhRV0
ÙÍÇ30
FUNCTION
0
• èÏó¸÷èÏ q.PR}q}I
ý/RVüý½?@èÏ
ùéÆüý"0
Ù}(3ï3/ (3·
ýIüý¡5üÄ·Ó*ï
3ýI¡/0
DOWN
k
UP
• Î$RVüý 6 -½½¾½${
«$RVüý&'·ôRVüý
÷°Àï%9/
ÆèÏó¸
¼èÏ0
• $hüýÊèÏó¸ºYü
ý&Ù/|&9«¬(30
®¡ù@ÊÙ |/}©ª(
3·NK±²&'èÏó0
STOP
=
5 89:
xy1z8{/
!·HI4%RVRS
|}67
RSTJ«$=¹¥RSùõ;HI±Oþ+uSQ
RdcRVS0Úö¼À=áâ±O¸.:0¸.:Ò
+RV9:)§RST]ù¸.:ö¼&=ù
»0
ÙÍÇ35
FUNCTION
èÏó¸÷èÏ5
4
¸.::PO¸
Q¸}A6QRP
Ù ¸ ·a ¸.:ïÙ 1 ·é
g0
Ù |/}©ª(3·NK±²&'
èÏó0
='
^
1
_
k
STOP
2
!·HI4%RVRS
RVµ`&RST!Pwx·õÂ4Ý%9a
RV0Úö¼À=12S0#ùÌ$Ä·é12SR
STLøù?®wx@A4%0
ÙÍÇ35
FUNCTION
èÏó¸÷èÏ5
4
/.PR¹R¸
Q¸}A6QRP
Ù¸·a12SïÙ1·é
g0
Ù |/}©ª(3·NK±²&'
èÏó0
^
1
_
k
2
STOP
=+
5 89:
STF
5 ;<9:
{|çèßû8 CDß67
"çèßû8CDß
67fg/¨è¥è)çé©ê©¦è
;<67vf²~
W0çèCDû8
RECEPTION
MODE
TEL
FAX
A.M.
«$=¸¹^ºq»u^ RS/&RSTÆzÄÅ
@HIøùÓÔ0@RST0®S<yPÌ·
1ÓÔ|ORVRS"%0
#6RSTØLRS"%ÍÏÓÔ=HI4%RS/¤
HIaRV"qµ`0
#6RSTùØLRS"%ÍÏÓÔ=ÞRÓÔïI4
%RS/¤ÄÅYPÌÀ=23ÄÅ/·Ï0#
6YPGùRST÷RVÆ8RS"%L§
RST·ÓÔÌ$&IRVRS0
[*ùRST!Ä·!·23ÄÅqÏÞRÓÔï
I4%RS01ÆST@÷ÄÅ0
==
!
Ó¸¹^ºq»u^RS/
çèßû8CDß67=>ÁB&
#ùÌ$Ä·°±¸¹^ºq»u^RS/23ÄÅç
&'0
ÙÍÇ35
FUNCTION
4
5 ;<9:
èÏó¸÷èÏ5
S}¸OPzROza
QY}¸.PRO}
Ù·øϯFEø$ç&'ù
½$5
Ù |/}©ª(3·NK±²&'
èÏó0
+*
1
7*
2
=7*
3
7*
4
STOP
=4
"
Óºq»RS/
{|û8 67
"û867fg
/¨è¥è)çé©ê©¦è;<
6 7vf² W0û8
RECEPTION
MODE
TEL
FAX
A.M.
«$=ºq»RS/&RST÷ÆzÄÅ@HI
øùÓÔRV"qRS0
÷=>
=E
;<
#6RSTùõ Ҥķ§! ^ ï
µ`#Ó¸¹u/øÃ/0
Óºq»RS/
]=>÷u
#ùÌ$Ä·°±RSTºq»RS/¸¹^ºq»RS^
u/RV"qÓÔùÄÅz½0Ä·Àò<Y
ù'½$0
ÙÍÇ35
FUNCTION
èÏó¸÷èÏ5
4
5 ;<9:
R:;¸zPºzR}
¸R¸zY
¯Fø$ÄÅz½<¸ðù'
½$/0
èÏó¸÷ÜÝèÏÀò?
@5
3
,* ÷=>
YzR¸¹qR}a
Q¸}A6QRP
Ù |/}©ª(3·NK±²&'
èÏó0
STOP
9:;<yz
[*µ`TnEnÄ·477 ?0=vwTn56dc
rÊËÌ6P÷Lµ`÷¥`hº0ñòóTUôõö
÷JKµ
=@
!
Óqa:auT/
{|û55 CDG-67
" û55C D G - 6
7fg/ ¨è¥è)çé©ê©¦è;
<67vf²~
W0û55CDG-
RECEPTION
MODE
TEL
FAX
A.M.
qa:auT/Â#6J÷uTRS
T¤RST÷HI¦ÚäRS"0Ê
O·Û
f±nc"0
47
!
Ó¸¹u/
{|çè CD;<67
RECEPTION
MODE
TEL
5 ;<9:
"çèCD67fg
/¨è¥è)çé©ê©¦è;<
6 7vf² ~ W0CDçè
FAX
A.M.
«$=¸¹u/&Ì
STùÒ!Ä·øùÓÔ0
RSTï1Æ
{|;
RSTÄÅ&
#6LRS"%ÊèÏó¸
è Ï z¸.¸RO /"?
@!÷Ò[K£0
Ò0
Beep
z¸.¸R
[*#6J÷RS"%«$G«$=RP
|/ÊÙçû¨çÝ 3·a0
4
!
Ó¸¹u/
#6§$;"b!?@ARV
R SÊ ! @ Ù |&9« ¬(
3Ê7`)Ù2a3ùõ
;Ù|&9«¬(3/0
• è Ï ó ¸ º z¸.¸RO /"&Ê8¸Ò0
START
z¸.¸R
{|ò;
TÄÅ&0
#6L9äRS"%ÊR
STýºKXT÷KX/?
@A8¸Ò0
Beep
òN
4
!
Ó¸¹u/
#6RSTeKXï)§$;
!?@ARVRSÊ+zÙT
¸ð{*ô*3)Ò+RK4
%u/0Í÷!¶RSTaR
S0A8¸Ò0
[*
#6RSTVrÂîFøµ`RST÷×a"
%ð**0
#6J÷RS"%«$G«$= RP|/Ê+zÙT
¸ð{*ô*·a0
]ÞÐ×
#ùÌ$Ä·Óð·{½$<T¸IRSö¼0
Ä·Àò<î2ù'½$0
ÙÍÇ35
FUNCTION
èÏó¸÷èÏ5
4
¸¹^ºq»z¸:P¸
¸R¸z7Y
¯F<î2ù'Æ8½$0
1
,
4
5 ;<9:
5
!
Ó¸¹u/
Ù |/}©ª(3·NK±²&'
èÏó0
STOP
Çà_çèßû8CDß×
#6Ý:<TIRSķ駸ø¹^ºq»
u^RS/;0%9Øö¼0ÍÄV¥!·T!
&RST×ØL¸¹^ºq»u^RS/;0%9"
%&áâð
aRS0
ÙÍÇ35
FUNCTION
èÏó¸÷èÏ5
4
z¸:P¸z¸.¸SPR
Q¸}A6QRP
Ù¸·aظ¹^ºq»u^R
S/; 0 % 9 ö ¼Ù 1 · ÷ é
0
Ù |/}©ª(3·NK±²&'
èÏó0
4'
^
1
_
k
STOP
2
!
Ó¸¹u/
;<&×
ÙÍÇ35
FUNCTION
5 ;<9:
#6!·RSTïTÓÔù@L9äRS"%RS
T÷HIa0#6ÓuvRS½T1Æ_S¸RV
µ`Ì;éÚö¼·ÛÌRSTáâð
<uvRS½
Tµ`0Êñb·cd·°±«$G0
4
èÏó¸÷èÏ5
ºq»}Rq¹z»
Q¸}A6QRP
Ù¸·aÚö¼ïÙ1·÷
é0
Ù |/}©ª(3·NK±²&'
èÏó0
^
1
_
k
2
STOP
4+
! Ó¸¹u/
;<Z,
RSTºn&J«$=HIÛàLµ`ùFà·ÿ¹¥
rFà0ÍÄV¥< µ`¸ñ0#ùÌ$
Ä·éÚö¼·¥=F๥Lµ`0
#6µ`}>dÿ¹¥rFà¤%k÷¹¥Î
?¸0Í89:< FļºÆbÂ'-\0
#6Lµ`>Fêõ·ncd+ïù\ï·
RV¤HIÛàö¼üļe»0Í89:µ`%
k÷¹¥Î?¸0
ÙÍÇ35
FUNCTION
4
èÏó¸÷èÏ5
z¸.¸SPRzqP
QqPA6Q77
Ù ¸ ·aHIÛàö¼ïÙ 1
·÷é0
Ù |/}©ª(3·NK±²&'
èÏó0
4=
77ÿ
Ð
1
k
2
STOP
!!
Ó¸¹u/
rçèCD67T+÷=>Ð;
#ùÌ$Ä·«$¸¹u/ÂYzÄÅ@RSTH
IÓÔaRS0$aÚö¼ÊÙ·øÏÙ
35
ÙÍÇ35
FUNCTION
èÏó¸÷èÏ5
4
5 ;<9:
YzR¸¹qR}a
Q¸}A6QRP
Ù¸·aÚö¼ïÙ1·÷
é0
Ù |/}©ª(3·NK±²&'
èÏó0
^
1
_
k
2
STOP
44
!"
¼E½¾4
2;<kl
ef¹¥9:#RSTer{Æ$±¢£¤ïØr/R
V"qRS÷½¾4Â0
Lµ`#Ž¾4Â&èÏó¸÷
¼º.qR¼
SzROqqef¹¥ñ/"ƤÐÑÖ"0×
Ö@RST÷HI¹¥#ŵ`0
#6RST}ryød÷Lµ`#Ž¾4ÂÊËÌ
ÿ;õÓryab,1ry0|¤µ`¯ºabļ
ÿ¹¥ryab0
ª«
4E
½¾4Âù#ŵ`&Êìéu0|¤Í¡
G0
øùµ`
#6}=uÖïu Öd?ø½¾4Â
µ`¤Þßu&RST÷¹¥º.¹¸qzz¸SPz¡
/0Ú
=ùé?µ`ù"êëRVR
STRS%9#ù/0
!
'5 >?
RSTüÄ·q÷¥µ`0Ä·ÓRST÷¥Æïn
µ`¶Oص`EnÄ÷¥/ÍRSTüAø
B_÷¥Tö¼ø0
÷µ`O®íîFEn67?/0
• èÏó¸÷º }¸RO z¸qORV
üý/"0
#ùÌ$ÊÀò·Æ8ïn8Àò
@÷¥«$G5
'5 >?
• |/94/}ø@A(6
#6$=Æ·¸Oص`÷¥
n÷¥`$§÷¥`"b?
ÊÙ.4/qr(3ù?
@ ¯ F ¶ O Ø µ ` ÷ ¥ ½0
#6÷¥½à+Ïʽ$õ
®¯FÊ7Ë0/
A
B C
0
Originals
99:
A
B
C
A
B
C
A
A A
B
B B
• }~4/}~|í
@A(
úø(6
#6$=Oص`ï¶Oص
`/÷¥n÷¥`ʯF¶O
ص`÷¥½0
6
3
,*
9
:>?
,* 9
:òú ß òú
>?:
Not
sorted
òú
Sorted
òú
A
B C
FUNCTION
C
C C
9
,* 9:
>?
4@
"
÷¥
• 9~34~?~&9¨~X?(6
#6$Ûàï[F÷¥`ÊÙ
9~34/?~&9¨~~X?(
3LèÏó¸ºø$#¶
Ä · Ó Sî ¸/ OPR
î/3qýI³#¶/0Ä
Àò#5
77Ûà^[F/
qPHIHIÛà·ÿ¹¥r
yFà0/
@
WW
X>
Y7
677
Y7
6Y
REDUCTION/
ENLARGEMENT
[*[F ^ Ûà«$¼ÓÆz0
• 9~|//<=(6
#ùÌ$Ê«$^臨
÷¥«G=ºR¸cd//0
Ù4/}?~}@A?®(30
RESOLUTION
COPY/HELP
• a÷¥0
[*
#6÷F´Oص`[FVr¤º½¾4J$9:Í
÷Ó¼wxøùµ`èÏó¸÷º:¸:Pz}º¹¹½¾
4J$/"/0#6ºÍ89:ÊÙ|&9«¬(3·÷
¥JwxOص`?@u÷÷¥õö·÷¥%Oص`êë
½¾4J$&OwxOص`0
E7
"
÷¥
T>?
÷¥·¹¥rµ`&Ä·Ó ÷¥«$qÀò
| µ`%kïÎ?¸¹¥0«$=¸}Â
%k/0$°±Ú«$Êñb·cd0
ÙÍÇ35
FUNCTION
èÏó¸÷èÏ5
4
Ù ¸ ·÷ ÷¥«$= ¸}
µ`%k÷¹¥/ïÙ
1·÷ ÷¥«$=RP|µ`
%k÷¹¥Î?¸/0
^
1
'5 >?
.PS.Pºº
Q¸}A6QRP
_
k
2
èÏó¸÷ÜÝèÏÀò?
@èÏ5
ºR¸SzPz
Q¸}A6QRP
Ù |/}©ª(3·NK±²&'
èÏó0
STOP
E
"
+5 ABCD
Ä·\Ó!uÆÓRSTq4ÝuäÞRÓ
Ô0
$4ÝïÞRÓÔRSTuÌa0
ÒïÙ |}~&~9¡¢(30
4%"%0
SPEAKER
k
Ó·ÂÆ8f4%5
• ûü6Ó½$3¯F³u
%90
01
02
03
• 6Ù,X1230
• 6Ù |}~~3 3&
(3?@Ó½$3¯F6-½
124%%90
§@(Äa!0
• #6Ùø |}~&~9¡¢(3Ê
Ò·a!0
E
,*/ STv7
"
4Ýu
[*
RSTÒ @Òó8¸/RSTT
÷efµÆ"b!0
#6«$= qa:auT/!²'ºC
D&E¤RSTļ TÞRÓÔ0#6Ó
Ù3uÄ·@i(QÙu¸F8Ù3
·Û̸ú5Êì¯FIRSE95Y{*{
*/0
opÐA××
Ä·Ó/3?|~&94¯©?°±(3q123ï124%
%90Ê;#6!·HI4%RVRSÂHI4%%9
øÃ%9?@ ÒïÙ|}~&~9¡¢(30RST÷
HI4Ý%9eÆÙ|&9«¬(3/0
Ä·!·Ù9~3&{(3u4E@Æ8%9eÆ Ò
ïÙ|}~&~9¡¢(3/0§@Ê Ò·"b!
0
*
Ä·!·Ù/3?|~&94¯©?°±(3·!²'÷§
\+0ñbÚcd@§üefLÙRø0
Ä·÷Ò[Kmn¸d S0ÔAz§!
&Ê Ò0#6ù÷Ò[Kmn¸ÊAzÙ/3?
|~&94¯©?°±(3·Þß!0
E
+5 ABCD
!A
"
=5 F;CDG-
F;CDG-
#ùÌ$Ä·÷uTRST~·|~H\¹
º(30Í÷{º&¦ÚRS0
h^ß~·|~H\¹º(3È
_0
÷uTuS3
~·|~H\¹º(30
• #ùÌ$Ä·÷Tu
TT30
pqçè5éêèC
D Ó Ø F
;Ó
F;CDG
-CD
ÓØ
E'
"
uT
]"&
XY°±uT{º¦Ú"P:·¶$RVRS
qu)Ù2a30"#Ä·G·¦Ú"5
ÊoÍHq;._0etqu0ÊäÙ@¦Ú
ïÙRSTa3·RVRSII0ËJ
9:÷"G&' 7 PÌ·G0#6"&'·
ļef,³!·HI4%RVRS0
#6{º¦Ú"G&'Ì· 7 PÌÊ"
a>¥¦F<xPÌË&'0ÍRST÷ùTØL
ÓHI4%&RVRS"%0
ÞÐCDG-F;
{ºùõÊÙ·cdIuT5
÷«$=qa:auT/0
RECEPTION
MODE
TEL
FAX
A.M.
=5 CDG-
E+
" uT
÷uT«$=HI0
uTÌ«$=En/zÄÅù@0|¤Ä
¼efL!·HI4%RVRS0
#6uTù.MÇö¼ÊV¥gÄ·xz
ÄÅ&qu0
[*
#6uTù;0Khö¼ÊV¥·I;0Khö
¼E91+!·T·IRSE9Ê
>
µ`/0#6Í/8E9,1¤<u¯FÚE
9·Kh"&RST÷I0
F;`c./
{º&uT÷øùquÂ[{º¦Ú"
0qu)Ä·¦Ú0ÍE&'GRST÷LL0®S
:0#6RSTØLRS"%ï·xPÌCD&'¤g÷Ï
Sa0
rÍÛÇàCDG
- õ fg Ñ Ò ;
<67]û8ßçè
û8kçè
E=
"!
ÄÀqa:auT/«$G
Ìû55 CDG-67½í.
#ùÌ$Ä·!··«$GqNuT§quK
X¼O0
î&
#6RSTuTqu@ØL@PÌCD&'g÷
ÏSa0#ùÌ$Ä·÷Ú«$G°±=+
7Pù'½G0
9:$÷DRØ&'«$=à+>PÌ0
#6RSTqu)¦ÚùõJÂ qu)Êð
Ó±
DR&'«$G0#6{º¦Ú"êõÆECD&'ÊV
¥«$G&'¶YCD&'qfïuEG{º¦Ú"·
ÛÝCD&'0
[*
Ä·!·¯FÊ77Ë&'«$qéDRØ&'0ÊÚ
RSTļefÇþPRSTIRVRS0
ÙÍÇ35
FUNCTION
èÏó¸÷èÏ5
4
=5 CDG-
/¸O¸¸.:a
¸R¸z7777@
¯FÆ8+îù'½$ï
¯Fîî·éÚö¼0
0
4
,
E4
""
ÄÀqa:auT/«$G
Ù |/}©ª(3·NK±²&'
èÏó0
STOP
rCDG-OP8
Úö¼a@#6uTþ+Ç£}efYzÄÅ@
qu¤÷þRST0ÍÆq(ÄV¥uT
Ó~J$GïuTùa&òÄ·LRS"
0
Úö¼ºn&J^é0#6$aÚö¼Êñb·cd5
[*
Úö¼a&ÊV¥uTJ«$=@zï±à/ÄÅ
@0|¤RST÷Q;}dcqu)ef¦Ú0
ÙÍÇ35
FUNCTION
èÏó¸÷èÏ5
4
ºq»z»qR}aºq¹}
Q¸}A6QRP
Ù¸·aÚö¼ïÙ1·÷
é0
Ù |/}©ª(3·NK±²&'
èÏó0
EE
^
1
_
k
STOP
2
"
45 HI
8
ÁÂRVö¼)ñbÆÏý(Ä÷1Ƶ`RV>78
1-\0Ê;îFµ`?@A¯FRST%9(Ä÷
µ`HIRV¶8-\0
)¼Ó123ï124%%9q4ÝRST%90
îFµ`0
• èÏó¸÷º }¸RO z¸qORV
üý/"0
Ù£9/&34&|¤¥(30
BROADCAST
èÏó¸÷èÏ5
;zPqO.q}:PO¸
}S¸¸OPzzqSO
Ó·ÂÆ8ïn8f4Ý
RST%95
01
02
03
• ÙÆ8ïn81230
• Ó½$3¯FÆ8ïn8124%
%90
0
1
2
3
,
E@
45 HI
ÁÂRV
'
Ù|&9«¬(30
START
èÏó¸÷èÏ5
}¸z¸}P¹PR
Sz¸}}z¸}Pa¸
• #ùÌ$Êg³ ^ 臨
0
+
Ù|&9«¬(30RVa0
• ÁÂRVs@RST÷HI¥º
ñ b
0Ê
 ÊR¬¨
U/ËR1|ù-\
½ =Ê;¦D" S/Ëï | ù
!"áâE90Sº¸Ã9:Ê
Az÷µ`RVY-\0
@7
RESOLUTION
START
ÁÂRV
{| ¡v¢£8
#6J÷Úk$"bÁÂRVRST%9«$Æ8ÿ3Â
Ê
q÷%9ÅFÿ3./Ä·Ó·ÜT
õöqñbÁÂRVÏý5
îFµ`0
• èÏó¸÷º }¸RO z¸qORV
üý/"0
• #ùÌ$Êg³ ^ 臨
0
RESOLUTION
Ù,Xÿ30aRV0
17/G1
18/G2
19/G3
,
45 HI
@
ÁÂRV
×eÔ ¡v
ÿ3)ÙÆ,Xÿ3(Ä4ÝÆÿRS%90$÷
Æÿ%9ÅFÿ3Êñb·cd0
123X^67^@[Äýÿ30Ê5¼÷Æ8Ù
31&«$=ÿ31230
Æ8ÿ3ÂEnÄ#Å>78%90
ù123124%%9«$=ç4%%9
ÅFÿ3Â0³%9÷ef#Å0
ÙÍÇ30
{/!Ä·
FUNCTION
èÏó¸÷èÏ5
7
zPS¸Rz:PO¸
Q}¸A6Q.¹¸qz
Ù ¸«$/·«$ÿ3ïÙ
1¡ /·¡ ÿ30
$«$ÿ3ÊÙ$«$Ù3
1 2 3 X^ 67^@ Â Æ
8/0
$ ¡ ÿ 3Ê Ù $ ¡
3?@(cdY0
@
Ù
½í
1
17/G1
KR
k
18/G2
2
19/G3
,
ÁÂRV
'
Ó·ÂÆ8ï/8f¯FR
S%95
02
01
03
• ÙÆ8ïn81230
• Ó½$3¯FÆ8ïn8124%
%90
0
2
1
4
,
Ù|&9«¬(30
=
NKcd > ·«$µÆ8ÿ3ï
u÷Ù
|/}©ª( 3LNK±
²&'èÏó0
START
hi k
STOP
45 HI
+
@
ÃuÄÅ
j!=> ä"<¤¥Ñ
#6ÓþUVuWX|¬ªo£¬ªo§«¬p|¬p©à6
ïºà§mª6DËÌaÃuÄÅö¼0aYö¼@R
STùÞRÓÔ9:7ºMÝÅÙdùRS&7ºM
ÅÙ0SùRSVF&RST6zÄÅ@HIY
«$G#/RS0$aÃuÄÅö¼Êñb·
cd0
ùé±n|¬p©àDË"Ê4777UVuWXZ0
!"()*
ù|¬p©à6ºà§mª6[!Ä·ÓÃuÄÅö¼0Ê
ìÓOPS&aÃuÄÅö¼|¤RST÷efOP
Ïý0
#6aøÃuÄÅö¼Êì÷«$= ¸¹^ºq»u
^RS/0#6Í\RST÷efOPÏý0
ÙÍÇ35
èÏó¸÷èÏ5
PSPR}¸R
Sz¸}} * Pz
Ù*30
èÏó¸÷èÏ5
OS¹¸»zRR
Q¸}A6QRP
@'
FUNCTION
4
ÃuÄÅ
Ùý¸þ/·aÃuÄÅö¼
ïÙý1þ|/·÷é0
èÏó÷ÜÝèÏÀò?@5
^
1
_
k
2
ºq»}Rq¹z»
Q¸}A6QRP
Ù |/}©ª(3·NK±²&'
èÏó0
STOP
45 HI
'
@+
È®?
¦0ú
Ä·RST¨¾È®?÷gs¶zRVRS&E@Æ?
RV0
Ì
Χ&
" <:¨f
Ò!{|
½í©STA×k
STv×AB
Ò!`ª «
¬½í
×
Êñb·cd·aÈ®?ö¼0Æ(aÈ®?ö¼÷
È®?êëøùRVRSGLéÚö¼0
ÙÍÇ35
èÏó¸÷èÏ5
.P¸z}|¸¸
Q¸}A6QRP
@=
FUNCTION
4
!
È®?
Ù ¸/·aÈ®?ö¼ïÙ
1|/·éÚö¼0
èÏó¸÷ÜÝèÏÀò?
@AèÏ5
^
1
_
k
2
qPSzRP
Q¸}A6QRP
Ù |/}©ª(3·NK±²&'
èÏó0
STOP
w&)
aÈ®?ö¼ù@üÄ·ÀòºÈ®?û0>"
0Ê5"Àò)Ò+ÆzRV0
îFµ`0
• Ì;îFµ`?@!Ä·Àò
"0
• ÌaÈ®?ö¼0
ÙÍÇ35
èÏó¸÷èÏ5
FUNCTION
5
45 HI
.P¸z}|¸¸|¸qO
Qz¸R
&râd
@4
"
È®?
¯F<¸%9·Àò"5
¸ÿz¸R]^/
1ÿ:SPzqRu$/
ìÿ.PRºO¸Rq¹T_/
ÿS¹}aO}z;¸Ê7/
'
1
,
4ÝRST%9RVµ`0
[*
$h>"ÀòÊÙ|/}©ª(3ï<VrÂhºµ
`0
@E
sÉ?Ê9
®¯ú°
Ä·÷RS?Ê9<ÆÊ9ÊSa7Ë{ÊSa76Ë/°±=
s É Ê 9Í Ï ÷ ¶ 8 ? 9 @ ® i ÿ Æ _ ] S ` ? ½#
ÊSa7^7YË{ÊSa76^7YË/0Í`)|??®0
îFµ`0
• Ì;îFµ`?@!Ä·«$
sÉ?Ê90
ÙÍÇ35
FUNCTION
èÏó¸÷èÏ5
Sq¸.PR¸z}¸
¸R¸z7
Ù ½ $ 3 · ¯ F ` ? ½Ê7Ë
ÊË/0#6Ú½$à+7Ê
gõ®¯FÊ7Ë0/
• #6$RVÈ®?ò÷gêë
` ? ½ G ÷ H I g ³ ?
½/0
0
8
,*±ú
45 HI
@@
sÉ?Ê9
'
4ÝRST%9RVµ`0
[*
77
#6$hsÉ?Ê9¿Ê<Vr¸hºµ`ïÙ |/}
©ª(30
#6¥=RV?9ø¯FsÉ?Ê9Æ÷7º
a
1&èÏó¸÷ºSq¸.PR¸zzPz?®¬½áâ/
"0#6J«$$¹¥ñb
¤ñb
RP¸U/
RÂ]èÏSq¸¸a?®áâ/"0
ËÌ$RS
*+;<C"
·bcdRSö¼ËÌqHøÎ$RVRS0þ
+ù¹¥$ÊcdËRSÓÄ·.Mry0
$ÓÚö¼Êñb·cd·ag?@Ù±Ãõö¯F
$RSRS%90
ÙÍÇ35
FUNCTION
4
èÏó¸÷èÏ5
ÑRºq».|¸.
Q¸}A6QRP
Ù ¸ ·a·bcdö¼ïÙ 1
·ég0
Ù |/}©ª(3·NK±²&'
èÏó0
^
1
_
k
2
STOP
Ôa²³´×
/%90EnÄ·¯
$¡ ·bcd%9¡Â%9̶eåÁY%9 ½½$0#6½fÚ½$ʹ¥·bcd%9¡#W
øÃ/0
7
45 HI
#øÏ·bcd%9¡Â¯Fï¡
Fy8%90
ËÌ$RS
ÙÍÇ35
FUNCTION
èÏó¸÷èÏ5
3
}Pz¸ÑRºq»
Q}¸A6Q.¹¸qz
Ù ¸ ··bcd%9¡Â¯F%
9ïÙ1·¡ ¡Â%90
½í
1
bc6Ó½$3¯F< ¸ ð -½½$0Ú½$·åÁ÷
Æcd¯FRS%90
KR
k
2
1
,
6¯F-½½$Ú½$·
åÁ$¡ RS%9?@(c
dY0
'
¯FRS%90
2
3
2
4
5
6
,
+
Ù|&9«¬(30
=
NKcd > ·¯Fï¡ /µÆ8
RS%9ïÙ|/}©ª(3·N
K±²&'èÏó0
7
START
hi k
STOP
7
ÍCÊÎRVRS/
µ¶ g·8
ÍCö¼eÆS#f9:ÓÔµÆgRST÷µ
`RVRST0üüÐRSTdgRVRST
IRVÏý0Ä·1&RSTÍCRSTô^
RSTÍC0
$ÓÍCö¼Ì;«$ýÍC3123O^SP¹¹O^ Í
C/0
ÙÍÇ35
FUNCTION
4
èÏó¸÷èÏ5
SP¹¹R
Q¸}A6QRP
Ù¸·aÚö¼ïÙ1·÷
é0
Ù |/}©ª(3·NK±²&'
èÏó0
^
1
_
k
2
STOP
[*÷123O^SP¹¹O^ÍC/«$=ÍC3ù@ef÷
g+1234%0
45 HI
7
ÍCÊÎRVRS/
g·8
Ó·ÂÆ8f4Ý$ÍC
RST%95
•
•
ABC
1
Òï Ù |}~&~9¡ ¢(
3/?@4ݳ%90R
STKX"%0
GHI
DEF
2
JKL
4
PQRS
5
TUV
7
3
MNO
6
WXYZ
8
0
Òï Ù |}~&~9¡ ¢(
3/?@Ù124%30R
STKX"%0
,
• Ù |}~~3 3&(3¯
F6-½124%%90
• Ó½$3¯F³%90
Ù123O^SP¹¹O^ÍC/0
• #6ÓÒÊèÏó¸
º SP¹¹RÍ C/" & ÷g [
K£0a0
7'
13
14
15
16/POLL
9
ÍCÊÎRVRS/
µ¶klµ¶
$µÆgRSTÍCRSTÌ;ñb·cd·÷µ`
#Ž¾4Â0§RSTÓÔRSTIÍC&RV
üýüa0Ä·Àò)ÍCÆzüÄ·Àòe*zÍ
C0@)9:RSTÄýupÊ{ðË0
¶z¼#ÅƵ`·+½¾4ÍC0
#6)ÍCÆzµ`÷ÍC«¬@HI<½¾4¡
0#6e*zÍCµ`÷¥¦½¾4ÂL÷g¡
#Æ.¡ µ`øÃ/0
îFµ`0
Ù 9~4~}/ /3~ijkl(3·
RECEPTION
÷«$=ºq»RS/0
TEL
MODE
ÙÍÇ35
èÏó¸÷èÏ5
FAX
A.M.
FUNCTION
8
45 HI
:¸:PzSP¹¹:PO¸
Q}¸A6Q.¹¸qz
7+
ÍCÊÎRVRS/
'
Ù¸·Àò«$0
+
Ù ¸ Ï)ÍCÆzï)Ù
1Ïe*zÍC0
=
1
Î÷
1
Ù|&9«¬(30
!>
k
2
START
• µ`÷wx½¾4Â?@R
ST&çÍC0
KR9:
$<½¾4¡
½¾4ÍCµ`Êñb·cd5
ÙÍÇ35
FUNCTION
èÏó¸÷èÏ5
8
:¸:PzSP¹¹:PO¸
Q}¸A6Q.¹¸qz
Ù1·Àò.¹¸qz¡
/0
Ù |&9« ¬(3 · ¡ µ `?
@Ù |/}©ª(3·NK±²&
'èÏó0
7=
2
START
STOP
!
ÍCÊÎRVRS/
µ¶#$¸
ÍCÙÚ@ö¼Ûùtó6h²9:ÍCRS
T0#6aøÚö¼)ÍCRSTRS%9J¯F
RSTÄRS%9iÀÊ_9Ë/¡9:!Í
C0Ú{ÍCRSTRS%9üÌOVYT«$o·+
åÁ0
$ÓÍCÙÚ@ö¼Êñb·cd·aÚö¼?@#?
øïFÄ%90
ÙÍÇ35
FUNCTION
èÏó¸÷èÏ5
3
}¸.z}¸¹¸.
QPRA6QPºº
Ù ¸ ·aÍCÙÚ@ö¼ïÙ
1·÷é0
Ù |&9«¬(3?@Ù |/}
©ª(30
ÝÞ
1
START
Çà
k
2
STOP
45 HI
74
"
ÍCÊÎRVRS/
geKR¹Ìµ¶×
EnÄ·RSTÄ%9¡Â#Å78RS%90
ÙÍÇ35
FUNCTION
èÏó¸÷èÏ5
3
Sq}}.PO¸:PO¸
Q}¸A6Q.¹¸qz
Ù¸·#Å%9ïÙ1·¡
90
%
½í
k
1
o6¯FÆ8+77ù'6
-½½$0Ú½$·åÁ÷Æ
cÂ#ÅRS%90
6¯F·åÁ$¡ RS%
9½$?@(cdY0
'
¯FRS%90
2
KR
3
0
2
1
,
2
5
4
6
,
+
Ù|&9«¬(30
=
NKcd > ·¯Fï¡ /µÆ8
%9ïÙ|/}©ª(·NK±²
&'èÏó0
7E
START
STOP
hi k
7
¬&Ïý
º?./
¬&ö¼«$Î$&'GHIñbRVïÍCÏý0Æ
zEnÄ«$FÏýÄõÆjÎ$¶Ïýñb&'0
Ä·ÓÚö¼·k³ Ël
odÌñbÏý&pRSTá0
&mnuÇ
[*ù123ï124%%9Ä·q4ÝRST0¼
Ó³%90
½íº?./
#6$«$RVÏýÊîFµ`0
ÙÍÇ35
FUNCTION
èÏó¸÷èÏ5
1
Ù¸·Àò}¸«$/0
'
Ù¸·«$RVÏý}¸RO:PO¸R
V//ïÙ1·«$ÍCÏý
SP¹¹R:PO¸ÍC//0
45 HI
:¸z:PO¸
Q}¸A6Q.¹¸qz
1
8
1
µ¶
k
2
7@
¬&Ïý
+
=
· 6@ à&¯¯F$ñbÏý
&'·6-½Ïà&·6-½
ÏÌ/0
0
,*@+
¯FEY±$ñbYÏý -½
½$#6÷@6@ à&G
ñbYÏýÊq·Úcd/5
0
,*
»%$
î6r²±
¸6r²Æ
16r²Î
ì6r²F
6r²x
ð6r²y
ù6r²s
4
Ù|&9«¬(30
E
Ù123ï¯FRST12
4%%90
• #6$«$ÍCÏýÊ(c
d0
@
7
Ù|&9«¬(30
2
9
START
0
1
,*
STA×'7
START
5
¬&Ïý
7
#ùÌ$g³§¶#6
*°±«$G¤uÆc/0
Ù|&9«¬(30
RESOLUTION
START
• #6$«$RVÏý¤
÷µ`wxL½¾4Â0
1zº?./
#6Æ$«$¬&Ïýù@hYÏýÊñb·cd0
ÙÍÇ35
FUNCTION
èÏó¸÷èÏ5
1
:¸z:PO¸
Q}¸A6Q.¹¸qz
Ù1·Àò.¹¸qz¡
/0
2
¯FÎ$$h¬&Ïýù½½$0
• #6t½øY½$Ê# W ø
Ã¥º¬&¡0
'
Ù |&9«¬(3?@Ù |/}
©ª(30
1
,
START
45 HI
STOP
E5 J?KL
Ä·¹¥ÄèϯFRST«$G"ù¡0üÄ·
sø²vI8ÁÏýù@÷ùé
¹¥ºq0·?Â
cwøÍÇ¡
0
$¹¥¡Êñb·cd0
Ù.4/qr(310
FUNCTION
2
èÏó¸÷èÏ5
¹}R:PO¸
Sz¸}}*Pz
Ù * 3ï 3LèÏó¸º
ø$¡0
Ù|&9«¬(3·¹¥¡0
k
START
¼Ð½¾
Ú
èÏøEñbRVÏý"EnÄèÏ>7
8Ïý/0
=/k5zqR}:}}PR}q.z¸SPzRV
vI
/z¸.¸SPR}q.z¸SPzvI
/õ)
èÏRV"@)èÏ"0
¹¥
ù@÷¡ øù"0#6éøHI¹¥
ùI¹¥>78Ïý
¤¶zñbøÆ8EÏýù@
EÏý÷^ÜExÏý"0
¹¥¡
R®
|~3~9?9~4~~9 yôRSÏýRST°ÀïRS%90#6
K?
YRSTùåÁö¼!"÷º#
jK(
Ê>Ë/0
|&9«¬(
aRV^&'0
è?9è~
è?9è(
RV^øÆ`&'0
}&¨~|(
JRV^?½0
/~(
/~(RÂ÷º·Æ8U
·ÎÑ|söñb#6ó¼söñb¤÷
z£}0/
/àº(RV^sö0
}·.&Hs
(}uÖdefñb0
&'(}¹¥rïµ`rdefñb0
/}&}~9'(&RSTrJ0
£|](}S
{defRVRS0
4/·~0îÖÉ4/·~0¸ì( }uS
áâdefñb0Ê
7Ö×f
ÂSáâ0
E5 J?KL
¹¥¡
4&4~pÒ(þ+Ùø|/}©ª(3{V
rÂeµ`ïRSTù§RSTø$
ÎRVö¼dhñb0#6$ð
RSÊ
V¥VrÂJîFµ`0#6$RSÊ
RVZ·~§ð
RVRS0
#ùÌ$Ä·÷vI
«$=|}L>78Ïý"&HI
¹¥0#ùÆ$Ä·Q&¹¥Ú
0/Êñb·cd5
ÙÍÇ35
FUNCTION
èÏó¸÷èÏ5
4
qPSzRP
Q¸}A6QRP
Ù¸·HIa¹¥ïÙ1·÷
é0
Ù |/}©ª(3·NK±²&'
èÏó0
'
^
1
_
k
STOP
2
¹¥¡
º?KL
Ú¡èÏ¿õ«$¬&Ïý·ô½¾4ÍCö¼|a0
CD×KL
Ú¡èÏJ«$=HI4%RS%90
¿KL
!"#$%&'()*+~&3~9}9RaA(,-
+
E5 J?KL
¹¥¡
¡KL
Ú¡èÏJ«$¶8ÿ3ÂRS%90
À£½¾
RSTÏýsù@HI¹¥ñb
· §«60RST
£n«$ùáâ7¾9:!¹¥Ú
0
ñb
ÂøºvI
Â,10ùéÐÑ
Ê
ØvI
0
efQ&¹¥ñb
0
#ùÌ$Ä·°±¹¥
_`0Êñb·cd0
ÙÍÇ35
èÏó¸÷èÏ5
zqR}q.PR¹}
½q¹q}SzR
FUNCTION
4
râd
4
E5 J?KL
!
"
¹¥¡
Ù¸ð½$·Àò¹¥_`0
1
q¹q}SzR
¹¥/
¶zRV{ïºáâù@¹
¥
0
2
¸zz^:¸z^:¸:
áâ ^ ¬& ^
½¾4/
ºáâ{¬&Ïýï½¾4R
Vù@¹¥
0
3
}¸ROPR¹
)RV/
¶zRV@¹¥
0
4
R¸¸zSzR
¹¥/
$¹¥
0
5
¸zzPzPR¹
)áâ/
)7¾áâ&!¹¥
0
Ù |/}©ª(3·NK±²&'
èÏó0
E
STOP
@5 MN
Ê6P¡ÕwxÐÑÒ·V¥øRVù\÷¥`¥E©
0
ÝaÏý®ðêë®ð[î\î¸ï/?@Æ©9¨
wxÐ{ÑÒôf@
ð0
ÊV¥J øù#ì¡3/}=÷
RVù\÷¥`¸+sS_0
9:Â
ÄÅÆ1
PQÁ
Ã
ÊÆ©íRST{k`ä®0
ª«
YìÓï0ÍÇļÓRST×ïf0
@
@5 MN
PQÁÂ
!"#
"$%&'()*+,-./0
1'(
)*2345678(9*+:;#"%<=>" !"#?@
AB.C
D*EFGH.
IJKL1GH?@M
NOPQRSTUV(6W
XYZQ[.
• GH
P\]^_`
+abcdef.gChijk
P\lmPQnopqr
.
NO1stuvw tx6*stX:.yzNOst6
*1{P|X:.
• I}~
1.TDuID
.
_161
I_1.
!"#$%&$'()%'%*$+,-./01
23
FUNCTION
START
9
/04%'*$56789:;+,-"
<=>$'
!?@3
AB
CDEFGHIJ,KLM
NO$PQDR"
• ?@ST:
CUVWXY
Z[\]^_`"abcdef
CUgh
CDijklm
n"
ú;
ê뢣¤¸ù½ }|»(
ì÷ïº0Azêë
÷¢£¤<¹¥,Âïº0
• Z®¸[Æyr?@÷¢£
¤[ry¸0
êëÓÔ¢£¤¸u?@<
RSTÂppﺢ£¤0
'
<êîÂhºEÓÔ¢£¤0
+
÷ÓÔ¢£¤F¹¥,÷ÓÔ¢
£¤¸cð¹¥,/Hc§
0
=
ppïryurÓÔ¢£¤
sf¥;r0
@5 MN
ú;
• Êìrtryï÷ru¦RS
TG0
4
± ¢ £ ¤ u E « $ Ó Ô ¬ ½ Ê
Ù¤/0
ú;
KÆ
#67¹¥ºq?®Âà$¿ïkù\¤Ä¼Æ$¡
ÕÓÔ¢£¤GÓÔ0Êñb·cd·¡ÕÓÔ0
êë¹¥,ß/H#øÏ/î
¸ï·Ýaßp0
• ª«
"bÏý&¹¥,Ge î\
°fgPhi0}ÚYìãj¹¥
,Gkï¹¥,ßlmryc
ð0
ê뢣¤¸ù½ }|»(
ì÷ïº0Azêë
÷¢£¤<¹¥,Âïº0
• Z®¸[Æyr?@÷¢£
¤[ry¸0
êëÓÔ¢£¤¸u?@<
RSTÂppﺢ£¤0
'
'
hÆyír÷ýsÒ0Ê
÷ý]Ó/0abqà+
àÎ0
+
ÓýorÒppÓÔ®·
ÓÔ¸¢£0
•
@5 MN
ú;
ø¡ÕrÒYìÓÔ®
Z`ã0Î{{h·ô
ÓÔ®0
• Yì¡ÕrÒLÓÔ
®0
=
uEî¸ÓÔ¢£¤0
• $F¢£¤Ê÷¢£¤¸cð
¹¥,/Hc§0
4
uE£¤ÿ¸¹¥,ßÊ
Ù¤/0
+
75 OPQR
OPWǶO
|}
OP
èÏ󸺹R¸
¸zzPzSáâ/"
0
WǶO
uEð
ñb0#6áâ?ÅÊ·
5
• 0< çè5éêèCD3I¸
SX·/ 0
• V¥ù1Æ_uS½Tî\0
• § ¥·V¥2RSTOPÏý0
• uSSQR0
• ð
÷RSTLµÆ_uS¸0
• #6Ö?7¾>
RSTļÆ$ú
û0
=
!
Ö×f
A×8OP
OP
ÒïÙ
)èûÈè¨;<3&
L4%"%0
• V¥ÒSJFOV30Ê
ÂÒ0
ef4%0
• V¥uSJOVFu0
75 OPQR
WǶO
• V¥uSJOV çè5éêèCD
3I¸0
• V¥J÷RST«$=Ò+uSOV4
%0Ê
ÂuS0
uJaefRV
µ`0
• V¥RSTùr0
• V¥uSJF çè5éêèCD3d
çè5èçCD½í30
• #6RSTO+Iet1Y
¤÷ef0
• 1èÏó¸|ùáâ"0
• Ê
Ò|L4%"%0
ù¹¥?
®0
• V¥$RVµ`®í[\VrÂ0
§Lù\S0
• #6éøáâ±OÊ
6 áâ
±O/uS¸QRļcù\
S0uEð
RVµ`0
• RST¸÷¥µ`0#6÷¥`üS
¤RSTļÆ$úû0
4
"
Ö×f
;<>?OP
OP
WǶO
uJaef
0
• V¥uSJF çè5éêèCD3d
çè5èçCD½í30
ð
µ`&¯º
=¹¥r0
• ÊV¥J÷RVRSTµ`OVîFVr
Â0÷¥Æ?µ`ï¹¥Æ
·V¡
RST¹¥ö¼|OP0
Lµ`?®0
• $Χ·M§¶RVµ`0#6L
µ`ù§¶?·N¤RSTļÆ$
úû0÷¥Æ?µ`ï¹¥Æ
·
RST¹¥ö¼|OP0
• ¢£¤Ä¼Æ$±0
Lù\S0
• #6RVRSTùáâ±OÊV¥/
gRST[JaÚö¼Ê
6áâ
±O/0
• #6áâ±OJéuS¸QRÄ
¼cù\S0ʧuEð
RVµ`0
• ÓԤļ×0
ÆEÓÔ¤0
• RST¸÷¥Æ?µ`ï¹¥Æ
0
#6÷¥`ï
?S¤RSTļ
Æ$úû0
÷¥©¢^ïº
sF0
• wxиï£[c÷¥`
RSµ`¸ºsF0ÊÙøáÕwx
Ð0
Lµ`ä÷¥`¸
ºù®¤'¤¥F0
• ÓԤļ×0±ÓÔ¤0
E
Ö×f
CDG-F;
uTefOP
Ïý0
WǶO
• V¥RSTJ«$= qa:au
T/0
• V¥RST çè5éêèCD3J
I¸0V¥RSTçè5èçCD½
í3JuTuS3
uTT3/0
75 OPQR
OP
• V¥uT{º¦Ú"7PùG0
• V¥DRØ&'«$GJ«$=FïxPÊ
O/0
@
Ö×f
ÎÏOP
OP
èÏó¸ùèÏ"
0
WǶO
• V¥uSJOVFu0
• ÷uî\Yu·1
|ùu0
Ù3@RS
T[e¦X0
• #6ÙÙ3&RSTù7ºäÙÊÝ
a¥T,ßÓ§¨ï©¨Ùz¸}¸uE
«$/ÙªÊ
?/0
RVï÷¥&efHIV
r0
• µ`abu´Ê
6 ÂÄR
Vµ`/0
RSTÂ øT¸"
bÞRÓÔ0
• #6J÷«$= qa:auT/
ÞRÓÔ·õÂÆùRS"F¤Ä¼Â Þ
RÓÔ0$ÛÌRK4%T7¾Â 9:Ê
@ÙT¸F835Êì¯
FIRSE9/0
ð
ÍC&ef0
• V¥ùry0
• V¥RVRSTO+HI0
• #6RVRSTùÍCÙÚ@ö¼ÊV¥
J÷RS%9¯FRSTôRVRS
TÂ0
7
Ö×f
{|¨èèç!½ív
#6ÙÏý®ðÙ3&RST[eKX¤Ìu
E«$RST0$sÚÏýÊñb·cd5
êë¹¥,ß/H#øÏ/î
¸ï·Ýaßp0
75 OPQR
• ª«
"bÏý&¹¥,Ge î
\°fgPhi0}ÚYìãj
¹¥,Gkï¹¥,ßlm
rycð0
Ó£p¨Ù 9~|~{ιº(Ù
ª0
• [*Ù9~|~{ιº(Ùª÷
¡ #Ž¾4Âøùµ`0
ÿ¸¹¥,ß÷g/Hjî
Ù·V¥Úÿ¸0
""%
&&×
&
.qR¼SzROqq
ef¹¥ñ/
þ+RSTef¹¥RSRSJ^½¾4
Â0Ú ¤ " Æ ¤ Î º Y Ö "
¼ º
0Ö×@RST÷HI"b¹¥0
.|¸.SqS¸z}ª¸
ryFà/
rTnÂîFryFàOV0hºry?
@îFq@abry0
.|¸. S.
8tuv/
#6Ùè§ûéCqr:3&uv
ùaïùOVLRST¤Ú"º
0
.P¸z PS¸R
ßðJÝa/
¹¥,ßJÝa0ZjÙ¹¥,ß/H·
÷ÿ¸0
OP.:¸RÑq::¸O
µ`^Øë/
Oص`7¾Ør:0Ê
.¡
ºR.PR:PO¸
ö¼/
(ê¥çé©ê3J6I0
zSa}Sq.¸º¹¹
ÿ'J$/
ø ù ÿ 3 [ J « $ &# 6 ð « $ ÿ
3¤Ú"º0
|P¹OË/
! ² ' Ù ø É©¦ßèû¨¥É * ß op
3Ó§+0AzÙÉ©¦ßèû¨¥É
*ßop §0
¹R¸¸zzPzSáâ/
RVïz0ÊÙç©)*+3·¡ Ú
"?@u
0#6áâ?ÅÊ
Ø
Ö×fÂSáâ0
Ør0
!"#$%&
'()*+,-./012"#)345.6
7"#$&',-"#89:;
5<.=>?!*"#@A)/BC
D7>?EFG,-BHIJ
K
LMNO
@PQRSTUVWXY"Z
).67/BHIJ
[
L
\]^]_
,-
"#$`2abcT,-de
]
fg^g &
Q2hijklmUVWnopq/R
Srstun/975.6
]
v
^f
ijkn
QRSWwcxyhiz{|}~c|}W
nhi<{n
i
Q2W"Z"#*+
/975.6B*cq
~Exy7
]
fg
W
Qq
~/"#$`Q
W
^
\g\ &
,-cwJ
L
A,-
\g\
gf ¡
,-¢¡£BHIq¤xy¡
\g¥
^]
¦§¨©
ª«¦§¨©¬
g¥
fg
rsW
Qq
~BH
IJ
[
LTUVW"Z"#ArsUVW
n
]f
gf "Z®
de/"#$`Q¯"#c°-
±
²³´µ
³¶
g·
¸¹/975.6*
¦§
g·
¸¹
""%
Pq¹Sq¸}
`?½/
JRV{ï÷¥?½0
»:¸:Pzº¹¹
»½¾4J$/
½¾4ÂJù>7RVüý÷
µ`Fµ`Vr¤Ú"º0¿õ
ORVüýs@üÄ·&ç«$RVü
ý0
#6 RSTþ+¹ ¥Öd ÷RS ½¾4
ÂÚ"]º0Í89:Ê×Ö
·"b¹¥[½¾40
Aï&×
ç"%
>P
ÏRV{ï÷¥«¬0
'«"%
>zäÙ/
YP
ÄPËP/
ÏRV{ï÷¥³0
12'«"%
ç
Ä7aXPË7a>P/
ÏÒJ8¸0
'
¡
Ør
KRÊ
KRÊË9:
!"()*
ÊìóÝaÏý®ð9:hºµ`ÍļVrT
`0
êë®ð[î\î¸ï·ÝaÏý
®ð0
hºµ`0
ÿ¸Ïý®ðV¥F$-0
+
75 OPQR
# 6 O Ø µ ` R V ï ÷ ¥ & e f O V V Fï ) è Ï ó ¸ º
OP.:¸RÑq::¸Oµ`Øë/"Ê;ð
Ù|&9«¬(
30#6µ`efµºÊÝaÏý®ðhºµ`0
¡
Ør
KRÌÊËJ?
#6Fn½Ør<RST®º
Êíîïry[ì?@ð
ïºØr0
#6ØrºqøÊhºrTnÂ
%ryï¬÷[KrT
n?@îkry[ì0
• #6efÙÚf¡
çñb·cd0
ØrÊ&
êë¹¥,ß/H#øÏ/î
¸ï·Ýaßp0
• ª«
"bÏý&¹¥,Ge î\
°fgPhi0Êìãj¹¥,
Gk0
=
!
¡
'
Ør
êë½= }|»(¢£¤¸
ì÷ïº0uEêë
÷¢£¤<¹¥,Âïº0
+
êëÓÔ¢£¤¸u?@<
RSTÂppﺢ£¤0
=
ÆFyr®ëÓÔ¢£¤#vø
Ï/·wS±`èfÓÔk?
@÷gpp[\Z®¸0
75 OPQR
• Z®¸[Æyr?@÷¢£
¤[ry¸0
• ÊìãjÓÔ¢£¤GèfÓÔ
|¤UÓÔ®0
• ÊìS±`ÓÔ|¤
UÓÔ0
4
"
¡
Ør
4
<RSTÂppïºØr0
• #ùÌ$ÊIe î\vHÍ
p·÷ry<RSTµº0
• ª«
ïºØr&ÊìÞO·0#6r
yrtRST¦ùru¤Ä
¼Æ$4ÝúûuÊt¡ ¯¦
ru0
Fusing
unit
Í6¯
ε
Wheel
E
uEî¸ÓÔ¢£¤0
• $F¢£¤Ê÷¢£¤¸cð
¹¥,/Hc§0
@
E
uE£¤ÿ¸¹¥,ßÊ
ÂÙ¤/0
STUVWX
½í$%&
Ô×
aÙ5
FUNCTION
aÙ5
3
PRR:;¸z}¸
èÏó¸÷èÏ5 Sz¸}}}qz¸
6aÙ5
3
èÏó¸÷èÏ5
Oq¸»:¸}¸
Sz¸}}}qz¸
START
>a!·Ù½$3q¯FRS%9E
n67-½/0
• $½$'F¯ÊÙ30
• #6¯FáâÊÙ)è覦éûST
A×3·µK¡ áâ0
@aÙ5
FUNCTION
START
6aÙ5
START
>a¯Fϱ²/-½7>/0
@a¯FÏÍ/-½76/0
Ya¯FÏÐx-½"#56777/0
Oa¯FÏà&/-½77 6>/·ô
ÏÌ/-½77Y/0
Ya!·Ù,X½$3q¯F°À
#øÏ0
Xas@ÊÙ5
• $ç¯FÆ$1ÆÙ3/8$&Ê
¯F·$&@Ù)èûÈè¨;<30
geKRÐA××
SPACE =
J=
T=
A=
K=
U=
B=
C=
D=
E=
F=
G=
L=
V=
M=
W=
N=
X=
O=
Y=
P=
Z=
a Ù5
R=
I=
S=
START
ºq»^¸¹:PO¸
Q}¸A6Q.¹¸qz
6aÙ¸·#Å%9ïÙ1·¡
90
• $°±$&FàÜÊÙ¨è¦éû!A
30Ùï*·ýI³%
$¿0
Oas@ÊÙ5
STOP
3
èÏó¸÷èÏ5
Q=
H=
FUNCTION
START
%
>aÙ123ï¯F6-½124%%9
<îî 22/#6$¡ %9
Ê(cdX/0
@a ¯F³RS^u%90
YaÙ5
START
STOP
Oa!·Ù½$3q¯F-\°ÀÊ
¯F°À%9Â$&¯F
/0
XaÙ5
START
STOP
@
12Î
8
;<
Ê÷µ`®í
En67?/[Fµ
`Vr0
Ù¨è¥è)çé©ê©¦è;<673L
èÏó¸ô>Îîø$0
TEL FAX
01 FEB 10:30
M:00% STAND-BY
RECEPTION
MODE
TEL FAX
01 FEB 10:30
M:00% STAND-BY
bA×
a
A.M.
A.M.
TEL FAX
01 FEB 10:30
M:00% STAND-BY
SPEAKER
ÒïÙ
A.M.
TEL FAX
01 FEB 10:30
M:00% STAND-BY
6a4ÝRS%90
A.M.
>a"%#6ùtʧÙ
RST¸}qza/3/0
û867*RST÷«$Ä
Åz½HIäRV"qµ`0
@aÙ5
çèCD67*
START
Beep
STvA×
START
Ù,X1230RST÷HIaR
V0
z¸.¸R
STA×
SPEED
DIAL
aÙ5
6a¯F6-½124%%90
>aÙ5
START
çèßû8CD ß 67*ÚÖÒ
+RSÞRÓÔ0LÓÔ
&RST÷HIØYÓÔ|=ÞRÓ
ÔêëI4%RS/ïHI4%R
S0
û55CDG-67*uTJ
RSTJa&ÀòÚ0
'7
YZ
Ï9UÐ
qa:a uT/ ,>@,WY
¸.: áâ±O/ ,O@
¸:q¹ up`/ ,W
ºq» RS/ ,>@,OW
ºq»RS/¸¹^ºq»u^RS/
ÄÅz½ ,O
¹R¸R}¸ !"Â/ÎÏ ,W
}~C¹D:¦§¨m©¦ª«¨m¬ª¨4 A
Ùî ,6Y
¸¹a¹R¸ uS/3 ,@
¸¹a}¸ u«$/3 ,O,W@
¸¹^ºq» u^RS/
,>@,OO
§^ºà u^RS/
;0%9 ,X@
¸¹ u/ ,>@,X
ÑÒ
 ÷¥«$ ,W
yzÄÅ@u ,XX
T
Ó ,X6
,O
µ`EFwxab ,@6
µ`ab A@,>7
µ`* ,@6
µ`Vr ,@>
µ`cð ,@>
±²«$ ,>
ÓÒ
efg«$G ,@O
Oص`mUn ,Y
OP4% ,@,W6
ÔÒ
$&¯F ,6
sÉ?Ê9 ,
HI4%ÂË ,Y6
HI4%%9 A#Å ,Y
ÕÒ
Øë¡ ,>Y>W
Ør¡ ,>Y>W
12S ,OY
124% ,YW,W6
1234% ,YX,W6
±Ò
¹u ,6>
hºOص` ,@@
Ò
È®? ,OW
vI
,6
HI¹¥ ,@
¬&¡ ,Y
¬&Ïý ,7
u4 ,Y7,O,W>
u4z½ ,O6
u4&''- ,O
ÖÒ
&'«$ ,>
rîF ,666
½¾4
¼E ,XW
RVRSH ,YO
µ` ,O>
ÖÎÒ
ñb
,X
«$¹¥_` ,X
7`)°À%9¯F ,6X>7
_9¡ ,Y
¶"«$ ,XO
RS"% ,XY
'
°±
î\«$ ,>O
qa:a uT/ ,>@,WY
ºq» RS/ ,>@,OW
¸¹^ºq» u^RS/
,>@,OO
¸¹ u/ ,>@,X
«$ ,>@
wxÐ¡Õ ,
uT
uTºÖ&
RS ,WW
I ,WY
,W@
ç4% ,Y@
Ö×Ò
úûR´ ,>W
23ÄÅç&' ,OX
ÖÒ
4% ,O7,W>
ÿ¡ ,X
ÿ3 ,6>
îFµ` ,@>
îF¹¥r ,666
,@O
·bcdRS ,776
·bcd%9¡ ,O
uS ,>
uT
Ö ,6
DRØ&' ,WX
u%9¡ ,Y
uS ,@
«=cd ,@W
ÖÑÒ
äÙç&' ,@7
§¶ ,@O
'
ÓÔ¢£¤
± ,66>
¡Õ ,6@6Y
¢£¤
Ùî ,X
± ,67
;0«$ ,X@
ÖÓÒ
ÁÂRV ,W
4% ,YW
OP ,@,W6
12 ,YW,W6
123 ,YX,W6
ç ,Y@
3 ,Y
4% ,@
Ë ,W>
Sáâ ,6O
÷¥ ,XW
ÍC ,7>7W
ÖÔÒ
TX¡Õ ,
À«$¡ ,O
ÖÕÒ
ÙK"% ,>@
34% ,Y
Ö±Ò
ÃuÄÅ ,@
×ÖÎÒ
ÄÅR´ ,>
×Ö×Ò
Ò ,6
×ÖÒ
èÏó" ,>6>@
r{|¿¦ØÙ:õsÚ
gÛÜ9:
{|ÝÞß
Óh²õùõʲc
³Øh²
õÓ h ²#$0Ó Ø h ²õ
(Ï×ØÓh²ñù_´
<¬0#6×ØÓh²ñ
_´Êi(÷óÓ·h²õµ
K£CDF÷ÛfÚµµ´0
5 ÝÞe ¶ # ÅÓ §{·³½
¾ 4 # Å ¸ 4
Êh ² õ Ë/ÂQ Ø Ó h
²ñ U¸ X õ{ÏÜ{
h²õ·ô,éÐÑ
µ`$k[þ±Ø¹
ºÊ Ë/h ² Ó 0 »
ù))·½h²õÓ
§d ^ ïX=¥¦
§h²õ{,éÐѵ`·ô$
k»ù²0ØÓh²ñ
Æuv¸Óh²õ
÷GÆTijhh²õú
Ø·+Ô0Ì÷h²õ
OØÂý²!ô
øù²÷GYúظ0
]Ä÷HW§h²õ{h²õ
ÔúØ{,éÐѵ`·ô
ØÓh²ñúØ»ùøùÓ
h²þµÆ$§
³
×ØÓh²ñ_´_`
(Ä0
5 LMh²õêõ×ý²¥;
ñ{= T_·ôøù²
ñ0= ø ¥ ; ¸ Ã ñ T _
g6Ò f ¼ Ä/
f§h²õ"b¦Ê½{¦îü
õ{¦ÿ ½ï·Ä¾¿ + Ü
Th²õ0f§h²õ"
b û ¡{÷ [ ¸{À Á{
À Â{º À{ <ï ³ ï k
h²õ9iþüý]
Ä÷h²õ·up<Ægu
vRVµÆguvï¸
RV0
5 à+ØÓh²ñÌõç
ù»0Ä·!·<Uh²õ{
,éÐѵ`{$k·ôøù,é
úØqQ&ÌØÓh²ñ0
#6óÕpØÓh²ñÂ
®$¤g ÷ i ( Ìd Ì
6µb!¶0Óh²ñÆ
( Ì Ì < U h ²õ{,
éÐѵ`{$k·ôøù,éú
Ø0
'5 aÇáOâqãÌ1
¥Ä÷h²õ{
ñ·ô,é¨
©ºb ÅÆ ·{ 5 g
6h²·ôÅÆf¼®$
Ä0#6ÅÆ·{5ÿf
hfh²õÌ1A
ºbh²õ{
ñ·ô,騩 g
6ÅÆ·ôhfh²õø
YÇ5ùf¼®$Ä0
+5 äå|æ#6E ÅÆÈÉ
-ïTCDh²õ¤
ÌÕp·®$0ÈÉ15
#6h²õ=ÆÛkOC¨pª¨¬©O©ªDAO¬OCD¤
Yh²õ^=Ê=uvh
² õ ËÈ É § h ² õ { Ð
ѵ`ô$køhf²³)*+
Oºqz} 6Y6a66XX7>«
_ ´  $ Ê Êù * ² ³ËË
#6h²õ= øO¬Où{
ÅÆÈÉ-ïTCD
¤Èɧh²õ{Ðѵ`ô
$kø»ù²³÷ºqz
Y6a66X«6_´Â$ʲ³
,1Ë#6·ý=ºqzùôk
Rq}q =+¤Rq}q W
Y6a66XWOl _´Â$ʲ³,
10
=5 çaLqèOPÓ9
:¥Ä·½h²õ
Óu^ï§úظ
ÑCD±²:ÌÏ7y
G Í ñ s ©ò õ Î0§
+ù*¥,
úØƵKïh²E
Óu^ï§øÏÐ
ÚkÑ·ôÄ·Ûf·Æ
ÒÓ÷±Óu^ï§0
÷Ôѱþ+{{
ÕïâdUÓu^ï
§ùÑ0ùéÓu^ï§
L¥Äêë<ÿÒ@ô
Òÿ$ÖùL¥Ä/[*
H
×±²:ÌÏ7y
ÜØG0Ø¥ÙÚ4f¼
²³]ļ»ù}YÇ
5dK²³0
45 aÇÝÞé7õ®êqèAë
ÑV~1HbÏÐÓh
²õ ù Ûé0h ²õ{, é Ð
Ñ µ` ô $ k[·Êú Ë
Aùk
¥0h ²)§
+XW_ù®$
h ² ) ÷ À =Ê Ë/Ñ
VÜÝÏ¡øùÑÏïL¥
Äêë*+<ÿÒ@ôÒ
ÿ$ÖùL¥Ä0¥
Äh²õÂêõö¼ÿ
$Îïh²õÞý&Â
ïºáâ]¥Äh²õ
$kÂÎ÷fL±O0Ú
{§+h²õï,éÐѵ`
ÓïÓ«6OV
@{h V @{Ä @ ï ®
ý¥ÄïßÃ0
ïh²Eø
b>ïñ®"ï9:[¼÷
ù®=¥ï·àFØ
¥ÜØ0#6h²õV¥Å
Îd ï h
² E /Ì Ï Ð ø ù Ì $ ú
û{û ï± Où Ú k Ç 0 Ç
YÇ5 L¥Ä}
ڸà 9:ļ§Ò
0
E5 ìbLM§+}ÓïefÓ
h²õï,éÐѵ`drs
á 7{ {ï ç 7 @ U
9: êë âã/ä
ÔÑ(Óïh²E
JÛfÚUļ7¾!¶0
ÇYÇ5*ï §
á7ïç7@UøÌÏÐÑ
}Ú¸Ã*ï 9:ļ
§Ò0
9: §+}U{
·ôåæþe¶+ÿ
<{ç è ² b =ê ë â ã/
+f¼/dÌÏÐ
ÚkÒÓÑ[·CD
h²õ&ømé`µ0
@5 O â í M Ì ò ¸+ # $ _
´ØÓh²ñ÷×ÅÆf¼
Yô ÅÆf ¼q ê0#
6ùf$¯²*fë}
£}7ØÓh²ñ®
$ïÂÆkefìb¤XY
·ÄEF*qìbÓh
²ñÂY®$·íLt
¿ËdØÓh²ñÂ%k
¤X&çkìbùf¼
»O0
75î9ïíØÓh²ñsøy
ôÓh²õ{,éÐѵ`ô
$ktù'³#$
Ä·hEøùùõï1²{ù
éÚñ®ïb>î
ï#$0 g·ñ®+6
Oh²Eï°|¤§ØÓ
h²ñ"bûOïû¡[
ù<¬O0
!
SHARP CORPORATION
ÂÆ¥G
R}/@YW}.ªª