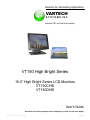
1
Solutions for Demanding Applications
VARTECH
S Y S T E M S I N C.
Industrial CRT and Flat Panel Displays
VT150 High Bright Series
15.0” High Bright Series LCD Monitors
VT150CHB
VT150DHB
User’s Guide
Read these instructions completely before attempting to operate your new Color Display.
VT150 High Bright User Guide
150-085
Table Of Contents
Section
Page
Section
Section 1
Section 4
Introduction
Display Timing
1.1 VT150 High Bright Series
3
1.2 Product Safety Precautions
4
Page
11
Section 5
Touch screen
Section 2
5.1 Introduction
12
Display Setup
5.2 Installation
12
2.1 Display Features
5
2.2 Unpacking The Display
5
Section 6
2.3 Included Parts
5
Troubleshooting Tips
2.4 Connecting Your Display
6
13
Section 7
Cleaning & Maintenance
14
Section 3
Getting Started
Section 8
3.1 Operating the Monitor
7
3.2 Adjusting the Viewing Angle
7
3.3 OSD Information
8-9
3.4 Self Test Check
9
3.5 OSD Table
10
VT150 High Bright User Guide
Special Notes
15
Section 9
Display Specifications
16
150-085
Section
1
1.1
INTRODUCTION
VT150 High Bright Series
The VT150 high bright (HB) series of LCD displays supplies a superior display consisting of a
native resolution of XGA (1024x768) and 700 nits of brightness.
The VT150 high bright series is capable of displaying video resolutions of VGA (640x480), SVGA
(800x600), and XGA (1024x768).
3
VT150 High Bright User Guide
150-085
1.1
Product Safety Precautions
⇒
Ensure that sufficient space is available around the display to provide the circulation
necessary for cooling.
⇒
Ensure that the ambient air temperature will not exceed the specified maximum
temperature.
⇒
Do not attempt to service this display yourself. The rear chassis has a seal so that non
qualified personal will not expose themselves to dangerous voltages or other risks.
⇒
To protect from electrical shock, unplug the display power supply from the wall before
moving.
⇒
Do not expose the display to direct sunlight or heat.
⇒
Do not use this display near water
⇒
Do not place any heavy objects on the power cords. Damage may cause electrical shock.
⇒
Unplug the power supply from the wall or unit if one of the following conditions exists.
⇒ Power cord or plug is damaged or frayed
⇒ Liquid is spilled into the display or the display is exposed to rain or water.
⇒ The display does not operate normally when the operating instructions are
followed.
⇒ The display has been dropped or the enclosure has been damaged.
⇒ The display exhibits a distinct change in performance, indicating a need for
service.
4
VT150 High Bright User Guide
150-085
Section
DISPLAY SETUP
2
2.1 VT150 High Bright Series Display Features
⇒
Touch panel control functions
⇒
Support for XGA resolution of 1024x768 pixels
⇒
Wide viewing angle
⇒
Wide tilting angle (VT150DHB)
⇒
Digital Character Smoothing
⇒
Automatic Set-Up
⇒
Windows 95/98/2000/XP Plug & Play Compliant
⇒
Versatile, functional & User friendly OSD
⇒
Plug & Play: Conforms to the VESA standards and support DDC1/2B specification
⇒
Meets Energy Star guidelines for power management
2.2 Unpacking and setting up your display
Your LCD monitor package will consist of the components listed below. Open shipping
container and lay all components on a flat clean surface.
2.3 What is included with your display
⇒
⇒
⇒
⇒
⇒
⇒
VT150CHB or VT150DHB LCD Monitor
VGA Cable
Power Cord
Audio Cable
Users Guide (CD)
Driver CD , USB or RS232 cable (Optional Touch)
5
VT150 High Bright User Guide
150-085
2.4 Connecting the Display
1. Turn off the PC and the LCD Monitor before making any connections.
2. Use the supplied VGA cable to connect the VGA connector of the LCD Monitor to the VGA
port of the PC system.
3. Use the supplied audio cable to connect the “Audio in” jack on your LCD Monitor and the
PC sound card’s “Audio out” or speaker jack.
4. Connect the male end of the power cord into a wall socket and the female end to the
Monitor.
5. If your LCD Monitor has a touch screen and USB interface, use the supplied USB cable to
connect the USB connector of LCD Touch Monitor to the USB port of the PC system.
Remember to follow proper software driver installation.
6. If your LCD Monitor has a touch screen and RS232 serial interface, unplug the PC keyboard
and reconnect it to the supplied serial cable power adaptor. Connect the other end of the
adaptor to the keyboard connector on the PC. Connect the serial D-connector to and
standard PC serial comport. Connect the other end or the serial interface cable to the
Monitor.
7. Turn on your computer, and then turn on your LCD Monitor.
n
Power
o
Input 1
p
Input 2
(Touch Function)
Connect to USB/RS232 cable
q
Audio In
Connect with PC sound card.
Plug the power cord in.
Connect with detachable VGA
cable.
6
VT150 High Bright User Guide
150-085
Section
3
3.1
Getting Started
Operating the Monitor
Users can adjust the picture to the desired brightness and sharpness by following these
instructions. The adjustment buttons utilize a security feature that required the use of a paper
clip or pin to activate each selection. This is accomplished through pinholes in each button
except the power on/off.
1
Power Switch
2
Auto
3
Exit /
4
+/
5
6
-/
Menu
3.2
Power On/Off
Automatically optimize positions, phase & clock when OSD is not
shown
Exit the OSD menu when OSD is shown
Selection or adjustment when OSD is shown/Quick brightness adjustment
Adjustment when OSD is shown/Quick contrast adjustment
Enter OSD/Access sub-menu & selection
Adjusting the Viewing Angle (VT150DHB)
Your LCD Monitor is designed to allow you to adjust to an optimal viewing angle.
The tilt mechanism has a locking knob on the rear of the display portion of the Touch Monitor.
There is a legend on the lock to indicate the locked or unlocked position of the locking knob.
Do not force the display to tilt without unlocking the mechanism first.
7
VT150 High Bright User Guide
150-085
3.3
How to Use the OSD (On Screen Display)
The OSD function allows the user to easily adjust the display to the desired requirements.
The OSD menu includes a main menu and sub-menus. Use the buttons on the right side
control panel to adjust the OSD (see Operating the Monitor).
Color Temp. Selection
Language
Settings
Volume Adjustment
Input Source Selection
Image Adjustment
Current Audio Status
Color Temp. Status
Source Resolution &
Frequency Status
Input Source Status
MAKE OSD ADJUSTMENTS
1.
2.
3.
4.
5.
6.
7.
Power on LCD Touch Monitor
Press “MENU” to display OSD menu
Press “+” or “-” to select menu item
Press “MENU” to select submenu
Press “+” or “-” to select sub-menu item
Press “EXIT” to finish and accept setting
Press “AUTO” to process auto tune function
8
VT150 High Bright User Guide
150-085
3.3
Additional On Screen Display (OSD) Information
The OSD disappears (times-out) several seconds after you stop pressing the buttons
while performing an adjustment. This function can be adjusted up to 60 seconds allowing the user more time. This adjustment is made in the “Settings” submenu.
Any changes made are automatically saved in the Touch Monitor memory when the
OSD disappears. Turning off the power should be avoided while using the OSD, as this
may not allow changes to be saved.
Adjustments for clock, phase and positions are saved for each signal timing or screen
resolution. Except for these adjustments, all other adjustments have only one setting
that applies to all signal timing.
The submenu color will change from white to pink when the function is selected.
You can skip the OSD menu and display commonly used adjustment scales directly by
using the following button operations (refer to previous diagram for button locations):
Brightness
Press the Brightness Button (3) when the Menu is not displayed.
Contrast
Auto Setting
Press the Contrast Button (2) when the Menu is not displayed.
Press the Auto Button (5) when the Menu is not displayed.
The Auto Adjust process may take as much as 10 consecutive seconds. The display image
will make noticeable changes as the Auto Adjust function completes.
3.4
Self Test Check
This product provides a self-test ability, through which you can check whether the LCD
monitor functions are working properly.
If your LCD monitor is properly connected, but there is no image showing and the power
indicator light on the Touch Monitor displays orange, please follow the steps below:
1.
2.
3.
4.
Turn off both the computer and LCD monitor.
Unplug the video signal connector from the back of the computer.
Turn the LCD monitor on.
The monitor should display “No Signal Input” on the screen and the power LED indicator
should be orange. If no display is observed, there may be a problem with the Touch
Monitor.
5. Turn off the LCD monitor and reconnect the signal cable, then turn the computer and LCD
monitor on. As the computer boots, there should be a video display and the power LED
should now be green. If the LED of the monitor is an orange color after completing the
steps above, please check your VGA card and computer system.
9
VT150 High Bright User Guide
150-085
3.5
On Screen Display (OSD) Control Adjustment Table
The following table indicates all the On Screen Display control, adjustment,
and setting menus.
Main Menu
IMAGE
AUDIO
COLOR
Sub Menu
Reference
BRIGHTNESS
Adjust the brightness of the screen
CONTRAST
Adjust the contrast of the image
CLOCK
Adjust the clock pulse of the image
PHASE
Adjust the focus of the image
H. POSITION
Move the image left and right on the screen
V. POSITION
Move the image up and down on the screen
SHARPNESS
Adjust the picture sharpness of lower resolutions
VOLUME
Adjust audio volume
MUTE
Set the audio mute on or off
9300K
To customize the color of the screen
7500K
6500K
LANGUAGE
USER R/G/B
Adjust red/green/blue gain
ENGLISH
Select OSD language
FRANCAIS
ITALIANO
Adjust OSD display time and setting
DEUTSCH
ESPANOL
日本語
Move OSD display position to any one of the following 5
positions within the overall screen
简体中文
繁體中文
SETTINGS
OSD TIMEOUT
OSD POSITION
AUTO SETTING
Set-up to adjust clock, phase and positions automatically
RECALL
INPUT SOURCE ANALOG
Select Analog input source
10
VT150 High Bright User Guide
150-085
Section
4
Display Timing
Applicable Video Timing
The following table lists the better display quality modes that these LCD monitors provide. If
the other video modes are input, the monitor will stop working or display unsatisfactory picture
quality.
VESA MODES
Horizontal
Vertical
Mode
Resolution
Nominal
Frequency
KHz
Nominal
Frequency
KHz
VGA
640 x 480
31.5
60.0
37.5
75.0
37.8
72.8
720 x400
31.5
70.1
800 X 600
35.2
56.3
37.9
60.3
46.9
75.0
48.1
72.0
48.4
60.0
56.5
70.1
60.0
75.0
SVGA
XGA
1024 x 768
MS-DOS MODES
DOS
640 x 350
31.5
70.1
MAC MODES
VGA
640 x 480
35.0
66.7
SVGA
832 x 624
49.7
74.6
11
VT150 High Bright User Guide
150-085
Section
5
5.1
Touch Screen
Introduction
Touch screens are a common means to interface operator inputs to a system. The universal
standard of Windows GUI (Graphical User Interface) has significantly increased the use of
touch screens.
There are four main touch technologies. The technologies are resistive, surface acoustic
wave (SAW), capacitive, and infrared (IR). Each touch technology has advantages and
disadvantages based on different user applications.
5.2
Installation
All Vartech Systems displays configured with a touch screen are supplied with a CDROM
which includes user manuals, application software, and drivers for various operating systems.
Insert the supplied CDROM into a CDROM drive and follow the installation instructions that
will appear on the screen.
Limited technical support is available by contacting Vartech Systems customer support at
800-223-8050.
12
VT150 High Bright User Guide
150-085
Section
6
Troubleshooting
If the LCD Touch Monitor fails to function correctly, please follow these steps for a possible
solution.
1. Perform the adjustments according to Operating the Monitor section.
2. Refer to the following troubleshooting chart if you cannot resolve the problem from other
sections of this Users Guide.
3. If the problem is not described below or you cannot correct the problem, stop using the
monitor and contact your dealer or the nearest service center for further assistance.
Problem
Troubleshooting Tip
Power indicator does not light
up
1) Verify that the power cord is plugged in firmly
2) Check that the power switch is turned on
3) If the AC outlet is OK. Please check using another
piece of equipment
Power indicator is green
1) Use keyboard or mouse to activate a blank screen
saver
2) Verify the computer is on
3) Check to see that the signal cable is properly
connected at both ends
4) Check to see if the signal timing of the computer is
within the spec of the monitor
Power indicator is amber
1) If the power management mode is on, use keyboard
or mouse to activate
2) Verify the computer is on
3) Check to see that the signal cable is properly
connected at both ends
4) Check to see if the signal timing of the computer is
within the spec of the monitor
Display is too dark or too bright Check to see if the video output level is within the spec;
assuming the CONTRAST and BRIGHTNESS controls
have no effect
Display is not in the center
Check to see if the signal timing of the computer is
within the spec; some graphics cards have their own
positioning controls
Display is shaking
Verify that the power voltage and the signal timing of the
computer are within the spec
Display is not synchronized
1) Check to see if the signal timing of the computer is
within the spec or if there is a graphics card failure
2) Check to see if the video output level is within the
spec
13
VT150 High Bright User Guide
150-085
Section
7
Cleaning and Maintenance
CLEANING
Warning
If you dropped any material or liquid such as water onto the monitor when cleaning, unplug
the power cable immediately and contact your dealer or the nearest service center. Always
make sure your hands are dry when unplugging the power cable.
Caution
˙For safety reasons, turn-off the power switch and unplug the monitor before cleaning.
˙Do not scratch or rub the screen with a hard object.
˙Never use any of the following solvents on the LCD Touch Monitor. Such harsh chemicals
may cause damage to the cabinet and the touch sensor.
Thinner Spray-type cleaner, Benzene, Wax, Abrasive cleaner, Acid or Alkaline solvent.
Cabinet
Remove dirt with a lightly moistened cloth and a mild solvent detergent. Then wipe the cabinet with a soft dry cloth.
Display Area (Touch Sensor)
• Periodic cleaning with a soft dry cloth is recommended. Non-abrasive household windowtype cleaners are recommended.
• Do not use tissue to clean the display area. It may scratch or dull the LCD screen.
POWER MANAGEMENT
This LCD Touch Monitor complies with the VESA DPMS (version 1.0p) power management
specification. DPMS provides four types of power saving modes by detecting the horizontal or
vertical sync signal. As well, the computer graphic card also needs to be DPMS compliant to
utilize these modes.
1
2
DPMS
Mode
On
Stand By
3
Suspend
No Display
Amber
≦ 5W
3 sec
On
< 10 Hz
4
Off
No Display
Amber
≦ 5W
3 sec
< 10 KHz
< 10 Hz
Item
Display
Power LED
Normal
No Display
Green
Amber
Power Consumption
Normal
≦ 5W
Recovery
Time
--3 sec
H-sync
V-sync
On
< 10 KHz
On
On
14
VT150 High Bright User Guide
150-085
Section
8
Notes
SPECIAL NOTES ON LCD TOUCH MONITORS
The following are normal with LCD Touch Monitors and do not indicate a problem.
• When the LCD Touch Monitor is first powered on, the picture may not fit in the display area. This is
because of the type of computer graphics system that is used. In such case, adjust the picture position to a desired image (See Operating the Monitor).
• The screen may flicker during initial use. Turn off the power and then turn it on again the flickering
should disappear.
• Users may notice some uneven brightness on the screen depending on the desktop resolution they
use. It is normal for LCD Touch Monitors to show uneven brightness.
• Due to the nature of the LCD displays, images displayed on the screen for long periods of time may
still appear after the screen content has been changed. This phenomenon can be corrected, over
time, by switching display content or leaving the monitor off for a number of hours.
• If the screen becomes dark, flickers, or does not light-up, contact your dealer or the nearest service
center for a backlight replacement. Do not attempt to replace it yourself.
15
VT150 High Bright User Guide
150-085
Section
9
Specifications
Display Size
15.0 Inch
Panel Type
TFT Active
Resolution Capabilities
VGA to XGA
Pixel Format
640x480, 800x600, 1024x768
Pixel Pitch
.297mm (w) x .297mm (h)
Viewing Angle
Left / Right: 60º/60º
Up / Down: 50º/60º
Active Display Area
11.972" (w) x 8.980" (h)
304.1mm (w) x 228.1mm (h)
Contrast Ratio
400:1 Typical
Brightness
700 Nits Typical
Back Light
40,000 Hours typical
Colors Supported
16.7M
Video Input
0.7Vp-p /75 ohm, Digital, NTSC/PAL
Sync
TTL Separate H&V, Combined,
SOG
Input Connectors
HD15(F), DVI, DB9(F) with cable for CVBS,
S-video
Power Source
90-264VAC Universal
Optional: 12VDC @ 2.5A (VT150CHB only)
Power Consumption
33 Watts @ 115VAC
4 Watts Sleep Mode
Temperature
Operating: 0° to 50°C
Storage: -20° to 60°C
Altitude
Operating: up to 10,000 ft
Storage: up to 40,000 ft
Response Time
TR = 6ms typical
TF = 17ms typical
16
VT150 High Bright User Guide
150-085
VARTECH SYSTEMS INC.
HEADQUARTERS
11529 Sun Belt Ct.
Baton Rouge, Louisiana 70809
Toll-Free: 800.223.8050
International Phone: 001.225.298.0300
Fax: 225.297.2440
E-mail: [email protected]
www.vartechsystems.com
17
VT150 High Bright User Guide
150-085-001
10.03.05
150-085