1
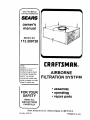
Save This Manual
For Future Reference
SEARS
owner's
manual
MODEL
NO.
113.299720
CRRFTSMRN
Serial
Number
Model and serial
numbers may be found
on the face beside the
switch.
You should
record both model and
serial numbers in a safe
AIRBORNE
FILTRATION SYSTFM
place for future use.
• assemmv
• operating:
• repai_ pa_t_
FOR YOUR
SAFETY
READ ALL
INSTRUCTIONS
CAREFULLY
j
Seam,
Part No. SP6131
Roebuck
and Co., Hoffman
Estateb.
ILL6_179
U.S.A.
Ptinte_l
in uJS.A.
FULL ONE YEAR WARRANTY
ON CRAFTSMAN
Airborne
Filtration
If within one year from the date of purchase,
Filtration System fails due to a defect
Sears will repair it, free of charge.
System
this Craftsman
in material
Airborne
or workmanship,
If this Craftsman Airborne Filtration System is used for commercial
or
rental purposes, this warranty coverage applies for only 90 days from
date of purchase.
WARRANTY
SERVICE IS AVAILABLE
BY SIMPLY CONTACTING
THE
NEAREST SEARS SERVICE CENTER/DEPARTMENT
THROUGHOUT
THE UNITED
STATES.
This warranty
applies only while this product is used in the United States.
This warranty gives you specific legal rights, and you may also have
other rights which vary from state to state.
Sears, Roebuck
and Co., D817 WA, Hoffman
Estates,
IL. 60179
IMPORTANT SAFETY INSTRUCTIONS
Safety is a combination of common sense,
staying alert and knowing how your Air-
Sparks inside the motor can ignite flammable vapors or dust. To avoid fire or
borne Filtration System works. Read this
manual to understand the Airborne Filtra-
explosion:
• Do not use this Airborne Filtration System near flammable or combustible
liq-
tion System.
Safety
Signal
uids, gases, or explosive dusts, such
as gasoline or other fuels, lighter fluid,
cleaners, oil- based paints, natural
Words
DANGER: means if the safety information
is not followed someone will be seriously
gas, hydrogen, coal dust, magnesium
dust, grain dust, or gun powder.
injured or killed.
WARNING:
means if the safety information is not followed someone could be
seriously
CAUTION:
To avoid health hazards
dusts, do not operate near toxic materials.
Do not use or store near hazardous materials.
injured or killed.
means if the safety informa-
tion is not followed
someone
might
from vapors or
To avoid electric shock, do not expose to
rain. Store indoors.
be
injured.
Do not allow Airborne
When using your Airborne Filtration Sys-
be used as a toy. Close attention
tem, follow basic safety precautions
ing the following.
sary when used by or near children.
WARNING-To
the risk of fire, electric
includ-
Filtration
System to
is neces-
Do not use this Airborne Filtration System
with a torn filter or without the filters
reduce installed.
shock, or
Do not use this Airborne Filtration
without fine filter screw installed.
injury:
System
Unplug from outlet before servicing. Turn
off Airborne Filtration System before
Read and understand this owner's manual
and all labels on the Airborne Filtration Sys-
unplugging.
tem before operating. Use only as described
in this manual To avoid personal injury or
damage to Airborne Filtration System, use
only Sears Craftsman recommended accessories.
To avoid injury from accidental starting,
unplug power cord before changing or
cleaning filters
2
Do not unplugby pullingon cord.To
unplug,graspthe plug,not the cord.
Do not use withdamagedcord, plug or
This product
other parts. If your Airborne Filtration System is not working as it should, has missing parts, has been dropped, damaged,
left outdoors, or dropped into water, return
it to a Sears Service Center.
Do not use the top of this unit for storage.
Keep cord away from heated surfaces,
such as light bulbs or heaters
Do not handle plug or the Airborne
Filtra-
tion System with wet hands.
Do not put any object into ventilation
openings.
should not be used in a
spray paint booth or in a kitchen type environment.
WARNING:
To reduce
the risk of
electric shock - do not expose
rain - store indoors.
to
WARNING:
For your own safety, read
and understand owner's manual. Do
not use the Airborne Filtration System to filter hot ashes, coals, toxic,
flammable
or other hazardous materials. Do not use around
explosive
liquids or vapors.
Keep hair, loose clothing, fingers and all
parts of body away from openings and
moving parts.
SAVE THESE INSTRUCTIONS
The operation
of any power tool can result
in foreign objects being blown into the
eyes, which can result in severe eye damage. Always wear safety goggles complying with CSA Z94-3-M88 (shown on
package) before commencing
operation.
Safety Goggles are available
retail or hardware stores.
at Sears
Use only extension cords that are rated
for outdoor use. Extension cords in poor
condition or that are too small in wire size
can pose fire and shock hazards. When
using an extension cord, be sure it is in
good condition. Using any extension cord
will cause some loss of power. To keep
the loss to a minimum, use the following
table to choose the minimum wire size
extension
cord.
Extension
Gauge
Cord Length
(A.W.G.)
0-50 Ft,
50-100
To avoid hearing damage, wear ear protectors when using any power tool for
_xtended hours, or when working in a
,oisy area.
_:or dust operations,
wear dust mask.
Ft.
14
12
Contents
Item
Page
Warranty Information .............................
Safety Instructions .................................
Contents ................................................
2
2
4
Unpacking and Checking
Carton Contents .............................
Installation Procedure ............................
4
5
Unpacking
Remove
of carton.
Check
if any parts are damaged
C
Wiring Diagram ......................................
Repair Parts ........................................
A
each item against the Carton Contents
List. Notify your Sears Store immediately
Key
A
B
Page
and Checking Carton Contents
entire contents
Carton
Item
Electrical Requirements
........................
Operation ...............................................
Maintenance ..........................................
or missing,
Contents
List
Description ...........................
Qty.
Airborne Filtration System .......... 1
Owners Manual ...........................
1
D
E
Bag of Loose Parts
Containing the following:
"S" Hook ......................................
Screw Hook .................................
4
4
F
G
H
J
K
3/16-24 Eye Bolt .........................
Extension Spring .........................
Double Loop Chain .....................
3/16" Lockwasher ........................
3/16-24 Hex Nut ..........................
4
4
4
8
8
D
G
©
7
8
8
9
10
--
Installation
Procedure
WARNING: For your own safety,
never connect plug to power source
outlet until all assembly steps are
2. Joists are normally sixteen inches
apart. Spacing of holes on width of
unit is 18-7/8", and on length of unit is
28" on center as shown. Chain allows
complete and you have read and
understood the safety and operation
instructions.
Do not operate filter
system
with any parts damaged
for suspension
direction.
or
3. Unit weighs 40 pounds
missing.
1. Select location for Airborne
from joist in either
so suspension
should be from center of ceiling joists
only.
Filtration
System. Unit should be installed with
the side opposite the switch and light
a minimum distance of six inches to
WARNING:
To reduce
the risk of
injury from a falling unit, install in
structure that will support 160
the nearest wall. Ends should be at
least two feet clear of wall surface to
pound
allow for proper air circulation
shown below.
4. When you have selected the location
for your unit, use a pencil to mark the
as
four suspension points in the joists
(again, make sure that these points are
at the center of the joists). Drill 1/8"
It is important that you select the location carefully so that it is not in a high
traffic area, or consider instalting it
above a bench to reduce the hazard of
diameter pilot holes 1-1/4" deep into
each of the four suspension points.
bumping your head on the unit. The
minimum height required for the unit
and suspension will be 17-3/8", so
keep this in mind when selecting
location.
load.
5. Install the four screw hooks in the pilot
holes up to the start of the curve as
shown on page 6.
a
32: ,O/c
Wall
I
I I
S urface'_--_
_'1
I
I
IIi
"ii
I
28" Olc_
i)
TIt-
t
I
....
I
J
"_
* Minimum
Suspension
Points(,).
Clearance
°
I
I4
* 24"
Un_
,
,•
'll
I.J
)l
"_-_
Ceiling Joist
• 24" minimum
clearance
unit openings,
to side.
6" minimum
from wall to
from wall
5
o
_
=o
_
_
I
_
/
Ceiling
Joist
l
I
I
,
Switch & Light Location
Filter Unit
I, _ .,,_____16,,olc_16,,o/€.__
I
o
4
*24"
= I
Installation
Procedure (continued)
6. The next step is to install the eye bolts
in the top of the unit. To do this, you
must remove the three filters first.
Refer to drawing under "Maintenance"
section
ters.
Ceiling
Joist
for location of three types of fil-
7. The Pre Filter (intake) slides out of the
channel in the cabinet.
8. The Fine Filter (mid bag type) has a
screw at the center of the bottom of
Screw
Hook
Double
Loop
Chain
the cabinet. To remove the Fine Filter,
remove screw and slide filter out about
2" to the right. Push left end of filter
into cabinet about 4". Slide filter further into cabinet at an angle. Tilt in at
top and pull filter towards you.
9. The diffuser (exhaust) slides out of the
channel in the cabinet.
10. Install a hex nut on an eye bolt until 1/4"
of thread is showing below the eye. Slip
on a Iockwasher and put eye bolt in hole
in top of cabinet. Repeat for other three
eye bolts.
1 1. Slip Iockwasher
and hex nut on eye
bolt as shown on Figure "B". Repeat
for other three eye bolts and then
tighten nuts with two wrenches
nuts are snug.
12. Filters can be reinstalled
• Diffuser
nel.
(exhaust)
until all
at this point.
- slide into chan-
• Fine Filter (mid bag type) - reverse
motions for removing the fine filter,
shown in step 8. Reinstall bottom
screw.
Eye Bolt
Lockwashem
• Pre Filter (intake) - slide into channel.
WARNING:
Although
compact
in
size, the Air Filtration Unit weighs
40 Ibs. To avoid back injury obtain
to lift the unit into place.
Top
Cabinet
11" Height
of Unit
13.To
suspend your unit at the minimum
height, five double loop sections of
chain are required (4-13/16"). Slip this
chain. Repeat for other three springs.
Refer to figure shown on previous
page.
length of chain over the screw eye in
17. Unit is now hung from the ceiling
the joist, letting the excess chain hang
down in case adjustment of length is
required later.
14. Place "S" hook in bottom
at four suspension
as
high as possible. If you prefer the unit
to hang lower, unhooking each of the
four chains from its screw hook (one
link of chain
at a time), and rehooking each chain
to its screw hook on a different link
points.
15. Lift cabinet up, with help and connect
"S" hooks to eye bolts at four points in
cabinet.
can do this. When the hanging height
is satisfactory, squeeze all four "S"
hook loops closed at the eye bolts and
16. Connect extension springs to "S"
hooks. Push unit up and connect
chains. (Optional: For a cleaner
appearance, snip off extra length of
chain links.)
upper loop of extension spring to bottom loop of fourth double loop of
Electrical
Requirements
Your filter system is wired for 120 volts
A.C. and is equipped with a 3 conductor
cord and grounding type plug approved by
Underwriters
Laboratories and Canadian
WARNING:
Standards
have it checked
trician.
Connect unit to the nearest 120 volt AC
outlet and route cord so that it will not be
WARNING:
and pulled accidentally.
This plug requires
Properly
Grounded
Outlet
\
15
WARNING:
Damaged power cords
can cause shocks or fires. If the
immedi-
3-Prong
by Sears Service Centers,
using Sears replacement
parts.
7
or
Plug
Grounding
Prong
WARNING: To assure product
SAFETY and RELIABILITY,
repairs
and adjustment
should be performed
always
plug
\
power cord is worn, cut or damaged
in any way, have it replaced
ately.
shock can kill.
never connect
Unplug filter unit before servicing
changing any filters.
replace
the 2-prong outlet with a grounded
amp 3-prong outlet.
elec-
to power source outlet until all
assembly steps are completed.
grounded type outlet, properly grounded.
If the outlet you are planning to use for
this filter unit is of the two prong type DO
NOT REMOVE OR ALTER THE
GROUNDING
PRONG IN ANY MANelectrician
by a qualified
Electric
To avoid shock,
a mating 3 conductor
NER. Have a qualified
shock can kill.
Not all outlets are properly
grounded. If you are not sure that
your outlet is properly grounded,
Association
easily snagged
Electric
Operation
WARNING: To avoid fire or explosion, do not operate this filter unit in
areas with flammable gases or flammable vapors such as lighter fluid,
Your Craftsman Airborne Filtration System is equipped with an Pull On/Pull Off
switch, a light to show power is ON, and a
power cord to plug into your electrical
let.
cleaners, oil-base paints, gasoline,
alcohol or explosive dust such as
When installation is complete, plug power
cord into wall receptacle. To activate Air-
coal, magnesium,
grain or gun powder in the air. To avoid health haz-
borne Filtration System, pull on switch
cord. Light will come on and filter unit is in
ards from vapors or dusts, do not
use this system to filter toxic materials. The Craftsman Airborne Filtration System
is intended
out-
operation.
To stop operation,
pull on
switch cord and the light will turn off.
for indoor
Remove power cord from wall receptacle
before changing or cleaning filters.
use only. Unplug power cord before
changing or cleaning filters.
WARNING:
CAUTION: The operation of any
power tool can result in foreign
objects being thrown into the eyes,
which can result in severe eye damage. Always wear safety goggles
complying with CSA Z94-3-M88
(shown on Package) before commencing operation. Safety Goggles
are available at Sears hardware
stores.
or electrical
To reduce the risk of fire
shock, do not use this
Airborne Filtration System with any
solid-state speed control device.
Maintenance
IMPORTANT:
To assure product safety
and reliability, repairs and adjustments
should only be performed by Sears Service Centers, always using Sears replacement parts.
#3 - Diffuser (exhaust)
Expanded aluminum
The #1 Pre Filter and #3 Diffuser can be
washed in warm water with a mild detergent, dried and then reinstalled. Check
the filters for tears or small holes. Do not
use a filter with holes or tears in it.
Filter Maintenance
WARNING: To avoid injury from
accidentally
starting, unplug power
cord before cleaning
ters.
or changing
fil-
Cleaning
]
Replace it immediately. To maintain peak
performance clean your filters often. Han-
I
dle the filters carefully, when removing to
clean or when installing.
The #2 Fine Filter should be replaced
when it becomes clogged with fine dust. A
Your Airborne Filtration System consists
of three types of filters as shown under
"Removal"
visual inspection can be done by sliding
the #1 Pre Filter out and checking the
Fine Filter for contents and tears or holes.
#1 - Pre Filter (intake)
If tears or holes appear,
immediately.
Polyurethane foam
#2 - Fine Filter (mid-bag type)
Non-woven polyester
replace your filter
Removal
WARNING: For your own safety, use
only Sears replacement
filters.
To remove the filters for cleaning or
replacement
review the section in your
manual under "Installation Procedure" fol-
WARNING:
To avoid electrical
shock, be sure to replace screw that
secures Fine Filter.
lowing steps, 7, 8 and 9.
#1
Squirrel
Cage Fan
Pre Filter (Intake)
#2
Fine Filter
(Mid-Bag Type)
#3
Diffuser
(Exhaust)
Air
Direction
I CAUTION:
are facing
For proper
proper direction.
operation,
the
make sure "Air Flow" arrows on the filters
Wiring Diagram
I
White
81ao.-tl /
c°nQUi_ikns _1
Wire Nut _.,=!t-_ Black _
Wire NU!
_Gr_ound I
__
White_
9
_'_Black
Repair Parts
Airborne Filtration System
Model Number 113.299720
Always
Key
No.
1
2
3
order by Part Number
PaN No.
825702
824294
- Not by Key Number
Description
Cabinet Assembly
Bottom Panel
4
5
9-17931
9-17933
824295
6
7
8
824311
824289
169123-9
Blower Assembly
Cord Assembly
Stra;n Relief
9
824288
Light
10
11
824292
STD375006
Switch Assembly
* Wire Connector
12
13
14
824290
60306
STD551225
Clip Wire
_Screw, Pan Hd. Cross Recess
15
16
STD541025
**
1 Pre Filter - intake
1 Fine Filter - Mid Bag Type
Diffuser- Exhaust
17
824301
18 _824299
19 1824302
20
21
22
-'_-"S" Hook 1-1/2"
STD541010
STD551210
824298
23:824300
24 _824291
25
26
iSTD551208
809372-3
27
28
29
STD541!10
821330
824597-1
--
SP6131
* Stanc/ard
Hardware
** Standard
weather
8-32 x 3/8" Lg.
* Lockwasher, 1/4" External Type
* Hex Nut 1/4-20
Gasket 1/8" Max. Th. x 1/4" x 9"
Screw Hook 1-9/16",
Eye Bolt 3/16-24 x 2'
* Hex Nut 3/16-24
* Lockwasher 3/16" External Type
.','Chain, Double Loop
Spring, Extension 1-1/4"
Clip Wire
* Leckwasher - External Type #8
* Screw, Pan Hd Cross Recess10-32
* Hex Nut 10-32 ZN
-,.Screw K-Lath #8 x 9/16"
Screen, Blower
Owners Manual
Item - May Be Purchased
stripping
(purchase
1" Stock Item - May be purchased
retail stores.
through
x 1/2"
(Not Illustrated)
Locally.
locally)
the hardware
10
department
of most Sears
Repair Parts
Airborne Filtration System
Model Number 113,299720
//
/
tD
\
11
For the repair or replacement pads you need
Call 7 am - 7 pm, 7 days a week
1-8OO-366-PART
(1-800-366-7278)
For in-home major brand repair service
Call 24 hours a day, 7 days a week
1-8OO-4-REPAIR
(1-800-473-7247)
Far the location of a
Sears Repair Service Center in your area
Call 24 hours a day, 7 days a week
1-800-488-1222
For information on purchasing a Sears
Maintenance Agreement or to inquire
about an existing Agreement
Call 9 am - 5 prn, Monday-Saturday
1-800-827-6655
SEARS
America's
Repair Spectahsts
The model and serial numbers
When requesting
service
following
information:
•
•
Product Type
Part Number
Seam,
Part No. SP6131
will be found on the handle.
or ordering
•
•
Roebuck
parts, always
provide
the
Model Number
Part Description
and Co., Chicago,
Form No. SP6131
IL. 60179 U.S.A.
Printed
in U.S.A.