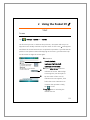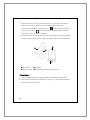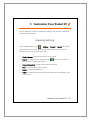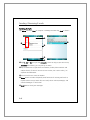
1
D X90 0 User Guide Safety Instructions Please Read Before Proceeding z Avoid heavily pressing on the touch screen. z Avoid heavily pressing on the touch screen with the stylus or your fingers. z This product is not charged when shipped from the factory. When you use this product the first time, we recommend that you install the battery as illustrated and fully charge it for about 8 hours before use. z Do not remove the battery while charging. z Before installing the SIM card, launch Communication Manager, then tap the button. When the color of the icon turns orange , this indicates that the wireless connection of the Pocket PC is disabled. z When aboard an aircraft, at a medical facility, or at the gas pump where wireless communication devices are prohibited, please launch the Communication Manager and then tap the the icon turns orange button. When the color of , the Flight Mode is activated and the wireless connection of the Pocket PC is disabled. z In case the Pocket PC is damaged, send it back to the dealer for repair. Do not attempt to disassemble the Pocket PC on your own; otherwise the warranty will be void. Where to Find Information For information on: See this source: Programs on your Pocket This User’s Guide and Pocket PC Help. To view PC Help, tap Additional programs that The Pocket PC Getting Started CD. > Help. can be installed on the Pocket PC Connecting to and Check the user’s guide that comes with this synchronizing with a product or look for the online help relevant to desktop computer synchronization tools on the desktop PC or the Pocket PC. Up-to-date information on http://www.microsoft.com/windowsmobile/ your Pocket PC Note This document lists the functions, specifications, and illustrations for reference only. The actual purchased product should be taken as the standard. Supported features for this product is subject to version differences. We reserve the right to make modifications to the features and contents contained in the instruction manual and the product. Trademarks and Copyright Copyright © 2008 Acer Incorporated. All Rights Reserved. Trademarks and trade names mentioned in this document are those of their respective owners. The Bluetooth® word mark and logos are owned by the Bluetooth SIG, Inc. and any use of such marks by Acer Incorporated is under license. Other trademarks and trade names are those of their respective owners. Contents 1 Getting Started / 1-1 PACKAGE CONTENT ..................................................................... 1-1 EXTERNAL VIEWS ......................................................................... 1-2 HARDWARE HOTKEY FUNCTIONS .................................................... 1-4 SIM CARD(S) ............................................................................. 1-6 Installing the SIM Card(s) ..................................................... 1-6 Removing the SIM Card(s).................................................... 1-7 BATTERY .................................................................................... 1-8 Installing the Battery ............................................................ 1-8 Removing the Battery........................................................... 1-9 CHARGING POWER AND POWER SUPPLY ......................................... 1-10 GETTING STARTED ..................................................................... 1-12 POWER ON AND OFF .................................................................. 1-13 Sleep Mode ....................................................................... 1-14 Turn on the Screen ............................................................ 1-15 Restarting the Pocket PC.................................................... 1-16 2 Using the Pocket PC / 2-1 START ....................................................................................... 2-1 Screen.................................................................................. 2-1 Today Screen ....................................................................... 2-3 Programs ............................................................................. 2-7 System Application Programs ............................................... 2-9 SPB MOBILE SHELL ..................................................................... 2-12 Starting Spb Mobile Shell ................................................... 2-12 Using Spb Mobile Shell ...................................................... 2-14 Configuring Spb Mobile Shell ............................................ 2-18 COMMUNICATION MANAGER ...................................................... 2-19 Switching a Connection On / Off ....................................... 2-20 Managing Dual SIM Cards on a Single Device .................... 2-21 Flight Mode ....................................................................... 2-22 ENTER INFORMATION ON YOUR POCKET PC .................................... 2-23 Enter Text Using the Input Panel ........................................ 2-24 Write on the Screen ........................................................... 2-28 Draw on the Screen ........................................................... 2-30 Record a Message.............................................................. 2-31 Voice Commander ............................................................. 2-33 3 Voice Command and Satellite Navigation / 3-1 NAVIGATION DEVICE INSTALLATION ................................................. 3-1 GPS NAVIGATION SOFTWARE INSTALLATION ..................................... 3-2 CONDITIONS FOR USING GPS CAR NAVIGATION ................................ 3-2 SATELLITE DATA UPDATE (NOT SUPPORTED IN USA) ........................... 3-4 LOCATION SMS .......................................................................... 3-7 GPS VIEWER .............................................................................. 3-9 4 Using the Phone / 4-1 ADJUSTING THE PHONE VOLUME..................................................... 4-4 PHONE FUNCTIONS ...................................................................... 4-5 Turning on Your Phone(s) .................................................... 4-5 Making a Call ...................................................................... 4-6 Answering / Ignoring a Call................................................ 4-11 Ending a Call ..................................................................... 4-12 Video Call .......................................................................... 4-13 CUSTOMIZING YOUR PHONE ........................................................ 4-16 PHONE APPLICATION PROGRAMS .................................................. 4-17 SIM Manager ..................................................................... 4-17 SIM Tool Kit ....................................................................... 4-19 SMS Sender ....................................................................... 4-20 Speed Dial ......................................................................... 4-21 5 Customize Your Pocket PC / 5-1 ADJUSTING SETTINGS.................................................................... 5-1 NOTIFICATIONS ........................................................................... 5-2 POWER PREFERENCE SETTINGS ........................................................ 5-3 BACKLIGHT ................................................................................ 5-4 LIGHT SENSOR............................................................................. 5-5 GRAVITY SENSOR ........................................................................ 5-6 MICROPHONE ............................................................................. 5-7 ADJUST VOLUME ......................................................................... 5-8 MEMORY OPTIMIZATION ............................................................... 5-9 SCENARIOS............................................................................... 5-10 FIND AND ORGANIZE INFORMATION ............................................... 5-11 NAVIGATION BAR AND COMMAND BAR ......................................... 5-12 POP-UP MENUS ......................................................................... 5-13 REDEFINE HOT KEYS ................................................................... 5-14 6 Synchronization / 6-1 WINDOWS VISTA PART ................................................................. 6-1 WINDOWS XP/2000/98 PART ....................................................... 6-3 INSTALLING AND USING ACTIVESYNC ............................................... 6-4 FAQ About Synchronization ................................................. 6-6 USB SYNCHRONIZATION ............................................................... 6-7 SYNCHRONIZATION TOOL ON POCKET PC ....................................... 6-10 SYNCHRONIZING USING BLUETOOTH .............................................. 6-11 7 Connections / 7-1 CONNECTING TO THE INTERNET ....................................................... 7-1 Connection Wizard .............................................................. 7-1 Setting the GPRS Connection............................................... 7-3 Starting GPRS Connection.................................................... 7-5 Disconnecting GPRS............................................................. 7-7 USING BLUETOOTH ...................................................................... 7-8 Setup the Bluetooth Connection.......................................... 7-9 INTERNET SHARING..................................................................... 7-13 CSD TYPE ............................................................................... 7-14 CONNECTING WITH A PERSONAL COMPUTER ................................... 7-15 WIRELESS LAN TRANSMISSION ..................................................... 7-15 8 Using Wireless LAN / 8-1 CONNECTING TO WIRELESS LAN .................................................... 8-2 CONFIGURE YOUR WIRELESS NETWORK ........................................... 8-3 WLAN Setup Scenarios......................................................... 8-3 Configure Your Wireless Network (Normal Setup)................ 8-4 Configure Your Wireless Network (Proxy Setup)................... 8-7 9 E-mails and Messages / 9-1 MESSAGE ACCOUNTS .................................................................. 9-1 TEXT MESSAGES .......................................................................... 9-3 Reading Received Text Messages ......................................... 9-3 Creating a Text Message...................................................... 9-5 MULTIMEDIA MESSAGES ............................................................... 9-7 Reading MMS Messages ...................................................... 9-7 Creating an MMS Message .................................................. 9-8 E-MAILS .................................................................................... 9-9 Synchronizing E-mail Messages.......................................... 9-10 Connecting Directly to the Mail Server ............................... 9-11 E-mail Server Setup ............................................................ 9-12 Sending / Receiving E-mails ................................................ 9-14 Direct Push Technology Alert ............................................. 9-16 WINDOWS LIVE™ MESSENGER .................................................... 9-18 Setting Up ......................................................................... 9-19 Working with Contacts ...................................................... 9-20 Chatting with Contacts...................................................... 9-21 10 Multimedia / 10-1 USING CAMERA ........................................................................ 10-1 Pocket PC Exterior and Camera.......................................... 10-1 How to Use the Camera?................................................... 10-3 Common Tools for Camera................................................ 10-7 Common Tools for Camcorder......................................... 10-10 Advanced Setup for Camera or Camcorder...................... 10-12 ALBUM.................................................................................. 10-15 Preview Album Information.............................................. 10-15 Slideshow Settings ........................................................... 10-17 NAMECARD MANAGER ............................................................. 10-18 Digitize New Name Cards ................................................ 10-18 Name Cards Management ............................................... 10-21 11 Companion Programs / 11-1 CALENDAR: SCHEDULING APPOINTMENTS AND MEETINGS .................. 11-2 Create an Appointment ..................................................... 11-3 Use the Summary Screen ................................................... 11-4 Create Meeting Requests ................................................... 11-4 Schedule a Meeting ........................................................... 11-5 CONTACTS ............................................................................... 11-6 Finding a Contact .............................................................. 11-6 Managing Your Contacts ................................................... 11-7 Creating a Contact ............................................................ 11-8 Using the Summary Screen ................................................ 11-9 TASKS: KEEPING A TO DO LIST ................................................... 11-10 Create a Task................................................................... 11-11 Use the Summary Screen ................................................. 11-12 NOTES: CAPTURING THOUGHTS AND IDEAS ................................... 11-13 Create a Note .................................................................. 11-14 WORD MOBILE ....................................................................... 11-15 EXCEL MOBILE ........................................................................ 11-18 Tips for Working in Excel Mobile...................................... 11-20 POWERPOINT MOBILE ............................................................... 11-21 WINDOWS MEDIA PLAYER......................................................... 11-22 STREAMING PLAYER ................................................................. 11-24 INTERNET EXPLORER ................................................................. 11-25 Using Internet Explorer..................................................... 11-25 The Mobile Favorites Folder.............................................. 11-27 Favorite Links ................................................................... 11-28 Synchronize Mobile Favorites ........................................... 11-28 12 Maintaining the Pocket PC / 12-1 BACKUP UTILITY ........................................................................ 12-1 Storage Space.................................................................... 12-1 Backup Files ....................................................................... 12-2 Advanced Settings Options ................................................ 12-3 Restore Files....................................................................... 12-5 ADDING OR REMOVING PROGRAMS............................................... 12-7 Add Programs Using Synchronization Tools........................ 12-7 Add a Program Directly from the Internet .......................... 12-8 Add a Program to the Start Menu...................................... 12-9 Remove Programs ............................................................ 12-10 MANAGE MEMORY ................................................................. 12-11 View Memory Status........................................................ 12-11 Find Available Memory..................................................... 12-12 SYSTEM INFORMATION .............................................................. 12-15 13 Voice Commander / 13-1 STARTING VOICE COMMANDER .................................................... 13-2 VOICE COMMAND FORMAT ......................................................... 13-3 VOICE COMMANDER SETTINGS ..................................................... 13-5 Contacts Settings Page ...................................................... 13-5 Application Settings Page................................................... 13-8 Music Settings Page ......................................................... 13-10 Digit Training Page........................................................... 13-12 Digit Settings Page........................................................... 13-14 Advanced Settings Page................................................... 13-15 FAQ..................................................................................... 13-16 14 Specifications / 14-1 15 Regulation Notice and Safety Declaration / 15-1 SAR INFORMATION .................................................................... 15-1 HEALTH AND SAFETY INFORMATION ............................................... 15-2 REGULATORY NOTICES................................................................ 15-6 WEEE NOTICES ........................................................................ 15-9 16 FAQ / 16-1 17 Index / 17-1 1 Getting Started / Package Content Pocket PC, stylus, battery, Getting Started CD, Quick Start Guide, AC adapter, USB cable, headset, leather case. o q n p r t nPocket PC oStylus rQuick Start sUSB Cable s pBattery qGetting Started CD tAC Adapter Guide 1-1 External Views 6 789 21 22 23 24 5 1 16 2 17 10 3 18 19 4 11 12 13 20 15 14 1. Strap holder 2. Volume control key 3. Record key / Voice Commander 4. Headset connector hot key 5. Light sensor 6. Video conference camera 7. Bluetooth / WLAN / GPS LED 8. Phone Receiver indicator 9. Charging / Mobile Phone LED 10. Display, Touch screen indicator 1-2 11. SEND button 12. Navigation pad 13. END button 14. Microphone 15. Mini USB connector 16. POWER button 25 17. RESET button 18. MicroSD slot 19. Camera hot key or Camcorder 20. Stylus holder 21. Camera lens 22. Preview mirror 23. Flashlight LED 24. Speaker 25. Back cover, battery is inside 1-3 Hardware Hotkey Functions r s n o p Hardware Button 1 2 3 t q Short Press (Press once and release) Adjust volume Record / Voice Commander Phone / dial / redial / Long Press (Press and hold for a few seconds and release) -Notes Telephone hold answer 4 z Hang up during call z Disconnect during GPRS connection z Skip to Today screen z Turns off the phone function z Turns on the phone function while in other programs 5 1-4 Turn on/off screen, enter Enter Power off mode of the the Sleep mode Pocket PC Hardware Button 5 +6z Short Press (Press once and release) POWER button + RESET Long Press (Press and hold for a few seconds and release) -- button = Cold boot 6 z RESET button -- 7 Camera or Camera Shutter -- 1-5 SIM Card(s) Your device is designed for operating two SIM cards simultaneously, so you can receive and make calls on either number. Both the SIM card slots are capable of carrying GSM SIM cards. The slot on the right is dedicated for GPRS/3G compatible SIM card. To make video calls or send an MMS message, please make sure your GPRS/3G SIM card has been installed in SIM1 card slot correctly. Installing the SIM Card(s) 1. Before installing or removing the SIM card, make sure all the wireless connecttions are disabled. Launch Communication Manager, then tap the button to turn it orange. 2. Press the POWER button to turn off the screen. 3. Disconnect the USB cable or AC adapter if either of them is connected to your Pocket PC. The removal of SIM card or battery while the Pocket PC is connected with a USB cable or AC adapter may damage your device. 4. Turn over your Pocket PC and remove the back cover. 5. With the missing corner facing out of the slot and the metallic contact facing down, slide the SIM card into the slot. 1-6 Removing the SIM Card(s) 1. Disconnect the USB cable or AC adapter if either of them is connected to your Pocket PC. 2. If the battery is installed, turn off the device and remove the battery. 3. With a small amount of pressure, plug your stylus tip a bit into the hole on the top of SIM slot, use it to hook the SIM card edge until it loosens from the SIM card holder. 4. Use your finger to slightly slide the SIM card out of the card slot. 1-7 Battery Using the Pocket PC for the First Time If you are opening this product for the first time, the main battery and the Pocket PC are packed separately inside the product package. Installing the Battery 1. Turn over the Pocket PC and remove the back cover. 2. Place the battery in the back of Pocket PC. Make sure that the golden contacts are aligned to the battery box. 3. Gently insert the battery until it clicks. 4. Replace the back cover. 1-8 Removing the Battery 1. If the phone, GPRS or wireless LAN connection function is already activated, deactivate it first and then replace the battery. 2. Disconnect the USB cable or AC adapter if either of them is connected to your Pocket PC. The removal of SIM card or battery while the Pocket PC is connected with a USB cable or AC adapter may damage your device. 3. Turn over your Pocket PC and remove the back cover. 4. Remove the battery. 1-9 Charging Power and Power Supply nConnect the AC adapter plug to any household power outlet. oConnect the other plug from the AC adapter to the USB port. The Pocket PC starts to charge automatically. pIf you need to connect Pocket PC and desktop computer, you could connect the USB cable to the USB port. And then connect the other end of the USB cable to the USB port on the desktop computer. Your Pocket PC will also charge at the same time. But don’t remove the battery while charging. Once you remove the battery, Pocket PC will not work. n o p 1-10 1. It will take about 8 hours to fully charge the battery after the first time you open the package. Subsequent charging will only take about 3 hours. After charging, you can disconnect the AC adapter and carry the Pocket PC around portably. To maintain smooth operation, charge the power regularly. 2. View the battery icon on the upper right corner to check the power usage condition. 3. The LED indicator on the top of the Pocket PC will indicate the various functions that are currently in use. LED Behavior / Meaning indicators Red ●Red always light: Device is charging. ●Red sparkling once every 4 seconds: Warning of battery low level, missed calls or unread messages. ●Red sparkling continuously: Battery level very low. Green ●Green always light: Battery charging is full. ●Green sparkling once every 4 seconds: GSM is connecting on line. Blue ●Blue sparkling once every 4 seconds: Bluetooth enabled. Amber Amber sparkling once every 4 seconds: WLAN enabled. White White sparkling once every 4 seconds: GPS enabled. 1-11 Getting Started Getting Started provides you with basic concepts and shortcuts to certain primary features and settings. Tap > Programs > Getting Started. 1 Tap a subject to view how to get started. 2 Tap hyperlink to execute the specified command. 3 Tap Back to return to the Getting Started main screen. 1-12 Power On and Off POWER button 1 .Press and hold the POWER button on the Pocket PC and then tap Yes to turn off the Pocket PC. All functions will be disabled; this is not the same as entering Sleep mode. 2 .To turn on, simply press the POWER button once. 1-13 Using the Stylus to Touch the Screen Your Pocket PC is designed for graphics-based operation. Generally z speaking, we usually “use the stylus to perform basic actions such as tap, drag, and tap and hold” on the touch screen. Other actions such as reset and cold boot will require the use of the stylus tip. Pull the stylus to full-length to make it easier to tap the screen during z operation. When kept completely in the stylus holder, the stylus length shortens. Avoid heavily pressing on the touch screen with the stylus or your fingers. z Sleep Mode 1. Press the POWER button of the Pocket PC to enter the Sleep mode. At this time, the screen is turned off and all peripheral devices enter the power-saving mode. But if the phone is turned on, it is still in the call waiting mode. 2. To turn on the screen later, just press the POWER button. 3 .Tap > Settings > System tab > Power and then the Advanced tab to set the device to turn off automatically after waiting for a certain time period. 1-14 Turn on the Screen This product is designed with a power-saving feature. If the screen is turned off, press the POWER button of the Pocket PC to turn it on. If the screen is too dark and you cannot see clearly, set the proper brightness level for the backlight. Tap > Settings > System tab > Backlight > Backlight Level tab. 1-15 Restarting the Pocket PC Appropriate situation: If the Pocket PC is unable to maintain normal operation, has no response, or if the screen is frozen. For your consideration, factoring into your safety and convenience, please refer to the following instructions in order: Reset Press the RESET button of Pocket PC with the tip of the stylus. Default Settings If the touch screen is functional, please tap procedures Clean Boot > Programs > Utilities > Default Settings Press and hold both POWER button and RESET button for a while, then release them simultaneously. Wait for a few seconds until the screen wakes up displaying the model name, firmware version and firmware build date of your device, instantly press and hold . Continue pressing and release it when you see an inquiry box shown on the screen. 1-16 Reset Reset method: Press the RESET button of Pocket PC with the tip of the stylus. z Appropriate situation: If the Pocket PC is unable to maintain normal operation, has no response, or if the screen is frozen. z Result: In a moment, when Pocket PC automatically completes the system startup process, the last display will be the Today screen. This will retain the Microsoft Windows, factory pre-installed applications, and user’s input data, newly installed programs, and user custom settings. 1-17 Default Settings Tap > Programs > Utilities > Default Settings. 1. If this application is inadvertently accessed, please select the to the upper right of the screen to exit, the system will not be affected. 2. If you are certain that you wish to perform this action, please select the data input block on the right, and enter the authorized code in the block to the left. Then tap OK. z Appropriate situation: If the Pocket PC is unable to maintain normal operation, but the touch screen is functional. Please refer to the instructions in this section to troubleshoot. z Result: This will retain only the Microsoft Windows, and factory pre-installed applications. Other settings such as user’s input data, newly installed programs, and user custom settings will all be cleared. 1-18 Clean Boot Cold boot method: Press and hold both POWER button and RESET button for a while, then release them simultaneously. Wait for a few seconds until the screen wakes up displaying the model name, firmware version and firmware build date of your device, instantly press and hold z . Appropriate situation: If a previous reset has already been attempted and the Pocket PC is still unable to maintain normal operations, has no response, or if the screen is frozen. z Before executing the preceding “Cold boot method”, please carefully consider the following instructions and then decide on the cold boot method. 1. After a cold boot is performed, if no buttons are pressed, when Pocket PC automatically completes the system startup process, the last display will be the Today screen. This is identical to the reset result. 2. If a previous reset has already been attempted but the Pocket PC is still unable to maintain normal operation, consider the following solution: n Press and hold both POWER button and RESET button for a while, then release them simultaneously. oWait for a few seconds until the screen wakes up displaying the model name, firmware version and firmware build date of your device, instantly press and hold . pContinue pressing and release it when you see this message shown on the screen. 1-19 The operation “Erase all data and load default?” will delete all the data you stored on your device and restore it back to factory default settings. If you press z upon seeing the line “Yes [press CAMERA button]” at the bottom of screen, all the data you stored, programs you installed and customized settings you made on this device will all be cleared. Follow the onscreen instructions to complete the resetting after the device reboots. Without your confirmation of this operation as pressing z , the device will cancel this procedure after a few seconds idle. Caution 1. After performing a cold boot, the system will retain Microsoft Windows and pre-installed programs. If you answer “Yes” to the question displayed after a cold boot, other items such as the user’s input data, newly installed programs and user settings will be lost. 2. There are two ways to retain your data, loaded default and registry: nPerform a Reset. oPerforming a Cold Boot, and answer “No” when the above question displays. 1-20 2 Using the Pocket PC / Start Screen Tap >Settings > System tab > Screen. The first time you use or cold boot the pocket PC, the system will ask you to align the screen. Kindly continue to tap the center of each cross (+) that appears and follow the screen instructions to complete the operation. If you feel that the position is not quite accurate while tapping on the screen, you follow the help for this section to align the screen again. nOrientation: n Portrait (default) Landscape (right-handed) Landscape (left-handed) o oTap the Align Screen button to calibrate the screen. When Align Screen appears, use the stylus to p tap the center of the cross (+) until the next cross appears, then follow the screen instructions to complete the operation. Finally, tap to exit. pText Size tab: For selecting the desired text size. 2-1 The following steps will bring you into the touch screen calibration mode. These steps provide a faster and more efficacious way to enter the touch screen calibration mode. And they also provide a method of getting into Screen program for when the touch screen dislocation is so severe that you completely cannot select or do anything using the stylus. 1. Simultaneously press on the bottom-left of the Pocket PC and the execution button in the center of the navigation pad. 2. Release these two buttons at the same time, and you will enter the calibration screen. 2-2 Today Screen When you turn on your Pocket PC for the first time each day (or after 4 hours of inactivity), you will see the Today screen. You can also display it by tapping > Today. On the Today screen, you can see at a glance the important information for the day. X Y Z[ n Start.,tap to switch to a program. oConnection status icons, tap to view the connection details. ZSpeaker icon. For adjusting volume. \ [Current battery status. \Communication Manager Displays your dual phones staus. When the name of service provider appears in orange, this phone is currently selected as the primary phone number when you make a call. ]Today screen. Displays important information for the day. Tap on any item to enter its relevant setup screen. ^ ^Tap to quick link to Speed Dial or Spb Mobile Shell. ] 2-3 The following table lists the icons that you may see on the Navigation Bar. Kindly refer to the “Meaning” column for explanation or tap on the icon to access the instant message. Icon Meaning (Located on the Navigation Bar at the top of the screen) Speaker is on Ringer off Pending alarm Battery charging Battery level Low battery Battery power is very low Battery is fully charged New instant message New e-mail or text message (SMS) New MMS mail If there is not enough space on the screen to display all notification icons, tap this icon to view all icons. Active connection to computer Synchronizing Sync error PowerPoint slide show 2-4 Icon Meaning (Located on the Navigation Bar at the top of the screen) Missing SIM1 card Missing SIM2 card Phone1 is turned off. Phone2 is turned off. Phone1 is turned on. Signal strength. Phone2 is turned on. Signal strength. Phone1 has not yet detected signal Phone2 has not yet detected signal No service. Phone1 has not yet connected to a network. No service. Phone2 has not yet connected to a network. Phone1 is searching for signal. Phone2 is searching for signal. Phone Voice call in progress Data call in progress Calls are forwarded Call on hold Missed call Roaming Bluetooth Wireless Active Wireless Data Calling Wireless in use 2-5 Icon Meaning (Located on the Navigation Bar at the top of the screen) GPRS not in use GPRS available GPRS connected Synchronizing over GPRS in use EDGE available EDGE connected Synchronizing over EDGE in use 3G network available 3G connected Synchronizing over 3G in use 3.5 G network available 3.5 G connected Synchronizing over 3.5 G in use represent the availibility of various data connection services provided by SIM card you installed in SIM1 slot. They are shown according to your monthly plans, telecom service provider, and network distribution conditions or effective system coverage area. To make modifications to your monthly plans, please contact your telecom service provider. 2-6 Programs You can switch from one program to another by selecting it from the menu. (You can customize which programs you see on this menu. For information, see “Adjusting Settings” section.) To access some programs, you’ll need to tap Icon > Programs, and then the program name. Programs Description Games Group Bubble Breaker, Solitaire GPS Group GPS Viewer, Location SMS, Satellite Data Update Multimedia Group Album, Camera, Namecard Manager Office Mobile Group Excel Mobile, OneNote Mobile, PowerPoint Mobile, Word Mobile Phone Group Scenarios, SIM Manager, SMS Sender, Speed Dial Utilities Group Application Recovery, Backup Utility, Default Settings, Memory Optimization Voice Commander Group Voice Commander, Voice Commander Settings ActiveSync Synchronize information between your Pocket PC and computer. Calendar Keep track of your appointments and create meeting requests. Contacts Keep track of your friends and colleagues. Notes Create handwritten or typed notes, drawings, and recordings. Tasks Keep track of your tasks. Messaging Send and receive e-mail messages. 2-7 Icon Programs Description Internet Explorer Browse Web and WAP sites, and download new programs and files from the Internet. Windows Live MSN related programs. Messenger Send and receive instant messages with your MSN contacts. Calculator Performs basic calculations. Pictures & Videos Take, view, and edit pictures. Windows Media Plays movies or sound files. Streaming Player Playback video or audio files from RTSP, HTTP etc. Internet Sharing Simulate Pocket PC as a modem for the PC to surf the Internet. Search Quickly find the information you need. File Explorer Manages files or folders. Communication Manager Manage wireless connections and related functions. You can also switch to some programs by pressing a program button. Your Pocket PC has one or more program buttons located on the front or side of the Pocket PC. The icons on the buttons identify the programs they switch to. For more information, refer to “Redefine Hot Keys” section. 2-8 System Application Programs Tap > Settings > Personal tab Program Description Buttons Set the hot key for Pocket PC hardware button. Input Set the details about the input method. Lock Set the access rights and password of Pocket PC. Menus Set the items displaying on the Owner Information Input owner information. Phone Set the details about the phone. Phone2 Set the details about the phone2. Sounds & Notifications Set the volume and notification method. Today Set the look of Today screen and display Start menu. information. 2-9 Tap > Settings > System tab Program Description About Display the important information about the Pocket PC. Backlight Set the details about the backlight and brightness. Certificates For network identification to prevent unauthorized access. Clock & Alarms Set the time and alarms. Gravity Sensor The built-in gravity sensor is able to recognize how your Settings hand manipulate this device and change the screen orientation accordingly. Memory View the memory usage, and the list of running programs, etc. Microphone Set the microphone volume. Power View the power usage condition, whether or not to power off after a waiting period. Regional Settings Set the region and information display formats such as date, time, etc. Remove Programs Remove programs that are no longer used. Screen Aligning the screen is helpful in determining the touch accuracy. You can select the portrait or landscape orientation. System Information 2-10 View the system information. Tap > Settings > Connections tab Program Beam Description Set if receiving end will accept beam data automatically or not. Bluetooth Establish the connection between the Pocket PC and other Bluetooth capable devices. Comm. Manager Manage the connections of your device. Connection Wizard Select the appropriate country and carrier name. Connections Set the network connection. CSD Type Set Pocket PC to simulate a modem and access the Internet through the built-in GSM device. Domain Enroll Enroll your device in company’s domain, in order to connect it to the System Center Mobile Device Manager. USB to PC Change the type of USB connection. 2-11 Spb Mobile Shell Spb Mobile Shell has easy to use functions and tools to keep your Pocket PC organized for quick access. The program consists of the main window panels (Now Screen, Spb Menu, Speed Dial), Quick panel (smart taskbar gestures), Spb Contacts (smart contact search), Task Manager, color based themes, and improved usability for device locking. Starting Spb Mobile Shell z On the Today screen, tap Spb Shell to quick link to Spb Mobile Shell. z Taskbar Smart Gestures: Tap-and-hold in the middle of the taskbar to launch Spb Mobile Shell. 1. The taskbar smart gestures allow you to launch Spb Mobile Shell from any application you are in. nTap-and-hold in the middle of the taskbar while moving your finger in a downwards gesture. oSelect one of the panels and release when the gray popups window appears. pIf you release your finger outside the gray area then the highlight disappears and the panels launching is canceled. 2-12 2. To return to the Today screen or the last active application, the following methods are available. nSlide your finger in a downwards gesture. oTap . 2-13 Using Spb Mobile Shell n o p q 1. Now Screen panel: The Now Screen gives you a quick and easy way to check your device status. nTap to select a city or open the r s weather details panel where you can update forecast or access the weather options. ^ oTap to adjust the phone profiles on your Pocket PC. pThree icons for e-mail, SMS, Voice mail, and missed calls. For example, when you receive an e-mail you will see the e-mail icon highlighted with the number of new e-mails you have in your inbox. You can open your Inbox to read new e-mails with just a tap, or with a few key presses. qDisplays your current time and date. Tap to open the time screen for more details. rUse the left/right gesture to switch between the main window panels. sThe calendar displays the days that correspond to the selected month and year settings. tTap soft keys to switch between the main window panels. Tap quit. 2-14 to 2. Spb Menu panel: Spb Menu n consists of two parts, smart launcher at the top (12 shortcuts) o and six large phone style menu items below. p nTap to quick link. oThe six large menu items not only show you what you have already q on your Pocket PC but it also adds very useful tools under some r categories. pUse the left/right gesture to switch between the main window panels. qTap soft keys to switch between the main window panels. Tap to quit. rTap and hold on any of the 12 items and Pin your favorite items or select Manage Pinned to customize the smart launcher. 2-15 n o 3. Speed Dial panel: The Speed Dial allows you to add up to sixteen photo contacts of your choice. You can also add a shortcut to p q r the Spb Contacts on the panel. nAdd your favorite contacts to the Speed Dial panel (applies only to entries stored in Contacts on your Pocket PC). s oTap the photo, name, or number of the contact whom you want to call. pUse the left/right gesture to switch between the main window panels. qTap to link to Spb Contacts. rTap soft keys to switch between the main window panels. Tap to quit. sTap and hold to open the context menu. 2-16 ÁOn the Speed Dial panel, tap the photo, name, or number of the n contact whom you want to call. The contact panel of your selected contact is then displayed. o nSelect one of the phone numbers that you want to dial or send a text message. oTap Open to view the contact full details card. ÁOn the Speed Dial panel, tap . The Spb Contacts panel is then displayed. When you start entering a phone number or contact name, Spb Contacts will automatically search and sort the contact entries that match the sequence you have entered. You can then select the desired number or contact from the filtered list to dial. 2-17 Configuring Spb Mobile Shell z On the Spb Menu panel, tap Settings category > Spb Mobile Shell. z Tap > Settings > System tab > Spb Mobile Shell. 1. Now Screen tab: Customize options on your Now Screen display. Show the Now Screen when device wakes up: Enable this option to show the Now Screen each time you wake your device from te standby mode. 2. Advanced tab: Customize Spb Menu and Now Screen advanced n options. 3. On the menu of Advanced tab, tap Menu to open the customization dialog of the six large menu items of the Spb Menu panel. o nSpb Menu tree. oProvides the relevant menu. You can Move Up, Move Down, Edit, Remove, Add and open the Menu Option for any of the Spb Menu tree items. 2-18 Communication Manager Communication Manager will assist you to manage the wireless connections of the Pocket PC including Phone1, Phone2, Bluetooth, WiFi and data connection. You can access Communication Manager by these methods: z On the Today screen, tap. z On the Today screen, tap the connection status icons on navigation bar, when the message window appears, tap Comm. Manager. z Tap > Programs > Comm. Manager 2-19 Switching a Connection On / Off On Communication Manager screen, single tap on these buttons to activate or disable each individual functions. z The icon indicates that the associated function is currently in the off state. For example, tap , when it becomes , the GPRS connection is available. z Tapping these buttons will turn the icons orange, indicating that these functions are newly activated. z To turn off these functions, simply tap on the buttons once again. Note You can enable Data Connection only when a 3G/GPRS SIM card in SIM1(3G ) slot and Phone1 is pre-activated. 2-20 Managing Dual SIM Cards on a Single Device You can have two numbers activated simultaneously on this device as if carrying two cell phones. Every time you call out or send a message, you may choose the network at the most economical rate while receiving with the other number freely. In Communication Manager, tap Phone1 or Phone2 icon to activate the SIM card you have installed in the corresponding slot. SIM1(3G) card slot is dedicated for SIM cards enabling data services over cellular network. To use video call, web-browsing, MMS or E-mail services, please install a 3G/GPRS compatible SIM card in this slot, and activate Phone1. SIM2(2G) card slot allows only the GSM services like voice call, text messaging and emergency number (in most countries)that your SIM card supports. To start using it, install any 2G SIM (a 3G SIM card may do) in this slot and activate Phone2. 2-21 Z X Phone1: X Connection status of SIM stored in Y SIM1(3G ) slot. [ Y As the SIM is successfully activated, the telephone receiver symbol will turn from dim grey to glowing orange, and you may receive incoming calls and messages on this number Z Phone2: Connection status of SIM stored in (SIM2)2G slot. [ When the text “Phone1”/ ”Phone2” is in orange, it indicates this number is currently selected to send outgoing calls when you press . Flight Mode You can enter Flight Mode in which all the wireless connections are disabled if your are to save down battery power or in occasions where wireless connections are prohibited like on a flight, at a medical facility, or at a gas pump. Launch the Communication Manager and then tap the color of the icon turns orange , the Flight Mode is activated and the wireless connections of the Pocket PC are all disabled. 2-22 button. When the Enter Information on Your Pocket PC You have several options for entering new information: 1. Use the input panel to enter typed text, either by using the soft keyboard or other input method. 2. Write directly on the screen. 3. Draw pictures on the screen. 4. Speak into your Pocket PC microphone to record a message. 5. Use synchronization tools to synchronize or copy information from your desktop computer to your Pocket PC. For more information, see Help on your desktop computer. 2-23 Enter Text Using the Input Panel Use the input panel to enter information in any program on your Pocket PC. You can either type using the soft keyboard or write using Letter Recognizer, Block Recognizer, or Transcriber. In either case, the characters appear as typed text on the screen. To show or hide the input panel, tap the Input Panel button. Tap the arrow next to the Input Panel button to see your choices. nSelect an input method. oTap to see your choices. pInput Panel button. n o p When you use the input panel, your Pocket PC anticipates the word you are typing or writing and displays it above the input panel. When you tap the displayed word, it is inserted into your text at the insertion point. The more you use your Pocket PC, the more words it learns to anticipate. 2-24 nTap here if this is the right word. n Note To change word suggestion options, such as the number of words suggested at one time, tap > Settings > Personal tab > Input > Word Completion tab. 2-25 Type with the Soft Keyboard 1 Tap the arrow next to the Input Panel button and then Keyboard. 2 On the soft keyboard that is displayed, tap the keys with your stylus. Use Letter Recognizer With Letter Recognizer you can write letters using the stylus just as you would on paper. 1 Tap the arrow next to the Input Panel button and then Letter Recognizer. 2 Write a letter in the box. When you write a letter, it is converted to typed text that appears on the screen. For specific instructions on using Letter Recognizer, with Letter Recognizer open, tap the question mark next to the writing area. Use Block Recognizer With Block Recognizer you can input character strokes using the stylus that are similar to those used on other Pocket PCs. 1. Tap the arrow next to the Input Panel button and then Block Recognizer. 2. Write a letter in the box. When you write a letter, it is converted to typed text that appears on the screen. For specific instructions on using Block Recognizer, with Block Recognizer open, tap the question mark next to the writing area. 2-26 Use Transcriber With Transcriber you can write anywhere on the screen using the stylus just as you would on paper. Unlike Letter Recognizer and Block Recognizer, you can write a sentence or more of information. Then, pause and let Transcriber change the written characters to typed characters. 1. Tap the arrow next to the Input Panel button and then Transcriber. 2. Write anywhere on the screen. For specific instructions on using Transcriber, with Transcriber open, tap the question mark in the lower right hand corner of the screen. Select Typed Text If you want to edit or format typed text, you must select it first. Drag the stylus across the text you want to select. You can cut, copy, and paste text by tapping and holding the selected words and then tapping an editing command on the pop-up menu, or by tapping the command on the Menu menu. 2-27 Write on the Screen In any program that accepts writing, such as the Notes program, and in the Notes tab in Calendar, Contacts, and Tasks, you can use your stylus to write directly on the screen. Write the way you do on paper. You can edit and format what you’ve written and convert the information to text at a later time. Write on the Screen Tap Menu and then check Draw to switch to writing mode. This action displays lines on the screen to help you write. nTap Menu and then check Draw. Use your stylus like a pen now. n Note Some programs that accept writing may not have the Draw function. See the documentation for that program to find out how to switch to writing mode. 2-28 Select Writing If you want to edit or format writing, you must select it first. 1. Tap and hold the stylus next to the text you want to select until the insertion point appears. 2. Without lifting, drag the stylus across the text you want to select. If you accidentally write on the screen, tap Menu, then Undo and try again. You can also select text by tapping Menu and then Draw to deselect it and then dragging the stylus across the screen. You can cut, copy, and paste written text in the same way you work with typed text: tap and hold the selected words and then tap an editing command on the pop-up menu, or tap the command on the Menu menu. 2-29 Draw on the Screen You can draw on the screen in the same way that you write on the screen. The difference between writing and drawing on the screen is how you select items and how they can be edited. For example, selected drawings can be resized, while writing cannot. Create a Drawing Cross three ruled lines on your first stroke. A drawing box appears. Subsequent strokes in or touching the drawing box become part of the drawing. Drawings that do not cross three ruled lines will be treated as writing. nThe drawing box indicates the boundaries of the drawing. n oTap Menu and then check Draw. o Note You may want to change the zoom level so that you can more easily work on or view your drawing. Tap Menu, Zoom and then a zoom level. 2-30 Select a Drawing If you want to edit or format a drawing, you must select it first. Tap and hold the stylus on the drawing until the selection handle appears. To select multiple drawings, tapping Menu and then Draw to deselect it and then drag to select the drawings you want. You can cut, copy, and paste selected drawings by tapping and holding the selected drawing and then tapping an editing command on the pop-up menu, or by tapping the command on the Menu menu. To resize a drawing, make sure the Draw function is not selected, and drag a selection handle. Record a Message In any program where you can write or draw on the screen, you can also quickly capture thoughts, reminders, and phone numbers by recording a message. In Calendar, Tasks, and Contacts, you can include a recording in the Notes tab. Refer to “Voice Recording Format” section. In the Notes program, you can either create a stand-alone recording or include a recording in a written note. If you want to include the recording in a note, open the note first. In the Inbox program, you can add a recording to an e-mail message. 2-31 Create a Recording 1. Hold your Pocket PC’s microphone near your mouth or other source of sound. 2. Press and hold the Record hardware button on your Pocket PC until you hear a beep. 3 While holding down the RECORD button, make your recording. 4 To stop recording, release the RECORD button. Two beeps will sound. The new recording appears in the note list or as an embedded icon. Note You can also make a recording by tapping the RECORD button on the Recording toolbar.To play a recording, tap it in the list or tap its icon in the note. n nIndicates an embedded recording. oTap to begin recording. pRecording toolbar. qTap Menu and then check View Recording Toolbar. o p q 2-32 Voice Commander By default, the system sets the button on the side of the Pocket PC as the “Voice Commander button.” Press this button to launch the Voice Voice Commander button Commander. For details on how to use this function, please refer to the Voice Commander section. 2-33 2-34 3 Voice Command and Satellite Navigation / Navigation Device Installation n o nPocket PC oCar Charger (* optional): when Pocket PC is low on power, recharge by connecting one end to the car cigarette lighter/12 volt power outlet and the other end to the socket on base of Pocket PC. Attention: The GPS signal receiver is built into the Pocket PC. If car windscreen has heat reflective metallic film, or Pocket PC is obstructed by objects, then the receptivity of the GPS will be adversely affected. Voice Command Satellite Navigation 3-1 GPS Navigation Software Installation Please follow your car navigation system operating manual’s instructions on software installation in order to use the navigation function. Conditions for Using GPS Car Navigation By using this system you are agreeing to the following conditions: 1. When using this device, please use with matching car mounts. Affix device securely to the car mount. Please be aware that installation in the areas depicted below is forbidden and is strictly prohibited. n o p nDo not place where it will obstruct driver vision oDo not place over air bag pDo not place where it can not be securely attached qDo not place in path of activated air bag 3-2 q 2. Please set navigation destination before driving. Do not operate this system while driving. 3. Please use this system with care. If any harm results from careless use of this system, the responsibility for safe driving resides with the driver. 4. GPS positioning is limited by weather and usage location (tall buildings, tunnels, underpasses, trees, bridges). Most GPS do not work indoors, nor can GPS signals penetrate buildings, car sun shades and heat reflective film with metallic content. Please install GPS outdoors with clear line of sight. Beneath the windscreen at the front of the car is a common choice, and the windscreen should be free of heat reflective film. 5. The GPS system is built and operated by the U.S. Department of Defense which is also responsible for its maintenance and calibration. Any changes made by them may affect the operation and accuracy of the GPS system. 6. Wireless devices (mobile phones, speed radar detectors) will all interfere with the satellite signal and cause unreliable signal reception. 7. The GPS position fix is provided only for the driver’s reference and should not affect actual driver behavior. 8. The electronic map data provided in the navigation system is for normal reference only and not intended for high precision applications. The user should determine their exact location based on actual road conditions. 9. The route provided by the navigation system, the audio cues and intersection data are derived from recommended optimal route calculated using the electronic map data. This is provided for the driver’s reference only, the driver should decide their chosen route according to actual road conditions. 10. When not in use, please do not leave the device inside the car. If exposed directly to sunlight, the battery may overheat and cause damage to this device. This may endanger the vehicle as well. Voice Command Satellite Navigation 3-3 Satellite Data Update (Not supported in USA) Tap > Programs > GPS > Satellite Data Update. Login to the provider’s server to download instant satellite data and enable the GPS function. Note: either of the following connections allows your Pocket PC to download the latest GPS data. If there is more than one connection available, the system will automatically select the best connection, in the following order: 1. Synchronization connection: Connect your Pocket PC to a PC (Desktop or Notebook). Please note that your PC must be online. 2. Wireless LAN connection. 3. GPRS connection: Roaming mode cannot update GPS data automatically. If necessary, change to manual mode. ÁThe system will update GPS data n o p automatically based on a schedule. Follow these steps: nCheck the Auto Update checkbox. [ oSet the date. pSet the time. [The text shows the expiration date of the GPS data. On the due date, the system will pop up a warning message. Refer to the following instruction about the Today screen. 3-4 ÁTap the Download button to update the GPS data manually. The figure on the left shows how to download using the synchronization connection. ÁTap the Setting button in the Satellite Data Update main screen to open the dialog in the left n o figure. nCheck the expiration checkbox to activate the reminder function on the due date. oThe default value is checked. The system will automatically update the data when online. Costs will be incurred when connecting over the GPRS, so consider carefully before activating this function. After setting your Pocket PC to the following connection mode and activating the automatic update and Internet connection functions, the system will automatically download the latest GPS information periodically. Voice Command Satellite Navigation 3-5 1. Synchronization connection. Make sure that your Pocket PC is connected to the PC, and that the PC is online. 2. Wireless LAN connection. 3. GPRS connection. ÁWhen the GPS data has expired, n the relevant message displays on the top of the screen. nThe icon reminds you that your GPS data has expired. o oTap the Notification button to open the message window. p pTap to close the message window. 3-6 Location SMS Tap > Programs > GPS > Location SMS. You can utilize the GPS function offered by your Pocket PC, to send the matching location automatically found by this program and the necessary message to your contacts. This could be helpful in preventing kidnapping, reporting disastrous situations, calling for help in emergencies or locating an individual. In addition, we have formulated many SMS templates based on different situations for your convenience. n o p [ \ 1. It is better to execute this program at a location with clear signal. nTap to open the Contacts screen, if set up in advance, you can choose contacts directly. oYou can directly enter mobile phone number in the To area. If there is more than one recipient, ] please use “;” to separate recipients. pYou can directly enter your message in this area, such as landmarks, features or street names. [Automatically searches for GPS information. \Tap to allow you to select, add, edit, or delete your most used messages. ]Tap to allow you to send SMS messages and report your location. Voice Command Satellite Navigation 3-7 1. Select in the main screen, once in the screen shown on the left, tap on any message and tap OK button to select. 2. Further, by pressing and holding anywhere on the screen, together with the pop-up menu, you can add, edit or delete your most used messages. 3. The content of the message that your recipient views looks similar to what is shown on the left. Actual messages differ depending on the recipient’s device. 3-8 GPS Viewer Tap > Programs > GPS > GPS Viewer. You may use this Pocket PC to automatically search the GPS coordinates of your location and check if the GPS functions work properly. n o p [ n o p q 1. Run this program in a location with good signal reception. nGreenwich Mean Time (GMT): After connecting to a satellite and obtaining the GMT, it will be displayed on the screen. Tap to set the satellite time as the system time. oReport GPS tracking information. pTap to change the unit. [Switch to Satellite mode. 2. Tap Satellite to switch to Satellite mode. nRed: Satellite detected (In View). Blue: Satellite data detected (Data Valid). Green: Tracking completed (Tracker). oSignal strength: The larger the figures, the stronger the signal. pSatellite ID: The IDs expressed in numbers in this field correspond to the IDs on the earth image above. qSwitch to Compass mode. Voice Command Satellite Navigation 3-9 3-10 4 Using the Phone / The Phone feature on the Pocket PC allows you to perform the following tasks: z Capability of carrying dual SIM cards. z 3.5 G video telephony. z Make and receive calls. z Quickly make calls or listen to voice mail without entering phone numbers using Contacts, Speed Dial, or your Call Log. z Check the Call Log to see who has called, whom you have called, add a new number to Contacts, and access notes taken while you were on a call. z Receive calls and easily take notes during the call. z Send SMS messages. z Customize how your phone rings. To switch to the Phone function, press or tap on the lower part of the Pocket PC > Phone. Cautions z To avoid distraction and affecting driving safety, never use your Pocket PC while driving an automobile or any other moving vehicle. z Make sure that the SIM card is properly installed in your Pocket PC and the Phone is already turned on before you use the functions described in this section. Using the Phone 4-1 z When aboard an aircraft, at a medical facility, or at the gas pump where wireless communication devices are prohibited, please launch the Communication Manager and then tap the the icon turns orange button. When the color of , the Flight Mode is activated and the wireless connection of the Pocket PC is disabled. z The Phone function relies on the Pocket PC main battery for power. Maintain the main battery power level to assure call quality and the normal operation. n p o q nMicrophone oEarphone pPhone Receiver qPhone Speaker (Bottom of Pocket PC) Precautions! z Avoid wearing earphones at high volume for extended periods of time. z Avoid wearing earphones while driving, cycling or in other situations where quick reactions are required. 4-2 Combination Method Operation Answer or Adjust Earphone End a Call Volume Hold the Hold the Pocket Press Pocket PC PC and position on the lower part of or While answering a call, push the manually for the receiver close the Pocket PC. volume control calls to your ear and key on the side of the speaker close the Pocket PC to to your lips. test the earphone volume. Install the Place the Use the line control external earphone in your function. Press and headset ear and position hold the button on the microphone the headset to to your lips. answer or end the -- call. Except the Bluetooth headset, when the phone is ringing, hold down the button to reject the incoming call. Using the Phone 4-3 Adjusting the Phone Volume Tap on the top and adjust all programs’ sound functions under . Adjust the phone sound volume under . 1. When there is no call, you can push the volume control key on the side of the Pocket PC or use the stylus to tap the speaker icon Tap and then to adjust the ring volume of the incoming call. 2. Push the volume control key on the side of the Pocket PC or tap and then to adjust the phone volume. You can only do this during a call. 3. Vibration mode: The speaker icon 4. Mute mode: The speaker icon on the top changes to on the top changes to . . Adjust the proper volume 1. If earphones are used with the Pocket PC to make calls, set the volume according to actual personal needs. 2. If earphones are not used with the Pocket PC and not held close to the ear for calls but similar to hands-free operation, it is recommended to set the sound volume for the top two levels. 3. For holding the Pocket PC close to the ear directly for calls, it is recommended that you set the volume to the lower four levels. It is recommended not to use the top two levels because the volume is high and may affect your hearing. Turn on or turn off the speakerphone 1. Enable the speakerphone: While answering a call, tap Speaker on to turn on. 2. Disable the speakerphone: Tap Speaker off to turn off. 4-4 Phone Functions Turning on Your Phone(s) Before using phone functions, please install you SIM card(s) and turn the phone(s) on. 1. On the Today screen, tap or , when the message window appears, tap Comm. Manager. 2. Or tap to launch Communication Manager. 3. In Communication Manager, tap the phone your desire, and follow the onscreen instructions to activate it. You may be requested to enter a preset t PIN (Personal Identification Number) which is usually a four-digit code. If PIN is entered incorrectly three times, your SIM will be blocked, please obtain the PUK (Personal Unblocking Key) from your service provider to unblock the SIM. Phone connection status The SIM card is missing The Phone is off Searching for network No network service The Phone is active 4. As the icon or appears at the top of the Today screen, you can start using the phone functions. Using the Phone 4-5 Making a Call On the Today screen, tap > Phone or press . To make a call, use the screen keypad to enter the phone number and tap to place the call on Phone1 or to place the call on Phone2. XPhone1 X Y Z \ ] [ ^ _ Service provider name YPhone2 Service provider name ZContacts display area List of people you lately contacte d with. [Hide Keyboard Tap to expand the contacts display area, and tap it again to restore the keyboard \Backspace If you enter a wrong digit, tap to clear it; you can tap and hold to clear the whole number. ]Phone2 Call button ^Phone1 Call button _Menu Tap to enter more phone functions Selecting the primary phone line By activating two SIM numbers on your device, you can make calls via either number. If one of the SIM numbers is used more frequently, you can assign it as the primarily-used number through Phone Dialer Selection. Hence, when a call is made by your pressing or launching a dialing action from any application, this call will automatically be made via the pre-selected number. On the Today screen, tap > Phone or press , tap Menu > Phone Dialer Selection, and choose a Phone as the selected primary number. 4-6 Note If only one SIM number on your device is activated, this number will be the primary number when you make calls, and Phone Dialer Selection is thus enabled. Making a call on either number You can always select your desired number to make a single call at will. If selected, the service provider name of this number will turn orange on the Today screen. Next time you place a call by directly pressing in certain applications such as Contacts, Call History, Speed Dial or Messaging, this call will be made on this selected number. On the Today screen, press to enter Phone screen. On Phone screen, after entering a telephone number or choosing a contact, you can make a call on either number by: Using the Phone 4-7 Tapping z to place the call on Phone1 or to place the call on Phone2. Or z Pre-assigning one of your two numbers as the primary number to make outgoing calls: Tap Menu > Phone Dialer Selection and choose the phone line, then you’ll only have to press to make a call on this selected number. Note If you tap or without activating the corresponding SIM beforehand, you will be asked to complete the activation process in order to make this call. Making a phone call from Contacts You can quickly locate stored phone numbers in Contacts and make calls. If you dial out by pressing or taping Call on the screen, this call will be made using the current selected number. You can always tap Menu > Phone Dialer Selection to change the current selected number. On the Today screen, tap z > Contacts Find the contact you want to call, and press . You can tap Menu > Phone Dialer Selection to change the current selected number. z If this contact has more than one number, tap and hold on the contact, and choose the number to call. 4-8 Making a call from Call History On the Phone screen, tap Call History . 1. To sort out call entries by different methods, tap Menu and then Filter to list the categories. 2. Find the number you wish to call, tap Call or press to call using the current selected number. You can tap Menu > Phone Dialer Selection to change the current selected number. Using the Phone 4-9 3. To view the number of calls, call time and manage call records, tap Menu and then Call Timers. 4-10 Answering / Ignoring a Call Upon receiving an incoming call, a window will pop up. 1. To answer this call, tap Answer or press . 2. To ignore this call, tap Ignore. The headline shows which phone on your device is being called. During the call, you can tap buttons on screen to execute several functions X Y Z XMute the microphone YTurn on/off the speaker ZCreate a note for the call [Return to Phone screen \ \Go to Contacts ] ]Hold the current call ^End the current call ^ _More phone options like setting up _ [ a Conference call or switching to Hand-free mode Using the Phone 4-11 Note If a call enters one SIM number while the other SIM number is already on a call, a pop-up window will inform you of the new incoming call, tap Answer to answer it, which will hang up the previous call in the meantime; or tap Ignore to hang up the new incoming call. Ending a Call During a connected call, you can tap End or press to hang up. As a screen of Last Call detail shows, you can tap Talk1 or Talk2 to redial to this contact. 4-12 Video Call Video Call enables you to see a real-time, two-way video of the other party during a call. To establish an instant video call with your device, make sure: z You are using a 3G SIM card in the coverage of network. z The other party is equipped with a compatible device and service system. Making a video call 1. On Phone screen, Select your contact and tap Menu > Video Call. 2. After dialing out, you will have to wait for a few seconds until video images of both parties are shown on your screen. If this video call fails to get connected, a window will pop up asking to redial or make a voice call. 3. As the video call is set up successfully, you may access several options during this call: Using the Phone 4-13 X X Carrier name and talk time Y Incoming / Outgoing call number Z Return to voice call keypad [ [ Video screen of your contact \ Video screen of yourself \ Y ] Z ] Video call control panel: Stop sending your video Switch to front/rear camera lens Video brightness Mute / Unmute microphone Chang the layout of both party’s screen End the video call 4. To end the call, simply tap 4-14 on the Video Call main menu. Receiving a video call Upon receiving a video call, a window pops up to notify you that this is an incoming video call. If you tap Answer, your device will start sending your image to your recipient, tap to stop showing the other party your image during the call. Note 1. Please insert your 3G SIM card in SIM1 slot, and activate Phone1 before making or receiving a video call. 2. If the video call dial out is unsuccessful, it is possible to switch to normal voice calls. 3. represent the availability of various data connection services provided by SIM card you installed in SIM1 slot. They are shown according to your monthly plans, telecom service provider, and network distribution conditions or effective system coverage area. To make modifications to your monthly plans, please contact your telecom service provider. Using the Phone 4-15 Customizing Your Phone You can enter the Phone or Phone2 settings page from > Settings > Personal tab on the Today screen to modify the relevant service settings. Note that the setup values you can change here depend on the services provided by your telephone company. If you choose the phone that is not currently activated, you will have to activate it before entering the settings page. nYou can set the ring type as ring, vibration or mute. n oIf you want to use a customized o ring tone file, use the p synchronization program on your desktop computer to copy the .wav ring tone file to the /Windows/Rings folder on the Pocket PC. You can then select this ring tone from the Ring tone list. pSet the key sound for dialing. qYou can set a PIN (Personal Identity Number) to block unauthorized access to your phone. Your first PIN is provided by your phone service provider. 4-16 Phone Application Programs Caution Before you can use the functions described in the Phone Group. Make sure that the SIM card is properly installed in your Pocket PC and the Phone is already turned on. If your Pocket PC does not include this function, it means it is not supported and you can skip this chapter. SIM Manager You can use SIM Manager to manage contact entries stored on your SIM cards, edit and copy contacts from SIM cards to your device, or vice versa. Tap > Programs > Phone > SIM Manager. nTap and hold to open a list to n choose between SIM1 and SIM2. o p oCheck the box to select all contact. pContact entry Tap and hold to bring up a menu of contact options. qTap to switch among various display modes. q Using the Phone 4-17 Change Display Mode You can change the display mode of SIM Manager to Standard, SIM1 Contacts, SIM2 Contacts and Outlook Contacts. When switching to SIM1 or SIM2, the full screen display for SIM card phonebook or Contacts will be as shown as per the illustration below. This will enable the phonebook contacts to be easier to read and more precise management can be conveniently performed. Copy Phonebook Information You can copy contact entry from SIM1, SIM2 or your device to one another. 1. Check the □ in front of a phonebook entry to select it. 2. On highlighted area, tap and hold to bring up a menu. 3. Tap Copy to SIM1/SIM2 or Copy to Contact. Note If you copy an entry comprising multiple numbers to a SIM card, only one number will be copied to the target storage place under the contact name. 4-18 SIM Tool Kit Tap > Programs > SimTKUI (SIM Tool Kit). This screen will list only the service menu offered by SIM1 which you installed in SIM1 slot. ÁThis screen is for reference only. n The actual screen is based on the service items provided by your telecom company. nTap any service item. oSelect button: Launch service item. Follow the screen or voice o instructions. Using the Phone 4-19 SMS Sender Tap > Programs > Phone > SMS Sender SMS Sender is a shortcut for you to directly start editing a new text message and send it out. To send a text message, on message composing screen: 1. Enter the recipient’s number in To field, or tap Menu > Add Recipient to select a person from Contacts. 2. Enter the content of your message in text field. 3. Tap Send 4. On Send via screen, choose the SIM number that you’ll use to send this message. 4-20 Speed Dial Tap > Programs > Phone > Speed Dial. Hot Key Switch nTap the box according to the functions provided by the system. n oTap to switch between these functions: Frequency Dial → Index Dial. pTools button: Provides the o p relevant menu. For example, select Settings to set the interface as Frequency Dial or Index Dial. Select Sound on/off to set the sound for tapping the screen. n o p q ÁTap Tools and then Color and Text to enter the Setting screen shown on the left. You can set the text font, text color and button background color according to your personal preferences. nFont oText color pButton background qPreview area Using the Phone 4-21 Frequently Dialed Screen ÁFrequency Dial screen n o p nTap any phone entry box to speed dial. You will make a call on the number currently selected by your device. To select the other number, press q to enter Phone screen, tap Menu > Phone Dialer Selection r oTap and hold the box, then select appropriate command from the pop-up menu. pSort according to the number of calls in descending order. The upper left corner has the most number of calls while the lower right corner has the least number. q § ¨: Tap to view the previous or next page. rTap to switch to the Frequency Dial screen as shown on the left. Note To make a video call from Speed Dial, please install your 3G SIM card in SIM1 slot and activate Phone1. 4-22 Index Dial n ÁIndex Dial screen o nSwitch to the Index Dial screen as shown on the left. oTap on any letters. The content displayed are the data created in Contacts. If you did not create any data in Contacts, the screen is blank. n nThe letter “F” appears on the upper left side of the screen (see left). This indicates that this page o contains all address data that starts with “F”. The English Address Book is arranged alphabetically using the First p Name. oTap any box to speed dial. p § ¨: Tap to view the previous or next page. Using the Phone 4-23 4-24 5 Customize Your Pocket PC / You can adjust the Pocket PC settings according to your personal preferences and install other programs. Adjusting Settings To see available options, tap > Settings > Personal or System tab located at the bottom of the screen. The following utilities allow you to adjust the settings based on your personal work style. z Clock & Alarms, to change the time or to set alarms z Menus, to customize what appears on the menu, and to enable a pop-up menu from the New button z Owner Information, to enter your contact information z Lock, to limit access to your Pocket PC z Power, to maximize battery life z Today, to customize the look and the information that is displayed on the Today screen Customize Your Pocket PC 5-1 Notifications Your Pocket PC reminds you in a variety of ways when you have something to do. For example, if you’ve set up an appointment in Calendar, a task with a due date in Tasks, or an alarm in Clock & Alarms, you’ll be notified in any of the following ways: z A message box appears on the screen. z A sound, which you can specify, is played. z A light flashes on your Pocket PC. z The Pocket PC vibrates. To choose reminder types and sounds for your Pocket PC, tap and then Settings. In the Personal tab, tap Sounds & Notifications. The options you choose here apply throughout the Pocket PC. 5-2 Power Preference Settings Tap > Settings > System tab > Power. View the power usage condition or perform the relevant power management settings. nPower icon Check this item, so that when n o you accidentally press the hardware buttons on the Pocket PC, the Pocket PC will not exit o p q the sleep mode. This will prevent unnecessary power consumption if a button is being pressed accidentally and not being discovered in time. pChecking this item displays the power icon on the upper right side of the screen. qAdvanced tab: Set the Pocket PC to turn off automatically after a period of inactivity. Customize Your Pocket PC 5-3 Backlight Tap > Settings > System tab > Backlight. 1. Battery Power or External Power tab: Set the relevant backlight functions. 2. Backlight Level tab: Adjust the backlight level. 5-4 Light Sensor The unique light sensor within your Pocket PC enhances the accuracy of onscreen view and decreases your eyestrain while saving on more battery life. Based on the ambient light intensity the sensor detected, it will adjust backlight brightness dynamically. The lighter the environment is, the more illumination the device outputs to brighten the screen; in a dusky place like a tunnel, the device dims the screen a bit to reduce power consumption. Tap > Settings > System tab > Backlight > Backlight Level tab. XCheck “Auto-adjust backlight by light sensor” to activate the light sensor. YTap to set your own backlight profiles. X Y XDrag the slider under each of the three light conditions to set your own profile. Tap OK to save your settings. X YTap to restore default settings. Y Customize Your Pocket PC 5-5 Gravity Sensor The gravity sensor in your Pocket PC is able to recognize its own orientation manipulated by your hand, and would so change the screen orientation accordingly. For example, if you position the device vertically and then turn it into a horizontal orientation, the screen mode will then change from portrait to landscape automatically. Tap > Settings > System tab > Gravity Sensor. n nTap o to save settings. oCheck “Gravity Sensor Screen p Orientation” to turn on Gravity Sensor. q pTap to check applications in \ which gravity sensor will disable itself. qDrag the slider to adjust the sensitivity. \Restore to default system settings. 5-6 Microphone Profile Microphone Cause * Voice Turn the volume down and Surrounding Commander find the proper volume setting interference recorded voice control for better recognition of when volume up. system. Speech Turn the volume up. More distance from recording the lecturer more interference recorded. * Used for the version built in “Voice Commander.” Tap > Settings > System tab > Microphone. 1. Use the slider to adjust volume of the recording mic. 3. Default button: Restore to default system settings. Note This document lists the functions, specifications, and illustrations for reference only. The actual purchased product should be taken as the standard. Customize Your Pocket PC 5-7 Adjust Volume Push the volume control key on the side of the Pocket PC. Or use the stylus to tap the under icon on the top of the screen to adjust all program sound functions . Adjust the incoming call’s volume under . 1. Adjust volume: When set to On, use the stylus to tap and drag the slider up and down to adjust the volume. You can also push + or - on the side of the Pocket PC. 2. Vibrate: Under Vibrate mode, the sound function of all programs will be replaced by vibration, including incoming call rings. The icon on the top changes to 3. Mute: Under Off mode, the sound function of all programs will be turned off, including incoming call rings. The on the top changes to 5-8 icon . Memory Optimization Tap > Programs > Utilities > Memory Optimization. Memory Optimization helps you to optimize the memory using in your Pocket PC. 1. Enable the auto-restart option and select the timer. Your Pocket PC will automatically restart. 2. Select the least memory. Your Pocket PC will restart when the memory is less than your settings. Customize Your Pocket PC 5-9 Scenarios Tap > Programs > Phone > Scenarios nSelect an applicable mode. oDetails button: Set the relevant options for this mode, such as volume, backlight, etc. n o ÁTap Details button to enter the screen shown on the left. And then tap Settings button to set the relevant options for this mode, such as volume, backlight, etc. 5-10 Find and Organize Information The Search feature on your Pocket PC helps you quickly locate information. 1. Tap > Programs > Search. Input the text you want to find and then select the data type. Tap on Search to start the search. 2. To find information that occupies a larger space, select Larger than 64 KB for Type. Actually, you can use File Explorer to search for files and place these files into folders systematically. Just tap > Programs > File Explorer. n nTap to change folders. o oSelect the sort order for the list. p pTap the folder name to open folder. qTap Menu and then New Folder to create a new folder. q Note You can move files in File Explorer by tapping and holding the item you want to move, and then tapping Cut or Copy and Paste on the pop-up menu. Customize Your Pocket PC 5-11 Navigation Bar and Command Bar The navigation bar is located at the top of the screen. It displays the active program and current time, and allows you to switch to programs and close screens. Use the command bar at the bottom of the screen to perform tasks in programs. The command bar includes menu names, buttons, and the Input Panel button. To create a new item in the current program, tap New. To see the name of a button, tap and hold the stylus on the button. Drag the stylus off the button so that the command is not carried out. n nTap to change volume or mute the Pocket PC. o oTap to select a program. pTap to quickly select a program you have recently used. p qTap to see additional programs. rTap to customize the Pocket PC. q r sMenu button. tInput panel button. s t uNew button. u 5-12 Pop-up menus With pop-up menus, you can quickly choose an action for an item. For example, you can use the pop-up menu in the contact list to quickly delete a contact, make a copy of a contact, or send an e-mail message to a contact. The actions in the pop-up menus vary from program to program. To access a pop-up menu, tap and hold the stylus on the item name that you want to perform the action on. When the menu appears, lift the stylus, and tap the action you want to perform. Or tap anywhere outside the menu to close the menu without performing an action. nTap and hold to display the pop-up menu. oLift the stylus and tap the action n o you want. pTap outside the menu to close it without performing an action. p Customize Your Pocket PC 5-13 Redefine Hot Keys Tap > Settings > Personal tab > Buttons. n o XButton 1 YButton 2 These hot keys can be redefined as launch keys for frequently used programs. and are exclusive phone functions so they cannot be redefined. 5-14 6 Synchronization / Windows Vista Part A PC with Windows Vista™ operating system can be used to enable connection and synchronize with your Pocket PC. The Windows Mobile® Device Center application can be used to manage your Pocket PC, and can provide Pocket PC access to other resources through the connected PC. The online services and application access can also keep the Pocket PC up-to-date with the connected PC. For example, if you make a modification to the Pocket PC, then this modification will be automatically applied to the appropriate information on the computer during the next synchronization, and vice versa. This way, the latest data can be ensured to be available no matter which computer is being accessed. Important Installation Notice Before you install Windows Mobile® Device Center, make sure that the USB cable on the Pocket PC is not connected to the personal computer. Connect the USB cable only after Windows Mobile® Device Center is installed. Synchronization 6-1 1. Software installation: You could use the Getting Started CD to install Windows Mobile® Device Center on the personal computer. 2. Hardware installation: The USB cable is a plug-and-play device. Use the USB cable to connect your Pocket PC to your personal computer. USB Port 3. Using Windows Mobile® Device Center nAfter installation is complete, the Setup Wizard helps you customize your synchronization settings. oOnce you use the USB cable to connect the two devices properly, the Set Up a Partnership screen appears on the personal computer. Set it up according to your requirements. The green icon appears on the status bar of your personal computer to indicate that it is Connected. 6-2 Windows XP/2000/98 Part A PC with Windows XP/2000/98 operating system can be used to enable connection and synchronize with your Pocket PC. Using Microsoft® ActiveSync®, you can synchronize the information on your desktop computer with the information on your device. Synchronization compares the data on your device with your desktop computer and updates both computers with the most recent information. For example: z Keep Pocket Outlook data up-to-date by synchronizing your Pocket PC with Microsoft Outlook data on your desktop computer. z Synchronize Microsoft Word and Microsoft Excel files between your Pocket PC and desktop computer. Your files are automatically converted to the correct format. Note By default, ActiveSync does not automatically synchronize all types of information. Use ActiveSync options to turn synchronization on and off for specific information type. With ActiveSync, you can also: z Back up and restore your Pocket PC data. z Copy (rather than synchronize) files between your device and desktop computer. z Control when synchronization occurs by selecting a synchronization mode. For example, you can synchronize continually while connected to your desktop computer or only when you choose the synchronize command. z Select which information types are synchronized and control how much data is synchronized. For example, you can choose how many weeks of past appointments you want synchronized. Synchronization 6-3 Installing and Using ActiveSync Important Installation Notice Before you install ActiveSync, make sure that the USB cable on the Pocket PC is not connected to the personal computer. Connect the USB cable only after ActiveSync is installed. 1. Installing ActiveSync: You could use the Getting Started CD to install Microsoft ActiveSync version 4.5 or above on the personal computer. ActiveSync is already installed on your Pocket PC. 2. Hardware installation: The USB cable is a plug-and-play device. Use the USB cable to connect your Pocket PC to your personal computer. USB Port 6-4 3. Using ActiveSync nAfter installation is complete, the ActiveSync Setup Wizard helps you customize your synchronization settings. oOnce you use the USB cable to connect the two devices properly, the Set Up a Partnership screen appears on the personal computer. Set it up according to your requirements. The green icon appears on the status bar of your personal computer to indicate that it is Connected. pClick Explore on the Microsoft ActiveSync on the personal computer to access files in the Pocket PC. Just like using a personal computer, manage the files in the two devices. Synchronization 6-5 FAQ About Synchronization Tap > Settings > Connections tab > USB to PC. 1. Factory setting defaults to checking the box. 2. If you have followed the above installation and operation procedures and find that the connection between your Pocket PC and desktop PC still cannot be established, please uncheck the box shown on the left. 6-6 USB Synchronization Before you start to synchronize, use the Pocket PC Getting Started CD to install synchronization tools on your personal computer. For more information on how to install, please refer to the Pocket PC Getting Started CD or online help. Synchronization tool is already installed on your Pocket PC. ActiveSync synchronization settings: 1. After installation is complete, the Setup Wizard will continue to guide you. Adjust the specifications according to your actual needs. 2. Use the USB cable to connect the two devices properly and the Set Up a Partnership screen appears on the personal computer. Set it up according to your requirements. nClick OK. oClick Next. Synchronization 6-7 pCheck the items you want to synchronize. qClick Next. rClick Finish. 6-8 sAfter installation is complete, the ActiveSync Setup Wizard helps you connect your Pocket PC to your desktop computer, set up a partnership so you can synchronize information between your Pocket PC and your desktop computer, and customize your synchronization settings. Your first synchronization process will automatically begin when you finish using the wizard. tThe green icon appears on the status bar of the personal computer to indicate that it is Connected. After your first synchronization, take a look at Calendar, Contacts, and Tasks on your Pocket PC. You’ll notice that information you’ve stored in Microsoft Outlook on your desktop computer has been copied to your device, and you didn’t have to type a word. Disconnect your Pocket PC from your computer and you’re ready to go! Synchronization 6-9 Synchronization Tool on Pocket PC Once you have set up ActiveSync and completed the first synchronization process, you can initiate synchronization from your Pocket PC. To switch to ActiveSync on your Pocket PC, tap > Programs > ActiveSync. For more information on how to use ActiveSync on your personal computer, run ActiveSync and refer to the ActiveSync online help. To learn more about the Pocket PC ActiveSync, switch to ActiveSync and tap > Help. Just refer to the Help for more information. After the synchronization is completed, tap Calendar, Contacts, and Tasks on the Pocket PC to view if the information saved in Microsoft Outlook on the personal computer is already copied to the Pocket PC. ÁOn the Pocket PC site: Tap n o p q 6-10 > Programs > ActiveSync nView synchronization status. oView connection status. pTap to connect and synchronize. qTap to synchronize via Bluetooth or change synchronization settings. Synchronizing using Bluetooth Without using the USB cable to connect the two devices, you can still synchronize using Bluetooth. The greatest advantage is that you don’t have to plug in and detach from the USB cable so often. This is especially useful for managing several Pocket PCs. For details on Bluetooth devices, refer to “Using Bluetooth” section. Synchronization 6-11 6-12 7 Connections / Connecting to the Internet This section teaches you how to use GPRS wireless network connection. GPRS wireless networking is a convenient function for working at home or while traveling. You can use the Pocket PC to browse websites and read or send E-mails, SMS or MSN messages. To start using GPRS service, please: 1. Contact your service provider for the data plan and apply for it. 2. Install the SIM card with the GPRS plan in SIM1 slot 3. Activate Phone1. Note SIM2 slot allows only the voice services such as phone call and SMS provided by the SIM card you install in it; for use of data transmission service such as GPRS, 3G or EDGE, please insert the compatible SIM card in SIM1 slot. Connection Wizard Generally, you will only need to install the SIM card to your Pocket PC to simultaneously use the mobile phone functions. The system will automatically add the connection items for this SIM card. To verify: Tap > Settings > Connections tab > Connections > “Manage existing connections,” the list will show the newly added network name. If the system is unable to successfully add the connection to your SIM card, it is possible to use Connection Wizard. Connections 7-1 Tap > Settings > Connections tab > Connection Wizard. 1. Select the country name from the list. 2. Select the carrier name from the list. 3. According to actual requirements, select the carrier name, and then tap Add button or Edit button. Or use the New button to add the new network connection. 4. Search button: Detect the currently available telecommunication service. If it is found, use the Add button to add the highlighted selection. If it is not found, the “New network” screen will be shown; please manually setup the network. 5. Recovery button: Restore to the original setup value. 6. Tap > Settings > Connections tab > Connections, and then “Manage existing connections,” the list will show the newly added network name. 7-2 Setting the GPRS Connection To connect to the Internet or use MMS service, please make sure you have installed SIM card in SIM1 slot and activated Phone1. Tap > Settings > Connections tab > Connections > Tasks tab. 1. As shown in the screen on the left tap “Add a new modem connection.” 2. Enter the “Make New Connection” screen as shown in the screen on the left. nInput a new connection name for convenience in making connections in the future. oSelect “Cellular Line (GPRS).” pLastly tap Next. Connections 7-3 3. Input the Access Point Name provided by your service provider and tap Next. 4. Input your personal information such as account number, and tap Finish. 7-4 Starting GPRS Connection 1. Turn on Phone: Tap or icon at the top of the screen and tap “Comm. Manager.” Tap and input your PIN to enable GSM. The icon will change to while the changes to . 2. Tap icon in the Communication Manager. When it becomes , the GPRS (Data) connection is available. 3. Tap , then tap Settings to link to Connections. You are ready to connect GPRS. represent the availibility of various data connection services provided by SIM card you installed in SIM1 slot. They are shown according to your monthly plans, telecom service provider, and network distribution conditions or effective system coverage area. To make modifications to your monthly plans, please contact your telecom service provider. Connections 7-5 4. Connect GPRS: Select “Manage existing connections” in Connections. Tap and hold on the newly created connection name, and then select Connect to enable GPRS connection. 5. Input your account information in the Logon Network screen and tap to login to the network. 6. After the connection is established, the icon will change to . 7. Now you can use the appropriate program to access the Internet, receive or send E-mails, etc. 7-6 Disconnecting GPRS 1. Disconnect GPRS: Tap and the message window appears. Tap Disconnect. 2. Turn off Phone: Tap and then “Comm. Manager.” Tap to disable GSM. Connections 7-7 Using Bluetooth Bluetooth is a short-distance wireless communication technology with an effective range under 10 meters (30 feet). When the Bluetooth power is turned on, the indicator will blink blue. Bluetooth LED indicator (Blue) 1.Tap to launch Communication Manager. 2.Tap to enable Bluetooth. Bluetooth capable devices such as the PC, Pocket PC, Bluetooth headset etc. can be connected to this product for the convenience of data sharing. 7-8 Setup the Bluetooth Connection On the Communication Manager screen, tap and hold the button, then release to enter the Bluetooth manager. Tap > Settings > Connections tab > Bluetooth Tap Bluetooth and then Devices tab. 1. Select “Add new device” and the system will begin to search for nearby Bluetooth devices. 2. The search results will be similar to the screen to the left. Select the device to connect with the n o list. nAll Bluetooth devices found nearby the system. oThis icon indicates a Bluetooth headset. p pRefresh button: Search again to q look for additional Bluetooth devices to connect with. qSelect any device to connect with, and then tap Next to follow the onscreen instructions. Connections 7-9 Note Pair for Bluetooth headset: When the system asks for the password, please refer to the instructions provided with your purchased Bluetooth headset. Pair for PC or Pocket PC: When the system asks for the password, please make sure that the identical password is entered to both devices. 3. Your Pocket PC connected with these devices will be able to transfer data, receive calls on a n Bluetooth headset, and other applications. o nSuccessfully connected devices will be shown as on the screen to the left. oTap and hold a device, for example the Bluetooth headset, then select Set Hands-free to be able to use the Bluetooth headset to receive calls. 7-10 n 4. The screen to the left is during a call. nPhone screen during a call will show a headset icon in the upper right corner, the Bluetooth headset will be used to communicate with the callee. Tap Bluetooth > Mode tab. 5. Configure the Bluetooth related options for your Pocket PC. 6. Tap > Settings > Personal tab > Owner Information. Enter the name that you wish to show in the Name field. At the same time, other Bluetooth capable devices can recognize your Pocket PC by this name. nCheckmarking the “Make this device visible to other devices” option will enable all Bluetooth capable devices within the 10 m (30ft) effective range to detect your Pocket PC, and transmit data with the proper authentication. oIf the “Make this device visible to other devices” option is not selected, your Pocket PC can send data to other devices but other devices will not be able to detect your Pocket PC. Connections 7-11 Tap Bluetooth and then COM Ports tab. 7. Follow the onscreen instructions to register the connected Bluetooth device as an effective COM port. 7-12 Internet Sharing Tap > Programs > Internet Sharing. This function provides a simulated modem function for the Pocket PC to connect to the PC. The built-in Bluetooth paring or USB port can be connected with the PC and provide Internet access on the PC. 1. The USB connection is used as an example. 2. Complete the connection setup between the Pocket PC and PC. The network connection and configuration can be attained from your telecom service provider. 3. Tap Connect and wait for the system to complete the connection. 4. This screen is only for reference as the actual connection method will depend on the Bluetooth paring or USB port; the connection configurations can be referenced from your telecom service provider. The fees will be decided by the service provider. Connections 7-13 CSD Type Tap > Settings > Connections tab > CSD Type. You must first apply for Circuit-Switched Data (CSD) service from your telecom company before you can use this function. In short, this function is similar to the modem dial-up in a personal computer. By simulating the Pocket PC as a modem and connecting through the built-in GSM device, you can use the Pocket PC to access the web. To start using this function, please install the CSD service-enabled SIM card in SIM1 slot and activate Phone1. ÁThis figure is for reference only. The parameters shown in the screen will be based on the settings provided by your telecom company. The charge rate is regulated by your telecom company. 7-14 Connecting with a Personal Computer For more information, refer to “Synchronization” section. Wireless LAN Transmission On the Today screen, tap to launch Communication Manager. For more information, refer to “Using Wireless LAN” section. Wireless LAN LED indicator (Amber) Tap to launch Communication Manager Connections 7-15 7-16 8 Using Wireless LAN / This section teaches you how to use the Pocket PC’s built-in wireless LAN function to connect to the Internet. It is convenient for you to browse websites and send/receive E-mails through wireless networks at certain locations where wireless networking services are provided. When you purchase credits for connecting to the Internet through a wireless LAN, you will be given the following information: an IP address, DNS name server address, Proxy server, port, and network key, etc. You need this information to setup and activate your connection. In some cases, you may need additional information to use a company’s wireless connection, please confirm with the network administrator in your company. If this is your first time using the wireless LAN function, firstly you should refer to the following “Configure Your Wireless Network” section for instructions for the necessary configuration settings. After you have completed the one-time configuration process, you only need to select the icon in the Communication Manager main menu for subsequent connections. Using Wireless LAN 8-1 Connecting to Wireless LAN On the Today screen, tap Tap to launch Comm. Manager. > Programs > Comm. Manager. n o p 8-2 nThis icon will show up on your screen whenever your Pocket PC has detected a usable wireless network and has connected to that network, indicating that your Pocket PC has successfully connected to the network hotspot (Access Point). The LED indicator on the Pocket PC will blink amber. oTap to connect or disconnect to your wireless network, a means that this function has been disabled. pTap and hold this button, then release to enter the configuration screen. ÁWhen the screen shown on the left appears, please choose a wireless network that you can use, and then tap OK button. Then, select Work, and tap Connect button. The first time you use the wireless LAN function, your system will ask you to set the above mentioned settings, after that, your system will continually use the settings from your most recent successful connection. Configure Your Wireless Network WLAN Setup Scenarios Location Home Select Networks > Settings > Connections tab > Connections > Advanced tab, Select Networks button, and then select My Work Network from “Programs that automatically connect to the Internet should connect using:” menu Office Café or restaurant Refer to the above and set as My Work Network Refer to the above and set as My Work Network Proxy Connection 1. Close Proxy connection 2. Not required to set Proxy > Settings > Connections tab > Connections > Tasks tab, select “Edit my proxy server,” and then check the Internet items to enable the entry bar about Proxy 1. Close Proxy connection 2. Not required to set Proxy Network key or Access Point 1. Authentication: Select Open 2. Data Encryption: Select WEP to enable the entry bar regarding Network key Refer to the above and set the items for Network key WLAN select different Access Point Using Wireless LAN 8-3 Configure Your Wireless Network (Normal Setup) You will need a correct IP address; DNS name server address, Proxy server, and connection port number to setup your connection. If you have purchased a wireless Internet service account, then the service desk at the location where you will be connecting will provide you with this information, or, you should obtain this information from the network administrator of your company. When your Pocket PC is unable to automatically detect or connect to a usable wireless network, please try to configure the network manually. Please refer to this section’s settings instructions. 1. Select the icon in the Communication Manager main menu, a icon will display on the navigation bar. 2. Then tap > Settings > Connections tab > Connections > Advanced tab, the screen displays shown on the left. 3. Select the Select Networks button. 8-4 4. As shown on the left, make sure that My Work Network is selected for both items, and finally tap to save and exit. My Work Network is the WLAN connection method. As this option is from a choice of two, the next time you need to use the GPRS connection, you will have to refer to the above listed steps, select My ISP for the first item. 5. At the Communication Manager screen, tap and hold, and then release the button to enter the setup screen. 6. Select name of a currently available network to enter the WLAN authorization setup screen. Using Wireless LAN 8-5 7. Set accordingly to the rules and information provided by the hotspot location. nAuthentication: Select Open oData Encryption: Select WEP to enable the entry bar about Network key pNetwork key qKey index 8. Tap and hold on the name of the network connection that you can currently use, then select Connect. When the icon appears on the top of the screen, your wireless network has been successfully connected. 8-6 Configure Your Wireless Network (Proxy Setup) To successfully configure your network, you will need the following information: a correct IP address, DNS name server address, Proxy server, and connection port number, etc. Please obtain the above listed information from your company’s network administrator. If your company’s networking environment doesn’t need Proxy server settings, please close the proxy connection. Tap > Settings > Connections tab > Connections > Tasks tab. When your Pocket PC fails to automatically detect or connect to a usable wireless network, please try using the manual method to configure your network settings. Please refer to the settings information in this section. 1. Select “Setup my proxy server” or “Edit my proxy server,” as shown on the left. 2. In the Proxy Settings tab screen, make sure that the following items have been checked: nThis network connects to the Internet oThis network uses a proxy server to connect to the Internet Using Wireless LAN 8-7 The above is applicable to an office environment that requires a Proxy setup. For others that close the proxy connection, please do not check the box named “This network connects to the Internet” and skip the following procedures. 3. Enter the name into the “Proxy server” field. 4. Select the Advanced button and enter the advanced settings screen. 5. You can modify the settings by tapping the HTTP type. 6. Enter the number into the “Port” field. Finally, tap exit. 8-8 to save and 9 E-mails and Messages / Message Accounts Messaging is where you can manage all message types including SMS (Short Messaging Service), MMS (Multimedia Messaging Service) and E-mail accounts. To use these services, please connect your device to a network connection. Tap > Messaging. On account picker screen, select the messaging service you want to use. nTap to enter Messages oTap to enter an E-mail accounts ou have established. pTap to setup a new E-mail Y account n p qChange the account settings. Or delete a message. q Emails and Messages 9-1 Note z To use MMS and E-mail, please: 1. Apply wireless service from your service provider 2. Activate this SIM in SIM1 slot 3. Go to > Settings > Connections tab > Connections to set up the network settings. 4. On the Today screen, tap and turn on Data Connection by tapping . z SIM2 slot allows only the SMS service provided by the SIM card you install in it; if you want to send MMS message or E-mail via a certain number, please insert the SIM of that number in SIM1 slot. 9-2 Text Messages Reading Received Text Messages Tap z > Messaging, On Messaging screen, tap Messages. To read received messages, tap ▼, and select the sub folder Inbox under Messages. Emails and Messages 9-3 z In Inbox, you can tap and hold a message to open a list of actions; you may Delete, Reply to or Forward this message. To sort the messages by sender or received time, tap Menu > Tools > Sort By and then choose the sort method. 9-4 Creating a Text Message 1. On Messaging screen, tap Messages > Menu > New > Text Message 2. In To: filed, enter the number of recipient or tap Menu > Add Recipients to select a contact. If there is more than one contact, use a semi-colon (;) to separate them. 3. In Text field, enter your message. You can tap Menu > My Text to use canned messages. 4. Tap Send. 5. Select the SIM number you will use to send this message. Emails and Messages 9-5 Note If the SIM card you select is not activated, a notice “Send failed” will pop up. 9-6 Multimedia Messages Reading MMS Messages Tap > Messaging > Messages. In Inbox, tap on a single MMS message to view it. z Use the playback controls: Play, Pause or Resume to view the message. z To save the objects attached to this MMS message: 1. Tap Menu > View Objects, 2. On object list, tap Menu > Save or Save All, Note z If you reply to an MMS message from Inbox, this reply message will be sent as an MMS message via SIM1 number. z If you want to send MMS message or E-mail via a certain number, please always activate the SIM of that number in SIM1 slot. z To modify MMS settings such as Receiving Options or Sending Options, in Inbox, tap Menu > MMS Settings. In these settings you may select to request / send a delivery report, set the size or delivery time of a message. Emails and Messages 9-7 Creating an MMS Message On Messaging screen, tap Messages > Menu > New > Multimedia Message Select an MMS template to compose a new MMS message. Or tap the envelop icon to open your own blank message. On an MMS composing screen, you may tap: z Bcc / Cc / To field to add recipients. z Subject field to enter the message title. z Menu > Insert to insert a file. z Menu > Slides to edit the slide content and settings. z Menu > Preview to preview your MMS message. z Send to send out this MMS message. Note z You may also send an MMS message from Camera, Album, Pictures & Videos, File Explorer and Notes. z SIM2 slot allows only the SMS service provided by the SIM card you install in it; if you want to send an MMS message or E-mail via a certain number, please activate the SIM of that number in SIM1 slot. 9-8 E-mails This section explains the basic preparations and processing principles. If you have any questions, refer to online help about Pocket PC or synchronization. Use Messaging to send and receive E-mails messages in either of these ways: 1. Send and receive e-mail messages by connecting directly to an e-mail server through an Internet service provider (ISP) or a network. 2. Synchronize e-mail messages with Microsoft Exchange or Microsoft Outlook on your desktop computer. Note Inbox synchronization does not support synchronization with Microsoft Outlook Express. Emails and Messages 9-9 Synchronizing E-mail Messages If you want to synchronize e-mails with company or home usage, please refer to this section. E-mail messages can be synchronized as part of the general synchronization process. You will need to enable Inbox synchronization in synchronization tools. For information on enabling Inbox synchronization, see Help on the desktop computer. During synchronization: 1. Refer to “Connecting to the Internet” section. Select the partnership you want to establish under “Set up a Partnership” and you can start to synchronize data. If you choose not to synchronize data, you can manually copy or move E-mails between the Pocket PC and a personal computer. 2. E-mail messages in the “Outbox” folder on your Pocket PC are transferred to Exchange or Outlook, and then sent from those programs. 3. Exchange or Outlook E-mail is supported. 4. Mails in the Pocket PC Inbox folder will be transmitted to the personal computer and then sent out via Microsoft Outlook or Microsoft Exchange. 5. If you delete mail in the Pocket PC, this mail will also be deleted from the personal computer the next time the two devices perform synchronization. 6. SMS messages are not synchronized. 9-10 Connecting Directly to the Mail Server For single-machine use, not combining office and home E-mails, please refer to “E-mail Server Setup” section. You will receive messages directly from the mail server. This is irrelevant to personal computer use. You can work online or offline. When working online, you read and respond to messages while connected to the e-mail server. Messages are sent as soon as you tap Send, which saves space on your Pocket PC. When working offline, once you’ve downloaded new message headers or partial messages, you can disconnect from the e-mail server and then decide which messages to download completely. The next time you connect, Inbox downloads the complete messages you’ve marked for retrieval and sends the messages you’ve composed. Based on your preference, you can program the Pocket PC to receive mail for the last few days, receive subjects only or the entire mail, or just receive mail with file attachments smaller than a specified size. If you want to receive more or less mail, tap Menu and then Options to adjust the E-mail account settings according to your needs. Emails and Messages 9-11 E-mail Server Setup Refer to this section if you are preparing for single-machine use and not combining office and home E-mails. If you already have an E-mail account from your ISP or company network, you can use Messaging to send and receive mails and messages. To establish a new Messaging E-mail server on your Pocket PC, refer to the following sections. 1. Obtain the following information from your ISP or company’s network administrator for convenience in setting up the E-mail service. nE-mail address, account name and password oPOP3 or IMAP4 server name for internal mail pSMTP server name for sending mail 2. Setup a new E-mail account: Tap E-mail. 9-12 > Messaging > Setup 3. Follow the instructions on the screens to setup the E-mail account. 4. Refer to “Connecting to the Internet” section or “Using Wireless LAN” section to connect the Pocket PC to the Internet and you can start sending and receiving E-mails and SMS messages. 5. Connecting to the E-mail server: nTap Menu > Go To, and then check the new E-mails account you setup. oTap Menu and then Send/Receive. Note Tap Menu > Tools > Options to change the E-mail account. Emails and Messages 9-13 Sending / Receiving E-mails Sending E-mails Tap Menu and then New to compose a message and then tap Send to send it. o n n p q r nTap To, Cc or Bcc to open the Contacts screen. As long as you have set up Contacts beforehand, you can just tap to select. oTap the data area to input the E-mail adress, mobile phone number and subject directly. If there is more than one contact, use a semi-colon (;) to separate the addressees. pUse the scroll bar to view the header. qMenu button: Provides frequently-used functions for writing mail such as request return receipt, attach files to E-mail, select canned messages, edit canned messages or cancel mail. rSend button: Send your messages. 9-14 Reading and replying E-mails Receive new mails by tapping Menu and then Send/Receive. Switch to the Inbox folder and tap to open. Changing preference settings nSet the Inbox Synchronization option in synchronization tools. > Messaging > Menu > Options, and then the Accounts, Message oTap tabs on the Pocket PC to set the appropriate options. Emails and Messages 9-15 Direct Push Technology Alert The Direct Push Technology alert function will enable you as a corporate user to never miss another e-mail, using the Pocket PC for the best business service. Through the synchronization feature, your Pocket PC can instantly and automatically receive important e-mails from Microsoft Exchange Server. Direct Push Technology Alert Settings The following description will explain how to setup the synchronization program on the Pocket PC end, and to directly synchronize the Pocket PC with Exchange Server. This way, your device under GPRS or wireless network connections will be able to receive in-coming e-mail alerts, and be able to instantly read the messages. A reminder that if you selected the connection method to be wireless network, for power saving purposes when the Pocket PC enters sleep mode the connection will be broken. During this time you will not be able to receive instant e-mail. However, you will only need to press the POWER button to automatically complete the connection to the wireless network. 1. Tap > Programs > ActiveSync > Menu > Configure Server. If the Exchange Server n synchronization has not been setup before, please select Add Server Source. o 9-16 nTap to connect and synchronize. oTap to modify the synchronization settings. 2. Obtain the e-mail, server address, user name, network etc. from the company network administrator to successfully setup the server data. 3. Tap Menu and then Schedule. The Peak times and Off-peak times provide a As items arrive option, this is the direct push technology alert function. Emails and Messages 9-17 Windows Live™ Messenger To switch to Windows Live™ Messenger, > Programs > Messenger. Windows Live™ Messenger on your Pocket PC is an instant messaging program that lets you: z See who is online. z Send and receive instant messages. z Have instant message conversations with groups of contacts. For more information on using Windows Live™ Messenger, tap > Help. To use Windows Live™ Messenger, you must have a Microsoft Passport™ account or a Microsoft Exchange e-mail account. You must have a Passport to use Windows Live™ Messenger Service. If you have a Hotmail® or MSN account, you already have a Passport. Once you have obtained either a Microsoft Passport or a Microsoft Exchange account, you are ready to set up your account. Note Sign up for a Microsoft Passport account at http://www.passport.com. Get a free Microsoft Hotmail e-mail address at http://www.hotmail.com. 9-18 Setting Up The first time you use: Tap > Program > Messenger. On the Today screen, tap Messenger to display the Windows Live™ Messenger sign-in screen. Before you can connect, you must enter Passport or Exchange account information. 1. Choose Messenger from > Program 2. Tap Sign in. Emails and Messages 9-19 Working with Contacts If you already use Windows Live™ Messenger on your desktop computer, your contacts will show up on your Pocket PC without being added again. The Windows Live™ Messenger window shows all of your messenger contacts at a glance, divided into Online and Offline categories, or sorted by groups. From this view, while connected, you can chat, send an e-mail, block the contact from chatting with you, or delete contacts from your list using the pop-up menu. nTap a contact to start a chat. oProvides the relevant menu. n For example, select Add new contact to create a new MSN contact. Or select Sign out to quit from Windows Live™ Messenger. o Notes To see others online without being seen, tap Menu, Change status, and then select Appear Offline. If you block a contact, you will appear offline but will remain on the blocked contact’s list. To unblock a contact, tap Menu, Contact options, and then Unblock contact. 9-20 Chatting with Contacts Tap a contact name to open a chat window. nView full chat. n oEnter your message in the text entry area, and tap Send. pReturn to the contacts list, and select a o contact to chat with. p qThe contact you are chatting with. q \Provides the relevant menu. For example, to invite another contact to \ a multi-user chat, select Options and then Add participant, and tap the contact you want to invite. Emails and Messages 9-21 9-22 10 Multimedia / Using Camera Pocket PC Exterior and Camera Front and Sides 1 2 3 4 5 6 7 8 9 Rear 10 11 12 Multimedia 10-1 1. MicroSD card slot 2. Camera hotkey, camera shutter, camcorder button 3. Activate or disable the flash or 4. Quit Camera spotlight 5. Digital zoom 6. Switch to other camera or camcorder modes 7. Select the storage location 8. Select front or rear camera lens 9. Select the environment lighting 10.Camera lens 11.Self portrait mirror 12.Flash or spotlight 10-2 How to Use the Camera? Notes For example, to take a self-portrait, face the light source and avoid dark surroundings or your back to the light source for better results Press the Tap button on the Pocket PC. > Programs > Multimedia > Camera. Action Scenery or Portrait (Default) Instructions 1. Point the screen of the Pocket PC toward you. 2. Press half the key to activate auto focus. When you hear beeps and the focus frame becomes green from red, press the same key to take a picture. 3. If the screenshot is good, press the camera shutter on the side of the Pocket PC to take the picture. Multimedia 10-3 Action Scenery or Portrait (Default) Instructions 4. If you are in the camera mode from the guidance wizard, pressing the camera shutter will link you to the applications. For more information about the provided tools, please refer to the later descriptions. 5. Tap Self Portrait 1. First tap to continue with the next shot. along the bottom of the screen. When the icon changes to , the front camera lens will be used. 2. Or flip the Pocket PC over and face the “self portrait mirror” beside the camera lens toward yourself. 3. If the screenshot is good, press the camera shutter 10-4 to take the picture. Video Video Instructions 1. Switch to the video mode. 2. Face the Pocket PC toward you. 3. If the screenshot is good, press the camcorder key on the side of the Pocket PC to begin filming. 4. During filming, you will see a red dot and flashing numbers of time lapsed at the upper left of the screen. Multimedia 10-5 Video Video Instructions 5. Press the camcorder key again to stop filming. If you are in the video mode from the guidance wizard, stopping filming will link you to the applications. For more information about the provided tools, please refer to the later descriptions. to continue with the next video 6. Tap segment. Icon Toolbar Description Continue to shoot or film Delete the current camera or camcorder Link to MMS Message or Messaging Link to Album When using camera mode, play or pause the video. When using “Continuous Shot” mode, go to the previous or next picture. 10-6 Common Tools for Camera The Camera can be used to take pictures or videos. This chapter will introduce the common tools for camera and icons on the screen. The previous chapter introduces hardware hotkeys on the Pocket PC that can also control some of the tool icons shown on the screen. 1 2 3 4 5 6 8 9 7 10 11 12 13 14 15 16 1. Switch to other camera or camcorder modes 2. Remaining shots 3. Timer for “self-timer” 4. Display or hide the date 5. Activate or disable the flash 6. Select the resolution, higher resolutions lead to larger picture files 7. Auto focus frame 8. Quit Camera 9. Digital zoom 10. Display or hide detailed information 11. Link to Album for browsing and managing files 12. Open the camera setup screen 13. Select the storage location 14. Select the special effect 15. Select front or rear camera lens 16. Select the environment lighting Multimedia 10-7 Camera Modes Tap W or X in button to switch to other camera modes. Camera Mode Description Á Normal camera mode. Á Camera mode with picture frame. Tap to select picture frame or background. Á Camera mode with GPS information. becomes to white icon after the GPS position is fixed. 10-8 Camera Mode Description Á “Continuous Shot” camera mode. Tap to select the number of shots. Multimedia 10-9 Common Tools for Camcorder The Camera can be used to take pictures or videos. This chapter will introduce the common tools for camcorder and icons on the screen. The previous chapter introduces hardware hotkeys on the Pocket PC that can also control some of the tool icons shown on the screen. 1 2 6 3 4 5 7 8 9 10 11 12 13 14 1. Switch to other camera or camcorder modes 2. Record status: When the recording begins, you will see a red dot. 3. Activate or disable the audio 4. Activate or disable the spotlight 5. Select the resolution, higher resolutions lead to larger video files 6. Quit Camera 7. Digital zoom 8. Display or hide detailed information 9. Link to Album for browsing and managing files 10. Open the camcorder setup screen 11. Select the storage location 12. Select the special effect 13. Select front or rear camera lens 14. Select the environment lighting 10-10 Camcorder Modes Tap W or X in button to switch to other camcorder modes. Camcorder Mode Description Á Normal camcorder mode. Á MMS camcorder mode. Multimedia 10-11 Advanced Setup for Camera or Camcorder n o p [ \ ÃTap the onscreen to open the advanced setup screen for the Camera. nTap to show the corresponding options for the function. oOptions. Flick to scroll l up or down to see the options if the number of items exceeds a screen displaying. pTap S or T to switch to the previous page or next page. [Tap to select camera or camcorder setup screen. to save the settings. \Tap 10-12 Camera Camcorder Descriptions Select the resolution, higher resolutions lead to larger files. Select the environment lighting (white balance). Adjust for fluorescent light frequency. -- Activate “self-timer;” a specific length of time can be set for “self-timer.” Activate or disable the flash or spotlight. -- Activate or disable the audio. -- Display or hide the date. Select effects. -- Select quality. -- -- Select file format. Select file format; videos in the 3GP format can be played back on the PC. Select storage location. Multimedia 10-13 Important Hints 1. When the “--” is shown, this indicates that the function is not supported under this mode. 2. When the camera lens is set to face the front, for example when you want to have a self portrait, the picture frame function will not be available. 3. Functions and options for various camera modes will be referred to the actual onscreen display, and will not be listed here in full. 10-14 Album Tap > Programs > Multimedia > Album. You can use Album to manage and view multimedia information such as pictures, music, and videos. Preview Album Information n o nDisplay the folder name you are browsing. p q oSelect the sort order for the list. pPreview thumbnails, which are arranged in the sort order you r s t q set. Tap a thumbnail to see a picture at full screen. Tap a thumbnail to play music or video file. Link to Camera. Tap to move to the upper directory. Then select the folder you want to browse. rFlick to scroll up or down the list if the height of current page exceeds the screen. sSelect other types or start the slide show. tProvides the relevant menu. For example, select Cut, Copy, Paste or Delete to manage the selected file. Select Slideshow Settings to set the details. Multimedia 10-15 ÁTap a thumbnail to see the picture at full screen. nFlick to scroll left or right to browse the previous or next picture. oIf you enable the “Gravity Sensor Screen Orientation,” you can turn your Pocket PC sideways to view the picture in landscape orientation. ZTap on or tap on the screen to display the pop-up menu. ÁTap on the screen to display the ` X Y pop-up menu. Z XStart the slide show. Tap anywhere on the screen to stop the slide show. YLink to MMS Message. You can send the picture as an [ ^ \ _ ] ^ attachment. ZLink to Messaging. You can send the picture as an attachment. [View information about this picture. \Delete this picture. ]Quit the browsing screen. ^Browse the previous or next picture. _Tap to zoom in or out. `Tap outside the pop-up menu to abort it. 10-16 to zoom in a picture. ÁTap nIn the zoom-in mode, the smaller X frame shown left is part of the picture what you see on the screen. Y oFlick to scroll left, right, up or Z [ down to view the part of picture \ [ exceeding the screen. ZTap outside the pop-up menu to abort it. [Browse the previous or next picture. \Tap to zoom in or out. Slideshow Settings Tap Album > Menu > Slideshow Settings. Multimedia 10-17 Namecard Manager > Programs > Multimedia > Namecard Manager. Provides full name cards management for scanning paper name cards into a digital format. The contacts database from Pocket PC can also be integrated into a unified contacts book. Digitize New Name Cards 1. Tap Recognize. 2. Tip: Before taking a picture, please take the following pointers to improve recognition quality. XIf the original name card is a landscape design, it is recommended that you rotate the Pocket PC before taking the picture. YKeep the Pocket PC’s camera lens at a distance of 10~12cm. ZFill the four corners of the screen marked by red indicators with the name card. 10-18 3. Take pictures Prepare a name card and adjust the position. Press the shutter to the side of the Pocket PC to take the shot. You can directly select on the screen to take a picture. 4. Name card recognition XSelect Language to choose the appropriate language for this name card. YSelect or Identify to recognize the contents on the name card. Y X Multimedia 10-19 X 5. Modify the name card’s contents and confirm XSelect the contents field to make modifications. YWhen selecting the contents field, the name card source will Y Z [ be shown for verification. Double tap on the name card area to zoom to the max viewing. \ ZSelect the field name to modify and adjust the error recognitions. [Choose whether to keep this data entry. \Add this name card to the contacts database on the Pocket PC. Go back to Contacts to view the new entry. Icon Meaning Enable or disable the flashlight. Select storage path Take a picture. Identical to the shutter at side of a Pocket PC. If the result is not satisfactory, retake the picture. Increase or decrease zoom. Rotate left or right. Identify name card. 10-20 Name Cards Management 1. Tap Manage. X Y Z 2. Main screen for name card management Only recognized name cards will be shown here. [ XEnter the quick search page. Tap a letter and the results for name cards created in Namecard \ s ^ Manager will be shown. YDelete the entered text to the left. ZSearch criteria for name card. All matching name cards for “Name, Work, or Tel” will be shown on the screen. To search for all name cards, please leave the field blank. Multimedia 10-21 [Name card index display area, select an entry to expand its contents. \Display area for the original name card. ]Provides the relevant menu. New: Create a new digital name card. Import: Supported format includes BMP, JPG, and PNG. An existing name card image file can be imported and then processed. Edit: Modify the name card information. Delete: Delete the selected name card. ^Return to the previous page. 3. Quick search screen After selecting a letter, the name cards created in Namecard Manager will be shown. The matching name or company entries will be shown on the name cards management list. 10-22 11 Companion Programs / Microsoft® Pocket Outlook includes Calendar, Contacts, Tasks, Messaging, and Notes. You can use these programs individually or together. For example, e-mail addresses stored in Contacts can be used to address e-mail messages in Messaging. Using synchronization tools, you can synchronize information in Microsoft Outlook or Microsoft Exchange on your desktop computer with your Pocket PC. You can also synchronize this information directly with a Microsoft Exchange server. Each time you synchronize, synchronization tools compare the changes you made on your Pocket PC and desktop computer or server and updates both computers with the latest information. For information on using synchronization tools, see Help on the desktop computer. You can switch to any of these programs by tapping them on the menu. Companion Programs 11-1 Calendar: Scheduling Appointments and Meetings Use Calendar to schedule appointments, including meetings and other events. You can check your appointments in one of several views (Agenda, Day, Week, Month, and Year) and easily switch views by using the View menu. nTap to go to today. oTap to display or edit the n o appointment details. pView menu. qTap Menu and then New Appointment to create a new appointment. p q Notes You can customize the Calendar display, such as changing the first day of the week, by tapping Menu > Tools > Options. 11-2 Create an Appointment n Tap to return to the calendar (the o n appointment is saved p q automatically). r oTap to choose from predefined text. s pTap to choose from previously entered locations. qTap to select a time. rTap to select a date. sNotes is a good place for maps and directions. 1. If you are in Day or Week view, tap the desired date and time for the appointment. 2. Tap Menu and then New Appointment. 3. Using the input panel, enter a description and a location. Tap first to select the field. 4. If needed, tap the date and time to change them. 5. Enter other desired information. You will need to hide the input panel to see all available fields. 6. To add notes, tap the Notes tab. You can enter text, draw, or create a recording. For more information on creating notes, see “Notes: Capturing Thoughts and Ideas” section. 7. When finished, tap to return to the calendar. Companion Programs 11-3 Notes If you select Remind me in an appointment, your Pocket PC will remind you according to the options set in > Settings > Personal tab >Sounds & Notifications. Use the Summary Screen When you tap an appointment in Calendar, a summary screen is displayed. To change the appointment, tap Edit. n o nView appointment details. oView. pTap Menu and then Edit to change appointment. p Create Meeting Requests You can use Calendar to set up meetings with users of Outlook or Pocket Outlook. The meeting request will be created automatically and sent either when you synchronize Inbox or when you connect to your e-mail server. Indicate how you want meeting requests sent by tapping Menu > Tools > Options. 11-4 Schedule a Meeting 1. Create an appointment. 2. In the appointment details, hide the input panel, and then tap Attendees. 3. From the list of e-mail addresses you’ve entered in Contacts, select the meeting attendees. The meeting notice is created automatically and placed in the Outbox folder. For more information on sending and receiving meeting requests, see Calendar Help and Messaging Help on the Pocket PC. Companion Programs 11-5 Contacts Contacts maintains a list of your friends and colleagues, in which you can easily manage or find their information on this device. To enter Contacts screen, tap > Contacts. X Contact entry stored on SIM1 card. \ Y Contact entry stored on SIM2 card. Z Contact entry stored as Outlook X ] Y Z Contact on your device. [ Tap to create a new contact. \ Tap and enter part of a name to quickly find it in the list. ] Tap to display the contact details; [ tap and hold to display a pop-up ^ menu of actions. ^ Tap to bring up relevant options for Contacts screen. Finding a Contact Contact list shows altogether contacts on your SIM card, SIM2 card and device. To find a contact, try the following methods: 1. On the contact list, enter a contact name in the box under the navigation bar; to show all contacts again, clear the text in the box. 2. In the contact list, tap Menu > Filter and then select the type of contact that you want displayed. 11-6 z To show all contacts again, select All Contacts. z To view a contact not assigned to a category, select No Categories. z To look for SIM2 contacts, check SIM2 Contacts to sort out the contacts stored on SIM2. 3. To view the names of companies your contacts work for, in the contact list, tap Menu > View By > Company. The number of contacts that work for that company will be displayed to the right of the company name. 4. Tap > Programs > Search, enter the contact name, select Contacts for the type, and then tap Search. Managing Your Contacts On Contacts list, tap Menu for more actions: z To edit a chosen contact, select Edit to modify the contact information. z To duplicate a contact entry to your device or SIM phonebook, select Copy Contact > To SIM / To SIM2 or To Contacts. z To share contact with other devices, select Send Contact > Beam to send this entry via Bluetooth, or Messages to send it via text-messaging. z To switch your current selected phone, tap Menu > Phone Dialer Selection > and then choose between Phone1 or Phone2. Companion Programs 11-7 Creating a Contact 1. On Contacts screen, tap New, and then select a contact type. z To create a contact on your device, select Outlook Contact, hereafter you can manage this contact even if the SIM card is absent. z To create a contact on either SIM1 or SIM2 card, select SIM Contact or SIM2 Contact. To manage your contact entries, you can also go to > Programs > Phone > SIM Manager. 2. Use the input panel to enter a name and other contact information. You will need to scroll down to see all available fields. 3. To assign the contact to a category, scroll to and tap Categories and select a category from the list. In the contact list, you can display contacts by category. 4. To add notes, tap the Notes tab. You can enter text, draw, or create a recording. For more information on creating notes, see “Notes: Capturing Thoughts and Ideas” section. 5. When editing is finished, tap return to the contact list. 11-8 to Using the Summary Screen When you tap a contact in the contact list, a summary screen is displayed. nView contact details. All of the available contact information is n listed, you can tap and use easily. oProvides the relevant menu. o For example, select Edit to change the contact information. Or select Save to SIM or Save to Contacts to duplicate to Contacts or SIM phonebook. p pTap to view notes. Companion Programs 11-9 Tasks: Keeping a To Do List Use Tasks to keep track of what you have to do. n nIndicates high priority. oTap to display or edit the task details. o pTap and hold to display a pop-up menu of actions. p qTap to change the status. rProvides the relevant menu. q r For example, tap Filter to select the category of tasks you want displayed in the list. Tap Sort By to select the sort order of the list. Or tap Options to change the way information is displayed in the list. 11-10 Create a Task 1. Tap Menu and then New Task. 2. Using the input panel, enter a description. 3. You can enter a start date and due date or enter other information by first tapping the field. If the input panel is open, you will need to hide it to see all available fields. 4. To assign the task to a category, tap Categories and select a category from the list. In the task list, you can display tasks by category. 5. To add notes, tap the Notes tab. You can enter text, draw, or create a recording. For more information on creating notes, see “Notes: Capturing Thoughts and Ideas” section. 6. When finished, tap to return to the task list. n nTap to return to the task list (the task is saved automatically). o oTap to choose from predefined subjects. pNotes is a good place for maps p and drawings. Notes To quickly create a task with only a subject, check Show Tasks entry bar on the Options menu. Then, tap “Tap here to add a new task” and enter your task information. Companion Programs 11-11 Use the Summary Screen When you tap a task in the task list, a summary screen is displayed. To change the task, tap Edit. n o nView task details. oTap to show and hide additional summary information. p pView notes. qTap to change task. q 11-12 Notes: Capturing Thoughts and Ideas Quickly capture thoughts, reminders, ideas, drawings, and phone numbers with Notes. You can create a written note or a recording. You can also include a recording in a note. If a note is open when you create the recording, it will be included in the note as an icon. If the note list is displayed, it will be created as a stand-alone recording. nTap to change the sort order of n the list. o oTap to open a note or play a recording. p pTap and hold to display a pop-up menu of actions. q r s qTap to record. rProvides the relevant menu. For example, check View Recording Toolbar to show the Recording toolbar. sTap to create a new item. Companion Programs 11-13 Create a Note 1. Tap New. 2. Create your note by writing, drawing, typing, and recording. For more information about using the input panel, writing and drawing on the screen, and creating recordings, see “Enter Information on Your Pocket PC.” n nTap to return to the note list (the note is saved automatically). oTap to show or hide the input panel. pProvides the relevant menu. For example, check View Recording Toolbar to add a o p 11-14 recording to the note; or check Draw to write on the screen. Word Mobile Word Mobile works with Microsoft Word on your desktop computer to give you easy access to copies of your documents. You can create new documents on your Pocket PC, or you can copy documents from your desktop computer to your Pocket PC. Synchronize documents between your desktop computer and your Pocket PC so that you have the most up-to-date content in both locations. Use Word Mobile to create documents, such as letters, meeting minutes, and trip reports. To create a new file, tap > Office Mobile, Word Mobile > New. A blank document appears. Or, if you’ve selected a template for new documents in the Options dialog box, that template appears with appropriate text and formatting already provided. You can open only one document at a time; when you open a second document, you’ll be asked to save the first. You can save a document you create or edit in a variety of formats, including Word Document, Document Template, Rich Text Format, and Plain Text. Word Mobile contains a list of the files stored on your Pocket PC. Tap a file in the list to open it. To delete, make copies of, and send files, tap and hold a file in the list. Then, select the appropriate action on the pop-up menu. Companion Programs 11-15 n o p nSelect the type of folder you want displayed in the list. oTap to change the sort order of the list. Tap to open a document. q p qTap and hold an item to see a pop-up menu of actions. r rTap to create a new document. Notes You can change the zoom magnification by tapping View and then Zoom. Then select the percentage you want. Select a higher percentage to enter text and a lower one to see more of your document. If you’re opening a Word document created on a desktop computer, check Wrap to Window on the View menu so that you can see the entire document. 11-16 Using the input panel, enter typed text into the document. For more information on entering typed text, see “Enter Information on Your Pocket PC.” To format existing text and to edit text, first select the text. You can select text as you do in a Word document, using your stylus instead of the mouse to drag through the text you want to select. You can search a document to find text by tapping Menu, Edit and then Find/Replace. n nTap to return to the document list o (changes are saved automatically). oTap and hold to see a pop-up menu of actions. p pTap to format text. qProvides the relevant menu. For example, select Format to change formatting options. q r rTap View and then check Toolbar to show the toolbar. Companion Programs 11-17 Excel Mobile Excel Mobile works with Microsoft Excel on your desktop computer to give you easy access to copies of your workbooks. You can create new workbooks on your Pocket PC, or you can copy workbooks from your desktop computer to your Pocket PC. Synchronize workbooks between your desktop computer and your Pocket PC so that you have the most up-to-date content in both locations. Use Excel Mobile to create workbooks, such as expense reports and mileage logs. To create a new file, tap > Office Mobile > Excel Mobile > New. A blank workbook appears. Or, if you’ve selected a template for new workbooks in the Options dialog box, that template appears with appropriate text and formatting already provided. You can open only one workbook at a time; when you open a second workbook, you’ll be asked to save the first. Excel Mobile contains a list of the files stored on your Pocket PC. Tap a file in the list to open it. To delete, make copies of, and send files, tap and hold a file in the list. Then select the appropriate action from the pop-up menu. 11-18 Excel Mobile provides fundamental spreadsheet tools, such as formulas, functions, sorting, and filtering. To display the toolbar, tap View and then check Toolbar. n nCell contents appear here as you enter them. oSelect cell contents for the o resource of chart. pInsert Chart button p qAutoSum button q rZoom button r ÁTap Format Chart button to modify the relevant information, such as titles, scale, type and series. Companion Programs 11-19 Tips for Working in Excel Mobile For more information on using Excel Mobile, tap > Help. Note the following when working in large worksheets in Excel Mobile: z View in full-screen mode to see as much of your worksheet as possible. Tap View and then check Full Screen. To exit full-screen mode, tap View and then Full Screen to restore. z Show and hide window elements. Tap View, Show and then tap the elements you want to show or hide. z Freeze panes on a worksheet. First select the cell where you want to freeze panes. Tap View and then Freeze Panes. You might want to freeze the top and leftmost panes in a worksheet to keep row and column labels visible as you scroll through a sheet. z Split panes to view different areas of a large worksheet. Tap View and then Split. Then drag the split bar to where you want it. To remove the split, tap View and then Remove Split. z Show and hide rows and columns. To hide a row or column, select a cell in the row or column you want to hide. Then tap Menu, Format, then Row or Column, and then Hide. To show a hidden row or column, tap Menu, Format, then Row or Column, and then Unhide. 11-20 PowerPoint Mobile View PowerPoint slides created in PowerPoint 97 and above versions on your desktop computer. The supported formats include .ppt and .pps files. n o p nSelect the type of folder you want displayed in the list. oTap to change the sort order of the list. pTap to open a file, and play the slides. q r qTap to open the file you played last time. rProvides the relevant menu. ÁTap on the lower left corner to open the menu. Tap End Show to quit. Companion Programs 11-21 Windows Media Player Use Microsoft Windows Media Player for Pocket PC to play digital audio and video files that are stored on your Pocket PC or on a network. To switch to Windows Media Player for Pocket PC, tap > Programs > Windows Media. nUse full-screen to view video. oDisplay website. Find music or video to be played from website. pReturn to the start of the current file or previous file. u qTap to play or pause. t rTap to skip to the next song. n op q r sTap to adjust volume. tAudio/mute uIndicates the progress of the s current track. ÁTo enter the screen shown on the n left, tap Menu and then Library. o nSelect Library. oTap and hold the file or folder to be played, then tap Play or Queue Up. pMenu button: Tap Open File to play files that do not belong to p 11-22 the current library. Tap Update Library to update the file list. Use Microsoft Windows Media Player on your desktop computer to copy digital audio and video files to your Pocket PC. For more information about using Windows Media Player for Pocket PC, tap > Help. Companion Programs 11-23 Streaming Player Tap > Programs > Streaming Player. Some audio and movie files that cannot be played back from Microsoft Windows Media Player, for example RTSP, HTTP… types of files, will be automatically switched to Streaming Player by the system. nAutomatically launch the n o p Streaming Player for playback when using Internet Explorer to run media files not supported by Windows Media. Tap in to enter the website address and media file name. q r u t s oView the video. Tapping in this area during playback will enable full-screen video content. Tapping the screen again will return to the normal display mode. pIndicates the current position in the track. qAdjust volume level. rProvides the relevant menu. sMute or enable sound. tStop. uPlay or pause. 11-24 Internet Explorer Using Internet Explorer Use Microsoft® Internet Explorer Mobile to view Web or WAP pages in either of these ways: z During synchronization with your desktop computer, download your favorite links and mobile favorites that are stored in the Mobile Favorites subfolder in Internet Explorer on the desktop computer. z Connect to an Internet service provider (ISP) or network and browse the Web. To do this, you’ll need to create the connection first, as described in “Connect to the Internet”. When connected to an ISP or network, you can also download files and programs from the Internet or intranet. To switch to Pocket Internet Explorer, tap > Internet Explorer. . Companion Programs 11-25 Browse the Internet Refer to “Connecting to the Internet” section to connect the Pocket PC to the Internet and start browsing websites. 1. Tap > Internet Explorer. 2. Input the site address into the address bar at the top of the screen and connect to this site. 3. Use the scroll bar at the right side or bottom of the screen, or press the up or down button on the Pocket PC to view the contents of the entire website. n nInput address here o oTap to launch pBack button qProvides the relevant menu, such as Favorites, Add to Favorites, Home, and Refresh. p q Aside from keying in the address directly, you can also connect to websites using the following methods. z Tap the Favorites button, and then tap the favorite you want to view. z In the address bar, tap the arrow ▼ to choose from previously entered addresses. Notes To add a favorite link while using the Pocket PC, go to the page you want to add, tap and hold on the page, and tap Add to Favorites. 11-26 View Mobile Favorites and Channels nTap the favorite you want to view. n oTap to add or delete a folder or favorite link. o 1. Tap the Favorites button to display your list of favorites. 2. Tap the page you want to view. You’ll see the page that was downloaded the last time you synchronized with your desktop computer. If the page is not on your Pocket PC, the favorite will be dimmed. You will need to synchronize with your desktop computer again to download the page to your Pocket PC, or connect to the Internet to view the page. The Mobile Favorites Folder Only items stored in the Mobile Favorites subfolder in the Favorites folder in Internet Explorer on your desktop computer will be synchronized with your Pocket PC. This folder was created automatically when you installed synchronization tools. Companion Programs 11-27 Favorite Links During synchronization, the list of favorite links in the Mobile Favorites folder on your desktop computer is synchronized with Pocket Internet Explorer on your Pocket PC. Both computers are updated with changes made to either list each time you synchronize. Unless you mark the favorite link as a mobile favorite, only the link will be downloaded to your Pocket PC, and you will need to connect to your ISP or network to view the content. For more information on synchronization, see Help on the desktop computer. Synchronize Mobile Favorites If you are using Microsoft Internet Explorer 5.0 or later on your desktop computer, you can download mobile favorites to your Pocket PC. Synchronizing mobile favorites downloads Web content to your Pocket PC so that you can view pages while you are disconnected from your ISP and desktop computer. Use the Internet Explorer plug-in installed with synchronization tools to create mobile favorites quickly. Create a Mobile Favorite 1. In Internet Explorer on your desktop computer, click Tools and then Create Mobile Favorite. 2. To change the link name, enter a new name in the Name box. 3. Optionally, in Update, select a desired update schedule. 4. Click OK. Internet Explorer downloads the latest version of the page to your desktop computer. 11-28 5. Synchronize your Pocket PC and desktop computer. Mobile favorites that are stored in the Mobile Favorites folder in Internet Explorer are downloaded to your Pocket PC. Notes If you did not specify an update schedule in step 3, you will need to manually download content to keep the information updated on your desktop computer and Pocket PC. Before synchronizing with your Pocket PC, in Internet Explorer on your desktop computer, click Tools and then Synchronize. You will see the last time content was downloaded to the desktop computer, and you can manually download content if needed. You can add a button to the Internet Explorer toolbar for creating mobile favorites. In Internet Explorer on your desktop computer, click View, Toolbars, and then Customize. Save Pocket PC Memory Mobile favorites take up storage memory on your Pocket PC. To minimize the amount of memory used: z In the settings for the Favorites information type in synchronization tools options, turn off pictures and sounds, or stop some mobile favorites from being downloaded to the Pocket PC. For more information, see Help. z Limit the number of downloaded linked pages. In Internet Explorer on the desktop computer, right-click the mobile favorite you want to change and then Properties. In the Download tab, specify 0 or 1 for the number of linked pages you want to download. Companion Programs 11-29 11-30 12 Maintaining the Pocket PC / Backup Utility Tap > Programs > Utilities > Backup Utility. Backup Utility is used to back up or restore files saved in the Pocket PC. You can back up personal data such as Calendar, Contacts, Tasks, Personal profile, Network settings, Messaging (E-mails and SMS), etc. Storage Space When making backups, you can choose the following storage spaces: 1. My Documents: Data saved here may disappear when you perform a cold boot. It is recommended that you use this area only as temporary storage. 2. External storage card. Maintaining the Pocket PC 12-1 Backup Files Wizard Mode nTap Backup. Next button and the oTap Wizard will guide through the steps that follow. n p Standard: Switch to the Standard mode. o p Standard Mode Backup your personal data to a storage space. ÁTap the Backup tab. n nTap to check the items for backup. o p oTap to select the storage space from the list. pTap Backup button to start the backup. q 12-2 q Advanced button: Enter the Advanced settings screen. Advanced Settings Options Under the Backup Files screen, tap Advanced button to enter the Advanced settings screen as shown below. ÁCheck the options as required. nIf you check this option, the Wizard will guide you through X the steps to complete the operation the next time you open Backup Utility. o oCancel button p pOK button ÁIf you checked “Auto backup files,” tap to enter the n screen shown on the left. o p q nSelect the backup option. oSelect the site to backup to. pPocket PC performs auto backup when the battery power is low. qTo backup regularly, tap to select “Auto Backup on schedule.” Maintaining the Pocket PC 12-3 ÁIf you checked “Auto backup on schedule,” tap to enter the screen shown on the left. n o p nBackup frequency. q oTap the date button on the right of “Starting” to set the starting date. pTap the time button on the right of “Starting” to set the starting time. qIf you have selected “Weekly,” tap the function button on the right of “Every” to set the day of the week to backup. ÁIf you selected “Manage old backup files,” tap to enter the screen shown on the left. n o 12-4 nTap the arrowhead to set the number of files. oTap the files to be retained. Restore Files Caution! 1. When restoring files, the system will delete all current data in the Pocket PC and replace it with the backup files. 2. To make sure that files can be restored successfully, do not use the Pocket PC while performing restore. 3. Restore cannot be stopped once it is started. Think carefully before proceeding. 4. After restore completed, your Pocket PC will reboot. Wizard Mode nTap Restore. Next button and the oTap Wizard will guide through the steps that follow. X p Standard: Switch to the Standard mode. o p Maintaining the Pocket PC 12-5 Standard Mode Restore the backup personal data from a storage space. ÁTap the Restore tab. n nSelect “Latest” below “Restore o From.” Or select from the list. p oTap backup file name from the list under “File Name.” pTap restoring. 12-6 Restore button to start Adding or Removing Programs Programs added to your Pocket PC at the factory are stored in ROM (read-only memory). You cannot remove this software, and you’ll never accidentally lose ROM contents. All other programs and data files added to your Pocket PC after factory installation are stored in RAM (random access memory). You can install any program created for your Pocket PC, as long as your Pocket PC has enough memory. The most popular place to find software for your Pocket PC is on the Pocket PC Web site (http://www.microsoft.com/windowsmobile/pocketpc/). Add Programs Using Synchronization Tools You’ll need to install the appropriate software for your Pocket PC on your desktop computer before installing it on your Pocket PC. 1. Determine your Pocket PC and processor type so that you know which version of the software to install. Tap > Settings. On the System tab, tap About. In the Version tab, make a note of the information in Processor. 2. Download the program to your desktop computer (or insert the CD or disk that contains the program into your desktop computer). You may see a single *.xip, *.exe, or *.zip file, a Setup.exe file, or several versions of files for different Pocket PC types and processors. Be sure to select the program designed for the Pocket PC and your Pocket PC processor type. 3. Read any installation instructions, Read Me files, or documentation that comes with the program. Many programs provide special installation instructions. 4. Connect your Pocket PC and desktop computer. Maintaining the Pocket PC 12-7 5. Double-click the *.exe file. nIf the file is an installer, the installation wizard will begin. Follow the directions on the screen. Once the software has been installed on your desktop computer, the installer will automatically transfer the software to your Pocket PC. oIf the file is not an installer, you will see an error message stating that the program is valid but it is designed for a different type of computer. You will need to move this file to your Pocket PC. If you cannot find any installation instructions for the program in the Read Me file or documentation, use synchronization tools Explore to copy the program file to the Program Files folder on your Pocket PC. For more information on copying files using synchronization tools, see Help. Once installation is complete, tap > Programs, and then the program icon to switch to it. Add a Program Directly from the Internet 1. Determine your Pocket PC and processor type so that you know which version of the software to install. Tap > Settings. On the System tab, tap About. In the Version tab, make a note of the information in Processor. 2. Download the program to your Pocket PC straight from the Internet using Pocket Internet Explorer. You may see a single *.xip, *.exe or *.zip file, a Setup.exe file, or several versions of files for different Pocket PC types and processors. Be sure to select the program designed for the Pocket PC and your Pocket PC processor type. 3. Read any installation instructions, Read Me files, or documentation that comes with the program. Many programs provide special installation instructions. 4. Tap the file, such as a *.xip or *.exe file. The installation wizard will begin. Follow the directions on the screen. 12-8 Add a Program to the Start Menu Tap > Settings > Personal tab > Menus. ÁCheck the box for the program. If you do not see the program listed, you can either use File Explorer on the Pocket PC to move the program to the Start Menu folder, or use synchronization tools on the desktop computer to create a shortcut to the program and place the shortcut in the Start Menu folder. z Using File Explorer on the Pocket PC: Tap > Programs > File Explorer, and locate the program (tap the folder list, labeled My Documents by default, and then My Device to see a list of all folders on the Pocket PC). Tap and hold the program and tap Cut on the pop-up menu. Open the Start Menu folder located in the Windows folder, tap and hold a blank area of the window, and tap Paste on the pop-up menu. The program will now appear on the menu. Maintaining the Pocket PC 12-9 z Using synchronization tools on the desktop computer: Use the Explorer in synchronization tools to explore your Pocket PC files and locate the program. Right-click the program and then click Create Shortcut. Move the shortcut to the Start Menu folder in the Windows folder. The shortcut now appears on the menu. For more information, see Help. Remove Programs Tap > Settings. On the System tab, tap Remove Programs. ÁTap a program name from the list under “Programs in storage memory” to highlight it and then tap Remove. If the program does not appear in the list of installed programs, use File Explorer on your Pocket PC to locate the program, tap and hold the program, and then tap Delete on the pop-up menu. 12-10 Manage Memory View Memory Status Tap > Settings > System tab > Memory. ÁTap the Main tab. n nThe status of Storage and Program memory. oFind: Quick link to the Search program. o ÁTap the Storage Card tab. n nCurrent storage card memory o status. oTap to select the built-in or external storage card. Maintaining the Pocket PC 12-11 Find Available Memory Under certain circumstances such as insufficient memory, the Pocket PC cannot allocate memory automatically. Try to solve this problem through the following methods: Tap > Programs > Search. 1. To find files occupying larger amounts of memory, select “Larger than 64 KB” for type and tap Search. 2. Then use File Explorer. 1. Tap > Programs > File Explorer. Use File Explorer to move the files you want to keep to external storage cards. Tap and hold the items to be moved, then tap Cut or Copy on the pop-up menu. Move to the storage card and then tap Paste. 2. Use File Explorer to delete files that you no longer need. 12-12 Tap > Messaging > Menu > Tools > Options > Storage tab. ÁCheck “Store attachments on storage card” to save attached files from E-mails automatically in the storage card in future. Tap > Internet Explorer > Menu > Tools > Options > Memory tab ÁTap Clear History and Delete Files to delete records of websites that you have browsed. Maintaining the Pocket PC 12-13 Tap > Programs > Notes/Word Mobile/Excel Mobile > Menu > Options. 1. Enter the Notes file list screen. 2. Tap Menu and then Options. 3. Tap the “Save to” function button and select SDMMC from the list. This indicates that you are using your external storage card. Hereafter, new files will be automatically saved to this storage card. Follw the same operation procedure for Notes in Word Mobile and Excel Mobile. In addition, you can use the Rename/Move or Save As function provided by the program above to move or save files to the storage card. 12-14 System Information Tap > Settings > System tab > System Information. Tap ª or ─ to display or hide the system information. To find detailed information of your SIM cards, tap ª infront of “Wireless module” to expand the category, and tap the SIM card you desire to look at. If you have installed two SIM cards in the slots, both IMEI numbers of the SIM cards will be shown here. Maintaining the Pocket PC 12-15 12-16 13 Voice Commander / Tap > Programs > Voice Commander. Voice Commander is continuous voice recognition application software in the Pocket PC. Voice Commander allows the user to use their own voice to dial and control functions. Voice Commander has the following features: z Fully voice-controlled system that allows the user to complete operations (such as dialing phone or running applications) quickly without using hands. z Uses Speaker-Independent (SI) recognition technology that allows the user to use the Pocket PC immediately without having to train or pre-record for the system. z Provides a Conversational UI for guiding beginners to issue voice commands through the conversational method. The user can then use commands easily without any practice. z Provides the Voice tag and “digit model adaptation” function so that the user can customize personal settings and further increase recognition and convenience in usage. The Voice Commander provided with this product does not need personal training or recording. You can use voice control to operate this Pocket PC immediately. Try calling out “Solitaire” to play. Press the Voice Commander button on the side of the Pocket PC and when the system prompts you to “Say Command,” just say “Start Solitaire” and the Solitaire game screen will appear. Voice Commander 13-1 Starting Voice Commander Here are two methods for running Voice Commander: 1. Tap > Programs > Voice Commander > Voice Commander. 2. Voice Commander key. The system sets the button on the Pocket PC as the exclusive “Voice Commander” button. Just press this key to run Voice. nShow the format of voice command. n oRe-Start button: Restart Voice Commander. pMenu button: Settings: Setup Voice Commander. Help: About Voice Commander. o Exit: Exit Voice Commander. Tap > Settings > Personal tab > Buttons to redefine Voice Commander button the Voice Commander hot key or other hardware buttons. 13-2 Voice Command Format Press the Voice Commander button on the Pocket PC and enter the Voice Commander screen. z Voice Name dialing Usage: Call <Contact> at <Home/Work/Mobile> Example 1: Call Jennifer Lopez Example 2: Call Jennifer Lopez at mobile z Voice Show Contact Usage: Show <Contact> at <Home/Work/Mobile> Example 1: Show Eric Clapton Example 2: Show Eric Clapton at work z Voice Digit Dial z Start Application Usage: Digit Dial Usage: Start <Application> Example: Digit Dial Example: Start Calendar (System: What number) 29109088 z Voice Show Appointment z Voice Play Music File Usage: Today’s/Tomorrow’s/ Usage: Play <Music file name> This week’s Appointment Example 1: Play The Moment Example 2: Play SHE album Example 3: Play Music z Goodbye Usage: Goodbye Voice Commander 13-3 Tips z All the names in Contacts will automatically become recognizable contacts in the “Voice dialing” syntax. However, if the number of contacts exceeds 1000 entries, the system will not recognize the excessive entries. To add these entries to Voice Commander for recognition, tap Menu > Settings or run Voice Commander Settings to check and add these contacts manually for voice recognition. z If your volume is too low or if your surroundings are so noisy that the system cannot recognize your voice, the system will prompt you “Please say again.” Adjust the distance between yourself and your Pocket PC or reduce the noise and try again. z If the user has a heavy accent that may cause poor voice recognition, use any of the following methods to train the personal digital adapted model in order to increase recognition: 1. Tap Menu > Setting > Digit Training tab. 2. Tap Voice Commander Settings > Digit Training tab. z You can also tap Voice Commander > Menu > Exit to end Voice Commander. z If you open another program while using Voice Commander and it covers the Voice Commander screen, Voice Commander will terminate automatically. 13-4 Voice Commander Settings There are two ways to run Voice Commander Settings: Tap > Programs > Voice Commander > Voice Commander Settings. Tap Menu > Settings while using Voice Commander. Voice Commander Settings allows the user to personalize the Voice Commander settings, add and remove contacts or applications within the recognition range, record voice tags or play commands to prompt the user on how to say the correct command. Contacts Settings Page Tap Voice Commander Settings and then the Contacts tab. The setting page will list all the names and their status (whether or not it is selected, with or without voice tag) in Contacts. n o p nCheck box function If a contact is checked, it can be identified normally. If unchecked, this indicates that it is not within the recognizable range. Please create a voice tag. q r o Lips icon: Voice tag is built. s pTap a contact name to highlight it for using with t buttons. Voice Commander 13-5 q Play button: Play the recorded voice tag for this contact and hear how it is pronounced. r Build button: Record the voice tag for this contact again. During the recording, tap Cancel button to cancel recording. Delete button: Delete the voice tag for this contact. s tContacts tab: Sets the voice commands for Contacts. Application tab: Sets the voice commands for applications. Digit Training tab: Sets the voice command for digital dialing. Advanced Settings tab: Sets the length and sensitivity for digital dialing. For example, record Alex Cooper in Contacts as Sweet Heart. 1. Tap Alex Cooper. 2. Tap Build button. 3. When you hear a beep, say the words “Sweet Heart” that you want to record. 4. When you hear a second beep, say “Sweet Heart” again. 5. After recording twice, the system will play the voice you just recorded to indicate that you have created a voice tag. 6. At this time, a Lips icon appears to the right of your contact, Alex Cooper, to indicate that there is a voice tag created for this name. This is helpful in identifying which contacts already have voice tags. 7. To create another voice tag, tap Build button and repeat the steps above. 8. Tap Delete button to remove the voice tag. The system will then restore the default voice for Alex Cooper. 13-6 Tips z You can choose which Contacts are to be added to the recognizable range of the Voice Commander. By default, the system automatically adds all names within the recognizable range. z If the number of Contacts exceeds 1000 entries, the system will not recognize the excessive entries. To add these contacts to Voice Commander for recognition, manually check the check boxes in front of the contact entries. Voice Commander 13-7 Application Settings Page Tap Voice Commander Settings > Application tab and the Settings page will list the applications and settings installed by the Pocket PC on and then Programs (whether or not it is selected, with or without voice tag). You can choose which applications are to be added to the recognizable range of the Voice Commander. By default, the system automatically adds all applications as recognizable targets in the < Application > syntax in “Voice open application.” No matter when you install a new application, the system updates immediately and adds the new application within the recognizable range. This helps you save time spent in finding applications. n o p q r s 13-8 nCheck box function If the application is checked, it can be identified normally. If unchecked, this indicates that it is not within the recognizable range. If the check box is gray and cannot be checked, this indicates that the item is unrecognizable. Build a voice tag to add a gray item into the recognizable range. o Lips icon: Voice tag is built. pTapped application name is highlighted and can be used with functions. q Play button: Play the recorded voice tag for this application and hear how it is pronounced. During the recording, tap r Build button: Record the voice tag for this application again. Cancel button : Tap to cancel recording. Delete button: If there is a Lips icon, the voice tag for this s application can be deleted and restored to the default system voice. Application example: You want to record Windows Live™ Messengers as “Chat room.” 1. Tap Windows Live™ Messengers. 2. Tap Build button. 3. When you hear a beep, say the words “Chat room” that you want to record. 4. When you hear a second beep, say “Chat room” again. 5. After recording twice, the system will play the voice you just recorded to indicate that you have created a voice tag. 6. At this time, a Lips icon appears to the right of Windows Live™ Messengers to indicate that there is a voice tag created for this application name. This is helpful in identifying which applications already have voice tags. 7. To create another voice tag, tap Build button and repeat the steps above. 8. Tap Delete button to remove the voice tag. The system will then restore the default voice for Windows Live™ Messengers. Voice Commander 13-9 Music Settings Page Tap Voice Commander Settings and then the Music tab, the settings page will list the music files and configuration status of the specify folder in your Pocket PC or on your storage card. If you add a new music file, the system will update in real-time, automatically adding the file to your recognizable range, saving you the time of searching for your music files. The system will automatically activate music files stored in the following folders: 1. All folders on your storage card. 2. The My Documents folder in your Pocket PC, or any folder that is inside the My Documents folder. 3. If you want to transfer the files to your Pocket PC via the synchronization tools, then you must put the files in either the Play lists folder or the Music folder. 13-10 n o p nCheck box function If the music file name is checked, it can be identified normally. If unchecked, this indicates that it is not within the recognizable q r s range. If the check box is gray and cannot be checked, this indicates that the item is unrecognizable. Build a voice tag to add a gray item into the recognizable range. o Lips icon: Voice tag is built. pTapped music file name is highlighted and can be used with functions. q Play button: Play the recorded voice tag for this music file name and hear how it is pronounced. During the recording, tap r Build button: Record the voice tag for this music file name again. Tap s Cancel button to cancel recording. Delete button: If there is a Lips icon, the voice tag for this music file name can be deleted and restored to the default system voice. Voice Commander 13-11 Digit Training Page Tap Voice Commander Settings and then the Digit Training tab. This function trains a set of personal voice model to increase accuracy in recognition for users with heavier accents. n o p q n9: Voice tag is built. oÎ: Current digit to be recorded. pCheck “Use adapted model” to use the model tailor made for you with better recognition ability. q \ r Record button: Start recording the assigned digit. Remove All button: Delete all voice tags. There are 10 sets of built-in 6-digit numbers that you have to recite. The steps are as follows: 1. Tap Record button. When you hear a beep, start reciting the displayed numbers. 2. After reciting, the system plays the numbers you just recited so that you can check if it is correct. 3. If correct, please tap Yes and the system prompts you to continue reciting the next set of numbers for recording. 4. If it is necessary to recite these numbers again, tap No and then recite again. 5. If you are not satisfied with the sound recorded before, tap Remove All button and the system will delete all recorded sounds. Please record again. 6. After recording 10 sets of numbers, the system will tell you that the voice model is already built. 13-12 Tips z As long as you have completed recording, then you can check “Use adapted model” to use the personal model tailored made for you. It is recommended that you recite all 10 sets of numbers so the adaptation effect is more obvious. If you do not want to use the adapted model, then just uncheck “Use adapted model.” z If you have trained 10 sets of number as 1 set of voice model, the system will show that all numbers are already recorded when you run this function. If some of the numbers are not yet recorded, the system returns to where it stopped the last time to let you continue with the unfinished portion. z You can also tap Remove All button and the system will delete the last voice model trained and let you train a new model Voice Commander 13-13 Digit Settings Page The digit setting is for voice recognition. The “Length of phone number” setting specifies the maximum number of digits that can be entered as the phone number. These settings will improve recognition accuracy. z There are three fields in this screen, you can set different lengths in the three fields respectively. The system default settings are 3, 7, and 10, this means that in Digital Dial your system will recognize telephone numbers of 3, 7, and 10 digits in length. z If you check No constraint, the system will not constrain the length of the telephone number that you input, any length of from 1 to 18 digits will be accepted. 13-14 Advanced Settings Page nSensitivity: When you use this setting, the voice recognition n system is not as strict while performing voice recognition tasks, in other words, under this setting the system will respond to your voice most of the time and you won’t have many non-responsive situations. You should set the system to Sensitive when in continually noisy environments, for example when on a train or in a factory, etc. Normal: Normal is the default setting and is best for the average environment. Accurate: Under the Accurate setting, the system is more strict when performing voice pattern matching. Recognition errors are less likely to occur when you set the system to Accurate. Voice Commander 13-15 FAQ Question: I want to make a call to my friend Andy Miller, but I’m tired of reading manuals. What do I need to know if I just want to make phone calls? Answer: Make sure you have Andy Miller’s name and phone number in the contact database. Press the Voice Commander button, and say “Call Andy Miller.” The system will guide you through it. Question: I added a new contact but it is not recognized. Answer: 1. The system only recognizes English words and characters or digits. Any symbols or marks will be ignored. However you can still make a voice tag for these items. 2. When the number of contacts exceeds 1,000 entries, the system will not recognize the excessive entries, until activated manually by the user. 3. To have a look at the status of the contact’s voice command attributes, please go to the Contacts setting page in Voice Commander Settings. Question: I recorded a voice tag for my friend last month, but I forgot what I recorded. Do I need to redo the recording? Answer: No! Just tap Voice Commander Settings, the Contacts tab, select the contact, and then tap 13-16 Play button. Question: I performed digit training today, but I found that the accuracy is worse than before, what do I do now? Answer: You can retry the digit training again in a “quiet” place. And if it still doesn’t help, disable the adapted model and use the default one. To disable the adapted model, tap Voice Commander Settings, the Digit Training tab, and then uncheck “Use adapted model.” Or just tap Remove All button to remove the model. It will save you some memory this way. Question: I accidentally activated Voice Commander, how can I abort it? Answer: Say “Goodbye.” Voice Commander 13-17 13-18 14 Specifications / Item Description ® Operating system Windows Mobile 6.1 Professional Processor Samsung SC3 6400, 533MHz Memory 256MB ROM, 128 MB RAM Display 2.8" VGA, 65,536 colors TFT-LCD touch window(640 x 480) Communication 3.5G HSDPA / UMTS (2100/1900/850 MHz) Quad-Band GSM:850/900/1800/1900 MHz EDGE class 10/GPRS class 10 2.75G GSM/GPRS Tri-Band(900/1800/1900) Wireless LAN 802.11b/g Bluetooth 2.0 class 2 + EDR GPS Embedded Chip, SiRF Star III Camera 3.2M pixels auto-macro with flashlight, up to 2048 x 1536 resolution 0.3M pixels fixed-focus Camera for conference call usage Light Sensor Sensing the brightness of environment to adjust panel luminance Gravity Sensor Gravity Sensor for user friendly operation Expansion slot MicroSD Interface (Audio) Built-in microphone and speaker, external stereo headsets jack Interface (Data) Mini USB 2.0 Sync Specifications 14-1 Design and specifications are subject to change without notice. Item Interface/Audio Description Built-in microphone and speaker External stereo headset jack Interface/Data USB Sync Power supply Battery: 1530 mAh Li-Ion Polymer, rechargeable, replaceable AC Adapter: 100~240 VAC/50~60 Hz, 5V/1A DC Environmental Daily operation: 0°c ~ 40°c; storage: -10°c ~ 50°c temperature Environmental 45% ~ 85% humidity Dimensions 106 x 60.5 x 17 mm 147g (including battery) Optional accessories 14-2 Battery, Car charger, Car mount 15 Regulation Notice and Safety Declaration / SAR Information Your device contains a radio transmitter and receiver, and it is designed, manufactured and tested not to exceed the radio frequency exposure limitations recommended by international guidelines. The maximum SAR values for DX900 are: z 0.831 W/kg @10g (GSM 900) z 0.373 W/kg @10g (GSM1800) z 0.492 W/kg @10g (WCDMA 2100) z 0.044 W/kg @10g (WiFi) Regulation Notice and Safety Declaration 15-1 Health and Safety Information Electrical and Battery Safety z Please use ONLY accessories approved by the manufacturer. Any battery, AC adapter or cable of which authenticity is not verified by authorized service point or dealer (even if similar to original product in appearance or specifications) should not be used with your Pocket PC. The warranty of your Pocket PC DOES NOT apply to damage caused by use with non-manufacturer approved products. z Follow the specifications of the battery manufacturer: Avoid charging the battery when the environmental temperature is higher than 45ºC. Do not store or use the battery when the environmental temperature is higher than 50ºC. Otherwise, battery expansion or leakage may occur. z Do not attempt to disassemble, pound, pierce or damage the battery to avoid causing injury, danger or risk. Application Environment Safety z Do not directly expose the Pocket PC to any of the following environments: rapid changes of temperature, high temperature (such as direct exposure to sunlight or stoves), extremely low temperature, high pressure, areas with electrostatic discharge interference or dusty and humid places. Do not soak or wet the Pocket PC with water or any other liquid. z Do not place the Pocket PC near electrical appliances (such as TVs, computers, scanners, disc players, faxes, hair dryers, etc.) that may generate electrostatic discharge interference. z 15-2 Never drop the Pocket PC nor subject it to strong impact. z Do not use ordinary pen or any object with a sharp tip to tap the Pocket PC cover or screen (LCD panel) to avoid damaging and scratching the surfaces. z Do not use corrosive or volatile liquids to wipe the Pocket PC. If necessary, use a soft cloth or tissue to wipe the Pocket PC. Warranty Security z In case the Pocket PC is damaged, kindly return it to your place of purchase. Do not attempt to disassemble this device on your own as this may void the warranty. z If any hazards result from the failure of the user to comply with usage rules, we will not be held responsible for any resulting warranty claims. Data Security z This company is not responsible for any data loss or damage to the Pocket PC due to improper use. Record important data in your notebook separately or use the USB accessories that come with this product to save important data to your computer or storage card. Privacy Restrictions z Some countries require full disclosure of recorded telephone conversations, and stipulate that you must inform the person with whom you are speaking that the conversation is being recorded. Always obey the relevant laws and regulations of your country when using the rewording feature of your Pocket PC Phone. IMPORTANT SAFETY PRECAUTIONS z When using this product, the safety precautions below must be taken to offset possible legal liabilities and damages. Regulation Notice and Safety Declaration 15-3 Safety in airports, medical facilities, and inflammable environments When aboard an aircraft, at a medical facility, or at the gas pump where wireless communication devices are prohibited, please launch the Communication Manager and then tap the icon turns orange button. When the color of the , the Flight Mode is activated and the wireless connection of the Pocket PC is disabled. Safety In Aircrafts Due to the possible interference caused by this product to an aircraft's navigation system and its communications network, using this product on board an airplane is against the law in most country. Interference With Medical Equipment Functions This product may cause medical equipment to malfunction. The use of this device is forbidden in most hospitals and medical clinics. Environment Restrictions Do not use this product in gas or refueling stations. The use of this product is also prohibited in fuel storehouse, chemical plants, and locations containing explosives. Safety For Environments Do not use this product in gas station, fuel depots, chemical plants or where blasting operations are in progress, or in potentially explosive atmospheres such as fueling areas, below deck on boats, fuel or chemical transfer or storage facilities, and areas where the air contains chemicals or particles, such as grain, dust, or Mattel powders. Please be aware that Sparks in such areas could cause an explosion or fire resulting in badly injury or even death. 15-4 Explosive Atmospheres When in any area with a potentially explosive atmosphere or where flammable materials exist, the product should be turned off and user should obey all signs and instructions. Sparks in such areas could cause an explosion or resulting in bally injury or even death. Users are advised not to use the equipment at refueling points such as service or gas stations. Users are reminded of the need to observe restrictions on the use of radio equipment in fuel depots, chemical plants or where blasting operations are in progress. Areas with a potentially explosive atmosphere are often, but not always, clearly marked. These include fueling areas, below desk on boats, fuel or chemical transfer or storage facilities, and areas where the air contains chemicals or particles, such as grain, dust, or metal powders. Nonionizing Radiation This product should be operated in the suggested normal condition only to ensure the radioactive performance and safety of the interference. As with other mobile radio transmitting equipments, user are advised that for satisfactory operation of the equipment and for the safety of personnel, it is recommended that no part of the human body be allowed to come too close to the antenna during operation of the equipment. Road Safety Vehicle drivers in motion are not permitted to use telephone service with handheld devices, except in case of emergency. In some countries, using hand-free devices as an alterative is allowed. Regulation Notice and Safety Declaration 15-5 Regulatory Notices Agency identification numbers For regulatory identification purposes, your product is assigned a model number of DX900. To ensure continued reliable and safe operation of your Pocket PC, use only the accessories listed in this document. This product is intended to be charged only from an approved battery charger (rated 5V DC, 1A). European Union Declaration of Conformity The CE marking indicated that the product to which it is affixed complies with all the applicable Directives of the European Parliament and Council of the European Union, in particular the Radio & Telecommunications Terminal Equipment (R&TTE) Directive, 1999/5/EC. Your product conforms to the following European Norms: z EN 60950-1:2001 (IEC 60950-1 (Modified)) – Information technology equipment – Safety – Part 1: General requirement. z ETSI EN 301 511 V9.0.2(2003-03) – Mobile communications (GSM); Harmonized standard for mobile stations in the GSM 900 and DCS 1800 bands covering essential requirements under article 3.2 of the R&TTE directive (1999/5/EC). 15-6 z ETSI EN 300 328 V1.7.1 – Electromagnetic compatibility and Radio spectrum Matters (ERM); Wide-band transmission systems; Data transmission equipment operating in the 2.4 GHz band and using spread spectrum modulation techniques; Harmonized EN covering essential requirements under article 3.2 of the R&TTE directive. z ETSI EN 301 489-1 V1.6.1 - Electromagnetic compatibility and Radio spectrum Matters (ERM); ElectroMagnetic Compatibility (EMC) standard for radio equipment and services; Part 1: Common technical requirements. z ETSI EN 301 489-7 V1.3.1 - Electromagnetic compatibility and Radio spectrum Matters (ERM); ElectroMagnetic Compatibility (EMC) for radio equipment and services; Part 7: Specific conditions for mobile and portable radio and ancillary equipment of digital cellular radio telecommunications systems (GSM and DCS). z ETSI EN 301 489-17 V1.2.1 - Electromagnetic compatibility and Radio spectrum Matters (ERM); ElectroMagnetic Compatibility (EMC) for radio equipment and services; Part 17: Specific conditions for 2.4 GHz wideband transmission systems and 5 GHz high performance RLAN equipment. z EN 55013:2001 – Sound and television broadcast receivers and associated equipment – Radio disturbance characteristics. z EN 55020:2002 – Sound and television broadcast receivers and associated equipment – Immunity characteristics. z EN 50371:2002 – Generic standard to demonstrate the compliance of low power electronic and electrical apparatus with the basic restrictions related to human exposure to electromagnetic fields (10 MHz ~ 300 GHz) – General public. Regulation Notice and Safety Declaration 15-7 z EN 50360 – 2001 – Product standard to demonstrate the compliance of mobile phones with the basic restrictions related to human exposure to electromagnetic fields (300 MHz ~ 3 GHz). 15-8 WEEE Notices The Directive on Waste Electrical and Electronic Equipment (WEEE), which entered into force as European law on 13th February 2003, resulted in a major change in the treatment of electrical equipment at end-of-life. The purpose of this Directive is, as a first priority, the prevention of WEEE, and in addition, to promote the reuse, recycling and other forms of recovery of such wastes of as to reduce disposal. The WEEE logo (shown left) on the product or on its box indicates that this product must not be disposed of or dumped with your general household waste. You are liable to dispose of all your electronic or electrical waste equipment by transferring it to a specified collection point for recycling of such hazardous waste. Isolated collection and proper recovery of your electronic and electrical wastes equipment at the time of disposal will allow us to help conserve natural resources. Moreover, proper recycling of the electronic and electrical waste equipment will ensure safety of human health and the environment. For more information about electronic and electrical waste equipment disposal, recovery, and collection points, please contact your local city center, town or country council, household waste disposal service, shop from where you purchased the equipment or manufacturer of the equipment. Regulation Notice and Safety Declaration 15-9 15-10 16 FAQ / 1. What features does the Pocket PC have? Answer: n Capability of carrying dual SIM cards. o Built-in 802.11b/g wireless networking module. p The latest Windows Mobile® 6.1 Professional operating system, with all its settings stored on a Flash ROM. You won’t have to worry about losing your data even if the Pocket PC runs completely out of power. The extra-large Flash memory space is capable of storing a large amount of personal data and application programs. 2. How do I configure the wireless network? And how do I connect to the Internet? Answer: Communication Manager will assist you in managing your Bluetooth devices, GSM mobile devices, and your wireless networks. nWhen you purchase credit points for connection to the Internet via a wireless connection, you will be given an IP address, DNS name server address, Proxy server, connection port number, and network key information, you will need this information to successfully connect to the Internet. Sometimes corporate networks may need additional information, please contact your company’s network administrator for details. If you are using your wireless network for the first time, please refer to the “Configure your Wireless Network” section and set the necessary configurations. In icon o general, you can activate the wireless connection by tapping the in Communication Manager. When your Pocket PC detects and connects to a available wireless network, a icon will appear on the top of your screen, this means that your Pocket PC has successfully connected with a network hotspot (Access Point). At this time, the indicator on the upper left of your pocket PC will flash amber. FAQ 16-1 3. My Pocket PC cannot boot. What should I do about it? Answer: nMake sure the Pocket PC battery you use still has enough power. oPlug your Pocket PC into the charger, and make sure the red charging indicator lights up. Press the POWER button. 4. My Pocket PC has a screen freeze or the system does not respond. What should I do about it? Answer: nYou may reset your Pocket PC. It means to re-start the whole system to release unnecessary resources so that the system can return to normal. oIf you have reset your Pocket PC but it still cannot operate normally, then you need to carry out a cold boot to solve this problem. To Carry out a cold boot:: Press and hold both POWER button and RESET button for a while, then release them simultaneously. Wait for a few seconds until the screen wakes up displaying the model name, firmware version and firmware build date of your device, instantly press and hold . Continue pressing and release it when you see an inquiry box shown on the screen. If you answer “Yes” to the question displays after a cold boot: (Erase all data and load default?) The programs installed by yourself, self-made settings, and self-made data (e.g., “Contacts” and “Calendar”) will disappear. And return to their default settings. As a result, we suggest you copy your data to the storage card. Data stored in the storage card will not vanish because of a cold boot. Or you can synchronize the data on your Pocket PC with your desktop computer. 16-2 5. Why doesn’t my Pocket PC make any sound? Answer: nTap the speaker icon on the top right of the screen, then select the volume control options, or adjust the volume of the incoming call sound. oAlternatively, you may use the volume control key to control the volume. 6. Why does my Pocket PC screen automatically become dark? Answer: Tap > Settings > System tab > Backlight > Battery power or the External power tab. You may find that if you use battery power, the backlight automatically shuts down after 30 seconds by default; the external power shuts down after 1 minute by default. If you think these times are too short, you may extend them as needed. 7. When I want to open a program or file, a warning message “Not enough memory” pops up. What should I do about it? Answer: Because your Pocket PC’s memory is shared by storage memory and program memory, the following methods are available. You may choose the one that works best for you. nRemove the programs you installed or that are not frequently used to release program memory space. oDelete data that is not used frequently or unnecessary to release storage memory space. FAQ 16-3 8. The characters on the screen are too small to read. How can I enlarge them? Answer: Tap > Settings > System tab > Screen > Text size tab. You may adjust the text size as you wish. Also, you may select the landscape orientation in the General tab screen. Try and change them so that you can read more smoothly. 9. The contact point of my stylus is not quite precise. What should I do about it? Answer: Align the screen in place, and the touch screen can respond to the operation of your stylus more precisely. The following two ways will bring you into the touch screen calibration mode. > Settings > System tab > Screen > Align Screen Button. nTap on the bottom-left of the Pocket PC and the oSimultaneously press execution button in the center of the navigation pad. 10. The hardware buttons of my Pocket PC doesn’t make any response or calls a wrong program. What should I do about it? Answer: Tap for correct setup. 16-4 > Settings > Personal tab > Buttons. Check each button 11. My Pocket PC's Activesync cannot be executed or make a connection. What should I do about it? Answer: nMake sure you have installed Activesync version 4.5 or above. The companion CD contains the software. If you have lost the CD, you may download it from the Microsoft Website. oMake sure the charger as well as the USB cable provided along with the product are already connected up to your PC end. pMake sure you are not executing another program that uses the same serial port you selected for operation during installation. qIf your Activesync is still not working, remove and delete the old version of Activesync software at the PC end and install it once again. 12. My PC uses Windows Vista™ operating system, how will it handle the Pocket PC connection? Answer: nPlease make sure that the Windows Mobile® Device Center included in the companion CD is installed. oMake sure that the included USB cable is properly connected to the PC port. 13. My PC currently has Microsoft Outlook installed; will it work with the Pocket PC? Answer: Refer to the download link which you can see in the companion CD. If your current Microsoft Outlook version is older than that, uninstall the older version, then install the Microsoft Outlook limited trial version. When the trial period is over, contact with Microsoft for more information on purchasing the retail version. FAQ 16-5 16-6 17 Index / 3 3.5 G video telephony · 4-1 Bubble Breaker · 2-7 Built-in camera lens · 1-3 Buttons · 2-9, 5-14 A About · 2-10 AC Adapter · 1-1 Accounts · 9-1 ActiveSync · 2-7, 6-10 ActiveSync Setup Wizard · 6-7 Adding or Removing Programs · 12-7 Adjust volume · 5-8 Adjust Volume · 5-8 Adjusting Settings · 5-1 Adjusting the Phone Volume · 4-4 Align Screen · 2-1 Answering a call · 4-11 C Calculator · 2-8 Calendar · 2-7, 11-2 Call History · 4-9 Camcorder · 1-3 Camera · 10-1, 10-3, 14-1 Camera button · 10-3 Camera hot key · 1-3 Certificates · 2-10 Charging · 1-10 Chatting with Contacts · 9-21 Circuit-Switched Data (CSD) · 7-14 Clean Boot · 1-16, 1-19 B Clock & Alarms · 2-10 Back cover · 1-3 Command Bar · 5-12 Backlight · 1-15, 2-10, 5-4 Communication · 14-1 Backup Files · 12-2 Communication Manager · 2-19 Backup Utility · 12-1 Connect GPRS · 7-6 Battery · 1-1, 1-8, 1-11 Connection · 3-4 Beam · 2-11 Connection Wizard · 2-11, 7-2 Block Recognizer · 2-26 Connections · 2-11, 7-1 Bluetooth · 2-11, 7-8, 7-9 Contacts · 2-7, 11-6 Browse the Internet · 11-27 Create a Note · 11-14 Index 17-1 Create a Task · 11-11 Find Information · 5-11 Create an Appointment · 11-3 Finding a contact · 11-6 Creating a contact · 11-8 Flashlight LED · 1-3 Creating a text message · 9-5 Flight mode · 2-22 Creating an MMS Message · 9-8 Fully charge the battery · 1-11 CSD Type · 2-11, 7-14 D G Getting Started CD · 1-1, 6-2, 6-4 Default Settings · 1-16, 1-18 GPRS Connection · 7-3 Dimensions · 14-2 GPS · 3-2, 14-1 Direct Push Technology · 9-16 GPS Viewer · 2-7, 3-9 Disconnect GPRS · 7-7 Display · 1-2, 14-1 Drag · 1-14 Draw on the Screen · 2-30 H Hardware installation, ActiveSync · 6-4 Hardware installation, WMDC · 6-2 Headset connector · 1-2 Dual SIM · 2-21 E Earphone · 4-2 E-mail · 9-12 E-mails · 9-9 End button · 1-2 End Button · 4-3 Ending a call · 4-12 Enter Information · 2-23 Excel Mobile · 11-18 I Input · 2-9 Input Panel button · 2-24 Install the external headset · 4-3 Installing ActiveSync · 6-4 Installing the SIM Card · 1-6 Interface/Audio · 14-2 Interface/Data · 14-2 Internet Explorer · 2-8, 11-26, 11-27 Internet Sharing · 2-8, 7-13 Expansion slot · 14-1 F Favorites · 11-28 File Explorer · 2-8, 5-11, 12-12 17-2 L LED indicator · 1-11 Letter Recognizer · 2-26 Light Sensor · 5-5 Location SMS · 2-7, 3-7 Lock · 2-9 Owner Information · 2-9 P Phone · 2-9, 4-1 M Making a call · 4-6 Phone Receiver · 1-2, 4-2 Memory · 2-10, 12-11, 14-1 Phone Speaker · 1-2, 4-2 Menus · 2-9, 12-9 Phone1 · 2-21, 2-22 Messaging · 2-7, 9-1 Phone2 · 2-21, 2-22 Messenger · 2-8, 9-18 Pictures & Videos · 2-8 Microphone · 2-10, 4-2, 5-7 Pocket PC · 1-1 MicroSD slot · 1-3 Pop-up menus · 5-13 ® ® Microsoft ActiveSync · 6-3 Power · 1-14, 2-10, 5-3 Microsoft® Internet Explorer Mobile · Power Button · 1-2, 1-13, 1-14, 1-15 11-26 Power supply · 14-2 Microsoft® Pocket Outlook · 11-1 PowerPoint Mobile · 11-21 Mini USB connector · 1-2 Preview mirror · 1-3 MMS · 9-7 Processor · 14-1 Mute · 5-8 Programs · 2-7 Mute mode · 4-4 N R Record a Message · 2-31 Name Cards Management · 10-21 Redefine Hot Keys · 5-14 Namecard Manager · 10-18 Regional Settings · 2-10 Navigation Bar · 2-4, 5-12 Remove Programs · 2-10, 12-10 Navigation button · 1-2 Reset · 1-16, 1-17 Notes · 2-7, 11-13 Reset button · 1-3 Notifications · 5-2 Reset Button · 1-17 O Operating system · 14-1 Organize Information · 5-11 Restore Files · 12-5 S Satellite Data Update · 2-7, 3-4 Index 17-3 Satellite Navigation · 3-1 Stylus holder · 1-3 Scenarios · 5-10 Synchronizing E-mail · 9-10 Screen · 2-1, 2-10 System Information · 2-10, 12-15 Search · 2-8, 5-11, 12-12 Select a Drawing · 2-31 Select Writing · 2-29 Send button · 1-2 Send Button · 4-3 SIM card · 1-6 SIM Manager · 4-17 SIM Tool Kit · 4-19 SIM1 · 2-21 SIM2 · 2-21 Sleep mode · 1-14 SMS · 9-3 T Tap · 1-14 Tap and hold · 1-14 Tasks · 2-7, 11-10 Text Message · 9-3 Today · 2-9 Today screen · 2-3 Touch screen · 1-2 Touch the screen · 1-14 Transcriber · 2-27 Turn off Phone · 7-7 Turn on Phone · 7-5 SMS Sender · 4-20 U Soft Keyboard · 2-26 Software installation, WMDC · 6-2 USB Cable · 1-1 Solitaire · 2-7 USB Synchronization · 6-7 Sounds & Notifications · 2-9 USB to PC · 2-11, 6-6 Spb Mobile Shell · 2-12 Using the stylus · 1-14 Speaker · 1-3, 2-3 V Speed Dial · 4-21 Vibrate · 5-8 Start · 2-3 Vibration mode · 4-4 Start a chat · 9-20 Video Call · 4-13 Start Menu · 12-9 Video conference camera · 1-2 Storage Space · 12-1 Voice Command Format · 13-3 Streaming Player · 11-24 Voice Commander · 2-7, 2-33, 13-1, Stylus · 1-1 13-2 17-4 Voice Commander Button · 2-33 Windows Media · 2-8, 11-22 Voice Commander hot key · 13-2 Windows Media Player · 11-22 Voice Commander Settings · 2-7, 13-5 Windows Mobile® Device Center · 6-1 Volume control key · 1-2 Wireless LAN · 7-15, 8-1 W Windows Live · 2-8 Word Mobile · 11-15 Write on the Screen · 2-28 Windows Live™ Messenger · 9-18 Index 17-5 First Version: January 2009 Current Version: April 2009, Version 2 Number: 20090331