1
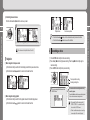
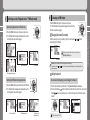
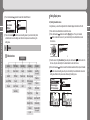
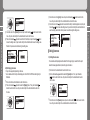
User’s Manual FY500 Copyright Thank you for purchasing MPIO FY500. FY500 is a digital audio player that enables users to play back music conveniently and utilize it for various purposes. To use this product properly, make sure to read through this manually before using it. http://www.mpio.co.kr For more information on the MPIO products, visit our web site on the Internet. You can find many answers to the customer’s various enquiries, or upgrade the product performance through firmware upgrade (system software) that operates this product. - MPIO holds patent, trademark, and other intellectual property right about this User’s Manual. Imitating all or part of software of this product, and duplication, reproduction, or interpretation without a prior consent with MPIO is prohibited. Making the electronic media version and the mechanical abridgement of the contents are also prohibited. Trademark - Microsoft, Windows, Windows Explorer, and Windows logo are the trademark or registered trademark of Microsoft Corporation. - Intel and Pentium are the registered trademark of Intel Corporation. - Macintosh and Macintosh are the registered trademark of Apple Computer, Inc. - Products and products described in this manual are the trademark or registered trademark of the corresponding company or organization, and ™ or R mark not always displayed explicitly. Disclaimer - Manufacturer and sales office do not bear any responsibility over the accidental damage that accompanies the injury to the user, which is caused by improper usage of this product. The contents of this manual are based on the product status at the time of sales and can be changed without a prior notice for continuous performance improvement and additional function supplementation in the future. 3 목차 목차 2 Table of Contents 1. Introduction 6 7 7 8 9 10 11 11 2. Before You Use 1. Installing the operating software 2. Connecting FY500 to the computer 3. Installing an USB driver manually 4. Saving music and data file 5. Unplugging FY500 from the PC 12 15 16 18 20 3. Learning Basic Usage 1. Inserting a battery 2. Turning the player on/off 3. Listening to music ① Music playback ② Navigation 4. Recording a voice 5. Switching a mode (Playback mode ↔FM Radio mode) 22 22 23 24 25 26 27 27 28 29 30 31 4. Using Advanced Functions 1. Playback mode ① Summary of button usage ② Changing the EQ setting value ③ Setting User EQ menu ④ Setting Live 3D Effect menu ⑤ Setting Repeat menu ⑥ Sector repeat (A↔B) ⑦ Adjusting the sound quality of voice recording ⑦ -1 Setting Quality menu ⑦ -2 Setting Record Gain menu ⑦ -3 Setting VOR menu ⑦ -4 Setting AGC menu ⑧ Setting Speed Control menu ⑨ Deleting a File(s) 2. FM Radio Mode ① Summary of button usage ② Setting FM Band menu ③ Setting Seek Step menu 33 34 35 37 38 39 40 41 41 41 43 44 45 46 47 48 ④ Setting Auto Preset menu ⑤ Setting FM Sound menu 3. Menu ① Menu structure ② Setting Display menu ② -1 Setting Visualization menu ② -2 Setting Menu Language menu ② -3 Setting File Info menu ② -4 Setting Playing Time menu ② -5 Setting Scroll Speed menu ② -6 Setting Backlight Time menu ② -7 Setting Contrast menu ② -8 Setting Lyrics menu ③ Setting System menu ③ -1 Setting Resume menu ③ -2 Setting Fade in menu ③ -3 Checking Information ③ -4 Setting Sleep menu ③ -5 Setting Auto Power Off menu ③ -6 Setting Initial Setting menu 48 49 50 51 52 52 53 54 55 55 56 57 58 59 59 60 61 5. Formatting FY500 & Firmware Upgrade 1. Windows PC ① Formatting ② Saving the initial setting value ③ Upgrading the firmware 2. Upgrading the firmware in Macintosh PC 63 66 67 69 6. Miscellaneous 1. Product specification 2. Minimum PC specification requirement 3. FAQ 70 71 72 5 Table of Contents Table of Contents 4 1. Usage Precautions ① Usage environment and product safety ② User’s safety ③ Safe data storage 2. Product features 3. Product composition 4. Name of components and button usage ① Name of components ② How to use a stick 5. Composition of the LCD information 6. Listening to FM Radio ① Changing the channel ② Saving the channel ③ Selecting the saved channel 7. FM recording 8. Using the menu ① Using the menu ② Example 1. Introduction 1 Usage Precautions 1 Usage environment and product safety Refrain from using or storing the product at the places listed below. Be careful not to insert the foreign object inside the product. (e.g., clip, paper, water, beverage, and so on.) If the product surface is covered with the foreign object, clean it with soft cloth or towel. Do not use the chemical solution. 6 7 Outdoor in the winter time or place with low temperature below zero (Product operational temperature: 0℃ ~40℃ ) Place with humidity or possibility of flooding. 2 User’s safety Dusty area Inside a car or under the direct sunlight Place with much vibration ① Traffic safety - Please refrain from using this product in wearing a headset or earphone while riding on the bicycle, motorcycle, or car. There is a risk of a car accident. Additionally, it may violate the regional laws and regulations. - Reduce the headset or earphone volume when listening to music or FM while you’re walking. There is a risk of an accident. ② Protecting your hearing capability - Please refrain from listening to music for a long time. Medical care expertise point out the risk of impairing your hearing capability if you use the portable audio device for a long time. 3 Safe data storage Close to the strong magnetic materials Be careful not to apply strong shock. Do not disassemble, repair, or modify at your own discretion. ① MPIO bears no responsibility over data loss or damage that occurs during data transmission between the product and the computer. ② Make sure to back the important data saved in the product. Data stored in the product can be lost due to product breakdown, malfunction, or other reasons. (External shock or power failure). In this case, MPIO bears no responsibility. Please keep in mind this. ③ Hold the plug tightly when inserting/disconnecting the USB socket terminal to/from the PC. ④ Do not apply shock or shake the product while the product is connected to the PC. ⑤ You should back up the data saved in the product before requesting the after service. MPIO will consider that the customers have backed up their data before sending it to MPIO for after service. MPIO will not back up your data upon receiving the after service request. Additionally, MPIO will bear no responsibility over data loss during the service. 1. Introduction 1. Introduction Place with high temperature like a heater or heat generator. 2 Product features ※ Digital audio player with a simple design that everybody can use with ease. 8 ① Supports USB 2.0 high-speed data transmission. 3 Product composition Basic components Main unit Earphone USB cable Quick guide Product warranty (AAA) Battery Utility CD 9 ② Supports USB mass storage MP3 player can be used as a moveable disc. You can save and use the data conveniently at any time and place. ③ Supports playback of multiple formats and DRM-applied file Supports playback of MP3, WMA, and ASF format music file, as well as the WMA file purchased online that is applied with DRM (Digital Rights Management). � 차� � 차� � 차� ④ FM radio function Besides simple listening to the FM radio, channel saving and automatic preset functions are also provided. ⑤ Supports voice recording and FM recording Voice and FM can be recorded. Additional components (Additional components can differ depending on the sales area.) Case Arm band Neck string ⑥ Supports 7 EQ types and Live 3D Effect Supported equalizer types include Normal, Pop, Rock, Jazz, Classic, Vocal, and user-defined EQ mode that allows for your preferred equalizer setting. Additionally, Live 3D Effect provides various sound effects such as Pure Studio, Concert, Groove, and Dynamic Bass. ⑦ 16 hour-long continuous playback time Low power consumption design technology ensures 16 hour long continuous playback with a single alkaline battery (AAA). ⑧ Provides Real Player License Real Player program is bundled with this product, which enables to author MP3 file and use the music library. ! Actual production composition can be different from the images shown below, and can be changed without a prior notice. Please make enquiry about purchasing accessories to MPIO Service Center. 1. Introduction 1. Introduction Data can be transferred and used faster and more conveniently using USB 2.0 interface. 4 10 Name of components and button usage 1 Name of components 11 Neck string hole USB terminal Pressing the button: Push the stick to the vertical direction shortly or longer. Pushing upward: Push the stick upward shortly or longer. Pushing downward: Push the stick downward shortly or longer. Pushing to the left: Push the stick to the left shortly or longer. Pushing to the right: Push the stick to the right shortly or longer. LCD Play/Pause 5 Composition of the LCD information Stick (See “How to use a stick.”) Function button Recording button How to use a hold switch(HOLD) Current track/ All tracks Live 3D Effect Repeat Sleep EQ Hold Available battery capacity Folder name Music information If you set the hold function, other buttons will be disabled. (Even though you press other button, the player will not respond to it.) Push the HOLD switch to the arrow direction as shown in the figure to set the hold mode. Battery terminal Elapsed time File format Bit rate 1. Introduction 1. Introduction Earphone jack 2 How to use a stick 2. Before You Use 1 ③ First, select the model name (FY500) and then, click the [Next] button. ! 13 If you use Windows 98/98SE, you must install the operation software before connecting FY500 to your PC. ① Insert the CD included in the product into the CD-ROM in your computer. Then, software installation will be started automatically after a while, as shown in the below figure. If the installation program does not start automatically, select the CD-ROM drive in Windows Explorer and double click the CD-ROM drive. (See the below figure.) 2. Before You Use 2. Before You Use 12 Installing the operating software The Windows ME/2000/XP OS will recognize FY500 as a moveable disc even though you don’t install any program. Therefore, you can use FY500 using Windows Explorer once connected to your PC. Click!! ④ If you click the [Next] button, all selected (checked) utility programs will be installed in your PC. You may select the program you want only. However, the following three programs should be installed without exception. * Windows 98 Device Driver (For the Windows 98/98SE users.) * MPIO Utility * Windows Media Player Plugin Click!! Click!! ② Click the [Next] button. 2 ⑤ Click the [Install] button to install the selected utility programs one by one. 14 15 Connection using the USB cable ① Connect FY500 to the computer USB port using an USB cable as shown in the figure. - If you detaching the USB driver while installing the USB driver, your PC may malfunction. ② The USB driver will be installed with the message “Unknown device has been found.” The installation screen may not appear. Click!! ⑥ Click the [Finish] button to complete installation. You can see the MPIO Utility icon on your desktop. How to install USB driver and check complete installation Windows 98/ME: [Control Panel]→[System]→[Device Manager]→[Hard Disk Controller]→ MPIO FY500 USB Device Windows 2000/XP: ! For more details on the MPIO utility functions, see [Using MPIO Utility] in page 64. Click!! [Control Panel]→[System]→[Hardware]→[Device Manager]→[Disc Drive] →MPIO FY500 USB Device ! The images shown in the “How to install USB driver and check complete installation” can be different depending on user’s PC environment. ! If the USB driver is not installed properly in Windows 98/98SE, see [Installing an USB driver manually] in page 16, and try to install USB driver again. 2. Before You Use 2. Before You Use Connecting FY500 to the computer 3 ③ First, insert a provided Utility CD into the CD-ROM, and click the ‘CD-ROM Driver’ option and then, click the [Next] button. If FY500 cannot be connected to the PC running Windows 98/98SE ④ When the driver is successfully installed, the Installation Complete window will appear. Click the [Finish] button. Click!! Click!! ② Click the ‘Search for a suitable driver for the device (recommended)’ option and click the [Next] button. You can check whether the driver is installed properly using the following menus. Windows 98/ME: [Control Panel]→[System]→[Device Manager]→ [Hard Disk Controller]→MPIO FY500 USB Device ! Click!! The actual screen image can differ, depending on the user’s PC environment. 17 2. Before You Use ① Connect FY500 to the PC using an USB cable. Then, the ‘Add New Hardware Wizard’ window will appear. Click the [Next] button. 2. Before You Use 16 Installing an USB driver manually Saving music and data file 4 ! Illegal download and duplication of the MP3 file is prohibited by law. MPIO will bear any responsibility at all with regards to the copyright of the MP3 files. ① Press the ▶/■ button longer to turn the player on and connect it to the computer using an USB cable. ② You can check successful USB connection on the LCD window of the player. ⓑ Drag and drop: Select the data to save and drag it while holding down the left mouse button. Then, release the left mouse button (drop) it on the moveable disc. ⑥ Then, the selected data will be saved in a moveable disc. USB CONNECTED USB connection screen when the power is turned on. USB connection screen when the power is turned off. ③ Run [Windows Explorer] in your PC. ④ Your PC will recognize FY500 as a moveable disc. (You can check in My Computer) (Data is being copied.) (Dragging and dropping the data on the moveable disc after selecting the data to save [Drag & Drop]) ! The drive letter (D:) shown in the above captured image can be different from the one displayed on your PC. ! If you take out the USB cable during file download or upload, the player may malfunction ! ! The music file display order in Windows Explorer when you select a moveable disc can be different from the actual playback order. If you rename music files like 001 *** , 002 *** ... in Windows Explorer, you can play them back by the order of number in the file name. 19 2. Before You Use 2. Before You Use 18 ⑤ You can save/delete the data or create a folder using the same method with the normal hard disc in the PC. (Save the data using the method described in the section ⓐ or ⓑ.) ⓐ Copy and paste: Select the data to save and click the right mouse button. Then, select the Copy menu and use the Paste menu in the moveable disc. 5 It is recommended to comply with the following steps to save unplug FY500 from your PC. If you fail to comply with these instructions, please be noted that the data can be lost or the product can be broken down. ④ When the ‘Stop Hardware Device’ window appears, select the ‘USB Mass Storage Device’ and click the [OK] button. For Window 98/98SE PC users - There is no command for safe removal of FY500 from the PC. Therefore, you should allow sufficient lead time before removal, so that file and data transmission between FY500 and PC can be completed. Click!! ⑤ Unplug FY500 from the PC if it is ‘safely removed’. ① Move the mouse pointer over the ‘Unplug or Eject Hardware’ icon in the Notification area of the Taskbar and click the right mouse button. ② Select ‘Unplug or Eject Hardware’ popup message. 21 ! Click!! ③ When ‘Unplug or Eject Hardware’ window appears, select the ‘USB Mass Storage Device’ in the Hardware Devices list and then, click the [Stop] button. Click!! Windows 2000- When the ‘Safely removed hardware’ message appears, click the [OK] button and unplug FY500 from the PC. Windows XP- When the ‘Safely removed hardware’ message appears, unplug FY500 from the PC. 2. Before You Use 2. Before You Use 20 Unplugging FY500 from the PC 3. Learning Basic Usage 1 1 Music playback ① Push the battery cover to the arrow direction to open it. ! Do not apply excessive force to the cover. It can break down. ② Insert the battery with proper polarity +, – and close the battery cover. (1 AAA battery) 2 Playback screen ① Pause/Stop pausing Press the ▶/■ button shortly during playback to pause playback. To resume playback, press the ▶/■ button shortly again. ① Press the ▶/■ button longer. Then, the player will be turned on with a logo screen. Then, the file list screen will appear. File list screen ② Press the ▶/■ button longer to turn the player off. ! Press the ▶/■ button shortly to play back the selected music. Or, press the stick to the vertical direction to play back the selected music. File list screen Turning the player on/off Logo screen Listening to music If there is not key input (or operation) for longer than 3 minutes in the stop mode, the player will be automatically turned off. See (Auto Power Off) in page 61. PAUSE ② Playing back previous/next music direction during playback to play back the previous or Push the stick towards or next music. * If you push the stick towards direction 10 seconds after music file playback, the music file currently being played back will be started again from the beginning. * If you push the stick towards direction before 10 seconds after music file playback, the music file next to the current one will be played back. ③ Fast Forward (FF)/Rewind (REW) To start FF or REW, push the stick towards or direction during playback. 23 3. Learning Basic Usage 3. Learning Basic Usage 22 3 Inserting a battery ④ Controlling the sound volume direction to volume up or down. Push the stick towards 24 25 * Push the stick towards * Push the stick towards [Volume control during playback] [Volume control while listening to FM] ! The volume can be adjusted between 00 and 40. 2 Navigation ① Music navigation in the pause mode ⓐ Push the stick shortly to switch to the file list display mode from the pause screen mode. ⓑ Push the stick towards direction to move to the intended music file. 4 Cursor moves up/down direction, or to the vertical direction shortly to enter into the folder. direction to move out from the folder. Recording a voice ① Press the REC button shortly to start voice recording. ② Press the ▶/■ button shortly to pause recording. Press the ▶/■ button shortly again to resume recording. ③ Press the REC button shortly to stop voice recording. Time elapsed after recording Remaining recording time PAUSE Pause screen Cursor moves up/down ② Music navigation during playback ⓐ Push the stick shortly to switch from the playback screen to the file list display screen. ⓑ Push the stick towards direction to move to the intended music file. You cannot use the voice recording function during music file playback. Press the ▶/■ button shortly to pause music file playback first, in order to use the voice recording function. The voice recording file will be saved in the RECORD folder. ! * Voice recording file will be named sequentially VOICE001, VOICE002.... , and recorded/saved by that order with the WAV file format. * If there is no sufficient memory for voice recording, voice recording will be automatically stopped. 3. Learning Basic Usage 3. Learning Basic Usage Playback screen 5 FM Radio mode) 6 Listening to FM Radio Press the FUNC button longer in the pause or stop mode. The “FM Radio Mode” message will be displayed for a while and the FM radio mode will be engaged. Switching from playback mode to FM radio mode ① Press the FUNC button longer in the pause or stop mode. ② The “FM Radio Mode” message will be displayed for a while and the FM radio mode will be engaged. 27 1 Changing the channel (Scan mode) Select the receiving channel you prefer by pushing the stick towards while listening to the FM radio. ! When playback is stopped or direction, Channel movement unit will be set by the value setting in the [FM Radio] / [Seek Step] menu. Scan mode Mode change screen FM radio mode When playing back or paused. Auto Scan function (Searches for the broadcasting channel automatically) direction. Then, the player will automatically scan the channel that provides the or Push the stick towards broadcasting service. 2 Saving the channel Switching from FM radio mode to playback mode You can save the frequency you’re listening in the channel. ① Press the FUNC button longer while listening to the FM radio. ② The “Playback Mode” message will be displayed for a while and the playback mode will be engaged. ① Press the stick while listening to the station. Then, [Save channel] screen will appear. ② Push the stick towards direction to select the intended channel number. Then, push the stick direction to save the frequency in a channel. Or, press the stick shortly to save the towards channel. Save channel When listening to FM Mode change screen Playback mode (Music list screen) ! FM channel cannot be deleted. When listening to FM [Save Channel] screen 3. Learning Basic Usage 3. Learning Basic Usage 26 Switching a mode (Playback mode 28 Changing the frequency saved in a channel. ① Select the channel containing the frequency, and push the stick towards direction. ② When the “OVERWRITE?” message appears, push the stick towards direction and select “YES”. Save channel 7 Press the FUNC button shortly to switch the reception mode (Channel Channel mode icon Order of currently saved channel/Number of total channels Frequency of the currently selected channel Frequency of the next channel [SCAN MODE] * You can record the FM radio broadcasting you’re currently listening to. Scan). Mono or stereo Currently selected frequency Icon appears for the saved frequency FM recording ① Press the REC button to start FM recording. 3 Selecting the saved channel Number of saved channels 29 Save channel ③ Push the stick towards direction and execute overwriting. Or, you can press the stick shortly to start overwriting. Scan mode icon NO CHANNEL!! If no channel was saved, the ‘NO CHANNEL!!’ message will appear and the Scan mode will be maintained. 3. Learning Basic Usage 3. Learning Basic Usage Save channel ! [CHANNEL MODE] * Navigate through the saved channel by pushing the channel towards direction. or or * If you push the stick towards direction and hold the stick, the saved channel will be searched quickly. * SCAN mode ( ◀ SCAN ▶ ) or Press the stick towards direction to change the receiving frequency. * CHANNEL mode (|◀CH ▶|) or Press the stick towards direction to move to the saved channel only. FM recording screen Screen displayed when listening to FM ② Press the ▶/■ button shortly to pause recording. Press the ▶/■ button to resume recording. ③ Press the REC button to stop recording. The FM recording file will be saved in the RECORD folder. ! * The voice recording file will be recorded/saved by the order of FMRADIO001, FMRADIO002..., and recorded/saved by that order with the WAV file format. * If there is no sufficient memory for the recording file, recording will be automatically stopped 8 Example 1. Changing the setting value in the [ID 3 Tag Language] menu ① Entering into the menu: Push a stick longer to the vertical direction. * Press the stick longer vertically to enter into the menu. Main Menu Audio FM Radio Recording Main Menu Audio FM Radio Recording ② Selecting [Display] menu: Push a stick towards direction select the [Display] menu. ③ Entering into the [Display] menu: Push a stick towards direction to enter into the menu. Or, push a stick shortly to the vertical direction to enter into the menu. Entering into the menu screen 1 Using the menu Setting Selecting a menu Entering into the menu Changing the setting value Saving the modified setting value Moving back to the upper menu Canceling menu change Main Menu Display System Stick lever operation Push a stick towards direction to select a menu. direction to enter into the menu. Push a stick towards or, push a stick to the vertical direction to enter into the menu. Push a stick towards direction to change the setting value. ④ Selecting the [ID 3 Tag Language] menu: Push a stick towards direction to select the [ID 3 Tag Language] menu. ⑤ Entering into the [ID 3 Tag Language] menu: Push a stick towards direction to enter into the menu. Or, push a stick shortly to the vertical direction to enter into the menu. ⑥ Changing the setting value in the [ID 3 Tag Language] menu: Press the stick towards direction to select the alphabet of the target language, and enter into the language list by moving direction to select the target direction. Press the stick towards the 5 direction lever to the language. Display Visualization Menu Language ID3 Tag Language direction. Push a stick towards or, push a stick to the vertical direction to save the setting value. Push a stick towards Push a stick towards ! direction. direction. Use this function to exit from the menu without saving the modified setting value. Display Visualization Menu Language ID3 Tag Language Selecting ID3 tag display language ID3 Tag Language D E F Entering into the ID3 tag display language menu ID3 Tag Language J K L Selecting Korean language ⑦ Saving the modified setting value: Push a stick towards direction to save the setting value. Or, push a stick shortly to the vertical direction to save the setting value. Returns to the previous menu after saving the setting value. ! Push a stick towards direction to exit from the menu without saving the modified setting value. 31 3. Learning Basic Usage 3. Learning Basic Usage 30 2 Example Using the menu 4. Using Advanced Functions Example 2. Changing the setting value in [Auto Play] menu ① Entering into the menu: Push a stick longer to the vertical direction. 3. Learning Basic Usage 32 ② Selecting [System] menu: Push a stick towards direction select the [System] menu. ③ Entering into the [System] menu: Push a stick towards direction to enter into the menu. Or, push a stick shortly to the vertical direction to enter into the menu. ④ Selecting the [Auto Play] menu: Check the cursor on the [Auto Play] menu. ⑤ Entering into the [Auto Play] menu: Push a stick towards direction to enter into the menu. Or, push a stick shortly to the vertical direction to enter into the menu. Main Menu Display System System Auto Play Resume Fade In ⑥ Changing the setting value in the [Auto Play] menu: Push a stick towards direction to modify the setting value. ⑦ Saving the modified setting value: Push a stick towards direction to save the setting value. Or, push a stick shortly to the vertical direction to save the setting value. Returns to the previous menu after saving the setting value. Auto Play Off On ! direction to exit from the menu without saving Push a stick towards the modified setting value. Playback mode 1 Summary of button usage BUTTON Operation : Press the button shortly. ●▶ ●●●▶: Press the button longer than 1 second. Navigation during Playback Stop Mode Playback Mode Pause Mode Playback Pause Playback Play back the selected file Power off Power off Power off Power off Delete the selected file Change EQ setting value Change EQ setting value Switch to FM mode Switch to FM mode Switch to FM mode Voice recording Set Repeat Voice recording Exit from navigation mode Move cursor up Volume up Volume up Move cursor up Move cursor up fast Volume up fast Volume up fast Move cursor up fast Move cursor down Volume down Volume down Move cursor down Volume down fast Volume down fast Move cursor down fast Move cursor down fast Enter into folder Enter into navigation Enter into stop mode mode during playback Enter into folder Playback if file is selected. Enter into menu Enter into menu Enter into menu Enter into menu Enter into folder Move to next file Move to next file Enter into folder FF FF Exit from folder Move to previous file Move to previous file REW REW Exit from folder 33 4. Using Advanced Functions (Playback mode) Main Menu Audio FM Radio Recording 1 2 Changing the EQ setting value (EQ) Method 1 (Using FUNC button) ① Press the FUNC button during playback to activate EQ icon on the LCD. ② Press the FUNC button again to change the EQ icon. Whenever you press the FUNC button, the EQ icon will be changed by the following order. N(Normal) → P(Pop) → R(Rock) → J(Jazz) → C(Classic) → V(Vocal) Method 2 (Using EQ menu) ⑤ Push a stick towards direction to save the setting value. Or, push a stick shortly to the vertical direction to save the setting value. Returns to the previous menu after saving the setting value. 3 Setting User EQ menu *You can define your own EQ effect by adjusting the setting values in each frequency range, instead of the pre-defined EQ setting values. ① Push a stick longer to enter into the menu. ② Check the cursor in the [Audio] menu and push a stick towards direction to enter into the menu. Or, push a stick shortly to the vertical direction to enter into the menu. Main Menu Audio FM Radio Recording ① Push a stick longer to enter into the menu. ② Check the cursor in the [Audio] menu and push a stick towards direction to enter into the menu. Or, push a stick shortly to the vertical direction to enter into the menu. Main Menu Audio FM Radio Recording EQ Normal Pop Rock Audio EQ User EQ Live 3D Effect ③ Push a stick towards direction direction to select [User EQ] menu, and push it again towards to enter into the menu. Or, push a stick shortly to the vertical direction to enter into the menu. Audio EQ User EQ Live 3D Effect User EQ 35 4. Using Advanced Functions (Playback mode) 4. Using Advanced Functions (Playback mode) 34 ③ Check the cursor in the [EQ] menu and push a stick towards direction to enter into the menu. Or, push a stick shortly to the vertical direction to enter into the menu. ④ Push a stick towards direction to select the intended EQ item. ④ Push a stick towards to set the setting value for the first frequency range. Adjusting the setting value for each frequency range. direction to adjust the setting values. : Push a stick towards User EQ User EQ ⑤ Push a stick towards to move the cursor to the second frequency range. Then, push a to set the setting value for the second frequency range. Use the same stick towards method to adjust the setting values for the remaining frequency ranges. Movement between frequency ranges in the User EQ menu direction. or : Push a stick towards User EQ User EQ ⑥ When the setting values for each frequency range is adjusted, push a stick towards direction and move to OK icon to save the setting value. Returns to the previous menu after saving the setting value. ! Canceling User EQ settings direction and move to the EXIT icon to cancel user-defined EQ setting. Push a stick towards * You can enjoy music with new feeling if you apply the 3D sound effect during file playback. ① Push a stick longer to enter into the menu. ② Check the cursor in the [Audio] menu and push a stick towards direction to enter into the menu. Or, push a stick shortly to the vertical direction to enter into the menu. Main Menu Audio FM Radio Recording ③ Push a stick towards direction to select [Live 3D Effect] menu, and push it again towards direction to enter into the menu. Or, push a stick shortly to the vertical direction to enter into the menu. ④ Push a stick towards direction to select the sound effect. Audio EQ User EQ Live 3D Effect Live 3D Effect Dynamic Bass Off Q 설정 3D 음향 효과 ⑤ Push a stick towards direction to save the setting values. Or, push a stick shortly to the vertical direction to save the setting value. Returns to the previous menu after saving the setting value. 37 4. Using Advanced Functions (Playback mode) 4. Using Advanced Functions (Playback mode) 36 4 Setting Live 3D Effect menu 6 Sector repeat (A ↔ B) 5 Setting Repeat menu * You can adjust the playback order of the saved music files ① Push a stick longer to enter into the menu. ② Check the cursor in the [Audio] menu and push a stick towards direction to enter into the menu. Or, push a stick shortly to the vertical direction to enter into the menu. Main Menu Audio FM Radio Recording ③ Push a stick towards direction to select [Repeat] menu, and push it again towards direction to enter into the menu. Or, push a stick shortly to the vertical direction to enter into the menu. ④ Push a stick towards direction to select the playback order. (Normal Directory Normal Repeat One Directory Repeat Repeat All Random Directory Random) Audio Repeat 3D 음향 효과 Repeat Normal Directory Normal Repeat One ⑤ Push a stick towards direction to save the setting values. Or, push a stick shortly to the vertical direction to save the setting value. Returns to the previous menu after saving the setting value. * You can set the specific sector during file playback (A↔B) and make it to be repeated. ① Press the REC button shortly during playback to set the starting point (A) of repetitive playback. ② Press the REC button again to set the ending point (B) of repetitive playback. A↔B Repeat icon display A↔B Repeat setting time display * Pause/Stop pausing during sector repetition. Press the ▶/■ button during sector repetition to pause playback. Press the ▶/■ button again to resume repetitive playback. * Releasing repetitive playback Press the REC button while sector repetition is set in order to release the sector repetition setting. 39 4. Using Advanced Functions (Playback mode) 4. Using Advanced Functions (Playback mode) 38 7 Adjusting the sound quality of voice recording * This section describes the menu settings that affect sound quality and function of voice recording. 7-1) Setting Quality menu : In this menu, you can adjust the sound quality for voice recording and FM recording. ① Push a stick longer to enter into the menu. ② Push a stick towards direction to select [Recording] menu, and push it again towards direction to enter into the menu. Or, push a stick shortly to the vertical direction to enter into the menu. Main Menu Audio FM Radio Recording ③ Push a stick towards direction direction to select [Quality] menu, and push it again towards to enter into the menu. Or, push a stick shortly to the vertical direction to enter into the menu. ④ Push a stick towards direction to select the intended recording sound quality. Quality Low Highin Recording Quality Record Gain VOR Sample rate Bit rate LOW 11.025kHz 45kbps HIGH 22.05kHz 89kbps ⑤ Push a stick towards direction to save the setting values. Or, push a stick shortly to the vertical direction to save the setting value. Returns to the previous menu after saving the setting value. ③ Push a stick towards direction to select [Record Gain] menu, and push it again towards direction to enter into the menu. Or, push a stick shortly to the vertical direction to enter into the menu. ④ Push a stick towards direction to select the amplification degree of the voice signal and FM radio signal. Recording Quality Record Gain VOR Record Gain Low Middle High ⑤ Push a stick towards direction to save the setting values. Or, push a stick shortly to the vertical direction to save the setting value. Returns to the previous menu after saving the setting value. 7-3) Setting VOR menu : The Voice Operation Recording (VOR) function continues recording only when the recording signal is detected, and stops temporarily if no recording sound is detected. When the VOR function is engaged, you can select the base value of the signal size so that recording can be decided depending on the recording signal size transferred by the internal microphone. 41 4. Using Advanced Functions (Playback mode) 4. Using Advanced Functions (Playback mode) 40 7-2) Setting Record Gain menu : Adjusts voice and FM signal amplification. ① Push a stick longer to enter into the menu. ② Push a stick towards direction to select [Recording] menu, and push it again towards direction to enter into the menu. Or, push a stick shortly to the vertical direction to enter into the menu. Main Menu Audio FM Radio Recording Main Menu Audio FM Radio Recording ③ Push a stick towards direction direction to select [VOR] menu, and push it again towards to enter into the menu. Or, push a stick shortly to the vertical direction to enter into the menu. ④ Push a stick towards direction to select the base signal size that will decide recording. Recording Quality Record Gain VOR Off VOR Off Library Office VOR function is disabled. Library Recording will be initiated by the small sound signal. Office Recording will be initiated by the middle sound signal. Park Recording will be initiated by the large sound signal. ⑤ Push a stick towards direction to save the setting values. Or, push a stick shortly to the vertical direction to save the setting value. Returns to the previous menu after saving the setting value. 7-4) Setting AGC menu : The Automatic Gain Control (AGC) function amplifies the small sound signal and reduces the large sound signal down to the proper value, depending on the recording sound signal size that is transferred through the internal microphone. ① Push a stick longer to enter into the menu ② Push a stick towards direction to select [Recording] menu, and push it again towards direction to enter into the menu. Or, push a stick shortly to the vertical direction to enter into the menu. Main Menu Audio FM Radio Recording ③ Push a stick towards direction direction to select [AGC] menu, and push it again towards to enter into the menu. Or, push a stick shortly to the vertical direction to enter into the menu. ④ Push a stick towards direction to decide whether the AGC function will be used or not. Recording AGC AGC Off On ⑤ Push a stick towards direction to save the setting values. Or, push a stick shortly to the vertical direction to save the setting value. Returns to the previous menu after saving the setting value. 43 4. Using Advanced Functions (Playback mode) 4. Using Advanced Functions (Playback mode) 42 ① Push a stick longer to enter into the menu. ② Push a stick towards direction to select [Recording] menu, and push it again towards direction to enter into the menu. Or, push a stick shortly to the vertical direction to enter into the menu. 8 Setting Speed Control menu This function is applicable for the MP3 file having lower than 22.05KHz sampling rate. * You can adjust speed of the file playback, which can be useful for foreign language study. ① Push a stick longer to enter into the menu. ② Push a stick towards direction to select [System] menu, and push it again towards to enter into the menu. Or, push a stick shortly to the vertical direction to enter into the menu. Main Menu Display System ! You cannot delete a music file during playback. To delete a music file, stop music playback first. 45 ① If the music file is being played back, press the ▶/■ button to pause it. PAUSE Pause screen Playback screen ③ Push a stick towards direction to select [Speed control] menu, and push it again towards direction to enter into the menu. Or, push a stick shortly to the vertical direction to enter into the menu. ④ Push a stick towards direction to select the intended speed. The playback speed can be adjusted by 9 steps. System Initial setting Speed control 9 Deleting a File(s) Speed control 100% Slow Default value Fast 50%, 63%, 75%, 88% 100% 125%, 150%, 175%, 200% ⑤ Push a stick towards direction to save the setting values. Or, push a stick shortly to the vertical direction to save the setting value. Returns to the previous menu after saving the setting value. ② Push a stick shortly in the pause mode to enter into the stop mode. Stop screen ③ Push a stick towards direction to select the file to delete, and press the FUNC button. ④ When the [Delete File] message appears, push a stick towards direction and select YES. direction to delete the selected file. Or, you can delete the file by pushing a Then push a stick stick shortly. DELETE FILE ARE YOU SURE? NO YES Delete File window DELETE FILE ARE YOU SURE? NO YES Select [Yes] – deletes a file. 4.목 Using 차 Advanced Functions (Playback mode) 4. Using Advanced Functions (Playback mode) 44 ! 2 FM Radio Mode 1 Summary of button Button Operation : Press the button shortly. ●▶ ●●●▶: Press the button longer than 1 second. Scan Mode Power off Channel Mode In this menu, you can set the FM frequency range to receive. ① Push a stick longer to enter into the menu. ② Push a stick towards direction to select the [FM Radio] menu, and push it again towards direction to enter into the menu. Or, push a stick shortly to the vertical direction to enter into the menu. Power off Switch to channel mode Switch to scan mode Switch to playback mode Switch to playback mode FM recording FM recording Volume up Volume up Volume up fast Volume up fast Volume down Volume down Volume down fast Volume down fast Main Menu Audio FM Radio Recording ③ Push a stick towards direction to select [FM Band] menu, and push it again towards direction to enter into the menu. Or, push a stick shortly to the vertical direction to enter into the menu. ④ Push a stick towards direction to select the intended reception frequency range. FM Radio Save channel FM Band Sound FM Band US/EU/KR/CN Worldwide Japan The frequency range for each option is as follows. Save frequency Enter into menu Enter into menu Move to next frequency Move to next channel Automatic seeking for the frequency that can be received Move to next channel fast Move to previous frequency Move to previous channel Automatic seeking for the frequency that can be received Move to previous channel fast US/EU/KR/CN 87.5MHz ~ 108MHz World Wide 76MHz ~ 108MHz Japan 76MHz ~ 92MHz ⑤ Push a stick towards direction to save the selected value. Or, push a stick shortly to the vertical direction to save the setting value. Returns to the previous menu after saving the setting value. 47 4. Using Advanced Functions (FM Radio Mode) 4. Using Advanced Functions (FM Radio Mode) 46 2 Setting FM Band menu 3 Setting Seek Step menu Main Menu Audio FM Radio Recording In this menu, you can set the frequency seek step when searching for the frequency range, using a stick. ③ Push a stick towards direction to select [Seek Step] menu, and push it again towards direction to enter into the menu. Or, push a stick shortly to the vertical direction to enter into the menu. ④ Push a stick towards direction to select the intended frequency movement unit. FM Radio Auto Preset Seek Step Seek Step 50kHZ 100kHz ⑤ Push a stick towards direction to save the setting values. Or, push a stick shortly to the vertical direction to save the setting value. Returns to the previous menu after saving the setting value. 4 Setting Auto Preset menu When this function is engaged, the play automatically deletes the saved channel and saves the frequency that can be automatically received in a channel. You can save up to 20 frequencies in the channel. ① Push a stick longer to enter into the menu. ② Push a stick towards direction to select the [FM Radio] menu, and push it again towards direction to enter into the menu. Or, push a stick shortly to the vertical direction to enter into the menu. ③ Push a stick towards direction to select [Auto Preset] menu, and push it again towards direction to enter into the menu. Or, push a stick shortly to the vertical direction to enter into the menu. ④ Push a stick towards direction to select whether automatic channel saving will be used or not. FM Radio Auto Preset Seek Step Auto Preset No Yes ⑤ Press the stick towards direction or shortly press the stick vertically to save the setting value. Returns to the previous menu after saving the setting value. 5 Setting FM Sound menu In this menu, you can select the sound for the FM radio that you’re currently listening to. ① Push a stick longer to enter into the menu. ② Push a stick towards direction to select the [FM Radio] menu, and push it again towards direction to enter into the menu. Or, push a stick shortly to the vertical direction to enter into the menu. Main Menu Audio FM Radio Recording ③ Push a stick towards direction to select [Sound] menu, and push it again towards direction to enter into the menu. Or, push a stick shortly to the vertical direction to enter into the menu. 49 4. Using Advanced Functions (FM Radio Mode) 4. Using Advanced Functions (FM Radio Mode) 48 ① Push a stick longer to enter into the menu. ② Push a stick towards direction to select the [FM Radio] menu, and push it again towards direction to enter into the menu. Or, push a stick shortly to the vertical direction to enter into the menu. Main Menu Audio FM Radio Recording FM Radio Save channel FM Band Sound Sound Stereo Mono 2-1) Setting Visualization menu : Using this menu, you can set the configuration of the information displayed at the bottom of the LCD. ⑤ Push a stick towards direction to save the setting values. Or, push a stick shortly to the vertical direction to save the setting value. Returns to the previous menu after saving the setting value. 3 ① Push a stick to the vertical direction to enter into the menu. ② Push a stick towards direction to select the [Display] menu. Then, push it towards direction to enter into the menu. Or, push a stick shortly to the vertical direction to enter into the menu. Main Menu Display Sysytemo Menu 1 Menu structure MainMenu Audio FM Radio Recording Display System Auto Play EQ Save channel Quality Visualization User EQ FM Band Record Gain Menu Language Live 3D Effect Sound VOR ID3 Tag Language Repeat Auto Preset AGC Seek Step (See page 32) Resume (See page 31) Fade In File Info Information Playing Time Sleep Scroll Speed Auto Power Off Backlight Time Initial setting Contrast Speed control Lyrics (See page 44) ③ Check the cursor in the [Visualization] menu and push a stick towards direction to enter into the menu. Or, push a stick shortly to the vertical direction to enter into the menu. ④ Push a stick towards direction to select the intended visualization effect, and push it towards direction to save the setting value. Or, push a stick shortly to the vertical direction to save the setting value. Returns to the previous menu after saving the setting value. Display Visualization Menu Language ID3 Tag Language File property display Visualization Status File info Progress bar display 51 4. Using Advanced Functions (Menu) 4. Using Advanced Functions (Menu) 50 2 Setting Display menu direction to select the intended FM sound. ④ Push a stick towards Main Menu Display Sysytemo ③ Check the cursor in the [Menu Language] menu and push a stick towards direction to enter into the menu. Or, push a stick shortly to the vertical direction to enter into the menu. ④ Push a stick towards direction to select the language, and push it shortly to the vertical direction to save the setting value. Returns to the previous menu after saving the setting value. Display Visualization Menu Language ID3 Tag Language Menu Language English KoreanI Simple Chinese 2-3) Setting File Info menu : You can select the information on the music file that will be displayed on the LCD. ① Push a stick to the vertical direction to enter into the menu. ② Push a stick towards direction to select the [Display] menu. Then, push it towards direction to enter into the menu. Or, push a stick shortly to the vertical direction to enter into the menu. Main Menu Display Sysytemo ③ Check the cursor in the [File Info] menu and push a stick towards direction to enter into the menu. Or, push a stick shortly to the vertical direction to enter into the menu. ④ Push a stick towards direction to select the method of music file information display, and push direction to save the setting value. Or, push a stick shortly to the vertical direction to it towards save the setting value. Returns to the previous menu after saving the setting value. Display File Info Playing Time Scroll Speed File Info Tag Info File info 2-4) Setting Playing Time menu : You can select the method of playing time display on the LCD. ① Push a stick to the vertical direction to enter into the menu. ② Push a stick towards direction to select the [Display] menu. Then, push it towards direction to enter into the menu. Or, push a stick shortly to the vertical direction to enter into the menu. Main Menu Display Sysytemo ③ Check the cursor in the [Playing Time] menu and push a stick towards direction to enter into the menu. Or, push a stick shortly to the vertical direction to enter into the menu. 53 4. Using Advanced Functions (Menu) 4. Using Advanced Functions (Menu) 52 2-2) Setting Menu Language menu : You can select the language to display the menu – English, Korean, Japanese, Simplified Chinese, or Traditional Chinese. ① Push a stick to the vertical direction to enter into the menu. direction ② Push a stick towards direction to select the [Display] menu. Then, push it towards to enter into the menu. Or, push a stick shortly to the vertical direction to enter into the menu. Display File Info Playing Time Scroll Speed Playing Time Running time Remaining time 2-6) Setting Backlight Time menu : You can adjust the LCD backlight time. ① Push a stick to the vertical direction to enter into the menu. ② Push a stick towards direction to select the [Display] menu. Then, push it towards direction to enter into the menu. Or, push a stick shortly to the vertical direction to enter into the menu. Main Menu Display Sysytemo 2-5) Setting Scroll Speed menu : You can adjust the scrolling speed of the music file information on the LCD. ① Push a stick to the vertical direction to enter into the menu. ② Push a stick towards direction to select the [Display] menu. Then, push it towards direction to enter into the menu. Or, push a stick shortly to the vertical direction to enter into the menu. Main Menu Display Sysytemo ③ Push a stick towards direction to select the [Scroll Speed] menu. Then, push it towards direction to enter into the menu. Or, push a stick shortly to the vertical direction to enter into the menu. ④ Push a stick towards direction to select the speed of the text flow, and push it towards direction to save the setting value. Or, push a stick shortly to the vertical direction to save the setting value. Returns to the previous menu after saving the setting value. Display File Info Playing Time Scroll Speed Scroll Speed ③ Check the cursor in the [Backlight Time] menu and push a stick towards direction to enter into the menu. Or, push a stick shortly to the vertical direction to enter into the menu. ④ Push a stick towards direction to select the LCD backlight time, and push it towards direction to save the setting value. Or, push a stick shortly to the vertical direction to save the setting value. Returns to the previous menu after saving the setting value. Display Backlight Time Contrast Lyrics Backlight Time 2-7) Setting Contrast menu : You can adjust the LCD contrast. ① Push a stick to the vertical direction to enter into the menu. ② Push a stick towards direction to select the [Display] menu. Then, push it towards direction to enter into the menu. Or, push a stick shortly to the vertical direction to enter into the menu. 55 4. Using Advanced Functions (Menu) 4. Using Advanced Functions (Menu) 54 ④ Push a stick towards direction to select the method of playing time display, and push it direction to save the setting value. Or, push a stick shortly to the vertical direction to towards save the setting value. Returns to the previous menu after saving the setting value. Main Menu Display Sysytemo ③ Check the cursor in the [Contrast] menu and push a stick towards direction to enter into the menu. Or, push a stick shortly to the vertical direction to enter into the menu. direction ④ Push a stick towards direction to select the LCD contrast, and push it towards to save the setting value. Or, push a stick shortly to the vertical direction to save the setting value. Returns to the previous menu after saving the setting value. Display Backlight Time Contrast Lyrics Contrast Level3 2-8) Setting Lyrics menu : It may not be supported, depending on the area. You can decide whether the lyric will be displayed on the LCD for the MP3 file containing the lyric information. ① Push a stick to the vertical direction to enter into the menu. ② Push a stick towards direction to select the [Display] menu. Then, push it towards direction to enter into the menu. Or, push a stick shortly to the vertical direction to enter into the menu. Main Menu Display Sysytemo Display Backlight Time Contrast Lyrics Lyrics On Off 3 Setting System menu 3-1) Setting Resume menu : You can decide whether playback will be started from the beginning or resumed from the point where the file was played back last, when the player is turned on. ① Push a stick to the vertical direction to enter into the menu. ② Push a stick towards direction to select the [System] menu. Then, push it towards direction to enter into the menu. Or, push a stick shortly to the vertical direction to enter into the menu. Main Menu Display System ③ Check the cursor in the [Resume] menu and push a stick towards direction to enter into the menu. Or, push a stick shortly to the vertical direction to enter into the menu. 57 4. Using Advanced Functions (Menu) 4. Using Advanced Functions (Menu) 56 ③ Check the cursor in the [Lyrics] menu and push a stick towards direction to enter into the menu. Or, push a stick shortly to the vertical direction to enter into the menu. ④ Check the cursor in the direction to select whether the lyric will be displayed or not, and push direction to save the setting value. Or, push a stick shortly to the vertical direction to it towards save the setting value. Returns to the previous menu after saving the setting value. ④ Push a stick towards direction direction to set the resuming function, and push it towards to save the setting value. Or, push a stick shortly to the vertical direction to save the setting value. Returns to the previous menu after saving the setting value. System Auto Play Resume Fade In Resume Off On ① Push a stick to the vertical direction to enter into the menu. ② Push a stick towards direction to select the [System] menu. Then, push it towards direction to enter into the menu. Or, push a stick shortly to the vertical direction to enter into the menu. Main Menu Display System 3-2) Setting Fade in menu : Using this function, you can make the introduction part of music to be increased steadily, so that the neighboring persons are not surprised by the loud sound. ① Push a stick to the vertical direction to enter into the menu. ② Push a stick towards direction to select the [System] menu. Then, push it towards direction to enter into the menu. Or, push a stick shortly to the vertical direction to enter into the menu. Main Menu Display System ③ Check the cursor in the [Fade In] menu and push a stick towards direction to enter into the menu. Or, push a stick shortly to the vertical direction to enter into the menu. direction ④ Push a stick towards direction to set the fade in function, and push it towards to save the setting value. Or, push a stick shortly to the vertical direction to save the setting value. Returns to the previous menu after saving the setting value. System Auto Play Resume Fade In Fade In Off On ③ Push a stick towards direction to select the [Information] menu, and push it towards direction to check the information on the player. Or, push a stick to the vertical direction to check the player information. System Information Sleep Auto Power Off Information 3-4) Setting Sleep menu : You can set the time period that the player is automatically turned off, if the certain period of time elapse after listening to music or FM. ① Push a stick to the vertical direction to enter into the menu. ② Push a stick towards direction to select the [System] menu. Then, push it towards direction to enter into the menu. Or, push a stick shortly to the vertical direction to enter into the menu. 59 4. Using Advanced Functions (Menu) 4. Using Advanced Functions (Menu) 58 3-3) Checking Information : In this menu, you can display various player information such as firmware version, memory size in use, and total memory size. Main Menu Display System ③ Check the cursor in the [Sleep] menu and push a stick towards direction to enter into the menu. Or, push a stick shortly to the vertical direction to enter into the menu. direction to ④ Push a stick towards direction to select the sleep time, and push it towards save the setting value. Or, push a stick shortly to the vertical direction to save the setting value. Returns to the previous menu after saving the setting value. System Information Sleep Auto Power Off Sleep 3-5) Setting Auto Power Off menu : Once this function is selected, the player will be automatically turned off if it is not used for a certain period of time in the pause mode. ① Push a stick to the vertical direction to enter into the menu. ② Push a stick towards direction to select the [System] menu. Then, push it towards direction to enter into the menu. Or, push a stick shortly to the vertical direction to enter into the menu. Main Menu Display System System Information Sleep Auto Power Off Auto Power Off 3-6) Setting Initial Setting menu : Once this function is engaged, all user-defined menu setting values will be cleared and the default menu setting values will be restored. ① Push a stick to the vertical direction to enter into the menu. ② Push a stick towards direction to select the [System] menu. Then, push it towards direction to enter into the menu. Or, push a stick shortly to the vertical direction to enter into the menu. Main Menu Display System ③ Check the cursor in the [Initial Setting] menu and push a stick towards direction to enter into the menu. Or, push a stick shortly to the vertical direction to enter into the menu. 61 4. Using Advanced Functions (Menu) 4. Using Advanced Functions (Menu) 60 ③ Check the cursor in the [Auto Power Off] menu and push a stick towards direction to enter into the menu. Or, push a stick shortly to the vertical direction to enter into the menu. ④ Push a stick towards direction to select automatic power-off time, and push it towards direction to save the setting value. Or, push a stick shortly to the vertical direction to save the setting value. Returns to the previous menu after saving the setting value. 5. Formatting FY500 & Firmware Upgrade ④ Push a stick towards direction to select the initialization status, and push it towards direction to save the setting value. Or, push a stick shortly to the vertical direction to save the setting value. Returns to the previous menu after saving the setting value. System Initial setting Speed control 놀람 방지 설정 Initial setting No Yes Windows PC 2 Formatting 63 Method 1 (Using MPIO utility) ① Turn the player on and connect it to the PC using an USB cable. ② Double click the “MPIO Utility” icon on the desktop. ④ Click the [OK] button. ③ Click the [Format & Config] button. Click!! Click!! ⑤ Click the [Start] button. ⑥ Click the [OK] button. Click!! Click!! 5. Formatting FY500 & Firmware Upgrade 4. Using Advanced Functions (Menu) 62 1 ⑦ If formatting is complete, click the [OK] button. ⑧ Click the [Close] button. Method 2 (Using Windows Format command) * It is recommended to use the MPIO utility to format the player memory. 5. Formatting FY500 & Firmware Upgrade Click!! Click!! ① Select the moveable disc and click the right mouse button. Then, select the Format menu. ② Click the [Start] button. ⑨ If you click the [OK] button, Format & Config (formatting and initialization) will be complete. Unplug the player from the PC. Click!! Click!! ! * The captured images used in “Using MPIO utility” section can be different, depending on the user’s PC environment. * MPIO utility does not support the MAC OS. * To see how to install MPIO utility, refer to [Installing the operating software] in page 12. ! * If the player memory is formatted, all current menu settings will be initialized. * Be noted that the player memory cannot be restored again, if formatted. 65 5. Formatting FY500 & Firmware Upgrade * If you have to format the player memory using the Windows “Format” command, select the file format type as FAT (FAT16). To use the player normally after formatting, you should restore the default values using MPIO utility. For more details, see [Setup Config] in page 67. * The captured images shown in the “Using Windows Format command” can differ, depending on the user’s PC environment. ! 64 3 Upgrading the firmware 2 Saving the initial setting value ! ① Turn the player on and connect it to the PC using an USB cable. ② Double click the “MPIO Utility” icon on the desktop. ④ Click the [OK] button. ③ Click the [Setup Config] button. Click!! ⑤ Click the [OK] button to complete Setup Config (Restores the default settings). Unplug the player from the PC. Click!! * To see how to install MPIO utility, refer to [Installing the operating software] in page 12. ① Download the latest firmware from the MPIO web site, and uncompress and save it in the PC. (www.mpio.com) ② Turn the player on and connect it to the PC using an USB cable. ③ Double click the “MPIO Utility” icon on the desktop. ⑤ Click the [OK] button. ④ Click the [F/W Upgrade] button. Click!! Click!! ⑥ Select the ‘Upgrade.FY500.dwu’ file from the [Browse File] window and click the [Open] button. The firmware upgrade file is compressed (zip file), which is provided by the MPIO homepage. When you uncompress the file, the revision details (.txt) and Upgrade.FY500.dwu file can be found. Click!! Click!! 67 5. Formatting FY500 & Firmware Upgrade 5. Formatting FY500 & Firmware Upgrade 66 * If the player memory is formatted using Windows Format command (FAT or FAT16), the default setting values of the player should be restored using the Setup Config function of MPIO utility. * To see how to install MPIO utility, refer to [Installing the operating software] in page 12. ⑦ Click the [OK] button. 2 Upgrading the firmware in Macintosh PC It is not recommended to format FY500 memory in Macintosh PC. If you use the Macintosh PC and want to format the memory, contact our service center. 68 At least 10MB free memory space in FY500 is required for firmware upgrade. ⑧ If you unplug the player from the PC, the play will automatically start firmware upgrade. You can check firmware upgrade status on the LCD as shown below. ① Download the latest firmware for Macintosh from the MPIO web site, and uncompress and save it in the PC. (www.mpio.com) The firmware upgrade file for Macintosh is compressed by Stuffit. When you uncompress the file, the revision details (.txt) and the firmware upgrade file (Image.dat, Player.rom, and Upgrade.axf) can be found. ② Turn the player on and connect it to the PC using an USB cable. ③ Save the firmware upgrade file (Image.dat, Player.rom, and Upgrade.axf) in FY500. ④ Unplug FY500 from the PC. ⑤ If you unplug the player from the PC, the play will automatically start firmware upgrade. You can check firmware upgrade status on the LCD as shown below. Once firmware upgrade is complete, the player will be automatically turned off. ! If you apply external shock or the battery is low while the player is upgrading the firmware, it can cause product breakdown or malfunction. Please keep in mind this. Once firmware upgrade is complete, the player will be automatically turned off. ! If you apply external shock or the battery is low while the player is upgrading the firmware, it can cause product breakdown or malfunction. Please keep in mind this. 5. Formatting FY500 & Firmware Upgrade 5. Formatting FY500 & Firmware Upgrade ! Click!! 69 6. Miscellaneous 1 Product specification Dimensions Weight 70 FM Radio Language Battery ! 128×64 Full Graphic LCD Memory 128MB / 256MB / 512MB / 1GB MP3, WMA(WMA DRM), ASF ADPCM (Mono) Frequency Range 20Hz ~ 20kHz S/N ratio 95dB Output Power 15mW/Channl(EU: 6mW/Channel) Frequency Band 76 ~ 108MHz S/N ratio 45dB FM recording ADPCM (Mono) Menu language English, Korean, Cantonese, Mandarin, Japanese ID3 tag language 55 languages PC Interface USB 2.0 (High Speed) � PC Interface 32g Decoding Voice recording Audio 26(W) × 67(H) × 20(D)/mm Supported OS Windows 98 / SE / ME / 2000 / XP Mac OS version 9.2 or later Mass Storage Class Supported Type AAA×1 Battery life Up to 14 hours (based on 128kbps MP3 file) Operating temperature 0℃ ~ 40℃ * The memory capacity that can be actually used can be reduced by the logical file system, regardless of the product’s memory capacity. * The total playback time can differ, depending on the usage method and menu setting. * Data transmission speed can differ, depending on the user’s PC specification. * Connection to the PC using the extension code like an USB hub cannot be guaranteed. Minimum PC specification requirement ① Windows - Main board: USB Interface 2.0 should be supported, and mounted with standard devices and CD-ROM drive - CPU: Pentium 133MHz or faster. - Memory: 64MB or more - Free HDD space: 20MB or more - Supported OS: Windows 98/98SE/ME/2000/XP ② Macintosh - Main board: USB Interface 2.0 should be supported, and mounted with standard devices and CD-ROM drive EX) Power Mac G3(Blue&White) / G4 / G4 Cube, iMac / iBook, Powerbook, Powerbook G4 - Free HDD space: 20MB or more - Supported OS: Mac OS version 9.2 or later. ! Connection to the PC using the extension cable or USB hub cannot be guaranteed. 71 6. Miscellaneous 6.Miscellaneous Display (LCD) 2 FAQ 3 72 ! Check the following items first if you think the product is malfunctioning. If the battery is completely discharged (flat), the player cannot be turned on. Replace with battery with new one and turn the player on. I cannot hear any sound or, I can hear noise. Check the sound volume. Your player may be influenced by the neighboring electrical device. If the music file is damaged, noise or sound interruption can occur. Letters on the LCD look broken. Set the language to English in the [ID3 Tag Language] menu (See page 31) first. Then, set the file name using the [Display]→[File info] menu (See page 53). If the problem still cannot be resolved, contact our customer service center. However, some special fonts/languages may still look broken. I can see that some memory is used but no saved file is found. Execute the [Format & Config] command using MPIO utility. (See page 64.) If you run the above command, all files in the product will be removed. You can check the data file only when the player is connected to the PC. Your player may be influenced by the neighboring electrical device. Secure enough distance. The earphone plays a role of an antenna when listening to the radio. Therefore, reception sensitivity can be deteriorated if you don’t use an earphone. Of, FM reception may be poor in some area. Please understand that. I cannot download the file from the PC Connection to the PC using the extension cable or USB hub cannot be guaranteed. Make sure to use the USB cable provided with the product as an accessory when connecting the player to the PC. 6. Miscellaneous 6.Miscellaneous I cannot turn on the player. 73 Letters on the LCD look broken. I can hear noise and cannot set the broadcasting channel when I listen to the radio.