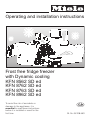
1
Operating and installation instructions
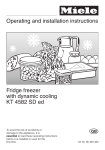
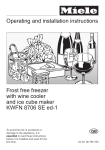
Frost free fridge freezer
with Dynamic cooling
KFN 8562 SD ed
KFN 8762 SD ed
KFN 8763 SD ed
KFN 8962 SD ed
To avoid the risk of accidents or
damage to the appliance, it is
essential to read these instructions
before it is installed or used for the
first time.
G
M.-Nr. 06 208 653
Contents
Description of the appliance . . . . . . . . . . . . . . . . . . . . . . . . . . . . . . . . . . . . . . . . . 4
Miele{home . . . . . . . . . . . . . . . . . . . . . . . . . . . . . . . . . . . . . . . . . . . . . . . . . . . . . . 6
Optional accessory . . . . . . . . . . . . . . . . . . . . . . . . . . . . . . . . . . . . . . . . . . . . . . . . . 6
Caring for the environment . . . . . . . . . . . . . . . . . . . . . . . . . . . . . . . . . . . . . . . . . . 7
Warning and Safety instructions . . . . . . . . . . . . . . . . . . . . . . . . . . . . . . . . . . . . . 8
How to save energy . . . . . . . . . . . . . . . . . . . . . . . . . . . . . . . . . . . . . . . . . . . . . . . 12
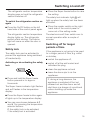
Switching on and off . . . . . . . . . . . . . . . . . . . . . . . . . . . . . . . . . . . . . . . . . . . . . . 14
To switch the refrigerator section off separately . . . . . . . . . . . . . . . . . . . . . . . . 14
Safety lock . . . . . . . . . . . . . . . . . . . . . . . . . . . . . . . . . . . . . . . . . . . . . . . . . . . . . . . 15
Switching off for longer periods of time . . . . . . . . . . . . . . . . . . . . . . . . . . . . . . . . . 15
The correct temperature . . . . . . . . . . . . . . . . . . . . . . . . . . . . . . . . . . . . . . . . . . . 16
Temperature selection in the refrigerator / freezer section . . . . . . . . . . . . . . . . . . 16
Temperature range . . . . . . . . . . . . . . . . . . . . . . . . . . . . . . . . . . . . . . . . . . . . . . 17
Temperature displays. . . . . . . . . . . . . . . . . . . . . . . . . . . . . . . . . . . . . . . . . . . . . . . 17
Temperature display brightness . . . . . . . . . . . . . . . . . . . . . . . . . . . . . . . . . . . . 18
Alarm . . . . . . . . . . . . . . . . . . . . . . . . . . . . . . . . . . . . . . . . . . . . . . . . . . . . . . . . . . . 19
Door alarm . . . . . . . . . . . . . . . . . . . . . . . . . . . . . . . . . . . . . . . . . . . . . . . . . . . . . . . 19
Switching on the alarm system . . . . . . . . . . . . . . . . . . . . . . . . . . . . . . . . . . . . . . . 19
Switching the alarm off early . . . . . . . . . . . . . . . . . . . . . . . . . . . . . . . . . . . . . . . . . 19
Using Super cool, Super freeze and Dynamic cooling. . . . . . . . . . . . . . . . . . . 20
Super cool . . . . . . . . . . . . . . . . . . . . . . . . . . . . . . . . . . . . . . . . . . . . . . . . . . . . . . . 20
Freezing fresh food . . . . . . . . . . . . . . . . . . . . . . . . . . . . . . . . . . . . . . . . . . . . . . . . 20
Super freeze. . . . . . . . . . . . . . . . . . . . . . . . . . . . . . . . . . . . . . . . . . . . . . . . . . . . . . 21
Dynamic cooling m . . . . . . . . . . . . . . . . . . . . . . . . . . . . . . . . . . . . . . . . . . . . . . . 22
Using the refrigerator efficiently. . . . . . . . . . . . . . . . . . . . . . . . . . . . . . . . . . . . . 23
Different storage zones . . . . . . . . . . . . . . . . . . . . . . . . . . . . . . . . . . . . . . . . . . . . . 23
Food which should not be stored in a refrigerator. . . . . . . . . . . . . . . . . . . . . . . . . 23
Storing food correctly. . . . . . . . . . . . . . . . . . . . . . . . . . . . . . . . . . . . . . . . . . . . . . . 24
Unpacked meats and vegetables . . . . . . . . . . . . . . . . . . . . . . . . . . . . . . . . . . 24
Protein rich foods . . . . . . . . . . . . . . . . . . . . . . . . . . . . . . . . . . . . . . . . . . . . . . . 24
Meat . . . . . . . . . . . . . . . . . . . . . . . . . . . . . . . . . . . . . . . . . . . . . . . . . . . . . . . . . 24
Adjusting the interior fittings . . . . . . . . . . . . . . . . . . . . . . . . . . . . . . . . . . . . . . . 25
Contents
Freezing and storing food . . . . . . . . . . . . . . . . . . . . . . . . . . . . . . . . . . . . . . . . . . 26
Maximum freezing capacity. . . . . . . . . . . . . . . . . . . . . . . . . . . . . . . . . . . . . . . . . . 26
Storing frozen food. . . . . . . . . . . . . . . . . . . . . . . . . . . . . . . . . . . . . . . . . . . . . . . . . 26
Home freezing . . . . . . . . . . . . . . . . . . . . . . . . . . . . . . . . . . . . . . . . . . . . . . . . . . . . 26
Hints on home freezing. . . . . . . . . . . . . . . . . . . . . . . . . . . . . . . . . . . . . . . . . . . 26
Packing . . . . . . . . . . . . . . . . . . . . . . . . . . . . . . . . . . . . . . . . . . . . . . . . . . . . . . . 27
Before placing food in the freezer section . . . . . . . . . . . . . . . . . . . . . . . . . . . . 27
Placing food in the freezer section . . . . . . . . . . . . . . . . . . . . . . . . . . . . . . . . . . 27
Freezer calendar . . . . . . . . . . . . . . . . . . . . . . . . . . . . . . . . . . . . . . . . . . . . . . . . . . 28
Marker system for frozen food . . . . . . . . . . . . . . . . . . . . . . . . . . . . . . . . . . . . . . . . 28
Defrosting. . . . . . . . . . . . . . . . . . . . . . . . . . . . . . . . . . . . . . . . . . . . . . . . . . . . . . . . 28
Ice cubes . . . . . . . . . . . . . . . . . . . . . . . . . . . . . . . . . . . . . . . . . . . . . . . . . . . . . . . . 29
Cooling drinks . . . . . . . . . . . . . . . . . . . . . . . . . . . . . . . . . . . . . . . . . . . . . . . . . . . . 29
Freezer tray . . . . . . . . . . . . . . . . . . . . . . . . . . . . . . . . . . . . . . . . . . . . . . . . . . . . . . 29
Cool pack. . . . . . . . . . . . . . . . . . . . . . . . . . . . . . . . . . . . . . . . . . . . . . . . . . . . . . . . 30
Defrosting . . . . . . . . . . . . . . . . . . . . . . . . . . . . . . . . . . . . . . . . . . . . . . . . . . . . . . . 31
Refrigerator section . . . . . . . . . . . . . . . . . . . . . . . . . . . . . . . . . . . . . . . . . . . . . . . . 31
Freezer section . . . . . . . . . . . . . . . . . . . . . . . . . . . . . . . . . . . . . . . . . . . . . . . . . . . 31
Cleaning and care . . . . . . . . . . . . . . . . . . . . . . . . . . . . . . . . . . . . . . . . . . . . . . . . 32
Cleaning the outer casing, the interior and accessories . . . . . . . . . . . . . . . . . . . . 32
Ventilation gaps . . . . . . . . . . . . . . . . . . . . . . . . . . . . . . . . . . . . . . . . . . . . . . . . . . . 33
Door seals . . . . . . . . . . . . . . . . . . . . . . . . . . . . . . . . . . . . . . . . . . . . . . . . . . . . . . . 33
Metal grille at the back of the appliance . . . . . . . . . . . . . . . . . . . . . . . . . . . . . . . . 33
Problem solving guide. . . . . . . . . . . . . . . . . . . . . . . . . . . . . . . . . . . . . . . . . . . . . 34
Noises . . . . . . . . . . . . . . . . . . . . . . . . . . . . . . . . . . . . . . . . . . . . . . . . . . . . . . . . . 37
After sales service . . . . . . . . . . . . . . . . . . . . . . . . . . . . . . . . . . . . . . . . . . . . . . . . 38
Electrical connection . . . . . . . . . . . . . . . . . . . . . . . . . . . . . . . . . . . . . . . . . . . . . . 39
Electrical connection U.K. . . . . . . . . . . . . . . . . . . . . . . . . . . . . . . . . . . . . . . . . . . . 39
Installation . . . . . . . . . . . . . . . . . . . . . . . . . . . . . . . . . . . . . . . . . . . . . . . . . . . . . . 40
Location . . . . . . . . . . . . . . . . . . . . . . . . . . . . . . . . . . . . . . . . . . . . . . . . . . . . . . . . . 40
Climate range . . . . . . . . . . . . . . . . . . . . . . . . . . . . . . . . . . . . . . . . . . . . . . . . . . 40
Ventilation. . . . . . . . . . . . . . . . . . . . . . . . . . . . . . . . . . . . . . . . . . . . . . . . . . . . . . . . 40
Installation . . . . . . . . . . . . . . . . . . . . . . . . . . . . . . . . . . . . . . . . . . . . . . . . . . . . . . . 41
Aligning the appliance . . . . . . . . . . . . . . . . . . . . . . . . . . . . . . . . . . . . . . . . . . . . . . 41
Changing the door hinging . . . . . . . . . . . . . . . . . . . . . . . . . . . . . . . . . . . . . . . . . 42
Building in the appliance . . . . . . . . . . . . . . . . . . . . . . . . . . . . . . . . . . . . . . . . . . 46
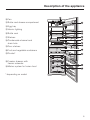
Description of the appliance
a On button for switching the whole
appliance on and
On/Off button for independently
switching the refrigerator section on
and off
b Refrigerator section temperature
display
c Refrigerator section
temperature selector buttons
left hand button: warmer
right hand button: colder
d Super cool button and indicator light
e Dynamic cooling button and
indicator light
f Safety lock indicator light
4
g Master switch for switching
the whole appliance on and off
h Freezer section temperature display
i Freezer section
temperature selector buttons
left hand button: warmer
right hand button: colder
j Super freeze button and indicator
light
k Alarm off button
Description of the appliance
l Fan
m Butter and cheese compartment
n Egg tray
o Interior lighting
p Bottle rack
q Shelves
r Condensate channel and
drain hole
s Door shelves
t Fruit and vegetable containers
u Divider*
v Freezer drawers with
freezer calendar
w Marker system for frozen food
* depending on model
5
Miele{home
Optional accessory
The Miele|home system gives you the
ability to check information about your
appliance at any time.
For example, if a temperature alarm,
power cut or other fault message
occurs, this information will be relayed
directly to the Miele|home system.
You will need a Miele|home system
(e.g. the Miele|home InfoControl)
and your appliance must be fitted
with the Communication module
(XKM 2000 KF) to benefit from this
feature.
Please refer to the leaflet supplied with
the Miele|home Communication
module for details on how to install it
and on how to sign it on to your
Miele|home system.
The Miele|home system is supplied
with its own operating instructions.
6
Caring for the environment
Disposal of the packing
material
The transport and protective packing
has been selected from materials which
are environmentally friendly for
disposal, and can normally be
recycled.
Ensure that any plastic wrappings,
bags etc. are disposed of safely and
kept out of the reach of babies and
young children. Danger of suffocation!
Rather than just throwing these
materials away, please ensure that they
are recycled.
Disposal of your old appliance
Please ensure that the appliance
presents no danger to children while
being stored for disposal.
It should be unplugged or
disconnected from the mains electricity
supply by a competent person. The
plug must be rendered useless and the
cable cut off directly behind the
appliance to prevent misuse. See the
"Warning and Safety" section of this
booklet for further details.
Electrical and electronic appliances
often contain materials which, if
handled or disposed of incorrectly,
could be potentially hazardous to
human health and to the environment.
They are, however, essential for the
correct functioning of your appliance.
Please dispose of your old appliance at
your local community waste collection /
recycling centre and not with your
household waste.
Take care not to damage the pipework
at the back of it before or during
transportation to an authorised
collection depot.
In this way, refrigerant in the pipework
and oil in the compressor will be
contained, and will not leak out into the
environment.
7
Warning and Safety instructions
Technical safety
This appliance complies with all
relevant legal safety requirements.
Improper use can, however, present
a risk of both personal injury and
material damage.
To avoid the risk of accidents and
damage to the appliance, please
read these instructions carefully
before installation and before using
it for the first time. They contain
important notes on the installation,
safety, operation and care of the
appliance.
Keep these instructions in a safe
place and pass them on to any
future user.
Correct use
This appliance is intended for
domestic use only for the cool
storage of foodstuffs as well as for
storing deep frozen food, freezing fresh
food and for preparing ice.
Any other usage is not supported by
the manufacturer and could be
dangerous. The manufacturer cannot
be held liable for damage caused by
incorrect or improper use of the
appliance.
This appliance is not a toy! To avoid
the risk of injury, do not allow
children to play on or near it, or to
play with the controls. Supervise its
use by the elderly or infirm.
8
This appliance contains the coolant
Isobutane (R600a), a natural gas
which is environmentally friendly.
Although it is flammable, it does not
damage the ozone layer and does not
increase the greenhouse effect. The
use of this environmentally friendly
coolant has, however, led to a slight
increase in the noise level of the
appliance. In addition to the noise of
the compressor, you might be able to
hear the coolant flowing around the
system. This is unavoidable, but does
not have any adverse effect on the
performance of the appliance.
Care must be taken during the
transportation and installation of the
appliance that no parts of the cooling
system are damaged. Leaking coolant
can damage the eyes.
In the event of any damage:
- avoid open fires and anything which
creates a spark,
- disconnect from the mains,
- air the room in which the appliance is
located for several minutes and
- contact the Service Department for
advice.
The more coolant there is in an
appliance, the larger the room it
should be installed in. In the event of a
leakage, if the appliance is in a small
room, there is the danger of
combustible gases building up.
For every 8 g of coolant at least 1 m3 of
room space is required. The amount of
coolant in the appliance is stated on the
data plate inside the appliance.
Warning and Safety instructions
Before connecting the appliance to
the mains supply, make sure that
the rating on the data plate
corresponds to the voltage and
frequency of the household supply.
This data must correspond in order to
avoid the risk of damage to the
appliance. Consult a qualified
electrician if in any doubt.
The electrical safety of this
appliance can only be guaranteed
when continuity is complete between
the appliance and an effective earthing
system which complies with local and
national safety regulations. It is most
important that this basic safety
requirement is present and regularly
tested and where there is any doubt,
the household wiring system should be
inspected by a qualified electrician.
The manufacturer cannot be held liable
for the consequences of an inadequate
earthing system (e.g. electric shock).
Safe operation of the appliance is
only assured if it has been installed
and connected in accordance with
these operating and installation
instructions.
This equipment may only be used
in mobile installations such as
ships, caravans, aircraft etc. if a risk
assessment of the installation has been
carried out by a suitably qualified
engineer.
Installation work, maintenance and
repairs may only be carried out by
suitably qualified and competent
persons in accordance with current
national and local safety regulations.
Repairs and other work by unqualified
persons could be dangerous and the
manufacturer will not be held liable.
Ensure current is not supplied to the
appliance until after maintenance or
repair work has been carried out.
The appliance is only completely
isolated from the electricity supply
when:
– it has been switched off at the wall
socket and the plug has been
withdrawn.
– the mains fuse is withdrawn, or
– the screw-out fuse is removed (in
countries where this is applicable).
Do not connect the appliance to
the mains electricity supply by an
extension lead.
Extension leads do not guarantee the
required safety of the appliance (e.g.
danger of overheating).
Use
Never handle frozen food with wet
hands. Your hands may freeze to
the frozen food. Danger of frost burn.
Do not take ice cubes out with your
bare hands and never place ice
cubes or ice lollies in your mouth
straight from the freezer.
The very low temperature of the frozen
ice or lollies can cause frost burn to the
lips and tongue.
9
Warning and Safety instructions
Do not allow children to play with
the appliance, for example to climb
inside the drawers or to swing on the
door.
Do not refreeze thawed or partially
thawed food. Defrosted food
should be used up as quickly as
possible, as food soon loses its
nutritional value and goes off. Defrosted
food may only be re-frozen after it has
been cooked.
Do not store explosive materials in
the appliance or any products
containing propellants (e.g. spray
cans). Thermostats switching on may
produce sparks which could present a
fire hazard. Flammable compounds
could explode.
Do not use any electrical
equipment in this appliance, e.g.
ice cream makers. Danger of sparking
and explosion!
If storing alcohol with a high
percentage proof, make sure it is
tightly closed and stored upright.
Danger of explosion.
Do not store cans or bottles
containing carbonated drinks or
liquids which could freeze in the
freezer. The cans or bottles could
explode. Danger of injury and damage
to the appliance.
When cooling drinks quickly in the
freezer, make sure bottles are not
left in for more than one hour;
otherwise they could burst. This could
result in injury or damage.
10
Observe the "use by" dates given
on food to avoid the risk of food
poisoning.
Storage times will depend on several
factors, including the freshness and
quality of the food as well as the
temperature at which it is stored. Follow
the instructions given on food
manufacturer’s packaging on storage
conditions required as well as the "use
by" date.
Do not use sharp edged objects to
– remove frost and ice,
– separate frozen foods and remove
ice trays. They will damage the
evaporator, causing irreversible
damage to the appliance.
Never place electric heaters or
candles in the appliance to defrost
it. These can damage the plastic parts.
Do not use defrosting sprays or
de-icers, as they might contain
substances which could damage the
plastic parts or which could cause the
build-up of gases and pose a danger to
health.
Do not use any oils or grease on
the door seals, as these will cause
the seals to deteriorate and become
porous with time.
If storing bottles of oil or food
containing high levels of fat or oil in
the appliance, take care not to let the
fat or oil come into contact with plastic
components. These can cause stress
cracks to occur in the plastic
components.
Warning and Safety instructions
Do not block the ventilation gaps in
the appliance as this would impair
the efficiency of the appliance, increase
the electricity consumption and could
cause damage to the appliance.
The appliance is designed for use
within certain climate ranges
(ambient temperatures), and should not
be used outside this range. The climate
range for your appliance is stated on
the data plate inside the appliance.
Installing it in a room with too low an
ambient temperature, e.g. a garage,
can lead to the appliance switching off
for longer periods so that it cannot
maintain the required temperature.
Do not use a steam-cleaning
appliance to defrost or clean this
appliance. Pressurised steam could
reach the electrical components and
cause a short circuit.
In countries where there are areas
which may be subject to infestation
by cockroaches or other vermin, pay
particular attention to keeping the
appliance and its surroundings in a
clean condition at all times. Any
damage which may be caused by
cockroaches or other vermin will not be
covered by the guarantee.
Disposal of your old appliance
Before disposing of an old
appliance, first make the door latch
or lock unusable.
This way you will prevent children from
accidentally locking themselves in and
endangering their lives.
Disconnect it from the mains. Cut
off the cable and render any plug
unusable.
Be careful not to damage any part
of the pipework whilst awaiting
disposal, e.g. by
– puncturing the refrigerant channels
in the evaporator.
– bending any pipework.
– scratching the surface coating.
Splashes of refrigerant can damage the
eyes.
The manufacturer cannot be held
liable for damage caused by
non-compliance with these Warning
and Safety instructions.
11
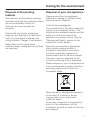
How to save energy
Normal energy
consumption
Increased energy
consumption
In a ventilated room.
In an enclosed, unventilated room.
Protected from direct sunlight.
In direct sunlight.
Not situated near to a heat source
(radiator, oven).
Situated near to a heat source
(radiator, oven).
Where the ideal ambient room
temperature is approx. 20 °C.
Where there is a high ambient
room temperature.
Temperature setting with
a thermostat which is
approximate
(set in stages).
With a medium setting of 2 to 3.
With a high setting: The lower the
temperature in the compartment,
the higher the energy
consumption.
Temperature setting with
a thermostat which is
exact to the degree
(digital display).
Cellar section 8 to 12 °C
Installation
Refrigerator section 4 to 5 °C
On appliances with winter setting,
please make sure that the winter
setting is switched off when the
ambient temperature is warmer
than 16 °C or 18 °C.
StayFresh zone just above 0 °C
Freezer section -18 °C
Wine storage section 10 to 12 °C
Use
Only open the doors when
necessary and for as short a time
as possible.
Frequent opening of the doors for
long periods will cause a loss of
coldness.
Store food in an organised way.
If food is not stored in an
organised way, searching for an
item will mean the door is open for
longer.
Allow hot food and drinks to cool
down before placing them in the
appliance.
Placing hot food in the appliance
will cause the compressor to run
for a long time, as the appliance
will have to work harder to lower
the temperature.
Store food covered or packaged.
The evaporation or condensation
of liquids will cause a loss of
coldness in the refrigerator.
Place frozen food in the
refrigerator to defrost.
Do not over-fill the appliance to
allow air to circulate.
12
How to save energy
Normal energy
consumption
Defrosting
Increased energy
consumption
Defrost the freezer when a layer of A layer of ice hinders the cold
ice one centimetre thick has built from reaching the frozen food, and
causes an increase in energy
up.
consumption.
13
Switching on and off
Before using for the first time
The stainless steel surface has a layer
of protective foil to prevent scratching
during transportation.
You can also switch the whole
appliance on by pressing the On/Off
button for the refrigerator section on the
left hand side of the control panel.
^ Do not remove this foil until the
appliance has been installed or built
in. Start at one of the upper corners.
Allow the appliance to run for a few
hours before placing food in it. This will
ensure that the temperature is
sufficiently low.
^ Clean stainless steel surfaces with a
suitable conditioning agent for
stainless steel.
Cool pack
^ Clean the inside of the appliance and
the accessories with warm water and
a little washing up liquid, and then
dry with a soft cloth.
Important:
To ensure the correct functioning of
the appliance, let it stand for
between 11/2 and 2 hour after
transporting it to its final location
before connecting it to the mains.
Switching on
The refrigerator and freezer sections
are switched on together by pressing
the master switch on the right hand
side of the control panel.
Place the cool pack in the top freezer
drawer or to save space on the freezer
tray. The cool pack will be at its most
effective after it has been in the freezer
for approx. 24 hours.
Switching off
^ Press the master switch on the right
hand side of the control panel.
The temperature display goes out and
the cooling process is switched off. If
this does not happen, then the safety
lock has been activated.
To switch the refrigerator section off
separately
The refrigerator section can be
switched off without having to switch off
the freezer section. This is useful e.g.
whilst on holiday.
^ Press the master switch on the right
hand side of the control panel.
The refrigerator section temperature
display lights up.
Bars light up in the freezer section
temperature display.
The appliance starts cooling.
14
^ Press the On/Off button for the
refrigerator section on the left hand
side of the control panel.
Switching on and off
The refrigerator section temperature
display goes out and the refrigerator
section switches off.
To switch the refrigerator section on
again
^ Press the On/Off button on the left
hand side of the control panel again.
The refrigerator section temperature
display lights up. The refrigerator
section starts cooling. The interior
light will come on when the door is
opened.
Safety lock
The safety lock can be activated to
prevent the appliance being switched
off inadvertently.
Activating or de-activating the safety
lock
^ Press the Super freeze button to save
the setting.
The safety lock indicator light X will
light up when the safety lock has been
activated.
^ Press the master switch on the right
hand side of the control panel to
come out of the setting mode.
The electronics will then switch over to
normal operation after a couple of
minutes.
Switching off for longer
periods of time
If the appliance is not going to be used
for a longer period of time, e.g. whilst
on holiday,
^ switch the appliance off,
^ switch off at the wall socket and
withdraw the plug,
^ clean the appliance out and
^ leave the doors ajar to air the
appliance.
^ Press and hold the Super freeze
button pressed in for approx.
5 seconds.
The Super freeze indicator light flashes
and a ; flashes in the temperature
display.
If, during a long absence, the
appliance is switched off but not
cleaned out and the doors are left
shut there is a danger of mould and
odours building up inside the
appliance.
^ Press the Super freeze button again.
; lights up in the temperature display.
^ You can now choose between ; 0
and ; 1 by pressing the temperature
selector buttons:
0: the safety lock is de-activated,
1: the safety lock is activated.
15
The correct temperature
It is very important to set the correct
temperature for storing food in the
appliance. Micro-organisms will cause
food which is not stored at the correct
temperature to deteriorate rapidly.
Temperature influences the growth rate
of these micro-organisms. Reducing
the temperature reduces their growth
rate.
The temperature in the appliance will
rise:
– the more often the door is opened
and the longer it is kept open,
– if too much food is stored in it at
once,
. . . in the freezer section
To freeze fresh food and to store frozen
food for a long time, a temperature
colder than -18 °C is required. At this
temperature the growth of
micro-organisms is generally halted. As
soon as the temperature rises above
-10 °C, the micro-organisms become
active in the food again so that it cannot
be kept as long. For this reason,
partially defrosted or defrosted food
must not be re-frozen. Food may be
re-frozen once it has been cooked, as
the high temperatures achieved when
cooking destroy most micro-organisms.
– the warmer the food is which is being
put into it,
Temperature selection in the
refrigerator / freezer section
– the higher the ambient temperature
surrounding the appliance.
The appliance is designed for use in
specific ambient temperatures
(climate ranges). Do not use in
ambient temperatures for which it is
not designed.
The temperatures for the refrigerator
section and for the freezer section are
set independently from one another
using the two buttons under the
appropriate temperature display.
Press the
. . . in the refrigerator section
We recommend a temperature of 4 °C
in the refrigerator section.
left button:
to raise the temperature
right button: to reduce the temperature
The temperature being set will flash in
the display.
16
The correct temperature
After setting the temperature you can
see the following information in the
display by pressing the buttons:
appliance may not reach the lowest
temperature.
– When first pressed, the last
temperature selected flashes.
Temperature displays
– Each subsequent press of the button
adjusts the temperature shown in
1 °C steps.
– Keeping the button pressed in
adjusts the temperature continually.
Approx. 5 seconds after letting go of
the button the current actual
temperature of the refrigerator or
freezer section is automatically shown.
If you have adjusted the temperature,
wait for approx. 6 hours if the
appliance is not very full and for
approx. 24 hours if the appliance is
full before checking the temperature
display as it will take this long for the
display to show the accurate
temperature of the appliance. If, after
this time, the temperature is still too high
or too low, you will need to adjust it
again.
Temperature range
The temperature can be adjusted:
– In the refrigerator section from 2 °C
to 11 °C
– In the freezer section from -16 °C to
-26 °C
The ambient temperature in the room
and the installation location can affect
the time it takes for the appliance to
reach the lowest temperature. If the
ambient temperature is too high, the
During normal operation the
temperature displays on the control
panel show the temperature in the
middle of the refrigerator section and
the temperature in the warmest part of
the freezer section.
If the temperature in the appliance is
not within the range that the appliance
is able to display (above 0 °C in the
refrigerator section, and below 0 °C in
the freezer section), bars will flash in
the temperature displays.
The temperature displays flash, if
– a different temperature is being set,
– the temperature in the appliance has
risen by several degrees, indicating
that the appliance is warming up too
much.
This loss of coldness is no cause for
concern in the following circumstances:
– when the door has been left open for
a while, e.g. for removing or storing a
large amount of food,
– when fresh food is being frozen.
However, if the temperature in the
freezer section remains above -18 °C
for a long time, check that the frozen
food has not started to defrost. If it has
started thawing, check that the food is
safe to use and if it is, use it as quickly
as possible.
17
The correct temperature
Temperature display brightness
The appliance is supplied with the
brightness of the temperature display
set as low as possible. However, if the
door is opened, a setting changed or if
the alarm is sounding, the temperature
display will appear much brighter for
approx. 1 minute.
You can adjust the level of brightness:
^ Press and hold the Super freeze
button pressed in for approx.
5 seconds.
The Super freeze indicator light flashes
and a ; flashes in the temperature
display.
^ Press one of the temperature selector
buttons repeatedly until an ^ appears
in the display.
^ Press the Super freeze button again.
^ lights up in the temperature display.
^ You can now adjust the level of
brightness by pressing the
temperature selector buttons. You
can choose from settings 1 to 5:
1: lowest setting,
5: brightest setting.
^ Press the Super freeze button to save
the setting.
^ Press the master switch on the right
hand side of the control panel to
come out of the setting mode.
18
The electronics will then switch over to
normal operation after a couple of
minutes.
Alarm
Your appliance has been fitted with a
warning system which ensures that the
temperature in the freezer section
cannot rise unnoticed.
An alarm will sound and the freezer
section temperature display will flash if
the temperature in the freezer section
becomes too warm. The temperature
the appliance is set at determines the
temperature the appliance recognises
as being too warm.
The alarm will sound and the
temperature display will flash,
Switching on the alarm system
The alarm system is always active. It
does not have to be switched on
manually.
Switching the alarm off early
Once the set temperature has been
reached in the freezer section, the
alarm switches off and the temperature
display stops flashing and lights up
constantly. However, if the noise
disturbs you, you can turn the alarm off
before this if you wish.
– if the freezer door has been left open
for a while, e.g. in order to load, to
re-arrange or to take food out.
– when freezing large amounts of food
at once.
Door alarm
The alarm will sound if the freezer
section door has been left open for
more than approx. 60 seconds.
^ Press the alarm off button.
The alarm will stop. The temperature
display will continue to flash until the
set temperature has been reached.
The display then stops flashing and
lights up constantly. The alarm
system is now ready should it be
needed again.
19
Using Super cool, Super freeze and Dynamic cooling
Super cool
Freezing fresh food
The Super cool function can be used to
rapidly reduce the temperature in the
refrigerator section to its lowest setting
(depending on the room temperature).
Fresh food should be frozen as quickly
as possible. This way the nutritional
value of the food, its vitamin content,
appearance and taste are not impaired.
Switching on Super cool
Super cool is particularly
recommended for faster chilling of
large amounts of fresh food or drink.
^ Press the Super cool button, the
Super cool indicator light will come
on.
The appliance works at full power to
lower the temperature in the
refrigerator section.
Switching off Super cool
The Super cool function switches itself
off automatically after approx. 6 hours.
The indicator light goes out and the
appliance continues running at normal
power.
To save energy, the Super cool function
can be switched off once food and
drinks are sufficiently chilled.
^ Press the Super cool button. The
Super cool indicator light will go out,
and the appliance will continue to
operate at normal power.
20
Food which takes a long time to freeze
will lose more water from its cells, which
then shrink.
During the defrosting process, only
some of this water is reabsorbed by the
cells; the rest collects around the food.
In practice this means that the food
loses a large degree of its moisture.
If food is frozen quickly, the cells have
less time to lose moisture, so they
shrink less. As there is not so much
moisture, it is easier for the food to
reabsorb it during the defrosting
process. There will be very little water
around the defrosted food.
Using Super cool, Super freeze and Dynamic cooling
Super freeze
Switching off Super freeze
Switch the Super freeze function on
before putting fresh food into the
freezer section.
Depending on the amount of food
placed in the freezer section the Super
freeze function will switch off
automatically after approx. 30 to 60
hours. The Super freeze indicator light
will go out and the appliance will
continue running at normal power.
Exceptions:
– when putting in food that is already
frozen.
– when freezing up to 2 kg fresh food
daily.
Switching on Super freeze
When freezing small quantities of food
in the freezer section, the Super freeze
function should be switched on 6 hours
beforehand. When freezing the
maximum load of food the Super
freeze function should be switched on
24 hours beforehand.
To save energy the Super freeze
function can be switched off once a
constant temperature of -18 °C or
colder has been reached in the freezer
section.
^ Press the Super freeze button. The
Super freeze indicator light will go out
and the appliance will continue to
operate at normal power.
^ Press the Super freeze button. The
Super freeze indicator light will come
on.
The appliance works at full power to
lower the temperature in the freezer
section.
21
Using Super cool, Super freeze and Dynamic cooling
Dynamic cooling m
Switching off Dynamic cooling
When the Dynamic cooling function is
not switched on, the natural circulation
of air in the appliance will cause
different temperature zones in the
refrigerator as the cold, heavy air will
sink to the lowest section of the
appliance. You should bear this in mind
when placing food in the appliance
(see "Using the refrigerator efficiently").
However, if you are placing a large
amount of food in the refrigerator at any
one time, it is a good idea to switch on
Dynamic cooling. This way you can
distribute the temperature inside the
appliance to all areas more evenly so
that all the food will be chilled to about
the same degree.
The temperature is set as normal with
the temperature control.
^ Press the Dynamic cooling button
m. The Dynamic cooling indicator
light will go out.
Dynamic cooling should also be
selected when:
– the ambient temperature in the room
is high (above approx. 30 °C), and
– the room humidity level is high.
Switching on Dynamic cooling
^ Press the Dynamic cooling button
m. The Dynamic cooling indicator
light will come on.
22
The fan for Dynamic cooling
automatically switches off whilst the
door is open.
Using the refrigerator efficiently
Different storage zones
Due to the natural circulation of the air
in the appliance, there are different
temperature zones in the refrigerator.
Cold, heavy air sinks to the lowest
section of the appliance. Make use of
the different zones when placing food
in the appliance.
Warmest area
The warmest area is in the top section
of the door. Use this for storing butter
and cheese.
Coldest area
The coldest area in a refrigerator is
directly above the vegetable
containers.
Use this for all delicate and highly
perishable food, e.g.
– fish, meat, poultry,
– sausage products, ready meals,
– dishes or baked goods containing
eggs or cream,
– fresh dough, cake mixtures, pizza or
quiche dough,
– soft cheese and other dairy
products,
– pre-packed vegetables and other
fresh food with a label stating it
should be kept at a temperature of
approx. 4 °C.
Do not store explosive materials in
the appliance or any products
containing propellants (e.g. spray
cans). Danger of explosion.
If storing alcohol with a high
percentage proof, make sure it is
tightly closed, and store upright.
If storing bottles of oil or food
containing high levels of fat or oil in
the appliance, take care not to let
the fat or oil come into contact with
plastic components. These can
cause stress cracks to occur in the
plastic components.
Food must not touch the back wall of
the appliance, as it may freeze to the
back wall.
Food which should not be
stored in a refrigerator
Not all food is suitable for storing in the
refrigerator. These include:
– Fruit and vegetables which are
sensitive to cold, such as bananas,
avocado pears, papaya, passion
fruit, aubergines/eggplant,
peppers/capsicum, tomatoes and
cucumbers
– Fruit which is not yet ripe
– Potatoes
– Some hard cheeses, e.g. Parmesan
23
Using the refrigerator efficiently
Storing food correctly
Unpacked meats and vegetables
Store food covered or packaged. This
will prevent food smells or tastes from
affecting other foods, and prevent food
from drying out and also any
cross-contamination of bacteria. The
growth of bacteria, such as salmonella,
can be avoided by setting the correct
temperature and maintaining good
standards of hygiene.
Different types of unpacked meats and
vegetables must be kept separate. To
avoid any microbiological
cross-contamination, these foods may
only be stored together if they are
wrapped.
Fruit and vegetables
Fruit and vegetables can be stored
loose in the vegetable containers.
However, you should bear in mind that
some types of vegetables give off a
natural gas which speeds up the rate at
which food perishes. Some fruit and
vegetables react strongly to this gas
and should not be stored together.
Examples of fruit which produce a
large amount of this natural gas are:
Apples, apricots, pears, nectarines,
peaches, plums, avocado pears and
figs.
Examples of fruit and vegetables
which react strongly to the natural
gases given off by other types of fruit
and vegetables are:
Kiwis, broccoli, cauliflower, Brussels
sprouts, mangos, honeydew melons,
apples, apricots, cucumbers, tomatoes,
pears, nectarines and peaches.
24
Protein rich foods
Please note that foods rich in protein
deteriorate faster than others.
Shell fish, for example, deteriorates
faster than fish, and fish deteriorates
faster than meat.
Meat
Meat should be stored loosely covered
in suitable containers or packaging.
Allowing the surface of the meat to dry
slightly helps to prevent the growth of
bacteria. To prevent the risk of bacterial
cross-contamination meat should not
be allowed to come into contact with
other foods.
Adjusting the interior fittings
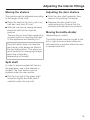
Moving the shelves
Adjusting the door shelves
The shelves can be adjusted according
to the height of the food.
^ Push the door shelf upwards, then
remove it by pulling it forwards.
^ Raise the shelf at the front, pull it out
half way, and then lift it out.
^ Replace the door shelf at the
required position. Ensure that it is
securely pushed back into position.
^ With the rear barrier facing upwards,
place the shelf at the required
position.
The rear barrier must face upwards to
prevent food from touching the back
of the appliance and freezing to it.
The shelf which does not have this
rear barrier must always be fitted in
the top shelf position. This gives you
more flexibility for arranging storage
within the refrigerator.
(depending on model)
Moving the bottle divider
(depending on model)
The bottle divider can be moved to the
left or right to ensure that bottles are
held securely in position when the door
is opened and shut.
Split shelf
In order to accommodate tall items in
the appliance, one of the shelves is
divided. The front section can be
pushed under the rear section.
^ Pull the front half of the glass shelf
forwards slightly and then push it
carefully under the rear half.
25
Freezing and storing food
Maximum freezing capacity
Home freezing
To ensure that fresh food placed in the
freezer freezes through to the core as
quickly as possible, the maximum
freezing capacity must not be
exceeded. The maximum freezing
capacity for freezing within a 24-hour
period is given on the data plate
“Freezing capacity ....kg/24 hrs”.
Only freeze fresh food which is in good
condition.
Storing frozen food
When buying frozen food to store in
your freezer, check
– that the packaging is not damaged,
– the use by date,
– the temperature at which the frozen
food is being stored in the shop. The
length of time it can be kept is
reduced if it has been stored at a
temperature warmer than -18 °C.
^ Buy frozen food once you have
finished the rest of your shopping,
and wrap it in newspaper or use a
cool bag or box to transport it.
^ Store it in the freezer as soon as
possible.
Never re-freeze partially or fully
defrosted food. Consume defrosted
food as soon as possible as it will
lose its nutritional value and spoil if
left for too long. Defrosted food may
only be re-frozen after it has been
cooked.
26
Hints on home freezing
– The following types of food are
suitable for freezing:
Fresh meat, poultry, game, fish,
vegetables, herbs, fresh fruit, dairy
products, pastry, leftovers, egg
yolks, egg whites and a range of
pre-cooked meals.
– The following types of food are not
suitable for freezing:
Grapes, lettuce, radishes, sour
cream, mayonnaise, eggs in their
shells, onions, whole raw apples and
pears.
– To retain colour, taste and vitamin C,
vegetables should be blanched after
they have been trimmed and
washed. To blanch: bring a large
saucepan of water to the boil and
immerse the vegetables in the fast
boiling water for 2-3 minutes,
depending on the variety. Remove,
and plunge into cold water to cool
quickly. Drain and pack ready for
freezing.
– Lean meat freezes better than fatty
meat, and can be stored for
considerably longer.
– To prevent chops, steaks, cutlets or
rolled meat from freezing together in
solid blocks when packed, separate
with a sheet of plastic freezer film.
Freezing and storing food
– Do not season fresh foods or
blanched vegetables before
freezing. Only season cooked food
lightly before freezing but care
should be taken as the taste of some
spices alters when frozen.
– Do not place hot foods or drinks in
the freezer. This causes already
frozen food to thaw and increases
the energy consumption
considerably. Allow hot foods and
drinks to cool down before placing
them in the freezer.
Packing
^ Freeze food in portions.
Unsuitable packing material
- wrapping paper
- grease-proof paper
- cellophane
- bin bags
- plastic carrier bags
Suitable packing material
- plastic freezer film
- freezer bags
- aluminium foil
- freezer containers
^ Expel as much air as possible from
bags etc. before sealing them, to
prevent freezer burn on food.
^ Close the packaging tightly with
- rubber bands
- plastic clips
- string or bag ties
- freezer tape.
^ Make a note of the contents and the
date of freezing on the packaging.
Before placing food in the freezer
section
When freezing more than 2 kg of fresh
food, switch on the Super freeze
function for some time before placing
the food in the freezer (see "Super
freeze").
Placing food in the freezer section
Food to be frozen can be placed
anywhere in the freezer section.
Each drawer and separator plate
can be loaded with a maximum of
25 kg.
When freezing large items e.g. a turkey
or a large joint of meat, the separator
plate in between two of the freezer
drawers can be removed to give more
room. This way food can be stored in
the space of two drawers.
The bottom freezer drawer must not
be taken out of the appliance.
If you remove the top drawer make
sure that you do not block the
ventilation slits in the back wall of
the appliance.
They are important for trouble-free
operation of the appliance.
^ Place the food flat in the bottom of
the drawers or on the separator
plates so that it freezes through to the
core as quickly as possible.
Freezer bags may also be sealed
using home heat-sealing kits.
27
Freezing and storing food
^ Make sure that the packaging and
containers are dry to prevent them
sticking together when frozen.
When freezing, make sure that food
already frozen does not come into
contact with fresh food being frozen
as this could cause the frozen food
to begin to defrost.
Use the markers to indicate the type of
food being frozen, and turn the dials to
the appropriate number to indicate the
month the food was first placed in the
freezer.
Defrosting
Frozen food can be defrosted in
different ways:
Freezer calendar
– in a microwave oven,
The freezer calendar on the freezer
drawer gives the length of time which
various foods can be stored for
effectively.
– in an oven using the "Fan" or "Defrost"
setting,
Where the storage time given on the
packaging differs, follow the advice on
the packaging.
Marker system for frozen food
Markers serve as a reminder of how
long food has been stored.
Each freezer drawer has two slide
markers with dials. The months are
represented on the dials as 1 – 12.
– at room temperature,
– in a refrigerator,
– in a steam oven.
Poultry It is particularly important to
observe food hygiene rules when
defrosting poultry. Do not use the liquid
from defrosted poultry. Pour it away and
wash the container it was in, the sink
and your hands. Danger of salmonella
poisoning!
Fruit should be defrosted at room
temperature in its packing, or in a
covered bowl.
Most vegetables can be cooked while
still frozen. Just put straight into boiling
water or hot fat. The cooking time is
slightly less than that of fresh
vegetables.
^ Slide the markers onto the guide
runners on the edge of the drawers.
28
Freezing and storing food
Cooling drinks
Never re-freeze partially or fully
defrosted food. Consume defrosted
food as soon as possible as it will
lose its nutritional value and spoil if
left for too long. Defrosted food may
only be re-frozen after it has been
cooked.
Ice cubes
(with or without release button
depending on model)
Drinks are best cooled quickly in the
refrigerator section using the Super
cool function. If bottles are, however,
placed in the freezer section for rapid
cooling, make sure they are not left in
for more than one hour, as they could
burst.
Freezer tray
The freezer tray is useful for freezing
small items such as berries and
vegetables. They can be frozen
individually and therefore maintain their
shape when defrosted.
^ Press down the release button on the
ice cube tray and fill the tray with water. Any excess will flow out through
the outlet.
^ Now pull the release button up to
seal the ice cube tray. Place the tray
on the bottom of one of the freezer
drawers.
^ Once frozen, use a blunt instrument,
for example a spoon handle, to
remove the ice tray from the freezer.
^ Ice cubes can be removed easily
from the tray by twisting the tray
gently or by holding it under cold
running water for a short while.
^ Space the food out loosely on the
tray.
^ Hang the tray in one of the upper
freezer drawers.
Leave food for 10 - 12 hours to freeze
thoroughly on the tray. Transfer it to a
freezer bag or suitable container once
frozen. Place the bag or container in
the freezer drawer.
29
Freezing and storing food
Cool pack
(depending on model)
The cool pack prevents the
temperature in the freezer rising too
quickly in the event of a power cut.
Place the ice pack in the upper drawer
directly on top of food or to save space
on the freezer tray. The cool pack will
be at its most effective after it has been
in the freezer for approx. 24 hours.
If there is a power cut, place the cool
pack directly on top of the frozen food
in the upper drawer so that the food will
be kept cold for as long as possible.
When placing fresh food in the freezer,
use the cool pack to separate the fresh
food from the food which is already
frozen so that the frozen food does not
begin to thaw.
The cool pack can also be used in a
cool bag to keep food or drinks cool for
a short period of time.
30
Defrosting
Refrigerator section
Freezer section
Condensate and frost can build up on
the back wall of the refrigerator section
whilst it is in use. These are
automatically removed and defrosted
by the appliance.
This freezer is equipped with a "Frost
free" system. The freezer section
defrosts automatically.
The condensate is drained away via a
channel and drain hole into an
evaporation system at the back of the
appliance.
Ensure that the condensate channel
and drain hole are kept clean and
are never blocked so that
condensate can flow away without
hindrance.
The moisture generated in the
appliance collects on the condenser
and is automatically defrosted and
dissipated from time to time.
This automatic defrosting system
enables the freezer section to remain
permanently ice-free, however, the food
stored in the freezer section will not
defrost.
31
Cleaning and care
Never use cleaning agents
containing abrasive substances
such as sand, soda, acids or
chemical solvents. "Non-abrasive"
cleaning agents are also unsuitable
as they can cause matt areas to
appear.
For stainless steel surfaces, use a
proprietary stainless steel cleaning
agent.
Do not let water get into the
electronic unit, ventilation gaps or
into the light.
Do not let water get into the
drainage channel and drain hole
when cleaning.
Do not use steam cleaning
apparatus to clean the appliance.
Steam could reach the electrical
components and cause a short
circuit.
The data plate located inside the
appliance must not be removed. It
contains information which is required
in the event of a service call.
Before cleaning
^ Switch the appliance off by pressing
the master switch, switching off at the
wall socket and removing the plug.
^ Take any food out of the appliance
and store it in a cool place.
^ Take out any removable parts, e.g.
shelves, for cleaning.
32
^ The stainless steel trim can be pulled
off the front edge of the refrigerator
section shelves for cleaning.
Cleaning the outer casing, the
interior and accessories
Use warm water with a little washing up
liquid. Wash all accessories by hand
only. Do not wash in a dishwasher. The
butter dish is, however, dishwasher
safe.
^ Clean the appliance at least once a
month.
^ Clean the condensate channel and
drain hole frequently, so that
condensate can drain away
unhindered. Use a straw or similar to
clear the drain if necessary.
^ Clean stainless steel surfaces with a
suitable cleaning agent following the
manufacturer’s instructions on the
packaging.
^ After cleaning, wipe the interior and
accessories with a damp cloth and
dry with a soft cloth. Leave the doors
open to air the appliance for a short
while.
E-Cloth
^ A microfibre "E-Cloth" is available
from the Miele UK Spare Parts
Department which is suitable for
cleaning surfaces such as stainless
steel, glass, plastic and chrome
without the use of chemicals.
Cleaning and care
Ventilation gaps
After cleaning
^ The ventilation gaps should be
cleaned regularly with a brush or
vacuum cleaner. A build-up of dust
will increase the energy consumption
of the appliance.
^ Replace all shelves and accessories
in the refrigerator section.
Door seals
Do not use any grease or oil on the
door seals as these will cause the
seals to deteriorate and become
porous over time.
The door seals should be cleaned
regularly with clean water and then
wiped dry with a soft cloth.
Metal grille at the back of the
appliance
The metal grille at the back of the
appliance (heat exchanger) should be
dusted at least once a year. A build-up
of dust will increase the energy
consumption of the appliance.
^ Place food back in the refrigerator
section, close the appliance doors,
insert the plug in the socket and
switch the refrigerator section and
the freezer section on.
^ Switch on the Super freeze function
so that the freezer section can cool
down quickly. The indicator light will
come on.
^ Once the temperature in the freezer
section has reached the required
temperature place the food back in
the freezer drawers and place them
back in the freezer section.
^ Switch off Super freeze by pressing
the super freeze button when the
temperature in the freezer is a
constant -18 °C or colder.
The indicator light will go out.
When cleaning the grille, make sure
that the pipework and other
components do not get broken or
damaged in any way.
33
Problem solving guide
Repairs to electrical appliances
should only be carried out by a
suitably qualified and competent
person in accordance with local and
national safety regulations. Repairs
and other work by unqualified
persons could be dangerous. The
manufacturer cannot be held liable
for unauthorised work.
Some minor problems can be corrected
without contacting the Service
Department.
What to do if . . .
. . . the refrigerator section or freezer
section does not get cool.
^ Check whether the respective section
is switched on. The relevant
temperature display must be lit up.
^ Check that the plug is correctly
inserted in the socket and switched
on.
^ Check that the fuse is not defective
and that the mains fuse has not
blown. If it has, contact the Miele Service Department.
. . . the door to the freezer section will
not open because it has been opened
and closed too many times in
succession.
This is not a fault. The suction caused
by opening and closing the door is
preventing the door from opening. Wait
a few minutes and then try again. It
should now open without force.
34
. . . the temperature in the refrigerator
section or freezer section is too low.
^ Select a warmer temperature.
^ Check that the doors have been
closed properly.
^ Has a large amount of fresh food
been put in at the same time for
freezing?
This makes the compressor run for
longer, causing the temperature in
the refrigerator section to fall
automatically.
^ Super cool has not switched itself off.
Super cool only switches itself off
after 6 hours.
^ Super freeze has not switched itself
off. Super freeze only switches itself
off after 30-60 hours.
. . . the appliance is switching in too
frequently and for too long.
^ Check whether the ventilation gaps
have been covered over or become
too dusty.
^ Check whether, the metal grille (heat
exchanger) at the back of the
appliance has become too dusty.
^ The doors have been opened too
frequently, or a large amount of fresh
food has been put in at once for
freezing.
^ Check that the doors have been
closed properly.
Problem solving guide
. . . the frozen food is thawing
because the freezer section is too
warm.
^ Is the room temperature lower than
the ambient temperature for which
the appliance is designed?
If so, raise the temperature of the
room.
Operating in a room which is too cold
will cause the cooling system to switch
off for too long causing the freezer
section to become too warm.
. . . food has frozen together.
. . . a bar is lit up or flashing in the
temperature displays.
Check the temperature displays about
6 hours after switching on the
appliance. The display will not show a
temperature until the temperature in the
appliance has reached a certain level.
. . . the following appear in one of the
temperature displays "F1" to "F5".
There is a fault. Call the Service
Department.
. . . "nA" appears in the freezer
section temperature display.
Use a blunt instrument, e.g. a spoon
handle or plastic scraper, to prise it
apart carefully.
The freezer section temperature has
risen too high at some point during the
last couple of days because of a power
cut.
. . . the alarm sounds and the freezer
section temperature display flashes.
^ Press the alarm off button whilst "nA"
is lit up in the display.
The freezer section temperature has
risen above the set temperature
because
^ the freezer section door has been
opened too frequently, or large
amounts of fresh food have been put
in at once for freezing.
^ the ventilation gaps are blocked.
Once the problem has been resolved
the freezer section temperature display
will light up constantly and the alarm
will go off.
The alarm will stop and the
temperature display will show the
warmest temperature recorded in the
freezer section during the power cut.
Depending on the temperature
displayed, you should check the
condition of food in the freezer. If it has
defrosted or started to defrost, check
that it is still safe to use and if so use it
as soon as possible. Defrosted food
may only be re-frozen after it has been
cooked.
The warmest temperature will show in
the display for about 1 minute. The
display will then revert to showing the
actual current temperature in the
freezer section.
35
Problem solving guide
At the end of a power cut, the
appliance will start operating again at
the last temperature setting selected.
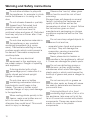
^ Replace the lamp.
Lamp specification:
220 - 240 V, max. 25 W, E 14 fitting.
. . . the super freeze or super cool
indicator light is not lit up although
the appliance is working.
The indicator light is defective. Call the
Service Department.
. . . you cannot switch the appliance
off.
The safety lock has been activated.
. . . . the interior light in the
refrigerator section is not working.
^ Was the refrigerator section door left
open for too long? The lighting
switches itself off automatically after
approx. 15 minutes.
If this is not the case, then the lamp is
defective:
^ Disconnect the appliance from the
mains. Switch off at the wall and
withdraw the plug from the socket, or
disconnect the mains fuse or remove
the screw-out fuse in countries where
this is applicable.
^ Press the sides of the lamp cover
inwards (1), disengage the cover (2)
and unclip it at the rear.
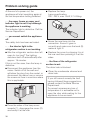
36
^ Screw the new lamp into the
connection. Ensure it goes in
correctly and make sure that seal (3)
makes a tight fit.
^ Replace the cover by clipping it in at
the rear and then pressing it in at the
sides.
. . . the floor of the refrigerator
section is wet.
The drain hole is blocked.
^ Clean the condensate channel and
drain hole.
If you still cannot remedy the fault
having followed these suggestions,
please contact the Miele Service
Department.
To prevent unnecessary loss of
temperature it is advisable not to
open the door while waiting for the
appliance to be serviced.
Noises
Normal noises
What causes them
Brrrrr...
Humming noise made by the motor (compressor). This noise can
get louder for brief periods when the motor is switching on.
Blubb, blubb....
A gurgling noise can be heard when coolant is circulating
through the pipes.
Click....
Clicking sounds are made when the thermostat switches the
motor on and off.
Sssrrrrr....
On multi-zone and frost-free appliances you can sometimes just
hear the movement of air circulating inside the appliance.
Remember that the noise of the compressor and the coolant circulating in the
system is unavoidable.
Noises that you can
easily rectify
What causes them, and what can you do about
them?
Rattling, vibrating
The appliance is uneven: Realign the appliance using a spirit
level, by raising or lowering the screw feet underneath the
appliance.
The appliance is touching another appliance or piece of
furniture: Move it away.
Drawers, baskets or shelves are unstable or sticking: Check
all removable items and refit them correctly.
Are any bottles or containers unstable or knocking against
each other? Separate them.
The transport cable clips are hanging loose at the back of
the appliance: Remove the clips.
37
After sales service
In the event of a fault which you cannot
correct yourself, or if the appliance is
under guarantee, please contact:
– Your Miele Dealer
or
– The Miele Service Department (see
back cover for address).
When contacting your Dealer or the
Service Department, please quote the
model and serial number of your
appliance. This information is given on
the data plate.
Please note that telephone calls may
be monitored and recorded for
training purposes.
38
Electrical connection
Electrical connection U.K.
Non-rewireable plugs (BS 1363)
All electrical work should be carried out
by a suitably qualified and competent
person in strict accordance with current
local and national safety (BS 7671 in
the UK).
The fuse cover must be re-fitted when
changing the fuse, and if the fuse cover
is lost, the plug must not be used until a
suitable replacement is obtained. The
colour of the correct replacement cover
is that of the coloured insert in the base
of the plug, or the colour that is
embossed in words in the base of the
plug (as applicable to the design of the
plug fitted).
The appliance is supplied with a mains
cable and moulded plug ready for
connection to an a.c. single phase
220-240 V 50 Hz supply.
The voltage and frequency are given on
the data plate. Please ensure that these
match the household mains supply. The
fuse rating is quoted on the plug.
Connection should be made via a
suitable switched socket which is easily
accessible. For extra safety it is
advisable to install a residual current
device (RCD) with a trip current of 30
mA (in accordance with DIN VDE 0664,
VDE 0100, Section 739).
Replacement fuses should be ASTA
approved to BS 1362 and have the
correct rating. Replacement fuses and
fuse covers may be purchased from
your local electrical supplier.
WARNING
THIS APPLIANCE MUST BE
EARTHED
Do not connect the appliance to the
mains electricity supply by an extension
lead. Extension leads do not guarantee
the required safety of the appliance
(e.g. danger of overheating).
The appliance must not be connected
to an inverter and must not be used
with a plug adapter as these can cause
damage to the appliance’s electronic
unit.
39
Installation
Climate range
Do not place any appliance which
gives off heat, such as a toaster or
microwave oven, on top of this
appliance, as this would increase
the appliance’s energy consumption.
This fridge freezer must not be
installed "side-by-side" next to
another refrigerator or freezer.
Since the appliance is not fitted with
side wall heating, "side-by-side"
installation next to another
refrigerator or freezer could cause a
build-up of condensation.
Further information is available from
your dealer.
Location
The appliance should be installed in a
dry, well-ventilated room.
The room temperature should not go
above or below the climate range for
which the appliance is designed.
The higher the ambient temperature of
the room, the more energy the
appliance requires to operate.
It should not be installed where it is
exposed to direct sunlight or directly
adjacent to a heat-producing appliance
such as an oven or a radiator.
40
The appliance is designed for use
within certain climate ranges (ambient
temperatures), and should not be used
outside this range. The climate range of
the appliance is stated on the data
plate inside the appliance.
Climate range
Ambient room
temperature
SN
N
ST
T
SN-NT
SN-T
+10°C to +32°C
+16°C to +32°C
+18°C to +38°C
+18°C to +43°C
+10°C to +38°C
+10°C to +43°C
Operating in a room which is too cold
will cause the cooling system to switch
off for too long, causing the internal
temperature in the appliance to rise
with the risk of food deteriorating and
going off or frozen food defrosting.
Ventilation
Air at the back of the appliance gets
warm. To ensure sufficient ventilation,
the ventilation gaps must not be
covered over. The air inlet and outlet
must not be covered or blocked in any
way. They should be dusted on a
regular basis.
Installation
Installation
^ Remove any cable clips from the
back of the appliance.
^ Check that all parts at the back of the
appliance are unhindered. Carefully
remove any hindrance.
^ Carefully push the appliance into
position. The appliance can be
placed directly against a wall.
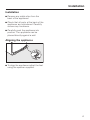
Aligning the appliance
^ To align the appliance adjust the feet
using the spanner supplied.
41
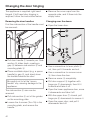
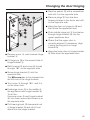
Changing the door hinging
The appliance is supplied right hand
hinged. If left hand door hinging is
required, follow the instructions below.
^ Remove the cover caps from the
opposite side, and fit them into the
empty holes.
Removing the door handles:
Changing over the doors:
First the side section of the handle must
be removed:
^ Open the lower door.
^ Pull door handle a towards you. Side
section b slides back, creating a
gap d between side section b and
mounting plate c.
^ Place a suitable object (e.g. a spoon
handle) in gap d, and slowly lever
the handle towards the door.
Be careful not to let the "spoon
handle" slip, causing damage to the
appliance.
^ Use a screwdriver to lever plinth a
out, then pull it forwards and out.
^ Use a screwdriver to remove cover
b, then close the door.
^ Remove screw c completely.
^ Pull door support d together with
hinge pin e downwards, then tilt it
forwards and take it off.
The side section b can now be
removed.
^ Open the lower appliance door, move
it downwards and take it off.
^ Pull side section b out of the guides
on the mounting plate.
^ With the upper door g closed, pull
hinge pin f downwards to remove it.
^ Loosen the 4 screws (Torx 15) in the
mounting plate, and remove the
handle.
42
^ Open the upper door, and pull it
downwards and off.
Changing the door hinging
^ Remove spacer p with a screwdriver
and refit it on the opposite side.
^ Remove plugs q from the door
bearing bushes in the doors and refit
on the opposite side.
^ Hang the door on hinge pin j and
then close the appliance door.
^ Push middle hinge pin f from below
through hinge bracket n into the
upper appliance door.
^ Check that the upper door is
correctly aligned. If necessary, align
it using the long slots in hinge
bracket n.
^ Remove cover h, and unscrew hinge
bracket i.
^ Hang the lower door in hinge bracket
n then close the appliance door.
^ Fit hinge pin j in the second hole of
hinge bracket i.
^ Refit bracket k and cover l turned
through 180° on the opposite side.
^ Screw hinge bracket i into the
opposite side.
The M4 screw has to be screwed into
the left hole of the hinge bracket.
^ Turn cover h through 180°, and fit it
on the other side.
^ Exchange cover m in the middle of
the appliance with hinge bracket n.
To do this:
Unscrew cover m and hinge bracket
n, turn them around and screw in on
the opposite side.
^ Pull bearing bush o downwards out
of hinge bracket n and refit it from
above into the hinge bracket.
43
Changing the door hinging
In the following illustration the lower
door is not shown in the closed
position to make it easier to see
what happens next.
^ With the lower door open, secure
cover b to the front of the plinth
fascia.
Refitting the handles:
Please make sure you follow the
instructions below carefully when
you refit the handle. The door seal
will be damaged if the handle is
fitted incorrectly.
^ Turn door support d around, pull
hinge pin e out, and refit on the
opposite side.
^ Fit both parts into hinge plate f. To
do this push hinge pin e through
hinge plate f into door support d.
Swing the door support in, push
upwards and re-assemble with screw
c.
^ Align the lower door with the
appliance housing using the long slot
in hinge plate f. Then tighten screw
c.
^ Refit plinth fascia a, pushing it firmly
into position.
44
^ Loosely attach the handle to the
opposite side of the door with the two
front screws b.
Mounting plate c must be positioned
on the side of the door so that when the
door is closed it is flush with the side of
the appliance.
If this is not the case,
^ Tighten both grub screws a with the
allen key provided until mounting
plate c lines up correctly.
^ Then tighten all 4 fixing screws b.
^ Slide the side section of the handle
d into the guides on the mounting
plate until it clicks into place.
Changing the door hinging
It is important to check that the side
section of the handle d does not
come into contact with the door seal
when opening the door, as this
would damage the door seal
permanently.
If, after you have refitted the handle,
you find that the side section does
touch the door seal when the door is
opened:
^ Realign mounting plate c with grub
screws a until the mounting plate
and the side section of the handle d
are at the correct angle and the side
section does not touch the seal when
the door is opened.
45
Building in the appliance
The air inlet and outlet must not be
covered or blocked in any way.
They should be dusted on a regular
basis.
When built into a kitchen run (max.
depth 580 mm) the appliance can be
installed directly next to a kitchen
furniture housing unit. The appliance
door b will protrude in front of furniture
fronts at the sides by 34 mm and by
51 mm in the middle of the door. This
enables the doors to be opened and
shut without being obstructed.
The appliance can be installed in a
kitchen run. To match the height of the
rest of the kitchen, the appliance can
be fitted with a suitable top box a.
A ventilation gap of at least 50 mm
depth must be allowed for behind the
appliance and top box, if fitted, for air
to circulate.
A gap of at least 40 mm is required
between the top of the appliance (or
top box) and the ceiling to ensure that
air can circulate without hindrance.
Otherwise the appliance has to work
harder, resulting in an increase in
electricity consumption.
46
When installed next to a wall c a
distance of approx. 36 mm is needed
on the hinge side between the wall and
the appliance, so that the doors and
handles have sufficient space for
opening.
47
Alteration rights reserved / 1606
KFN 8562 SD ed, KFN 8762 SD ed, KFN 8763 SD ed, KFN 8962 SD ed
M.-Nr. 06 208 653 / 00
en / GB