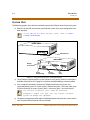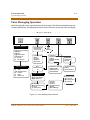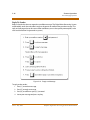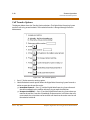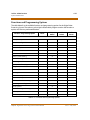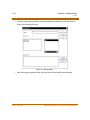
1
Te chnical Manual Issue 2 - May 2004 CD P/N: 250-14 Issue Release Date Changes 1 12-98 Initial Release 1a 9-02 Statements have been added for clarification purposes. 2.0 5-04 » Voice Messaging illustration on page 3-3 has been revised. » Formatting changes have been applied. » Product name was changed to: Vodavi TalkPath Voice Processing System. Copyright © 2004 VODAVI Communications Systems, Inc. All Rights Reserved This material is copyrighted by VODAVI Communications Systems, Inc. Any unauthorized reproductions, use or disclosure of this material, or any part thereof, is strictly prohibited and is a violation of the Copyright Laws of the United States (17 U.S.C. Section 101 et. seq.). VODAVI Communications Systems Inc. reserves the right to make changes in specifications at any time and without notice. The information furnished by VODAVI Communications Systems, Inc. in this material is believed to be accurate and reliable, but is not warranted to be true in all cases. TalkPath™ is a trademark of VODAVI Communications Systems, Inc. set/2004 Warranty and Software License Important Notice: The Digital Voice Processing System in this package contains software that is proprietary to Vodavi Communications Systems and is licensed to the end-user by VODAVI Communications Systems. By using the Digital Voice Processing System, you are agreeing to be bound by the terms and conditions of the Software License printed on the reverse. You should read the Software License carefully and discuss this with the end user. If you do not agree to be bound by it, please notify us in writing within ten (10) days of receipt of your Digital Voice Processing System. Limited Warranty and Disclaimer: Vodavi Communications Systems warrants that the Digital Voice Processing System, including the Software licensed on the reverse, shall conform to VODAVI's written specifications therefore and will be warranted against defects in material and workmanship for a period of twelve (12) months from date of shipment from its U.S. warehouse to Customer (warranty is determined based on the date the Bar Coded, serialized product ships from the warehouse) provided that the Digital Voice Processing System receives normal service and maintenance during the warranty period. VODAVI's obligation under this warranty shall be limited to the repair or replacement of any Digital Voice Processing System or Software, or part or component therof, which may prove defective under normal and proper use and servicing during the warranty period. This warranty shall not apply to any Digital Voice Processing System or Software, or part or component thereof, which has been subject to improper handling, lightning damage, power surge, accident, negligence, alteration, abuse, or misuse. EXCEPT AS STATED ABOVE, VODAVI SHALL NOT BE LIABLE FOR THE BREACH OF ANY WARRANTY, EXPRESS OR IMPLIED, INCLUDING WITHOUT LIMITATION THE WARRANTY OF MERCHANTABILITY OR FITNESS FOR A PARTICULAR PURPOSE OR FOR ANY DAMAGES OR OTHER OBLIGATION OR LIABILITY ARISING OUT OF OR ON CONNECTION WITH THE SALE, INSTALLATION, USE OR SERVICING OF THE DIGITAL VOICE PROCESSING SYSTEM OR SOFTWARE. IN NO EVENT SHALL VODAVI BE LIABLE FOR INCIDENTAL, SPECIAL OR CONSEQUENTIAL DAMAGES, OR ANY OTHER DAMAGES WHETHER ARISING FROM CONTRACT LAW, TORT OR OTHERWISE, NOR SHALL ANY RECOVERY OF ANY KIND AGAINST VODAVI COMMUNICATIONS SYSTEMS BE GREATER IN AMOUNT THAN THE PURCHASE PRICE OF THE DIGITAL VOICE PROCESSING SYSTEM. Warranty Claims: To receive warranty service, contact VODAVI Customer Service. PLEASE NOTE that the installing company (qualified interconnect) is responsible for any transaction involving material return for repair. The distributor (supply house) should never become involved in any such procedure. The installing company will always deal directly with VODAVI for repairs. Post-Warranty Repairs: After the Warranty Period has expired, Vodavi Communications Systems shall provide repair and replacement service for your Digital Voice Processing System in accordance with the procedures and charges set forth in the VODAVI CUSTOMER SERVICE POLICY, a copy of which is available upon request. Software License By opening this package and placing this system into service, you indicate your acceptance, and the acceptance of the purchaser/user of the software included in the system (the "Software"), of the following terms and conditions. Therefore READ THIS CAREFULLY and discuss with the user of the system before operating the Software. Grant of License: Vodavi Communications Systems (of Scottsdale, Arizona) is licensed to sell, use and sublicense the Software, and hereby grants Customer a non-transferable, non-exclusive sublicense to use the Software for its own purposes on a single computer system only. Title and ownership rights to the Software and Technical manual shall remain at all times in Vodavi Technology, Inc. No other rights to use the Software are implied. Proprietary Materials: The Software is proprietary to and constitutes trade secrets of Vodavi Technology, Inc. and the Technical Manual is proprietary to and constitutes trade secrets of Vodavi Technology, Inc. All applicable rights to patents, copyrights, trademarks, and trade secrets in the Software and Technical Manual are and shall remain in Vodavi Communications Systems. Customer shall use utmost diligence to protect the trade secrets and other proprietary rights of Vodavi Communications Systems in the Software and Technical Manual from disclosure to third parties. Customer shall also promote compliance by agreement or instruction with the terms and conditions of this License by employees or others with access to the Software and Technical manual. Modification and Copies: Customer may copy the Software for back-up and archive purposes only. However, Customer may not make copies of any portion of the Software to give, sell, sublicense, or otherwise transfer to any third party, unless (i) such third party acquires all or substantially all of Customer's assets, (ii) Customer obtains the approval of Vodavi Communications Systems, in writing, and (iii) Customer retains no copies of the Software. Customer may not copy the Technical Manual. The transferee must agree in writing to terms and conditions specified by Vodavi Communications Systems, including execution of a software license and payment to Vodavi Communications Systems of a customary inspection fee, to be granted the right by Vodavi Communications Systems to use the Software. Indemnification: Vodavi Communications Systems agrees that, if notified promptly and given sole control of the defense and all related settlement negotiations, it will defend customer against any claim based on the allegation the Software infringes a valid patent, copyright or trademark, and will pay any resulting cost, damages and attorneys' fees awarded by a court with respect to any such claim against Customer. Vodavi Communications Systems shall have no obligations hereunder where Customer has modified the Software or used the Software in combination with software or equipment not provided by Vodavi Communications Systems. If any Software becomes, or in Vodavi Communications Systems' opinion is likely to become, subject of such claim of infringement, Vodavi Communications Systems will, at its option and expense, either procure rights for Customer to continue using the Software, or replace or modify the Software to provide non-infringing software that performs substantially similar functions to the original Software. Upon failure of the foregoing provisions, Vodavi Communications Systems will refund the purchase price of the Digital Voice Processing System less a reasonable allowance for use. THE FOREGOING STATES THE ENTIRE LIABILITY OF Vodavi Communications Systems FOR INFRINGEMENT BY ANY SOFTWARE PROVIDED WITH THE DIGITAL VOICE PROCESSING SYSTEM. Termination of License: Use of the Software on any equipment other than for which it was obtained or authorized, or any breach of the provisions of this License shall automatically terminate this License. Upon termination of this License, Customer shall immediately discontinue all use of the Software and shall destroy all copies of the Software. Contents & Tables i Contents 1 - Introduction Overview . . . . . . . . . . . . . . . . . . . . . . . . . . . . . . . . . . . . . . . . . . . . . . . . . . . . . . . . . . . . . . . . . . . . 1-1 Quick Start . . . . . . . . . . . . . . . . . . . . . . . . . . . . . . . . . . . . . . . . . . . . . . . . . . . . . . . . . . . . . . . . . . 1-1 System Unit . . . . . . . . . . . . . . . . . . . . . . . . . . . . . . . . . . . . . . . . . . . . . . . . . . . . . . . . . . . . . . . . . 1-2 Product Features . . . . . . . . . . . . . . . . . . . . . . . . . . . . . . . . . . . . . . . . . . . . . . . . . . . . . . . . . 1-3 Digital Voicemail Features . . . . . . . . . . . . . . . . . . . . . . . . . . . . . . . . . . . . . . . . . . . . . . . . 1-3 Company Contact . . . . . . . . . . . . . . . . . . . . . . . . . . . . . . . . . . . . . . . . . . . . . . . . . . . . . . . . . . . 1-4 E-Mail Support . . . . . . . . . . . . . . . . . . . . . . . . . . . . . . . . . . . . . . . . . . . . . . . . . . . . . . . . . . . 1-4 Phone Support . . . . . . . . . . . . . . . . . . . . . . . . . . . . . . . . . . . . . . . . . . . . . . . . . . . . . . . . . . . 1-4 Fax Support . . . . . . . . . . . . . . . . . . . . . . . . . . . . . . . . . . . . . . . . . . . . . . . . . . . . . . . . . . . . . . 1-4 Product Replacement Program . . . . . . . . . . . . . . . . . . . . . . . . . . . . . . . . . . . . . . . . . . . 1-4 FCC Information . . . . . . . . . . . . . . . . . . . . . . . . . . . . . . . . . . . . . . . . . . . . . . . . . . . . . . . . . . . . . 1-5 User Responsibility . . . . . . . . . . . . . . . . . . . . . . . . . . . . . . . . . . . . . . . . . . . . . . . . . . . . . . . 1-5 Information For This Equipment . . . . . . . . . . . . . . . . . . . . . . . . . . . . . . . . . . . . . . . . . . 1-5 Registration . . . . . . . . . . . . . . . . . . . . . . . . . . . . . . . . . . . . . . . . . . . . . . . . . . . . . . . . . . . . . . 1-5 Telephone Company Rights and Responsibilities . . . . . . . . . . . . . . . . . . . . . . . . . . 1-5 Repair Instructions . . . . . . . . . . . . . . . . . . . . . . . . . . . . . . . . . . . . . . . . . . . . . . . . . . . . . . .1-6 2 - Installation Hardware Requirements . . . . . . . . . . . . . . . . . . . . . . . . . . . . . . . . . . . . . . . . . . . . . . . . . . . . . 2-1 Unpacking Unit . . . . . . . . . . . . . . . . . . . . . . . . . . . . . . . . . . . . . . . . . . . . . . . . . . . . . . . . . . . . . . 2-1 Hardware Installation . . . . . . . . . . . . . . . . . . . . . . . . . . . . . . . . . . . . . . . . . . . . . . . . . . . . . . . . 2-2 Installing Batteries . . . . . . . . . . . . . . . . . . . . . . . . . . . . . . . . . . . . . . . . . . . . . . . . . . . . . . .2-2 Placement and Mounting . . . . . . . . . . . . . . . . . . . . . . . . . . . . . . . . . . . . . . . . . . . . . . . .2-2 Connecting Phone Lines . . . . . . . . . . . . . . . . . . . . . . . . . . . . . . . . . . . . . . . . . . . . . . . . .2-3 Connecting Serial Cable or Modem . . . . . . . . . . . . . . . . . . . . . . . . . . . . . . . . . . . . . . .2-4 Connecting Power . . . . . . . . . . . . . . . . . . . . . . . . . . . . . . . . . . . . . . . . . . . . . . . . . . . . . . .2-4 Selecting Phone System Integration . . . . . . . . . . . . . . . . . . . . . . . . . . . . . . . . . . . . . . . . . . 2-5 Vodavi Phone Systems . . . . . . . . . . . . . . . . . . . . . . . . . . . . . . . . . . . . . . . . . . . . . . . . . . . . . . . 2-6 Phone System Requirements . . . . . . . . . . . . . . . . . . . . . . . . . . . . . . . . . . . . . . . . . . . . . . . . . 2-6 Phone System Programming and Voicemail Setup . . . . . . . . . . . . . . . . . . . . . . . . . . . . 2-7 Optional Station Programming . . . . . . . . . . . . . . . . . . . . . . . . . . . . . . . . . . . . . . . . . . . . . . . 2-8 TalkPath - Digital Voice Processing System Technical Manual Issue 2 - May, 2004 ii Contents & Tables 3 - Feature Operation Overview . . . . . . . . . . . . . . . . . . . . . . . . . . . . . . . . . . . . . . . . . . . . . . . . . . . . . . . . . . . . . . . . . . . . 3-1 Introduction . . . . . . . . . . . . . . . . . . . . . . . . . . . . . . . . . . . . . . . . . . . . . . . . . . . . . . . . . . . . . . . . 3-1 Some Basics . . . . . . . . . . . . . . . . . . . . . . . . . . . . . . . . . . . . . . . . . . . . . . . . . . . . . . . . . . . . . 3-2 Getting Started . . . . . . . . . . . . . . . . . . . . . . . . . . . . . . . . . . . . . . . . . . . . . . . . . . . . . . . . . . 3-2 Voice Messaging Operation . . . . . . . . . . . . . . . . . . . . . . . . . . . . . . . . . . . . . . . . . . . . . . . . . . 3-3 System Access . . . . . . . . . . . . . . . . . . . . . . . . . . . . . . . . . . . . . . . . . . . . . . . . . . . . . . . . . . . 3-4 Smart Prompts . . . . . . . . . . . . . . . . . . . . . . . . . . . . . . . . . . . . . . . . . . . . . . . . . . . . . . . . . . . 3-5 Record Name . . . . . . . . . . . . . . . . . . . . . . . . . . . . . . . . . . . . . . . . . . . . . . . . . . . . . . . . . . . . 3-5 Password . . . . . . . . . . . . . . . . . . . . . . . . . . . . . . . . . . . . . . . . . . . . . . . . . . . . . . . . . . . . . . . . 3-6 Greeting . . . . . . . . . . . . . . . . . . . . . . . . . . . . . . . . . . . . . . . . . . . . . . . . . . . . . . . . . . . . . . . . 3-7 Retrieving Messages . . . . . . . . . . . . . . . . . . . . . . . . . . . . . . . . . . . . . . . . . . . . . . . . . . . . . 3-9 Sending A Message . . . . . . . . . . . . . . . . . . . . . . . . . . . . . . . . . . . . . . . . . . . . . . . . . . . . . . 3-12 Reply To Sender . . . . . . . . . . . . . . . . . . . . . . . . . . . . . . . . . . . . . . . . . . . . . . . . . . . . . . . . . 3-16 State . . . . . . . . . . . . . . . . . . . . . . . . . . . . . . . . . . . . . . . . . . . . . . . . . . . . . . . . . . . . . . . . . . . . 3-18 Message Notification . . . . . . . . . . . . . . . . . . . . . . . . . . . . . . . . . . . . . . . . . . . . . . . . . . . . 3-20 Distribution Lists . . . . . . . . . . . . . . . . . . . . . . . . . . . . . . . . . . . . . . . . . . . . . . . . . . . . . . . . 3-22 Personal Distribution Lists . . . . . . . . . . . . . . . . . . . . . . . . . . . . . . . . . . . . . . . . . . . . . . . 3-24 Guest Mailboxes . . . . . . . . . . . . . . . . . . . . . . . . . . . . . . . . . . . . . . . . . . . . . . . . . . . . . . . . . 3-27 Voice Note Pad . . . . . . . . . . . . . . . . . . . . . . . . . . . . . . . . . . . . . . . . . . . . . . . . . . . . . . . . . . . . . . 3-30 Create an Information Group . . . . . . . . . . . . . . . . . . . . . . . . . . . . . . . . . . . . . . . . . . . . . 3-31 Modify an Information Group . . . . . . . . . . . . . . . . . . . . . . . . . . . . . . . . . . . . . . . . . . . . 3-32 Add a New Entry . . . . . . . . . . . . . . . . . . . . . . . . . . . . . . . . . . . . . . . . . . . . . . . . . . . . . . . . . 3-33 Modify an Existing Entry . . . . . . . . . . . . . . . . . . . . . . . . . . . . . . . . . . . . . . . . . . . . . . . . . 3-34 Automated Attendant Operation . . . . . . . . . . . . . . . . . . . . . . . . . . . . . . . . . . . . . . . . . . . . 3-36 Automated Attendant Functions . . . . . . . . . . . . . . . . . . . . . . . . . . . . . . . . . . . . . . . . . 3-36 System Access . . . . . . . . . . . . . . . . . . . . . . . . . . . . . . . . . . . . . . . . . . . . . . . . . . . . . . . . . . . 3-37 Call Transfer Options . . . . . . . . . . . . . . . . . . . . . . . . . . . . . . . . . . . . . . . . . . . . . . . . . . . . . 3-38 Issue 2 - May, 2004 TalkPath - Digital Voice Processing System Technical Manual Contents & Tables iii 4 - Online Administration Overview . . . . . . . . . . . . . . . . . . . . . . . . . . . . . . . . . . . . . . . . . . . . . . . . . . . . . . . . . . . . . . . . . . . . 4-1 Supervisor Functions . . . . . . . . . . . . . . . . . . . . . . . . . . . . . . . . . . . . . . . . . . . . . . . . . . . . . . . . 4-2 Record Prompts . . . . . . . . . . . . . . . . . . . . . . . . . . . . . . . . . . . . . . . . . . . . . . . . . . . . . . . . . . . . . 4-3 Edit Menu Prompts . . . . . . . . . . . . . . . . . . . . . . . . . . . . . . . . . . . . . . . . . . . . . . . . . . . . . . 4-4 Edit System Prompts . . . . . . . . . . . . . . . . . . . . . . . . . . . . . . . . . . . . . . . . . . . . . . . . . . . . . 4-4 Edit Mailbox Names . . . . . . . . . . . . . . . . . . . . . . . . . . . . . . . . . . . . . . . . . . . . . . . . . . . . . . 4-6 Mailbox Administration . . . . . . . . . . . . . . . . . . . . . . . . . . . . . . . . . . . . . . . . . . . . . . . . . . . . . . 4-7 Reset the Mailbox Password . . . . . . . . . . . . . . . . . . . . . . . . . . . . . . . . . . . . . . . . . . . . . . 4-7 Change the Mailbox COS . . . . . . . . . . . . . . . . . . . . . . . . . . . . . . . . . . . . . . . . . . . . . . . . . 4-8 Recover Deleted Messages from a Mailbox . . . . . . . . . . . . . . . . . . . . . . . . . . . . . . . . 4-8 Add a Mailbox . . . . . . . . . . . . . . . . . . . . . . . . . . . . . . . . . . . . . . . . . . . . . . . . . . . . . . . . . . . 4-9 Delete a Mailbox . . . . . . . . . . . . . . . . . . . . . . . . . . . . . . . . . . . . . . . . . . . . . . . . . . . . . . . . . 4-9 Distribution List Administration . . . . . . . . . . . . . . . . . . . . . . . . . . . . . . . . . . . . . . . . . . . . . . 4-10 Add a New Distribution List . . . . . . . . . . . . . . . . . . . . . . . . . . . . . . . . . . . . . . . . . . . . . . 4-10 Delete a Distribution List . . . . . . . . . . . . . . . . . . . . . . . . . . . . . . . . . . . . . . . . . . . . . . . . . 4-10 Edit a Distribution List . . . . . . . . . . . . . . . . . . . . . . . . . . . . . . . . . . . . . . . . . . . . . . . . . . . . 4-11 Broadcast Message Administration . . . . . . . . . . . . . . . . . . . . . . . . . . . . . . . . . . . . . . . . . . . 4-12 Listen to Message . . . . . . . . . . . . . . . . . . . . . . . . . . . . . . . . . . . . . . . . . . . . . . . . . . . . . . . . 4-12 Create New Message . . . . . . . . . . . . . . . . . . . . . . . . . . . . . . . . . . . . . . . . . . . . . . . . . . . . . 4-12 Cancel a Broadcast Message . . . . . . . . . . . . . . . . . . . . . . . . . . . . . . . . . . . . . . . . . . . . . . 4-13 System Administration . . . . . . . . . . . . . . . . . . . . . . . . . . . . . . . . . . . . . . . . . . . . . . . . . . . . . . . 4-14 Set Up Voice Lines . . . . . . . . . . . . . . . . . . . . . . . . . . . . . . . . . . . . . . . . . . . . . . . . . . . . . . . 4-14 Voicemail . . . . . . . . . . . . . . . . . . . . . . . . . . . . . . . . . . . . . . . . . . . . . . . . . . . . . . . . . . . . . . . .4-15 Auto Attendant . . . . . . . . . . . . . . . . . . . . . . . . . . . . . . . . . . . . . . . . . . . . . . . . . . . . . . . . . .4-15 Menu . . . . . . . . . . . . . . . . . . . . . . . . . . . . . . . . . . . . . . . . . . . . . . . . . . . . . . . . . . . . . . . . . . .4-15 Time Control . . . . . . . . . . . . . . . . . . . . . . . . . . . . . . . . . . . . . . . . . . . . . . . . . . . . . . . . . . . .4-16 Select a Phone System . . . . . . . . . . . . . . . . . . . . . . . . . . . . . . . . . . . . . . . . . . . . . . . . . . . 4-16 System Shutdown . . . . . . . . . . . . . . . . . . . . . . . . . . . . . . . . . . . . . . . . . . . . . . . . . . . . . . . 4-17 System Date and Time . . . . . . . . . . . . . . . . . . . . . . . . . . . . . . . . . . . . . . . . . . . . . . . . . . . 4-17 Functions and Programming Options . . . . . . . . . . . . . . . . . . . . . . . . . . . . . . . . . . . . . 4-19 TalkPath - Digital Voice Processing System Technical Manual Issue 2 - May, 2004 iv Contents & Tables 5 - Laptop/PC Administration Overview . . . . . . . . . . . . . . . . . . . . . . . . . . . . . . . . . . . . . . . . . . . . . . . . . . . . . . . . . . . . . . . . . . . . 5-1 Install Laptop/PC Admin Software . . . . . . . . . . . . . . . . . . . . . . . . . . . . . . . . . . . . . . . . . . . 5-1 Connect Cabling . . . . . . . . . . . . . . . . . . . . . . . . . . . . . . . . . . . . . . . . . . . . . . . . . . . . . . . . . . . . 5-1 Communicate With the System . . . . . . . . . . . . . . . . . . . . . . . . . . . . . . . . . . . . . . . . . . . . . . 5-2 Run Software . . . . . . . . . . . . . . . . . . . . . . . . . . . . . . . . . . . . . . . . . . . . . . . . . . . . . . . . . . . . . . . . 5-2 Modem Connection . . . . . . . . . . . . . . . . . . . . . . . . . . . . . . . . . . . . . . . . . . . . . . . . . . . . . . . . . 5-2 Laptop/PC Connection . . . . . . . . . . . . . . . . . . . . . . . . . . . . . . . . . . . . . . . . . . . . . . . . . . . . . . 5-7 Software Description . . . . . . . . . . . . . . . . . . . . . . . . . . . . . . . . . . . . . . . . . . . . . . . . . . . . . . . . 5-8 Status Bar . . . . . . . . . . . . . . . . . . . . . . . . . . . . . . . . . . . . . . . . . . . . . . . . . . . . . . . . . . . . . . . . 5-9 Subscribers . . . . . . . . . . . . . . . . . . . . . . . . . . . . . . . . . . . . . . . . . . . . . . . . . . . . . . . . . . . . . . 5-10 Create Subscribers . . . . . . . . . . . . . . . . . . . . . . . . . . . . . . . . . . . . . . . . . . . . . . . . . . . . . . . 5-11 Delete Subscribers . . . . . . . . . . . . . . . . . . . . . . . . . . . . . . . . . . . . . . . . . . . . . . . . . . . . . . . 5-12 Edit Subscribers . . . . . . . . . . . . . . . . . . . . . . . . . . . . . . . . . . . . . . . . . . . . . . . . . . . . . . . . . 5-13 Mailbox Settings . . . . . . . . . . . . . . . . . . . . . . . . . . . . . . . . . . . . . . . . . . . . . . . . . . . . . . . . 5-14 Class of Service (COS) . . . . . . . . . . . . . . . . . . . . . . . . . . . . . . . . . . . . . . . . . . . . . . . . . . . . 5-22 General Tab . . . . . . . . . . . . . . . . . . . . . . . . . . . . . . . . . . . . . . . . . . . . . . . . . . . . . . . . . . . . . 5-24 Message Tab . . . . . . . . . . . . . . . . . . . . . . . . . . . . . . . . . . . . . . . . . . . . . . . . . . . . . . . . . . . . . 5-26 Maintenance Tab . . . . . . . . . . . . . . . . . . . . . . . . . . . . . . . . . . . . . . . . . . . . . . . . . . . . . . . . 5-31 Notification Tab . . . . . . . . . . . . . . . . . . . . . . . . . . . . . . . . . . . . . . . . . . . . . . . . . . . . . . . . . . 5-36 Auto Attendant Tab . . . . . . . . . . . . . . . . . . . . . . . . . . . . . . . . . . . . . . . . . . . . . . . . . . . . . . 5-40 Menus . . . . . . . . . . . . . . . . . . . . . . . . . . . . . . . . . . . . . . . . . . . . . . . . . . . . . . . . . . . . . . . . . . . 5-43 Insert Menu . . . . . . . . . . . . . . . . . . . . . . . . . . . . . . . . . . . . . . . . . . . . . . . . . . . . . . . . . . . . . 5-44 Delete Menu . . . . . . . . . . . . . . . . . . . . . . . . . . . . . . . . . . . . . . . . . . . . . . . . . . . . . . . . . . . . 5-44 Edit Menu . . . . . . . . . . . . . . . . . . . . . . . . . . . . . . . . . . . . . . . . . . . . . . . . . . . . . . . . . . . . . . . 5-45 Time Controls . . . . . . . . . . . . . . . . . . . . . . . . . . . . . . . . . . . . . . . . . . . . . . . . . . . . . . . . . . . . 5-51 Insert Time Control . . . . . . . . . . . . . . . . . . . . . . . . . . . . . . . . . . . . . . . . . . . . . . . . . . . . 5-52 Delete Time Control . . . . . . . . . . . . . . . . . . . . . . . . . . . . . . . . . . . . . . . . . . . . . . . . . . . . . 5-52 Edit Time Control . . . . . . . . . . . . . . . . . . . . . . . . . . . . . . . . . . . . . . . . . . . . . . . . . . . . . . . . 5-53 Voice Lines . . . . . . . . . . . . . . . . . . . . . . . . . . . . . . . . . . . . . . . . . . . . . . . . . . . . . . . . . . . . . . 5-57 Reset Display . . . . . . . . . . . . . . . . . . . . . . . . . . . . . . . . . . . . . . . . . . . . . . . . . . . . . . . . . . . . 5-60 Shrink . . . . . . . . . . . . . . . . . . . . . . . . . . . . . . . . . . . . . . . . . . . . . . . . . . . . . . . . . . . . . . . . . . . 5-60 Exit . . . . . . . . . . . . . . . . . . . . . . . . . . . . . . . . . . . . . . . . . . . . . . . . . . . . . . . . . . . . . . . . . . . . . 5-60 Pull-Down Menus . . . . . . . . . . . . . . . . . . . . . . . . . . . . . . . . . . . . . . . . . . . . . . . . . . . . . . . . . . . 5-61 File Menu . . . . . . . . . . . . . . . . . . . . . . . . . . . . . . . . . . . . . . . . . . . . . . . . . . . . . . . . . . . . . . . . 5-61 Setup Menu . . . . . . . . . . . . . . . . . . . . . . . . . . . . . . . . . . . . . . . . . . . . . . . . . . . . . . . . . . . . . 5-61 Setup Phone System . . . . . . . . . . . . . . . . . . . . . . . . . . . . . . . . . . . . . . . . . . . . . . . . . . . . . 5-61 Modem Setup . . . . . . . . . . . . . . . . . . . . . . . . . . . . . . . . . . . . . . . . . . . . . . . . . . . . . . . . . . . 5-64 Advanced Setup . . . . . . . . . . . . . . . . . . . . . . . . . . . . . . . . . . . . . . . . . . . . . . . . . . . . . . . . . 5-71 Edit Registry . . . . . . . . . . . . . . . . . . . . . . . . . . . . . . . . . . . . . . . . . . . . . . . . . . . . . . . . . . . . . 5-72 Issue 2 - May, 2004 TalkPath - Digital Voice Processing System Technical Manual Contents & Tables v 6 - Upgrading Upgrading Ports . . . . . . . . . . . . . . . . . . . . . . . . . . . . . . . . . . . . . . . . . . . . . . . . . . . . . . . . . . . . . 6-1 Hardware Installation . . . . . . . . . . . . . . . . . . . . . . . . . . . . . . . . . . . . . . . . . . . . . . . . . . . . 6-1 Tools Required . . . . . . . . . . . . . . . . . . . . . . . . . . . . . . . . . . . . . . . . . . . . . . . . . . . . . . . . . .6-1 Prepare Unit . . . . . . . . . . . . . . . . . . . . . . . . . . . . . . . . . . . . . . . . . . . . . . . . . . . . . . . . . . . . .6-2 Access Line Card Mounting and Install Card . . . . . . . . . . . . . . . . . . . . . . . . . . . . . .6-2 Software Installation . . . . . . . . . . . . . . . . . . . . . . . . . . . . . . . . . . . . . . . . . . . . . . . . . . . . . 6-3 Generic Upgrading Information . . . . . . . . . . . . . . . . . . . . . . . . . . . . . . . . . . . . . . . . . . . . . . 6-5 7 - Technical / Troubleshooting Overview . . . . . . . . . . . . . . . . . . . . . . . . . . . . . . . . . . . . . . . . . . . . . . . . . . . . . . . . . . . . . . . . . . . . 7-1 LED Sequences . . . . . . . . . . . . . . . . . . . . . . . . . . . . . . . . . . . . . . . . . . . . . . . . . . . . . . . . . . . . . . 7-1 Normal LED Boot Sequence . . . . . . . . . . . . . . . . . . . . . . . . . . . . . . . . . . . . . . . . . . . . . .7-2 Other Error Conditions . . . . . . . . . . . . . . . . . . . . . . . . . . . . . . . . . . . . . . . . . . . . . . . . . . .7-3 Looking at Boot Up . . . . . . . . . . . . . . . . . . . . . . . . . . . . . . . . . . . . . . . . . . . . . . . . . . . . . . . . . . 7-3 Boot Up Problems . . . . . . . . . . . . . . . . . . . . . . . . . . . . . . . . . . . . . . . . . . . . . . . . . . . . . . . . . . . 7-6 ECom . . . . . . . . . . . . . . . . . . . . . . . . . . . . . . . . . . . . . . . . . . . . . . . . . . . . . . . . . . . . . . . . . . . . . . . 7-6 Com Port Options . . . . . . . . . . . . . . . . . . . . . . . . . . . . . . . . . . . . . . . . . . . . . . . . . . . . . . . . 7-8 Modem Connection . . . . . . . . . . . . . . . . . . . . . . . . . . . . . . . . . . . . . . . . . . . . . . . . . . . . . . 7-9 Shut Down and Park . . . . . . . . . . . . . . . . . . . . . . . . . . . . . . . . . . . . . . . . . . . . . . . . . . . . . 7-9 Debug Mode . . . . . . . . . . . . . . . . . . . . . . . . . . . . . . . . . . . . . . . . . . . . . . . . . . . . . . . . . . . . 7-11 Download . . . . . . . . . . . . . . . . . . . . . . . . . . . . . . . . . . . . . . . . . . . . . . . . . . . . . . . . . . . . . . . 7-12 Upload . . . . . . . . . . . . . . . . . . . . . . . . . . . . . . . . . . . . . . . . . . . . . . . . . . . . . . . . . . . . . . . . . . 7-13 Parking the System . . . . . . . . . . . . . . . . . . . . . . . . . . . . . . . . . . . . . . . . . . . . . . . . . . . . . . . . . . 7-15 Executing DOS Commands . . . . . . . . . . . . . . . . . . . . . . . . . . . . . . . . . . . . . . . . . . . . . . . . . . 7-16 Transferring Files . . . . . . . . . . . . . . . . . . . . . . . . . . . . . . . . . . . . . . . . . . . . . . . . . . . . . . . . . . . . 7-17 Backing Up the System . . . . . . . . . . . . . . . . . . . . . . . . . . . . . . . . . . . . . . . . . . . . . . . . . . . . . . 7-18 Restoring System Backup . . . . . . . . . . . . . . . . . . . . . . . . . . . . . . . . . . . . . . . . . . . . . . . . . . . . 7-19 System Reinitialize . . . . . . . . . . . . . . . . . . . . . . . . . . . . . . . . . . . . . . . . . . . . . . . . . . . . . . . . . . . 7-20 Debug Mode. . . . . . . . . . . . . . . . . . . . . . . . . . . . . . . . . . . . . . . . . . . . . . . . . . . . . . . . . . . . . . . . . 7-21 Viewing the Logs . . . . . . . . . . . . . . . . . . . . . . . . . . . . . . . . . . . . . . . . . . . . . . . . . . . . . . . . . . . . 7-22 Questions and Answers . . . . . . . . . . . . . . . . . . . . . . . . . . . . . . . . . . . . . . . . . . . . . . . . . . . . . . 7-22 A - Common Registry Variables The Registry . . . . . . . . . . . . . . . . . . . . . . . . . . . . . . . . . . . . . . . . . . . . . . . . . . . . . . . . . . . . . . . . . A-1 REGADD . . . . . . . . . . . . . . . . . . . . . . . . . . . . . . . . . . . . . . . . . . . . . . . . . . . . . . . . . . . . . . . . . A-1 REGLIST . . . . . . . . . . . . . . . . . . . . . . . . . . . . . . . . . . . . . . . . . . . . . . . . . . . . . . . . . . . . . . . . . . A-1 TalkPath - Digital Voice Processing System Technical Manual Issue 2 - May, 2004 vi Contents & Tables B - Command Files Overview . . . . . . . . . . . . . . . . . . . . . . . . . . . . . . . . . . . . . . . . . . . . . . . . . . . . . . . . . . . . . . . . . . . . B-1 Command File Structure . . . . . . . . . . . . . . . . . . . . . . . . . . . . . . . . . . . . . . . . . . . . . . . . . . . . . B-1 Quick Commands . . . . . . . . . . . . . . . . . . . . . . . . . . . . . . . . . . . . . . . . . . . . . . . . . . . . . . . . . . . B-5 Technical . . . . . . . . . . . . . . . . . . . . . . . . . . . . . . . . . . . . . . . . . . . . . . . . . . . . . . . . . . . . . . . . . . . . B-6 Predefined Command Files . . . . . . . . . . . . . . . . . . . . . . . . . . . . . . . . . . . . . . . . . . . . . . . . . . B-7 Modifying Command Files . . . . . . . . . . . . . . . . . . . . . . . . . . . . . . . . . . . . . . . . . . . . . . . . . . . B-8 C - Installation Forms D - System Log and Error Messages Introduction . . . . . . . . . . . . . . . . . . . . . . . . . . . . . . . . . . . . . . . . . . . . . . . . . . . . . . . . . . . . . . . . D-1 Error Log . . . . . . . . . . . . . . . . . . . . . . . . . . . . . . . . . . . . . . . . . . . . . . . . . . . . . . . . . . . . . . . . . . . . D-1 System Activity Log . . . . . . . . . . . . . . . . . . . . . . . . . . . . . . . . . . . . . . . . . . . . . . . . . . . . . . . . . D-1 Auto Attendant . . . . . . . . . . . . . . . . . . . . . . . . . . . . . . . . . . . . . . . . . . . . . . . . . . . . . . . . . . D-2 Log Interpretation . . . . . . . . . . . . . . . . . . . . . . . . . . . . . . . . . . . . . . . . . . . . . . . . . . . . . . . D-3 Voice Messaging . . . . . . . . . . . . . . . . . . . . . . . . . . . . . . . . . . . . . . . . . . . . . . . . . . . . . . . . . D-3 Log Interpretation . . . . . . . . . . . . . . . . . . . . . . . . . . . . . . . . . . . . . . . . . . . . . . . . . . . . . . . D-4 Menu Routing . . . . . . . . . . . . . . . . . . . . . . . . . . . . . . . . . . . . . . . . . . . . . . . . . . . . . . . . . . . D-5 Error Messages . . . . . . . . . . . . . . . . . . . . . . . . . . . . . . . . . . . . . . . . . . . . . . . . . . . . . . . . . . . . . . D-5 Error List . . . . . . . . . . . . . . . . . . . . . . . . . . . . . . . . . . . . . . . . . . . . . . . . . . . . . . . . . . . . . . . . . D-5 System Errors . . . . . . . . . . . . . . . . . . . . . . . . . . . . . . . . . . . . . . . . . . . . . . . . . . . . . . . . . . . . D-7 Index Issue 2 - May, 2004 TalkPath - Digital Voice Processing System Technical Manual Contents & Tables vii Figures Voice Processing System - Front & Back Panels . . . . . . . . . . . . . . . . . . . . . . . . . . . . . 1-2 Low Voltage Power Supply . . . . . . . . . . . . . . . . . . . . . . . . . . . . . . . . . . . . . . . . . . . . . . . .2-1 Wall Mounted Digital Voice Processing System . . . . . . . . . . . . . . . . . . . . . . . . . . . . 2-3 Special Keys . . . . . . . . . . . . . . . . . . . . . . . . . . . . . . . . . . . . . . . . . . . . . . . . . . . . . . . . . . . . . . 3-2 Voice Message Menu Structure . . . . . . . . . . . . . . . . . . . . . . . . . . . . . . . . . . . . . . . . . . . . 3-3 System Access . . . . . . . . . . . . . . . . . . . . . . . . . . . . . . . . . . . . . . . . . . . . . . . . . . . . . . . . . . . . 3-4 Record a Name . . . . . . . . . . . . . . . . . . . . . . . . . . . . . . . . . . . . . . . . . . . . . . . . . . . . . . . . . . . 3-5 Change a Password . . . . . . . . . . . . . . . . . . . . . . . . . . . . . . . . . . . . . . . . . . . . . . . . . . . . . . . 3-6 Record Standard Greeting . . . . . . . . . . . . . . . . . . . . . . . . . . . . . . . . . . . . . . . . . . . . . . . . 3-8 Retrieve a Message . . . . . . . . . . . . . . . . . . . . . . . . . . . . . . . . . . . . . . . . . . . . . . . . . . . . . . .3-10 Other Message Options . . . . . . . . . . . . . . . . . . . . . . . . . . . . . . . . . . . . . . . . . . . . . . . . . . . 3-11 Prepare a Message to Send . . . . . . . . . . . . . . . . . . . . . . . . . . . . . . . . . . . . . . . . . . . . . . . 3-12 Record Message Keys . . . . . . . . . . . . . . . . . . . . . . . . . . . . . . . . . . . . . . . . . . . . . . . . . . . . . 3-13 Mailbox to Receive Message . . . . . . . . . . . . . . . . . . . . . . . . . . . . . . . . . . . . . . . . . . . . . . 3-14 Send Options . . . . . . . . . . . . . . . . . . . . . . . . . . . . . . . . . . . . . . . . . . . . . . . . . . . . . . . . . . . . . 3-14 Reply to a Message . . . . . . . . . . . . . . . . . . . . . . . . . . . . . . . . . . . . . . . . . . . . . . . . . . . . . . . 3-16 Re-record Keys . . . . . . . . . . . . . . . . . . . . . . . . . . . . . . . . . . . . . . . . . . . . . . . . . . . . . . . . . . . 3-17 Set the State . . . . . . . . . . . . . . . . . . . . . . . . . . . . . . . . . . . . . . . . . . . . . . . . . . . . . . . . . . . . . . 3-18 State Functions . . . . . . . . . . . . . . . . . . . . . . . . . . . . . . . . . . . . . . . . . . . . . . . . . . . . . . . . . . . 3-19 Set Message Notification . . . . . . . . . . . . . . . . . . . . . . . . . . . . . . . . . . . . . . . . . . . . . . . . . . 3-20 Message Notification Keys . . . . . . . . . . . . . . . . . . . . . . . . . . . . . . . . . . . . . . . . . . . . . . . . 3-21 Message Notification Functions . . . . . . . . . . . . . . . . . . . . . . . . . . . . . . . . . . . . . . . . . . . 3-21 Send Message to Distribution List . . . . . . . . . . . . . . . . . . . . . . . . . . . . . . . . . . . . . . . . . 3-23 Distribution List . . . . . . . . . . . . . . . . . . . . . . . . . . . . . . . . . . . . . . . . . . . . . . . . . . . . . . . . . . 3-24 Add / Delete Mailbox Entries . . . . . . . . . . . . . . . . . . . . . . . . . . . . . . . . . . . . . . . . . . . . . .3-25 Delete a Mailbox . . . . . . . . . . . . . . . . . . . . . . . . . . . . . . . . . . . . . . . . . . . . . . . . . . . . . . . . . . 3-26 Delete a Personal List . . . . . . . . . . . . . . . . . . . . . . . . . . . . . . . . . . . . . . . . . . . . . . . . . . . . .3-27 Create a Guest Mailbox . . . . . . . . . . . . . . . . . . . . . . . . . . . . . . . . . . . . . . . . . . . . . . . . . . . 3-28 Send a Guest Message . . . . . . . . . . . . . . . . . . . . . . . . . . . . . . . . . . . . . . . . . . . . . . . . . . . . 3-29 Note Pad Information Groups . . . . . . . . . . . . . . . . . . . . . . . . . . . . . . . . . . . . . . . . . . . . . 3-30 Create an Information Group . . . . . . . . . . . . . . . . . . . . . . . . . . . . . . . . . . . . . . . . . . . . . .3-31 Add, Change, or Delete a Group . . . . . . . . . . . . . . . . . . . . . . . . . . . . . . . . . . . . . . . . . . .3-32 Add an Entry to an Information Group . . . . . . . . . . . . . . . . . . . . . . . . . . . . . . . . . . . . . 3-33 Modify or Delete an Information Group Entry . . . . . . . . . . . . . . . . . . . . . . . . . . . . . . 3-34 Access Extension Options . . . . . . . . . . . . . . . . . . . . . . . . . . . . . . . . . . . . . . . . . . . . . . . . . 3-37 Call Transfer Options . . . . . . . . . . . . . . . . . . . . . . . . . . . . . . . . . . . . . . . . . . . . . . . . . . . . . . 3-38 Modem Screen . . . . . . . . . . . . . . . . . . . . . . . . . . . . . . . . . . . . . . . . . . . . . . . . . . . . . . . . . . . 5-3 Modem Error Message . . . . . . . . . . . . . . . . . . . . . . . . . . . . . . . . . . . . . . . . . . . . . . . . . . . . 5-3 Modem File Menu . . . . . . . . . . . . . . . . . . . . . . . . . . . . . . . . . . . . . . . . . . . . . . . . . . . . . . . .5-4 TalkPath - Digital Voice Processing System Technical Manual Issue 2 - May, 2004 viii Contents & Tables Dial Button . . . . . . . . . . . . . . . . . . . . . . . . . . . . . . . . . . . . . . . . . . . . . . . . . . . . . . . . . . . . . . . 5-5 Hangup Button . . . . . . . . . . . . . . . . . . . . . . . . . . . . . . . . . . . . . . . . . . . . . . . . . . . . . . . . . . . 5-6 Phone System Configuration Screen . . . . . . . . . . . . . . . . . . . . . . . . . . . . . . . . . . . . . . 5-7 Admin Screen . . . . . . . . . . . . . . . . . . . . . . . . . . . . . . . . . . . . . . . . . . . . . . . . . . . . . . . . . . . . 5-8 Status Bar . . . . . . . . . . . . . . . . . . . . . . . . . . . . . . . . . . . . . . . . . . . . . . . . . . . . . . . . . . . . . . . . 5-9 Remote System Not Responding Message . . . . . . . . . . . . . . . . . . . . . . . . . . . . . . . . . 5-9 Subscribers Screen . . . . . . . . . . . . . . . . . . . . . . . . . . . . . . . . . . . . . . . . . . . . . . . . . . . . . . . 5-10 Create Subscribers . . . . . . . . . . . . . . . . . . . . . . . . . . . . . . . . . . . . . . . . . . . . . . . . . . . . . . . . 5-11 Delete Subscriber Range . . . . . . . . . . . . . . . . . . . . . . . . . . . . . . . . . . . . . . . . . . . . . . . . . . 5-12 Edit Subscriber . . . . . . . . . . . . . . . . . . . . . . . . . . . . . . . . . . . . . . . . . . . . . . . . . . . . . . . . . . . 5-13 Subscriber Mailbox . . . . . . . . . . . . . . . . . . . . . . . . . . . . . . . . . . . . . . . . . . . . . . . . . . . . . . . 5-14 Subscriber Extension . . . . . . . . . . . . . . . . . . . . . . . . . . . . . . . . . . . . . . . . . . . . . . . . . . . . . 5-18 Class of Service Screen . . . . . . . . . . . . . . . . . . . . . . . . . . . . . . . . . . . . . . . . . . . . . . . . . . . . 5-22 Create New Class of Service . . . . . . . . . . . . . . . . . . . . . . . . . . . . . . . . . . . . . . . . . . . . . . . 5-23 Class of Service General Tab . . . . . . . . . . . . . . . . . . . . . . . . . . . . . . . . . . . . . . . . . . . . . . 5-24 Class of Service Message Tab . . . . . . . . . . . . . . . . . . . . . . . . . . . . . . . . . . . . . . . . . . . . . . 5-26 Class of Service Maintenance Tab . . . . . . . . . . . . . . . . . . . . . . . . . . . . . . . . . . . . . . . . . 5-31 Class of Service Notification Tab . . . . . . . . . . . . . . . . . . . . . . . . . . . . . . . . . . . . . . . . . . . 5-36 Class of Service Auto Attendant Tab . . . . . . . . . . . . . . . . . . . . . . . . . . . . . . . . . . . . . . . 5-40 Menus Screen . . . . . . . . . . . . . . . . . . . . . . . . . . . . . . . . . . . . . . . . . . . . . . . . . . . . . . . . . . . . 5-43 Create New Menu Screen . . . . . . . . . . . . . . . . . . . . . . . . . . . . . . . . . . . . . . . . . . . . . . . . . 5-44 Delete Menu Confirmation Screen . . . . . . . . . . . . . . . . . . . . . . . . . . . . . . . . . . . . . . . . 5-44 Edit Menu Screen . . . . . . . . . . . . . . . . . . . . . . . . . . . . . . . . . . . . . . . . . . . . . . . . . . . . . . . . . 5-45 Key Actions . . . . . . . . . . . . . . . . . . . . . . . . . . . . . . . . . . . . . . . . . . . . . . . . . . . . . . . . . . . . . . 5-47 Time Controls . . . . . . . . . . . . . . . . . . . . . . . . . . . . . . . . . . . . . . . . . . . . . . . . . . . . . . . . . . . . 5-51 Create New Time Control . . . . . . . . . . . . . . . . . . . . . . . . . . . . . . . . . . . . . . . . . . . . . . . . . 5-52 Delete Time Control Confirmation . . . . . . . . . . . . . . . . . . . . . . . . . . . . . . . . . . . . . . . . 5-52 Edit a Time Control . . . . . . . . . . . . . . . . . . . . . . . . . . . . . . . . . . . . . . . . . . . . . . . . . . . . . . . 5-53 Define Time Control Function . . . . . . . . . . . . . . . . . . . . . . . . . . . . . . . . . . . . . . . . . . . . . 5-54 Voice Lines . . . . . . . . . . . . . . . . . . . . . . . . . . . . . . . . . . . . . . . . . . . . . . . . . . . . . . . . . . . . . . . 5-57 Edit Line Settings . . . . . . . . . . . . . . . . . . . . . . . . . . . . . . . . . . . . . . . . . . . . . . . . . . . . . . . . . 5-58 Select Phone System Message . . . . . . . . . . . . . . . . . . . . . . . . . . . . . . . . . . . . . . . . . . . . 5-61 Configuration Files . . . . . . . . . . . . . . . . . . . . . . . . . . . . . . . . . . . . . . . . . . . . . . . . . . . . . . . 5-62 Configuration Warning Screen . . . . . . . . . . . . . . . . . . . . . . . . . . . . . . . . . . . . . . . . . . . . 5-62 Comm Port Options . . . . . . . . . . . . . . . . . . . . . . . . . . . . . . . . . . . . . . . . . . . . . . . . . . . . . . 5-63 Modem Setup Menu . . . . . . . . . . . . . . . . . . . . . . . . . . . . . . . . . . . . . . . . . . . . . . . . . . . . . . 5-64 Modem Quick Configure . . . . . . . . . . . . . . . . . . . . . . . . . . . . . . . . . . . . . . . . . . . . . . . . . . 5-65 Modem Information . . . . . . . . . . . . . . . . . . . . . . . . . . . . . . . . . . . . . . . . . . . . . . . . . . . . . . 5-66 Modem Phonebook . . . . . . . . . . . . . . . . . . . . . . . . . . . . . . . . . . . . . . . . . . . . . . . . . . . . . . 5-69 Phonebook Entry . . . . . . . . . . . . . . . . . . . . . . . . . . . . . . . . . . . . . . . . . . . . . . . . . . . . . . . . . 5-69 Telephone Number . . . . . . . . . . . . . . . . . . . . . . . . . . . . . . . . . . . . . . . . . . . . . . . . . . . . . . . 5-70 Issue 2 - May, 2004 TalkPath - Digital Voice Processing System Technical Manual Contents & Tables ix Delete Phonebook Entry Warning . . . . . . . . . . . . . . . . . . . . . . . . . . . . . . . . . . . . . . . . . 5-70 Modem Setup . . . . . . . . . . . . . . . . . . . . . . . . . . . . . . . . . . . . . . . . . . . . . . . . . . . . . . . . . . . . 5-71 Registry Entries . . . . . . . . . . . . . . . . . . . . . . . . . . . . . . . . . . . . . . . . . . . . . . . . . . . . . . . . . . . 5-72 Registry Values . . . . . . . . . . . . . . . . . . . . . . . . . . . . . . . . . . . . . . . . . . . . . . . . . . . . . . . . . . . 5-73 System Settings . . . . . . . . . . . . . . . . . . . . . . . . . . . . . . . . . . . . . . . . . . . . . . . . . . . . . . . . . . 5-73 System Reboot Warning Message . . . . . . . . . . . . . . . . . . . . . . . . . . . . . . . . . . . . . . . . . 5-74 Set Unit Date and Time . . . . . . . . . . . . . . . . . . . . . . . . . . . . . . . . . . . . . . . . . . . . . . . . . . . 5-75 Default Phone System Configuration . . . . . . . . . . . . . . . . . . . . . . . . . . . . . . . . . . . . . . 5-75 Shutdown Voicemail System . . . . . . . . . . . . . . . . . . . . . . . . . . . . . . . . . . . . . . . . . . . . . .5-76 Reports Menu . . . . . . . . . . . . . . . . . . . . . . . . . . . . . . . . . . . . . . . . . . . . . . . . . . . . . . . . . . . . 5-77 Log Report . . . . . . . . . . . . . . . . . . . . . . . . . . . . . . . . . . . . . . . . . . . . . . . . . . . . . . . . . . . . . . . 5-78 Help Menu . . . . . . . . . . . . . . . . . . . . . . . . . . . . . . . . . . . . . . . . . . . . . . . . . . . . . . . . . . . . . . . 5-79 Help About . . . . . . . . . . . . . . . . . . . . . . . . . . . . . . . . . . . . . . . . . . . . . . . . . . . . . . . . . . . . . . . 5-80 Current Configuration . . . . . . . . . . . . . . . . . . . . . . . . . . . . . . . . . . . . . . . . . . . . . . . . . . . . 5-80 Removing the Cover . . . . . . . . . . . . . . . . . . . . . . . . . . . . . . . . . . . . . . . . . . . . . . . . . . . . . . 6-2 ECom Screen . . . . . . . . . . . . . . . . . . . . . . . . . . . . . . . . . . . . . . . . . . . . . . . . . . . . . . . . . . . . . 7-7 Com Port Options . . . . . . . . . . . . . . . . . . . . . . . . . . . . . . . . . . . . . . . . . . . . . . . . . . . . . . . .7-8 Modem Connection . . . . . . . . . . . . . . . . . . . . . . . . . . . . . . . . . . . . . . . . . . . . . . . . . . . . . . 7-9 Hello Prompt . . . . . . . . . . . . . . . . . . . . . . . . . . . . . . . . . . . . . . . . . . . . . . . . . . . . . . . . . . . . . 7-10 Debug Mode . . . . . . . . . . . . . . . . . . . . . . . . . . . . . . . . . . . . . . . . . . . . . . . . . . . . . . . . . . . . . 7-11 Protocol Status . . . . . . . . . . . . . . . . . . . . . . . . . . . . . . . . . . . . . . . . . . . . . . . . . . . . . . . . . . . 7-13 Select Protocol . . . . . . . . . . . . . . . . . . . . . . . . . . . . . . . . . . . . . . . . . . . . . . . . . . . . . . . . . . . 7-13 Batch Upload . . . . . . . . . . . . . . . . . . . . . . . . . . . . . . . . . . . . . . . . . . . . . . . . . . . . . . . . . . . . . 7-14 Protocol Status . . . . . . . . . . . . . . . . . . . . . . . . . . . . . . . . . . . . . . . . . . . . . . . . . . . . . . . . . . . 7-15 TalkPath - Digital Voice Processing System Technical Manual Issue 2 - May, 2004 x Contents & Tables Tables Vodavi Phone Systems . . . . . . . . . . . . . . . . . . . . . . . . . . . . . . . . . . . . . . . . . . . . . . . . . . . . 2-6 Editing System Prompts . . . . . . . . . . . . . . . . . . . . . . . . . . . . . . . . . . . . . . . . . . . . . . . . . . 4-5 Functions and Programming Options . . . . . . . . . . . . . . . . . . . . . . . . . . . . . . . . . . . . . 4-19 Hardware Kit Parts . . . . . . . . . . . . . . . . . . . . . . . . . . . . . . . . . . . . . . . . . . . . . . . . . . . . . . . . 6-1 Module Debug Parameters . . . . . . . . . . . . . . . . . . . . . . . . . . . . . . . . . . . . . . . . . . . . . . . 7-12 Common Registry Variables . . . . . . . . . . . . . . . . . . . . . . . . . . . . . . . . . . . . . . . . . . . . . . . A-1 Command Files . . . . . . . . . . . . . . . . . . . . . . . . . . . . . . . . . . . . . . . . . . . . . . . . . . . . . . . . . . . B-1 Quick Commands . . . . . . . . . . . . . . . . . . . . . . . . . . . . . . . . . . . . . . . . . . . . . . . . . . . . . . . . B-5 Options . . . . . . . . . . . . . . . . . . . . . . . . . . . . . . . . . . . . . . . . . . . . . . . . . . . . . . . . . . . . . . . . . . D-5 Issue 2 - May, 2004 TalkPath - Digital Voice Processing System Technical Manual 1 Introduction Overview The Talkpath Voice Processing System is a standalone, compact, full-featured PC-compatible voicemail system that supports one company. It is a self-contained system, designed for easy installation. The Talkpath Voice Processing System unit connects directly to the following Vodavi phone systems: ❐ ❐ ❐ ❐ DVXPlus Mach I DVXPlus II DVXPlus III DVXPlus IV Quick Start To install the Talkpath Voice Processing System as quickly as possible, follow these steps: 1 Hardware Installation: See Section 2 for instructions on unpacking , installing, and phone system requirements for the Talkpath Voice Processing System unit. 2 Select Phone System: The Talkpath Voice Processing System must be configured for your particular phone system. There are two configuration methods: Telephone-based administration (see Section 4). Laptop/PC-based administration (see Section 5). Set the Date and Time: ❐ ❐ 3 Refer to Section 4 or Section 5 for instructions on setting the Talkpath Voice Processing System date and time. Issue 2 - May, 2004 Talkpath - Digital Voice Processing System Technical Manual 1-2 Introduction System Unit System Unit The following graphic shows the front and back panels of the Talkpath Voice Processing System. ❐ When lit, the red LEDs on the front panel indicate system status, port configuration, and boot sequence. If the LEDs do not match the port count, refer to Section 7 Technical / Troubleshooting NOTES - FRONT PANEL - LED Indicators - BACK PANEL Battery Access Panel Power Adapter Plug RS-232 Serial Port Port Jacks Figure 1-1. Voice Processing System - Front & Back Panels ❐ ❐ The AC adapter supplied with the system connects to AC power. The RS-232 serial port is available to connect to a PC, laptop or a customer provided 9600 bps or better modem. Four or eight line connectors connect the Talkpath Voice Processing System to a supported phone system. On 2-port systems, there are four jacks: 1 and 2 are active, jacks 3 and 4 are inactive. On 6-port systems: jacks 1-6 are active, jacks 7 and 8 are inactive. For the unit to operate, port 1 MUST be connected. NOTES ❐ Plugging a single line port into the Digital voicemail system can damage the equipment The battery compartment holds eight AA alkaline batteries that retain the system clock in case of a power failure (batteries are not included). Issue 2 - May, 2004 Talkpath - Digital Voice Processing System Technical Manual Introduction 1-3 System Unit Product Features The Talkpath Voice Processing Systems contain a rich feature set and has high storage capacity. It is wall-mountable and completely self-contained (no monitor or keyboard required). Talkpath Systems also feature laptop/PC administration through a serial port, and modem support for remote administration. An external modem must be provided by the customer. Benefits of the Talkpath Voice Processing System include: Economical compared to conventional PC platforms ❐ Pre-configured software saves installation and setup time The Talkpath Systems are equipped with 8 LED indicators. When the system is on, these lights are lit. When operating correctly, the number of lit LED indicators corresponds to the port size (e.g., 6 LEDs for a 6-port, 2 LEDs for a 2-port, etc.) When a call comes in, the line handling the call blinks, then lights steady again when the call terminates. ❐ Digital Voicemail Features Digital system features also include: ❐ ❐ Reduced equipment costs by eliminating SLT equipment requirement The telephone system and voicemail system have date/time synchronization. The voicemail system requests the date and time from the telephone system. If the voicemail system is more than the value of the Registry parameter DVMTimeDiff minutes out of sync with the telephone system, the voicemail system adjusts the date and time. The system then shuts down and restarts with the new date and time. The default value for DVMTimeDiff is 00:05:00 or 5 minutes. The telephone system displays the number of messages in a mailbox. On a display phone, the system shows the number of urgent new, new and saved messages. The display shows: VM MESSAGES XXX-YYY-ZZZ 11/28/05 04:00a ❐ ❐ Where: XXX = number of new urgent messages YYY = number of new messages ZZZ = number of saved messages One Touch Record or Record on the Fly provides a means of recording telephone conversations into your voicemailbox. Answering machine emulation monitors a caller recording a voicemail message into a mailbox. While the caller is recording, you may connect to them or let them finish leaving the messsage undisturbed. Talkpath - Digital Voice Processing System Technical Manual Issue 2 - May, 2004 1-4 Introduction Company Contact ❐ Caller ID/ANI information displays on the telephone display as each message plays and remains with voicemail messages. When retrieving the message, press [60] to dial the number with the voicemail message. When caller ID/ANI is available, the display shows: XXX-XXX-XXXX YYYYY xxx-xxx-xxxx = telephone number & yyyyy = name associated with the telephone number When there is no caller ID/ANI information, the display shows: Outside Call ❐ ❐ Smart Transfer features let the system quickly determine if a station is Busy, Do Not Disturb, or Out of Service. This transfers calls quickly and efficiently, routing the caller to the correct location. Park and Page features provides a means to let external callers reaching a mailbox be placed into a system park location, then have the voicemail system places an external page to announce the holding party. Company Contact This section contains product support information. Please use this information to contact Vodavi Communications Systems. E-Mail Support For e-mail support, contact our technical services department. Phone Support If you encounter a problem you cannot solve, call Vodavi Communications Systems Technical Support, Monday through Friday, during the hours of 6:00 am - 5:00 p.m. PT. Follow the instructions to reach the appropriate support department. Fax Support Use our fax line for sending registration or support information. Product Replacement Program Should the Talkpath Voice Processing System be found defective in materials or workmanship as stated in the Limited Product Warranty, please contact Vodavi Communications Systems, Inc. for a return authorization. You will then receive a return authorization number and instructions on returning the defective product for replacement. Issue 2 - May, 2004 Talkpath - Digital Voice Processing System Technical Manual Introduction 1-5 FCC Information FCC Information User Responsibility Should the need arise in the future, the telephone company will call the user and request the following information for any terminal equipment being connected to the Public Switched Telephone Network: Information For This Equipment Manufacturer: Vodavi Communications Systems, Inc. ❐ Model Number: (unit label) OKT-2(2 port) OKT-4 (4 port) OKT-6 (6 port) OKT-8(8 port) ❐ ❐ These units have passed and are in compliance with FCC regulation CFR47 Part 15. Jack(s) that may be used with the unit: RJ-11 Registration Note that FCC registration does not constitute an expressed or implied performance guarantee. Only the manufacturer's warranty set forth in this booklet covers the unit performance. Telephone Company Rights and Responsibilities If your unit causes harm to the Telephone Network, the telephone company may discontinue your service temporarily. If possible, they notify you in advance. But, if advance notice is not practical, you are notified as soon as possible. You have the opportunity to correct the situation and you will be informed of your right to file a complaint with the FCC. Your telephone company may make changes in its facilities, equipment, operation, or procedures that could affect the proper functioning of your unit. If they do, you will receive advanced notification so you may maintain uninterrupted service. Talkpath - Digital Voice Processing System Technical Manual Issue 2 - May, 2004 1-6 Introduction FCC Information Repair Instructions If you experience trouble with the unit, follow the procedure below: Determine whether the problem is with your unit. If the problem is in your unit, refer to these guidelines for obtaining service: ❐ ❐ If the unit is covered by the manufacturer's warranty, follow the procedure set forth in the warranty (purchaser's responsibility) for obtaining repair or unit replacement. If the unit is no longer covered by the manufacturer's warranty, you may return the unit to the manufacturer for repair or refurbishment. You are billed for any repairs. Manufacturer's policy and procedure on repair and refurbishment is available upon request by writing or calling: Vodavi Communications Systems, Inc. 4717 East Hilton Avenue Phoenix, AZ 85034 MRA: 800-825-4020 FAX: (602)443-6102 Repair to this equipment can be made only by the above manufacturer and its authorized agents, and by others who may be authorized by the FCC. Any product received without the MRA number and proper paperwork will be returned freight collect. Call or fax us for a return authorization number. Issue 2 - May, 2004 Talkpath - Digital Voice Processing System Technical Manual 2 Installation Hardware Requirements To install the Talkpath Voice Processing System, the following hardware is required: ❐ ❐ ❐ ❐ ❐ 4 6/32 x 1 inch long screws (1 inch long #6 wood screws may also be used) and the applicable wall anchors to mount the voice processing system to the wall. Screwdriver Phone switch Power connector supplying 110V AC 8 AA alkaline batteries (not supplied) Unpacking Unit When unpacking the unit, be sure you have: ❐ ❐ Talkpath Voice Processing System unit Power supply Figure 2-1. Low Voltage Power Supply ❐ ❐ ❐ Windows Administration diskette 9-pin null modem cable for laptop/PC administration Talkpath Voice Processing System manual Issue 2 - May, 2004 Talkpath - Digital Voice Processing System Technical Manual 2-2 Installation Hardware Installation Hardware Installation Installing Batteries Vodavi suggests installing eight AA alkaline batteries so if power is shut off, the system properly retains the date and time. In an unpowered unit, the eight AA alkaline batteries last approximately eight weeks. In a powered unit, they remain unaffected. The battery compartment has pull-tabs attached. Pull them to open the battery compartment. With the battery tray open, insert the batteries, slide the tray in, then snap the tabs shut. Installing the batteries in the Digital Voice Processing System unit incorrectly can cause permanent damage to the unit. NOTES Vodavi has made every reasonable effort to ensure that this product works in most business environments. However, there may be some environments (RFI and EFI) in which this product may not work properly. In such cases, it is the responsibility of the installer to take the necessary actions to correct the situation. Placement and Mounting Place the Talkpath Voice Processing System on any sturdy, flat surface, or wall mount it using the screw slots located on the bottom of the unit. Wall mounting is preferred for safety reasons. The units can be stacked. Unit must be oriented with ventilation slots on top and bottom. Screw slots allow one orientation. Position the unit so the LEDs are not blocked from view. If a console or PC is permanently connected, a screw-lock connector is recommended. For wall mounting, two upper holes and two lower holes are 8 3/8 inches apart, and the distance between the upper and lower holes is 12 1/2 inches. Mount the screws to the wall first, then position the voice processing system unit onto the screws. Insert the screws far enough into the wall far enough that when the unit is mounted onto them and slid down, the unit holds securely and safely to the wall. Do NOT open the case to tighten the screws because the lid cannot be reinstalled. Do NOT move or mount the system while it is powered. Make sure there is two inches of free space all around the unit to provide adequate ventilation. NOTES Issue 2 - May, 2004 Talkpath - Digital Voice Processing System Technical Manual Installation 2-3 Hardware Installation The figure below shows the Digital Voice Processing System unit mounted on the wall. Figure 2-2. Wall Mounted Digital Voice Processing System Connecting Phone Lines Connect the phone lines by plugging each line into an RJ-11 jack, the same as with a digital station. This can be done whether the Talkpath Voice Processing System unit is on or off. Connect all voicemail ports to digital ports on the phone systems. Voicemail port 1 must be connected to the system for the system to operate. The last active voicemail port must be connected so Message Waiting Indicators (MWI) and notifications are available. Connect the digital phone lines to voicemail before powering on the voicemail unit. Do not connect analog phone lines to the Digital voicemail because equipment failure can occur. NOTES Ports can be installed after the system is booted, but two calls must be placed to that port before it will answer. It is suggested to reboot the system to activate each additional port. The unit has four or eight RJ-11 line connectors on the back, but only the number of ports ordered are active. Talkpath - Digital Voice Processing System Technical Manual Issue 2 - May, 2004 2-4 Installation Hardware Installation Connecting Serial Cable or Modem When connecting the Digital Voice Processing System directly (or locally), use the console connection at the rear of the Digital Voice Processing System to connect the supplied 9-pin null modem cable to the laptop/PC. If attaching a modem to the Digital Voice Processing System, you must supply the necessary straight-through, 9-pin to 25-pin cable to match the modem. When connecting cables, treat the Digital Voice Processing System as a PC or other DTE device. NOTES The modem attached to the TalkPath Voice Processing System must have DIP switches that allow setting it for auto-answer and suppress result codes. To work with the TalkPath Voice Processing System, the modem MUST have switches that allow setting of these two features. Connecting Power When installing, the Digital Voice Processing System, connect the 18V AC power supply from the unit to a dedicated 120V AC, 60 Hz grounded power outlet, as shown in Figure 2-1. When the unit is ready to answer, the number of LED indicators corresponds to the port size (e.g., 6 LEDs for a 6-port, 2 LEDs for a 2-port, etc.) If, after 2-3 minutes, there are any other LEDs lit, refer to the Technical/Troubleshooting discussion in Section Section 7. Some considerations when connecting the Digital Voice Processing System: ❐ ❐ ❐ ❐ Do not make phone line connections during a lightning storm. Only use the power supply that came with Digital Voice Processing System. Other power supplies could damage the system. Be sure to route the connecting cables so they are free of tension. Connect the digital phone lines to the voicemail before powering on the voicemail unit. Issue 2 - May, 2004 Talkpath - Digital Voice Processing System Technical Manual Installation 2-5 Selecting Phone System Integration Selecting Phone System Integration Table 1 lists the available Vodavi phone systems, with their corresponding phone system number and the section in which they appear in this manual. You may use laptop/PC administration or telephone-based administration to configure the Digital Voice Processing System. NOTES After setting up the phone system, the voicemail must be set up to match the phone system to which you are connecting. The default phone system setting is: 000 (3 digits, blind transfers). Change the phone system setting using Laptop Administration (see Section 5) or using the phone (see Section 4). You can select the desired phone system by entering the 3-digit number of the phone system configuration file to load. To select a phone system via telephone-based administration, follow these steps: 1 Dial any extension number connected to the voicemail system, not the voicemail hunt grp. 2 The system answers with: Thank you for calling. If you know your party’s extension, you may dial it now. If you know your party’s name but not their extension, please dial [4]. To reach an operator, dial [0] or remain on the line. To listen to the instructions again, dial [✳]. If the system is in night mode, it plays: Thank you for calling. Our offices are closed. Please call back at a later time. If the menu greeting was re-recorded, a different prompt plays. 3 To access voicemail, press [7]. 4 Enter mailbox number 100. 5 Press [✳] followed by the password for the mailbox. The default password is 0000. 6 7 Press [7] to access administrator functions. If the mailbox is not in the supervisor Class of Service, the system prompts for the administrator password. The administrator password (default is 2275) must be entered within 3 seconds. Press [8] for system administration. 8 Press [2] to select a phone system. 9 The system then prompts for a phone system number. Select the number for the system that best matches your phone system from Table 1. 10 The system confirms your input, then resets. 11 Once the system restarts, Voice Processing System is configured for your phone system. After selecting a phone system, the next step is to set the date and time on the Digital Voice Processing System. Refer to Section 4. Talkpath - Digital Voice Processing System Technical Manual Issue 2 - May, 2004 2-6 Installation Vodavi Phone Systems Vodavi Phone Systems Below is a table of the phone systems that are compatible with the Digital Voice Processing System, along with the identification number for each phone system. Vodavi Phone System Name Number Default (3 digits, blind transfer) 000 DVXPlus Mach I (3-digit extensions) 903 DVXPlus II (3-digit extensions) 900 DVXPlus III (3-digit extensions) 901 DVXPlus IV (3-digit extensions) 902 DVXPlus Mach I (4-digit extensions) 913 DVXPlus II (4-digit extensions) 910 DVXPlus III (4-digit extensions) 911 DVXPlus IV (4-digit extensions) 912 Table 2-1. Vodavi Phone Systems Phone System Requirements Listed below are the phone system requirements for voicemail systems: ❐ ❐ A digital port for each voicemail port purchased. For example, a 6-port voicemail system requires six digital ports. Phone system software 1.36 or higher Verify that the phone system software is version 1.36 or higher. To determine the version, dial [605] from the first programmed attendant station. The following message displays on the display phone: Eng. Ver. X.XX-YYYY VODAVI ALL HH:MM Where: X.XX = version number HH:MM = the current time Issue 2 - May, 2004 Talkpath - Digital Voice Processing System Technical Manual Installation 2-7 Phone System Programming and Voicemail Setup Phone System Programming and Voicemail Setup Follow these steps to program the phone system: 1 Determine the extensions connected to the voicemail system. 2 Go to station 100 for programming. 3 Enter Admin Mode by dialing [✳✳3226]. 4 Program the system date and time: a Press [Flash 11]. The following message displays: DATE & TIME MMM DD YY 5 HH:MM b Choose the display format by pressing the appropriate flexible button. [Button 1] LED Off = 12 hour display format [Button 1] LED On = 24 hour display format c Enter the date and time: YYMMDDHHMMSS (military format). d Press [HOLD]. Program the Voicemail Group: a Press [Flash65, button 1]. The following message displays: VM 440 AAA LLL R XXX,XXX, XXX,XXX,XXX,XXX,XXX,XXX Where: AAA = Alternate Group LLL = Leave Mail Index R = Retrieve mail index from out pulsing table for retrieving messages 0-7 XXX = Voicemail Station Numbers (ports), up to 8 stations maximum in each group 6 b Press [Button 12]. c Enter the 3-digit station numbers. A maximum of eight stations can be entered. Enable ICLID if feature is installed on the phone system. Otherwise, skip to the next step. a Press [Flash 56, button 1]. b Press [HOLD] to save. Talkpath - Digital Voice Processing System Technical Manual Issue 2 - May, 2004 2-8 Installation Optional Station Programming 7 Program CO Line Ringing Assignments to ring CO lines directly to voicemail, if necessary. a Press [Flash 40]. b Enter the CO line range (CO line numbers are 3 digits in length). c Press [HOLD]. d Press [Button 10]. The following displays: RING ASSIGNMENTS ENTER DDDR e Dial [4407]. f Press [HOLD] to save. 8 Plug the voicemail ports into the digital voicemail. 9 Apply power to the voicemail unit. Voicemail ports must be plugged into the digital voicemail system to allow boot up. NOTES 10 Program the voicemail system to match the phone system type. Refer to the Voicemail Administration manual for instructions. 11 Configure Subscriber, Menu, Class of Service, Time Control, and Voice Line settings through laptop/PC administration. Refer to Section 5. Optional Station Programming Perform the following steps to program the stations: 1 Enable Call Forwarding on the station if using the voicemail Blind Transfer option. a Lift handset or press [ON/OFF]. b Press the FWD button c [7] = no answer calls d [8] = busy calls e [9] = busy and no answer calls f Dial [440]. A confirmation tone is heard. g Replace the handset or press [ON/OFF]. Issue 2 - May, 2004 Talkpath - Digital Voice Processing System Technical Manual Installation 2-9 Optional Station Programming 2 3 4 Program the One Touch Record Begin Button. a Press [SPEED] twice. b Press the flexible button to program. c Press [649440]. A confirmation tone is heard. d Press [ON/OFF]. Program the Record Pause/Resume Button. a Press [SPEED] twice. b Press the flexible button to program. c Press [655]. A confirmation tone is heard. d Press [ON/OFF]. Program answering machine emulation button. a Press [SPEED] twice. b Press the flexible button to program. c Press [654X]. A confirmation tone is heard. Where X is: [1] = Speaker Mode [0] = Ring Mode Talkpath - Digital Voice Processing System Technical Manual Issue 2 - May, 2004 2-10 Installation Optional Station Programming Issue 2 - May, 2004 Talkpath - Digital Voice Processing System Technical Manual 3 Feature Operation Overview The Digital Voice Processing System is a stand-alone, compact, full-featured PC-compatible Voicemail System. It is a self-contained system, designed for easy installation. Introduction The Digital Voice Processing System is a powerful tool for telephone automation. With it, you can: Receive voice messages ❐ Send voice messages ❐ Record a personal greeting ❐ Verify the date and time a message was sent ❐ Screen incoming calls ❐ Be notified of an important message any time, any place ❐ Let a calling party wait on hold ❐ One-touch recording ❐ LCD-based caller information Use this guide to learn how to use the Digital Voice Processing System features. The guide covers: ❐ The features and their use How to access features ❐ How to change feature settings Voice prompts and menu help systems guide you through the operation of all the features. The menu-driven Digital Voice Processing System is easy to use. By taking the time to read this manual, you may maximize the capabilities of this system. ❐ ❐ NOTES Issue 2 - May, 2004 The system administrator may not have activated all the features described in this manual and, therefore, some may be inaccessible. Check with the system administrator to determine which features are available on your system. Talkpath - Digital Voice Processing System Technical Manual 3-2 Feature Operation Introduction Some Basics A menu is a group of features or selections. Access features by pressing [0-9], [#], or [✳] from the dialpad of any touch-tone telephone. Menus are connected in a tree structure, that is, general topics are divided into more specific areas. For example, when you dial your mailbox number the menu prompts, Press [1] to retrieve messages. Press [2] to send a message. Press [8] for personal options. These selections are general topics that deal with a number of feature settings. Select [8] personal options, to hear the following: Press [1] to edit greeting. Press [2] to change your password... Special keys include [✳] which replays the current menu selections, [#] which takes you back to the previous menu, and [9] which hangs up or disconnects from the Digital Voice Processing system. [✳] is also used at specific points in the program to gain access to system features. Figure 3-1. Special Keys As a new user, press [✳] often to replay the menu selections and become familiar with the system. Experienced users may not want to listen to the menu selections. In that case, the Type Ahead feature overrides voice prompts and lets users enter a string of keys that directly accesses the desired voicemail feature. Getting Started Before going further, gather the following information: ❐ ❐ ❐ ❐ The internal or external phone number to access the Digital Voice Processing System. Your mailbox number. Your extension number. Your password. Issue 2 - May, 2004 Talkpath - Digital Voice Processing System Technical Manual Feature Operation 3-3 Voice Messaging Operation Voice Messaging Operation Voice Messaging lets users send and receive voice messages. This eliminates telephone tag and increases productivity. The following illustration shows the menu structure for voice messaging. - - - - - - - Listen to Messages WHILE LISTENIN G [6] [0] Callback Sender [6] [1] Move to Saved Msgs [6] [2] Pause [6] [3] Skip [6] [8] Volume Down [6] [9] Volume Up [7] Rewind [8] Fast Forward AFTER LISTENI NG [1] [2] [3] [#] [4] [5] [8] Replay Save Delete & Confirm Forward Reply Date & Time - - - M A I N Send a Message Record Message when finished … press any key M E N U Extended Options - - - - - Edit Personal Options - - - - - Transfer to Mbx or Ext See Auto Attendant [1] Message OK [2] Hear [3] Cancel [4] Append [5] Re-record [1] Greeting [2] Password [3] Name [4] Delete Sent Msg [8] Other Enter Mailbox Number -or- [1] Notification Settings [2] Mailbox State [3] Distribution List [4] Guest Mailbox [1] Standard [2] Temporary [8] Other [1] Internal (Future) [2] Busy [3] Time Sensitive SEND OP TIONS [✳] [✳] Spell Name [✳] [4] Guest Mailbox [✳] [5] System List [#] Send as is [✳] Re-enter Destination [3] Cancel [6] Send Options At any time, press: [1] Private [2] Urgent [3] Cancel [4] Confirm Delivery [5] Future [#] Send Message [#] to go back [✳] to replay menu [9] to hang up Figure 3-2. Voice Message Menu Structure Talkpath - Digital Voice Processing System Technical Manual Issue 2 - May, 2004 3-4 Feature Operation Voice Messaging Operation System Access Figure 3-3. System Access To access the system: 1 Dial the internal extension or outside phone number of the Digital Voice Processing System. Once connected, the system prompts you with a greeting similar to the following, The office is now closed. Please try your call again later. 2 Enter your mailbox number. 3 Press [✳] to access your mailbox. The system responds with: Please enter your password. [✳] is the default key set at the factory. The system administrator may have changed this key. NOTES 4 Enter your password. The System Administrator initially sets the password. The default password is 0000. Once a user accesses their mailbox the system always plays a message with the number of messages, the number of new messages and the number of saved messages. For example: You have two new messages and three saved messages. The next set of messages are: ❐ ❐ ❐ ❐ ❐ Press [1] to retrieve messages Press [2] to send a message Press [8] for personal options Press [6] for extended personal options Press [0] to transfer to a mailbox or extension Issue 2 - May, 2004 Talkpath - Digital Voice Processing System Technical Manual Feature Operation 3-5 Voice Messaging Operation If there are no messages, the system prompts: Press [2] to send a message ❐ Press [8] for personal options ❐ Press [6] for extended personal options ❐ Press [0] to transfer to a mailbox or extension New users must: ❐ 1 Record their name as the owner of this mailbox 2 Change the security code 3 Record a personal greeting The System Administrator can enable a First Time Help feature that guides users through recording their name, changing their password and recording a greeting. Users can change any of these options at any time. Smart Prompts Smart prompting is the ability to provide prompts for available features to the user. These prompts play only when the feature is enabled by the system administrator. The following options are available to mailbox owners if they were activated in Class Of Service. Refer to Section 5. Record Name Recording names for each mailbox provides the mailbox with a personalized identity. For example, when a voice mailbox (VM) user leaves a message they hear the following prompt, Message will be sent to (Name). This gives the caller a confirmation that the message was sent to the correct person. Confirmation is especially useful if the message was sent using the spell by name feature. If a name is not recorded the caller hears Message will be sent to mailbox XXXX. Figure 3-4. Record a Name Talkpath - Digital Voice Processing System Technical Manual Issue 2 - May, 2004 3-6 Feature Operation Voice Messaging Operation To record a name: 1 Press [8] for personal options 2 Press [3] for name option 3 Press [2] to record your name Once the name is recorded: 1 Press [1] to listen to the current name 2 Press [2] to record again 3 Press [#] when finished recording Password To keep messages confidential and prevent unauthorized use of a mailbox, change the password. The password can be changed as often as needed. The password is a four digit number, unless the System Administrator sets a different number. Select a code that is easy to remember but is not obvious. For example, do not use 5555. However, the first four digits of a home telephone number might work well. If the code is forgotten, the administrator can reset the mailbox. Figure 3-5. Change a Password Issue 2 - May, 2004 Talkpath - Digital Voice Processing System Technical Manual Feature Operation 3-7 Voice Messaging Operation To change a password: 1 Press [8] for personal options. 2 Press [2] for password option. The current password plays. 3 Enter the new password followed by [#] 4 Press [#] to keep the new password. Greeting The greeting is a personal message that callers hears when they dial a mailbox. The greeting usually tells the caller that the mailbox owner is unavailable, when the owner can be reached, and how to record a message. To record a greeting, the mailbox owner should speak at a natural pace, perhaps just slightly faster than normal. The Digital Voice Processing System has several greeting options available: Standard ❐ Temporary ❐ Busy ❐ Time Sensitive When mailbox owners do not record a personal message, the system plays the following message: ❐ Please leave a message after the tone. When you are finished, you can hang up or press any key for other options. Talkpath - Digital Voice Processing System Technical Manual Issue 2 - May, 2004 3-8 Feature Operation Voice Messaging Operation Figure 3-6. Record Standard Greeting To record a Greeting: 1 Press [8] for Personal Options 2 Press [1] to Record Greeting 3 Press [1] for Standard Greeting options 4 Press [2] to record the Standard greeting Once the greeting is recorded: 1 Press [1] to review it 2 Press [2] rerecord 3 Press [3] to erase it 4 Press [#] to return As mentioned, the Digital Voice Processing System has three other greeting types besides the standard greeting. ❐ Standard — Default greeting that is played 24 hours a day, seven days a week or any time a caller accesses a mailbox, unless the mailbox owner has programmed one of the other greetings for special situations. The temporary, time sensitive, and busy greetings override the standard greeting when activated. Issue 2 - May, 2004 Talkpath - Digital Voice Processing System Technical Manual Feature Operation 3-9 Voice Messaging Operation ❐ ❐ ❐ Temporary — Mailbox users can record temporary greetings for times when they are out of the office such as vacations, business trips or personal appointments. Temporary greetings become effective as soon as they are recorded. Busy — This greeting is used when a transfer to an extension encounters a busy extension. In this case, the system checks for a busy greeting and if found, plays the greeting to the caller. Time Sensitive — The System Administrator configures the mailbox for time sensitive greetings. The mailbox owner can then record greetings based on the System Administrator’s schedule (refer to Section 7). Note that time sensitive greetings take precedence over all other greetings. Retrieving Messages Mailbox subscribers hear their messages played back in the following order: new messages first and then previously saved messages. All messages are played in the order they were received with the oldest message played first, unless programmed differently by the System Administrator. The following diagram shows the features available while reviewing the messages. Features can be accessed at any time. It is unnecessary to wait until the end of the message. Even if a message is forwarded, it must be saved, deleted or skipped. NOTES If the message is saved, the system erases it automatically after a designated time period. The System Administrator programs this retention period through class of service, typically set to a week. Users should verify the retention period with the System Administrator. After hearing you have a message, press [1] to listen to the message. Talkpath - Digital Voice Processing System Technical Manual Issue 2 - May, 2004 3-10 Feature Operation Voice Messaging Operation Figure 3-7. Retrieve a Message Options available while listening to a message: Press [6] and [0] to Call Back the internal or external caller that left the message ❐ Press [6] and [1] to Skip Directly to Saved Message ❐ Press [6] and [2] to Pause, press [2] to Resume ❐ Press [6] and [3] to Skip a Message ❐ Press [6] and [8] Volume Down ❐ Press [6] and [9] Volume Up ❐ Press [7] to Rewind ❐ Press [8] to Fast Forward After listening to a message: ❐ ❐ ❐ ❐ ❐ ❐ ❐ Press [1] to Replay Press [2] to Save Press [3] and [#] to Delete and Confirm Press [4] to Forward Press [5] to Reply Press [8] to Hear Date/Time Issue 2 - May, 2004 Talkpath - Digital Voice Processing System Technical Manual Feature Operation 3-11 Voice Messaging Operation Figure 3-8. Other Message Options Other options include: ❐ ❐ ❐ ❐ Press [1] to Forward As Is Press [4] to Leave Preamble and Forward Lets a mailbox owner pass the message to another mailbox owner. When forwarding messages, users enter the mailbox number or press [✳] and spell the called person's name. The person receiving the forwarded message hears the preamble (comments) first, followed by the message. Press [5] to Reply Respond directly to the person who left the message without entering a mailbox number. This feature is available only when the message is recorded in one mailbox, then sent to another mailbox. Calling a mailbox directly and leaving a message does not record the mailbox number for a reply. Press [8] to Hear the Date/Time Gives the date and time the message was sent. The system automatically attaches this information to each message. NOTES If you hang up without doing a delete or save, your messages are automatically saved in the state they originated when you accessed the mailbox. Talkpath - Digital Voice Processing System Technical Manual Issue 2 - May, 2004 3-12 Feature Operation Voice Messaging Operation Sending A Message Users may send messages to other mailbox owners or to a system distribution list, a personal distribution list, or to guest mailboxes. Once a message is recorded, a mailbox user can send that message to any number of mailboxes. Figure 3-9. Prepare a Message to Send Issue 2 - May, 2004 Talkpath - Digital Voice Processing System Technical Manual Feature Operation 3-13 Voice Messaging Operation To prepare a message to send: 1 Press [2] to send a message. 2 Record your message after the tone. 3 When finished, press any key to end recording. Once a message is recorded, there are several options available: ❐ ❐ ❐ ❐ ❐ Press [1] if message is okay Press [2] to listen to the message Press [3] to cancel the message Press [4] to append to the message Press [5] to record the message again Figure 3-10. Record Message Keys Talkpath - Digital Voice Processing System Technical Manual Issue 2 - May, 2004 3-14 Feature Operation Voice Messaging Operation Figure 3-11. Mailbox to Receive Message When the message is ready to send: 1 Enter the desired mailbox number or: 2 [✳] and [✳] to spell a name (1st 4 characters). ❐ [✳] and [4] to send to a guest mailbox. ❐ [✳] and [5] to send to a system distribution list. ❐ [✳] and [7] to send to a personal distribution list (0-9). Press [#] when finished. ❐ Figure 3-12. Send Options Issue 2 - May, 2004 Talkpath - Digital Voice Processing System Technical Manual Feature Operation 3-15 Voice Messaging Operation The following send options are available: 1 [#] to send message as is. 2 [✳] to reenter send destination. 3 [3] to cancel. 4 [6] For additional send options. [1] Private [2] Urgent [3] Cancel [4] Confirmation [1] Certified [2] Notification of non-delivery [5] Future Delivery Enter MM:DD:HH:MM, press: [1] AM [2] PM [#] Confirm [3] Cancel [#] Send NOTES If a user does not have the option enabled, the system does not prompt the user. For example: If the Class of Service does not permit spell name, the prompts do not give the user the option, or if the user does not have a guest mailbox defined, the system does not prompt with the 4 option. Talkpath - Digital Voice Processing System Technical Manual Issue 2 - May, 2004 3-16 Feature Operation Voice Messaging Operation Reply To Sender Reply to Sender lets the user respond to a mailbox message. The Digital Voice Processing System automatically sends the subscriber’s reply to the person or mailbox that sent the message. The reply and message also can be sent to other mailboxes, can use the spell by name option, or be sent to a distribution list (personal or system). Figure 3-13. Reply to a Message To reply to the sender: 1 Press [1] to retrieve message. 2 Press [5] to reply to message. 3 Press [#] to confirm or press [✳] to cancel. 4 Leave your message and press any key. Issue 2 - May, 2004 Talkpath - Digital Voice Processing System Technical Manual Feature Operation 3-17 Voice Messaging Operation After recording the reply the options are: ❐ ❐ ❐ ❐ Press [1] to send the reply. Press [2] to replay the reply. Press [3] to cancel the reply. Press [4] to re-record the reply. After the reply, the system returns you to the retrieve message function. NOTES Figure 3-14. Re-record Keys Talkpath - Digital Voice Processing System Technical Manual Issue 2 - May, 2004 3-18 Feature Operation Voice Messaging Operation State The mailbox State determines how the system handles a call when someone leaves a message. Usually, this means playing the called party's personal greeting, then prompting the caller to leave a message. However, several other feature selections let the call be handled differently. Figure 3-15. Set the State To set the state: 1 Press [8] for personal options. 2 Press [8] for other options. 3 Press [2] for mailbox state options. Refer to Section 5 for additional information on state functions. Activating this feature may cause the system to perform in an unexpected manner. NOTES Issue 2 - May, 2004 Talkpath - Digital Voice Processing System Technical Manual Feature Operation 3-19 Voice Messaging Operation The diagram below shows the available state options: Figure 3-16. State Functions Talkpath - Digital Voice Processing System Technical Manual Issue 2 - May, 2004 3-20 Feature Operation Voice Messaging Operation Message Notification Message Notification instructs the system to contact the mailbox owner on receipt of a message by dialing an alternate phone number or activating a paging device. Refer to Section 5 for additional information on message notification. Figure 3-17. Set Message Notification To set message notification: 1 Press [8] for personal options. 2 Press [8] for other options. 3 Press [1] for notification. Notification type can be immediate, timed or urgent only. ❐ ❐ ❐ Immediate — The system dials the mailbox owner as soon as the message is left. Timed — The system waits for a set time before dialing the mailbox owner. On Urgent Only — Activates notification when messages are marked as urgent. Issue 2 - May, 2004 Talkpath - Digital Voice Processing System Technical Manual Feature Operation 3-21 Voice Messaging Operation The following diagram shows the notification selections: Figure 3-18. Message Notification Keys Message notification functions include: Figure 3-19. Message Notification Functions ❐ ❐ ❐ ❐ ❐ Press [1] to play the current settings. Press [2] to turn this feature off. Press [3] to set immediate notification. Press [4] to set time notification. Press [5] to set the number where to reach you. This number can be an internal extension, outside phone number, or digital pager. Talkpath - Digital Voice Processing System Technical Manual Issue 2 - May, 2004 3-22 Feature Operation Voice Messaging Operation When the system calls a mailbox owner, the owner hears: You have a new message (Name). Please enter your password to accept the message. Owners can access their messages manually anytime. However, if an owner is expecting an important message or does not plan to be in the office, this feature provides added flexibility. NOTES For notification per time period, the system administrator must create a Command File. See Appendix C for examples and instructions. Distribution Lists The Distribution List option lets users create a message and send it to a group of mailboxes. The System Administrator can create lists for mailbox users. For example, there could be a system distribution list for all employees involved in a particular product, or all employees in a department. Issue 2 - May, 2004 Talkpath - Digital Voice Processing System Technical Manual Feature Operation 3-23 Voice Messaging Operation Send to Distribution List The following diagram shows how to send a message to a distribution list. Figure 3-20. Send Message to Distribution List Talkpath - Digital Voice Processing System Technical Manual Issue 2 - May, 2004 3-24 Feature Operation Voice Messaging Operation Personal Distribution Lists The Digital Voice Processing System lets mailbox users create, edit or delete up to ten personal distribution lists. Each list may contain up to 25 mailboxes. Create a Distribution List Use the instructions in the following diagram (if you are calling into a VM port) to create a personal distribution list. Personal distribution lists are useful for sending meeting reminders or other notices to groups. Figure 3-21. Distribution List Issue 2 - May, 2004 Talkpath - Digital Voice Processing System Technical Manual Feature Operation 3-25 Voice Messaging Operation Add Mailbox Entries to Personal List Use the following diagram to add mailbox entries into an existing list. Figure 3-22. Add / Delete Mailbox Entries Talkpath - Digital Voice Processing System Technical Manual Issue 2 - May, 2004 3-26 Feature Operation Voice Messaging Operation Delete a Mailbox Entry on Personal List Use the following diagram to delete a mailbox entry from a list. Useful for keeping personal lists current when mailbox users are in special groups. Figure 3-23. Delete a Mailbox Issue 2 - May, 2004 Talkpath - Digital Voice Processing System Technical Manual Feature Operation 3-27 Voice Messaging Operation Delete a Personal List This feature is helpful in keeping complete lists current and making room for current lists. Delete a list when it is no longer needed. Figure 3-24. Delete a Personal List Guest Mailboxes The Digital Voice Processing System lets users create up to ten guest mailboxes. Guest mailboxes are utilized by individuals who do not have their own permanent mailbox on the system. Guests receive messages from the mailbox owner and can easily reply to the message. The Guest Greeting recording must include a prompt for the Guest to enter their mailbox number, followed by [#]. NOTES Talkpath - Digital Voice Processing System Technical Manual Issue 2 - May, 2004 3-28 Feature Operation Voice Messaging Operation Create a Guest Mailbox Each guest mailbox can contain up to ten messages. Use the following diagram to create a guest mailbox. Figure 3-25. Create a Guest Mailbox Once a guest mailbox is created, the guest mailbox creator has the following options: Press [1] to list mailboxes ❐ Press [2] to create a mailbox ❐ Press [3] to delete a mailbox ❐ Press [4] to edit mailbox greetings The Digital Voice Processing System uses one guest mailbox greeting for all guest mailboxes. This greeting is played whenever a guest mailbox user accesses the guest mailbox. The guest greeting should be generic. For example: ❐ To see if I left you a message, enter your guest mailbox number followed by [#]. The Guest Greeting recording must include a prompt for the Guest Mailbox user to enter their Guest Mailbox number followed by [#]. NOTES Issue 2 - May, 2004 Talkpath - Digital Voice Processing System Technical Manual Feature Operation 3-29 Voice Messaging Operation Guest Messages Use the following diagram to leave messages for guest mailboxes. Figure 3-26. Send a Guest Message Using a guest mailbox: 1 Have the guest call into the system and access the owner's mailbox. 2 While listening to the mailbox greeting, press [4] (G for guest). 3 After pressing [4], the caller hears the guest greeting recorded by the mailbox owner. 4 Guests enter the mailbox number assigned to them followed by [#]. 5 The system plays any messages stored in the guest mailbox. 6 After each message, the guest can: ❐ ❐ ❐ ❐ Press [1] to replay messages Press [3] to play next message Press [2] to reply to owner Press [8] to timestamp The system automatically deletes guest messages. The guest mailbox owner cannot save or forward the message. NOTES Talkpath - Digital Voice Processing System Technical Manual Issue 2 - May, 2004 3-30 Feature Operation Voice Note Pad Voice Note Pad The Voice Note Pad is a programmable voice database that uses recorded information for retrieval later. For example, a system user wants to track the phone numbers of various business contacts, including the ABC Company. The user first creates an information group called Business Phone Numbers. The user enters 222, a keyword or ID for the ABC company (222 represents the letters ABC on the phone key pad). The person then records the ABC Company's phone number, business hours, and any additional information. To hear this information, the user simply accesses the note pad, selects the Business Phone Numbers information group, and enters the ID code for ABC Company. ❐ ❐ ❐ The note pad can create up to eight information groups. The number of entries stored in a group is limited only by the available disk space. Entry IDs can be any combination of keys 0-9 and from 1-8 digits. Figure 3-27. Note Pad Information Groups Steps to follow when working with the voice note pad: 1 Access your mailbox. 2 Press [6] to edit Extended Options. 3 Press [2] to access the personal note pad. 4 Select an option from the following: ❐ ❐ ❐ ❐ A group number (system names the groups already set up). Valid numbers are 1-8. To repeat groups, press [✳]. Press [#] to return. Issue 2 - May, 2004 Talkpath - Digital Voice Processing System Technical Manual Feature Operation 3-31 Voice Note Pad Create an Information Group Figure 3-28. Create an Information Group To create a new information group, follow the instructions for accessing a voice note pad, then: 1 Select an option Enter an unused group number from 1-8. ❐ Press [#] to create an information group. ❐ Press [✳] to repeat selections. Record a brief description for the new group. When finished, press [#]. You hear: New Group Created ❐ 2 Talkpath - Digital Voice Processing System Technical Manual Issue 2 - May, 2004 3-32 Feature Operation Voice Note Pad Modify an Information Group Figure 3-29. Add, Change, or Delete a Group To add, modify, or delete information in a group, change the group description or delete the entire group, access the group using the procedures above, then: 1 Enter the group number to modify. You hear: You selected (Group Description) 2 Enter the keyword, then press [#]. 3 When finished, press [#], then: ❐ ❐ Press [1] + [✳] to change group description or Press [3] + [✳] to delete group and all IDs. Issue 2 - May, 2004 Talkpath - Digital Voice Processing System Technical Manual Feature Operation 3-33 Voice Note Pad Add a New Entry Figure 3-30. Add an Entry to an Information Group 1 Enter a keyword, then press [#]. You hear: There is no information for the keyword you entered. To create a new entry under this keyword, press [#] 2 Press [✳] to enter. 3 Press [#] to record a new entry. You hear: After the tone, start recording. When finished, press any key. 4 Record the information you want associated with this keyword. When done, press [#]. You hear: ID information created. Talkpath - Digital Voice Processing System Technical Manual Issue 2 - May, 2004 3-34 Feature Operation Voice Note Pad Modify an Existing Entry Figure 3-31. Modify or Delete an Information Group Entry Issue 2 - May, 2004 Talkpath - Digital Voice Processing System Technical Manual Feature Operation 3-35 Voice Note Pad 1 Enter the keyword, you hear: 2 Press [1] to hear again Press [2] to re-record ID ❐ Press [3] to delete ID ❐ Press [4] to append to ID ❐ Press [#] to return Press [1] + [✳] to change the group description. You hear: 3 ❐ After the tone, record the new group description Press [3] + [✳] to delete the group and all information stored in the group. You hear: ❐ ❐ ❐ ❐ Press [#] to delete group Otherwise, press [✳] Talkpath - Digital Voice Processing System Technical Manual Issue 2 - May, 2004 3-36 Feature Operation Automated Attendant Operation Automated Attendant Operation Access the Auto Attendant menu using the Voicemail Menu. Press [6] (Extended Options) on the Main Voicemail menu to change Auto Attendant functions. Features available to a voicemail owner are dependent on the configuration set by the System Administrator. This section discusses the basic features available to Mailbox Owners. The Digital Voice Processing System Auto Attendant Module performs call transfers without the assistance of a live operator. The Digital Voice Processing System supports two transfer methods: Blind and supervised. Automated Attendant Functions The following shows the functions for the Automated Attendant: Issue 2 - May, 2004 Talkpath - Digital Voice Processing System Technical Manual Feature Operation 3-37 Automated Attendant Operation System Access System access lets a mailbox user set and edit the special Automated Attendant features. Access extension features through the Voicemail Owner menu. Figure 3-32. Access Extension Options Talkpath - Digital Voice Processing System Technical Manual Issue 2 - May, 2004 3-38 Feature Operation Automated Attendant Operation Call Transfer Options The diagram below shows the Transfer Option selections. The Digital Voice Processing System transfers calls using several methods. The method of transfer is changed through Extension Maintenance. Figure 3-33. Call Transfer Options 1 Press [1] for the extension settings option. 2 Select the desired transfer option. When the Digital Voice Processing System forwards a call to an extension the transfer can be: ❐ ❐ Immediate Forward — Press [1] and the Digital Voice Processing System forwards the call immediately to the mailbox without trying to reach the extension. Unsupervised (Blind) — Press [2] and the Digital Voice Processing System does not monitor the transfer, it transfers immediately to the extension. In the event the call is unanswered, the system does not forward the call. Note that the station must be call forwarded to voicemail. Issue 2 - May, 2004 Talkpath - Digital Voice Processing System Technical Manual Feature Operation 3-39 Automated Attendant Operation ❐ Supervised — Press [3] and the Digital Voice Processing System monitors the transfer. If the call is unanswered, it is forwarded. If the System Administrator enables the Call Screening or Call Holding functions, the extension can be set with these options: Press [1] to set Call Screen Press [2] to set Call Hold Press [3] to set Both Call transfers to the mailbox or extension of the person calling. If the transfer is Supervised or Immediate Forward, select where to forward the call. NOTES Talkpath - Digital Voice Processing System Technical Manual Issue 2 - May, 2004 3-40 Feature Operation Automated Attendant Operation Issue 2 - May, 2004 Talkpath - Digital Voice Processing System Technical Manual 4 Online Administration Overview After connections are established (see Section 2), the system accepts calls. Remember that the laptop/PC administration or telephony administration (limited access) can be used to configure the Digital Voice Processing System unit. This section describes the telephony administration. Access the system as the system administrator and perform the following steps: 1 Dial any of the extension numbers connected to the Digital Voice Processing System. 2 The system responds with: Thank you for calling. If you know your party’s extension you may dial it now. If you know your party’s name but not their extension, please dial [4]. To reach an operator dial [0] or remain on the line. To listen to the instructions again, dial [✳]. If the system is in night mode, it plays: Thank you for calling. Our offices are closed. Please call back at a later time. If the greeting was re-recorded, a different prompt plays. 3 To access voicemail, press [7]. 4 Enter mailbox number. 5 Press [✳] followed by the password. The default password is 0000. 6 Press [7] to access administrator functions. If the mailbox is not in the supervisor Class of Service, the system prompts for the administrator password. The default administrator password is [2275]. The password must be entered within 3 seconds. With the online administration, data is entered only through a touch-tone telephone. The Admin Password can be changed in the Registry (only by using the laptop/PC). NOTES Issue 2 - May, 2004 If you have not configured your phone system, do so now. Refer to Section 2 for information. Talkpath - Digital Voice Processing System Technical Manual 4-2 Online Administration Supervisor Functions Supervisor Functions The following is an overview of the Administrative Functions. Issue 2 - May, 2004 Talkpath - Digital Voice Processing System Technical Manual Online Administration 4-3 Record Prompts + 7 5 Administer Broadcast Messages 1 2 3 # Listen to message Create a message Cancel a broadcast message Return one level Record Prompts Record Prompts handles the recording of various prompts in the system. With this option, the administrator can edit three types of prompts: Menu prompts ❐ System prompts ❐ Mailbox signatures Option prompts are played during options processing. A caller hears this prompt instructing them on what keys to press for an option. System prompts are generic prompts for basic system functions, such as the voicemail instruction prompt or the auto attendant instruction prompt. These can be customized. ❐ Mailbox signatures are the recorded names associated with a particular mailbox. For all of these prompts, if the prompt does not exist, the only option available is to record a new one. If the prompt does exist, it can be played, re-recorded, or deleted. NOTES Talkpath - Digital Voice Processing System Technical Manual Issue 2 - May, 2004 4-4 Online Administration Record Prompts Edit Menu Prompts Editing Menu Prompts overwrites the default option prompts. It plays the current greeting if it exists and lets you record or re-record a greeting, depending on whether one exists. If a greeting exists, it can be changed or deleted. These prompts play: Enter the menu number followed by [#]. Press [#] to return. At this point, enter the menu number. (Default Menus are 100-179) [1] to hear greeting [2] to re-record [3] to delete [#] when finished Edit System Prompts Editing System Prompts allows re-recording of default system prompts. The table below outlines the customizable prompts used while in the Record Prompts option of the Administrative Functions. All prompts are located in the VOX directory. Record new information to replace the default prompt, or create a blank prompt (with one byte of data) to suppress certain prompts. These prompts play: Enter the 3-digit prompt number to re-record followed by [#]. Press [#] to go back. At this point, enter the prompt number to edit. (Default prompt numbers are 001-012. See Section). [1] listen to Current System prompt [2] to re-record the Current Custom prompt [3] to delete the Custom System prompt [#] to edit another prompt Issue 2 - May, 2004 Talkpath - Digital Voice Processing System Technical Manual Online Administration 4-5 Record Prompts Prompt Number Description VOPGPRE.VOX 001 Preamble prompt that plays in front of a numeric page. Page message is. You have a message to call. VMINSTR.VOX 002 Voicemail instructions prompt. Enter the mailbox number of the person you are trying to reach. Press 0 for the operator. Press ✻ for the directory. VMSYSGRT.VOX 003 First system greeting. Played if selected in COS. The person you have tried to reach is not available. Please leave a message after the tone. VMSYSGR2.VOX 004 Second system greeting. Played if selected in COS. Begin speaking at the tone. When you are finished recording, you may hang up or press any key for more options. VMRECKEY.VOX 005 Replaces the record start key prompt. To start recording press 1. VMRECOPT.VOX 006 Replaces the record option prompt. To send message, press 1; To play message, press 2; To cancel message, press 3; To append message press 4; To re-record message press 5. DIRGETDI.VOX 007 Prompt asking for lookup digits in directory. Enter the first four characters of the person’s last name. For Q, press 7. For Z, press 9. AAINSTR.VOX 008 Provides auto attendant instructions. Enter the extension number of the person you are trying to reach. For the company directory press ✻. To reach an operator, press 0. AAHVCALL.VOX 009 Prompt announcing that an extension has a call. You have a call. AACALLFO.VOX 010 Announces that the extension has a call for a particular extension. Call for... AASCNASK.VOX 012 Prompt asking caller to say name. Who may I say is calling? Table 4-1. Editing System Prompts Talkpath - Digital Voice Processing System Technical Manual Issue 2 - May, 2004 4-6 Online Administration Record Prompts AAXFRMSG.VOX 013 Prompt telling callers they will be transferred. Please hold while I transfer you to... AAHOLD.0 014 First prompt played when the system must put a caller on hold and the COS plays to play hold files. Please hold. We appreciate your patience... By default, this prompt is not active on the system. AAHOLD.1 015 Hold files played when the system needs to put a caller on hold and the COS plays to play hold files. Please continue to hold... AAHOLD.2 016 Hold files played when the system needs to put a caller on hold and the COS plays to play hold files. Please continue to hold... … Description … Number … Prompt AAHOLD.9 023 Hold files played when the system needs to put a caller on hold and the COS plays to play hold files. Please continue to hold... Table 4-1. Editing System Prompts (Continued) Edit Mailbox Names The Edit Mailbox Name option changes a mailbox name or a list (group) of mailbox names. An example of when a mailbox name is used is when the name plays when you select to transfer your phone to another extension. A system list is a group of mailboxes where specific messages are sent; for example, a group of mailboxes associated with people in a department such as Sales. These prompts play: Enter the mailbox or list number to record signature followed by [#]. Press [#] to go back. Enter the mailbox or list number followed by #. The system plays the current signature for the list or mailbox. [1] to hear name [2] to re-record [3] to delete [#] when finished [#] returns one level Issue 2 - May, 2004 Talkpath - Digital Voice Processing System Technical Manual Online Administration 4-7 Mailbox Administration Mailbox Administration Mailbox Administration resets mailbox passwords, creates new mailboxes and deletes mailboxes. With this option, the administrator controls and changes the subscriber’s (user’s) mailbox actions. Mailbox Administration consists of: 5 5 5 5 5 Reset the mailbox password Change the mailbox COS Recover deleted messages for a mailbox Add a mailbox Delete a mailbox Reset the Mailbox Password This option lets the administrator reset the mailbox password. This is helpful if the password is forgotten. These prompts play: Enter the mailbox number followed by [#]. Enter the mailbox number followed by #. The system plays: The current password. To leave password as entered press [#]. To change, enter new password followed by [#]. When the password is changed, the system plays: The new password is yyyy, press [#] to confirm or [✳] to cancel. Return to Mailbox Administration. If the password is not changed, the system plays: Password has not been changed. Returns to the previous level. Talkpath - Digital Voice Processing System Technical Manual Issue 2 - May, 2004 4-8 Online Administration Mailbox Administration Change the Mailbox COS This option changes the characteristics of a particular mailbox to that of a different Class of Service. For example, there may be a COS set for a message record length that is different from the original COS setting. The COS that you are changing must already exist. Refer to Section 5 for more information on the available COS options. NOTES These prompts play: Enter the mailbox number followed by [#]. Enter the mailbox number followed by [#]. The system plays the current class of service. To leave class of service as entered, press [#]. To change, enter the new class of service followed by [#] or press [#]. When the class of service is changed, the system plays: The new class of service is yyy, press [#] to confirm or [✳] to cancel. When [✳] is pressed, the system plays: Class of service has not been changed. Return to Mailbox Administration. When [#] is pressed, the system plays: Class of service was changed. Return to the previous level. Recover Deleted Messages from a Mailbox Recover a Mailbox’s Deleted Messages provides deleted message recovery before system clean up occurs which occurs nightly. These prompts play: To recover messages for a particular mailbox, enter the mailbox number followed by [#]. To go back, press [#] Enter the mailbox number followed by [#]. If there are no deleted messages, the system plays: No deleted messages were found for mailbox mmm where mmm is the mailbox number. Issue 2 - May, 2004 Talkpath - Digital Voice Processing System Technical Manual Online Administration 4-9 Mailbox Administration If the mailbox has deleted messages, the system plays: X deleted messages were found for mailbox mmm where mmm is the mailbox number and X is the number of deleted messages. Press [#] to go ahead with message recovery. Press [✳] to skip recovery. Pressing [✳] plays Mailbox Administration. When [#] is pressed, the system plays: Messages are being recovered Return to the previous level. Add a Mailbox This option adds a mailbox to the system. Use this option when adding a new subscriber to the Digital Voice Processing system. These prompts play: Enter the mailbox number to add followed by [#]. Press [#] to go back. Enter the mailbox number followed by [#]. The system plays: Mailbox was added. Return to the previous level. A template mailbox must have been defined in the registry. Registry items are changed from Laptop/PC Administration. Refer to Appendix A for additional information. NOTES Delete a Mailbox This option deletes a mailbox from the system. These prompts play: Please enter the mailbox number to delete followed by [#]. Enter the mailbox number followed by [#]. The system plays: You have selected to delete mailbox mmm. Press [#] to confirm or [✳] to cancel. If [#] is pressed the system plays: Mailbox was deleted. Return to Mailbox Administration. If [✳] is pressed the system plays: Mailbox will not be deleted. Return to Mailbox Administration, then press [#] to return to System Administration. Talkpath - Digital Voice Processing System Technical Manual Issue 2 - May, 2004 4-10 Online Administration Distribution List Administration Distribution List Administration Distribution List Administration is where an administrator creates or deletes a distribution list. A distribution list is a collection of mailboxes assigned a group number. A message can be sent to a group of mailboxes using one list number. Thus, distribution lists simplify sending messages to groups of subscribers. Add a New Distribution List Adds a new distribution list. These prompts play: Enter the system list to add followed by [#]. Press [#] to go back. Enter the system list number. List number yyy created. Press [✳] to add members to the list, or [#] to go back. When [✳] is pressed, access Edit a Distribution List for further instructions. Pressing [#] returns to the Distribution List Administration. Delete a Distribution List Deletes an existing distribution list. These prompts play: Enter system list to delete followed by [#], or press [✳] for a directory of lists. Press [#] to go back. Pressing [✳] lists all system lists. You have reached end of the lists. After entering the list number to delete, the system plays: You have entered the following list to delete yyy. Press [#] to confirm or [✳] to cancel. Pressing [#] plays: List number yyy deleted. Pressing ✳] plays: List not deleted. Returns to the beginning of Delete a Distribution List. Issue 2 - May, 2004 Talkpath - Digital Voice Processing System Technical Manual Online Administration 4-11 Distribution List Administration Edit a Distribution List This option changes an existing distribution list and adds users to a current distribution list. These prompts play: Enter system list to edit followed by [#], or press [✳] for a directory of system lists. Press [#] to go back. Pressing [✳] plays a directory of system lists. You have reached the end of the directory of lists. Go to the top of Edit a Distribution List. When the number to edit is entered, the system plays: yyy, Press [#] to confirm or [✳] to cancel. Pressing [✳] returns to the top of Edit a Distribution List. When [#] is pressed, the system plays: [1]listen to a directory of members in the list [2]add members to the distribution list [3]delete members from the distribution list [#]return to Mailbox Administration [#]return to System Administration Talkpath - Digital Voice Processing System Technical Manual Issue 2 - May, 2004 4-12 Online Administration Broadcast Message Administration Broadcast Message Administration Broadcast Message Administration puts a broadcast message into a mailbox. By default, a broadcast message goes to every subscriber in the voicemail system. Broadcast Message Administration plays a currently recorded broadcast message or a new one. A system can have up to ten broadcast messages (0-9). Broadcast messages are different from distribution lists in the following ways: Broadcast messages use less disk space. ❐ A broadcast message automatically enters a subscriber’s mailbox. It plays automatically when a subscriber goes into their mailbox; the subscriber need not retrieve it. This prompt plays: ❐ You have x broadcast messages active. Listen to Message Plays an existing broadcast message. These prompts play: Active broadcast messages are:... Select the message number to play. To repeat selections press [✳]. When finished, press [#]. Pressing [✳] repeats the selections. Pressing [#] returns to the Broadcast Message Administration. Entering a message number plays that message, then returns to Broadcast Message Administration. Create New Message Creates a new broadcast message. These prompts play: Available broadcast slots are... Select which message number to create. To repeat selections, press [✳]. When finished, press [#]. Pressing [✳] accesses Create a New Message. Pressing [#] replays the available broadcast slots. Entering an available broadcast slot plays: Issue 2 - May, 2004 Talkpath - Digital Voice Processing System Technical Manual Online Administration 4-13 Broadcast Message Administration You have selected to create broadcast message number b where b is the number you chose. [1] send broadcast message [2] listen to the recording [3] cancel [4] append to the recording [5] re-record the message [#] return Cancel a Broadcast Message This option cancels an already distributed broadcast message. These prompts play: Active broadcast messages are... Select the message number to delete. To repeat selections, press [✳]. When finished, press [#]. Pressing [✳] repeats the active messages. Pressing [#] returns to Broadcast Message Administration. Entering a number to delete plays: Delete broadcast message number b. To confirm deletion, press [#]. To abort, press [✳]. Pressing [✳] plays: Broadcast message not deleted. Pressing [#] plays: Broadcast message deleted. Pressing [#] returns to Broadcast Administration. Talkpath - Digital Voice Processing System Technical Manual Issue 2 - May, 2004 4-14 Online Administration System Administration System Administration With this option, the administrator controls and can change the operation of the voicemail system, via the telephone. Changing these settings from default values may cause erratic system operation and may require Laptop/PC Administration to correct. NOTES Set Up Voice Lines This option determines what functions are available on voice lines. It designates how lines are answered. Configure port numbers as part of the voice lines option. A port number is the voice channel on a voice processing system, such as 1-4 on a 4-port system and 1-8, or 1-8 on an 8-port system. Press 0 to configure all ports. These prompts play: Please enter the port number to configure, or press [0] for all ports. When the caller enters a port number, the system plays: Port x is configured to run... then plays the configuration of that line. When the user enters [0] the system plays: Press [1] to hear how each line is configured, or press [0] to continue. When the caller enters [1], the system plays how each line is configured. When the caller enters [0], the system plays: Enter the module you want to run. The Enter Module to Run prompt provides these options: [1] for Voicemail [2] for Auto-attendant [3] for Menu [4] for Time Control [#] to return Issue 2 - May, 2004 Talkpath - Digital Voice Processing System Technical Manual Online Administration 4-15 System Administration Voicemail Pressing [1] plays: You have selected Voicemail, press [#] to confirm, or [✳] to cancel. Please enter the mailbox to run, or press [#] to continue. Press [#] to prompt the user for the mailbox number or Enter the mailbox number to place the caller in a mailbox. This prompt then plays: You are about to change your line settings, press [#] to confirm or [✳] to cancel. Press [#] to return one level or enter the phone system configuration file. The system plays: Run code was changed. The system will now reset itself. Run code refers to the module you selected to run. The system reboots. Auto Attendant Pressing [2] plays: You have selected Auto attendant, press [#] to confirm, or [✳] to cancel. Please enter the extension to run, or press [#] to continue. Press [#] to prompt the user for the extension number or Enter the extension number to send the caller to an extension. Then, this prompt plays: You are about to change your line settings, press [#] to confirm or [✳] to cancel. Press [#] to return one level or enter the phone system configuration file. The system plays: Run code was changed. The system will now reset itself. Run code refers to the module you selected to run. The system reboots. Menu Pressing [3] plays: You have selected Menu, press [#] to confirm, or [✳] to cancel. Please enter the menu to run, or press [#] to continue. Enter a valid menu number to run. This prompt plays: You are about to change your line settings, press [#] to confirm or [✳] to cancel. Press [#] to return one level or enter the phone system configuration file. The system plays: Run code was changed. The system will now reset itself. Run code refers to the module you selected to run. The system reboots. Talkpath - Digital Voice Processing System Technical Manual Issue 2 - May, 2004 4-16 Online Administration System Administration Time Control Pressing [4] plays: You have selected Time Control, press [#] to confirm, or [✳] to cancel. Enter the time control to run, or press [#] to continue. Enter a valid time control to run. Then, this prompt plays: You are about to change your line settings, press [#] to confirm or [✳] to cancel. Press [#] to return one level or enter the phone system configuration file. The system plays: Run code was changed. The system will now reset itself. Run code refers to the module you selected to run. The system reboots. Select a Phone System The Select a Phone System option changes the default phone system configuration. For more information on selecting phone systems, see Section 2. These prompts play: Enter the three digit number for the phone system configuration file you want to load, followed by the [#], or press just [#] to go back. Press [#] to return one level or enter the phone system configuration file. The system plays: You are about to replace your current configuration file with a new one. Press [#] to confirm or [✳] to cancel. Pressing [✳] plays: Configuration file has not been changed. Press [#] to return one level or enter the phone system configuration file. The system plays: Configuration file was changed. The system will now reset itself. The system reboots. Issue 2 - May, 2004 Talkpath - Digital Voice Processing System Technical Manual Online Administration 4-17 System Administration System Shutdown The System Shutdown option shuts down the system. The following are the System Shutdown options: Shut down and park the system ❐ Shut down and reboot the system For more information on these options, see the shutdown information in Section 5. These prompts play: ❐ [1] shut down and park. The system plays: The system will now reset itself. The system shuts down. [2] shut down and reboot. The system plays: The system will now reset itself. The system shuts down and reboots itself. System Date and Time Changes the system date and time. Changing the system date and time resets voicemail and drops callers. These prompts play: Enter the two-digit month 01 through 12. Press [✳] to go back or [#] to cancel. Enter the two-digit month. 01= January, 02-February, etc 12=December Pressing [#] prompts for the month. Pressing [✳] the Setup Lines options play. Please enter the two-digit day 01 through 31. Press [✳] to go back or [#] to cancel. Enter the two-digit day. Pressing [#] prompts for the month. Pressing [✳] plays the Setup Lines options. Please enter the four-digit year. Press [✳] to go back or [#] to cancel. Enter the four digits. Pressing [#] prompts for the day. Pressing [✳] plays the Setup Lines options. Please enter the two-digit hour 00 through 23. Press [#] to go back or [✳] to cancel. Enter the time in a 24-hour clock format, where 13=1:00p. Pressing [#] prompts for the year. Pressing [✳] plays the Setup Lines options. Please enter the two-digit minute 00 through 59. Press [✳] to go back or [#] to cancel. Enter the minute of the hour. Talkpath - Digital Voice Processing System Technical Manual Issue 2 - May, 2004 4-18 Online Administration System Administration Pressing [#] prompts for the hour. Pressing [✳] plays the Setup Lines options. Tells the date and time and prompts for confirmation of the date and time entered. Press [#] to confirm. Press [✳] to cancel. Pressing [#] plays: The system’s date and time was changed. The system will now reset itself. The system reboots. Pressing [✳] returns one level. Pressing [#] returns to the System Administration. Issue 2 - May, 2004 Talkpath - Digital Voice Processing System Technical Manual Online Administration 4-19 System Administration Functions and Programming Options The table below lists the available functions and programming options for the Digital Voice Processing System. The columns to the right indicate which program contains the function or option, and who may make modifications. PC/Laptop Admin On-line Admin Select phone system X X Select PBX configuration X X X X X X Function / Programming Option ECom Mailbox Owner General Shutdown system X Re-initialize system X Set date and time Software version X X Disable system caching X Fax detect setting X Run Debug module X Operator transfer settings X Assign function module to voice lines X Command files X X* View logs X X Set owner send options X Set owner edit options X Administer broadcast messages X* X Set message cascading X Set call options X Set call screening and waiting X Set last options X Administer system lists X* X Table 4-2. Functions and Programming Options Talkpath - Digital Voice Processing System Technical Manual Issue 2 - May, 2004 4-20 Online Administration System Administration Function / Programming Option ECom Set pager / phone number notify PC/Laptop Admin On-line Admin X Mailbox Owner X Registry Reset Registry to default X Add Registry items X X Edit Registry items X X Edit Prompts Menu prompts X System prompts X Mailbox signature X X Subscriber Programming Add subscribers X X* Delete subscribers X X* Edit subscribers X X* COS X X Name (for company directory) X Password X Department X X X Subscriber Mailbox Time control X Operator X Cascade to mailbox X Play greeting action X Action X Record name Off premise notification Notification settings X* X X X* X* X Table 4-2. Functions and Programming Options Issue 2 - May, 2004 Talkpath - Digital Voice Processing System Technical Manual Online Administration 4-21 System Administration Function / Programming Option ECom PC/Laptop Admin On-line Admin Mailbox Owner Subscriber Extension Time control X Transfer type X X Screening and holding X X* Subsequent actions X * Administer personal lists X Administer guest mailboxes X Administer personal notepad X Recover deleted messages X Record greetings X Standard X Busy X Time sensitive X Temporary X Class of Service Add COS X Delete COS X Edit COS X Menus Add menu X Delete menu X Edit menu X Time Controls Add time control X Delete time control X Edit time control X * = limited or not the same Table 4-2. Functions and Programming Options Talkpath - Digital Voice Processing System Technical Manual Issue 2 - May, 2004 4-22 Online Administration System Administration Issue 2 - May, 2004 Talkpath - Digital Voice Processing System Technical Manual 5 Laptop/PC Administration Overview Laptop/PC Administration is a Windows-based program for administering your Digital Voice Processing System. You may use Laptop/PC Administration or the telephony administration to configure the Digital Voice Processing System. This section refers to the Laptop/PC Administration. Install Laptop/PC Admin Software Installing the Laptop/PC Administration software requires one floppy diskette. Simply insert the diskette into the disk drive and run setup.exe, then follow the instructions on the screen. Windows 3.1 and Windows 3.11 for Workgroups Setup 1 Select the Program Manager. 2 Select RUN from the menu. 3 Enter A:\setup.exe in the Open field. 4 Click OK. Windows 95/98 NT Setup 1 Click Start on the task bar at the bottom of the screen. 2 Click Run from the Start menu. 3 Enter A:\setup.exe in the Open field. 4 Click OK. Connect Cabling The Digital Voice Processing System can be administered locally via a direct connection to a laptop/PC, or remotely using modems. If connecting the Digital Voice Processing System directly to the laptop/PC serial port, use the provided 9-pin null modem cable. If connecting to the Digital Voice Processing System via modem, the modem must be attached to the Digital Voice Processing System as described in Section 2. Issue 2 - May, 2004 Talkpath - Digital Voice Processing System Technical Manual 5-2 Laptop/PC Administration Communicate With the System Communicate With the System During a routine installation, the PC-based Admin program communicates with the Digital Voice Processing System. There are times when a more general purpose tool must be used that allows diagnosis of start-up / configuration problems and allows uploading and downloading of software to the system. To communicate with the Digital Voice Processing System at this lower level, a terminal communication program is required such as ProComm Plus™ or ECom. ECom is a communication application installed from the Windows Admin disk. When using the terminal communications program, set the serial port parameters to 9600 baud, no parity, 8 data bits, and 1 stop bit. Some communications programs that run under Windows are too slow for the Digital Voice Processing System's high data transfer rate. In this section, the term ECom indicates the terminal communications package you should be using. Run Software Perform these steps to begin running the Windows administration program: Windows 3.1 and Windows 3.11 for Workgroups In the Admin Group, double-click the Admin icon. Windows 95/98 NT Click Start. From the Startup menu, select Programs, Admin, then click the Admin icon. Modem Connection The Digital Voice Processing System supports remote maintenance via a modem. Many installations require that a modem be connected to the Digital Voice Processing System so remote maintenance and service can be performed. The Digital Voice Processing System requires a Hayes command set compatible modem that supports at least 9600 baud transfers. It also requires a modem that supports switch selectable settings. During boot-up, the Digital Voice Processing System sends the necessary AT commands to the modem to set it for auto-answer and to suppress result codes. However, usually it is necessary to configure the modem using DIP switches to do the same thing. Once a modem is connected, the system must be restarted. During reboot, signals are sent to the modem to place it in autoanswer mode. Below are the commands sent to the modem: @ECHO AT @ECHO AT S0=1 Q1 Issue 2 - May, 2004 Talkpath - Digital Voice Processing System Technical Manual Laptop/PC Administration 5-3 Modem Connection If the modem requires different commands to place it in Auto-Answer mode, make changes according to the modem manufacturer’s specifications. The modem used by the Windows Admin program requires that result codes NOT be suppressed. NOTES When the Digital Voice Processing System is parked or restarted, the modem drops the current connection. It is necessary to reconnect the modems after a park or reboot. If a system is parked, it must be connected with ECom (or a similar communications package). When using a modem to communicate with a Digital Voice Processing System, the laptop/PC and the Digital Voice Processing System need customer-provided Hayes-compatible modems. Both modems must connect at 9600 bps. When a modem is connected to the Digital Voice Processing System, the first screen displayed is shown below. This screen prompts for the remote modem phone number with which to connect. Figure 5-1. Modem Screen If the Digital Voice Processing System does not detect a modem hookup, nor is it connected to a Digital Voice Processing System, an error screen displays indicating the system is not responding. When OK is clicked, the ComPorts Option screen displays for adjustment of settings as needed. Figure 5-2. Modem Error Message Talkpath - Digital Voice Processing System Technical Manual Issue 2 - May, 2004 5-4 Laptop/PC Administration Modem Connection The following screen shows the File pull-down menu before dialing a remote modem. When the administration menu is displayed and an attempt to dial via modem is made, the File pull-down menu consists of the Dial and Exit options. Figure 5-3. Modem File Menu Issue 2 - May, 2004 Talkpath - Digital Voice Processing System Technical Manual Laptop/PC Administration 5-5 Modem Connection When an attempt to dial a remote modem is made, a Dial button is added to the main Digital Voice Processing System screen as shown below. Figure 5-4. Dial Button Talkpath - Digital Voice Processing System Technical Manual Issue 2 - May, 2004 5-6 Laptop/PC Administration Modem Connection When connected to a remote modem, the Dial button changes to Hangup on the main Digital Voice Processing System screen as shown below. Figure 5-5. Hangup Button Issue 2 - May, 2004 Talkpath - Digital Voice Processing System Technical Manual Laptop/PC Administration 5-7 Laptop/PC Connection Laptop/PC Connection If the Digital Voice Processing System is not configured to a phone system, or if it is configured to a default phone system, the Default Phone System Configuration screen displays as shown. Figure 5-6. Phone System Configuration Screen Unchecking the Display this message at start-up each time the program is run option prevents the Default Phone System Configuration screen from displaying again. To display the screen again, select Setup, Advanced, Phone System Config Message from the Setup pull-down menu. Running the laptop/PC administration software requires having the Digital Voice Processing System unit connected. If Yes is clicked on the Default Phone System screen, the system prompts to select the phone system. (Refer to the discussion on phone system setup later in this section.) Click OK, then double-click the phone system selection. When the confirmation screen displays, click Yes and the system reboots. After the system reboots, the Admin screen displays. Clicking No also displays the Admin screen as shown in Figure 5-7. Admin Screen. Talkpath - Digital Voice Processing System Technical Manual Issue 2 - May, 2004 5-8 Laptop/PC Administration Software Description Figure 5-7. Admin Screen Software Description The following options are available: ❐ ❐ ❐ ❐ Subscribers Use this button to add, delete, and edit subscriber information. Class of Service (COS) Use this button to add, delete, and edit COS information. Menu Use this button to add, delete, and edit multi-level menu information. Time Controls Use this button to add, delete, and edit time control information. Issue 2 - May, 2004 Talkpath - Digital Voice Processing System Technical Manual Laptop/PC Administration 5-9 Software Description Voice Lines Use this button to administer voice lines. ❐ Reset Use this button to reset the current screen. ❐ Shrink Use this button to reduce the expanded screen to its default size. ❐ Exit Use this button to exit the laptop/PC administration program. Menu items are also accessed using a pull-down menu. ❐ Status Bar The following screen illustrates the status bar located at the bottom of the Digital Voice Processing System option screens: Figure 5-8. Status Bar The status bar provides an explanation for each button on the main menu. For example, if the Time Control button is highlighted, the status bar reads: Display Time Controls Note the four signal indicators at the bottom of the screen. The Carrier Detect (CD) option is lit as long as there is a carrier signal between the two modems, or between voicemail and the laptop/PC. The Data Send Ready (DSR) option is lit as long as there is a carrier signal between the two modems, or between voicemail and the laptop/PC. The CD and DSR are solid green on direct port connection. The Transmit (Tx) option blinks whenever data goes out, and the Receive (Rx) option blinks when data enters. If the connection is lost, the screen reduces and the following screen displays: Figure 5-9. Remote System Not Responding Message Talkpath - Digital Voice Processing System Technical Manual Issue 2 - May, 2004 5-10 Laptop/PC Administration Software Description Subscribers A subscriber is someone who owns an extension and mailbox on the voicemail system. The Subscribers menu displays mailboxes, extensions, and the names of subscribers. To display this menu, press the Subscribers button, or select Setup, Subscribers from the Setup pull-down menu. Then, click Insert to add a subscriber. Highlight an existing subscriber and double-click to edit it. Highlight a subscriber and click Delete to delete it. Figure 5-10. Subscribers Screen As part of the Subscribers option, insert or delete a subscriber by clicking the corresponding buttons as illustrated by the following screens. Issue 2 - May, 2004 Talkpath - Digital Voice Processing System Technical Manual Laptop/PC Administration 5-11 Software Description Create Subscribers The screen below shows the Insert Subscribers option. To access this screen, click the Insert button from the Subscribers screen. Figure 5-11. Create Subscribers Start Mailbox Enter the subscriber’s mailbox number. Typically this is the person’s extension. Start Extension Enter the extension to which to link this mailbox. Number to Create Number of mailboxes to add. Only use when creating multiple mailboxes. Template Mailbox When a subscriber is created and another new subsciber will have similar mailbox/extension features, enter the previously created subscriber’s mailbox number. This copies all mailbox and extension settings to the new subscriber for easier editing. Talkpath - Digital Voice Processing System Technical Manual Issue 2 - May, 2004 5-12 Laptop/PC Administration Software Description Delete Subscribers The following screen shows the Delete Subscribers option. To access this screen, click the Delete button from the Subscribers screen. Figure 5-12. Delete Subscriber Range Start Extension Select the first mailbox in the range to delete. Number to Delete Number of mailboxes to delete. Issue 2 - May, 2004 Talkpath - Digital Voice Processing System Technical Manual Laptop/PC Administration 5-13 Software Description Edit Subscribers While displaying the subscribers screen, double-clicking one of the subscribers provides editing and verification of passwords and user names. Figure 5-13. Edit Subscriber Password The password provides the user with access to their mailbox. We recommend setting the password to something that easily remembered. The default password is 0000. First Name and Last Name Change as needed. The Last Name field contains the name used in the directory. Department Enter the department or area in which the employee works. Class of Service Select the Class of Service to associate with this mailbox. Note that if the Class of Service field is blank, the voicemail system defaults to the last COS used by the system. In a system that uses multiple COSs, errors could arise. Assign a Class of Service to each extension to avoid potential problems. From the Subscribers screen, click the Mailbox Settings or Extension Settings. Talkpath - Digital Voice Processing System Technical Manual Issue 2 - May, 2004 5-14 Laptop/PC Administration Software Description Mailbox Settings Mailbox Settings let you customize your mailbox options. For example, actions and notification options. Figure 5-14. Subscriber Mailbox Time Control Calls are often handled differently in the evening, during the weekend, or on holidays than during regular business hours. The time control function defines a set of alternative actions that the Digital Voice Processing System performs for a given time setting. Time controls are created by selecting Time Control from the Setup menu. Set Time Controls to NONE if this function is not used. Use the Time Control option to configure date and time sensitive mailbox greetings. Refer to Section 7 for additional information. Use the Time Control option only with help from Technical Support. NOTES Issue 2 - May, 2004 Talkpath - Digital Voice Processing System Technical Manual Laptop/PC Administration 5-15 Software Description Operator Enter a personal operator for the mailbox that is used when a caller dials [0] while connected to the mailbox. The call is transferred to an alternate extension instead of to the system-wide operator. This is used to transfer calls to a personal assistant. Cascade Message cascading is a feature that copies or moves messages left for the originating mailbox to another mailbox. To use message cascading, the Class of Service (COS) for the originating mailbox must be configured to allow the feature. Within the mailbox settings, only enter the destination mailbox. This feature is inoperable until the COS settings are properly administered. Typical uses include archiving and notification of no response to messages left in a mailbox (i.e., for customer service). Mailbox Action Click Play Greeting if the Digital Voice Processing System plays the greeting recorded for this mailbox when it is accessed. Use the drop down list to select the actions performed by the mailbox when a message is left. These actions function as follows: Take a Message Records messages in the mailbox for later retrieval. Forward to Mailbox Sends the caller to an alternate mailbox where a message may be left. Notification and MWI rules of the forwarded to mailbox apply. Forward to Extension Sends the caller to an extension. Extension settings of the forwarded to extension apply. Forward to Menu Sends the call to a menu where additional options may be available to the caller. Refer to the discussion on menus later in this section for more information. Forward to Time Control The Digital Voice Processing System executes the assigned time control and takes the appropriate action. Use caution when selecting this option. Forward to Module Automatically runs another module when the mailbox is accessed. Special applications only. Talkpath - Digital Voice Processing System Technical Manual Issue 2 - May, 2004 5-16 Laptop/PC Administration Software Description Mailbox is Off Disables the message capability for a mailbox. This option plays Mailbox is off to the caller. Mailbox is Full Notifies the mailbox owner that the mailbox cannot record any new messages until old ones are deleted. Plays a message to the caller saying the mailbox is full. Notification (External) Notification refers to external numbers (e.g., pager, mobile, etc.) Select the type of notification the Digital Voice Processing System uses when a message is left in the mailbox. Notification options include: No Notification Disables message notification. Immediate Notification Sends notification immediately upon receiving messages. Timed Notification Sets a time to notify mailbox owner of new messages. Urgent Notification Instructs the Digital Voice Processing System to send notification only if the message left is marked urgent. Phone Number Enter the phone number to dial for notification. Do not enter 9, 1 for any number. NOTES Issue 2 - May, 2004 If you have an integrated system, do not set notification to call an internal extension because the notification message could be left in the extension owner’s mailbox. This causes the Digital Voice Processing System to send another notification message, creating a continuous loop. Talkpath - Digital Voice Processing System Technical Manual Laptop/PC Administration 5-17 Software Description Pager Notification When selecting a notification method, a Pager Notification checkbox displays and is checked if the notification number is a pager. Click OK before exiting this window. Talkpath - Digital Voice Processing System Technical Manual Issue 2 - May, 2004 5-18 Laptop/PC Administration Software Description Extension Settings For Extension Settings, return to the Edit Subscribers screen. Then, click Extension Settings to edit the actions for mailbox numbers and to change transfer options and time controls. Figure 5-15. Subscriber Extension Time Control Calls are often handled differently in the evening, on weekends, or on holidays than during regular business hours. The time control function defines a set of alternative actions that the Digital Voice Processing System performs for a time setting. Time controls are created by selecting Time Control from the Setup menu. If Time Controls are not used, set to NONE. Use this option only with help from Technical Support. NOTES Issue 2 - May, 2004 Talkpath - Digital Voice Processing System Technical Manual Laptop/PC Administration 5-19 Software Description Actions The Digital Voice Processing System provides three action fields that control how the system handles incoming calls. The Digital Voice Processing System refers to these options in a cascading order. That is, the first field has precedence over the second, and the second field has priority over the third. For example: 1 An incoming call is answered by the Digital Voice Processing System. 2 If the supervised transfer option was selected, the Digital Voice Processing System checks the first action for instructions on how to handle the call. 3 The Digital Voice Processing System performs a supervised transfer to the extension. 4 The line is busy so the call returns to the Digital Voice Processing System. 5 The Digital Voice Processing System checks the second Action for instructions on how to handle a busy signal. The forward to voicemail option was selected. 6 The Digital Voice Processing System sends the call to the appropriate voice mailbox. Fields associated with each Action change to reflect the Action selection. For example, if Supervised Transfer is selected in the Action field, the field to the right of it changes to Number to Dial. If the Action selection is set Forward to Menu, the field changes to Menu and accepts the name of the menu to which calls are sent. Action 1 Blind Transfer Indicates an unsupervised transfer to the requested extension. Supervised Transfer The Digital Voice Processing System monitors call transfers to determine whether the called extension is busy or is not being answered. If the call is not answered, the Digital Voice Processing System refers to the subsequent Action entries (Action 2) for instructions on handling the call. Only one transfer type (Supervised or Blind) is selected at a time. Screen Caller When a person dials an extension through the auto attendant, the call screening feature prompts the caller to state his name. The Digital Voice Processing System plays the caller’s name to the extension owner before the call is actually transferred. The extension owner can accept or reject the call, or send it to another extension or voice mailbox. This option works only with Supervised Transfer. Talkpath - Digital Voice Processing System Technical Manual Issue 2 - May, 2004 5-20 Laptop/PC Administration Software Description Holding Allowed Lets the caller hold on the line if the called party is busy. The caller hears: I'm sorry, [extension's name] is busy. If you would like to hold, press [1]. To try another extension or leave a message for this extension, press [2]. This option works only with Supervised Transfer. Forward to Mailbox Forwards calls to the specific mailbox entered in the Mailbox field. Usually this is the called extension's personal mailbox. Forward to Extension Forwards calls to the extension entered in the Extension field. Forward to Menu Forwards calls to the menu entered in the Menu field. Refer to the discussion of menus later in this section for additional information. Forward to Module Forwards callers to a custom script module. Consult Technical Support before selecting this option. NOTES Forward to Time Control Runs the designated time control file and performs the actions designated for the current time. Refer to the discussion of time controls later in this section for additional information. Action 2 and Action 3 Available options depend on the selection for Action 1. For example, if Forward to Mailbox is selected, enter the mailbox number. After selecting Action 1 from the dropdown list, complete the action by completing any fields to the right of it. When Supervised Transfer is selected as Action 1, Action 2 box becomes active. When Action 1 is supervised transfer and the transfer resulted in a Busy or No Answer condition, Action 2 setting specifies what happens next. Invoke Action 2 when the following conditions exist for the Action 1 supervised transfer: Issue 2 - May, 2004 Talkpath - Digital Voice Processing System Technical Manual Laptop/PC Administration 5-21 Software Description Do Always The action always occurs. Only On Busy The Digital Voice Processing System uses this option if the previous transfer results in a busy signal. Only On No Answer The Digital Voice Processing System uses this option if the transferred call was not answered. The above conditions apply when setting up Action 3. Talkpath - Digital Voice Processing System Technical Manual Issue 2 - May, 2004 5-22 Laptop/PC Administration Software Description Class of Service (COS) Class of Service involves features and settings applied to a subscriber group. The Class of Service (COS) screen displays the COS name and description. To begin any COS operation, click the COS button on the toolbar or select COS from the Setup menu. Figure 5-16. Class of Service Screen The Digital Voice Processing System mailboxes and extensions are associated with a Class of Service (COS) that defines their attributes. All mailboxes and extensions with the same COS operate identically in terms of options available to users. Grouping mailboxes and extensions into classes of service provides a way to change options for all mailboxes and extensions in the same class simultaneously. By supporting multiple COSs, the Digital Voice Processing System lets you provide users with options to system features on an as needed basis. Create a template COS to use when creating more than one COS. Issue 2 - May, 2004 Talkpath - Digital Voice Processing System Technical Manual Laptop/PC Administration 5-23 Software Description After selecting Class of Service from the Setup menu or clicking the COS button on the tool bar, click Insert to add a COS or Delete to delete the COS. Enter a name for the COS, using a 3-digit number, then click OK. The COS screen displays. Double-click the COS just created. The Edit COS dialog box displays. Define the Class of Service. Figure 5-17. Create New Class of Service When creating a new COS or editing an existing COS, click the tab corresponding to the parameters to change. Once a category is selected, another category is selected by clicking the page controls (Next, Prev) at the bottom of the screen, or by clicking the desired tab. Within Class of Service, double-clicking COS displays a window with the following tabs: ❐ ❐ ❐ ❐ ❐ General Message Maintenance Notification Auto Attendant Talkpath - Digital Voice Processing System Technical Manual Issue 2 - May, 2004 5-24 Laptop/PC Administration Software Description General Tab The General tab sets the desired general Class of Service values. Figure 5-18. Class of Service General Tab Description Descriptive text (up to 30 characters) to help identify the COS in other operations. Time Control Calls are often handled differently in the evening, on the weekend, or on holidays than during regular business hours. The time control function defines a set of alternative actions that the Digital Voice Processing System performs for a time setting. Creat time controls by selecting Time Control from the Setup menu. If Time Controls are not used, set to NONE. Use this option only with the help of Technical Support. NOTES Issue 2 - May, 2004 Talkpath - Digital Voice Processing System Technical Manual Laptop/PC Administration 5-25 Software Description User Type Set user type to 99 when granting system administrator access. For all other uses, set the user type to 10. Types 02-98 are not used. Event Counters Set these counters to off if an overview of system usage is not needed. Owners Check Owners to maintain a count of mailbox/extension maintenance accesses by the mailbox owner. Callers Check Callers to maintain a count of mailbox/extension access by callers (non-owners). Language Mailbox and extension prompts play in the selected language. Restricted OutDial Disables long distance dialing from the extension or from mailbox notification by entering the number of digits required for local calls (typically 7 or 10). Talkpath - Digital Voice Processing System Technical Manual Issue 2 - May, 2004 5-26 Laptop/PC Administration Software Description Message Tab Sets values for messages in the Digital Voice Processing System. Figure 5-19. Class of Service Message Tab Message Type The Digital Voice Processing System mailboxes store voice or page messages. Voice Voice is the most common message type and is typically the only option selected which lets callers leave a voice recording for the called party. If mailboxes using this COS wish to receive numeric page messages, check the Page option. Page This option lets callers leave a numeric message. Note that a single mailbox can store a combination of message types. Mailboxes set for voice messages can be notified by a numeric pager. This setting applies only to inbound messages, not the notification type. If more than one message type is selected, choose one for the default. Issue 2 - May, 2004 Talkpath - Digital Voice Processing System Technical Manual Laptop/PC Administration 5-27 Software Description Default Message Type If the mailbox uses both message types and the caller does not select one, Default Message determines which type the system records. Play Message Type Menu Select this option if the Digital Voice Processing System presents the caller with a menu such as: To leave a voice message, press [1]; To leave a page message, press [2]. Deselect this option if the mailbox owner handles access to message type options in the mailbox greeting. Message Properties Length Determines the time allocated to a message. After the specified number of seconds elapses, the caller is presented with the Send Menu, as if they had pressed a key to stop recording. The recommended length is 120 seconds. Count Determines the maximum number of messages stored in a mailbox. When the number of messages in a mailbox exceeds this parameter, the mailbox plays a message saying it is full. No further messages are permitted until one or more messages in the mailbox is deleted. A maximum of 50 messages is recommended. Retention The Digital Voice Processing System automatically deletes messages stored longer than a specified amount of time. Thirty days is the recommended default retention period but can be extended or shortened, depending on specific needs. Record On Key Omit this to have the Digital Voice Processing System automatically begin recording a voice message. When used, the caller must press a key for recording to begin. Greeting Type Select from the following types of pre-recorded messages or prompts used when greeting a caller: Talkpath - Digital Voice Processing System Technical Manual Issue 2 - May, 2004 5-28 Laptop/PC Administration Software Description Personal A message played to a calling party before a message is recorded to a mailbox. If the owner does not record a personal greeting, the system greeting (default) is used. System A generic message used when no personal greeting is recorded. If the Personal and System greetings are activated, the Digital Voice Processing System plays the personal greeting when one has been recorded. Class of Service A single greeting that plays for all mailboxes sharing the same Class of Service. This is done to conserve disk space by eliminating the need for each mailbox to have its own greeting prompt. Voice Insert A COS greeting consists of the Class of Service prefix prompt, a name prompt, and a Class of Service suffix prompt. Voice Insert is often used to personalize a Class of Service greeting and limit the disk space used. System Add-On A shorter version of the system default greeting that follows a personal greeting. This greeting says Begin speaking at the tone. To stop recording press any key, etc. whereas the regular system greeting says The person you have tried to reach is unavailable, begin recording... Greeting Length Enter the time for each greeting in seconds. Park and Page If enabled, the following occurs: when a call comes into a mailbox and during the mailbox greeting the caller presses 7, the caller is transferred to a park location and the system initiates a company-wide broadcast page for the mailbox owner. The mailbox greeting must include instructions for dialing [7] to access Park and page. Park and Page is not available on all systems. NOTES Issue 2 - May, 2004 Talkpath - Digital Voice Processing System Technical Manual Laptop/PC Administration 5-29 Software Description Stop Record Key Activates the one-key urgent message send feature. With this option, when an outside caller presses 8 to end recording a voice message, the message is marked urgent, sent, and the caller proceeds to Last Options. The mailbox greeting must include instructions for dialing [8] for urgent messages. NOTES Record Options On The caller presses a key after leaving a voice message then hears the following options: Press [1] to send the message Press [2] to play the message Press [3] to cancel Press [4] to append the message Press [5] to re-record the message Send Options Select Urgent, Confidential, or both if callers can specify options for messages they leave. Urgent Messages are preceded by an Urgent prompt that triggers immediate notification. These messages play first in a group of messages. Confidential Messages cannot be forwarded and are preceded with a warning to pick up the phone if messages are played on a speaker phone. Last Options Determines system actions once a caller leaves a message. On If Last Options is set to On, the Digital Voice Processing System plays default menu options. Default menu options are: To access another mailbox, press [1]. To access an extension, press [2]. To disconnect, press [9]. To transfer to an operator, press [0]. Talkpath - Digital Voice Processing System Technical Manual Issue 2 - May, 2004 5-30 Laptop/PC Administration Software Description Off If Last Options is set to Off, the Digital Voice Processing System plays thank you and hangs up. Menu If Last Options is set to menu, the Last Options Menu plays. Note that setting this option off limits a caller’s ability to navigate the system. Issue 2 - May, 2004 Talkpath - Digital Voice Processing System Technical Manual Laptop/PC Administration 5-31 Software Description Maintenance Tab Determines the modifications users can make to their personal mailboxes. Figure 5-20. Class of Service Maintenance Tab First Time Help New users are prompted to record essential parameters such as a mailbox greeting, mailbox name, and a password. Say Date and Time The Digital Voice Processing System announces the date and time a message was received. Manual Natural The user must press a key to hear the date and time. Natural means the date and time is said in general terms; for example, Monday or yesterday. Press [8] after the message plays. Talkpath - Digital Voice Processing System Technical Manual Issue 2 - May, 2004 5-32 Laptop/PC Administration Software Description Manual Full The user presses a key to hear the complete date and time. For example, Monday, February 28, 1998, at 7:00 p.m. Press [8] after the message plays. Automatic Natural Date and time play automatically at the beginning of each new message. The user need not press any keys. Automatic Full Complete date and time play automatically. The user need not press any keys. Message Order Determines order in which messages play. Message order is chronological as follows: First In-First Out The first message left plays first. Last In-First Out The last message left plays first. Owner Play Options Mailbox owners have several options for handling played messages. This makes mailbox management as simple or as sophisticated as desired. These options are: Save Messages Press [2] to save messages for later retrieval. Confirm Deletes Requires users to press [#] after pressing [3] to delete messages. This is used as a safeguard against accidental deletion. Forward Messages Press [4] to forward messages to other mailboxes or to an outside number. Reply To Messages Press [5] to reply to a message. Issue 2 - May, 2004 Talkpath - Digital Voice Processing System Technical Manual Laptop/PC Administration 5-33 Software Description Dial Source Connects to the person who sent the message. Skip Messages Press [6], then [3] to skip a message while listening to messages. Owner Send Options Determine the functions available to users when sending messages from their mailbox: Not Allowed Creates simple mailboxes that cannot send a message. Urgent Users can assign urgent status to a message. Urgent messages are preceded by an Urgent prompt that trigger immediate notification. These messages play first in a group of messages. Confidential Specifies that a message cannot be forwarded and is preceded with a warning to the recipient that the message is confidential. Outside Numbers Sends a message to an outside number. Use this option with caution since the Digital Voice Processing System attempts to call an outside number and play the message. Future Delivery Delivers messages at a future time and date. Distribution Lists Sends messages to a system-wide list that is maintained by the administrator. Confirmation Lets the user request receipt information for a marked message. The system notifies the sender when the message is listened to, or if the message is not played before the notification attempts expired. Talkpath - Digital Voice Processing System Technical Manual Issue 2 - May, 2004 5-34 Laptop/PC Administration Software Description Owner Edit Options Determine the mailbox customization available to users within this COS: Password Restricts unauthorized access to the mailbox. Lets the mailbox owner change the mailbox password. Typically, this option is off only when a mailbox is for temporary use. Greeting Lets a mailbox owner edit their greeting and typically, is enabled. The greeting is a message played to a calling party before a message is recorded to the mailbox. Name/Signature Lets an owner change the mailbox name used in prompts associated with the mailbox. Name / Signature is an identifier for a mailbox and is used when calls are transferred, and when messages are forwarded, replied to, or sent. Notification Lets an owner change notification settings such as the extension or number to call, and the time of notification (such as a pager). Notification is the indication of new messages in mailboxes and does not affect message waiting indicators on telephones. Delete Sent Message Lets a mailbox owner unsend messages sent to another local mailbox. The system prompts the owner for the destination mailbox, then checks for unheard messages from the owner that are in the destination mailbox. Each message plays and lets the owner selectively delete them. Mailbox State Lets an owner turn the mailbox off, set it to greeting only, forward calls to an extension, forward calls to a mailbox, or forward calls to menu. Turn this option off when a simple mailbox is desired or there is a possibility of activating erroneous forwarding. Personal Lists Lets a user create up to 10 personal lists and maintain them via the telephone. Personal distribution lists are numbered from 0 to 9. Each contains personalized mailbox lists addressed as a group to simplify delivery. Issue 2 - May, 2004 Talkpath - Digital Voice Processing System Technical Manual Laptop/PC Administration 5-35 Software Description Guest Mailboxes Lets an owner communicate with a guest who has no mailbox on the system. System mailboxes can have up to 10 guest mailboxes. Mailbox owners administer guest mailboxes and assign unique numbers to each guest. Owners may send messages to guest mailboxes following the prompts for sending to other address types. Guests press [4] to retrieve messages during the owner’s greeting. The guest then enters their unique number (phone number or social security number, etc.), followed by [#]. The guest may then retrieve messages sent by the mailbox owner and reply to the mailbox owner. Auto-Attendant Lets a mailbox owner edit extension settings. The mailbox owner can also change forwarding and the transfer type. Notepad Gives the mailbox owner access to a personal voice note pad that is referenced with an index. The index can be any 8-digit number with an associated voice file. For example, a personal note pad can be used for saving phone numbers and addresses. Transfer Out Lets a mailbox owner transfer to other extensions or mailboxes. Turn off this option when the auto attendant is not used. At the top level of the mailbox owner options, a caller can press 0. The system then plays To access another mailbox, press [1]. To access an extension, press [2]. Talkpath - Digital Voice Processing System Technical Manual Issue 2 - May, 2004 5-36 Laptop/PC Administration Software Description Notification Tab Describes notification options that tell mailbox owners when they have new messages. Figure 5-21. Class of Service Notification Tab Message Waiting The Digital Voice Processing System sends message waiting commands to telephone systems that support message waiting lights or similar notification devices. Off - Do Not Use Do not light the Message Waiting Indicator (MWI). An example is a mailbox without an internal telephone. After First New Message Only sends commands to the phone system for notification after the first new message. After Every Message Sends command after each new message. Issue 2 - May, 2004 Talkpath - Digital Voice Processing System Technical Manual Laptop/PC Administration 5-37 Software Description Message Waiting Indicator Strings - MWI Set Sequence, MWI Clear Sequence Message Waiting Indicator strings are available and can be modified in the Digital Voice Processing System, however, they have no affect on the system. This feature is handled by the digital communications with the phone. Event Handler Group Event handler groups control notification settings like message waiting and pager notifications. On a two-line system, line two is the notification line by default. On all other systems, the last system line is for notification. You can program the Digital Voice Processing System on a Class of Service basis (in the Notification Options dialog box) to use only preselected lines for outgoing notification. Do not change event handler groups without assistance from Technical Support. NOTES Voice Notify Options Password Required Forces the owner to enter a password to retrieve messages. Message Pick-Up Allowed Allows message retrieval. Note that allowing message retrieval without a password can undermine the privacy and mailbox security. Also, do not use voice notification on systems using blind or release transfers. Message Cascading Gives the Digital Voice Processing System great flexibility when delivering a message. Any incoming message, depending on the cascade setting, can be redirected to other mailboxes. No Cascading Set to Off to disable this function. Immediately Cascading begins immediately, allowing storage of duplicate messages in several mailboxes. When Notify Fails Forwards the message to another mailbox only when the notification fails and the mailbox owner has not retrieved the message. Talkpath - Digital Voice Processing System Technical Manual Issue 2 - May, 2004 5-38 Laptop/PC Administration Software Description Urgent Only Cascades only those messages marked urgent. Original Message - Save as New, Delete Original, Save Original These options are available when Message Cascading is set to Immediate or When Notify Fails. Typically, set this to Save as New. Setting this option to Save Original saves the message in the original mailbox once forwarding is complete. Setting this option to Delete Original deletes the original message from the mailbox once forwarding is complete. Notify Interval (External) Determines the time interval between notification attempts until the owner retrieves the message. This number is defined in the mailbox notification settings and is measured in minutes, with a maximum interval of 999 minutes. Notify Attempts (External) Determines how many times the Digital Voice Processing System attempts to notify a mailbox owner after receiving a new message. This number is defined in the mailbox notification settings and can be a maximum of 999. Notification attempts continue as long as there is a new message in the mailbox. NOTES Notify Script Complex notification scripts are created on a per Class of Service basis. Use this option only if a notification script is already written. The Digital Voice Processing System provides 20 notification scripts that are similar in function. There are two groups of command files: 0XX.CF and 1XX.CF. The 0XX.CF files are: 006.CF, 008.CF, 010.CF, 012.CF, 014.CF, 016.CF, 018.CF, 020.CF, 022.CF, and 024.CF. The 1XX.CF files are: 106.CF, 108.CF, 110.CF, 112.CF, 114.CF, 116.CF, 118.CF, 120.CF, 122.CF, and 124.CF. The number in each name represents how long after dialing the paging service the Digital Voice Processing System waits before it sends the mailbox number. All notification scripts send the mailbox number, ✳, an urgent message count, another ✳, a new message count, another ✳, and the saved message count. For example, if mailbox 123 is being notified and has 1 urgent new message, 2 non-urgent new messages and 15 saved messages, the following is sent: 123✳1✳2✳15. Some pagers display ✳ as -, so the display could look like: 123-1-2-15. The difference between 0XX.CF and 1XX.CF files is how the script handles messages forwarded to a mailbox. For more information regarding notification scripts, see Appendix B. Issue 2 - May, 2004 Talkpath - Digital Voice Processing System Technical Manual Laptop/PC Administration 5-39 Software Description Pager Retries Disables pager retries but leaves all other retry options enabled. Since most pagers have memory and reminder features, the owner is not repeatedly paged for the same message. Pager retries are directly related to Notify Attempts. Talkpath - Digital Voice Processing System Technical Manual Issue 2 - May, 2004 5-40 Laptop/PC Administration Software Description Auto Attendant Tab Provides information on several automated operations within the Digital Voice Processing System. Figure 5-22. Class of Service Auto Attendant Tab Call Options Customers can change their extension settings from their mailbox. Blind Transfer Allows unsupervised call transfers. the Digital Voice Processing System simply forwards the call to the requested extension. This option is commonly used with hunt groups or when the phone is always answered. Issue 2 - May, 2004 Talkpath - Digital Voice Processing System Technical Manual Laptop/PC Administration 5-41 Software Description Supervised Transfer The Digital Voice Processing System monitors the transfer to determine whether the called extension is busy or is not being answered. The customer can significantly alter the voicemail system functioning. NOTES If Supervised Transfer is selected, check one or both of the following: Call Screening When a caller dials an extension, Call Screening prompts them for a name. This information is given to the called party before the call is actually transferred. The called party can accept or reject the call. Call Holding The caller can hold if the called party is busy. The caller hears: I'm sorry, [extension's name/signature] is busy. If you would like to hold, press [1]. To try another extension or leave a message for this extension, press [2]. Hold Interval Determines how long the Digital Voice Processing System waits before retrying a busy extension (related to Call Holding). For example, if the Digital Voice Processing System attempts to ring a busy extension, and the hold interval is set to 10 seconds, it retries the extension every 10 seconds until a connection is made or until the retry limit is reached. Time is measured in seconds, with a maximum interval of 999 seconds. Hold Type This setting (related to Call Holding) determines what a caller hears if an extension is busy and they elect to hold. Silence Silence keeps the call connected but the caller hears nothing while on hold. Dial Hold Sequence The Digital Voice Processing System executes a flash-hook when the caller is placed on hold (if provided by the phone system, the flash-hook activates background music). Talkpath - Digital Voice Processing System Technical Manual Issue 2 - May, 2004 5-42 Laptop/PC Administration Software Description Play Hold Files The caller hears recorded messages prepared for the Digital Voice Processing System. Hold files are recorded using the Digital Voice Processing System’s telephone based administration and up to nine can be recorded. Record the first prompt file by selecting system prompt 014. The second prompt is 015. All nine files are accessed using 014 through 022. Refer to Table 4-1. Editing System Prompts for additional information. Call Queueing Places multiple calls on hold for a single extension. The Digital Voice Processing System holds the calls in a queue until they are answered which are answered in the order received. Call Holding must be enabled for this feature to operate. NOTES Screen Length Determines the time in which a caller must respond with a name when prompted through Call Screening. Time is measured in seconds with a maximum interval of 999 seconds. Default is 3 seconds. Play Original When a message is left in a mailbox of a forwarded extension, the originally dialed extension is identified at the start of the message. The identifier of the originally dialed extension is omitted when this option is not selected. Transfer Strings - Transfer Prefix, Transfer Postfix Transfer strings are available and can be modified in the Digital Voice Processing System, however, they have no affect on the system. This feature is handled by digital communications with the phone system. Issue 2 - May, 2004 Talkpath - Digital Voice Processing System Technical Manual Laptop/PC Administration 5-43 Software Description Menus The Menus screen displays names and descriptions. Multi-level menus direct users and callers to information, assist them in performing tasks, and guide them with using the system. Insert a menu by clicking the Insert button. Edit a menu by double-clicking one listed. Delete a menu by highlighting the menu and pressing Delete. Figure 5-23. Menus Screen A menu is a list of actions executed through touch-tone keys. For example, For sales, press [4]. For support, press [5]. For administration, press [6]... A menu performs up to 13 actions, with each action corresponding to a key on a standard telephone keypad (including # and ✳), plus one time-out action. An action is an instruction selected from the Menu Action List and instructs the Digital Voice Processing System how to respond when a particular key is pressed. An action performs another module (transfers a call to an extension through the auto attendant) or performs a special feature (plays a prerecorded message). Talkpath - Digital Voice Processing System Technical Manual Issue 2 - May, 2004 5-44 Laptop/PC Administration Software Description Insert Menu Click Insert and the following screen displays: Figure 5-24. Create New Menu Screen When creating a new menu, complete the following fields: Name A 3-digit numeric name that references the new menu. The Digital Voice Processing System includes menus in the 1XX range. Menus you create should be between 200-998. Description Text that describes the menu being created. Template A 3-digit numeric code of another menu to use as a template when creating this menu. For example, if menu 200 exists and you want to create menu 201 that is similar to 200, enter 200 as the template menu. The template field may be left blank. Delete Menu Before deleting a menu, a confirmation screen displays as illustrated below. Figure 5-25. Delete Menu Confirmation Screen Issue 2 - May, 2004 Talkpath - Digital Voice Processing System Technical Manual Laptop/PC Administration 5-45 Software Description Edit Menu From the menu screen, double-click a menu to select it, then select the options for that menu. This screen permits editing of an existing menu. Figure 5-26. Edit Menu Screen Description Enter a brief description of the function that identifies the purpose of this menu. Password Specify the password to protect the on-line recording action. This password is required when a caller accesses the action Record Prompts. Talkpath - Digital Voice Processing System Technical Manual Issue 2 - May, 2004 5-46 Laptop/PC Administration Software Description Time Control Calls are often handled differently in the evening, during the weekend, or on holidays than during regular business hours. The time control function defines a set of alternative actions that the Digital Voice Processing System performs for a time setting. Create time controls by selecting Time Control from the Setup menu. Set Time Controls to NONE if time controls are not desired. Use this Support. option only with assistance from Technical NOTES Instructions Select the instructions prompt containing the information the caller uses to determine which keys to press. Enter the filename with the VOX extension. The menu number should match the instruction filename. A typical instruction prompt would be: Press [4] for sales, press [5] for support... Note that most menus have instruction prompt files. However, these prompt files are dependent on the application design. Hidden menu options not described in the prompt are also available. The instruction prompt must be a number to enable use of online administration. NOTES Time Out The amount of time the time-out action is in effect if the caller presses no key. Retries The number of times a caller can initiate an invalid option. If the caller exceeds this number, the Max Retries key action is taken. Key Actions The bottom part of the Edit Menu screen addresses Key Actions. Key actions determine the response invoked when a particular key is pressed. Each dial-pad key has an accompanying key action field. In addition, there is a field labeled Time-Out. The Time-Out field indicates what happens when the caller does not press any keys before the Time-Out period elapses. Clicking any Key Action displays the X Key Action dialog box for editing the key. Issue 2 - May, 2004 Talkpath - Digital Voice Processing System Technical Manual Laptop/PC Administration 5-47 Software Description Clicking one of the actions in the Action section displays a description of that action. For example, if the operator option is selected, a notification of transferring the caller to the operator displays. Figure 5-27. Key Actions Define a key by selecting an option as follows: Mailbox Sends the caller to a specific mailbox. If no mailbox is entered, the Digital Voice Processing System prompts the caller for a mailbox number. Prompt for Mailbox Prompts for the mailbox number. For example, if key action 1 is a prompt for a mailbox, when the caller presses [1], they hear Please enter the mailbox number of the person you are trying to reach. Key is First Digit of Mailbox The first digit of the mailbox being accessed. For example, if key 2 is set to Key is first digit, when a caller presses [2], they do not hear a prompt and the system waits for more digits. Goto Mailbox Goes to a specific mailbox. For example, if key 3 is set to mailbox 40, when the caller presses [3], they directly access mailbox 40. Talkpath - Digital Voice Processing System Technical Manual Issue 2 - May, 2004 5-48 Laptop/PC Administration Software Description Extension Sends the caller to a specific extension. If no extension is entered, the Digital Voice Processing System prompts the caller for an extension number. Prompt for Extension Prompts for the extension number. For example, if key action 1 is a prompt for an extension, when the caller presses 1, they hear Please enter the number of the person you are trying to reach. Key is First Digit of Extension The first digit of the extension being accessed. For example, if key 2 is set to Key is first digit, when a caller presses [2], they do not hear a prompt and the system waits for more digits. Goto Extension Goes to a specific extension. For example, if key 3 is set to go to extension 40, when the caller presses [3], they directly access extension 40. Menu Executes the selected menu. Owner Access Gives access to mailbox owner features. Can be used with in-band integration or to provide access through a hidden key on a menu. Run Module Runs other modules that the Digital Voice Processing System supports. Do not perform this function without assistance from Technical Support. NOTES Time Control Enter the time control to run. Takes actions based on time, day, and day of the week values, as specified in a time control setting. Issue 2 - May, 2004 Talkpath - Digital Voice Processing System Technical Manual Laptop/PC Administration 5-49 Software Description Command File Runs the command file script. See Appendix C for more information. Do not perform this function without assistance from Technical Support. NOTES Company Directory Provides a company directory listing for mailboxes or extensions. Hang Up Plays thank-you for calling prior to disconnecting the caller. For example, a menu might include this option at the end of a list: press [4] for sales, [5] for support, [#] to return to the previous menu, and [9] to hang up. Operator Transfers the caller to an operator using the blind transfer to [0]. Refer to the information later in this section for configuring the operator. Invalid Option Plays the message Invalid option and repeats the instructions. Disabled Makes pressing a key have no effect, as if the key was never pressed. Play Prompt Plays the indicated voice prompt file. Play Instructions Replays the instructions prompt, such as: To hear this menu again press... Record Prompts Lets a caller re-record menu prompts. After pressing the key associated with this action, the caller is prompted for the menu password. The Instructions or any Play Prompt file attached to a key, is then recorded or edited. Talkpath - Digital Voice Processing System Technical Manual Issue 2 - May, 2004 5-50 Laptop/PC Administration Software Description Change Language Changes the prompt files to those recorded in the selected language. Only the purchased language is available. NOTES Issue 2 - May, 2004 Talkpath - Digital Voice Processing System Technical Manual Laptop/PC Administration 5-51 Software Description Time Controls Time controls route calls, send callers to voicemail, and play menus, etc. (based on time and day settings). Up to 10 time periods can be defined within a time control setting, making a time control as simple or as complex as desired. Time Controls can be chained together to allow more than ten day/time options, however, chaining Time Controls can cause delays. Time Controls are searched by item, starting with the first item. The Time Control menu displays time control names and descriptions. To access the Time Controls function, click Time Control on the main menu. Figure 5-28. Time Controls Edit an existing time control by clicking on it or click Insert to add a new time control. To delete a time control, highlight it and click Delete. Talkpath - Digital Voice Processing System Technical Manual Issue 2 - May, 2004 5-52 Laptop/PC Administration Software Description Insert Time Control Figure 5-29. Create New Time Control When creating a new time control, complete the following fields: Name A 3-digit numeric name that references the new time control. The Digital Voice Processing System includes time controls in the 1XX range. Create time controls between 200-999. Description Text that describes the time control being created. Template The 3-digit numeric code of another time control to use as a template. For example, if time control 200 exists and time control 201 is similar to 200, enter 200 as the template time control. The template field may be left blank. Delete Time Control A confirmation displays before deleting a time control as shown below. Figure 5-30. Delete Time Control Confirmation Issue 2 - May, 2004 Talkpath - Digital Voice Processing System Technical Manual Laptop/PC Administration 5-53 Software Description Edit Time Control From the Time Control menu, click a time controls to display the following screen: Figure 5-31. Edit a Time Control Description Enter a description for the time control that describes its purpose. Talkpath - Digital Voice Processing System Technical Manual Issue 2 - May, 2004 5-54 Laptop/PC Administration Software Description Items 1-10 Click any item button to define a time control function. Make sure the last time control entry includes all dates, times, days, and an action. Otherwise, the system may terminate the call unexpectedly. Figure 5-32. Define Time Control Function Use the tenth field to chain time controls together. NOTES Date Enter a start and end date, using MM/DD date format (01/01 through 12/31), to indicate specific starting and ending dates to which the time control applies. Note that when specifying date and time, leaving either field blank means the option to applies to ALL dates. Issue 2 - May, 2004 Talkpath - Digital Voice Processing System Technical Manual Laptop/PC Administration 5-55 Software Description Time Enter a start and end time, using twenty-four hour format (00:00 through 23:59), to indicate the specific times during the day that the time control is active. Leaving these fields blank means the option applies to all times. Days Click the checkbox for each day to which the time control item applies. Make certain all times, days, and dates are specified to achieve desirable results. NOTES Mailbox Greeting Enter a number from 1-9 to distinguish different time-related events within a time control. The mailbox greeting setting controls which mailbox greeting plays when a mailbox is accessed and a time control is defined. Refer to the previous discussion of mailbox settings for more information. Action Select the action to perform during the indicated dates, days of the week, and hours during the day. Mailbox Sends the caller to a specific mailbox. If no mailbox is entered, the Digital Voice Processing System prompts the caller for a mailbox number. Prompt for Mailbox Prompts for the mailbox number. Key is First Digit of Mailbox The first digit of the mailbox being accessed. Goto Mailbox Accesses a specific mailbox. Extension Sends the caller to a specific extension. If no extension is entered, the Digital Voice Processing System prompts the caller for an extension number. Talkpath - Digital Voice Processing System Technical Manual Issue 2 - May, 2004 5-56 Laptop/PC Administration Software Description Prompt for Extension Prompts for the extension number. Key is First Digit of Extension The first digit of the extension being accessed. Goto Extension Accesses a specific extension. Menu Executes the selected menu. Run Module Runs other modules that the Digital Voice Processing System supports. Do not perform this function without assistance from Technical Support. NOTES Time Control Executes actions defined in a time control setting. Command File Executes the command file script. Company Directory Provides a company directory listing for mailboxes or extensions. Issue 2 - May, 2004 Talkpath - Digital Voice Processing System Technical Manual Laptop/PC Administration 5-57 Software Description Voice Lines Displays voice line actions. Voice Line actions define how the Digital Voice Processing System answers incoming calls. Figure 5-33. Voice Lines Talkpath - Digital Voice Processing System Technical Manual Issue 2 - May, 2004 5-58 Laptop/PC Administration Software Description Double-clicking a voice line displays the Edit Line Settings dialog box for specifying actions for the selected line. Figure 5-34. Edit Line Settings Mailbox Sends the caller to a specific mailbox. If no mailbox is entered, the Digital Voice Processing System prompts the caller for a mailbox number. Extension Sends the caller to a specific extension. If no extension is entered, the Digital Voice Processing System prompts the caller for an extension number. Menu Executes the selected menu. Run Module Enter a module name to execute and any parameters for the module. Do not perform this function without assistance from Technical Support. NOTES Issue 2 - May, 2004 Talkpath - Digital Voice Processing System Technical Manual Laptop/PC Administration 5-59 Software Description Time Control Enter a time control to execute. Command File Enter a command file to execute. Refer to Appendix B for more information. Talkpath - Digital Voice Processing System Technical Manual Issue 2 - May, 2004 5-60 Laptop/PC Administration Software Description Reset Display The Reset button clears the main window. Shrink The Shrink button returns the laptop/PC administration programming window to its original size. Exit The Exit button exits laptop/PC administration. Issue 2 - May, 2004 Talkpath - Digital Voice Processing System Technical Manual Laptop/PC Administration 5-61 Pull-Down Menus Pull-Down Menus Menus at the top of the main screen provide access to the functions described below. File Menu Generally, the only option available on the File menu is Exit which exits the Digital Voice Processing System administration program. However, if there is a modem connection, available options include Dial, Hangup, and Exit. See the Setup Modem discussion earlier in this section for more information on these functions. Setup Menu The Setup menu consists of these options: Subscriber ❐ Class of Service ❐ Menu ❐ Time Control ❐ Lines ❐ Phone System ❐ Port Setup ❐ Modem ❐ Advanced The first five options provide the same functions as the corresponding buttons in the main menu. The other options are described below. ❐ Setup Phone System Lists available configuration files and their corresponding phone systems. The following message displays if a phone system has not been selected. Refer to Section 2 for information on selecting a phone system. Figure 5-35. Select Phone System Message Talkpath - Digital Voice Processing System Technical Manual Issue 2 - May, 2004 5-62 Laptop/PC Administration Pull-Down Menus The screen below displays after clicking OK on the Select Phone System message or if a phone system was already selected. Figure 5-36. Configuration Files Double-clicking a configuration file displays the following screen that lists the new and current Digital Voice Processing System configuration: Figure 5-37. Configuration Warning Screen After pressing Yes, the Digital Voice Processing System reboots. Issue 2 - May, 2004 Talkpath - Digital Voice Processing System Technical Manual Laptop/PC Administration 5-63 Pull-Down Menus Port Setup To configure the Digital Voice Processing System via laptop/PC administration, select Setup: Port Setup from the main window. Figure 5-38. Comm Port Options The default options are shown. It is recommended that none of these options other than the main ComPorts be changed. Set this option to the laptop/PC ComPort. Talkpath - Digital Voice Processing System Technical Manual Issue 2 - May, 2004 5-64 Laptop/PC Administration Pull-Down Menus Modem Setup The following options are available: ❐ ❐ ❐ Quick Configure Setup Phone Book Figure 5-39. Modem Setup Menu Issue 2 - May, 2004 Talkpath - Digital Voice Processing System Technical Manual Laptop/PC Administration 5-65 Pull-Down Menus Quick Configure The Modem Quick Configure provides a list of other available modems. Figure 5-40. Modem Quick Configure Talkpath - Digital Voice Processing System Technical Manual Issue 2 - May, 2004 5-66 Laptop/PC Administration Pull-Down Menus Modem Setup If the desired modem is not listed, select Modem Setup from which the administration program can be used to configure the modem. Figure 5-41. Modem Information Do not change these options unless you are familiar with modems. Contact the modem provider if assistance is needed. Commands Command strings that are sent to the modem during different stages of the communication process. Initialize Initializes the modem. Dial The dialing sequence. Issue 2 - May, 2004 Talkpath - Digital Voice Processing System Technical Manual Laptop/PC Administration 5-67 Pull-Down Menus Dial Suffix Command that follows the dialing sequence. This is necessary because some modems require additional command strings after the dial command. It is recommended to leave this set to ^M, which is the default. Cancel Dial Cancels the dial. Hangup Hangs up the modem and disconnects the call. Configure Determines the configuration string for your modem. Refer to the manual supplied with the modem to determine the necessary configuration string. Answer Forces the modem to go off hook and answer the line. Result Codes Codes that the administration program expects to receive from the modem. Okay Normal response for a properly executed command. Connect Code returned when the modem connects to a remote modem. Busy Remote modem is busy. Voice Someone answered the phone line and attempted to speak into it. No Carrier An interruption occurred (intentionally or unintentionally) with the remote system connection. Talkpath - Digital Voice Processing System Technical Manual Issue 2 - May, 2004 5-68 Laptop/PC Administration Pull-Down Menus No Dialtone The modem went off hook but did not receive a dial tone. Error The modem detected an error. Ring An incoming call was detected by the modem. At the bottom of the Modem Setup screen is Link Rate information. Link Rate Def BPS Rate Default communication rate between the two systems. Lock DTE Rate Forces the baud rate to remain the same. It is recommended that the baud rate be left at 9600 (default). Issue 2 - May, 2004 Talkpath - Digital Voice Processing System Technical Manual Laptop/PC Administration 5-69 Pull-Down Menus Phonebook Use the Modem Phonebook screen to edit phonebook entries. The advantage of the Phonebook is that when administering one or more voicemail systems, phone numbers are conveniently stored in the phonebook. Figure 5-42. Modem Phonebook Adding a modem phonebook entry displays the following screen. Figure 5-43. Phonebook Entry Name An associated name for this number. Talkpath - Digital Voice Processing System Technical Manual Issue 2 - May, 2004 5-70 Laptop/PC Administration Pull-Down Menus Number Telephone number to dial at the site. Changing a modem phonebook entry displays the following screen for editing the phonebook entry: Figure 5-44. Telephone Number Removing a modem phonebook entry displays a confirmation screen. Figure 5-45. Delete Phonebook Entry Warning Issue 2 - May, 2004 Talkpath - Digital Voice Processing System Technical Manual Laptop/PC Administration 5-71 Pull-Down Menus Advanced Setup Provides the following alternatives: ❐ ❐ ❐ ❐ ❐ Edit Registry System Settings Set Unit Date and Time Phone System Config Message On Shutdown Figure 5-46. Modem Setup Talkpath - Digital Voice Processing System Technical Manual Issue 2 - May, 2004 5-72 Laptop/PC Administration Pull-Down Menus Edit Registry The registry contains system variables that control the Digital Voice Processing System. Normally, these values need not change. Contact Vodavi Communications Systems’ Technical Support department for assistance if a change is required. Figure 5-47. Registry Entries Improper changes to the Registry items can cause erratic system behavior. NOTES Issue 2 - May, 2004 Talkpath - Digital Voice Processing System Technical Manual Laptop/PC Administration 5-73 Pull-Down Menus Change the names and values of registry entries by double-clicking an entry on the Edit Registry screen. Figure 5-48. Registry Values System Settings Figure 5-49. System Settings Talkpath - Digital Voice Processing System Technical Manual Issue 2 - May, 2004 5-74 Laptop/PC Administration Pull-Down Menus System Caching If System Updates Take Effect Immediately is selected, any change made to a menu, mailbox, COS, etc., is immediately effective. The disadvantage is that this option slows the system. Unchecking this option requires a system reboot for changes to take effect. NOTES Turn caching off (by checking the box) when initially configuring the system; turn caching on (by unchecking the box) when programming changes are complete. Fax Detect Fax Detect strings are available and can be modified in the Digital Voice Processing System, however, they have no affect on the system. This feature is handled by the digital communications with the phone system. Operator Global default operator for all operator functions. This is the dial sequence sent to the phone system to contact the Operator [0]. In most situations, this is the sequence dialed when the caller dials [0]. Set Unit Date and Time Sets the Digital Voice Processing system date and time, then the system restarts. All callers are disconnected. The System Reboot Warning message displays followed by the Set Unit Date and Time screen after clicking OK. Figure 5-50. System Reboot Warning Message Issue 2 - May, 2004 Talkpath - Digital Voice Processing System Technical Manual Laptop/PC Administration 5-75 Pull-Down Menus Figure 5-51. Set Unit Date and Time Phone System Config Message On If the Digital Voice Processing System is not configured to a phone system, or if it is configured to a default phone system, the Default Phone System Configuration screen displays as shown below. Deselecting the Display this message at start-up each time the program is run option prevents the Default Phone System Configuration screen from displaying in the future. Selecting Setup, Advanced, Phone System Config Message On from the Setup pull-down menu displays this screen again. Figure 5-52. Default Phone System Configuration Talkpath - Digital Voice Processing System Technical Manual Issue 2 - May, 2004 5-76 Laptop/PC Administration Pull-Down Menus Shutdown Menu The Shutdown menu provides various options for shutting down the Digital Voice Processing System. Figure 5-53. Shutdown Voicemail System Shutdown and Park Unit Shuts down the voicemail unit and does not restart it again. The power supply must be removed to restart. Shutdown and Restart System Shuts down the voicemail unit and executes a verification of configuration information (without rebooting the system). Shutdown and Reboot Unit Shuts down the voicemail unit, then reboots the system. Quick Start Initiates a quick shutdown and startup without internal configuration verification. Issue 2 - May, 2004 Talkpath - Digital Voice Processing System Technical Manual Laptop/PC Administration 5-77 Pull-Down Menus Reports Menu Displays system logs. Select an option from the main administration menu (Subscribers, COS, Menus, etc.) to access the Reports menu. Figure 5-54. Reports Menu Talkpath - Digital Voice Processing System Technical Manual Issue 2 - May, 2004 5-78 Laptop/PC Administration Pull-Down Menus On the Reports menu, the only available option is Logs. Enter the log date and start and end times for the report. Figure 5-55. Log Report Issue 2 - May, 2004 Talkpath - Digital Voice Processing System Technical Manual Laptop/PC Administration 5-79 Pull-Down Menus Help Menu The Help menu contains two options: About and Current Configuration. Figure 5-56. Help Menu Talkpath - Digital Voice Processing System Technical Manual Issue 2 - May, 2004 5-80 Laptop/PC Administration Pull-Down Menus Help, About lists the Digital Voice Processing System administration software and voicemail system versions as shown below. Figure 5-57. Help About Help, Current Config lists information about the configuration file currently selected as shown below. Figure 5-58. Current Configuration Issue 2 - May, 2004 Talkpath - Digital Voice Processing System Technical Manual 6 Upgrading Upgrading Ports Use these instructions when upgrading the number of ports on a voicemail unit. A port upgrade kit must be purchased from Vodavi before proceeding. Call your sales representative with the serial number of the voice processing unit for the upgrade. NOTES Instructions are separated into two sections: hardware and software. Use the software section for all upgrades. Use the hardware section only when moving from: 2 to 6 ports ❐ 2 to 8 ports ❐ 4 to 6 ports ❐ 4 to 8 ports If upgrading from 2 to 4 or 6 to 8 ports, go directly to the Software Installation section which immediately follows the Hardware Installation section. ❐ Hardware Installation Hardware must be added to the voicemail system when upgrading from: ❐ ❐ ❐ ❐ 2 to 6 ports 2 to 8 ports 4 to 6 ports 4 to 8 ports Tools Required Phillips #1 or 2 screwdriver Nut driver (for ¼ inch hex standoff) ❐ Static control wrist strap. For example: Desco #9070 or Ideal Stat Gard #61-038 kit. Parts included in the hardware kit are shown in the following table: ❐ ❐ Item 1 Part 8 port replacement digital line card Quantity 1 Table 6-1. Hardware Kit Parts Issue 2 - May, 2004 Talkpath - Digital Voice Processing System Technical Manual 6-2 Upgrading Upgrading Ports Prepare Unit 1 Shut down and park the voicemail system using the Windows Admin program (Setup, Advanced, Shutdown) or the telephony interface. 2 Disconnect power to the system. 3 Disconnect all phone lines from the voicemail ports. 4 Remove unit from wall by lifting off the mounting screws (if wall mounted). 5 Place unit on sturdy flat surface, preferably on a static dissipating surface such as a properly grounded anti-static mat. Access Line Card Mounting and Install Card 1 It is highly recommended to use anti-static precautions, such as a static-dissipating wrist strap (see Tools Required above), before opening the upgrade kit and whenever the voicemail unit is open. This point cannot be overstressed. This unit and the hardware upgrade kit contain static-sensitive components. These components MUST receive adequate protection from electro-static discharge. 2 Remove top cover by unscrewing the four screws, two on each of the bottom side edges of the unit. Slide the cover off towards the end with the LED lights. Figure 6-1. Removing the Cover 3 Locate the line card (the RJ-11 connectors for the phone lines). 4 The old 4 port line card and the new 8 port line card are mounted the same. They differ in the number of components stuffed onto the line card. During the removal and installation process, note the location of screws, ribbon cable, and the orientation of the ribbon cables. 5 Remove the two ribbon cables and note the orientation for installation to the 8 port card. Issue 2 - May, 2004 Talkpath - Digital Voice Processing System Technical Manual Upgrading 6-3 Upgrading Ports 6 Remove the 6 screws holding the card to the metal support bracket. Remove the line card and store it in a safe and static-free location. 7 Remove the metal support bracket by removing the two rear screws and the two screws connecting the standoffs. 8 Install the 8 port metal support bracket, using four screws. 9 install the 8 port line card, using six screws. 10 Install the two ribbon cables noting the polarity and location. Do not bend the pins. Reassemble chassis 1 Slide the cover back into place. It is easiest to slide the cover on a flat surface. Make sure both edges on the base slide into the grooves on the lid. It is difficult to install the screws if the cover is not on properly. Insert the four #8 screws into chassis sides and tighten. 2 Replace the unit to its original mounting or location. Reconnect the RJ-11 ports to lines from the phone system, and power-up the unit. 3 When the system boots, the new ports are unavailable until the software upgrade is performed. Software Installation For all upgrades, the software must be loaded to activate the ports. The necessary software is found on a 3.5-inch diskette in the upgrade kit. Follow these instructions to upgrade the software: Requirements ❐ ❐ ❐ ❐ Laptop or PC running Windows 3.1.1 or Windows 3.11 for Workgroups, or higher with floppy disk drive and an available serial port and null modem cable. Admin software loaded on the laptop or PC. Ecom or ProComm software loaded on the laptop/PC (Note: remaining instructions assume that Ecom is the software used to complete the upgrade) Port upgrade diskette Steps 1 Connect the laptop/PC to the voicemail system. 2 Start the Windows Admin program. 3 Shut down and park the voicemail by selecting Setup, Advanced, Shutdown. Then select Shutdown and Park Unit. Exit the Admin program. 4 Insert the Port Upgrade disk into the diskette drive of the laptop/PC. 5 Start Ecom on the laptop/PC and verify the connection to the voicemail unit. Talkpath - Digital Voice Processing System Technical Manual Issue 2 - May, 2004 6-4 Upgrading Upgrading Ports 6 Using Ecom, enter the following DOS commands: CD\ [Enter] ZMR [Enter] 7 Use Ecom to send the two files located on the diskette (NEWKEY.KEY and PORTUP.BAT) by pressing the PgUp key. Select Zmodem transfer. Browse for the A: drive and select both files, click Add and OK. Start the upload to the voicemail system. See Section 7 for more information on file uploading. 8 After a successful upload, execute the following DOS commands: PORTUP [Enter] REBOOT [Enter] 9 As the system reboots, the new ports are activated (the LEDs for active ports are all solidly lit when the reboot completes). If any other LEDs remain lit, refer to Section 7, Technical/Troubleshooting. NOTES Make test calls to all ports to verify that the upgrade completed successfully. If problems exist, refer to Section 7, Technical/Troubleshooting or contact Technical Support for assistance. All ports return to their default configuration and must be reconfigured to their original setting prior to placing the Test Calls. NOTES Now that your port count has increased, phone system programming must be modified (Flash 65, button #12) to accommodate the new ports. The last port in the voicemail group must be connected for message waiting indicators, notifications, etc. to work properly. Issue 2 - May, 2004 Talkpath - Digital Voice Processing System Technical Manual Upgrading 6-5 Generic Upgrading Information Generic Upgrading Information Follow these instructions to upgrade the self-contained digital voicemail unit. The diskette sent from Vodavi Communications contains a file for upgrading. Any reference in the following section to xxxxxxxx.zip refers to the file on the diskette. NOTES To download the files from the Internet, follow the instructions below: 1 Create a directory on your hard drive called UPDATE. 2 Using any web browser, download the XXXXXXXX.zip file to the UPDATE directory on your hard drive. 3 Connect the voice processing unit to the laptop/PC using the serial cable. 4 Start the ECom program. 5 Click SEND next to +DIE 0. 6 Click the C:\HELLO text in the screen. 7 Create a level 1 backup of your system. Refer to Section 7 for additional information on system backups. 8 When the C:\HELLO prompt displays, type CD\ and press [Enter]. 9 Select FILE -> UPLOAD -> OK. 10 Select ZMODEM and click OK. 11 Double-click the UPDATE directory. 12 Highlight XXXXXXXX.zip and click ADD. 13 Click OK. A screen displays that shows the upload status of the files. When the upload completes, the C:\ prompt displays. 14 At the C:\ prompt, type PKUNZIP -D -O XXXXXXXX.zip and press [Enter]. 15 Type REBOOT and press [Enter]. The system reboots and the upgrade is complete. 16 Exit ECom. If the files were received on a diskette from Vodavi Communications, follow these instructions. 1 Place the diskette you received in the disk drive of the laptop or PC. 2 Connect the voicemail unit to the laptop or PC. 3 Access the voicemail unit via ECOM. 4 Click Send next to +DIE0. 5 At the c:\HELLO> prompt type CD\ and press [Enter]. Talkpath - Digital Voice Processing System Technical Manual Issue 2 - May, 2004 6-6 Upgrading Generic Upgrading Information 6 Type ZMR and press [Enter]. 7 Choose File ->Upload ->OK. 8 Choose ZModem and press OK. 9 Double-click the UPDATES directory. 10 Highlight xxxxxxxx.zip and click Add. 11 Click OK. 12 A screen displays that shows the upload status of the files. When the upload is complete, the c:\ prompt displays. 13 At the C:\ prompt type PKUNZIP -D -O xxxxxxxx.zip and press [Enter]. 14 Type REBOOT and press [Enter]. 15 The system shuts down and the upgrade is complete. 16 Exit ECom. Issue 2 - May, 2004 Talkpath - Digital Voice Processing System Technical Manual 7 Technical / Troubleshooting Overview This section provides information on diagnosing problems that may occur on the Digital Voice Processing System. The information in this section is highly technical and unless the procedures are performed as instructed, the system may fail to operate. A good working knowledge of DOS and PC-based systems is essential. LED Sequences LED Sequence: . = off o = low intensity O = high intensity S = blinking Issue 2 - May, 2004 Talkpath - Digital Voice Processing System Technical Manual 7-2 Technical / Troubleshooting LED Sequences Normal LED Boot Sequence LED 12345678 Description If system does not progress... ???? ???? Boot-up checking – see below Cables disconnected. Memory SIMM loose. O... .... Checking hard-drive and other system resources Hard drive problem. Boot with Ecom to view errors. .O.. .... Configuring system File problem. Re-index databases. ..O. .... Setting modem ...O .... Starting the voice processing Key file missing. Invalid number of ports. Configuration files not valid. OO.. .... 2 port system ready to answer System ready OOOO .... 4 port system ready to answer System ready OOOO OO.. 6 port system ready to answer System ready OOOO OOOO 8 port system ready to answer System ready OSOO .... 4 port system, port 2 active System working .... O... System parked Power unit on and off to restart .... .O.. System re-booting Wait for re-boot. Issue 2 - May, 2004 Talkpath - Digital Voice Processing System Technical Manual Technical / Troubleshooting 7-3 Looking at Boot Up Other Error Conditions LED 12345678 Description Diagnosis No Lights System not booting. BIOS failure, BIOS chip loose. Open unit and reconnect. O... o.o. No memory found. Memory SIMM loose, disconnected or failed. Open unit and reconnect. oO.O o.o. 20 seconds O.oo o o No boot-able device. Hard drive data or power cable disconnected. Hard drive failure. Open unit and reconnect. oO.O OOOo System not booting. Hard drive not connected to the motherboard. Open unit and reconnect. O... O.O. Memory SIMM is disconnected. Open unit and reseat the memory SIMM. Looking at Boot Up Once power is reapplied to the Voice Processing System, a PC boot-up screen displays: General Software 80386 Embedded BIOS (tm) Version 4.0 Copyright (C) 1992-1997 General Software, Inc. Connected Systems Dolphin Wait..... (C) 1996 General Software, Inc. 80386-4.0-01F3-FA4E Talkpath - Digital Voice Processing System Technical Manual Issue 2 - May, 2004 7-4 Technical / Troubleshooting Looking at Boot Up Next, the system CMOS BIOS configuration screen displays: +------------------------------------------------------------------------------+ | SYSTEM BIOS CONFIGURATION, (C) 1996 GENERAL SOFTWARE, INC. | +---------------------------------------+--------------------------------------+ | System CPU : 80386 | Low Memory : 703KB | | Coprocessor : Disabled | Extended Memory : 3072KB | | Drive A: Type : RFD Disk(n/a) | Drive C: Type : 49 | | Drive B: Type : Not installed | Drive D: Type : 0 | | System Video : Auto | Serial Ports : 03F8 | | ROM Shadowing : Enabled | Parallel Ports : | | Embedded BIOS Version: 3.5IDE | Manufacturing Mode : 03F8 / 19K | +---------------------------------------+--------------------------------------+ Starting PC DOS... Then the system boots: HIMEM: DOS XMS Driver, Version 3.15 - 05/30/94 Extended Memory Specification (XMS) Version 3.0 Copyright (C) IBM Corp. 1988, 1994 Installed A20 handler number 2. 64K High Memory Area is available. IBM Expanded Memory Manager 386 Version 4.50 Copyright (c) IBM Corp. 1986, 1994 EMM386 successfully installed. Available expanded memory . . . . . . . . 3008 KB LIM/EMS version . . . . . . . . Total expanded memory pages . . Available expanded memory pages Total handles . . . . . . . . . Active handles . . . . . . . . Page frame segment . . . . . . 4.0 216 188 64 1 E000 H . . . . . . . . . . . . . . . . . . . . . . . . . . . . . . Total upper memory available . . . . . . Largest Upper Memory Block available . . Upper memory starting address . . . . . . Issue 2 - May, 2004 95 KB 95 KB C800 H Talkpath - Digital Voice Processing System Technical Manual Technical / Troubleshooting 7-5 Looking at Boot Up EMM386 Active. Dolphin Advanced Power Management V2.0. System APM support detected and initialized C:\>set VSICFG=0xC000 0x310 10 C D C:\>set PATH=C:\;C:\DOS;C:\UTILS;C:\HELLO\SYSTEM C:\>set TEMP=C:\TEMP C:\>set VSIXMSMEM=1 C:\>lights ff3f 0 C:\>smartdrv /X C:\>cd\ C:\>makekey found key file - exiting C:\>cd\hello\dsp C:\HELLO\DSP>call denv C:\HELLO\DSP>call testenv C:\HELLO\DSP>set VSICFG=0xC000 0x310 10 C D C:\HELLO\DSP>set LDSPPATH=loaddsp -v evp.bin C:\HELLO\DSP>dinit DInit Version 1.0 03/09/98 (C)opyright 1998 Santa Barbara Connected Systems Corp. All Rights Reserved Usage: DInit [channel number] Clock via channel 1 Enabling channel 1 C:\HELLO\DSP>loaddsp -v evp.bin LOADDSP DSP Image Loader Version 1.6 08/Apr/97 (C)opyright 1997 Santa Barbara Connected Systems Corp. All Rights Reserved. Hardware Interrupt 10 IO base address 310 Memory Segment c000 C:\HELLO\DSP> C:\HELLO\DSP>cd\hello C:\HELLO>regadd "DisableXSIAM=1" Talkpath - Digital Voice Processing System Technical Manual Issue 2 - May, 2004 7-6 Technical / Troubleshooting Boot Up Problems REGADD: DisableXSIAM=1 C:\HELLO>chk_port 10/13/98 13:28:13 SETPORT (Build:2) VSI Channels=8 Registry Channels=8 Return Er ror Level=0 REGADD: DisableXSIAM=0 Configuring system... Modem to auto-answer... AT AT S0=1 Q1 Loading voice engine... +OK Boot Up Problems Q: All lights on the system turn on and the system appears to boot normally, but calls are not being answered. A: The cable from the motherboard to the voice card(s) is not connected. Open the voicemail unit and reconnect the voice cards to the motherboard. Q: The system boots properly and the batteries are installed. When the power is removed, then is re-applied, the date and time are not maintained. A: Check the status of the batteries. Make sure they are seated properly and are charged. Also, open the unit and make certain the battery connection is tight, via JP10. ECom ECom is the communications program shipped on the Laptop/PC Administration diskette. ECom is a 16-bit Windows program that communicates directly with the Digital Voice Processing System and provides access to DOS functions and debugging information. It is suggested to use the supplied ECom application because Ecom supports transferring of files between the Digital Voice Processing System and the PC, via the ZModem protocol. Anytime the system is accessed via ECom, Laptop/PC Admin must be shut down. NOTES Issue 2 - May, 2004 Talkpath - Digital Voice Processing System Technical Manual Technical / Troubleshooting 7-7 ECom The following screen shows ECom: Figure 7-1. ECom Screen Talkpath - Digital Voice Processing System Technical Manual Issue 2 - May, 2004 7-8 Technical / Troubleshooting ECom Com Port Options Press [ALT]+[P] from the ECom screen to access the Com Port Options screen as shown below: Figure 7-2. Com Port Options The default communications port options are as follows: Com Ports Defines the Com Port connecting to the Laptop/PC. Baud Rates Default is 9600. This baud rate must match the BaudRate setting in your Registry. Parity Default is None. Data Bits Default is 8. Stop Bits Default is 1. Flow Control Software Transmit and Software Receive must be checked. XOn Char should be 17 and XOff Char should be 19. Issue 2 - May, 2004 Talkpath - Digital Voice Processing System Technical Manual Technical / Troubleshooting 7-9 ECom Modem Connection The modem connection, via ECom, works the same whether the modem is connected or there is a direct connection to the Digital Voice Processing System. To access modem features, press [ALT]+[D]. The modem dial screen displays. Figure 7-3. Modem Connection Once the modems are connected, all features described in this section are supported. There is a phone book, similar to the phone book for the Laptop/PC Administration software. Use this phone book to enter the remote site name and telephone number and save this information. Shut Down and Park The voicemail system must be shut down and parked to access DOS or debugging functions. Shut down and park the system in any of three ways: 1 Access the Online Administration program by getting into a mailbox and accessing supervisor functions, then press [8], [3], [1] to shut down and park the system. Start ECom and press [Enter] until the C:\HELLO> prompt displays. If the voicemail system is shut down and parked, the modem connection is dropped. The system must be recalled for access. NOTES 2 Via the laptop/PC administration program Select Setup, Advanced, Shutdown, and Shutdown and Park unit. Exit the Laptop/PC Admin module. Start ECom and press [Enter] until the C:\HELLO> prompt displays. Talkpath - Digital Voice Processing System Technical Manual Issue 2 - May, 2004 7-10 Technical / Troubleshooting ECom 3 Via the ECom program, connect to the Digital Voice Processing System. Press Send next to +DIE0 to display the C:\HELLO> prompt. Figure 7-4. Hello Prompt Access to DOS functions is available, including directory and type commands. Issue 2 - May, 2004 Talkpath - Digital Voice Processing System Technical Manual Technical / Troubleshooting 7-11 ECom Debug Mode From the DOS prompt the voicemail system can be brought up in debug mode. If VMDEBUG is typed at the C:\HELLO> prompt, the system comes up in a communicative mode. In debug mode, the Administration program will not run. The following screen shows how the voicemail looks when the system is ready to take calls in its non-stealth mode. Figure 7-5. Debug Mode Note that the system displays the log line: I!XSIAM Info: XSIAM Shutting down for a short nap The system is ready to receive voicemail calls. Logging information displays on the ECom screen and is written to the logs. To exit Debugging mode, press [3] from the ECom screen. The voicemail system is parked again. To restart the voicemail system, type REBOOT and the system reboots. It is then safe to exit the ECom program. Talkpath - Digital Voice Processing System Technical Manual Issue 2 - May, 2004 7-12 Technical / Troubleshooting ECom To display more logging information in the unit, add a registry parameter ModuleDebug. ModuleDebug accepts several parameters as shown in the following table: Basic Foundation H! Voicemail Vm Auto Attendant Aa Menus Mn Voicemail Owner Vo Directory Di Events Ev Message Manager Mm Time Control Tc Integration In Command File Cf Database Db Distribution List Dl Notification No Table 7-1. Module Debug Parameters For example, to see if the menus and time controls are configured correctly, go into Admin module and insert the ModuleDebug name with a value of TcMn. Or, access the system via ECom and at the DOS prompt type REGADD “ModuleDebug=MmTc” Module Debugging must be turned off when troubleshooting is complete. To turn off Module Debug, type REGADD “ModuleDebug=” Download Upload and download files to the Digital Voice Processing System in ECom. To download or send a file from the Digital Voice Processing System to the laptop/PC, do the following: 1 Make certain the Digital Voice Processing System is shut down and parked. 2 From the C:\HELLO> prompt, type ZMS <filename> and press [Enter]. If the file to download is not in the C:\HELLO directory, move to the correct directory to type the ZMS command. NOTES 3 The system displays a status screen (shown below). 4 When the download is complete, the system returns to the C:\HELLO> prompt. Issue 2 - May, 2004 Talkpath - Digital Voice Processing System Technical Manual Technical / Troubleshooting 7-13 ECom 5 The file is downloaded to the C:\Admin directory on the local hard drive. Figure 7-6. Protocol Status Upload To upload a file from the Laptop/PC to the Digital Voice Processing System, do the following: 1 Make certain the Digital Voice Processing System is shut down and parked. 2 Type CD \ and press [Enter]. The file uploads to the C:\ directory. 3 Type ZMR and press [Enter]. 4 Press [Page Up]. 5 The system prompts for the transfer protocol to use. Figure 7-7. Select Protocol Talkpath - Digital Voice Processing System Technical Manual Issue 2 - May, 2004 7-14 Technical / Troubleshooting ECom 6 The next screen prompts for files to transfer. Double-click the file(s) to transfer. They are listed in the Outgoing Files box. Figure 7-8. Batch Upload 7 After selecting the appropriate files, click Add, then OK and the file transfers begin. Issue 2 - May, 2004 Talkpath - Digital Voice Processing System Technical Manual Technical / Troubleshooting 7-15 Parking the System The screen changes to a protocol screen showing the upload status. When complete the C:\ prompt displays. Figure 7-9. Protocol Status Parking the System Many troubleshooting and updating techniques require that the Digital Voice Processing System be parked before the system is accessed. Normally, the Digital Voice Processing System is running, accepting phone calls, etc. When the system is parked, it is no longer taking phone calls, instead is waiting for DOS commands. Park a system one of three ways: 1 Via Windows Admin: Select Setup, Advanced, Shutdown. Select Shutdown and Park unit. Admin then disconnects. 2 Via Telephone: Access any mailbox. At the mailbox greeting, press [✻] followed by the password for that mailbox. Press [7] for administrator functions. If prompted for a password type 2275. Press [8], [3], [1]. Once the system is parked, voice calls cannot be made into the system. NOTES Talkpath - Digital Voice Processing System Technical Manual Issue 2 - May, 2004 7-16 Technical / Troubleshooting Executing DOS Commands 3 Via ECom: Send to the Digital Voice Processing System the string +DIE 0 followed by CR/LF. From ECom press Send in the top right-hand corner of the screen. If a modem is connected, the parking process disconnects the modem. NOTES Once a system is parked, restart the system so it processes phone calls by doing the following: Unplug the power, wait 5 seconds, and re-apply power OR At the DOS prompt, type REBOOT and press [Enter]. Once the system is parked, use ECom to execute DOS commands and transfer files. Pressing [Enter] displays the DOS prompt: C:\HELLO>. Executing DOS Commands The Digital Voice Processing System supports most DOS commands, including cd, dir, copy, move, etc. The following are utility programs on the Digital Voice Processing System that may help diagnose problems. LASTLINE.EXE Shows the last lines of a text file. On the command line specify the file name and number of bytes to display. Run LASTLINE by itself to show help. Useful for viewing the end of a log file. LATEST.EXE Lists the last 20 files on the system. Accepts -S to search sub-directories. Also accepts wild cards. Run LATEST ? for help. Useful for locating new files on the system. BIGGEST.EXE Lists the largest 20 files on the system. Accepts -S to search sub-directories. Also accepts wild cards. Switch allows display of smallest files. Run BIGGEST ? for help. Useful in diagnosing where disk space is used. DIRSIZE.EXE Lists the total size of files in each directory. Useful in determining where disk space is used. GREP.COM Extracts text lines from a text file based on matching rules. Useful in extracting log lines for a particular mailbox or extension, or gathering log lines for a particular time of day. Type GREP ? for more information. MAKEKEY.EXE Displays the system serial number. Issue 2 - May, 2004 Talkpath - Digital Voice Processing System Technical Manual Technical / Troubleshooting 7-17 Transferring Files Transferring Files The Digital Voice Processing System can transfer files via the ZModem protocol. Since the Digital Voice Processing System communicates at 9600 baud, it is suggested to use ZIP compression on files before transfer. Before file transfer occurs, the Digital Voice Processing System must be parked. Once the system is parked, use ECom and DOS commands to navigate through the directory structure. Change the directory to the location where files are uploaded or downloaded. To transfer files from the PC to the Digital Voice Processing System (upload) the steps are: 1 Park the system. 2 Make sure the file is prepared (edited, saved, compressed, etc.) on the laptop/PC. 3 On the Digital Voice Processing System, get into the DOS directory where the file is to be uploaded. 4 Ensure the file does not already exist. 5 On the Digital Voice Processing System execute a ZMR (Zmodem Receive) command. 6 From Ecom, select upload a file using the Zmodem protocol. Then select the file to send. 7 After the file transfer completes, the DOS prompt displays. To transfer files from the Digital Voice Processing System to the PC (download): 1 Change directories on the Digital Voice Processing System to the file location. 2 Run ZMS (Zmodem Send) with the file name and the extension. For example, to download the file TEST.ZIP from the Digital Voice Processing System, run: ZMS TEST.ZIP 3 The terminal emulation program then downloads the file. 4 After the file transfer is complete, the DOS prompt displays. Advanced users can use fast ZMS and fast ZMR. NOTES Talkpath - Digital Voice Processing System Technical Manual Issue 2 - May, 2004 7-18 Technical / Troubleshooting Backing Up the System Backing Up the System To back up the data on the Digital Voice Processing System, it must be parked first. Back up the Digital Voice Processing System at three levels. The first level is to back up the DBASE directory: 1 Access the system via ECom. 2 Press Send next to +DIE0. 3 At the C:\HELLO> prompt, type BACKUP1 and press [Enter]. A confirmation to backup the system displays. 4 Press [Enter]. The backup completes and the system prompts to download the system backup. 5 Press any key to begin the download. To not download the files, press [CONTROL]+[SHIFT]+[C], then press [Y]. If [CONTROL]+[SHIFT]+[C] is pressed, the backup must be downloaded later. NOTES The next level of backup includes the previous level and subscriber greetings, menus greetings, and other static voice prompts: 1 Access the system via ECom. 2 Press Send next to +DIE0. 3 At the C:\HELLO> prompt, type BACKUP2 and press [Enter]. A confirmation displays to backup the system. 4 Press [Enter]. The backup completes and the system prompts to download the system backup. 5 Press any key to begin the download. To not download the files, press [CONTROL]+[SHIFT]+[C], then press [Y]. If [CONTROL]+[SHIFT]+[C] is pressed, the backup must be downloaded later. NOTES The final level of backup includes BACKUP1, BACKUP2, and Voice Messages. This backup may take several hours to download. 1 Access the system via ECom. 2 Press Send next to +DIE0. Issue 2 - May, 2004 Talkpath - Digital Voice Processing System Technical Manual Technical / Troubleshooting 7-19 Restoring System Backup 3 At the C:\HELLO> prompt, type BACKUP3 and press [Enter]. A confirmation displays to backup the system. 4 Press [Enter]. The backup completes and the system prompts to download the system backup. 5 Press any key to begin the download. To not download the files, press [CONTROL]+[SHIFT]+[C], then press [Y]. If [CONTROL]+[SHIFT]+[C] is pressed, the backup must be downloaded later. NOTES Restoring System Backup The instructions below describe how to restore a system backup. To restore data on the Digital Voice Processing System, the system must be parked first. The following are general instructions for restoring backup files. Connect the Digital Voice Processing System unit to the host computer, then use these DOS commands: BACKUPx.ZIP represents the name of the file to restore, and x is a variable for any number or character. NOTES 1 CD \ 2 ERASE BACKUPx.ZIP 3 ZMR BACKUPx.ZIP 4 PKUNZIP -D -O BACKUPx.ZIP 5 REBOOT Restore the backup of the Digital Voice Processing System at three levels. The first level is to restore databases that contain subscriber, COS, menu, time control and system settings. To transfer files from the host system and unzip them, connect the Digital Voice Processing System unit to the host computer, then use these DOS commands: 1 CD \ 2 ERASE BACKUP1.ZIP 3 ZMR BACKUP1.ZIP 4 PKUNZIP -D -O BACKUP1.ZIP 5 REBOOT Talkpath - Digital Voice Processing System Technical Manual Issue 2 - May, 2004 7-20 Technical / Troubleshooting System Reinitialize The next restore level retrieves subscriber greetings, menu greetings, and other static voice prompts. First, connect the Digital Voice Processing System unit to the host computer, then use these DOS commands: 1 CD \ 2 ERASE BACKUP2.ZIP 3 ZMR BACKUP2.ZIP 4 PKUNZIP -D -O BACKUP2.ZIP 5 REBOOT The third restore level restores everything, including voice messages. Connect the Digital Voice Processing System unit to the host computer, then use these DOS commands: 1 CD \ 2 ERASE BACKUP3.ZIP 3 ZMR BACKUP3.ZIP 4 PKUNZIP -D -O BACKUP3.ZIP 5 REBOOT NOTES If there are multiple files, execute ZMR commands for each file. After executing the ZMR command, use ECom’s file transfer commands to initiate a ZModem file upload. Do this for each file to restore. System Reinitialize Do the following to reinitialize the database: Do not reinitialize the system without help from Technical Support. This deletes messages and custom prompts. NOTES 1 Start the Ecom program. 2 Click SEND next to +DIE 0. 3 Click the C:\HELLO text in the screen. 4 Type REINIT and press [Enter] 5 Type REBOOT and press [Enter]. The voicemail system reinitializes. If an incorrect number of ports is specified, the voicemail system may not run correctly. NOTES Issue 2 - May, 2004 Talkpath - Digital Voice Processing System Technical Manual Technical / Troubleshooting 7-21 Debug Mode Debug Mode To have more logging information, add a registry parameter ModuleDebug. ModuleDebug accepts several parameters as shown in Table 7-1. Module Debug Parameters. For example, to see if menus and time controls are configured correctly, enter the Admin module and insert the ModuleDebug name with a value of TcMn. To see if your menus and time controls are configured properly, do the following (via Laptop/PC Admin): 1 Access the Laptop/PC Admin and select Setup, Advanced, Registry. 2 Find the ModuleDebug parameter. If it is there, double-click and modify the value. Otherwise, insert the value name. 3 Enter TcMn. 4 Click OK. Via ECom: 1 Access ECom. 2 Press Send next to +DIE0. 3 At the C:\HELLO> prompt, type REGADD ModuleDebug=MnTc and press [Enter]. To see the active call come through the voicemail unit, run the voicemail engine in debug mode as follows: 1 Access the voicemail unit via ECom. 2 Click Send next to +DIE 0. At the C\HELLO> prompt, type VMDEBUG. This puts the system in debug mode and shows calls in the system. When XSIAM shuts down for a brief time, the system is ready to receive calls. 3 To exit debug mode, press [3]. The engine shuts down and the C\HELLO> prompt displays. 4 To put the system in stealth mode, type VMRUN at the DOS prompt. Remove debugging parameters from the registry to conserve hard drive space and to maintain system speed. NOTES Talkpath - Digital Voice Processing System Technical Manual Issue 2 - May, 2004 7-22 Technical / Troubleshooting Viewing the Logs Viewing the Logs To view the logs on the Digital Voice Processing System, the system must be parked first. On the Digital Voice Processing System, daily log files are stored on the hard drive as ASCII text files in the C:\HELLO\LOGS directory. There is an error log named HELLO.ERR that contains system level errors. There is a daily log file for each day that contains tracking information for that day’s activities. The daily log files are named HEmmddyy.LOG where mm is the two digit month number, dd is the two digit day and yy is the two digit year. Questions and Answers Q: When I make changes to subscriber, COS, menu or time control settings, the changes do not take effect. What is the problem? A: The Digital Voice Processing System uses an internal, per channel, cache to speed up operations. If answering the line with Menu 100 and modifications are made to menu 100 using the PC based Admin program, those changes are not effective until the system is reset. By default, caching is turned off. View the Caching setting in Admin by selecting Setup, Advanced, System Settings, then click the System Updates Take Effect Immediately option. Q: The system does not process calls as fast as I would expect. What can I do to improve the speed? A: Verify that the ModuleDebug registry variable is deleted from your system. Make sure the Disable System Caching option is checked and the Fax Detect option is not checked. Q: A menu has a Time Out value. If the Time Out value is 0, then the system will not allow any key presses to activate any key actions. The system will only follow the Time Out key action. A: The Time Out value is defined as Specifies the length of time after which, if the caller presses no key, the Time Out action is to run. When the Time Out value is greater than 0 and the caller presses a key during the prompt or within the number of seconds indicated by the Time Out value, that key action is taken. If the caller exceeds the Time Out value, the Time Out action is taken. When the Time Out value is 0, the only action taken is the Time Out action. The caller may not enter DTMF keys. When the Time Out value is set to 0, many prompt files can play in succession. An example would be to list all employees in a company, but not record them in a single prompt file. Create a series of menus with the Time Out key action to call the next menu and a Time Out value of 0. Issue 2 - May, 2004 Talkpath - Digital Voice Processing System Technical Manual Technical / Troubleshooting 7-23 Questions and Answers Q: Subscriber changes (e.g., Name, Department, Password, etc.) do not stick when the customer reboots the unit after making a change, or looks at another list (COS, LINES, etc.) and then looks at the Subscriber list again. A: To reproduce the problem follow the steps below in the Laptop/PC Administration Program. The solution is to restore the original subscriber database and index files on the unit. Follow these steps to restore the original subscriber database and index files: 1 Start the ECom program. 2 Click SEND next to +DIE 0. 3 Click the C:\HELLO text in the screen. 4 Type CD \HELLO\ORIG\DBASE and press [Enter]. 5 Type COPY MB*.* C:\HELLO\DBASE and press ENTER. If the system prompts you to overwrite the files, press [Y], then [Enter]. 6 Type COPY EX*.* C:\HELLO\DBASE and press [Enter]. If the system prompts you to overwrite the files, press [Y], then [Enter]. 7 Type REBOOT. The subscriber database and index files are reinitialized. Proceeding further will delete the subscriber database. Messages, signatures, and greetings are still available but all mailboxes will be deleted and must be recreated (enter the names, etc.). NOTES Do NOT delete or modify the files in the C:\HELLO\ORIG\DBASE directory. They are there if the databases must be restored to their original state (in case of file corruption). Q: The modem will not go into auto-answer mode when you power the voicemail off and on with the modem attached. What is wrong? A: The cause of the problem is unknown at this time, but it is being investigated. When the unit is powered down and restarted, the port may be in an unrecognized state. The unit also sends a lot of information to the modem during the boot process. This problem does not occur when a reboot is done from Admin or Ecom. The problem may not always be recreated. Follow the procedure below to resolve the problem: 1 Power off the modem. 2 Pull the power cable from the back of the voicemail unit. Wait ten seconds. 3 Put the power cord back into the unit 4 Wait until LIGHT #2 on the unit lights. Talkpath - Digital Voice Processing System Technical Manual Issue 2 - May, 2004 7-24 Technical / Troubleshooting Questions and Answers 5 Turn the modem on. 6 In a few seconds, the AA light on the modem lights and the unit/modem pair functions normally. Reboot the unit via remote commands. Contact technical support for more information or additional help. Q: How do I set up a mailbox to have time sensitive greetings? A: You must create a time control for the mailbox. Configure the time controls as you would like: 1 Define the dates, days, and times. 2 Set the mailbox greeting to correspond to the time sensitive greeting it should represent. 3 Set the mailbox settings to call the time control defined above. Q: After my system plays my opening menu prompt, the system takes 8-12 seconds to respond to any keys I press. A: If Fax Detect is enabled, the MenuFaxToneDetect value is too long. MenuFaxToneDetect determines how long the Digital Voice Processing System waits for the fax tone before returning control to the Menu. Modify the parameter in the registry to lower this value. If the MenuFaxToneDetect registry item is not in the system, insert the value. See Appendix B for more information on adding items to the Registry. This value can be as low as 1. When this value is set to 1, it means there is a one second pause before the menu prompt is played when fax detect is enabled. If Fax Detect Enabled is not selected, the system may be waiting too long for Inband signaling information. Look for InBandWait in the registry. Make this value as low as possible yet allowing proper call routing. Test call situations to verify proper call routing, including call forward busy or no answer to voicemail, transfers to extensions, calls coming into the voicemail from the CO, and message waiting indicators set and clear. If the delay between the time the call is answered and when the prompt plays is still unacceptable, contact technical support for an alternate solution. Q: The telephone system sends ring to the voicemail port, but the Digital Voice Processing System will not answer. A: There could be many reasons for the problem. See below for possible solutions: 1 Be certain the system was started with a digital line plugged into port 1 on the Digital Voice Processing System. 2 Plug a digital station into one of the voicemail lines. Determine if the station will ring. If not, configure the phone system to ring the voicemail ports and retest. Issue 2 - May, 2004 Talkpath - Digital Voice Processing System Technical Manual Technical / Troubleshooting 7-25 Questions and Answers 3 Add the Registry parameter, ModuleDebug=In and shut down and park the system. Access the system via ECom. At the C:\HELLO prompt, type VMDEBUG and press [ENTER]. Then, generate a call into the system and look for the log line: DEBUG: RAW CTI Packet <1> - [LXXXXXXXXXXX] Where X is a number between 0-9. If you do not see this log line, the Digital Voice Processing System is not receiving a ring packet from the phone system. Configure the phone system to generate a ring packet. 4 Contact Technical Support. Q: The Digital Voice Processing System seems to answer the call, but then hangs up almost immediately. What is wrong? A: There could be many reasons for the problem. See below for possible solutions: 1 Check the time control settings. The Digital Voice Processing System may be nearing the end of the time control and there is no definition for the current date and time. If there is no definition for the current date and time the system hangs up. 2 Check the minlcoff parameter in the Registry. Normal ranges are between 30-60. 3 Contact Technical Support. Q: I applied power to my Digital Voice Processing System, but the system does not boot up. A: There could be many reasons for the problem. See below for possible solutions: 1 Ground yourself by using a wrist strap or other grounding device. 2 Remove the case and verify all internal connections. 3 Verify the connection from voice board(s) to the motherboard. 4 Verify connections from the motherboard to the hard drive. 5 Verify power connections to the hard drive. 6 Check the LED Sequence topic in this section for more details on boot up light sequence. 7 Contact Technical Support. Q: Message Waiting Lights are not working on my system. A: All phone systems have pre-configured Message Waiting Indicator parameters programmed. See Appendix B for information on the AaMwiSet and AaMwiClr parameters. Make certain the last line on a 2, 4, 6, or 8 port system are plugged into the phone system. Notification settings are transmitted on these lines. Without telephone lines plugged into the notification ports, the Digital Voice Processing System cannot notify the telephone system of new messages. Talkpath - Digital Voice Processing System Technical Manual Issue 2 - May, 2004 7-26 Technical / Troubleshooting Questions and Answers Q: How do I modify a Command File? A: First download the command file to the laptop/PC. Command files created by default are in the C:\HELLO\CFILES directory. See the instructions for downloading files from the Digital Voice Processing System to the laptop/PC. Once downloaded, modify the command file using a text editor and save it in plain text format. When the command file is modified, upload it to the C:/HELLO/CFILES directory. See instructions for uploading files from the laptop/PC to Digital Voice Processing System. See Appendix B for Command File information. NOTES Q: Call Queuing will not work. A: For call queuing to work, use supervised transfers and make sure call holding is enabled. Q: Calls are not being routed to extensions properly. A: First, replace the Digital Voice Processing System with a digital telephone set and verify that transfers work properly without the voicemail system. Verify the entire path by which a call is handled. Typical problems include incorrect Time Control and Menu settings. Compare the Time Control and Menu configurations to the default Time Control and Menu settings described in this manual. Use these defaults as a template when configuring the Time Control and Menu settings. Q: I would like to see my calls processed on the screen. A: There could be many reasons for the problem. See below for possible solutions: 1 Use the ECom program shipped on the Digital Voice Processing System administration diskette. 2 Click Send next to +DIE0. 3 When the C:\HELLO> prompt displays, type VMDEBUG and press [Enter]. The system begins to run. 4 When finished testing, press [3] to bring the voicemail system down. 5 At the C:\HELLO> prompt, type REBOOT and the system reinitializes. 6 Exit the ECom program. Note that when using the Digital Voice Processing System in debug mode, system overhead is significantly increased. It is highly recommended to return the system to its non-debug state when troubleshooting is complete. Issue 2 - May, 2004 Talkpath - Digital Voice Processing System Technical Manual A Common Registry Variables The Registry The Registry is a database of settings (similar to the Windows 95/NT Registry) that controls how the Digital Voice Processing System operates. Changing settings in the Registry affects how the system operates. Change the Registry using the Admin program or ECom as follows: 1 Admin: Select Setup, Advanced, Edit Registry. From the list box select add, delete or edit. 2 ECom: From the DOS prompt use DOS commands to look at and edit the Registry: REGADD Adds and changes Registry items. Run REGADD with no parameters to see a usage description. REGLIST Displays registry values. Run REGLIST with no parameters to see a usage description. After making changes to the Registry that affect the system, restart the Digital Voice Processing System so the changes are effective. Registry Variable Description AaBlindDelay Amount of time between AaTransferPreXXX and sending the extension number to switch. CallLogging Determines what information is written to the log file. Ss= System Foundation, Vm= Voicemail, Aa=Auto-Attendant, Mn=Menus, Vo= Voicemail Owner, Tm=Time Control, Mm=Message Manager, No=Notification. ComBaud On the voicemail unit side, this is the baud rate from the self-contained voicemail unit. Valid baud rates are 300, 1200,2400, etc... (Default = 9600). ComParam For voicemail, this is the Parity, Data Bits and Stop Bits from the selfcontained voicemail unit. Default is N81. ComPort For voicemail, this is the Com Port that the self-contained voicemail unit uses. Default is 1. (COM1) * Note that on all systems only COM1 is supported. Table A-1. Common Registry Variables Issue 2 - May, 2004 Talkpath - Digital Voice Processing System Technical Manual A-2 Common Registry Variables The Registry Registry Variable Description DirType Type of directory the system uses. Valid entries are Li for list mode, Si for single mode, and Pg for pager mode. DisableXSIAM Determines whether the XSIAM module runs. The XSIAM module enables communications between the self-contained voicemail unit and the Laptop/PC Administration program. 1 means do not run XSIAM, and 0 means run XSIAM on startup. Default is 0. DVMDisableCID Disable Caller ID information to the LCD screen. Default is 0 for no. Set to 1 for yes. DVMSynchTime Time of day (or night) the time synchronization check runs (default = 01:00:00). Time is in 24-hour clock format. DVMTimeDiff Time difference between the phone system time and voicemail system time. Default = 00:05:00. DVMTimeEventGroup Event group for time synchronization. Default = 5. DVMXferWait Number of seconds to wait for nor answer when using supervised transfers. Default = 15 (about 4 rings). ExtensionLength Number of digits for the default extensions. flash-time Length of flash-hook (x10msec). lcdly Loop current delay. MailboxLength Number of digits for the default mailbox length. MaxMenuPromptLength Maximum length of a menu prompt, in seconds. MenuFaxToneWait Time to wait for fax tones before the menu prompt plays. minlcoff Minimum time loop current must be off before a drop in loop current is detected. MinRecordLength Minimum time for a valid message (in seconds). ModuleDebug Gives additional logging information for debugging purposes. Should be turned off when the debugging process is complete. See Section 7 for more information. nbrdna Number of rings before no answer is detected. oh_dly Off-Hook Delay: Time delay that occurs after executing a channel offhook command. DTMF digits are not recognized while going off-hook (x10ms). OneTouchLengthXXX Length of time in minutes one touch recording is allowed. XXX is the COS. This overrides the Class of Service MaxMessageLength setting. Table A-1. Common Registry Variables (Continued) Issue 2 - May, 2004 Talkpath - Digital Voice Processing System Technical Manual Common Registry Variables A-3 The Registry Registry Variable Description pause-time Pause Time: Delay caused by a comma (,) in the dialing string (x10ms). r_ird Ring Interring Delay: Maximum time between incoming rings. The ring counter is reset after this time expires; rings that occur after this interval are considered the start of a new call cycle (x100ms). r_off Ring Off: Minimum ring voltage off duration for an incoming ring (x100ms). r_on Ring On: Minimum ring voltage on duration for an incoming ring (x100ms). rings Number of rings before a voice line answers an incoming call. t_idd DTMF Interdigit Delay: Delay between digits during DTMF dialing (x10ms). Vm10DigitDial If in the area that supports 10 digit local dialing. Useful when pressing [60] for callback while listening to a message. Set the value to 0 for the system to dial 1 before any 10-digit number. Set the value to 1 for the systm to not dial 1. VmCleanDay Day of the week to delete old messages. Su=Sunday, Mo=Monday, Tu=Tuesday, We=Wednesday, Th=Thursday, Fr=Friday, Sa=Saturday. VmCleanTime Indicates what time of day to clean up old messages (HHMM and 24hour clock format). VMDeleteConfirmFlush Controls how the system handles [3] [#] to confirm deletion of a voicemail. VmMwiResend Resend the Message Waiting Indicator (AaMwiSetXXX). VmTemplate Template that the online administration uses to create a new mailbox on the system. XOnXOff Type of flow control being used, 0 = None, 1 = Hardware (RTS/CTS), 2 = Software (XOn/XOff))1 (Default = 2). AdminPassword Online administrator password (Default = 2275). Table A-1. Common Registry Variables (Continued) Talkpath - Digital Voice Processing System Technical Manual Issue 2 - May, 2004 A-4 Common Registry Variables The Registry Issue 2 - May, 2004 Talkpath - Digital Voice Processing System Technical Manual B Command Files Overview Command Files expand the basic system to meet the needs of special notification/paging systems, phone systems, TIE lines, and special installations. Command files can be used in three places: mailbox notification, extension forwarding, and directly from a menu. Command File Structure A command file is an ASCII text file with one command per line. Only the commands listed below may be used; any other lines are discarded. Lines beginning with ; (semicolon) are ignored. The command file is case sensitive and commands must be spelled as indicated below. In the list below, items in brackets, < and >, are variables and represent strings that must be supplied. Anytime a <Mailbox> or <Extension> is shown, omitting it causes the command file to use the global mailbox and extension. Command Description Quit Quit this command file and return. OnHook Put port on-hook. OffHook [=Delayed] Take phone off-hook. If =Delayed is specified, the phone is not placed off-hook until a dial or call is actually executed. This is useful when the time between the OffHook and Dial is too long. Call=<DtmfString> Call the number. CallResult<07-12>=<Command...> Branch on result of a call; 7=busy, 8=no answer, 10=connect. LogCallResult Log the result. Dial=<DtmfString> Dial the number. Sleep=<SecondsToSleep> Pause for seconds. LogCallResult Log the result. Dial<DtmfString> Dial the number. Sleep= <SecondsToSleep> Pause for seconds. Table B-2. Command Files Issue 2 - May, 2004 Talkpath - Digital Voice Processing System Technical Manual B-2 Command Files Command File Structure Command Description PlayFirstMessage=[ New | Save | Kill | Delete ] Play the first message. Without a parameter, the message is left as a new message. Save, Delete, or Kill also can be used to act on the message. Use Kill to delete the message after playing. DoMessageRetrieval= <Mailbox> Allow message retrieval. CommandFile= <NewCommandFile>, <Path> Run another command file. Say= <FileName>, <Path> Say a file. Log= <LogString> Log the string. Status= <StatusString> Show string in status box. Console= <ConsoleString> Put string to console. Echo= <On|Off> Turn Status() on or off. Mailbox= <Mailbox> Go to mailbox. Extension= <Extension> Go to extension. Module= <ModulesName>, <glb_parameter> Run other module. Line <00-32>= <Command...> Check current line. Notify Do notification for the global mailbox. This restarts notification for the global mailbox if the system has not extinguished the notification retries. This is similar to the Pager Uses Retries field in the COS record. Pager Uses Retries is inactive for command file paging. Use the Notify command to force using retries. DtmfRead= <count>, <terminate>, <time> Read Dtmfs. Dtmf <String>= <Command...> Branch on Dtmf read. WriteDtmf= <FileName>, <path> Append Dtmf contents to file. HangUp= <Command...> On hangup do (DtmfRead only). HangUp=Off Do not look for hangup. Menu= <Menu Name> Run a menu. DialMailbox Dial glb_mailbox. CallMailbox Call glb_mailbox. DialExtension Dial glb_extension. CallExtension Call glb_extension. Table B-2. Command Files (Continued) Issue 2 - May, 2004 Talkpath - Digital Voice Processing System Technical Manual Command Files B-3 Command File Structure Command Description Debug= <On|Off> Turn CommFile debugging on or off. CallMailboxWhere Call the number in the glb_mailbox Where field. DialMailboxWhere Dial the number in the glb_mailbox Where field. DialMailboxBeeperFile Dial the digits found in B <mailbox>.MSG. DayOfWeek <0-6>= <Command ...> Execute if today matches the day of the week. Time <HH:MM>- <HH:MM>= <Command ...> If the current time falls between the times execute the command. First time is lowest. DeliverNewFax= <Dtmf String> If there are new faxes for this mailbox deliver them to the number specified or to the mailbox Where field if none specified. Always uses GlbMailbox. WhereFieldIsNotifyTimed= <On | Off> Selects whether the WhereFields are taken from the current time period (Off) or the time period for the notification. CancelPendingNotifies Cancels all pending notifications for this mailbox and deletes all queued notification requests. It does not modify paging files. PlayVoicePage Plays the next voice page file. Only used on voice pagers. Most systems use PlayFirstMessage. DialPrefixForWhereField Dial the prefix assuming dial the mailboxWherefield is dialed. DeleteAllPages Delete all pager files (beeper files) associated with the global mailbox. ProcessNextEvent Process the next event for this channel group. This speeds up event handling because the channel does not return to the wait state. If the next event is a notification event, the system can process it much more quickly than if the command file did a Quit and returned to the main loop. If no events are due for this channel, the next instruction in the command file after ProcessNextEvent executes. AbortIfNoPages If no paging (beeper) files exist, abort (Quit) the command file. Table B-2. Command Files (Continued) Talkpath - Digital Voice Processing System Technical Manual Issue 2 - May, 2004 B-4 Command Files Command File Structure Command Description PreDialDelay=xx PostDialDelay=xx Use the pre- and post- dial delays to pause between taking the phone off-hook and dialing. These statements are only useful if OffHook=Delayed is also used. Normally, use these only when the execution of the command file is progressing too slowly to use the Sleep=X command. LoadMailboxBeeperFile Loads the next paging (beeper) file into memory so when DialMailboxBeeperFile is called, the system need not hit the disk. PreventMboxAsPage Prevents the mailbox number from being sent as a page. RestartIfNewMessage Restart this command file (with the same global mailbox) if new voice messages exist. DeleteAllNewMessages Delete all new messages for the global mailbox. WaitForEvent= <Seconds> Waits the specified number of seconds for an event. WaitResultX= <Command..> Use WaitResultX to break out the message. NewMessagesXXX-XXX= <Command..> Based on the new message count, execute the command. Also indicates different commands for execution based on the number of new messages. DialNewMssgCount DialSavedMssgCount Dials the DTMF digits representing the New or Saved voice message counts for the global mailbox. GlbMailbox= <mailbox number> Change the global mailbox to a new mailbox. Normally, when command files are used to do mailbox notification (or in paging systems), GlbMailbox is set to the mailbox number doing the notify. This command can be used to change the global mailbox. This is common for cascaded pagers. Table B-2. Command Files (Continued) Issue 2 - May, 2004 Talkpath - Digital Voice Processing System Technical Manual Command Files B-5 Quick Commands Quick Commands QuickCommand=<command sequence> Quick commands replace the longer command strings with shorter mnemonic strings described below. Additionally, processing the command file is much faster when using mnemonics. NOTES The Dw, Tw, and Dp commands are preloaded so the information (page file or the Where field for the mailbox) is loaded and the complete Quick Command executes very quickly. Command Description Qu Quit On OnHook Of OffHook Sl Sleep, requires one digit seconds, Sl5 = Sleep=5,Sl5Sl5=Sleep=10 Dw DialMailboxWhere Dp DialMailboxBeeperFile, dials pager file Pm PlayFirstMessage, followed with d=Delete, s=Save n=New Ne ProcessNextEvent Za Zap (erase) all messages Ap Abort if no pages Rp Restart if pages exist No Notify Tw Where field is timed. (placed before Dw) Rn Restart if new messages. Table B-3. Quick Commands Talkpath - Digital Voice Processing System Technical Manual Issue 2 - May, 2004 B-6 Command Files Technical Example: QuickCommand=OfSl1DwSl3DpSl1OnNeQu is equivalent to: OffHook Sleep=2 DialMailboxWhere Sleep=3 DialMailboxBeeperFile Sleep=1 OnHook ProcessNextEvent Quit Although not as fast, this works. Combine Quick Commands and regular commands as follows: QuickCommand=OfSl1DwSl3 DialMailboxBeeperFile Sleep=1 QuickCommand=OnNeQu Technical When creating a command file for pager notification, the timing of the digits sent from the voicemail system to the pager is critical. The command file must be sychronized with the timing of the pager being used. When determining the timing of the pager, call the paging company, then calculate the amount of time from when you dialed the last digit to the pager company and the time the pager company asks that the digits be sent to the pager. Modify the Sleep time to be the calculated time for the digits sent to the pager. For additional information, please contact technical support. Issue 2 - May, 2004 Talkpath - Digital Voice Processing System Technical Manual Command Files B-7 Predefined Command Files Predefined Command Files The self-contained voicemail unit has several predefined command files that are located in the \HELLO\CFILES subdirectory. There are two groups of command files: 0XX.CF and 1XX.CF. The 0XX.CF files are: 006.CF, 008.CF, 010.CF, 012.CF, 014.CF, 016.CF, 018.CF, 020.CF, 022.CF, and 024.CF. The 1XX.CF files are: 106.CF, 108.CF, 110.CF, 112.CF, 114.CF, 116.CF, 118.CF, 120.CF, 122.CF, and 124.CF. The last two digits of the filename describe the number of seconds after dialing the pager number (but before sending the mailbox digits to the paging company). All notification scripts send the mailbox number, an ✳ (asterisk), an urgent message count, another ✳ (asterisk), a new message count, another ✳ (asterisk), and the saved message count. The difference between 0XX.CF and 1XX.CF files is how the script handles messages forwarded to a mailbox. 0XX.CF files handle messages forwarded to the mailbox by sending the originating mailbox to the pager. 0XX.CF files send the originating number, an ✳ (asterisk), an urgent message count, another ✳ (asterisk), a new message count, another ✳ (asterisk), and the saved message count. For example, mailbox 101 forwards a new message to mailbox 123. Mailbox 123 has no urgent new messages, the new message forwarded from mailbox 101, and 15 saved messages. The 0XX.CF notification script sends 101✳0✳1✳15. Below is a sample of the pager file (it is from 010.CF): OffHook Sleep=2 DialPrefixForWhereField Sleep=3 DialMailboxWhere Sleep=10 DialMsgSource MsgSourceOk=Dial=✳ Dial=✳ DialUrgentMsgCount Dial=✳ DialNewOnlyMsgCount Dial=✳ DialSavedMsgCount Dial=# OnHook Notify Quit Talkpath - Digital Voice Processing System Technical Manual Issue 2 - May, 2004 B-8 Command Files Modifying Command Files 1XX.CF files handle messages forwarded to the mailbox by sending the originating mailbox to the pager. 1XX.CF files send the originating mailbox number, an ✳ (asterisk), an urgent message count, another ✳ (asterisk), and the saved message count. For example, mailbox 101 forwards a new message to mailbox 123. Mailbox 123 has no urgent new messages, the new message forwarded from mailbox 101, and 15 saved messages. The 1XX.CF notification script sends 123✳0✳1S15. Below is a sample of the pager file (it is from PAGER110.CF): OffHook Sleep=2 DialPrefixForWhereField Sleep=3 DialMailboxWhere Sleep=10 DialMailbox Dial=✳ DialUrgentMsgCount Dial=✳ DialNewOnlyMsgCount Dial=✳ DialSavedMsgCount Dial=# OnHook Notify Quit Modifying Command Files To modify a command file, download the file to the laptop/PC as follows: 1 Access the Digital Voice Processing System via ECom. 2 If the system is not already parked, click Send next to +DIE0. 3 Type CD CFILES and press [Enter]. 4 Download the pager file to modify by typing ZMS <filename>, where <filename> is the pager file to modify. 5 The system sends the file to the laptop/PC in the C:\ADMIN directory. 6 Modify the file using any text editor and save the file as plain text. 7 Type REBOOT and press [Enter]. The system reboots. Issue 2 - May, 2004 Talkpath - Digital Voice Processing System Technical Manual Command Files B-9 Modifying Command Files Once the file is modified, upload it to the laptop/PC as follows: 1 Access the Digital Voice Processing System via ECom. 2 Make certain the unit is parked. If not, park the Digital Voice Processing System by clicking Send next to +DIE0. 3 Type CD CFILES and press [Enter]. 4 Type ZMR and press [Enter]. 5 Press [PgUp]. 6 Select ZMODEM protocol and click OK. 7 Select the files to download to the unit and click OK. 8 When the C:\HELLO\CFILES prompt displays, type REBOOT and press [Enter] to reboot the Digital Voice Processing System. Talkpath - Digital Voice Processing System Technical Manual Issue 2 - May, 2004 B-10 Command Files Modifying Command Files Issue 2 - May, 2004 Talkpath - Digital Voice Processing System Technical Manual C Installation Forms Job Name: _____________________________________ Sales Rep:_________________ End User Contact (Administrator): ___________________________ Phone: _____________ End User Contact responsible for recording custom prompts: __________________________ Installer: _____________________________ User Trainer:___________________________ Installation Dates: Start:_____________ Complete: ___________________ End User Training: _____________________ Telephone System Information Type of telephone system (brand and model): ___________________________________ How many digits are there in the telephone system's station or extension numbers? _________ List the digital port extension numbers that are to be used for voicemail Ports: 1_______ 2_______ 3_______ 4_______ 5_______ 6_______ 7_______ 8_______ What is the telephone system's voicemail group number or numbers? ___________________ Voicemail Equipment Considerations Where is the voicemail system to be located? ____________________________________ Is this location environmentally stable (air conditioned & heated)? Yes No Will the systems be connected to a dedicated and grounded 120 volt, 60 Hz AC outlet? Yes No NOTES Questions on this page answered NO represent less than ideal conditions and may cause immediate or delayed malfunctions, or may disrupt certain voicemail and telephone system capabilities. Issue 2 - May, 2004 Talkpath - Digital Voice Processing System Technical Manual C-2 Installation Forms Voicemail Functions Number Of Voice Mailbox Users (Subscribers): _______________ Number of Internal Subscribers (who have a phone in the telephone system): _____________ Number of External Subscribers (who do not have a phone in the telephone system): _______ Are internal subscribers going to forward their phones to their mailboxes? Will the telephone system provide Preset Call Forwarding to voicemail? Will Subscribers use Pager Notification? Yes Yes Yes No No No Automated Attendant Functions When is Automated Attendant to be used? Daytime ____ Night ____ Both ____ Never ____ Will Automated Attendant be used as an overflow answering point (to help the live system operator)? _____ Number of CO Lines to be directly answered by Automated Attendant : ________ FAX Detection - Will the system be set to automatically route Fax calls? Yes No Fax phone number or extension number: _________________________________________ Operator-What do telephone system users normally dial to reach the system Operator? ____ Issue 2 - May, 2004 Talkpath - Digital Voice Processing System Technical Manual Installation Forms C-3 INSTALLATION FORM - Subscriber Information Complete one copy of this form for each Subscriber or group of Subscribers Subscriber Name or Group Description: __________________________________________ Mailbox/Extension Number(s): Department: _______________________________________ Class Of Service (COS): _____________________________________________________ Mailbox Settings Operator:__________ Cascade:__________ Mailbox Time Control (special use): __________ Mailbox Action Play Greeting: Yes No Action: Destination: _________________________________________________________ Notification:_________________________ Phone Number: __________________________ Pager Notification: Yes No Time (if timed notification): ______________________ Extension Settings Extension Time Control (special use): ____________________________________________ Action 1 - when calls are first transferred to the extension Action: __________________ Destination: _________________________________ Supervised Transfer Options (circle one): Action 2 - Do Always Screen Caller Only On Busy Allow Holding Only On No Answer Action: __________________ Destination: _________________________________ Supervised Transfer Options (circle one): Action 3 - Do Always Screen Caller Only On Busy Allow Holding Only On No Answer Action: __________________ Destination: _________________________________ Supervised Transfer Options (circle one) : Screen Caller Talkpath - Digital Voice Processing System Technical Manual Allow Holding Issue 2 - May, 2004 C-4 Installation Forms Complete one copy of this form for each Class Of Service COS Name (number): _____________________ Description: ________________________ General Settings Time Control (special use): ________________ Restrict Outdial - Number of digits: ________ User Type: (01=normal, 99=Administrators) Event Counter (check one): Owners Callers Message Settings Message Type: Voice Default Message Type: Page Voice Page Play Message Type Menu Message Properties: Length: _____ (sec) Count:______ (messages) Retention: _____ (days) Record Key - Wait for key press before recording messages? Yes No Greeting Types: Personal System Class Of Service Voice Insert System Add On Greeting Length:________ (sec.) Park and Page active? Callers: Yes No Stop Record Key: _________ Record Options On? Send Options: No Options Urgent Confidential Yes No Last Option On or Off: ________ Maintenance Settings First Time Help (circle one)? Message Order: Yes First in - First Out No Say Date and Time type: __________________ Last In - First Out Owner Play Options: Save Messages Forward Messages Dial Source Confirm Delete Reply To Messages Skip Messages Owner Send Options: Not Allowed disallow the following options Urgent Future Delivery Confidential System List Outside Confirmation Number Issue 2 - May, 2004 Talkpath - Digital Voice Processing System Technical Manual Installation Forms C-5 COS Name (number): ______________________ Description: ________________________ Maintenance Settings (continued) Owner Edit Options: Password Greeting Name/Signature Notification Delete Message Sent Mailbox State Personal Lists Guest Mailboxes Auto Attendant Notepad Transfer Out Notification Settings When will the system set Message Waiting? _________________________ Message Wait Set Sequence:(special use) __________________________ Message Wait Clear Sequence:(special use) _________________________ Event Handler Group: ___________________ (special use - default is 5) Voice Notification Options: Password Required Message Pick-Up Allowed Cascading: When will Cascade occur? ________________________ Cascade Message Save / Delete Options: Save as New Urgent Only Option Delete Original Save Original Notification Interval: ________ (minutes) Notification Attempts: __________ (number of tries) Pager Retries? Yes No Notification Script:__________________________________ (special use - default is Pager12.CF) Auto Attendant Settings Call Options: Blind Transfer Call Screening Hold Interval: ________________ (sec.) Call Queuing? Yes Supervised Transfer Call Holding Hold Type: _____________________________ No Screen Length: _________ (sec.) Play Original?: Yes No Transfer Prefix: _______________________________________ Transfer Suffix: _______________________________________ Talkpath - Digital Voice Processing System Technical Manual Issue 2 - May, 2004 C-6 Installation Forms INSTALLATION FORM - Menu Information Complete one copy of this form for each Menu Description: ______________________________________________________________ Number: _________ Password:_________ Time Control:______________ (special use) Instructions: ______________________________________________________________ (special use - This is the Menu's number .VOX file name for prompts.) Time Out: _________ (sec.) Max Retries:___________ (number of retries before hangup) Keys Actions - including additional parameters: mailbox numbers, menu numbers, etc. ✳ ________________________________________________________________ # ________________________________________________________________ 0 ________________________________________________________________ 1 ________________________________________________________________ 2 ________________________________________________________________ 3 ________________________________________________________________ 4 ________________________________________________________________ 5 ________________________________________________________________ 6 ________________________________________________________________ 7 ________________________________________________________________ 8 ________________________________________________________________ 9 ________________________________________________________________ Prompt script for this mailbox - to be recorded via Administrator ________________________________________________________________________ ________________________________________________________________________ ________________________________________________________________________ ________________________________________________________________________ Issue 2 - May, 2004 Talkpath - Digital Voice Processing System Technical Manual Installation Forms C-7 INSTALLATION FORM - Time Control Settings Complete one copy of this for each Time Control Time Control Name (Number): ________________ Description: ______________________________________________________________ System Searches for a match, sequentially starting at item 1 Item Number: ____________ Start Time: ___________ Mark active days for these hours: MO TU WE TH FR SA SU End Time: _____________ Action (the menu or mailbox calls are to go to): Time Period Number: ______ (enter 1 to 9, for users to select time sensitive greetings) Item Number: __________ Start Time: ___________ Mark active days for these hours: MO TU WE TH FR SA SU End Time: _____________ Action (the menu or mailbox calls are to go to): Time Period Number: ______ (enter 1 to 9, for users to select time sensitive greetings) Item Number: __________ Start Time: ___________ Mark active days for these hours: MO TU WE TH FR SA SU End Time: _____________ Action (the menu or mailbox calls are to go to): Time Period Number: ______ (enter 1 to 9, for users to select time sensitive greetings) Item Number: __________ Start Time: ___________ Mark active days for these hours: MO TU WE TH FR SA SU End Time: _____________ Talkpath - Digital Voice Processing System Technical Manual Issue 2 - May, 2004 C-8 Installation Forms Action (the menu or mailbox calls are to go to): Time Period Number: ______ (enter 1 to 9, for users to select time sensitive greetings) * Up to 10 items can be assigned to a Time Control - use additional sheets for more items. Installation Form - Voice Lines Settings Action To Perform When Calls Ring In Additional Parameters Line 1 _______________________________ __________________ Line 2 _______________________________ __________________ Line 3 _______________________________ __________________ Line 4 _______________________________ __________________ Line 5 _______________________________ __________________ Line 6 _______________________________ __________________ Line 7 _______________________________ __________________ Line 8 _______________________________ __________________ Issue 2 - May, 2004 Talkpath - Digital Voice Processing System Technical Manual D System Log and Error Messages Introduction The Digital Voice Processing System outputs two kinds of logs: error log and system activity (or call record) log. All logs are in ASCII format which allows printing or viewing them with simple DOS commands. Log files record system events and provide an audit trail used by the administrator to analyze how the system is being used. Error Log The error log is output to a file named HELLO.ERR. Each line or record in this file contains four fields. The first field is the date the message was added to the log. The second field is the time. The third field is the channel (or line) number. If the channel number is zero the message is not linked to a particular channel. The rest of the log is text that describes the problem or error. There are three error log messages that indicate system initiation and system termination as illustrated in the following sample: 04/28/95 13:51:21 00 010 Sys:Digital Voice Processing System M1 v7.16a SN: 000000 system reset (F=4). 04/28/95 13:51:21 00 010 Sys: D40DRV Version 3.20a 04/28/95 13:52:28 00 010 Sys:Digital Voice Processing System M1 v7.16a SN: 000000 system terminated(F=4). The first two lines show the Digital Voice Processing System startup. The third line shows that the Digital Voice Processing System was brought down. System Activity Log The system log is comprised of separate files. Each day the Digital Voice Processing System runs, it generates a different file. The files are stored in the C:\HELLO\LOGS directory. The name of the file is HEmmddyy.LOG, where mm is the month, dd is the day, and yy is the year. For example, the log for May 7, 1995 is named HE050795.LOG. Issue 2 - May, 2004 Talkpath - Digital Voice Processing System Technical Manual D-2 System Log and Error Messages System Activity Log The system log is more complicated than the error log. Every phone call that the Digital Voice Processing System takes generates a log line indicating what the caller did. The Digital Voice Processing System outputs system activity log lines similar to those found in the error log (see above). NOTES Logging is a programmable feature, by default, the Voice Messaging, Auto Attendant, and Menu items are enabled. Other options can be enabled or disabled in programming. In general, each log line has four fields. The first field is the time the log line was output. The next field is the channel (line) that output the line. A line number of 00 indicates a system message. The third field is the call start time. Not all lines contain this field. The fourth field is the message. A log message can be very simple or very complex. This document focuses on understanding the different log lines. Logs depend on the caller or mailbox owner decisions. The following sections discuss different logs and the meaning of each log item. Each module (i.e., Voice Messaging...) has a letter code associated with it. Listed below are the current modules and the codes: Auto Attendant: [AutoA] Voice Messaging: [Vmail] ❐ Menu Routing: [Menu] At the end of each log line you may see the letter H followed by a number. This means the Digital Voice Processing System detected that the caller had a hangup. The number indicates the type of hangup: ❐ ❐ H7 - Hangup packet from the phone system was received If no H is listed, it means the caller selected to hangup by pressing a key, such as 9 from Voice Messaging maintenance. Each of the modules has different log information included after it. These are described individually with their corresponding code information. ❐ Auto Attendant AutoA. in the log represents the Auto Attendant function. After the AutoA is the extension the person dialed. Following the extension is the destination where the caller was sent. In most cases this is a call to an extension. Extensions with supervised transfer have codes following the extension number. Possible codes are: ❐ ❐ ❐ Busy Ca NoAnswer Ca Connect (Call Answered) Issue 2 - May, 2004 Talkpath - Digital Voice Processing System Technical Manual System Log and Error Messages D-3 System Activity Log If the call was answered, the transaction ends. If there was no answer the call was probably sent to the person's mailbox (see Voice Messaging below). In the case of Busy the caller may elect to retry the extension therefore, the call repeats. This example from the System Log illustrates how to read an Auto Attendant Log. 09:23:16 05 Log: AutoA 100 Call 100 Busy CaScHo 09:23:25 05 Log: AutoA 100 Hold Holding 1 09:23:46 05 Log: AutoA 100 Call 100 NoAnswer 09:23:46 05 Log: AutoA 100 To mailbox 100 Log Interpretation This log is an example of someone calling for extension 100. The extension is busy as written in the first line. The abbreviations CaScHo stand for (Ca) Supervised Transfer, (Sc) Screening, (Ho) Holding. Basically, the supervised auto attendant transferred the call, it was screened and put on hold. The second line states that it was held only one time. The third line indicates the phone system tried the line again. The last line tells the phone system to go ahead and send the caller to mailbox 100. Extensions with unsupervised transfer have the code blXXXX which stands for blind transfer followed by the extension number. Since the Digital Voice Processing System hangs up automatically after a blind transfer, the log line ends. Voice Messaging Voice Messaging log records are split into two general types. One type is for message taking; the other is for mailbox maintenance. General message taking is when an internal or external caller leaves a message for a mailbox. Mailbox maintenance is when an internal user is in their mailbox retrieving messages, changing personal options, etc. There are a minimum of four lines that are created for a system log once a mailbox is opened. These lines represent what the system had to do so the caller could receive or give a message. 14:30:37 04 Log: Start Call 14:30:43 04 Log: Vmail 100 access 14:30:49 04 Log: Owner 100 VN:3 VS:8 PN:0 PS:2 14:30:55 04 Log: Stop Call 14:30:37 Talkpath - Digital Voice Processing System Technical Manual Issue 2 - May, 2004 D-4 System Log and Error Messages System Activity Log Log Interpretation The first line of this Log states that a call started at 14:30:37 on line 04. The second line depicts the time and the extension the caller called. The third line shows the time and mailbox numbers with the associated abbreviations. The abbreviations stand for: VN — Voicemail New message VS — Voicemail Saved message PN — Pager New message PS — Pager Saved message Log users can tell how many messages are on a particular mailbox. In this example there were three new messages, eight saved messages, zero new pager messages, and two saved pager messages. The first line provides the call start time and the last line shows the time the message stopped. Logs depend on caller or mailbox owner decisions. The general message taker is indicated in the log with the Vmail code. After the Vmail code is the mailbox number where the caller is sent. Other Vmail log lines examples and their interpretation are: 14:30:43 04 Log: Vmail 100 to Owner Mailbox 100 was accessed as an owner. 14:30:43 04 Log: Vmail 100 Voice Send to mb 101 Mailbox 100 recorded a message and sent it to mailbox 101. 14:30:43 04 Log: Vmail 100 Voice 0:00:20 K9 A caller left a 20 second voice message and terminated the call with the 9 digit. 14:30:43 04 Log: Vmail track msg: 100.IVX Play Log Line for the message tracker logging option. Issue 2 - May, 2004 Talkpath - Digital Voice Processing System Technical Manual System Log and Error Messages D-5 Error Messages Menu Routing Menu Logs 10:25:08 04 Log: Start Call 10:25:08 04 Log: Vmail 100 Access 10:25:27 04 Log: Menu Demo 10:25:08 Keys 2:MnSALESMNU 10:25:32 04 Log: Stop Call 10:25:08 The only difference between these logs and previous ones is the third line. This line describes which menu was picked (Demo), the time the call was made (10:25:08), the key the caller pressed for options (2), and where the option forwarded the caller (Salesmnu) when the menu finished prompting. Other options include: HgUp Hang up the line Oper Transfer to the operator Inst Replay instructions Menu Run a menu AutoA Go to Auto Attendant Vmail Go to Voice Messaging Disb Disable key Invd Invalid key Table D-1. Options Error Messages If an error occurs, the Digital Voice Processing System attempts to identify the cause of the error and provides information to help resolve the problem. Error List The following list summarizes the Digital Voice Processing System error messages and the probable cause of each error. H!VMAIL Warning: Message type MssgType not supported. H!VMAIL Error: No Last Option menu defined COS Name. H!OWNER Error: Invalid password length. Talkpath - Digital Voice Processing System Technical Manual Issue 2 - May, 2004 D-6 System Log and Error Messages Error Messages H!OWNER Error: No prompt keys specified. Disconnecting. H!DBASE Error: Unknown dBase command ModuleParameter. H!DBASE Error: Unable to access KeyValue. H!MENU Error: Invalid menu password. H!NOTIFY Error: Invalid password length. H!NOTIFY Error: No period in MbxOnline notify setting. H!OWNERA Error: No prompt keys specified. Disconnecting. H!OWNERO Warning: Nothing to edit at VoMenu8., returning. H!OWNERO Error: No prompt keys specified. Disconnecting. H!OWNERS Error: Called with no module parameter. H!OWNERS Error: Invalid gMailboxLength. H!OWNERS Error: Warning to open SYSLIST.DBF. H!OWNERS Error: Unable to open address file for send. H!OWNERS Error: No prompt keys specified. Disconnecting. H!OWNERV Error: RunOwnerMenu failed on VoMenuRoot=11. H!OWNERV Error: Unable to open address file for forward H!OWNERV Error: Unable to open address file for send H!OWNERV Error: Warning to open SYSLIST.DBF. H!OWNERV Error: No prompt keys specified. Disconnecting. H!OWNERX Warning: Nothing to edit at VoMenu6., returning. H!OWNERX Error: No prompt keys specified. Disconnecting. H!TIMECO Error: Start time invalid. H!TIMECO Error: End time xxxxx invalid. H!TIMECO Error: Time control in loop;. H!AUTOA Error: Invalid gMailboxLength. H!MSGMAN SetUp Error: No group 1 handlers for message manager. H!MSGMAN Error: Event EvData not for Message Manager. Check event queues. H!MSGMAN Error: Message Manager command. H!MSGMAN Error: Unable to open. H!MSGMAN Error: Personal list #. Issue 2 - May, 2004 Talkpath - Digital Voice Processing System Technical Manual System Log and Error Messages D-7 Error Messages H!MSGMAN Error: No room in guest mailbox. H!MSGMAN Error: Return receipt needs source. H!MSGMAN Error: Unable to open. H!MSGMAN Error: File names wrong for rename. H!MSGMAN Error: Broadcast file mData not found. H!MSGMAN Error: Broadcast file mData bad name. H!MSGMAN Error: Broadcast file mData bad name. H!COMFIL Error No command file specified. H!COMFIL Error File not found FileName. System Errors The following is a list of system errors detailing the actual error message followed by an explanation. These error messages are shown for reference only, since they appear infrequently, if at all. However, this list may be helpful to programmers or developers who design their own systems or applications. 000 Sys: *Channel Init Error (code=%d)* Error initializing channel parameter block. Low level software/hardware problem. 000 Sys: *Invalid Line(%d) In Event(code=%d,data=%d)* Error received from voice driver. Low level hardware/software problem. 000 Sys: *No Memory for System Var * Unable to complete system variable loading from HELLO.SDF. Not enough free memory before running HELLO. 000 Sys: *Not enough disk (%ldK) to output* Unable to produce normal output (logs, recordings, etc.) during HELLO operation. Not enough free disk space before running HELLO. 000 Sys: *Not enough disk (%ldK) to run* Unable to produce critical output (error log, etc.). Not enough free disk space before running HELLO. Talkpath - Digital Voice Processing System Technical Manual Issue 2 - May, 2004 D-8 System Log and Error Messages Error Messages 000 Sys: *System Var already defined* Duplicate system variable names found while loading HELLO.SDF. HELLO configuration error (via MAINT).System Errors. 000 Sys: *Too Many System Vars (%d) for * More system variables in HELLO.SDF than HELLO can store. HELLO limit reached. (maximum 50 system variables). 000 Sys: Critical Error Count = %d Hourly log message indicating how many DOS critical errors trapped by optional error handler. Not an error by itself, but does indicate some system errors. 000 Sys: New Years Day! Log message indicating New Year rollover. Not an error. 001 Sys: (%s) * Invalid Port = %d * Invalid comm port specified in RS232 operation. Module error. 001 Sys: (%s) * Port %d Already Locked by %d * Comm port already locked by other line. Not an error, just competition for ports. 001 Sys: (%s) * Port %d NOT Locked (%d) * Comm port not locked as expected. Module error. 001 Sys: (%s) * Port %d NOT Open * Comm port not open as expected. Module error. 001 Sys: (Close) *Port %d LOCKED by line %d* Comm port locked by other line during close. Not an error, just indicates multiple lines accessing comm port. 001 Sys: (Open) *Port %d Already Opened by line %d* Comm port already open during another open operation. Module error. 001 Sys: *Open error %d on port %d* Error opening comm port for operations. Low level software (LCOM) or hardware error. Issue 2 - May, 2004 Talkpath - Digital Voice Processing System Technical Manual System Log and Error Messages D-9 Error Messages 002 Sys: *No mem - Alloc Lengths List (n=%d)* Error allocating module variable lengths list. Not enough free memory before running the Digital Voice Processing System. 002 Sys: *No mem - Alloc Value * (c=%d,n=%d)* Error allocating module variable. Not enough free memory before running the Digital Voice Processing System. 002 Sys: *No mem loading constants (c=%d,n=%d)* Error allocating module constants. Not enough free memory before running the Digital Voice Processing System. 002 Sys: *No mem loading instructions (n=%d)* Error allocating module instruction code. Not enough free memory before running the Digital Voice Processing System. 002 Sys: *No mem-Alloc Value List (n=%d)* Error allocating module variable value list. Not enough free memory before running Digital Voice Processing System. 002 Sys: *No Memory Allocating User Q * Error allocating user queue. Not enough free memory before running the Digital Voice Processing System. 003 Sys: * Stack Overflow * Too many nested subroutine calls. The Digital Voice Processing System limit reached. (maximum 10 nesting levels). 003 Sys: * Stack Underflow * Too many subroutine returns. Module error, number of returns must match calls. 003 Sys: *Invalid function %d * Unrecognized function code in module. Module file error or internal Digital Voice Processing System error. 003 Sys: *Invalid opcode %d* Unrecognized instruction code in module. Module file error or internal Digital Voice Processing System error. Talkpath - Digital Voice Processing System Technical Manual Issue 2 - May, 2004 D-10 System Log and Error Messages Error Messages 003 Sys: *Mark Dead scr=%d addr=%d mark=%2X l=%d v Internal marker overwritten. Internal Digital Voice Processing System error. 003 Sys: *String Overflow(cat) d_max=%d d_len=%d s_len=%d Attempt to set variable to a value that is too long. Module error. 003 Sys: *String Overflow(sv) d_len=%d d_max=%d s_len=%d Attempt to set variable to a value that is too long. Module error. 003 Sys: *Task Mssg(%d,%s) BEFORE Answer* Unprocessed message received from other task thrown away prior to going into answer mode. Module error, modules for multi-tasking systems should process all messages received prior to going into answer mode. 003 Sys: LineDown = %d* Log message indicating a line was shut down by module command. Not an error. 004 Sys: * Can't concat sys segment (too many)* Error concatenating voice segments from the system voice file (hellosys.vox). The Digital Voice Processing System limit reached. (maximum 30 segments) Probably too large too large a number in SayNumber or SayMoney, too long a string in SayChars, etc. 004 Sys: * Can't find sys segment * Unable to find a voice segment in system voice file (HELLOsys.vox). Missing file or module error. 004 Sys: * Can't find voice message :%s/%s * Unable to find a voice file. Missing file or module error. 004 Sys: * Can't open voice index (memory) * Unable to successfully open a permanent voice index, due to insufficient memory for segment table. Not enough memory before running the Digital Voice Processing System. 004 Sys: * Invalid Definition #%d in Voice Index * Error reading segment information from VDX file. Indicates error in VDX file format. 004 Sys: * No Segments in Voice Index * No segments found in VDX file. Indicates empty VDX file. Issue 2 - May, 2004 Talkpath - Digital Voice Processing System Technical Manual System Log and Error Messages D-11 Error Messages 004 Sys: * System voice file :%s not voxopen for %s(%s) * Unable to play system segments because system voice file is not VOXOPEN in HELLO.SDF or HELLO.LOD. Configuration error (via MAINT) of HELLO.SDF or HELLO.LOD. 004 Sys: * Voice file :%s not found * Unable to find a voice file for VOXOPEN. Missing file or configuration error (via MAINT) of HELLO.SDF or HELLO.LOD. 004 Sys: * Voice file already open * Unable to VOXOPEN voice file, already open. Configuration error (via MAINT) of HELLO.SDF or HELLO.LOD. 004 Sys: * Voice index :%s not found * Unable to open VDX file to find segment. Missing file or module error. 004 Sys: *Call error (c=%d)* Error attempting to make an outbound call. Low level software/hardware error. 004 Sys: *Can't open record voice file * Error opening record file for recording. The Digital Voice Processing System internal error or DOS file sharing error. 004 Sys: *Can't record :%s (in use)* Error opening record file for recording. File is already open by another line. 004 Sys: *Can't record (disk space)* Error recording file. Not enough disk space to record. 004 Sys: *Dial error (c=%d)* Error attempting to make a outbound dial. Low level software/hardware error. 004 Sys: *DTMF Overflow (act=%d max=%d)* Too many DTMF digits read into variable. Internal Digital Voice Processing System error. 004 Sys: *GetDTMFs (%d,%d,%s) err=%d* Error attempting to make a DTMF read. Low level software/hardware error. Talkpath - Digital Voice Processing System Technical Manual Issue 2 - May, 2004 D-12 System Log and Error Messages Error Messages 004 Sys: *Invalid VoxDate * Error saying date. Invalid date data or module error. 004 Sys: *Play file /%s (%d:%d) error %d* Error playing file. Low level software/hardware error. 004 Sys: *Record file (%d) error %d* Error recording file. Low level software/hardware error. 004 Sys: *System Error %d:%d st=%d fh=%d * Critical DOS error. Low level software/hardware error. 004 Sys: *Var too small(%d) for READDTMF(%d)* Variable for read DTMF is smaller than requested length. Module error. 005 Sys: *Can't %s - mbox locked by line %d* Unable to perform specified operation on mailbox, because it is locked by another line. Module error. 005 Sys: *Can't %s - mbox not open* Unable to perform specified operation mailbox, because line does not have it opened. Module error. 005 Sys: *Can't create for mbox - create error* Error creating deleted message file. Internal Digital Voice Processing System or DOS error. 005 Sys: *Can't delete for mbox - del error %d* Error deleting message file. Internal Digital Voice Processing System or DOS error. 005 Sys: *Can't delete for mbox - not exist* Error deleting message file, file does not exist. Module error. 005 Sys: *Can't open mbox - maximum open* Unable to open mailbox, mailbox table is full. The Digital Voice Processing System limit reached. (maximum 32 mailboxes open). 005 Sys: *Can't say for mbox - not exist* Error playing mailbox message file, file does not exist. Module error. Issue 2 - May, 2004 Talkpath - Digital Voice Processing System Technical Manual System Log and Error Messages D-13 Error Messages 005 Sys: *Dup file len(%ld) mismatch on mbox* Error in indirect message file length. Internal Digital Voice Processing System error. 005 Sys: *Mbox Reset %d Count Mismatch (%d%d)* Message counts in MDX and directory differ. Missing files or Digital Voice Processing System internal error. 005 Sys: *No Dest mbox to dup from mbox* Nonexistent mailbox specified. Module error. 005 Sys: *No Disk Space to dup to mbox * Unable to duplicate mailbox message. Not enough free disk space before running the Digital Voice Processing System. 005 Sys: *TC(%s) Mbox Count %d Mismatch (%d%d)* Message counts in MDX and directory differ. Missing files or Digital Voice Processing System internal error. 005 Sys: *TC(%s) unable to read mbox %d index* Error reading mailbox index entry. Internal Digital Voice Processing System error. 005 Sys: *Unable to Del mssg; %d(%ld) %d (ec=%d)* Error deleting short message just recorded. Internal Digital Voice Processing System or DOS error. 005 Sys: *Unable to dup from to (create)* Error creating new message file for mailbox. Message directory full, Internal Digital Voice Processing System or DOS error. 005 Sys: *Unable to open for dup to mbox * Error opening mailbox message file. Internal Digital Voice Processing System or DOS error. 005 Sys: *Unable to open file for mbox * Error opening mailbox message file. Internal Digital Voice Processing System or DOS error. 005 Sys: *Unable to say indirect mssg for * Error playing indirect mailbox message file. Low level software/hardware or Internal Digital Voice Processing System error. Talkpath - Digital Voice Processing System Technical Manual Issue 2 - May, 2004 D-14 System Log and Error Messages Error Messages 005 Sys: Del mssg; %d(%ld) %d Log message reporting the deletion of a newly recorded mailbox message that was shorter than the minimum recording length. Not an error. 006 Sys: *Can't open - maximum files* Unable to open file, maximum number of files open. The Digital Voice Processing System limit reached. (maximum 16 files). 006 Sys: *Can't say :%s/%s to file (%d)* Error saying into file, file not opened for write or file not opened in binary mode. Module error. 006 Sys: *File not opened for write* Error writing to file, file not opened for write. Module error. 006 Sys: *FRead too long(%d) for dest(%d)* Error reading into variable, specified read length longer than variable. Module error. 006 Sys: *FSearch too long(%d) for dest(%d)* Error file searching into variable, specified length longer than variable. Module error. 006 Sys: *No Disk Space to open output file * Unable to open file for output. Not enough free disk space available. 006 Sys: *No Disk Space to say to file * Unable to say into file due to insufficient disk space. Not enough free disk space available. 006 Sys: *No Disk Space to write to file * Unable to write to file due to insufficient disk space. Not enough free disk space available. 006 Sys: *Unable open file ; name too long* Unable to open file, filename is too long. Module error. 006 Sys: *Unable to open dest file :%s to copy* Error creating destination file to copy to. File already open or DOS error. 006 Sys: *Unable to open source file :%s to copy* Error opening source file to copy from. Missing file or DOS error. Issue 2 - May, 2004 Talkpath - Digital Voice Processing System Technical Manual System Log and Error Messages D-15 Error Messages 007 Sys: *Database %d not opened during %s* Database not open as expected for dBase operation. Module error. 007 Sys: *Error=%d on field val file during DbaseFreplace* Error replacing field value, usually invalid field name or value conversion. Module or database error. 007 Sys: *Index %d not opened during %s* Index not open as expected for dBase operation. Module error. 007 Sys: *Invalid field for file during DbaseFstr* Error referencing field value, usually invalid field name or value conversion. Module or database error. 007 Sys: *Invalid field val for file during DbaseFReplace* Error replacing field value, usually invalid field name or value conversion. Module or database error. 007 Sys: *No Current Record(%ld) in db during %s* No database record selected as expected. Module error. 007 Sys: *Unable to alloc buffer(%d) for dbase* Unable to allocate record buffer during dBase open. Not enough free memory available. 007 Sys: *Unable to alloc buffer(%d) for index* Unable to allocate index buffer during index open. Not enough free memory available. 007 Sys: *Unable to GO to rec=%ld in dbase; Error=%d* Error during go operation, probably invalid record number. Module or database error. 007 Sys: *Unable to open dbase; Error=%d* Error during dbase open operation. Missing database file, module error, or database error. 007 Sys: *Unable to open dbase; Invalid filename* Unable to open database, invalid filename. Module error. Talkpath - Digital Voice Processing System Technical Manual Issue 2 - May, 2004 D-16 System Log and Error Messages Error Messages 007 Sys: *Unable to open dbase; Max_dbs(%d)* Unable to open database file, maximum already open. The Digital Voice Processing System limit reached. (maximum 4 databases) 007 Sys: *Unable to open index for db; opened for db* Unable to open index file with currently selected database, that index already opened with another database file. Module error. 007 Sys: *Unable to open index; Error=%d* Error opening index file. Missing file, module error, or database error. 007 Sys: *Unable to open index; Invalid filename* Unable to open index file, invalid filename. Module error. 007 Sys: *Unable to open index; maximum indices(%d)* Unable to open index file, maximum already open. The Digital Voice Processing System limit reached. (maximum 4 indices). 007 Sys: *Unable to open index; No database selected* Unable to open index, must have database open and selected. Module error. 007 Sys: *Unable to write rec=%ld in dbase; Error=%d* Error writing database record. Module or database error. 009 Sys: * QRec=%d during %s (hl=%d fl=%d) * Invalid user queue record number during operation. Internal Digital Voice Processing System error. 009 Sys: * Queue file length = %ld *\n Invalid user queue file length. Internal Digital Voice Processing System error. 010 Sys: * Not Enough Memory* (%ld) Unable to perform operation due to insufficient free memory. Not enough free memory available. 010 Sys: Digital Voice Processing System v%d.%02d system reset (F=%d). Log message indicating the startup of Digital Voice Processing System. Not an error. Issue 2 - May, 2004 Talkpath - Digital Voice Processing System Technical Manual System Log and Error Messages D-17 Error Messages 010 Sys: Digital Voice Processing System v%d.%02d system terminated (F=%d). Log message indicating the termination of Digital Voice Processing System. Not an error. 010 Sys: MEMORY U[%ld] F[%ld] D[%ld] : %s Log message indicating the amount of used and free memory. Not an error. 011 Sys: Blockage Cleared Group# %d Log message indicating that blockage no longer exists for a particular blockage group. Not an error. 011 Sys: Blockage Detected Group# %d Log message indicating that blockage has begun for a particular blockage group. Not an error. 011 Sys: Trans to IDLE (cs=%d ev=%d ed=%d) Error message indicating a transition to the IDLE processing state for a line. Internal Digital Voice Processing System error. 014 Sys: Closing file :%s (f#%d) Log message indicating the closing of a file. Not an error. 014 Sys: Opening file :%s (f#%d) Log message indicating the opening of a file. Not an error. ??? Sys: *Invalid Key :%d Type (%d)* Error in key value type. Low level software/hardware problem. Talkpath - Digital Voice Processing System Technical Manual Issue 2 - May, 2004 D-18 System Log and Error Messages Error Messages Issue 2 - May, 2004 Talkpath - Digital Voice Processing System Technical Manual Index i In de x Symbols +DIE0 7-10 A AaBlindDelay A-1 AC adapter 1-2 Access features 3-2 access messages manually 3-22 action 5-55 Action 1 5-20 Action 2 5-20 Action 3 5-20 Actions 5-19 Add a Mailbox 4-9 Add a mailbox 4-7 Add a New Distribution List 4-10 Add A New Entry 3-33 Add Mailbox Entries to Personal List 3-25 Admin module 7-12, 7-21 Admin program A-1 administration program 5-66 AdminPassword A-3 Advanced Setup 5-71 alternate extension 5-15 alternate mailbox 5-15 ANI 1-4 Answering machine emulation 1-3 audit trail D-1 Auto Attendant 3-36, 4-15, D-2 Auto Attendant Module 3-36 Auto Attendant Tab 5-40 Auto-Answer mode 5-3 auto-answer mode 7-23 B Backing Up the System 7-18 Batteries 1-2, 2-1, 2-2 Baud Rate 7-8 TalkPath - Digital Voice Processing System Technical Manual baud rate 5-68 Blind 3-36 Blind Transfer 5-19, 5-40 blind transfer 5-49, D-3 broadcast message 4-12 Broadcast Message Administration 4-12 Busy greeting 3-9 C cache 7-22 Call Holding 5-41 Call Options 5-40 Call Queuing 7-26 call record D-1 Call Screening 5-41, 5-42 Caller ID 1-4 CallLogging A-1 calls in queue 5-42 Cancel a Broadcast Message 4-13 Carrier Detect (CD) 5-9 Change mailbox COS 4-7 Change the Mailbox COS 4-8 Class Of Service 3-5 Class of Service 3-15, 4-8, 5-8, 5-13, 5-15, 5-22 CMOS BIOS 7-4 Com Port 7-8 Com Port Options 7-8 ComBaud A-1 Command File 5-59, 7-26 command file script 5-49, 5-56 Command Files B-1 Command strings 5-66 Communicate With the System 5-2 communications port 7-8 company directory listing 5-49, 5-56 ComParam A-1 ComPort 5-63, A-1 ComPorts Option 5-3 Issue 2 - May 2004 ii Confidential 5-29 Configuration 1-1 configuration files 5-61 configuration information 5-76 configure modem 5-66 Configure port numbers 4-14 configure the modem 5-2 Connect Cabling 5-1 Connecting Phone Lines 2-3 Connectors 1-2 Count 5-27 Create a Distribution List 3-24 Create a Guest Mailbox 3-28 Create an Information Group 3-31 create new mailboxes 4-7 Create New Message 4-12 Create Subscribers 5-11 Current Config 5-80 custom script module 5-20 D daily log files 7-22 Data Bits 7-8 Data Send Ready (DSR) 5-9 database A-1 Date/Time 3-11 Date/time synchronization 1-3 DBASE directory 7-18 Debug Mode 7-21 debug mode 7-11, 7-21, 7-26 debugging information 7-6 Debugging mode 7-11 debugging parameters 7-21 Def BPS Rate 5-68 default communications port 7-8 Default Message Type 5-27 default password 3-4 Default Phone System Configuration 5-7 default phone system configuration 4-16 Define a key 5-47 Delete a Distribution List 4-10 Issue 2 - May 2004 Index Delete a Mailbox 4-9 Delete a mailbox 4-7 Delete a Personal List 3-27 Delete Mailbox Entry on Personal List 3-26 delete mailboxes 4-7 Delete Menu 5-44 Delete Subscribers 5-12 Delete Time Control 5-52 dial command 5-67 dial sequence 5-66 Dial Suffix 5-67 DIP switches 2-4 direct connection 5-1 DirType A-2 Disable message notification 5-16 Disable System Caching 7-22 DisableXSIAM A-2 disconnect the call 5-67 distributed broadcast message 4-13 Distribution List 3-22 distribution list 3-16 Distribution List Administration 4-10 DOS functions 7-6, 7-10 Download 7-12 DVMDisableCID A-2 DVMSynchTime A-2 DVMTimeDiff 1-3, A-2 DVMTimeEventGroup A-2 DVMXferWait A-2 E ECom 5-2, 7-6, 7-7, 7-8, 7-10, 7-11, 7-21, 7-23, A-1 Edit a Distribution List 4-11 Edit Line Settings 5-58 Edit Mailbox Names 4-6 Edit Menu 5-45 Edit Registry 5-71, 5-72, 5-73 Edit Subscriber 5-13 Edit Subscribers 5-18 Edit Time Control 5-53 TalkPath - Digital Voice Processing System Technical Manual Index E-mail support 1-4 Enter Module to Run 4-14 Entry ID 3-30 Error List D-5 Error Log D-1 error log D-1, D-2 Error Messages D-5 Event Counters 5-25 Event handler group 5-37 Executing DOS Commands 7-16 Exit 5-9, 5-61 extension forwarding B-1 Extension Settings 5-13, 5-18 ExtensionLength A-2 external numbers 5-16 F Fax Detect 7-24 Fax Detect strings 5-74 FCC regulation 1-5 File Menu 5-61 File pull-down menu 5-4 file transfer 7-17 First Time Help 3-5, 5-31 flash-time A-2 Flow Control 7-8 Forward 3-11 Forward to Extension 5-20 Forward to Mailbox 5-20 Forward to Menu 5-20 Forward to Module 5-20 Forward to Time Control 5-20 G General tab 5-24 greeting 3-7 Greeting Length 5-28 greeting options 3-7 Greeting Type 5-27 Grouping mailboxes and extensions 5-22 Guest Greeting 3-27 TalkPath - Digital Voice Processing System Technical Manual iii Guest Mailbox 3-29 guest mailbox greeting 3-28 Guest Mailboxes 3-27 Guest Messages 3-29 H hangup D-2 Hangup packet D-2 Hardware 2-1 Hardware Installation 1-1 Hayes-compatible modems 5-3 Help 5-79 Help Menu 5-79 Help, About 5-80 hidden key 5-48 Hold files 5-42 Hold Interval 5-41 Hold Type 5-41 Holding D-3 I Immediate 3-20 information group 3-30 Initialize the modem 5-66 Insert Menu 5-44 Insert Subscribers option 5-11 Insert Time Control 5-52 Internet 6-5 Items 1-10 5-54 K key action field 5-46 Key Actions 5-46 keyword 3-35 L Language 5-25 language 5-50 Laptop Administration 2-5 Laptop/PC administration 5-1 laptop/PC administration 5-1, 5-7 Laptop/PC Administration diskette 7-6 Issue 2 - May 2004 iv Laptop/PC Connection 5-7 Last Options 5-29 lcdly A-2 LED Boot Sequence 7-2 LED indicators 1-3, 2-4 LED Sequence 7-1 line configuration 4-14 Listen to Message 4-12 Lock DTE Rate 5-68 log date 5-78 Log Interpretation D-3, D-4 logging information 7-12 M Mailbox Administration 4-7, 4-9 mailbox greeting 5-55 mailbox name 4-6 mailbox notification B-1 Mailbox Settings 5-13, 5-14 Mailbox State 3-18 MailboxLength A-2 Maintenance Tab 5-31 Manual Natural 5-31 MaxMenuPromptLength A-2 meeting reminder 3-24 Menu 4-15, 5-8 menu 3-2 Menu Action List 5-43 menu help systems 3-1 Menu Logs D-5 Menu Routing D-5 MenuFaxToneDetect 7-24 MenuFaxToneWait A-2 Menus 5-43 Message Cascading 5-37 Message cascading 5-15 Message Notification 3-20 Message Order 5-32 Message Properties 5-27 message record length 4-8 Message Tab 5-26 Issue 2 - May 2004 Index message waiting 5-36 Message Waiting Indicator (MWI) 5-36 Message Waiting Indicator parameters 7-25 Message Waiting Indicator strings 5-37 Message Waiting Lights 7-25 minlcoff A-2 MinRecordLength A-2 Model Number 1-5 Modem 1-3 modem 5-1 Modem cable 2-1, 2-4 modem cable 5-1 modem configuration string 5-67 Modem Connection 5-2 modem connection 7-9 modem features 7-9 modem hookup 5-3 modem phonebook entry 5-70 modem provider 5-66 Modem Quick Configure 5-65 Modem Setup 5-66, 5-68 Modify a Group 3-32 Modify An Existing Entry 3-34 Modify an Information Group 3-32 Modifying Command Files B-8 ModuleDebug 7-12, 7-21, 7-22, A-2 Mounting 2-2 Multi-level menus 5-43 N nbrdna A-2 New users 3-5, 5-31 Notification 5-15 notification 5-16 Notification attempts 5-38 notification options 5-14, 5-36 notification scripts 5-38 Notification settings 7-25 Notification Tab 5-36 numeric message 5-26 TalkPath - Digital Voice Processing System Technical Manual Index O oh_dly A-2 On Urgent Only 3-20 One Touch Record 1-3 one-key urgent message 5-29 OneTouchLengthXXX A-2 Owner Edit Options 5-34 Owner Play Options 5-32 P page message 5-26 page messages 5-26 Pager Notification 5-17 pager notification B-6 pager retries 5-39 Parity 7-8 Park and Page 1-4, 5-28 park the system 4-17 Parking the System 7-15 password 3-6 password verification 5-13 pause-time A-3 PC boot-up screen 7-3 Personal Distribution List 3-24 personal greeting 3-18, 5-28 Phone Book 5-64 Phone system 1-1, 2-5 Phone System Config Message 5-75 phone system programming 6-4 phone system software version 2-6 phone systems 2-6 Placement 2-2 Play Greeting 5-15 Port Setup 5-63 port upgrade kit 6-1 Power supply 2-1, 2-4 Preamble 3-11 predefined command files B-7 ProComm Plus™ 5-2 Product Warranty 1-4 program phone system 2-7 TalkPath - Digital Voice Processing System Technical Manual v program stations 2-8 protocol screen 7-15 Pull-Down Menus 5-61 Q Questions and Answers 7-22 Quick commands B-5 Quick Configure 5-64 quick shutdown and startup 5-76 R r_ird A-3 r_off A-3 r_on A-3 reboot the system 4-17 Receive (Rx) 5-9 Record on the Fly 1-3 Record Prompts 5-45 Recording names 3-5 Recover Deleted Messages 4-8 Recover deleted messages 4-7 REGADD A-1 Registration 1-4 Registry A-1 registry 5-72, 7-21, 7-22, 7-24 registry values A-1 REGLIST A-1 reinitialize the database 7-20 remote connection 5-1 remote maintenance 5-2 remote site 7-9 Remote System 5-9 Reply 3-11 Reply to Sender 3-16 Reports Menu 5-77 Requirements 6-3 re-record menu prompts 5-49 Reset 5-9 reset mailbox 3-6 reset mailbox password 4-7 reset mailbox passwords 4-7 Issue 2 - May 2004 vi Restore the backup 7-19 Restoring System Backup 7-19 Restricted OutDial 5-25 Result Codes 5-67 Retention 5-27 retention period 3-9 Retrieving Messages 3-9 Return authorization 1-4 rings A-3 RS-232 serial port 1-2 Run code 4-15 Run Module 5-56, 5-58 Run Software 5-2 S Screen Caller 5-19 Screening D-3 Select a Phone System 4-16 Select Phone System 5-62 send message to distribution list 3-23 send messages 3-12 Send Options 5-29 send options 3-15 serial number 6-1 Serial port 1-3 serial port 5-1, 5-2 set date and time 2-5 Set Unit Date and Time 5-71, 5-74 Set Up Voice Lines 4-14 Setup 5-64 Setup Menu 5-61 Setup Phone System 5-61 Shrink 5-9 Shut Down and Park 7-9 shut down and park 4-17 shut down and reboot 4-17 Shutdown 5-71, 5-76 Shutdown and Park Unit 5-76 signal indicators 5-9 Silence 5-41 Smart Prompt 3-5 Issue 2 - May 2004 Index Smart Transfer 1-4 Software Installation 6-3 Special keys 3-2 Standard greeting 3-8 status bar 5-9 Stop Bits 7-8 Storage capacity 1-3 subscriber 4-12, 5-10 Subscriber changes 7-23 subscriber database 7-23 Subscribers 5-8 Subscribers option 5-10 Supervised 3-36 Supervised Transfer 5-19, 5-41, D-3 switch selectable settings 5-2 System Access 3-4 System access 3-37 system activity D-1, D-2 System Activity Log D-1 System Add-On 5-28 System Administration 4-14 System Administrator 3-4, 3-9, 3-36 system administrator 3-1 System Caching 5-74 System Date and Time 4-17 System Errors D-7 system events D-1 system greeting 5-28 system list 4-6 system log D-2, D-3 system logs 5-77 system overhead 7-26 System Reinitialize 7-20 System Settings 5-71, 5-73 System Shutdown 4-17 system-wide operator 5-15 T t_idd A-3 Telephone company 1-5 Telephone-based administration 2-5 TalkPath - Digital Voice Processing System Technical Manual Index vii telephony administration 5-1 template 5-44, 5-52 Template Mailbox 5-11 Temporary greeting 3-9 terminal communication program 5-2 TIE lines B-1 Time Control 4-16, 5-8, 5-24, 5-59 Time Control option 5-14 Time Controls 5-14, 5-18 Time controls 5-51 Time Out value 7-22 time periods 5-51 Time Sensitive greeting 3-9 time sensitive greetings 7-24 Timed 3-20 time-out action 5-46 tracking information 7-22 transfer method 3-36 transfer options 5-18 Transfer strings 5-42 Transferring Files 7-17 Transmit (Tx) 5-9 troubleshooting 7-15, 7-26 Type Ahead 3-2 VMDeleteConfirmFlush A-3 VmMwiResend A-3 VmTemplate A-3 voice database 3-30 Voice Insert 5-28 voice line 5-57 voice line actions 5-57 Voice Lines 5-9 Voice message 5-26 Voice Messaging 3-3, D-3 Voice Messaging log D-3 Voice Note Pad 3-30 Voice Notify Options 5-37 voice prompt file 5-49 Voice prompts 3-1 Voicemail 4-15 Voicemail Owner 3-37 Voicemail ports 2-3 voicemail system operation 4-14 VOX extension 5-46 U XOnXOff A-3 unsupervised transfer D-3 updating 7-15 Upgrading 6-5 upgrading 6-1 Upload 7-13 Urgent 5-29 urgent message 5-29 W Wall mount 2-2 Windows Administration diskette 2-1 X Z ZIP compression 7-17 ZModem 7-6, 7-17 ZModem protocol 7-17 ZMS command 7-12 V view the logs 7-22 Viewing the Logs 7-22 Vm10DigitDial A-3 VmCleanDay A-3 VmCleanTime A-3 VMDEBUG 7-11 TalkPath - Digital Voice Processing System Technical Manual Issue 2 - May 2004 viii Issue 2 - May 2004 Index TalkPath - Digital Voice Processing System Technical Manual