1
PROSTAR DCS COMPACT
TECHNICAL MANUAL
T A B L E
PROGRAMMING
TABLE OF CONTENTS NOVEMBER 1997
O F
Table of
Contents
C O N T E N T S
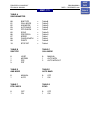
PROGRAMMING SECTION
PART
1
2
DESCRIPTION
PAGE
INTRODUCTION TO PROGRAMMING
1.1
PROGRAMMING OVERVIEW .................................................. 1.1.1
1.2
PROGRAMMING LEVELS ....................................................... 1.2.1
1.3
PROGRAM LIST (V1.x) ............................................................ 1.3.1
1.4
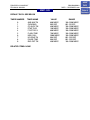
PROGRAM LIST IN NUMERICAL ORDER (V2.x) ..................... 1.4.1
1.5
PROGRAM LIST IN ALPHABETICAL ORDER (V2.x) ............... 1.5.1
1.6
MMC’S ASSOCIATED BY CATEGORY (V2.x) ........................... 1.6.1
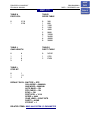
PROGRAMMING PROCEDURES
2.1
HOME
PAGE
PROGRAM PROCEDURES ...................................................... 2.1.1
MMCS APPEAR IN NUMERICAL ORDER
2.2
DEFAULT DATA ........................................................................ 2.2.1
2.3
SPECIAL APPLICATIONS ........................................................ 2.3.1
2.4
BLANK DATA RECORD SHEETS
PROSTAR DCS COMPACT
TECHNICAL MANUAL
PROGRAMMING
PART 1 JUNE 2001
PART 1. INTRODUCTION TO PROGRAMMING
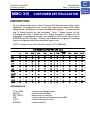
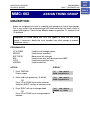
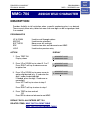
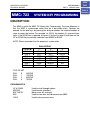
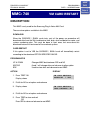
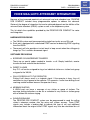
1.1 PROGRAMMING OVERVIEW
The DCS COMPACT system arrives from the factory with default data. Connect it to
trunks, stations and power, turn the system on and it is fully operational. The only thing
left to do is customize the data to fit the customer’s needs. This is called programming
the system.
MMC stands for Man Machine Code and each program is assigned a different three
digit code. These MMC codes are used to view, create or change customer data.
Programming is simply deciding what needs to be done and knowing which MMC is
used to do it. For example, use MMC 601 to create a station group. System speed dial
numbers are entered in MMC 705 and soft keys are assigned to individual keysets
using MMC 722.
System programming may be done from any display keyset. The first thing you must
do is open system programming. As a security measure, a passcode must be known to
do this.
•
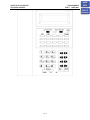
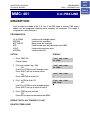
iDCS KEYSETS
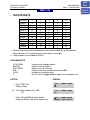
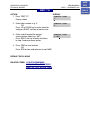
This section provides more detailed programming procedures that can be used by
experienced display keyset users. These procedures will help explain some of the
displays observed as the simpler procedures detailed in the Keyset User Guide are
followed.
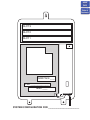
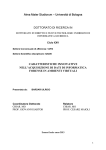
The diagram below illustrates the keys on an iDCS 28D and an iDCS 18D keyset that
have special functions during programming. When required, these keys will be referred
to by the names described below.
1.1.1
HOME
PAGE
Table of
Contents
PROSTAR DCS COMPACT
TECHNICAL MANUAL
PROGRAMMING
PART 1 JUNE 2001
HOME
PAGE
Table of
Contents
1.1.2
PROSTAR DCS COMPACT
TECHNICAL MANUAL
PROGRAMMING
PART 1 JUNE 2001
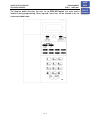
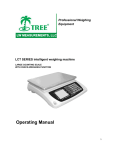
The diagram below illustrates the keys on an iDCS 8D keyset that have special
functions during programming. When required, these keys will be referred to by the
names described below.
1.1.3
HOME
PAGE
Table of
Contents
PROSTAR DCS COMPACT
TECHNICAL MANUAL
•
PROGRAMMING
PART 1 JUNE 2001
HOME
PAGE
Table of
Contents
DCS KEYSETS
This section provides more detailed programming procedures that can be used by
experienced display keyset users. These procedures will help explain some of the
displays observed as the simpler procedures detailed in the Keyset User Guide are
followed.
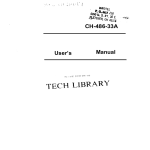
The diagram below illustrates the keys on a display keyset that have special functions
during programming. When required, these keys will be referred to by the names
described below.
1.1.4
PROSTAR DCS COMPACT
TECHNICAL MANUAL
PROGRAMMING
PART 1 JUNE 2001
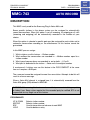
1.2 PROGRAMMING LEVELS
There are three levels of programming: SYSTEM, CUSTOMER and STATION. System
and customer levels are under passcode protection while station programming does
not require a passcode.
To prevent conflicting data from being entered, only one person at a time can enter
programming with the technician or customer passcode. While programming is in
progress, normal system operation is not affected. For your convenience, the system
displays [xxx IN PGM MODE] when another keyset is in the program mode.
A. System level
This level is entered via MMC 800 and requires the technician level passcode. It
allows access to all system programs, station programs and maintenance
programs.
B. Customer level
This level is entered via MMC 200 and requires the customer passcode. It allows
access to station programs and system programs allowed by the technician in MMC
802. When using the customer passcode to access station programs, data for all
stations can be viewed or changed.
NOTE: When the system is programmed for multiple tenant use, each tenant has an
individual customer passcode enabled in MMC 201. The access for tenant
passcode is limited to only certain MMCs. See MMC 201 for more details.
After opening programming with the customer passcode, you must press TRSF to
exit. Now press TRSF and the MMC number you wish to access.
C. Station level
All keysets can access station programs 102–117 without using a passcode. Each
user can only change station data for his/her own keyset.
When the LCD 24B keyset is in programming, the display shows instructions,
prompts and choices. Existing data is always displayed before it can be changed.
The keystroke sequence for each MMC is detailed in the following pages.
Before you begin entering customer data, follow this important reminder.
IMPORTANT REMINDER
When first installing this system, always use MMC 811 to reset and clear memory.
This will ensure that you begin with clean default data.
Now begin entering customer data.
1.2.1
HOME
PAGE
Table of
Contents
PROSTAR DCS COMPACT
TECHNICAL MANUAL
PROGRAMMING
PART 1 NOVEMBER 1997
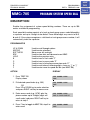
Table of
Contents
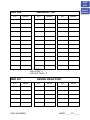
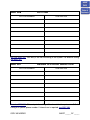
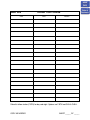
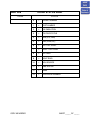
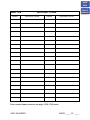
1.3 PROGRAM LIST (V1.x)
100:
101:
102:
103:
104:
105:
106:
107:
108:
109:
110:
111:
112:
113:
114:
115:
116:
117:
118:
200:
201:
202:
203:
204:
206:
207:
208:
209:
210:
211:
214:
300:
301:
302:
303:
304:
305:
306:
307:
308:
309:
310:
311:
400:
401:
402:
403:
404:
405:
406:
STATION LOCK
CHANGE USER PASSCODE
CALL FORWARD
SET ANSWER MODE
STATION NAME
STATION SPEED DIAL
STATION SPEED DIAL NAME
KEY EXTENDER
STATION STATUS
CLOCK DISPLAY
KEYSET ON/OFF
KEYSET RING TONE
ALARM REMINDER
VIEW MEMO NUMBER
OFF-HOOK RING VOLUME
SET PROGRAMMED MESSAGE
ALARM AND MESSAGE
ASSIGN BACKGROUND MUSIC VOLUME
STATION RING VOLUME
OPEN CUSTOMER PROGRAMMING
CHANGE CUSTOMER PASSCODE
CHANGE FEATURE PASSCODES
ASSIGN UA DEVICE
COMMON BELL CONTROL
BARGE-IN TYPE
ASSIGN VM/AA PORT
ASSIGN RING TYPE
ASSIGN ADD-ON MODULE
CUSTOMER ON/OFF PER TENANT
DOOR RING ASSIGNMENT
DISA ALARM RINGING STATION
CUSTOMER ON/OFF PER STATION
ASSIGN STATION COS
PICKUP GROUPS
ASSIGN BOSS/SECRETARY
ASSIGN EXTENSION/TRUNK USE
ASSIGN FORCED CODE
HOT LINE
ASSIGN OFF-HOOK SELECTION
ASSIGN BACKGROUND MUSIC SOURCE
ASSIGN STATION MUSIC ON HOLD
LCR CLASS OF SERVICE
ASSIGN SIM PARAMETER
CUSTOMER ON/OFF PER TRUNK
C.O./PBX LINE
TRUNK DIAL TYPE
TRUNK TOLL CLASS
TRUNK NAME
TRUNK NUMBER
TRUNK RING ASSIGNMENT
HOME
PAGE
407:
408:
409:
410:
500:
501:
502:
503:
504:
505:
506:
507:
600:
601:
602:
603:
604:
605:
606:
700:
701:
702:
703:
704:
705:
706:
707:
708:
709:
710:
711:
712:
713:
715:
720:
721:
722:
723:
724:
725:
726:
800:
801:
802:
804:
805:
806:
810:
811:
1.3.1
FORCED TRUNK RELEASE
ASSIGN TRUNK MUSIC ON HOLD SOURCE
TRUNK STATUS READ
ASSIGN DISA TRUNK
SYSTEM-WIDE COUNTERS
SYSTEM TIMERS
FORWARD NO ANSWER TIMER
TRUNK-WIDE TIMER
PULSE MAKE/BREAK RATIO
ASSIGN DATE AND TIME
TONE CADENCE
ASSIGN AUTO NIGHT TIME
ASSIGN OPERATOR GROUP
ASSIGN STATION GROUP
STATION GROUP NAME
ASSIGN TRUNK GROUP
ASSIGN STATION TO PAGE ZONE
ASSIGN EXTERNAL PAGE ZONE
ASSIGN SPEED BLOCK
COPY COS CONTENTS
ASSIGN COS CONTENTS
TOLL DENY TABLE
TOLL ALLOWANCE TABLE
ASSIGN WILD CHARACTER
ASSIGN SYSTEM SPEED DIAL
SYSTEM SPEED DIAL BY NAME
AUTHORIZATION CODE
ACCOUNT CODE
PBX ACCESS CODE
LCR DIGIT TABLE
LCR TIME TABLE
LCR ROUTE TABLE
LCR MODIFY DIGIT TABLE
PROGRAMMED STATION MESSAGE
COPY KEY PROGRAMMING
SAVE STATION KEY PROGRAMMING
STATION KEY PROGRAMMING
SYSTEM KEY PROGRAMMING
DIAL NUMBERING PLAN
SMDR OPTIONS
VM/AA OPTIONS
ENABLE TECHNICIAN PROGRAM
CHANGE TECHNICIAN PASSCODE
CUSTOMER ACCESS MMC NUMBER
SYSTEM I/O PARAMETER
SYSTEM VERSION DISPLAY
CARD PRE-INSTALL
HALT PROCESSING
RESET SYSTEM
PROSTAR DCS COMPACT
TECHNICAL MANUAL
PROGRAMMING
PART 1 JANUARY 2001
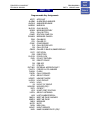
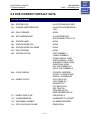
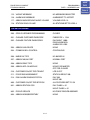
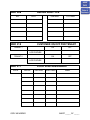
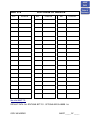
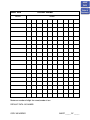
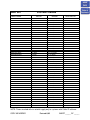
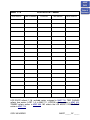
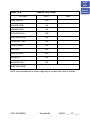
1.4 PROGRAM LIST IN NUMERICAL ORDER (V2.x)
100:
101:
102:
103:
104:
105:
106:
107:
108:
109:
110:
111:
112:
113:
114:
115:
116:
117:
118:
119:
200:
201:
202:
203:
204:
206:
207:
208:
209:
210:
211:
214:
300:
301:
302:
303:
304:
305:
306:
307:
308:
309:
310:
311:
312:
315:
400:
401:
402:
403:
STATION LOCK
CHANGE USER PASSCODE
CALL FORWARD
SET ANSWER MODE
STATION NAME
STATION SPEED DIAL
STATION SPEED DIAL NAME
KEY EXTENDER
STATION STATUS
CLOCK DISPLAY
KEYSET ON/OFF
KEYSET RING TONE
ALARM REMINDER
VIEW MEMO NUMBER
OFF-HOOK RING VOLUME
SET PROGRAMMED MESSAGE
ALARM AND MESSAGE
ASSIGN BACKGROUND MUSIC VOLUME
STATION RING VOLUME
CALLER ID DISPLAY
OPEN CUSTOMER PROGRAMMING
CHANGE CUSTOMER PASSCODE
CHANGE FEATURE PASSCODES
ASSIGN UA DEVICE
COMMON BELL CONTROL
BARGE-IN TYPE
ASSIGN VM/AA PORT
ASSIGN RING TYPE
ASSIGN ADD-ON MODULE
CUSTOMER ON/OFF PER TENANT
DOOR RING ASSIGNMENT
DISA ALARM RINGING STATION
CUSTOMER ON/OFF PER STATION
ASSIGN STATION COS
PICKUP GROUPS
ASSIGN BOSS/SECRETARY
ASSIGN EXTENSION/TRUNK USE
ASSIGN FORCED CODE
HOT LINE
ASSIGN OFF-HOOK SELECTION
ASSIGN BACKGROUND MUSIC SOURCE
ASSIGN STATION MUSIC ON HOLD
LCR CLASS OF SERVICE
ASSIGN SIM PARAMETER
ALLOW CALLER ID
CUSTOMER SET RELOCATION
CUSTOMER ON/OFF PER TRUNK
C.O./PBX LINE
TRUNK DIAL TYPE
TRUNK TOLL CLASS
404:
405:
406:
407:
408:
409:
410:
412:
414:
415:
416:
500:
501:
502:
503:
504:
505:
506:
507:
600:
601:
602:
603:
604:
605:
606:
608:
700:
701:
702:
703:
704:
705:
706:
707:
708:
709:
711:
712:
713:
714:
715:
718:
720:
721:
722:
723:
724:
1.4.1
TRUNK NAME
TRUNK NUMBER
TRUNK RING ASSIGNMENT
FORCED TRUNK RELEASE
ASSIGN TRUNK MUSIC ON HOLD SOURCE
TRUNK STATUS READ
ASSIGN DISA TRUNK
ASSIGN TRUNK SIGNAL
ASSIGN CALLER ID TRUNKS
REPORT TRUNK ABANDON DATA
ASSIGN E & M TRANSLATION
SYSTEM-WIDE COUNTERS
SYSTEM TIMERS
FORWARD NO ANSWER TIMER
TRUNK-WIDE TIMER
PULSE MAKE/BREAK RATIO
ASSIGN DATE AND TIME
TONE CADENCE
ASSIGN AUTO NIGHT TIME
ASSIGN OPERATOR GROUP
ASSIGN STATION GROUP
STATION GROUP NAME
ASSIGN TRUNK GROUP
ASSIGN STATION TO PAGE ZONE
ASSIGN EXTERNAL PAGE ZONE
ASSIGN SPEED BLOCK
ASSIGN REVIEW BLOCK
COPY COS CONTENTS
ASSIGN COS CONTENTS
TOLL DENY TABLE
TOLL ALLOWANCE TABLE
ASSIGN WILD CHARACTER
ASSIGN SYSTEM SPEED DIAL
SYSTEM SPEED DIAL BY NAME
AUTHORIZATION CODE
ACCOUNT CODE
PBX ACCESS CODE
LCR TIME TABLE
LCR ROUTE TABLE
LCR MODIFY DIGIT TABLE
DID NUMBER AND NAME TRANSLATION
PROGRAMMED STATION MESSAGE
SPECIAL CODE TABLE
COPY KEY PROGRAMMING
SAVE STATION KEY PROGRAMMING
STATION KEY PROGRAMMING
SYSTEM KEY PROGRAMMING
DIAL NUMBERING PLAN
HOME
PAGE
Table of
Contents
PROSTAR DCS COMPACT
TECHNICAL MANUAL
725:
726:
727:
728:
740:
741:
743:
745:
746:
747:
SMDR OPTIONS
VM/AA OPTIONS
SYSTEM VERSION DISPLAY
CALLER ID TRANSLATION TABLE
VM CARD RESTART
ASSIGN MAILBOX
AUTO RECORD
VM DESTINATION
VM HALT
VM DRIVE ALARM
PROGRAMMING
PART 1 JANUARY 2001
748:
749:
800:
801:
802:
804:
806:
810:
811:
1.4.2
ASSIGN VMMOH
VM PORT IN/OUT
ENABLE TECHNICIAN PROGRAM
CHANGE TECHNICIAN PASSCODE
CUSTOMER ACCESS MMC NUMBER
SYSTEM I/O PARAMETER
CARD PRE-INSTALL
HALT PROCESSING
RESET SYSTEM
HOME
PAGE
Table of
Contents
PROSTAR DCS COMPACT
TECHNICAL MANUAL
PROGRAMMING
PART 1 JANUARY 2001
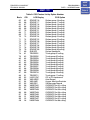
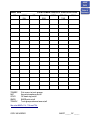
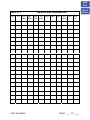
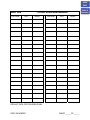
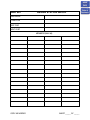
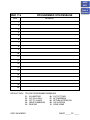
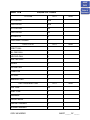
1.5 PROGRAM LIST IN ALPHABETICAL ORDER (V2.x)
ACCOUNT CODE
ADD-ON MODULE ASSIGNMENT
ALARM AND MESSAGE
ALARM REMINDER
AUTHORIZATION CODE
AUTO NIGHT TIME ASSIGNMENTS
AUTO RECORD
BACKGROUND MUSIC SOURCE
BACKGROUND MUSIC VOLUME
BARGE-IN TYPE ASSIGNMENTS
BOSS/SECRETARY ASSIGNMENTS
C.O./PBX LINE
CALL FORWARD
CALLER ID ALLOW
CALLER ID DISPLAY
CALLER ID TRUNK ASSIGNMENTS
CARD PRE-INSTALL
CHANGE CUSTOMER PASSCODE
CHANGE FEATURE PASSCODES
CID REVIEW BLOCK ASSIGNMENTS
CID TRANSLATION TABLE
CLOCK DISPLAY
COMMON BELL CONTROL
COPY COS CONTENTS
COPY KEY PROGRAMMING
COS CONTENTS ASSIGNMENTS
CUSTOMER ACCESS MMC NUMBER
CUSTOMER ON/OFF PER STATION
CUSTOMER ON/OFF PER TENANT
CUSTOMER ON/OFF PER TRUNK
CUSTOMER SET RELOCATION
DATE AND TIME ASSIGNMENT
DIAL NUMBERING PLAN
DID TRANSLATION NAME & NUMBER
DISA ALARM RINGING STATION
DISA TRUNK ASSIGNMENT
DOOR RING ASSIGNMENT
E & M TRANSLATIONS
EXTENSION/TRUNK USE ASSIGNMENTS
EXTERNAL PAGE ZONE RELAY
FORCED CODE ASSIGNMENTS
FORCED TRUNK RELEASE
FORWARD NO ANSWER TIMER
HALT PROCESSING
HOT LINE
KEY EXTENDER
KEYSET ON/OFF
KEYSET RING TONE
LCR CLASS OF SERVICE
LCR DIGIT TABLE
708
209
116
112
707
507
743
308
117
206
303
401
102
312
119
414
806
201
202
608
728
109
204
700
720
701
802
300
210
400
315
505
724
714
214
410
211
416
304
605
305
407
502
810
306
107
110
111
310
710
LCR MODIFY DIGIT TABLE
LCR ROUTE TABLE
LCR TIME TABLE
MAILBOX ASSIGNMENT
OFF-HOOK RING VOLUME
OFF-HOOK SELECTION ASSIGNMENTS
OPEN CUSTOMER PROGRAMMING
OPERATOR GROUP ASSIGNMENTS
PBX ACCESS CODE
PICKUP GROUPS
PULSE MAKE/BREAK RATIO
RESET SYSTEM
RING TYPE ASSIGNMENTS
SAVE STATION KEY PROGRAMMING
SET ANSWER MODE
SET PROGRAMMED MESSAGE
SIM PARAMETERS
SMDR PRINT OPTIONS
SPECIAL CODE TABLE
SPEED BLOCK
SPEED DIAL BY NAME (SYSTEM)
SPEED DIAL SYSTEM
STATION COS ASSIGNMENT
STATION GROUP ASSIGNMENTS
STATION GROUP NAME
STATION KEY PROGRAMMING
STATION LOCK
STATION MESSAGE PROGRAM
STATION MUSIC ON HOLD
STATION NAME
STATION RING VOLUME
STATION SPEED DIAL
STATION SPEED DIAL NAME
STATION STATUS
STATION TO PAGE ZONE
STATION USER PASSCODE
SYSTEM I/O PARAMETER
SYSTEM TIMERS
SYSTEM VERSION DISPLAY
SYSTEM WIDE KEY PROGRAMMING
SYSTEM-WIDE COUNTERS
TECHNICIAN PASSCODE
TECHNICIAN PROGRAMING
TOLL ALLOWANCE TABLE
TOLL DENY TABLE
TONE CADENCE
TRUNK ABANDON DATA REPORT
TRUNK DIAL TYPE
TRUNK GROUP ASSIGNMENTS
1.5.1
733
712
711
741
114
307
200
600
709
302
504
811
208
721
103
115
311
725
718
606
706
705
301
601
602
722
100
715
309
104
118
105
106
108
604
101
804
501
727
723
500
801
800
703
702
506
415
402
603
HOME
PAGE
Table of
Contents
PROSTAR DCS COMPACT
TECHNICAL MANUAL
TRUNK MUSIC ON HOLD SOURCE
TRUNK NAME
TRUNK NUMBER
TRUNK RING ASSIGNMENT
TRUNK SIGNALING
TRUNK STATUS READ
TRUNK TOLL CLASS
TRUNK-WIDE TIMER
UA DEVICE ASSIGNMENTS
VIEW MEMO NUMBER
PROGRAMMING
PART 1 JANUARY 2001
408
404
405
406
412
409
403
503
203
113
VM/AA PORT ASSIGNMENTS
VM/AA OPTIONS
VM CARD RESTART
VM DESTINATION
VM DRIVE ALARM
VM HALT
VMMOH ASSIGNMENT
VM PORT IN/OUT
WILD CHARACTER ASSIGNMENTS
1.5.2
207
726
740
745
747
746
748
749
704
HOME
PAGE
Table of
Contents
PROSTAR DCS COMPACT
TECHNICAL MANUAL
PROGRAMMING
PART 1 JANUARY 2001
Table of
Contents
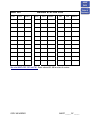
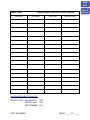
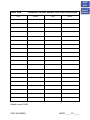
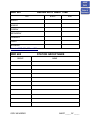
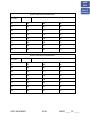
1.6 MMC’S ASSOCIATED BY CATEGORY (V2.x)
KEYSET USER OPTIONS
ALARM AND MESSAGE
ALARM REMINDER
BACKGROUND MUSIC VOLUME
CALL FORWARD
CALLER ID DISPLAY
CLOCK DISPLAY
KEY EXTENDER
KEYSET ON/OFF
KEYSET RING TONE
OFF-HOOK RING VOLUME
116
112
117
102
119
109
107
110
111
114
SET ANSWER MODE
SET PROGRAMMED MESSAGE
STATION LOCK
STATION NAME
STATION RING VOLUME
STATION SPEED DIAL
STATION SPEED DIAL NAME
STATION STATUS
STATION USER PASSCODE
VIEW MEMO NUMBER
103
115
100
104
118
105
106
108
101
113
209
206
728
201
214
211
200
RING TYPE ASSIGNMENTS
SMDR OPTIONS
SYSTEM VERSION DISPLAY
UA DEVICE ASSIGNMENTS
VM/AA OPTIONS
VM/AA PORT ASSIGNMENTS
208
725
727
203
726
207
312
308
303
720
300
315
304
305
306
LCR CLASS OF SERVICE
OFF-HOOK SELECTION
PROGRAMMED STATION MESSAGE
SAVE STATION KEY PROGRAMMING
SIM PARAMETER
STATION COS ASSIGNMENTS
STATION KEY PROGRAMMING
STATION MUSIC ON HOLD
SYSTEM KEY PROGRAMMING
310
307
715
721
311
301
722
309
723
401
414
400
410
416
407
415
402
TRUNK MUSIC ON HOLD SOURCE
TRUNK NAME
TRUNK NUMBER
TRUNK RING ASSIGNMENT
TRUNK SIGNAL TYPE
TRUNK STATUS READ
TRUNK TOLL CLASS
408
404
405
406
412
409
403
SYSTEM LEVEL PROGRAMS
ADD-ON MODULE ASSIGNMENT
BARGE-IN TYPE
CALLER ID TRANSLATION TABLE
CHANGE CUSTOMER PASSCODE
DISA ALARM RINGING STATION
DOOR RING ASSIGNMENT
OPEN CUSTOMER PROGRAMMING
STATION LEVEL PROGRAMS
ALLOW CALLER ID
BACKGROUND MUSIC SOURCE
BOSS/SECRETARY ASSIGNMENT
COPY KEY PROGRAMMING
CUSTOMER ON/OFF PER STATION
CUSTOMER SET RELOCATION
EXTENSION/TRUNK USE ASSIGNMENT
FORCED CODE ASSIGNMENT
HOT LINE
TRUNK LEVEL PROGRAMS
C.O./PBX LINE
CALLER ID TRUNKS
CUSTOMER ON/OFF PER TRUNK
DISA TRUNK ASSIGNMENT
E & M TRANSLATION
FORCED TRUNK RELEASE
REPORT TRUNK ABANDON DATA
TRUNK DIAL TYPE
1.6.1
HOME
PAGE
PROSTAR DCS COMPACT
TECHNICAL MANUAL
PROGRAMMING
PART 1 JANUARY 2001
Table of
Contents
TIMER OPTIONS
AUTO NIGHT TIME
DATE AND TIME
FORWARD NO ANSWER TIMER
PULSE MAKE/BREAK RATIO
507
505
502
504
SYSTEM TIMERS
SYSTEM-WIDE COUNTERS
TONE CADENCE
TRUNK-WIDE TIMER
501
500
506
503
GROUP / BLOCK / ZONE PROGRAMMING
EXTERNAL PAGE ZONE
OPERATOR GROUP
PICKUP GROUPS
REVIEW BLOCK ASSIGNMENT
SPEED BLOCK ASSIGNMENT
605
600
302
608
606
STATION GROUP NAME
STATION GROUP PROGRAMMING
STATION PAGE ZONE
TRUNK GROUP PROGRAMMING
602
601
604
603
708
707
700
701
724
714
PBX ACCESS CODE
SPECIAL CODE TABLE
SYSTEM SPEED DIAL BY NAME
SYSTEM SPEED DIAL PROGRAMMING
TOLL ALLOWANCE TABLE
709
718
706
705
703
806
801
802
800
HALT PROCESSING
RESET SYSTEM
SYSTEM I/O PARAMETER
810
811
804
710
713
712
LCR TIME TABLE
DIAL NUMBERING PLAN
711
724
743
741
746
740
VM DESTINATION
VM DRIVE ALARM
VMMOH ASSIGNMENT
VM PORT IN/OUT
745
747
748
749
SYSTEM TABLES
ACCOUNT CODE
AUTHORIZATION CODE
COPY COS CONTENTS
COS CONTENTS PROGRAMMING
DIAL NUMBERING PLAN
DID NUMBER AND NAME TRANSLATION
TECHNICIAN ONLY PROGRAMS
CARD PRE-INSTALL
CHANGE TECHNICIAN PASSCODE
CUSTOMER ACCESS MMC NUMBER
ENABLE TECHNICIAN PROGRAM
LCR PROGRAMS
LCR DIGIT TABLE
LCR MODIFY DIGIT TABLE
LCR ROUTE TABLE
CADENCE / SVMi-4
AUTO RECORD
MAILBOX ASSIGNMENT
VM CARD HALT
VM CARD RESTART
HOME
PAGE
1.6.2
PROSTAR DCS COMPACT
TECHNICAL MANUAL
PROGRAMMING
PART 2 NOVEMBER 1997
PART 2. PROGRAMMING PROCEDURES
2.1 PROGRAM PROCEDURES
THE FOLLOWING INSTRUCTIONS FOR EACH MMC ASSUME THAT YOU HAVE
ALREADY OPENED PROGRAMMING.
HELPFUL HINT:
When you are finished programming in MMCs 100–811 and have other programming
to do, press SPK to exit the MMC but stay in the programming mode and use one of
the following methods.
1. Dial another MMC code directly and continue programming.
2. Press VOLUME UP and DOWN keys to scroll through all MMC codes. When the
desired MMC code is reached, press SPK and continue programming.
Pressing TRSF will always save changes and exit the programming mode.
2.1.1
HOME
PAGE
Table of
Contents
PROSTAR DCS COMPACT
TECHNICAL MANUAL
PROGRAMMING
PART 2 DECEMBER 1994
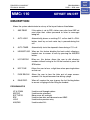
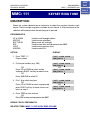
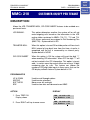
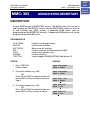
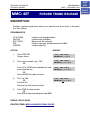
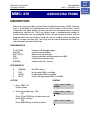
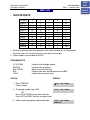
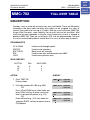
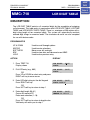
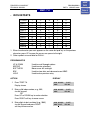
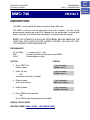
MMC: 100
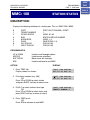
STATION LOCK
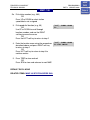
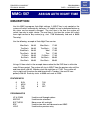
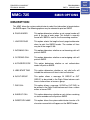
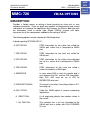
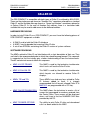
DESCRIPTION:
Allows the system administrator or technician to lock or unlock an individual station
or all stations simultaneously. The two options are as follows:
0
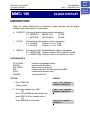
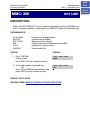
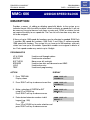
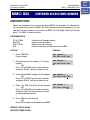
UNLOCKED
Unlocks a locked station
1
LOCKED
Locks an unlocked station
PROGRAM KEYS
UP & DOWN
KEYPAD
SOFT KEYS
SPK
HOLD
ANS/RLS
Used to scroll through options
Used to enter selections
Move cursor left and right
Used to store data and advance to next MMC
Used to clear previous entry
Used to select ALL
ACTION
DISPLAY
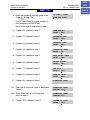
1. Press TRSF 100
Display shows
[201] STN LOCK
UNLOCKED
2. Dial station number (e.g., 205)
OR
Use UP and DOWN to select station
and use RIGHT soft key to move
cursor
OR
Press ANS/RLS to select all stations
[205] STN LOCK
UNLOCKED
3. Enter 0 to unlock or 1 to lock (e.g., 1)
OR
Press UP or DOWN key to make
selection and press RIGHT soft key
to return to step 2
[205] STN LOCK
LOCKED
[ALL] STN LOCK
??
HOME
PAGE
Table of
Contents
PROSTAR DCS COMPACT
TECHNICAL MANUAL
PROGRAMMING
PART 2 DECEMBER 1994
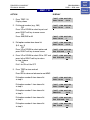
MMC: 100
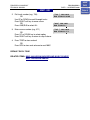
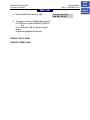
4. Press TRSF to save and exit
OR
Press SPK to save and advance to next MMC
DEFAULT DATA: ALL STATIONS UNLOCKED
RELATED ITEMS: STATION USER PROGRAMMING
HOME
PAGE
Table of
Contents
PROSTAR DCS COMPACT
TECHNICAL MANUAL
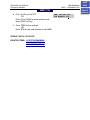
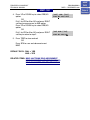
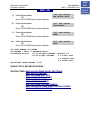
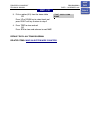
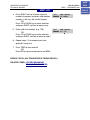
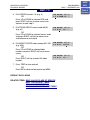
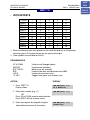
MMC: 101
PROGRAMMING
PART 2 DECEMBER 1994
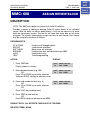
CHANGE USER PASSCODE
DESCRIPTION:
Allows the system administrator or technician to reset any keyset’s passcode to its
default value of “1234.” This MMC cannot display station passcodes; it can only
reset them to default.
Keyset users can set or change their individual passcodes. The passcode is used to
lock or unlock the keyset for toll restriction override and to access the DISA feature.
NOTE: Default passcodes cannot be used for toll restriction override or for DISA access.
PROGRAM KEYS
UP & DOWN
KEYPAD
SOFT KEYS
SPK
HOLD
Used to scroll through options
Used to enter selections
Move cursor left and right
Used to store data and advance to next MMC
Used to clear previous entry
ACTION
DISPLAY
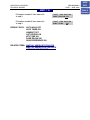
1. Press TRSF 101
Display shows
[201] PASSCODE
PASSCODE:****
2. Dial keyset number (e.g., 205)
OR
Use UP or DOWN to scroll through
keyset numbers and press RIGHT
soft key to move the cursor right
[205] PASSCODE
PASSCODE:****
3. Press HOLD to reset passcode
[205] PASSCODE
PASSCODE : 1234
4. Press TRSF to store and exit
OR
Press SPK to store and advance to next MMC
DEFAULT DATA: ALL STATION PASSCODES = 1234
RELATED ITEMS: MMC 100 STATION LOCK
HOME
PAGE
Table of
Contents
PROSTAR DCS COMPACT
TECHNICAL MANUAL
PROGRAMMING
PART 2 NOVEMBER 1997
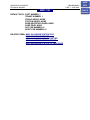
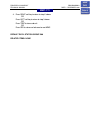
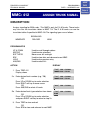
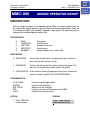
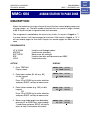
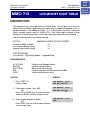
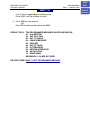
MMC: 102
CALL FORWARD
DESCRIPTION:
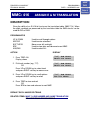
Allows the system administrator to program the call forward destinations for other
station users. The MMC also allows the call forward to be set after the destination
has been entered.
The DCS COMPACT system allows five types of call forwarding: FORWARD ALL,
FORWARD NO ANSWER, FORWARD BUSY, FORWARD FOLLOW ME and
FORWARD EXTERNAL. There is an additional option, FORWARD BUSY/NO
ANSWER, that allows both of these options to be activated at the same time,
provided that destinations have been entered for both.
0 = FORWARD CANCEL
1 = ALL CALL
2 = BUSY
3 = NO ANSWER
4 = BUSY/NO ANSWER
5 = DND AUTO
6 = EXT
PROGRAM KEYS
UP & DOWN
KEYPAD
SOFT KEYS
SPK
HOLD
Used to scroll through options
Used to enter selections
Move cursor left and right
Used to store data and advance to next MMC
Used to clear previous entry
ACTION
DISPLAY
1. Press TRSF 102
Display shows
[201] FORWARD
0:FORWARD CANCEL
2. Dial station number (e.g., 205)
OR
Press UP or DOWN to select station
and press RIGHT soft key to move cursor
[205] FORWARD
0:FORWARD CANCEL
3. Dial 0–5 to select forward type
OR
Press UP or DOWN to select forward type
and press RIGHT soft key to move cursor
[205] FORWARD
1:ALL CALL:NONE
HOME
PAGE
Table of
Contents
PROSTAR DCS COMPACT
TECHNICAL MANUAL
PROGRAMMING
PART 2 NOVEMBER 1997
HOME
PAGE
Table of
Contents
MMC: 102
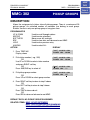
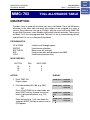
4. Dial destination number (e.g., 201)
OR
Press UP or DOWN to select destination
and press RIGHT soft key to move cursor
[205] FORWARD
1:ALL CALL:201
5. Dial 1 for YES, 0 for NO
OR
Press UP or DOWN to select YES or
NO and press RIGHT soft key to
return to step 2
[205] FORWARD
CURENTLY SET :YES
6. Press TRSF to store and exit
OR
Press SPK to store and advance
to next MMC
DEFAULT DATA: NONE
RELATED ITEMS: MMC 301 ASSIGN STATION COS
MMC 501 SYSTEM TIMERS
MMC 502 FORWARD NO ANSWER TIMER
MMC 701 ASSIGN COS CONTENTS
MMC 722 STATION KEY PROGRAMMING
MMC 723 SYSTEM KEY PROGRAMMING
PROSTAR DCS COMPACT
TECHNICAL MANUAL
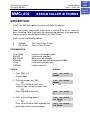
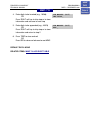
MMC: 103
PROGRAMMING
PART 2 DECEMBER 1994
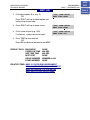
SET ANSWER MODE
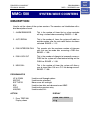
DESCRIPTION:
Allows a system administrator to change the answer mode of any keyset or add-on
module. Each keyset or add-on module can have its answer mode set to one of the
following options:
0. RING: The keyset will ring in one of eight custom ring patterns. Calls are
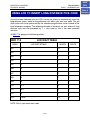
answered by pressing the ANS/RLS key or by lifting the handset.
1. AUTO: After giving a short attention tone, the keyset will automatically answer
calls on the speakerphone. When a C.O. line is transferred to a keyset in Auto
Answer, the screened portion of the call will be Auto Answer, but the keyset or addon module (AOM) will ring when the transfer is complete if the user has not pressed
the ANS/RLS key or lifted the handset.
2.. VOICE: The keyset will not ring. After a short attention tone, callers can make an
announcement but the ANS/RLS key or handset must be used to answer calls.
NOTE: As the Basic 12B keyset is not a speakerphone, if it is set for Auto Answer, it
will operate as if it is in Voice Announce mode. The Basic 12B keyset user must use
the handset to speak to the calling party.
PROGRAM KEYS
UP & DOWN
KEYPAD
SOFT KEYS
SPK
HOLD
ANS/RLS
Used to scroll through options
Used to enter selections
Move cursor left and right
Used to store data and advance to next MMC
Used to clear previous entry
Used to select ALL
ACTION
DISPLAY
1. Press TRSF 103
Display shows
[201] ANS MODE
RING MODE
2. Dial keyset number (e.g., 205)
OR
Press UP or DOWN to select keyset
and press RIGHT soft key to move cursor
OR
Press ANS/RLS to select All
[205] ANS MODE
RING MODE
[ALL] ANS MODE
?
HOME
PAGE
Table of
Contents
PROSTAR DCS COMPACT
TECHNICAL MANUAL
PROGRAMMING
PART 2 DECEMBER 1994
MMC: 103
[205] ANS MODE
3. Dial 0, 1 or 2 to change ring mode
VOICE ANNOUNCE
OR
Press UP or DOWN to select ring mode and
press RIGHT soft key to return to step 2
above
4. Press TRSF to store and exit
OR
Press SPK to store and advance
to next MMC
DEFAULT DATA: ALL KEYSETS RING
RING FREQUENCY DEFAULT IS 5
RELATED ITEMS: MMC 111 KEYSET RING TONE
HOME
PAGE
Table of
Contents
PROSTAR DCS COMPACT
TECHNICAL MANUAL
PROGRAMMING
PART 2 JANUARY 2002
MMC: 104
STATION NAME
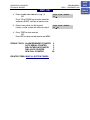
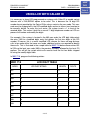
DESCRIPTION:
Allows the system administrator or technician to enter a character name to identify
an individual station. There are ten characters for Version 1 software. There are 11
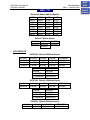
characters for Version 2 software.
Names are written using the keypad. Each key press selects a character. Pressing
the dial pad key moves the cursor to the next position. For example, if the directory
name is “SAM SMITH,” press the number “7” three times to get the letter “S.” Press
the number “2” once to get the letter “A.” Continue selecting characters from the
table below to complete your message. Pressing the bottom left programmable key
will change the letter from upper case to lower case.
NOTE: When the character you want appears on the same dial pad key as the
previous character, press the UP key to move the cursor to the right.
•
DCS KEYSETS
COUNT
DIAL 0
DIAL 1
DIAL 2
DIAL 3
DIAL 4
DIAL 5
DIAL 6
DIAL 7
DIAL 8
DIAL 9
DIAL
1
Q
space
A
D
G
J
M
P
T
W
:
2
Z
?
B
E
H
K
N
R
U
X
=
3
.
,
C
F
I
L
O
S
V
Y
[
4
)
!
@
#
$
%
^
&
(
]
5
0
1
2
3
4
5
6
7
8
9
The # key can be used for the following special characters: #, space, &, !, :, ?, ., %,
$, -, <, >, /, =, [, ], @, ^, (, ), _, +, {, }, |, ;, \, " and ~.
HOME
PAGE
Table of
Contents
PROSTAR DCS COMPACT
TECHNICAL MANUAL
PROGRAMMING
PART 2 JANUARY 2002
Table of
Contents
MMC: 104
•
iDCS KEYSETS
COUNT
DIAL 0
DIAL 1
DIAL 2
DIAL 3
DIAL 4
DIAL 5
DIAL 6
DIAL 7
DIAL 8
DIAL 9
DIAL
1
2
3
4
5
<
space
A
D
G
J
M
P
T
W
:
>
?
B
E
H
K
N
Q
U
X
=
.
,
C
F
I
L
O
R
V
Y
[
)
!
@
#
$
%
^
S
0
1
2
3
4
5
6
7
8
9
Z
]
1. When the character you want appears on the same dial pad key as the previous
character, press UP to move the cursor one space to the right.
2. Other symbols are available for DIAL #.
PROGRAM KEYS
UP & DOWN
KEYPAD
SOFT KEYS
SPK
HOLD
A
Used to scroll through options
Used to enter selections
Move cursor left and right
Used to store data and advance to next MMC
Used to clear previous entry
Key 19; acts as toggle between upper case and lower case
ACTION
HOME
PAGE
DISPLAY
1. Press TRSF 104
Display shows
[201] STN NAME
2. Dial the station number (e.g., 205)
OR
Press UP or DOWN to select station
and press RIGHT soft key to move cursor
[205] STN NAME
_
3. Enter the station name using the procedure
described above
Press the RIGHT soft key to return to step 2
[205] STN NAME
SAM SMITH
PROSTAR DCS COMPACT
TECHNICAL MANUAL
PROGRAMMING
PART 2 JANUARY 2002
MMC: 104
4. Press TRSF to store and exit
OR
Press SPK to store and advance to next MMC
DEFAULT DATA: NONE
RELATED ITEMS: “A” BUTTON IS BUTTON #19 ON KEYSET
HOME
PAGE
Table of
Contents
PROSTAR DCS COMPACT
TECHNICAL MANUAL
PROGRAMMING
PART 2 APRIL 1995
MMC: 105
STATION SPEED DIAL
DESCRIPTION:
Allows the system administrator or technician to program the personal speed dial
locations assigned to a station. This must be done for single line telephones
because these stations cannot access programming. Each station may have up to
50 locations or bins assigned to it in MMC 606 Assign Speed Block. The speed dial
bins are numbered 00–49. Each speed dial number consists of a trunk or trunk
group access code followed by a separator and up to 18 digits to be dialed. These
dialed digits may consist of 0–9, 4 and #. If the system recognizes a valid trunk or
trunk group access number, it will automatically insert the separator.
PROGRAM KEYS
UP & DOWN
KEYPAD
SOFT KEYS
SPK
HOLD
B
C
D
E
F
Used to scroll through options
Used to enter selections
Move cursor left and right
Used to store data and advance to next MMC
Used to clear previous entry
Used to insert a flash code “F”
Used to insert a pause code “P”
Used to insert a pulse/tone conversion code “C”
Used to mask/unmask following digits (shows as “[” or “]”)
Used to enter name for speed dial bin (see MMC 106)
ACTION
1. Press TRSF 105
Display shows
DISPLAY
[201] SPEED DIAL
00 :
2a. Dial station number (e.g. 205)
OR
Press UP or DOWN to select station
and press RIGHT soft key to move cursor
OR
Press LEFT soft key to go to step 4
[205] SPEED DIAL
00 :
2b. If selected station has no speed dial
bins, the display will be as shown and
a new station may be selected
[205] SPEED DIAL
SPDBLK NOT EXIST
HOME
PAGE
Table of
Contents
PROSTAR DCS COMPACT
TECHNICAL MANUAL
PROGRAMMING
PART 2 APRIL 1995
HOME
PAGE
Table of
Contents
MMC: 105
3. Dial location number (e.g., 05)
OR
Press UP or DOWN to select location
and press RIGHT soft key to move cursor
OR
Press LEFT soft key to return to step 2
[205] SPEED DIAL
05: _
4. Enter trunk access code (e.g., 9)
followed by the number to be dialed
(e.g., 4264100)
OR
Press the RIGHT soft key to return to step 2
OR
Press the LEFT soft key to return to step 3
[205] SPEED DIAL
05 : 9-4264100_
Press HOLD button to clear an entry
If an error is made, use DOWN arrow to step
back
5. Press “F” button to access MMC 106 Station
Speed Dial by Name
OR
Press TRSF to save and exit
OR
Press SPK to save and advance to next MMC
DEFAULT DATA: NONE
RELATED ITEMS: MMC 106 STATION SPEED DIAL NAME
MMC 606 ASSIGN SPEED BLOCK
PROSTAR DCS COMPACT
TECHNICAL MANUAL
PROGRAMMING
PART 2 JANUARY 2002
MMC: 106
STATION SPEED DIAL NAME
DESCRIPTION:
Allows a character name to be entered for each personal speed dial location. This
name enables the speed dial number to be located when the directory dial feature
is used. The directory dial feature allows the display keyset user to select a speed
dial location by viewing its name. There are ten characters for Version 1 software.
There are 11 characters for Version 2 software.
Names are written using the keypad. Each press of a key selects a character.
Pressing the dial keypad moves the cursor to the next position. For example, if the
directory name is “SAM SMITH,” press the number “7” three times to get the letter
“S.” Press the number “2” once to get the letter “A.” Continue selecting characters
from the table below to complete your message. Pressing the bottom left
programmable key changes the letter from upper case to lower case.
NOTE: When the character you want appears on the same dial pad key as the
previous character, press the UP key to move the cursor to the right.
•
DCS KEYSETS
COUNT
DIAL 0
DIAL 1
DIAL 2
DIAL 3
DIAL 4
DIAL 5
DIAL 6
DIAL 7
DIAL 8
DIAL 9
DIAL
1
Q
space
A
D
G
J
M
P
T
W
:
2
Z
?
B
E
H
K
N
R
U
X
=
3
.
,
C
F
I
L
O
S
V
Y
[
4
)
!
@
#
$
%
^
&
(
]
5
0
1
2
3
4
5
6
7
8
9
The # key can be used for the following special characters: #, space, &, !, :, ?, ., %,
$, -, <, >, /, =, [, ], @, ^, (, ), _, +, {, }, |, ;, \, " and ~.
HOME
PAGE
Table of
Contents
PROSTAR DCS COMPACT
TECHNICAL MANUAL
PROGRAMMING
PART 2 JANUARY 2002
Table of
Contents
MMC: 106
•
iDCS KEYSETS
COUNT
DIAL 0
DIAL 1
DIAL 2
DIAL 3
DIAL 4
DIAL 5
DIAL 6
DIAL 7
DIAL 8
DIAL 9
DIAL
1
2
3
4
5
<
space
A
D
G
J
M
P
T
W
:
>
?
B
E
H
K
N
Q
U
X
=
.
,
C
F
I
L
O
R
V
Y
[
)
!
@
#
$
%
^
S
0
1
2
3
4
5
6
7
8
9
Z
]
1. When the character you want appears on the same dial pad key as the previous
character, press UP to move the cursor one space to the right.
2. Other symbols are available for DIAL #.
PROGRAM KEYS
UP & DOWN
KEYPAD
SOFT KEYS
SPK
HOLD
A
Used to scroll through options
Used to enter selections
Move cursor left and right
Used to store data and advance to next MMC
Used to clear previous entry
Key 19; acts as toggle between upper case and lower case
ACTION
1. Press TRSF 106
Display shows
2a. Dial station number (e.g., 205)
OR
Press UP or DOWN to select station
and press RIGHT soft key to move cursor
HOME
PAGE
DISPLAY
[201] SPEED NAME
00:
[205] SPEED NAME
00:
[305] SPEED NAME
SPDBLK NOT EXIST
PROSTAR DCS COMPACT
TECHNICAL MANUAL
PROGRAMMING
PART 2 JANUARY 2002
Table of
Contents
MMC: 106
2b. Dial station number (e.g., 305)
OR
Press UP or DOWN to select station
speed blocks not assigned
3. Dial speed dial location (e.g., 05)
OR
Use UP or DOWN to scroll through
location numbers and use the RIGHT
soft key to move the cursor
OR
Press the LEFT soft key to return to step 2
[205] SPEED NAME
01:_
4. Enter the location name using the procedures
described above and press RIGHT soft key
to return to step 2
OR
Press LEFT soft key to return to step 3 to
continue entries
[205] SPEED NAME
01:SAM SMITH
5. Press TRSF to store and exit
OR
Press SPK to store and advance to next MMC
DEFAULT DATA: NONE
RELATED ITEMS: MMC 105 STATION SPEED DIAL
HOME
PAGE
PROSTAR DCS COMPACT
TECHNICAL MANUAL
PROGRAMMING
PART 2 DECEMBER 1994
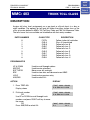
MMC: 107
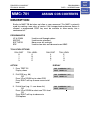
KEY EXTENDER
DESCRIPTION:
Use this program to view the programmable keys assigned to keyset station. In
addition, it allows the system administrator to assign key extenders to some keys that
will make a general access feature key more specific. The feature keys that can have
extenders are listed below.
FEATURE KEY
BOSS
DIR
DP
DS
FWRD
GPIK
MMP
PAGE
SG
SPD
PSM
EXTENDER
Boss and Secretary (1–4)
Directory dial by name type (1–3)
Direct Pickup (extension or station group number)
Direct Station Select (station number)
Call Forward (0–5)
Group Pickup (01–20)
Meet Me Page (0–9, )
Page (0–9, )
Station Group (500–529)
Speed Dial (00–49, 500–999)
Programmed Station Message (01–20)
PROGRAM KEYS
UP & DOWN
KEYPAD
SOFT KEYS
SPK
HOLD
Used to scroll through options
Used to enter selections
Move cursor left and right
Used to store data and advance to next MMC
Used to clear previous entry
ACTION
DISPLAY
1. Press TRSF 107
Display shows first station
[201] KEY EXTEND
01:CALL1
2. Dial station number (e.g., 205)
OR
Use UP or DOWN to scroll through
station numbers and press RIGHT
soft key to move the cursor
[205] KEY EXTEND
01:CALL1
HOME
PAGE
Table of
Contents
PROSTAR DCS COMPACT
TECHNICAL MANUAL
PROGRAMMING
PART 2 DECEMBER 1994
HOME
PAGE
Table of
Contents
MMC: 107
3. Enter key number (e.g., 18)
OR
Use UP and DOWN to scroll through
keys and use RIGHT soft key to
move the cursor
OR
Press the key to be programmed
Dial extender according to above table
System will return to this step
If no more entries, press LEFT soft
key to return to step 2
[205] KEY EXTEND
18:DS
4. Press TRSF to store and exit
OR
Press SPK to store and advance to next MMC
[205] KEY EXTEND
18:DS 207
DEFAULT DATA: NONE
RELATED ITEMS: MMC 720 COPY KEY PROGRAMMING
MMC 721 SAVE STATION KEY PROGRAMMING
MMC 722 STATION KEY PROGRAMMING
MMC 723 SYSTEM KEY PROGRAMMING
MMC 724 DIAL NUMBERING PLAN
NOTE: When the RIGHT soft key will not move the cursor to the right, you are
attempting to add an extender to a key that cannot have one.
PROSTAR DCS COMPACT
TECHNICAL MANUAL
PROGRAMMING
PART 2 JUNE 2001
MMC: 108
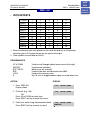
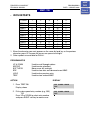
STATION STATUS
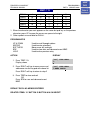
DESCRIPTION:
Displays the following attributes of a station port. This is a READ ONLY MMC.
0
1
2
3
4
5
6
7
PORT
TENANT NUMBER
PICKUP GROUP
SGR
BOSS-SECR
PAGE:
DAY COS NO
NIGHT COS NO
PORT, SLOT-CHANNEL, OFSET.
1
NONE, 01–30
STATION GROUP NUMBER
NONE, 1–4
PAGE ZONE (1–4)
COS (01–30)
COS (01–30)
PROGRAM KEYS
UP & DOWN
KEYPAD
SOFT KEYS
SPK
Used to scroll through options
Used to enter selections
Move cursor left and right
Used to advance to next MMC
ACTION
DISPLAY
1. Press TRSF 108
Display shows first station
[201] STN STATUS
P07:S2-01 OFS:01
2. Dial station number (e.g., 205)
OR
Press UP or DOWN to select station
and press RIGHT soft key to move cursor
[205] STN STATUS
P15:S1-09 OFS:01
3. Dial 0–7 to select station status type
OR
Press UP or DOWN to select status and
press RIGHT soft key to return to step 2
[205] STN STATUS
TENANT NUMBER:1
4. Press TRSF to exit
OR
Press SPK to advance to next MMC
HOME
PAGE
Table of
Contents
PROSTAR DCS COMPACT
TECHNICAL MANUAL
PROGRAMMING
PART 2 JUNE 2001
MMC: 108
DEFAULT DATA: PORT NUMBER: ?
TENANT NUMBER: 1
PICKUP GROUP: NONE
STATION GROUP: NONE
BOSS/SECRETARY PAIRS: NONE
PAGE ZONE: NONE
DAY COS NUMBER: 01
NIGHT COS NUMBER: 01
RELATED ITEMS: MMC 301 ASSIGN STATION COS
MMC 302 PICKUP GROUPS
MMC 303 ASSIGN BOSS/SECRETARY
MMC 601 ASSIGN STATION GROUP
MMC 604 ASSIGN STATION TO PAGE ZONE
HOME
PAGE
Table of
Contents
PROSTAR DCS COMPACT
TECHNICAL MANUAL
PROGRAMMING
PART 2 DECEMBER 1994
MMC: 109
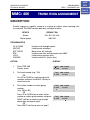
CLOCK DISPLAY
DESCRIPTION:
Allows the system administrator or technician to select the date and time display
mode on a per-station basis or system-wide.
0
COUNTRY Sets overall display format and has two options
0 = ORIENTAL
MM/DD DAY
HH:MM
1 = WESTERN
DAY DD MON
HH:MM
1
CLOCK
Sets format of clock display and has two options
0 = 12 HOUR
Displays 1 P.M. as 01:00
1 = 24 HOUR
Displays 1 P.M. as 13:00
2
DISPLAY
Sets format of DAY and MON display and has two options
0 = UPPER CASE Displays Friday as FRI and March as MAR
1 = LOWER CASE Displays Friday as Fri and March as Mar
PROGRAM KEYS
UP & DOWN
KEYPAD
SOFT KEYS
SPK
HOLD
ANS/RLS
Used to scroll through options
Used to enter selections
Move cursor left and right
Used to store data and advance to next MMC
Used to clear previous entry
Used to select ALL
ACTION
DISPLAY
1. Press TRSF 109
Display shows
[201] DAY FORMAT
COUNTRY:WESTERN
2. Dial station number (e.g., 205)
OR
Press UP or DOWN to select station and
press RIGHT soft key to move cursor
OR
Press ANS/RLS for all keysets
[205] DAY FORMAT
COUNTRY:WESTERN
[ALL]DAY FORMAT
COUNTRY:?
HOME
PAGE
Table of
Contents
PROSTAR DCS COMPACT
TECHNICAL MANUAL
PROGRAMMING
PART 2 DECEMBER 1994
Table of
Contents
MMC: 109
3. Dial 0–2 to select mode
OR
Use UP and DOWN to scroll through
modes and press RIGHT soft key to
move cursor
HOME
PAGE
[205] DAY FORMAT
COUNTRY:ORIENTAL
4. Use UP or DOWN to scroll through
formats and press RIGHT soft key
to return to step 2
OR
Press LEFT soft key to return to step 3
5. Press TRSF to store and exit
OR
Press SPK to store and advance to
next MMC
DEFAULT DATA: COUNTRY: WESTERN
CLOCK: 12 HOUR CLOCK
DISPLAY: LOWERCASE
RELATED ITEMS: MMC 505 ASSIGN DATE AND TIME
PROSTAR DCS COMPACT
TECHNICAL MANUAL
MMC: 110
PROGRAMMING
PART 2 APRIL 2002
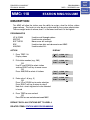
KEYSET ON/OFF
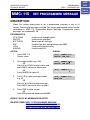
DESCRIPTION:
Allows the system administrator to set any of the keyset features listed below.
1.
AME PSWD
If this option is set to YES, station users who have AME set
must enter their station password to listen to messages
being left.
2.
AUTO HOLD
Automatically places an existing C.O. call on hold if a CALL
button, trunk key or trunk route key is pressed during that
call.
3.
AUTO TIMER
Automatically starts the stopwatch timer during a C.O. call.
4.
HEADSET USE
When on, this feature disables the hook switch allowing a
headset user to answer all calls by pressing the ANS/RLS
button.
5.
HOT KEYPAD
When on, this feature allows the user to dial directory
numbers without having to first lift the handset or press the
SPK button.
6.
KEY TONE
Allows the user to hear a slight tone when pressing buttons
on their set.
7.
PAGE REJOIN
Allows the user to hear the latter part of page announcements if his keyset becomes free during a page.
8.
RING PREF.
When off, requires the user to press the fast flashing button
to answer a ringing call after lifting the handset.
PROGRAM KEYS
UP & DOWN
KEYPAD
SOFT KEYS
SPK
HOLD
ANS/RLS
Used to scroll through options
Used to enter selections
Move cursor left and right
Used to store data and advance to next MMC
Used to clear previous entry
Used to select ALL
HOME
PAGE
Table of
Contents
PROSTAR DCS COMPACT
TECHNICAL MANUAL
PROGRAMMING
PART 2 APRIL 2002
Table of
Contents
MMC: 110
ACTION
HOME
PAGE
DISPLAY
1. Press TRSF 110
Display shows
[201] STN ON/OFF
AUTO HOLD :OFF
2. Dial keyset number (e.g., 205)
OR
Press UP or DOWN to select keyset and
press RIGHT soft key to move cursor
OR
Press ANS/RLS for All
[205] STN ON/OFF
AUTO HOLD :OFF
3. Dial option number from above list
(0–5, e.g., 3)
OR
Press UP or DOWN to select option and
press RIGHT soft key to move cursor
[205] STN ON/OFF
AUTO HOLD :OFF
4. Press UP or DOWN to select ON or OFF and
press left or RIGHT soft key to return
to step 3 above
OR
Dial 1 for ON or 0 for OFF
[205] STN ON/OFF
HOT KEYPAD :OFF
[ALL] STN ON/OFF
AUTO HOLD :?
[205] STN ON/OFF
HOT KEYPAD : ON
5. Press TRSF to store and exit
OR
Press SPK to store and advance to next MMC
Dial option number 0 from above list
at step 3
[205] STN ON/OFF
AUTO HOLD :OFF
Dial option number 1 from above list
at step 3
[201] STN ON/OFF
AUTO TIMER :ON
Dial option number 2 from above list
at step 3
[205] STN ON/OFF
HEADSET
:OFF
Dial option number 3 from above list
at step 3
[205] STN ON/OFF
HOT KEYPAD: ON
Dial option number 4 from above list
at step 3
[205] STN ON/OFF
KEY TONE
:ON
PROSTAR DCS COMPACT
TECHNICAL MANUAL
PROGRAMMING
PART 2 APRIL 2002
Table of
Contents
MMC: 110
Dial option number 5 from above list
at step 3
[205] STN ON/OFF
PAGE REJOIN:ON
Dial option number 6 from above list
at step 3
[205] STN ON/OFF
RING PREF. :ON
DEFAULT DATA:
HOME
PAGE
AUTO HOLD OFF
AUTO TIMER ON
HEADSET OFF
HOT KEYPAD ON
KEY TONE ON
PAGE REJOIN ON
RING PREFERENCE ON
RELATED ITEMS: MMC 301 ASSIGN STATION COS
MMC 701 ASSIGN COS CONTENTS
CADENCE AME FEATURE
PROSTAR DCS COMPACT
TECHNICAL MANUAL
PROGRAMMING
PART 2 DECEMBER 1994
MMC: 111
KEYSET RING TONE
DESCRIPTION:
Allows the system administrator or technician to select the ring tone heard at each
keyset. There are eight ring tones available at each keyset. A short tone burst of the
selection will be heard when the dial key pad is pressed.
PROGRAM KEYS
UP & DOWN
KEYPAD
SOFT KEYS
SPK
HOLD
ANS/RLS
Used to scroll through options
Used to enter selections
Move cursor left and right
Used to store data and advance to next MMC
Used to clear previous entry
Used to select ALL
ACTION
DISPLAY
1. Press TRSF 111
Display shows
[201] RING TONE
FREQUENCY 6
2. Dial keyset number (e.g., 205)
[205] RING TONE
FREQUENCY 6
OR
[ALL] RING TONE
FREQUENCY ?
OR
Press UP or DOWN to select station
and press RIGHT soft key to move cursor
OR
Press ANS/RLS to select All
3. Dial 1–8 to select ring tone
OR
Press UP or DOWN to select ring tone and
press RIGHT soft key to move cursor and
return to step 2
[205] RING TONE
FREQUENCY 5
OR
[ALL] RING TONE
FREQUENCY 5
4. Press TRSF to store and exit
OR
Press SPK to store and advance to next MMC
DEFAULT DATA: FREQUENCY 5
RELATED ITEMS: MMC 114 OFF-HOOK RING VOLUME
HOME
PAGE
Table of
Contents
PROSTAR DCS COMPACT
TECHNICAL MANUAL
PROGRAMMING
PART 2 JUNE 1995
MMC: 112
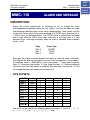
ALARM REMINDER
DESCRIPTION:
Allows the system administrator or technician to set or change the alarm
clock/appointment reminder feature for any station. This must be done for single
line telephones as they cannot access programming. Three alarms may be set for
each station and each alarm may be defined as a TODAY alarm (one-time) or as a
DAILY alarm as described below. The TODAY alarm is automatically canceled after
it rings while the DAILY alarm rings every day at the same time. Alarm numbers are
0, 1 and 2.
Entry
Alarm Type
DIAL 0
DIAL 1
DIAL 2
NOTSET
TODAY
DAILY
PROGRAM KEYS
UP & DOWN
KEYPAD
SOFT KEYS
SPK
HOLD
Used to scroll through options
Used to enter selections
Move cursor left and right
Used to store data and advance to next MMC
Used to clear previous entry
ACTION
DISPLAY
1. Press TRSF 112
Display shows
[201]ALM CLK(1)
HHMM:
NOTSET
2. Dial station number (e.g., 205)
OR
Press UP or DOWN to select station
and press RIGHT soft key to move cursor
[205]ALM CLK(1)
HHMM:
NOTSET
3. Dial 1–3 to select alarm (e.g., 2)
OR
Press UP or DOWN to select alarm and
press RIGHT soft key to move cursor
OR
Press LEFT soft key to return to step 2
[201]ALM CLK(1)
HHMM:
NOTSET
HOME
PAGE
Table of
Contents
PROSTAR DCS COMPACT
TECHNICAL MANUAL
PROGRAMMING
PART 2 JUNE 1995
Table of
Contents
MMC: 112
4. Enter alarm time in 24 hour clock format,
e.g., 1300
Display will automatically advance to step 5
[205]ALM CLK (2)
HHMM:1300 NOTSET
5. Dial valid entry from above list for alarm type
OR
Press UP or DOWN to select alarm type
and press RIGHT soft key to move cursor
and return to step 2
[205] ALM
CLK
HHMM:1300 DAILY
6. Press TRSF to store and exit
OR
Press SPK to save and advance to next
MMC
DEFAULT DATA: ALARMS SET TO NOTSET
RELATED ITEMS: NONE
HOME
PAGE
PROSTAR DCS COMPACT
TECHNICAL MANUAL
PROGRAMMING
PART 2 JANUARY 2002
MMC: 113
VIEW MEMO NUMBER
DESCRIPTION:
Allows a station user the ability to view a memo that the user has left. A memo can
be left by entering a memo via the dial keypad using the table below. MMC 112
Alarm Reminder can be programmed to remind you to read the memo. A memo of
up and including fourteen characters can be entered. Using the dial keypad, press
“6” twice to enter the letter “N,” and press “3” two times for an “e.” Pressing the “A”
key will change the letters from upper case to lower case.
NOTE: When the character you want appears on the same dial pad key as the
previous character, press the UP key to move the cursor to the right.
•
DCS KEYSETS
COUNT
DIAL 0
DIAL 1
DIAL 2
DIAL 3
DIAL 4
DIAL 5
DIAL 6
DIAL 7
DIAL 8
DIAL 9
DIAL
1
Q
space
A
D
G
J
M
P
T
W
:
2
Z
?
B
E
H
K
N
R
U
X
=
3
.
,
C
F
I
L
O
S
V
Y
[
4
)
!
@
#
$
%
^
&
(
]
5
0
1
2
3
4
5
6
7
8
9
The # key can be used for the following special characters: #, space, &, !, :, ?, ., %,
$, -, <, >, /, =, [, ], @, ^, (, ), _, +, {, }, |, ;, \, " and ~.
•
iDCS KEYSETS
COUNT
DIAL 0
DIAL 1
DIAL 2
DIAL 3
DIAL 4
1
2
3
4
5
<
space
A
D
G
>
?
B
E
H
.
,
C
F
I
)
!
@
#
$
0
1
2
3
4
HOME
PAGE
Table of
Contents
PROSTAR DCS COMPACT
TECHNICAL MANUAL
PROGRAMMING
PART 2 JANUARY 2002
Table of
Contents
MMC: 113
DIAL 5
DIAL 6
DIAL 7
DIAL 8
DIAL 9
DIAL
J
M
P
T
W
:
K
N
Q
U
X
=
L
O
R
V
Y
[
%
^
S
Z
]
5
6
7
8
9
1. When the character you want appears on the same dial pad key as the previous
character, press UP to move the cursor one space to the right.
2. Other symbols are available for DIAL #.
PROGRAM KEYS
UP & DOWN
KEYPAD
SOFT KEYS
SPK
HOLD
Used to scroll through options
Used to enter selections
Move cursor left and right
Used to store data and advance to next MMC
Used to clear previous entry
ACTION
HOME
PAGE
DISPLAY
1. Press TRSF 113
Display shows
[201] VIEW MEMO
1:
2. Press RIGHT soft key to move cursor and
add memo via dial key pad with above list
Press RIGHT soft key to return to step 2
[201] VIEW MEMO
1:NEED BREAD
3. Press TRSF to store and exit
OR
Press SPK to save and advance to next
MMC
DEFAULT DATA: NO MEMOS ENTERED
RELATED ITEMS: “A” BUTTON IS BUTTON #19 ON KEYSET
PROSTAR DCS COMPACT
TECHNICAL MANUAL
PROGRAMMING
PART 2 DECEMBER 1994
MMC: 114
OFF-HOOK RING VOLUME
DESCRIPTION:
Allows the system administrator to set the off-hook ring volume for any or all
keysets.
PROGRAM KEYS
UP & DOWN
KEYPAD
SOFT KEYS
SPK
ANS/RLS
Used to scroll through options
Used to enter selections
Move cursor left and right
Used to store data and advance to next MMC
Used to select ALL
ACTION
DISPLAY
1.
Press TRSF 114
Display shows
[201] OFFRNG VOL
RING VOLUME 4
2.
Dial station number (e.g., 205)
OR
Press UP or DOWN to select station and
press RIGHT soft key to move cursor
OR
Press ANS/RLS for All
[205] OFFRNG VOL
RING VOLUME 4
3.
Press UP or DOWN to select ring level or
dial level of volume 1–8 on dial keypad
Press RIGHT soft key to return to step 2
[205] OFFRNG VOL
RING VOLUME 3
4.
Press TRSF to store and exit
OR
Press SPK to store and advance to
next MMC
DEFAULT DATA: RING LEVEL 4
RELATED ITEMS: MMC 111 KEYSET RING TONE
[ALL] OFFRNG VOL
RING VOLUME 4
HOME
PAGE
Table of
Contents
PROSTAR DCS COMPACT
TECHNICAL MANUAL
MMC: 115
PROGRAMMING
PART 2 DECEMBER 1994
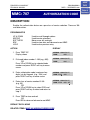
SET PROGRAMMED MESSAGE
DESCRIPTION:
Allows the system administrator to set a programmed message at any or all
keysets. There are 20 messages available. Ten are pre-programmed and ten can be
customized in MMC 715 Programmed Station Message. Programmed station
messages are numbered 01–20.
PROGRAM KEYS
UP & DOWN
KEYPAD
SOFT KEYS
SPK
HOLD
ANS/RLS
Used to scroll through options
Used to enter selections
Move cursor left and right
Used to store data and advance to next MMC
Used to clear previous entry
Used to select ALL
ACTION
DISPLAY
1.
Press TRSF 115
Display shows
[201] PGMMSG(00)
CANCEL PGM MSG
2.
Dial station number (e.g., 205)
OR
Press UP or DOWN to select station and
press RIGHT soft key to move cursor
OR
Press ANS/RLS to select All
[205] PGMMSG(00)
CANCEL PGM MSG
3.
Dial 01–20 to select message number,
e.g., 05
OR
Press UP or DOWN to select message
Press RIGHT soft key to return to step 2
[205] PGMMSG(05)
PAGE ME
4.
Press TRSF to store and exit
OR
Press SPK to store and advance to next MMC
[ALL] PGMMSG(??)
DEFAULT DATA: NO MESSAGES SELECTED
RELATED ITEMS: MMC 715 PROGRAMMED MESSAGE
MMC 722 STATION KEY PROGRAMMING
MMC 723 SYSTEM KEY PROGRAMMING
HOME
PAGE
Table of
Contents
PROSTAR DCS COMPACT
TECHNICAL MANUAL
PROGRAMMING
PART 2 JANUARY 2002
Table of
Contents
MMC: 116
ALARM AND MESSAGE
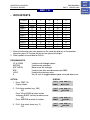
DESCRIPTION:
Allows the system administrator or technician to set or change the alarm
clock/appointment reminder feature for any station. This must be done for single
line telephones because they cannot access programming. Three alarms may be
set for each station. Each alarm may be defined as a TODAY alarm (one-time) or as
a DAILY alarm as described below. The TODAY alarm is automatically canceled
after it rings while the DAILY alarm rings every day at the same time. It is also
possible to set a message to display when the alarm is sounded. Alarm numbers
are 0, 1 and 2.
Entry
Alarm Type
DIAL 0
DIAL 1
DIAL 2
NOTSET
TODAY
DAILY
Messages are written using the keypad. Each press of a key will select a character.
Pressing the dial pad key will move the cursor to the next position. For example, if
the directory name is “SAM SMITH,” press the number “7” three times to get the
letter “S.” Now press the number “2” once to get the letter “A.” Continue selecting
characters from the table below to complete your message. Pressing the “A” key
will change the letter from upper case to lower case.
•
DCS KEYSETS
COUNT
DIAL 0
DIAL 1
DIAL 2
DIAL 3
DIAL 4
DIAL 5
DIAL 6
DIAL 7
DIAL 8
DIAL 9
DIAL
HOME
PAGE
1
Q
space
A
D
G
J
M
P
T
W
:
2
Z
?
B
E
H
K
N
R
U
X
=
3
.
,
C
F
I
L
O
S
V
Y
[
4
)
!
@
#
$
%
^
&
(
]
5
0
1
2
3
4
5
6
7
8
9
The # key can be used for the following special characters: #, space, &, !, :, ?, ., %,
$, -, <, >, /, =, [, ], @, ^, (, ), _, +, {, }, |, ;, \, " and ~.
PROSTAR DCS COMPACT
TECHNICAL MANUAL
PROGRAMMING
PART 2 JANUARY 2002
Table of
Contents
MMC: 116
•
iDCS KEYSETS
COUNT
DIAL 0
DIAL 1
DIAL 2
DIAL 3
DIAL 4
DIAL 5
DIAL 6
DIAL 7
DIAL 8
DIAL 9
DIAL
1
2
3
4
5
<
space
A
D
G
J
M
P
T
W
:
>
?
B
E
H
K
N
Q
U
X
=
.
,
C
F
I
L
O
R
V
Y
[
)
!
@
#
$
%
^
S
0
1
2
3
4
5
6
7
8
9
Z
]
1. When the character you want appears on the same dial pad key as the previous
character, press UP to move the cursor one space to the right.
2. Other symbols are available for DIAL #.
PROGRAM KEYS
UP & DOWN
KEYPAD
SOFT KEYS
SPK
HOLD
A
Used to scroll through options
Used to enter selections
Move cursor left and right
Used to store data and advance to next MMC
Used to clear previous entry
Key 19; acts as toggle between upper case and lower case
ACTION
HOME
PAGE
DISPLAY
1. Press TRSF 116
Display shows
[201] ALM REM(1)
HHMM:
NOTSET
2. Dial station number (e.g., 205)
OR
Press UP or DOWN to select station
and press RIGHT soft key to move cursor
OR
Press ANS/RLS to select all stations
[205] ALM REM(1)
HHMM:
NOTSET
3. Dial 1–3 to select alarm (e.g., 2)
OR
[201] ALM REM(1)
HHMM:
NOTSET
[ALL] ALM REM(1)
HHMM: →NOTSET
PROSTAR DCS COMPACT
TECHNICAL MANUAL
PROGRAMMING
PART 2 JANUARY 2002
Table of
Contents
MMC: 116
Press UP or DOWN to select alarm and
press RIGHT soft key to move cursor
OR
Press LEFT soft key to return to step 2
4. Enter alarm time in 24 hour clock format
(e.g., 1300)
Display automatically advances to step 5
[205] ALM REM (2)
HHMM:1300 NOTSET
5. Dial valid entry from above list for alarm type
OR
Press UP or DOWN to select alarm type
and press RIGHT soft key to move cursor
[205] ALM REM
HHMM:1300 DAILY
6. Enter message using above table
Press RIGHT soft key to return to step 2
[205] ALM REM
Sam SMITH
7. Press TRSF to store and exit
OR
Press SPK to save and advance to next MMC
DEFAULT DATA: ALARMS SET TO NOTSET
RELATED ITEMS: NONE
HOME
PAGE
PROSTAR DCS COMPACT
TECHNICAL MANUAL
PROGRAMMING
PART 2 DECEMBER 1994
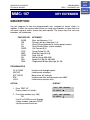
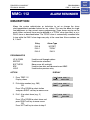
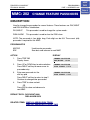
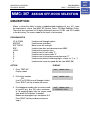
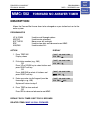
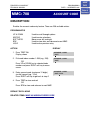
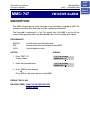
MMC: 117 ASSIGN BACKGROUND MUSIC VOLUME
DESCRIPTION:
Allows station users the ability to assign volume levels for their individual
background music. This MMC will not change the level for the speakerphone.
Background music will return to the level set by the user when the call is completed.
This level can also be set system-wide by the system administrator.
PROGRAM KEYS
UP & DOWN
KEYPAD
SOFT KEYS
SPK
HOLD
ANS/RLS
Used to scroll through options
Used to enter selections
Move cursor left and right
Used to store data and advance to next MMC
Used to clear previous entry
Used to select ALL
ACTION
DISPLAY
1. Press TRSF 117
Display shows
[201] BGM VOLUME
VOLUME 13
2. Enter desired station number (e.g., 205)
OR
Press UP or DOWN key to make selection
and press RIGHT soft key
OR
Press ANS/RLS key to select all stations
[ALL] BGM VOLUME
VOLUME ??
3. Enter valid volume level (1–16) and press
RIGHT soft key to return to step 2
[ALL] BGM VOLUME
VOLUME 06
4. Press TRSF to store and exit
OR
Press SPK to store and advance to next MMC
DEFAULT DATA: VOLUME LEVEL 13
RELATED ITEMS: SEE WARNING FOR CONNECTION TO RADIO OR MUSIC
SOURCE
HOME
PAGE
Table of
Contents
PROSTAR DCS COMPACT
TECHNICAL MANUAL
MMC: 118
PROGRAMMING
PART 2 DECEMBER 1994
STATION RING VOLUME
DESCRIPTION:
This MMC will allow the station user the ability to assign a level for his/her station
ringer volume. This level can also be set system-wide by the system administrator.
There are eight levels of volume; level 1 is the lowest and level 8 is the highest.
PROGRAM KEYS
UP & DOWN
KEYPAD
SOFT KEYS
SPK
ANS/RLS
Used to scroll through options
Used to enter selections
Move cursor left and right
Used to store data and advance to next MMC
Used to select ALL
ACTION
DISPLAY
1. Press TRSF 118
Display shows
[201] RING VOL.
RING VOLUME 1
2. Dial station number (e.g., 205)
OR
Use UP and DOWN to select station
and use RIGHT soft key to move cursor
OR
Press ANS/RLS to select all stations
[205] RING VOL.
RING VOLUME 1
3. Enter value 1–8 (e.g., 5)
OR
Press UP or DOWN key to make selection
Press RIGHT soft key to return to step 2
Note that a short ring burst of value selected
is heard
[205] RING VOL.
RING VOLUME 5
[ALL] RING VOL.
RING VOLUME ?
4. Press TRSF to save and exit
OR
Press SPK to save and advance to next MMC
DEFAULT DATA: ALL STATIONS SET TO LEVEL 4
RELATED ITEMS: STATION USER PROGRAMMING
HOME
PAGE
Table of
Contents
PROSTAR DCS COMPACT
TECHNICAL MANUAL
PROGRAMMING
PART 2 JUNE 1995
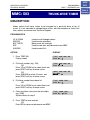
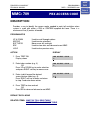
MMC: 119
CALLER ID DISPLAY
DESCRIPTION:
NOTE: This MMC only applies to systems with Caller ID software.
Allows the technician to change the order in which the Caller ID information will be
displayed on an LCD set. Caller ID display options are the following:
0. NO DISPLAY
No Caller ID data will be displayed.
1. NUMBER FIRST
The Caller ID number received from the Central Office will
be displayed first.
2. NAME FIRST
The Caller ID name received from the Central Office will be
displayed first.
PROGRAM KEYS
UP & DOWN
KEYPAD
SPEAKER
ANS/RLS
Used to scroll through options
Used to enter selections
Used to store data and advance to next MMC
Used to select ALL
ACTION
DISPLAY
1. Press TRSF 119
Display shows first station
Current display mode
[201] CID DISPLAY
NUMBER FIRST
2. Enter station number (e.g., 205)
OR
Press UP or DOWN to scroll through
stations and press the RIGHT soft key
to select a station
OR
Press ANS/RLS to select ALL
[205] CID DISPLAY
NUMBER FIRST
3. Dial display option 0, 1 or 2 (e.g., 2)
OR
Press UP or DOWN to select option
and press RIGHT or LEFT soft key to
return to step 2
[205] CID DISPLAY
NAME FIRST
HOME
PAGE
Table of
Contents
PROSTAR DCS COMPACT
TECHNICAL MANUAL
PROGRAMMING
PART 2 JUNE 1995
MMC: 119
4. Press TRSF to store and exit
OR
Press SPK to save and advance to next MMC
DEFAULT DATA: NUMBER FIRST
RELATED ITEMS: NONE
HOME
PAGE
Table of
Contents
PROSTAR DCS COMPACT
TECHNICAL MANUAL
PROGRAMMING
PART 2 DECEMBER 1994
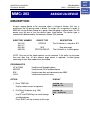
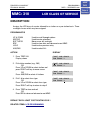
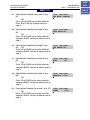
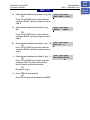
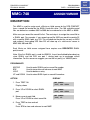
MMC: 200
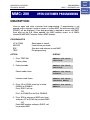
OPEN CUSTOMER PROGRAMMING
DESCRIPTION:
Used to open and close customer level programming. If programming is not
opened and an attempt is made to access a system MMC, the error message [NOT
PERMIT] will be displayed. A four digit passcode is required to access this MMC.
Each digit can be 0–9. When opened, this MMC enables access to all MMCs
allowed in MMC 802 Customer Access MMC Number.
PROGRAM KEYS
UP & DOWN
KEYPAD
SPK
TRSF
Select open or closed
Used to enter passcode
Save data and advance to next MMC
Exit programming
ACTION
DISPLAY
1. Press TRSF 200
Display shows
ENABLE CUS.PROG.
PASSCODE:
2. Enter passcode
ENABLE CUS.PROG.
PASSCODE:
Correct code shows
ENABLE CUS.PROG.
DISABLE
Incorrect code shows
ENABLE CUS.PROG.
PASSWORD ERROR
3. Press UP or DOWN arrow key to select
ENABLE or DISABLE
Press RIGHT soft key
OR
Dial 1 for ENABLE or dial 0 for DISABLE
4. Press SPK to advance to MMC entry level
and press UP or DOWN key to select MMC
OR
Enter MMC number and press RIGHT soft
key to enter MMC
ENABLE CUS.PROG.
ENABLE
HOME
PAGE
Table of
Contents
PROSTAR DCS COMPACT
TECHNICAL MANUAL
PROGRAMMING
PART 2 DECEMBER 1994
MMC: 200
5. To log out, press TRSF key
DEFAULT DATA: CLOSED
RELATED ITEMS: MMC 201 CHANGE CUSTOMER PASSCODE
MMC 501 SYSTEM-WIDE TIMERS
MMC 802 CUSTOMER ACCESS MMC NUMBER
HOME
PAGE
Table of
Contents
PROSTAR DCS COMPACT
TECHNICAL MANUAL
PROGRAMMING
PART 2 DECEMBER 1994
MMC: 201
CHANGE CUSTOMER PASSCODE
DESCRIPTION:
Used to change the passcode allowing access to MMC 200 Open Customer
Programming from its current value.
NOTE: The passcode is four digits long. Each digit can be 0–9. The current (old)
passcode is required for this MMC.
PROGRAM KEYS
KEYPAD
SPK
Used to enter passcodes
Save data and advance to next MMC
ACTION
DISPLAY
1. Press TRSF 201
CUST. PASSCODE
NEW CODE:_
2. Enter new passcode via keypad (maximum
four digits)
CUST. PASSCODE
NEW CODE:
3. Verify new passcode via keypad
CUST. PASSCODE
VERIFY :
PASSCODE verified
OR
CUST. PASSCODE
VERIFY :SUCCESS
PASSCODE failure
Return to step 2
CUST. PASSCODE
VERIFY :FAILURE
4. Press TRSF to store and exit
OR
Press SPK to save and advance to next
MMC
DEFAULT DATA: PASSCODE = 1234
RELATED ITEMS: MMC 200 OPEN CUSTOMER PROGRAMMING
HOME
PAGE
Table of
Contents
PROSTAR DCS COMPACT
TECHNICAL MANUAL
PROGRAMMING
PART 2 NOVEMBER 1997
MMC: 202 CHANGE FEATURE PASSCODES
DESCRIPTION:
Used to change the passcodes for several features. These features are: DAY/NIGHT
and DISA ALARM as listed below:
DAY/NIGHT
This passcode is used to change the system mode .
DISA ALARM
This passcode is used to clear the DISA alarm
NOTE: The passcode is four digits long. Each digit can be 0–9. The current (old)
passcode is required for this MMC.
PROGRAM KEYS
KEYPAD
SPK
Used to enter passcodes
Save data and advance to next MMC
ACTION
DISPLAY
1.
Press TRSF 202
Display shows
CHANGE PASSCODE
DAY/NIGHT :0000
2.
Press UP or DOWN key to make selection
Press RIGHT soft key to move cursor to
passcode entry
CHANGE PASSCODE
DISA ALARM :5678
3.
Enter new passcode via the
dial key pad
Press RIGHT soft key to return to step 2
Continue to change other passcodes
CHANGE PASSCODE
DISA ALARM :9999
4.
Press TRSF to store and exit
OR
Press SPK to store and advance to
next MMC
DEFAULT DATA: DAY/NIGHT 0000
DISA ALARM 5678
RELATED ITEMS: MMC 410 ASSIGN DISA TRUNK
MMC 507 ASSIGN AUTO NIGHT TIME
HOME
PAGE
Table of
Contents
PROSTAR DCS COMPACT
TECHNICAL MANUAL
PROGRAMMING
PART 2 DECEMBER 1994
MMC: 203
ASSIGN UA DEVICE
DESCRIPTION:
Assigns ringing device to be accessed when a Universal Answer (UA) key is
pressed or the UA pickup code is dialed. To assign UA, assignment is made in
MMC 601 Assign Station Group for a group; then the group is entered here. The UA
device may be one of the two device types listed below. The device type is
automatically determined by the directory number (DN) entered.
DIRECTORY NUMBER
201–222
301–317
361–362
500–529
DEVICE TYPE
DESCRIPTION
STATION
The UA device is a keyset or SLT.
ROP
STATION GROUP
Ring over page.
The UA device is a station group.
NOTE: Only one of the above options can be selected. If the ability to ring more
than one item (e.g., all four external page zones) is required, a station group
containing all four zone codes must be created.
PROGRAM KEYS
UP & DOWN
KEYPAD
SPK
HOLD
Used to scroll through options
Used to enter DN of selected device
Used to store data and advance to next MMC
Used to clear previous entry
ACTION
DISPLAY
1. Press TRSF 203
Display shows current assignment
ASSIGN UA
NONE-NO UA
2. Dial DN of UA device (e.g., 205)
OR
Use UP and DOWN keys to scroll through
available devices
Press RIGHT soft key to return to this step
ASSIGN UA
205 -STATION
HOME
PAGE
Table of
Contents
PROSTAR DCS COMPACT
TECHNICAL MANUAL
PROGRAMMING
PART 2 DECEMBER 1994
MMC: 203
3. Press TRSF to store and exit
OR
Press SPK to save and advance to next
MMC
DEFAULT DATA: NONE
RELATED ITEMS: MMC 204 COMMON BELL CONTROL
MMC 601 ASSIGN STATION GROUP
MMC 605 ASSIGN EXTERNAL PAGE ZONE
HOME
PAGE
Table of
Contents
PROSTAR DCS COMPACT
TECHNICAL MANUAL
PROGRAMMING
PART 2 DECEMBER 1994
MMC: 204
COMMON BELL CONTROL
DESCRIPTION:
Determines whether the common bell relay contacts have an interrupted or
continuous closure when activated. If interrupted is chosen, the relay follows an
internal C.O. ring pattern of one second closed followed by three seconds open. As
default, all common bell relay pairs are assigned as 381 or 382.
PROGRAM KEYS
UP & DOWN
KEYPAD
SOFT KEYS
SPK
Used to scroll through options
Used to enter selections
Move cursor
Used to store data and advance to next MMC
ACTION
DISPLAY
1. Press TRSF 204
Display shows current setting
[381]COM. BELL
CONTINUOUS
2. Dial common bell number
OR
Press UP or DOWN key to make selection of
common bell numbers and press RIGHT soft
key to advance cursor
[382]COM. BELL
CONTINUOUS
3. Dial 0 for continuous or 1 for interrupted
operation
OR
Use UP or DOWN to scroll through options
Press RIGHT soft key to return to step 2
[382]COM. BELL
INTERRUPTED
4. Press TRSF to store and exit
OR
Press SPK to store and advance to next MMC
DEFAULT DATA: CONTINUOUS
RELATED ITEMS: MMC 203 ASSIGN UA DEVICE
MMC 601 ASSIGN STATION GROUP
HOME
PAGE
Table of
Contents
PROSTAR DCS COMPACT
TECHNICAL MANUAL
PROGRAMMING
PART 2 DECEMBER 1994
MMC: 206
BARGE-IN TYPE
DESCRIPTION:
Sets the type of barge-in that is permitted.
OPTION
TYPE OF BARGE IN
DESCRIPTION
0
NO BARGE-IN
Barge-in feature is unavailable regardless
of a station’s barge-in status.
1
BARGE-IN WITH TONE
Barge-in will have an intrusion tone and
display at the barged-in on station.
2
BARGE-IN WITHOUT TONE
Barge-in is allowed. There is no barge-in
tone or display at the barged-in on station
and the barging-in station will be muted.
PROGRAM KEYS
UP & DOWN
KEYPAD
SOFT KEYS
SPK
Used to scroll through options
Used to enter selections
Move cursor left and right
Used to store data and advance to next MMC
ACTION
DISPLAY
1. Press TRSF 206
Display shows
BARGE IN TYPE
NO BARGE IN
2. Dial 0–2 to select barge-in type (e.g., 2)
OR
Press UP or DOWN to select barge-in type
and press RIGHT soft key
BARGE IN TYPE
WITHOUT TONE
3. Press TRSF to store and exit
OR
Press SPK to save and advance to next
MMC
DEFAULT DATA: NO BARGE -IN
RELATED ITEMS: MMC 301 ASSIGN STATION COS
MMC 701 ASSIGN COS CONTENTS
HOME
PAGE
Table of
Contents
PROSTAR DCS COMPACT
TECHNICAL MANUAL
MMC: 207
PROGRAMMING
PART 2 NOVEMBER 2000
ASSIGN VM/AA PORT
DESCRIPTION:
Allows technician to change a “NORMAL” SLI ports to a VMAA port. VMAA ports will
receive inband signalling digits designated in MMC 726 (VM/AA Options) and will
also receive a true disconnect signal upon completion of a call. Only SLI boards,
not KDb-SLI, support disconnect signal. Do not set VMAA ports as “data ring”
(MMC 208). This will delete inband signalling for voice mail integration. VMAA ports
have the equivalent of data secure written in the program and are always protected
against tones.
NOTE: This MMC is not used to assign SVMi-4 voice mail card ports. Voice mail
card ports are assigned as voice mail ports automatically when the COMPACT
detects a SVMi-4 card.
PROGRAM KEYS
UP & DOWN
KEYPAD
SOFT KEYS
SPK
HOLD
ANS/RLS
Used to scroll through options
Used to enter selections
Move cursor left and right
Used to store data and advance to next MMC
Used to clear previous entry
Used to select ALL
ACTION
DISPLAY
1. Press TRSF 207
Display shows
[209] VMAA PORT
NORMAL PORT
2. Dial station number (e.g., 205)
OR
Press UP or DOWN to select station
and press RIGHT soft key to move cursor
[205] VMAA PORT
NORMAL PORT
3. Dial 1 or 0 to select port type (1 = VMAA and
0 = NORMAL) OR
Press UP or DOWN to select option
Press RIGHT soft key
[209] VMAA PORT
VMAA PORT
HOME
PAGE
Table of
Contents
PROSTAR DCS COMPACT
TECHNICAL MANUAL
PROGRAMMING
PART 2 NOVEMBER 2000
MMC: 207
4. Press TRSF to store and exit
OR
Press SPK to store and advance to next MMC
DEFAULT DATA: NORMAL PORT
RELATED ITEMS: MMC 726 VM/AA OPTIONS
SVMi-4 CARD
HOME
PAGE
Table of
Contents
PROSTAR DCS COMPACT
TECHNICAL MANUAL
PROGRAMMING
PART 2 NOVEMBER 1997
MMC: 208
ASSIGN RING TYPE
DESCRIPTION:
Provides the flexibility to program single lines to have ICM ringing, C.O. ringing and
data secure. With the many types of external ringing devices, all configurations can
be met. Only SLI boards, not key daughterboards, support disconnect signal. Do
not make VMAA ports data ring; this will return them to a single line port and stop
voice mail integration.
OPTIONS
0
ICM RING
This is the default option. When set to this option stations will
ring on intercom calls with the intercom ring pattern of
400mS on, 200mS off, 400mS on and 3S off. The stations
will NOT receive a disconnect signal.
1
CO RING
When set to this option stations will ring on intercom calls
with the CO pattern of 1S on, and 3S off. The stations will
NOT receive a disconnect signal
2
DATA RING
When set to this option stations will ring on intercom calls
with the CO pattern of 1S on, and 3S off. The stations will
receive a disconnect signal and are protected against
intrusion tones
PROGRAM KEYS
UP & DOWN
KEYPAD
SOFT KEYS
SPK
HOLD
ANS/RLS
Used to scroll through options
Used to enter selections
Move cursor left and right
Used to store data and advance to next MMC
Used to clear previous entry
Used to select ALL
ACTION
DISPLAY
1. Press TRSF 208
Display shows
[209] RING TYPE
ICM RING
2. Dial station number (e.g., 205)
OR
Press UP or DOWN to select station and
press right soft key to move cursor
[205] RING TYPE
ICM RING
HOME
PAGE
Table of
Contents
PROSTAR DCS COMPACT
TECHNICAL MANUAL
PROGRAMMING
PART 2 NOVEMBER 1997
MMC: 208
3. Dial 0, 1 or 2 to select port type
[205]RING TYPE
OR
DATA RING
Press UP or DOWN to select option
Press LEFT or RIGHT soft key to return to step 2
4. Press TRSF to store and exit
OR
Press SPK to store and advance to next MMC
DEFAULT DATA: ICM RING
RELATED ITEMS: MMC 207 ASSIGN VMAA PORTS
HOME
PAGE
Table of
Contents
PROSTAR DCS COMPACT
TECHNICAL MANUAL
PROGRAMMING
PART 2 DECEMBER 1994
MMC: 209
ASSIGN ADD-ON MODULE
DESCRIPTION:
Designates to which station an add-on module (AOM) is assigned and assigns off-hook
voice announce (OHVA) to an AOM. OHVAED allows off-hook voice announce.
PROGRAM KEYS
UP & DOWN
KEYPAD
SOFT KEYS
RELEASE
HOLD
Used to scroll through options
Used to enter selections
Move cursor left and right
Used to store data and advance to next MMC
Clears previous entry
ACTION
DISPLAY
1. Press TRSF 209
Display shows first AOM
[301] AOM MASTER
MASTER:NONE
2. Dial AOM number
OR
Use UP or DOWN to scroll through AOM
numbers and use soft keys to move cursor
[301] AOM MASTER
MASTER:NONE
3a. Enter station number, e.g., 301
OR
Use UP or DOWN for selection of stations
AND
[301] AOM MASTER
MASTER:201
3b. Enter 1 for OHVAED: ON or 0 for OFF
OR
Use UP or DOWN to scroll through ON/OFF
options
Press RIGHT soft key to return to step 2
[301] AOM MASTER
OHVAED:ON
4. Press TRSF to store and exit
OR
Press SPK to save and advance to next MMC
DEFAULT DATA: NONE FOR MASTER
OFF FOR OHVAED
RELATED ITEMS: NONE
HOME
PAGE
Table of
Contents
PROSTAR DCS COMPACT
TECHNICAL MANUAL
MMC: 210
PROGRAMMING
PART 2 NOVEMBER 1997
CUSTOMER ON/OFF PER TENANT
DESCRIPTION:
Allows the LCR, TRANSFER MOH, CID CODE INSERT features to be enabled on a
per-tenant basis.
LCR ENABLE:
This option determines weather the system will or will not
route outgoing calls based on the information in the LCR
routing tables contained in MMC's 710, 711, 712 and 713.
LCR access code must be assigned in Dial Numbering Plan
(MMC 724). System default is NO.
TRANSFER MOH:
When this option is turned ON outside parties will hear trunk
MOH instead of ring back tone from the time a transfer is
completed until the call is answered by an internal party.
System default is NONE.
CID CODE INSERT
When this option is ON the system will insert the digit “1”
when receiving CID information. When OFF the digit “1” will
not be inserted in the CID information. This option is tenant
wide. In certain areas the central offices are using a 10 digit
numbering plan for calls. This feature can reduce the
number of LCR digit table inputs in those areas that use the
CID display callback feature. System default is ON.
PROGRAM KEYS
UP & DOWN
KEYPAD
SOFT KEYS
SPK
Used to scroll through options
Used to enter selections
Move cursor left and right
Used to store data and advance to next MMC
ACTION
DISPLAY
1. Press TRSF 210
Display shows
TEN. ON AND OFF
LCR ENABLE :OFF
2. Press RIGHT soft key to move cursor
TEN. ON AND OFF
LCR ENABLE :OFF
HOME
PAGE
Table of
Contents
PROSTAR DCS COMPACT
TECHNICAL MANUAL
PROGRAMMING
PART 2 NOVEMBER 1997
Table of
Contents
MMC: 210
3. Dial 1 for ON or 0 for OFF
OR
Press UP or DOWN to make selection and
press RIGHT soft key
4. Press TRSF to store and exit
OR
Press SPK to store and advance to next MMC
DEFAULT DATA: LCR IS OFF
RELATED ITEMS: LCR PROGRAMMING
CID PROGRAMMING
MOH PROGRAMMING
HOME
PAGE
TEN. ON AND OFF
LCR ENABLE :ON
PROSTAR DCS COMPACT
TECHNICAL MANUAL
PROGRAMMING
PART 2 DECEMBER 1994
MMC: 211
DOOR RING ASSIGNMENT
DESCRIPTION:
Designates which devices will ring when a door box button is pressed and which
ring mode the devices will follow. There are two types of device that can ring; these
are listed below with their default directory numbers.
DEVICE
DEFAULT DIRECTORY NUMBERS
Station
Station group
201–222, 301–316
500–529
PROGRAM KEYS
UP & DOWN
KEYPAD
SOFT KEYS
SPK
HOLD
ANS/RLS
Used to scroll through options
Used to enter selections
Move cursor left and right
Used to store data and advance to next MMC
Clears previous entry
Used to select ALL
ACTION
DISPLAY
1. Press TRSF 211
Display shows first door phone
[202] DOOR RING
D:500
N:500
2. Dial door phone number (e.g., 230)
OR
Press UP or DOWN to scroll through door
phones
Use RIGHT soft key to move cursor
OR
Press ANS/RLS to select all door ring
[222] DOOR RING
D:500
N:500
3. Enter new DAY/NIGHT selection via
dial keypad
OR
Press UP or DOWN key to make selection
and press RIGHT soft key
[202] DOOR RING
D:301
N:500
[ALL] DOOR RING
D:500
N:500
HOME
PAGE
Table of
Contents
PROSTAR DCS COMPACT
TECHNICAL MANUAL
PROGRAMMING
PART 2 DECEMBER 1994
MMC: 211
4. Press RIGHT soft key to return to step 2 above
OR
Press LEFT soft key to return to step 3 above
OR
Press TRSF to store and exit
OR
Press SPK to store and advance to next MMC
DEFAULT DATA: STATION GROUP 500
RELATED ITEMS: NONE
HOME
PAGE
Table of
Contents
PROSTAR DCS COMPACT
TECHNICAL MANUAL
PROGRAMMING
PART 2 DECEMBER 1994
MMC: 214 DISA ALARM RINGING STATION
DESCRIPTION:
Assigns the DISA alarm to ring at a specific phone. It is recommended that the
person who can clear the alarm receive the notification. There can be two distinct
stations for notification. Both a day and a night station can be selected. A valid
destination can be either a station group (500–529) or an individual station (201–
222, 301–316).
PROGRAM KEYS
UP & DOWN
KEYPAD
SOFT KEYS
SPK
HOLD
Used to scroll through options
Used to enter selections
Move cursor left and right
Used to store data and advance to next MMC
Used to clear previous entry
ACTION
DISPLAY
1. Press TRSF 214
Display shows
DISA ALARM RING
D:500
N:500
2. Enter valid day destination number (e.g.,
217)
OR
Press UP or DOWN key to make selection
and press RIGHT soft key to advance cursor
DISA ALARM RING
D:217
N:500
3. Enter valid night destination number (e.g.,
249)
OR
Press UP or DOWN key to make selection
and press RIGHT soft key to return to step 2
DISA ALARM RING
D:217
N:249
4. Press TRSF to store and exit
OR
Press SPK to store and advance to next MMC
DEFAULT DATA: DAY 500
NIGHT 500
RELATED ITEMS: NONE
HOME
PAGE
Table of
Contents
PROSTAR DCS COMPACT
TECHNICAL MANUAL
MMC: 300
PROGRAMMING
PART 2 NOVEMBER 1997
CUSTOMER ON/OFF PER STATION
DESCRIPTION:
Allows the following features to be enabled on a per-station basis.
ACCESS DIAL
Determines whether a user can select a trunk or trunk group
by dialing its directory number (DN) i.e. 80, 81, 701, 702,
etc.. This selection should be turned to off when using LCR.
MICROPHONE
Allows all keysets to be used in the speakerphone mode.
OFFHOOK RING
Will allow a short burst of ring tone to indicate another call.
SMDR PRINT
When the station is set for no C.O. calls to and from this
station, the station will not print on SMDR. This includes
transferred calls or calls picked up from hold or park.
TGR ADV.TONE
When this feature is set to ON, a warning tone will be heard
each time LCR advances to the next route.
VMAA FORWARD
This feature selects whether intercom calls can be
forwarded to voice mail.
ON = Permits forward to voice mail.
OFF = No forward to voice mail.
PROGRAM KEYS
UP & DOWN
KEYPAD
SOFT KEYS
SPK
HOLD
ANS/RLS
ACTION
1. Press TRSF 300
Display shows
Used to scroll through options
Used to enter selections
Move cursor left and right
Used to store data and advance to next MMC
Used to clear previous entry
Used to select ALL
DISPLAY
[201] CUS.ON/OFF
ACCESS DIAL :ON
HOME
PAGE
Table of
Contents
PROSTAR DCS COMPACT
TECHNICAL MANUAL
PROGRAMMING
PART 2 NOVEMBER 1997
Table of
Contents
MMC: 300
2. Dial station number (e.g., 205)
OR
Press UP or DOWN to select station
OR
Press ANS/RLS for ALL and press RIGHT soft
key to move cursor and advance to step 3
[205] CUS.ON/OFF
ACCESS DIAL :ON
3. Press UP or DOWN to select feature and
press RIGHT soft key to move cursor and
advance to step 4
[ALL] CUS.ON/OFF
ACCESS DIAL :ON
4. Press UP or DOWN to select ON/OFF and
press RIGHT soft key
OR
Dial 1 for ON or 0 for OFF
[ALL] CUS.ON/OFF
ACCESS DIAL :OFF
5. Press LEFT soft key to return to step 2
Press RIGHT soft key to return to step 1
OR
Press TRSF to store and exit
OR
Press SPK to store and advance to next MMC
DEFAULT DATA: ALL FEATURES SET TO ON
RELATED ITEMS: LCR PROGRAMMING
HOME
PAGE
[ALL] CUS.ON/OFF
ACCESS DIAL :ON
PROSTAR DCS COMPACT
TECHNICAL MANUAL
PROGRAMMING
PART 2 DECEMBER 1994
MMC: 301
ASSIGN STATION COS
DESCRIPTION:
Used to assign a day and night class of service to each keyset. There are 30
different classes of service that are defined in MMC 701 Assign COS Contents.
Classes of service are numbered 01–30.
PROGRAM KEYS
UP & DOWN
KEYPAD
SOFT KEYS
SPK
HOLD
ANS/RLS
Used to scroll through options
Used to enter selections
Move cursor left and right
Used to store data and advance to next MMC
Used to clear previous entry
Used to select ALL
ACTION
DISPLAY
1. Press TRSF 301
Display shows first station
[201] STN COS
DAY:01 NIGHT:01
2. Dial station number (e.g., 205)
OR
Use UP and DOWN to scroll through stations
Press RIGHT soft key to advance to step 3
OR
Use UP and DOWN to scroll through stations
and press LEFT soft key to advance to step
4
OR
Press ANS/RLS to select all stations
[205] STN COS
DAY:01 NIGHT: 01
3. Enter day class of service (e.g., 05)
OR
Use UP and DOWN to scroll through classes
of service and press RIGHT soft key to
advance to step 4
OR
Use UP and DOWN to scroll through classes
of service and press LEFT soft key to return
to step 2
[205] STN COS
DAY:05 NIGHT:01
[ALL] STN COS
DAY:01 NIGHT:01
HOME
PAGE
Table of
Contents
PROSTAR DCS COMPACT
TECHNICAL MANUAL
PROGRAMMING
PART 2 DECEMBER 1994
MMC: 301
[205] STN COS
4. Enter night class of service (e.g., 05)
DAY:05 NIGHT:05
OR
Use UP and DOWN to scroll through classes
of service and press RIGHT soft key to return
to step 2
OR
Use UP and DOWN to scroll through classes
of service and press LEFT soft key to return
to step 3
5. Press TRSF to save and exit
OR
Press SPK to save and advance to next
MMC
DEFAULT DATA: DAY CLASS = 01
NIGHT CLASS = 01
RELATED ITEMS: MMC 701 ASSIGN COS CONTENTS
HOME
PAGE
Table of
Contents
PROSTAR DCS COMPACT
TECHNICAL MANUAL
PROGRAMMING
PART 2 DECEMBER 1994
MMC: 302
PICKUP GROUPS
DESCRIPTION:
Allows the assignment of stations into call pickup groups. There is a maximum of 20
pickup groups. An unlimited number of members can belong to each group.
Stations can be in only one pickup group at any given time.
PROGRAM KEYS
UP & DOWN
KEYPAD
SOFT KEYS
SPK
HOLD
ANS/RLS
Used to scroll through options
Used to enter selections
Move cursor left and right
Used to store data and advance to next MMC
Used to clear previous entry
Used to select ALL
ACTION
DISPLAY
1. Press TRSF 302
Display shows
[201] PICKUP GRP
PICKUP GRP :NONE
2. Dial station number ( e.g., 205)
OR
Use UP or DOWN to select station number
and press RIGHT soft key
OR
Press ANS/RLS key to select all
[205] PICKUP GRP
PICKUP GRP :NONE
3. Dial pickup group number
OR
Press UP or DOWN to select group number
[205] PICKUP GRP
PICKUP GRP :05
[ALL] PICKUP GRP
PICKUP GRP :??
4. Press RIGHT soft key to return to step 2 above
OR
Press LEFT soft key to return to step 3 above
OR
Press TRSF to store and exit
OR
Press SPK to store and advance to next MMC
DEFAULT DATA: NO PICKUP GROUPS ASSIGNED
RELATED ITEMS: MMC 107 KEY EXTENDER
MMC 722 STATION KEY PROGRAMMING
MMC 723 SYSTEM KEY PROGRAMMING
HOME
PAGE
Table of
Contents
PROSTAR DCS COMPACT
TECHNICAL MANUAL
MMC: 303
PROGRAMMING
PART 2 DECEMBER 1994
ASSIGN BOSS/SECRETARY
DESCRIPTION:
Assigns BOSS keysets to SECRETARY keysets. One BOSS station can have up to
and including four SECRETARY stations and one SECRETARY station can have up
to and including four BOSS stations. A dedicated BOSS button must be
programmed on the SECRETARY keyset(s). A dedicated BOSS button must also be
programmed on the BOSS keyset.
PROGRAM KEYS
UP & DOWN
KEYPAD
SOFT KEYS
SPK
HOLD
ANS/RLS
F BUTTON
Used to scroll through options
Used to enter selections
Move cursor left and right
Used to store data and advance to next MMC
Used to clear previous entry
Used to select ALL
Used to toggle BOSS/SECRETARY field (button 21)
ACTION
DISPLAY
1. Press TRSF 303
Display shows
BOSS STN:NONE
SECR 1:NONE
2. Dial station number (e.g., 205)
OR
Press UP or DOWN to selected station and
press RIGHT soft key to advance cursor to
step 3
BOSS STN:NONE
SECR 1:NONE
3. Dial station number (e.g., 201)
OR
Press UP or DOWN to selected station and
press RIGHT soft key to return to step 3
BOSS STN:205
SECR 1:201
BOSS STN :205
SECR 1:NONE
BOSS STN:205
SECR 2:202
HOME
PAGE
Table of
Contents
PROSTAR DCS COMPACT
TECHNICAL MANUAL
PROGRAMMING
PART 2 DECEMBER 1994
MMC: 303
4. Press LEFT soft key to return to step 2 and
continue entries
OR
Press TRSF to store and exit
OR
Press SPK to store and advance to next MMC
DEFAULT DATA: NONE
RELATED ITEMS: MMC 722 STATION KEY PROGRAMMING
HOME
PAGE
Table of
Contents
PROSTAR DCS COMPACT
TECHNICAL MANUAL
MMC: 304
PROGRAMMING
PART 2 DECEMBER 1994
ASSIGN EXTENSION/TRUNK USE
DESCRIPTION:
Allows trunks on a per-station basis the ability to answer incoming calls, to dial out
or to do both. If a station is set to NO Dial, the station will not have the ability to
place a call. If the station is set to NO Answer, the station cannot answer an
incoming call.
NOTE: MMC 406 Trunk Ring Assignment will override this MMC for the Answer
option.
PROGRAM KEYS
UP & DOWN
KEYPAD
SOFT KEYS
SPK
HOLD
ANS/RLS
Used to scroll through options
Used to enter selections
Move cursor left and right
Used to store data and advance to next MMC
Used to clear previous entry
Used to select ALL
ACTION
DISPLAY
1. Press TRSF 304
Display shows
[201] USE [701]
DIAL:YES ANS:YES
2. Dial the station number ( e.g., 205)
OR
Press UP or DOWN key to select station and
press RIGHT soft key to advance to step 3
[205] USE [701]
DIAL:YES ANS:YES
3. Dial the trunk ID number ( e.g., 704)
OR
Press UP or DOWN key to select trunk and
press RIGHT soft key to advance to step 4
[205] USE [704]
DIAL:YES ANS:YES
HOME
PAGE
Table of
Contents
PROSTAR DCS COMPACT
TECHNICAL MANUAL
PROGRAMMING
PART 2 DECEMBER 1994
Table of
Contents
MMC: 304
4. Press UP or DOWN key to select YES/NO
option
OR
Dial 1 for YES or 0 for NO and press RIGHT
soft key to move cursor to ANS option
Press UP or DOWN key to select YES/NO
option
OR
Dial 1 for YES or 0 for NO and press RIGHT
soft key to return to step 2
HOME
PAGE
[205] USE [704]
DIAL:NO ANS:YES
[205 USE [704]
DIAL:NO ANS:NO
5. Press TRSF to store and exit
OR
Press SPK to save and advance to next
MMC
DEFAULT DATA: DIAL = YES
ANS = YES
RELATED ITEMS: MMC 406 TRUNK RING ASSIGNMENT
MMC 722 STATION KEY PROGRAMMING
MMC 723 SYSTEM KEY PROGRAMMING
PROSTAR DCS COMPACT
TECHNICAL MANUAL
MMC: 305
PROGRAMMING
PART 2 DECEMBER 1994
ASSIGN FORCED CODE
DESCRIPTION:
Allows the assignment of either account or authorization codes on a per-station
basis or on an all-station basis.
PROGRAM KEYS
UP & DOWN
KEYPAD
SOFT KEYS
SPK
HOLD
ANS/RLS
Used to scroll through options
Used to enter selections
Move cursor left and right
Used to store data and advance to next MMC
Used to clear previous entry
Used to select ALL
FEATURE KEYS
0 NONE
1 AUTHORIZE
ACTION
2 ACCOUNT
DISPLAY
1. Press TRSF
Display shows
[201] FORCD CODE
NONE
2. Dial station number ( e.g., 205)
OR
Press UP or DOWN key to select station and
press RIGHT soft key to move cursor and
advance to step 3
[205] FORCD CODE
NONE
3. Dial a feature option 0–2, e.g., 2
OR
Press UP or DOWN key to select option
and press RIGHT soft key to return to step 2
[205] FORCD CODE
ACCOUNT
4. Press TRSF to store and exit
OR
Press SPK to store and advance to next MMC
DEFAULT DATA: NONE
RELATED ITEMS: MMC 707 AUTHORIZATION CODE
MMC 708 ACCOUNT CODE
HOME
PAGE
Table of
Contents
PROSTAR DCS COMPACT
TECHNICAL MANUAL
PROGRAMMING
PART 2 DECEMBER 1994
MMC: 306
HOT LINE
DESCRIPTION:
Allows the DCS COMPACT to have a automatic ring down circuit for INTERNAL use
only. If an external number is to be dialed, use MMC 307 Assign Off-Hook Selection.
PROGRAM KEYS
UP & DOWN
KEYPAD
SOFT KEYS
SPK
HOLD
ANS/RLS
Used to scroll through options
Used to enter selections
Move cursor left and right
Used to store data and advance to next MMC
Used to clear previous entry
Used to select ALL
ACTION
DISPLAY
1. Press TRSF 306
Display shows
Press RIGHT soft key to advance cursor
[201] HOT LINE
NONE
2. Enter valid number via dial pad keys
OR
Press UP or DOWN to make selection and
press RIGHT soft key to return to step 1
[201] HOT LINE
202
DEFAULT DATA: NONE
RELATED ITEMS: MMC 307 ASSIGN OFF-HOOK SELECTION
HOME
PAGE
Table of
Contents
PROSTAR DCS COMPACT
TECHNICAL MANUAL
PROGRAMMING
PART 2 DECEMBER 1994
MMC: 307 ASSIGN OFF-HOOK SELECTION
DESCRIPTION:
Allows a station the ability to make a predetermined outgoing call, e.g., 911, upon
the expiration of a timer (see MMC 501 System Timers, Off-Hook Selection Timer).
There can be a maximum of 18 digits dialed with pauses, FLASH, and OCC added
in the dial string. The access code for the trunk is not counted.
PROGRAM KEYS
UP & DOWN
KEYPAD
SOFT KEYS
SPK
HOLD
B
C
D
E
F
Used to scroll through options
Used to enter selections
Move cursor left and right
Used to store data and advance to next MMC
Used to clear previous entry
Used to insert a flash code “F”
Used to insert a pause code “P”
Used to insert a pulse/tone conversion code “C”
Used to mask/unmask following digits—shows as “[” or “]”
Used to enter name for speed dial bin (see MMC 106)
ACTION
DISPLAY
1. Press TRSF 307
Display shows
[201] OFFHK SEL.
2. Dial station number
OR
Use UP or DOWN to scroll through stations
Press RIGHT soft key to move the cursor
[205] OFFHK SEL.
_
3. Dial telephone number with an access code [205] OFFHK SEL.
9-1305P4264100_
or trunk ID (e.g., 9 or 701) with a maximum
of 18 outgoing digits after the access code
(see above list of options if needed)
Bottom row of program keys are options B–E
Press RIGHT soft key to advance cursor to
step 4
HOME
PAGE
Table of
Contents
PROSTAR DCS COMPACT
TECHNICAL MANUAL
PROGRAMMING
PART 2 DECEMBER 1994
Table of
Contents
MMC: 307
4. Dial 1 for YES or 0 for NO
OR
Press UP or DOWN key to select YES/NO
option
Press RIGHT soft key to return to step 2
HOME
PAGE
[205] OFFHK SEL.
CURENTLY SET:YES
5. Press TRSF to store and exit
OR
Press SPK to store and advance to next MMC
DEFAULT DATA: CURRENTLY SET = NO
RELATED ITEMS: MMC 501 SYSTEM TIMERS, OFF-HOOK SELECTION TIMER
PROSTAR DCS COMPACT
TECHNICAL MANUAL
PROGRAMMING
PART 2 NOVEMBER 2000
MMC: 308 ASSIGN BACKGROUND MUSIC SOURCE
DESCRIPTION:
Assigns a background music source to the DCS keysets. There are a total of 3
possible music selections (see below). One music connection is provided on the
KSU motherboard. A second external source is provided with the addition of a MISC
card.
If you have a SVMi-4 Voice Mail System installed you may also select a SVMi-4
recording as a music source. The recording must already been defined in MMC 748
and will show up here as the SVMi-4 port associated with the recording.
OPTIONS
1. NONE: No Background Music.
2. EXTERNAL DEVICE: Music Source or Digital announcer. This is entered as the
directory number of an external music source located on the KSU motherboard
(371) or a MISC card (372).
3. VOICE MAIL SOUND FILE: If the COMPACT system has an optional SVMi-4
card installed, up to 100 custom recorded sound files from the Voice Mail card
can be used for BGM sources. Select the SVMi-4 port assigned in MMC748. For
information on creating the sound files see SVMi-4 System Administrator
Manual-Recording greetings by number. If you select this option be advised that
VMMOH source requires one dedicated SVMi-4 port/channel.
PROGRAM KEYS
UP & DOWN
KEYPAD
SOFT KEYS
SPEAKER
HOLD
ANS/RLS
Used to scroll through options
Used to enter selections
Move cursor left and right
Used to store data and advance to next MMC
Used to clear previous entry
Used to select ALL
ACTION
1.
Press TRSF 308
Display shows current setting
DISPLAY
[201 ] BGM SOURCE
BGM SOURCE:NONE
HOME
PAGE
Table of
Contents
PROSTAR DCS COMPACT
TECHNICAL MANUAL
PROGRAMMING
PART 2 NOVEMBER 2000
Table of
Contents
MMC: 308
Dial keyset number (e.g., 205)
OR
Use UP or DOWN to scroll through keyset
numbers; press RIGHT soft key to move cursor
OR
Press ANS/RLS to select all stations
[205 ] BGM SOURCE
BGM SOURCE:NONE
3.
Enter source number (e.g., 371)
OR
Press UP or DOWN key to make selection and
press RIGHT soft key to return to step 2
[205 ] BGM SOURCE
BGM SOURCE:371
4.
Press TRSF to store and exit
OR
Press SPK to store and advance to next MMC
2.
HOME
PAGE
[ALL] BGM SOURCE
BGM SOURCE:?
DEFAULT DATA: NONE
RELATED ITEMS: MMC 309 ASSIGN STATION MUSIC ON HOLD
MMC 408 ASSIGN TRUNK MUSIC ON HOLD SOURCE
AUTO ATTENDANT PROGRAMMING
MMC 748 ASSIGN VMMOH
PROSTAR DCS COMPACT
TECHNICAL MANUAL
MMC: 309
PROGRAMMING
PART 2 NOVEMBER 2000
ASSIGN STATION MUSIC ON HOLD
DESCRIPTION:
This MMC is used to select what MOH source you will hear when another internal
station puts you on hold. There are a total of 3 possible music selections (see
below). One music connection is provided on the KSU motherboard. A second
external source is provided with the addition of a MISC card.
If you have a SVMi-4 Voice Mail System installed you may also select a SVMi-4
recording as a music source. The recording must already been defined in MMC 748
and will show up here as the SVMi-4 port associated with the recording.
OPTIONS
1. NONE: No Background Music.
2. EXTERNAL DEVICE: Music Source or Digital announcer. This is entered as the
directory number of an external music source located on the KSU motherboard
(371) or a MISC card (372).
3. VOICE MAIL SOUND FILE: If the COMPACT system has an optional SVMi-4
card installed, up to 100 custom recorded sound files from the Voice Mail card
can be used for BGM sources. Select the SVMi-4 port assigned in MMC748. For
information on creating the sound files see SVMi-4 System Administrator
Manual-Recording greetings by number. If you select this option be advised that
VMMOH source requires one dedicated SVMi-4 port/channel.
PROGRAM KEYS
UP & DOWN
KEYPAD
SOFT KEYS
SPK
HOLD
ANS/RLS
Used to scroll through options
Used to enter selections
Move cursor left and right
Used to store data and advance to next MMC
Used to clear previous entry
Used to select ALL
ACTION
1. Press TRSF 309
Display shows current setting
DISPLAY
[201 ] MOH SOURCE
MOH SOURCE:NONE
HOME
PAGE
Table of
Contents
PROSTAR DCS COMPACT
TECHNICAL MANUAL
PROGRAMMING
PART 2 NOVEMBER 2000
HOME
PAGE
Table of
Contents
MMC: 309
2. Dial keyset number (e.g., 205)
OR
Use UP or DOWN to scroll through keysets
Press RIGHT soft key to move the cursor
OR
Press ANS/RLS to select all stations
[205 ] MOH SOURCE
MOH SOURCE:NONE
3. Enter source number (e.g., 371)
OR
Press UP or DOWN key to make selection
Press RIGHT soft key to return to step 2
[205 ] MOH SOURCE
MOH SOURCE:371
[ALL] MOH SOURCE
MOH SOURCE:?
4. Press TRSF to store and exit
OR
Press SPK to store and advance to next MMC
DEFAULT DATA: NONE
RELATED ITEMS: MMC 308 ASSIGN BACKGROUND MUSIC SOURCE
MMC 408 ASSIGN TRUNK MUSIC ON HOLD SOURCE
MMC 748 ASSIGN VMMOH
PROSTAR DCS COMPACT
TECHNICAL MANUAL
MMC: 310
PROGRAMMING
PART 2 DECEMBER 1994
LCR CLASS OF SERVICE
DESCRIPTION:
Assigns the LCR class of service allowed for a station on a per-station basis. There
are eight classes which may be assigned.
PROGRAM KEYS
UP & DOWN
KEYPAD
SOFT KEYS
SPK
HOLD
ANS/RLS
Used to scroll through options
Used to enter selections
Move cursor left and right
Used to store data and advance to next MMC
Used to clear previous entry
Used to select ALL
ACTION
DISPLAY
1. Press TRSF 310
Display shows
[201] LCR CLASS
LCR CLASS 1
2. Dial station number (e.g., 205)
OR
Press UP or DOWN to select station and
press RIGHT soft key to move cursor
OR
Press ANS/RLS to select all stations
[205] LCR CLASS
LCR CLASS 1
3. Dial 1–8 to select class type
OR
Press UP or DOWN to select class type
Press RIGHT soft key to return to step 2
[205] LCR CLASS
LCR CLASS 3
4. Press TRSF to store and exit
OR
Press SPK to store and advance to next MMC
DEFAULT DATA: LEAST COST ROUTING COS 1
RELATED ITEMS: LCR PROGRAMMING
[ALL] LCR CLASS
LCR CLASS ?
HOME
PAGE
Table of
Contents
PROSTAR DCS COMPACT
TECHNICAL MANUAL
MMC: 311
PROGRAMMING
PART 2 DECEMBER 1994
ASSIGN SIM PARAMETER
DESCRIPTION:
NOTE: This MMC has no function on the DCS COMPACT at this time. It may be
used in the future.
Assigns and sets parameters for the serial interface module (SIM).
PROGRAM KEYS
UP & DOWN
KEYPAD
SOFT KEYS
SPK
HOLD
Used to scroll through options
Used to enter selections
Move cursor left and right
Used to store data and advance to next MMC
Used to clear previous entry
ACTION
DISPLAY
1. Press TRSF 311
Display shows
[205] SIM PARA.
SIM TYPE :DTE
2. Enter station number of SIM (e.g., 220) via
dial keypad
OR
Press UP or DOWN key to make selection
and press RIGHT soft key to move cursor
[220] SIM PARA.
SIM TYPE :DTE
3a. Enter desired selection from table A (e.g., 01)
OR
Press UP or DOWN key to make selection
and press RIGHT soft key to move cursor
[220] SIM PARA.
CALL MODE:MANUAL
3b. Enter desired selection from table B
(e.g., 02)
OR
Press UP or DOWN key to make selection
Press RIGHT soft key to move cursor to step
4
[220] SIM PARA.
SIM TYPE :DTE
HOME
PAGE
Table of
Contents
PROSTAR DCS COMPACT
TECHNICAL MANUAL
PROGRAMMING
PART 2 DECEMBER 1994
HOME
PAGE
Table of
Contents
MMC: 311
3c. Enter desired selection from table D (e.g.,
02)
OR
Press UP or DOWN key to make selection
Press RIGHT soft key to move cursor to
step 4
[220] SIM PARA.
ANS MODE :MANUAL
3d. Enter desired selection from table E (e.g.,
03)
OR
Press UP or DOWN key to make selection
and press RIGHT soft key to move cursor to
step 4
[220] SIM PARA.
AUTO BAUD:ON
3e. Enter desired selection from table F (e.g.,
04)
OR
Press UP or DOWN key to make selection
and press RIGHT soft key to move cursor to
step 4
[220] SIM PARA.
DTR CHECK:ON
3f. Enter desired selection from table G (e.g.,
05)
OR
Press UP or DOWN key to make selection
and press RIGHT soft key to move cursor to
step 4
[220] SIM PARA.
ECHO
:ON
3g. Enter desired selection from table H (e.g.,
06)
OR
Press UP or DOWN key to make selection
and press RIGHT soft key to move cursor to
step 4
[220] SIM PARA.
PROTOCOL :V110
3h. Enter desired selection from table I (e.g., 07)
OR
Press UP or DOWN key to make selection
and press RIGHT soft key to move cursor to
step 4
[220] SIM PARA.
SPEED
:9600
PROSTAR DCS COMPACT
TECHNICAL MANUAL
PROGRAMMING
PART 2 DECEMBER 1994
Table of
Contents
MMC: 311
3i. Enter desired selection from table J (e.g., 08) [220] SIM PARA.
CHAR LENG:8 BITS
OR
Press UP or DOWN key to make selection
and press RIGHT soft key to move cursor to
step 4
3j. Enter desired selection from table K (e.g.,
09)
OR
Press UP or DOWN key to make selection
and press RIGHT soft key to move cursor to
step 4
[220] SIM PARA.
PARITY
:NONE
3k. Enter desired selection from table L (e.g., 10) [220] SIM PARA.
STOP BIT :1
OR
Press UP or DOWN key to make selection
and press RIGHT soft key to move cursor to
step 4
4. Enter desired selection from table C (e.g., 1)
OR
Press UP or DOWN key to make selection
and press LEFT soft key to move cursor
back to step 3 and continue entries
OR
Proceed to step 5
5. Press TRSF to store and exit
OR
Press SPK to store and advance to next MMC
HOME
PAGE
[220] SIM PARA.
CALL MODE:AWITH
PROSTAR DCS COMPACT
TECHNICAL MANUAL
PROGRAMMING
PART 2 DECEMBER 1994
MMC: 311
TABLE A
SIM PARAMETER
00
01
02
03
04
05
06
07
08
09
10
SIM TYPE
CALL MODE
ANS MODE
AUTO BAUD
DTR CHECK
ECHO
PROTOCOL
SPEED
CHAR LENGTH
PARITY
STOP BIT
TABLE B
SIM TYPE
0
1
2
3
HOST
MODEM
DTE
PRT
0
1
2
MANUAL
AUTO WITH
AUTO WITHOUT
TABLE E
AUTO BAUD
MANUAL
AUTO
TABLE F
DTR CHECK
0
1
Table B
Table C
Table D
Table E
Table F
Table G
Table H
Table I
Table J
Table K
Table L
TABLE C
CALL MODE
TABLE D
ANS MODE
0
1
=
=
=
=
=
=
=
=
=
=
=
0
1
OFF
ON
TABLE G
ECHO
OFF
ON
0
1
OFF
ON
HOME
PAGE
Table of
Contents
PROSTAR DCS COMPACT
TECHNICAL MANUAL
PROGRAMMING
PART 2 DECEMBER 1994
MMC: 311
TABLE H
PROTOCOL
0
1
TABLE I
SPEED TABLE
V110
V120
0
1
2
3
4
5
6
7
8
9
300
600
1200
2400
4800
9600
19200
38400
48000
56000
TABLE J
CHAR LENGTH
TABLE K
PARITY TABLE
0
1
2
3
0
1
2
8
7
6
5
NONE
ODD
EVEN
TABLE L
STOP BIT
0
1
2
1
1.5
2
DEFAULT DATA: SIM TYPE = DTE
CALL MODE = MANUAL
ANS MODE = MANUAL
AUTO BAUD = ON
DTR CHECK = ON
ECHO = ON
PROTOCOL = V110
SPEED = 9600
CHAR LENG = EIGHT BITS
PARITY = NONE
STOP BIT = 1
RELATED ITEMS: MMC 804 SYSTEM I/O PARAMETER
HOME
PAGE
Table of
Contents
PROSTAR DCS COMPACT
TECHNICAL MANUAL
PROGRAMMING
PART 2 JUNE 1995
Table of
Contents
MMC: 312
ALLOW CALLER ID
DESCRIPTION:
NOTE: This MMC only applies to systems with Caller ID software.
Allows the system administrator or technician to allow or deny the displaying of
Caller ID data at LCD keysets.
Each keyset can have the following options:
0
1
CID NOT ALLOWED
CID ALLOWED
No Caller ID data will be displayed
Caller ID data will be displayed
PROGRAM KEYS
UP & DOWN
KEYPAD
SOFT KEYS
SPEAKER
HOLD
ANS/RLS
HOME
PAGE
Used to scroll through options
Used to enter selections
Move cursor left and right
Used to store data and advance to next MMC
Used to clear previous entry
Used to select ALL
ACTION
DISPLAY
1. Press TRSF 312
Display shows
[201] ALLOW CID
CID NOT ALLOW
2. Dial station number (e.g., 205)
OR
Press UP or DOWN to select station
and press right soft key to move cursor
OR
Press ANS/RLS to select ALL
[205] ALLOW CID
CID NOT ALLOW
OR
3. Dial 1 or 0 to select option
[205] ALLOW CID
CID ALLOW
OR
[ALL] ALLOW CID
CID ALLOW
OR
Press UP or DOWN to select option
Press right soft key to return to step 2
[ALL] ALLOW CID
??
PROSTAR DCS COMPACT
TECHNICAL MANUAL
PROGRAMMING
PART 2 JUNE 1995
MMC: 312
4. Press TRSF to store and exit
OR
Press SPK to save and advance to next MMC
DEFAULT DATA: CALLER ID IS NOT ALLOWED
RELATED ITEMS: MMC 116 ALARM AND MESSAGE
MMC 414 ASSIGN CALLER ID TRUNKS
HOME
PAGE
Table of
Contents
PROSTAR DCS COMPACT
TECHNICAL MANUAL
MMC: 315
PROGRAMMING
PART 2 JANUARY 2002
CUSTOMER SET RELOCATION
DESCRIPTION:
System Administration access allows Customer Set Relocation with similar station
equipment. All assignments such as trunk ring, station group, station COS, station
speed dial etc. will follow the Customer Set Relocation program. 12 button keysets
and 24 button keysets can be exchanged. Basic 7 button keysets can be
exchanged with Basic 7 button key sets. Single line stations numbers can be
exchanged. If incompatible set types are selected the DCS system will provide an
ERROR:NO MATCH message. 12 button and 24 button key assignments should be
taken in consideration when relocating these types of sets.
NOTE: Customer access to this feature is default OFF in MMC 802.
PROGRAM KEYS
UP & DOWN
KEYPAD
SOFT KEYS
SPK
HOLD
ANS/RLS
Used to scroll through options
Used to enter selections
Move cursor left and right
Used to store data and advance to next MMC
Used to clear previous entry
Used to select ALL
HOME
PAGE
Table of
Contents
PROSTAR DCS COMPACT
TECHNICAL MANUAL
PROGRAMMING
PART 2 JANUARY 2002
Table of
Contents
MMC: 315
ACTION
DISPLAY
1. Press TRSF 315
Display shows
SET RELOCATION
EXT _
EXT
2. Enter first station number (e.g.,202)
press RIGHT soft key to move cursor
SET RELOCATION
EXT 202 EXT _
3. Enter second station number (e.g.,210)
Press RIGHT softkey to enter data
SET RELOCATE
EXT 202 EXT 210
4. Display will return to STEP 1
Go to STEP 2
OR
5. Press SPK to advance to next MMC
SET RELOCATION
EXT _
EXT
DEFAULT DATA:
HOME
PAGE
NONE
RELATED ITEMS: MMC 722 STATION KEY PROGRAMMING
MMC 723 SYSTEM KEY PROGRAMMING
PROSTAR DCS COMPACT
TECHNICAL MANUAL
PROGRAMMING
PART 2 DECEMBER 1994
MMC: 400
CUSTOMER ON/OFF PER TRUNK
DESCRIPTION:
Assigns several options on a per-trunk basis.
OPTIONS
0
1
2
1A2 EMULATION
TRUNK INC DND
TRUNK FORWARD
Trunk override call (NO PRIVACY)
Allows trunk to override DND (DIL)
Allows trunk to be forwarded
PROGRAM KEYS
UP & DOWN
KEYPAD
SOFT KEYS
SPK
HOLD
ANS/RLS
Used to scroll through options
Used to enter selections
Move cursor left and right
Used to store data and advance to next MMC
Used to clear previous entry
Used to select ALL
ACTION
DISPLAY
1. Press TRSF 400
Display shows
[701] TRK ON/OFF
1A2 EMULATE:OFF
2. Dial trunk number (e.g., 704)
OR
Press UP or DOWN key to select trunk
OR
Press ANS/RLS for all trunks and press
RIGHT soft key to move cursor to options
Dial option number from above list (0–2)
OR
Press UP or DOWN key to select option and
press RIGHT soft key to move cursor
[704] TRK ON/OFF
1A2 EMULATE:OFF
[ALL] TRK ON/OFF
1A2 EMULATE :?
[704] TRK ON/OFF
TRK FORWARD :ON
HOME
PAGE
Table of
Contents
PROSTAR DCS COMPACT
TECHNICAL MANUAL
PROGRAMMING
PART 2 DECEMBER 1994
Table of
Contents
MMC: 400
3. Dial 1 for ON or 0 for OFF
OR
Press UP or DOWN key to select ON/OFF
and press RIGHT soft key to return to step 2
Press TRSF to store and exit
OR
Press SPK to store and advance to next MMC
DEFAULT DATA: 1A2 EMULATE OFF
TRUNK INC DND OFF
TRUNK FORWARD ON
RELATED ITEMS: NONE
HOME
PAGE
[704] TRK ON/OFF
TRK FORWARD OFF
PROSTAR DCS COMPACT
TECHNICAL MANUAL
PROGRAMMING
PART 2 DECEMBER 1994
MMC: 401
C.O./PBX LINE
DESCRIPTION:
Used to select the mode of the C.O. line. If the PBX mode is chosen, PBX access
codes can be recognized allowing more complete toll restriction. This mode is
assigned on a per-trunk basis.
PROGRAM KEYS
UP & DOWN
KEYPAD
SOFT KEYS
SPK
HOLD
ANS/RLS
Used to scroll through options
Used to enter selections
Move cursor left and right
Used to store data and advance to next MMC
Used to clear previous entry
Used to select ALL
ACTION
DISPLAY
1. Press TRSF 401
Display shows
[701] PBX LINE
CO LINE
2. Dial trunk number (e.g., 704)
OR
Use UP or DOWN to scroll through trunks
Press RIGHT soft key to move cursor
OR
Press ANS/RLS to select ALL
[704] PBX LINE
CO LINE
3. Dial 1 for PBX or 0 for CO
OR
Use UP or DOWN to scroll through options
Press RIGHT soft key to return to step 2
[704] PBX LINE
PBX LINE
4. Press TRSF to store and exit
OR
Press SPK to store and advance to next MMC
DEFAULT DATA: ALL TRUNKS C.O. LINE
RELATED ITEMS: NONE
[ALL] PBX LINE
?
HOME
PAGE
Table of
Contents
PROSTAR DCS COMPACT
TECHNICAL MANUAL
PROGRAMMING
PART 2 DECEMBER 1994
MMC: 402
TRUNK DIAL TYPE
DESCRIPTION:
Used to determine the dialing type of each C.O. line. There are two options: rotary
dial and Dual Tone Multi Frequency (DTMF).
PROGRAM KEYS
UP & DOWN
KEYPAD
SOFT KEYS
SPK
HOLD
ANS/RLS
Used to scroll through options
Used to enter selections
Move cursor left and right
Used to store data and advance to next MMC
Used to clear previous entry
Used to select ALL
ACTION
DISPLAY
1. Press TRSF 402
Display shows
[701] DIAL TYPE
DTMF TYPE
2. Dial trunk number (e.g., 704)
OR
Use UP or DOWN to scroll through trunk
numbers and press RIGHT soft key to move
the cursor
OR
Press ANS/RLS to select ALL
[704] DIAL TYPE
DTMF TYPE
3. Dial 1 for PULSE or 0 for DTMF
OR
Use UP or DOWN to scroll through options
Press RIGHT soft keys to return to step 2
[704] DIAL TYPE
DIAL PULSE TYPE
4. Press TRSF to store and exit
OR
Press SPK to store and advance to next MMC
DEFAULT DATA: ALL TRUNKS DTMF
RELATED ITEMS: MMC 501 SYSTEM TIMERS
MMC 503 TRUNK-WIDE TIMER
[ALL] DIAL TYPE
?
HOME
PAGE
Table of
Contents
PROSTAR DCS COMPACT
TECHNICAL MANUAL
PROGRAMMING
PART 2 JUNE 1995
MMC: 403
TRUNK TOLL CLASS
DESCRIPTION:
Assigns toll class level assignments on a per-trunk or all-trunk basis in a day or
night condition. The options for toll level will follow the either station class or the
class of service defined in MMCs 702 Toll Deny Table and 703 Toll Allowance Table.
The toll classes that are available are listed below with their entry numbers.
ENTRY NUMBER
CLASS TYPE
DESCRIPTION
0
1
2
3
4
5
6
7
8
F-STN
CLS-A
CLS-B
CLS-C
CLS-D
CLS-E
CLS-F
CLS-G
CLS-H
Follow station toll restriction
Class A Unrestricted
Follow toll class B
Follow toll class C
Follow toll class D
Follow toll class E
Follow toll class F
Follow toll class G
Follow toll class H
PROGRAM KEYS
UP & DOWN
KEYPAD
SOFT KEYS
SPK
HOLD
ANS/RLS
Used to scroll through options
Used to enter selections
Move cursor left and right
Used to store data and advance to next MMC
Used to clear previous entry
Used to select ALL
ACTION
DISPLAY
1. Press TRSF 403
Display shows
[701] TOLL CLASS
D:F-STN N:F-STN
2. Dial trunk number
OR
Use UP or DOWN to scroll through trunk
numbers and press RIGHT soft key to move
the cursor
OR
Press ANS/RLS to select ALL
[704] TOLL CLASS
D:F-STN N:F-STN
[ALL] TOLL CLASS
D:?
N:?
HOME
PAGE
Table of
Contents
PROSTAR DCS COMPACT
TECHNICAL MANUAL
PROGRAMMING
PART 2 JUNE 1995
Table of
Contents
MMC: 403
3. Press LEFT soft key to advance to night toll
class
OR
Press RIGHT soft key to advance to day toll
class and enter toll class (e.g., 2)
OR
Use UP or DOWN to scroll through toll
classes and use RIGHT soft key to move the
cursor right
4. Press RIGHT soft key to return to step 2
OR
Enter night toll class (e.g., 2)
OR
Use UP or DOWN to scroll through toll
classes and use RIGHT soft key to return to
step 2
HOME
PAGE
[704] TOLL CLASS
D:CLS-B N:F-STN
[704] TOLL CLASS
D:CLS-B N:CLS-B
5. Press TRSF to store data and exit
OR
Press SPK to save and advance to next MMC
DEFAULT DATA: ALL TRUNKS F-STN DAY/NIGHT
RELATED ITEMS: MMC 202 CHANGE FEATURE PASSCODES
MMC 301 ASSIGN STATION COS
MMC 507 ASSIGN AUTO NIGHT TIME
MMC 701 ASSIGN COS CONTENTS
TOLL RESTRICTION
PROSTAR DCS COMPACT
TECHNICAL MANUAL
PROGRAMMING
PART 2 JANUARY 2002
MMC: 404
TRUNK NAME
DESCRIPTION:
Allows a character name to be entered to identify an individual trunk. There are ten
characters for Version 1 software and 11 characters for Version 2 software.
Names are written using the keypad. Each press of a key will select a character.
Press the desired key to move the cursor to the next position. For example, if the
directory name is “SAM SMITH,” press the number “7” three times to get the letter
“S.” Now press the number “2” once to get the letter “A.” Continue selecting
characters from the table below to complete your message. Pressing the “A” key
will change the letter from upper case to lower case.
NOTE: When the character you want appears on the same dial pad key as the
previous character, press the UP key to move the cursor to the right or the DOWN
key to move the cursor left. A space can be entered by using these keys.
•
DCS KEYSETS
COUNT
DIAL 0
DIAL 1
DIAL 2
DIAL 3
DIAL 4
DIAL 5
DIAL 6
DIAL 7
DIAL 8
DIAL 9
DIAL
1
Q
space
A
D
G
J
M
P
T
W
:
2
Z
?
B
E
H
K
N
R
U
X
=
3
.
,
C
F
I
L
O
S
V
Y
[
4
)
!
@
#
$
%
^
&
(
]
5
0
1
2
3
4
5
6
7
8
9
The # key can be used for the following special characters: #, space, &, !, :, ?, ., %,
$, -, <, >, /, =, [, ], @, ^, (, ), _, +, {, }, |, ;, \, " and ~.
HOME
PAGE
Table of
Contents
PROSTAR DCS COMPACT
TECHNICAL MANUAL
PROGRAMMING
PART 2 JANUARY 2002
Table of
Contents
MMC: 404
•
iDCS KEYSETS
COUNT
DIAL 0
DIAL 1
DIAL 2
DIAL 3
DIAL 4
DIAL 5
DIAL 6
DIAL 7
DIAL 8
DIAL 9
DIAL
1
2
3
4
5
<
space
A
D
G
J
M
P
T
W
:
>
?
B
E
H
K
N
Q
U
X
=
.
,
C
F
I
L
O
R
V
Y
[
)
!
@
#
$
%
^
S
0
1
2
3
4
5
6
7
8
9
Z
]
1. When the character you want appears on the same dial pad key as the previous
character, press UP to move the cursor one space to the right.
2. Other symbols are available for DIAL #.
PROGRAM KEYS
UP & DOWN
KEYPAD
SOFT KEYS
SPK
HOLD
A
Used to scroll through options/move cursor left or right
Used to enter selections
Move cursor left and right
Used to store data and advance to next MMC
Used to clear previous entry
Key 19; acts as toggle between upper case and lower case
ACTION
HOME
PAGE
DISPLAY
1. Press TRSF 404
Display shows
[701] TRUNK NAME
2. Dial trunk (e.g., 704)
OR
Press UP or DOWN to select trunk
Press RIGHT soft key to move the cursor
[704] TRUNK NAME
3. Enter trunk name using the procedure above
Press RIGHT soft key to return to step 2
[704] TRUNK NAME
SAMSUNG
PROSTAR DCS COMPACT
TECHNICAL MANUAL
PROGRAMMING
PART 2 JANUARY 2002
MMC: 404
4. Press TRSF to store and exit
OR
Press SPK to store and advance to next MMC
DEFAULT DATA: NO NAMES ENTERED
RELATED ITEMS: MMC 104 STATION NAME
MMC 405 TRUNK NUMBER
“A” KEY IS BUTTON 19
HOME
PAGE
Table of
Contents
PROSTAR DCS COMPACT
TECHNICAL MANUAL
PROGRAMMING
PART 2 JANUARY 2002
MMC: 405
TRUNK NUMBER
DESCRIPTION:
Allows a ten digit number to be entered to identify an individual trunk.
Numbers are written using the keypad. Each press of a key will select a digit.
Pressing the desired key will move the cursor to the next position. For example, if
the directory number is “426-4100,” press the number “4” five times to get the
number “4.” Now press the number “2” five times for number “2.” Continue
selecting characters from the table below to complete your number.
NOTE: When the number you want appears on the same dial pad key as the
previous number, press the UP key to move the cursor to the right or the DOWN key
to move the cursor left. A space can be entered by using these keys. The # key will
enter special digits, including a dash.
•
DCS KEYSETS
COUNT
DIAL 0
DIAL 1
DIAL 2
DIAL 3
DIAL 4
DIAL 5
DIAL 6
DIAL 7
DIAL 8
DIAL 9
DIAL
1
Q
space
A
D
G
J
M
P
T
W
:
2
Z
?
B
E
H
K
N
R
U
X
=
3
.
,
C
F
I
L
O
S
V
Y
[
4
)
!
@
#
$
%
^
&
(
]
5
0
1
2
3
4
5
6
7
8
9
The # key can be used for the following special characters: #, space, &, !, :, ?, ., %,
$, -, <, >, /, =, [, ], @, ^, (, ), _, +, {, }, |, ;, \, " and ~.
HOME
PAGE
Table of
Contents
PROSTAR DCS COMPACT
TECHNICAL MANUAL
PROGRAMMING
PART 2 JANUARY 2002
Table of
Contents
MMC: 405
•
iDCS KEYSETS
COUNT
DIAL 0
DIAL 1
DIAL 2
DIAL 3
DIAL 4
DIAL 5
DIAL 6
DIAL 7
DIAL 8
DIAL 9
DIAL
1
2
3
4
5
<
space
A
D
G
J
M
P
T
W
:
>
?
B
E
H
K
N
Q
U
X
=
.
,
C
F
I
L
O
R
V
Y
[
)
!
@
#
$
%
^
S
0
1
2
3
4
5
6
7
8
9
Z
]
1. When the character you want appears on the same dial pad key as the previous
character, press UP to move the cursor one space to the right.
2. Other symbols are available for DIAL #.
PROGRAM KEYS
UP & DOWN
KEYPAD
SOFT KEYS
SPK
HOLD
A
Used to scroll through options/move cursor left or right
Used to enter selections
Move cursor left and right
Used to store data and advance to next MMC
Used to clear previous entry
Key 19; acts as toggle between upper case and lower case
ACTION
HOME
PAGE
DISPLAY
1.
Press TRSF 405
Display shows
[701] CO TEL NO.
2.
Dial trunk (e.g., 705)
OR
Press UP or DOWN to select trunk and
press RIGHT soft key to move the cursor
[704] CO TEL NO.
3.
Enter trunk number using the procedure
described above
[704] CO TEL NO.
3054264100
PROSTAR DCS COMPACT
TECHNICAL MANUAL
PROGRAMMING
PART 2 JANUARY 2002
MMC: 405
4.
Press RIGHT soft key to return to step 2
above
OR
Press TRSF to store and exit
OR
Press SPK to store and advance to next MMC
DEFAULT DATA: NO NUMBERS ENTERED
RELATED ITEMS: MMC 404 TRUNK NAME
HOME
PAGE
Table of
Contents
PROSTAR DCS COMPACT
TECHNICAL MANUAL
MMC: 406
PROGRAMMING
PART 2 DECEMBER 1994
TRUNK RING ASSIGNMENT
DESCRIPTION:
Enables ringing to a specific station or to a group of stations when incoming calls
are received. This MMC controls both day and night locations.
DEVICE
DEFAULT DN
Station
Station group
201–222, 301–316
500–529
PROGRAM KEYS
UP & DOWN
KEYPAD
SOFT KEYS
SPK
HOLD
ANS/RLS
Used to scroll through options
Used to enter selections
Move cursor left and right
Used to store data and advance to next MMC
Used to clear previous entry
Used to select ALL (trunks only)
ACTION
DISPLAY
1.
Press TRSF 406
Display shows
[701] TRK RING
D:500
N:500
2.
Dial trunk number (e.g., 704)
OR
Use UP or DOWN to scroll through trunk
numbers and press the RIGHT soft key to
move the cursor
[704] TRK RING
D:500
N:500
3.
Dial station number or station group
number
(e.g., 205 or 501)
OR
Press UP or DOWN key to select station
number or station group number and press
RIGHT soft key to move cursor to night
destination and repeat step 3
OR
Press RIGHT soft key to return to step 2
[704] TRK RING
D:205
N:500
[704] TRK RING
D:205
N:501
HOME
PAGE
Table of
Contents
PROSTAR DCS COMPACT
TECHNICAL MANUAL
PROGRAMMING
PART 2 DECEMBER 1994
MMC: 406
4.
Press TRSF to store and exit
OR
Press SPK to store and advance to next MMC
DEFAULT DATA: ALL TRUNKS DAY:500 NIGHT:500
RELATED ITEMS: MMC 202 CHANGE FEATURE PASSCODES
MMC 507 ASSIGN AUTO NIGHT TIME
MMC 601 ASSIGN STATION GROUP
HOME
PAGE
Table of
Contents
PROSTAR DCS COMPACT
TECHNICAL MANUAL
MMC: 407
PROGRAMMING
PART 2 DECEMBER 1994
FORCED TRUNK RELEASE
DESCRIPTION:
Provides a postive forced trunk release to a specific trunk or all trunks in the event
of a trunk lockup.
PROGRAM KEYS
UP & DOWN
KEYPAD
SOFT KEYS
SPK
ANS/RLS
Used to scroll through options
Used to enter selections
Move cursor left and right
Used to store data and advance to next MMC
Used to select ALL
ACTION
DISPLAY
1.
Press TRSF 407
Display shows
[701] TRK RELS.
RELEASE?Y:1,N:0
2.
Dial in trunk number ( e.g., 704)
OR
[704] TRK RELS.
RELEASE?_Y:1,N:0
Press UP or DOWN key selected trunk and
press right soft key
OR
Press ANS/RLS to select all trunks
[ALL] TRK RELS.
RELEASE?_Y:1,N:0
3.
Dial 1 for YES
OR
Dial 0 for NO
Pressing 1or 0 will return to step 2
[704] TRK RELS.
RELEASE?1Y:1,N:0
4.
Press TRSF to store and exit
OR
Press SPK to store and advance to next MMC
DEFAULT DATA: NONE
RELATED ITEMS: MMC 603 ASSIGN TRUNK GROUP
HOME
PAGE
Table of
Contents
PROSTAR DCS COMPACT
TECHNICAL MANUAL
MMC: 408
PROGRAMMING
PART 2 NOVEMBER 2000
ASSIGN TRUNK MUSIC ON HOLD SOURCE
DESCRIPTION:
Allows the System Administrator to select what a trunk caller will hear when that
trunk is placed on hold. There are a total of 5 possible music selections (see below).
If you have a SVMi-4 Voice Mail System installed you may also select a SVMi-4
recording as a music source. The recording must already been defined in MMC 748
and will show up here as the SVMi-4 port associated with the recording.
OPTIONS
1. NONE: No Background Music.
2. EXTERNAL DEVICE: Music Source or Digital announcer. This is entered as the
directory number of an external music source located on the KSU motherboard
(371) or a MISC card (372).
3. VOICE MAIL SOUND FILE: If the COMPACT system has an optional SVMi-4
card installed, up to 100 custom recorded sound files from the Voice Mail card
can be used for BGM sources. Select the SVMi-4 port assigned in MMC748. For
information on creating the sound files see SVMi-4 System Administrator
Manual-Recording greetings by number. If you select this option be advised that
VMMOH source requires one dedicated SVMi-4 port/channel.
PROGRAM KEYS
UP & DOWN
KEYPAD
SOFT KEYS
SPK
HOLD
ANS/RLS
Used to scroll through options
Used to enter selections
Move cursor left and right
Used to store data and advance to next MMC
Used to clear previous entry
Used to select ALL
ACTION
1. Press TRSF 408
Display shows current setting
DISPLAY
[701 ] TRK MOH
MOH SOURCE:TONE
HOME
PAGE
Table of
Contents
PROSTAR DCS COMPACT
TECHNICAL MANUAL
PROGRAMMING
PART 2 NOVEMBER 2000
HOME
PAGE
Table of
Contents
MMC: 408
2. Dial trunk number (e.g., 704)
OR
Use UP or DOWN to scroll through trunks
Press RIGHT soft key to move cursor
OR
Press ANS/RLS to select ALL
[704 ] TRK MOH
MOH SOURCE:TONE
3. Enter source number (e.g., 371)
OR
Press UP or DOWN key to select option
Press RIGHT soft key to return to step 2 above
[705 ] TRK MOH
MOH SOURCE:371
[ALL] TRK MOH
MOH SOURCE:?
4. Press TRSF to store and exit
OR
Press SPK to store and advance to next MMC
DEFAULT DATA: TONE
RELATED ITEMS: MMC 308 ASSIGN BACKGROUND MUSIC SOURCE
MMC 748 ASSIGN VMMOH
PROSTAR DCS COMPACT
TECHNICAL MANUAL
PROGRAMMING
PART 2 DECEMBER 1994
Table of
Contents
MMC: 409
TRUNK STATUS READ
DESCRIPTION:
Allows the status of trunks to be read in a format that will enable the servicing
personnel to quickly identify the ownership and position of a trunk. This is a readonly MMC.
OPTION TABLE
00
01
02
03
04
05
06
07
08
09
10
11
12
13
Port Number
Tenant Number
1A2 Emulation On/Off
Trunk Forward Sts On/Off
Trunk Line Type
Trunk Dial Type
Day Trunk Toll Restriction
Night Trunk Toll Restriction
Day Trunk Ring Destination
Night Trunk Ring Destination
Trunk Music on Hold Source
Trunk DISA Status
Trunk Name
Trunk Listed Number
PROGRAM KEYS
UP & DOWN
KEYPAD
SOFT KEYS
SPK
HOLD
ACTION
1. Press TRSF 409
Display shows
HOME
PAGE
Used to scroll through options
Used to enter selections
Move cursor left and right
Used to store data and advance to next MMC
Used to clear previous entry
DISPLAY
[701] TRK STATUS
P00:C1-01-OFS:01
PROSTAR DCS COMPACT
TECHNICAL MANUAL
PROGRAMMING
PART 2 DECEMBER 1994
Table of
Contents
MMC: 409
2. Enter trunk number via dial keypad (e.g.,
707)
OR
Press UP or DOWN key to make selection
and press RIGHT soft key to advance cursor
HOME
PAGE
[707] TRK STATUS
P33:C2-03-OFS:07
3a. Enter desired option
OR
Press UP or DOWN key to make selection
[707] TRK STATUS
TENANT NUMBER:1
3b. Enter desired option
OR
Press UP or DOWN key to make selection
[707] TRK STATUS
1A2 EMUL STS:OFF
3c. Enter desired option
OR
Press UP or DOWN key to make selection
[707] TRK STATUS
TRK FWD STS :ON
3d. Enter desired option
OR
Press UP or DOWN key to make selection
[707] TRK STATUS
LINE: CO LINE
3e. Enter desired option
OR
Press UP or DOWN key to make selection
[707] TRK STATUS
DIAL:DTMF TYPE
3f. Enter desired option
OR
Press UP or DOWN key to make selection
[707] TRK STATUS
DAY TOLL :F-STN
3g. Enter desired option
OR
Press UP or DOWN key to make selection
[707] TRK STATUS
NIGHT TOLL:F-STN
3h. Enter desired option
OR
Press UP or DOWN key to make selection
[707] TRK STATUS
DAY RING :500
3i. Enter desired option
OR
Press UP or DOWN key to make selection
[707] TRK STATUS
NIGHT RING:500
PROSTAR DCS COMPACT
TECHNICAL MANUAL
PROGRAMMING
PART 2 DECEMBER 1994
HOME
PAGE
Table of
Contents
MMC: 409
3j. Enter desired option
OR
Press UP or DOWN key to make selection
[707] TRK STATUS
MOH SOURCE:TONE
3k. Enter desired option
OR
Press UP or DOWN key to make selection
[707] TRK STATUS
DISA:NORMAL
3l. Enter desired option
OR
Press UP or DOWN key to make selection
[707] TRK STATUS
NAME:
3m. Enter desired option
OR
Press UP or DOWN key to make selection
[707] TRK STATUS
TEL#:
P00:PORT NUMBER IN SYSTEM
CX=CABINET 1 MAIN, 2 EXPANSION RACK
0X=POSTION ON PCB, (C1-01~04)MAIN CABINET, POSTION 1/4
(C2-01~06)EXP CABINET,
1~2 FIRST SLOT
3~4 SECOND SLOT
5~6 THIRD SLOT
OFS=ACTUAL TRUNK NUMBER (1~10)
DEFAULT DATA: SEE ABOVE ENTRIES
RELATED ITEMS: MMC 400 CUSTOMER ON/OFF PER TRUNK
MMC 401 C.O./PBX LINE
MMC 402 TRUNK DIAL TYPE
MMC 403 TRUNK TOLL CLASS
MMC 404 TRUNK NAME
MMC 405 TRUNK NUMBER
MMC 406 TRUNK RING ASSIGNMENT
MMC 408 ASSIGN TRUNK MUSIC ON HOLD SOURCE
MMC 410 ASSIGN DISA TRUNK
PROSTAR DCS COMPACT
TECHNICAL MANUAL
MMC: 410
PROGRAMMING
PART 2 NOVEMBER 1997
ASSIGN DISA TRUNK
DESCRIPTION:
Allows the system the ability to have Direct Inward System Access (DISA). Because
there is a possibility that unauthorized calls will be made via this feature, several
safeguards have been added. The end user must be informed of these to prevent
unnecessary service calls. DISA can lockout when a predetermined number of
invalid consecutive calls are attempted. Callers will then receive error tone until the
programmable timer has expired. The key may be used to initiate new dial tone
while in a station to station call. The # key may be used to terminate the DISA call
and disconnect the central office line.
PROGRAM KEYS
UP & DOWN
KEYPAD
SOFT KEYS
SPK
HOLD
ANS/RLS
Used to scroll through options
Used to enter selections
Move cursor left and right
Used to store data and advance to next MMC
Used to clear previous entry
Used to select ALL (trunks)
FEATURE KEYS
0
1
2
3
NORMAL
DAY
NIGHT
BOTH
No DISA service
In day mode DISA is available
In night mode DISA is available
In day and night mode DISA is available
ACTION
DISPLAY
1. Press TRSF 410
Display shows
[701] DISA LINE
NORMAL
2. Dial trunk number (e.g., 704)
OR
Press UP or DOWN key to select trunk and
press RIGHT soft key
OR
Press ANS/RLS key to select all trunks
[704] DISA LINE
NORMAL
[ALL] DISA LINE
?
HOME
PAGE
Table of
Contents
PROSTAR DCS COMPACT
TECHNICAL MANUAL
PROGRAMMING
PART 2 NOVEMBER 1997
Table of
Contents
MMC: 410
3. Dial an option (0–3) from the above table
OR
Press UP or DOWN key to select trunk and
press RIGHT soft key to return to step 2
HOME
PAGE
[704] DISA LINE
NIGHT
4. Press TRSF to store and exit
OR
Press SPK to store and advance to next MMC
DEFAULT DATA: ALL TRUNKS NORMAL
RELATED ITEMS: MMC 500 SYSTEM-WIDE COUNTERS
PROSTAR DCS COMPACT
TECHNICAL MANUAL
PROGRAMMING
PART 2 NOVEMBER 1997
Table of
Contents
MMC: 412
ASSIGN TRUNK SIGNAL
DESCRIPTION:
Assigns signaling for E&M cards. This MMC is only for E & M trunks. These trunks
may also use the translation tables in MMC 714. The E & M trunks can use the
translation tables if specified in MMC 416. The signaling types are as follows:
SIGNALLING
IMMEDIATE
DELAYED
WINK
PROGRAM KEYS
UP & DOWN
KEYPAD
SOFT KEYS
SPK
HOLD
ANS/RLS
HOME
PAGE
Used to scroll through options
Used to enter selections
Move cursor left and right
Used to store data and advance to next MMC
Used to clear previous entry
Used to select ALL
ACTION
1. Press TRSF 412
Display shows
DISPLAY
[705] TRK SIGNAL
IMMEDIATE START
2a. Enter desired trunk number (e.g., 706)
OR
Press UP or DOWN key to make selection
Press RIGHT soft key to move cursor
OR
Press ANS/RLS to select all trunks
[706] TRK SIGNAL
IMMEDIATE START
2b. Enter desired trunk type selection from above
OR
Press UP or DOWN key to make selection
and press RIGHT soft key to return to step 2a
[706] TRK SIGNAL
WINK
3. Press TRSF to store and exit
OR
Press SPK to store and advance to next MMC
[ALL] TRK SIGNAL
?
PROSTAR DCS COMPACT
TECHNICAL MANUAL
PROGRAMMING
PART 2 NOVEMBER 1997
MMC: 412
DEFAULT DATA: ALL TIE TRUNKS SET TO IMMEDIATE
RELATED ITEMS: MMC 416 E & M TRANSLATION
MMC 714 DID NUMBER AND NAME TRANSLATION
HOME
PAGE
Table of
Contents
PROSTAR DCS COMPACT
TECHNICAL MANUAL
MMC: 414
PROGRAMMING
PART 2 JUNE 1995
ASSIGN CALLER ID TRUNKS
DESCRIPTION:
NOTE: This MMC only applies to systems with Caller ID software.
Allows the system administrator or technician to activate Caller ID on a per-trunk
basis. Activating Caller ID will delay the incoming ring indication at the operator by
two ring cycles to allow for the collection of the Caller ID data.
Each trunk has the following options:
0
1
NORMAL
CID TRUNK
This is not a Caller ID trunk.
This is a Caller ID trunk.
PROGRAM KEYS
UP & DOWN
KEYPAD
SOFT KEYS
SPEAKER
HOLD
ANS/RLS
Used to scroll through options
Used to enter selections
Move cursor left and right
Used to store data and advance to next MMC
Used to clear previous entry
Used to select ALL
ACTION
DISPLAY
1. Press TRSF 414
Display shows
[701] CID TRUNK
NORMAL
2. Dial trunk number (e.g., 705)
OR
Press UP or DOWN to select trunk
and press right soft key to move cursor
OR
Press ANS/RLS to select ALL
[705] CID TRUNK
NORMAL
OR
3. Dial 1 or 0 to change options
[705] CID TRUNK
CID TRUNK
OR
[ALL] CID TRUNK
CID TRUNK
OR
Press UP or DOWN to select an option and
press right soft key to return to step 2
[ALL] CID TRUNK
??
HOME
PAGE
Table of
Contents
PROSTAR DCS COMPACT
TECHNICAL MANUAL
PROGRAMMING
PART 2 JUNE 1995
MMC: 414
4. Press TRSF to store and exit
OR
Press SPK to save and advance to next MMC
DEFAULT DATA: ALL TRUNKS ARE NORMAL
RELATED ITEMS: MMC 119 CALLER ID DISPLAY
MMC 312 ALLOW CALLER ID
HOME
PAGE
Table of
Contents
PROSTAR DCS COMPACT
TECHNICAL MANUAL
MMC: 415
PROGRAMMING
PART 2 JUNE 1995
REPORT TRUNK ABANDON DATA
DESCRIPTION:
NOTE: This MMC only applies to systems with Caller ID software.
Allows the system administrator or technician to enable or disable the reporting of
abandoned C.O. calls for which CID information has been collected on a per-trunk
basis. There are two options for this MMC as follows:
0 REPORT: NO
Abandoned call records for incoming calls with CID
information will not be printed on SMDR or stored in the
system call abandon list. These records will continue to be
stored in the station review list.
1 REPORT: YES
Abandoned call records for incoming calls with CID
information will be printed on SMDR and stored in the
system call abandon list. These records will also be stored
in the station review list.
NOTE: In order for these abandoned call records to print on SMDR, MMC 725
SMDR OPTIONS Option 11 Print Abandoned Call Records must be set to YES.
PROGRAM KEYS
UP & DOWN
KEYPAD
SOFT KEYS
SPK
HOLD
ANS/RLS
Used to scroll through options
Used to enter selections
Move cursor left and right
Used to store data and advance to next MMC
Used to clear previous entry
Used to select ALL
ACTION
DISPLAY
1. Press TRSF 415
Display shows
[701] TRK ABNDN
REPORT : YES
2. Dial trunk number (e.g., 705)
OR
Use UP and DOWN to select trunk and use
left or right soft key to move cursor
[705] TRK ABNDN
REPORT : YES
HOME
PAGE
Table of
Contents
PROSTAR DCS COMPACT
TECHNICAL MANUAL
PROGRAMMING
PART 2 JUNE 1995
Table of
Contents
MMC: 415
3. Dial 1 for YES or 0 for NO
OR
Use UP and DOWN to scroll through
options and use left or right soft key to
return to step 2
HOME
PAGE
[705] TRK ABNDN
REPORT : NO
4. Press TRSF to save and exit
OR
Press SPK to save and advance to next MMC
DEFAULT DATA: ALL TRUNKS WILL REPORT DATA
RELATED ITEMS: MMC 725 SMDR OPTIONS
MMC 414 ASSIGN CALLER ID TRUNKS
PROSTAR DCS COMPACT
TECHNICAL MANUAL
MMC: 416
PROGRAMMING
PART 2 NOVEMBER 1997
Table of
Contents
ASSIGN E & M TRANSLATION
DESCRIPTION:
Gives the ability of an E & M tie line to use the translation tables (MMC 714). When
the digits received are processed by the translation table the E&M circuits can be
used for DID or DNIS.
PROGRAM KEYS
UP & DOWN
KEYPAD
SOFT KEYS
SPK
ANS/RLS
HOME
PAGE
Used to scroll through options
Used to enter selections
Move cursor left and right
Used to store data and advance to next MMC
Used to select ALL
ACTION
DISPLAY
1. Press TRSF 416
Display shows
[705] E&M TRANS
UNUSE DID TRANS
2. Dial trunk number (e.g., 717)
OR
Press UP or DOWN key to select trunk
and press RIGHT soft key to move cursor
[707] E&M TRANS
UNUSE DID TRANS
3. Press UP or DOWN key to scroll options
and press RIGHT soft key to select
[707] E&M TRANS
USE DID TRANS
4. Press TRSF to store and exit
OR
Press SPK to store and advance to next MMC
DEFAULT DATA: UNUSE DID TRANS
RELATED ITEMS: MMC 714 DID NUMBER AND NAME TRANSLATION
RELATED TRUNK PROGRAMMING
PROSTAR DCS COMPACT
TECHNICAL MANUAL
PROGRAMMING
PART 2 DECEMBER 1994
MMC: 500
SYSTEM-WIDE COUNTERS
DESCRIPTION:
Used to set the values of the system counters. The counters are listed below with a
brief description of each.
1. ALARM REMINDER
This is the number of times that an alarm reminder
will ring a station before canceling. RANGE = 1–99.
2. AUTO REDIAL
This is the number of times the system will redial an
outside number after the auto redial feature has been
activated. RANGE = 1–15.
3. DISA INTERCOM CALL
This counter sets the maximum number of intercom
calls that can be made after accessing a DISA line.
RANGE = 1–99.
4. DISA LOCK OUT
This is the number of attempts to incorrectly access a
DISA line the system will allow before locking out the
DISA line. RANGE = 1–99.
5. NEW CALL
This is the number of times the system will allow a
user to signal New Call on a C.O. line during one call.
RANGE = 1–99.
PROGRAM KEYS
UP & DOWN
KEYPAD
SOFT KEYS
SPK
HOLD
ANS/RLS
ACTION
1. Press TRSF 500
Display shows
Used to scroll through options
Used to enter selections
Move cursor left and right
Used to store data and advance to next MMC
Used to clear previous entry
Used to select ALL
DISPLAY
ALARM REM.CNTER
01→
HOME
PAGE
Table of
Contents
PROSTAR DCS COMPACT
TECHNICAL MANUAL
PROGRAMMING
PART 2 DECEMBER 1994
Table of
Contents
MMC: 500
2. Enter number from above list (e.g., 3)
OR
Press UP or DOWN key to make selection
and press RIGHT soft key to move cursor
DISA LOCK CNTER
05→
3. Enter in new value via dial keypad
If entry is valid, system will return to step 2
DISA LOCK CNTER
05→02
4. Press TRSF to store and exit
OR
Press SPK to store and advance to next MMC
DEFAULT DATA: ALARM REMINDER COUNTER 5
AUTO REDIAL COUNTER
5
DISA INTERCOM COUNTER
5
DISA LOCK COUNTER
5
NEW CALL COUNTER
99
RELATED ITEMS: MMC 501 SYSTEM TIMERS
HOME
PAGE
PROSTAR DCS COMPACT
TECHNICAL MANUAL
PROGRAMMING
PART 2 NOVEMBER 2000
MMC: 501
SYSTEM TIMERS
DESCRIPTION:
Allows the technician to adjust individual timers as necessary.
NOTE: Certain timers are disabled when the value is “000”.
PROGRAM KEYS
UP & DOWN
KEYPAD
SOFT KEYS
SPK
Used to scroll through options
Used to enter selections
Move cursor left and right
Used to store data and advance to next MMC
ACTION
DISPLAY
1. Press TRSF 501
Display shows first timer value
AA INT DGT TIME
05 SEC →
2. Press UP or DOWN key to select timer and
press RIGHT soft key to move cursor
KMMC LOCK OUT TM
30 SEC → _
3. Enter new value using keypad; if valid, system
returns to step 2 with new value
KMMC LOCK OUT TM
30 SEC → 255
4. Press TRSF to store and exit
OR
Press SPK to store and advance to next MMC
DEFAULT DATA: SEE TABLE OF TIMERS AND VALUES
RELATED ITEMS: NONE
HOME
PAGE
Table of
Contents
PROSTAR DCS COMPACT
TECHNICAL MANUAL
PROGRAMMING
PART 2 NOVEMBER 2000
HOME
PAGE
Table of
Contents
MMC: 501
TIMER TABLE
TIMER NAME
DEFAULT
RANGE
ALERT TONE TIMER
ALM REM.INTERVAL
ALM REM.RING OFF
ATT.RECALL TIME
AUTO REDIAL INT.
AUTO REDIAL RLS.
CADENCE CARD TONE INT TIME
CALLBACK NO ANS
CAMP ON RECALL
CID DISPLAY TIME*
CID MSG RECEIVE*
CO–CO DISCONNECT
CONFIRM TONE TM
CRD TONE INT TM
DIAL PASS TIME
DISA DISCONNECT
DISA DTMF DETECT
DISA LOCK OUT/TM
DISA PASS CHECK
DISPLAY DELAY TM
DOOR LOCK RELES.
DOOR RING DETECT
DOOR RING OFF TM
E-HOLD RECALL TM
EXT.FWD DELAY TM
FIRST DIGIT TIME
HOK FLASH MAX TM
HOK FLASH MIN TM
HOOK OFF TIME
HOOK ON TIME
INQUIRY RELEASE
INTER DIGIT TIME
KMMC LOCK OUT TM
LCR ADVANCE TIME
LCR INTER DIGIT
OFF HOK RING INT
OFF HOOK SELECT
OHVA ANSWER TIME
PAGE TIME OUT
PAGE TONE TIME
PARK RCALL TIME
PC-MMC LOCK OUT
POWER DOWN TIME
RECALL DISCONECT
RECALL WAIT TIME
SMDR START/DP
1000 MS
10 SEC
26 SEC
30 SEC
30 SEC
45 SEC
000 SEC
30 SEC
30 SEC
05 SEC
08 SEC
20 MIN
1000 MS
30 SEC
05 SEC
30 MIN
000 SEC
30 MIN
30 MIN
03 SEC
500 MS
50 MS
30 SEC
45 SEC
10 SEC
10 SEC
800 MS
350 MS
200 MS
1000 MS
30 SEC
10 SEC
30 SEC
05 SEC
05 SEC
15 SEC
05 SEC
10 SEC
20 SEC
500 SEC
45 SEC
5 MIN
2000 MS
45 MIN
15 SEC
30 SEC
100–2500 MS
1–255 SEC
1–25 SEC
1–255 SEC
1–255 SEC
1–255 SEC
001–255 SEC
1–255 SEC
1–255 SEC
1–25 SEC
1–25 SEC
0–255 MIN
100–2500 MS
001–255 SEC
1–25 SEC
1–255 MIN
0-255 SEC
1–255 MIN
1–255 MIN
1–255 SEC
100–2500 MS
10–250 MS
1–255 SEC
0–255 SEC
1–255 SEC
1–255 SEC
0010–2500MS
0010–2500MS
10–250 MS
100–2500 MS
1–255 SEC
10–255 SEC
100–255 SEC
1–255 SEC
1–255 SEC
1–255 SEC
0–255 SEC
1–255 SEC
1–255 SEC
100–2500
0–255 SEC
5–60 MIN
1000–9000 MS
1–255 SEC
1–255 SEC
1–255 SEC
PROSTAR DCS COMPACT
TECHNICAL MANUAL
PROGRAMMING
PART 2 NOVEMBER 2000
Table of
Contents
MMC: 501
TIMER NAME
SMDR START/DTMF
SYS HOLD RECALL
TRANSFER RECALL
DEFAULT
RANGE
15 SEC
45 SEC
15 SEC
1–255 SEC
0–255 SEC
0–255 SEC
NOTE: Timers marked with an asterisk require optional hardware and/or software.
TIMER DESCRIPTIONS
ALERT TONE TIMER
This timer sets the duration of the attention tone preceding a
call to a keyset in the Voice Announce or Auto Answer
mode. This tone will also precede a forced Auto Answer call.
ALM REM INTERVAL
This timer controls the time length between ring attempts at
a station when alarm reminder is set.
ALM REM RING OFF
This timer controls the length of the ring cycle duration when
alarm reminder is set at a station.
ATT RECALL TIME
This is the length of time a transfer recall will ring at a station
before recalling the operator.
AUTO REDIAL INT
This timer controls the time between attempts after RETRY
dialing is set on a station.
AUTO REDIAL RLS
This timer controls the duration of a Ring No Answer
condition on a retry number dialed before the auto redial is
automatically canceled.
CALLBACK NO ANS
This timer controls the time before the callback is
automatically canceled when a callback detects Ring No
Answer.
CADENCE CARD TONE INT TIME
HOME
PAGE
This is the call record tone interval time. An
entry other than zero will cause a tone to be
heard by all the parties in a recorded
conversation. The range for the tone is 001
(every second) to 255 (every 255 seconds). A
value of 000 means no tone.
CAMP ON RECALL
This timer controls the duration of time a camped-on call will
stay at a destination before recalling to the transferring
station.
CID DISPLAY TIME
The amount of time that the Caller ID information remains on
the keyset’s display.
PROSTAR DCS COMPACT
TECHNICAL MANUAL
PROGRAMMING
PART 2 NOVEMBER 2000
MMC: 501
CID MSG RECEIVE
The amount of time that the system will allow a valid
message from the C.O.
C.O.-C.O. DISCONNECT This timer monitors the duration of a unsupervised
conference; when it expires, both trunks are disconnected.
CONFIRM TONE TIME
The tone heard when a feature is activated or deactivated.
CRD TONE INT TM
This is the call record tone interval time. An entry other than
zero will cause a tone to be heard by all the parties in a
recorded conversation. The range for the tone is 001 (every
second) to 255 (every 255 seconds). A value of 000 means
no tone. Requires SVMi-4 card.
DIAL PASS TIME
This timer monitors the duration of the time before
connecting the transmit of an analog station port to the trunk
side of an outgoing call.
DISA DTMF DETECT
This timer sets the time duration that DTMF can be received
on a DISA line.
DISA DISCONNECT
This timer controls the maximum duration of a DISA call.
DISA LOCK OUT TIMER This timer controls the duration of time a DISA call is not
allowed to be made after the DISA error counter has expired
(MMC 500).
DISA PASS CHECK
This timer defines the time period before the system clears
the incorrect passcode counter.
DISPLAY DELAY TIMER This timer controls the duration a display is shown in the
LCD display. This timer also controls the duration of time
that error tone is heard.
DOOR LOCK RELEASE This timer controls the duration of time the door lock relay
will be activated.
DOOR RING DETECT
This timer controls the duration of time before a call is
answered by the door phone.
DOOR RING OFF TM
This timer controls the duration of ringing at the door ring
destination before automatically canceling.
E-HOLD RECALL TM
This timer controls the duration of time a call is held
exclusively at a station before recalling.
HOME
PAGE
Table of
Contents
PROSTAR DCS COMPACT
TECHNICAL MANUAL
PROGRAMMING
PART 2 NOVEMBER 2000
MMC: 501
EXT. FWD DELAY TM
This timer controls the External Call Forward feature which
will allow a station to ring before the call is placed on
external call forwarding.
FIRST DIGIT TIME
This timer controls how long the system will wait for dialing
to begin before dropping the dial tone and returning the
user to error tone.
HOK FLASH MAX TM
This timer monitors the duration of a hookswitch flash to
ensure that the flash is valid and not a line noise or an
accidental hookswitch bounce (LONGEST DURATION).
HOK FLASH MIN TM
This timer monitors the duration of a hookswitch flash to
ensure that the flash is valid and not a line noise or an
accidental hookswitch bounce (SHORTEST DURATION).
HOOK OFF TIME
This timer controls the time before dial tone is sent to a
single line station.
HOOK ON TIME
This timer sets the minimum amount of time that the system
will recognize as an SLT hang up.
INQUIRY RELEASE
This timer monitors the duration of the interaction of the soft
key to determine when to return the LCD back to a normal
status. This timer affects only display phones.
INTER DIGIT TIME
This timer controls the grace period between dialing valid
digits before dropping the call and returning the user back
to error tone.
KMMC DIGIT TIME
This timer controls the grace period between programming
actions while in a programming session. The timer
automatically returns the system to secure programming
status.
LCR ADVANCE TIME
This timer controls the duration of time before selecting the
next allowable route when a station is allowed to route
advance.
LCR INTER DIGIT
This timer controls the grace period between dialing valid
digits before dropping the call and returning the user back
to error tone.
OFF HOOK RING
This timer controls the duration of time between ring bursts
to a user who has a camped-on call.
HOME
PAGE
Table of
Contents
PROSTAR DCS COMPACT
TECHNICAL MANUAL
PROGRAMMING
PART 2 NOVEMBER 2000
MMC: 501
OFF HOOK SELECT
This timer controls the grace period before placing a
internal/external call as programmed in MMCs 306 and 307.
OHVA ANSWER TIME
This timer controls the time duration of an OHVA call before
automatic rejection.
PAGE TIME OUT
This timer controls the duration of an external page
announcement.
PAGE TONE TIME
This timer controls the duration of tone burst heard over the
page prior to the page announcement.
PARK RECALL TIME
This timer controls the duration of time a call is parked
before recalling to the call park originator.
PC-MMC LOCK OUT
This timer monitors the PCMMC activity, drops the link if no
action is created by PCMMC and returns the system back to
secure program status.
POWER DOWN TIME
This timer monitors the power to the ROM pack to begin
shutdown status.
RECALL DISCONNECT
This is the time an attendant recall will ring before being
disconnected.
RECALL WAIT TIME
This is the time any recall (hold or transfer) continues to
recall at your station before it recalls to the operator.
SMDR START/DIAL
PULSE (ROTARY)
the
This grace period timer starts SMDR recording for rotary
dialing. This timer also controls the LCD duration timer on
the keysets. The duration time displayed and the SMDR time
duration will be the same.
SMDR START/DTMF
This grace period timer starts SMDR recording for touchtone
dialing. This timer also controls the LCD duration timer on
the keysets. The duration time displayed and the SMDR time
duration will be the same.
SYS HOLD RECALL
This timer determines the time calls can be left on hold
before recalling back to the holding station. This is a
system-wide timer. Setting timer to 000 will defeat this
feature and no recalling will take place.
TRANSFER RECALL
This timer determines the time transferred calls ring before
recalling. This is a system-wide timer.
HOME
PAGE
Table of
Contents
PROSTAR DCS COMPACT
TECHNICAL MANUAL
PROGRAMMING
PART 2 DECEMBER 1994
MMC: 502 FORWARD NO ANSWER TIMER
DESCRIPTION:
Allows the Forward No Answer timer to be changed on a per-station basis or for the
entire system.
PROGRAM KEYS
UP & DOWN
KEYPAD
SOFT KEYS
SPK
ANS/RLS
Used to scroll through options
Used to enter selections
Move cursor left and right
Used to store data and advance to next MMC
Used to select ALL
ACTION
DISPLAY
1. Press TRSF 502
Display shows
[201] NO ANS FWD
010 SEC →_
2. Dial station number (e.g., 205)
OR
Press UP or DOWN key to select station and
press RIGHT soft key
OR
Press ANS/RLS to select all stations and
press RIGHT soft key
[205] NO ANS FWD
010 SEC →_
3. Enter new value via dial keypad (must be
three digits, e.g., 020)
System will return to step 2
[205] NO ANS FWD
010 SEC →020
4. Press TRSF to store and exit
OR
Press SPK to store and advance to next MMC
DEFAULT DATA: TIMER IS SET FOR 15 SECONDS
RELATED ITEMS: MMC 102 CALL FORWARD
[ALL] NO ANS FWD
SEC →_
HOME
PAGE
Table of
Contents
PROSTAR DCS COMPACT
TECHNICAL MANUAL
MMC: 503
PROGRAMMING
PART 2 DECEMBER 1994
TRUNK-WIDE TIMER
DESCRIPTION:
Allows certain trunk timer values to be changed on a per-trunk basis or for all
trunks. It is not advisable to change these values, with the exception of trunk flash
time, without assistance from Technical Support.
PROGRAM KEYS
UP & DOWN
KEYPAD
SOFT KEYS
SPK
ANS/RLS
Used to scroll through options
Used to enter selections
Move cursor left and right
Used to store data and advance to next MMC
Used to select ALL
ACTION
DISPLAY
1. Press TRSF 503
Display shows
[701] ANS.BAK TM
0600 MS →
2. Dial trunk number (e.g., 704)
OR
Press UP or DOWN key to select trunk and
press RIGHT soft key to move cursor
OR
Press ANS/RLS to select all trunks and
press RIGHT soft key to move cursor
[704] ANS.BAK TM
0600 MS →
3. Dial timer number from above list
OR
Press UP or DOWN key to select timer and
press RIGHT soft key to move cursor
[704] DTMP DUR.
0600 MS →_
4. Enter new timer value (must be four digits,
e.g., 0700)
System returns to step 2
[704] DTMP DUR.
0600 MS →0700
5. Press TRSF to store and exit
OR
Press SPK to store and advance to next MMC
[ALL] ANS.BAK TM
MS →
HOME
PAGE
Table of
Contents
PROSTAR DCS COMPACT
TECHNICAL MANUAL
PROGRAMMING
PART 2 DECEMBER 1994
Table of
Contents
MMC: 503
DEFAULT DATA: SEE BELOW
TIMER NUMBER
TIMER NAME
0
1
2
3
4
5
6
7
8
9
ANS.BAK TM
CLEARING
CO SUPV TM
DTMF DUR.
F-DGT DELY
FLASH TIME
NEW CALL
NO RING TM
PAUSE TIME
RNG DET.TM
RELATED ITEMS: NONE
HOME
PAGE
VALUE
600 MSEC
002 SEC
400 MSEC
100 MSEC
600 MSEC
700 MSEC
2000 MSEC
004 SEC
003 SEC
400 MSEC
RANGE
100–2500 MSEC
001–25 SEC
100–2500 MSEC
100–2500 MSEC
100–2500 MSEC
100–2500 MSEC
100–2500 MSEC
001–255 SEC
001–255 SEC
100–2500 MSEC
PROSTAR DCS COMPACT
TECHNICAL MANUAL
PROGRAMMING
PART 2 DECEMBER 1994
MMC: 504
PULSE MAKE/BREAK RATIO
DESCRIPTION:
Allows the ability to change the value of pulses per second and the duration of the
make/break time. This will only affect rotary dial trunks.
FEATURE KEYS
Dial 0
Dial 1
Make/Break Ratio (01–99)
Pulse Per Second (10 or 20)
PROGRAM KEYS
UP & DOWN
KEYPAD
SOFT KEYS
SPK
Used to scroll through options
Used to enter selections
Move cursor left and right
Used to store data and advance to next MMC
ACTION
DISPLAY
1. Press TRSF 504
Display shows
MAKE/BREAK RATIO
33 MAKE→
2. Dial 0 or 1 for option
OR
Press UP or DOWN key for selection and
press RIGHT soft key to move cursor
PULSE PER SECOND
10 PPS →_
3. Dial new value
System returns to step 2
PULSE PER SECOND
10 PPS →20
4. Press TRSF to store and exit
OR
Press SPK to store and advance to next MMC
DEFAULT DATA: MAKE/BREAK = 33
PULSES PER SECOND = 10
RELATED ITEMS: MMC 402 TRUNK DIAL TYPE
HOME
PAGE
Table of
Contents
PROSTAR DCS COMPACT
TECHNICAL MANUAL
PROGRAMMING
PART 2 DECEMBER 1994
MMC: 505
ASSIGN DATE AND TIME
DESCRIPTION:
Allows the system date and time to be set. This will set the system-wide clock.
FEATURE KEYS
W
MM
DD
YY
HH
MM
Day
Month
Date
Year
Hour
Minute
0–6 (0:SUN, 1:MON, 2:TUE, 3:WED, 4:THU, 5:FRI, 6:SAT)
01–12
01–31
00–99 (1990–2089)
00–23
00–59
PROGRAM KEYS
KEYPAD
SPK
Used to enter selections
Used to store data and advance to next MMC
ACTION
DISPLAY
1. Press TRSF 505
Display shows
OLD:6010184:0047
NEW:WMMDDYY:HHMM
2. Enter new time and date using above table
System returns to step 2
OLD:6010184:0047
NEW:3020994:1445
3. Verify time and date
Reenter if necessary
OLD:3020994:1445
NEW:WMMDDYY:HHMM
4. Press TRSF to store and exit
OR
Press SPK to store and advance to next MMC
DEFAULT DATA: SAT 01 JAN 12:00
RELATED ITEMS: NONE
HOME
PAGE
Table of
Contents
PROSTAR DCS COMPACT
TECHNICAL MANUAL
PROGRAMMING
PART 2 DECEMBER 1994
MMC: 506
TONE CADENCE
DESCRIPTION:
Provides the ability to customize the tone cadence on a system-wide basis. There
are ten tone cadences available. The tone control of the cadence may be changed
from interrupt tone to continuous tone. Please call Technical Support before
changing any cadences as some systems may require default settings.
FEATURE KEYS
OPTIONS KEYS
0 CONTINUOUS TONE
1 INTERRUPT TONE
PROGRAM KEYS
UP & DOWN
KEYPAD
SOFT KEYS
SPK
Used to scroll through options
Used to enter selections
Move cursor left and right
Used to store data and advance to next MMC
LIST OF TONES
0
1
2
3
4
BUSY TONE
CONFM/BARGE
DIAL TONE
DND/NO MORE
ERROR TONE
5
6
7
8
9
HOLD/CAMPON
MSGWAT TONE
RGBACK TONE
RING TONE
TRSFER TONE
ACTION
DISPLAY
1. Press TRSF 506
Display shows
BUSY TONE
CONTINUOUS TONE
2. Dial tone number from above list (0–9, e.g., 9)
OR
Press UP or DOWN key to select tone, press
LEFT soft key and advance to step 3
TRSFER TONE
INTERRUPT TONE
HOME
PAGE
Table of
Contents
PROSTAR DCS COMPACT
TECHNICAL MANUAL
PROGRAMMING
PART 2 DECEMBER 1994
Table of
Contents
MMC: 506
TRSFER TONE
3. Dial tone option 0 for CONTINUOUS or
INTERRUPT TONE
1 for INTERRUPT
OR
Press UP or DOWN key to select tone
control and press RIGHT soft key to advance
to step 4
OR
Press LEFT soft key to return to step 2
4. Dial new value for interrupt times (must be
four digits)
Press RIGHT soft key advances cursor
Press LEFT soft key retreats cursor
If valid entry, system returns to step 2
TRSFER TONE:0100
9900 0100 9900
5. Press TRSF to store and exit
OR
Press SPK to store and advance to next MMC
DEFAULT DATA: SEE BELOW
TONE
0
1
2
3
4
5
6
7
8
9
BUSY TONE
CONFIRM/BARGE-IN TONE
DIAL TONE
DND/NO MORE TONE
ERROR TONE
HOLD/CAMP-ON TONE
MESSAGE WAIT TONE
RING BACK TONE
RING TONE
TRANSFER TONE
NOTE: All times are in milliseconds.
RELATED ITEMS: NONE
HOME
PAGE
ON
OFF
ON
OFF
500
500
1000
500
500
1000
1000
1000
1000
100
500
500
250
1000
250
250
250
3000
500
100
500
500
1000
500
500
1000
1000
1000
1000
100
500
500
250
1000
250
250
250
3000
500
100
PROSTAR DCS COMPACT
TECHNICAL MANUAL
PROGRAMMING
PART 2 NOVEMBER 1997
MMC: 507
ASSIGN AUTO NIGHT TIME
DESCRIPTION:
Use this MMC to program Auto Night settings. A NIGHT key is not needed as the
system will switch automatically; however, it is helpful to have a dedicated button so
the status can be manually changed. The start time is the time the system will
switch from day to night service. The end time is the time the system will switch
from night service to day service.(e.g., start 17:00 Wednesday and end at 08:00
Thursday).
Use the following example of Auto Night Time service:
Mon End=
Tue End=
Wed End=
Thur End=
Fri End=
Sat End=
Sun End=
08:30
08:30
08:30
08:30
08:30
00:00
00:00
Mon Start=
Tue Start=
Wed
Thur
Fri Start=
Sat Start=
Sun Start=
17:00
17:00
17:00
17:00
17:30
00:00
00:00
Using a 24 hour clock in the example above notice that the END time is within the
same 24 hour period. The system will stay in NIGHT from the previous day until the
end time which is 08:30. Monday starts the night time at 17:00. The system will
stay in night until it reaches the end time which is Tuesday ( the next 24 hour
period) at 08:30. Each day starts at 00:00 and ends at 24:00
FEATURE KEYS
0
1
2
3
SUN
MON
TUE
WED
4
5
6
THU
FRI
SAT
PROGRAM KEYS
UP & DOWN
KEYPAD
SOFT KEYS
SPK
HOLD
Used to scroll through options
Used to enter selections
Move cursor left and right
Used to store data and advance to next MMC
Used to clear previous entry
HOME
PAGE
Table of
Contents
PROSTAR DCS COMPACT
TECHNICAL MANUAL
PROGRAMMING
PART 2 NOVEMBER 1997
Table of
Contents
MMC: 507
ACTION
HOME
PAGE
DISPLAY
1. Press TRSF 507
Display shows
NIGHT TIME (SUN)
ST:0000 END:0000
2. Dial day number (0–6, e.g., 3)
OR
Press UP or DOWN key to select day
Press RIGHT soft key to advance cursor to
step 3
NIGHT TIME (WED)
ST:0000 END:0000
3. Dial start time for night, e.g., 1730
If valid, cursor moves to end time
Enter end time
If valid, system returns to step 2
Begin again
4. Press TRSF to store and exit
OR
Press SPK to store and advance to next MMC
NIGHT TIME (WED)
ST:1730 END:0800
DEFAULT DATA: START 0000
END 0000
RELATED ITEMS: MMC 722 STATION KEY PROGRAMMING
MMC 723 SYSTEM KEY PROGRAMMING
PROSTAR DCS COMPACT
TECHNICAL MANUAL
PROGRAMMING
PART 2 DECEMBER 1994
MMC: 600
ASSIGN OPERATOR GROUP
DESCRIPTION:
Used to assign members to the operator group. There are several options that can
be selected for ringing, overflow, group transfer and overflow destination. There are
a maximum of eighty (80) members allowed in one group. The operator group is
automatically assigned group number 500.
FEATURE KEYS
0
1
2
3
4
RING
OVERFLOW
GRP TRSF
NEXT PORT
MEMBER
Ring mode
Overflow time
Group transfer time
Overflow port
Group member (e.g., station 202)
RING MODES
0 SEQUENTIAL
The first idle station listed in the group will ring. If the first is
busy, the next idle station will ring.
1 DISTRIBUTE
The first call will ring the first station listed in the group. The
next call will ring the next station listed in the group.
2 UNCONDITION All the stations listed in the group will ring. Busy stations will
receive off-hook ring (MAX 32 STATIONS RINGING).
PROGRAM KEYS
UP & DOWN
KEYPAD
SOFT KEYS
SPK
HOLD
ACTION
1. Press TRSF 600
Display shows
Used to scroll through options
Used to enter selections
Move cursor left and right
Used to store data and advance to next MMC
Used to clear previous entry
DISPLAY
[500] OPER.GROUP
RING:UNCONDITION
HOME
PAGE
Table of
Contents
PROSTAR DCS COMPACT
TECHNICAL MANUAL
PROGRAMMING
PART 2 DECEMBER 1994
Table of
Contents
MMC: 600
2. Dial feature option (0–4, e.g., 3)
OR
Press RIGHT soft key to select option and
move cursor to next step
[500] OPER.GROUP
NEXT PORT:NONE
3. Press RIGHT soft key to move cursor
[500] OPER.GROUP
NEXT PORT:NONE
4. Dial in value for port (e.g., 205)
If valid entry, system returns to step 2
[500] OPER.GROUP
NEXT PORT:205
5. Press TRSF to store and exit
OR
Press SPK to store and advance to next MMC
DEFAULT DATA: RING MODE
OVERFLOW TIME
GRP TRSF TIME
NEXT PORT
GROUP MEMBER
OTHER MEMBER
HOME
PAGE
NONE
000 SEC
000 SEC
NONE
MEMBER 01:201
NONE
RELATED ITEMS: MMC 211 DOOR RING ASSIGNMENT
MMC 406 TRUNK RINGING ASSIGNMENT
MMC 601 ASSIGN STATION GROUP
MMC 602 STATION GROUP NAME
PROSTAR DCS COMPACT
TECHNICAL MANUAL
MMC: 601
PROGRAMMING
PART 2 NOVEMBER 2000
ASSIGN STATION GROUP
DESCRIPTION:
This MMC is used to build all station groups except the operator group (for the
operator group see MMC 600).
The options for setting up these groups are as follows; A thru G.
A. TYPE: This is the type of group you are creating and can be one of the
following:
1. NORMAL: Used to assign stations in a ring group. The members can be
stations, common bell contacts or Ring over Page relays.
2. VMAA: Used to group a number of voice mail port extensions. These must
have been defined in MMC 207 as VMAA ports or they cannot be entered
here. Check all programming in MMC 726 to ensure that the In band DTMF
codes are properly set.
3. SVMi-4: This is the voice mail group for the built in Samsung Voice Mail card.
When an SVMi-4 card is installed, group 529 is created as a CADENCE
group. The SVMi-4 must use 529.
4. UCD: Used to build a UCD group. A UCD group works as follows:
The group NEXT destination (see below) is defined as an SLT port to which
you must connect some type of announcement device to play to callers while
they are on hold.
Please note that this type of UCD group has the following limitations:
a) The announcement device must be able to terminate the announ-cement
with a hook flash and a transfer back to the UCD group.
b) Only one caller at a time can hear the announcement.
c) Each caller connected to the announcement must hear the announcement in its entirety.
d) It is possible that a new caller may “jump ahead” in the queue if a
previous caller is currently connected to the announcement device.
B. RING MODE: Each group can have one of the following ring modes. This will
decide how calls are placed to the group.
HOME
PAGE
Table of
Contents
PROSTAR DCS COMPACT
TECHNICAL MANUAL
PROGRAMMING
PART 2 NOVEMBER 2000
MMC: 601
1. SEQUENTIAL: The stations listed as “members” (see below) will be called
on a first available basis. Calls will first go to the first member, if the first
member is busy, calls will go to the second member, if the first member is
busy, calls will go to the second member etc. This type of group is useful for
placing the bulk of the incoming calls to a selected individual, with other
members only getting the calls when the first member is busy.
2. DISTRIBUTED: The first call will go to the first member, the second call will
go to the second member, the third call will go to the third member. This type
of group is useful for evenly distributing the call among all group members.
3. UNCONDITIONAL: Calls are placed to all group members simultaneously. If
a group member is busy, the can receive off hook ring if defined in MMC 300.
This ring mode option is not available for UCD or VMAA groups.
C. OVERFLOW: This is a timer value that will cause unanswered calls to a group to
begin also ringing the NEXT PORT ( see below) after this timer has elapsed. If
set to 000, no overflow will take place.
D. GRP TRANSFER: This is a timer that will determine how long C.O. calls
transferred to the group will ring there before recalling. If set to 000, no recall will
take place.
E. NEXT PORT: This is the station or group number that callers will also ring at if
the OVERFLOW feature has been programmed. The NEXT port can be defined
as:
1. COMMON BELL ( DN # 363 - 365).
2. RING OVER PAGE ( DN # 361 - 365).
F. MEMBER: List all members that are to be in the group. Up to 32 members are
allowed in each group, but stations can be assigned to multiple station groups.
G. WRAP UP: This is only available for UCD groups, and will make a UCD agent
unavailable to receive additional UCD calls after hanging up from the last one.
This is to allow agents to complete work associated with the previous call before
the next call begins ringing.
NOTES: When a group is called, or a caller is transferred to a group, ringback is
sent to the caller. A busy signal will not be returned even if all group members are
busy. Obviously UCD is an exception to this rule.
HOME
PAGE
Table of
Contents
PROSTAR DCS COMPACT
TECHNICAL MANUAL
PROGRAMMING
PART 2 NOVEMBER 2000
Table of
Contents
MMC: 601
Calls to a group do not follow the call forwarding instructions of any stations in the
group.
FEATURE KEYS
0
1
2
3
4
5
6
TYPE
RING
OVERFLOW
GRP TRSF
WRAP-UP
NEXT PORT
MEMBER
Group type (Normal, VM/AA, UCD, CADENCE)
Ring mode (Sequential, distributed or unconditional)
Overflow time (000 - 250 secs.)
Group transfer time (000 - 250 secs.)
Wrap-up time (timer only valid in type = UCD)
Overflow port (Any station, common bell or ring over page)
Group members (e.g., station 202, 225, 231)
RING MODES
0 SEQUENTIAL
The first idle station listed in the group will ring. If the first is
busy, the next idle station will ring.
1 DISTRIBUTED
The first call will ring the first station listed in the group. The
next call will ring the next station listed in the group.
2 UNCONDITIONAL All the stations listed in the group will ring. Busy stations will
receive off-hook ring. MAXIMUM 32 STATIONS RINGING.
PROGRAM KEYS
UP & DOWN
KEYPAD
SOFT KEYS
SPK
HOLD
ACTION
1. Press TRSF 601
Display shows
HOME
PAGE
Used to scroll through options
Used to enter selections
Move cursor left and right
Used to store data and advance to next MMC
Used to clear previous entry
DISPLAY
[501] STN.GROUP
TYPE:NORMAL GRP
PROSTAR DCS COMPACT
TECHNICAL MANUAL
PROGRAMMING
PART 2 NOVEMBER 2000
HOME
PAGE
Table of
Contents
MMC: 601
2. Dial group number (e.g., 505)
OR
Press UP or DOWN key to select group
Press LEFT soft key to move cursor to type
of group and DIAL group type (0–2, e.g., 1)
OR
Press UP or DOWN key to make selection
Press LEFT soft key to move cursor to TYPE
[505] STN.GROUP
TYPE:NORMAL GRP
3. Dial feature option number (0–6, e.g., 0)
OR
Press UP or DOWN key to make selection
Press RIGHT soft key to move cursor to
ring value
[505] STN GROUP
RING:SEQENTIAL
4. Dial ring option (0–2, e.g., 1)
OR
Press UP or DOWN key to make selection
Press LEFT soft key to move cursor
back to RING or press RIGHT soft key to
return to step 2
[505] STN GROUP
RING:DISTRIBUTE
5. Dial next feature option and continue
OR
Press UP or DOWN key to select option
OR
Press LEFT soft key to return to step 2
[505] STN GROUP
RING:DISTRIBUTE
[505] STN GROUP
TYPE:VMAA
6. Press TRSF to store and exit
OR
Press SPK to store and advance to next MMC
DEFAULT DATA: NORMAL GROUP
RELATED ITEMS: MMC 203 ASSIGN UA DEVICE
MMC 204 COMMON BELL CONTROL
PROSTAR DCS COMPACT
TECHNICAL MANUAL
PROGRAMMING
PART 2 JANUARY 2002
MMC: 602
STATION GROUP NAME
DESCRIPTION:
Allows the system administrator or technician to enter a character name to identify
an individual station group. There are ten characters for Version 1 software and 11
characters for Version 2 software.
Names are written using the keypad. Each press of a key will select a character.
Pressing the next key will move the cursor to the next position. For example, if the
directory name is “SAMSUNG," press the number “7” three times to get the letter
“S.” Now press the number “2” once to get the letter “A.” Continue selecting
characters from the table below to complete your message. Pressing the bottom left
programmable key will change the letter from upper case to lower case.
NOTE: When the character that you want appears on the same dial pad key as the
previous character, press the UP key to move the cursor to the right or the DOWN
key to move the cursor left.
•
DCS KEYSETS
COUNT
DIAL 0
DIAL 1
DIAL 2
DIAL 3
DIAL 4
DIAL 5
DIAL 6
DIAL 7
DIAL 8
DIAL 9
DIAL
1
Q
space
A
D
G
J
M
P
T
W
:
2
Z
?
B
E
H
K
N
R
U
X
=
3
.
,
C
F
I
L
O
S
V
Y
[
4
)
!
@
#
$
%
^
&
(
]
5
0
1
2
3
4
5
6
7
8
9
The # key can be used for the following special characters: #, space, &, !, :, ?, ., %,
$, -, <, >, /, =, [, ], @, ^, (, ), _, +, {, }, |, ;, \, " and ~.
HOME
PAGE
Table of
Contents
PROSTAR DCS COMPACT
TECHNICAL MANUAL
PROGRAMMING
PART 2 JANUARY 2002
Table of
Contents
MMC: 602
•
iDCS KEYSETS
COUNT
DIAL 0
DIAL 1
DIAL 2
DIAL 3
DIAL 4
DIAL 5
DIAL 6
DIAL 7
DIAL 8
DIAL 9
DIAL
1
2
3
4
5
<
space
A
D
G
J
M
P
T
W
:
>
?
B
E
H
K
N
Q
U
X
=
.
,
C
F
I
L
O
R
V
Y
[
)
!
@
#
$
%
^
S
0
1
2
3
4
5
6
7
8
9
Z
]
1. When the character you want appears on the same dial pad key as the previous
character, press UP to move the cursor one space to the right.
2. Other symbols are available for DIAL #.
PROGRAM KEYS
UP & DOWN
KEYPAD
SOFT KEYS
SPK
HOLD
Used to scroll through options
Used to enter selections
Move cursor left and right
Used to store data and advance to next MMC
Used to clear previous entry
ACTION
HOME
PAGE
DISPLAY
1. Press TRSF 602
Display shows
[501] SGR NAME
2. Dial group number (e.g., 505)
OR
Press UP or DOWN key to make selection
Press LEFT or RIGHT soft key to move cursor
[505] SGR NAME
3. Enter name using above method and table
[505] SGR NAME
SAMSUNG
PROSTAR DCS COMPACT
TECHNICAL MANUAL
PROGRAMMING
PART 2 JANUARY 2002
MMC: 602
4. Press LEFT or RIGHT soft key to return to step 2
OR
Press TRSF to store and exit
OR
Press SPK to store and advance to next MMC
DEFAULT DATA: NONE
RELATED ITEMS: MMC 104 STATION NAME
MMC 404 TRUNK NAME
MMC 600 ASSIGN OPERATOR GROUP
MMC 601 ASSIGN STATION GROUP
HOME
PAGE
Table of
Contents
PROSTAR DCS COMPACT
TECHNICAL MANUAL
MMC: 603
PROGRAMMING
PART 2 DECEMBER 1994
ASSIGN TRUNK GROUP
DESCRIPTION:
Allows the assignment of trunks to a specific trunk group or to several trunk groups.
This is very useful in the programming of LCR when more than one trunk is to be in
several dialing plans. There are two different modes of operation: (1) sequential and
(2) distribute.
WARNING: As stated above, one trunk can appear in more than one trunk
group. If necessary, delete the trunk member from other groups to prevent
accidental access.
PROGRAM KEYS
UP & DOWN
KEYPAD
SOFT KEYS
SPK
HOLD
ANS/RLS
Used to scroll through options
Used to enter selections
Move cursor left and right
Used to store data and advance to next MMC
Used to clear previous entry
Used to select ALL
ACTION
DISPLAY
1. Press TRSF 603
Display shows
[9]
TRK GROUP
MODE:SEQUENTIAL
2. Enter valid trunk group (e.g., 9, 80–89)
OR
Press UP or DOWN key to make selection
and press RIGHT soft key to advance cursor
[81] TRK GROUP
MODE:SEQUENTIAL
3. Press RIGHT soft key to change mode
OR
Press UP or DOWN key to change mode to
member
[81] TRK GROUP
MEMBER 01:NONE
HOME
PAGE
Table of
Contents
PROSTAR DCS COMPACT
TECHNICAL MANUAL
PROGRAMMING
PART 2 DECEMBER 1994
Table of
Contents
MMC: 603
4. Press RIGHT soft key to move cursor to
number of member and enter valid member
number (1–80, e.g., 05) via dial keypad
OR
Press UP or DOWN key to make selection
and press RIGHT soft key to move cursor
[81]
TRK GROUP
MEMBER 05:NONE
5. Enter valid trunk number (e.g., 729)
OR
Press UP or DOWN key to make selection
and press RIGHT soft key to return to step 2
[81]
TRK GROUP
MEMBER 01:729
6. Repeat steps 1–6 to remove trunk from
group 9 if necessary
7. Press TRSF to store and exit
OR
Press SPK to store and advance to next MMC
DEFAULT DATA: ALL TRUNKS ARE IN TRUNK GROUP 9
RELATED ITEMS: LCR PROGRAMMING
TENANT PROGRAMMING
HOME
PAGE
PROSTAR DCS COMPACT
TECHNICAL MANUAL
MMC: 604
PROGRAMMING
PART 2 DECEMBER 1994
ASSIGN STATION TO PAGE ZONE
DESCRIPTION:
Allows the technician to assign a keyset to any of the four internal paging zones and
all page (page + ). The total number of keysets that can receive a page is limited
to 80. A keyset may be assigned to more than one zone.
The assignment is controlled by the use of class marks. If a keyset is flagged as “1”
in a zone column, it will receive pages for that zone. If the keyset is flagged as “0,” it
will not receive pages for that zone. Keysets can receive pages for more than one
zone.
PROGRAM KEYS
UP & DOWN
KEYPAD
SOFT KEYS
SPK
HOLD
Used to scroll through options
Used to enter selections
Move cursor left and right
Used to store data and advance to next MMC
Used to clear entry
ACTION
DISPLAY
1. Press TRSF 604
Display shows
ENTRY:STN :1234*
01:NONE:00001
2. Enter index number (01–80, e.g., 05)
via dial keypad
OR
Press UP or DOWN key to make selection
and press RIGHT soft key to move cursor
ENTRY:STN :1234*
05:NONE:00001
3. Enter station number (e.g., 205) via dial
keypad
OR
Press UP or DOWN key to make selection
and press RIGHT soft key to move cursor
ENTRY:STN :1234*
05:205 :00001
4. Move cursor under page zone desired by
pressing UP or DOWN key, enter the digit
1 under zone and press RIGHT soft key to
return to step 2 to continue with entries
ENTRY:STN :1234*
05:205 :01001
HOME
PAGE
Table of
Contents
PROSTAR DCS COMPACT
TECHNICAL MANUAL
PROGRAMMING
PART 2 DECEMBER 1994
MMC: 604
5. Press TRSF to store and exit
OR
Press SPK to store and advance to next MMC
DEFAULT DATA: NO STATIONS ASSIGNED
ALL ZONE IS SET
RELATED ITEMS: NONE
HOME
PAGE
Table of
Contents
PROSTAR DCS COMPACT
TECHNICAL MANUAL
MMC: 605
PROGRAMMING
PART 2 MARCH 1998
ASSIGN EXTERNAL PAGE ZONE
DESCRIPTION:
This MMC is used to define the members of each external page zone. Each zone
must contain the audio circuit (360) as a member to and however many of the MISC
card relays (361 to 364) as required to receive an audio output. If 360 is not
assigned as a member only a contact closure will occur when that page zone is
accessed. When they are assigned these members (audio circuit and relays) will
operate in unison to perform a page. A page zone can have up to 5 members and
each member (audio circuit or relay) can be in multiple zones.
NOTE: The system will only have page relays if a MISC card is installed. If a MISC
board is not installed, only the audio circuit (360) can be assigned as a page zone
member.
PROGRAM KEYS
UP & DOWN
KEYPAD
SOFT KEYS
SPK
HOLD
Used to scroll through options
Used to enter selections
Move cursor left and right
Used to store data and advance to next MMC
Used to clear previous entry
ACTION
DISPLAY
1. Press TRSF 605
Display shows first external page zone
EXT.PAGE ZONE:(5)
MEMBER 01:NONE
2. Dial page zone number (e.g., 6)
OR
Use UP or DOWN to select desired page zone
numbers and use press RIGHT soft key to
move the cursor
EXT.PAGE ZONE:(6)
MEMBER 01:NONE
3. Dial member number (e.g., 05)
OR
Use UP or DOWN to select member numbers
and use the RIGHT soft key to move the cursor
OR
Press the LEFT soft key to return to step 2 above
EXT.PAGE ZONE:(6)
MEMBER 05:
HOME
PAGE
Table of
Contents
PROSTAR DCS COMPACT
TECHNICAL MANUAL
PROGRAMMING
PART 2 MARCH 1998
Table of
Contents
MMC: 605
4. Enter member via dial keypad (e.g., 362)
and press RIGHT soft key to return to step 2
OR
Use UP or DOWN to select member numbers
and use the RIGHT soft key to move the cursor
OR
Press LEFT soft key to return to step 3 above
5. Press TRSF to store and exit
OR
Press SPK to store and advance to next MMC
DEFAULT DATA:
NONE
RELATED ITEMS: NONE
HOME
PAGE
EXT.PAGE ZONE:(6)
MEMBER 05:362
PROSTAR DCS COMPACT
TECHNICAL MANUAL
MMC: 606
PROGRAMMING
PART 2 NOVEMBER 1997
ASSIGN SPEED BLOCK
DESCRIPTION:
Provides a means of adding or deleting speed dial blocks to the system or an
individual keyset. With the ability to delete a block or blocks or speed dial, it will not
be necessary to waste these on such items as voice mail, DPIMs or stations that do
not require the ability to use speed dial. The Free List will show how many bins are
left to be assigned.
A library of up to 1500 speed dial numbers may be allocated as needed. RAM Pack
1 provides 500 speed dial numbers. RAM Pack 2 and Caller ID software provide
1500 speed dial numbers. The system list can have up to 500 numbers and each
station can have up to 50 numbers. Speed dial numbers are assigned in blocks of
ten. Each speed number may contain up to 18 digits.
PROGRAM KEYS
UP & DOWN
KEYPAD
SOFT KEYS
SPEAKER
HOLD
TRSF
Used to scroll through options
Used to enter selections
Move cursor left and right
Used to store data and advance to next MMC
Used to clear entry
Used to exit programming
ACTION
DISPLAY
1. Press TRSF 606
Display shows
FREE LIST:60
SYSTEM:20
2. Press RIGHT soft key to advance to next line
FREE LIST:60
SYSTEM:20
3. Make a selection of SYSTEM or EXT
using UP or DOWN key
Press RIGHT soft key to advance cursor
FREE LIST:60
EXT201:1
FREE LIST:60
4. Enter desired extension number via dial
EXT205:1
keypad (e.g., 205)
OR
Press UP or DOWN key to make selection and
press RIGHT soft key to advance cursor
HOME
PAGE
Table of
Contents
PROSTAR DCS COMPACT
TECHNICAL MANUAL
PROGRAMMING
PART 2 NOVEMBER 1997
Table of
Contents
MMC: 606
5. Enter valid number for bins (e.g., 0–5 for EXT
or 00–50 for SYSTEM)
OR
Press UP or DOWN key to make selection
OR
Press HOLD key to delete bin(s)
HOME
PAGE
BUSY LIST:60
EXT205:5
6. Press TRSF to store and exit
OR
Press SPK to store and advance to next MMC
DEFAULT DATA: SYSTEM: 200 ENTRIES
STATIONS: ONE BIN OF TEN ENTRIES
RELATED ITEMS: MMC 705 ASSIGN SYSTEM SPEED DIAL
MMC 706 SYSTEM SPEED DIAL BY NAME
PROSTAR DCS COMPACT
TECHNICAL MANUAL
PROGRAMMING
PART 2 JUNE 1995
MMC: 608
ASSIGN REVIEW BLOCK
DESCRIPTION:
NOTE: This MMC only applies to systems with Caller ID software.
Provides a means of adding or deleting Caller ID review blocks to an individual
keyset. With the ability to add or delete blocks, it will not be necessary to waste
these on non-display keysets. The free list will show how many bins are left to be
assigned. The system automatically assigns ten bins to each keyset. Each keyset
may be assigned a maximum of 50 bins.
PROGRAM KEYS
UP & DOWN
KEYPAD
SOFT KEYS
SPEAKER
HOLD
TRSF
Used to scroll through options
Used to enter selections
Move cursor left and right
Used to store data and advance to next MMC
Used to clear entry
To exit programming
ACTION
DISPLAY
1. Press TRSF 608
Display shows first station
[201] REVW BLOCK
10 : 840 FREE
2. Enter desired extension (e.g., 205)
OR
Press UP or DOWN key to make selection
and press RIGHT soft key to advance cursor
[205] REVW BLOCK
10 : 840 FREE
3. Enter valid number for bins (e.g., 5 )
OR
Press UP or DOWN key to make selection
OR
Press HOLD key to delete bin(s)
[205] REVW BLOCK
50 : 800 FREE
4. Press TRSF to store and exit
OR
Press SPK to store and advance to next MMC
DEFAULT DATA: ALL KEYSETS: ONE BLOCK OF TEN BINS
RELATED ITEMS: NONE
HOME
PAGE
Table of
Contents
PROSTAR DCS COMPACT
TECHNICAL MANUAL
MMC: 700
PROGRAMMING
PART 2 DECEMBER 1994
COPY COS CONTENTS
DESCRIPTION:
Provides the flexibility so that the technician can create a copy of a selected class of
service or create another class of service options easily without the interruption of
an existing class of service.
PROGRAM KEYS
UP & DOWN
KEYPAD
SOFT KEYS
SPK
“F” KEY
Used to scroll through options
Used to enter selections
Move cursor left and right
Used to store data and advance to next MMC
Used to advance to MMC 701
ACTION
DISPLAY
1. Press TRSF 700
Display shows
COPY COS ITEMS
COS 01→COS 01
2. Dial selected COS to copy (e.g., 05)
OR
Press UP or DOWN key to select COS and
press RIGHT soft key to move cursor and
advance to next step
COPY COS ITEMS
COS 05→COS 01
3. Dial target COS (e.g., 06)
OR
Press UP or DOWN key to select COS
Press RIGHT soft key to move cursor
back to step 2
COPY COS ITEMS
COS 05→COS 06
4. Press F key to advance to MMC 701 and
press RIGHT soft to advance cursor
COS CONTENTS(06)
TOLL LEVEL:A
5. Press TRSF to store and exit
OR
Press SPK to save and advance to next
MMC
DEFAULT DATA: NONE
RELATED ITEMS: MMC 701 ASSIGN COS CONTENTS
HOME
PAGE
Table of
Contents
PROSTAR DCS COMPACT
TECHNICAL MANUAL
PROGRAMMING
PART 2 NOVEMBER 2000
MMC: 701
ASSIGN COS CONTENTS
DESCRIPTION:
Similar to MMC 700 but does not allow a copy command. This MMC is primarily
used for creating a new class of service. If the unsupervised conference feature is
allowed, a programmed CONF key must be available to allow reentry into a
conference call.
PROGRAM KEYS
UP & DOWN
KEYPAD
SOFT KEYS
SPK
Used to scroll through options
Used to enter selections
Move cursor left and right
Used to store data and advance to next MMC
TOLL LEVEL OPTIONS
DIAL DIGIT
0
1
2
3
TOLL LEVEL
A
B
C
D
DIAL DIGIT
4
5
6
7
ACTION
TOLL LEVEL
E
F
G
H
DISPLAY
1. Press TRSF 701
Display shows
COS CONTENTS(01)
TOLL LEVEL:A
2. Dial COS (e.g., 06)
OR
Press UP or DOWN key to select COS
Press RIGHT soft key to move cursor to toll
level
COS CONTENTS(06)
TOLL LEVEL:A
3. Dial toll level (e.g., 2—see above list)
OR
Press UP or DOWN to select new TOLL level
OR
Press RIGHT soft key to advance to
COS options
COS CONTENTS(06)
TOLL LEVEL:C
HOME
PAGE
Table of
Contents
PROSTAR DCS COMPACT
TECHNICAL MANUAL
PROGRAMMING
PART 2 NOVEMBER 2000
Table of
Contents
MMC: 701
4. Dial COS option (e.g., 09—see Caller ID
option list or Basic option list)
OR
Press UP or DOWN key to select option
Press RIGHT soft key to move cursor
COS CONTENTS(06)
09:DND
:YES
5. Dial 0 for NO or 1 for YES
OR
Press UP or DOWN key to select option
Press LEFT soft key to return to step 4
Press RIGHT soft key to return to step 2
COS CONTENTS(06)
09:DND
: NO
6. Press F key to enter MMC 700 if copy
of COS to another COS is required
Refer to MMC 700 for copying
COPY COS ITMES
COS 01→COS 10
7. Press TRSF to store and exit
OR
Press SPK to store and advance to next MMC
Table A. COS Feature List by Option Number
Basic
01
02
03
04
—
—
—
05
06
07
08
09
10
11
12
13
14
15
16
17
18
19
CID
01
02
03
04
05
06
07
08
09
10
11
12
13
14
15
16
17
18
19
20
21
22
LCD Display
AA CALER
ALM CLR
AUTO RDL
CALLBACK
CID ABND
CID INQR
CID INVT
CONFER
DALM CLR
DAY/NIGH
DIRECT
DISA
DND
DOOR
DSS
DTS
EXT FWD
FEATURE
FLASH
FOLOW-ME
FORWARD
GRP I/O
HOME
PAGE
COS Option
Auto answer control by caller*
Alarm sensor ring answer
Retry on busy
Callback
Caller ID Abandon*
Caller ID Inquire*
Caller ID Investigate*
Conference
DISA alarm ring clear
Change day/night mode
Directory dial
Allow DISA use
Do Not Disturb
Door ring answer
Direct station select
Direct trunk select
External call forward
Feature key
Trunk flash
Call forward-follow me
Forward
Group in/out
PROSTAR DCS COMPACT
TECHNICAL MANUAL
PROGRAMMING
PART 2 NOVEMBER 2000
Table of
Contents
MMC: 701
Table A. COS Feature List by Option Number
Basic
20
21
22
23
24
25
26
27
28
29
30
31
32
33
34
35
36
37
38
39
40
41
42
43
44
45
46
47
48
49
50
51
52
53
54
55
56
57
58
59
60
61
CID
23
24
25
26
27
28
29
30
31
32
33
34
35
36
37
38
39
40
41
42
43
44
45
46
47
48
49
50
51
52
53
54
55
56
57
58
59
60
61
62
63
64
LCD Display
HOLD
HOT LINE
INTERCOM
MESSAGE
MM PAGE
NEW CALL
OHVAED
OHVAING
ONEA2
OPERATOR
OUT TRSF
OVERRIDE
PAGE 0
PAGE 1
PAGE 2
PAGE 3
PAGE 4
PAGE 5
PAGE 6
PAGE 7
PAGE 8
PAGE 9
PAGE
PICKUP
SECURE
SSPD TOL
STN LOCK
STNGRP 01
STNGRP 02
STNGRP 03
STNGRP 04
STNGRP 05
STNGRP 06
STNGRP 07
STNGRP 08
STNGRP 09
STNGRP 10
STNGRP 11
STNGRP 12
STNGRP 13
STNGRP 14
STNGRP 15
HOME
PAGE
COS Option
Hold
Hot line
Intercom call
Message
Meet me page
New call
Ohvaed
Ohvaing
1A2 emulation
Operator
Outgoing transfer
Overide
Page zone 0 PAGING
Page zone 1 PAGING
Page zone 2 PAGING
Page zone 3 PAGING
Page zone 4 PAGING
Page zone 5 PAGING
Page zone 6 PAGING
Page zone 7 PAGING
Page zone 8 PAGING
Page zone 9 PAGING
Page zone PAGING
Call pickup
Override secure
System speed dial toll check
Station locking
Station group 01 calling
Station group 02 calling
Station group 03 calling
Station group 04 calling
Station group 05 calling
Station group 06 calling
Station group 07 calling
Station group 08 calling
Station group 09 calling
Station group 10 calling
Station group 11 calling
Station group 12 calling
Station group 13 calling
Station group 14 calling
Station group 15 callling
PROSTAR DCS COMPACT
TECHNICAL MANUAL
PROGRAMMING
PART 2 NOVEMBER 2000
MMC: 701
Table A. COS Feature List by Option Number
Basic
62
63
64
65
66
67
68
69
70
71
72
73
74
75
76
77
78
79
80
81
82
83
84
85
86
87
88
89
90
91
92
93
94
95
96
97
98
99
A0
CID
65
66
67
68
69
70
71
72
73
74
75
76
77
78
79
80
81
82
83
84
85
86
87
88
89
90
91
92
93
94
95
96
97
98
99
A0
A1
A2
A3
LCD Display
COS Option
STNGRP 16
Station group 16 calling
STNGRP 17
Station group 17 calling
STNGRP 18
Station group 18 calling
STNGRP 19
Station group 19 calling
STNGRP 20
Station group 20 calling
STNGRP 21
Station group 21 calling
STNGRP 22
Station group 22 calling
STNGRP 23
Station group 23 calling
STNGRP 24
Station group 24 calling
STNGRP 25
Station group 25 calling
STNGRP 26
Station group 26 calling
STNGRP 27
Station group 27 calling
STNGRP 28
Station group 28 calling
STNGRP 29
Station group 29 calling
STNGRP 30
Station group 30 calling
SYS SPD
System speed dial
TRKGRP01
Trunk group 01 calling
TRKGRP02
Trunk group 02 calling
TRKGRP03
Trunk group 03 calling
TRKGRP04
Trunk group 04 calling
TRKGRP05
Trunk group 05 calling
TRKGRP06
Trunk group 06 calling
TRKGRP07
Trunk group 07 calling
TRKGRP08
Trunk group 08 calling
TRKGRP09
Trunk group 09 calling
TRKGRP10
Trunk group 10 calling
TRKGRP11
Trunk group 11 calling
UNCO CNF
CO to CO conference
VMS AREC
Auto Record
VMS AME
Answer Machine Emulator
VMS REC
VM Message Record
VMSSTN01
CADENCE Port 01 calling
VMSSTN02
CADENCE Port 02 calling
VMSSTN03
CADENCE Port 03 calling
VMSSTN04
CADENCE Port 04 calling
VMSSTN05
CADENCE Port 05 calling
VMSSTN06
CADENCE Port 06 calling
VMSSTN07
CADENCE Port 07 calling
VMSSTN08
CADENCE Port 08 calling
HOME
PAGE
Table of
Contents
PROSTAR DCS COMPACT
TECHNICAL MANUAL
PROGRAMMING
PART 2 NOVEMBER 2000
MMC: 701
DEFAULT DATA: ALL VALUES YES EXCEPT 32, 92 AND 93
RELATED ITEMS: MMC 700 COPY COS CONTENTS
MMC 702 TOLL DENY TABLE
MMC 703 TOLL ALLOWANCE TABLE
TOLL RESTRICTION
SVMi-4 CARD
HOME
PAGE
Table of
Contents
PROSTAR DCS COMPACT
TECHNICAL MANUAL
PROGRAMMING
PART 2 DECEMBER 1994
TOLL RESTRICTION OVERVIEW
The PROSTAR DCS COMPACT allows each station to be assigned a class of service
for use in the day mode and a class of service for use in the night mode. This class of
service determines the station’s dialing class which can be set to A through H. Class A
has no restrictions and Class H is restricted to internal calls only. Classes B, C, D, E, F
and G are controlled by the entries listed in the deny table in MMC 702, the allow table
in MMC 703 and the wild cards defined in MMC 704.
TOLL RESTRICTION RULES
1. The deny entries prevent certain numbers from being dialed. The allow entries are
only exceptions to these deny entries.
2. Listing numbers in the allow tables without any entries in the deny tables is the
same as having no restriction.
3. A wild card in any position in the deny table means that an exception exists in the
allow table for the digits defined by the wild card.
4. A wild card at the end of any allow entry means that more digits may be dialed.
5. Do not put a single wild card as an entry in the allow table.
6. When changing any entry or BCDEFG status, you must enter all digits.
The flexibility of this system can accommodate areas using 1 + dialing, areas that do
not require the digit 1, interchangeable office codes and is ready for any future
changes in the North American Dialing Plan such as four digit area codes. The
following examples are provided as an aid to help understand how to use the deny and
allow tables.
EXAMPLE 1
This system is installed in an area where seven digits is a free call, 1 + seven digits is a
toll call within that area code and 1 + ten digits is a call to another area code. Area
codes all have 0 or 1 as a middle digit.
Customer requirements:
z
z
Phones with dialing class B can dial 1 + seven digits and local calls.
All classes (B, C, D, E, F and G) are restricted (denied) from dialing 0 + calls and all
976 calls.
z Classes B and D are restricted from dialing 1 + any area code + seven digits.
z Classes C and E can dial all area codes.
z All classes can dial 1-800 calls.
HOME
PAGE
Table of
Contents
PROSTAR DCS COMPACT
TECHNICAL MANUAL
PROGRAMMING
PART 2 DECEMBER 1994
Table of
Contents
TOLL RESTRICTION OVERVIEW
TOLL DENY TABLE
TOLL ALLOW TABLE
ENTRY
DIGITS
BCDEFG
ENTRY
DIGITS
BCDEFG
001
002
003
004
005
006
0
1X0
1X1
976
1976
1XXX976
111111
101011
101011
111111
111111
111111
0001
1800X
111111
WILD CARD
0 1 2 3 4 5 6 7 8 9
#
X
1 1 1 1 1 1 1 1 1 1 0 0
Y
0 0 0 0 0 0 0 0 0 0 0 0
Z
0 0 0 0 0 0 0 0 0 0 0 0
EXAMPLE 2
This system is installed in an area where seven digits is a free call, 1 + seven digits is a
toll call within that area code and 1 + ten digits is a call to another area code. Area
codes all have 0 or 1 as a middle digit.
Customer requirements:
z
HOME
PAGE
All classes (B, C, D, E, F and G) are restricted from dialing 411 calls, 976 calls, 1900 calls and 0 + calls.
z Only Class B phones can dial 1-800 numbers.
z Class C phones can only dial local calls, 1 + seven digits and numbers in area
code 212.
z Class E phones can only dial 911.
PROSTAR DCS COMPACT
TECHNICAL MANUAL
PROGRAMMING
PART 2 DECEMBER 1994
Table of
Contents
TOLL RESTRICTION OVERVIEW
TOLL DENY TABLE
TOLL ALLOW TABLE
ENTRY
DIGITS
BCDEFG
ENTRY
DIGITS
BCDEFG
001
002
003
004
005
006
976
1976
1XXX976
1900
1X1X
1X0
111111
111111
111111
111111
010000
010000
001
002
1212X
911
010000
000100
007
0
111111
008
009
010
411
1800
X
111111
011111
000100
WILD CARD
0 1 2 3 4 5 6 7 8 9
#
X
1 1 1 1 1 1 1 1 1 1 0 0
Y
0 0 0 0 0 0 0 0 0 0 0 0
Z
0 0 0 0 0 0 0 0 0 0 0 0
HOME
PAGE
EXAMPLE 3
This system is installed in an area where seven digits is a free call, 1 + seven digits is a
toll call within that area code and 1 + ten digits is a call to another area code. Area
codes all have 0 or 1 as a middle digit.
Customer requirements:
Class B phones are in a national telemarketing group that cannot dial numbers in its
own area code (305) but is allowed calls to all other area codes. 1-800 calls are allowed
and 1-900 calls are not.
PROSTAR DCS COMPACT
TECHNICAL MANUAL
PROGRAMMING
PART 2 DECEMBER 1994
Table of
Contents
TOLL RESTRICTION OVERVIEW
TOLL DENY TABLE
TOLL ALLOW TABLE
ENTRY
DIGITS
BCDE
ENTRY
DIGITS
BCDE
001
002
003
X
1305
1900
1000
1000
1000
001
002
003
1X0X
1X1X
1800X
1000
1000
1000
WILD CARD
0 1 2 3 4 5 6 7 8 9
#
X
1 1 1 1 1 1 1 1 1 1 0 0
Y
0 0 0 0 0 0 0 0 0 0 0 0
Z
0 0 0 0 0 0 0 0 0 0 0 0
HOME
PAGE
EXAMPLE 4
This system is installed in an area where not all seven digit calls are “free” and a 1 is
not required when dialing other area codes. Area codes all have 0 or 1 as a middle
digit.
Customer requirements:
z
Class B phones can only dial area codes east of the Mississippi and all C.O.
prefixes in their own area code.
z Class C phones are allowed to dial 186 out of 292 C.O. prefixes.
z Class D phones are only allowed to dial 57 of the 292 C.O. prefixes.
z Classes C and D cannot dial outside their own area code.
The large number of entries required to demonstrate this example makes a full listing
impractical. Follow these guidelines:
Class B Programming—List all of the allowed area codes in the allow table and mark
each entry for Class B and enter X0X and X1X in the deny table for Class B. This will
deny all area codes not listed in the allow table.
Class C Programming—Enter X in the deny table to restrict all numbers not listed in the
allow table and mark this entry to apply to Class C. List the 186 allowable C.O. prefixes
in the allow table and mark these entries to apply to Class C.
Class D Programming—Add a 1 in the Class D column of the X entry to make it apply
to Class D. List the 57 allowable C.O. prefixes in the allow table and mark these entries
to apply to Class D. Some or all of these C.O. prefixes may already be entered for
PROSTAR DCS COMPACT
TECHNICAL MANUAL
PROGRAMMING
PART 2 DECEMBER 1994
TOLL RESTRICTION OVERVIEW
Class C above. Do not repeat the entry; you only need to add a 1 in the Class D
column to each entry that applies to Class D.
WILD CARD
0 1 2 3 4 5 6 7 8 9
#
X
1 1 1 1 1 1 1 1 1 1 0 0
Y
0 0 0 0 0 0 0 0 0 0 0 0
Z
0 0 0 0 0 0 0 0 0 0 0 0
HOME
PAGE
Table of
Contents
PROSTAR DCS COMPACT
TECHNICAL MANUAL
PROGRAMMING
PART 2 DECEMBER 1994
MMC: 702
TOLL DENY TABLE
DESCRIPTION:
Provides a way to make toll restriction very easy and flexible. There are 500 entries
allowable in the deny table and each entry index can be assigned to a class of
service. Each index can have up to 12 digits. With the use of wild cards (MMC 704
Assign Wild Character), more flexibility can be built into the toll restriction. Wild
cards can be used repeatedly in the dial string, limited only to what is allowed or
denied in MMC 704. There are six toll levels, B–G, that are programmable. Toll level
A is set as unrestricted by default and toll level H is set as in house only by default.
PROGRAM KEYS
UP & DOWN
KEYPAD
SOFT KEYS
SPK
HOLD
Used to scroll through options
Used to enter selections
Move cursor left and right
Used to store data and advance to next MMC
Used to clear previous entry
WILD CARD KEY
BUTTON
DIAL
WILD CARD
19
20
21
0
1
2
X
Y
Z
ACTION
DISPLAY
1. Press TRSF 702
Display shows
DENY(001):BCDEFG
:000000
2. Dial index number 001–500 (e.g., 005)
OR
Press UP or DOWN key to select index and
press RIGHT soft key to move cursor and
enter via dial pad toll pattern (e.g., 212)
OR
Enter wild card (e.g., 21X) from above list
and press RIGHT soft key to move cursor to
COS options
DENY(005):BCDEFG
:000000
DENY(005):BCDEFG
212
:000000
DENY(005):BCDEFG
21X
:000000
HOME
PAGE
Table of
Contents
PROSTAR DCS COMPACT
TECHNICAL MANUAL
PROGRAMMING
PART 2 DECEMBER 1994
Table of
Contents
MMC: 702
3. Press UP or DOWN key to move cursor
along line until under toll class mark (e.g., E)
Enter a 1 for YES or 0 for NO and press
RIGHT soft key to return to step 1
OR
Press LEFT soft key to return to step 2
HOME
PAGE
DENY(001):BCDEFG
212
:000100
4. Press TRSF to store and exit
OR
Press SPK to store and advance to next MMC
DEFAULT DATA: ALL ENTRIES ARE SET TO 0
RELATED ITEMS: MMC 703 TOLL ALLOWANCE TABLE
MMC 704 ASSIGN WILD CHARACTER
PROSTAR DCS COMPACT
TECHNICAL MANUAL
PROGRAMMING
PART 2 DECEMBER 1994
MMC: 703
TOLL ALLOWANCE TABLE
DESCRIPTION:
Provides a way to make toll restriction very easy and flexible. There are 500 entries
allowable in the allow table and each entry index can be assigned to a class of
service. Each index can have up to 12 digits. With the use of wild cards (MMC 704
Assign Wild Character), more flexibility can be built into toll restriction. There are six
toll levels, B–G, that are programmable. Toll level A is set as unrestricted by default,
and toll level H is set as in house only by default.
PROGRAM KEYS
UP & DOWN
KEYPAD
SOFT KEYS
SPK
HOLD
Used to scroll through options
Used to enter selections
Move cursor left and right
Used to store data and advance to next MMC
Used to clear previous entry
WILD CARD KEY
BUTTON
DIAL
WILD CARD
19
20
21
0
1
2
X
Y
Z
ACTION
DISPLAY
1. Press TRSF 703
Display shows
ALOW(001):BCDEFG
:000000
2. Dial index number 001–500 (e.g., 005)
OR
Press UP or DOWN key to select index and
press RIGHT soft key to move cursor and
enter via dial pad toll pattern (e.g., 212)
OR
Enter wild card (e.g., 21X) from above list
and press RIGHT soft key to move cursor to
COS options
ALOW(005):BCDEFG
:000000
ALOW(005):BCDEFG
212
:000000
ALOW(005):BCDEFG
21X
:000000
HOME
PAGE
Table of
Contents
PROSTAR DCS COMPACT
TECHNICAL MANUAL
PROGRAMMING
PART 2 DECEMBER 1994
Table of
Contents
MMC: 703
3. Press UP or DOWN key to move cursor
along line until under toll class mark (e.g., E)
Enter a 1 for YES or 0 for NO and press
RIGHT soft key to return to step 1
OR
Press LEFT soft key to return to step 2
HOME
PAGE
ALOW(001):BCDEFG
212
:000100
4. Press TRSF to store and exit
OR
Press SPK to store and advance to next MMC
DEFAULT DATA: ALL ENTRIES ARE SET TO 0
RELATED ITEMS: MMC 702 TOLL DENY TABLE
MMC 704 ASSIGN WILD CHARACTER
PROSTAR DCS COMPACT
TECHNICAL MANUAL
MMC: 704
PROGRAMMING
PART 2 DECEMBER 1994
ASSIGN WILD CHARACTER
DESCRIPTION:
Provides flexibility to toll restriction when a specific numbering plan is so desired.
There are only three entry tables but more than one digit can be assigned per table
if so needed.
PROGRAM KEYS
UP & DOWN
KEYPAD
SOFT KEYS
SPK
HOLD
Used to scroll through options
Used to enter selections
Move cursor left and right
Used to store data and advance to next MMC
Used to clear previous entry
ACTION
DISPLAY
1. Press TRSF 704
Display shows
:0123456789*#
X:000000000000
2. Press UP or DOWN key to select X, Y or Z
Press RIGHT soft key to advance cursor
to option line
:0123456789*#
Z:000000000000
3. Press UP or DOWN key to move cursor to
option digit desired (e.g., 5) and enter the
digit 1 under the desired digit
If needed, place the digit 1 under one or
more digits
Press LEFT soft key to return to step 2
OR
Press RIGHT soft key to return to step 1
:0123456789*#
Z:000001000000
4. Press TRSF to store and exit
OR
Press SPK to store and advance to next MMC
DEFAULT DATA: ALL ENTRIES SET TO 0
RELATED ITEMS: MMC 702 TOLL DENY TABLE
MMC 703 TOLL ALLOWANCE TABLE
HOME
PAGE
Table of
Contents
PROSTAR DCS COMPACT
TECHNICAL MANUAL
MMC: 705
PROGRAMMING
PART 2 FEBRUARY 1996
PROGRAM SYSTEM SPEED DIAL
DESCRIPTION:
Enables the assignment of system speed dialing numbers. There are up to 500
entries available for programming.
Each speed dial number consists of a trunk or trunk group access code followed by
a separator and up to 18 digits to be dialed. These dialed digits may consist of 0–9,
and #. If the system recognizes a valid trunk or trunk group access number, it will
automatically insert the separator.
PROGRAM KEYS
UP & DOWN
KEYPAD
SOFT KEYS
SPK
HOLD
B
C
D
E
F
Used to scroll through options
Used to enter selections
Move cursor left and right
Used to store data and advance to next MMC
Used to clear previous entry
Used to insert a flash code “F”
Used to insert a pause code “P”
Used to insert a pulse/tone conversion code “C”
Used to mask/unmask following digits. shows as “[“ or “]”
Used to enter name for speed dial bin (see MMC 706)
ACTION
DISPLAY
1. Press TRSF 705
Display shows
SYS SPEED DIAL
500:
2. Dial desired speed index (e.g., 505)
OR
Press UP or DOWN key to make selection
and press RIGHT soft key to move cursor
SYS SPEED DIAL
505:
3. Enter access code (e.g., 9/701) plus the
phone number up to 18 digits (digits will
scroll under) and press RIGHT soft key to
return to step 2
SYS SPEED DIAL
505:9–1212234567
4. Press F key to toggle to MMC 706, step 3 to
enter name
SYS SPEED NAME
505:
HOME
PAGE
Table of
Contents
PROSTAR DCS COMPACT
TECHNICAL MANUAL
PROGRAMMING
PART 2 FEBRUARY 1996
MMC: 705
5. Press TRSF to store and exit
OR
Press SPK to store and advance to next MMC
DEFAULT DATA: NONE
RELATED ITEMS: MMC 706 SYSTEM SPEED DIAL BY NAME
HOME
PAGE
Table of
Contents
PROSTAR DCS COMPACT
TECHNICAL MANUAL
PROGRAMMING
PART 2 JANUARY 2002
MMC: 706
SYSTEM SPEED DIAL BY NAME
DESCRIPTION:
Allows a character name to be entered for each system speed dial location. There
are ten characters for Version 1 software and 11 characters for Version 2 software.
This name enables the speed dial number to be located when using the directory
dial feature. The directory dial feature allows the display keyset user to select a
speed dial location by scanning its name.
Names are written using the keypad. Each press of a key selects a character.
Pressing a different key moves the cursor to the next position. For example, if the
directory name is “SAM SMITH,” press “7” three times to get the letter “S.” Press
“2” once to get the letter “A.” Continue selecting characters from the table below to
complete your message. Pressing the “A” key will change the letter from upper
case to lower case.
NOTE: When the character you want appears on the same dial pad key as the
previous character, press the UP key to move the cursor to the right.
•
DCS KEYSETS
COUNT
DIAL 0
DIAL 1
DIAL 2
DIAL 3
DIAL 4
DIAL 5
DIAL 6
DIAL 7
DIAL 8
DIAL 9
DIAL
1
Q
space
A
D
G
J
M
P
T
W
:
2
Z
?
B
E
H
K
N
R
U
X
=
3
.
,
C
F
I
L
O
S
V
Y
[
4
)
!
@
#
$
%
^
&
(
]
5
0
1
2
3
4
5
6
7
8
9
The # key can be used for the following special characters: #, space, &, !, :, ?, ., %,
$, -, <, >, /, =, [, ], @, ^, (, ), _, +, {, }, |, ;, \, " and ~.
HOME
PAGE
Table of
Contents
PROSTAR DCS COMPACT
TECHNICAL MANUAL
PROGRAMMING
PART 2 JANUARY 2002
Table of
Contents
MMC: 706
•
iDCS KEYSETS
COUNT
DIAL 0
DIAL 1
DIAL 2
DIAL 3
DIAL 4
DIAL 5
DIAL 6
DIAL 7
DIAL 8
DIAL 9
DIAL
1
2
3
4
5
<
space
A
D
G
J
M
P
T
W
:
>
?
B
E
H
K
N
Q
U
X
=
.
,
C
F
I
L
O
R
V
Y
[
)
!
@
#
$
%
^
S
0
1
2
3
4
5
6
7
8
9
Z
]
1. When the character you want appears on the same dial pad key as the previous
character, press UP to move the cursor one space to the right.
2. Other symbols are available for DIAL #.
PROGRAM KEYS
UP & DOWN
KEYPAD
SOFT KEYS
SPK
HOLD
TRSF
Used to scroll through options
Used to enter selections
Move cursor left and right
Used to store data and advance to next MMC
Used to clear previous entry
Used to store and exit MMC
ACTION
HOME
PAGE
DISPLAY
1. Press TRSF 706
Display shows
SYS SPEED NAME
500:
2. Dial system speed entry number (e.g., 505)
OR
Press UP or DOWN to select entry number
and press RIGHT soft key to move cursor
SYS SPEED NAME
505:
PROSTAR DCS COMPACT
TECHNICAL MANUAL
PROGRAMMING
PART 2 JANUARY 2002
Table of
Contents
MMC: 706
3. Enter name using dial keypad and above
table and press RIGHT soft key to return to
step 2
OR
Press the F key to toggle to speed dial
number to return to MMC 705, step 5
HOME
PAGE
SYS SPEED NAME
505:SAMSUNG
SYS SPEED DIAL
505:
4. Press RIGHT soft key to return to step 2
OR
Press TRSF to store and exit
OR
Press SPK to store and advance to next MMC
DEFAULT DATA: NO NAMES
RELATED ITEMS: MMC 705 ASSIGN SYSTEM SPEED DIAL
PROSTAR DCS COMPACT
TECHNICAL MANUAL
MMC: 707
PROGRAMMING
PART 2 DECEMBER 1994
AUTHORIZATION CODE
DESCRIPTION:
Enables the authorization feature on a per-class of service selection. There are 100
available entries.
PROGRAM KEYS
UP & DOWN
KEYPAD
SOFT KEYS
SPK
HOLD
Used to scroll through options
Used to enter selections
Move cursor left and right
Used to store data and advance to next MMC
Used to clear previous entry
ACTION
DISPLAY
1. Press TRSF 707
Display shows
AUTHOR.CODE(001)
CODE:
COS:--
2. Dial code index number 1–100 (e.g., 005)
OR
Press UP or DOWN key to selected index
number and press RIGHT soft key to move
cursor
AUTHOR.CODE(005)
CODE:_
COS:--
3. Enter authorization code (maximum four
digits) via dial keypad (e.g., 1234) and
press RIGHT soft key to move cursor
AUTHOR.CODE(001)
CODE:1234 COS:--
4. Enter class of service number 01–30
(e.g., 05)
OR
Press UP or DOWN key to select COS and
press RIGHT soft key to select and return to
step 2
AUTHOR.CODE(001)
CODE:1234 COS:05
5. Press TRSF to store and exit
OR
Press SPK to store and advance to next MMC
DEFAULT DATA: NONE
RELATED ITEMS: MMC 305 ASSIGN FORCED CODE
HOME
PAGE
Table of
Contents
PROSTAR DCS COMPACT
TECHNICAL MANUAL
PROGRAMMING
PART 2 NOVEMBER 1997
MMC: 708
ACCOUNT CODE
DESCRIPTION:
Enables the account code entry feature. There are 250 available entries.
PROGRAM KEYS
UP & DOWN
KEYPAD
SOFT KEYS
SPK
HOLD
Used to scroll through options
Used to enter selections
Move cursor left and right
Used to store data and advance to next MMC
Used to clear previous entry
ACTION
DISPLAY
1. Press TRSF 708
Display shows
ACCOUNT CODE
(001)
2. Dial code index number 1–250 (e.g., 250)
OR
Press UP or DOWN key to selected index
number and press RIGHT soft key to move
cursor
ACCOUNT CODE
(005)
3. Enter account code (maximum 12 digits)
via dial keypad (e.g., 1234)
Press RIGHT soft key to go back to step 2
ACCOUNT CODE
(005)1234
4. Press TRSF to store and exit
OR
Press SPK to store and advance to next MMC
DEFAULT DATA: NONE
RELATED ITEMS: MMC 305 ASSIGN FORCED CODE
HOME
PAGE
Table of
Contents
PROSTAR DCS COMPACT
TECHNICAL MANUAL
PROGRAMMING
PART 2 DECEMBER 1994
MMC: 709
PBX ACCESS CODE
DESCRIPTION:
Provides a way to identify the access codes needed to work toll restriction when
system is used with either a PBX or CENTREX-supplied dial tone. There is a
maximum of five (5) entries allowable.
PROGRAM KEYS
UP & DOWN
KEYPAD
SOFT KEYS
SPK
HOLD
Used to scroll through options
Used to enter selections
Move cursor left and right
Used to store data and advance to next MMC
Used to clear previous entry
ACTION
DISPLAY
1. Press TRSF 709
Display shows
PBX ACCESS CODE
1:
2. Enter index number (e.g., 3)
OR
Press UP or DOWN key to make selection
and press RIGHT soft key to move cursor
PBX ACCESS CODE
3:_
3. Enter via dial keypad the desired
access/feature code (e.g., 9)
Press RIGHT soft key to enter and return
to step 2 and enter more entries
PBX ACCESS CODE
3:9
4. Press TRSF to store and exit
OR
Press SPK to store and advance to next MMC
DEFAULT DATA: NONE
RELATED ITEMS: MMC 702 TOLL DENY TABLE
MMC 703 TOLL ALLOWANCE TABLE
HOME
PAGE
Table of
Contents
PROSTAR DCS COMPACT
TECHNICAL MANUAL
PROGRAMMING
PART 2 DECEMBER 1994
MMC: 710
LCR DIGIT TABLE
DESCRIPTION:
The LCR DIGIT TABLE contains all numerical digits for the completion of outgoing
call placement. This table works in conjunction with LCR ROUTE TABLE, LCR TIME
TABLE and LCR MODIFY DIGITS TABLE. There is a maximum of 500 entries with a
digit string length of ten numerical digits. This system will automatically maintain
entered digit strings in numerical order. The characters and # are also accepted
for use with feature codes.
PROGRAM KEYS
UP & DOWN
KEYPAD
SOFT KEYS
SPK
HOLD
Used to scroll through options
Used to enter selections
Move cursor left and right
Used to store data and advance to next MMC
Used to clear previous entry
ACTION
DISPLAY
1. Press TRSF 710
Display shows
LCR DIGIT
DIGIT:
(001)
2. Dial LCR entry (e.g., 005)
OR
Press UP or DOWN to select entry and press
RIGHT soft key to move cursor
LCR DIGIT
DIGIT: _
(005)
3. Enter LCR digit string via the dial keypad
Press RIGHT soft key
OR
Press LEFT soft key to return to step 1
LCR DIGIT (005)
DIGIT:305426
4. Enter digit length (00–31)
Cursor will move to RT:
Enter route selection (1–16)
OR
Press LEFT soft key to return to length value
Valid entry will return you to step 1
LCR DIGIT (005)
LENGTH:10 RT:01
HOME
PAGE
Table of
Contents
PROSTAR DCS COMPACT
TECHNICAL MANUAL
PROGRAMMING
PART 2 DECEMBER 1994
MMC: 710
5. Press TRSF to store and exit
OR
Press SPK to store and advance to next MMC
DEFAULT DATA: NONE
RELATED ITEMS: MMC 505 ASSIGN DATE AND TIME
MMC 712 LCR ROUTE TABLE
HOME
PAGE
Table of
Contents
PROSTAR DCS COMPACT
TECHNICAL MANUAL
PROGRAMMING
PART 2 DECEMBER 1994
MMC: 711
LCR TIME TABLE
DESCRIPTION:
This table allows the flexibility of the system, through the LCR ROUTES, to allow
calls placed at any given time of day to use the least cost trunk route that is
available. When LCR ROUTE ADVANCE is allowed, it is possible for calls to be
placed on more expensive trunks on any given time of day. There are four possible
time entries per day; the start time of the next time is the end time of the previous
time period.
PROGRAM KEYS
UP & DOWN
KEYPAD
SOFT KEYS
SPK
HOLD
Used to scroll through options
Used to enter selections
Move cursor left and right
Used to store data and advance to next MMC
Used to clear previous entry
FEATURE KEYS
DAY
SUN
MON
TUE
WED
THU
FRI
SAT
VALUE
0
1
2
3
4
5
6
TIME
A
B
C
D
BAND
0
1
2
3
ACTION
LCRT
LCRRT
LCRRT
LCRRT
LCRRT
DISPLAY
1. Press TRSF 711
Display shows
LCR TIME (SUN:A)
HHMM:
LCRT:-
2. Dial day of week (SUN–SAT, e.g., WED)
OR
Press UP or DOWN to make day selection
and press RIGHT soft key to make entry and
move cursor and advance to step 3
LCR TIME (WED:A)
HHMM:
LCRT:-
1
2
3
4
HOME
PAGE
Table of
Contents
PROSTAR DCS COMPACT
TECHNICAL MANUAL
PROGRAMMING
PART 2 DECEMBER 1994
Table of
Contents
MMC: 711
3. Dial time band (A–D, e.g., B)
OR
Press UP or DOWN to make time band
selections and press RIGHT soft key to make
entry and move cursor and advance to step 4
LCR TIME (WED:B)
HHMM:
TIME:-
4. Dial time via keypad (24 hour format)
Cursor moves to LCRT (see MMC 712)
Dial entry 1–4
OR
Press UP or DOWN to select entry and
press RIGHT soft key to make entry and
return to step 1
OR
If entry is dialed, return to step 2
LCR TIME (WED:B)
HHMM:0800LCRT:-
5. Press TRSF to store and exit
OR
Press SPK to store and advance to next MMC
DEFAULT DATA: NONE
RELATED ITEMS: MMC 712 LCR ROUTE TABLE
HOME
PAGE
LCR TIME (WED:B)
HHMM:0800LCRT:1
PROSTAR DCS COMPACT
TECHNICAL MANUAL
PROGRAMMING
PART 2 DECEMBER 1994
MMC: 712
LCR ROUTE TABLE
DESCRIPTION:
The LCR ROUTE TABLE has the responsibility for the selection of a specific trunk
group in the completion of an outward bound call. This table works in conjunction
with LCR DIGIT TABLE, LCR TIME TABLE, LCR COS TABLE and LCR MODIFIED
DIGITS TABLE. After the user dials a valid digit string, the system will use the LCR
ROUTE TABLE to select a specific predetermined trunk group. There is a maximum
number of 16 routes available beginning with the ROUTE NUMBER 1. If more than
one trunk group are available for call completion, the system will use the first
designated trunk group and then start to utilize succeeding trunk groups. If all trunk
groups are busy in a selected route, call queue will become active and allocate
trunks as they become available.
PROGRAM KEYS
UP & DOWN
KEYPAD
SOFT KEYS
SPK
HOLD
Used to scroll through options
Used to enter selections
Move cursor left and right
Used to store data and advance to next MMC
Used to clear previous entry
ACTION
DISPLAY
1. Press TRSF 712
Display shows
LCR ROUTE (01:1)
C:1 G:NONE M:---
2. Dial LCR ROUTE index number 1–16
(e.g., 05)
OR
Press UP or DOWN to selected index and
press RIGHT soft key to move cursor and
advance to next step 3
LCR ROUTE (05:1)
C:1 G:NONE M:---
3. Dial TIME BAND index number 1–4 (e.g., 2)
OR
Press UP or DOWN to selected index and
press RIGHT soft key to move cursor and
advance to next step 4
LCR ROUTE (05:2)
C:1 G:NONE M:---
HOME
PAGE
Table of
Contents
PROSTAR DCS COMPACT
TECHNICAL MANUAL
PROGRAMMING
PART 2 DECEMBER 1994
HOME
PAGE
Table of
Contents
MMC: 712
4. Dial LCRCOS number 1–8 (e.g., 4)
OR
Press UP or DOWN to selected COS and
press RIGHT soft key to move cursor and
advance to next step 5
LCR ROUTE (05:2)
C:4 G:NONE M:---
5. Dial TRUNK GROUP access code 80–89
(e.g., 81)
OR
Press UP or DOWN to selected access code
and press RIGHT soft key to move cursor
and advance to next step 6
LCR ROUTE (05:2)
C:4 G:81 M:---
6. Dial MODIFY DIGITS index number 001–100
(e.g., 050)
OR
Press UP or DOWN to selected index
number and press RIGHT soft key to move
cursor
OR
Press RIGHT soft key to enter NO index
number
LCR ROUTE (05:2)
C:4 G:81 M:050
LCR ROUTE (05:2)
C:4 G:81 M:---
7. Press TRSF to store and exit
OR
Press SPK to store and advance to next MMC
DEFAULT DATA: NONE
RELATED ITEMS: MMC 310 LCR CLASS OF SERVICE
MMC 710 LCR DIGIT TABLE
MMC 711 LCR TIME TABLE
MMC 713 LCR MODIFY DIGIT TABLE
PROSTAR DCS COMPACT
TECHNICAL MANUAL
PROGRAMMING
PART 2 DECEMBER 1994
MMC: 713
LCR MODIFY DIGIT TABLE
DESCRIPTION:
This program entry is also referred to as Outdial Rules. This will give the system the
ability to add or delete a digit string or singular digit if needed to complete a call. A
perfect example is the adding of a digit “1.” An advantage is to insert a common
carrier network access code of 10288 (ATT®). With these digits inserted, a long
distance call will be placed over a local line utilizing the common carrier network.
The characters and # can also be entered.
OPTION
MAXIMUM NUMBER OF DIGIT ENTRIES
Number of digits to delete
Insert (before dialing string)
Append (after dialing string)
15
14
14
DIGIT STRING KEY
Insert String + Digit String (delete) + Append String
PROGRAM KEYS
UP & DOWN
KEYPAD
SOFT KEYS
SPK
HOLD
Used to scroll through options
Used to enter selections
Move cursor left and right
Used to store data and advance to next MMC
Used to clear previous entry
ACTION
DISPLAY
1. Press TRSF 713
Display shows
LCR MODIFY (001)
NOF DEL DGT:00
2. Enter index number ( e.g., 005)
OR
Press UP or DOWN keys to make selection
and press RIGHT soft key to move cursor
LCR MODIFY (005)
NOF DEL DGT:00
3. Enter number of digits to delete
OR
Press RIGHT soft key to skip step and move
cursor to next step
LCR MODIFY (005)
INS:_
HOME
PAGE
Table of
Contents
PROSTAR DCS COMPACT
TECHNICAL MANUAL
PROGRAMMING
PART 2 DECEMBER 1994
Table of
Contents
MMC: 713
4. Enter digits to be inserted (e.g., 10288)
OR
Press RIGHT soft key to skip step or to store
information and advance to next step
LCR MODIFY (005)
INS:10288_
5. Enter digits to be appended (e.g., 45678)
OR
Press RIGHT soft key to skip step or to store
information and return to step 2
LCR MODIFY (005)
APP:_
6. Press TRSF to store and exit
OR
Press SPK to store and advance to next MMC
DEFAULT DATA: NONE
RELATED ITEMS: MMC 710 LCR DIGIT TABLE
HOME
PAGE
PROSTAR DCS COMPACT
TECHNICAL MANUAL
PROGRAMMING
PART 2 JANUARY 2002
MMC: 714 DID NUMBER AND NAME TRANSLATION
DESCRIPTION:
Assigns an incoming DID call to a specific day or night station or station group. It
also provides a call waiting option, if needed, so that a second incoming DID call
can be received. A name can be added to the number. There are ten characters for
Version 1 software and 11 characters for Version 2 software. There are a maximum
of 200 entries.
Names are written using the keypad. Each press of a key selects a character.
Pressing the dial pad key moves the cursor to the next position. For example, if the
directory name is “SAM SMITH,” press “7” three times to get the letter “S.” Press
“2” once to get “A.” Continue selecting characters from the table below to complete
your message. Pressing the bottom left programmable key changes the letter from
upper case to lower case.
NOTE: When the character you want appears on the same dial pad key as the
previous character, press the UP key to move the cursor to the right.
•
DCS KEYSETS
COUNT
DIAL 0
DIAL 1
DIAL 2
DIAL 3
DIAL 4
DIAL 5
DIAL 6
DIAL 7
DIAL 8
DIAL 9
DIAL
1
Q
space
A
D
G
J
M
P
T
W
:
2
Z
?
B
E
H
K
N
R
U
X
=
3
.
,
C
F
I
L
O
S
V
Y
[
4
)
!
@
#
$
%
^
&
(
]
5
0
1
2
3
4
5
6
7
8
9
The # key can be used for the following special characters: #, space, &, !, :, ?, ., %,
$, -, <, >, /, =, [, ], @, ^, (, ), _, +, {, }, |, ;, \, " and ~.
HOME
PAGE
Table of
Contents
PROSTAR DCS COMPACT
TECHNICAL MANUAL
PROGRAMMING
PART 2 JANUARY 2002
Table of
Contents
MMC: 714
•
iDCS KEYSETS
COUNT
DIAL 0
DIAL 1
DIAL 2
DIAL 3
DIAL 4
DIAL 5
DIAL 6
DIAL 7
DIAL 8
DIAL 9
DIAL
1
2
3
4
5
<
space
A
D
G
J
M
P
T
W
:
>
?
B
E
H
K
N
Q
U
X
=
.
,
C
F
I
L
O
R
V
Y
[
)
!
@
#
$
%
^
S
0
1
2
3
4
5
6
7
8
9
Z
]
1. When the character you want appears on the same dial pad key as the previous
character, press UP to move the cursor one space to the right.
2. Other symbols are available for DIAL #.
PROGRAM KEYS
UP & DOWN
KEYPAD
SOFT KEYS
SPK
HOLD
Used to scroll through options
Used to enter selections
Move cursor left and right
Used to store data and advance to next MMC
Used to clear previous entry
ACTION
HOME
PAGE
DISPLAY
1. Press TRSF 714
Display shows
DID DIGIT (001)
DGT:
CW:NO
2. Enter valid index number, e.g., 005,
via dial keypad
OR
Press UP or DOWN key to make selection
Press RIGHT soft key to move cursor
DID DIGIT (005)
DGT:
CW:NO
3. Enter digits to be translated (e.g., 5065)
via dial keypad and press RIGHT
soft key to move cursor
DID DIGIT (005)
DGT:5065 CW:NO
PROSTAR DCS COMPACT
TECHNICAL MANUAL
PROGRAMMING
PART 2 JANUARY 2002
HOME
PAGE
Table of
Contents
MMC: 714
4. Enter 1 for YES or 0 for NO CALL WAITING
press RIGHT soft key to move cursor to next
display
DID DIGIT (005)
DGT:5065 CW:YES
5. Enter station or group number for DAY
destination via dial keypad
OR
Press UP or DOWN key to make selection
If valid entry, system will advance cursor
DID DIGIT (005)
RG→D:205 N:NONE
6. Enter station or group number for NIGHT
destination via dial keypad
OR
Press UP or DOWN key to make selection
If valid entry, system will move cursor
DID DIGIT (005)
RG→D:205 N:NONE
7. Enter name using above table and press
RIGHT soft key to return to step 2
DID DIGIT
NAME:_
. Press TRSF to store and exit
OR
Press SPK to store and advance to next MMC
DEFAULT DATA: NO ENTRIES
RELATED ITEMS: TRUNK PROGRAMMING
MMC 416 ASSIGN E&M TRANSLATION
(005)
PROSTAR DCS COMPACT
TECHNICAL MANUAL
PROGRAMMING
PART 2 JANUARY 2002
MMC: 715
PROGRAMMED STATION MESSAGE
DESCRIPTION:
Allows a 16 character custom message to be programmed. Messages are written
via the keypad. Each press of a key will select a character. Pressing a different key
will move the cursor to the next position. For example, if the message is
“Sunbathing,” press the number “7” three times to get the letter “S.” Now press the
number “8” two times to get the letter “U.” Continue selecting characters from the
table below to complete your message. Pressing the “A” key will change the letter
from upper case to lower case.
NOTE: When the character you want appears on the same dial pad key as the
previous character, press the UP key to move the cursor to the right or the DOWN
key to move the cursor to the left. A space can be entered by using these keys.
•
DCS KEYSETS
COUNT
DIAL 0
DIAL 1
DIAL 2
DIAL 3
DIAL 4
DIAL 5
DIAL 6
DIAL 7
DIAL 8
DIAL 9
DIAL
1
Q
space
A
D
G
J
M
P
T
W
:
2
Z
?
B
E
H
K
N
R
U
X
=
3
.
,
C
F
I
L
O
S
V
Y
[
4
)
!
@
#
$
%
^
&
(
]
5
0
1
2
3
4
5
6
7
8
9
The # key can be used for the following special characters: #, space, &, !, :, ?, ., %,
$, -, <, >, /, =, [, ], @, ^, (, ), _, +, {, }, |, ;, \, " and ~.
HOME
PAGE
Table of
Contents
PROSTAR DCS COMPACT
TECHNICAL MANUAL
PROGRAMMING
PART 2 JANUARY 2002
Table of
Contents
MMC: 715
•
iDCS KEYSETS
COUNT
DIAL 0
DIAL 1
DIAL 2
DIAL 3
DIAL 4
DIAL 5
DIAL 6
DIAL 7
DIAL 8
DIAL 9
DIAL
1
2
3
4
5
<
space
A
D
G
J
M
P
T
W
:
>
?
B
E
H
K
N
Q
U
X
=
.
,
C
F
I
L
O
R
V
Y
[
)
!
@
#
$
%
^
S
0
1
2
3
4
5
6
7
8
9
Z
]
1. When the character you want appears on the same dial pad key as the previous
character, press UP to move the cursor one space to the right.
2. Other symbols are available for DIAL #.
PROGRAM KEYS
UP & DOWN
KEYPAD
SOFT KEYS
SPK
HOLD
“A” KEY
Used to scroll through options
Used to enter selections
Move cursor left and right
Used to store data and advance to next MMC
Used to clear previous entry
Toggles from upper case to lower case
ACTION
HOME
PAGE
DISPLAY
1. Press TRSF 715
Display shows
PGM.MESSAGE (01)
IN A MEETING
2. Enter index number (e.g., 11)
OR
Press UP or DOWN arrow to make selection
Press RIGHT soft key to move cursor
PGM.MESSAGE (11)
_
3. Enter message via dial keypad using the
above table (maximum 16 characters)
PGM.MESSAGE (11)
SunBathing
PROSTAR DCS COMPACT
TECHNICAL MANUAL
PROGRAMMING
PART 2 JANUARY 2002
MMC: 715
Use “A” key to toggle upper case/lower case
Press RIGHT soft key to return to step 2
4. Press TRSF to store and exit
OR
Press SPK to store and advance to next MMC
DEFAULT DATA: TEN PROGRAMMED MESSAGES AS DETAILED BELOW
01. IN A MEETING
02. OUT ON A CALL
03. OUT TO LUNCH
04. LEAVE A MESSAGE
05. PAGE ME
06. OUT OF TOWN
07. IN TOMORROW
08. RETURN AFTERNOON
09. ON VACATION
10. GONE HOME
MESSAGES 11–20 ARE NOT USED
RELATED ITEMS: MMC 115 SET PROGRAMMED MESSAGE
HOME
PAGE
Table of
Contents
PROSTAR DCS COMPACT
TECHNICAL MANUAL
MMC: 718
PROGRAMMING
PART 2 NOVEMBER 1997
SPECIAL CODE TABLE
DESCRIPTION:
Provides a way to insert the special feature codes to activate central office custom
calling features such as CID Block and call waiting disable. The special feature
codes can be used on a per call basis without affecting LCR or toll restriction
programming. There is a maximum of ten (10) entries available each of which may
be up to four digits long. The four rules that apply to the Special Code Table are as
follows:
Rule 1.
Toll restriction is only applied to digits following the entries in the Special
Code Table. This eliminates toll restriction bypass with second dial tone
central office features such as CID block (✱67).
Rule 2.
LCR will only route calls based on the digits following the entries in the
Special Code Table. This rule allows end user per call special code
activation.
Rule 3.
LCR modify digits tables will only delete digits that are follow in the
Special Code Table entries. This allows central office features such as
CID block to be used when LCR deletes digits. Can be used in Foreign
Exchange (FX) routing by removing the 1+ area code..
Rule 4.
LCR modify digits tables will only insert digits after the Special Code
Table entries. This allows for central office features such as call waiting
block to be activated but route the call with a specific PIC code such as
10288 (AT&T).
Example of Rule 4: User dials ✱67 1 305 529 2900, the DCS will seize a C.O. line and
dial ✱67 10288 1 305 529 2900.
PROGRAM KEYS
UP & DOWN
KEYPAD
SOFT KEYS
SPK
HOLD
Used to scroll through options
Used to enter selections
Move cursor left and right
Used to store data and advance to next MMC
Used to clear previous entry
HOME
PAGE
Table of
Contents
PROSTAR DCS COMPACT
TECHNICAL MANUAL
PROGRAMMING
PART 2 NOVEMBER 1997
Table of
Contents
MMC: 718
ACTION
1. Press TRSF 727
Display shows
DISPLAY
SPECIAL CODE
1:
2. Enter index number, e.g., 3
OR
Press UP or DOWN key to make selection
and press RIGHT soft key to move cursor
SPECIAL CODE
3:_
3. Enter via dial keypad the desired
access/feature code (e.g., Q67)
Press RIGHT soft key to enter and return
to step 2 and enter more entries
SPECIAL CODE
3: 67
4. Press TRSF to store and exit
OR
Press SPK to store and advance to next MMC
DEFAULT DATA: NONE
RELATED ITEMS: LCR PROGRAMMING
MMC 702 TOLL DENY TABLE
MMC 703 TOLL ALLOW TABLE
HOME
PAGE
PROSTAR DCS COMPACT
TECHNICAL MANUAL
MMC: 720
PROGRAMMING
PART 2 DECEMBER 1994
COPY KEY PROGRAMMING
DESCRIPTION:
Provides a tool for duplicating key assignments from one keyset to another. This can be
done on a per-station basis or on all stations but not on a group of stations. One
limitation is that you must copy a 24B keyset to a 24B keyset, a 12B keyset to a 12B
keyset and an AOM to an AOM.
PROGRAM KEYS
UP & DOWN
KEYPAD
SOFT KEYS
SPK
HOLD
ANS/RLS
Used to scroll through options
Used to enter selections
Move cursor left and right
Used to store data and advance to next MMC
Used to clear previous entry
Used to select ALL
ACTION
DISPLAY
1. Press TRSF 720
Display shows
[201] COPY KEY
SRC PHONE:NONE
2. Enter station number (e.g., 205)
OR
Press UP or DOWN keys to make selection
and press RIGHT soft key to move cursor
[205] COPY KEY
SRC PHONE:NONE
3. Enter station number to copy from
Cursor is returned to step 2
OR
Press UP or DOWN key to make selection
[205] COPY KEY
SRC PHONE:203
4. Press RIGHT soft key to return to step 2
OR
Press TRSF to store and exit
OR
Press SPK to store and advance to next MMC
DEFAULT DATA: NONE
RELATED ITEMS: MMC 107 KEY EXTENDER
MMC 721 SAVE STATION KEY PROGRAMMING
MMC 722 STATION KEY PROGRAMMING
MMC 723 SYSTEM KEY PROGRAMMING
HOME
PAGE
Table of
Contents
PROSTAR DCS COMPACT
TECHNICAL MANUAL
MMC: 721
PROGRAMMING
PART 2 DECEMBER 1994
SAVE STATION KEY PROGRAMMING
DESCRIPTION:
Provides a service tool which will minimize the accidental loss of programmable
keys on the DCS COMPACT electronic keysets. The method of operation is
simple—first the data is saved and then the station can be replaced with another
station type or the keys can be reprogrammed to other features. Once testing or
replacement is completed, the data can be restored to the individual station,
providing the same type is in place.
NOTE: This program is not to be confused with AUTO SET RELOCATE. This
program is for saving and restoring the same electronic device type at that port.
PROGRAM KEYS
UP & DOWN
KEYPAD
SOFT KEYS
SPK
Used to scroll through options
Used to enter selections
Move cursor left and right
Used to store data and advance to next MMC
ACTION
DISPLAY
1. Press TRSF 721
Display shows
[201] SAVE KEY
RESTORE
2. Enter desired station number (e.g.,205)
OR
Press UP or DOWN key to make selection
and press RIGHT soft key
[205] SAVE KEY
RESTORE
3. Press UP or DOWN key to make function
selection (e.g., SAVE)
[201] SAVE KEY
SAVE
4. Press RIGHT soft key to enter and return to
step 2
OR
Press TRSF to store and exit
OR
Press SPK to store and advance to next MMC
DEFAULT DATA: NONE
RELATED ITEMS: MMC 107 KEY EXTENDER
MMC 722 STATION KEY PROGRAMMING
MMC 723 SYSTEM KEY PROGRAMMING
HOME
PAGE
Table of
Contents
PROSTAR DCS COMPACT
TECHNICAL MANUAL
MMC: 722
PROGRAMMING
PART 2 JANUARY 2002
STATION KEY PROGRAMMING
DESCRIPTION:
Allows the customizing of programmable keys on specific electronic keysets, or
AOM on the DCS COMPACT system. For keysets, buttons 1 and 2 are set as CALL
buttons by default. For AOM’s all buttons are set as DS keys by default. Features
are entered via dial pad keys by pressing the dial pad number the required number
of steps to select the feature. For example, for OHVA, the number 6 is pressed three
times. If the BOSS key is required, press 2 for the first letter B and then use the UP
or DOWN key to change the selection from BARGE to BOSS.
DIAL KEYPAD
COUNT→
DIAL 2
DIAL 3
DIAL 4
DIAL 5
DIAL 6
DIAL 7
DIAL 8
1
AAPLAY
DICT
GPIK
LCR
MMPA
PAGE
TG
2
BARGE
DICT
HLDPK
LCR
NEW
REJECT
UA
3
CALL
FAUTO
IG
LCR
OHVA
SG
PROGRAM KEYS
UP & DOWN
KEYPAD
SOFT KEYS
SPK
HOLD
Used to scroll through options
Used to enter selections
Move cursor left and right
Used to store data and advance to next MMC
Used to clear previous entry
ACTION
DISPLAY
1. Press TRSF 722
Display shows
[201] KEY (KTS)
01:CALL1 →
2. Enter selected station number (e.g., 205)
OR
Press UP or DOWN key to select station
Press RIGHT soft key to move cursor
[205] KEY (64B)
01:CALL1 →
HOME
PAGE
Table of
Contents
PROSTAR DCS COMPACT
TECHNICAL MANUAL
PROGRAMMING
PART 2 JANUARY 2002
Table of
Contents
MMC: 722
3. Enter selected key number (e.g., 18)
OR
Press UP or DOWN key to select key number
Press RIGHT soft key to move cursor
[201] KEY (KTS)
18:NONE →_
4. Using the dial keypad chart, press dial pad
key number to make a selection
OR
Press UP or DOWN key to make a selection
Press RIGHT soft key to advance cursor to
step 5 to enter extender if required or to return
to step 2
[201] KEY (KTS)
18:NONE →GPIK_
5. If required, enter extender (e.g.,03)
OR
Press UP or DOWN key to make a selection
Press RIGHT soft key to return to step 2
[201] KEY (KTS)
18:NONE →GPIK03
6. Press TRSF to store and exit
OR
Press SPK to store and advance to next MMC
DEFAULT DATA: SEE BELOW
RELATED ITEMS: MMC 107 KEY EXTENDER
•
DCS KEYSETS
Default 24 Button Keyset with or without Display
01:CALL1
07:NONE
13:NONE
19:CONF
02:CALL2
08:NONE
14:NONE
20:SPD
03:NONE
09:NONE
15:NONE
21:LNR
04:NONE
10:NONE
16:NONE
22:PAGE
05:NONE
11:NONE
17:NONE
23:CBK
06:TG9
12:NONE
18:NONE
24:MSG
Default 12 Button Keyset
01:CALL1
07:CONF
02:CALL2
08:SPD
03:NONE
09:LNR
04:NONE
10:PAGE
HOME
PAGE
05:NONE
11:CBK
06:TG9
12:MSG
PROSTAR DCS COMPACT
TECHNICAL MANUAL
PROGRAMMING
PART 2 JANUARY 2002
Table of
Contents
MMC: 722
Default 32 Button Add-On Module
01:DS
05:DS
09:DS
13:DS
17:DS
21:DS
25:DS
29:DS
02:DS
06:DS
10:DS
14:DS
18:DS
22:DS
26:DS
30:DS
03:DS
07:DS
11:DS
15:DS
19:DS
23:DS
27:DS
31:DS
04:DS
08:DS
12:DS
16:DS
20:DS
24:DS
28:DS
32:DS
Default 7 Button Keyset
01:CALL1
04:NONE
•
02:CALL2
05:NONE
07:MSG
03:NONE
06:NONE
iDCS KEYSETS
iDCS 28D - Default 28 Button Keyset
01:CALL1
06:NONE
11:NONE
16:NONE
02:CALL2
07:NONE
12:NONE
17:NONE
03:NONE
08:NONE
13:NONE
18:NONE
21:NONE
22:NONE
23:MEMORY
24:TRANSFER
04:NONE
09:NONE
14:NONE
19:NONE
05:MESSAGE
10:NONE
15:NONE
20:NONE
25:NONE
26:NONE
27:REDIAL
28:SPEAKER
iDCS 18D - Default 18 Button Keyset
01:CALL1
06:NONE
02:CALL2
07:NONE
03:NONE
08:NONE
21:NONE
22:NONE
23:MEMORY
24:TRANSFER
04:NONE
09:NONE
05:MESSAGE
10:NONE
25:NONE
26:NONE
27:REDIAL
28:SPEAKER
iDCS 8D - Default 8 Button Keyset
01:CALL1
05:NONE
02:CALL2
06:NONE
HOME
PAGE
03:MESSAGE
07:NONE
04:TRANSFER
08:SPEAKER
PROSTAR DCS COMPACT
TECHNICAL MANUAL
PROGRAMMING
PART 2 JANUARY 2002
MMC: 722
Programmable Key Assignments
ACCT:
ALARM:
AN/RLS:
BARGE:
BLOCK:
BOSS:
CALL:
CAMP:
CANMG:
CBK:
CID:
CONF:
CR:
CS:
CSNR:
DICT:
DIR:
DLOCK:
DND:
DP:
DS:
DT:
EXT MIC:
FAUTO:
FLASH:
FWRD:
GPIK:
HDSET:
HLDPK:
HOLD:
IG:
INQIRE:
ISPY:
LCR:
LISTN:
LNR:
MMPA:
MMPG:
MSG:
MUTE:
NEW:
NIGHT:
ACCOUNT
ALARM RING ANSWER
ANSWER/RELEASE
BARGE-IN
OHVA BLOCK
BOSS/SECRETARY
CALL BUTTON
STATION CAMP-ON
MESSAGE CANCEL
CALLBACK
CALLER ID*
CONFERENCE
CALL RECORD KEY
CALL STATUS
CALLER ID SAVE NUMBER REDIAL*
DICTATION
DIRECTORY
DOOR LOCK
DO NOT DISTURB
DIRECT PICKUP
DSS KEY
DTS KEY
EXTERNAL MICROPHONE**
FORCED AUTO ANSWER
FLASH
CALL FORWARD
GROUP PICKUP
HEADSET MODE
HOLD PICKUP
HOLD
IN/OUT OF GROUP
INQUIRE (CID)*
CID SPY*
LEAST COST ROUTING
GROUP LISTENING
LAST NUMBER REDIAL
MEET ME PAGE ANSWER
MEET ME PAGE
MESSAGE
MUTE
NEW CALL
NIGHT SERVICE
HOME
PAGE
Table of
Contents
PROSTAR DCS COMPACT
TECHNICAL MANUAL
PROGRAMMING
PART 2 JANUARY 2002
MMC: 722
Programmable Key Assignments
NND:
NXT:
OHVA:
OPER:
PAGE:
PAGPK:
PMSG:
REJECT:
RETRY:
REVW:
SETMG:
SG:
SNR:
SPD:
SPK:
STORE:
TG:
TIMER:
TRSF:
UA:
VM:
VMADM:
VMAME:
VMMSG:
VT:
NAME NUMBER DATE (CID)
NEXT (CID)
OFF-HOOK VOICE ANNOUNCE
OPERATOR
PAGE
PICKUP PAGE HOLD
PROGRAMMED STATION MESSAGE
OHVA REJECT
AUTO REDIAL ON BUSY
REVIEW (CID)*
SET MESSAGE W/O RING
STATION GROUP
SAVED NUMBER REDIAL
SPEED DIAL
SPEAKER**
STORE DISPLAYED NUMBER (CID)*
TRUNK GROUP
TIMER
TRANSFER**
UNIVERSAL ANSWER
VOICE MAIL MEMO*
VOICE MAIL ADMINISTRATION*
ANSWER MACHINE EMULATION*
VOICE MAIL MESSAGE KEY*
VOICE MAIL TRANSFER*
NOTE: Items marked with an asterisk (*) require optional hardware and/or software.
Items marked with double asterisks (**) indicate iDCS keyset specific feature keys.
HOME
PAGE
Table of
Contents
PROSTAR DCS COMPACT
TECHNICAL MANUAL
PROGRAMMING
PART 2 JANUARY 2002
Table of
Contents
MMC: 723
SYSTEM KEY PROGRAMMING
DESCRIPTION:
This MMC is much like MMC 722 Station Key Programming. The main difference is
that this MMC is system-wide rather than on a per-station basis. Features are
entered via dial pad keys by pressing the dial pad number the required number of
steps to select the feature. For example, for OHVA, the number 6 is pressed three
times. If the BOSS key is required, first press 2 for the first letter B and then use the
UP or DOWN key to make the selection from BARGE to BOSS.
NOTE: Please remember that this program is system-wide.
DIAL KEYPAD
COUNT→
DIAL 2
DIAL 3
DIAL 4
DIAL 5
DIAL 6
DIAL 7
DIAL 8
1
AAPLAY
DICT
GPIK
LCR
MMPA
PAGE
TG
2
BARGE
DICT
HLDPK
LCR
NEW
REJECT
UA
3
CALL
FAUTO
IG
LCR
OHVA
SG
TYPE OF SET
DIAL
DIAL
DIAL
DIAL
0
1
2
3
24BTNS
12BTNS
32BTNS
7BTNS
PROGRAM KEYS
UP & DOWN
KEYPAD
SOFT KEYS
SPK
HOLD
HOME
PAGE
Used to scroll through options
Used to enter selections
Move cursor left and right
Used to store data and advance to next MMC
Used to clear previous entry
PROSTAR DCS COMPACT
TECHNICAL MANUAL
PROGRAMMING
PART 2 JANUARY 2002
Table of
Contents
MMC: 723
ACTION
1. Press TRSF 723
Display shows
DISPLAY
SYS.KEY PROGRAM
TYPE:24 BTN SETS
SYS.KEY PROGRAM
2. Enter the type of set via dial pad (e.g., 2)
TYPE:24 BTN SETS
OR
Press UP or DOWN key to make selection and
press RIGHT soft key to move cursor
SYS.KEY PROGRAM
3. Enter key number (e.g., 18)
18:DS →
OR
Press UP or DOWN key to make selection and
press RIGHT soft key move cursor
4. Using the dial keypad chart, press the dial
pad key number to make a selection
OR
Press UP or DOWN key to make a selection
Press RIGHT soft key to advance cursor to
step 5 to enter extender if required
OR
Press LEFT soft key to return to step 3
SYS.KEY PROGRAM
18:DS →GPIK
5. If required, enter extender (e.g.,03)
OR
Press UP or DOWN key to make a selection
Press RIGHT soft key to return to step 2
Press LEFT soft key to return to step 3
SYS.KEY PROGRAM
18:DS →GPIK03
6. Press TRSF to store and exit
OR
Press SPK to store and advance to next MMC
DEFAULT DATA: SEE BELOW
RELATED ITEMS: NONE
HOME
PAGE
PROSTAR DCS COMPACT
TECHNICAL MANUAL
PROGRAMMING
PART 2 JANUARY 2002
Table of
Contents
MMC: 723
•
DCS KEYSETS
Default 24 Button Keyset with or without Display
01:CALL1
07:NONE
13:NONE
19:CONF
02:CALL2
08:NONE
14:NONE
20:SPD
03:NONE
09:NONE
15:NONE
21:LNR
04:NONE
10:NONE
16:NONE
22:PAGE
05:NONE
11:NONE
17:NONE
23:CBK
06:TG9
12:NONE
18:NONE
24:MSG
Default 12 Button Keyset
01:CALL1
07:CONF
02:CALL2
08:SPD
03:NONE
09:LNR
04:NONE
10:PAGE
05:NONE
11:CBK
Default 32 Button Add-On Module
01:DS
05:DS
09:DS
13:DS
17:DS
21:DS
25:DS
29:DS
02:DS
06:DS
10:DS
14:DS
18:DS
22:DS
26:DS
30:DS
03:DS
07:DS
11:DS
15:DS
19:DS
23:DS
27:DS
31:DS
04:DS
08:DS
12:DS
16:DS
20:DS
24:DS
28:DS
32:DS
Default 7 Button Keyset
01:CALL1
04:NONE
02:CALL2
05:NONE
07:MSG
HOME
PAGE
03:NONE
06:NONE
06:TG9
12:MSG
PROSTAR DCS COMPACT
TECHNICAL MANUAL
PROGRAMMING
PART 2 JANUARY 2002
Table of
Contents
MMC: 723
•
iDCS KEYSETS
iDCS 28D - Default 28 Button Keyset
01:CALL1
06:NONE
11:NONE
16:NONE
02:CALL2
07:NONE
12:NONE
17:NONE
03:NONE
08:NONE
13:NONE
18:NONE
21:NONE
22:NONE
23:MEMORY
24:TRANSFER
04:NONE
09:NONE
14:NONE
19:NONE
05:MESSAGE
10:NONE
15:NONE
20:NONE
25:NONE
26:NONE
27:REDIAL
28:SPEAKER
iDCS 18D - Default 18 Button Keyset
01:CALL1
06:NONE
02:CALL2
07:NONE
03:NONE
08:NONE
21:NONE
22:NONE
23:MEMORY
24:TRANSFER
04:NONE
09:NONE
05:MESSAGE
10:NONE
25:NONE
26:NONE
27:REDIAL
28:SPEAKER
iDCS 8D - Default 8 Button Keyset
01:CALL1
05:NONE
02:CALL2
06:NONE
03:MESSAGE
07:NONE
HOME
PAGE
04:TRANSFER
08:SPEAKER
PROSTAR DCS COMPACT
TECHNICAL MANUAL
PROGRAMMING
PART 2 JANUARY 2002
MMC: 723
Programmable Key Assignments
ACCT:
ALARM:
AN/RLS:
BARGE:
BLOCK:
BOSS:
CALL:
CAMP:
CANMG:
CBK:
CID:
CONF:
CR:
CS:
CSNR:
DICT:
DIR:
DLOCK:
DND:
DP:
DS:
DT:
EXT MIC:
FAUTO:
FLASH:
FWRD:
GPIK:
HDSET:
HLDPK:
HOLD:
IG:
INQUIRE:
ISPY:
LCR:
LISTN:
LNR:
MMPA:
MMPG:
MSG:
MUTE:
NEW:
NIGHT:
NND:
ACCOUNT
ALARM RING ANSWER
ANSWER/RELEASE
BARGE-IN
OHVA BLOCK
BOSS/SECRETARY
CALL BUTTON
STATION CAMP-ON
MESSAGE CANCEL
CALLBACK
CALLER ID*
CONFERENCE
CALL RECORD KEY
CALL STATUS
CALLER ID SAVE NUMBER REDIAL*
DICTATION
DIRECTORY
DOOR LOCK
DO NOT DISTURB
DIRECT PICKUP
DSS KEY
DTS KEY
EXTERNAL MICROPHONE**
FORCED AUTO ANSWER
FLASH
CALL FORWARD
GROUP PICKUP
HEADSET MODE
HOLD PICKUP
HOLD
IN/OUT OF GROUP
INQUIRE (CID)*
CID SPY*
LEAST COST ROUTING
GROUP LISTENING
LAST NUMBER REDIAL
MEET ME PAGE ANSWER
MEET ME PAGE
MESSAGE
MUTE
NEW CALL
NIGHT SERVICE
NAME NUMBER DATE (CID)*
HOME
PAGE
Table of
Contents
PROSTAR DCS COMPACT
TECHNICAL MANUAL
PROGRAMMING
PART 2 JANUARY 2002
MMC: 723
NXT:
OHVA:
OPER:
PAGE:
PAGPK:
PMSG:
REJECT:
RETRY:
REVW:
SG:
SETMG:
SNR:
SPD:
SPK:
STORE:
TG:
TIMER:
TRSF:
UA:
VM:
VMADM:
VMAME:
VMMSG:
VT:
NEXT (CID)*
OFF-HOOK VOICE ANNOUNCE
OPERATOR
PAGE
PICKUP PAGE HOLD
PROGRAMMED STATION MESSAGE
OHVA REJECT
AUTO REDIAL ON BUSY
REVIEW (CID)*
STATION GROUP
SET MESSAGE W/O RING
SAVED NUMBER REDIAL
SPEED DIAL
SPEAKER**
STORE DISPLAYED NUMBER (CID)*
TRUNK GROUP
TIMER
TRANSFER**
UNIVERSAL ANSWER
VOICE MAIL MEMO*
VOICE MAIL ADMINISTRATION*
ANSWER MACHINE EMULATION*
VOICE MAIL MESSAGE KEY*
VOICE MAIL TRANSFER*
NOTE: Items marked with an asterisk (*) require optional hardware and/or software.
Items marked with double asterisks (**) indicate iDCS keyset specific feature keys.
HOME
PAGE
Table of
Contents
PROSTAR DCS COMPACT
TECHNICAL MANUAL
PROGRAMMING
PART 2 NOVEMBER 2000
MMC: 724
DIAL NUMBERING PLAN
DESCRIPTION:
Provides the access codes and dialing plan needed for the operation of features
and programs. The system comes with a wide range of acceptable numbering
plans set as default and the option to customize the dialing plan. There is also an
error message provided because of the chance of duplicating an access/feature
code. Dialing codes are entered via the dial pad key by pressing the dial pad
number the required steps to select the feature. For example, for OHVA, the number
6 would be pressed three times. NOTE: Please remember that this program is
system-wide.
DIAL KEYPAD
COUNT→
DIAL 2
DIAL 3
DIAL 4
DIAL 5
DIAL 6
DIAL 7
DIAL 8
DIAL 9
1
ACCT
DICT
GPIK
LCR
MMPA
PAGE
TG
WCOS
2
BGM
DICT
HLDPK
LCR
NEW
REJECT
UA
WCOS
3
CAMP
FAUTO
IOG
LCR
OHVA
SG
WCOS
PROGRAM KEYS
UP & DOWN
KEYPAD
SOFT KEYS
SPK
HOLD
Used to scroll through options
Used to enter selections
Move cursor left and right
Used to store data and advance to next MMC
Used to clear previous entry
ACTION
1. Press TRSF
Display shows
DISPLAY
DIAL NUMBER PLAN
ACCT
:47
→
2. Using the chart, press dial pad key
DIAL NUMBER PLAN
number to make selection
DICT :NONE →_
OR
Press UP or DOWN key to make selection and
press RIGHT soft key to advance cursor
3. Enter digits (e.g., 68) via the dial keypad
DIAL NUMBER PLAN
DICT :NONE →68
HOME
PAGE
Table of
Contents
PROSTAR DCS COMPACT
TECHNICAL MANUAL
PROGRAMMING
PART 2 NOVEMBER 2000
Table of
Contents
MMC: 724
4. Press LEFT soft key to enter change and
continue to make changes
OR
Press RIGHT soft key to enter and return to
step 2; if a error message appears indicating
duplication of access code, enter 1 for YES for
change or enter 0 for NO for no change
SAME DIAL EXIST
CHANGE? Y:1,N:0
SAME DIAL EXIST
CHANGE? Y:1,N:0
5. Press TRSF to store and exit
OR
Press SPK to store and advance to next MMC
DEFAULT DATA: SEE BELOW
RELATED ITEMS: ALL PROGRAMS AND FEATURES
ABAND
ACCT
ALM
AUTH
BARGE
BGM
BLOCK
BOSS
CAMP
CANMG
CBK
CONF
CB
DICT
DIR
DIRPK
DISALM
DLOCK
DND
FAUTO
FLASH
FWD
GRPK
HLDPK
IG
LCR
LISTN
LNR
NONE
47
NONE
NONE
371–372
NONE
NONE
45
42
44
46
381
NONE
NONE
65
58
13
40
14
49
60
66
12
53
NONE
NONE
19
MMPA
MMPG
MSG
NEW
NIGHT
OHVA
OPER
PAGE
PAGPK
PMSG
REJECT
RETRY
ROP
SETMG
SGP
SNR
SPEED
STN
TGP
TRK
UA
VMADM
VMAME
VMMEM
VMMSG
WCOS
HOME
PAGE
56
54
43
NONE
NONE
NONE
0
55
10
48
NONE
NONE
3601–3639
41
500–529
17
16
201–299, 301–349
9, 80–89
701–799
67
NONE
NONE
NONE
NONE
59
NOTE: Items marked with an asterisk require optional hardware and/or software.
PROSTAR DCS COMPACT
TECHNICAL MANUAL
MMC: 725
PROGRAMMING
PART 2 JANUARY 2002
HOME
PAGE
Table of
Contents
SMDR OPTIONS
DESCRIPTION:
This MMC allows the system administrator to select the information to be printed on
the SMDR report. The following options may be selected to print on SMDR.
0. PAGE HEADER
This option determines whether or not a page header will
print at the top of each page. This feature is normally
turned off if SMDR is sent to a call accounting machine.
1. LINE PER PAGE
This option selects the length of each page to determine
when to print the SMDR header. The number of lines
may be in the range 01–99.
2. INCOMING CALL
This option determines whether or not incoming calls will
print on SMDR.
3. OUTGOING CALL
This option determines whether or not outgoing calls will
print on SMDR.
4. AUTHORIZE CODE
This option determines whether or not authorization
codes will print on SMDR.
5. LESS START TIME
This option determines whether or not valid calls will
include the minimum call time in total call duration.
6. IN/OUT GROUP
This option allows a message, IN GROUP or OUT
GROUP, to be printed in the Digits Dialed column each
time a station enters or leaves a group.
7. DND CALL
This option allows a message, IN DND or OUT DND, to
be printed in the Digits Dialed column each time a station
enters or leaves DND.
8. WAKE-UP CALL
This option determines whether or not stations receiving
an alarm reminder call will print on SMDR.
9. DIRECTORY NAME
This option allows the system administrator to enter a 16
character name which will appear on the SMDR header.
PROSTAR DCS COMPACT
TECHNICAL MANUAL
PROGRAMMING
PART 2 JANUARY 2002
Table of
Contents
MMC: 725
10. CALLER ID
This option can be selected to print Caller ID data
received from the Central Office on incoming calls. This
option requires the use of a 132 column (wide carriage)
printer or an 80 column printer set for condensed print.
The DIRECTORY NAME that appears on the SMDR header is programmed as
follows. Names are written using the keypad. Each press of a key will select a
character. Pressing the next key will move the cursor to the next position. For
example, if the directory name is “SAM SMITH," press the number “7” four times to
get the letter “S.” Now press the number “2” twice to get the letter “A.” Continue
selecting characters from the table below to complete your message.
NOTE: When the character you want appears on the same dial pad key as the
previous character, press the right soft key to move the cursor to the right.
•
DCS KEYSETS
COUNT
DIAL 0
DIAL 1
DIAL 2
DIAL 3
DIAL 4
DIAL 5
DIAL 6
DIAL 7
DIAL 8
DIAL 9
DIAL
1
Q
space
A
D
G
J
M
P
T
W
:
2
Z
?
B
E
H
K
N
R
U
X
=
3
.
,
C
F
I
L
O
S
V
Y
[
HOME
PAGE
4
)
!
@
#
$
%
^
&
(
]
5
0
1
2
3
4
5
6
7
8
9
The # key can be used for the following special characters: #, space, &, !, :, ?, ., %,
$, -, <, >, /, =, [, ], @, ^, (, ), _, +, {, }, |, ;, \, " and ~.
PROSTAR DCS COMPACT
TECHNICAL MANUAL
PROGRAMMING
PART 2 JANUARY 2002
Table of
Contents
MMC: 725
•
iDCS KEYSETS
COUNT
DIAL 0
DIAL 1
DIAL 2
DIAL 3
DIAL 4
DIAL 5
DIAL 6
DIAL 7
DIAL 8
DIAL 9
DIAL
1
2
3
4
5
<
space
A
D
G
J
M
P
T
W
:
>
?
B
E
H
K
N
Q
U
X
=
.
,
C
F
I
L
O
R
V
Y
[
)
!
@
#
$
%
^
S
0
1
2
3
4
5
6
7
8
9
Z
]
1. When the character you want appears on the same dial pad key as the previous
character, press UP to move the cursor one space to the right.
2. Other symbols are available for DIAL #.
PROGRAM KEYS
UP & DOWN
KEYPAD
SOFT KEYS
SPEAKER
Used to scroll through options
Used to enter selections
Move cursor left and right
Used to store data and advance to next MMC
ACTION
HOME
PAGE
DISPLAY
1. Press TRSF 725
Display shows
PAGE HEADER
PRINT : YES
2. Dial the option number (e.g., 1)
OR
Use the UP and DOWN keys to scroll
through the options and press the RIGHT
soft key to select an option
LINE PER PAGE
66 LINE / PAGE
PROSTAR DCS COMPACT
TECHNICAL MANUAL
PROGRAMMING
PART 2 JANUARY 2002
Table of
Contents
MMC: 725
3. Enter the number of lines per page in the
range 01–99 (e.g., 50)
OR
Use UP and DOWN to change number of
lines and press the RIGHT soft
key to save the data and return to step 2
50 LINE / PAGE
LINE PER PAGE
4. If option 0 is selected at step 2
PAGE HEADER
PRINT : YES
5. If option 2 is selected at step 2
INCOMING CALL
PRINT : YES
6. If option 3 is selected at step 2
OUTGOING CALL
PRINT : YES
7. If option 4 is selected at step 2
AUTHORIZE CODE
PRINT : NO
8. If option 5 is selected at step 2
LESS START TIME
PRINT : YES
9. If option 6 is selected at step 2
IN/OUT GROUP
PRINT : YES
10. If option 7 is selected at step 2
DND CALL
PRINT : YES
11. If option 8 is selected at step 2
WAKE-UP CALL
PRINT : YES
12. If option 9 is selected at step 2
DIRECTORY NAME
_
12a. Enter the 16 character name as described
above
DIRECTORY NAME
SAMSUNG DCS
12b. Press RIGHT key to save name and
return to step 2
DIRECTORY NAME
SAMSUNG DCS
13. If option 10 is selected at step 2
HOME
PAGE
CALLER ID DATA
PRINT : YES
PROSTAR DCS COMPACT
TECHNICAL MANUAL
PROGRAMMING
PART 2 JANUARY 2002
MMC: 725
14. After all desired options have been selected,
press TRSF to exit
OR
Press SPK to exit and advance to next MMC
DEFAULT DATA:
PAGE HEADER
LINE PER PAGE
INCOMING CALL
OUTGOING CALL
AUTHORIZE CODE
LESS START TIME
IN/OUT GROUP
DND CALL
WAKE-UP CALL
DIRECTORY NAME
YES
66
NO
YES
NO
YES
NO
NO
YES
NO DEFAULT DEFINED
RELATED ITEMS: MMC 300 CUSTOMER ON/OFF PER STATION
HOME
PAGE
Table of
Contents
PROSTAR DCS COMPACT
TECHNICAL MANUAL
PROGRAMMING
PART 2 DECEMBER 1994
MMC: 726
VM/AA OPTIONS
DESCRIPTION:
Provides a flexible means of setting in band signaling for voice mail or auto
attendant parameters. There are eight main options for programming and several
sub-options to customize the application. Main options are listed in bold type with
the sub-options listed in normal type. Simple YES/NO, numeric and alpha
characters are all the requirements needed for the setting of VM/AA.
The following options may be selected for VM/AA operation:
In band signaling OPTIONS LIST 0–7
0. EXT FOR DN1
DTMF information for the station that called the
VM/AA port station that is forwarded to VM/AA
port.
1. TRK FOR DN1
DTMF information for the trunk that called the
VM/AA port.
2. EXT FOR DN2
DTMF information for the station that originated
the call to a station that is forwarded to a VM/AA
port.
3. TRK FOR DN2
DTMF information for the trunk that called a
station forwarded to a VM/AA port.
4. SEPERATOR
In cases where DN2 is used, this specific digit is
sent between the DN1 and the DN2 information.
Both DN1, DN2 must be set to YES for
SEPERATOR to be sent.
5. DISCONECT SIGNAL
This signal is sent when the calling station or C.O.
line hangs up.
6. CALL TYPE ID
Under this VM/AA option is several customizing
applications.
0. DIRECT CALL
A call originating directly from another station in
the system.
1. ALL FWD CALL
This indicates that a call was forwarded to the
VM/AA port from a station with CALL FORWARD
ALL set.
HOME
PAGE
Table of
Contents
PROSTAR DCS COMPACT
TECHNICAL MANUAL
PROGRAMMING
PART 2 DECEMBER 1994
Table of
Contents
MMC: 726
2. BSY FWD CALL
This indicates that a call was forwarded to the
VM/AA port from a station with CALL FORWARD
BUSY set.
3. NOA FWD CALL
This indicates that a call was forwarded to the
VM/AA port from a station with CALL FORWARD
NO ANSWER set.
4. RECALL
A call is recalling the VM/AA port after being
transferred and not answered.
5. DIR TRK CALL
A C.O. call has gone directly to VM/AA (e.g., trunk
717 DIL to VM/AA).
6. OVERFLOW
A call has OVERFLOWED to the VM/AA port from
a station group.
7. DID CALL
A DID call has called the VM/AA port.
8. MESSAGE CALL
A message button or message reply feature code
has been used to call the VM/AA port.
7. CALL PROGRESS TONES
DTMF digits can be sent in place of normal
system tones. Digits can be assigned to the
following tones:
TONES
VALUE
0. DIAL TONE
1. BUSY TONE
2. RNGBACK TONE
3. DND NO MORE
4. HDSET ANSWER
5. SPKER ANSWER
BA
4
5
6
3
2
PROGRAM KEYS
UP & DOWN
KEYPAD
SOFT KEYS
SPK
HOLD
A
B
C
HOME
PAGE
Used to scroll through options
Used to enter selections
Move cursor left and right
Used to store data and advance to next MMC
Used in some fields where a value is entered or deleted
Used to input alpha character “A”
Used to input alpha character “B”
Used to input alpha character “C”
PROSTAR DCS COMPACT
TECHNICAL MANUAL
PROGRAMMING
PART 2 DECEMBER 1994
Table of
Contents
MMC: 726
ACTION
HOME
PAGE
DISPLAY
1. Press TRSF 726
Display shows
EXT FOR DN1
YES
2. Enter the OPTION number from above list
(e.g., 4)
OR
Press UP or DOWN key to make selection
Press LEFT soft key to move cursor
SEPERATOR
NO
3. Enter 1 for YES or 0 for NO
OR
Press UP or DOWN key for selection and
press RIGHT soft key to return to step 2
SEPERATOR
YES
4. If option 0 is selected at step 2
EXT FOR DN1
YES
5. If option 1 is selected at step 2
TRK FOR DN1
YES
6. If option 2 is selected at step 2
EXT FOR DN2
NO
7. If option 3 is selected at step 2
TRK FOR DN2
NO
8. If option 4 is selected at step 2
(A valid entry consists of digits 0–9 or alpha
characters A–C)
SEPERATOR
NO
9. If option 5 is selected at step 2
(A valid entry consists of digits 0–9 or alpha
characters A–C)
DISCONECT SIGNAL
C
10. If option 6 is selected at step 2
(A valid entry consists of digits 0–9 or alpha
characters A–C)
See above list under the CALL TYPE ID
options list
CALL TYPE ID
DIRECT CALL : NO
11. If option 7 is selected at step 2
(A valid entry consists of digits 0–9 or alpha
PROGRESS TONE ID
DIAL TONE
:B
PROSTAR DCS COMPACT
TECHNICAL MANUAL
PROGRAMMING
PART 2 DECEMBER 1994
MMC: 726
characters A–C)
See above list under the PROGRESS TONE ID
DEFAULT DATA: ALL SET TO NO
EXT FOR DN1 = YES
TRK FOR DN1 = YES
EXT FOR DN2 = NO
TRK FOR DN2 = NO
SEPARATOR = NO
DISCONNECT SIGNAL = C
CALL TYPE ID = NO (ALL)
PROGRESS TONE ID = BA
RELATED ITEMS: MMC 207 ASSIGN VM/AA PORT
HOME
PAGE
Table of
Contents
PROSTAR DCS COMPACT
TECHNICAL MANUAL
MMC: 727
PROGRAMMING
PART 2 NOVEMBER 2000
SYSTEM VERSION DISPLAY
DESCRIPTION:
This MMC is only used for system version display. This is a READ ONLY MMC. It
applies only to DCS Compact systems with Version 2.x software.
PROGRAM KEYS
SPK
ACTION
1. Press TRSF 727
Display shows
DEFAULT DATA: NONE
RELATED ITEMS: NONE
Used to store data and advance to next MMC
DISPLAY
ROM VERSION
,94.03.23. V01.00
HOME
PAGE
Table of
Contents
PROSTAR DCS COMPACT
TECHNICAL MANUAL
PROGRAMMING
PART 2 JANUARY 2002
Table of
Contents
MMC: 728
CID TRANSLATION TABLE
DESCRIPTION:
Allows the system administrator or technician to associate a CID number received
from the central office with a name programmed in this translation table. If there is
no match between a received number and a name in this table, “no CID name” will
be displayed.
The translation table consists of 250 entries with each entry comprised of a ten digit
telephone number and a 16 digit name.
Names are written using the keypad. Each press of a key will select a character.
Pressing the next key will move the cursor to the next position. For example, if the
directory name is “SAM SMITH,” press the number “7” three times to get the letter
“S.” Now press the number “2” once to get the letter “A.” Continue selecting
characters from the table below to complete your message.
NOTE: When the character you want appears on the same dial pad key as the
previous character, press the VOL UP key to move the cursor to the right.
•
DCS KEYSETS
COUNT
DIAL 0
DIAL 1
DIAL 2
DIAL 3
DIAL 4
DIAL 5
DIAL 6
DIAL 7
DIAL 8
DIAL 9
DIAL
HOME
PAGE
1
Q
space
A
D
G
J
M
P
T
W
:
2
Z
?
B
E
H
K
N
R
U
X
=
3
.
,
C
F
I
L
O
S
V
Y
[
4
)
!
@
#
$
%
^
&
(
]
5
0
1
2
3
4
5
6
7
8
9
The # key can be used for the following special characters: #, space, &, !, :, ?, ., %,
$, -, <, >, /, =, [, ], @, ^, (, ), _, +, {, }, |, ;, \, " and ~.
PROSTAR DCS COMPACT
TECHNICAL MANUAL
PROGRAMMING
PART 2 JANUARY 2002
Table of
Contents
MMC: 728
•
iDCS KEYSETS
COUNT
DIAL 0
DIAL 1
DIAL 2
DIAL 3
DIAL 4
DIAL 5
DIAL 6
DIAL 7
DIAL 8
DIAL 9
DIAL
1
2
3
4
5
<
space
A
D
G
J
M
P
T
W
:
>
?
B
E
H
K
N
Q
U
X
=
.
,
C
F
I
L
O
R
V
Y
[
)
!
@
#
$
%
^
S
0
1
2
3
4
5
6
7
8
9
Z
]
1. When the character you want appears on the same dial pad key as the previous
character, press UP to move the cursor one space to the right.
2. Other symbols are available for DIAL #.
PROGRAM KEYS
UP & DOWN
KEYPAD
SOFT KEYS
SPK
HOLD
Used to scroll through options
Used to enter selections
Move cursor left and right
Used to store data and advance to next MMC
Used to clear previous entry
ACTION
HOME
PAGE
DISPLAY
1. Press TRSF 728
Display shows first entry
TRANSLATION(001)
DIGIT:
2. Dial entry number (e.g., 005)
OR
Use UP and DOWN to scroll through entries
Press RIGHT soft key to select entry
TRANSLATION(005)
DIGIT:
PROSTAR DCS COMPACT
TECHNICAL MANUAL
PROGRAMMING
PART 2 JANUARY 2002
HOME
PAGE
Table of
Contents
MMC: 728
3. Enter telephone number and press RIGHT
soft key to advance to name entry
OR
Enter telephone number and press
LEFT soft key to return to step 2
TRANSLATION(005)
DIGIT:3054264100
4. Enter associated name as described
above and press RIGHT or LEFT soft key
to return to step 2
OR
Press SPK to save and advance to next
MMC
OR
Press TRSF to save and exit programming
TRANSLATION : 005
SAMSUNG TELECOM
DEFAULT DATA: NONE
RELATED ITEMS: MMC 312 ALLOW CID
MMC 414 ASSIGN CID
MMC 608 ASSIGN REVIEW BLOCKS
PROSTAR DCS COMPACT
TECHNICAL MANUAL
PROGRAMMING
PART 2 NOVEMBER 2000
MMC: 740
VM CARD RESTART
DESCRIPTION:
This MMC is only used for the Samsung Plug In Voice Mail Card.
There are two options available in this MMC:
DOWNLOAD
When the CADENCE / SVMi-4 card starts, part of the power up procedure will
download data from the 50si to determine time, date, what mailboxes to create, and
system numbering plan. This must be done at least once, but once done this
download feature can be turned off to save boot up time.
CARD RESTART
If this option is set to YES the CADENCE / SVMi-4 card will immediately restart
according to the download OPTION SPECIFIED ABOVE.
PROGRAM KEYS
UP & DOWN
KEYPAD
SPK
Changes MMC data between YES and NO
0 and 1 will change data and advance to other option
Used to store data and advance to next MMC
ACTION
1. Press TRSF 740
Display shows
DISPLAY
VM CARD RESTART
DOWNLOAD ? YES
2. Dial 0 for NO to set option and advance
3. Display shows
4. Dial 0 for NO to set option and advance
5. Press TRSF to store and exit
OR
Press SPK to store and advance to next MMC
VM CARD RESTART
CARD RESTART? NO
HOME
PAGE
Table of
Contents
PROSTAR DCS COMPACT
TECHNICAL MANUAL
PROGRAMMING
PART 2 NOVEMBER 2000
MMC: 740
DEFAULT DATA:
CARD RESTART: NO
DOWNLOAD: YES
RELATED ITEMS: NONE
HOME
PAGE
Table of
Contents
PROSTAR DCS COMPACT
TECHNICAL MANUAL
MMC: 741
PROGRAMMING
PART 2 NOVEMBER 2000
ASSIGN MAILBOX
DESCRIPTION:
This MMC is only used for Samsung Plug In Voice Mail card. It assigns each station
or group as having a mailbox in a specific group. When stations or groups are
assigned to a group, during Voice Mail card power up mailboxes will be created for
each directory number with a “YES” entry. (If MMC 740 is set to DOWNLOAD =
YES)
Once the Voice Mail database has been created new boxes can be added:
a) Through Voice Mail administration,
b) By adding a new mailbox in this MMC.
A mailbox can be removed using this MMC only if it was created by this MMC.
A mailbox cannot be removed using this MMC if it was created by SVMi-4
administration.
If a station that do not have an associated voice mail box, call the Voice Mail system
they will be answered by the Voice Mail system main greeting.
NOTE: The groups that are supported are 500 to 529 (529 being the Voice Mail
group). Mailboxes that are needed for people that do not have an extension must
be added through Voice Mail programming.
PROGRAM KEY
UP & DOWN
KEYPAD
SPK
Selects station number
Selects station number
Used to store data and advance to next MMC
ACTION
DISPLAY
1. Press TRSF 741
Display shows
[741] ASSIGN MBX
201 : YES
2. Dial station number
OR
Press UP or DOWN to scroll the number
[741] ASSIGN MBX
[225] : YES
HOME
PAGE
Table of
Contents
PROSTAR DCS COMPACT
TECHNICAL MANUAL
PROGRAMMING
PART 2 NOVEMBER 2000
Table of
Contents
MMC: 741
3. Press RIGHT soft key to move cursor
[741] ASSIGN MBX
[225] : YES
4. Enter YES or NO
[741] ASSIGN MBX
[225] : NO
5. Press TRSF to store and exit
OR
Press SPK to store and advance
to next MMC
DEFAULT DATA: ALL STATIONS = YES
RELATED ITEMS: SVMi-4 CARD
HOME
PAGE
PROSTAR DCS COMPACT
TECHNICAL MANUAL
MMC: 743
PROGRAMMING
PART 2 NOVEMBER 2000
AUTO RECORD
DESCRIPTION:
This MMC is only used for the Samsung Plug In Voice Mail card.
Some specific stations in the phone system can be assigned to automatically
record conversations. When this option is set all incoming, all outgoing or all calls
(incoming and outgoing) will be automatically recorded in the mailbox of your
choice.
When this option is selected a specific port must be assigned for each station set to
automatic conversation recording or the effectiveness of this feature cannot be
guaranteed.
In this MMC you can assign:
1. Which stations use this feature. —Station number
2. What mailbox the conversation are recorded in. —Mailbox number equal to a
station number
3. What type of conversations are recorded, in, out or both. —I,O or B
4. What port is dedicated to the station. —Voice mail channel/port number
A maximum of 4 stations can use this feature in the DCS COMPACT at the same
time as it requires a SVM port.
The same port cannot be assigned to more than one station. Attempts to do this will
result in an error message.
When a Voice Mail channel is assigned here, it is automatically removed from the
Voice Mail group (529) defined in MMC 601.
WARNING: Before using this feature make sure that you are not violating any state
or federal laws. Some states require that the recorded party be notified. STA is not
responsible for any illegal use of this feature.
PROGRAM KEY
UP & DOWN
KEYPAD
SPK
HOLD
Selects station number
Selects station number
Used to store data and advance to next MMC
Used to delete an entry
HOME
PAGE
Table of
Contents
PROSTAR DCS COMPACT
TECHNICAL MANUAL
PROGRAMMING
PART 2 NOVEMBER 2000
Table of
Contents
MMC: 743
ACTION
DISPLAY
1. Press TRSF 743
Display shows
[743]AUTO RECORD
STN:201 :MB:None
2. Dial station number
OR
Press UP or DOWN to select the number
[743]AUTO RECORD
STN:205 :MB:None
3. Press RIGHT soft key to move cursor
[743]AUTO RECORD
STN:205 :MB:_
4. Enter mailbox number using number
Keys (e.g., 299)
[743]AUTO RECORD
STN:205 :MB:299
5. Press right SOFT key to move cursor.
Enter VM channel number using keypad
or UP or DOWN
[743]AUTO RECORD
PORT:_
:CALL:
6. Press RIGHT soft key to move cursor
Enter call data, I, O or B.
[743]AUTO RECORD
PORT:238 :CALL:B
7. Press TRSF to store and exit
OR
Press SPK to store and advance to next MMC
8. Enter 0 for non urgent or 1 for urgent
DEFAULT DATA: NONE
RELATED ITEMS: NONE
HOME
PAGE
PROSTAR DCS COMPACT
TECHNICAL MANUAL
MMC: 745
PROGRAMMING
PART 2 NOVEMBER 2000
VM DESTINATION
DESCRIPTION:
This MMC is only used for the Samsung Plug In Voice Mail card.
This MMC provides an emergency destination for trunk/station calls to group 529. If
the Voice Mail card is removed or is offline.
In addition any calls to a station forwarded to the Voice Mail card will not forward,
they will remain ringing at the “fwd from” station until answered.
The destination can be a station number or a group number. This destination is also
used for the HDD alarm destination (MMC 747).
PROGRAM KEY
UP & DOWN
KEYPAD
SPK
HOLD
Selects destination station number
Selects destination station number
Used to store data and advance to next MMC
Used to delete an entry
ACTION
DISPLAY
1. Press TRSF 745
Display shows
VM DESTINATION
DEST:500
2. Dial station number
OR
Press UP or DOWN to scroll to number
VM DESTINATION
DEST:213
3. Press TRSF to store and exit
OR
Press SPK to store and advance to next MMC
DEFAULT DATA: VOICE MAIL DESTINATION = 500
RELATED ITEMS: MMC 747 DRIVE ALARM
SVMi-4 CARD
HOME
PAGE
Table of
Contents
PROSTAR DCS COMPACT
TECHNICAL MANUAL
PROGRAMMING
PART 2 NOVEMBER 2000
MMC: 746
VM HALT
DESCRIPTION:
This MMC is only used for the Samsung Plug In Voice Mail card.
This MMC is used to halt the Voice Mail card (take it offline). No calls will be
disconnected, however no new IN/OUT bound calls are established. It ensures that
there is no traffic on the Voice Mail card when it is removed from the system.
NOTE: THIS OPERATION SHOULD BE PERFORMED BEFORE REMOVING THE
VOICE MAIL CARD FROM THE DCS COMPACT SYSTEM. YOU CAN NOT HALT
THE VOICE MAIL CARD USING MMC 810.
PROGRAM KEY
UP & DOWN
SPK
HOLD
1 = processing, 0 = halt
Used to store data and advance to next MMC
Used to delete an entry
ACTION
DISPLAY
1. Press TRSF 746
Display shows
[746]VM HALT
STATUS:PROC
2. Enter 1 to halt
OR
0 to process to scroll to number
[746]VM HALT
STATUS:HALT
3. Display shows:
Press # to confirm
[746]VM HALT
ARE YOU SURE?:_
4. Display shows:
[746]VM HALT
STATUS:HALTED
5. Press TRSF to store and exit
OR
Press SPK to store and advance to next MMC
DEFAULT DATA: NONE
RELATED ITEMS: SVMi-4 CARD – LED INDICATIONS
HOME
PAGE
Table of
Contents
PROSTAR DCS COMPACT
TECHNICAL MANUAL
MMC: 747
PROGRAMMING
PART 2 NOVEMBER 2000
VM DRIVE ALARM
DESCRIPTION:
The MMC will generate an alarm message at the destination assigned in MMC 745
whenever the Voice Mail disk drive reaches a predefined threshold.
The threshold is measured in % full. This means that if the MMC is set for 80, the
alarm will be generated when the disk exceeds 80% of the available drive space.
PROGRAM KEY
KEYPAD
SPK
HOLD
Used to enter new threshold value
Used to store data and advance to next MMC
Used to delete an entry
ACTION
DISPLAY
1. Press TRSF 747
Display shows
[747]VM ALARM
THRESHOLD:80
2. Enter new threshold level
[747]VM ALARM
THRESHOLD:75
3. Press TRSF to store and exit
OR
Press SPK to store and advance to next MMC
DEFAULT DATA: 80%
RELATED ITEMS: MMC 745 VM DESTINATION
SVMi-4 CARD
HOME
PAGE
Table of
Contents
PROSTAR DCS COMPACT
TECHNICAL MANUAL
MMC: 748
PROGRAMMING
PART 2 NOVEMBER 2000
ASSIGN VMMOH
DESCRIPTION:
This MMC is used to assign each a Music on Hold source for the DCS COMPACT
from a sound file located on the SVMi-4 hard disk drive. The 100 available sound
files are defined as numbers 5001 to 5099, but are referred to in this MMC as 00-99.
Make sure you record the sound file first. The next step is to assign the sound file to
a SVMi-4 port. For example, if you record sound file 5025 you would associate 25
with a specific SVMi-4 port, e.g. 225. This will dedicate the port for use only as MOH
and remove it from group 529. Now 225 will show up as a valid music source in
MMC 308, 309 and 408.
Each Music on Hold source assigned here requires one DEDICATED SVMi-4
port/channel.
Note: If the first SVMi-4 port is used for VMMOH, it must be disabled before boot up
since SVMi-4 and the DCS use port 1 during boot up to exchange critical
information. For this reason we suggest you use the last port(s) as VMMOH ports.
PROGRAM KEY
KEYPAD
SPK
HOLD
UP and DOWN
Used to enter SVMI-4 port or sound file number
Used to store data and advance to next MMC
Used to delete an entry
Used to select SVMI-4 port or sound file number
ACTION
DISPLAY
1. Press TRSF 748
Display shows
SET VMMOH
[225] NOT USED
2. Press UP or DOWN to select SVMI-4
port
SET VMMOH
[228] NOT USED
3. Move cursor to next field.
Press UP or DOWN to select sound file
SET VMMOH
[228] 25
4. Press TRSF to store and exit
OR
Press SPK to store and advance to next MMC
HOME
PAGE
Table of
Contents
PROSTAR DCS COMPACT
TECHNICAL MANUAL
PROGRAMMING
PART 2 NOVEMBER 2000
MMC: 748
DEFAULT DATA: ALL SVMI-4 PORTS NOT USED FOR SOUND FILE
RELATED ITEMS: MMC 308 ASSIGN BACKGROUND MUSIC SOURCE
MMC 309 ASSIGN STATION MUSIC ON HOLD
MMC 408 ASSIGN TRUNK MUSIC ON HOLD SOURCE
SVMi-4 CARD
HOME
PAGE
Table of
Contents
PROSTAR DCS COMPACT
TECHNICAL MANUAL
MMC: 749
PROGRAMMING
PART 2 NOVEMBER 2000
VM PORT IN/OUT
DESCRIPTION:
This MMC is used to assign each Voice Mail Port as used for incoming, outgoing or
both way calls. Note that this MMC must be sent to support outgoing calls if off
premises notification (beeper, outbound follow me of outbound notification) is used.
PROGRAM KEY
KEYPAD
SPK
HOLD
Used to enter new value
Used to store data and advance to next MMC
Used to delete an entry
ACTION
DISPLAY
1. Press TRSF 749
Display shows
VM IN / OUT
[225] IN
2. Press UP or DOWN to view options
VM IN / OUT
[225] OUT
3. Press UP or DOWN to select option
VM IN / OUT
[225] OUT
4. Press TRSF to store and exit
OR
Press SPK to store and advance to next MMC
DEFAULT DATA: ALL PORTS IN / OUT
RELATED ITEMS: SVMi-4 CARD
HOME
PAGE
Table of
Contents
PROSTAR DCS COMPACT
TECHNICAL MANUAL
PROGRAMMING
PART 2 DECEMBER 1994
MMC: 800
ENABLE TECHNICIAN PROGRAM
DESCRIPTION:
Used to open and close technician level programming. If programming is not
opened and an attempt is made to access a system MMC, the error message
“ACCESS DENIED” will be displayed.
A four digit passcode is required to access this MMC. Each character can be digits
0–9 or . When opened, this MMC enables access to all MMCs.
PROGRAM KEYS
UP & DOWN
KEYPAD
SOFT KEYS
SPK
Used to scroll through options
Used to enter selections
Move cursor left and right
Used to store data and advance to next MMC
ACTION
DISPLAY
1. Press TRSF 800
Display shows
ENABLE TECH.PROG
PASSCODE:
2. Enter passcode
ENABLE TECH.PROG
PASSCODE:4321
Correct code shows
ENABLE TECH.PROG
DISABLE TENANT:1
Incorrect code shows
ENABLE TECH. PROG
PASSCODE ERROR
3. Press UP or DOWN to open or close
OR
Enter 1 to enable or enter 0 to disable
Press RIGHT soft key to move to tenant
number and enter tenant number (1–2)
ENABLE TECH.PROG
ENABLE TENANT:1
4. Press SPK to advance to MMC entry level
801:TEC.PASSCODE
SELECT PROG.ID
ENABLE TECH.PROG
ENABLE TENANT:1
HOME
PAGE
Table of
Contents
PROSTAR DCS COMPACT
TECHNICAL MANUAL
PROGRAMMING
PART 2 DECEMBER 1994
Table of
Contents
MMC: 800
5. Enter the MMC desired (e.g., 209)
6. To log out and return to MMC 800, press UP
or DOWN key to select DISABLE TENANT:1
OR
Press SPK then TRSF to return to normal
display
Programming option will time out
DEFAULT DATA: NONE
RELATED ITEMS: NONE
HOME
PAGE
209:AOM MASTER
AOM NOT EXIST
PROSTAR DCS COMPACT
TECHNICAL MANUAL
PROGRAMMING
PART 2 JUNE 1995
MMC: 801
CHANGE TECHNICIAN PASSCODE
DESCRIPTION:
Used to change the passcode allowing access to MMC 800 Enable Techncian
Program from its current value.
NOTE: The passcode is four characters long. Each character can be digits 0–9 or .
The current or “old” passcode is required for this MMC.
PROGRAM KEYS
KEYPAD
SPK
Used to enter passcodes
Save data and advance to next MMC
ACTION
DISPLAY
1. Press TRSF 801
TECH. PASSCODE
NEW CODE:_
2. Enter new passcode
TECH. PASSCODE
NEW CODE:****
3. Enter new passcode again
TECH. PASSCODE
VERIFY :****
4. If passcode is correct, press RIGHT soft key
to continue and enter desired MMC
TECH. PASSCODE
VERIFY SUCCESS
5. If passcode is incorrect
TECH. PASSCODE
VERIFY:FAILURE
6. System returns to step 2
TECH. PASSCODE
NEW CODE:****
7. Press TRSF to store and exit
OR
Press SPK to save and advance to next
MMC
DEFAULT DATA: DEFAULT PASSCODE = 1234
RELATED ITEMS: MMC 800 ENABLE TECHNICIAN PROGRAM
HOME
PAGE
Table of
Contents
PROSTAR DCS COMPACT
TECHNICAL MANUAL
MMC: 802
PROGRAMMING
PART 2 DECEMBER 1994
CUSTOMER ACCESS MMC NUMBER
DESCRIPTION:
Allows the customer to have access to certain MMCs. For example, it is advised that
the customer have access to MMC 102 Call Forward for call forwarding but it is not
advised that the customer have access to MMC 710 LCR DIgit Table for LCR dial
plans. This MMC is for both tenants.
PROGRAM KEYS
UP & DOWN
KEYPAD
SOFT KEYS
SPK
Used to scroll through options
Used to enter selections
Move cursor left and right
Used to store data and advance to next MMC
ACTION
DISPLAY
1. Press TRSF 802
Display shows
MMC TENANT:1
100:STN LOCK:YES
2. Enter desired tenant number (1–2) via dial
keypad
OR
Press UP or DOWN key to make selection
and press RIGHT soft key to move cursor
MMC TENANT:1
100:STN LOCK:YES
3. Enter desired MMC number via dial keypad
OR
Press UP or DOWN key to make selection
and press RIGHT soft key to move cursor
MMC TENANT:1
102:CALL FWD:YES
4. Enter 1 for YES or 0 for NO via dial keypad
OR
Press UP or DOWN key to make selection
and press LEFT soft key to return to step 3
to make additional entries
MMC TENANT:1
102:CALL FWD:NO
5. Press TRSF to store and exit
OR
Press SPK to store and advance to next MMC
DEFAULT DATA: NONE
RELATED ITEMS: NONE
HOME
PAGE
Table of
Contents
PROSTAR DCS COMPACT
TECHNICAL MANUAL
PROGRAMMING
PART 2 DECEMBER 1994
MMC: 804
SYSTEM I/O PARAMETER
DESCRIPTION:
Provides a means of setting parameters for the serial I/O ports to work with either a
personal computer or with SMDR recording. Programming can be accomplished
easily with the tables below to customize either I/O port.
PARAMETER OPTIONS
Dial 0
Dial 1
Dial 2
Dial 3
Dial 4
Dial 5
Dial 6
Dial 7
Service
Baud Rate
Char Length
Parity
Retry Count
Stop Bit
Wait Time
DSR Check
SERVICE TYPE
Dial 0
Dial 1
Dial 2
PARITY
PCMMC
SMDR
Not used
SPEED
Dial 0
Dial 1
Dial 2
Dial 3
Dial 4
Type of Service
Speed
Character Length
Parity Bit
Number of Retries
Stop Bit
Message Wait Time
Wait for DSR
Dial 0
Dial 1
Dial 2
None
Odd
Even
STOP BIT
1200 bps
2400 bps
4800 bps
9600 bps
19200 bps
Dial 1
Dial 2
1 bit
2 bit
CHARACTER LENGTH
Dial 7
Dial 8
7 bits
8 bits
PROGRAM KEYS
UP & DOWN
KEYPAD
SOFT KEYS
SPK
HOLD
Used to scroll through options
Used to enter selections
Move cursor left and right
Used to store data and advance to next MMC
Used to clear entry (when valid)
HOME
PAGE
Table of
Contents
PROSTAR DCS COMPACT
TECHNICAL MANUAL
PROGRAMMING
PART 2 DECEMBER 1994
Table of
Contents
MMC: 804
ACTION
DISPLAY
1. Press TRSF 804
Display shows
SYS I/O PORT:1
SERVICE:PC-MMC
2. Enter desired port via dial keypad (e.g., 2)
OR
Press UP or DOWN key to make selection
and press RIGHT soft key to move cursor
SYS I/O PORT:2
SERVICE:SMDR
3. Enter parameter desired via dial keypad
(e.g., 1) from the above option list
OR
Press UP or DOWN key to make selection
and press RIGHT soft key to move cursor
SYS I/O PORT:2
BAUD:9600 BPS
4. Press TRSF to store and exit
OR
Press SPK to store and advance to next MMC
DEFAULT DATA: SERVICE
BAUD RATE
CHAR LENGTH
PARITY
RETRY COUNT
STOP BIT
WAIT TIME
DSR CHECK
RELATED ITEMS: PCMMC
SMDR
PORT 1
PORT 2
9600 BPS
8 BITS
NONE
03
1 BIT
200 MSEC
ON
HOME
PAGE
PCMMC
SMDR
PROSTAR DCS COMPACT
TECHNICAL MANUAL
PROGRAMMING
PART 2 NOVEMBER 1997
MMC: 805
SYSTEM VERSION DISPLAY
DESCRIPTION:
This MMC is only used for system version display. This is a READ ONLY MMC. It
applies only to DCS systems with Version 1.x software.
PROGRAM KEYS
SPK
Used to store data and advance to next MMC
ACTION
1. Press TRSF 805
Display shows
DISPLAY
ROM VERSION
,94.03.23. V01.00
Press UP or DOWN key to select other
system versions
SYSTEM PROCESSOR
CPM VERSION
,94.03.23. V01.00
LOCAL PROCESSOR
LPM1 VERSION
,94.03.23. V01.00
LOCAL PROCESSOR
LPM2 VERSION
,94.03.23. V01.00
DEFAULT DATA: NONE
RELATED ITEMS: NONE
HOME
PAGE
Table of
Contents
PROSTAR DCS COMPACT
TECHNICAL MANUAL
PROGRAMMING
PART 2 DECEMBER 1994
MMC: 806
CARD PRE-INSTALL
DESCRIPTION:
Allows for the pre-programming of a slot for a specific card. For example, after the
system is installed and a new card is added, running this program will cause the
system to accept the card for what it is and not for what it is not.
PROGRAM KEYS
UP & DOWN
KEYPAD
SOFT KEYS
SPK
Used to scroll through options
Used to enter selections
Move cursor left and right
Used to store data and advance to next MMC
ACTION
DISPLAY
1. Press TRSF 806
Display shows
CARD PRE-INSTALL
BASIC 4TRK
2. Press UP or DOWN key to make selection
and press RIGHT soft key
CARD PRE-INSTALL
204 CARD:1
3. Continue to add cards as shown in step 2
OR
Press TRSF to store and exit
OR
Press SPK to store and advance to next MMC
DEFAULT DATA: NONE
RELATED ITEMS: NONE
HOME
PAGE
Table of
Contents
PROSTAR DCS COMPACT
TECHNICAL MANUAL
PROGRAMMING
PART 2 DECEMBER 1994
MMC: 810
HALT PROCESSING
DESCRIPTION:
Used only in the event that all data processing needs to be stopped.
PROGRAM KEYS
UP & DOWN
KEYPAD
Used to scroll through options
Used to enter selections
OPTIONS
0
1
PROCESSING
HALT
ACTION
DISPLAY
1. Press TRSF 810
Display shows
HALT/PROCESSING
PROCESSING
2. Press UP or DOWN key to make selection
OR
Dial selection using above option menu
AND
Press RIGHT soft key
HALT/PROCESSING
HALT
3. Press TRSF to store and exit
OR
Press SPK to store and advance to next MMC
DEFAULT DATA: PROCESSING
RELATED ITEMS: NONE
HOME
PAGE
Table of
Contents
PROSTAR DCS COMPACT
TECHNICAL MANUAL
PROGRAMMING
PART 2 DECEMBER 1994
MMC: 811
RESET SYSTEM
DESCRIPTION:
Provides two methods of restarting the system. The first method will restart the
system and clear all memory. The second method will restart the system only. If
clear all memory is selected, only the default data will return. Extreme care should
be taken when using this MMC. If the system is restarted, all voice/data connections
are dropped. If memory is cleared, all customer data is deleted and system returns
to defaulted status.
PROGRAM KEYS
UP & DOWN
KEYPAD
SOFT KEYS
Used to scroll through options
Used to enter selections
Move cursor left and right
ACTION
DISPLAY
1. Press TRSF 811
Display shows
SYSTEM RESTART
RESET SYSTEM?NO
2. Press UP or DOWN key to make selection
(RESET SYSTEM or CLEAR MEMORY)
After selection is made, press RIGHT
soft key to move cursor to YES/NO option
SYSTEM RESTART
CLEAR MEMORY?NO
3. Press UP or DOWN key to make selection
and press RIGHT soft key
SYSTEM RESTART
CLEAR MEMORY?YES
4. Press UP or DOWN key to make selection
and press RIGHT soft key (this will erase all
data in the system)
SYSTEM RESTART
ARE YOU SURE?YES
5. System will return with default time and date
and default extension number
OR
If system just restarted, it will return to
normal programmed status
DEFAULT DATA: NONE
RELATED ITEMS: NONE
HOME
PAGE
Table of
Contents
PROSTAR DCS COMPACT
TECHNICAL MANUAL
PROGRAMMING
PART 2 NOVEMBER 1997
2.2 DCS COMPACT DEFAULT DATA
STATION PROGRAMS
100: STATION LOCK
ALL STATIONS UNLOCKED
101: CHANGE USER PASSCODE
ALL STATION PASSCODES =
1234
102: CALL FORWARD
NONE
103: SET ANSWER MODE
ALL KEYSETS RING
RING FREQUENCY DEFAULT IS 5
104: STATION NAME
NONE
105: STATION SPEED DIAL
NONE
106: STATION SPEED DIAL NAME
NONE
107: KEY EXTENDER
NONE
108: STATION STATUS
PORT NUMBER: ?
TENANT NUMBER: 1
PICKUP GROUP: NONE
STATION GROUP: NONE
BOSS/SECT PAIRS: NONE
PAGE ZONE: NONE
DAY COS NUMBER: 01
NIGHT COS NUMBER: 01
109: CLOCK DISPLAY
COUNTRY: WESTERN
CLOCK: 12 HOUR CLOCK
DISPLAY: LOWERCASE
110: KEYSET ON/OFF
AUTO HOLD OFF
AUTO TIMER ON
HEADSET OFF
HOT KEYPAD ON
KEY TONE ON
PAGE REJOIN ON
RING PREFERENCE ON
111: KEYSET RING TONE
FREQUENCY 5
112: ALARM REMINDER
ALARMS SET TO NOTSET
113: VIEW MEMO NUMBER
NO MEMOS ENTERED
114: OFF-HOOK RING VOLUME
RING LEVEL 4
2.2.1
HOME
PAGE
Table of
Contents
PROSTAR DCS COMPACT
TECHNICAL MANUAL
PROGRAMMING
PART 2 NOVEMBER 1997
HOME
PAGE
Table of
Contents
115: VACANT MESSAGE
NO MESSAGES SELECTED
116: ALARM AND MESSAGE
ALARMS SET TO NOTSET
117: ASSIGN BACKGROUND MUSIC VOLUME
VOLUME LEVEL 13
118: STATION RING VOLUME
ALL STATIONS SET TO LEVEL 4
SYSTEM PROGRAMS
200: OPEN CUSTOMER PROGRAMMING
CLOSED
201: CHANGE CUSTOMER PASSCODE
PASSCODE = 1234
202: CHANGE FEATURE PASSCODES
DAY/NIGHT 0000
DISA ALARM 5678
ALARM CLR 8765
203: ASSIGN UNA DEVICE
NONE
204: COMMON BELL CONTROL
CONTINUOUS
206: BARGE-IN TYPE
NO BARGE-IN
207: ASSIGN VM/AA PORT
NORMAL PORT
208: ASSIGN RING TYPE
NONE
209: ASSIGN ADD-ON MODULE
NONE FOR MASTER
OFF FOR OHVAED
210: CUSTOMER ON/OFF PER TENANT
LCR IS OFF
211: DOOR RING ASSIGNMENT
STATION GROUP 500
214: DISA ALARM RINGING STATION
DAY 500
NIGHT 500
300: CUSTOMER ON/OFF PER STATION
ALL FEATURES SET TO ON
301: ASSIGN STATION COS
DAY CLASS = 01
NIGHT CLASS = 01
302: PICKUP GROUPS
NO PICKUP GROUPS ASSIGNED
303: ASSIGN BOSS/SECRETARY
NONE
2.2.2
PROSTAR DCS COMPACT
TECHNICAL MANUAL
PROGRAMMING
PART 2 NOVEMBER 1997
HOME
PAGE
Table of
Contents
304: ASSIGN EXTENSION/TRUNK USE
DIAL = YES
ANS = YES
305: ASSIGN FORCED CODE
NONE
306: HOT LINE
NONE
307: ASSIGN OFF-HOOK SELECTION
CURRENTLY SET = NO
308: ASSIGN BACKGROUND MUSIC SOURCE
NONE
309: ASSIGN STATION MUSIC ON HOLD
NONE
310: LCR CLASS OF SERVICE
LEAST COST ROUTING COS 1
311: ASSIGN SIM PARAMETER
SIM TYPE = DTE
CALL MODE = MANUAL
ANS MODE = MANUAL
AUTO BAUD = ON
DTR CHECK = ON
ECHO = ON
PROTOCOL = V110
SPEED = 9600
CHAR LENGTH = 8 BITS
PARITY = NONE
STOP BIT = 1
400: CUSTOMER ON/OFF PER TRUNK
1A2 EMULATE OFF
TRUNK INC DND OFF
TRUNK FORWARD ON
401: C.O./PBX LINE
ALL TRUNKS C.O. LINE
402: TRUNK DIAL TYPE
ALL TRUNKS DTMF
403: TRUNK TOLL CLASS
ALL TRUNKS F-STN DAY/NIGHT
404: TRUNK NAME
NO NAMES ENTERED
405: TRUNK NUMBER
NO NUMBERS ENTERED
406: TRUNK RING ASSIGNMENT
ALL TRUNKS DAY: 500
NIGHT: 500
407: FORCED TRUNK RELEASE
NONE
408: ASSIGN TRUNK MUSIC ON HOLD SOURCE
TONE
409: TRUNK STATUS READ
SEE MMC 409
410: ASSIGN DISA TRUNK
ALL TRUNKS NORMAL
2.2.3
PROSTAR DCS COMPACT
TECHNICAL MANUAL
PROGRAMMING
PART 2 NOVEMBER 1997
HOME
PAGE
Table of
Contents
500: SYSTEM-WIDE COUNTERS
ALARM REMINDER CNTR
AUTO REDIAL COUNTER
DISA INTERCOM CNTR
DISA LOCK COUNTER
NEW CALL COUNTER
501: SYSTEM TIMERS
SEE TABLE OF TIMERS AND
VALUES
502: FORWARD NO ANSWER TIMER
TIMER SET FOR 15 SECONDS
503: TRUNK-WIDE TIMER
SEE MMC 503
504: PULSE MAKE/BREAK RATIO
MAKE/BREAK = 33
PULSES PER SECOND = 10
505: ASSIGN DATE AND TIME
SAT 01 JAN 12:00
506: TONE CADENCE
SEE MMC 506
507: ASSIGN AUTO NIGHT TIME
START 0000
END 0000
600: ASSIGN OPERATOR GROUP
RING MODE
OVERFLOW TIME
GRP TRSF TIME
NEXT PORT
GROUP MEMBER
OTHER MEMBER
601: ASSIGN STATION GROUP
NONE
602: STATION GROUP NAME
NONE
603: ASSIGN TRUNK GROUP
ALL TRUNKS ARE IN GROUP 9
604: ASSIGN STATION TO PAGE ZONE
NO STATIONS ASSIGNED
ALL ZONE IS SET
605: ASSIGN EXTERNAL PAGE ZONE
NONE
606: ASSIGN SPEED BLOCK
SYSTEM: 200 ENTRIES
STATIONS: ONE BIN OF TEN
ENTRIES
700: COPY COS CONTENTS
NONE
701: ASSIGN COS CONTENTS
ALL OPTIONS SET TO YES
702: TOLL DENY TABLE
ALL ENTRIES ARE SET TO 0
703: TOLL ALLOWANCE TABLE
ALL ENTRIES ARE SET TO 0
704: ASSIGN WILD CHARACTER
ALL ENTRIES ARE SET TO 0
2.2.4
5
5
5
5
99
NONE
000 SEC
000 SEC
NONE
MEMBER 01:201
NONE
PROSTAR DCS COMPACT
TECHNICAL MANUAL
PROGRAMMING
PART 2 NOVEMBER 1997
HOME
PAGE
Table of
Contents
705: ASSIGN SYSTEM SPEED DIAL
NONE
706: SYSTEM SPEED DIAL BY NAME
NO NAMES
707: AUTHORIZATION CODE
NONE
708: ACCOUNT CODE
NONE
709: PBX ACCESS CODE
NONE
710: LCR DIGIT TABLE
NONE
711: LCR TIME TABLE
NONE
712: LCR ROUTE TABLE
NONE
713: LCR MODIFY DIGIT TABLE
NONE
714: DID NUMBER AND NAME TRANSLATION
NO ENTRIES
715: VACANT MESSAGE
TEN PREPROGRAMMED
MESSAGES (SEE MMC 715)
720: COPY KEY PROGRAMMING
NONE
721: SAVE STATION KEY PROGRAMMING
NONE
722: STATION KEY PROGRAMMING
SEE MMC 722
723: SYSTEM KEY PROGRAMMING
SEE MMC 723
724: DIAL NUMBERING PLAN
SEE MMC 724
PAGE HEADER = YES
LINE PER PAGE = 66
INCOMING CALL = NO
OUTGOING CALL = YES
AUTHORIZE CODE = NO
LESS START TIME = YES
IN/OUT GROUP = NO
DND CALL = NO
WAKE-UP CALL = YES
DIRECTORY NAME = NO
DEFAULT DEFINED
725: SMDR OPTIONS
726: VM/AA OPTIONS
ALL SET TO NO
EXT FOR DN1 = YES
TRK FOR DN1 = YES
EXT FOR DN2 = NO
TRK FOR DN2 = NO
2.2.5
PROSTAR DCS COMPACT
TECHNICAL MANUAL
PROGRAMMING
PART 2 NOVEMBER 1997
HOME
PAGE
Table of
Contents
SEPARATOR = NO
DISCONNECT SIGNAL = C
CALL TYPE ID = NO (ALL)
PROGRESS TONE ID = BA
800: ENABLE TECHNICIAN PROGRAM
NONE
801: CHANGE TECHNICIAN PASSCODE
DEFAULT PASSCODE = 4321
802: CUSTOMER ACCESS MMC NUMBER
NONE
804: SYSTEM I/O PARAMETER
SERVICE PORT 1
PORT 2
BAUD RATE
CHAR LENGTH
PARITY
RETRY COUNT
STOP BIT
WAIT TIME
805: SYSTEM VERSION DISPLAY
NONE
806: CARD PRE-INSTALL
NONE
810: HALT PROCESSING
NONE
811: RESET SYSTEM
NONE
2.2.6
PCMMC
SMDR
9600 BPS
8 BITS
NONE
03
1 BIT
200 MSEC
PROSTAR DCS COMPACT
TECHNICAL MANUAL
PROGRAMMING
PART 2 NOVEMBER 1997
2.3 SPECIAL APPLICATIONS
This part of the technical manual is titled “Special Applications” because it provides
information about interfacing with customer-provided equipment or using a feature in a
different way than it was intended. Perhaps an application may require a combination
of CPE, creative programming, unusual feature operation or all of the above.
Because these applications require installation instructions and a combination of
programming sequences, there is no obvious place to put this information. Therefore,
we created this part of the manual. As additional special applications are reported from
the field, we will include them in this section.
2.3.1
HOME
PAGE
Table of
Contents
PROSTAR DCS COMPACT
TECHNICAL MANUAL
PROGRAMMING
PART 2 NOVEMBER 1997
VOICE MAIL/AUTO ATTENDANT INTEGRATION
Because of the increased popularity of voice mail and auto attendant use, PROSTAR
DCS COMPACT includes many programmable options to address this demand.
Obviously the degree of integration that can be achieved depends on the abilities of the
voice mail/auto attendant (VM/AA) system as well as the telephone system.
This list details the capabilities provided by the PROSTAR DCS COMPACT for voice
mail integration.
HARDWARE PROVISIONS
a. The VM/AA system must be connected to single line circuits on any SLI card.
b. Each port is equipped with a dedicated DTMF receiver for detecting DTMF signaling
from the VM/AA.
c. These ports will also provide an instant break in loop current when the calling party
hangs up. This is called a disconnect signal.
SOFTWARE PROVISIONS
a. SCREENED OR UNSCREENED TRANSFER
There are no special codes needed to transfer a call. Simply hookflash, receive
transfer dial tone and dial the destination.
b. DIRECT IN LINES
Any C.O. call can be assigned to ring at an individual station or a station hunt group
assigned to the VM/AA.
c. CALLS OR RECALLS TO THE OPERATOR
Dialing 0 will always result in a ringback signal. If the operator is busy, the call
continues to ring in queue to the operator. This prevents a caller from dialing 0 and
reaching another mailbox because the operator is busy.
d. MESSAGE WAITING
A VM/AA port can leave a message at any station or group of stations. The
message waiting indication can be set or canceled at any station or station group
with or without the stations ringing.
e. IN BAND SIGNALING
The PROSTAR DCS COMPACT system can be programmed to send the calling
station’s extension number after the voice mail system answers. These DTMF
signals may include a leading digit to indicate the type of call and additional
information about the original caller. DTMF signals may also be substituted for call
2.3.3
HOME
PAGE
Table of
Contents
PROSTAR DCS COMPACT
TECHNICAL MANUAL
PROGRAMMING
PART 2 NOVEMBER 1997
progress tones to speed up voice mail call processing. This program allows call
forwarding to a mailbox and bypassing of the main greeting for automatic message
retrieval. Blind transfers may be performed because the recall will be correctly
identified. NOTE: The effectiveness of this program depends on the ability of the
voice mail system to make use of this information.
f. STATION HUNT GROUP WITH OVERFLOW
Each station group can have an individual overflow destination with an individual
overflow timer. The overflow destination will ring whenever a call to the group is not
answered. If the voice mail system becomes inoperative, calls are automatically
routed to the overflow destination.
g. INTERNAL CALL FORWARDING TO VOICE MAIL
This option in MMC 300 will allow intercom calls to or deny them from following call
forward to voice mail. This feature conserves disk drive space by storing only calls
originating outside the PROSTAR system.
h. ONE TOUCH VOICE MAIL ACCESS
One touch speed dial keys can be programmed to automatically dial, log into and
retrieve messages from voice mail.
i.
CALL PROGRESS TONES
The only tones sent to a VM/AA port are dial tone, busy and ringback. To eliminate
confusion, busy tone is substituted for DND or error tones on voice mail ports only.
2.3.4
HOME
PAGE
Table of
Contents
PROSTAR DCS COMPACT
TECHNICAL MANUAL
PROGRAMMING
PART 2 NOVEMBER 1997
STAND-ALONE ADD-ON MODULE
To make an add-on module operate as a stand-alone unit, perform the following steps
in the order in which they are listed.
MMC 103
With the technician or customer passcode, assign the answer mode as
Voice Announce, Auto Answer or Ring.
MMC 105
Assign speed dial numbers for that AOM.
MMC 606
Advance to the extension number of the AOM you want to use as standalone. Assign blocks of speed dial numbers to this AOM.
NOTES:
1. Transferred calls cannot be camped-on to a busy AOM. If a station attempts this,
the transferred call will ring back to the station immediately.
2. Busy station camp-on will not work when calling a busy AOM.
2.3.5
HOME
PAGE
Table of
Contents
PROSTAR DCS COMPACT
TECHNICAL MANUAL
PROGRAMMING
PART 2 NOVEMBER 1997
INDIVIDUAL STATION PAGE
The system was not designed to permit page announcements to individual keysets.
However, a forced auto answer key (FAUTO) can be used to accomplish this objective.
1. Program a keyset for RING in MMC 103.
2. Assign an FAUTO key to each keyset that is allowed to page individual keysets.
3. Call another station. When you hear ringback tone, press the FAUTO key. The
ringing will stop and an Auto Answer call is set up.
NOTE: To prevent the use of this feature from getting out of control, only assign FAUTO
keys to those keysets needing to page individual keysets.
2.3.7
HOME
PAGE
Table of
Contents
PROSTAR DCS COMPACT
TECHNICAL MANUAL
PROGRAMMING
PART 2 NOVEMBER 1997
CALLER ID
The DCS COMPACT is compatible with both types of Caller ID as defined by BELLCORE.
These are the single message format or “Number Only” sometimes referred to as standard
Caller ID and the multiple message format or “Name and Number” sometimes referred to
as Deluxe Caller ID. In the case of Number Only delivery, there is a translation table
available that may be used to add names to the delivered number.
HARDWARE PROVISIONS
In order to install Caller ID on a DCS COMPACT, you must have the following pieces of
DCS COMPACT equipment available:
A RAM 2 card to hold the Caller ID database
A MISC 2 card to decode the incoming Caller ID data
A set of four EPROMs containing the Caller ID version of system software
SOFTWARE PROVISIONS
The MMCs related to Caller ID are listed below with a short description of their use. They
are listed in the recommended order in which they should be programmed. This sequence
is suggested so that the installer gets a better understanding of how the feature works.
There is no technical reason to follow this sequence.
MMC 414 CID TRUNKS
This MMC is used by the technician to determine
which trunks will receive Caller ID data.
MMC 312 ALLOW CID
This MMC is used by the technician to determine
which keysets are allowed to receive Caller ID
displays.
MMCs 722 and 723
These MMCs have had new keys related to Caller
ID features added to them. It is strongly
recommended that all keysets allowed Caller ID in
MMC 312 are programmed with a CID key.
MMC 728 CID TRANSLATION
This MMC allows the technician to create a list of
names that correspond to numbers received from
the Central Office. These names will be displayed
when a call rings in that has NUMBER ONLY data
provided by the CO.
MMC 725 SMDR OPTIONS
The ability to print Caller ID data and abandoned
calls has been added to this MMC.
2.3.9
HOME
PAGE
Table of
Contents
PROSTAR DCS COMPACT
TECHNICAL MANUAL
PROGRAMMING
PART 2 NOVEMBER 1997
MMC 119 CID DISPLAY
This MMC is used by the end user to determine
which piece of Caller ID data is displayed when a
call rings at the user’s station.
MMC 501 SYSTEM TIMERS
This MMC has two new timers related to Caller ID.
The only timer that may need adjustment is the
CID DISPLAY TIME. This is the length of time that
CID data is displayed after the CID key is pressed.
MMC 415 TRK. ABANDON
This MMC is used by the technician to determine
which trunks will record data in the Call Abandon
list and print with an Abandon “A” flag on SMDR.
MMC 608 CID BLOCK
This MMC is used by the technician to assign CID
Review blocks to keysets to allow the user to
review CID data for previous calls.
MMC 701 CLASS OF SERVICE
All of the Caller ID features have been added to
this MMC to enable the technician to allow or
deny them.
MMC 724 NUMBER PLAN
The Caller ID features have been added to this
MMC to allow a technician to assign an access
code where necessary.
In addition to the above MMCs, it is necessary to have LCR programmed on the system
to enable certain features with a DIAL/REDIAL option to be used. This is because the
number format provided by the Central Office contains the area code. This area code
must be stripped off in the LCR modified digits section to allow a local number to be
correctly dialed.
For example, if the system is located in the 305 area code, the LCR digit table points
the entry 1305 to a modified digits entry that deletes the first four digits of the CID
number. Of course, this is a much simplified LCR scheme. As there are long distance
calls to be made within the home area code, additional entries are required to identify
these.
For example, if 1305-426 is a local call, the area code has to be stripped, but if 1305858 is long distance, the area code has to remain to allow the number to be dialed.
There are two ways of doing this. You can either enter all of the local office codes and
tell the system to strip the area code from them or you can enter the long distance
codes and tell them to ignore the modify digits entry.
A list of all of the local office codes can be found at the front of the local telephone
directory.
2.3.10
HOME
PAGE
Table of
Contents
PROSTAR DCS COMPACT
TECHNICAL MANUAL
PROGRAMMING
PART 2 NOVEMBER 1997
USING LCR TO INSERT LONG DISTANCE PICK CODE
One of the more common uses for LCR is to use this feature to automatically insert the
long distance access code for long distance calls within your own area code. This will
allow these calls to be processed by the selected long distance carrier instead of the
local telephone company. The following example is based on an area where all long
distance calls must be preceded by 1 + area code as this is the most common
scenario.
In MMC 710, program the following entries:
MMC 710
LCR DIGIT TABLE
INDEX
LCR DIGIT STRING
LENGTH
ROUTE
001
1
11
1
002
2
7
1
003
3
7
1
004
4
7
1
005
5
7
1
006
6
7
1
007
7
7
1
008
8
7
1
009
9
7
1
010
411
3
1
011
911
3
1
012
0
1
1
013
1AAA
11
2
NOTE: AAA is your home area code.
2.3.11
HOME
PAGE
Table of
Contents
PROSTAR DCS COMPACT
TECHNICAL MANUAL
PROGRAMMING
PART 2 NOVEMBER 1997
Table of
Contents
In MMC 711, program the following entries:
MMC 711
LCR TIME TABLE
TIME CHANGE BANDS
A
B
HHMM
LCRT
SUN
0001
1
MON
0001
1
TUE
0001
1
WED
0001
1
THU
0001
1
FRI
0001
1
SAT
0001
1
C
HHMM
LCRT
D
HHMM
LCRT
HHMM
LCRT
DAY
In MMC 712, program the following entries:
MMC 712
LCR ROUTE
LCR ROUTE TABLE
TIME CHANGE
LCRCOS
TRK GROUP
1
1
1
80
2
1
1
80
2.3.12
HOME
PAGE
MOD DIGITS
001
PROSTAR DCS COMPACT
TECHNICAL MANUAL
PROGRAMMING
PART 2 NOVEMBER 1997
Table of
Contents
In MMC 713, program the following:
MMC 713
INDEX
001
LCR MODIFY DIGIT TABLE
NO. OF DELETE
DIGITS (15)
NO. OF INSERT
DIGITS (14)
NO. OF APPEND
DIGITS (14)
10XXX
NOTE: 10XXX is the access code for the long distance carrier of your choice.
HOME
PAGE
In MMC 603, move all of the C.O. lines from trunk group 9 to trunk group 80. You
will have to delete the line numbers from trunk group 9 as trunks can be in more
than one group.
In MMC 724, assign 9 as the LCR access code. This will delete 9 from the first trunk
group automatically.
In MMC 210, turn on LCR.
Setting LCR up like this will not prevent C.O. lines from being accessed by Direct Trunk
(DT) keys but it does mean that speed dial numbers will have to be reprogrammed to
allow them to access LCR.
2.3.13
PROSTAR DCS COMPACT
TECHNICAL MANUAL
PROGRAMMING
PART 2 NOVEMBER 1997
Table of
Contents
USING LCR WITH CALLER ID
It is necessary to have LCR programmed on systems with Caller ID to enable certain
features with a DIAL/REDIAL option to be used. This is because the 10 digit CID
number format provided by the Central Office always contains the area code. This area
code must be stripped off in the LCR modified digits section to allow a local number to
be correctly dialed. To make this task easier, the system inserts a 1 in front of the
received digits. This makes it look like a normal 11 digit telephone number so LCR can
process the number and modify the digits.
For example, if the system is located in the 305 area code, the LCR digit table points
the entry 1305 to a modified digits entry that deletes the first four digits of the CID
number. Of course, this is a much simplified LCR scheme. As there are long distance
calls to be made within the home area code, additional entries are required to identify
these calls. This is illustrated in the sample table for MMC 710 below where entries 013
to XXX are the local area code (305 in the previous example) followed by the local CO
prefixes. This will tell the system which calls need to have the first four didits stripped
off using the modifiy digits table.
In MMC 710, program the following entries:
MMC 710
LCR DIGIT TABLE
INDEX
LCR DIGIT STRING
LENGTH
ROUTE
001
1
11
1
002
2
7
1
003
3
7
1
004
4
7
1
005
5
7
1
006
6
7
1
007
7
7
1
008
8
7
1
009
9
7
1
2.3.15
HOME
PAGE
PROSTAR DCS COMPACT
TECHNICAL MANUAL
PROGRAMMING
PART 2 NOVEMBER 1997
MMC 710
Table of
Contents
LCR DIGIT TABLE
010
411
3
1
011
911
3
1
012
0
1
1
013
1AAALLL
11
2
Ð
Ð
11
2
XXX
1AAALLL
11
2
NOTE: AAA is your home area code and LLL is a local prefix. For example, at STA,
AAA= 305 and one LLL = 426. To operate correctly, all of the local prefixes must be
entered in this table. These prefixes can be found at the front of the local telephone
directory.
In MMC 711, program the following entries:
MMC 711
LCR TIME TABLE
TIME CHANGE BANDS
A
B
HHMM
LCRT
SUN
0001
1
MON
0001
1
TUE
0001
1
WED
0001
1
THU
0001
1
FRI
0001
1
SAT
0001
1
HHMM
C
LCRT
DAY
2.3.16
HHMM
HOME
PAGE
D
LCRT
HHMM
LCRT
PROSTAR DCS COMPACT
TECHNICAL MANUAL
PROGRAMMING
PART 2 NOVEMBER 1997
Table of
Contents
In MMC 712, program the following entries:
MMC 712
LCR ROUTE
LCR ROUTE TABLE
TIME CHANGE
LCRCOS
TRK GROUP
1
1
1
80
2
1
1
80
MOD DIGITS
001
In MMC 713, program the following:
MMC 713
INDEX
001
LCR MODIFY DIGIT TABLE
NO. OF DELETE
DIGITS (15)
NO. OF INSERT
DIGITS (14)
NO. OF APPEND
DIGITS (14)
4
NOTE: The deleted digits are the 1 + AAA from the LCR digit table in MMC 710.
In MMC 603, move all of the C.O. lines from trunk group 9 to trunk group 80. You
will have to delete the line numbers from trunk group 9 as trunks can be in more
than one group.
In MMC 724, assign 9 as the LCR access code. This will delete 9 from the first trunk
group automatically.
In MMC 210, turn on LCR.
Setting LCR up like this will not prevent C.O. lines being accessed by Direct Trunk (DT)
keys but it does mean that speed dial numbers will have to be reprogrammed to allow
them to access LCR.
2.3.17
HOME
PAGE
PROSTAR DCS COMPACT
TECHNICAL MANUAL
PROGRAMMING
PART 2 NOVEMBER 1997
2.4 BLANK DATA RECORD SHEETS
The following blank data record sheets are provided for you to record the programmed
data for each system you install.
USEFUL GUIDELINES
A. Keep a record of each system programming in a safe place on-site.
B. Use a pencil to record the data. Ink cannot easily be erased or changed.
C. Always update the record sheets when changes are made to the system database.
D. These sheets may be copied as needed.
2.4.1
HOME
PAGE
Table of
Contents
HOME
PAGE
Table of
Contents
PROSTAR DCS COMPACT
DATABASE FORMS
CUSTOMER NAME:
_____________________________________
ADDRESS:
_____________________________________
_____________________________________
_____________________________________
_____________________________________
TELEPHONE NUMBER:
SYSTEM VERSION:
_____________________________________
____________________
DATABASE CONTAINS __________ SHEETS
HOME
PAGE
Table of
Contents
SLOT 3
SLOT 2
SLOT 1
RAM PACK ____
2 SLI ________________
MISC ____
SYSTEM CONFIGURATION FOR ___________________________
HOME
PAGE
MMC 107
Table of
Contents
KEY EXTENDER
LCD 24B OR STD 24B KEYSET
EXT NO.
01:
02:
03:
04:
05:
06:
07:
08:
09:
10:
11:
12:
13:
14:
15:
16:
17:
18:
19:
20:
21:
22:
23:
24:
LCD 24B OR STD 24B KEYSET
EXT NO.
01:
02:
03:
04:
05:
06:
07:
08:
09:
10:
11:
12:
13:
14:
15:
16:
17:
18:
19:
20:
21:
22:
23:
24:
LCD 24B OR STD 24B KEYSET
EXT NO.
01:
02:
03:
04:
05:
06:
07:
08:
09:
10:
11:
12:
13:
14:
15:
16:
17:
18:
19:
20:
21:
22:
23:
24:
COPY AS NEEDED
01/02
SHEET ______ OF ______
HOME
PAGE
Table of
Contents
LCD 12B OR BASIC 12B KEYSET
EXT NO.
01:
02:
03:
04:
05:
06:
07:
08:
09:
10:
11:
12:
LCD 12B OR BASIC 12B KEYSET
EXT NO.
01:
02:
03:
04:
05:
06:
07:
08:
09:
10:
11:
12:
LCD 12B OR BASIC 12B KEYSET
EXT NO.
01:
02:
03:
04:
05:
06:
07:
08:
09:
10:
11:
12:
LCD 12B OR BASIC 12B KEYSET
EXT NO.
01:
02:
03:
04:
05:
06:
07:
08:
09:
10:
11:
12:
LCD 12B OR BASIC 12B KEYSET
EXT NO.
01:
02:
03:
04:
05:
06:
07:
08:
09:
10:
11:
12:
COPY AS NEEDED
01/02
SHEET ______ OF ______
HOME
PAGE
Table of
Contents
7B KEYSET
EXT NO.
01:
02:
03:
04:
05:
06:
05:
06:
05:
06:
05:
06:
05:
06:
07:
7B KEYSET
EXT NO.
01:
02:
03:
04:
07:
7B KEYSET
EXT NO.
01:
02:
03:
04:
07:
7B KEYSET
EXT NO.
01:
02:
03:
04:
07:
7B KEYSET
EXT NO.
01:
02:
03:
04:
07:
COPY AS NEEDED
01/02
SHEET ______ OF ______
HOME
PAGE
Table of
Contents
32 BUTTON ADD-ON MODULE
EXT NO.
01:
02:
03:
04:
05:
06:
07:
08:
09:
10:
11:
12:
13:
14:
15:
16:
17:
18:
19:
20:
21:
22:
23:
21:
25:
26:
27:
28:
29:
30:
31:
32:
32 BUTTON ADD-ON MODULE
EXT NO.
01:
02:
03:
04:
05:
06:
07:
08:
09:
10:
11:
12:
13:
14:
15:
16:
17:
18:
19:
20:
21:
22:
23:
21:
25:
26:
27:
28:
29:
30:
31:
32:
COPY AS NEEDED
01/02
SHEET ______ OF ______
HOME
PAGE
Table of
Contents
iDCS 28D KEYSET
EXT NO.
01:
02:
03:
04:
05:
06:
07:
08:
09:
10:
11:
12:
13:
14:
15:
16:
17:
18:
19:
20:
21:
25:
22:
26:
23:
27:
24:
28:
iDCS 28D KEYSET
EXT NO.
01:
02:
03:
04:
05:
06:
07:
08:
09:
10:
11:
12:
13:
14:
15:
16:
17:
18:
19:
20:
21:
25:
22:
26:
23:
27:
24:
28:
COPY AS NEEDED
01/02
SHEET ______ OF ______
HOME
PAGE
Table of
Contents
iDCS 18D KEYSET
EXT NO.
01:
02:
03:
04:
05:
06:
07:
08:
09:
10:
21:
25:
22:
26:
23:
27:
24:
28:
iDCS 18D KEYSET
EXT NO.
01:
02:
03:
04:
05:
06:
07:
08:
09:
10:
21:
25:
22:
26:
23:
27:
24:
28:
COPY AS NEEDED
01/02
SHEET ______ OF ______
HOME
PAGE
Table of
Contents
iDCS 8D KEYSET
EXT NO.
01:
02:
03:
04:
05:
06:
07:
08:
iDCS 8D KEYSET
EXT NO.
01:
02:
03:
04:
05:
06:
07:
08:
iDCS 8D KEYSET
EXT NO.
01:
02:
03:
04:
05:
06:
07:
08:
iDCS 8D KEYSET
EXT NO.
01:
02:
03:
04:
05:
06:
07:
08:
iDCS 8D KEYSET
EXT NO.
01:
02:
03:
04:
05:
06:
07:
08:
COPY AS NEEDED
01/02
SHEET ______ OF ______
HOME
PAGE
MMC 201
CHANGE CUSTOMER PASSCODE
PASSCODE
MMC 202
CHANGE FEATURE PASSCODES
PASSCODE
MMC 203
ASSIGN UA DEVICE
UA DEVICE
DEVICE LOCATION
RING PAGE
STATION
COM BELL
STATION GROUP
MMC 204
COMMON BELL
COMMON BELL CONTROL
DEVICE NUMBER
INTERRUPTED
CONTINUOUS
COPY AS NEEDED
SHEET ______ OF ______
Table of
Contents
HOME
PAGE
MMC 206
EXT
BARGE-IN TYPE
BARGE
Barge in options are:
MMC 207
EXT
Table of
Contents
EXT
BARGE
EXT
BARGE
NO BARGE IN = 0
WITH TONE = 1
WITHOUT TONE = 2
ASSIGN VM/AA PORT
VM/AA
COPY AS NEEDED
EXT
VM/AA
EXT
VM/AA
SHEET ______ OF ______
HOME
PAGE
MMC 208
Table of
Contents
ASSIGN RING TYPE
EXT
DATA
MMC 210
ICM RING
C.O. RING
CUSTOMER ON/OFF PER TENANT
TENANT 1
ON
OFF
ON
OFF
LCR FEATURE
TENANT 2
LCR FEATURE
MMC 211
DOOR
DOOR RING ASSIGNMENT
DEVICE
COPY AS NEEDED
DAY RING
NIGHT RING
NAME
SHEET ______ OF ______
HOME
PAGE
MMC 209
AOM
Table of
Contents
ASSIGN ADD-ON MODULE
MASTER
AOM
MASTER
AOM
MASTER
Enter AOM station number and MASTER station number, e.g., 288 is the AOM unit and
201 is the MASTER station unit assigned to the AOM.
COPY AS NEEDED
SHEET ______ OF ______
HOME
PAGE
MMC 300
EXT
TRKGRP
MIC
OFHR
SMDR
TRKADV
CUSTOMER ON/OFF PER STATION
ACCESS
DIAL
MIC
OFF-HOOK
RING
SMDR
TGR ADV
TONE
VM/AA
Dial access to trunk groups
Keyset microphone on/off
Off-hook ring on/off
SMDR print on/off
Trunk group advance tone on/off
See also MMCs 114, 710 and 724.
COPY AS NEEDED
SHEET ______ OF ______
Table of
Contents
HOME
PAGE
MMC 301
EXT
DAY
Table of
Contents
ASSIGN STATION COS
NIGHT
EXT
DAY
NIGHT
EXT
DAY
NIGHT
See also MMCs 202, 507 and 701. Enter value of 01–30 for class of service.
COPY AS NEEDED
SHEET ______ OF ______
HOME
PAGE
MMC 302
Table of
Contents
PICKUP GROUPS
PICKUP GROUP NO.
PICKUP GROUP NO.
PICKUP GROUP NO.
See also MMCs 722, 723 and 724. The maximum number of pickup groups is 20.
COPY AS NEEDED
SHEET ______ OF ______
HOME
PAGE
MMC 303
ASSIGN BOSS/SECRETARY
SECRETARY
BOSS
SECRETARY
BOSS
SECRETARY
BOSS
SECRETARY
BOSS
SECRETARY
BOSS
SECRETARY
BOSS
One boss can have a maximum of four secretaries. Only one secretary can be
assigned to a boss. See also MMCs 107, 723 and 724.
COPY AS NEEDED
SHEET ______ OF ______
Table of
Contents
HOME
PAGE
MMC 304
EXT
TRK
ASSIGN EXTENSION/TRUNK USE
DIAL
ANS
EXT
TRK
DIAL
ANS
Enter a value of YES or NO for each station and trunk. Default is set to YES for all
stations and trunks.
COPY AS NEEDED
SHEET ______ OF ______
Table of
Contents
HOME
PAGE
MMC 305
EXTENSION
ASSIGN FORCED CODE
ACCOUNT
AUTHORIZED
REMARKS
See also MMCs 707, 708, 722, 723 and 724.
Maximum number of authorization codes: 100 (ROM 1) 250 (ROM 2)
Maximum number of account codes: 250 (ROM 1) 500 (ROM 2)
COPY AS NEEDED
SHEET ______ OF ______
Table of
Contents
HOME
PAGE
MMC 306
STATION NUMBER
Table of
Contents
HOT LINE
DESTINATION
See also MMC 501. This entry is for hot line calling in the system. For external calling,
use MMC 307.
MMC 307
STATION NUMBER
ASSIGN OFF-HOOK SELECTION
DESTINATION
See also MMC 501. This entry is for calling off-hook outside the system via C.O. for
calling to a specific phone number. If internal use is required, use MMC 306.
COPY AS NEEDED
SHEET ______ OF ______
HOME
PAGE
MMC 310
EXT
LCRCOS
Table of
Contents
LCR CLASS OF SERVICE
EXT
LCRCOS
EXT
LCRCOS
See also MMC 712.
DEFAULT DATA: ALL STATIONS SET TO 1. OPTIONS ARE CLASSES 1–8.
COPY AS NEEDED
SHEET ______ OF ______
HOME
PAGE
MMC 311
SIM
TYPE
Table of
Contents
ASSIGN SIM PARAMETER
CALL
MODE
COPY AS NEEDED
ANS
MODE
AUTO
BAUD
DTR
CHECK
ECHO
PROCL
SPEED
CHR
LNGTH
PRTY
STOP
BIT
SHEET ______ OF ______
HOME
PAGE
MMC 312
Table of
Contents
ALLOW CALLER ID
STATION NUMBER
ALLOW CALLER ID?
NOTE: This record sheet is used only with systems with Caller ID software.
COPY AS NEEDED
Revised 6/95
SHEET ______ OF ______
HOME
PAGE
MMC 400
TRK NUM
CUSTOMER ON/OFF PER TRUNK
1A2 EMUL
TRK FWD
TRK INC DND
See also MMCs 406, 722 and 723.
DEFAULT DATA: 1A2 EMULATE
TRK INC. DND
TRK FORWARD
COPY AS NEEDED
OFF
OFF
ON
SHEET ______ OF ______
Table of
Contents
HOME
PAGE
MMC 401
TRK NUM
Table of
Contents
C.O./PBX LINE
PBX LINE
CO LINE
TRK NUM
PBX LINE
CO LINE
Enter CO LINE or PBX LINE for one or all trunks. Default is CO LINE.
COPY AS NEEDED
SHEET ______ OF ______
HOME
PAGE
MMC 402
TRK NUM
Table of
Contents
TRUNK DIAL TYPE
DTMF
ROTARY
TRK NUM
DTMF
ROTARY
Enter DTMF or DIAL PULSE for one or all trunks.
COPY AS NEEDED
SHEET ______ OF ______
HOME
PAGE
MMC 403
TRK
Table of
Contents
TRUNK TOLL CLASS
DAY
NIGHT
Default is follow station (F-STN) for day and night. Options are F-STN and CLS-A–CLS-H.
COPY AS NEEDED
SHEET ______ OF ______
HOME
PAGE
MMC 404
TRUNK
Table of
Contents
TRUNK NAME
NAME
Maximum number of digits for name/number is ten.
DEFAULT DATA: NO NAMES
COPY AS NEEDED
SHEET ______ OF ______
HOME
PAGE
MMC 405
TRUNK NUMBER
TRUNK
NUMBER
Table of
Contents
Maximum number of digits for name/number is ten.
DEFAULT DATA: NO NUMBERS
COPY AS NEEDED
SHEET ______ OF ______
HOME
PAGE
MMC 406
TRK NUM
Table of
Contents
TRUNK RING ASSIGNMENT
DAY
NIGHT
TRK NUM
DAY
NIGHT
DEFAULT DATA: STATION GROUP 500
COPY AS NEEDED
SHEET ______ OF ______
HOME
PAGE
MMC 408
TRK
ASSIGN TRUNK MUSIC ON HOLD SOURCE
NONE
TICK
MOH
Default is set to TONE.
COPY AS NEEDED
SHEET ______ OF ______
Table of
Contents
HOME
PAGE
MMC 409
TRUNK STATUS READ
TRUNK
COPY AS NEEDED
STATUS
0
=
TENANT NUMBER
1
=
PORT NUMBER
2
=
1A2 EMULATION
3
=
TRK FWD STATUS
4
=
LINE (C.O./PBX)
5
=
DIAL (DTMF/DP)
6
=
DAY TOLL LEVEL
7
=
NIGHT TOLL LEVEL
8
=
DAY RING
9
=
NIGHT RING
10
=
MOH SOURCE
11
=
DISA STATUS
12
=
NAME
13
=
TELEPHONE NUMBER
SHEET ______ OF ______
Table of
Contents
HOME
PAGE
MMC 410
TRUNK NUMBER
ASSIGN DISA TRUNK
STATUS
NORMAL
DAY
NIGHT
BOTH
TRUNK NUMBER
STATUS
NORMAL
DAY
NIGHT
BOTH
TRUNK NUMBER
STATUS
NORMAL
DAY
NIGHT
BOTH
TRUNK NUMBER
STATUS
NORMAL
DAY
NIGHT
BOTH
Enter trunk ID and option desired. Default data is NORMAL.
COPY AS NEEDED
SHEET ______ OF ______
Table of
Contents
HOME
PAGE
MMC 414
ASSIGN CALLER ID TRUNKS
TRUNK NUMBER
CALLER ID OR NORMAL
NOTE: This record sheet is used only with systems with Caller ID software.
COPY AS NEEDED
Revised 6/95
SHEET ______ OF ______
Table of
Contents
HOME
PAGE
MMC 415
TRUNK NUMBER
REPORT TRUNK ABANDON DATA
REPORT ABANDONED CALLS
NOTE: This record sheet is used only with systems with Caller ID software.
COPY AS NEEDED
Revised 6/95
SHEET ______ OF ______
Table of
Contents
HOME
PAGE
MMC 501
Table of
Contents
SYSTEM TIMERS
TIMER NAME
VALUE
RANGE
ALERT TONE TIMER
500 MSEC
(100–2500 MSEC)
ALM REM. RING OFF
10 SEC
(1–25 SEC)
ALM REM. INTERVAL
30 SEC
(1–255 SEC)
ATT. RECALL TIME
30 SEC
(1–255 SEC)
AUTO REDIAL INT.
30 SEC
(1–255 SEC)
AUTO REDIAL RLS.
45 SEC
(1–255 SEC)
CALLBACK NO ANS
30 SEC
(1–255 SEC)
CAMP ON RECALL
30 SEC
(1–255 SEC)
CI D MSG RECEIVE*
08 SEC
( 1-255 SEC)
CID DISPLAY*
05 SEC
(1 - 255 SEC)
C.O.-C.O. DISCONNECT
20 MIN
(0–255 MIN)
DATA EXIT TIME
10 SEC
(1–25 SEC)
DATA OTASK TIMER
100 MSEC
(100–2500 MSEC
DISA DISCONNECT
30 MIN
(1–255 MIN)
DISA LOCK OUT TM
30 MIN
(1–255 MIN)
DISA PASS CHECK
30 MIN
(1–255 MIN)
DISPLAY DELAY TM
02 SEC
(1–255 SEC)
DOOR LOCK RELES
500 MSEC
(100–2500 MSEC)
DOOR RING DETECT
50 MSEC
(10–250 MSEC)
DOOR RING OFF TM
30 SEC
(1–255 SEC)
E-HOLD RECALL TM
45 SEC
(0–255 SEC)
EXT.FWD DELAY TM
10 SEC
(1–255 SEC)
FIRST DIGIT TIME
10 SEC
(1–255 SEC)
HOOK FLASH TIME
800 MSEC
(100–2500 MSEC)
HOOK OFF TIME
200 MSEC
(10–250 MSEC)
HOOK ON TIME
1000 MSEC
(100–2500 MSEC)
INQUIRY RELEASE
30 SEC
(1–255 SEC)
INTERDIGIT TIME
10 SEC
(10–255 SEC)
KMMC LOCKOUT TM
30 SEC
(10–255 SEC)
LCR INTER DIGIT
05 SEC
(1–255 SEC)
LCR ADVANCE TIME
05 SEC
(1–255 SEC)
OFF-HOOK RING INT
15 SEC
(1–255 SEC)
OFF-HOOK SELECT.
05 SEC
(1–255 SEC)
OHVA ANSWER TIME
10 SEC
(1–255 SEC)
PAGE TIME OUT
05 SEC
(1–255 SEC)
PAGE TONE TIME
500 SEC
(100–2500 SEC)
PARK RCALL TIME
45 SEC
(0–255 SEC)
PC-MMC LOCK OUT
10 MIN
(5–99 MIN)
POWER DOWN TIME
2000 MSEC
(1000–9000 MSEC)
RECALL DISCONECT
45 MIN
(1–255 SEC)
RECALL WAIT TIME
15 SEC
(1–255 SEC)
SMDR START/DTMF
15 SEC
(1–255 SEC)
SMDR START/DP
30 SEC
(1–255 SEC)
SYS HOLD RECALL
45 SEC
(0–255 SEC)
TRANSFER RECALL
15 SEC
(0–255 SEC)
NEW VALUE
NOTE: Timers marked with an asterisk apply only to systems with Caller ID software.
COPY AS NEEDED
Revised 6/95
SHEET ______ OF ______
HOME
PAGE
MMC 502
EXT NUM
COPY AS NEEDED
FORWARD NO ANSWER TIMER
NOANS FWD
EXT NUM
NOANS FWD
SHEET ______ OF ______
Table of
Contents
HOME
PAGE
MMC 503
Table of
Contents
TRUNK-WIDE TIMER
TRUNK
TIMER
VALUE
ANS.BAK
CLEARING
CO SUPV
DTMF DUR
F-DGT DELY
FLASH
NEW CALL
NO RING
PAUSE
RNG DETECT
ANS.BAK
CLEARING
CO SUPV
DTMF DUR
F-DGT DELY
FLASH
NEW CALL
NO RING
PAUSE
RNG DETECT
Call STA Technical Support before changing values.
COPY AS NEEDED
SHEET ______ OF ______
HOME
PAGE
MMC 504
Table of
Contents
PULSE MAKE/BREAK RATIO
MAKE/BREAK RATIO
PULSE PER SECOND
System-wide trunk timer.
MMC 506
TONE
TONE CADENCE
ON
OFF
ON
OFF
BUSY
BARGE
DIAL
DND
ERROR
HOLD
MSG
RBT
RING
XFER
All times are in milliseconds.
COPY AS NEEDED
SHEET ______ OF ______
HOME
PAGE
MMC 600
ASSIGN OPERATOR GROUP
RING MODE
OVERFLOW
GRP TRSF
NEXT PORT
MEMBERS (MAX 80)
COPY AS NEEDED
SHEET ______ OF ______
Table of
Contents
HOME
PAGE
MMC 601
ASSIGN STATION GROUP
RING MODE
OVERFLOW
GRP TRSF
NEXT PORT
MEMBERS (MAX 80)
COPY AS NEEDED
SHEET ______ OF ______
Table of
Contents
HOME
PAGE
MMC 507
Table of
Contents
ASSIGN AUTO NIGHT TIME
DAY
START
END
SUNDAY
MONDAY
TUESDAY
WEDNESDAY
THURSDAY
FRIDAY
SATURDAY
See also MMCs 201, 722 and 723.
MMC 602
GROUP
COPY AS NEEDED
STATION GROUP NAME
NAME
SHEET ______ OF ______
HOME
PAGE
Table of
Contents
MMC 603
TRK GROUP
ASSIGN TRUNK GROUP
MODE
MEMBER(S)
TRK GROUP
MODE
MEMBER(S)
Enter valid trunk group number e.g., 9, 80–89. Enter mode type: SEQUENTIAL or
DISTRIBUTE. Enter members, e.g., 701.
COPY AS NEEDED
SHEET ______ OF ______
HOME
PAGE
MMC 604
INDEX
ASSIGN STATION TO PAGE ZONE
STATION
1
2
3
4
Enter page index 01–80, station number and 1 in each zone box.
COPY AS NEEDED
SHEET ______ OF ______
Table of
Contents
HOME
PAGE
MMC 605
MEMBER
Table of
Contents
ASSIGN EXTERNAL PAGE ZONE
DN
5
6
7
8
Enter MEMBER 1–20, DN, e.g., 3602, and 1 for the zone.
COPY AS NEEDED
SHEET ______ OF ______
HOME
PAGE
MMC 606
STATION NUMBER
COPY AS NEEDED
ASSIGN SPEED BLOCK
NUMBER OF BINS
SHEET ______ OF ______
Table of
Contents
HOME
PAGE
MMC 608
ASSIGN REVIEW BLOCK
STATION NUMBER
NUMBER OF BINS
NOTE: This record sheet is used only with systems with Caller ID software.
COPY AS NEEDED
Revised 6/95
SHEET ______ OF ______
Table of
Contents
HOME
PAGE
MMC 701
COS #
TOLL LEVEL
Table of
Contents
ASSIGN COS CONTENTS
ITEM
01
02
03
04
05
06
07
08
09
10
11
12
13
14
15
16
17
18
19
20
21
22
23
24
25
26
27
28
29
30
31
32
33
34
35
36
37
38
39
40
41
42
43
44
45
46
47
48
49
50
FEATURE
AA CALER
ALM CLR
AUTO RDL
CALLBACK
CID ABND*
CID INQR*
CID INVT*
CONFER
DAY/NIGH
DIRECT
DALM CLR
DND
DOOR
DSS
DTS
EXT FWD
FEATURE
FLASH
FORWARD
GRP I/O
HOLD
HOT LINE
INTERCOM
MESSAGE
MM PAGE
NEW CALL
OHVAED
OHVAING
ONEA2
OPERATOR
OUT TRSF
OVERIDE
PAGE 0
PAGE 1
PAGE 2
PAGE 3
PAGE 4
PAGE 5
PAGE 6
PAGE 7
PAGE 8
PAGE 9
PAGE
PICKUP
SECURE
SSPD TOL
STN LOCK
STNGRP 01
STNGRP 02
STNGRP 03
OPTION
ITEM
51
52
53
54
55
56
57
58
59
60
61
62
63
64
65
66
67
68
69
70
71
72
73
74
75
76
77
78
79
80
81
82
83
84
85
86
87
88
89
90
91
92
93
94
95
96
97
98
99
FEATURE
STNGRP 04
STNGRP 05
STNGRP 06
STNGRP 07
STNGRP 08
STNGRP 09
STNGRP 10
STNGRP 11
STNGRP 12
STNGRP 13
STNGRP 14
STNGRP 15
STNGRP 16
STNGRP 17
STNGRP 18
STNGRP 19
STNGRP 20
STNGRP 21
STNGRP 22
STNGRP 23
STNGRP 24
STNGRP 25
STNGRP 26
STNGRP 27
STNGRP 28
STNGRP 29
STNGRP 30
SYS SPD
TRKGRP 01
TRKGRP 02
TRKGRP 03
TRKGRP 04
TRKGRP 05
TRKGRP 06
TRKGRP 07
TRKGRP 08
TRKGRP 09
TRKGRP 10
TRKGRP 11
UNCO CNF
OPTION
NOTE: Items marked with an asterisk apply only to systems with Caller ID software.
COPY AS NEEDED
Revised 6/95
SHEET ______ OF ______
HOME
PAGE
MMC 702
INDEX
EXT
Table of
Contents
TOLL DENY TABLE
COS B
COS C
COS D
COS E
COS F
COS G
Maximum number of deny indexes is 500. See also MMC 704.
COPY AS NEEDED
SHEET ______ OF ______
HOME
PAGE
MMC 703
INDEX
EXT
Table of
Contents
TOLL ALLOWANCE TABLE
COS B
COS C
COS D
COS E
COS F
COS G
Maximum number of allow indexes is 500. See also MMC 704.
COPY AS NEEDED
SHEET ______ OF ______
HOME
PAGE
MMC 704
Table of
Contents
ASSIGN WILD CHARACTER
DIGITS TO BE ALLOWED OR DENIED
TABLE
0
1
2
3
4
5
6
7
8
9
#
0
1
2
3
4
5
6
7
8
9
#
0
1
2
3
4
5
6
7
8
9
#
X
TABLE
Y
TABLE
Z
See MMCs 702 and 703. Place a (1) in each box for the desired digit.
MMC 709
INDEX
PBX ACCESS CODE
PBX ACCESS CODE
1
2
3
COPY AS NEEDED
SHEET ______ OF ______
HOME
PAGE
MMC 705
BIN
COPY AS NEEDED
PROGRAM SYSTEM SPEED DIAL
SPEED DIAL NUMBER
Revised 6/95
SHEET ______ OF ______
Table of
Contents
HOME
PAGE
MMC 706
BIN
COPY AS NEEDED
SYSTEM SPEED DIAL BY NAME
NAME
SHEET ______ OF ______
Table of
Contents
HOME
PAGE
MMC 707
INDEX
Table of
Contents
AUTHORIZATION CODE
CODE
COS
INDEX
CODE
COS
Enter authorization codes (four digits maximum)—100 entries.
COPY AS NEEDED
SHEET ______ OF ______
HOME
PAGE
MMC 708
INDEX
Table of
Contents
ACCOUNT CODE
ACCOUNT CODE
INDEX
ACCOUNT CODE
Enter account codes maximum four digits, ROM 2 250 codes.
COPY AS NEEDED
SHEET ______ OF ______
HOME
PAGE
MMC 710
INDEX
Table of
Contents
LCR DIGIT TABLE
LCR DIGIT STRING
LENGTH
ROUTE
Maximum number of LCR Digit Index entries is 500. Maximum number of digits for
string length is 10. Maximum number of digits for length is 31. LCR route table consists
of 1–16.
COPY AS NEEDED
SHEET ______ OF ______
HOME
PAGE
MMC 711
Table of
Contents
LCR TIME TABLE
TIME CHANGE BANDS
A
HHMM
B
LCRT
HHMM
C
LCRT
HHMM
D
LCRT
HHMM
LCRT
DAY
SUN
MON
TUE
WED
THU
FRI
SAT
Day reflects the day of the week for time change for LCR route selection. HHMM
reflects at what time selection will occur for LCR route change. Hours are entered in 24
hour format, e.g., 1:00 P.M. = 13:00 (two digits required). Minutes are entered in normal
format (two digits required). LCRT reflects the entry in MMC 712 regarding what time
element will be used. Entries are 1–4.
COPY AS NEEDED
SHEET ______ OF ______
HOME
PAGE
MMC 712
LCR ROUTE
Table of
Contents
LCR ROUTE TABLE
TIME CHANGE
LCRCOS
TRK GROUP
MOD DIGITS
LCR ROUTE reflects 1–16, available routes assigned in MMC 710. TIME CHANGE
reflects time entries (LCRT 1–4) in MMC 711. LCRCOS reflects entries in MMC 310.
TRKGRP reflects entries in MMC 603. MD reflects the LCR MODIFY DIGITS TABLE
entries in MMC 713.
COPY AS NEEDED
SHEET ______ OF ______
HOME
PAGE
MMC 713
INDEX
LCR MODIFY DIGIT TABLE
NO. OF DELETE
DIGITS (15)
NO. OF INSERT
DIGITS (14)
NO. OF APPEND
DIGITS (14)
Index reflects the number of entries from 1–100 allowed. The number of delete digits is
the amount of digits to be removed from the dial plan (maximum 15). The number of
insert digits is the amount of digits to be added to the dial plan (maximum 14). The
number of append digits is the amount of digits added at the end of the dial plan
(maximum 14).
COPY AS NEEDED
SHEET ______ OF ______
Table of
Contents
HOME
PAGE
Table of
Contents
MMC 715
INDX
PROGRAMMED STN MESSAGE
MESSAGE
1.
2.
3.
4.
5.
6.
7.
8.
9.
10.
11.
12.
13.
14.
15.
16.
17.
18.
19.
20.
DEFAULT DATA: TEN PRE-PROGRAMMED MESSAGES
01. IN A MEETING
06. OUT OF TOWN
02. OUT ON A CALL
07. IN TOMORROW
03. OUT TO LUNCH
08. RETURN AFTERNOON
04. LEAVE A MESSAGE
09. ON VACATION
05. PAGE ME
10. GONE HOME
COPY AS NEEDED
SHEET ______ OF ______
HOME
PAGE
MMC 722 and 723
Table of
Contents
KEY PROGRAMMING
LCD 24B OR STD 24B KEYSET
EXT NO.
01:
02:
03:
04:
05:
06:
07:
08:
09:
10:
11:
12:
13:
14:
15:
16:
17:
18:
19:
20:
21:
22:
23:
24:
LCD 24B OR STD 24B KEYSET
EXT NO.
01:
02:
03:
04:
05:
06:
07:
08:
09:
10:
11:
12:
13:
14:
15:
16:
17:
18:
19:
20:
21:
22:
23:
24:
LCD 24B OR STD 24B KEYSET
EXT NO.
01:
02:
03:
04:
05:
06:
07:
08:
09:
10:
11:
12:
13:
14:
15:
16:
17:
18:
19:
20:
21:
22:
23:
24:
COPY AS NEEDED
01/02
SHEET ______ OF ______
HOME
PAGE
Table of
Contents
LCD 12B OR BASIC 12B KEYSET
EXT NO.
01:
02:
03:
04:
05:
06:
07:
08:
09:
10:
11:
12:
LCD 12B OR BASIC 12B KEYSET
EXT NO.
01:
02:
03:
04:
05:
06:
07:
08:
09:
10:
11:
12:
LCD 12B OR BASIC 12B KEYSET
EXT NO.
01:
02:
03:
04:
05:
06:
07:
08:
09:
10:
11:
12:
LCD 12B OR BASIC 12B KEYSET
EXT NO.
01:
02:
03:
04:
05:
06:
07:
08:
09:
10:
11:
12:
LCD 12B OR BASIC 12B KEYSET
EXT NO.
01:
02:
03:
04:
05:
06:
07:
08:
09:
10:
11:
12:
COPY AS NEEDED
01/02
SHEET ______ OF ______
HOME
PAGE
Table of
Contents
7B KEYSET
EXT NO.
01:
02:
03:
04:
05:
06:
05:
06:
05:
06:
05:
06:
05:
06:
07:
7B KEYSET
EXT NO.
01:
02:
03:
04:
07:
7B KEYSET
EXT NO.
01:
02:
03:
04:
07:
7B KEYSET
EXT NO.
01:
02:
03:
04:
07:
7B KEYSET
EXT NO.
01:
02:
03:
04:
07:
COPY AS NEEDED
01/02
SHEET ______ OF ______
HOME
PAGE
Table of
Contents
32 BUTTON ADD-ON MODULE
EXT NO.
01:
02:
03:
04:
05:
06:
07:
08:
09:
10:
11:
12:
13:
14:
15:
16:
17:
18:
19:
20:
21:
22:
23:
21:
25:
26:
27:
28:
29:
30:
31:
32:
32 BUTTON ADD-ON MODULE
EXT NO.
01:
02:
03:
04:
05:
06:
07:
08:
09:
10:
11:
12:
13:
14:
15:
16:
17:
18:
19:
20:
21:
22:
23:
21:
25:
26:
27:
28:
29:
30:
31:
32:
COPY AS NEEDED
01/02
SHEET ______ OF ______
HOME
PAGE
Table of
Contents
iDCS 28D KEYSET
EXT NO.
01:
02:
03:
04:
05:
06:
07:
08:
09:
10:
11:
12:
13:
14:
15:
16:
17:
18:
19:
20:
21:
25:
22:
26:
23:
27:
24:
28:
iDCS 28D KEYSET
EXT NO.
01:
02:
03:
04:
05:
06:
07:
08:
09:
10:
11:
12:
13:
14:
15:
16:
17:
18:
19:
20:
21:
25:
22:
26:
23:
27:
24:
28:
COPY AS NEEDED
01/02
SHEET ______ OF ______
HOME
PAGE
Table of
Contents
iDCS 18D KEYSET
EXT NO.
01:
02:
03:
04:
05:
06:
07:
08:
09:
10:
21:
25:
22:
26:
23:
27:
24:
28:
iDCS 18D KEYSET
EXT NO.
01:
02:
03:
04:
05:
06:
07:
08:
09:
10:
21:
25:
22:
26:
23:
27:
24:
28:
COPY AS NEEDED
01/02
SHEET ______ OF ______
HOME
PAGE
Table of
Contents
iDCS 8D KEYSET
EXT NO.
01:
02:
03:
04:
05:
06:
07:
08:
iDCS 8D KEYSET
EXT NO.
01:
02:
03:
04:
05:
06:
07:
08:
iDCS 8D KEYSET
EXT NO.
01:
02:
03:
04:
05:
06:
07:
08:
iDCS 8D KEYSET
EXT NO.
01:
02:
03:
04:
05:
06:
07:
08:
iDCS 8D KEYSET
EXT NO.
01:
02:
03:
04:
05:
06:
07:
08:
COPY AS NEEDED
01/02
SHEET ______ OF ______
HOME
PAGE
MMC 724
DIAL NUMBERING PLAN
FEATURE
ABND*
ACCT
ALM
ALMCLR
AUTH
BARGE
BGM
BLOCK
BOSS
CAMP
CANMG
CBK
CONF
CB
DICT
DIR
DIRPK
DISALM
DLOCK
DND
FAUTO
FLASH
FWD
GRPK
HLDPK
HOLD
IOG
LCR
LISTN
LNR
MMPA
MMPG
MSG
NEW
NIGHT
OHVA
OPER
PAGE
PAGPK
PMSG
REJECT
RETRY
ROP
SETMG
SGP
SNR
SPEED
STN
TGP
TRK
UA
WCOS
DEFAULT
NEW VALUE
64
47
351–3512
57
NONE
371–372
NONE
NONE
45
42
44
46
381–382
NONE
NONE
65
58
13
40
NONE
49
60
66
12
11
53
NONE
NONE
19
56
54
43
NONE
NONE
NONE
0
55
10
48
NONE
NONE
3601–3639
41
500–529
17
16
201–299, 301–349
9, 80–89
701–799
67
59
NOTE: The ABND feature (marked with an asterisk) only applies to systems with Caller
ID software.
COPY AS NEEDED
Revised 6/95
SHEET ______ OF ______
Table of
Contents
HOME
PAGE
MMC 725
OPTIONS
Table of
Contents
SMDR OPTIONS
DEFLT
PAGE HEADER
YES
LINE PER PAGE
66
INCOMING CALL
NO
OUTGOING CALL
YES
AUTHORIZE CODE
NO
LESS START TIME
YES
IN/OUT GROUP
NO
DND CALL
NO
WAKE-UP CALL
YES
CALLER ID*
NO
ABANDON CALL*
NO
NEW
DIRECTORY NAME
NOTE: Items marked with an asterisk apply only to systems with Caller ID software.
COPY AS NEEDED
Revised 6/95
SHEET ______ OF ______
HOME
PAGE
MMC 726
Table of
Contents
VM/AA OPTIONS
OPTIONS
EXT FOR DN1
YES
TRK FOR DN1
YES
EXT FOR DN2
NO
TRK FOR DN2
NO
SEPARATOR
#
DISCONNECT SIGNAL
C
CALL TYPE ID
DIRECT CALL
1
ALL FWD CALL
2
BSY FWD CALL
3
NOA FWD CALL
4
RECALL
5
DIR TRK CALL
6
OVERFLOW
7
DID CALL
8
MESSAGE CALL
9
CALL PROGRESS TONE
DIAL TONE
BA
BUSY TONE
4
RINGBACK
5
DND/NO MORE
6
HANDSET ANSWER
3
SPEAKER ANSWER
2
COPY AS NEEDED
DFLT
NEW
DFLT
NEW
DFLT
NEW
SHEET ______ OF ______
HOME
PAGE
MMC 728
CALLER ID TRANSLATION
CALLER ID NUMBER
ASSIGNED NAME
NOTE: This record sheet is used only with systems with Caller ID software.
COPY AS NEEDED
Revised 6/95
SHEET ______ OF ______
Table of
Contents
HOME
PAGE
MMC 802
MMC
CUSTOMER ACCESS MMC NUMBER
DEFAULT
100
YES
101
YES
103
YES
104
YES
105
YES
106
YES
107
YES
108
YES
109
YES
110
YES
111
YES
112
YES
113
YES
114
YES
115
YES
116
YES
117
YES
200
YES
201
YES
202
YES
404
YES
502
YES
505
YES
507
YES
602
YES
705
YES
706
YES
708
YES
715
YES
MMC
OPTION
Table of
Contents
HOME
PAGE
Table of
Contents
MMC 804
SYSTEM I/O PARAMETER
PORT 1
PARAMETERS
PORT 2
SERVICE
SERVICE
SPEED
SPEED
CHAR LENGTH
CHAR LENGTH
PARITY
PARITY
RETRY COUNT
RETRY COUNT
STOP BIT
STOP BIT
WAIT TIME
WAIT TIME
DSR CHECK
DSR CHECK
DEFAULT DATA: SERVICE
PORT 1
PORT 2
BAUD RATE
CHAR LENGTH
PARITY
RETRY COUNT
STOP BIT
WAIT TIME
COPY AS NEEDED
PARAMETERS
PCMMC
SMDR
2400 BPS
8 BITS
NONE
03
1 BIT
200 MSEC
SHEET ______ OF ______