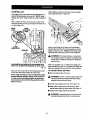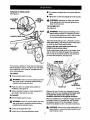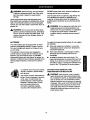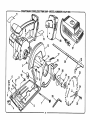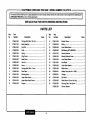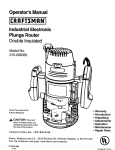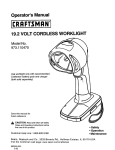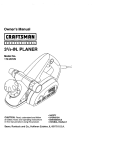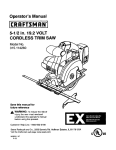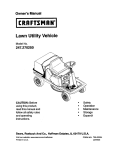
1
972000-394
/
Owner's Manual
I:RRFTSMRN+
5-1/2 in. INDUSTRIAL
CORDLESS TRIM SAW
Model No.
315.271810
Save this manual for
future reference
CAUTION:
Read and follow all Safety Rules
and Operating Instructions
before first use of this product.
NRTL
Sears, Roebuck and Co., Hoffman
972000-394
7-97
Estates,
IL 60179
USA
• TableofContents
...........................................................................................................................................
2
•
Warranty and Introduction..............................................................................................................................
2
•
Rules For Safe Operation ...........................................................................................................................
3-5
A. Important Safety Rules For Battery Tools ..............................................................................................
4
B. Important Safety InstructionsFor Charger .............................................................................................
4
C. Important Safety InstructionsFor Trim Saws .........................................................................................
5
•
Product Specifications and Unpacking ;.........................................................................................................
6
[]
Accessories ....................................................................................................................................................
6
•
Features ......................................................................................................................................................
[]
Operation ...................................................................................................................................................
•
Maintenance .................................................................................................................................................
19
•
Battery Pack Removal and Preparation For Recycling................................................................................
19
•
Exploded View and Repair Parts List ......................................................................................................
•
Parts Ordering / Service ...............................................................................................................................
_i,
Look for this symbol to point out important
safety is involved.
safety precautions.
7-8
9-17
20-21
22
It means attention !!! Your
FULL ONE YEAR WARRANTY ON CRAFTSMAN INDUSTRIAL CORDLESS TRIM SAW
If this I:RRFTSl4RN Industrial Cordless Trim Saw fails due to a defect in material or workmanship within one
year from the date of purchase, Sears will repair it, free of charge.
WARRANTY SERVICE IS AVAILABLEBY
STORE IN THE UNITED STATES.
SIMPLY RETURNING THE TOOL TO THE NEAREST SEARS
This warranty gives you specific legal rights,and you may also have other rights which vary from state to state.
Sears, Roebuck and Co., Dept. 817WA, Hoffman Estates, IL 60179
Your trim.saw has many features for making cutting
operations more pleasant and enjoyable. Safety,
performance and dependability have been given top
priority in the design of this trim saw making it easy to
maintain and operate.
,_
CAUTION: Carefully read through this entire
owner's manual before using your new trim saw.
Pay close attention to the Rules For Safe
Operation, Wamings and Cautions. If you use
your trim saw properly and only for what it is
intended, you will enjoy years of safe, reliable
service.
WARNING:
The operation of any power tool can result in foreign objects being thrown into your eyes,
which can result in severe eye damage. Before beginning power tool operation, always wear
safety goggles or safety glasses with side shields and a full face shield when needed. We
recommend Wide Vision Safety Mask for use over eyeglasses or standard safety glasses
with side shields, available at Sears Retail Stores.
Thepurposeof safetysymbolsis to attrqctyourattentionto possibledangers.Thesafetysymbols,and
the explanations
withthem,deserveyourcarefulattentionandunderstanding.
Thesafetywamingsdo
not bythemselveseliminateanydanger.Theinstructionsor warningstheygivearenotsubstitutesfor
properaccidentpreventionmeasures.
SYMBOL
MEANING
SAFETY ALERT SYMBOL:
Indicates caution or warning. May be used in conjunctionwith other symbols'orpictographs.
&
DANGER: Failure to obey a safety waming will result in serious injuryto yourself or to others.
Always follow the safety precautions to reduce the risk of fire, electricshock and personal injury.
&
WARNING: Failure to obey a safety warning can result in serious injuryto yourself or to others.
Always follow the safety precautions to reduce the risk of fire, electric shock and personal injury.
&
CAUTION: Failure to obey a safety warning may result in property damage or personal injuryto
yourself or to others. Always follow the safety precautions to reduce the risk of fire, electric shock
and personat injury.
NOTE:
Advisesyou of informationor instructionsvital to the operaUon or maintenance of the equipment.
_lb WARNING: Do not attempt to operate this tool
until you have read thoroughly and understand
completely all instructions,safety rules, etc.
contained in this manual. Failure to comply can
result in accidents involvingfire, electric shock,
or serious personal injury. Save owner's manual
and review frequently for continuingsafe
operation, and instructing;otherswho may use
this tool.
•
USE RIGHT TOOL. Don't force small tool or
attachment to do the job of a heavy duty tool.
Don_tuse tool for purpose not intended - for
example - A circular saw should never be used
for cutting tree limbs or logs.
•
READ ALL INSTRUCTIONS
KNOW YOUR POWER TOOL. Read owner's
manual carefully. Learn its applications and
limitations as well as the specificpotential
hazards related to this tool
GUARD AGAINST ELECTRICAL SHOCK by
preventing body contact with grounded surfaces,
For example: Pipes, radiators, ranges, refrigerator enclosures,
AVOID DANGEROUS ENVIRONMENT. Donl
use power toot in damp or wet locationsor
expose to rain. Keep work area well lit.
AND VISITORS
AWAY.
WEAR PROPER APPAREL. Do not wear loose
clothing or jewelry that can get caught in tool's
moving parts and cause personal injury. Rubber
gloves and nonskidfootwear are recommended
when working outdoors.Wear protective hair
covering to contain long hair and keep it from
being drawn into nearby air vents.
ALWAYS WEAR SAFETY GLASSES. Everyday
eyeglasses have only impact-resistantlenses;
they are NOT safety glasses.
KEEP WORK AREA CLEAN. Cluttered areas
and benches invite accidents.
KEEP CHILDREN
DON'T FORCE TOOL. It will do the job better
and safer at the rate for which it was designed.
•
PROTECT YOUR LUNGS. Wear a face mask or
dust mask if operation is dusty.
•
PROTECT YOUR HEARING. Wear hearing
protection during extended periods of operation.
•
SECURE WORK. Use clamps or a vise to hold
work. It's safer than using your hand and it frees
both hands to operate toof.
•
DON'T OVERREACH, Keep proper footing and
balance at all times. Do not use while standing
on a ladder or unstable support.
All
visitors should wear safety glasses and be kept a
safe distance from work area. Do not let visitors
contact tool or extension cord.
STORE IDLE TOOLS. When not in use tools
should be stored in a dry and high or locked-up
place - out of the reach of children.
3
RULES FOR SAFE OPERATION
!
•
(Continued)
making adjustTnentsto it, or when changing
accessories.
MAINTAIN TOOLS WITH CARE. Keep tools
sharp at all times, and clean for best and safest
performance. Follow instructionsfor lubricating
and changing accessories.
USE ONLY THE CHARGER PROVIDED WITH
YOUR BATTERY TOOL. Do not substitute any
other charger. Use of another charger could
cause batteries to explode causing possible
serious injury.
REMOVE ADJUS'EING KEYS AND
WRENCHES. Form habit of checking to see that
keys and adjusting wrenches are removed from
tool before turning it on.
•
NEVER USE IN AN EXPLOSIVE ATMOSPHERE. Normal sparkingof the motor could
ignite flammable liquids,gases, or fum@s.
DO NOT PLACE BATTERY TOOLS OR THEIR
BATTERIES NEAR FIRE OR HEAT. They may
explode.
•
DO NOT CHARGE BATTERY TOOL IN A
DAMP OR WET LOCATION.
KEEP HANDLES DRY, CLEAN, AND FREE
FROM OIL AND GREASE. Always use a clean
cloth when cleaning. Never use brake fluids,
gasoline, petroleum-based products or any
strong solvents to clean your tool.
Your battery tool should be charged in a location
where the temperature is more than 50°F but
less than 100°F.
Under extreme usage or temperature conditions,
battery leakage may occur. If liquid comes in
contact with your skin, wash immediately with
soap and water, then neutralize with lemon juice
or vinegar. If liquid gets in your eyes, flush them
with clean water for at least 10 minutes, then
seek immediate medical attention.
STAY ALERT. Watch what you are doing and
use common sense. Do not operate tool when
you are tired. Do not rush.
CHECK DAMAGED PARTS. Before further use
of the tool, a guard or other part that is damaged
should be carefully checked to determine that it
will operate propedy and perform its intended
function. Check for alignment of moving parts,
binding of moving parts, breakage of parts,
mounting, and any other conditions that may
affect its operation. A guard or other part that is
damaged should be properly repaired or
replaced by an authorized service center unless
indicated elsewhere in this instructien manual.
DO NOT USE TOOL IF SWITCH DOES NOT
TURN IT ON AND OFF. Have defective switches
replaced by an authorized service center.
If carrying your battery tool at your side, make
sure it is not running and your finger is not on the
switch. Avoid accidental starting.
SECURE WORK before applying power. NEVER
hold workpiece in your hand or across your legs.
WHEN SERVICING USE ONLY IDENTICAL
CRAFTSMAN REPLACEMENT PARTS,
IMPORTANT
CHARGER
CUTTING INTO ELECTRICAL WIRING IN
WALLS AND FLOORS CAN CAUSE THE
BLADE AND METAL PARTS TO BECOME
ELECTRICALLY LIVE. Do not touch metal parts
when cutting into walls and floors; grasp only the
insulated handle(s) provided on the tool Make
sure hidden electrical wiring, water pipes, and
mechanical hazards are not in the blade path
when cutting into a wall or floor.
INSPECT FOR and remove all nails from lumber
before cuffing.
IMPORTANT
TOOLS
SAFETY RULES FOR BATTERY
Battery toolsdo not have to be plugged into an
electrical outlet; therefore, they are always inan
operating condition. Be aware of possible
h=azardswhen carrying your battery tool, when
INSTRUCTIONS
FOR
SAVE THESE INSTRUCTIONS. T_hismanual
contains important safety and operating
instructionsfor battery charger part number
975283-001:
DRUGS, ALCOHOL, MEDICATION. Do not
operate tool while under the influence of drugs,
alcohol, or=anymedication.
M
SAFETY
Before using battery charger, read all instructions
and cautionary markings in this manual, on
battery charger, and product using battery
charger.
A
WARNING: To reduce risk of injury, charge
only nickel-cadmium type rechargeable batteries.
Other types of batteries may burstcausing
personal injury and damage.
Do not expose charger to rain or snow.
Use of an attachment not recommended or sold
by the battery charger manufacturer may result
in a risk of fire, electric shock, or injuryto
persons.
To reduce risk of damage to charger body and
cord, pull by charger body rather than cord when
disconnecting charger.
RULES FOR SAFE OPERATION
M
(Continued)
Make sure cord is located so that it will not be
stepped on, tripped over, or otherwise subjected
to damage or stress.
•
KEEP HANDS AWAY FROM CUTTING AREA.
Keep hands away from blade. Do not reach
undemeath work while blade is rotating. Do not
attempt to remove cut material when blade is
moving.
An extension cord should not be used unless
absolutelynecessary. Use of improper
extension cord could result in a risk of fire and
electricshock. If extension cord must be used,
make sure:
a.
That pins on plug of extension cord are the
same number, size and shape as those of
plug on charger.
A
WARNING:
•
USE RIP FENCE. Always use a fence or straight
edge guide when ripping.
b. That extension cord is properly wired and in
good electrical condition;and
c.
25'
50'
100'
150'
Cord Size (AWG)
16
16
16
NOTE: AWG = American Wire Gage
14
risk of blade pinchingand kickba,ck; always
support large panels as shown in Figure 10,
Page 12. When cutting operation requires the
resting of the saw on the workpiece, the saw
should be rested on the larger portion and the
smaller piece cut off.
LOWER BLADE GUARD.
WARNING: If lower blade guard must be raised
to make a cut, always raise it with the retracting
handle to avoid serious injury. See Figure 22,
Page 17.
DO NOT OPERATE CHARGER WITH A
DAMAGED CORD OR PLUG. If damaged,
have replaced immediately by a qualified
serviceman.
Do not operate charger if it has received a
sharp blow, been dropped, or otherwise
damaged in any way; take it to a qualified
serviceman.
Do not disassemble charger; take it to a
qualified serviceman when service or repair is
required. Incorrect reassembly may result in a
risk of electdc shock or fire.
To reduce risk of electricshock, unplug charger
from outlet before attempting any maintenance
o(-cleaning. Tuming off controls will not reduce
this risk.
Do not use charger outdoors.
Disconnect charger from power supply when
not in use.
IMPORTANT
TRIM SAWS
SAFETY INSTRUCTIONS
FOR
KEEP GUARDS IN PLACE AND IN WORKING
ORDER. Never wedge or tie lower blade guard
open. Check operation of lower blade guard
before each use. Do not use if lower blade guard
does not close brisklyover saw blade.
_i,
WARNING: If saw is dropped, lower blade
guard or bumper may be bent, restrictingfull
return. If lower blade guard or bumper becomes
bent or damaged, replace them before reuse.
Blades coast after turn off.
SUPPORT LARGE PANELS. To minimize the
That wire size is large enough for AC
ampere rating of charger as specified
below:
Cord Length (Feet)
KEEP BLADES CLEAN AND-SHARP. Sharp
blades minimize stalling and kickback.
•
GUARD AGAINST KICKBACK. Kickback occurs
when the saw stalls rapidly and is driven back
towards the operator. Release switch
immediately if blade binds or saw stalls. Don't
remove saw from work during a cut while the
blade is moving. See Pages 12 and 13.
•
BEFORE MAKING A CUT, BE SURE THE
DEPTH AND BEVEL ADJUSTMENTS ARE
TIGHT.
USE ONLY CORRECT BLADES. Do not use
blades with incorrectsize holes. Never use blade
washers or boltsthat are defective or incorrect.
The maximum blade capacity of your saw is 5-1/2
inches.
NEVER touch the blade or other moving parts
during use.
NEVER start a saw when its blade is touching
the workpiece.
NEVER lay a tool down before its moving parts
have come to a complete stop.
SAVE THESE INSTRUCTIONS. Refer to them
frequently and use them to instruct others who
may use this tool. If you loan someone this tool,
loan them these instructionsalso.
SAVE THESE INSTRUCTIONS
Blade Diameter
5-1/2 in. (140 mm)
Blade Arbor
3/8 in. (10 mm)
Cutting Depth at 0 ° Bevel Cut
Cutting Depth at 45 ° Bevel Cut
1-9/16 in. (40 ram)
No Load Speed
4,000 RPM
Motor -
18 Volts DC
Charge Rate
1-1/8 in. (29 ram)
Charger Rating
Your trim saw has been shipped completely
assembled except for the blade. Inspect it carefully to
make sure no breakage or damage has occurred
duringshipping. If any parts are damaged or missing,
contact your nearest Sears Retail Store to obtain
replacement parts before attempting to operate saw. A
blade, blade wrench, and this owners manual are also
included.
WARNING: If any parts are missing, do not
operate this tool until the missing parts are
replaced. Failure to do so could result in possible
serious personal injury.
The following recommended accessories are currently available at Sears Retail Stores.
II
5-1/2 in.
_1_ WARNING:
1 Hour
120 volts, 60 Hz, AC
Thin Kerf Blade
The use of attachments or accessories not listed might be hazardous.
6
BATI'ERY
CHARGER
GREENUGHT "ON"
INDICATES
SLOWCHARGING
MODEOR FULLYCHARGED
REDLIGHT"ON"
INDICATESFAST
CHARGINGMODE
YELLOWUGHT"ON"AND
REDUGI'ITFLASHINGINDICATES
DEFECTIVEBA"I'I'ERY
PACK
BATTERYPACK
1-7/16IN.
BACKSIDE
OFCHARGER
Fig. 1
IMPORTANTINFORMATIONFORRECHARGINGHOTBATrERIES
When using your trim saw continuously,the batteries
in your battery pack will become hot. You should _eta
hot battery pack cool down for approximately 30
minutes before attempting to recharge. When the
battery pack becomes discharged and is hot, this wilt
cause the red lighton your battery charger to flash.
When battery pack cools down, red light will glow
continuouslyindicatingfast charging mode, 1 hour
charge time. The green light indicates slow charging
mode, requiring overnight charging for batteries to
reach full charge.
Once the battery pack cools down, it will recharge
battery pack in fast charging mode as normal.
Note: This situation only occurs when continuoususe
of your saw causes the batteries to become hot. It
does not occur under normal circumstances.
Refer to "CHARGING YOUR TRIM SAW" for normal
recharging of batteries, if the charger does not charge
your battery pack under normal circumstances, return
both the battery pack and charger to your nearest
Sears repair center for electrical check.
CHARGER
See Figure 1.
Your charger has a "key hole" hanging feature for convenient, space saving storage. Screws shouldbe installed
so that center distances are 1-7/16 inches apart.
7
KNOWYOURTRIMSAW
SWITCH
See Figure 2.
See Figure 2.
Before attempting to use any tool familiarize yourself
with all operating features and safety requirements.
Features include easily operated bevel cut and depth
of cut adjustment mechanisms; positive 0° bevel stop;
spindle lock; and blade wrench storage.
,_
WARNING: If any parts are missing, do not
operate tool until the missing parts are replaced.
Failure to do so could result in possible serious
personal injury.
Your saw is equippeo with a lock-off button which
reduces the possibilityof accidental starting, The lockoff button is located on the handle above the switch
trigger. You must depress the lock-off button in order
to pull the switch trigger. The lock resets each time
the trigger is released. NOTE: You can depress the
lock-off button from either the left or_ght side.
APPLICATIONS
(Use only for the purpose listed below)
•
cutting all types of wood products (lumber,
plywood, paneling).
RIP
GUIDESCREW
(WINGSCREW)
LOCK-OFF
BUTTON
SPINDLE
LOCKBu'n'ON
BLADEWRENCH
STORAGEAREA
BLADEWRENCH
(5 mmHEXKEY)
DEPTHOF
CUTADJUSTMENT
(DEPTHADJUSTMENTKNOB)
SWITCH
TRIGGER
RIP
GUIDESCREW
(WINGSCREW)
UPPER
BLADEGUARD
BEVELCUT
ADJUSTMENT
(BEVELADJUSTMENT
KNOB)
BASE
ASSEMBLY
BLADE
_WER
BLADEGU_D
RIPGUIDE
Fig. 2
_k
WARNING: Always wear safety gogglQsor
safety glasses with side shields when operating
tools. Failure to do so could result in objects
being thrown into your eyes, resulting in possible
serious injury.
If battery pack is deeply discharged, red light
should become steady after voltage has increased,
normally within 30 minutes.
WARNING: Do not allow familiarity with your
trim saw to make you careless. Remember that a
careless fraction of a second is sufficientto inflict
severe injury.
Green lighton indicates battery pack is in slow
charging mode or fully charged.
CHARGING
if after one hour red light is stillflashing, this
indicates a defective battery pack and should be
replaced.
Yellow light on and red light flashing indicates
defective battery pack. Return battery pack to your
nearest Sears Repair Center for checking or
replacing.
YOUR TRIM SAW
The battery pack for this tool has been shipped in a
low charge condition to prevent possible problems.
Therefore, you should charge it until light on front of
charger changes from red to green.
Note: Batteries will not reach full charge the first time
they are charged. Allow several cycles (cuffing
followed by recharging) for them to become fully
charged.
•
When your battery pack becomes fully charged, the
red light will turn OFF and the green light willturn
ON.
•
If you remove batte_ pack from charger and
reinsert it immediately (less than 5 seconds)
back in charger, the green light will come on
indicating full charge and slow charging mode
until removed from charger. If you remove
battery pack from charger and wait more than 5
seconds before reinserUng it back in charger,
the charger will function normally.
TO CHARGE
•
Charge battery pack only with the charger
provided.
•
Make sure power supply is normal house
voltage, 120 volts, 60 Hz, AC only.
•
Connect charger to power supply.
•
Place battery pack in charger aligning raised rib in
charger with groove in battery pack.
•
•
Press down on battery pack to be sure contacts on
battery pack engage properly with charger
contacts.
The battery pack will become slightlywarm to the
touch while charging. This is normal and does not
indicate a problem.
•
DO NOT place charger in an area of extreme heat
or cold. It will work best at normal room
temperature.
•
• After normal usage, 1 hour of charging time is
required to be fully charged. A minimum charge
time of 1-1/2 hours is required to recharge a
completely discharged tool.
Red light shouldturn on. Red light indicates fast
charging mode.
If red light is flashing, this indicates battery pack is
deeply dischargedor hot.
_k
If battery pack is hot, red light should become
steady after battery pack has cooled down.
LED FUNCTION
CAUTION: Your battery pack contains special
high temperature batteries to help prevent battery
damage when left on charge for extended periods
of time. However, once the batteries become fully
charged, w_ recommend that you unplug your
charger from power supply.
OF CHARGER
LED WILL BE LIGHTED TO INDICATE STATUS OF CHARGER AND BA'I'rERY PACK:
•
Red LED Lighted = Fast Charging Mode.
•
Green LED Lighted = Slow Charging Mode and Fully Charged Battery Pack.
•
Red LED Flashing = Hot or Deeply Discharged Battery Pack. Also Defective
Battery Pack After 1 Hour.
•
Yellow LED Lighted and Red LED Flashing = Defective Battery Pack.
_1 im
9
&
WARNING: Always remove battery pack from
your saw when you are assembling parts, making
adjustments, assembling or removing blades,
cleaning, or when.not in use. Removing battery
pack will prevent accidental starting that could
cause serious personal injury.
TO REMOVE BA'I-rERY
•
PACK
Locate latches on end of battery pack a_d
depress to release battery pack from your saw.
See Figure 3.
TO ASSEMBLE
OR REMOVE BLADE
TO ASSEMBLE BLADE:
•
DEPRESSLATCHESTO
RELEASEBATTERYPACK
Remove battery pack from saw.
WARNING: Failure to remove battery pack from
saw could result in accidental starting causing
possibleserious personal injury.
4,'
•
WARNING: A 5-1/2 in. blade is the maximum
blade capacity of your saw. Never use a blade
that is too thick to allow outer blade washer to
engage with the flats on the spindle. Larger
blades will come in contact with the blade guard,
while thicker blades wil( prevent blade screw
from securing blade on spindle. Either of these
situationscould result in a serious accident.
•
Locate latches on end of battery pack and depressto
release battery pack from your saw. See Figure3.
•
Remove blade wrench (5 mm hex key) from
storage area. See Figure 2.
•
Depress spindle lock button and remove blade
screw and outer blade washer. See Figure 4.
Remove battery pack from your sa_,.
TO INSTALL
BATTERY
PACK-
See Figure 3.
•
•
Place battery pack in your saw. Align raised rib
inside saw with groove on battery pack.
Make surethe latches on each side of your
battery pack snap in place and battery pack is
secured in saw before beginning operation.
INNER
_lb CAUTION: When placingbattery pack in your
saw, be sure raised rib inside saw aligns with
groove on battery pack and latches snap in place
properly. Improper assembly of battery pack can
cause damage to internal components.
LOWER
BLADE
GUARD
HANDLE
OUTER BLADE
BLADE SCREW
BLADE WASHER
Fig. 4
NOTE: Turn blade screwclockwiseto remove.
•
_k
10
Wipe a drop of oil onto inner blade washer and
outer blade washer where they contact blade.
WARNING: If inner blade washer has been
removed, replace it before placing blade on
spindle. Failure to do so could cause an accident
since blade will not tighten properly.
n
•
SAW BLADES
Fit saw blade inside lower blade guard and onto
spindle. NOTE: The saw teeth point upwbrd at the
front of saw as shown in figure 4-;
The best of saw blades will not cut efficiently if they
are not kept clean, sharp, and properly set. Using a
dull blade will place a heavy load on your saw and
increase the danger of kickback. Keep extra blades on
hand, so that sharp blades are always available.
Replace outer blade washer.
I!1 Depress spindle lock button,then replace blade
screw. Tighten blade screw securely.
NOTE: Turn blade screwcounterclockwisetotighten.
•
Gum and wood pitch hardened on blades will slow
your saw down. Use gum and pitchremover, hotwater, or kerosene to remove these accumulations. Do
not use gasoline.
Re.turnblade wrench to storagearea.
REMEMBER: Never use a blade that is too thicl_ to
allow the outer blade washer to engage with the
fiats on the spindle.
BLADE
The lower blade guard attached to your trim saw is
there for your protection and safety. R should
never be altered for any reason. If it becomes
damaged or begins to return slow or sluggish, do
not operate your saw until the damage has been
repaired or replaced. Always leave guard in
operating position when using saw.
TO REMOVE BLADE:
•
_k
Remove battery pack from saw.
WARNING: Failure to remove battery pack from
saw could result in accidental starting causing
possible serious personal injury.
•
Remove blade wrench from storage area. See
Figure2.
•
Positionyour saw as shown in figure 5, depress
spindle lock button, and remove blade screw.
&
NOTE: Turn blade screw clockwiseto remove.
•
GUARD SYSTEM
Remove outer blade washer. See Figure 4.
NOTE: Blade can be removed at this poinL
DANGER: When sawing through workpiece,
lower blade guard does not cover blade on the
underside of workpiece. Since blade is exposed
on underside of workpiece, keep hands and
fingers away from cuttingarea. Any part of your
body coming in contact with moving blade will
result in serious injury. SeeFigure 6.
LOWERBLADEGUARD
IS IN UP POSITION
WHENMAKINGA CUT
SPINDLE
LOCKBUTTON
BLADE
SCREW
BLADEEXPOSEDON
UNDERSIDEOFWORKPIECE
BLADE
WRENCH
Fig. 6
Never use saw when guard is not operating
correctly. Guard should be checked for correct
operation before each use. If you drop your saw,
check the lower blade guard and bumper for
damage at all depth settings before reuse. NOTE:
The guard is operating correctly when it moves
freely and readily returns to the closed position. If
for any reason your lower blade guard does not
close freely, take it to the nearest Sears Parts and
Repair Center for service before using.
Fig. 5
11
CKBACK
Figure 7.
TO LESSEN THE CHANCE
•
OF KICKBACK:
Always keep the correct blade depth setting - the
correct blade depth setting for all cuts should not
exceed 1/4 in. below the matedal to be cut. See
Figure 9. One blade tooth below the material to be
cut works best for most efficient cutting action.
KICKBACK
BLADESETTOODEEP
Fig. 7
• best guard against kickback is to avoid
ngerous practices.
',kbackoccurswhen the blade stalls rapidly and the
N iSdriven back towards you. Blade stallingis
Jsedby any actionwhich pinches the blade in the
od.
CORRECTBLADEDEPTHSETrlNG=
BLADEEXPOSEDONEBLADETOOTH
BELOWTHE MATERIALTOBECUT
DANGER: Release switch"immediately if blade
binds or saw stalls. Kickback could cause you to
lose controlof your saw. Loss of controlcan lead
to sadous injury.
KICKBACK
•
IS CAUSED
• Sawing into knots or nails in workpiece.
• Twisting blade while making a cut.
•
•
Inspect the workpiece for knots or nails before
beginning a cut. Never saw into a knot or nail.
•
Make straight cuts. Always use a straight edge
guide when rip cutting. This helps prevent twisting
the blade in the cut.
Always use clean, sharp and propedy set blades.
Never make cuts with dull blades.
Making a cut Witha dull, gummed up, or improperly
set blade.
To avoid pinchingthe blade, support the workpiece
propedy before beginning a cut. The right and
wrong ways to support large pieces of work are
shown in figures 8 and 10.
Incorrectlysupportingworkpiece, See Figure 8.
WRONG
Fig.lO
Fig. 8
•
•
BY;
Incorrectblade depth setting. See Figure 7.
Fig. 9
Forcing a cut.
• Cutting warped or wet lumber.
• Tool misuse or incorrectoperating procedures.
12
n When making a cut use steady, even pressure.
Never force cuts.
i
STARTING
A CUT
Know the right way to use your saw.
See Figure 12.
Do not cut warped or wet lumber.
[] Always hold your saw firmly with both hands and
keep your body in a balanced position so as to
resist the forces of kickback should it occur.
_When using your saw, always stay alert and
exercise control. Do not remove your saw from
workpiece while the blade is moving.
DEPTH OF CUT ADJUSTMENT
Always keep correct blade depth setting. The correct
blade depth setting for all cuts should not exceed 1/4
inch below the material to be cut. More blade depth
will increase the chance of kickback and cause the cut
to be rough. One blade tooth below the material to be
cut works best for most efficientcutting action.
TO ADJUST
BLADE DEPTH
RIGHT
[] Remove battery pack from saw.
Fig. 12
Never use your saw as shown in figure 13,
,_k WARNING: Failure to remove battery pack from
saw could result in accidental starting causing
possible serious personal injury.
BASE
ASSEMBLY
DEPTH
ADJUSTMENT
KNOB
WRONG
Fig. 11
Fig. 13
Never place your hand on the workpiece behind
your saw while making a cut.
[] Loosen depth adjustment knob. See Figure 11..
I
Hold base fiat against the workpiece and raise or
lower saw untilthe required depth is reached.
_IL WARNING: To make sawing easier and safer,
always maintain proper control of your saw. Loss
of control of your saw could cause an accident
resulting in possible serious injury.
[] Tighten depth adjustment knob securely.
13
TO HELP MAINTAIN
CONTROL:
•
Always supportyour workpiece near the cut.
•
Supportyour workpiece so the cut will be on your
left.
•
Clamp your workpiece so it will not move during the
cut.
Place your workpiece with itsgood side down, NOTE:
The good side is the side on which appearance is
important.
Before beginning a cut, draw a guideline along the
desired line of cut. Then place front edge of base on
that part of your workpiece that is solidilysupported.
See Figure 12.
Never place your saw on that part of the
workplece that will fall off when the cut is made.
See Figure 14.
RIGHT
Fig. 15
Depress the lock-offbutton and squeeze the switch
trigger to start your saw. Always let the blade reach
full speed, then guide your saw intothe workpiece.
_1_ WARNING: The blade coming in contact with
the workpiece before it reaches full speed could
cause your saw to "kickback"towards you
resulting in serious injury.
When making a cut use steady, even pressure.
Forcing causes rough cuts, could shorten the life of
your saw and could cause "kickback."
REMEMBER:
When sawing through work, the lower blade guard
does not cover the blade, exposing it on the
underside of work. Keep your hands and fingers
away from cutting area. Any part of your body
coming in contact with the moving blade will
result In serious Injury.
WRONG
Fig. 14
After you complete your cut release the trigger and
allow the blade to come to a complete stop. Do not
remove your saw from workpiece while the blade
is moving.
Hold your saw firmly with both hands.
See Figure 15.
_i_
CAUTION: When liftingyour saw from the
workpiece, the blade is exposed on the
underside of your saw until the lower blade guard
closes. Make sure lower blade guard is closed
before setting your saw down on work surface.
TO CROSS CUT OR RIP CUT
When making a cross cut or rip cut, align your line of
cut with the outer blade guide notch on the saw base
as shown in figure 16.
14
TOPVIEW
OFSAW
GUIDEUNE
RIP GUIDE (EDGE GUIDE)
FRONT
OFSAW
Use the rip guide provided with your saw when
making wide rip cuts. A five inch scale has been
provided on the rip guide. When using the width of cut
scale on the base in combination with the rip guide,
cuts can be made up to 6 in. to the left of the blade or
8-3/4 in. to the right of the blade.
)
The rip guide helps prevent the bladefrom twisting in
a cut. The blade twisting in a cut can cause kickback.
TO ASSEMBLE
•
GUIDENOTCH
Remove battery pack from saw.
_1_ WARNING: Failure to remove battery pack from
saw could result in accidental starting causing
possible serious personal injury.
ALIGNOUTERBLADEGUIDENOTCHON ;AWBASEWITH
LINEOFCUTASSHOWNWHENMAKINGCROSSCUTSOR
RiP CUTS
RIP GUIDE
Fig. 16
Since blade thicknesses vary, always make a trial cut
in scrap material along a guideline to determine how
much, if any, the guideline must be offset to produce
an accurate cut. NOTE: The distancefrom the line of
cut to the guideline is the amount you should offset
the guideline.
RIP
GUIDESCREW
(WINGSCREW)
WIDTH OF CUT SCALE
See Figure 17.
RIPGUIDE
(EDGEGUIDE)
BASE
ASSEMBLY
PLACERIP
GUIDETHRUHOLES
Fig. 18
•
Place rip guide through holes in saw base as
shown in figure 18.
•
Adjust rip guide to the width needed.
• Tighten rip guide screw (wing screw) securely.
When using a rip guide, position the face of the rip
guide firm!y against the edge of workpiece. This
makes for a true cut without pinchingthe blade. The
guiding edge of workpiece must be straightfor your
cut to be straight. Use caution to prevent the blade
from binding in the cut.
WIDTHOF
CUTSCALE
BLADE
Fig. 17
A width of cut scale has been provided on the base of
your saw. When making straight cross cuts or rip cuts,
the scale can be used to measure up to four inches to
the right side of the blade. It can be used to measure
up to one inchto the left side of the blade.
15
TO BEVEL CUT
When making a bevel cut hold your saw firmly with
both hands as shown in figure 20.
The angl_ of cut of your saw may be adjusted to any
desired setting between zero and 50 °. NOTE: When
making cuts at 50 °, blade shouldbe set at full depth of
cut.
When making 45 ° bevel cuts, there is a notch in the
saw base tohelp you line up the blade with the line of
cut: See Figure 19.
BEVEL
SCALE
BEVEL
ADJUSTMEnt
KNOB
LOWER
BLADEGUARD
Fig. 20
BLADE:
GUIDENOTCH
Rest the front edge of the base on the workpiece.
Depress the lock-offbutton and squeeze the switch
trigger to start your saw. Always let the blade reach
full speed, then guide your saw into the workpiece.
GUIDELINE
,_
WARNING: The blade coming in contact with
the workpiece before it reaches full speed could
cause saw to "kickback" toward you resulting in
serious injury.
ALIGNINNERBLADEGUIDENOTCHONSAWBASEWITH
UNE OFCUTASSHOWNWHENMAKING45° BEVELCUTS
Fig. 19
After you complete your cut release the trigger and
allow the blade to come to a complete stop. After the
blade has stopped, lift your saw from the workpiece.
Align your line of cut with the inner blade guide notch
on the saw base when making 45 ° bevel cuts.
TO ADJUST
•
Since blade thicknesses vary and different angles
require different settings, always make a trial cut
in scrap material along a guideline to determine
how much you should offset the guideline on the
board to be cut.
,_
BEVEL SETTING
Remove battery I_aCkfrom saw.
WARNING: Failure to remove battery pack from
saw could result in accidental starting causing
possibleserious personal injury.
•
Loosen bevel adjustment knob. See Figure 19.
•
Raise motorhousingend of saw untilyou reach
desiredangle settingon bevel scale. See Figure 19.
• Tighten bevel adjustment knob securely.
&
16
WARNING: Attempting bevel cut without knob
securely tightened can result in serious injury.
POSITIVE 0 ° BEVEL STOP
See Figure 21.
• Turn screw and adjust base until square with saw
blade.
• Tighten hex nut and bevel adjustmentknob securely.
ADJUSTMENT
SCREW
BEVEL
ADJUSTMENT
KNOB
_i,
.
WARNING: Attempting to make cuts without
bevel adjustment knob securely tightened can
result in serious injury.
TO POCKET CUT
See Figure 22.
HEXNUT
BLADE
_I_ WARNING: Always adjustbevel setting to zero
before makinga pocket cut. Attemptinga pocket
cut at any othersettingcan resultin loss of control
POSITIVE0° BEVELSTOP
of your saw possiblycausing seriousinjury.
Adjust the bevel setting to zero, set blade to correct
blade depth setting, and swing the lower blade guard
up using the lower blade guard handle.
Always raise the lower blade guard with the
handle to avoid serious injury.
CARPENTER'S
SQUARE
While holdinglower blade guard by the handle, firmly
rest the front of the base fiat against the workpiece
with the rear of the handle raised so the blade does
not touchthe workpiece. See Figure 22.
LOWERBLADE
GUARDHANDLE
Fig. 21
Your saw has a positive 0° bevel stop, that has been
factory adjusted to assure 0° angle of your saw blade
when making 90 ° cuts. However, misalignment can
occurduring shipping.
TO CHECK
• Remove battery pack from saw.
_1_ WARNING: Failure to remove battery pack from
saw could result in accidental starting causing
possibleserious personal injury.
•
•
LOWER
BLADEGUARD
POCKETCUT
Place your saw in an upside down position on
workbench. See Figure 21.
Fig. 22
Using a carpenter's square, check squareness of
saw blade to the base of your saw.
Depress the lock-off button and squeeze the switch
trigger to start your saw. Always let the blade reach
full speed then slowly lower blade into the
workpiece until base is flat against workpiece.
TO ADJUST
[] Remove battery pack from saw.
After you complete your cut release the triggerand allow
the blade to come to a completestop.After the blade
has stopped,remove it from the workpiece.Comers.
may then be cleared out with a handsaw or sabre sew.
_1_ WARNING: Failure to remove battery pack from
saw could result in accidental starting causing
possible serious personal injury.
A
•
_M_ WARNING: Never tie the lower blade guard in a
raised position. Leaving the blade exposed could
lead to serious injury.
Loosen bevel adjustment knob.
• Loosen hex nut securing adjustment screw.
17
i
ill
i
i
i
i
i
i
i
i
ii i
i
ii
i
i
i
ii
i
i
i
!
iil!
ill
i
|ll
i i
i
i
i
i
i
ii
i
i
i
i
i
ii
i
|ll
ii
ill
i
i
i
i
|l!
ii
ij
i
_
i
i
ii
i i
i i i
ii|m
ii i
i
i
i
i
ii
i
illl
i
i
ill
i
i i
ii
i
illll
i
i
mml
i
i
i
i i
t8
|lira
|
DO NOT abuse power tools. Abusive practicescan
damage tool as well as workpiece.
_IL WARNING: When servicing, use only identical
Craftsman replacement parts. Use of _.ny other
part may create a hazard or cause product
damage.
Only the parts shown on parts list, page twenty one,
are intended to be repaired or replaced by the
customer. All other parts should be replaced by a
qualified service technician at an authorized service
facility.
Avoid using solvents when cleaning plastic parts.
Most plasticsare susceptible to damage from various
types of commercial solvents and may be damaged
by-their use. Use clean cloths to remove dirt, dust, oil,
grease, etc.
_
,_
WARNING: Do not at any time let brake fluids,
gasoline, petroleum-based products, penetrating
oils, etc. come in contact with plastic parts. They
contain chemicals that can damage, weaken or
destroy plastic.
BATTERIES
WARNING: Do not attempt to modify this toolor
create accessories not recommended for use
with this tool. Any such alteration or modification
is misuse and coutd result in a hazardous
condition leading to possible serious personal
injury.
To obtain the longest possible battery life, we suggest.
the following:
Your saw's battery pack is equipped with 15 nickelcadmium rechargeable batteries. Length of service
from each charging will depend on the type of work
you are doing.
The batteries in this tool have been designed to
provide maximum trouble free life. However, like all
batteries, they will eventually wear out. DO NOT
disassemble battery pack and attempt to replace the
batteries. Handling of these batteries, especially when
wearing rings and jewelry, could resultin a serious
burn.
•
Store and charge your batteries in a cool area.
Temperatures above normal room temperature
will shorten battery life.
•
Never store batteries in a discharged condition.
Recharge them immediately after they are
discharged.
•
All batteries gradually lose their charge. The
higher the temperature the quicker they lose their
charge. If you store your tool for long periods of
time without using it, recharge the batteries every
month or two. This practice will prolongbattery..
BA'I'rERY PACK REMOVAL AND
PREPARATION
FOR RECYCLING
To preserve natural resources, please
recycle or dispose of expired battery
pack I_roperly.
A
This product contains nickel-cadmium
battery. Must be disposed of properly.,
Local, state, or federal laws may
prohibitdisposal of nickel-cadmium
batteries in ordinary trash. Consult
your Iocaf waste authorityfor
information regardingavailable
recycling and/or disposaloptions.
19
WARNING: Upon removal, cover the battery
pack's terminals with heavy duty adhesive tape.
Do not attempt to destroy or disassemble battery
pack or remove any of its components. Nickelcadmium batteries must be recycled or disposed
of properly. Also, never touch both terminals with
metal objects and/or body parts as short circuit
may result. Keep away from children. Failure to
comply with these warnings could result in fire
and/or serious injury.
CRAFTSMAN
CORDLESS
TRIM SAW-
MODEL
NUMBER
315.271810
....
11
12
26
10
i
I
21
.
24
5
29
25
2
,,,,
,,
t,
20
_
,
CRAFTSMAN
n
I
CORDLESS
I
TheCORDLEssmOdel
nn
nunlber
wiH=rF_|_l_
SAW_eorf°Undwhen°n
p,_teo_c_erin_
a
atlachedt°repair
III
parts.the
TRIM SAW-
n
n
motor
i
SEE BACK
nn
I
III
NUMBER
315.271810
n
housin
II
MODEL
n I
9.
I
I
AIvl_ays
I
mention
the
rl_Oldel
number
in
al,
correspo|_dence
ilnunnmmnl
re9arding
_.
I
your
I u
I
!
II
PAGE FOR PARTS ORDERING
INSTRUCTIONS
PARTS LIST
Key
No.
Part
Number
1
975546-000
Carriage Bolt (M6 x 102 mm) ......................... 1
16
975541-000
Bumper Screw ................................................
2
975547-000
Base Assembly ............................................... 1
17
975540-000
3
975544-000
Lock Nut .........................................................
2
18
975539-000
Spring ............................................................. I
Lower Blade Guard ........................................ 1
4
975548-000
Knob ................................................................ 2
19
975538-000
Ball Bearing (NTN #6200LB) ......................... 1
5
975552-000
Spring .............................................................
1
20
975537-000
Bearing Retainer ............................................ 1
6
975551-000
Wing Screw .................................................... 1
21
975536-000
Bearing Retainer Screw ................................. 3
7
975549-000
Base Screw ...................................................
1
22
975534-000
Inner Blade Washer ....................................... 1
8
975559-000
Hex Nut ..........................................................
1
23
975419-001
Saw Blade ......................................................
9
975558-000
Screw .............................................................
1
24
975533-000
Outer Blade Washer ....................................... 1
10
975550-000
Carriage Bolt (M6 x 13 mm) ........................... 1
25
975532-000
Blade Screw ...................................................
11
975556-000
Data Plate .......................................................
1
26
975284-001
Battery Pack (Item No. 11098) ....................... 1
12
975557-000
Waming Label ................................................ 1
27
975283-001
Charger ..........................................................
1
13
975545-000
Upper Blade Guard ........................................ 1
28
975554-000
Rip Guide .......................................................
1
14
975543-000
Upper Blade Guard Screw ............................. 3
29
975553-000
Blade Wrench (5 mm Hex Key) ..................... 1
15
975542-000
Bumper ...........................................................
30
975555-000
Carrying Case - Not Shown ........................... 1
Owner's Manual
Description
Key
No.
Quan,
1
Part
Number
972000-394
21
Descrlptlon
Quan.
1
1
1
Fortherepairorreplacementpartsyouneed
delivereddirectlyto yourhome
Call7 am- 7 pro, 7 daysaweek
1-800-366-PART
(1-800-366-7278)
Forrepair service
Call 24 hours a day,7 days a week
1-8OO-4-REPAIR
(1-800-473-7247)
Forthelocationof a
SearsPartsandRepairCenterinyourarea
Call24 hours a day,7 days a week
1-800-488-1
222
m||mmm
mmmmmm
The model numberof this toolwill be foundon a serial plate
attachedto the motorhousing.When requestingservice or
orderingparts, always providethe following information:
• ProductName
5-1/2 in. Industrial
CordlessTrimSaw
• ModelNumber
315.271810
• Part Name
•
Part Number
SEARS
America's
RepairSpeciaiists
Manual del Usuario
CRRFTSHRN'°
SIERRA RECORTADORA INDUSTRIAL
A BATERIA DE 5-1/2 pulg.
Modelo N°
315.271810
Conserve este manual para
referencia futura
_, ATENCION:
Lea cuidadosamente todas las Reglas
de Seguridad y las Instrucciones antes
de usar esta herramienta.
NRTL
Sears, Roebuck and Co., Hoffman
972000-394
7-97
Estates,
IL 60179
USA
[]
Tabla de materias ...........................................................................................................................................
2
•
Garantfa e Introduccibn..................................................................................................................................
2
•
Reglas para Funcionamiento Seguro .........................................................................................................
3-5
Reglas de Seguddad lmportantes para Herramientas a Bateda ...............................................................
4
Instrucciones Importantes de Seguddad para el Cargador ........................................................................
4
Instrucciones lmportantes de Seguridad para las Sierras Recortadoras ...................................................
5
[]
Especificaciones del Productoy Desempaque ..............................................................................................
6
[]
Accesodos ...................................................................................................................................................
6
[]
Caracterfsticas ............................................................................................................................................
7-B
•
Funcionamiento.........................................................................................................................................
•
Mantenimiento ..............................................................................................................................................
19
[]
Desmontaje del Bloque de Baterfas y Pmparacibn para el Reciclaje .........................................................
19
[]
Vista Esquemdtica y Lista de Repuestos................................................................................................
•
Pedidos de Repuestos / Servicio .................................................................................................................
Este sfmbolo le indica importantes
riesgo para su seguridad.
reglas
de seguridad,
iSignifica
atenci6nE
9-17
20-21
22
Existe
GARANTIA COMPLETA DE UN A_IO DE LA .SIERRA RECORTADORA INDUSTRIAL A BATERIA
CRAFTSMAN
Siesta Sierra Recortadora Industrial a Baterfa I:RIIFTSMRN falla debido a un defecto de material o mano de
obra dentro de un a5o de la fecha de compra, Sears la reparard gratuitamente.
EL SERVIClO BAJO GARANTIA PUEDE OBTENERSE DEVOLVIENDO LA HERRAMIENTA AL ALMACEN
SEARS O CENTRO DE SERVIClO SEARS MAS CERCANO EN LOS ESTADOS UNIDOS.
Esta garantfa le otorga derechos legales especfficosy usted puede ademds tenet otros derechos que varfan de
un estado a otro.
Sears, Roebuck and Co., DEPT. 817WA, Hoffman Estates, IL 60179
Su sierra recortadora tiene muchas caractedsticasque
contribuyena facilitar y hacer mds agradable su
trabajo. Se ha dado pdoridadm_lximaa la seguridad,
rendimientoy dependabilidad en el disefio de esta
sierra recortadora por Io cual es fdcil de mantener y
operar.
A
_k
ATENCION: Lea cuidadosamente todo este
manual antes de usar su nueva sierra
recortadora. Preste mucha atencibn alas Reglas
para FuncionamientoSLeguroasf como alas
Advertencias y Avisos. Si usted utiliza la sierra
recortadora debidamente y solamente para el
pmp,Ssito que ha sido dise_iada,usted disfrutard
de muchosaSos de servicio seguro.
ADVERTENCIA:
La utilizaci6n de cualquier herramienta mecdnica puede causar la proyeccibn de objetos
extrafiosa sus ojos, Io cual puede ocasionar da_os oculares severos. Antes de comenzar a
usar ia herramienta mecdnica, siempre use sus ientes protectoreso galas de seguridad con
proteccibnlateral y una m_scara completa cuando sea necesado. Recomendamos una
Mdscara de Visi6n Amplia para usar sobre sus lentes protectores o lentes de seguridad
est_ndar, con pmteccibn lateral, disponible en los Almacenes Sears.
2
Estossfmbolosdeseguridadse
utilizan para advertide sobre ciertos rlesgos posiblos. Los sfmbolos de
seguridad y las explicaciones que acompa_an estos sfmbolos merecen cuidadosa atenci6n y
comprensi6n. Las advertencias por si mismas no eliminan ning,_n peligro. Las instrucciones o las
advertencias que se proporcionan no reemplazan a las medidas adecuadas de prevenci6n de accidentes.
SIMBOLO
A
SIGNIFICADO
SlMBOLO
DE ALERTA
SOBRE SEGURIDAD:
Indica atencibn, advertencia o peligro. Puede usarse conjuntamente con otrossimbolos o
pictogramas.
&
A
A
NOTA:
,_
PELIGRO: Si no se obedece una advertencia de seguridad puede lesionarse a si mismo y a
otros. Siempre siga las precauctonesde seguridad para reducirel riesgo de incendio, choque
el_ctrico y lesibn personal.
ADVERTENCIA:
Si no se obedece una advertencia de seguridad puede lesionarse a si mismo y
a otros. Siempre siga las precauciones de seguridad para reducir el riesgo de incendio,choque
el_'trico y lesibn personal.
ATENCION: Si no se obedece una advertencia de seguridad puede lesionarse a si mismo y a
otms. Siempre siga las precauciones de seguridad para reducirel riesgo de incendio,choque
el_ctdco y lesi6n personal.
Inforrnacibn o instruccionesvitales para el funcionamiento o mantenimiento de la herramienta.
ATENClON:
No intente hacer funcionar esta
herramienta sin antes haber lefdo y comprendido
bientodas las instrucciones, lasreglasde seguridad,
etc. indicadas en este manual. El incumplimiento
deestas instruccionespuede ocasionaraccidentes,
incendio, choque eldctrico o lesiones personales
graves. Conserve el manual del usuarioy est0dielo
frecusntemente para poder utilizar el equipo con
seguridad y poder comunicar las instrucciones
apropiadas a otras personas que utilicen esta
herramienta.
•
•
•
LEA TODAS LAS INSTRUCClONES
•
•
II
•
•
CONOZCA SU HERRAMIENTA MECANICA. Lea
cuidadosamenteel manualdel usuario. Aprenda
susaplicacionesy limltacionesasf como tambi_nlos
riesgospotencialesespecificosrelacionadoscon
esta herramienta.
PROTEJASE CONTRA CHOQUE ELECTRICO
evitandocontactodel cuerpocon las superficies
puestasa tierra. Por ejemplo: las cajasde las
tubedas,radiadores,estufas,refrigeradores.
MANTENGA EL AREA DE TRABAJO LIMPIA. Los
lugaresy bancosde tra'bajodesordenadosinvitana
_osaccidentes.
EVITE TODOS LOS AMBIENTES PEMGROSOS.
No usesu herr'amientamecdnicadonde haya
humedad,en lugaresmojados o donde est6
expuestaa la Iluvia. Mantengael lugar de trabajo
bieniluminado.
MANTENGA A LOS NINOS Y A LOS .-ESPECTADORES ALEJADOS. Todos los
espectadores debenusar lentes de seguridady ser
mantenidos a una distanciaprudentedel _rea de
trabajo. No deje que losespectadorestoquenla
herramientao el cordonde extensibn.
•
•
•
•
•
ALMACENAMIENTO DE I.AS HERRAMIENTAS
QUE NO $E USAN. Cuandono estdnen uso las
herramientasdeben set guardadasen un lugar
seco, alto o bajo flave -'fuera del alcance de los
ni_os.
NO FUERCE LA HERRAMIENTA. Eltrabajo
quedardhechomejor y de manera rods segurasi la
herramientatrabaja a la velocidadpara la cual furl
dise_ada.
USE LA HERRAMIENTA CORRECTA. No fuerce a
una herramientao a un accesoriopequeF,
o que
haga el trabajo de una herramientade servicio
pesado. No use la herramientapara propbsitosque
no ha sidodiseSada. Pot ejemplo,no use una sierra
circularpare cortartroncoso ramas de -_oles.
USE VESTIMENTA ADECUADA. No use ropao
joyas sueltas,puss puedenquedar atrapadasen las
piezasmbvilesde la herramientay causar lesi6n
personal. So recomiendausar guantesde goma y
calzadoantirresbaladizocuandose trab_jaal airs
libre. Tambi6n,protdjaseel cabellolargoy sujetelo
a fin de evitarque quede atrapado en los
respiraderoscemanos.
USE SIEMPRE LENTIESPROTECTORES. Los
anteojosregularestienen solamente lentes
resistentesal impacto;silosNO son lentes de
seguddad.
PROTIEJASUS PULMONES. Utiliceuna mdscara
contrael polvosi el trabajova a despedirmucho
polvo.
PROTEJA SU AUDIClON. Utiliceproteccibnpara
los oidosduranteperiodosptolongadosde
funcionamiento.
SUJEI'E EL TRABAJO. Use mordazaso un tomilio
de bancopara sujetarel trabajo. Es m_s seguro
clue usarsu mano y le deja ambasmanes iibres
para utilizarla herramienta.
REGLAS
•
•
•
•
•
•
•
•
•
•
•
PARA FUNCIONAMIENTO
SEGURO
(Continuaci6n)
NO USE LA HERRAMIENTA A UNA DISTANCIA
DEMASIADO ALEJADA. Mantengasiempreun
buen equilibfioy una posicidn firme. No la uUlice
estandoen una escalera o en un apoyoinestable.
MANTENGA BIEN CUIDADAS LAS
HERRAMIENTAS. Mantenga las herramientas
afiladas en todo momento y limpJaspara un
rendimientomejor y •as seguro. Siga las
instruccionesde iubricacibny de cambiode
accesorios.
SAQUE LAS LLAVES DE AJUSTE Y LLAVES
INGLESAS. Acostdmbresea verificarsi se han
sacado todas las Ilaves de la herramientaantesde
poneda en marcha.
NUNCA USE EN UNA ATMOSFERA EXPLOSlVA.
Las chispasnor•ales del motorpueden hacer
explotarlos I(quidos,vaporeso gases inflamables.
MANTENGA LAS MANIJAS SECAS, UMPIAS Y
SIN ACEITE NI GRASA. Siempreuse un paso
limpiopara efectuar la limpieza. Nunca use Ifquido
de frenos,gasolina, productosa base de petroleoo
solventespara limp•atsu herramienta.
MAN.TENGASE ALERTA. Pongaatenci6n a Io que
estd haciendoy use sent•docom0n. No haga
funcionarla herramientacuandoestdcansado. No
se apresure.
INSPECClON DE PIEZAS DAI_IADAS. Antes de
seguir utilizandola herramienta,inspeccionepara
deter••nat si algt_nprotectoro cualquierpieza que
estd daF.aclafuncionard debidamente. Verifiqueel
alineamientode las piezas m6viles,si estdn
atascadaso si hay roturade piezas, reviseademds
el montaje y cualquierotroestado que pueda afectar
su funcionamiento. Si se daSa un protectoro
cualquierotra pieza debe ser reparadao
reemplazadapot un centro de servicioautorizadoa
menos que se indiqueen otro lugaren este manual
del usuario.
NO USE LA HERRAMIENTA SI EL INTERRBPTOR
NO FUNClONA DEBIDAMENTE. Haga reemplazar
el interruptordefectuosoporun cent• de servicto
aiJtodzado.
DROGAS, ALCOHOL, MEDICAMENTOS. No haga
funcionaresta herramientacuandoestdbajo la
influenciade drogas, alcoholo haya tornado
medicina.
Si CORTA A TRAVES DE CABLEADO
ELECTRICO EN PAREDES Y PISOS PUEDE
CAUSAR QUE I.A HOJA Y LAS PIEZAS
METALICAS QUEDEN CON CORRIENTE. No
toque las piezas metdlicascuandocorte en una
pared y pisos;sujete solamentela(s)manija(s)
alslada(s) provista(s)de ia herramienta. Asegt_mse
de que no haya cableadoek_trico escondido,
tuberias del agua ni riesgosmecdnicos en ei
trayectode la hojacuandoest_ cortandoen una
pared o piso.
INSPECClONE y saquetodoslos clavosde la
madera antes de cortarla.
REGLAS DE SEGURIDAD IMPORTANTES
PAPA HERRAMIENTAS
A BATERIA
•
•
•
•
•
•
•
•
•
Las herramientasa bateria no deben set
enchufadasen un tomacorrienteel_ctrico,por Io
tantosiempreestdn listaspara ser usadas. Estd
ate•to a Nosposiblespeligroscuandotransportesu
herramientaa hater(a,cuando ha ce ajustes a la
sierrao ¢uandoca•hie accesorios.
USE SOLAMENTE EL CARGADOR QUE SE
SUMINISTRA CON LA HERRAMIENTA A
BATERIA. No utiliceningt_notro cargador. Si usa
otropuede hacer explotarla bater(a causando
algunalesibnseria.
NO COLOQUE LAS HERRAMIENTAS A BATERIA
O SUS BATERIAS CERCA DEL FUEGO O DE
UNA FUENTE DE CALOR. Se puedeproduciruna
explosibn.
NO CARGUE LA HERRAMIENTA A BATERIA EN
UN LUGAR HUMEDO.
Su herramientaa bater(a debe ser cargadaen un
lugardonde la temperaturasea superiora 10° C
(50° F) pero inferiora 37° C (100° _P/.
Bajocondicionesde uso o temperaturaextrema,
puedeocurrirescape de Uquidoen la bater(a. Si el
I(quidoentra en contactocon la piel, Idvese
inmediatamentecon agua y jabbn, luego neutralice
conjugo de Umbno vinagre. Si entra I(quidoa sus
ojos,Idveloscon agua limpiadurante 10 minutos,
luegobusqueatenci6n mddicainmediata.
Sitransportasu herramientaa bateriaen un
costado,asegOresede que no est_ funcionandoy
que su dedo no estd en el gatillo. Evite la puestaen
marcha accidental.
ASEGBRE EL TRABAJO antes de poneren
marchala herramienta. NUNCA sujete el trabajoen
su mano sobresus piemas.
CUANDO EFECTUE MANTENIMIENTO USE
SOLAMENTE REPUESTOS CRAFTSMAN
AUTENTICOS.
INSTRUCCIONES
IMPORTANTES DE
SEGURIDAD PARA EL CARGADOR
•
•
CONSERVE ESTAS INSTRUCCIONES. Este
manual contieneinstruccionesde seguridad y
funcionamiento importantessobre el cargadorde la
bateda, ndmem de pieza 975283-001.
Antes de usar el cargadorde la baterla, lea todas
lasinstruccionesy advertencias indicadasen este
manual,en el cargadorde la bateda yen la
herramientaque es alimentadapot el cargador.
ADVERTENCIA:
Para reducirel riesgode lesibn,
carguesolamantebater/'asrecargablesde n(quely
cadmio. Otrostiposde bater(aspueden explotar
causandolesibnpersonaly dar_o.
No expongael cargadora la Iluvia o a la nieve.
El use de un ascesorio no recomendadoo vend•do
por el fab,ricantedel cargadorde la bater(a,puede
resultaren un desgode incendio,choqueel_-'tdcoo
lesi6na otras personas.
REGLAS PARA FUNCIONAMIENTO
[]
III
[]
[]
[]
•
•
[]
SEGURO
(C0ntinuaci6n)
Para reducirel riesgode dafio al cuerpodel cargador
y al cordbn,cuandodesconecteel cargadortire del
cuerpodel cargadoren vez que del cordon.
Aseg_msede que el cordonquede situadode
manera que no vaya a pisado o a tropezaren dl o
que de otra maneravaya a ser dafiado.
No debe usarseun cord6nde extensibna menos que
sea absolutamentenecesario.El uso de cordonesde
extensi6ninadecuadospuede resultaren riesgo de
)ncendio y de choqueelectrico. Si se debe usar un
cord6nde extensi6n,asegGresede que:
a. Lasclavijasdel enchufedel cord6nde extensibn
son igualesen n_mero, tamafio y forma alas del
cargador,
b. El cordonde extensi6nest_ debidamente
cableadoyen buen estad0;y
c. El calibredel cable es suficientepara el amperaje
nominalCA del cargador,segL_nse especificaa
conUnuacibn:
[]
[]
&
[]
[]
Largodel Cord6n(Pies)
25
50
100 150
Tamafio del Cordbn (AWG) 16
16
16
14
NOTA: AWG = AmericanWire Gage
NO HAGA FUNCIONAR EL CARGADOR Sl EL
CORDON O EL ENCHUFE ESTAN DAI_IADOS.Si
est_.ndafiados,h&galosreemplazarinmediatamente
per un electricistacaliflcado.
No haga funcionarel cargadorsi ha recibidoun golpe
fuerte, si se ha cafdo o si se ha dafiado de alguna
m_era, U_veloa un tdcnicocalificado.
[]
No desarmeel cargador;Ildveloa unt6cnico
calificadocuandonecesite servicioo reparacibn. El
rearmadoincorrectopuede resultaren un desgode
choqueel6ctricoo incendio.
Para reducirel desgode choque eldctrico,
desenchufeel cargadordel tomacorrienteantesde
efectuarcualquiermantenimientoo limpieza.AI
apagar loscontrolesno se reducirdeste riesgo.
No use e! cargadora ta intemperie.
Desconecteel cargadorde la fuente de energ[a
cuandono est_ en uso.
INSTRUCClONES IMPORTANTES
DE
SEGURIDAD PARA LAS SIERRAS
RECORTADORAS
•
MANTENGA LOS PROTECTORES EN SU LUGAR
Y EN BUEN ESTADO DE FUNCIONAMIENTO.
Nuncaacuhe o sujele el protectorinferiorde la hoja
para que quede abierto. Revise el funcionamiento
del protectorinferiorde |a hoj_ antesde cada uso.
No use la herramientasi el protectorinferiorde la
hojano cierradebidamente sobre la hojade la sierra.
MANTENGA LAS HOJAS UMP|AS Y ARLADAS.
Las hojas afiladas reducen a un minimo la perdida
de velocidad y el retroceso.
MANTENGA LAS MANOS ALEJADAS DEL AREA
DE CORTE. Mantenga las manos alejadas de las
hojas. No pase las manos por debajo del trabajo, ni
alrededor o sobre la hoja cuando 6sta estd girando.
No intente sacar material cortado cuando la hoja estd
en movimiento.
ADVERTENCIA:
Despues de apagar la
herramienl_, la hoja contint'=agirando libremente..
USE LA GUIA DE CORTE AL HILO. Cuando estd
haciendo cortes al hilo, use siempre una regla o una
guia de corte al hilo,
APOYE LOS PANELES GRANDES. Para disminuir
el desgo de que la hoja petfizque la madera y se
produzca retroceso, siempre apoye los paneles
grandes oomo se muestra en la Figura 10,
Pdgina 12, Cuando la operaci6n de corte requiere
que sea necesado descansar la slerr_ en la madera,
la sierra debe descansar en la porcibn rods grande
de la madera y cortar el pedazo mds chico.
PROTECTOR INFERIOR DE LA HOJA.
ADVERTENCIA:
Si el protector inferior de la hoja
debe ser levantado para hacer un code, para
_evantado siempre utilice la manija retrdctil a fin de
evitar una tesibn grave. Ver Figura 22, Pdgina 17.
PROTEJASE CONTRA EL RETROCESO. El
retroceso ocurre (:,._andola sierra se detiene
rdpidamen_e yes lanzada para atrds hacia el
operador. Suelte el interruptor inmediatamente si la
hoja se atasca o detiene. No saque la sierra de la
pieza de trabajo durante un corte cuando la hoja estd
girando. Ver P_ginas 12 y 13.
[]
ANTES DE HACER UN CORTE, ASEGURESE DE
QUE LOS AJUSTES DE PROFUNDIDAD Y DE
INGLETE ESTEN BIEN APRETADOS.
[]
USE SOLAMENTE LAS HOJAS CORRECTAS. No
use hojas con orificios de tamafio incorrecto. Nunca
use arandelas o pemos de hojas que estdn
defectuosos o sean incorrectos. El tamafio mdximo
de hoja para esta sierra es de 5-1/2 pulgadas.
[]
NUNCA TOQUE LA HOJA u otras piezas m6viles
durante el uso.
•
NUNCA ponga en marcha una sierracuandola hoja
este tocandola pieza que va a cortar.
[]
NUNCA depositela herramientaantesde que sus
piezas mbvileshayan dejadode girar
completarnente.
•
CONSERVE ESTAS INSTRUCCIONES. COnsulte
estas instruccionesfrecuentemente y dselas para
instruira otrossobreel usode esta herramienta. Si
•usted prestaesta herramientaa otra persona
entreguetambi6n lasinstrucciones.
_lb ADVERTENCIA: Si la sierra se cae, el protector
inferiorde la hojao eltope pueden doblarse,
impidiendoque el protectorse cierre bien,
Si el protectorinferiorde la hojao el tope se doblano
da_an, reemplacelosantes de volvera usar.
CONSERVE ESTAS INSTRUCCIONES
5
Di_metro
dela Hoja
Ejede la Hoja
Profundidad del
Corte en Bisela 0°
Profundidad dei
Corte en Bisel a 45 °
5-112 pulg. (140 mm)
3/8 pulg. (10 ram)
Velocidad sin Carga
Motor
Velocidad de Carga
1-9/16 pulg. (40 mm)
Potencia Nominal
del Cargador
4.000 RPM
18 Voltios CC
1 Hora
120 Voltios,60 Hz, CA
1-1/8 puiq. (29 mm)
Su sierra recortadora se envib completamente armada
a excepcibn de la hoja. inspeccibnelacuidadosamente
para asegurarse de que no se hayan producido
roturas o da_lodurante e! envfo. Si hay partes
dahadas o faltantes, Ilame a su Almacen Sears mds
cercano para obtener piezas de repuesto antes que
intente utilizar la siena. Tambi_n se incluye una hoja,
una Ilave de la hoja y este Manual del Usuario.
A
ADVERTIENCIA: Si falta cualquiera de las
piezas, no haga funcionar esta herramienta basra
que las piezas faltantes no hayan sido
reemplazadas. De Io contrari0 puede resultar en
una posible lesibn personal grave.
Los siguentes accesorios recomendados estdn disponiblesen los Almacenes Sears.
[]
Hoja ranuradora delgada de 5 1/2 pulg.
_IL ADVERTENClA:
Puede ser peligrosousar dispositivoso accesoriosque no se hayan recomendadoaparezcan
en la lista anterior.
CARGADOR
DELABATERIA
LALUZVERDE
ILUMINADA
iNDICA
MO
.I)0DECARGA
LENTA
0TOTALMENTE
CARGADO
LALUZROJA
"ENCENDIDA"
INDICA
MODO
DE
CARGA
RAPIDA
-LUZAMARILLA
ILUMINADA
Y
LALUZROJA
DESTELLANDO
INDICA
BLOOUE
DE
BATERIAS
DEFECTUOSO
BLOQUE
DE
BATERIAS
1-7116
PULG.
PAR'rE
TRASERA
DELCARGADOR
INFORMACION
Fig.1
IMPORTANTE PARA CARGAR BATERIAS CALIENTES
Cuando use su sierra recortadora en forma continua,
las baterfas en el bioque de bater_aspuede
calentarse. Usted debe de|ar enfriar el bloque de
baterfas dumnte aproximadamente 30 rninutosantes
de intentar recargado. Cuando el bloquede baterfas
se descargue y est_ caliente, la luz roja en el
cargador de la bateria comenzard a destellar.
Cuando el bloque de baterfas se enfrfe, la luz roja
brillardcontinuamente indicandoel modo de carga
rdpida, 1 hora de carga. La luz verde indica mode de
carga lenta, requiriendocarga hasta el dfa siguiente
para que las baterfas alcancen su carga total.
Una vez que el bloque de baterfas se ha enfriado
usted puede recargar el bloquede baterfas en el modo
de carga rdpida, de manera usual.
Nora: Esta situacibnocurre solamentecuando el uso
continuo de su sierra causa que las bater_asse
calienten. No ocurre b_ajocircunstancias normales.
Consulte "C_RGA DE LA SIERRA RECORTADORA"
para carga normal de las baterias. Si el cargador no
carga su bloque de baterfas bajo circunstancias
normales, devuelva ambos, el bloquede baterfas y eF
cargador a su centro de reparacibn Sears rods cercano
para revisibn el_ctrica.
CARGADOR
VerF_gura1,
Su cargadorestdprovistode dos "bocallaves" en la partetrasera para facilitarsu almacenamientocolgandolode manera
apropiada,Se deben instalardos tomillosde modooue la distanciade centroa centrosea de 1 -7/16 pulgadas.
7
CONOZCA
SU SIERRA RECORTADORA
INTERRUPTOR
Vet Figura 2.
Ver Figura 2.
Antes de intentar usar su sierra, familiadcese con todas
las caracteristicas de funcionamiento y con los
requerimientos de seguridad.
Su sierra est_ equipada con un botbn de cierre que
reduce la poSibilidad de puesta en marcha accidental. El
bot6n de cierre es_ situado en la manija arriba del
gatiUo. Usted debe oprimir el botbn de cierre para poder
apretar el gati,o. El cierre se reposic|ona
automdticamente toda vezque se deje de oprimir el
gatillo. NOTA: Usted puede oprimir el botbn de cierre ya
sea del lado izquierdo o derecho.
Las caractedsticas incluyen mecanismos de ajuste de
fdcil operaci6n para cortes en bisel y para ajuste de la
profundidad de code, tope de bisel positivo de 0°,
bloqueo del husillo y almacenamiento para la gave de las
hojas.
ADVERTENClA:
USOS
Si talta cualquiera de las
(Usar solamente
continuaci6n)
piezas, no haga funcionar esta herramienta hasta
que las piezas faltantes no hayan sido
reemplazadas. De Io contrafio puede resultar en
una posible lesibn personal grave.
•
para los prol_sitos
indicados a
Para cortar toOo tipo de preductos de madera
(madera eJaborada, madera larnineda y paneles).
GUIA
DE CORTE
AL
TORNILLO
DE
LAHILO
BOTONDE
ClERRE
(TORNILLO DE ALETA)
__
DEL HUSILLO
I
_
LLAVE DE LA HOJA
\
(Smm.EX.)
ALMACENAMIENTO
DE LA LLAVEDE
LA HOJA
AJUSTE DE LA
PROFUNDIDAD DEL CORTE
(BOTON DE AJUSTE DE LA
PROFUNDIDAD)
GA_LLO
TORNILLO
DE LA
GUlADECORTEAL HILO
FORNILLODEALETA)
PROTECTOR
SUPERIOR
DELAHOJA
AJUSTEDECORTEENBISEL
( BOTONDEAJUSTEDEBISEL)
PROTECTOR
INFERIOR
DELA HOJA
HOJA
GUIADE
CORTEAL HILO
CONJUNTO
DELABASE
Fig. 2
8
ADVERTENCIA:
Siempre use lentes
Si el bloquede bateriasestdtotalmenteagotado,la
luz rojadebe dejar de destelleardespu_sque el
voltajeha aumentado,normalmentedentro de 30
minutos.
protectoreso gafasde seguridadcon protectores
lateralescuandoest_ utilizandosu herramienta.
Si no Io hace puede que salten objetosa sus ojos,
resultandoen una lesibngrave.
Si despu_.sde una horala luz rojaaOnestd
destelland0,_sto es indicacionde que el bloquede
-bateriasest=idefectuosoy debe ser reemplazado.
La luz verde iluminadaindicaque el cargadorestd en
el modo de carga lentoo que est_ totalmentecargado.
La luz amarillailuminaday la luz rojadestellando
indicaque el bioquede batedas defectuoso.Devuelva
el bloquede bateriasa su Centro de Reparaci6n
Sears mdscercanopara su revisibn o reemplazo.
• Cuandoel bloquede bateriasestdtotalmente
cargado,ia luz roja se AI_AGARA y se ENCENDERA
la luzverde.
-A°ADVERTENClA:No
permitaque su_miliaddad
con su sierra recortadorainterfieracon su atenci6n
y prudencia.Recuerdeque un descuidode una
fracci6nde segundopuedecausar una lesi6n
grave.
CARGA
DE LA SIERRA
RECORTADORA
El bloquede bateriaspara esta herramientaha sido
enviado con carga baja para evitarposiblesproblemas.
Por Io tanto usted debe cargarlohastaque ta luzverde
situadaen la parte delanteradel cargadorcambie de roja
a verde.
•
Si usted s_tcael bloque de baterias del cargador y
Io vuelve _tInserter inmedlatamente (en menos de
5 segundqs) en el cargader, se encendeni la luz
verde indi.Candocarga completa y mo_iode carga
lenta hast_tque Io saque del cargador. Si usted
saca el bl0que de baterias del cargador y espera
m=tsde 5 =mgundos para colocerio nuevamente an
el cargador funcionard normalmente.
• Despu_scl_.usonormal,se requiem una 1 horade
carga parsque el bioquede baterFasquede
totalmentecargado.Se requiemun minimotiempode
carga de 1_1/2horaspara recargaruna herramienta
que est_ completamentedescargada.
• El bloquede bateriaspermanecer,_ligeramente
calientecuandose estd cargando. Esto es normaly
no es indicacibnde problema.
• NO coloqueel cargadoren un ambientede mucho
calor o frio. Trabajard mejora temperaturaambiente
normal.
Nota: I_asbaterfas no alcanzan su carga totalla primera
vez que son cargadas. Deje que pasenvariosciclos
(corte rods carga) hasta que las batedaspuedan
cargarseen su totalidad.
PARA CARGAR
•
Cargue e! bloquede bateriassoiamentecon el
cargadorsuministradocon la herramienta.
• Asegt_rese de que la alimentaci6n es el voltaje
normal del hogar; 120 voltios, 60 Hz, CA
solamente.
• Conecte el cargadora lafuente de alimentacibn
electrica.
•
•
•
Coloque el bloquede bateriasen el cargador
alineandola nervaduradel cargadorcon la ranura del
bloquede bateriaso
Empuje hacia abajo el bloquede batedas para
asegurarsede que los contactosdel bloquede
baterias enganchendebidamentecon loscontactos
del cargador.
La luz rojadebe encenderse.La luz rojaindicamodo
de carga r&pida.
Si la luz rojaesta destellando,_sto indicaque el
bloque de bateriasestd muy descargadoo caliente.
Si el bloquede bateriasestbcaliente,la luz rojadebe
permaneceriluminadasin destellarcuandoel bloque
de bateriasse haya enfriado.
_
ATENCION: Et bloquede bateriascontiene
baterfasespecialesde alta temperaturapara ayudar
a evitar da_o de tas batedas cuandose deja
cargandoduranteperiodosprolongados.Sin
embargo,una vez que las bateriasse cargan
completawhente,
recomendamosque desenchufeel
cargadorde la fuente de energia el_ctrica.
FUNCION DEL DIODO EMISOR DE LUZ (LED) DEL CARGADOR
EL EMISOR DE LUZ (LED) SE ILUMINADA PARA INDICAR EL ESTADO DEL CARGADOR
Y DEL BLOQUE DE BATERIAS:
•
LED Rojo Iluminado- Mode de Carga Rdpida
•
LED Verde Iluminado - Mode de Carga Lenta y Bloquede E_terias TotalmenteCargado.
•
LED Rojo Destellando- Bloquede Bater|as Caliente o Total_ente Agotado,Tambi_n
Bloquede BateriasDefectuosodespu_s de 1 hora,
•
LED AmarilloIluminadoy LED Rojo Destellando- BtoquedeiBateriasDefectuoso.
I
9
ADVERTIENClA:
PARA ARMAR O SACAR
Siempre saque el bloque de
baterfas de la sierra cuando estd instalando
piezas, haciendo ajustes, instalando 0 sacando
hojas, limpiandola o cuando no estd en uso. AI
sacar el bloque de baterias evitar8 la puesta en
marcha accidental que podrfa provocar una lesibn
personal grave.
DESMONTAJE
III
DEL BLOQUE
LA HOJA
PARA ARMAR LA HOJA:
•
Saque el bloquede bateriasde la sierra.
_Ib ADVERTENClA:
Si no se saca et bioquede
baterfasde la sierrase puede causar la puesta en
marcha accidentalcausandouna posiblelesibn
personalgrave.
DE BATERIAS
•
Ubiquelos pestillossituadosen el extremodel
bloquede baterfasy oprfmalospara sacaref bloque
de bateriassu sierra. Ver Figura3.
OPRIMALOSPESTILLOS
PARA
DESENGANCHAR
ELBLOOUEDE BATERIAS
Ubiquelos pestillossituadosen el extremo del bloque
de baterfasy oprimalospara sacar el bloquede
bateriasde su sierra. Ver Figura3.
III Saque ia llave de la hoja(llave hexagonalde 5 ram)
de! _.mad_ almacenamiento. VerFigura 2.
•
Oprimael botbnde bloqueodel husilloy saque el
tornillode la hojay la arandelaexterior de la hoja. Vet
Figura 4.
PESTILLOS
BLOQUEDE
BATERIAS
HOJA
Fig. 3
III
Saque el bloquede bateHasde su sierra.
INSTALACION DEL BLOQUE DE BATERIAS
Ver Figura3.
III Coioquee} bloquede bateriesen su sierra, Alinee la
nervadurasituada dentrode ia sierracon la ranura
del bloquede baterias.
•
Asegdresede que los pestillosque se encuentrana
ambos ladosdel bloquede baterfas se enganchen
en su lugary que el bloquede baterfas est6 bien
aseguradoen la sierra antes de comenzar a usarla.
_IL
A
INTERIOR
DELA HOJA
MANIJADEL
ARANDELA
PROTECTOR
EXTERIOR
INFERIORDE
DELA HOJA
LA HOJA
TOFINILLO
DELA
HOJA
Fig. 4
NOTA: Ginsel tomillode la hoja a la derechapara
sacarlo.
ATENClON: Cuando coloque el bloque de
baterfasen la sierra, asegt]resede que la
nervadurasituadadentro de la sierraquede
alineadacon la ranura del bloquede baterias y
que los pestillosse enganchenen su lugar en
forma debida. El montajeincorrectodel bloquede
baterfaspuede causar dafio a los cdmponentes
internos.
•
Coloque una gota de aceite en la arandela interiorde
la hojay an la arandela exteriorde ta hojaen el lugar
donde tocan la hoja.
_i_ ADVER'rENClA:
Si se ha sacado la arandela
interiQr, instdlela nuevamente antes de colocar la
hoja en el husilto. De Io contrario puede causar un
accidente pues la hoja no quedard debidamente
apretada,
ADVERTENCIA:
El tamano maximode hoja que
puedeutilizarseen la sierraes una hoja de
5-1/2 pulg.Ademds, nuncause una hojaque sea
dernasiadogruesapues la arandelaexteriorde la
hojase puedeenganchar con la cara plana del
husillo.Las hojasmdsgrandestocar_n los
protectoresde las hojasy las hojasrnasgruesas
evitar_.nque el tornillode la hoja asegum bien la
hojaen el husillo.Cualquierade estas dos
situacionespuede resultaran un accidentegrave.
10
II Coloque
ia hojade la sierraen el husillo,dentrodel
•
LAS HOJAS DE LA SIERRA
protectorinferiorde la hoja. NOTA: Los dientesde la
hojadeben quedar dirig_os hacia aribaen la parte
delantera de la sierracomo se muestraen la Figura4.
Vuelva a colocarla arandela exteriorde la hoja.
•
Oprima el bot6nde bloqueodel husillo,luego vuelva a
colocarel tomillode la hoja.Aprietefirmementeel
tormllo de la hoja.
NOTA: Gire el tomillo de la hoja a la izquierda pars
apretado.
•
Guards nuevamentela Ilavede ta hojaen el drea de
almacenamiento.
SlSTEMA DE PROTECClON DE LA HOJA
El protector inl_edorde la hoja se ha instalado en su
sierra recort_ora pars su protecci6n y seguridad.
NOdebe set modlficado pot ningtin motivo. Si se
dafia o comlehza a cerrarse en forms lenta o se
atascs, no uti_ieeIs sierra hasta que el da_o no haya
sido reparado_o el protector reemplazado. Siempre
mantenga el I_mtector en la posici6n de
funcionamiento cuando est_ usando su sierra.
RECUERDE: Nunca use una ho|a que sea demasiado
gmesa puPs permitird que la amndela exterior de la
hoja se enganche con el lado piano del huslUo.
PARA LA SACAR LA HOJA:
•
_k
Saque el bloquede bateriasde la sierra.
ADVERTENCIA:
Si no se saca el bloquede
bateriasde la sierrase puede causarla puesta en
marchaaccidentalcausandouna posiblelesibn
personalgrave.
•
Saque la Ilave de la hoja del &tea de almacenamiento.
Ver Figura2.
•
Coloquesu sierracomo se muestraen la Figura5,
opdmael bot6nde bloqueodel husilloy saque el
tomillode la hoja. NOTA: Gire el tornillode la hoja a
ia derechapara sacarlo.
Saque la arandela exteriorde la hoja. Vet Figura4.
NOTA: En este momento se puede sacar la hoja.
•
LasmejoreshCjasde sierra no cortardneficientementesi
no se mantienenlimpias,afitadasy debidamente
ajustadas. Si $e usa una hojadesafilada,su sierraserd
sometidaa una carga pesada y aumentarael peiigrode
retroceso. Mantengahojasadicionalesa I_ mano, de
manera que siempretenga hojasafiladasdisponibies.
La goma y la resinade la madera que se ha endurecido
en las hojashardmas lentala sierra. Use un qu_agoma
y quitaresina,agua calienteo kerosenpars sacar estas
acumulaciones.No use gpsolina.
PELIGRIO: Cuando estdefectuandocortes
completos, el protectorinferiorde la hojano cubre la
hoja pore_lladoinferiorde la pieza de trabajo.
Debidoa que la hojaestd expuestaporel Iado de
abajo, main.tenga
las manosy los dedosaiejadosdel
drea de c<prte.
Cualquierparte de su cuerpoque
toquela hoja giratoriaresultaraen una iesibn grave.
Vet Figura 6.
EL PROTECTO
R INFERIORDELA HOJAESTA
LEVANTADO
CUANDOSE HACEUN CORTE
BOTONDEBLOQUEO
DELHUSILLO
HOJAEXPUESTA
PORIF. PAFITE
INFERIORDELAPIEZADETRABAJO
TORNILL0
DELA HOJA
Fig. 6
Nunca use la Sierra cuando el protector no Pstd
furmionando =)rrectamente.
El protector debe ser
revisado pare veriflcar su funcionamiento correcto
antes do e,ada :uao. Si deja caer la sierra, revise el
protector Inferior de la hoja y el tope para veriflcar si
Pst_ daflado, on todos los ajustes de profundidad
antes de volvqr a usarlo. NOTA:. E! protector es_
funcionando correctamente cuando so mueve
Iibremente y v(mlve rdpidamente a la posicl6n
cerrada. S! po_' cualquier motivo el protector Inferior
de la hoja no qe clerm libremente, antes de usarlo
II0velo a su Cqtltro Sears de Reperaciones y
Repuestos pa_ su reparaci6n.
LLAVEDE
LA HOJA
Fig. 5
11
RETROCESO
Ver F_ura 7.
PARA DI_MINUIR
RETROCESO:
•
RETROCESO
AJUSTEDEMASL_DO
PROFUNDODELAHOJA
LA POSIBILIDAD
DE
Siempre=mantengaun ajuste de altura correcto de
la hoja -el ajuste de altura correctode la hoja pare
todos los cortes no debe ser superior a 114 de
pulgada por el lado inferior del material que va a
ser cortado. Vet Figura 9. Un diente de la hoja por
debajo_delmaterial que vd a ser cortado resulta en
una accid,n de corte mds eficaz.
Fig. 7
La mejor protecci6n contra el retroceso es evitar
las pr=tcticas peligrosas.
El retroceso ocurre cuando la hoja se detiene
rdpidamente y la sierra es lanzada para atrds hacia
usted. La detenci6n de la hoja es causada por
cualquier accibn que aprieta ia hoja en la madera.
_lh PELIGRO: Suelte inmediatemente el gatillo si la
hoja se atasca o la sierra se detiene. El
retroceso puede hacede perder el control de su
sierra. La p_rdida de! control puede causar una
lesibn grave.
EL RETROCESO
ES CAUSADO
AJUSTECOIl:RECTO
DEALTURADELA HOJA=
HOJAEXPUESTA1/4DEPULGADAO MENOS
ENELLADOINFERIORDELA PIEZADETRABAJO
POR:
•
Ajuste incorrecto de la profundidad de la hoja. Ver
Figura 7.
•
Corte en una madera que tiene nudos o clavos.
•
TorsiOnde la hoja cuando se est&haciendo el
corte.
•
Fig. 9
•
Inspeccibne si la pieza tiene nudos o clavos antes
de comerlzar el corte. Nunca haga un corte sobre
un nudo iOclavos.
•
Haga co_tesrectos. Siempre use una gula de
borde recto cuando est_ efectuando cortes al hilo.
Esto ayuda a evitar que la hoja se tuerza en el
corte.
Ejecucibn de un corte con una hoja no afilada,
cubierta de suciedad o con una hoja que est8
incorrectamenteajustada.
Siempre _tilice hojas limpias, afiladas y
debidamente ajustadas. Nunca haga cortes con
hojas desafiladas.
• Apoyo incormcto de la pieza de trabajo. Ver
Flgura 8.
•
Para evit_ pellizcar la madera, apoye debidamente
la pieza de trabajo antes de comenzar el corte. En
la Figuras 8 y 10 se muestra la manera correcta e
incorrectade apoyar maderos largos.
INCORRECTO
Fig. 8
II Cuando se fuerza un corte.
CORRECTO
III Corte de madera ht_meda o combada.
II Mal uso de la herramienta o procedimientos
incorrectos de funcionamiento.
12
Fig. 10
[]
PARA COMENZAR
AI hacer el corte use una presibn firme e uniforme.
Nunca fuerce los cortes.
UN CORTE
Aprenda a usar correctamente su sierra.
Ver Figura 12,
[] No corte madera que este combada o h_meda.
• Siempre sujete firmemente con ambas manos la
sierra y mantenga su cuerpo en posicibn
equilibrada para que pueda resistJrlos retrocesos si
es que se produjeran.
Cuando use su sierra slempre mant6ngase alerta y
est6 en control. No ievante la siena de la pleza de
trabajo cuando la hoja est6 girando,
AJUSTE
DE LA PROFUNDIDAD
DEL CORTE
Siempre mantenga un ajuste de altura correctode la
hoja. El ajuste de altura correcto de la ho|a para todos
los codes no debe ser superior a 1/4 de pulgada por el
lado inferior del materialque va a ser cortado, Un
ajuste de altura mayor de la hoja aumentard la
posibilidadde retrocesoy el corte resultard aspem.
PARA AJUSTAR
LA ALTURA
DE LA HOJA
• Saque el bloque de baterias de la sierra.
CORRECTO
ADVERTENClA: Si no se saca el btoque de
baterias de la sierra se puede causar la puesta
en marcha accidentalcausando una posible
lesi6n personalgrave.
COKJBNTO
DELA BASE
•
BOTONDEAJUSTE
DELA PROFUNDIDAD
Fig. 12
Nunca use smsierra como se muestra en la
Figura 13.
Fig. 11
INCORRECT0
Afloje el botch de ajuste de la profundidad. Vet
Figura 11.
Fig. 13
Nunca coloque su mano en ie pleza de trabajo
detr_s de ie s_erra cuando es_ haciendo el corte.
[] Mantenga la base plana,contra la pieza de trabajo
y levante o baje la sierra hasta que se obtenga la
altura requerida.
_IL ADVERT_FNCIA: Para hacer los cortes de
manera rods facil y mds segura, siempre
mantenga un buen controlde su sierra. La
p_rdida d,s control puede causar un acc_dente
que resulte en una posiblelesibn (]rave.
[] Apriete firmemente el bot6n de ajuste de la
profundidad.
13
PARA AYUDAR
A MANTENER
EL CONTROL:
•
Siempre apoye la pieza de trabajo cerca del corte.
•
Apoye la pieza de trabajo de modo que el corte
quede a su izquierda.
•
Sujete la pieza de trabajo de mode que no se
moverd cuando est8 haciendo el corte.
sujete firmemente la sierra con ambas manos.
Ver FTgura!5.
Coloque la pieza de trabajo con el lado bueno hacia
abajo. NOTA: E! iado bueno es el lack)en el cual la
•apariencia es importante.
Antes de comenzar un code, trace una linea de guia a
Io largo de la lfnea de corte deseada. Luego coloque
el borde delantem de la base en esa parte de su pieza
de trabajo que estd firmemente apoyada. Ver
Figura 12.
Nunca coloque la sierra en la parts de la pleza de
trabaJo que se desprenderc'icuando el corte sea
hecho. Vet Figura 14.
CORRECT0
Fig. 15
Oprima el b0t6n de cierre y apriete el gatillopars
poner en marcha ia sierra. Siempre deje que la hoja
alcance la viplocidadtotal, luego gufe la sierra hacia la
pieza de tmbajo.
ADVERTENClA:
Si la hoja toca la pieza de
trabajojantes de que alcance su velocidad total
podrfa causar retroceso de la sierra hacia usted
resultando en una lesibn grave.
Cuando hags un corte use una presibn constante e
uniforme. Si fuerza la sierra producirdcortes
asperos, puede acortar la vida Otil de la sierra y
causar retrolc_so.
INCORRECTO
RECUERDE:
Cuando est_i haciendo cortes completos, el
protector illferior de la hoja no cubre la hoja,
dej=tndolaqxpuesta por el lado inferior del trabajo.
Mantenga Su$ manos y dedos alejados del =ires del
corte. Cuaqquler parts de su cuerpo que toque la
hoJa que gim resultar_ en una lesi6n grave.
Fig. 14
Despu_s de,completar el corte sueite el gatiiloy deje
que la hoja se detenga completamente. No saque ia
sierra de la!pleza de trabajo hasta que la hoja no
se hays delenido €ompletamente.
ATEN_ION:
AI levantar la sierra del trabajo, la
hoja queclaexpuesta por el lado inferior de su
sierra basts que el protector inferiorde la hoja se
cierm. Aseg6rese de que el protectorinferiorde
la hoja,estdcerrado antes de depositar su sierra
en una,superficiede trabajo.
PARA HACER UN CORTE TRANSVERSAL
AL HILO
O
Cuando ha_a un corte transversal o al hilo,alines su
ifnea de corls con la entalladura exterior de la gufa de
ia hoja situada en la base de la sierra, como se
muestra en la Figura 16.
14
VISTA
SUPERIOR
DELASIERRA
FRENTE
DELASIERRA
UNEA
DEGUIA
GUIA DE CORTE AL HILO (GUIA DE BORDE)
Use la gufa de corte al hilo provista con su sierra
cuando haga cortes al hilo anchos. Se ha provisto
una escala delcinco pulgadas en la gufa de corte al
hilo. Cuando use la escala de ancho de corte de ta
base conjuntamente con la gufa de corte al hilo,se
pueden hacer <;odes de hasta 6 pulg. a la izquierdade"
la hoja o de 8-3/4 pulg. a la derecha de la hoja.
Ayuda a evitar que la hoja se tuerza en el code. La
torsidnde la hoja en un corte puede causar retrocesO.
PARA ARMAR
ENTALLADURA
DE GUIADE LA
HOJA
•
TRANSVERSALES
0 CORTESAL HIL0
Fig. 16
ADVERTENCIA:
Si no se saca el bloque de
baterias de ia sierra se puede causar la puesta
en marchlaaccidental causando una posible
lesi6n personal grave.
TORNILLODE LRGUIA
DE CORTEAL I_ILO
(TORNILLODEALETA)
Debido a que los grosores de ias hojas varfan,
siempre haga un corte de prueba en un material
sobrante a Io largo de la Ifnea de gufa para deterrninar
cuanto, si asf fuera, debe desviarse de la linea de gu_a
para producir un corte exacto. NOTA: La distancia
desde la Ifnea del corte a la tfnea de gufa es la
cant•dadque usted debe desviar la linea de gufa.
ESCALA DE ANCHO
Ver Figura 17.
Saque el bloque de baterias de Ia sierra.
_k
AUNEELAENTALLADURA
EXTERIORDEGUIADELAHOJA
SITUADAENLABASEDELASIERRACONLALINEADE
CORTECOMOSEMUESTRACUANDOHAGACORTES
LA GUIA DE CORTE AL HILO
DE CORTE
GLIIADE
CORTEALHILO
(GUIADEBORDE)
CONJUNTO
DELA BASE
COLOOUELAGUIADE
CORTEAL HILO!ATRAVES
DE LOS0RIRClOS
F.SCALA
DE
ANCHODECORTE
Fig. 18
•
Coloque la gufa de corte al hilo a travds de los
orificiosen la base de la sierra como se muestra en
la Figura 18.
•
Ajuste la guia de code at hilo a ta anchura
necesaria.
•
Apfiete firmemente el tomillode la gufa de code
al hilo (tom!llo de aleta).
Cuando use una guia de corte al hilo, coloque la
cam de la gu[a de code al hilo firmemente contra el
borde de la pieza de trabajo. Esto permite hacer un
code limpio y t_thoja no queda apretada en el code.
El borde de gL_fadel trabajo debe estar derecho
para que su cd=le_luede derecho. Tenga cuidado
para evitar que. la hoja se quede atascada en el
corte.
HOJA
Fig. 17
Se ha provistouna escala de ancho de corte en ta
base de la sierra. Cuando se hacen cortes derechos
transversales o cortes al hilo, la escala puede
utilizarsepara medir hasta cuatro pulgadas por el
lado derecho de la sierra.. Puede utilizarse para medir
hasta una pulgada por el lado izquierdo de la hoja,
15
PARA HACER CORTES
EN BISEL
Cuando haga un corte en bisel sostenga su sierra
firmemente con ambas manos como se muestra en la
Figura 20.
El dngulo de corte de su sierra puede ser ajustado a
cualquier ajuste deseado entre cero y 50 °. NOTA:
Cuando haga cortes en bisel a 50 °, la hoja debe estar
ajustada para corte a la profundidad m_xima.
Cuando haga cortes en bise_de 45 ° hay una
entalladura en la base de la Sierra para ayudade a
aiinear la hoja con la Ifnea de corte. Vet Figura 19.
ESCALADE
BISEL
BOTONDE/UUSTE t
I
DE BISEL
PROTECTOR
INFERIORDE
LA HOJA
ENTALLADURA
DEGUIADE LA
HOJA
Fig. 20
UNEADEGUIA
Haga descB.nsarel bor_ledelantero de la base en la
pieza de trabajo. Oprima et botbn de cierre y apriete el
gatiltopara poner en marcha la sierra. Siempre deje
que la hoja aicance la velocidad total, luego gufe la
sierra hacialla pieza de trabajo.
&
AUNEELAENTALLADURA
INTERIORDEGUIADELA HOJA
SITUADAENLABASEDELASIERRACONLA UNEADE
CORTECOMOSEILUSTRACUANDOHAGACORTESEN
BISELDE45°
Fig. 19
ADVEiRTENCIA: Si la hoja toca la pieza de
trabajo',antes de que aicance su velocidad total
podda .:causarretroceso de la sierra hacia usted
resultando en una lesibn grave.
Despu_s de compietar su corte, sueite el gatilio y deje
que la hoja se detenga completamente. Despu6s de
que la hoja 4seha detenido completamente, levante la
sierra del trabajo.
PARA REGULAR EL AJUSTE EN BISEL
Aiinee su linea de corte con la entailadura de gufa
infedorde la hoja en la base de la sierra cuando haga
cortes en bisel de 45 °.
Dado que los grosorea de las bojas vadan y
diferentes dngulos requieren ajustes diferentes,
siempre haga un corte de prueba en un material
que no va usar a Io largo de una-Ifnea de gufa para
determinar cuanto debe desvlar la Ifnea de gufa en
la madem que va a cortar.
•
_IL
ADVERTENCIA: Si no se saca el btoque de
baterfas de la sierra se puede causar la puesta
en mamha accidental causando una posible
iesibn personal grave.
•
Afloje el botbn de ajuste de bisel. Ver Figura 19.
•
Levante el extremo de la caja del motor de la sierra
hasta que.alcance el ajuste de dngulo deseado en
la escal_,de bisel. Vet Figura 19.
•
Apriete firmemente el botbn de ajuste de bisel.
_k
16
Saque el bloque de baterfas de la sierra.
ADVE_TENCIA:
Si se intenta hacer un corte
en biP,
el sin que el botbn estd firmemente
apretadlose puede produciruna lesibn grave.
TOPEPOSITIVODEBISELDE0°
•
Ver Figura21.
TORNILLO
DEAJUSTE
Aprietefirmementela tuerca hexagonaly el bot6n
de ajustedel bisel.
,_1_ ADVER;TENCIA: Si trata de hacer cortessin
apretarfi_Tnamente
el bot6nde ajuste de biselse
puede pmduciruna tesi6ngrave.
BOTONDE
PARA HACER CORTES DE CAVIDADES
Ver Figura22.
ADVERTENClA:
Siemprereguleel ajuste de
corteen bisala cero antes de hacer un cortede
cavidad.Si intentahacer un corte de cavidaden
cualquier,otroajuste, puede resultaren p_rdidade
controlde la sierraposiblementecausandouna
lesibngrave.
_ERCA
HEX.
HOJA
TOPEDE BISEL
POSITIVODE0°
Regule el ajuste de bisela cero,coloquela hojaa la
altura de corte'correctoy girehacia arriba el protectorde
la hoja inlerior.usandola manijadetprotectorinferiorde la
hoja.
Siempre levan_eel protector inferior con la manija
pars evitar le_iones graves.
Mientrassujeta el protectorde la hoja inferiorcon la
manija, hags dP.Jscansar
firmemente la parte delanterade
la base de mo_ioque quede planscontrala pieza de
trabajo,con la parte tmsera de la manijalevantadade
modo que la h0ja no toqueel trabajo.Vet Figura22.
ESCUADRA
DECARPINTER0
Fig. 21
Su sierratiene un tope positivode biselde 0° que ha sido
ajustadoan la fdbrica para asegurarun angulode 0° de la
hojade su sierracuando se hacen cortesde 90°. Sin
embargo,puede producirsedesalineamientoduranteel
embarque.
PARA VERIFICAR
• Saque el bloquede bateriasde la sierra.
_IL ADVERTENClA:
Si no se sacs el bloquede
bateriasde la sierrase puede causar la puesta en
marcha accidentalcausandouna posiblelesibn
personalgrave.
Coloquela sierra al rev_.sen un banco. Ver Figura 21.
Usandouna escuadrade carpintero,revisela
perpendicutaridadde la hojade Is sierraen relaci6n
a la base de la sierra.
PARA AJUSTAR
•
Saque el bloquede baterfasde la sierra.
A
A& ADVERTENCIA:
Si no se saca el bloquede
bateriasde la sierrase puede causarta puestaen
marchaaccidental causandouna posiblelesi6n
personalgrave.
• Aflojeel botbnde ajustedel biseL
CORTEDE
CAVIDAD
PROTECTOR
INFERIOR
DELA HOJA
Fig. 22
Optima el botbnde cierrey aprieteel gatillopara poner
en-marchala sierra.Siempre deje qua la hoja alcance
la velocidad _lens y entonces lentamente baje la
hoja hacla la p_lezade trabajo haste que la base
quede plans ¢ontra la pieza de trabajo.
Despudsde que completeel corte suelteel gatitloy deje
que la hoja se detenga completamente. Despudsde que
la hoja se ha detenidolevdntelade la pieza de trabajo.
Las esquinaspueden entoncesser perfeccionad_.s
con
una sierra man,uato con una sierraaftemativa.
r
• Aflojela tuerca hexagonalque sujeta el tomillode
ajuste.
_k
• Gire el tomilloy ajuste la base hastaque quede
perpendiculara la hojade la sierra.
17
ADVERTENCIA:
Nunca sujeteel protector
inferiorde_la hoja de modo que quede en la
posicibnelevada. Si se deja la hoja expuestase
puedenc_usar tesionesgraves.
I
|i
nn ,
,
imnnnm n n unto
n nln n
n
i n nnnnun
II in
jm,i
n n II
I
I!
Imll
ij
j
j
II
I
I
I
I
III
I
.
ininl
III
IIIUI
I
I
i
i
i
ml
ii
nl
Ill
I
Ill
I
I
II
•
|1
I
mill
_
.....................
J
i nl
I
mill
II
nmlum
III
I
II
IIIII
II
11
I
II
III
i
iii
I
I
III
i
I
I
i
ii
i
J
II
I
III
i1
i
II
i
in
in
in
il
inn
BURn
i
inn
i
I
-
I
I
I|
qi
i
i
III
•
iilil
in
]
I
i
i
i
I
I
i
i
L
ilillilillU
i
iii
i
nUBBin
lull
I
II
i ii
il
i e; eenL
ill
BLUR
ii
III
ill
I
I
I
ill
UUlnU
i
ii
iilil
inn
m
ilili
In
gig
I
il
_
i
nn
I
"18
i ii
iRa
in
illli
I
A
ADVERTENCIA:
Cuando repare la herramienta
use solamente repuestos autdnticosCraftsman.
El uso de cualquier otro repuesto puede crear un
riesgo o daSar el producto.
Evite usar solventescuando limpie Jas piezas de
p ldstico. La may0rfa de los pl_sticosson susceptibles
a diversos tipos de solventes comerciales y pueden
dafiarse con su uso. Use paSos limpiospara sacar la
suciedad, potvo, aceite, grasa, etc.
&
NO haga uso abusivo de ias herramientas mecdnicas.
El uso abusivo puede daSar la herramientay tambi_n
la pieza de trabajo.
Solamente las piezas mostradas en la lista de piezas,
en la pdgina 21, estdn destinadas a set reparadas o
reemptazadas por el cliente. Todas las otras piezas
deben ser reemplazadas po_run t_cnico de servicib
calificadoen un centro de reparacibn autodzado.
_I_ ADVERTENCIA:
No trate de modificaresta
herramienta ni de crear accesorios no
recomendados para su uso con esta
herramienta. Cualquiera alteracibn o modificacibn
se considera mal uso y puede resultar en una
condici6n peligrosa que cause una posible lesi6n
persona/grave.
ADVERTENClA:
Evite en todo momento que
los liquidos de frenos, gasolina, productosa
base de petrbleo, aceites penetrantes, etc.
entren en contacto con las piezas de plastico.
Eilos contienen productosquimicos que pueden
dafiar, debilitar o destruir el pldstico.
BATERIAS
El bloque de baterias de su sierra estd equipado con
15 baterfas de nfquel y cadmio recargables. La
duracibn del servicio de cada carga dependerd del tipo
de tmbajo que;estd realizando.
I.as baterias en esta herramienta han sido disefiadas
pare proveer,duracibn mdxima sin problemas. Sin
embargo, como todas las baterlas, eventualmente se
agotardn. NO desarme el bioque de batedas ni intente
reemplazar las baterias. La manipulacibnde estas
baterias, especialmente cuando estd usando an,los y
joyas, puede resultar en una quemadura grave.
Para conservar los recursos naturales
le rogamos reciclar o eliminar el
bloque de baterias de manera
apropriada.
Para obtener la vida dtil mds larga de las baterfas,
sugerimosIo siguiente:
•
Guarde y celrgueias baterfas en un lugar fresco.
Las temper.aturassuperiores a la temperatura
ambiente normal acortardn la vida =itilde las
bateHas.
•
Nunca guarde las baterias descargadas.
Cdrguelas inmediatamente despuds que se han
descargad0.
•
Todas las baterfas pierden gradualmente su
carga. Mier_l_ras
mds alta es la temperatura, rods
rdpidamen!0epierden la carga. Si guarda su
herramienta por periodos de tiempo prolongados
sin usada, cargue las bater_ascada mes o cada
dos meses. Esta practica prolongardla vida 0Lil
de las batertas.
DESMONTAJE
PREPARACION
_lb
Este productocontiene una baterfa de
nfquel y cadmio. Debe ser eliminada
de manera adecuada. Las leyes
locales, estatales y federaies pueden
prohibitque las baterfas usadas sean
descartadas en la basura com_n.
Consulte con las autoridades locales
para obtener informaci6n sobre el
reciclaje y/o la manera correcta de
descartar estos Droductos.
19
DEL BLOQUE DE BATERIAS
PARA EL RECICLAJE.
¥
ADVERTENCIA:
Despu6s de sacar el bloque
de batedas, cubra los bomes del bloque de
bateda con cinta adhesiva resistente. No intente
destruir, desarmar la baterfa o sacar cualquiera
de sus componentes. Las batedas de nfquel y
cadmio de!:_n ser recicladas o descartadas de
manera adecuada..Igualmente, nunca toque
ambos bomes con objetos metdlicos yio una
parte del cuerpo pues se pueden producir
cortocircuitos. Mantdngase fuera del alcance de
los nifios. Si no se cumplen estas advertencias,
se Duede Droclucir un incendio v/o lesibn grave.
SIERRA RECORTADORA
A BATERIA CRAFTSMAN
- NUMERO DE MODELO 315.271810
L
12
O
13
_
14
6
9
27
_17
i0
22
5
29
I
25
2
...........
20
.........
'
SIERRA RECORTADORA A BATERIA CRAFTSMAN
- NUMERO DE MODELO 315.271810
i
ii
i
I
i i
El nt_merode modelo
se encuentra en una placa situada
en la caja del
motor, Siempre mencione el n0mero del modelo en toda la correspondencia
! referente a su SIERRA RECORTADORA A BATERIA o cuando haga pedldos de repuestos.
i
I
II
III llll
I
I
II
I
VER LA ULTIMA PAGINA PARA LAS INSTRUCCIONES
i
!
I
I
COMO PEDIR REPUESTOS
i
LISTA DE REPUESTOS
N_ de
Ref.
NQmero de
Repuesto
Descripci6n
1
975546-000
Pemo de Carmcer|a (M6 x 102 mm) ................ 1
2
975547-000
Conjunto de la Base .........................................
3
975544-000
Contratuerca .....................................................
4
975548-000
Bot6n ................................................................
2
5
975552-000
Resorte .............................................................
1
6
975551-000
Tornillode Aleta ................................................
7
975549-000
8
Nn de
N,_mero de
Ref.
Repuesto
Descripci6n
17
975540-000
Resorte .............................................................
1
18
975539-000
Protector Inferior de la Hoja .............................. 1
2
19
975538-000
"Cojinetede Bola (NTN #6200LB) ..................... 1
20
975537-000Ret6n de Cojinete .............................................
21
975536-000
Tomillo de Retdn de Cojinete ........................... 3
1
22
975534-000
Arandela Inferior de la Hoja .............................. 1
Tomillo de la Base ............................................
1
23
975419o001
Hoja de Sierra ...................................................
1
975559-000
Tuerca Hex.......................................................
1
24 -
975533-000
Arandela Exterior de la Hoja .............................
1
9
975558-000
Tomillo ..............................................................
1
25
975532-000
Tomillo de la Hoja .............................................
1
10
975550-00O
Pemo de Carrocerfa (M6 x 13 mm) .................. 1
26
975284-001
Bloquede Baterfas (ArtfculoN° 11098) ............ 1
11
975556-000
Placa de Datos .................................................
1
27
975283-001
Cargador ...........................................................
1
12
975557-000
Etiqueta de Advertencia.................................... 1
28
975554-0OO
Gu(a de Corte al Hilo ........................................
1
13
975545-000
Protector Superior de la Hoja ........................... 1
29 '
975553-000
Llave de la Hoja (5 mm Hex.) ........................... 1
14
975543-000
Tomillo de ProtectorSuperior de la Hoja.......... 3
30
975555-000
Caja Portadora - No se Ilustra .......................... 1
15
975542-000
Tope ..................................................................
1
972000-394
Manual del Usuario
16
975541-000
Tomillo de Tope ................................................
1
Cant.
21
Cant.
1
1
Sears se complace
en ofrecer a sus
dientes servicio de reparaci6n
de aparatos electrodom_sticos y
electr6nicos de todas las marcas.
En Sears, usted puede contar con
operadoresen espafiol, a los
que puede llamar sin c_go alungo.
Para pedir servicio de reparaci6n
a domicilio,
Llame 24 horas al dia, 7 dlas a la semana
1 800-676-5811
Para ordenar piezas con entrega
a domicilio,
Llame de 7 am a 7 pm, 7 _as a la semana
1 8O0-659-7084