1
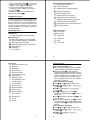
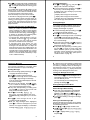
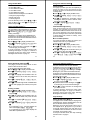
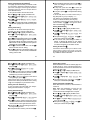
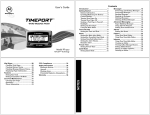
A
Contents
Button Use .............................................................. 1
PF1500 Word Message Pager ............................... 2
Getting the Most from Your Pager........................... 2
PF1500 Service Levels ........................................... 3
PF1500 Pager Icons ............................................... 3
Pager Quick Start ................................................... 6
Receiving and Previewing Your Messages ............ 7
Reading Messages.................................................. 8
Replying to Messages ............................................. 9
Turning the Backlight On and Off ......................... 10
Deleting Messages from InBoxes.......................... 10
Using the Main Menu ........................................... 11
Using Your Main Folder ........................................ 11
Using Your News/Info InBox ................................. 12
Using Your News/Info Folder ................................ 14
Pager Settings ...................................................... 14
Setting the Alert Mode........................................ 14
Setting News/Info Alerts ..................................... 15
Setting the Alarm................................................ 15
Setting Quiet Mode............................................. 16
Setting Private Time ........................................... 16
Setting the Time and Date .................................. 17
Setting Alert Volume........................................... 17
Setting Key Click ................................................ 18
Setting Transmitter Off Mode ............................. 18
Checking Vital Signs ............................................. 19
Turning the Word Message Pager Off................... 19
Other Features ...................................................... 20
Cleaning Your Pager ............................................ 21
Patent Information ................................................ 21
Repair and Maintenance ...................................... 21
Battery Information ............................................... 22
Safety Information ................................................. 24
Warranty Information............................................. 27
PF1500 User’s Guide
PF1500 Word Message Pager
Button Use
PRESS:
PRESS:
Move up/
Increment
Move down/
Decrement
PRESS & HOLD:
PRESS & HOLD:
Continuously
scroll/Increment
Continuously
scroll/
Decrement
Congratulations on your purchase of the Motorola
PF1500 word message pager. Whether receiving
or responding to a message with its unique reply
capabilities, the PF1500 pager can become a vital
part of your business and personal life.
This booklet contains operating instructions that
explain how to use your new PF1500 pager and
provides helpful suggestions for first-time, as well
as experienced, users. This user’s guide includes
a detachable quick reference card on the back
cover.
Getting the Most from Your Pager
PRESS:
PRESS:
Back/Escape
Select
PRESS & HOLD:
PRESS & HOLD:
Backlight on/off
Menu/Action
980333-O
1
Spend a few minutes learning all of the functions
and capabilities of your new pager.
• Give your pager’s number to assistants,
business associates, friends, and family.
• Include your pager’s number on business cards
and on your answering machine message.
• Leave your pager’s number at your children’s
school and with the baby-sitter so you can
always be reached in an emergency.
• Confirm your carpool arrangements and
meeting times without delays and without phone
calls by using your unit’s reply capabilities (if
service is available).
While performing procedures:
• If you do not press a button for several seconds,
the unit automatically returns to the standby
mode. (To continue from where you were,
simply repeat the steps necessary to return to
that point.)
2
• Your PF1500 pager uses !# to scroll and
highlight a menu option and , to select the
option or to save changes and settings.
• To return to the preceding mode without
accepting any option changes you may have
made, press ..
The Status screen can be accessed from the
Main menu by pressing ..
Message Preview and Read Icons:
S Message has been read
b Reply to messages
g Message reply in progress (flashing)
J Delete message/inbox
D Move message to folder
R Message reply was successful
PF1500 Service Levels
[ Message reply was unsuccessful
The name of the service level that may appear on
your PF1500 display may vary depending on your
service provider (refer to your service provider for
details). The level of service displayed may
change at times depending on the type of
coverage available in the area that you are using
your PF1500 pager.
^ Message contains custom reply choices
n InBox created (unread messages)
Sn All messages in the inbox have been read
m InBox alert selected
PF1500 Pager Icons
Status Screen Icons
] Out of Range
Standby Icon:
1 Power on (Flashing: unread messages)
_ Low Battery
l Audible Alert
Main Menu Icons:
E Main InBox (Flashing: unread messages)
j News/Info InBox (Flashing: unread msgs.)
D Main Folder, News/Info Folder
J Delete read messages not in Main Folder
: Pager Settings
; Vital Signs
k Vibrate Alert
K Alarm
h Private Time
I Turn Pager Off
3
Pager Quick Start
Other Icons:
L Main Alert, News/Info Alert
K Set Alarm
k Quiet Mode
Step 1: Turning the pager on:
➊ Ensure that a fresh battery is properly installed
as listed in “Battery Information” on page 22.
➋ Press and release ,. The pager emits a
4-second power-up alert, the Status screen is
displayed followed by the Main menu and then
goes into standby mode. If you have an unread
message, 1 flashes on the Standby screen.
Note: If the pager does not turn on, see “Battery
Information” on page 22.
Step 2: Setting the time and date:
➊ Press ,, !, or #to display the Main menu.
➋ Use #to highlight : Pager Settings
and press ,.
➌ Use # to highlight M Set Time & Date
and press ,.
➍ Use !#to change the hour. Press , to
advance to the minutes and use !# to set the
correct time.
➎ Press , to advance to the date, use !# to set
the correct date.
➏ When the year has been set, press , to accept
changes and return to the Pager Settings menu.
At any time, press . to escape without saving
changes.
Step 3: Setting the alert mode:
➊ Press ,, !, or #to display the Main menu.
➋ Use #to highlight : Pager Settings
and press ,.
➌ Use # to highlight L Main Alert
and press ,.
h Set Private Time
M
<
a
+
Set Date and Time
Alert Volume/Key Click
Transmitter Off
Next/higher value
-
Preceding/lower value
e
List Items Above
d
List Items Below
4
o Move InBox Up
p Move InBox Down
c Battery Gauge
= Message Memory
^ About Screen
f Back/Escape
? Yes/On
@ No/Off
5
6
➍ Use !# to scroll through the list of available alert
options and highlight your selection, then press
,. To sample an alert without selecting, press
and hold ,.
If an audible alert is selected, l displays on the
Status screen. If vibrate is selected, k displays
on the Status screen. If silent is selected, an alert
icon does not appear on the Status screen.
When the battery is low, alerts are shortened.
To exit without changing alert mode, press ..
You are now ready to begin receiving pages. Try
sending yourself a page to verify proper operation
of your pager. Then read through the rest of this
guide for complete information about all of your
pager’s features.
Receiving and Previewing Your Messages
• When you receive a personal or information
service message, the Status screen displays
and the unit alerts according to the L main or
news/information alert setting. A flashing E or
j displays on the Main menu indicating which
type of message has been received.
• To stop the alert, press any button. The 1 on
the Standby screen and E or j on the Main
menu flash until you have read all received
personal or news/info service messages.
• If reminder alerts were preset, the unit
periodically alerts to remind you of any unread
messages. The reminder alert is a chirp if the
alert option was set for any audible alert or the
alert is a short vibration if set to vibrate alert. The
reminder alert is a chirp followed by a 1 second
vibration if set to chirp and vibrate. The reminder
alert is a 2 second vibration followed by a chirp
if set to vibrate and beep.
7
Replying to Messages
If this service is available on your pager, follow
the instructions below to reply to a message:
Reading Messages
➊ To read a message (while previewing), use !#
to highlight the desired message.
➋ Press , to read the selected message.
➌ Use !#to scroll through the text of a message
or press , to page through the message.
If pre-set, the time and date displays as the last
line of each message.
➍ At the end of the message, press , to reply,
move, or delete the message, or press . to
return to the Message Preview screen.
➎ At any time, while previewing or reading, press
and hold , to access a pop-up menu with
Reply, Move, and Delete options.
➏ Press , to choose b Reply to
Message. Your pager displays a list of preprogrammed reply messages for you to choose
from.
➐ Use !#to scroll through the list of preprogrammed reply messages.
➑ With your reply message choice highlighted,
press , to send the message that you have
selected. Your pager will display a confirmation
message of Message Transmitting.
9
Previewing Messages
➊ Use !# to highlight E or j and press , to
display a list of the first 4 messages.
➋ If you have more than 4 messages, use !# to
move to any of the message listings.
S displays next to any message you previously
previewed and read.
Rdisplays when a reply was successful.
[ displays when a reply was unsuccessful.
^ displays next to any unread personal message
with custom reply choices attached.
Reading Messages
If your pager has Reply capability, please refer to
the Reading Message instructions presented in
“Replying to Messages” on page 9
➊ To read a message (while previewing), use !#
to highlight the desired message.
➋ Press , to read the selected message.
➌ Use !#to scroll through the text of a message
or press , to page through the message.
If pre-set, the time and date displays as the last
line of each message.
➍ At the end of the message, press , to move or
delete the message, or press . to return to
the Message Preview screen.
➎ At any time, while previewing or reading, press
and hold , to access a pop-up menu with
Delete, and Move options. If you are reading an
information service message, the pop-up menu
also gives you a Create InBox option (refer to
“Create an InBox” on page 12).
8
g flashes next to the message to indicate that
the reply is in progress. If the message reply was
successful, R displays before the message on
the Message Preview screen. If the message
reply was unsuccessful, [ displays before the
message on the Message Preview screen.
Turning the Backlight On and Off
Press and hold . until the backlight turns on.
The backlight remains on until the pager times
out to the Standby screen.
You can manually turn the backlight off by
pressing and holding ..
Deleting Messages from InBoxes
Delete Messages While Reading
➊ At the end of each message is a Move/Delete
option. (Reply/Move/Delete if reply service is
available.) Press , and use !# to move to
J Delete Message and press , again.
➋ To exit without deleting or moving the message,
press ..
Deleting All Read Messages J
All read messages in the inboxes can be deleted.
Messages in your Main and News/Info folders are
not affected by this action.
➊ Press ,, !, or #to display the Main menu.
➋ Use # to highlight J Delete Messages
and press ,.
➌ Use !# to highlight either ? Yes or @ N o
and press ,.
10
Using the Main Menu
Using Your News/Info InBox j
Use the Main menu for the following functions:
• Access Main InBox
• Access News/Info InBox
• Access Main Folder
• Access News/Info Folder
• Delete all read messages in the InBoxes
• Change the pager settings
• Display vital signs
• Turn the pager off
From the Standby screen, press ,, !, or # to
view the Main menu. Use !# to highlight a
feature and press ,.
Create an InBox
Your pager provides you with the capability to
create an inbox for any information service
message for which no information service inbox
currently exists.
➊ Press ,, !, or # to display the Main menu.
➋ Use !# to highlight j News/Info InBox
and press ,.
➌ Use !# to highlight the information service
message for which you want to create an inbox,
then press and hold ,.
➍ Use !# to highlight n Create InBox
and press ,.
Using Your Main Folder D
View InBox Message History
After an information service inbox has been
created, any message received at the same
address/sub-address is stored in the inbox as the
new current message. Your pager retains the
previous messages sent to the inbox (numbered
in descending order, newest to oldest), if this
option is enabled.
Use your folder to save messages. To move any
message from the main inbox to the folder, press
, and select D Move to Folder after
viewing a message.
Messages in your folder can be deleted but are
protected from the Delete Messages function on
the Main menu and from automatic deletion when
the unit’s memory is full.
➊ Press ,, !, or # to display the Main menu.
➋ Use !# to highlight D Main Folder and
press ,.
➌ If you have more than 4 messages, use !# to
scroll through your messages.
To read a message, perform the steps under
“Reading Messages” on page 8; to delete a
message, perform the steps under “Deleting
Messages from InBoxes” on page 10.
11
Setting News/Info InBox Alerts L
Your pager provides the ability to set an alert
mode for each information inbox.
To set an information inbox alert mode:
➊ Press ,, !, or # to display the Main menu.
➋ Use !# to highlight j News/Info InBox
and press ,.
➌ Use !# to highlight the information inbox for
which you want to set an alert, then press and
hold ,.
➍ Use !# to highlight L Set InBox Alert
and press ,.
➎ Use !# to scroll through the list of available alert
options and highlight your selection, then press
,.
Deleting an InBox
➊ Press ,, !, or # to display the Main menu.
➋ Use !# to highlight j News/Info InBox
and press ,.
➌ Use !# to highlight the information inbox for
which you want to delete, then press and hold
,.
➍ Use !# to highlight J Delete InBox
and press ,.
➎ Use !# to highlight ? Yes or @ No and press
,.
If you selected ? Yes, the pager deletes the
inbox and displays INBOX DELETED.
If you selected @ No, the pager displays the
InBox Menu Options screen.
13
Move an InBox Up/Down
Your pager provides the ability to position your
inboxes in the order of your preference.
To move an inbox up or down:
➊ Press ,, !, or # to display the Main menu.
➋ Use !# to highlight j News/Info InBox
and press ,.
➌ Use !# to highlight the information inbox you
want to move, then press and hold ,.
➍ Use !# to highlight either o Move InBox
Up or p Move InBox Down and press ,.
12
Using Your News/Info Folder D
Use your news/info folder to save news/info
messages. To move any message from the news/
info inbox to the folder, press , and select D
Move to Folder after viewing a message.
Messages in your folder can be deleted but are
protected from the Delete Messages function on
the Main menu and from automatic deletion when
the unit’s memory is full.
➊ Press ,, !, or # to display the Main menu.
➋ Use !# to highlight D News/Info
Folder and press ,.
➌ If you have more than 4 messages, use !# to
scroll through your list of inboxes/messages.
➍ Press ,. to select the inbox or message that
you want to access.
To read a message, perform the steps under
“Reading Messages” on page 8; to delete a
message, perform the steps under “Deleting
Messages from InBoxes” on page 10.
Pager Settings
Setting the Main Alert Mode L
Your pager has a standard alert, a chirping alert,
a vibrating alert, and nine pleasing alerts. You can
also set the alert to Silent (no alert).
Whenever your main alert mode is set for any of
the audible alerts, l appears on your Status
screen. k appears when your main alert is set
for vibrate. If silent is selected, an alert icon does
not appear on the Status screen.
To set your main alert mode, see “Step 3: Setting
the alert mode:” on page 6.
14
Setting the News/Info Alert ModeL
Your pager provides the ability to set alert modes
for information messages differently than for
personal messages to distinguish between
message types. You can set a unique alert for
each News/Info InBox.
To set your information services alert mode:
➊ Press ,, !, or # to display the Main menu.
➋ Use !# to highlight :Pager Settings
and press ,.
➌ Use !# to highlight LNews/Info Alert
and press ,.
➍ Use !# to scroll through the list of available alert
options and highlight your selection, then press
,.
Setting the Alarm K
The alarm can be set for either a specific time
and date, or it can be used as a daily alarm.
➊ Press ,, !, or # to display the Main menu.
➋ Use !# to highlight :Pager Settings
and press ,.
➌ Use !#to highlight KSet Alarm and press ,.
➍ The alarm enabled Wand alarm disabled
Vsymbols indicate the status of the alarm. The
alarm status can be changed when the symbol is
highlighted by pressing !#.
➎ Press , to advance to the hour. Use the !#
buttons to enter the hour setting.
➏ Press , to advance to the minutes setting. Use
the same steps to set the minutes, AM/PM/24hr
setting, and the date.
15
➊ Press ,, !, or # to display the Main menu.
➋ Use !# to highlight : Pager Settings
and press ,.
➌ Use !# to highlight h Set Private
Time and press ,.
➍ Press ,. to move to the hour digit and use !#
to set the start and end time (set hour, minute,
AM/PM) that you want for private time.
➎ Press ,. to save your changes. To exit without
saving changes, press . .
When private time is set, h appears on your
Status screen. When private time is active, the l
or k are not displayed on your Status screen.
Setting the Time and Date M
To set your pager’s time and date, see “Step 2:
Setting the time and date:” on page 6.
Setting Alert Volume<
➊ Press ,, !, or # to display the Main menu.
➋ Use !# to highlight :Pager Settings
and press ,.
➌ Use !#to highlight <Alert Volume and
press ,.
➍ Use !# to set the volume. Moving the volume
indicator to the left lowers the volume. Moving the
volume indicator to the right raises the volume.
➎ Press Press , o save the setting and return to
the Pager Settings menu.
➏ To sample the alert volume, press and hold ,.
17
➐ After all settings have been entered, press , to
save the changes and return to the Pager
Settings menu.
➑ At any time, press and hold , to save the
changes and return to the Pager Settings menu.
➒ At any time, press . to escape without saving
changes.
To set a Daily Alarm, increment the month (or
day) field past 12 (or 31) to display --/--/-- .
If an alarm is set, Kdisplays on the Status
screen. To silence an alarm, press any key.
To disable a previously set alarm and retain its
time and date, use !# to change the alarm
status to disabled V and press ,.
Setting Quiet Mode k
➊ Press ,, !, or # to display the Main menu.
➋ Use !# to highlight : Pager Settings
and press ,.
➌ Use !# to highlight k Quiet Mode and
press ,.
➍ The options are ? On, or @ Off. Use !# to
make your selection and press ,.
➎ If the current main alert setting is audible or
vibrate, a flashing k displays on the Status
screen. If the main alert is set to silent, an alert
icon does not appear on the Status screen.
Setting Private Time h
PrivateTime mode allows you to select a time
p e ri o d d u r i n g w h i c h t h e p a g e r r e c e i ve s
messages and performs all functions, but without
any audible or vibrate notification.
16
Setting Key Click <
When this feature is turned on and the pager is in
audible mode, a “click” is emitted whenever a
button is pressed. The click is not heard when the
pager is in quiet mode.
➊ Press ,, !, or # to display the Main menu.
➋ Use !# to highlight : Pager Settings
and press ,.
➌ Use !# to highlight < Key Click and
press ,.
➍ The options are ? On, or @ Off. Use !# to
make your selection and press ,.
Setting Transmitter Off Mode a
When this feature is turned on, the transmitter is
turned off.
Note: When the transmitter is turned off, the
pager can receive messages, however, you
cannot transmit acknowledgements or replies.
➊ Press ,, !, or # to display the Main menu.
➋ Use !# to highlight :Pager Settings
and press ,.
➌ Use !# to highlight a Transmitter
Off and press ,.
➍ The options are ? Yes, or @No. Use !# to
make your selection and press ,.
18
Checking Vital Signs ;
Other Features
The Vital Signs feature options include displays
for the current status of the battery, message
memory, and information “about” your pager.
➊ Press ,, !, or # to display the Main menu.
➋ Use !# to highlight ;Vital Signs and
press ,.
To check the battery status:
Use !# to highlight UBattery and press
,.
The percentage of remaining battery power is
displayed.
To check the message memory status:
Use !# to highlight = Message Memory
and press ,.
The amount of memory used for both personal
and News/ Info message is displayed.
To display information about your pager:
Use !# to highlight ^Aboutand press ,.
Information about your paging unit is displayed.
Low Battery Indicator: A c displays on the
fourth line of the Status screen at the onset of a low
battery condition.
Message Status: If enabled, the third line of the
Status screen displays text messages that
indicate carrier-specific service modes. Refer to
your service provider literature.
Updated Message: If your pager is configured to
save messages received with errors, UPDATED
displays at the beginning of the message when
an update occurs. This display indicates that the
message has been retransmitted to your pager to
correct previously received errors.
Out of Range: If programmed, ] displays
whenever you are out of your coverage area.
Upon returning to your coverage area, ] n o
longer displays on the Status screen. Refer to
“Battery Information” if your pager’s internal
battery is low.
Memory Full Indicator: When the pager’s main
message memory is full, MEMORY FULL displays
on the second line of the Status screen.
When the pager’s memory is full, the pager
automatically deletes your oldest messages
(read messages first, then unread messages) to
make room for new messages.
To prevent a message from being automatically
deleted when the memory is full, move it to your
Main or News/Info folder.
Turning the Pager Off I
You can turn off the unit to save battery power.
(Messages stored by the system while the pager
is off are received by the pager if the unit is turned
back on within the coverage area.)
➊ Press ,, !, or # to display the Main menu.
➋ Use !# to highlight I Turn Pager Off
and press ,.
➌ The options are ? Yes to turn the pager off, or
@ No to leave the pager on. Use !# to make
your selection and press ,.
19
20
Cleaning Your Pager
Battery Information
To clean smudges and grime from the exterior of the
housing, use a soft, nonabrasive cloth moistened in
a mild soap and water solution.
Wipe the surface using a second cloth moistened in
clean water.
Do not immerse the pager in water. Do not use
any other cleaning solutions.
Your pager operates with a single AA size alkaline
battery (do not use carbon zinc batteries). The AAsize battery also recharges the pager’s internal NiCd
battery.
Two AA-size batteries are provided with your
pager. The first battery you install recharges the
pager’s internal battery and does not last long.
Use the second AA-size battery to replace the
first AA-size battery.
A battery gauge is provided with the Vital Signs
feature of the Main menu. Refer to “Checking
Vital Signs ;” on page 19.
If c displays, the pager’s AA-size battery is low.
Replace the AA-size battery.
If it has been a while since the battery was
replaced, you may need to charge the pager’s
internal NiCd battery overnight (or for a number
of hours) to ensure proper operation of your
pager.
Note: This product contains a Nickel-Cadmium
(NiCd) rechargeable batter y that must be
recycled or disposed of properly. Recycling
facilities may not be available in all areas.
Patent Information
This product is manufactured under one or more
Motorola U.S. Patents. A partial listing of these
patents is provided on the inside surface of the
battery door. Other patents covering this product
are pending.
Repair and Maintenance
When properly handled, your PF1500 pager is
capable of many years of trouble-free service.
However, if it ever requires service, contact your
Service Provider or a Motorola sales office for more
information.
For questions pertaining to the functions and use
of your Motorola pager, please call 1-800-5489954.
For questions pertaining to your paging service,
contact your respective paging service provider.
21
22
Replacing the Battery
➊ Hold the pager face down and slide the latch
toward the battery door.
➋ Slide the battery door approximately 1/8 inch in
the direction of the arrow (toward the outer edge).
See diagram for battery door location.
Latch Unlock
➌ Lift the battery door away from the housing.
➍ Lift the battery out of the compartment taking note
of the positive (+) and negative (−) markings on
the battery and the pager housing.
➎ Insert a new battery, taking note of the positive
(+) and negative (−) markings on the battery and
the markings on the pager housing.
➏ Replace the battery door cover and lock the
battery door latch.
CAUTION: Take note of the positive (+) and negative
(-) markings. Do not insert the battery backwards or all
messages will be erased.
23
Safety Information
Read this information before using a wearable
two-way paging device.
First introduced in 1995, the two-way pager is
one of the most exciting and innovative electronic
products ever developed. With it you can stay in
contact with your family, your office, information
services, and others.
For the safe and efficient operation of your
two-way pager, observe these guidelines:
Your two-way pager is a radio transmitter and
receiver. When it is ON, it receives and also
sends out radio frequency (RF) energy.
The two-way pager transmitter operates in the
frequency range of 896MHz to 902MHz, and the
receiver operates in the range of 929MHz to
942MHz. It utilizes commonly used frequency
modulation (FM) techniques.The unit transmits at
a power level of 0.15W for short periods of time
(from 0.016 to 0.160 seconds). Transmissions
occur infrequently and usually follow within a few
seconds of a page that has been received or
when the unit is first turned on.
In 1991, the Institute of Electrical and Electronics
Engineers (IEEE), and in 1992, the American
National Standards Institute (ANSI), updated the
1982 ANSI Standard for safety levels with respect
to human exposure to RF energy. Over 120
scientists, engineers, and physicians from
universities, government health agencies and
industry, after reviewing the available body of
research, developed this updated standard. In
March, 1993, the U.S. Federal Communications
24
Commission (FCC) proposed the adoption of this
updated Standard. The design of your two-way
pager complies with this updated Standard.
You may choose to turn the transmitter in your
two-way pager OFF at any time. Refer to “Setting
Transmitter Off Mode a” on page 18.
Blasting Areas
To avoid interfering with blasting operations, turn
your unit OFF when in a “blasting area” or in
a r e a s p o s t e d “ Tu r n o f f t w o - w ay r a d i o ” .
Construction crews often use remote control RF
devices to set off explosives.
Electronic Devices
Most modern electronic equipment is shielded
from RF energy, however, RF energy from twoway pagers may effect inadequately shielded
electronic equipment.
Check with the manufacturer or it’s representative
to determine if the following equipment or
systems are adequately shielded from external
RF energy:
• Motor Vehicle electronic and entertainment
systems (standard and any add-on equipment).
• Medical Equipment, hospital or personal (such
as pacemakers, hearing aids, etc.).
Turn your two-way pager OFF in health care
facilities when any regulation posted in the areas
instructs you to do so. Hospitals or health care
facilities may be using equipment that could be
sensitive to external RF energy.
Potentially Explosive Atmospheres
Do not allow your two-way pager to be within the
p r ox i m i t y o f a n y p o t e n t i a l l y ex p l o s i ve
atmospheres. It is rare, but your two-way pager
may generate sparks. Two-way pagers have
internal electronic circuits which may be
operational even when the device is turned off or
the battery removed.
Areas with a potentially explosive atmosphere
are often, but not always, clearly marked and
include the following:
• Gas stations
• Below deck on boats
• Fuel or chemical transfer/storage facilities
• Areas where air may contain chemicals or
particles, such as grain, dust, or metal powders
• Any area where you would normally be advised
to turn off your motor vehicle.
Do not transport or store flammable gas, liquid or
explosives in the compartment of your vehicle
that contains your two-way pager. Vehicles using
liquefied petroleum gas (such as propane or
butane) must comply with the National Fire
Protection Standard (NFPA-58). For a copy of this
standard, contact the National Fire Protection
Association, One Batterymarch Park, Quincy, MA
02269, Attn: Publication Sales Division.
Aircraft
Follow these rules when around aircraft:
• Turn your two-way pager OFF before boarding
any aircraft. Do not use it while airborne!
• To prevent possible interference with aircraft
systems, use your two-way pager on the ground
only with crew permission. This is a U.S. Federal
Aviation Administration (FAA) regulation.
25
26
ONE (1) YEAR STANDARD LIMITED WARRANTY AND
PROVISIONS (U.S.A. ONLY)
Motorola warrants the pager against defects in material
and workmanship under normal use and service for the
period of time specified below. This express warranty is
extended by Motorola, 1500 Gateway Blvd., Boynton
Beach, Florida 33426 to the original end user purchaser
only and is not assignable or transferable to any other
party.
This warranty sets forth the full extent of MOTOROLA’s
r e s p o n s i b i l i t i e s r e g a r d i n g t h e p a g e r. R e p a i r,
replacement, or refund of the purchase price, at
MOTOROLA’s option, is the exclusive remedy. THIS
WARRANTY IS GIVEN IN LIEU OF ALL OTHER
WARRANTIES, EXPRESS OR IMPLIED, INCLUDING
WITHOUT LIMITATION, IMPLIED WARRANTIES OF
M E R C H A N TA B I L I T Y A N D F I T N E S S F O R A
PA RT I C U L A R P U R P O S E . T H I S WA R R A N T Y I S
LIMITED TO THE DURATION CHOSEN. IN NO EVENT
SHALL MOTOROLA BE LIABLE FOR DAMAGES IN
EXCESS OF THE PURCHASE PRICE OF THE
MOTOROLA PAGER, FOR ANY LOSS OF USE, LOSS
OF TIME, INCONVENIENCE, COMMERCIAL LOSS,
L O S T P RO F I T S O R S AV I N G S O R OT H E R
I N C I D E N TA L , S P E C I A L O R C O N S E QU E N T I A L
DAMAGES ARISING OUT OF THE USE OR INABILITY
TO USE SUCH PRODUCT, TO THE FULL EXTENT
SUCH MAY BE DISCLAIMED BY LAW.
Motorola pagers are shipped from the factory with a
standard limited warranty of one (1) year on parts and
labor from date of purchase by the original end user
purchaser, based on proof of purchase. In the event of a
defect, malfunction, or failure to conform to specifications
during the warranty period, Motorola, at its option, will
either repair, replace or refund the purchase price of the
pager. Repair, at Motorola’s option, may include the
replacement of parts or boards with functionally
equivalent reconditioned or new par ts or boards.
Replaced parts and boards are warranted for the
balance of the original warranty period.
(continued)
27
LIMITED WARRANTY AND PROVISIONS
(U.S.A. ONLY) continued
All parts and boards removed in the replacement
process shall become the property of Motorola. This
warranty does not cover defects, malfunctions,
performance failures or damages to the unit resulting
from use in other than its normal and customary manner,
misuse, accident or neglect, the use of non-conforming
parts, or improper alterations or repairs. This warranty
does not cover wear and tear on covers or housings, nor
the coverage or range over which the pager will receive
signals.
For information on how to receive service on
Motorola pagers or covered accessories, call 1-800548-9954 or1-800-793-7834 (TTY).
Pager warranty will be VOID if any of the following
conditions occur:
• Pagers that are incomplete such as those in which
boards or components are missing and/or
incompatible.
• Pagers whose serial numbers do not match on the
boards, or pagers in which the board serial numbers
don’t match the housing.
• Pagers that have been opened by, or had work
performed by, anyone other than a Motorola authorized
pager service center.
• Pagers received with non-conforming or non-Motorola
housings or parts.
Flat rate repair fees apply to pagers and accessories not
covered under warranty.
STATE LAW RIGHTS
SOME STATES DO NOT ALLOW THE EXCLUSION OR
LIMITATION OF INCIDENTAL OR CONSEQUENTIAL
DAMAGES, OR LIMITATION ON HOW LONG AN
IMPLIED WARRANTY LASTS, THEREFORE THE
ABOVE LIMITATIONS OR EXCLUSIONS MAY NOT
APPLY. This warranty gives you specific legal rights and
you may also have other rights which vary from state to
state.
28
Federal Communications Commission (FCC)
Compliance
This device complies with part 15 of the FCC Rules.
Operation is subject to the following two conditions:
(1) This device may not cause harmful interference,
and (2) this device must accept any interference
received, including interference that may cause
undesired operation.
Note: This equipment has been tested and found to
comply with the limits for a Class B digital device,
pursuant to part 15 of the FCC Rules. These limits
are designed to provide reasonable protection
against harmful interference in a residential
installation. This equipment generates, uses and can
radiate radio frequency energy and, if not installed
and used in accordance with the instructions, may
cause harmful interference to radio communications.
However, there is no guarantee that interference will
not occur in a particular installation. If this equipment
does cause harmful interference to radio or television
reception, which can be determined by turning the
equipment off and on, the user is encouraged to try to
correct the interference by one or more of the
following measures:
• Reorient or relocate the receiving antenna.
• Increase the separation between the equipment
and receiver.
• Connect the equipment into an outlet on a circuit
different from that to which the receiver is
connected.
• Consult the dealer or an experienced radio/TV
technician for help.
@6881032B70@
1, Motorola, FLEX and PF1500 are
trademarks or registered trademarks
of Motorola, Inc.
f
© 1998 by Motorola
All Rights Reserved.
Paging Products Group
1500 Gateway Blvd.
Boynton Beach, FL 33426-8292
Printed in U.S.A. 9/98
@6881032B70@
6881032B70-O
29
PF1500 Word Message Pager
Quick Reference Card
Setting the Alert Mode
➊ Press , , !, or # to display the Main Menu.
➋ Use # to highlight :and press ,.
➌ Use # to highlight L and press ,.
Button Use
➍ Use !#to highlight an option and press ,.
(To sample without selecting, press and hold
,.)Checking Vital Signs
➊ Press , , !, or #to display the Main Menu.
➋ Use #to highlight ;and press ,.
➌ Use !#to highlight either U or = and press
,.
Checking Vital Signs
➊ Press , , !, or #to display the Main Menu.
➋ Use #to highlight ;and press ,.
➌ Use !#to highlight either U or = and press
,.
Setting Transmitter Off Mode
PRESS:
PRESS:
Move up/
Increment
Move down/
Decrement
PRESS & HOLD:
PRESS & HOLD:
Continuously
scroll/Increment
Continuously
scroll/
Decrement
➊ Press , , !, or #to display the Main Menu.
➋ Use !#to highlight :and press ,.
➌ Use #to highlight aand press ,.
➍ Use !#to highlight ? Yes
➎ Press ,. to select ? Yes
t, Motorola, FLEX and PF1500 are
trademarks of Motorola, Inc.
© 1998 by Motorola, Inc.
All Rights Reserved.
f
PRESS:
PRESS:
Back/Escape
Select
PRESS & HOLD:
PRESS & HOLD:
Backlight on/off
Menu/Action
980333-O
Paging Products Group
1500 Gateway Blvd.,
Boynton Beach, FL 33426-8292
Printed in U.S.A. 9/98
Pager Icons
Reading Your Messages
Standby Icon:
1 Power on (Flashing: unread messages)
Message Preview and Read Icons:
➊
➋
➌
➍
S
Message has been read
Press , , !, or #to display the Main Menu.
Use !#to highlight E or jand press ,.
Use !#to highlight any message and press ,.
Use !#to scroll up/down through a message or
press , to page down through a message.
b Reply to messages
g Message reply in progress (flashing)
Setting the Time and Date
J Delete message/InBox
➊
➋
➌
➍
D Move message to folder
R
Message reply was successful
[
Message reply was unsuccessful
^
n
in
m
Message contains custom reply choices
News/Info InBox created (unread messages)
All messages in the InBox have been read
InBox alert selected
Status Screen Icons:
] Out of Range
_Low Battery
l Audible Alert
k Vibrate Alert
K Alarm
h Private Time
Other Icons:
+
e
d
@
?
Next/higher value
Preceding/lower value
List Items Above
List Items Below
No
Yes
Press , , !, or # to display the Main Menu.
Use #to highlight :and press ,.
Use #to highlight M and press ,.
Use !#to change the hour. Press , to
advance to other fields (minutes, am/pm/24hr,
day, month, year) that you want to modify. Use
!#to set each field.
➎ When the last field (Year) has been set, press ,
to accept changes and return to the Pager Settings Menu. At any time, press . to escape
without saving changes.
Setting the Alarm
➊
➋
➌
➍
Press , , !, or # to display the Main Menu.
Use !#to highlight : and press ,.
Use !#to highlight Kand press ,.
Use !#to set the alarm mode to W (on) or
V(off).
➎ Press , to advance to the hour field.
➏ Use !#to set the hour. Press , to move to
other fields (minutes, am/pm/24hr, day, month,
year) that you want to modify. Use !#to set
each field. Then press ,.
To set a Daily Alarm, increment the month (or day)
field past 12 (or 31) to display --/--/-- .