1
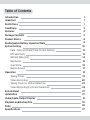
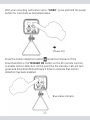
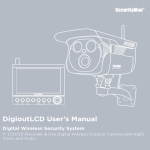
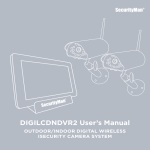
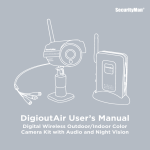
SmartCamDVR User’s Manual
Compact High Definition Color Camera with Micro SD
Recorder, Rechargeable Battery, and Remote Control
© Copyright 2012
This manual is furnished under license and may be used or copied only in
accordance with the terms of such license. Except as permitted by such license,
no part of this publication may be reproduced, stored in a retrieval system, or
transmitted, in any form or any means, electronic, mechanical, recording, or
otherwise, including translation to another language or format, without the
prior written permission of SecurityMan. The content of this manual is furnished
for informational use only, is subject to change without notice, and should not
be construed as a commitment by SecurityMan. SecurityMan Inc assumes no
responsibility or liability for any errors or inaccuracies that may appear in this book.
FCC Information
This device complies with part 15 of the FCC Rules. Operation is subject to the
following two conditions:
(1) This device should not cause harmful interference.
(2) This device must accept any interference received, including interference that
may cause undesired operation. Operation of this equipment in a residential area
is likely to cause interference in which case, the user at his or her own risk and
expense will be required to correct the interference.
Warranty
SecurityMan Inc warrants that this product will be free from defects in title,
materials and manufacturing workmanship for a period of one year or otherwise
specified on the product packaging. This limited warranty shall commence from
the date of purchase. SecurityMan products warranty is not transferable and is
limited to the original purchaser. If the product is found to be defective then, as
your sole remedy and as the manufacturer’s only obligation, SecurityMan will
repair or replace the product. This warranty shall not apply to products that have
been subjected to abuse, misuse, abnormal electrical or environmental conditions,
normal wear and tear, or any condition other than what can be considered normal use.
Warranty Disclaimers
SecurityMan Inc, makes no other warranties, express, implied or otherwise,
regarding this product, and specifically disclaims any warranty for merchantability
or fitness for a particular purpose. The exclusion of implied warranties is not
permitted in some states and the exclusions specified herein may not apply to you.
This warranty provides you with specific legal rights. There may be other rights
that you have which vary from state to state.
Limitation of Liability
The liability of SecurityMan Inc, arising from this warranty and sale shall be limited
to a refund of the purchase price. In no event shall SecurityMan be liable for costs
of procurement of substitute products or services, or for any lost profits, or for any
consequential, incidental, direct or indirect damages, however caused and on any
theory of liability, arising from this warranty and sale. These limitations shall apply
not withstanding any failure of essential purpose of any limited remedy.
For Tech Support Call: 888-977-3777
SecurityMan
4601 E. Airport Drive
Ontario, CA, 91761, USA
Tel: 909-230-6668
Fax: 909-230-6889
Email: [email protected]
Website: www.securitymaninc.com
Copyright 2012 by SecurityMan v1.0
Table of Contents
Introduction
Important
Restrictions
Conditions
Features
Package Contents
Product Basics
Rechargeable Battery Important Note
System Setting
Date, Time, and Date/Time Format Setting
MD Sensitivity
Refresh Rate (Hz)
Resolution
OverWrite
Button Sound
Operation
Taking Photo
Video Recording
Taking Photo by Motion Detection
Video Recording by Motion Detection
System Reset
Installation
Video/Audio Output Display
Playback and Backup File
FAQs
Specifications
1
1
1
3
4
5
6
9
10
12
13
14
15
16
17
18
19
20
23
24
27
27
31
32
35
37
Introduction
Thank you for purchasing SmartCamDVR, a compact high definition
color camera with a micro SD digital video recorder, rechargeable
battery, and remote control. This is a handheld micro device that
records audio, video and picture directly to the Micro SD memory card.
Supports motion detection event recording with a 3-second pre-event
recording capability. SmartCamDVR is a complete digital video recorder
system emphasis on simple and easy to install and operate.
Important
This guide provides important information on the use and operation of
SmartCamDVR. Please read all the information carefully prior to using
the product for the best performance and to prevent any damage/
injuries or misuse of the device(s). Customers are entitled to have read
through this complete user’s manual before using the SmartCamDVR.
Any unapproved changes or modifications will void the warranty. Please
ensure to have a complete understanding of the following restrictions.
Restrictions
When using this product, the safety precautions below must be taken to
avoid possible legal liabilities and damages. Retain and follow all product
safety and operating instructions. Observe all warnings in the product
operating instructions. To reduce the risk of bodily injury, electric shock,
fire and damage to the equipment, observe the following precautions.
PLEASE NOTE that under certain circumstances, audio/video recording
may be PROHIBITED by law. This device should be used only in compliance
with all applicable federal, state and local statutes.
1
• DO NOT places this product too close to medical equipments.
1. Radio waves might potentially cause breakdown of medical
electrical equipments and thus cause incidents.
2. Place the product at least 22cm from the heart pacemaker.
Radio wave potentially influences heart pacemaker and thus leads
to respiratory disturbance.
• DO NOT uses this product to monitor equipments or activities that are
relevant to one’s privacy. Monitoring one’s private activities without
consent is illegal and this product is not designed and manufactured
for these purposes.
• DO NOT use this product to carry out any illegal activities.
SecurityMan shall not be responsible for any consequences of illegal
conducts made by users.
• DO NOT put the plastic package bags in reach of children or babies.
Young children can choke on these items if they put them into their
mouths.
• DO NOT plug the AC adapter into the outlet in improper situations.
• Plugging in an AC adapter with wet hands might cause electric shock.
• Plugging in the AC adapter unsteadily might cause fire or electric
shock.
• DO NOT cover the AC adapter when it is connected to an outlet, place
the adapter near heaters, or put it on the floor which is equipped with
a heater. The above mentioned operation might cause fire or incidents.
• DO NOT use it aboard; please abide by the airway’s provision. It might
influence communication aboard and the flying apparatus if departing
from the airway’s regulation. This will result in accident, possible death
and severe physical hurt.
2
• DO NOT disassemble or repair the dialer or any other relevant
peripheral equipment s on your own. Improper disassembly might
cause damage to the product or the peripheral equipment.
• DO NOT put the camera in quaky paces. The camera may be unstable
or out of operation if installed improperly. Such installation may also
cause breakdown.
• DO NOT touch, shake or hold the antenna. Touching, shaking or holing
the antenna might influence the receiving of electromagnetic wave,
and thereby influence the receiving effect.
• DO NOT use the camera in complex environment, the obstruction of
stumbling block will affect the electromagnetic wave and influence
the receiving range. Wall, tree and other stumbling block might absorb,
reflect the electromagnetic wave, and influence the receiving range.
• DO NOT use the camera in the places which are covered with
metal. The around metal, such as elevator and cabin, might shield the
electromagnetic wave, and result in inability to receive signals.
Conditions
Please read the following messages to make sure your working
environment is suitable.
• The temperature should be kept between –10˚C and 50˚C (14˚F to
122˚F). The relative humidity should be kept between 20% and 80%.
• Avoid putting the product in places where temperature or humidity
may change rapidly.
• Keep it dry, dustless and avoid lens exposure in direct sunlight.
• Keep product away from heat sources such as electric heaters.
3
• Do not use the camera near harmful chemicals.
• Do not place product near any strong magnetic objects
• It might influence the normal operation of the product if used at the
fringe range of normal temperature. Please turn off the power when
not in use.
• Do not disassemble the product.
• Do not shake or strike the product.
• Please obey the local government’s environment protection policy.
Features
• Cost-effective D.I.Y. camera system for home and small business
• Crystal clear audio/video recording in AVI format
• Rechargeable battery for up to 2 hours of stand-by time
• Up to 13.5 hours (32GB, HD) of video recording
• 3 seconds pre-alarm and 15 seconds post-alarm motion detection
recording (NEVER miss important evidence)
• Date/time stamp recording
• Small camera designed for hidden observation/surveillance
• Easy operation by remote control (up to 10m/30ft)
• Selectable Overwrite or Stop recording options when the memory
card becomes full
• Easy PC playback/video backup via mini USB port
4
** Micro SD card is not included
Package Contents
1 x SmartCamDVR
1 x Mounting Bracket
1 x Remote Control
1 x Adapter
1 x Video Cable
1 x Remote Control
Receiver cable
1 x USB Cable
Plectrum for Reset
User’s Manual &
Quick Guide
5
Product Basics
Right Side
Camera Lens
Mounting Bracket
Left Side
Video OUT/IR Extension
Video OUT
IR Extension
Microphone
Buzzer hole
Bottom Side
MIC
Buzzer
Reset
Air Ventilations
6
Reset
Back Panel
Motion Detection
ON/OFF
Power/Manual
Record/Stop
Status Indicator
Recharging Indicator
USB port
Video/Photo Switch
Remote Control
REC
STOP
TRIGGER ON
TRIGGER OFF
7
Buttons Description:
REC: Press to initiate manual recording.
STOP: Press to stop manual recording.
TRIGGER ON: Press to enable motion detection mode.
TRIGGER OFF: Press to disable motion detection mode.
When using the remote control, please make sure to connect the IR
EXTENSION cable or the Remote Control Receiver cable (included) to the
IR EXTENSION port and make sure the IR receiver module at the end of
the receiver cable is pointing towards the remote control.
Press the REC or TRIGGER ON buttons to activate manual recording
or motion detection recording accordingly. During activation, the
SmartCamDVR will beep twice giving an audible notification that the
recording type has been successfully activated. Press the STOP or
TRIGGER OFF buttons to disable manual recording or disable motion
detection recording. When disabling, the SmartCamDVR will beep once to
indicate that the recording type has been disabled.
Tips:
• The RC (remote control) uses infrared signal waves to communicate
with the receiver module by direct line of sight, please ensure objects
are not hindering when RC is in use.
• RC distance is 10m in direct line of sight, if the transmitting distance
gets shorter or looses accuracy, please replace the battery
• If the remote control is not in use please remove the battery from the
remote control to avoid circuit damage and conserve battery life.
• To replace or remove the battery; reference the diagram
illustrated at the back side of the RC.
8
Rechargeable Battery Important Note
It is important that the battery is fully charged for first time use.
Please let the battery charge for at least 2 hours before using the
SmartCamDVR. The charging indicator will turn solid red while charging
and turn off when fully charged. The SmarCamDVR are shipped with low
battery, using while the battery is low may result in a system halt and
automatic system shut down. Rechargeable battery stand-by time can
last up to 2 hours, please use the provided power adapter for continuous
operation.
NOTE: To prolong the rechargeable battery life, the battery must be fully
charged and discharged completely on a month to month base. Battery
capacity/life span may decrease and varies on usage.
9
System Setting
Insert a Micro SD card (not included) into the Micro SD slot located on
the right side of the SmartCamDVR. Using the provided USB cable, plug
the smaller end into the back of the camera and the other end into a
computer as shown below.
Once connected, an AutoPlay window will appear. Please click on “Open
folder to view files” option and then click on the “DVXSET.EXE” file to
launch the System Setting application as illustrated below. The System
Setting consists of the follow settings:
• Date • Time
• Date/Time Format • MD Sensitivity
• Refresh Rate (Hz) • Resolution
• OverWrite • Button Sound
10
11
Date, Time, and Date/Time Format Setting
To set the date and time, click on the corresponding value as illustrated
below, then use the
(up) and
(down) arrows to adjust the date and
time accordingly.
After setting the date and time, click on the
(down) arrow located to
the right of the “Date/Time Format” label Date/Time Format to select
the date and time format to be used. There are three options available
for the Date/Time Format; YY/MM/DD, DD/MM/YY, and MM/DD/YY
(default). When finished, click on the SAVE button at the bottom of the
window to confirm and save your changes.
12
MD Sensitivity
To adjust the Motion Detection Sensitivity level, simply click on the drop
down arrow
located to the right of the MD Sensitivity label to view
the options available. The sensitivity levels range from 1 to 5, with 1 being
the least sensitive and 5 being the most (defaulted at #3). View the chart
below the image for a “number verses distance” ratio.
Here are the numbers versus distance ratios for MD Sensitivity:
Level
Level
Level
Level
Level
1: up to 10-feet (Lease sensitive)
2: up to 15-feet
3: up to 25-feet (Default)
4: up to 30-feet
5: up to 35-feet (Most sensitive)
13
The Motion Detection Sensitivity level depends on your application. If there
are to many false recordings, please reduce the sensitivity level or increase
the level if you want to capture more, click the SAVE button at anytime to
confirm and save the setting.
Refresh Rate (Hz)
The default refresh rate (light frequency) is set to 60Hz which is standard
for United Sates and Japan. 50Hz is commonly used in Europe and China,
please check with your country to determine which Hz to use. To change
the frequency, click on the
(down) arrow to select between 60Hz and
50Hz as shown below. Click on the SAVE button at anytime to confirm
and save the setting.
14
Resolution
Resolution refers to the quality of the video being recorded (video
resolution). The default resolution is set to HD (High Definition) 1280
x 720 which can record up to 13.5 hours when using a 32GB Micro SD
card. This is the highest level of resolution. To make changes to the
cameras resolution, click on the
(down) arrow to select between
HD, D1, and VGA as illustrated below. Click on the SAVE button at
anytime to confirm and save your changes.
Resolution versus Recording time ratio when using a 32GB Micro SD Card:
HD: 1280 x 720, up to 13.5 hours (High Definition)
D1: 800 x 592, up to 36 hours.
VGA: 640 x 480, up to 41 hours.
15
OverWrite
The OVERWRITE option allows you to enable the SmartCamDVR to
record continuously when the Micro SD Card is full. When set to “ON”
(default), the SmartCamDVR will automatically start recording over
previously recorded footage ensuring that the DVR will record new
events as they occur. To make changes to the overwrite setting, click
on the
(down) arrow to select between ON and OFF as illustrated
below. When set to “OFF” the SmartCamDVR will stop recording when
the memory card becomes full. Click on the SAVE button at anytime to
confirm and save your changes.
16
Button Sound
The BUTTON SOUND setting enables (ON) and disables (OFF) the
audible alert notification that can be heard whenever a command is
initiated. For example, when set to “ON” (default), the camera will send
out a beeping sound whenever you start or stop manual recording.
To make changes to the button sound setting, click on the
(down)
arrow to select between ON and OFF as illustrated below. When set to
“OFF” audible notifications will not be heard. Click on the SAVE button
at anytime to confirm and save your changes.
17
Operation
Light indicators and what they mean.
Status Indicator
Recharging Indicator
LED Indicator
Description
Solid Red
Charging (off when fully charged)
Green Then Blue
Power On, Stand-by
Green Light then Flashes Blue
Photo Snapshot
Flash Blue Then Green
Video Recording
Rapid Flash Then Off
Low Power
18
Taking Photo (manually)
To start taking manual snap shots using your SmartCamDVR, move the
event type switch to “PHOTO” as illustrated below.
Blue and green indicator
(Photo Mode)
With your recording preference set to “PHOTO”, press and hold the
power button for 4 seconds as illustrated below.
(Power On)
19
Next, press (don’t hold) the power/record
button located on back
of the camera or the REC button on the RC (remote control) to take a
photo which will be stored to the memory card.
Press once
the blue indicator flashes
NOTE: The SmartCamDVR will take 3 consecutive snap shots every
time the REC button is pressed while in “Photo” mode.
Video Recording
To start recording video manually using your SmartCamDVR, move the
event type switch to “VIDEO” as illustrated below.
20
(Video Mode)
With your recording preference set to “VIDEO”, press and hold the power
button for 4 seconds as illustrated below.
(Power On)
21
Next, press (don’t hold) the power/record button
located on back
of the camera or the REC button on the RC (remote control) to start
video recording. At this point the SmartCamDVR will beep twice and the
indicator light will stay solid green whenever video recording has been
initiated. When left recording over a 24hr period, each recording will be
broken down into 15 minute increments.
Press once
the blue indicator turns off
To manually stop video recording, press (don’t hold) the power/record
button
located on back of the camera or the STOP button on the
RC (remote control). At this point the SmartCamDVR will beep 5 times
to indicate that there are new events recorded and return to stand-by
mode (solid blue light) when finished.
IMPORTANT NOTICE: The SmartCamDVR is not equipped Infrared
LED’s for night vision and requires a minimum of 10 LUX of lighting for
operation. We strongly recommend using the SmartCamDVR in a well lit
area as it may not record well in dark environments..
22
Taking Photo by Motion Detection
To start taking snap shots based on MOTION DETECTION, move the
event type switch to “PHOTO” as illustrated below.
Blue and green indicator
(Photo Mode)
Press the motion detection button
located on the back of the
SmartCamDVR or the TRIGGER ON button on the RC (remote control)
to enable motion detection. At this point the the indicator LED will turn
green and SmartCamDVR will beep 2 times to indicate that motion
detection has been enabled.
Blue status indicator
23
In motion detection photo mode, the green indicator light will stay solid
and flashes blue three times to indicate motion detection photo recording
and then changes back to green for stand-by. To STOP (disable) motion
detection recording, press the motion detection button
located on
the back of the SmartCamDVR or the TRIGGER OFF button on the RC
(remote control) at any time. When disabling motion detection recording,
the indicator light will turn blue and the SmartCamDVR will beep 5 times
if there are any new events recorded and beep 1 time if there were no new
events recorded.
NOTE: The SmartCamDVR will take 3 consecutive snap shots “Per Motion
Detection Event” in “Photo” mode and will beep 5 times when disarming
to indicate that there are new events recorded.
Video Recording by Motion Detection
To start recording video based on MOTION DETECTION, move the event
type switch to “VIDEO” as illustrated below.
(Video Mode)
24
With your recording preference set to “VIDEO”, press and hold the power
button for 4 seconds as illustrated below.
(Power On)
Press the motion detection button
located on the back of the
SmartCamDVR or the TRIGGER ON button on the RC (remote control)
to enable motion detection. At this point the the indicator LED will turn
green and SmartCamDVR will beep 2 times to indicate that motion
detection has been enabled.
Blue status indicator
25
When motion is detected, the indicator light will flash blue and stay solid
green to indicate that the camera is recording. Motion Detected video
recording records in increments of 15 seconds per even with a 3 second
“pre-alarm” recording totaling the total time per video clip to 18 seconds.
To STOP (disable) motion detection recording, press the motion detection
button
located on the back of the SmartCamDVR or the TRIGGER
OFF button on the RC (remote control) at any time as illustrated below.
Blue status indicator
When disabling motion detection video recording, the indicator light will
turn blue and the SmartCamDVR will beep 5 times if there are any new
events recorded and beep 1 time if there were no new events recorded.
IMPORTANT NOTICE: If motion is still being detected after the 15 second
time frame the SmartCamDVR will continue to record using the same file
until it reaches the 15 minute max mark. At this time a new event will be
generated and the recording will continue if the movement persists.
26
System Reset
The reset button should only be used in the event that the SmartCamDVR’s
buttons or functions start to act abnormal or erratic. Events such as: not
being able to shut off the device, not being able to start or stop manual
recording or not being able to start or stop motion detection recording,
etc. If you should come across any of the incidents mentioned above,
please use the included plectrum to press and hold the reset button for 3
seconds to reset the SmartCamDVR.
MIC
Buzzer
Reset
Reset hole
Installation
1. Make sure the Micro SD card (up to 32GB) is inserted into the Micro SD
slot as illustrated below.
27
2. Fine a suitable monitoring location and place the mounting bracket up
against the desired location and put a light mark with a pencil. Bend
the top half of the bracket joint away for clearance. Use the dry wall
screw provided to secure the bracket to the wall. Next, loosen the
fasten screw on the mounting bracket using a Philip screw driver.
Simply slide the SmartCamDVR through the bracket and turn the
screw clockwise with a Philip screw driver to secure as illustrated below.
3. Connect one end of the power adapter (included) to the Mini USB
port on the back side of the SmartCamDVR and then connect the
other end into an electrical power outlet as illustrated below. The
charging indicator light will turn red and turns off when the
battery is full.
Charging
Indicator
28
4. Next, connect one end of the IR EXTENSION cable (provided) to the
IR port of the SmartCamDVR and then peel off the adhesive overlay
to mount the IR receiver to a suitable location as illustrated below.
The IR receiver requires direct line of sight with the remote control.
IR Receiver
(for Remote
Control)
5. Adjust the angle of the camera to a desired view by pivoting the
camera up and down.
29
Manually record a few files by pressing on the TRIGGER ON button
of the remote control. Playback the file by removing the SD card to a
card reader on your computer or connect the SmartCamDVR directly
to your computer for playback to ensure proper monitoring areas.
Or, use the Video cable (provided) to live feed to the TV for proper
monitoring areas before use as illustrated. Please see video output
display below.
IMPORTANT: It is very important for the camera angle to display the
areas intended for monitoring and recording. When connecting the
Video cable to the TV turn the TV to the auxiliary input; ie VIDEO 1,
VIDEO 2, LINE 1, LINE2, and etc.
30
Video Output Display
When the device is connected to a TV using the Video cable provided,
a live camera video feed will appear on screen as shown below.
A: “
“
“
” Video icon.
” Photo icon.
” Recording icon.
B: Current time and date.
C: Recording duration.
D: Motion Detection icon.
IMPORTANT: Using the video output cable for live monitoring will not
provide audio output to the TV screen. However, the audio is still recorded
and can be heard when playing back the video file/clip. Please use the
video output to setup and adjust the cameras viewing angle as needed.
31
Playback and Backup File
To playback the recorded video/photo files, please use the USB cable
that was provided to connect your SmartCamDVR to your computer or
lap top as illustrated.
Connect to computer
Once connected, an “AutoPlay” window will appear as shown below.
Please click on the “Open folder to view files” option as shown.
32
Double click on the VIDEO or PHOTO folder to pull up the recorded date
folder and then double click on the recorded date folder to pull up the
video/photo files for playback as illustrated below.
Now double click on the event file you wish to playback using your
computers default media player. Please use VLC media player (free to
download) If the video freezes or does not playback smoothly.
NOTE: The actual file names of a video\photo are the time of the event(s)
and the folded name are the date of the event(s).
33
To backup the video\photo files, please high light one or multiple files
and then right mouse click on the file to select “Copy”. Then access the
backup drive or partition and right mouse click to “Paste” to backup the
video\photo files as illustrated below.
After completing the operation on the computer, please disconnect the
SmarCamDVR from the computer and a blue light indicator will turn on
to represent stand-by mode.
34
FAQs
Q1. This device is equipped with infrared remote control. The reception
may be affected or operation does not work in the following cases:
A. Objects hindering the receiver or remote controller. The remote
controller deviating from the receiver too much (the horizontal
and vertical reception angle of the receiver approx. 90 degrees). The
distance between the remote controller and receiver too far (within 8
meters recommended). Low battery of the remote controller
B: If the remote control is no use for a long time, the batteries should be
taken out to avoid eroding circuits.
C: When the device is working or it is started up, the micro SD card can
not be take out to avoid damaging the card, device or files.
D: Please check the machine regularly. If any abnormal performance is
detected, please check the power or press “RESET” to reset the machine.
E: To avoid false motion-triggering, please avoid not putting the product
straightly to strong light.
F: If the product is used to watch out of the window, the motion
sensitivity may be decreased, or there will be false triggering due to
glisten of the glass.
G: In low-light condition, or the moving object being same color as
background, the sensitivity may be decreased.
Q. When I turned on my SmartCamDVR and try to record, I cannot
record video clips or take any pictures?
A. Please check if the Micro SD card is inserted with the pins/teeth
facing down and that the SD card clicks into place. Plug the A/C
adapter into the system in case the battery has drained.
35
Make sure the Micro SD card is not full.
Q. The SmartCamDVR device cannot power on or start up?
A. Be sure to press and hold down the
power button for a period
of 4 seconds to turn on the device. Check for low battery or connect
the device to the A/C adapter provided. Else try to reset the camera
by pressing the “Reset” button located at the bottom of the camera
for a period of 3 seconds.
Q. When I connected the SmartCamDVR into my computer, the
computer does not detect the device?
A. Check if both ends of the cable are connected well between the
computer and the SmartCamDVR system. Try to connect the USB
cable into another available USB ports on your computer or restart
the computer while the device is connected to see if the computer
detect. Check to see if the camera can be turned ON before
can connecting to the PC.
Q. The recorded video/picture files cannot be played back, why is that?
A. Make sure the connection to the computer is secured and the
computer is able to detect the hardware. Update the media player to
the latest available version, or try to playback using a VLC player
(please google “VLC player” free to download).
Q. The SmartCamDVR is not functioning?
A. The camera could freeze due to quick/frequent operation; the
processor may not get up to speed. Please wait a few seconds for
the processor to get up to speed before the next command or
operation. Else try to reset the camera by pressing the “Reset” button
located at the bottom of the camera for a period of 3 seconds.
36
Specifications
Image Sensor
Video Resolution
Audio
Built-in Memory
Storage Medium
Rechargeable Battery
Charge Time/Work Time
Power Consumption
Power Supply
Dimensions (WxDXH)
Weight (net)
Viewing Angle
Video File Format (frame rate)
Video File Size/Frame Size
Photo format (resolution)
Motion Detection Distance
USB Port
Remote Control Frequency
Remote Control Battery
PC Operating System
Operating Temperature
Operating Humidity
Color CMOS, 5.17m pixels (Max)
HD (1280x720), D1 (800x592),
VGA (640x480)
Microphone built-in
22 MB flash memory
MicroSD card up to 32GB (not included),
HD:13.5h, D1:36h, and VGA:41h
720mAh Lithium-ion battery
2-hr/2-hr (Max)
420mA (Max); 270mA (standby)
5VDC 800mA, 100-240VAC
101 x 32 x 28mm
58g
45°
AVI (30fps, auto)
15MB/min/8.3K/frame
JPEG (2592x1944)
26ft
USB 2.0 (PC connection)
433MHz
CR2025 cell battery
Windows 98SE/2000/ME/XP/Vista/7
-10°C ~ 50°C/14°F ~ 122°F
15% ~ 85%RH
37