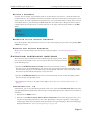
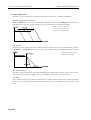
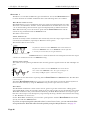
1
The lightning flash with the arrowhead symbol within an
equilateral triangle is intended to alert the user to the
presence of uninsulated voltage within the products
enclosure that may be of sufficient magnitude to constitute
a risk of electric shock to persons.
CAUTION AVIS
RISK OF ELECTRIC SHOCK
DO NOT OPEN
RISQUE DE SHOCK ELECTRIQUE
NE PAS OUVRIR
Le symbole éclair avec le point de flèche à l´intérieur d´un triangle
équilatéral est utilisé pour alerter l´utilisateur de la presence à
l´intérieur du coffret de ”voltage dangereux” non isolé d´ampleur
suffisante pour constituer un risque d`éléctrocution.
CAUTION: TO REDUCE THE RISK OF ELECTRIC
SHOCK DO NOT REMOVE COVER (OR BACK).
NO USER SERVICEABLE PARTS INSIDE.
REFER SERVICING TO QUALIFIED PERSONNEL.
The exclamation mark within an equilateral triangle is
intended to alert the user to the presence of important
operating and maintenance (servicing) instructions in the
literature accompanying the product.
ATTENTION:POUR EVITER LES RISQUES DE CHOC
ELECTRIQUE, NE PAS ENLEVER LE COUVERCLE.
AUCUN ENTRETIEN DE PIECES INTERIEURES PAR L´USAGER.
CONFIER L´ENTRETIEN AU PERSONNEL QUALIFE.
AVIS: POUR EVITER LES RISQUES D´INCIDENTE OU
D´ELECTROCUTION, N´EXPOSEZ PAS CET ARTICLE A LA PLUIE
OU L´HUMIDITET.
Le point d´exclamation à l´intérieur d´un triangle équilatéral est
employé pour alerter l´utilisateur de la présence d´instructions
importantes pour le fonctionnement et l´entretien (service) dans le
livret d´instructions accompagnant l´appareil.
Instructions pertaining to a risk of fire, electric shock or injury to persons.
IMPORTANT SAFETY INSTRUCTIONS
SAVE THESE INSTRUCTIONS
Warning - When using electric products, basic precautions
should always be followed, including the following:
1. Read all the instructions and observe the graphic symbols
above before using the product.
2. Do not use this product near water - for example near a
bathtub, washbowl, kitchen sink, in a wet basement, near or
in a swimming pool, a swamp or the like.
3. This product should be used only with a cart or a stand that
is recommended by the manufacturer.
4. This product, either alone or in combination with an
amplifier and headphones or speakers may be perfectly
capable of producing sound levels that could cause permanent
hearing loss. Do not operate for a long period of time at a
high volume level or at a level that is uncomfortable. If you
experience any hearing loss or ringing in the ears, you should
consult an audiologist.
5. The product should be located so that its location or
position does not interfere with or obstruct its normal flow of
ventilation.
6. The product should be located away from heat sources such
as radiators, heat registers or other products that produce
heat.
7. The product should be connected to a power supply only
of the type described in these operation instructions or as
marked on the product.
8. The power supply cord of the product should be unplugged
from the outlet when the product is left unused for a long
period of time.
9. Care should be taken so that objects do not fall, or liquids
are not spilled into the enclosure through openings.
10. The product should be serviced by qualified service
personnel when:
A. The power supply cord has been damaged; or
B. Objects have fallen or liquids have been spilled
onto the product; or
C. The product has been exposed to rain; or
D. The product does not appear to operate normally or
exhibits a marked change in performance; or
E. The product has been dropped or the enclosure
has been damaged.
11. Do not attempt to service the product beyond those
means described in this operating manual. All other
servicing should be referred to qualified service personnel.
Trademarks: The Nord Modular logo is registred trademark of Clavia DMI AB. All other
trademarks mentioned in this publication are the properties of their respective holders.
Specifications and appearances are subject to change without notice.
Copyright by Clavia DMI AB, 2005
NORD STAGE Eighty Eight V1.1x
Table of contents
Table of contents
1. Introduction ......................................................... 5
Welcome ....................................................................................... 5
About the Owner’s Manual........................................................ 6
Clavia on the Internet ............................................................... 6
2. Overview ................................................................ 7
The Nord Stage front panel ..................................................... 7
The Keyboard............................................................................... 8
About Knobs & Buttons............................................................. 8
3. Connections ........................................................10
Nord Stage rear panel ............................................................ 10
Audio connections .................................................................... 10
MIDI connections ...................................................................... 10
Connecting pedals.................................................................... 11
4. Getting Started .................................................12
About Instruments ................................................................... 12
About Programs........................................................................ 12
Activating instrument sections .............................................. 13
About Panel A & B .................................................................... 14
Setting output Level for instruments .................................. 14
Adding a Global effect ............................................................ 15
5. The Program section ..........................................16
Overview..................................................................................... 16
What is a Program? .................................................................. 18
Storing Programs..................................................................... 19
6. The Instruments .................................................20
Introduction.............................................................................. 20
Common Features...................................................................... 20
The Organ Section.................................................................... 21
The Piano section...................................................................... 27
The Synth section..................................................................... 31
1
Table of contents
NORD STAGE Eighty Eight V1.1x
7. The Effects ......................................................... 44
About the effects .....................................................................44
The Panel effects......................................................................45
The Rotor section ....................................................................49
8. Keyboard Zones and Dual Panel setups ......... 50
About Keyboard Zones .............................................................50
Octave Shift ..............................................................................52
Dual Panel setups ....................................................................52
9. The Morph Assign feature ................................ 54
About Morph Assign .................................................................54
Using Morph - an example.........................................................54
Morph Assignable parameters.................................................55
About setting Morph parameter ranges ................................56
Clearing Morph Assignments...................................................56
About Aftertouch .....................................................................56
10. The Extern section .......................................... 57
About the Extern section ........................................................57
Setting up ..................................................................................57
Using the Extern section .........................................................57
The Parameter section..............................................................58
11. System functions............................................. 60
System menu...............................................................................60
Sound Menu................................................................................62
MIDI menu ...................................................................................62
Extern menu ...............................................................................63
12. Factory Presets and OS ................................. 64
Internal memory ........................................................................64
Factory presets ........................................................................64
Downloading Piano instruments via USB ...............................65
OS upgrades ..............................................................................65
13. MIDI functions ................................................. 66
About the MIDI implementation................................................66
2
NORD STAGE Eighty Eight V1.1x
Table of contents
Using Nord Stage with a sequencer ...................................... 67
Program, Controller and Synth Sound dumps..................... 68
Panic........................................................................................... 69
14. MIDI implementation .........................................70
MIDI Controller list ................................................................ 70
MIDI Implementation Chart...................................................... 73
Index........................................................................75
3
Table of contents
4
NORD STAGE Eighty Eight V1.1x
NORD STAGE Eighty Eight V1.1x
1. Introduction: Welcome
1. INTRODUCTION
WELCOME
We’d first like to thank you for purchasing the Nord Stage Eighty Eight! Clavia’s goal when developing
the Nord Stage was to create a flagship stage instrument encompassing the whole range of Clavia’s expertise. Building on the success of the Nord Electro, the Nord Stage incorporates the best emulations of traditional electromechanical/acoustic keyboard instruments on the market as well as a synthesizer section
designed for maximum ease of use, yet offering wide sonic possibilities.
Nord Stage features outstanding classic keyboard sounds with true feel, from natural keyboard response to
authentic sound. A medium weighted hammer action 88 note keyboard makes this instrument the largest
in Clavia’s range, yet it weighs only 18,5 kilos which is an achievement in itself.
To make a great tool you have to put all the focus on a few things, and that’s what we did with the Nord
Stage. Think about it, the best tool isn’t a Swiss army knife.
Nord Stage Eighty Eight has the following main features:
• Organ section with faithful reproductions of three classic models; B-3 (Hammond), V-Type (Vox Continental) and F-Type (Farfisa).
• Piano section with concert grand/upright acoustic pianos, Rhodes and Wurlitzer electric pianos, Clavinet, and electric grand.
• Synth section with subtractive, FM and wavetable synthesis.
• Comprehensive effects section.
• A medium weighted hammer action 88 note keyboard with Aftertouch.
• An Extern section for controlling external MIDI instruments.
• A Morph feature for applying multiple parameter changes to a sound with controllers.
• Splits and layers are easily set up by assigning instruments to Keyboard Zones.
But that’s not all. There are two independent Panels “A” and “B”, that can have their own settings. This
means that you have access to six instrument sections and two independent effect sections! Amongst other
things, this allows for “dual manual” B-3 organ emulation.
Page 5
1. Introduction: About the Owner’s Manual
NORD STAGE Eighty Eight V1.1x
ABOUT THE OWNER’S MANUAL
The manual is arranged mainly as a reference manual. In many cases you’ll get tips on how to practically
use the functions, alone and also together with other functions. Every time the manual wants your attention to an object on the Stage, the name of that object will be printed LIKE THIS, e.g. ‘press the STORE
button’. The LCD display on the Nord Stage is always referred to as the DISPLAY. Whenever there is a
reference to the ‘keyboard’, that reference also applies to any incoming MIDI note messages.
READING
THE MANUAL IN
ADOBE ACROBAT READER
This manual is also available in the digital PDF-file format. It can be downloaded, free of charge, from Clavia’s web site at http://www.clavia.se. When reading the manual as PDF-file, you will need Adobe Acrobat
Reader 4.0 or later. This program can be downloaded, free of charge, at http://www.adobe.com.
With Adobe Acrobat Reader it is possible to use special navigation features like hyperlinks. This means
that you can click with the mouse on a word or sentence and automatically get to the location indicated by
the word/sentence. To better show what words or sentences are hyperlinked in this manual, these words
are written in magenta.
CLAVIA ON THE INTERNET
If you have access to the Internet, you’re very welcome to visit http://www.clavia.se. There you will find
the latest information about Nord Stage and other Clavia products. In the future you’ll also be able to
download new Nord Stage sounds and software upgrades, free of charge.
Page 6
NORD STAGE Eighty Eight V1.1x
2. Overview: The Nord Stage front panel
2. OVERVIEW
THE NORD STAGE FRONT PANEL
Master
Organ section
Level/Rotor
effect section
THE
Piano
section
Program section
Synth section
Extern
section
Effects section
PROGRAM SECTION
The central Program section is where you select and store Programs, access System parameters, activate
keyboard zones for splits and layers, and assign Morphing functions. See “The Program section” on page 16
for details.
MASTER
LEVEL/ROTOR SECTION
The leftmost front panel section contains a Master Level control and a rotary speaker simulator effect.
The MASTER LEVEL knob controls the overall output level for all four CH OUT jacks and the HEADPHONES output.
The Rotor effect section is logically placed close to the organ section (as rotary speaker effects are most commonly used with organ sounds), but can be applied to any instrument section just like the other effects. See
“The Rotor section” on page 49
THE ORGAN
SECTION
The Organ section in the Stage features emulations of three classic organ models; a Hammond B-3, a Vox
Continental II (V-Type) and a Farfisa Compact DeLuxe (F-Type). See “The Organ Section” on page 21.
THE PIANO
SECTION
The piano section in Nord Stage comprises various multi-sampled piano instruments. Nord Stage utilizes
advanced multi-level sample playback, catching every nuance from soft to hard key strokes. Nord Stage
comes right out of the box with ten classic piano instruments stored in Flash memory. The big advantage
with Flash memory is that you can replace instruments with new ones and that no backup battery is required. The Stage also sports a USB interface for quick and easy download of new piano sounds. See “The
Piano section” on page 27.
Page 7
2. Overview: The Keyboard
THE SYNTH
NORD STAGE Eighty Eight V1.1x
SECTION
The Synth section has been designed for maximum ease of use in live situations. It is basically utilizes standard subtractive synthesis but also incorporates FM and wavetable synthesis.
See “The Synth section” on page 31.
THE EXTERN
SECTION
The Extern section controls an external MIDI instrument. You can use the PARAMETER knob to control
various parameters on the external device. You can also assign the external instrument to any Keyboard
Zone, just like the built-in instruments! See “The Extern section” on page 57.
THE EFFECTS
SECTION
Here you’ll find the numerous effects and modulations you can use to add that extra flavour to your sounds.
See “The Effects” on page 44.
THE KEYBOARD
The keyboard of Nord Stage features 88 fully weighted keys for optimal feel and response with piano instruments. For organ sounds there is also a fast trigger response option which closely mimics the feel of a
real organ.
The keyboard can be split into three Keyboard Zones to which any instrument section can be freely assigned. Assigned Keyboard Zones are saved with a Program. See “Keyboard Zones and Dual Panel setups”
on page 50.
ABOUT KNOBS & BUTTONS
THE
KNOBS
There are two types of knobs on the Nord Stage:
• Rotary Encoders that show the position with green LED indicators.
These always reflect the “true” value, and can also be controlled using the Morph
function (see “About Morph Assign” on page 54).
• Other knobs are of potentiometer type. This means that when you begin to edit a
Program the values of the parameters can be totally different from the knobs physical positions. As soon as you begin turning a knob, the parameter value will ‘snap’ to
the knob’s physical position. This could generate drastic changes to the sound but
that’s normal.
Page 8
NORD STAGE Eighty Eight V1.1x
THE
2. Overview: About Knobs & Buttons
BUTTONS
There are three types of buttons for editing sounds on the Nord Stage:
SELECTOR BUTTONS
Press the SELECTOR button repeatedly to select between options printed next to the
corresponding triangular LED (see figure).
ON/OFF BUTTONS
The ON/OFF buttons have a LED next to them to indicate the status.
DRAWBAR BUTTONS
The DRAWBAR buttons are special in the way that they auto-increment/decrement the corresponding parameter when held. I.e. if you hold a DRAWBAR button the corresponding drawbar parameter will continue to increment or decrement (within its range) until you release the button.
Page 9
3. Connections: Nord Stage rear panel
NORD STAGE Eighty Eight V1.1x
3. CONNECTIONS
NORD STAGE REAR PANEL
AUDIO CONNECTIONS
• Make all audio connections before turning on your power amplifier!
• All signal cables used with the Nord Stage must be shielded.
• The four audio outputs (CH OUT 1-4)) are line level and unbalanced.
• If you wish to connect the Nord Stage in stereo to your audio equipment, you should use CH1 OUT in
pair with CH2 OUT.
• You can also route individual instruments to CH OUTPUTS 3 & 4 either in stereo or as two mono
channels. This is done on the System page - see page 60.
MIDI CONNECTIONS
• If you are using a Nord Stage together with a MIDI keyboard, connect a MIDI cable from MIDI Out
on the keyboard to MIDI IN on the Nord Stage.
• If you are using Nord Stage to control an external MIDI instrument, connect a MIDI cable from MIDI
OUT on the Nord Stage to the MIDI In connector on the other instrument.
Page 10
NORD STAGE Eighty Eight V1.1x
3. Connections: Connecting pedals
CONNECTING PEDALS
The Nord Stage has four pedal inputs, one CONTROL PEDAL input (for controlling Nord Stage parameters), one ORGAN SWELL input, one SUSTAIN PEDAL input and one ROTOR SPEED input (for rotary
speaker fast/slow selection). You can select for each instrument whether it should react to sustain or not
(see “Activating the Sustain Pedal/Pitch Stick for Instruments” on page 20). Connect the pedals as shown
in the figure below:
When connecting an expression-type pedal to the CONTROL PEDAL OR ORGAN SWELL input, you
should use a stereo cable (Tip-Ring-Sleeve). Please note that the pedal must have a stereo output jack. Pedals from various manufacturers can have different characteristics but any expression pedal can easily be adjusted to function properly with Nord Stage (see “Ctrl Pedal Gain” on page 61).
THE ORGAN SWELL
INPUT
You can connect an expression pedal to the ORGAN SWELL input to control organ swell, the characteristic
volume/frequency response control used by the original B-3 organ, and normal organ swell for the other
organs.
USING
A
ROTOR SPEED
PEDAL
You can use a pedal connected to the ROTOR SPEED input to switch between Slow and Fast rotor speed
for the Rotary Speaker effect. In this case you may need to make System settings to make it operate the
way you like. This is done on the System menu page - see “System menu” on page 60, where you can set
up the Rotor Speed control mode (Hold/Toggle).
Page 11
4. Getting Started: About Instruments
NORD STAGE Eighty Eight V1.1x
4. GETTING STARTED
ABOUT INSTRUMENTS
When “Instrument sections” or “Instruments” are referred to in the manual this is a collective reference to
the Organ, Piano and Synth instruments which can be all be active within a Program.
ABOUT PROGRAMS
A Program in Nord Stage basically contains all settings (instruments and effects etc.) when the Program
was saved. A Program can consist of a single instrument or a combination of up to six instruments, which
can be assigned to one ore more Keyboard Zones for split and layered sounds.
Programs also contains settings for both Panel A and B (see “About Panel A & B” on page 14.
For more details about the Program memory architecture see “What is a Program?” on page 18.
SELECTING PROGRAMS
The Program memory in Nord Stage consists of 21 Program Pages, with each Page holding 6 Programs
for a total of 126 Programs. All Programs can be edited and replaced at any time. To select a Program for
playing/editing, proceed as follows:
1. Select a Page (1-21) by pressing the PAGE -/+ buttons in the Program section.
2. Select a Program on the current Page by pressing one of the six PROGRAM
buttons 1 to 6.
• You can also use the VALUE DIAL to the right of the DISPLAY
to select Programs. By turning the knob you can continuously
scroll between all Programs (on all Pages).
Page 12
NORD STAGE Eighty Eight V1.1x
EDITING
A
4. Getting Started: Activating instrument sections
PROGRAM
Actually, how to change a programmed sound can be described in one sentence: “tweak the knobs and
press the buttons”. It is as simple as that! Don’t be afraid to edit and overwrite the factory Programs. If you
want to restore any of the original factory programs later, you can download them at http://www.clavia.se
and transfer them to your Nord Stage as MIDI SysEx files. To indicate that a Program has been edited
(changed from the stored version), an asterisk is shown to the right of the Program number in the DISPLAY.
REVERTING
TO THE ORIGINAL
PROGRAM
If you have edited a Program and want to revert to the stored original, just press the corresponding PROGRAM button again.
STORING
AND
NAMING PROGRAMS
How to store and name Programs is described in a separate chapter - see “The Program section” on
page 16.
ACTIVATING INSTRUMENT SECTIONS
There are three main instrument sections in Nord Stage: the Organ section, the Piano section and the Synth section. You can activate/deactivate instrument sections
in the following ways:
• Pressing the KB ZONE SELECT ON/OFF button for an Instrument section so
that one or more of the LEDs lights up will activate the corresponding instrument. If all LEDs are lit,
the instrument will play across the whole range of the keyboard. Any other active instrument(s) will in
this case be layered with the instrument you just activated.
• Pressing the KB ZONE SELECT button for an active Instrument section (so that the LEDs go dark)
will turn off the corresponding section.
• For information on how to use splits see the chapter “Keyboard Zones and Dual Panel setups” on
page 50.
INSTRUMENT INIT 1-4
Alternatively, you can use the following method to select one of four basic INSTRUMENT INIT setups (Organ/Split Organ/Piano/Synth). This will activate the corresponding instrument, and deactivate all other instruments.
1. Hold down the SHIFT button.
2. Press one of the ORGAN, SPLIT ORGAN, PIANO OR SYNTH buttons in the Program section to activate the corresponding instrument section. The “Split Organ” setup uses a split for a Lower/Upper
manual organ where the lower half of the keyboard plays an organ belonging to Panel A and the upper
half plays Panel B (see “About Split Organ Setups” on page 26).
Page 13
4. Getting Started: About Panel A & B
NORD STAGE Eighty Eight V1.1x
ABOUT PANEL A & B
All instruments in Nord Stage are two part multitimbral. This means that each instrument section can produce two sounds simultaneously, with completely independent settings. The key to this feature are the two
Panels; A and B.
The two PANEL buttons A and B selects which Panel is currently active (or edit active - see below). Each
Panel controls three instrument sections and four Panel effects. The intended functionality of having two
Panels with their own settings is not to alternate between two sound setups within a selected Program (although you can).
The “proper” way to use Panels is rather to have both Panels activated, giving you access to two simultaneous instrument sounds in each instrument section, e.g. a Rhodes and a Clavinet, two Synths etc. In dual
panel mode you are basically layering two sets of the Nord Stage panel.
• You activate both panels by holding down one of the PANEL A/B buttons and then pressing the other.
• To exit “Dual Panel” mode, hold down one of the PANEL A/B buttons and then press the other.
ABOUT PANEL
EDIT FOCUS
Both Panels activated. One of the PANEL button LEDs will blink to indicate which Panel is currently has edit focus.
If both Panels are activated, the settings on the front panel always reflects settings for one of the Panels (A
or B) at a time.
• Any tweaking of parameters will only affect the currently “edit active” Panel, which is indicated by a
blinking PANEL button.
• Pressing the other PANEL button will then instantly switch edit focus to the other Panel and allow you
to edit the settings.
• Each Panel contains independent settings for three instruments (Organ/Piano/Synth), as well as the settings of the four Panel effects (Effect 1/2, Delay and AmpSim/EQ).
• Thus, within a single Program you can use up to six instruments and eight independent effects.
SETTING OUTPUT LEVEL FOR INSTRUMENTS
Each instrument has a LEVEL rotary encoder at the top. This adjusts the output level for the corresponding
instrument section. The LEVEL encoders can be Morph controlled.
Page 14
NORD STAGE Eighty Eight V1.1x
4. Getting Started: Adding a Global effect
ADDING A GLOBAL EFFECT
Nord Stage features four effect sections; the Rotor section (rotary speaker effect), the Effects section (three separate effects units; Effect 1, 2 and Delay), the Ampsim/EQ section
(overdrive and amplifier/speaker modelling with EQ), and a Compressor and Reverb section. The Compressor and Reverb effects are global, and affect all instruments routed to
the main CH OUT 1/2 jacks. The other effects can process one instrument at a time per
Panel.
• To add a global reverb effect to a sound, simply press the ON button in the Reverb section.
Now you can adjust the amount of reverb effect using the DRY/WET knob, and set the
basic reverb character (Hall/Stage/Room) using the Selector button!
How to use the other effects is described in the Effects chapter, see “The Effects” on
page 44..
Page 15
5. The Program section: Overview
5. THE PROGRAM
NORD STAGE Eighty Eight V1.1x
SECTION
OVERVIEW
The Program section comprises central functions such as Program handling, system pages etc. System pages are covered in a separate chapter - see “System functions” on page 60.
PAGE -/+
BUTTONS
The PAGE -/+ buttons are used to select Programs and to navigate between System menu pages.
DISPLAY
The DISPLAY normally shows the name of the currently selected Program, but is also used for displaying
various system parameters.
THE SHIFT
BUTTON
Many buttons and knobs have secondary functions that you can access by holding down SHIFT
and pressing the button or turning the knob. The Shift induced functions are always printed
below the corresponding button or knob. For example, pressing SHIFT + PROGRAM 3 button
will allow you to access the MIDI system parameters.
Page 16
NORD STAGE Eighty Eight V1.1x
5. The Program section: Overview
VALUE DIAL
The VALUE DIAL to the right of the Display is used to select Program locations, and to set system parameter values.
THE STORE
BUTTON
The red STORE button is used when storing Programs (see “Storing Programs” on page 19).
PROGRAM
BUTTONS
Below the DISPLAY are the six PROGRAM buttons (1- 6). Use them to select Programs and to select various system functions (using SHIFT).
THE LIVE 1/2
BUTTONS
Pressing either of the LIVE 1/2 buttons will activate the Live memory - see “About the Live 1&2 memory”
on page 18 for a description of this special memory feature.
KB ZONES 2/3
BUTTONS
These buttons are used to activate keyboard zones. Each Program can have up to
three keyboard zones (Lower/Upper/Hi), and each instrument section can be set to
play across all, two or one of these zones - see “Keyboard Zones and Dual Panel setups” on page 50.
MORPH ASSIGN
BUTTONS
This section allows you to assign panel parameter(s) to be controlled using the Mod wheel, a control pedal
or keyboard aftertouch. Multiple parameters can be Morph-assigned so that when you for example move
the Mod wheel it will change the drawbars settings for the organ and the volume of the piano section simultaneously. See “The Morph Assign feature” on page 54.
Page 17
5. The Program section: What is a Program?
PANEL A/B
NORD STAGE Eighty Eight V1.1x
BUTTONS
For each Program you have two independent Panels; A and B, where each Panel contains independent settings for the three instrument sections and effects. If you activate both Panels you can use two instruments
of the same type at the same time, e.g. two Piano instruments or a Split Organ setup (see “About Split
Organ Setups” on page 26. This is done by simultaneously pressing both PANEL A and B buttons. When
both panels are active you have access to six instrument sections and eight effects sections (Effect 1 & 2,
Delay and AmpSim/EQ x2). One of the PANEL A & B buttons will then blink to indicate edit focus, i.e.
which of the two Panel’s settings that are currently shown and can be tweaked. To switch edit focus to the
other Panel, press the corresponding PANEL button.
WHAT IS A PROGRAM?
A Program basically stores everything (except System functions which are mostly global). To understand
the internal architecture in Nord Stage, keep the following in mind:
• For each Panel, settings for all three Instruments, the four Panel Effects, and the Extern section are
independent.
• A Program stores settings for both Panel A and B, so a Program contains independent settings for six
instruments, eight Panel Effects, and two Extern sections.
• The Global effects (Compressor/Reverb), and the Rotor effect, are not Panel independent, but are stored
with the Program as well.
• Splits, layers (Keyboard Zones) and Morph assignments are of course also part of a Program.
ABOUT
THE
LIVE 1&2
MEMORY
The special Live memory feature can be described as a “live program memory”. If you activate the LIVE 1
OR 2 buttons, all changes to panel settings you make will be continuously saved. If you switch the power
off, or select another Program, the settings are still stored in the Live memory, so when you power up next
time (or return to the Live memory) all settings will be exactly as you left them.
Having two Live memory locations means that two independent setups can be “saved” in this way.
If Live memory is selected and you decide you wish to store the settings permanently as a Program you can
do so using the standard methods (see below).
You can also store Programs into the Live 1 or 2 memory locations, in which case the Program settings will
replace the current Live memory settings. Note that when you store a Program into either of the Live memory locations, the stored settings will be “transferred” to Live memory, i.e. any changes you make will be
stored continuously, and you will not be able to revert back to the exact settings as they were when
“stored”.
Page 18
NORD STAGE Eighty Eight V1.1x
5. The Program section: Storing Programs
STORING PROGRAMS
Storing a Program will overwrite the existing Program in the selected memory location.
Note! When Nord Stage is shipped from factory, Memory Protect is set to ‘On’. To be able to
store Programs, see “Memory Protect” on page 61.
STORING
A
PROGRAM
To store a Program without changing its name, proceed as follows:
1. Press the STORE button once. The STORE button and the curStore to 1:5
rently selected PROGRAM button indicator starts blinking, and
the DISPLAY will read “Store to X : X” (the current Page and Pro- Wizard
gram number), plus the Program name,
2. Next step is to select a Page/Program location to store the edited Program in. You can use the PAGE /+ buttons to select a Program Page (1-21), and the PROGRAM 1-6 buttons to select a Program
number on the selected Page (or the Live 1 or 2 memories). Alternatively, you can use the VALUE
DIAL to scroll through all Programs (on all Program Pages). To cancel the operation, press any button, except for the SHIFT, PROGRAM, STORE or PAGE -/+ buttons.
• From here you can opt to name the program before finally storing it - see “Naming a Program” below.
3. Press STORE again to store your Program. The Display now reads “Program Stored!” for a short duration.
NAMING
A
PROGRAM
To name a program, proceed as follows:
1. Hold down SHIFT and press the STORE button once. The STORE button indicator starts blinking,
and the DISPLAY will read “Set Name”.
2. Now use one of the following methods to name your Program:
• You can move the cursor position left or right in the DISPLAY by using the PAGE -/+ buttons.
• When the cursor is at the position where you want to enter/change a character, you can use the VALUE
DIAL to scroll through all available characters (a-z.A-Z, 0-9, Space and “-”).
• By holding down SHIFT and pressing the PAGE + (INS) button, you enter a blank step at the cursor
position.
• By holding down SHIFT and pressing the PAGE - (DEL) button, you erase the character at the cursor
position.
• Alternatively, you can press and hold down the KB ZONES 2 OR 3 button. This will bring up the characters in the DISPLAY with the focus on the character the cursor was last on. You can now use the
VALUE DIAL to select a character at the current cursor position. When you release the KB ZONES button the cursor automatically moves to the next position.
3. Press STORE again. Now you can use the same methods as outlined in “Storing a Program” above to
store your name with the Program.
Page 19
6. The Instruments: Introduction
NORD STAGE Eighty Eight V1.1x
6. THE INSTRUMENTS
INTRODUCTION
The Nord Stage features 3 different Instruments; Organ, Piano and Synth. Each Instrument is two part
multitimbral meaning that there are actually two independent sound engines for each Instrument. These
“engines” are internally connected to the Panels, one for Panel A and another for Panel B. The Organ behaves a little differently in that there is actually only one “engine” but supports two manuals with separate
drawbar settings - see “About Split Organ Setups” on page 26.
COMMON FEATURES
ACTIVATING
THE
SUSTAIN PEDAL/PITCH STICK
FOR INSTRUMENTS
You can freely set which instruments are to respond to a connected Sustain Pedal and to Pitch Bend
• To activate the Sustain pedal for an instrument, press SHIFT + the right
OCTAVE SHIFT button in the corresponding instrument section so that the
“SUSTPED” LED lights up below the button. You use the same general method
to deactivate reception of Sustain for an instrument section, which in that case
turns off the “SUSTPED” LED indicator.
• To activate Pitch Bend for an instrument section, press SHIFT + the left
OCTAVE SHIFT button in the corresponding instrument section so that the
“PSTICK” LED lights up below the button.
The bend range is fixed to -/+ 2 semitones.
LEVEL
ENCODER
The LEVEL rotary encoder allows you to adjust the output volume for the instrument. Instrument level can be Morph controlled.
KB ZONE SELECT
BUTTONS
The KB ZONE SELECT buttons allow you to assign the instrument to Keyboard
Zones to create splits and layers. This is described in “Keyboard Zones and Dual
Panel setups” on page 50.
OCTAVE SHIFT
Each instrument has a finite note range. You can use Octave Shift to shift the pitch up or down within the
instruments note range. See “Octave Shift” on page 52 for more information.
Page 20
NORD STAGE Eighty Eight V1.1x
6. The Instruments: The Organ Section
THE ORGAN SECTION
The Organ section in the Stage features emulations of three classic organ models; a Hammond B-3, a Vox
Continental II (V-Type) and a Farfisa Compact DeLuxe (F-Type).
You select which model to play using the ORGAN MODEL button.
THE B-3 MODEL (HAMMOND)
The B-3 Organ in the Nord Stage is based on a digital simulation of the mechanical tone wheels of the
classic Hammond B-3 organ. This simulation utilizes innovative and advanced methods to capture every
nuance of the original B-3 sound, for example:
• An extremely accurate digital model of the original chorus and vibrato scanner.
• Modeling of the individual random contact bounces for each harmonic.
• Modeling of the unique frequency characteristics of the built-in pre-amplifier which forms the ”body” of
the B-3 sound.
• Simulation of the energy stealth on the tone wheels that results in the typical ”compressed” sound.
• Authentic tuning of the tone wheels according to the original B3 design.
• Extremely fast keyboard response.
• Full polyphony.
THE DRAWBARS
The drawbars of Nord Stage are represented by buttons and LED chain graphs instead of ordinary mechanical drawbars. This gives you a big advantage: when you change preset or Programs, the correct drawbar
settings are recalled immediately and shown by the LEDs. In other words, no need for the regular ’trial and
error’ method. It’s very easy to get the hang of changing the drawbar settings in a natural way with the
buttons.
Page 21
6. The Instruments: The Organ Section
NORD STAGE Eighty Eight V1.1x
The drawbars of Nord Stage behave similar to their mechanical
counterparts, i.e. you “pull out”
the drawbars by pressing the
LOWER DRAWBAR buttons and
“push them back in” by pressing
the UPPER DRAWBAR buttons.
The DRAWBAR buttons are special in the way that they auto-increment/decrement the drawbar
value when held. I.e. if you hold a
DRAWBAR button the corresponding drawbar value will continue to increment or decrement
(within its range) until you release
the button. Each drawbar represents a harmonic (sometimes
called a partial). In the figure you
can see the pitch interval among
In the figure above we have chosen C3 as our reference note. The FUND drawbar is
the nine drawbars. Note that the considered the basic (fundamental) harmonic in the organ sound. The arrows point
SUB3 drawbar actually lies a 5th at the respective note that each drawbar represents when C3 is our reference note.
above the fundamental harmonic.
However, in most situations it is perceived as sounding below the basic harmonic. When you play different
notes on the keyboard, the harmonics are being transposed up or down with the fixed harmonic intervals.
PERCUSSION
In the original B-3 the Percussion effect is generated by a single envelope generator that controls either the 2nd or 3rd harmonic. The envelope “opens up” for a short moment in the beginning of the sound
when you press the key(s).
• You activate and deactivate the Percussion effect by pressing the
ON button.
• The Percussion effect can be set to control either the 2nd (HARMONIC 3RD button LED Off) or 3rd
harmonic.
• The envelope Decay time can be set to Fast (DECAY button LED Off) or Slow and the Volume characteristics to Normal (VOLUME button LED Off) or Soft.
(The horizontal dotted lines
represent the current drawbar level without Percussion)
The figure above shows the Percussion envelope in
SOFT mode
Page 22
The figure above shows the Percussion envelope in NORMAL mode
NORD STAGE Eighty Eight V1.1x
6. The Instruments: The Organ Section
Like on the original B-3, the Percussion is a single-triggered non-legato effect. By “single-triggered” we
mean that the percussion is only present when you hit the keys when no other note is sounding. In other
words, if you play a note or a chord and then add on more notes without releasing the previously pressed
keys, there will be no percussion effect in the new notes. You have to release all keys to be able to play new
notes with the percussion effect. Also, like on the original B-3, in Normal Percussion mode the sustain level
is significantly lower than in Soft Percussion mode (or with the Percussion effect disabled).
VIBRATO
The original B-3 chorus and vibrato scanner consists of a tapped delay line in
combination with a rotating scanner. For the Vibrato effect, phase shift is applied to the signal. For the Chorus effect, the phase modulated signal is added
to the original signal. A lot of time and effort have been spent in accurately
recreating the chorus and vibrato scanner effect. Like on the original B-3,
Nord Stage offers three different types of choruses (C1-C3) and three different
types of vibratos (V1-V3). Select one of these types by pressing the SELECTOR button. You activate and deactivate the Vibrato section by pressing the
ON button.
KEY CLICK CONTROL
On an original B-3 organ, the key click produced by the random contact bounces is actually an audio artifact. This particular artifact later became a desirable effect amongst musicians. In the Nord Stage you can
select the amount of key click that should be present in the B-3 organ sounds.
1. Press the SHIFT + SOUND buttons to access the Sound menu page.
2. You use the PAGE -/+ buttons to navigate to the Organ Key Click Level menu item.
3. Now you can use the VALUE DIAL to change the Click Level 0-100%. Default setting is 50%.
When you are done, press the SOUND button again to exit the Sound page.
Page 23
6. The Instruments: The Organ Section
NORD STAGE Eighty Eight V1.1x
THE V-TYPE MODEL (VOX CONTINENTAL II)
The Vox Continental is probably the most famous of all the transistor-based combo organs that emerged
in the early 60’s. Transistor technology made it possible to manufacture much more compact and portable
organ instruments. Compared to the mighty sound of tone-wheel based organs, transistor organs generally
sounded reedier and weaker, but the Vox Continental had a distinctive sound character which together
with the portability and cool design (inverse keyboard and chrome “Z-frame” stand) made the instrument
massively popular at the time. The sound is timeless and recreated faithfully in Nord Stage.
THE DRAWBARS
The original Vox Continental also used drawbars to change the timbre of the sound. The harmonic intervals
for the V-Type organ are printed on the upper row above the drawbars (see page 21 for a general description of how the drawbars work in Nord Stage).
In the figure you can see the pitch
SUB SUB3 FUND 2ND 5TH 3-4-8TH
Sine
interval among the six drawbars
used by the V-Type organ. Note
that the 6th drawbar from the left
controls three harmonics simultaneously (3rd-4th-8th). The two
rightmost drawbars determine the
mix of the two basic waveforms
that make up the sound generating source of the organ sound, just
like on the original. You have access to sine (soft) and triangle
(bright) waveforms which can be
freely mixed together. If these
drawbars are both fully “pushed
in”, the organ will not produce any
sound.
In the figure above we have chosen C3 as our reference note. The FUND drawbar is
considered the basic (fundamental) harmonic in the organ sound. The arrows point
at the respective note that each drawbar represents when C3 is our reference note.
VIBRATO
There is only one type of vibrato
available for the V-Type, which is activated using the ON button in the Vibrato section.Note that the VType vibrato is common for both Panels if a dual manual organ is used.
F-TYPE MODEL (FARFISA)
The typical “buzzy” sound of the Farfisa organ is one of the most distinct and easily recognizable keyboard
sounds ever created, yet it is actually possible to get quite a wide range of sounds out of the instrument.
For Nord Stage a Farfisa Compact DeLuxe was used as the source model.
Page 24
NORD STAGE Eighty Eight V1.1x
THE REGISTER SELECTORS
The drawbars act as on/off switches, or “Register selectors” when
the F-Type model is selected. Instead of drawbars, the original
Farfisa organs featured “rocker”type switches to select instrument
“voices” (actually different filter
settings) in various footage (octave) ranges. In Nord Stage, this
functionality is reproduced. When
the F-Type organ model is selected, the LOWER DRAWBAR buttons are used to turn voices on,
and the HIGHER DRAWBAR buttons turns them off. The drawbar
LEDs 5-8 are lit up for an activated voice, and drawbar LEDs 1-4
are lit up for a deactivated voice.
The available voices for the F-type
(also printed on the panel directly
over the drawbars) are as follows
(from left to right):
6. The Instruments: The Organ Section
SUB
SUB3 FUND 2ND
5TH
3-4-8TH
Sine
In the figure above we have chosen C3 as our reference note. The four ‘Register selectors
correspond to the fundamental harmonic (but with different tonal characteristics).
The arrows point at the respective note that each drawbar represents when C3 is our
reference note.
Register
selector #
Voice
Panel Name
1
Bass 16
BAS16
2
Strings 16
STR16
3
Flute 8
FLUTE8
4
Oboe 8
OBOE8
5
Trumpet 8
TRMP8
6
Strings 8
STR8
7
Flute 4
FLUTE4
8
Strings 4
STR4
9
A bright voice, pitched an octave and a
fifth above the fundamental.
2 2/3
Note that the voices aren’t supposed to replicate the instruments they are named after, but rather to describe the basic tonal characteristic of the voice (i.e. flute=soft/oboe=reedy/strings=bright/trumpet=brassy).
VIBRATO
The F-Type Model has two basic vibrato modes; “Light” and “Heavy”, with different rates for each mode.
Slow/Fast rate for the Light mode is set with the V1/V2 Selectors and C 1/C2 sets the rate for Heavy mode.
Note that the F-Type vibrato is common for both Panels if a dual manual organ is used.
Page 25
6. The Instruments: The Organ Section
SWELL
NORD STAGE Eighty Eight V1.1x
CONTROL
Swell is the characteristic volume function that you control from the B-3’s pedal. Swell is not only a volume
control - for the B-3 it also changes the character of the sound in a special way. To use Swell control on the
Nord Stage, simply plug in a standard resistive expression pedal to the ORGAN SWELL input on the rear
panel (see “Connecting pedals” on page 11).
A expression pedal connected to the ORGAN SWELL input will control Swell for all organ models.
ROTARY SPEAKER
The Rotor section (rotary speaker simulation) is logically placed next to the Organ section, but you can also
use it for Piano or Synth sounds, just like the other effects. The Rotor effect is described on page 49.
ORGAN
PRESET
1&2
For each Organ Model you can store two organ Presets within a single Program. This is a quick way of
changing between two sound variations, without having to change Programs.
You change between Presets 1 & 2 by pressing the PRESET II button. The drawbar settings and the Vibrato/Percussion (on/off) settings in both Presets are stored with the Program.
ABOUT SPLIT ORGAN SETUPS
If you press SHIFT and the SPLIT ORGAN button you will activate a basic Split Organ setup, where Both
Panel A and B are active. In this mode the keyboard is split to play a “Lower” and an “Upper” Manual
organ. Panel A settings control the Lower Manual and Panel B the Upper Manual. By default, the split
point is set at middle C.
A blinking PANEL button indicates which Panel is edit active, i.e. which of the two Panel’s settings are
currently shown. To edit/show settings for the other Panel/Manual, press the corresponding PANEL button.
Each Panel/Manual can have their own drawbar, Vibrato (on/off) and Percussion (on/off) settings.
Page 26
NORD STAGE Eighty Eight V1.1x
6. The Instruments: The Piano section
THE PIANO SECTION
The Piano section of Nord Stage contains six Piano Categories, and each Category can contain different
instrument Types. You can freely add new piano instruments via USB using the Nord Stage Manager utility (see “Downloading Piano instruments via USB” on page 65).
Right out of the box, Nord Stage features a fine collection of carefully selected acoustic and electromechanical pianos. A lot of effort was put in to ensure that the play response and sound of the sampled instruments
matches every nuance of the real article. Each piano instrument has been multi-sampled in a vast amount
of levels. That’s one reason why they all sound and feel so authentic.
ABOUT
THE
PIANO INSTRUMENTS
Since all piano samples are stored in Flash memory you can easily add and/or replace the stored piano instruments with new ones.
When you download Piano instruments, these will always automatically be loaded into the corresponding
Category. The user can select whether to overwrite an existing instrument in this category, or to add it as
a new Type. Thus, the Piano Categories printed on the panel are always correct.
A Program saves Piano instruments by Category and the Type number. If a Program refers to a Piano instrument that isn’t currently loaded, i.e. an empty Type slot, the Type display will blink showing the missing Type number. If this happens, you can either navigate to another instrument Type in the selected
Category and select to use this instead, or use the Nord Stage Manager utility to download an instrument into the empty Type slot.
Page 27
6. The Instruments: The Piano section
SELECTING
NORD STAGE Eighty Eight V1.1x
PIANO INSTRUMENTS
You use the SELECTOR button to select an instrument category and then use the TYPE button to select
a specific instrument or variation within the selected category.
The Piano categories are as follows:
CLAV
This is the Clavinet Category.
WURL
This is the Wurlitzer Category.
RHOD
This Category is for Fender Rhodes pianos.
GRAND
This Category is for acoustic grand pianos.
UPRIGHT
This Category is for acoustic upright pianos.
E GRAND
This Category is for electric grand pianos.
Page 28
NORD STAGE Eighty Eight V1.1x
ABOUT
THE
FACTORY
6. The Instruments: The Piano section
SOUND LIBRARY
As mentioned previously, the Piano section is open-ended in that you can load new instruments using the
Nord Stage Manager utility. Below follows a description of the Piano Instruments that are included with
the Nord Stage from factory:
Category
Type #
Description
Clav
1-4
This selects a sampled Hohner Clavinet D6.
There are 4 Types selectable, with different pick-up variations. (See “Pick-up
Type” on page 30.)
In addition, all possible filter combinations of the original Clavinet D6 can be
recreated in the Clav EQ section. (See “Clav EQ” on page 30).
Wurl
1
Wurlitzer 200A electric piano.
Rhod
1
Rhodes Mk I Stage Piano SeventyThree. It was built in May 1978 and was
adjusted to “deep timbre adjustment”. The so called volume adjustment is set
to ‘Low’. These settings gives the piano a warm sound with a rich fundamental.
Rhod
2
Rhodes Mk II Stage Piano built in April 1981 and adjusted to ‘shallow’ timbre.
Remember this sound? It became famous thanks to the great Chick Corea.
The volume adjustment is set to ‘close’.
Rhod
3
Rhodes Mark V Stage Piano 73, built in June 1984 and adjusted to ‘ideal’ timbre. The volume adjustment is set to ‘close’. According to inventor Harold
Rhodes, the Mark V was "the best Rhodes ever built". The sound of the Mark V
offers improved clarity in the upper range, better consistency of tone in the low
range and increased sustain compared to earlier versions of Rhodes pianos.
Grand
1
Yamaha C7 Concert Grand, sampled in stereo with close miking.
Grand
2
Steinway Concert Model D (Ambient). Also in stereo with room ambiance.
Upright
1
A piano manufactured by Svenska Pianofabriken (Swedish Piano Factory). It
was carefully tuned to sound like a typical “parlour” piano.
Upright
2
Upright Yamaha M5J. A serious upright piano with plenty of character.
E.Grand
Yamaha CP-80 Electric Grand.
ABOUT INFO
If you press Shift and the INFO button in the Piano Select section, the display will momentarily show the
instrument’s name and additional information about the currently selected instrument, e.g. mic placement
“Close” or “Ambient”.
Page 29
6. The Instruments: The Piano section
CLAVINET
NORD STAGE Eighty Eight V1.1x
SOUND
On an original Clavinet D6 you can select different pick-up and filter combinations
by pressing a number of rocker switches. This functionality is very faithfully simulated in the Nord Stage, which means that you get all possible original Clavinet D6
sound variations (plus an additional four) by selecting different pick-up and filter
combinations! Here’s s how it works:
CLAV EQ
The two CLAV EQ buttons works as filter selectors. By selecting different combinations of the BRILLIANT/TREBLE and MEDIUM/SOFT filter buttons you can reproduce all 15 possible filter variations, exactly like on the original D6.
PICK-UP TYPE
A Clavinet D6 has two separate pick-ups, one on the “neck” and one on the “bridge”. By selecting either
one pick-up or both in different combinations you can alter the character of the sound quite drastically.
When the Clavinet is selected in the Nord Stage, you use the TYPE button in the Piano Select section to
select pick-up variations according to the table below:
Pick-up Type
Description
1 (CB)
Only the "bridge" pick-up; a bright sound.
2 (CA)
Only the "neck" pick-up; a warmer, less bright sound.
3 (DA)
Both pick-ups 180 degrees out of phase; the fundamental is almost cancelled out and the
sound becomes thin.
4 (DB)
Both pick-ups on and in phase; a very full sound.
DYNAMICS (VELOCITY
SENSITIVITY)
Some of the piano instruments sampled for the Nord Stage have very wide dynamic ranges by nature and
naturally we wanted to capture this as accurately as possible.
Therefore, it could be perceived that it is a little hard to reach the most extreme levels when playing the
Nord Stage piano sounds with the default keyboard Dynamics setting. This is because the dynamic response curves have been very carefully adjusted to match each original instrument's response characteristics. In other words, Clavia's intention was that when you play a Rhodes sound, for example, it should
almost feel like you are playing a Rhodes piano. However, If you want the piano sounds to respond more
easily to keyboard velocity, you can set this in the following way.
• Hold SHIFT and press the DYNAMICS button to select one of the three modes. The LEDs to the right
of the TYPE DISPLAY light up to indicate what mode is selected. Select between 1-3, where 3 is the
most compressed response. If all LEDs are off, this indicatesthe instrument’s original sensitivity.
The Dynamics setting is saved with a Program.
Page 30
NORD STAGE Eighty Eight V1.1x
6. The Instruments: The Synth section
THE SYNTH SECTION
BASICS
The Synth section in Nord Stage was designed to be a versatile yet easy to use “stage” synthesizer to complement the other instrument sections. It is based on traditional “subtractive” synthesis, but also features
waveforms derived from FM and wavetable synthesis.
The Synth is polyphonic with 16 voices.
Combining advanced sound generating features with traditional analog sound shaping (envelopes/filter) allows for a wide variety of sounds, yet it is very easy to use as there are not many parameters to tweak. Nord
Stage is after all primarily a stage instrument!
Page 31
6. The Instruments: The Synth section
NORD STAGE Eighty Eight V1.1x
OSC GROUP
TIMBRE CONTROL
The central TIMBRE control is used to shape the sound in various ways (depending on waveform). Timbre
can be Morph controlled.
WAVE SELECTOR BUTTONS
The two WAVE SELECTOR buttons are used to switch between the different modes and categories in the
osc group. Hold shift and press the wave buttons up or down to choose a category (Analog/FM/Digital),
the LED indicators shows wich category is activated while just pressing the wave buttons up or down will
switch between the different waveform within the selected category.
WAVES IN THE ANALOG CATEGORY
The Analog category has ten waveforms to choose from, summarized in the chart below.
Wave display
Waveform
S
Sd
S\
P
PF
P\
t
t\
C\
n
Sawtooth
Sawtooth detuned
Sawtooth synced
Pulse
Pulse fixed time
Pulse synced
Triangle
Triangle synced
Cos synced
Noise
SAWTOOTH
The sawtooth wave contains all harmonics and is the richest of the available waveforms. It is suitable for
all sorts of sounds.
The sawtooth signal shape
Page 32
The sawtooth signal frequency spectrum
NORD STAGE Eighty Eight V1.1x
6. The Instruments: The Synth section
The TIMBRE knob does not have any effect on the sawtooth wave.
PULSE
The pulse wave contains only odd harmonics at 50% pulse width (square wave). This waveform is special
in that its harmonic content can be varied continuously, by adjusting the pulse width (PWM).
The pure square wave: a pulse wave
with 50% pulse width
The frequency spectrum of a pure square wave. The signal
contains only odd harmonics
The pulse wave at 10% pulse width
The frequency spectrum at 10% pulse width. Now, also even
harmonics are gradually introduced making the sound
“sharper” but also “thinner”
The pulse wave at 5% pulse width
The narrower the pulse width, the more harmonics are present
in the frequency spectrum
The TIMBRE knob controls the pulse width of the pulse wave, from 50% (square wave) to 1%. You can
modulate the Timbre using Morph (see page 54), Velocity or Mod Envelope. This waveform is suitable for
many type of sounds and has a more “hollow” character than the Sawtooth wave.
TRIANGLE
The triangle waveform has only odd and not very strong harmonics. It is suitable for flute sounds and similar.
NOISE
The noise waveform is a chaotic waveform, it does not contain any harmonics, together with cutoff, resonance and the effect section it can produce interesting atmospheres.
Page 33
6. The Instruments: The Synth section
NORD STAGE Eighty Eight V1.1x
OSCILLATOR SYNC WAVEFORMS
The Saw, Square, Triangle and Sine waveforms can be synchronized, these modes are marked with a special
character in the wave display and extended with synced in the main DISPLAY. Oscillator Synchronization
means that you use the signal from one oscillator to restart another oscillator. Nord Stage has a “hidden”
sync oscillator for waveforms with this option. Oscillator sync is very useful for generating lead lines with
classic “hard sync” sounds. When sync is applied, the basic pitch of the oscillator is locked to that of the
sync oscillator. When you vary the pitch of the synchronized oscillator with the TIMBRE knob, this will be
perceived as a change in timbre, with a frequency spectrum with deep resonance in the oscillator’s harmonics.
Tip! When using Oscillator Sync, it can be very useful to have the Timbre amount(s) modulated from any
of the Morph assign sources. This will generate a signal with continuously varied harmonic content.
If you choose one of the synchronized oscillator mode, the Oscillator will start over with a new period of
the waveform, each time the sync-oscillator does so. If the Oscillator then has a higher frequency than the
sync-oscillator, it will get a complex waveform that depends both on its own pitch and on that of the syncoscillator.
Example 1: a sawtooth wave synced by a sync oscillator. The sawtooth wave is restarted every time the sync oscillator
begins a new cycle. The resulting signal gets deep resonance in its harmonics.
Page 34
NORD STAGE Eighty Eight V1.1x
6. The Instruments: The Synth section
FM CATEGORY
The basic principle behind FM synthesis relies on one oscillator (the modulator) modulating the frequency
of another (the carrier). There are several different types of algorithms in the FM category ranging from
one up to three oscillators (operators) working together. Depending on what kind of sound you want
choose from the different combinations availible and you have many interesting FM sounds at your disposal. When a new wave is selected the main DISPLAY shows, for a short duration, the algorithm used together with information on the frequency relations between the operators and whether feedback is used. The
wave display shows the modulator (s) frequency relation to the carrier. If an operator uses feedback it is
indicated by a dot next to the digit. In the chart below all availible algorithms together with the notation
used in the wave display are listed:
Wave disp.
Cr
1
2
3
5
9
1.
2.
3.
5.
9.
11
21
31
51
91
22
42
82
1.1
1:2
1:3
1:5
1:9
1.F
2.F
3.F
5.F
9.F
Algorithm
1 op with feedback
2 op
2 op
2 op
2 op
2 op
2 op with feedback
2 op with feedback
2 op with feedback
2 op with feedback
2 op with feedback
3 op
3 op
3 op
3 op
3 op
3 op
3 op
3 op
3 op with feedback
3 op with feedback
3 op with feedback
3 op with feedback
3 op with feedback
3 op with feedback
3 op with feedback
3 op with feedback
3 op with feedback
3 op with feedback
Freq. relation
1
1:1
2:1
3:1
5:1
9:1
1:1
2:1
3:1
5:1
9:1
1:1:1
2:1:1
3:1:1
5:1:1
9:1:1
2:2:1
4:2:1
8:2:1
1:1:1
1:2:1
1:3:1
1:5:1
1:9:1
1:1:2
2:1:2
3:1:2
5:1:2
9:1:2
DIGITAL WAVEFORM CATEGORY
This category features 32 different sampled waveforms with different tonal character. In this category the
timbre knob does not have any effect on the different waveforms.
Page 35
6. The Instruments: The Synth section
NORD STAGE Eighty Eight V1.1x
TIMBRE CONTROL
This knob governs the amount of modulation applied to the Timbre parameter. The Timbre parameter can
be controlled by Velocity or the Mod Envelope. The TIMBRE CONTROL knob controls the modulation
amount for the different modes/algorithms in the FM category.
VELOCITY
If you turn the TIMBRE CONTROL knob clockwise, the Timbre will be raised if you play harder.
MOD ENV
If you press SHIFT and turn the TIMBRE CONTROL knob so that the MOD ENV LED lights up, the Timbre parameter will instead be modulated by the Mod Envelope (see page 37).
Page 36
NORD STAGE Eighty Eight V1.1x
6. The Instruments: The Synth section
MOD ENVELOPE
The Mod (Modulation) Envelope is a simple type of envelope only comprising Attack and Decay/Release.
It sends out a control signal that could look like in the figure below.
In this illustration, the Mod Envelope outputs a
control signal that rises to maximum amount at the
set Attack time and then falls back to zero at the set
Decay time.
The Mod Envelope can control the Filter Frequency and the Timbre parameters, and the amount of Mod
Envelope is set with the respective FREQ/TIMBRE CONTROL knobs. The Mod Envelope can be used either as an Attack/Decay or Attack/Release envelope or, in Repeat mode, as a LFO with shapable waveform
(Attack and Decay times).
ATTACK
Attack sets the time it should take for the envelope to reach maximum level after you have pressed a key.
Turn the ATTACK knob clockwise to increase Attack time.
ENV VEL
If you press SHIFT and turn the ATTACK knob so that the ENV VEL indicator lights up, the amount of
Mod Envelope applied will be velocity controlled (i.e. how hard or soft you play).
DECAY/RELEASE
When the attack phase is over, the envelope drops back to zero level. Use the DECAY knob to set the time
this should take.
Instead of having a Decay time, you can switch to have a Release time instead (see figures below). When
you press a key, the Attack phase proceeds as usual. When the Attack phase is over the envelope remains
Page 37
6. The Instruments: The Synth section
NORD STAGE Eighty Eight V1.1x
on the maximum level for as long as you hold down the key. When you release the key, the Release phase
starts and the amount falls back to zero.
In Attack/Release mode, the control signal from the
Mod Envelope behaves basically like this
Hold down SHIFT and turn the DECAY knob so that the lower LED in the Env Mode section lights up to
select Release time instead of Decay. Hold down SHIFT and turn the ATTACK knob to revert to Decay
time.
REPEAT
Hold down SHIFT and turn the DECAY knob so that both LEDs in the Env Mode section light up to select
Repeat mode. This makes the Modulation Envelope restart directly after the Decay phase, creating cyclic
modulation (like an LFO) with “shapable” waveform where you can change the waveshape and cycle time
by adjusting the Attack and Decay times.
Page 38
NORD STAGE Eighty Eight V1.1x
6. The Instruments: The Synth section
AMP ENVELOPE
An amplifier is most often used at the final stage of a synth signal chain, to control volume.
By modulating the amplifier with an envelope, the sound can be given its basic “shape”. In
fact, the “volume shape” is one of the most important factors to how we identify the sound.
By setting up a proper volume envelope you can make a sound “soft”, “hard”, “plucked”
“static” etc. The Amp Envelope has basic Attack and Decay/Release parameters.
ATTACK
The ATTACK knob is used to adjust how long it should take for the sound to reach from zero
to full amplitude after a key has been pressed. With long Attack settings the sound will gradually “fade in”.
ENV VEL
If you press SHIFT and turn the ATTACK knob so that the ENV VEL indicator lights up,
the amount of Amp Envelope applied will be velocity controlled (i.e. how hard or soft you play).
DECAY/RELEASE
When the attack phase is over, the envelope drops back to zero level. Use the DECAY knob to set the time
this should take.
Instead of having a Decay time, you can switch to have a Release time instead (see figures below). When
you press a key, the Attack phase proceeds as usual. When the Attack phase is over the envelope remains
on the maximum level for as long as you hold down the key. When you release the key, the Release phase
starts where the level falls back to zero.
In Attack/Release mode, the signal from the Amp
Envelope behaves basically like this
Hold down SHIFT and turn the DECAY knob so that the lower LED in the Env Mode section lights up to
select Release time instead of Decay. Hold down SHIFT and turn the ATTACK knob to revert to Decay
time. If you hold down SHIFT and turn the knob so that both LED’s light up, you will get a alternative
decay mode with a short release.
Page 39
6. The Instruments: The Synth section
NORD STAGE Eighty Eight V1.1x
FILTER SECTION
The Filter section in Nord Stage comprises a lowpass filter with either a 12dB or 24 dB slope.
FILTER FREQUENCY CUTOFF
With the FREQ knob you set the cutoff frequency. Simply put, if you turn the FREQ knob clockwise, the
high-frequency content in the signal will increase. This parameter can be Morph controlled.
When you “open” a lowpass filter, the high-frequency content
increases in the output signal.
LP FILTER
In Nord Stage you can select between 12 dB/octave and 24 dB/octave (4-pole) slopes for the low pass filter.
Press SHIFT + the 4 POLE button to switch type. The “4-Pole” LED shows which filter mode is selected.
The figure shows the filter with
24 dB and 12 dB slopes.
24 DB (4-POLE)
This is the classic “synth filter” slope used in the Minimoog and Prophet-5 among others. It cuts out frequencies rather drastically, 24 dB per octave. A 24 dB filter is also known as a 4-pole filter.
12 DB
The 12 dB/octave slope leaves more harmonics than the 24dB variation discussed above. This type of filter
has been used in various early Oberheim synthesizers and others. A 12 dB filter is also known as a 2-pole
filter.
Page 40
NORD STAGE Eighty Eight V1.1x
6. The Instruments: The Synth section
KB TRACK
The reason for having the Keyboard Track switch is related to basic acoustics. If you raise the pitch of a
waveform, the harmonics naturally raise in frequency. If the cutoff frequency is constant, the sound will be
perceived as getting “muddier” the higher up the keyboard you play. To avoid this effect, use KB Track.
KB Track (keyboard tracking) has three modes; “FULL”, “2/3” and “1/3”, which is set with the KB
TRACK button. With KB T turned off (both LEDs off), the filter frequency setting is constant regardless
of where on the keyboard you play. When Keyboard Track is activated, the filter frequency setting will be
higher for higher notes as indicated in the illustration below. At “Full” tracking (both LEDs on) the filter
frequency tracks the keyboard 100% (if you turn up the Resonance parameter to full so that the filter selfoscillates and produces a pitch, Filter Frequency will track to 12 notes/octave). If “2/3” or “1/3” is selected,
the filter frequency/keyboard relationship is more subtle, i.e. the filter frequency will increase less with
higher notes (66% and 33% respectively).
The figure shows how the
Frequency1 value changes
according to where on the
keyboard you play when
KB TRACK is activated.
RESONANCE
The Resonance parameter is used to further adjust the characteristics of the Filter. Increasing the Resonance
will emphasize frequencies around the set Filter Frequency (cutoff frequency), making the sound thinner.
Further raising the Resonance will make the sound resonant to a point where the filter starts to self-oscillate
and produce a ringing pitch. Exactly where in the frequency spectrum this “ringing” occurs, depends on
the Frequency value.
4
The figure shows a 24 dB
lowpass filter with different
resonance amounts (Q-values).
Q=0.5 represents zero Resonance amount and Q=×
maximum amount.
FREQUENCY CONTROL
This knob governs the amount of modulation applied to the Filter Frequency. The Filter Frequency can be
controlled by Velocity or the Mod Envelope. The FREQ CONTROL knob controls the modulation Amount
for both modes.
Page 41
6. The Instruments: The Synth section
NORD STAGE Eighty Eight V1.1x
VELOCITY
If you turn the FREQ CONTROL knob clockwise, the filter frequency cutoff will be raised if you play harder.
MOD ENV
If you press SHIFT and turn the FREQ CONTROL knob so that the MOD ENV LED lights up, the filter
frequency will instead be modulated by the Mod Envelope (see “Mod Envelope” on page 37).
VOICES
SECTION
LEGATO/MONO
This section allows you to set various voice modes.
MONO MODE
In Mono mode you can only play one note at a time, just like on a traditional monophonic synthesizer. If
you play one key and then a second key without releasing the first key, the last note will sound. If you now
release the last key, the first one will retrig and start sounding again.
To activate Mono mode, press the SELECTOR button so that the MONO LED lights up.
LEGATO MODE
To activate Legato mode, press the SELECTOR button so that the LEGATO LED lights up.
In Legato mode you can only play one note at a time, just like on a traditional monophonic synthesizer. If
you play a new key before releasing the previously played key (legato), the new note will replace the previous one at the current Envelope phase of the previously pressed key. I.e. the new note will not retrigger
the Envelopes (Amp and Mod).
If you release the last played key before playing a new key (non-legato), the new note will sound exactly
like in Mono mode, i.e. the complete Envelopes will be retriggered.
GLIDE (PORTAMENTO)
When activated, the Glide function makes the pitch “glide” from one note to the next when playing (this
is sometimes called portamento). It operates in legato/mono mode only. The glide characteristics can be
described as “constant rate”, which means that the greater the “distance” between two subsequent notes,
the longer the glide time. Turn the GLIDE knob clockwise to increase the glide rate.
AUTO
Press SHIFT and turn the GLIDE button to select Auto Glide mode (the Auto LED is lit). This means that
glide is active only when you play legato (you press a new key before you release the previous key).
UNISON
When you activate Unison, several slightly detuned voices are added to the basic sound for fat chorus effects. Note that Unison doesn’t reduce the polyphony!
• You adjust the detune amount among the voices with the UNISON knob.
Page 42
NORD STAGE Eighty Eight V1.1x
6. The Instruments: The Synth section
VIBRATO
Vibrato modulates the pitch of the oscillators to produce natural vibrato effects.
There are three basic methods you can use to control Synth Vibrato which is set using the
SELECTOR button in the Vibrato section:
• If Aftertouch (A.Touch) is selected you can control the vibrato by pressing down held
notes on the keyboard. See “About Aftertouch” on page 56.
• You can also control vibrato using the Mod Wheel.
• There are also three delay (Dly 1-3) modes which automatically activates vibrato after a certain time for
held notes. The difference between the three delay modes is the time it takes for vibrato to activate;
Dly1 is the fastest time and Dly3 the slowest. The basic Delayed Vibrato depth and speed settings are
set globally on the Sound Page - see “Sound Menu” on page 62.
EQ
The Synth also features a basic 2 band EQ section. This allows you to quickly
boost or cut treble and bass frequencies by +/- 15 dB. Turn the TREBLE or
BASS knob clockwise (from center position) to boost the respective frequency
band and vice versa. A LED indicates when the EQ is active.
SOUND SELECT
SECTION
When you save a Program the current Synth settings are naturally stored together with all other panel settings, but the Sound Select section allows you to select/store Synth sounds separately from Programs.
SELECTING SYNTH SOUNDS
The available memory slots are divided into three categories; Synth, Pad and Bass, with 99 memory slotsin
each category. Having categories helps you quickly find the type of sound you are looking for.
Use the two SOUND SELECT UP/DOWN buttons to step through all the available sounds. To jump between categories, press SHIFT and the SOUND SELECT UP/DOWN buttons. When you select a sound, the name is shown briefly
in the main Display. The smaller LCD Display in the Sound Select section always shows the patch number.If a Synth sound has been edited, a dot is shown
after the number to reflect this in the Display.
STORING SYNTH PATCHES
To store a Synth Patch, press SHIFT and the STORE SYNTH button in the Voices section. The display in
the Sound Select section starts blinking. You can now use the SOUND SELECT UP/DOWN buttons to navigate to a memory location where you would like to store your Patch. To switch category, press SHIFT and
the CATEGORY buttons.
To name a Synth Patch you can use the PAGE -/+ buttons to move the cursor and the VALUE DIAL to
select character just as for Programs, see page 13.
To store, press the STORE SYNTH button again.
SOUND INIT
To start with a “clean slate” when programming sounds you can use the Sound Init function. This will initialize the Patch to basic default settings. This is done by pressing SHIFT and the VIBRATO SELECTOR
button.
Page 43
7. The Effects: About the effects
NORD STAGE Eighty Eight V1.1x
7. THE EFFECTS
ABOUT THE EFFECTS
The Effects available in Nord Stage can be divided into three main categories:
• Panel Effects - these can affect one instrument (per Panel) at a time. Panel effects are the effects in the
main Effects section and in the AmpSim/EQ section. All Panel effects have independent settings for
Panel A and B, thus you have two sets of Panel effects available for each Program. See below for a
description of the Panel effects.
• Global Effects - these affect all instruments routed to the main outputs CH1 & CH2. The Compressor
and Reverb on the far right of the front panel are global effects. See page 48.
• The Rotor Effect works slightly differently compared to Panel effects. See “The Rotor section” on
page 49.
ABOUT
MONO/STEREO AND EFFECT ROUTING
Some of the effects are mono in/out, some are stereo in/out and others are mono in/stereo out. For each
individual effect the channel configuration is stated in the related text. The internal routing of some effects,
means that the instrument level has to be taken into account. Whenever this applies it will also be explained in the corresponding effect description.
Page 44
NORD STAGE Eighty Eight V1.1x
7. The Effects: The Panel effects
THE PANEL EFFECTS
ACTIVATING PANEL
EFFECTS
To add an individual effect to an instrument, you simply press the ON/OFF button at the bottom of the
corresponding effect section. This will automatically select the instrument section (ORG/PIANO/SYNTH)
that the selected effect currently points to as the source (indicated by a lit LED below the name of the instrument). To select another instrument to be processed by the effect, press SHIFT and the SOURCE button
to change instrument.
MAKING
SETTINGS FOR
PANEL
EFFECTS
(EFFECTS
SECTION)
To make settings for individual effects in the main “Effects” section (Effect 1/Effect 2/Delay), you mainly
use the RATE/TEMPO and AMOUNT knobs. Which parameters these two knobs control depend on the
selected effect - these are described for the corresponding effects below. The RATE/TEMPO and AMOUNT
knobs can also be Morph controlled - see page 54.
ABOUT THE FOCUS BUTTON
If you have more than one effect activated in the Effects section (e.g. Effect 1 and Effect 2), The FOCUS
button is used to select which effect’s settings (Rate/Tempo and Amount) you currently “see” and can edit.
Pressing the Focus button will alternate focus between the currently activated effects. The LED beside the
corresponding Effect 1/Effect 2/Delay section is lit for the edit active effect.
Page 45
7. The Effects: The Panel effects
NORD STAGE Eighty Eight V1.1x
EFFECT 1
The Effect 1 section offers six different types of modulation. You use the SELECTOR button
to switch between the available modulation effects. The following effects are available:
RM (RING MODULATION)
Ring Modulation is a type of modulation where two signals are multiplied with each other.
The result is an inharmonic “bell like” sound. Herbie Hancock used this effect a lot in the
‘70s. In the Nord Stage the instrument signal is multiplied with an additional sinewave.
When RM is selected you set the sinewave pitch with the RATE/TEMPO knob and the
amount of ring modulation with the AMOUNT knob.
This effect is mono in/out.
TREM (TREMOLO)
Tremolo is basically volume modulation that continuously varies the output signal volume. Tremolo is a
commonly used modulation, especially for Wurlitzer electric pianos.
The Tremelo effect is stereo in/out.
The filled curve indicates maximum AMOUNT value and the dashed curves
indicate lower AMOUNT values. At zero AMOUNT value the output level
is constantly at maximum level (the straight dashed line).
Use the RATE/TEMPO and AMOUNT knobs to control the Tremolo rate and depth. Note that the output
volume is at maximum level at zero AMOUNT setting.
A-PAN (AUTO PAN)
The A-Pan is an auto panning modulation that smoothly pans the signal between the Left and Right outputs.
The filled curve indicates maximum AMOUNT value and the dashed
curves indicate lower AMOUNT values. The signal smoothly pans between the Left and Right outputs as indicated in the figure.
You control the rate and amount of panning with the RATE/TEMPO and AMOUNT knobs. The Pan effect
is stereo in/out.
Tip! If the RATE/TEMPO KNOB is set to zero you can place the signal processed by A-Pan anywhere in
the stereo field manually by using the AMOUNT knob, just like a pan control on a mixer.
WAH-WAH
The Wah-Wah modulation is often used for electric guitars to get that characteristic “talking guitar”
sound. Wah-Wah can also be extremely useful on electric piano sounds. Try out the Clavinet sound with
Wah-Wah modulation and you’ll understand. Basically, the Wah-Wah modulation is a lowpass type of
filter that can be swept across the frequency range. During the sweep, the filter’s characteristics also changes. The Wah effect is mono in/out.
For the Wah-Wah1 modulation you control the “pedal position” with the RATE/TEMPO knob and the
wet/dry mix with the AMOUNT knob.
If you use an expression pedal connected to the CONTROL PEDAL INPUT you can control the filter
sweep and thus the Wah-Wah effect from the pedal by using the Morph function - see page 54.
Page 46
NORD STAGE Eighty Eight V1.1x
7. The Effects: The Panel effects
A-WHA 1&2 (AUTO-WAH)
Auto-Wah 1-2 are variations of the Wah-Wah effect described above. For A-Wha you control the filter
sweep range from the signal’s amplitude envelope (envelope follower). For the Auto-Wah 1 modulation
you control the range with the RATE/TEMPO knob and the wet/dry mix with the AMOUNT knob.
A-Wha 2 works in the same way, but produces a different character.
EFFECT 2
The Effect 2 section offers six types of vintage style effects to add that extra flavour to your
sounds.
FLANGER 1&2
The flanger produces a very characteristic comb filter effect. You set the flanging rate with
the RATE/TEMPO knob and the amount with the AMOUNT knob. The Flanger effect is
mono in/out.
PHASER 1&2
The phaser effect produces a very characteristic “sweep” effect commonly used with electric
piano sounds. You control the rate of the phase shift with the RATE/TEMPO knob and the
phase shift amount with the AMOUNT knob. This effect is mono in/out.
CHORUS 1&2
The Chorus effect simulates having several slightly detuned signals. You set the rate for the chorus effect
with the RATE/TEMPO knob and the amount with the AMOUNT knob. This effect is stereo in/out.
DELAY
The Delay effect produces echo/repeat effects. It has the following parameters:
You set the Delay time with the RATE/TEMPO knob, and the AMOUNT knob adjusts the
balance between the dry signal and the delay repeats.
The FEEDBACK knob controls the number of delay repeats. Delay is stereo in/out.
PING PONG
If you press SHIFT and turn the FEEDBACK knob so that the PING PONG indicator lights
up, the delay repeats will alternate between the left and right channels. When short delay
times are used, the repeats will be “asymmetrical” and produce delays that are more like early reflections in reverb units.
TAP TEMPO
You can also use Tap Tempo to set a delay time matching the tempo of a song. Simply tap the TAP TEMPO
button in the tempo you wish the delay to sync to a number of times, and the delay time will adjust automatically. As long as the Tap Tempo LED is lit the tempo is calculated - wait until it goes dark to tap in
another tempo.
Page 47
7. The Effects: The Panel effects
NORD STAGE Eighty Eight V1.1x
AMPSIM/EQ
This effect section combines an equalizer with amplifier and speaker cabinet simulation, for overdrive effects. This effect is mono in/out.
DRIVE
The Drive knob controls the amount of overdrive for the Ampsim section. If the
Drive LED is on, it indicates that overdrive is active.
EQ SECTION
This is a 3-band equalizer which features controls for bass, midrange and treble.
When there is no amp modelling, the EQ operates like a standard mixer EQ,
with +/- 15 dB boost/cut for each band .
When amp modelling is used, boosting and/or cutting will produce different
tonal charcteristiscs, depending the selected amp model.
AMP MODEL
You select a type of amplifier/speaker simulation using the SELECTOR button
in the Amp Model section. There are three Types available, with different characteristiscs. If all LEDs are off, the effect combines EQ with overdrive (no amp/
speaker modelling).
GLOBAL EFFECTS
If activated, the Compressor and Reverb effects will process all signals routed to the
CH 1/CH 2 outputs, but do not affect any signals routed to the CH 3/CH 4 outputs.
Both these effects are stereo in/out.
COMPRESSOR
The Compressor will even out the dynamics of what you play, making low level
sounds louder and high level sounds lower. This produces a tight, punchy sound and
makes the overall level easier to control in a live mix situation. You activate the Compressor using the ON button. The AMOUNT knob logically controls the amount of
compression applied.
REVERB
The Reverb section simulates the natural sound reflections in various acoustic environments. You can choose between three basic reverb types:
• Hall - a spacious reverb environment with long decay.
• Stage - a medium sized environment.
• Room - this produces room ambience with a short decay.
The DRY/WET knob sets the balance between the unprocessed and the processed signal.
Page 48
NORD STAGE Eighty Eight V1.1x
7. The Effects: The Rotor section
THE ROTOR SECTION
The Rotor effect (rotary speaker simulation) in Nord Stage accurately reproduces the
sound of the rotating horn and bass rotor, as well as the characteristics of the builtin amplifier of the original Leslie units. The Rotor effect is mono in/Stereo out.
• You activate or deactivate the Rotor effect for a selected instrument in the same
way as Panel Effects (see “Activating Panel effects” on page 45.
• You switch between fast and slow rotor speeds by pressing the SPEED button.
• To stop the rotors, press the STOP button (this does not deactivate the Rotary
Speaker simulation - it only stops the rotors). When you press the STOP button
again the rotors will accelerate to the current Rotor Speed setting.
The DRIVE knob controls the amount of overdrive. This simulates the pre-amp
overdrive effect of the original Leslies.
By plugging in a sustain pedal or a foot switch to the ROTOR SPEED PEDAL input
you can control the Rotor speed, see “Using a Rotor Speed pedal” on page 11. The
Rotor Speed can also be Morph controlled - see page 54.
ABOUT
THE
ROTOR
EFFECT’S INTERNAL ROUTING
The Rotor effect is internally placed after the panel effects in Nord Stage. It also “sums” signals if both Panel A and B are active. This means that if you are using a split organ setup for example, both “manuals” will
be affected by the Rotor (just like on a the real thing).
Note also that the Rotor Drive parameter is dependent on the processed instrument’s Level setting. If the
instrument being processed by the Rotor uses a very low level setting, the amount of available drive will
be significantly reduced. Again, this is very much like it works with the “real articles” - when you increase
the organ level, e.g. by using a swell pedal, the amount of distortion from the Rotor effect increases.
Page 49
8. Keyboard Zones and Dual Panel setups: About Keyboard Zones
NORD STAGE Eighty Eight V1.1x
8. KEYBOARD ZONES
DUAL PANEL SETUPS
AND
ABOUT KEYBOARD ZONES
You can split the Nord Stage keyboard in up to three Keyboard Zones; Lower (LO), Upper (UP) and High
(HI). You can then assign any of the Instrument sections to any (or all) of these zones.
CREATING
A SPLIT
Creating a split so that different instruments are assigned to different keyboard zones is very easy to set up.
Proceed as follows:
1. Activate two instrument sections, e.g. an organ sound and a piano sound, by pressing the KB ZONE
SELECT buttons in each corresponding section so that the KB ZONE LEDs (Lo/Up/Hi) light up. If
you now play the keyboard you should now hear both instruments layered.
2. Press the KB ZONES 2 button. This splits the keyboard into two Zones, an upper and a lower. The
split point is indicated by a green LED above the corresponding key on the keyboard.
Page 50
NORD STAGE Eighty Eight V1.1x
8. Keyboard Zones and Dual Panel setups: About Keyboard Zones
3. To assign the Organ instrument section to play on the lower Keyboard
Zone only, hold down SHIFT and then press the KB ZONE SELECT button for the Organ section until only the LO KB Zone indicator is lit.
4. To assign the Piano instrument to play on the upper half of the keyboard
hold down SHIFT AND press the ZONE SELECT button for the Piano section until both the UP/HI KB Zone indicators are lit.
Now the lower half of the keyboard will play the organ sound, and the upper
half will play the piano!
To activate all three Keyboard Zones, press the KB ZONES 3 button. Now the keyboard is split into three
Zones.
Now if you press the ZONE SELECT button for an Instrument section, you can step through the following
options:
• LO/UP/HI indicators lit - the corresponding instrument will play across all Zones 1-3.
• LO indicator lit - the corresponding instrument will play across Zone 1 only.
• LO/UP indicators lit - the corresponding instrument will play across Zones 1-2.
• UP indicator lit - the corresponding instrument will play across Zone 2 only.
• UP/HI indicators lit - the corresponding instrument will play across Zones 2-3.
• HI indicator lit - the corresponding instrument will play across Zone 3 only.
SETTING
SPLIT POINTS TO CHANGE
ZONE
RANGES
You can set the split points for Zone 2 and 3 in the following way:
Press SHIFT and KB ZONE 2 button repeatedly. As you can see the green split indicator above the keyboard alternates between the available split points. There are split points at C and F in each octave.
You use the same method but use the KB ZONE 3 button to set the split point for Zone 3.
LAYERING
INSTRUMENTS
By assigning two or three instrument sections to play the same zones, they will be layered, i.e. play at the
same time. You can freely select which instrument(s) should play for each Zone, e.g. you could have a piano
assigned on its own to the Upper Zone, but have piano layered with organ in the HI Zone.
Page 51
8. Keyboard Zones and Dual Panel setups: Octave Shift
NORD STAGE Eighty Eight V1.1x
OCTAVE SHIFT
Each Instrument section and the Extern section have two OCTAVE SHIFT buttons, which can be used to
transpose the notes up or down in octave steps within the total note range of the instrument.
Each instrument in Nord Stage has a finite note range, and only the Synth and the Organ can extend the
range beyond the 88 notes of the keyboard.
Thus, if a piano instrument is set play across the whole keyboard, Octave Shift will not work, as the whole
range is already accessible.
But when you are using splits, e.g. so that a piano is set to play in a Zone with a range of 2 octaves, you
can use the OCTAVE SHIFT buttons to transpose the piano up or down to select which 2 octave range of
the available 8 octaves is to play in this Zone. Thus, you can always access the whole note range of any
instrument within any set Zone range.
Down 2 octaves
Up 1 octave
Down 3 octaves
Up 2 octaves
In the illustration above, a piano has been assigned to play in a KB Zone stretching from C4 to C6. Without Octave Shift, the actual note range that will be played will be the same as the set Zone. The dotted
lines show which note range will be played in the set Zone when using Octave Shift. In this case you can
transpose the piano up or down two octaves so you can play any two octave note range from the selected
Zone. No matter what a Zone range is set to you can always reach the entire note range of any instrument.
DUAL PANEL SETUPS
If you press both PANEL A and PANEL B buttons so that they both light up, this means that both Panels
are active. One of the Panels is always “edit active”, i.e. it is the panel settings for either Panel A or Panel
B that is currently shown and can be edited. The active Panel is indicated by a blinking PANEL button. To
show/edit the settings for the other Panel press the corresponding PANEL button so that it starts blinking.
When you have both Panels active you have access to two of each Instrument section, and two Effect sections. Amongst other things, this allows you to play two sounds from each Instrument section simultaneously, e.g. a Clavinet and a Rhodes or two Synths. For the Organ section things work slightly differently.
Instead of two completely separate organ sections, you get a Lower/Upper manual split, like on a real B-3.
See “About Split Organ Setups” on page 26.
Keyboard Zone split points are global, i.e. they are the same for both Panels.
Page 52
NORD STAGE Eighty Eight V1.1x
USING
8. Keyboard Zones and Dual Panel setups: Dual Panel setups
AN EXTERNAL KEYBOARD
(DUAL KB)
If you like to use an external keyboard to control one of the Panels, you set it up as follows:
• Select a MIDI channel to transmit over from the external keyboard, and select the same MIDI channel
as the “Dual KB” channel on the Nord Stage MIDI page menu - see “MIDI menu” on page 62.
• Press SHIFT and the PANEL B button so that the DUAL KB indicator lights up.
Now the internal keyboard will control Panel A and the external keyboard will control Panel B. It is not
possible to activate both Panels in this mode.
This function is ideal for live situations when you have a second keyboard in your rig that you mostly use
to play internal sounds, but would in certain circumstances like to use to play the Nord Stage “double manual”. By activating Dual KB you can quickly switch between these modes without having to bother with
MIDI menus. Having this function easily accessible on the front panel makes its easy to turn off and prevent the external keyboard to play when its used to play its own sounds.
Page 53
9. The Morph Assign feature: About Morph Assign
NORD STAGE Eighty Eight V1.1x
9. THE MORPH ASSIGN
FEATURE
ABOUT MORPH ASSIGN
The three main MORPH ASSIGN buttons are located in the Program section.
The Morph function can be used to control single or multiple parameters using the Wheel, a connected Control pedal or Aftertouch (see
“About Aftertouch” on page 56). This gives you plenty of real-time
control possibilities to augment your playing style. It is very simple to
set up and use, and all Morph assignments are stored with the Program.
Many of the Factory Programs have Morph assigned parameters. If a
Program uses Morph one or more of the MORPH ASSIGN indicators will be lit to indicate this.
E.g. if the WHEEL indicator in the Morph Assign section is lit for a Program you can move the wheel and
all Morph assigned parameters will move correspondingly so you “see” exactly what parameters are currently assigned.
USING MORPH - AN EXAMPLE
In this example we shall describe how to assign Morph to the LEVEL rotary encoders for two Instrument
sections and use the Wheel to lower the level of one instrument while simultaneously raising it for the other. This allows you to “morph” seamlessly between two sounds by using the Wheel.
1. Set up so that you have two Instrument sections active e.g. the Piano and Organ section, and that
these are assigned to the same Zones so that they are layered when you play the keyboard.
2. Set the LEVEL knob for one of the two active instrument sections to the maximum value (fully clockwise) and the LEVEL knob for the other active instrument section to the minimum value (fully counter-clockwise).
3. Hold down the WHEEL button in the Morph Assign section and turn the LEVEL knob set to maximum value down to minimum value.
As you can see, the encoder LED pointing to the maximum value position (where it initially was set) stays
lit and the encoder LED pointing to the minimum value position (where you just set it) is also lit. The two
lit encoder LEDs now indicate the Level range (see “About setting Morph parameter ranges” on page 56)
controlled by the Morph Assign function, which in this case was the full range of the Level rotary encoder.
4. Release the WHEEL button in the Morph Assign section and push the Wheel forward. The Level knob
is now controlled by the Wheel and the LED’s continuously reflect the level changes when moving the
Wheel. In this example, when the Wheel is fully forward the Level goes down to zero, and when you
move the Wheel back the Level goes back up to maximum.
Page 54
NORD STAGE Eighty Eight V1.1x
9. The Morph Assign feature: Morph Assignable parameters
5. Hold down the WHEEL button in the Morph Assign section again while turning the Instrument
LEVEL knob that was set to minimum value in Step 2 up to maximum value.
6. Release the WHEEL button in the Morph Assign section.
7. When you now move the Wheel, the Level is gradually lowered for one instrument and raised for the
other instrument, allowing you to “morph” between the two instruments!
MORPH ASSIGNABLE PARAMETERS
Basically you can use the Morph function to control all rotary encoders (knobs that show parameter values
with LEDs) and the organ drawbars. Apart from the number of assignable parameters, there is no limit to
how many parameters you can control simultaneously using Morph.
The following parameters can be Morph controlled:
• The LEVEL knobs for all Instrument sections.
• The TIMBRE knob in the Synth section.
• The FILTER FREQUENCY knob in the Synth section.
• The DRAWBARS in the Organ section.
• The Effect RATE/TEMPO knob.
• The Effect AMOUNT knob.
• The PARAMETER knob in the Extern section (see page 58).
• The ROTOR SPEED button - Note that this is not visible! E.g. hold down the WHEEL button in the
Morph Assign section, and press the ROTOR SPEED button once. Now the Wheel controls the Rotor
Speed. Note also that this enables you to set Rotor Speed continuously, instead of just alternating
between two fixed speeds. To deactivate, hold down the WHEEL button in the Morph Assign section,
and press the ROTOR SPEED button again.
Page 55
9. The Morph Assign feature: About setting Morph parameter ranges
NORD STAGE Eighty Eight V1.1x
ABOUT SETTING MORPH PARAMETER RANGES
In the previous example we controlled the full range of two Instrument LEVEL knobs with Morph. But
you can also set relative ranges for parameters. For example, you could assign one parameter to be controlled fully (min/max), and another parameter knob to be controlled from 12 o’clock position to 3 o’clock position. This would mean that the first parameter would vary between the min and max values whereas the
second parameter would vary between 12 o’clock position to 3 o’clock within the Morph assigned controller’s full range.
When you press and hold down one of the buttons in the Morph Assign section to assign Morphing, the
initial position of a parameter determines the first value, and the position you move the parameter to determines the second value. Using the Wheel as an example, this means that when you move the Wheel
fully forward the parameter will move from the first value to end up on the second value.
CLEARING MORPH ASSIGNMENTS
To clear Morph Assignments, press SHIFT and the corresponding button in the Morph Assign section that
stores the assignments that you wish to clear.
To remove an individual parameter, hold down the MORPH ASSIGN button that the parameter is assigned
to. The current range will be shown by the rotary encoder LEDs for the parameter. Move the rotary encoder
until both LEDs go off to erase the Morph assignment.
ABOUT AFTERTOUCH
We have previously used the Wheel as an example controller, but you can also use Aftertouch to Morph
control parameters.
The Nord Stage keyboard can respond in two ways to how you play. The first is velocity (not applicable for
organ sounds or Morph), which means that the faster the player presses a key down, the higher the velocity
value. Once a key is played and held down, there is also 'Aftertouch' (sometimes called channel pressure).
The player can apply more pressure on a key while it is down; and this will generate a signal that can be
used to control parameters.
Page 56
NORD STAGE Eighty Eight V1.1x
10. THE EXTERN
10. The Extern section: About the Extern section
SECTION
ABOUT THE EXTERN SECTION
A good stage instrument wouldn’t be complete if it didn’t allow you to control external MIDI instruments. Normally you can do this by simply connecting an external
instrument via MIDI. Although this works, it usually doesn’t provide the flexibility
and control that you need in live situations. Perhaps you want to use splits, perhaps
you want to be able to switch the external instrument on or off at will, or perhaps you
wish to change programs on the external instrument from your stage keyboard. All
this is possible via MIDI of course, but it isn’t always so easy to set up. And no musician wants to deal with complicated MIDI menus in a live situation.
When developing Nord Stage, Clavia aimed to make external control an integrated
feature of the instrument, where all the essential external MIDI control functions
would be as accessible and easy to use as the functions and parameters for the built-in
instruments. And that’s what you get in the Extern section!
SETTING UP
1. Connect a MIDI cable from Nord Stage’s MIDI Out to the MIDI In on the external device.
2. Press SHIFT and the EXTERN button to access the Extern menu.
3. Use The PAGE buttons to access the “Extern MIDI Channel” page.
4. Use the VALUE DIAL to select the MIDI channel (1-16) you would like to transmit over. Press the
EXTERN button again to exit the menu.
5. Set the external instrument to receive on the same MIDI channel.
USING THE EXTERN SECTION
ACTIVATING
Before Extern MIDI is sent out from Nord Stage, you have to activate the Extern section. This is done by
pressing the ON button under the PARAMETER rotary encoder.
ABOUT KEYBOARD ZONES
You can activate Keyboard Zones to create splits and layers just as for the internal instruments. If you set
the Extern section to only play in the LO Zone, the external instrument will only respond to notes played
in this Zone. In other words, it works transparently together with the built-in instruments! See “Keyboard
Zones and Dual Panel setups” on page 50 for information on how to set up and use Keyboard Zones.
Page 57
10. The Extern section: The Parameter section
NORD STAGE Eighty Eight V1.1x
OCTAVE SHIFT
The OCTAVE SHIFT buttons in the extern section also work exactly as for internal instruments. As with
them, the shift range depends on the total note range of the external instrument, and the range of the Keyboard Zone(s) that the external instrument is currently assigned to. See “Octave Shift” on page 52.
ACTIVATING PITCH STICK/SUSTAIN PEDAL
MESSAGES
By pressing SHIFT and one of the OCTAVE SHIFT buttons you can set up whether Nord Stage should
send Pitch bend and/or Sustain pedal messages via the Extern MIDI channel (a lit LED indicates it is activated).
THE PARAMETER SECTION
The Parameter section comprises the three buttons in the Parameter Select section and the PARAMETER
rotary encoder at the top. Simply put, you select a parameter and vary the value of the selected parameter
with the rotary knob. The PARAMETER rotary encoder can also be Morph controlled - see page 54.
The following parameters can be set using the Parameter Select buttons:
VOLUME
If this is activated, the PARAMETER rotary encoder will send MIDI Volume messages (0-127), allowing
you to control the level of the external device. The external instrument may have to be set to receive MIDI
CC messages for this to function. You can turn this off on the Extern menu - see “Extern menu” on page 63.
PROG CHANGE
When this is on, the PARAMETER rotary encoder will send Program Change messages (0-127). This allows
you to select Programs for the external instrument. This works slightly differently than for other parameters. The Parameter rotary encoder will in this mode send a Program Change message for each individual
rotary encoder LED. To access all 127 messages simply continue to turn the rotary encoder multiple times
- it will continue to send messages across the whole range. The external instrument may have to be set to
receive MIDI Program Change messages for this to function.
You can turn this off on the Extern menu - see “Extern menu” on page 63.
(If the external instrument organizes programs in Banks, there is an option to send Bank Change messages
on the Extern Menu page, - see “Extern menu” on page 63.)
Page 58
NORD STAGE Eighty Eight V1.1x
10. The Extern section: The Parameter section
MIDI CC
This allows you send MIDI Control Change messages to control a parameter of your choice on the external
instrument. You first have to decide which Controller number the PARAMETER rotary encoder should
send value changes for. This is done on the Extern Menu:
1. Press SHIFT and the EXTERN button to access the Extern menu.
2. Use the PAGE buttons to select the “Extern MIDI CC Number” menu page.
3. Use the VALUE DIAL to select a MIDI CC Number (0-119). You may want to consult the manual for
the external instrument to see which parameters are assigned to which CC numbers.
4. Press the EXTERN button again to exit the menu.
If you now activate the MIDI CC button in the Parameter Select section, you can control the selected external parameter using the PARAMETER rotary encoder in the Extern section. You can turn this off on the
Extern menu - see “Extern menu” on page 63. The external instrument may have to be set to receive MIDI
CC messages for this to function.
ABOUT SEND ON LOAD
You can set whether Program Change, Volume or MIDI CC messages are sent out when you load a Program in Nord Stage. If you do not want this to occur, make sure “Send On Load” is set to “Off” on the
Extern menu.
Page 59
11. System functions: System menu
11. SYSTEM
NORD STAGE Eighty Eight V1.1x
FUNCTIONS
System functions are divided into four menus; “System, Sound, MIDI and Extern”, which are accessed by
using the corresponding buttons in the Program section.
All changes you make to system functions are automatically stored in Nord Stage.
SYSTEM MENU
Press the SHIFT + SYSTEM buttons to enter the System menu. You use the PAGE -/+ buttons to navigate
between the various pages on the System menu, and the VALUE DIAL is used to change settings.
When you are done, press the SYSTEM button again to exit the System menu.
The following items can be found on the System menu:
Function
Description
Range/Values
Transpose
Transpose allows you transpose the pitch of instruments up or down in semitone steps.
-/+ 6 semitones (in steps of
1 semitone). Default value
is “0” (no transpose).
Fine Tune
Fine Tune can be used to adjust the pitch of instruments in finer increments.
+/- 50 Cents (half a semitone). Default value is “0”
(no fine tune).
Organ Audio
Output
This allows you to set which channel output pairs (or
mono output) to use for the Organ section.
“1 & 2” (Default), ”3 & 4”,
”3” ,”4”
Piano Audio
Output
This allows you to set which channel output pairs (or
mono output) to use for the Piano section.
“1 & 2” (Default), ”3 & 4”,
”3” ,”4”
Synth Audio
Output
This allows you to set which channel output pairs (or
mono output) to use for the Synth section.
“1 & 2” (Default), ”3 & 4”,
”3” ,”4”
Organ Keyboard
Trig Mode
This allows you to change how the Nord Stage keyboard triggers Organ sounds. When “Fast” is
selected, you will trigger organ sounds before the key
is fully depressed. This mode closely mimics the way
a real B-3 triggers notes.
Fast (Default), Normal
Sustain Pedal
Polarity
This allows you to change the polarity of a connected
sustain pedal, in case the functionality of the pedal is
reversed (i.e. when the pedal is up, sustain is on and
vice versa).
Open, Closed (Default)
Page 60
NORD STAGE Eighty Eight V1.1x
11. System functions: System menu
Sustain Pedal
Use as Rotor
You can connect a Sustain Pedal (as opposed to a
switch pedal) to the Rotor Speed connector. If you
wish to use a sustain pedal to control rotor speed set
this to “Yes”. Note that even if this is enabled, and you
connect a pedal to the Rotor Speed input, this setting
will be overridden and you will be able to use both
pedals separately.
Yes, No (Default)
Rotor Pedal
Polarity
This allows you to change the polarity of a sustain
pedal connected to control Rotor Speed, in case the
functionality of the pedal is reversed (i.e. when the
pedal is up, Rotor Speed is fast and vice versa).
Open, Closed (Default)
Rotor Pedal Mode
If you are using a sustain pedal connected to control
Rotor Speed this allows you to set how this should
operate. “Hold” means that the Rotor Speed is fast for
as long as the pedal is down and reverts back to slow
when the pedal is released (or vice versa depending
on the set pedal polarity). “Toggle” means that the
fast/slow rotor speed is switched with a pedal depression, like an on/off switch pedal.
Hold (Default), Toggle
Ctrl Pedal
Gain
Some makes of control pedals may not produce the
full “control gain range” when connected to Nord
Stage. When this page is selected you can “see” the
range of a connected control pedal in the Display when you press down the pedal a Monitor value is
briefly shown (0-100%). The value should be 100%
when the pedal is fully down. If it isn’t, you can adjust
the gain so that the pedal works properly.
1.00 to 1.50 (1.41 Default)
Control Pedal
Use as Swell
You can use a control pedal to control organ swell. If
you wish to do so set this to “Yes”. Note that even if
this is enabled, and you connect a pedal to the Organ
Swell input, this setting will be overridden and you will
be able to use both pedals separately.
Yes, No (Default)
Swell Pedal
Gain
Some makes of control pedals may not produce the
full “control gain range” when connected to Nord
Stage’s Organ Swell input. When this page is
selected you can “see” the range of a connected control pedal in the Display - when you press down the
pedal a Monitor value is briefly shown (0-100%). The
value should be 100% when the pedal is fully down. If
it isn’t you can adjust the Gain so that it works properly.
1.00 to 1.50 (1.41 Default)
Memory Protect
This is set to “On” when Nord Stage leaves the factory, meaning that you cannot save any changes to
Programs (this basically to prevent prospective customers from changing the factory programs when trying out the instrument). Set this to Off if you wish to
store your own Programs.
On, Off
Page 61
11. System functions: Sound Menu
NORD STAGE Eighty Eight V1.1x
SOUND MENU
Press the SHIFT + SOUND buttons to access the Sound menu.
You use the PAGE -/+ buttons to navigate between the various menu items on the Sound menu, and the
VALUE DIAL is used to change settings.
When you are done, press the SOUND button again to exit the Sound menu.
The following items can be found on the Sound menu:
Function
Description
Range/Values
Organ Key Click
Level
This sets the amount of Key Click for B-3 organ
sounds (see “Key click control” on page 23)
1-10 (Default value is 5)
Synth Vibrato Rate
This determines the rate of the Synth Vibrato.
4.00 - 8.00 Hz (Default
6.00 Hz)
Synth Dly Vibrato
Amount
This determines the amount of Synth Vibrato when
any of the vibrato delay modes are used.
0-50 cent (Default value is
25 cent)
MIDI MENU
Press the SHIFT + MIDI buttons to access the MIDI menu.
You use the PAGE -/+ buttons to navigate between the various menu items on the MIDI menu, and the
VALUE DIAL is used to change settings.
When you are done, press the MIDI button again to exit the MIDI menu.
The following items can be found on the MIDI menu:
Function
Description
Range/Values
MIDI Control
Local
Here you set whether the Nord Stage keyboard and
front panel controls should control internal Programs
or only send MIDI. Local On is the normal “play
mode”. In Local Off mode, the front panel and keyboard actions are transmitted via MIDI only and do
not control the internal sound(s) directly.
On (Default), Off
MIDI Panel A/B
Channel
This sets the MIDI channel for Panel A/B
1-16, Off (Default A ch 1)
(Default B ch 2)
MIDI Organ A/B
Channel
This sets the MIDI channel for the Organ section A/B
1-16, Off (Default off)
MIDI Piano A/B
Channel
This sets the MIDI channel for the Piano section A/B
1-16, Off (Default off)
MIDI Synth A/B
Channel
This sets the MIDI channel for the Synth section A/B
1-16, Off (Default off)
MIDI Dual KB
Channel
This sets the MIDI channel for an external keyboard
when using Dual KB mode - see page 53.
1-16, Off (Default 16)
MIDI Prog Change
Mode
This allows you to set whether you want Nord Stage
to transmit and/or receive MIDI Program Change
Messages.
Off, Send, Receive, Send &
Receive (Default)
MIDI Ctrl Change
Mode
This allows you to set whether you want Nord Stage
to transmit and/or receive MIDI Controller Messages.
Off, Send, Receive, Send &
Receive (Default)
Page 62
NORD STAGE Eighty Eight V1.1x
11. System functions: Extern menu
Send MIDI Ctrl
You can perform a dump of all MIDI Controllers for
the selected Panel. See “Sending MIDI Controller
dumps” on page 68.
Panel A, Panel B
Dump Program
Source
Here you can perform a MIDI SysEx dump of the currently selected Program or of all 126 Programs of the
internal memory (plus the Live buffers 1 & 2). See
“Sending Program dumps” on page 68.
One (Default), All
Dump Synth Sound
Sound
Here you can perform a separate MIDI SysEx dump
of just the Synth memory banks. You can select to
send a single sound category bank (Synth/Pad/Bass)
or all banks. See “Sending Synth Sound bank
dumps” on page 68.
Synth, Pad, Bass, All
(Default)
Instrument SysEx ID
Most instruments have a unique Instrument ID #. If
more than one of the same instruments are connected in a MIDI network, this ensures that no instrument will receive SysEx dumps not intended for it.
1-16, All (Default)
EXTERN MENU
Press the SHIFT + EXTERN buttons to access the Extern menu, where you can find settings and functions
relating to the Extern section - see “The Extern section” on page 57.
You use the PAGE -/+ buttons to navigate between the various menu items on the menu, and the VALUE
DIAL is used to change settings.
When you are done, press the EXTERN button again to exit the Extern menu.
Note that most items on the Extern menu have separate entries for Panel A and B! Whatever Panel has
current edit focus when accessing these menu pages, “A” or “B”, is shown in the upper right corner of the
Display. The following items can be found on the Extern menu:
Function
Description
Range/Values
Extern MIDI
Channel
This sets the MIDI channel to transmit to the external instrument
from Panel B (make sure the external instrument is set to receive
on the same channel).
1-16 (14 is default
for Panel A 15 is
default for Panel B)
Extern MIDI CC
Number
This decides which MIDI Controller number the Extern section
should send when MIDI CC is activated.
MIDI CC 0-119
(Default is 2)
Extern MIDI Volume
The Extern section can send MIDI Volume messages (0-127),
allowing you to control the level of the external device.
Off (Default), 0-127
Extern MIDI
Prog Change
The Extern section can send MIDI Program Change messages
(0-127), allowing you to change programs on the external device.
Off (Default), 1-128
Extern MIDI
Prog Bank
This allows you to change MIDI Program Bank on the external
device. Note that there are many different variations between
instruments in how Banks are numbered and accessed via MIDI.
Nord Stage always transmits Bank messages as MIDI CC # 32.
Off (Default), 1-128
Extern MIDI CC
Value
This will transmit values for the selected MIDI CC number.
Off (Default), 1-127
Send On Load
To avoid transmitting Program Change, Volume or MIDI CC messages when you load a Program in Nord Stage, make sure “Send
On Load” is set to “Off” on the Extern menu.
No (Default), Yes
Page 63
12. Factory Presets and OS: Internal memory
NORD STAGE Eighty Eight V1.1x
12. FACTORY PRESETS
OS
AND
INTERNAL MEMORY
The Operating System, Programs and Piano samples in Nord Stage are stored in a so-called Flash memory.
A Flash memory keeps the data also when the power is shut off. Another big advantage is that you can
replace data in the Flash memory at any time. This means that you will be able to download OS upgrades
and Programs to your Nord Stage from a computer or sequencer without needing to replace or add any
new hardware. Nord Stage also features a USB port for quick and easy download of new Piano instrument
samples.
The internal sound memory of Nord Stage consists of 21 Banks holding 6 Programs each for a total of 126
Programs. In addition there are the two Live buffer memories, which will continuously store any changes
as they are made, and remember these settings after the power is shut off.
FACTORY PRESETS
All factory Programs of Nord Stage can be replaced. To make sure you don’t accidentally overwrite Programs you want to keep, it’s a good idea to back up your sounds regularly on a computer or on a hardware
sequencer that can record and play back MIDI SysEx. data. For information on how to back up Programs
please refer to “Sending Program dumps” on page 68.
RESTORING
THE FACTORY PRESETS
The factory Programs will be available as a MIDI SysEx file for download at the Clavia web site at
http://www.clavia.se. Please refer to “Receive MIDI SysEx Dumps” on page 69 for information on how to
restore the factory presets.
Page 64
NORD STAGE Eighty Eight V1.1x
USB
12. Factory Presets and OS: Downloading Piano instruments via
DOWNLOADING PIANO INSTRUMENTS VIA USB
To be able to do this you have to use Clavia’s Stage Manager application. With this you will be able to
download and add/replace/erase piano sounds in the Flash memory of the Nord Stage. Please visit http://
www.clavia.se to download the USB dump application for Mac (OS X) and PC (Windows) - free of charge!
OS UPGRADES
The latest OS version for Nord Stage will be available for download at http://www.clavia.se.
Page 65
13. MIDI functions: About the MIDI implementation
13. MIDI
NORD STAGE Eighty Eight V1.1x
FUNCTIONS
ABOUT THE MIDI IMPLEMENTATION
The following MIDI messages can be transmitted and received from Nord Stage:
NOTE ON/OFF
• Note On and Note Off messages are sended and received.
PITCH BEND
• Pitch Bend messages are sended and received by Nord Stage.
CONTROLLERS
• If you have an Control/Expression pedal connected to the ORGAN SWELL INPUT, this is transmitted
and received as Controller 4.
• If you have an Control/Expression pedal connected to the CONTROL PEDAL INPUT, this is transmitted
and received as Controller 11 (Expression). By using the Morph function you can control most of Nord
Stage’s parameters with a Control pedal.
• If you have a sustain pedal connected to the SUSTAIN PEDAL INPUT, this is transmitted and received
as Controller 64 (Sustain Pedal).
• If you have a sustain pedal connected to the ROTOR SPEED INPUT, this is transmitted and received as
Controller 90.
• Almost all other controls (knobs and buttons) on the front panel are also transmitted and received as
Control Change messages. This can be used to record your actions on the front panel into a MIDI
sequencer. For a full list of which parameters correspond to which Controller number, see the MIDI
implementation chapter on page 70.
KEYBOARD VELOCITY
Nord Stage can transmit and receive Keyboard Velocity messages. Organ sounds will always be played
back at nominal level regardless of incoming MIDI Velocity data.
AFTERTOUCH
The Nord Stage keyboard can transmit 'Aftertouch' (sometimes called channel pressure). The player can
apply more pressure on a key while it is down; and this will generate a signal that can be used to control
parameters - see “About Aftertouch” on page 56.
PROGRAM CHANGE
When you select a Program, a Program Change message is transmitted via MIDI on the selected MIDI
Channel. If a Program Change message is received on the selected MIDI Channel, Nord Stage will change
Program accordingly. The 126 Program locations send and respond to Program Change values 0-125.
Page 66
NORD STAGE Eighty Eight V1.1x
13. MIDI functions: Using Nord Stage with a sequencer
MIDI SYSEX (SYSTEM EXCLUSIVE)
Single Programs or all Programs can be transmitted and received as a System Exclusive dump (see “Sending
Program dumps” on page 68).
USING NORD STAGE WITH A SEQUENCER
CONNECTIONS
1. Connect the MIDI Out on the Nord Stage to the MIDI In on your sequencer.
2. Connect the MIDI Out from your sequencer to the MIDI In on the Nord Stage.
LOCAL ON/OFF
Local Off should be used when you use a sequencer to record and play back from Nord Stage. When using
a sequencer, you connect the MIDI Out of Nord Stage to the sequencer’s MIDI In. Then, from the sequencer’s MIDI Out back to the Nord Stage MIDI In. Since the sequencer echoes back incoming MIDI
data, Nord Stage will respond normally to your playing and knob tweaking via the MIDI “loop”. If you
use Local On with a sequencer setup as described above, this would cause “double-triggered” notes when
you play; both from the keyboard internally and via the MIDI “loop”. Therefore, always use Local Off when
used in this way together with a sequencer.
Local On/Off is set on the “MIDI menu” on page 62.
MIDI
CHANNEL
Nord Stage can be set to respond to 6 individual MIDI channels. This is set up on the MIDI menu - see
“MIDI menu” on page 62.
PROGRAM CHANGE
To record a Program Change message, activate recording in the sequencer and simply select a new Bank
(1-21) and Program (1-6) by using the PAGE -/+ buttons and the PROGRAM buttons, respectively. The
126 Program locations send and respond to Program Change values 0-125.
CONTROLLERS
When you record knob movements and button presses, make sure that the sequencer “echoes” the changes
back on the correct MIDI Channel, or your changes won’t have any effect.
SOME
NOTES ABOUT
CONTROLLERS
AND
“CHASING”
Consider a situation where you record a Controller message, e.g. a Drawbar opening, in the middle of your
sequencer song. Then you “rewind” the sequencer to a position before the recorded Drawbar opening. The
problem is that the Nord Stage’s Drawbar will remain opened, although it really should be as it was before
you recorded the opening. To solve such problems, several sequencers include a function called “Controller
Chasing”, which keeps track of Controller changes and tries to adjust the settings on the instrument according to the current position in the sequencer song.
However, in our example this wouldn’t help much, because the Drawbar opening was the first Controller
message recorded in the song. The sequencer has no information about the Drawbar setting before the recorded change, and therefore cannot “chase” the settings properly. To solve this, you could record a “snapshot” of all Controller settings of the Nord Stage Program(s) at the beginning of your sequencer song. See
"Sending MIDI Controller dumps” below.
Page 67
13. MIDI functions: Program, Controller and Synth Sound dumps
NORD STAGE Eighty Eight V1.1x
PROGRAM, CONTROLLER AND SYNTH SOUND DUMPS
To dump Program, Synth Sound or MIDI Controller SysEx via MIDI, either to another Nord Stage or for
recording the data into another MIDI device, proceed as follows:
SENDING PROGRAM
DUMPS
1. Connect a cable from MIDI OUT on the Nord Stage to MIDI In on the receiving device.
2. Set up the receiving device so that it accepts MIDI SysEx and MIDI Controller data.
3. Press SHIFT + MIDI button and select the “Dump Program Source” menu item using the PAGE -/+
buttons. Here you can select whether to send all Programs (‘ALL’), or the currently selected program
(‘ONE’) by using the VALUE DIAL.
4. If needed, set the receiving MIDI device to “recording mode”.
5. Press the STORE button to send the dump to the MIDI OUT of Nord Stage. The Store indicator will
stop flashing once the dump has been sent.
Note: For Organ and Synth sounds, the complete settings for the sound will be dumped as MIDI
SysEx. For Piano sounds, all parameters will be sent but NOT the actual instrument samples.
Therefore, when dumping back a Piano sound, make sure the actual instrument samples are
already loaded in the Nord Stage. Otherwise the parameters in the SysEx message will be applied to another available Piano instrument.
SENDING MIDI CONTROLLER
DUMPS
1. Set up as in steps 1 and 2 in the preceding description.
2. PRESS SHIFT + MIDI button and select the ‘Send MIDI Ctrl” menu item using the PAGE -/+ buttons. Here you can select whether to send all Controllers from Panel A or Panel B by using the VALUE
DIAL or by pressing the corresponding PANEL button.
3. Press the STORE button to send the dump to the MIDI OUT of Nord Stage. The Store indicator will
stop flashing once the dump has been sent.
SENDING SYNTH SOUND
BANK DUMPS
You can perform a separate MIDI SysEx dump of just the Synth memory banks. You can select to send a
single sound category bank (Synth/Pad/Bass) or all banks:
1. Set up as in steps 1 and 2 in the preceding description.
2. PRESS SHIFT + MIDI button and select the ‘Dump Synth Sound” menu item using the PAGE -/+
buttons. Here you can select whether to send all Controllers from Panel A or Panel B by using the
VALUE DIAL or by pressing the corresponding PANEL button.
3. Press the STORE button to send the dump to the MIDI OUT of Nord Stage. The Store indicator will
stop flashing once the dump has been sent.
Page 68
NORD STAGE Eighty Eight V1.1x
13. MIDI functions: Panic
RECEIVE MIDI SYSEX DUMPS
To receive a MIDI SysEx Dump, do like this:
1. Connect a cable from the MIDI Out on the transmitting device to MIDI IN on the Nord Stage.
2. Initiate the transmission on the transmitting device.
If the dump contained all Programs (All), it will replace all Programs currently stored in the Nord Stage.
If the dump contained only a single Program (One), it will be temporarily placed in the currently selected
Program memory location. You will then have to store the Program manually to a memory location using
the Store function (see “Storing Programs” on page 19).
PANIC
If notes should hang using the Nord Stage in a MIDI setup, all you need to do is hold down the SHIFT
button and press the PANIC button in the Piano section. This will execute an internal All Notes Off, and
reset certain parameters to their default values.
Page 69
14. MIDI implementation: MIDI Controller list
14. MIDI
NORD STAGE Eighty Eight V1.1x
IMPLEMENTATION
MIDI CONTROLLER LIST
The following is a list of the MIDI Controller numbers used for all KNOBS and BUTTONS on the front
panel:
Page 70
Nord Stage Parameter
MIDI Controller #
Organ Preset II
3
Organ Swell
4
Organ Drawbar 1
9
Organ Drawbar 2
14
Organ Drawbar 3
15
Organ Drawbar 4
16
Organ Drawbar 5
17
Organ Drawbar 6
18
Organ Drawbar 7
19
Organ Drawbar 8
20
Organ Drawbar 9
21
Organ Percussion Enable
22
Organ Type
23
Organ Vibrato Type
24
Organ Vibrato Enable
25
Organ Percussion Harmonic
26
Organ Percussion Speed
27
Organ Percussion Level
28
Organ PStick Enable
29
Piano Clav Filter 1
30
Piano Clav Filter 2
31
Piano Dynamics
33
Synth Glide Rate
34
Synth Glide Auto
35
Synth Voice Mode
36
Synth Unison
37
Synth Vibrato Mode
38
Synth Mod Envelope Attack
39
Synth Mod Envelope Decay
40
Synth Mod Envelope Mode
41
Synth Mod Envelope Velocity
42
NORD STAGE Eighty Eight V1.1x
14. MIDI implementation: MIDI Controller list
Nord Stage Parameter
MIDI Controller #
Synth Oscillator Mode
43
Synth Oscillator Wave
44
Synth Oscillator Timbre
45
Synth Oscillator Timbre Amount
46
Synth Oscillator TimbreVelocity
47
Synth Filter Frequency
48
Synth Filter Resonance
49
Synth Filter Amount
50
Synth Filter Velocity
51
Synth Filter KBT (Keyboard tracking)
52
Synth Filter Type
53
Synth Amp Envelope Attack
54
Synth Amp Envelope Decay
55
Synth Amp Envelope Mode
56
Synth Amp Envelope Velocity
57
Synth EQ Gain Lo
58
Synth EQ Gain Hi
59
Effect 1 Type
60
Effect 1 Source
61
Effect 1 Amount
62
Effect 1 Rate
63
Effect 1 Enable
69
Effect 2 Type
70
Effect 2 Source
71
Effect 2 Amount
72
Effect 2 Rate
73
Effect 2 Enable
74
Delay Destination
75
Delay Amount
76
Delay Rate
77
Delay Feedback
78
Delay Ping Pong on/off
79
Delay Enable
80
AmpSim Type
81
AmpSim Destination
82
AmpSim Drive
83
AmpSim Bass EQ
84
AmpSim Mid EQ
85
AmpSim Treble EQ
86
Page 71
14. MIDI implementation: MIDI Controller list
Page 72
NORD STAGE Eighty Eight V1.1x
Nord Stage Parameter
MIDI Controller #
AmpSim Enable
87
Rotor Destination
88
Rotor Drive
89
Rotor Speed
90
Rotor Stop
91
Rotor Enable
92
Compressor Amount
93
Compressor Enable
94
Reverb Amount
95
Reverb Size
96
Reverb Enable
97
Organ Enable Sustain Pedal
98
Organ Octave Shift
99
Organ Level
100
Organ Enable
101
Organ KB Zone Assignment
102
Piano Enable PStick
103
Piano Enable Sustain Pedal
104
Piano Octave Shift
105
Piano Level
106
Piano Enable
107
Piano KB Zone Assignment
108
Synth Enable PStick
109
Synth Enable Sustain Pedal
110
Synth Octave Shift
111
Synth Level
112
Synth Enable
113
Synth KB Zone Assignment
114
NORD STAGE Eighty Eight V1.1x
14. MIDI implementation: MIDI Implementation Chart
MIDI IMPLEMENTATION CHART
Model: Clavia Nord Stage Eighty Eight OS V1.0x Date: 2005-06-29
Function
Transmitted
Recognized
Remarks
MIDI Channels
1 – 16
1 – 16
Individual channels for Panel A and B.
Velocity
Note On/Off
O
O
Incoming Velocity data ignored for
Organ.
Aftertouch
O
O
Pitch Bend
O
O
Control Change
O
O
See “MIDI Controller list” on page 70.
Program Change
O
O
0-125, 126=Live1,127= Live 2
System Exclusive
O
O
See the MIDI Implementation section.
O: Yes
✕: No
Page 73
14. MIDI implementation: MIDI Implementation Chart
Page 74
NORD STAGE Eighty Eight V1.1x
NORD STAGE Eighty Eight V1.1x
Index
Numerics
2nd, 3rd (Organ Percussion) 22
A
Aftertouch 56
Amp Envelope
Attack 39
Amp Envelope (Synth) 39
Ampsim/EQ 48
Attack
Amp Envelope 39
Mod Envelope 37
Auto-Wah (modulation) 47
B
B-3 Organ 21
Bank
Selecting 12
Buttons
About 9
C
C1-C3 (Organ Chorus) 23
Chorus (effect) 47
Chorus (organ) 23
Clav EQ (Piano section) 30
Compressor 48
Connections
Audio 10
MIDI 10
Pedals 11
Control pedal
Connecting 11
Technical requirements 11
Controllers
dump 68
List (MIDI) 70
MIDI transmission and reception 66
Ctrl Pedal Gain 61
Index
D
Decay/Release
Amp Envelope 39
Mod Envelope 37
Display 16
Drawbars (B-3) 21
Drawbars (V-type organ) 24
Dual KB 53
Dual Panel setups 52
Dump (Program source) 63
Dump Program Source 63
E
Editing Programs 13
Effects section 44
Env Vel
Amp Envelope (Synth) 39
Mod Envelope (Synth) 37
EQ (Synth) 43
Expression pedal
Technical requirements 11
Extern Section
About 57
Setting up 57
Using 57
F
Factory presets 64
Restoring 64
Fast (Rotary Speaker) 49
Filter
KBT (Keyboard Tracking) 41
Resonance 41
Filter Frequency Cutoff (Synth) 40
Filter Section (Synth) 40
Fine Tune 60
Flanger (effect) 47
FM (Synth) 35
Focus button (Effects) 45
Frequency Control (Filter modulation) 41
Front panel 7
G
Glide (Synth) 42
Global Effects
Compressor 48
Reverb 48
Page 75
Index
I
Instruments
Activating 13
Internal memory 64
Internet 6
K
KBT
Filter 41
Key click control (B-3 organ) 23
Keyboard
About 8
Keyboard splits 50
Keyboard Tracking
Filter 41
Keyboard Zones 50
Knobs
About 8
L
Live Buffer memory 18
Live Buffer mode 17
Live buttons 17
LP Filter (Synth) 40
M
Master level 7
Memory (internal) 64
Memory Protect 61
MIDI
about the implementation 66
channels
using with sequencer 67
connections 67
Controller list 70
controllers
"chasing" when using a sequencer 67
recording in sequencer 67
implementation chart 73
local on/off 67
Program Change 66
recording in sequencer 67
Program dump 68
send all MIDI controllers 68
Sysex dump of single Programs 68
Sysex reception of Program and Program
Banks 69
Page 76
NORD STAGE Eighty Eight V1.1x
MIDI Page 62
Mod Envelope
Attack 37
Decay/Release 37, 39
Modulation Envelope 37
Repeat mode 38
Mono (Synth) 42
Morph Assign
About 54
Assignable parameters 55
Clearing 56
N
Note On/Off
MIDI transmission and reception 66
O
Octave Shift 52
Octave Shift (Extern section) 58
Organ B-3 section 21
Organ Key Click Level (Sound Page) 62
Organ Output 60
Organ Trig Mode 60
OS upgrades 65
Oscillator
Analog waveforms 32
Sync 34
Waveforms
Digital 35
FM 35
Pulse and Square wave 33
Sawtooth wave 32
Sine wave 33
Triangle wave 33
Oscillator section (Synth) 32
Output Level
Instrument 14
P
Page +/- buttons 16
Panel A & B 52
About 14
Edit focus 14
Panel Effects
Activating 45
Ampsim/EQ 48
Effect 1 46, 47, 48
NORD STAGE Eighty Eight V1.1x
Effect 2 47
Making settings for 45
Pan 46
RM (ring modulation) 46
Wah-Wah 46
Panic button 69
Patch selector (Synth) 43
pdf file (reading the manual as...) 6
Pedals
Connecting 11
Rotor Speed 11
Percussion (B-3) 22
Phaser (effect) 47
Piano
downloading new instruments via USB 65
Piano instruments
Selecting 28
Piano Output 60
Ping Pong (Delay Effect) 47
pitch bend MIDI messages 66
Preset II button (Organ section) 26
Program
Naming 19
reverting to stored 13
What is it? 12
Program buttons 17
Program Change (MIDI) 66
Programs
About 12
Saving 19
Selecting 12
Q
Q-value (Filter) 41
R
Rear panel 10
Register selectors (V-type) 25
Release
Amp Envelope 39
Mod Envelope 37
Resonance (Filter) 41
Reverb 48
RM Effect 46
Rotor Effect 49
Rotor effect
Internal routing 49
Rotor Pedal Mode 61
Index
Rotor Pedal Polarity 61
Rotor Speed pedal
Connecting 11
S
Send On Load (Extern) 59
Shift button 16
Slow (Organ Percussion) 22
Soft (Organ Percussion) 22
Sound Page 62
Split Organ 26
Splits
Creating 50
Stop (Rotary Speaker) 49
Store button 17
Storing Programs 19
Storing Synth Patches 43
Sustain pedal
Connecting 11
Sustain Pedal Polarity 60
Swell (Organ) 26
Swell Pedal Gain 61
Sync Oscillator 34
Synth
Amp Envelope 39
Digital (wavetable) 35
EQ 43
FM 35
Mod Envelope 37
Osc section 32
Sound Init 43
Sound Select section 43
Vibrato 43
Synth Output 60
Synth Sound bank dumps 68
Synth Vibrato
Amount 62
Rate 62
System menu 60
T
Tap Tempo (Delay Effect) 47
Timbre control (Synth) 36
Transpose 60
Tremolo (modulation) 46
Page 77
Index
U
Unison (Synth) 42
USB (for downloading Piano instruments) 65
V
V1-V3 (Organ Vibrato) 23
Value Dial 17
Velocity Sensitivity (Piano)
Dynamics (Piano) 30
Vibrato (F-Type organ) 25
Vibrato (organ) 23
Vibrato (Synth) 43
V-Type Organ (Vox Continental) 24
Page 78
NORD STAGE Eighty Eight V1.1x