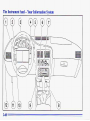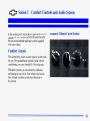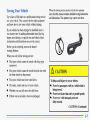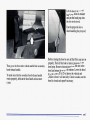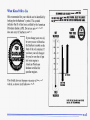
1
1
1
CAVALIER
0 The 1996 Chevrolet Cavalier Owner’s Manual
.............................................................
...................................................................
.....................................................
SeatsandRestraintSystems
1-1
This section tells you how to use your seats and safety belts properly. It also explains the
“SRS” system.
. .
FeaturesandControls
2-1
This section explains how to start and operate your Chevrolet.
Comfort Controls and Audio Systems
3-1
This section tellsyou how to adjust the ventilation and comfort controls and how to operate your
audio system.
YourDrivingandtheRoad
4-1
Here you’ll find helpful information and tips about the road and how to drive under different conditions.
ProblemsontheRoad
5-1
This section tells you what to do if you have a problem while driving, such
a flat
as tire or overheated
engine, etc.
ServiceandAppearanceCare
6-1
Here the manual tells you how to keep your Chevrolet running properly and looking good.
MaintenanceSchedule
7-1
This section tells you when to perform vehicle maintenance and what fluids and lubricants to use.
CustomerAssistanceInformation
8-1
This section tellsyou how to contact Chevrolet for assistance and how to get service and owner publications.
It also givesyou information on “Reporting Safety Defects” on page
8-8.
Index
9-1
Here’s an alphabetical listingof almost every subject in this manual.
You can use it to quickly find
something you want to read.
..............................................................
..................................................................
............................................................
..................................................................
........................................................
................................................................................
i
We support voluntary
technician certification.
GENERAL MOTORS,GM, theGM Emblem,
CHEVROLET, the Chevrolet Emblem andthe
name CAVALIER areregistered trademarks of
General Motors Corporation.
This manual includesthe latest information at the time it
was printed. We reserve the right to makechanges in the
product after that time without further notice. For
vehicles first sold in Canada, substitute the name
“General Motors of Canada Limited” for Chevrolet
Motor Division wheneverit appears in this manual.
Please keepthis manual in yourChevrolet, so it will be
there if you ever need it when you’re on the road.
If you
sell the vehicle, please leave this manual init so the new
owner can use it.
Litho in U.S.A.
Part No. 10273194 B First Edition
ii
WE SUPPORT
VOLUNTARY TECHNICIAN
CERTIFICATION THROUGH
National institutefor
AUTOMOTIVE
SERVICE
EXCELLENCE
L
For Canadian OwnersWho refer a
French Language Manual:
Aux propriktaires canadiens:Vous pouvez vous
procurer un exemplaire de ceguide en frangais chez
votre concessionaire ou au:
DGN Marketing Services Ltd.
1500 Bonhill Rd.
Mississauga, Ontario L5T 1C7
@CopyrightGeneral Motors Corporation 1995
All Rights Reserved
The dynamic William C . “Billy”
Durant shifted gears from making
carriages to making cars,
forming half the team thatgave
birth to Chevrolet.
Louis Chevrolet, the other half of the team,
at the wheel of his experimental “Classic
Six,” which enteredproduction in I912.
That year 2999 vehicles were produced.
I
I
In 1932 Chevrolet
introduced the
Synchro-Mesh
transmission and .
oflered a host of
accessories -- including
such niceties as a clock?
iv
I
I
The legacy of America’sfavorite sportscar
began-in 1953, when 319 hand-assembled
white Corvettes
launched
the
first use of a
fiberglass body in
a production car.
=
I
I
;
I
I
I
. I
I
The 1957 Chevy started a romance with the American
public -- and was powered by an available fuel-injected V8.
Your new Chevrolet continuesa tradition of quality and value.
legendary 327 V8.
V
How to Use This Manual
Many people read their owner’s manual from beginning
to end when they first receive their new vehicle. This
will help you learnabout the features and controls for
your vehicle.In this manual, you’ll find that pictures
and words worktogether to explain things quickly.
Index
A good placeto look for what you need is the Indexin
the back of the manual.It’s an alphabetical list of all
that’s in the manual, andthe page number where you’ll
find it.
Safety Warnings and Symbols
You will find a number of safety cautions in this book.
We use the word CAUTION to tell you about things that
could hurt you if you were
to ignore the warning.
vi
These mean thereis something thatcould hurt
you or other people.
-
In thecaution area, we tell you whatthe hazard is. Then
we tell you what todo to help avoid or reduce the
hazard. Please read these cautions. If you don’t, youor
others couldbe hurt.
You will also find a circle
with a slash through it in
this book. This safety
symbol means “Don’t,”
“Don’t do this,’’ or “Don’t
let this happen.’’
Vehicle Damage Warnings
the
In
notice
area,
we
tell
you
about
something
that
can
damage your vehicle. Many times, this damage would
Also, in thisbookyouwillfindthesenotices:notbecoveredbyyourwarranty,and
it couldbecostly.
But the notice will tell you what
to do to help avoid
the damage.
NOTICE:
These mean thereis something that could
damage your vehicle.
When you read other manuals, you might see
CAUTION and NOTICE warnings in different colors
or
in different words.
You’ll also see warning labelson your vehicle. They use
yellow for cautions, blue for notices and thewords
CAUTION or NOTICE.
vii
Vehicle Symbols
These are some of the symbols you may find on your vehicle.
For example,
these symbols
are used on an
original battery:
CAUTION
POSSIBLE
INJURY
A
These symbols
are important
for you and
your passengers
whenever your
vehicle is
driven:
These symbols
have to do with
your lights:
These symbols
are on some of
your controls:
These symbols
are used on
warning and
indicator lights:
COOLANT
TEMP
TURN
SIGNALS
PROTECT
EYES BY
SHIELDING
@
CAUSTIC
BAllERY
CHARGING
SYSTEM
WINDSHIELD
DEFROSTER
FASTEN
SEAT
BELTS
BRAKE
BURNS
COOLANT
SPARK OR
FLAME
COULD
EXPLODE
BATTERY
viii
ENGINE OIL
PRESSURE
,\I/,
FOG LAMPS
$0
ANTI-LOCK
BRAKES
Here are some
other symbols
you may see:
-I-1
FUSE
LIGHTER
(a)
a
HORN
SPEAKER
e,
FUEL
(@)
m
)a(
b
B
0SectiOn 1
Seats and Restraint Systems
Here you’ll find information about the seats in your
Chevrolet and howto use your safety belts properly.
You can also learn about some things you shouldnot do
with air bags and safety belts.
Seats and Seat Controls
This section tells you aboutthe seats -- how to
adjust them -- and also about reclining seatbacks and
head restraints.
a1 Front
You can lose controlof the vehicle if you try to
adjust a manual driver’s seatwhile the vehicle is
moving. The suddenmovement could startle and
confuse you,or make you push a pedal when you
don’t want to. Adjust the driver’s seat
only when
the vehicle is not moving.
Move the lever on the front
of the driver’s seat to unlock
it. Slide the seat to where you want
it. Then release the
lever and tryto move the seat with your body, to make
sure the seatis locked into place.
1-1
Manual Lumbar Support (Convertible with
White Vinyl Seats Only)
The manual lumbarsupport control is located at the
front of the driver’sseat, toward the right.Turn the knob
clockwise or counterclockwise to increase or decrease
the amountof support to your lower back.
Reclining Front Seatbacks
Pull the lever in front of the front passenger’s seat upto
unlock it. Slide the seat to where you wantit. Then
release the lever and try to movethe seat with your
body, to make sure theseat is locked into place.
L
To adjust the seatback, lift the leveron the outer side of
the seat and move the seatback
to where you want it.
1-2
Release the lever to lock the seatback. f i l l up on the
lever and the seat will go to an upright position.
But don’t have a seatback reclined if your vehicle is
moving.
-
A CAUTION:
Sitting ina reclined position whenyour vehicle is
in motion canbe dangerous. Even if you buckle
up, your safetybelts can’t dotheir jobwhen
you’re reclined likethis.
The shoulder belt can’t its
dojob because it
won’t be against yourbody. Instead, itwill be in
front of you. In a crash you could go into it,
receiving neckor other injuries.
The lap belt can’t its
do job either. In a crash the
belt could go up over your abdomen. The belt
forces would be there, not at your
pelvic bones.
This could causeserious internal injuries.
For proper protection when the vehicle is in
motion, have the seatback upright. Then
sit well
back in the seatand wear yoursafety belt properly.
1-3
Head Restraints
Easy-Entry Seat (Opti
1)
Slide the head restraint up or down so that the topof the
restraint is closest to the top of your ears.This position
reduces the chanceof a neck injury in a crash.
Seatback Latches (2-Door Models)
The front seatback folds
forward to let people get
into the back seat.
To fold a front seatback forward, lift the latch.
When you return the seatback to its original position, the
seatback will lock.
1
A
If an easy entry right front
seat isn’t locked, it
can move. In a sudden stop or crash, the person
sitting there could be injured. After you’ve used
it, be sureto push rearward onan easy entry seat
to be sure itis locked.
On two-door models, the rightfront seat of your vehiclc
makes it easyto get in and out of the rear seat.
0 Tilt the rightfront seatback completely forward and
the whole seat willslide forward.
0 Move the rightfront seatback to itsoriginal position
after someone getsinto the rear seat area. Then move
the seat rearward until it locks.
0 Tilt the seatback completely forward again
to
get out.
Rear Seats
Folding the Rear Seat
I
To close the seat, push the seatback up to its
original position.
To open the fold-down rear seat, pull forward
on the
seat tab.
Check to ensurethe seatback is in its original position
and securely latchedby pulling forward on the top
of the seatback. Move any obstructions in the
trunk compartment.
1-5
Your vehicle hasa light that
comes on as a reminder to
buckle up. (See “Safety
Belt ReminderLight” in
the Index.)
Safety Belts: They’re for Everyone
’
:
1
This part ,of the manual tells you how to use safety belts
properly. It also tells you some things you should not do
with safety belts.
And it explains the Supplemental Restraint System
(SRS), or air bag system.
1
Don’t let anyone ride where
he or shecan’t wear
a safety belt properly.If you are in a crash and
you’re not wearinga safety belt,your injuries
can be much worse. You can hit things inside the
vehicle or be ejected fromit. You can be seriously
injured orkilled. In the same crash,
you might
not be if you are buckled up. Always fasten your
safety belt, and check that your passengers’ belts
are fastened properlytoo.
I
In most states and Canadian provinces,the law says to
wear safety belts. Here’s why:
They work.
You never know if you’ll be in a crash. If you do have a
crash, you don’t knowif it will be a bad one.
A few crashes are mild, and somecrashes can beso
serious that even buckled upa person wouldn’t survive.
But mostcrashes are in between.In many of them,
people who buckleup can survive and sometimes walk
away. Withoutbelts they could have been badly hurtor
killed.
After morethan 25 years of safety belts in vehicles,
the facts are clear. In most crashes buckling up does
matter ... a lot!
Why Safety Belts Work
When you ride in or on anything, you go as fast as
it goes.
Put someone on it.
Take the simplest vehicle. Suppose it's just a seat
on wheels.
1-7
Get it up to speed. Thenstop the vehicle. The rider
doesn't stop.
1-8
The person keeps going until stoppedby something.
In a realvehicle, it could be the windshield...
I
or the instrument panel ...
I
or the safety belts!
Wia safety belts, you slow down as the vehicle does.
You get more timeto stop. You stop over moredistance,
and your strongest bones take theforces. That's why
safety belts make such good sense.
1-9
Here Are Questions Many PeopleAsk @
About Safety Belts-- and the Answers
A:
Won’t I be trapped in the vehicle after
an
accident if I’m wearing a safety belt?
A:
You could be -- whether you’re wearinga safety
belt or not. But youcan unbuckle a safety belt,
even if you’re upside down. And yourchance of
being consciousduring and after an accident, so
you can unbuckle and get out, is much greater if
you are belted.
Qi’
If my vehicle has air bags, why should I have to
wear safety belts?
A:
Air bags are in many vehicles today andwill be in
most of them inthe future. But they are
supplemental systems only; so they work with
safety belts -- not instead of them. Everyair bag
system ever offered for sale has required the use of
safety belts. Evenif you’re in a vehicle that has air
bags, you still have to buckle up to getthe most
protection. That’s true not only
in frontal collisions,
but especially in side andother collisions.
If I’m a good driver, and I never drive far from
home, why should I wear safety belts?
You may be anexcellent driver, butif you’re in an
accident -- even one that isn’t your fault -- you and
your paskengerscan be hurt. Beinga good driver
doesn’t protect you from
things beyond your
control, such as bad drivers.
Most accidents occur within25 miles (40 km) of
home. And the greatest numberof serious injuries
and deaths occur at speeds of less than 40 mph
(65 b b ) .
Safety belts arefor everyone.
How to Wear Safety Belts Properly
Driver Position
Adults
This part describes the driver’s restraint system.
This part is only for people of adult size.
Lap-Shoulder Belt
Be aware that there are special things to know about
safety belts and children. And there are different rules
for smaller children and babies. If a child will be riding
in your Chevrolet, see the part of this manual called
“Children.” Follow those rules for everyone’s
protection.
The driver has a lap-shoulder belt. Here’s how to wear
it properly.
1. Close and lock the door.
2. Adjust the seat (to see how, see “Seats”in the Index)
so you can sit up straight.
First, you’ll want to know whichrestraint systems your
vehicle has.
We’ll start withthe driver position.
1-11
3. Pick up the latch plate and pullthe belt across you.
Don’t letit get twisted.
4. Push the latch plate into the buckle untilit clicks.
If the belt stops beforeit reaches the buckle,tilt
the latch plate and keep pulling
until you can buckle
the belt.
Pull up on thelatch plate to make sure it is secure.
If the belt isn’t longenough, see “Safety Belt
Extender” at the endof this section.
Make sure the releasebutton on the buckleis
positioned so you would be able to unbuckle the
safety belt quicklyif you ever had to.
1-12
5. To make the lap part tight, pull down on the buckle
end of the belt as youpull up on the shoulder belt.
The lap part of the belt should be worn low and snug on
the hips,just touching the thighs.In a crash, this applies
force to the strong pelvic bones. And you’d
be less likely
to slide under the lap belt.
If you slid under it, the belt
would apply forceat your abdomen.This could cause
serious or even fatal injuries. The shoulder belt should
go
over the shoulder and
acrms the chest. Theseparts of the
body are best able to take belt restraining forces.
The safety beltlocks if there’sa sudden stop or crash.
1-13
Shoulder Belt HeightAdjuster (&Door Models)
Before you begin to drive, move the shoulder belt .
adjuster to the height thatis right for you.
To move it down, squeeze the release button and.move
the adjuster to the desired position. You can move the
adjuster up just by pushing up on theshoulder belt
guide. After you move theadjuster to where you wantit,
try to move it down withoutsqueezing the release button
to make sure it has lockedinto position.
Adjust the heightso that the shoulder portion of.the belt is
centered onyour shoulder. The belt shouldbe away from
your face and neck, but not falling
off your shoulder.
1-14'
@
What's wrong with this?
A CAUTION:
You can be seriously hurt if your shoulder belt
is
too loose. Ina crash, you would move forward
too much, which could increase injury. The
shoulder belt shouldfit against your body.
A:
The shoulder belt is too loose. It won't give nearly
as much protection this way.
1-15
@
What’s wrong with this?
A CAUTION:
.
-
.
You can be seriously injured if your belt is
buckled in the wrong place like this.
In a crash,
the beltwould go up over your abdomen. The
belt forceswould be there, not at the
pelvic
bones. This could causeserious internal injuries.
Always buckle your beltinto thebuckle
nearest you.
A:
The belt is buckled in the wrong place.
@
What’s wrong with this?
You can be seriously injured
if you wear the
shoulder belt under your arm, aIncrash, your
body would move too far forward, which would
increase the chanceof head and neck injury,
Also, the beltwould apply too much force to the
ribs, which aren’tas strong as shoulderbones.
You could also severelyinjure internal organs
like your liveror spleen.
A:
The shoulder belt is worn under the arm. It should
be worn over the shoulder at all times.
1-17
Q."What's wrong with this?
~
You can be seriously injuredby a twisted belt.In
a crash, you wouldn't have the full width of the
belt to spread impact forces. aIfbelt is twisted,
make it straightso it canwork properly, or ask
your dealer tofix it.
A:
The belt is twisted across the body.
.
Your Chevrolet has two air bags -- one air bag for the
driver and another air bag for the right front passenger.
Here are the most important thin,gsto know about the air
bag system:
You can be severely injured orkilled in a crash if
you aren’t wearing yoursafety belt even if you
have an airbag. Wearing yoursafety belt during a
crash helps reduce your chanceof hitting things
inside the vehicle or being ejected.fromit. The air
bag is only a (‘supplemental restraint.” That is, it
works with safety belts but doesn’t replace them.
Air bags are designed to workonly in moderate to
severe crashes where the front
of your vehicle hits
something. They aren’tdesigned to inflate at all in
rollover, rear, side or low-speed frontal crashes.
Everyone in yourvehicle, including the driver,
should wear a safety belt properly whether or
not there’s an air bag for thatperson.
--
To unlatch the belt, just push the button on the buckle.
The belt should go back out of the way.
Before you close the door, be sure the belt is out of the
way. If you slam the door on it, you can damage both the
belt and your vehicle.
,
Supplemental Restraint System (SRS)
--
This part explains the Supplemental Restraint System
(SRS) or air bag system.
1-19
There is an air bag readiness
light on the instrument
I
A CAUTION:
AIR
BAG
panel, which shows
AIR BAG.
Air bags inflate with great force, faster than the
blink of an eye. If you’re too close to an inflating
air bag, it could seriously injure you. Safety belts
help keepyou in position for anair bag inflation
in a crash. Always wear your safety belt,
even
with an airbag. The driver shouldsit as far
back aspossible while still maintaining control
The system checksthe air bag’s electrical system for
of the vehicle.
malfunctions. Thelight tells you if there is an electrical
problem. See “Air Bag Readiness Light” in the Index
for more information.
A CAUTION:
R
-
An inflating air bag can seriously injure small
children. Always secure children properly in your
vehicle. To read how, see the partof this manual
called “Children” and the caution label
on the
right frontpassenger’s safety belt.
1-20
How the Air Bag System Works
Where is the air bag?
The driver's air bag is in the middleof the
steering wheel.
.
.
The right front passenger's air bagis in the instrument
panel on the passenger's side.
-
vehicle strikes something that will moveor deform, such
as a parked car, the thresholdlevel will be higher. The
air bag is not designedto inflate in rollovers, side
impacts or rear impacts, because inflation would not
help the occupant.
I
,
Don’t put anything on, or attach anything to, the
steering wheelor instrument panel. Also, don’t
put anything (suchas pets or objects) between
any occupant and the steering wheel or
instrument panel.If something is between an
occupant and an air bag, it could affect the
performance of the air bag or worse, it could
cause injury.
--
In any particular crash, no one can say whetheran air
bag should have inflated simply becauseof the damage
to a vehicle or because of what the repair costs were.
Inflation is determined by the angle of the impact and
the vehicle’s deceleration. Vehicle damage
is only one
indication of this.
What makes an air bag inflate?
In a frontal or near-frontal impact of sufficient severity,
the air bag sensing systemdetects that thevehicle is
suddenly stopping asa result of a crash. The sensing
The air bag is designed toinflate in moderateto severe
system triggersa chemical reaction of the sodium azide
frontal or near-frontal crashes. The air bag will inflate
only if the impact speed is above the system’s designed sealed inthe inflator. The reaction produces nitrogen
gas, which inflates the air bag. The inflator, air bag and
“threshold level.” If your vehicle goes straight into a
related
hardware are all partof the air bag modules
wall that doesn’t moveor deform, the threshold level is
packed inside the steering wheel and in the instrument
about 9 to 15 mph (14 to 24 krn/h). The threshold level
panel in front of the rightfront passenger.
can vary, however, withspecific vehicle design, so that
it canbe somewhat aboveor below this range. If your
When shouldan air bag inflate?
How does an air bag restrain?
In moderate to severe frontalor near-frontal collisions,
even belted occupants can contact the steering wheel
or
the instrument panel.The air bag supplements the
protection providedby safety belts. Air bags distribute
the force of the impact more evenlyover the occupant’s
upper body, stopping the occupant more gradually. But
air bags would not help youin many types of collisions,
including rollovers, rear impacts and side impacts,
primarily becausean occupant’s motion is not toward the
air bag. Air bags should neverbe regarded as anythmg
more than a supplement to safety belts, and then only in
moderate to severe frontalor near-frontal collisions.
What will yousee after anair bag inflates?
After the air bag inflates, it quickly deflates. This occurs
so quickly that some people may not evenrealize the air
bag inflated. Some components of the air bag module in
the steering wheel hub for the driver’s air bag, or the
instrument panel for theright front passenger’s bag, will
be hotfor a short time. The part of the bag that comes
into contact with you maybe warm, but it willnever be
too hot to touch. There will be some smoke and dust
coming from vents in the deflated air bags. Air bag
inflation will not prevent the driver from seeing or from
being able to steer the vehicle, nor will it stop people
from leaving the vehicle.
I
When anair bag inflates, there is dust in the air.
This dust could cause breathing problems for
people witha history of asthma.orother
breathing trouble. To avoid this, everyone in the
vehicle should get out
as soon as it is safe to do so.
If you have breathing problems but can’t get out
of the vehicleafter an air bag inflates, then get
fresh air by opening a window or door.
In many crashes severe enough to inflate an air bag,
windshields are broken by vehicle deformation.
Additional windshield breakage mayalso occur from the
right front passenger air bag.
The airbags are designed to inflate only once. After
they inflate, you’ll need some newparts for your air
bag system.If you don’t get them, the air bag system
won’t be thereto help protect you in another crash.
A new system will include air bag modules and
possibly other parts.The service manual for your
vehicle covers the need to replace other parts.
1-23
0
Your vehicle is equipped with a crash sensing
and diagnostic module, which records information
about theair bag system. The module records
information aboutthe readiness of the system, when
the sensors areactivated and driver’s safety belt
usage at deployment.
, e Let only qualified technicians work on your
air bag system. Improper service can mean that
your air bag system won’t work properly.
See your
dealer for service.
Servicing Your Air Bag-Equipped
Chevrolet
Air bags affect how your Chevrolet should
be serviced.
There are parts of the air bag systemin several places
around your vehicle.You don’t wantthe system to
inflate while someoneis working on your vehicle.Your
Chevrolet dealerand the Cavalier Service Manual have
information about servicing your
vehicle and the air bag
system. To purchase a service manual, see “Service and
Owner Publications” in the Index.
NOTICE:
If you damage the cover for the’ driver’s or the
right frontpassenger’s air bag, they may not
work properly. You may have to replace the
air
bag module in the steering
wheel or both theair
bag module and the instrument panel for the
right frontpassenger’s air bag. Do not open or
break theair bag covers.
I
For up to10 minutes after the ignition
key is
turned off and the battery
is disconnected, an air
bag can still inflate during improper
service. You
can be injured if you are close to anair bag when
it inflates. Avoid wires wrapped with yellow tape
or yellow connectors. Theyare probably part of
the air bag system. Be sure tofollow proper
service procedures, and make sure the person
performing work foryou is qualified to doso.
The air bag system doesnot need regular maintenance.
Safety Belt Use During Pregnancy
Safety belts work for everyone, including pregnant
women. Like all occupants, they are more likely to be
seriously injured if they don’t wear safety belts.
The best way to protect the fetusis to protect the
mother. When a safety beltis worn properly, it’s more
likely that the fetus won’t be hurt
in a crash. For
pregnant women, asfor anyone, the key to making
safety belts effective is wearing them properly.
Right Front Passenger Position
The right front passenger’s safety belt works the same
way as the driver’s safety belt. See “Driver Position,”
earlier in this section.
Rear Seat Passengers
It’s very importantfor rear seat passengers to buckle up!
Accident statistics show that unbelted people in the rear
seat are hurt more often in crashes than those who are
wearing safety belts.
Rear passengers who aren’t safety belted can be thrown
out of the vehicle in a crash. And theycan strike others
in the vehicle whoare wearing safety belts.
A pregnant woman should wear a lap-shoulder belt, and
the lap portion should be worn as low
as possible, below
the rounding, throughout the pregnancy.
1-25
I
\
Rear Seat Outside Passenger Positions
Lap-Shoulder Belt
The positions nextto the windows have lap-shoulder
belts. Here’s how to wearone properly.
1. Pick up the latchplate and pull the belt across you.
Don’t let it get twisted.
2. Push the latch plate into the buckle until it clicks.
1-26
a
If the belt stops beforeit reaches the buckle, tilt the
it.
latch plate and keep pulling until you can buckle
3. To make the lap part tight, pull down on the buckle
pull up on the shoulder part.
end of the belt as you
Pull up on the latch plate make
to
sure it is secure.
If the belt is not long enough, see “Safety Belt
Extender” at the endof this section. Makesure the
release button on the buckle is positionedso you
would be ableto unbuckle the safety belt quicklyif
you ever had to.
1-27
force to the strong pelvic bones. And you’d be less
If you slid underit, the
likely to slide under the lap belt.
belt would apply force at your abdomen. This could
cause serious or even fatal injuries. The shoulder belt
should go over the shoulder and across the chest.
These partsof the body are best able to take belt
restraining forces.
The safety belt locksif there’s a sudden stop or a crash.
You can be seriously hurtif your shoulder beltis
too loose. In a crash,you would move forward
too much, which could increase injury. The
shoulder belt should fit against your body.
The lap part of the belt should be worn low and snug on
the hips,just touching the thighs.In a crash, this applies
1-28
There is one guide for each outside passenger position in
the rear seat. To provide added safety beltcomfort for
children who have outgrown child restraints and for
smaller adults, the comfort guides may be installed on
the shoulderbelts. Here’s how to install a comfort guide
and use the safety belt:
To unlatch thebelt, just push the button on thebuckle.
Rear Safety BeltComfort Guides for
Children and Small Adults
Rear shoulder belt comfortguides will provide added
safety belt comfortfor children who have outgrown
child restraints and for small adults. When installed ona
shoulder belt, the comfort guide pulls the belt away
from the neckand head.
1. Pull the elastic cord out from between the edge of
the seatback andthe interior body to remove the
guide from its storage clip.
1-29
2. Slide the guide under and past the belt. The elastic
cord must be under the belt. Then, place the guide
over the belt, and insert the two edges
of the beltinto
the slotsof the guide.
1-30
3. Be sure that the beltis not twisted andit lies flat.
The elastic cord must be under the belt the
andguide
on top.
To remove and store the comfort guides,just perform
these steps in reverse order. Squeeze the belt edges
together so that you can take them out from the guides.
Pull the guide upwardto expose its storage clip, and
then slide the guide onto the clip. Rotate the guide and
clip inward and in between the seatback andthe interior
body, leaving only the loopof elastic cord exposed.
Center Passenger Position
4. Buckle, position and release the safety belt as
described in “Rear Seat Outside Passenger Positions’’
earlier in this section. Make sure that the shoulder
belt crosses the shoulder.
1-31
Lap Belt
To make the belt shorter, pull
its free end as shown until
the belt is snug.
When you sit in the center seating position, you have a
lap safety belt, which hasno retractor. To make the belt
longer, tilt the latch plate
and pull it along the belt.
Buckle, position and release it the same way
as the lap
part of a lap-shoulder belt.If the belt isn’t long enough,
see “Safety Belt Extender” at the end
of this section.
Make sure the release buttonon the buckle is positioned
so you would be ableto unbuckle the safety belt quickly
if you ever had to.
Children
Everyone in a vehicle needs protection! That includes
infants and all children smaller than adult
size. In fact,
the law in every state in the United States and in every
Canadian province says childrenup to some age must be
restrained while in a vehicle.
Smaller Children and Babies
A very youngchild's hip bonesare so small that a
regular belt might not staylow on the hips,as it
should. Instead, thebelt will likely be over the
child's abdomen. In a crash, thebelt would apply
force right on thechild's abdomen, which could
cause seriousor fatalinjuries. So, be sure that
any child small enoughfor oneis always properly
restrained in a child or infant restraint.
Smaller children and babies should always be
restrained in a child or infant restraint. The
instructions for the restraintwill say whether it is
the right type and size for your child.
CAUTION: (Continued)
1-33
heavy you can't hold it. For example, in a crash
at only 25 mph(40 km/h), a 12-lb. (5.5 kg) baby
will suddenly become a 240-lb. (110 kg) force on
your arms. The babywould be almost impossible
to hold.
Secure the baby in an infant restraint.
A
Never hold a baby in your armswhile riding in a
vehicle. A baby doesn't weigh much until a
crash. During a crash a baby will become so
CAUTION: (Continued)
--
Child Restraints
Be sure the child restraint is designed to be used in a
vehicle. If itis, it will have a label saying that it meets
Federal Motor Vehicle Safety Standards.
Then follow theinstructions for the restraint. You may
find these instructions on the restraint itself or in a
booklet, or both.These restraints use the belt system in
your vehicle, but the child also has to be secured within
the restraint to help reduce the chance of personal injury.
The instructions that come with the infant or child
restraint will showyou how to do that.
Where to Put the Restraint
Accident statistics show that childrenare safer if they
are restrained in the rear rather than thefront seat. We at
General Motors therefore recommend that you put your
child restraint in therear seat. Never put a rear-facing
child restraint in thefront passenger seat. Here’s why:
A CAUTION:
A child in a rear-facing child restraint can
be
seriously injured if the right frontpassenger’s
air bag inflates. Thisis because the backof a
rear-facing child restraintwould be very close to
the inflating airbag. Always secure a rear-facing
child restraint in the rearseat.
You may, however, secure a forward-facing child
restraint in the right frontseat. Beforeyou secure
a forward-facing child restraint, alwaysmove the
front passenger seat asfar back asit will go. Or,
secure the childrestraint in the rear seat.
Wherever you install it, be sure to secure the child
restraint properly.
Keep in mind that an unsecured child restraint can move
around in a collision or sudden stop and injure people in
the vehicle. Be sureto properly secure any child
restraint in your vehicle-- even when no childis in it.
1-35
Top Strap
If your vehicleis not a convertible and you need
to have
an anchor installed, you can ask your Chevrolet dealer to
put one in for you.If you want to install an anchor
yourself, your dealer can tell you how
to do it.
For cars first sold in Canada, child restraints with
a top
strap must be anchored according to Canadian law.
Your dealer can obtainthe hardware kit and installit for
you, or you may installit yourself using the instructions
provided in the kit.
Use the tether hardware kit available from the dealer.
The hardware and installation instructions were
specifically designed for this vehicle.
If your child restraint has a top strap, it should be
anchored. If you have a convertible, don’t use a restraint
like that in your vehicle because the top strap anchor
cannot be installed properly.You shouldn’t use this type
of restraint without anchoring the top strap.
Securing a Child Restraint in a Rear
Outside Seat Position’
You’ll be using thelap-shoulder belt. See the earlier part
about thetop strap if the child restraint has one.
1. Because your vehicle has a right front passenger
airbag, always move theseat as far back as it will
go beforesecuring a forward facing child restraint.
(See “Seats” in the Index.)
2. Put the restraint on the seat. Follow the instructions
for the child restraint.
3. Secure the child in the child restraint as the
instructions say.
Tilt thelatch plate to adjust the beltif needed.
If the shoulder belt goes
in front of the child’s face or
neck, put it behind the child restraint.
4. Pick up the latch plate, and run the lap and shoulder
portions of the vehicle’s safety belt through or
around the restraint. The child restraint instructions
will show youhow.
1-37
5. Buckle the belt. Makesure the release buttonis
positioned so you would be able to unbuckle the
safety belt quicklyif you ever had to.
6. To tighten the belt, pull upon the shoulder belt while
you push down on the child restraint.
7. Push and pull the child restraint in different
directions to be sureit is secure.
To remove the child restraint,
just unbuckle the vehicle’s
safety belt and letit go back all the way.The safety belt
will move freely again and be ready to work for an adult
or larger child passenger.
1-38
Securing a Child Restraint in the Center
Rear Seat Position
You’ll be using thelap belt.
See the earlier part about the top strap if the child
restraint .has one.
1. Make the belt as long as possible by tiltingthe latch
plate and pullingit along the belt.
2. Put the restraint on the seat. Follow the instructions
for the childrestraint.
3. Secure the child in the childrestraint as the
instructions say.
4. Run the vehicle’s safety belt throughor around the
restraint. The child restraint instructions will show
you how.
1-39
7. Push and pull the child restraint in different
directions to be sure it is secure. If it isn’t, secure the
restraint in a different place in the vehicle and
contact the child restraint maker for their advice
about how to attach the child
restraint properly.
To remove the child restraint, just unbuckle the vehicle’s
safety belt. It will be ready to work for an adult or larger
child passenger.
Securing a Child Restraint in the Right
‘FrontSeat Position
n
5. Buckle the belt. Makesure the release button is
positioned so you wouldbe.able to unbuckle the
safety belt quickly you
if ever had to.
6 . To tighten the belt, pullits free end while you push
down on the childrestraint.
1-40
U
Your vehicle has a right front passengerair bag. Never
put a rear-facing child restraintin this seat. Here’s why:
4. Pick up the latch plate, and run the lap and shoulder
or
portions of the vehicle’s safety belt through
around the restraint. The child restraint instructions
will show you how.
A child in a rear-facing child restraintcan be
seriously injured if the right front passenger’s air
bag inflates. This is because the backof a
rear-facing child restraint would be very
close to
the inflatingair bag. Always securea rear-facing
child restraintin the rearseat.
You’ll be using the lap-shoulder belt.See the earlier part
about the topstrap if the child restraint has one.
1. Because your vehicle hasa right front passenger air
bag, always move the seat asfar back as it will go
before securing a forward-facing child restraint.
(See “Seats” in the Index.)
2. Put the restraint on the seat. Followthe instructions
for the child restraint.
3. Secure the child in the child restraintas the
instructions say.
Tilt the latch plate to adjust the belt
if needed.
If the shoulder belt goes in front of the child’s
face or
neck, put it behind the child restraint.
1-41
5 . Buckle the belt. Make sure the release button
is
positioned so you wouldbe able to unbuckle the
safety belt quicklyif you ever had to.
6. To tighten the belt, pull upon the shoulder belt while
you push down on the child restraint.
7. Push and pull the child restraintin different
directions to be sureit is secure.
To remove the child restraint,
just unbuckle the vehicle’s
safety belt and letit go back all the way. The safety belt
will move freely again and be ready to work for an adult
or larger child passenger.,
1-42
Larger Children
If you have thechoice, a child should sit next to
a
window so the child can weara lap-shoulder belt and
get the additional restraint a shoulder belt can provide.
Accident statistics showthat children are safer if they
are restrained in the rear seat. But they need
to use the
safety belts properly.
0,
Children who aren’t buckled up can be thrownout in
a crash.
0
Children who aren’t buckled upcan strike other
people who are.
Children who have outgrownchild restraints should
wear the vehicle’s safety belts.
1-43
I
A CAUTION:
Never do this.
Here two children are wearing-the same
belt. The
belt can’t properly spread the impact
forces. In a
crash, thetwo children can be crushed together
and seriously injured. A belt must be used by
only one personat a time.
1-44
&:
What if a child is wearinga lap-shoulder belt,
but the childis so small that the shoulderbelt is
very close to thechild’s face or neck?
A:
Move the child toward the center
of the vehicle,but
be sure that the shoulder belt
still is on the child’s
shoulder, so that in a crash the child’s upper body
would have the restraint that belts provide.
If the
child is sitting in arear seat outside position, see
“Rear Safety Belt Comfort Guides” in the Index.
If the child is so small that the shoulder belt
is still
very close to the child’s
face or neck, you might
want to place the child in the center seat position,
the one that has only alap belt.
I
Never do this.
Here a child issitting in a seat ‘that has
a
lap-shoulder belt, but the shoulder
part isbehind
the child. If the child wears the belt in this way, in
a crash thechild might slideunder thebelt. The
belt’s force would then be applied right on the
child’s abdomen. Thatcould cause seriousor
fatal injuries.
Wherever the child sits, thelap portion of the belt
should be worn low and snug on the
hips, just touching
the child’s thighs.This applies belt force to the child’s
pelvic bones in a crash.
1-45
Safety Belt Extender
If the vehicle’ssafety belt will fasten around you, you
should useit.
But if a safety belt isn’t long enough fasten,
to
your
dealer will orderyou an extender. It’sfree. When you go
in to order it, take the heaviest coat you will wear, so the
extender will be long enoughfor you. The extender will
be just foryou, and just forthe seat in your vehicle that
you choose. Don’t let someone
else use it, and use it
only for the seat it is made to fit. To wear it, just attach it
to the regular safety belt.
Torn or frayed safety belts maynot protect you in a
crash. They can rip apart under impactforces. If a belt is
torn or frayed, get a new one right away.
Also look for any opened or broken air bagcovers, and
have them repaired orreplaced. (The air bag system
does not needregular maintenance.)
Replacing Restraint System Parts
After a Crash
If you’ve had a crash, do you need new belts?
Checking Your Restraint Systems
After a very minor collision, nothing may be necessary.
But if the belts werestretched, as they would be ifworn
during a more severecrash, then you need newbelts.
Now and then, makesure the safety belt reminder light
and all yourbelts, buckles, latch plates, retractors and
anchorages are working properly. Look for any
other
loose or damaged safety belt systemparts. If you see
anything that might keepa safety belt system from
doing its job,have it repaired.
If belts are cutor damaged, replace them. Collision
damage also may mean you will needto have safety belt
or seat parts repairedor replaced. New parts and repairs
may be necessary evenif the belt wasn’t being used at
the time of thecollision.
If an air bag inflates, you’ll need to replace air bag
system parts. See the part on the air bag systemearlier in
this section.
NOTES
1-47
NOTES
a Section 2
Features and Controls
Here you can learn about the many standard and optional
features on your Chevrolet,and information on starting,
shifting and braking.Also explained are the instrument
panel and thewarning systems that tell youif everythmg is
working properly -- and what to doif you have a problem.
Keys
*
I
.
A CAUTION:
- .-
Leaving young children in a vehicle with the
ignition key is dangerous for many reasons.
A child
or others could be badly injured
or even killed.
They could operate power windows or other
controls or even make the vehicle move. Don’t
leave thekeys in a vehicle with young children.
2-1
One key is for the
ignition, the doors and
all other locks.
NOTICE:
Your Chevrolet has a number of new features
that can help prevent theft. But you can have
a
lot of trouble getting into your vehicle if you ever
lock your keys inside.You may even haveto
damage your vehicleto get in.So be sure you
have extra keys.
When a new Chevrolet is delivered, the dealer removes
the key tag fromthe key, and givesit to the first owner.
Each taghas a code on it that tells yourdealer or a
qualified locksmith how to makeextra keys. Keep the
tag in a safe place. If you lose your key, you’ll be ableto
have a new one madeeasily using the tag.
2-2
Door Lo -‘IS
Use your key to unlock y our
vehicle from the outside.
You can also use the
optional remote keyless
entry system to unlock
your vehicle.
Unlocked doors canbe dangerous.
Passengers especially children can easily
open the doors and fall
out. When a door is
locked, the inside handle won’t open it.
Outsiders caneasily enter through an unlocked
door when you slow down o r stop your vehicle.
This may not be so obvious: You increase the
chance of being thrown out of the vehicle ina
crash if the doors aren’tlocked. Wear safety belts
properly, lock your doors,and you will be far
better off whenever you drive your vehicle.
--
--
To lock thedoor from the
inside, push the locking
lever forward.
There are several ways to lock and unlock yourvehicle.
To unlock the door, pull the lockinglever backward.
2-3
Power Door Locks (Option)
1
You can lock or unlock all
doors of your vehicle from
the driver or passenger door
lock switch.
Rear Door Security Lock (4-Door Models)
Your Chevrolet is equipped
with rear door security
locks that help prevent
passengers from opening
, the rear doors of your car
1 from the inside.
~
To use one of these locks:
1. Use a key tomove the lock all the wayup.
2. Close the door.
The lever on each rear door works only that door’s lock. 3. Do the same thing to the otherrear door lock.
It won’t lock (or unlock) allof the doors -- that’s a
The rear doorsof your vehicle cannotbe opened from
safety feature.
inside whenthis feature is in use. If you want to open a
rear door when the security lock on:
is
1. Unlock the door from the inside.
2. Then open the door from the outside.
If you don’t cancel the security
lock feature, adults or
older children whoride in the rear won’t be ableto oDen
Push the lower portionof the switchto lock your
doors. Push the upper portion
of the switchto unlock
your doors.
2-4
-
the rear door from the inside. You should let adults and
older children know howto cancel the locks.
To cancel the rear door lock:
1. Unlock the door from the inside and open the door
from the outside.
Your Keyless Entry
System operates ona
radio frequency subjectto
Federal Communications
Commission (FCC) Rules.
2. Use a key to move the lock all the way down.
3. Do the same for the other rear door.
The rear door locks will now work normally.
Leaving Your Vehicle
If you are leaving the vehicle, open your door and set
the locks from inside. Then get out and close the door.
Keyless Entry System (Option)
If your Chevrolet has this option, you can lock and
unlock your doors or unlock your trunk from upto
30 feet (9 m) away using the key chain
transmitter
supplied with your vehicle.
This device complies with Part15 of the FCC Rules.
Operation is subject to the following two conditions:
(1) This device may not cause harmful interference,
and (2) This device must accept anyinterference
received, including interference that may cause
undesired operation.
Should interference to this system occur, try this:
Check to determine if battery replacement is
necessary. See the instructions on battery
replacement.
Check the distance. You may be too far from your
vehicle. This product has a maximum range.
2-5
0
Check the location. Other vehicles or objects may be
blocking the signal.
See your Chevroletdealer or a qualified technician
for service.
Changes or modifications to this systemby other than an
authorized servicefacility could void authorizationto
use this equipment.
Operation
The driver’s door will unlock automatically when
UNLOCK is pressed. If pressed again withinfive
seconds, all the doors will unlock. All doors will lock
when DOOR is pressed.
The trunk will unlockanytime when the opened trunk
symbol on the KeylessEntry Control is pressed and
the ignition key is OFF. On vehicles equipped witha
manual transaxle, the parking brake mustbe set.
Press DOORor UNLOCK to illuminate the interior
lamps. The lamps will thengo off after 40 seconds
when UNLOCK is pressed andfor a few seconds when
DOOR is pressed. When theignition is turned on, the
lamps will also fade out. See “Illuminated Entry” in
the Index.
Matching Tkansmitter(s) To Your Vehicle
Each key chain transmitter coded
is
to prevent another
transmitter from unlocking your vehicle.If a transmitter
is lostor stolen, a replacement can be purchased
through your dealer. Remember to bring
any remaining
transmitters with you when yougo to your dealer.
When the dealer matches the replacement transmitter
to
your vehicle, any remaining transmitters must also be
matched. Once the newtransmitter is coded, the lost
transmitter will not unlock yourvehicle. Each vehicle
can have only twotransmitters matched to it.
Battery Replacement
Under normal use,the batteries in your key chain
transmitter should last about two years.
You can tell the batteries are weak
if the transmitter
won’t work at the normalrange in any location. If you
have to getclose to your,vehiclebefore thetransmitter
works, it’s probably time to change the batteries.
Replacing the Batteries in the
Keyless Entry System
Transmitter
Trunk
1. Pop the cover off by inserting a coin or similar object
in the slot between the covers,and then twisting.
2. Lift the cover off, bottom half first
3. Remove and replace the two batteries. Use two
Duracell@batteries, type DL-2016, or equivalent.
4. Put the two halves back together. Make sure the
cover is on tightly, so water won’t get in.
It canbe dangerous to drive with the trunk
lid
open because carbon monoxide (CO) gascan
come into your vehicle. You can’t see or smell
CO. It can cause unconsciousnessand even death.
If you must drivewith the trunklid open or if
electrical wiring or other cableconnections must
pass through theseal between the body and the
trunk lid:
Make sure all windows are shut.
Turn the fanon your heating or cooling
system to its highest speed with
the setting
on any airflow selection except
MAX. That
will force outsideair into your vehicle. See
“Comfort Controls” in the Index.
If you have air outlets on or under the
instrument panel, open them all the way.
See “Engine Exhaust” in the Index.
5. Check the transmitter operation.
2-7
Remote Trunk Release (Option)
Pull upwardon the remote
release handle, locatedon
the floor near the left side
of
the driver’s seat,to release
the trunk lid.
When you park your Chevrolet and open the driver’s
door, you’ll hear a chime reminding you to remove your
key from the ignition and takeit with you. Alwaysdo
this. Your steering wheel will be locked, and
so will
your ignition.If you have an automatic transaxle, taking
your key out also locks your transaxle. And remember
to lock the doors.
Parking at Night
Park in a lighted spot, close all windows and lock your
vehicle. Rememberto keep your valuables outof sight.
Put them in a storage area,
or take them with you.
Parking Lots
Theft
Vehicle theft is big business, especiallyin some cities.
Although your Chevrolet has a number
of theft-deterrent
features, we know that nothing we put on it can make
it
impossible to steal. However, there are ways you can help.
Key in the Ignition
If you leave your vehicle with the keys inside, it’s an
easy target forjoy riders or professional thieves-- so
don’t do it.
2-8
If you park in a lot where someone will be watching
your vehicle, it’s best to lock
it up and take your keys.
But what if you haveto leave your ignition key? What
if
you have to leave something valuable in your vehicle?
0 Put your valuables in a storage area, like your trunk
or glove box.
0 Lock all the doors except the driver’s.
0 Then take the door key with you.
Passlock
New Vehicle LLBreak-InT’
TM
Your vehicle is equipped with the Passlock
theft-deterrent system.
Passlock is a passive theft-deterrent system. The system is
armed once the key is removed from the ignition. Passlock
enables fuelif the ignition lock cylinder is turned with a
valid key. If a correct key is not used, fuel is disabled.
During normal operation, the THEFT SYSTEM light will
go off after the engineis started. In the unlikely event that
the engine stalls and the THEFT SYSTEM light flashes,
wait until the light stops flashing before trying to restart
the engine. Remember to release the key from the
START position as soon as the engine starts. If after
several tries the vehicle still does not start, the vehicle
may need service. At this time, you may also want to
check the fuses (see “Fuses and Circuit Breakers” in the
Index). See your Chevrolet dealer for service.
If the THEFT SYSTEM light comes on while the engine
is running, a problem has been detected and the system
may need service.See your dealer for service.
In an emergency, call the Chevrolet Roadside Assistance
Program at 1-800-CHEV-USA 1-800-243-8872.
NOTICE:
Your modern Chevrolet doesn’t needan
elaborate “break-in.” But itwill perform better
in the long run if you follow these guidelines:
Don’t drive at any one speed fast or
slow for the first500 miles (804 km).
Don’t make full-throttlestarts.
Avoid making hard stops for the first
200 miles (322 km) or so. During this time
your new brake linings aren’tyet broken
in. Hard stops withnew linings can mean
premature wear and earlier replacement.
Follow this breaking-in guideline every
time you get new brake linings.
Don’t tow a trailer during break-in.
See “Towing a Trailer” in the Index for
more information.
--
--
I
2-9
Ignition Switch
OFF (C): Unlocks the steering wheel, ignition and
transaxle, but does not send electrical power to any
accessories. In the OFF position, the instrument cluster
and the automatic transaxle gear shift indicator have
electrical power. Use this positionif your vehicle must
be pushedor towed, but never try to push-start your
vehicle. A warning chime will sound if you open the
driver’s door when the ignition isoff and the key is in
the ignition.
RUN (D): An on positionto which the switch returns
after you start your engine and release the switch.
The
switch stays in the RUN position when the engine is
A
E
running. But even when the engine is not running, you
can use RUN to operate your electrical power
accessories, and to display some instrument panel
warning lights.
With the ignition key in the ignition switch, you can turn START (E): Starts the engine. When the engine starts,
release the key. The ignition switch will return to RUN
the switch to five positions.
for normal driving.
ACCESSORY (A): An on position in which youcan
operate your electrical power accessories. Press in the Note that even if the engine is not running, the positions
ACCESSORY and RUN are on positions that allow you to
ignition switch as you turn
the top of it toward you.
operate your electrical accessories, suchas the radio.
LOCK (B): The only position in which you
can
remove thekey. This locks your steering wheel, ignition
and transaxle.
2-10
Key Release Button (ManualTransaxle)
On manual transaxlevehicles, turning thekey to
LOCK will lock the steering column and result in
a loss of ability to steer the
vehicle. This could
cause a collision. If you need to turn the engine
off while the vehicle is moving,turn thekey only
to OFF. Don’t press thekey release button while
the vehicle is moving.
NOTICE:
If your key seemsstuck in LOCK and
you can’t
turn it, be sure itis all the way in. If it is, then
turn the steering wheel leftand rightwhile you
turn thekey hard. But turn thekey only with
your hand. Using a tool to forceit could break
the key or the ignition switch.If none of this
works, then your vehicle needs service.
I used.
is
The ignition key cannot be
removed from the ignition
unless the key release
button
To remove the key,turn the key to the OFF position.
While pressing the key release button in, turn the key to
the LOCK position. Pull the key straight out.
2-11
Starting Your Engine
Manual transaxle
Engines start differently. The 8th digitof your Vehicle
Identification Number (VIN) shows the code letter or
number for your engine. You will find the VIN at thetop
left of your instrument panel.(See “Vehicle
Identification Number” inthe Index.) Follow the proper
steps to start theengine.
The gear selector shouldbe in NEUTRAL (N). Hold the
clutch pedal to thefloor and start the engine. Your
vehicle won’tstart if the clutch pedalis not all the way
down -- that’s a safety feature.
Automatic transaxle
Move your shift leverto PARK (P) or NEUTRAL (N).
Your engine won’t start in any otherposition -- that’s a
safety feature. To restart when you’re already moving,
use NEUTRAL (N) only.
NOTICE:
Don’t try to shift toPARK (P) if your Chevrolet
is moving. If you do, you could damage the
transaxle. Shift toPARK (P) only when your
vehicle is stopped.
2-12
Starting Your 2.2 Liter Engine
1. Without pushing the accelerator pedal, turn your
ignition key to START. Whenthe engine starts, let
go of the key. The idle speed will go down as your
engine gets warm.
I NOTICE:
r
Holding your key in START for longer than
15 seconds at a time
will cause your battery to
be drained much sooner. And the excessive heat
can damage your starter motor.
2. If your engine still won’t start (or starts but then
stops), it couldbe flooded withtoo much gasoline.
Try pushing youraccelerator pedal all the way tothe
floor and holding it there as you hold
the key in
START for about three seconds.If the vehicle starts
briefly but then stops again, do the same thing, but
this time keep the pedal down for fiveor six seconds.
This clears the extra
gasoline from the engine.
NOTICE:
Your engine is designed to work with the
electronics in yourvehicle. If you add electrical
parts oraccessories, you could change theway
the engine operates.Before adding electrical
equipment, check with your dealer. If you don’t,
your engine might not perform properly.
If you ever have to have your vehicle towed, see
the partof this manualthat tells how to do it
without damaging yourvehicle, See “Towing
Your Vehicle” in theIndex.
Starting Your 2.4 Liter Engine
1. Without pushing the accelerator pedal, turn your
ignition key to START. When theengine starts,let
go of the key. The idle speed will go down as your
engine gets warm.
I NOTICE:
Holding yourkey in START for longer than
15 seconds at a time will cause your battery to
be drained much sooner. And the excessive heat
can damage your starter
motor.
2. If it doesn’t start right away, and if the weather is
very cold (below-20°F or -29”C), push the
accelerator pedal aboutone-quarter of the way down
while you turn the key to START. Do this until the
engine starts. As soon asit does, let go of the key.
3. If your engine still won’t start (or starts but then
stops), it could be flooded with too much gasoline.
Try pushing youraccelerator pedal all the way to the
floor and holdingit there as you hold the key in
START for about three seconds. This clears the extra
gasoline from the engine. If the vehicle starts briefly
but then stops again, do the same thing, but this time
keep the pedalabout one-quarter of the way down
for fiveor six seconds.
2-13
NOTICE:
Engine Coolant Heater (Option)
Your engine is designed to workwith the
electronics in your vehicle. If you add electrical
parts or accessories, you could change theway
the engine operates. Before adding electrical
equipment, check with your
dealer. If you don’t,
your engine might notperform properly.
If you ever haveto have yourvehicle towed, see
the partof this manual thattells how to do it
without damaging yourvehicle. See “Towing
Your Vehicle” in the Index.
2.2L Engine
2-14
Plugging the cord into an ungrounded outlet
could cause an electrical shock. Also, the wrong
kind of extension cord could overheatand cause
a fire. You could be seriously injured. Plug the
cord intoa properly grounded three-prong
110-volt AC outlet. If the cordwon’t reach, use a
heavy-duty three-prongextension cord ratedfor
at least 15 amps.
2.4L Engine
In very cold weather,0°F (- 18 C) or colder, theengine
coolant heater can help. You’ll
get easier starting and
better fuel economy during engine warm-up. Usually,
the coolant heater should be plugged in a minimum of
four hours prior to starting your vehicle.
O
To use the coolant heater:
1. Turn off the engine.
2. Open the hood and unwrapthe electrical cord.
3. Plug it into a normal, grounded 110-volt AC outlet.
4. After you’ve used the coolant heater, be sure to store
the cord as it was before to keep it away from moving
engine parts. If you don’t, it could be damaged.
How long shouldyou keep the coolant heater plugged
in? The answer depends on the outside temperature, the
kind of oil you have, andsome other things. Insteadof
trying to list everything here, we ask that you contact
your Chevrolet dealer in the area where you’ll be
parking your vehicle.The dealer can give you the best
advice for that particular area.
2-15
Automatic Transaxle Operation
Your Chevrolet may be equipped witha three-speed
automatic or a four-speed automatic transaxle. The shift
lever is located onthe console between the seats.
There are six different positions for the shift lever on the
three-speed automatic and sevenpositions for the
four-speed automatic transaxles. While PARK (P),
REVERSE (R)and NEUTRAL (N) operate identically
for both transaxles, the forward gear positions represent
different gearing andoperation. See “Forward Gears
(3-Speed)” or “Forward-Gears (4-Speed)” later in
this section.
P R N D 2 1
Three-Speed Automatic Transaxle
I
Four-Speed Automatic Transaxle
2-16
PARK (P): This locks your front wheels. It’s the best
position to use when you start your engine because your
vehicle can’tmove easily.
It is dangerous toget out of your vehicle if the
shift leveris not fully in PARK(P) with the
parking brake firmlyset. Your vehicle can roll.
Don’t leave your vehicle whenthe engineis
running unless you have to. If you have left the
engine running, the vehicle can
move suddenly.
You or otherscould be injured.To be sure your
vehicle won’t move, even when you’re on fairly
level ground, alwaysset your parking brake and
move the shiftlever to PARK (P).
See “Shifting Into PARK (P)” in theIndex. If
you’re pullinga trailer, see“Towing a Trailer’’ in
the Index.
Ensure the shift lever is fully in PARK (P) range before
starting the engine. Your Chevrolet has a brake-transaxle
shift interlock. You have to fully apply your regular
brakes before you can shift from PARK (P) when the
ignition key is in the RUNposition. If you cannot shift
out of PARK (P), ease pressure on theshift lever -- push
the shift lever all the wayinto PARK (P) and also
release the shift lever button on floor shift console
models as you maintain brakeapplication. Then move
the shift lever into the gear you wish.(Press the shift
lever button before moving theshift lever.) See
“Shifting Out of PARK (P)” in the Index.
REVERSE (R): Use this gear to back up.
NOTICE:
Shifting to REVERSE (R) while your
vehicle is
moving forward could damage your transaxle.
Shift to REVERSE (R) onlyafter yourvehicle
is stopped.
To rock your vehicle backand forth to get out of snow,
ice orsand without damaging yourtransaxle, see “If
You’re Stuck: InSand, Mud, Ice or Snow” in the Index.
NEUTRAL (N): In this position, your engine
doesn’t connect withthe wheels. To restart when you’re
already moving, use NEUTRAL(N) only. Also, use
NEUTRAL (N) when your vehicle is being towed.
2-17
A CAUTION:
Shifting out of PARK (P) or NEUTRAL (N) while
your engine is “racing”(running at high speed)
is dangerous.Unless your footis firmly on the
brake pedal, your vehicle could move very
rapidly. You could lose controland hit people or
objects. Don’t shift out of PARK (P) or
NEUTRAL (N) while your engine is racing.
I NOTICE:
Damage to your transaxle caused
by shifting out
of PARK (P) or NEUTRAL (N) with the engine
racing isn’t covered by your warranty.
Forward Gears (3-Speed)
DRIVE (D): This position is fornormal driving.
SECOND (2): This position gives you more power but
lower fuel economy. You can use SECOND (2) on hills.
It canhelp control your speedas you go down steep
mountain roads, but then you wouldalso want to use
your brakes off and on.
I NOTICE:
Don’t drive in SECOND (2) for more than
25 miles (41 km), or at speeds over55 mph
(88 km/h), or you can damage your transaxle.
Use DRIVE (D) as much as possible. Don’t shift
into SECOND(2) unless you are going slower
than 65 mph (105 km/h), or you can damage
your engine.
FIRST (1): This position gives you even more power (but
lower fuel economy)than SECOND (2). You can use it on
very steep hills, orin deep snow or mud.If the selector
2-18
lever is putin FIRST (l),the transaxle won’tshift into
first gear until the vehicle is going slowly enough.
NOTICE:
If your frontwheels can’t rotate,don’t try to
drive. This might happenif you were stuck in
very deep sand or mud or were up against
solid a
object. You could damage your transaxle.
Also, if
you stop when going uphill,don’t hold your
vehicle there with onlythe acceleratorpedal.
This could overheat and damage the transaxle.
Use your brakes or shift into
PARK (P) tohold
your vehicle in position on a hill.
Forward Gears (4-Speed)
AUTOMATIC OVERDRIVE (D): This position is for
normal driving with the fourspeed automatic transaxle.
If you need more powerfor passing, and you’re:
Going less than about 35 mph (56 km/h), push your
accelerator pedal about halfway down.
Going about 35 mph (56 km/h), push your
accelerator all the way down.
THIRD (3): This position is also used for normal
driving, however, it offers more power andlower fuel
economy than AUTOMATIC OVERDRIVE(D). Here
are some times you mightchoose THIRD (3) instead of
AUTOMATIC OVERDRIVE (D):
When driving on hilly, winding roads.
0
When going down a steep hill.
SECOND (2): This position gives you more power but
lower fuel economy. You can use SECOND (2) on hills.
It can help control your speed as yougo down steep
mountain roads, but then you wouldalso want to use
your brakesoff and on.
NOTICE:
Don’t drive inSECOND (2) for more than
25 miles (41 km), or atspeeds over55 mph
(88 km/h), oryou can damageyour transaxle.
Use AUTOMATIC OVERDRIVE (D) or
THIRD (3) as much as possible. Don’t shift
into SECOND ( 2 ) unless you are going slower
than 65 mph (105 km/h), or you can damage
your engine.
2-19
FIRST (1): This position gives you even more power (but
lower fuel economy) thanSECOND (2). You can use it on
very steep hills, or in deep snow or mud. If the selector
lever is put in FIRST (1)’ the transaxle won’tshift into
Manual Transaxle
first gear until the vehicle is going slowly enough.
NOTICE:
If your frontwheels can’t rotate, don’ttry to
drive. This might happenif you were stuck in
very deep sandor mud or
were up against a solid
object. You could damage yourtransaxle. Also, if
you stop when going uphill, don’t hold your
vehicle there withonly the accelerator pedal. This
could overheat and damage the transaxle.
Use
your brakes or shift into
PARK (P) to hold your
vehicle in position on
a hill.
2-20
.-
This isyour shift pattern.
1
2
3
4
5
R
THIRD (3), FOURTH (4) and FIFTH (5): Shift into
THIRD (3), FOURTH (4) AND FIFTH ( 3 , the same
way you do for SECOND (2). Slowly let up on the
clutch pedal as you press the accelerator pedal.
To stop, let up on theaccelerator pedal and press the
brake pedal. Just before the vehicle stops, press the
clutch pedal and the brakepedal, and shift to
NEUTRAL (N).
NEUTRAL (N): Use this position whenyou start or
idle your engine.
Here’s how to operate your transaxle:
FIRST (1): Press the clutch pedal and shift into
HRST (1). Then, slowly letup on the clutch pedal as
REVERSE (R):To back up, press down the clutch
pedal and shift into REVERSE (R). Let up on the clutch
pedal slowly while pressing the
accelerator pedal.
you press the accelerator pedal.
You can shift into FIRST (1) when you’re going less
NOTICE:
than 20 mph (32 km/h). If you’ve come to a complete
stop and it’s hard to shiftinto FIRST (1)’ put the shift
lever in NEUTRAL (N) and let up on the clutch. Press
the clutch pedal back down. Then shift into FIRST (1).
Shift to REVERSE (R) only after your vehicleis
stopped. Shifting to REVERSE(R) while your
vehicle is moving could damage your transaxle.
SECOND (2): Press the clutch pedal as you let up on
the accelerator pedal and shift into SECOND (2). Then,
slowly letup on the clutch pedal as you press the
accelerator pedal.
Also, use REVERSE (R),along with the parking brake,
for parking your vehicle.
3 31
I
Shift Light (Manual Transaxle)
j Shift Speeds
If you have a manual
transaxle, you havea
SHIFT light. This light will
show you whento shift to
the next higher gear for best
fuel economy.
/r\ CAUTION:
r
If you skip more than one gear whenyou
downshift, you could lose control of your vehicle.
And you could injure yourself or others. Don’t
shift from FIFTH (5) to SECOND (2), or from
FOURTH (4) to FIRST (1).
This chart shows you whento shift to the next higher
gear for best fuel economy.
AccelerationShiftSpeeds
FIRST (1) to SECOND (2)
SECOND (2) to THIRD (3)
THIRD (3) to FOURTH (4)
FOURTH (4) to FWTH ( 5 )
~
17 mph (27 ludh)
30 mph (48 km/h)
39 mph (63 kmh)
45 mph (72 km/h)
: If your speed drops below 20 mph(32 km/h), or if the
~
1
I
engine is not running smoothly, you should downshiftto
the next lower gear.You may haveto downshift twoor
more gears to keep the engine running smoothlyor for
good performance.
2-22
SHIFT
When this light comes on, you can shift to the next
higher gear.if weather,road and traffic conditionslet
you. For the best fuel economy, accelerate slowly and
shift when thelight comes on.
While you accelerate,it is normal for the light to go on
and off if you quickly changethe position of the
accelerator. Ignore the SHIFT light when you downshift.
Parking Brake
To set the parkingbrake, hold the brake pedal down
and
pull up on the parking brake lever. If the ignition is on,
the brake system warning light will come on.
To release the parking brake, hold the brakepedal down.
Pull the parkingbrake lever up until you can press the
release button. Hold therelease button in as you move
the brakelever all the way down.
NOTICE:
-
Driving with the parking brake
on can cause
your rear brakes to overheat.You may have to
replace them,and you could also damage other
parts of your vehicle.
The parking brake lever
is located between the bucket seats.
2-23
1
Shifting Into PARK (P)
(Automatic Transaxle Models Only)
1. Hold the brake pedal downand-setthe parking brake.
D
It can be dangerous to get out
of your vehicle if
the shift lever is not fullyPARK
in (P)with the
parking brake firmlyset. Your vehicle can roll.
If you have leftthe engine running, thevehicle
can move suddenly. You or otherscould be
injured. To be sure yourvehicle won’t move, even
when you’re on fairly-level ground, use the steps
that follow. If you’re pulling a trailer,see
“Towing a lkailer” in theIndex.
2. Move the shift lever into the PARK (P) position like
this: Hold in the button on the lever,and push the
lever all the way toward the front of your vehicle,.
3. Move the ignition key to LOCK.
4. Remove the key and take it with you. If you can
leave your vehicle with the ignition key
in your
hand, your vehicleis inPARK (P).
2;-24
Leaving Your Vehicle With the Engine
Running (Auton~ ticTransaxle“del
3nly)
~
It can be dangerousto leave your vehicle with
the engine running. Your vehicle could movesuddenly if theshift lever is not fully in PARK (P)
with the parking brake firmly
set. And, if you
leave thevehicle with the engine running, it could
overheat and even catchfire. You or others could
be injured. Don’t leave your vehicle with the
engine running unless you have to.
If you have to leave your vehicle with the
engine
running, be sure your vehicleis in PARK (P) and your
parking brake is firmly set before you leaveit. After
you’ve moved the shift leverinto the PARK (P)
position, hold theregular brake pedal down. Then, seeif
you can move the shift lever away from
PARK (P)
without first pushing the button.
Torque Lock (Automatic Transaxle)
If you are parkingon a hill and you don’t shift your
transaxle into PARK (P) properly, the weight of the
vehicle mayput too much force on the parking pawl in
the transaxle. You may find it difficult to pullthe shift
lever out ofPARK (P). This is called “torque lock.’’To
prevent torque lock, set the parking brake and then shif
into PARK (P) properly before you leave the driver’s
seat. To find out how,see “Shifting Into PARK (P)” in
the Index.
When you are ready to drive, movethe shift lever out of
PARK (P) before you release the parking brake.
If torque lock does occur, you may need to have another
vehicle push yours a little uphill
to take some of the
pressure from the transaxle,so you can pull the shift
lever out of PARK (P).
If you can, it means that the shift lever wasn’t fully
locked into PARK (P).
2-25
Shifting Out of PARK (P)
(Automatic Transaxle)
Your Chevrolet has a brake-transaxle shift interlock.
You have to fully appZy your regular brakes before you
can shift fromPARK (P) when the ignition is in the
RUN position. See“Automatic Transaxle” in the Index.
If you cannot shiftout of PARK (P), ease pressure on
the shift lever -- push the shiftlever all the way into
PARK (P) and also release the shift lever button on floor
shift console models as you maintain brake application.
Then move the shiftlever into the gear you wish.(Press
the shift lever button before movingthe shift lever.)
If you ever hold the brake pedal down but
still can’t
shift out of PARK (P), try this:
1. Turn the key to OFF.
2. Apply and hold the brake untilthe end of Step 4.
3. Shift toNEUTRAL (N).
,
4. Start the vehicle and thenshift to the drive gear
yowwant.
5. Have the vehicle fixed as soon as you can.
Parking Your Vehicle
(Manual lkansaxle)
Before you get out your
of vehicle, put your manual transaxle
in REVERSE (R) and firmly apply the parking brake.
Parking Over ThingsThat Burn
Engine Exhaust
CAUTION:
-
Things that can burn could touchhot exhaust
parts under yourvehicle and ignite. Don’t park
over papers, leaves, dry grass or other things that
can burn.
Engine exhaust cankill. It contains the gas
carbon monoxide (CO),which you can’t seeor
smell. It can cause unconsciousness and death.
You might have exhaust coming in if:
Your exhaust system sounds strange
or different.
Your vehicle gets rusty underneath.
Your vehicle was damaged in a collision.
Your vehicle was damaged when driving over
high points on the roador over road debris.
Repairs weren’t done correctly.
Your vehicle or exhaust system had been
modified improperly.
If you ever suspect exhaustis coming into
your vehicle:
Drive it only with all the windows down to
blow out anyCO; and
Have your vehicle fixed immediately.
2-27
Running Your Engine While You’re
Parked (Automatic Transaxle)
It’s better not to park with the engine running.ifBut
you
ever have to, here aresome things to know.
r A 7AUTICU:
I
Idling the engine with the air system control
off
could allow dangerous exhaustinto yourvehicle
(see the earlier Caution under “Engine
Exhaust”).
Also, idling ina closed-in placecan let deadly
carbon monoxide (CO) into yourvehicle even if
the fanswitch is at the highest setting. One place
this can happenis a garage. Exhaust with
CO can come in easily. NEVER park in a
garage with the engine running.
Another closed-in placecan bea blizzard. (See
“Blizzard” in the Index.)
--
--
1 A CAUTION:
I
I
It can be dangerous to get out
of your vehicle if
the shift leveris not fully in PARK (P)with the
parking brake firmly set. Your vehicle can roll.
Don’t leave,your vehicle when the engine is
running unless you have to. If you’ve left the
engine running, thevehicle can move suddenly.
You or otherscould be injured.To be sure your
vehicle won’t move, even when you’re on fairly
level ground, always set your parking brake and
move the shift lever toPARK (P).
Follow the proper steps
‘tobe sure your vehicle won’t
move. See “Shifting Into PARK (P)” in the Index.
If you are parking ona hill andif you’re pullinga
trailer, also see “Towinga Trailer’’ in the Index.
2-28
--
-
Windows
On a vehicle with manual windows, use the window
crank to open and close each window.
Power Windows (Option)
The driver’s window switch has an auto-down feature.
The driver’s window can be opened to the desired
amount by pushing the rear of the switch
to the first
detent. For the auto-downfeature, push the rear of the
switch all the way down.The window will continue
going down until fully opened.
To stop the window whileit is lowering, briefly press
the switch forward, then release.
To raise the window, press and hold the switch forward.
In a sedan model, you may also have a lockout switch
Press it to disable the rear passenger power window
switches. This will prevent rear passengers from
opening and closing the windows.The driver can still
control all windows with the switch the
in lock position.
rress the lockout button again to enable
the passenger
window switches.
Horn
With power windows, switcheson the center console
control each of the windows when the ignitionis on. In
addition, in fourdoor models, each rear passengerdoor
has a control switchfor its own window.
You can sound the horn by pressing the center of your
steering wheel near the horn symbols.
2-29
Tilt Steering Wheel (Option)
Turn Signal/Multifunction Lever
I
A tilt steering wheel allows you
to adjust the steering
wheel before youdrive. You can also raise it to the
highest level to give your legs more room when youexit
and enter the vehicle.
To tilt the wheel, hold thesteering wheel and pull the
lever. Move the steering wheelto a comfortable level,
then release the leverto lock the wheel in place.
2-30
The lever on the left side of the steering column
includes your:
0
Turn Signal and Lane Change Indicator
0
Headlamp High/Low Beam Changer
0
Cruise Control (Option)
Turn Signal and Lane Change Indicator
The turn signal has two upward (for right) and two
downward (for left) positions.These positions allow you
to signal a turnor a lane change.
To signal a turn, move the leverall the way up or
down. When the turnis finished, the lever will
return automatically.
An arrow on the instrument
panel will flash in the
direction of the turn or
lane change.
To signal a lane change,just raise or lower the lever
until the arrow startsto flash. Hold it there until you
complete your lane change.The lever will returnby
itself when you releaseit.
As you signal a turnor a lane change,if the arrows don’t
flash butjust stay on, a signal bulb may be burned
out
and other drivers won’t see your turn signal.
If a bulb is burned out, replace
it to help avoid an
accident. If the arrows don’tgo on at all when you
signal a turn, check the fuse (see “Fuses and Circuit
Breakers’’ in the Index) andfor burned-out bulbs.
2-31
Headlamp HighlLow BeamChanger
Windshield Wipers
To change the headlampsfrom low beam to highor high
to low, pull the turn signal lever
all the way toward you.
Then release it.
When the high beamsare
on, this lighton the
instrument panel also
will be on.
r
Flash-To-Pass
This feature lets you use your high-beam headlamps
to
signal a driverin front of you that you want to pass.
You control the windshield wipers by moving the stalk
with the windshield wiper symbol
on it up or down.
To use it, pull the turn signal/multifunction lever toward
you until the high-beam headlamps come
on, then
release the leverto turn them off.
2-32
~
.
For a single wiper cycle, press the stalkdown until
the wipers start, then let go.The wipers will stop after
one cycle. For morecycles, hold the wiper stalk
down longer.
Controlled Cycle Wipers (Option)
For fixed delay wipercycles, move the wiper switch to
DELAY for wiper cycles with a fixed time delay
between them.
For steady wipercycles, move the wiper stalk up to
either 1 or 2, depending on the wiper speed you want.
To turn wipers off, move the stalk down to OFF.
Remember that damaged wiper blades may prevent you
from seeing well enoughto drive safely. To avoid
damage, be sureto clear ice and snowfrom the wiper
blades before using them.If they’re frozen to the
windshield, carefully loosenor thaw them. If your
If your vehicle has variable controlled-cycle windshield
blades do become damaged, get new blades or blade
wipers, you can set the wiper speed for a long or short
inserts.
delay between wipes.This can be very useful in light
Heavy snow orice can overload your wipers.A circuit
rain or snow.
breaker will stop themuntil the motor cools. Clear away
Move the stalk toDELAY, then rotate the band to
snow or ice to prevent an overload.
choose the delay you want. Rotate the band
up for
shorter delay times between wiper cycles. Rotate the
band down forlonger delay times between wiper cycles.
2-33
Windshield Washer
Driving without washer fluidis dangerous. A bad mud
splash can block yourvision. You could collide with
another vehicle. Check your washer fluid often.
I
I A CAUTION:
In freezing weather, don’t use your washer until
the windshield is warmed. Otherwise the washer
fluid can form ice on the windshield, blocking
your vision.
To wash your windshield, pull the stalk with the wiper
symbol onit toward you one time. The wipers will clear
the window and then eitherstop or return to your preset
speed. If you had no speed selected, the wipers will stop.
2-34
Cruise Control (Option)
When you apply your brakes,or the clutchpedal if you
haveamanual transaxle, the c ‘se contrc jhu off.
*
I
ACAUTION:
0
0
- -
Cruise control can be dangerous where
you
can’t drive safely at a steady speed. So,
don’t use your cruise control on winding
roads orin heavy traffic.
Cruise control can be dangerous on
slippery roads.On such roads, fast changes
in tire traction can cause
needless wheel
spinning, and you could lose control. Don’t
use cruise control on slippery roads.
With cruise control, you can maintain a speedof about
25 mph (40 km/h) or more without keeping yourfoot on
the accelerator.This can really help on long trips. Cruise
control does not work at speeds below about
25 mph (40 km/h).
2-35
I
A
- CAUTION:
If you leave yourcruise control switch on when
you’re not using cruise, you might hit
a button
and go into cruise whenyou don’t want to.You
could be startled and even lose control. Keep
the cruise control switch
OFF until you want to
use it.
I
1. Move the cruise control switch to ON.
2. Get up to the speed you want.
3. Push the SET button at the end of the lever and
release it.
4. Take your foot off the accelerator pedal.
2-36
Resuming a Set Speed
You'll go right back up to yourchosen speed and
stay there.
If you hold the switchat R/A longer than a half second,
the vehicle will keep going faster untilyou release the
switch or apply the brakeor clutch pedal. You could be
startled and even lose control.So unless you want togo
faster, don't hold the switch at R/A.
Increasing Speed WhileUsing Cruise Control
There are two ways to go to a higher speed:
Use the accelerator pedalto get to a higher speed.
Push the SET button at the end of the lever, then
release the button and the accelerator pedal. You'll
now cruise at the higher speed.
Suppose you setyour cruise control at a desired speed
and then you apply the brakeor clutch pedal. This,of
course, shuts off thecruise control. But youdon't need
to reset it. Onceyou're going about 25 mph (40 km/h)
or more, you can move the cruise
control switch from
ON to R/A for about a half second.
Move the cruise control switchfrom ON to R/A.
Hold it there until you get up to the speedyou want,
and then release the switch.To increase your speed
in very small amounts, move the switch to RIA for
less than a half a second and then releaseit. Each
time you do this, your vehicle willgo about 1 mph
( 1.6 h/h)
faster.
2-37
Reducing Speed While Using Cruise Control
Using Cruise Control onHills
There are two ways to reduce your speed while using
cruise control:
How well your cruisecontrol will work on hills depends
upon your speed, load and the steepness of the hills.
When going upsteep hills, you may haveto step on the
accelerator pedalto maintain your speed. When going
downhill, you may have to brakeor shift toa lower gear
to keep your speed down.Of course, applying the brake
or clutch pedal takes youout of cruise control. Many
drivers find this too muchtrouble and don’tuse cruise
control on steep hills.
0
Push in the button at the end of the lever until you
reach the lower speed you want, then
release it.
0
To slow down in very small amounts, push the
button for lessthan half a second. Each time you
do
this, you’ll go about 1 mph (1.6 h/h)
slower.
Passing Another Vehicle While Using Cruise Control
Use the acceleratorpedal to increase your speed. When
you take your foot off the pedal, your vehicle will slow
down to the cruise control speed you set earlier.
Ending Cruise Control
There are several ways to turn off the cruise control:
Step lightly on the brake pedal, or push the clutch
pedal, if you have a manual transaxle, OR
0
Move the cruise switch to OFF.
Erasing Cruise SpeedMemory
When you turn off the cruise control or the ignition,
your cruisecontrol set speed memory is erased.
2-38
Lamps
PARKING LAMPS
pf
This position will turnon the following:
0
ParkingLamps
0
SidemarkerLamps
0
Taillamps
0
Instrument Panel Lights
HEADLAMPS
This position will turn on the following:
0
Headlamps
ParkingLamps
The band on the turn signal/multifunction lever controls
your vehicle’s lamps.
0
SidemarkerLamps
0
Taillamps
Instrument Panel Lights
Turn the band clockwise all the
way to turn the
lamps off.
Lamps On Reminder
If you open the driver’sdoor with the ignition off and
the lamps on, you will hear a warning chime.
2-39
Daytime Running Lamps
Daytime Running Lamps( D m ) can makeit easier for
others to see the front of your vehicle during the day.
DRL can be helpful in many different driving
conditions, but they can be especially helpful
in the
short periods after dawnand before sunset.
The DRL system willmake your high-beam headlamps
come on at reduced brightnessin daylight when:
the ignition is on with the engine running,
the headlamp switch is OFF,
the parking brake is released and
0
the transaxle is not in PARK (P) or NEUTRAL (N)
on models with an automatic transaxle.
This indicator light on your
instrument panel comes on
2-40
When theDRL are on, only your high-beam headlamps
will be on at reduced brightness.
The taillamps,
sidemarker and other lamps won’t be on.
Your
instrument panel won’t be
lit up either.
When you turn on the headlamp switch, your high-beam
headlamps will go out, and your headlamps will come
on. The other lamps thatcome on with your headlamps
will also come on.
When you turnoff the headlamp switch, the regular
lamps willgo off, and your high-beam headlamps will
come on at reduced brightness.
To idle your vehicle with theDRL off, set the parking
brake. The DRL will stay off until you release the
parking brake.
As with any vehicle, you should turnon the regular
headlamp system whenyou need it.
Fog Lamps (224 Model)
Fog lamps will go off whenever the high-beam
headlamps come on. When the high beamsgo off, the
fog lamps will come on again.
Interior Lamps
Instrument Panel Intensity Control
Use your fog lamps for better vision in foggy or misty
conditions.
The switch for your fog lamps is next to the instrument
panel intensity control.
Push the top of the switch to turn the foglamps on. Push
the bottom of the switch to turn the fog lampsoff.
When using fog lamps, the parking lamps or low-beam
headlamps must be on.
You can brighten or dim the instrument panel lights by
turning the dial up or down.
Turn the dial up all the way to turn on the interior
courtesy lamps.
2-41
Illuminated Entry
When you openeither front door, or opena rear door,
the lamps insideyour vehicle willgo on. These lamps
will fade off after about 40 seconds, or when the ignition
is turned on after all thedoors have been closed.
Front Reading Lamps(Models with
Sunroof or Convertible Top)
If the ignition has been off for lessthan twominutes,
the lamps inside your vehicle will stayon for about
15 seconds to provide an illuminated exit when you
remove thekey from the ignition.
After you exit the vehicle and allof the doors have been
closed, the lamps willstay on for an additional four
seconds beforefading off. These lamps willalso go on
when you press theDOOR or UNLOCK button on the
optional Keyless Entry Transmitter.
These lamps are located on the rearview mirror. Turn
each one on andoff by pressingits switch.
2-42
1
Battery Saver
Mirrors
Your Chevrolet is equipped with a battery saver feature
designed to protect your vehicle’s battery.
Inside DaylNight Rearview Mirror
When any interior lamp (trunk, reading, dome, glove
box, etc.) is left on and the ignition is turned OFF,the
battery rundown protection system will automatically
turn the lamp off after 20 minutes. This will avoid
draining the battery. This system does notprotect
against leaving on the headlamps.
To reactivate the interior lamps, either:
The ignition must be turned on,
The activated lamp switch must be turned off, then
on, OR
A front door must be opened.
The battery rundown protection feature will also be
activated when any door is left open.
If your vehicle is left with the ignition off for over
24 days, the battery power to the clock and audio system
will turnoff to reduce the battery drain. When the
ignition is turned on again, battery power willbe
resupplied. Under these conditions it will be necessary
to reset the clock and audio system settings.
To reduce glare from lamps behind you, move the lever
toward you tothe night position.
2-43
Manual Remote Control Mirror
The outside rearview mirror
should be adjustedso you
can just see the sideof your
vehicle when youare sitting
in a comfortable driving
position.
Adjust the driver’s side outside mirror with the control
lever on the driver’s door.
Power Remote Control Mirrors(Option)
I
The mirror control is
located on the driver’s door.
Rotate the control clockwise
or counterclockwise to
choose the mirror you want
to adjust.
Then move the control in the direction you want the
mirror to move. Adjust each mirror
so you can just see
the side of your vehicle when you are sitting ain
comfortable driving position.
To adjust your passenger’s side mirror, sit in the driver’s The mirror is a spring-loaded breakaway design.
seat and havea passenger adjust themirror,for you.
The mirror is a spring-loaded breakaway design.
2-44
Convex OutsideMirror
Storage Compartments
Your passenger’s side mirror is convex. A convex
mirror’s surface is curved so you can see more from the
driver’s seat.
Center Console StorageArea
/I\ CAUTION:
A convex mirror can make things (like other
vehicles) look farther away than they really are.
If you cut too sharply into the right lane, you
could hit a vehicleon your right. Check your
inside mirror or glance over your shoulder before
changing lanes.
To open the center console, pull the lift lever up and
the lid back.
To close the center console, push the lid down until
it clicks.
2-45
Center Console Cupholders
Open the center console lid all the way
to uncover the
front and rear cupholders. There is also a cupholderat
the front of the console.
Convenience Net (Option)
Your vehicle may havea convenience net. You’llsee it
just inside the back wallof the trunk. Put small loads,
like grocery bags, behind the net. It can help keep them
from falling over during sharp turnsor quick starts and
stops. Unclip a corner of the convenience net
to fit
larger objects behind the net, then reclip it to secure
them in place.
The net isn’t for larger, heavierloads. Store them in the
trunk asfar forward as you can.
You can unhook the netso that it will lie flat when
you’re not usingit.
Floor Mat Retainer
Your vehicle may be equipped with afloor mat retainer
for the driver.This retainer is located at the rear, right
side of the floor mat.To remove, twist thetab
one-quarter of a turnto the rightor left. Lift the mat
straight up over the tab. Reverse this procedure
to
replace and secure thefloor mat.
Ashtrays and CigaretteLighter
To use the lighter,just push
it in all the way and let go.
When it’s ready, it will pop
back out by itself.
I NOTICE:
To clean the front ashtray, push down on the snuffer
plate and lift the ashtrayout.
Don’t hold a cigarette lighter in with your hand
while it is heating. If you do, it won’t be able to
back away from the heating element when it’s
ready. That can make it overheat, damaging the
lighter and the heating element.
2-47
To clean the rear ashtray,
open it, push downon the
snuffer, and pullit out.
Sunroof (Option)
Press and release the rear
of
the switch and the glass
panel will open to the
vent position.
Open the sunshadeby hand
when using the vent
position.
I NOTICE:
Don’t put papers and other things that burn into
your ashtrays. If you do, cigarettes or other
smoking materials couldset them on fire, causing
damage.
Sun Visors
To block out glare, you can swing down the visors.
You
can also swing them to the side.
2-48
Press and release the rear
of the switch againto open the
glass panel and the sunshade. Press the front of the
switch to stop the panel in any position.
Press and hold the front of the switch to close the glass
panel. The sunshade can only be closed by hand.
The sunroof glass panel cannotbe opened or closed if
your Chevrolet has an electrical failure.
Convertible Top (Option)
Lowering Your Convertible Top
The following steps explain the proper operation of your
convertible top.
1. Set the parking brake and shift yourautomatic
transaxle to PARK (P) or your manualtransaxle to
NEUTRAL (N).
NOTICE:
0
0
0
Remove anyitems from the convertible top
storage areabefore you lower thetop. Even
small items inthe storage area can damage
the topor other partsof the system.
Don’t raise or lower the convertible top
when the temperatureis below 20°F
(-7°C). The cold can cause cracks and
other damage to the top
as it is being
lowered or raised.
Don’t raise or lower the convertible top
while the vehicle is moving. The wind could
damage thetop. Bring the vehicle toa
complete stop before attempting to raise
or
lower the top. Always make sure that
the topis securely latched before driving
the vehicle.
2. Turn the ignition to the RUN position. Lower the
side door windows.
3. Push the button inthe latch handle and turn the
handle down to unhook the latch pins from the holes
over the windshield.
2-49
4. Pull the latch handle rearward away from the
5. Turn the latch handle up to the lockedposition.
windshield and holdit to fully lower the
convertible top.
2-50
~
6. From inside the vehicle, pull the tab on the rear seat
to fold down the seat. See “Fold-Down Rear Seat” in
the Index.
7. Open the trunk andremove both boot side covers.
Leave the trunk open.
8. Install the boot side cover by inserting the tab (A) on
the undersideof the cover into the slot (B) at the top
of the quarter trim panel. Place the rearflap of the
boot side cover in the trunk lid
opening, aligning the
eyelet (C) over the boot snap ball stud (D).
I
9. Attach the two snaps on the inside flap to the top
of the quarter trim panel. Attach the front
snap (E)
first and then the rear snap
(F). The rear snap is
adjustable for ease of installation.
2-52
10. Pull the boot center coverfrom behind the rear
seatback and placeit over the inner sides of the
boot side covers and the lowered top.
I
Raising Your Convertible Top
1. Set the parking brake andshift your automatic
transaxle to PARK (P) or your manualtransaxle to
NEUTRAL (N).
2. Open the trunk andleave it open.
11. Go to the rear of the vehicle. Place the boot center
cover along the trunklid opening. Align one snap
to snap ball stud andDush forward. Repeat for
other snap.
12. Close the trunk lid.
13. Raise the rear seatback to the up position. Push the
seat back to makesure it is latched.
3. From inside the vehicle, fold down the rear seatback.
See “Fold-Down Rear Seat” inthe Index.
2-53
t
4. Go to the rearof the vehicle. mlll the snap knobs
rearward to disengage the rearcenter cover.
Carefully tuck the center boot behind the rear
seatback. Make sure that
the center cover is not
covering the rear seatbacklatch. Tuck end ofcenter
boot rearward to keep
it away fromthe rear
seatback hinge.
'2-54
5. Unsnap both boot side cover snaps(E and F) from
the top of the quarter trimpanel.
6. Lift side cover eyelet (C) at rear of side boot cover
from snap ball stud (D). Raise the back of the boot
side cover to unhook the tab (A) from the slot (B)
in the quarter trim panel. Do the same on the
other side.
7. Store both boot side covers in the trunk.
8. Close the trunk,
9. Raise the rear seatback to the up position. Push the
seat back to make sureit is latched.
10. Turn the ignition to the RUN position.
11. Lower both door windows to avoid wear to
the weatherstrips.
3 LC
12. Push the buttonin the latch handle and turn the
handle down. Push the handle forward toward the
windshield and holdit until the convertible top is
fully raised, and the latch pinsare all the way in the
holes above the windshield.
13. Turn the latch handle up to lock the top.
1. Set the parking brake and shift your automatic
transaxle to PARK (P)or your manualtransaxle to
NEUTRAL (N). Turn the engine off.
Lowering the Top Manually
NOTICE:
2. Push the button in the latch handle and turn the
handle down.
Do not attempt to lower the top manually
as
damage to the vehicle will occur.If the top fails to
raise or lower completely, see “Raising the
Top
Manually” following.
I
3. Open the trunk.
I
Raising the Top Manually
If your vehicle loses power, or something else happens
that prevents you fromraising the top electrically, you
may need to raise the top manually. This will allow you
to safely drive the vehicle until you can get the top
repaired. Raising the convertible top manually should
only be done in an emergency and requires two people.
Before you do these steps, check to make sure that the
bypass switch in the trunk is switched up to the
NORMAL OPERATIONposition. If it is not, switch it
to the NORMAL OPERATION position and see if the
power top works.
2-57
4. Press the bypass switch downto the EMERGENCY
OVERRIDE position. The switch is located under
the shelf panel onthe driver’s side in the trunk.
5. Remove the top boot as described
in Steps 4 through 7
in “Raising Your Convertible Top” earlier in
this section.
6. Lower thedoor windows completely.
7. Position one personon each side of the vehicle.
Carefully lift the top by grasping the front corners of
the top, not the linkage.
I NOTICE:
Do not attempt to force the top up if
does
it not
move freely.The top or its linkage can be
damaged. Make sure both
sides are being lifted
together to avoid twisting. Seeyour dealer if you
still can’t move the top easily.
8. Raise the top until it is allthe way up. Line upthe
top so the pins are even with the holes.
9. Pull down on the top and turn the latch handle up to
lock the convertible top.
10. Press the bypass switch up to the NORMAL
OPERATION position.
11. Close the trunk.
12, Raise the rear seatback to the up position. Push the
seat back to make sure it is latched.
2-59
The Instrument Panel -- Your Information System
/
2-60
Your instrument panel is designed to let you know at a glance how your vehicle is running. You’ll know howfast
you’re going, how much fuel you’re using, and manyother things you’ll need todrive safely and economically.
The main components of your instrument panel are:
1. Instrument Panel Intensity Control
7. Climate Controls and Rear Window Defogger
2. Turn Signal/Multifunction Lever
8. Ashtray .
9. Parking Brake Lever
3. Hazard Warning Flashers Switch
4. Ignition Switch
10. Tilt Steering Wheel Lever (Option)
5. Windshield Wiperwasher Controls
6. Audio System
11. Hood Release Lever
12. Fuse Panel
2-61
Instrument Panel Clusters
UNLEADED
FUELONLY
Your Chevrolet is equipped with one of these instrument panelclusters, which includeindicator warning lights and
gages thatare explained on the following pages. Besure to read about those that apply
to the instrument panelcluster
for your vehicle.
2-62
Speedometer and Odometer
Tamper Resistant Odometer
Your speedometer lets you see your speed in bothmiles
per hour (mph) and kilometers per hour (km/h). Your
odometer shows how far your vehicle has beendriven,
in either miles (used inthe United States) or kilometers
(used in Canada).
Your Chevrolet has a tamper resistant odometer. If you
see silver lines between the numbers, you’ll know that
someone has probably triedto turn it back, so the
numbers may notbe true.
2-63
You may wonder what happensif your vehicle needsa
new odometer installed.
If the new onecan be set tothe mileage total of the old
odometer, thenit must be. But if it can't, then it's set at
zero anda label must be put onthe driver's door to
show the old mileagereading when the new odometer
was installed.
Trip Odometer (Option)
RPM
,\\"I
\\\
4
' 3
3 2
I ""///,
4
e4
5
$
\
The tachometer displays the
engine speed inrevolutions
per minute (rpm).
6
XIOOO
1
RPM
4
APPLY BRAKE TO
SHIFT FROM PARK
0
The trip odometer can tell you how
far your vehicle has
been driven since you last set the trip odometer to zero.
To set thetrip odometer tozero, press the knob to the
right of it.
2-64
Tachometer (Option)
I
NOTICE:
~~~
~~~~~~~
~
~~~
~
Do not operate the engine with the tachometer
in
the red area, or engine damage may occur.
~~~
Warning Lights, Gages and
Indicatl IS
This part describes the warning lights and gages that
may be on your vehicle.The pictures will help you
locate them.
Warning lights and gagescan signal that somethingis
wrong before it becomes serious enough to cause an
expensive repair or replacement. Paying attention to
your warning lights and gages could also
save you or
others from injury.
Warning lights come on when there may beor is a
problem with one of your vehicle’s functions.As you
will see in the detailson the next few pages,some
warning lights come on briefly when you start the
engine just to let you know they’re working.If you are
familiar with this section, you should not be alarmed
when this happens.
Gages can indicate when there may be or is a problem
with one of your vehicle’s functions. Oftengages and
warning lights work together tolet you know when
there’s a problem with your vehicle.
When one of the warning lightscomes on and stays on
when you are driving,or when one of the gages shows
there may be a problem, check the section that tells you
what to do about it. Please fallow this manual’s advice.
Waiting to do repairs can be costly and even
dangerous. So please get to know your warning lights
and gages. They’re a big help.
--
Safety Belt Reminder Light
When the keyis turned to RUN or START, a chime will
come on for about eight seconds to remind people
to
fasten their safety belts, unless the driver’s safety belt is
already buckled.
The safety belt light will
also come on and stay on
for about 20 seconds, then
it will flash for about
55 seconds. If the driver’s
belt is already buckled,
neither the chime nor the
light will come on.
2-65
Air Bag Readiness Light
There is an air bag readinesslight on the instrument
panel, which showsAIR BAG. The system checks the
air bag’s electrical system for malfunctions. The light
tells you if,there’is an electrical problem. The system
check includes theair bag sensor,the air bag modules,
the wiring and the
crash sensing and diagnostic module.
For more information onthe air bag system, see “Air
Bag” in the Index.
AIR
BAG
You will see this light flash
,fora few seconds when you
turn your ignition to RUN
or START. Then thelight
should go out. This means
the system is ready.
If the air bag readinesslight doesn’t come on when you
start your vehicle, or stays on, or comes on when you
are driving, your air bag system may not work properly.
Have your vehicle servicedright away.
2-66
Charging System Light
El
The charging systemlight
will come on briefly when
you turn on theignition, and
the engine is not running, as
a check to show you it is
working. Thenit should
go out.
If it stays on, or comes on while you are
driving, you
may havea problem with theelectrical charging system.
It could indicate that you havea loose generator drive
belt, or another electrical problem. Have it checked
right away. Driving whilethis light is on could drain
your battery.
If you must drivea short distance with the light on, be
certain to turn off all y o q accessories, such as the radio
and air conditioner.
Brake System Warning Light
Your Chevrolet’s hydraulic brake system is dividedinto
two parts. If one part isn’t working, the other part can
still work and stop you. For good braking, though, you
need both parts working well.
harder to push. Or,the pedal may go closerto the floor.
It may take longer to stop. If the light is still on, have the
vehicle towed for service. (See “Towing Your Vehicle”
in the Index.)
If the warning light comes on, there could be a brake
problem. Have your brake systeminspected right away.
BRAKE
This light should come on
briefly when you turn the
ignition key to RUN. If it
doesn’t come on then, have
it fixed so it will be ready to
warn you if there’s a
problem.
(a)
(@)
If the light comes on while youare driving, pull off the
road and stop carefully. You may notice that the pedal is
Your brake system may not be working properly
if the brake system warning light
is on. Driving
with the brake system warning light on can lead
to an accident. If the light
is still on after you’ve
pulled off the road and stopped carefully, have
the vehicle towed for service.
When the ignition is on, the brake system warninglight
will also come on when youset your parking brake.The
light will stay onif your parking brakedoesn’t release
fully. If it stays onafter your parking brake isfully
released, it means you havea brake problem.
Anti-Lock Brake System Warning Light
With the anti-lock brake
system, this light will come
on when youstart your
engine and it will stay on
for three seconds. That’s
normal.
If the light stays on, turn the ignition off. Or, if the light
comes on when you’re driving, stop as soon as possible
and turnthe ignition off. Then start the engine again to
reset the system.If the light still stays on, or comes on
again while you’redriving, your Chevrolet needs
service. If the regular brake system warninglight isn’t
on, you still have brakes, but you don’t have anti-lock
brakes. If the regular brake system warninglight is also
on, you don’t have anti-lockbrakes and there’sa
problem with your regular brakes.See “Brake System
Warning Light” earlier in this part.
2-68
The anti-lock brake system warninglight should come
on briefly when you turn the
ignition key to RUN. If the
light doesn’t comeon then, haveit fixed so it will be
ready to warn you if there is a problem.
Enhanced lkaction System Warning Light
(Option)
ETS
OFF
With the Enhanced Traction
System (ETS), this warning
light should comeon briefly
as you start the engine. If
the warning light doesn’t
come on then, have itfixed
so it will be ready to warn
you if there’sa problem.
If it stays on, or comes on when you’redriving, there
may be a problem with your Enhanced Traction
System
and yourvehicle may need service. When
this warning
light is on, the system will not limit wheel spin. Adjust
your driving accordingly.
The Enhanced Traction System warning light may
come
on for thefollowing reasons:
Enhanced Traction System Active Light
When your Enhanced
If you turn the system off by moving the shift lever to
Traction System is limiting
a position other than THIRD
(3) or OVERDRIVE (a)?
wheel spin, this light will
the warning light will come on and stay on.
To turn
come on. Slippery road
the system back on, move theshift lever back to the
conditions may existif the
LOW
THIRD (3) or OVERDRIVE (a)
position again. The
Enhanced Traction System
warning light shouldgo off. (See “Enhanced Traction
TRAC
active light comeson, so
System” in the Index for more information.)
adjust your driving
accordingly.
The warning light will come on when you set your
parking brake with the enginerunning, and it will
stay on if your parking brake doesn’t release fully.
If the transaxle shift leveris in the THIRD (3) or
The light will stay onfor a few seconds after the
OVERDRIVE (@)position and the warning light
Enhanced Traction System stops limiting wheel spin.
stays on after your parking brake is fully released, it
The Enhanced Traction System active light also comes
means there’s a problem with the system.
on’briefly when you turn the ignition keyto RUN. If the
If the Enhanced Traction System warning light comes
light doesn’t come on then,have it fixed so it will be
on and stays on for an extended periodof time when
there to tell you when the system is active.
the transaxle shift lever is in the
THIRD (3) or
OVERDRIVE (0)
position and the parking brakeis
fully released, your vehicle needs service.
0
2-69
Engine Coolant Temperature Gage
\
100
Low Coolant Warning Light
9H
If this light comes on and
stays on, your system is low
on coolant and the engine
may overheat.
1
,
1
TEMP
Your vehicle is equipped withone of these gages. With
the ignition inthe RUN position, this gage shows the
engine coolant temperature.
If the gage pointer movesinto the red area, your engine
is too hot! It means that yourengine coolant has
overheated. If you have been operating your vehicle
under normal drivingconditions, you should pulloff the
road, stop your vehicle and turnoff the engineas soon
as possible.
In “Problems on the Road,”this manual shows whatto
do. See “Engine Overheating” in theIndex.
2-70
See the Index under “EngineCoolant” and have your
vehicle serviced as soon as you can.
Malfunction Indicator Lamp
(Check Engine Light)
Your Chevrolet is equipped
with a computer which
monitors operation of the
fuel, ignition and emission
control systems.
CHECK
This system is called OBD I1 (On-Board
Diagnostics-Second Generation) andis intended to
assure that emissions are at acceptable levels for the life
of the vehicle, helpingto produce a cleaner
environment. (In Canada,OBD I1 is replaced by
Enhanced Diagnostics.) The CHECK ENGINE light
comes on to indicate that thereis a problem and service
is required. Malfunctionsoften will be indicated bythe
system before any problemis apparent, which may
prevent more serious damage to your vehicle. This
system is also designed to assist your service technician
in correctly diagnosing any malfunction.
NOTICE:
If you keep driving your vehicle with this light
on, aftera while, your emission controlsmay not
work as well, your fuel economy may not as
be
good and your engine may not run
as smoothly.
This could lead to costly repairs that
may not be
covered by your warranty.
This light should come on, as a checkto show youit is
working, when the ignition ison and the engine is not
running. If the light doesn’tcome on, have it repaired.
This light will also come on during a malfunction inone
af two ways:
Light Flashing -- A misfire condition has been
detected. A misfire increases vehicle emissions and
may damage the emission control system
on your
vehicle. Dealer or qualified service center diagnosis
and service is required.
Light On Steady -- An emission control system
malfunction has been detected on your vehicle.
Dealer or qualified service center diagnosis and
service may be required.
2-71
If the LightIs Flashing
If the LightIs On Steady
The following may prevent moreserious damage to
your vehicle:
You may be able tocorrect the emission system
malfunction by considering thefollowing:
0
Reduce vehicle speed.
Did youjust put fuel into your vehicle?
0
Avoid hard accelerations.
If so, reinstall the fuel cap, making sure to fully install
the cap. Thediagnostic system can determine if the fuel
cap has been left offor improperly installed. This will
allow fuel to evaporate into the atmosphere.A few
driving trips should turnthe light off.
Avoid steep uphill grades.
If towing a trailer, reduce the amount of cargo being
hauled as soon as itis possible.
If the light stops flashing and remains on steady, see “If
the Light Is On Steady” following.
If the light continues to flash, when it is safe to do so,
stop the vehicle. Put your vehicle inPARK (P). Turn the
key off, wait at least10 seconds andrestart the engine.
If the light remains on steady,see “If the Light Is On
Steady” following. If the light is still flashing follow the
previous steps, and drive the vehicle to your dealer or
qualified servicecenter for service,
2-72
Did you just drive througha deep puddle of water?
If so, your electrical system maybe wet. The condition
will usuallybe corrected whenthe electrical system
dries out. A few driving trips should turn the light off.
Are you lowon fuel?
As your engine starts to run out of fuel, your engine may
not run as efficiently as designed since small amounts of
air are sucked into the
fuel line causing a misfire. The
system can detect this. Addingfuel should correct this
condition. Make sure to install the fuel cap properly. It
will take a few drivingtrips to turn thelight off.
Have you recently changed brands
of fuel?
Oil Pressure Warning Light
If so, be sure to fuel your vehicle with qualityfuel (see
“Fuel” in the Index). Poor fuel quality will cause your
engine not to run as efficiently as designed.You may
notice this as stalling after start-up, stalling when you
put the vehicle into gear, misfiring, hesitation on
acceleration or stumbling on acceleration. (These
conditions may go away once the engine is warmed up.)
This will be detected by the system andcause the light
to turn on.
If you experience this condition, change thefuel brand
you use. It will require at least one full tank of the
proper fuel to turn the light off.
If none of the above steps have made the light turn
off,
have your dealer or qualified service center check the
vehicle. Your dealer has the proper test equipment and
diagnostic tools to fix any mechanical
or electrical
problems that may have developed.
If you havea low engine oil
pressure problem, this light
will stay on after you start
your engine, or come on
when you are driving.This
indicates that yourengine is
not receiving enough oil.
The engine could be lowon oil, or could have some
other oil problem. Haveit fixed immediately.
The oil light could alsocome on in two other situations:
0
When the ignition is on but the engineis not running,
the light willcome on as a testto show youit is
working, but the light willgo out when you turn the
ignition to START. If it doesn’tcome on with the
ignition on, you may have a problem with the fuse o
bulb. Have it fixed right away.
2-73
If you’re idling at a stop sign, the light may blink on
and then off.
Check Oil Light
If you make a hard stop, the light may come
on for a
moment. This is normal.
CHECK
OIL
Don’t keep driving if the oil pressure is low. If
you do, your engine can become
so hot that it
catches fire.You or others could be burned.
Check your oil as soon as possible and have your
vehicle serviced.
I NOTICE:
Damage to your engine from neglected oil
problems can be costly andis not covered by your
warranty.
This light should comeon
briefly while you are
starting your engine. If the
light doesn’t come on, have
it repaired. ‘Ifthe light
comes on while starting and
stays on, your engine oil
level should be checked.
Prior to checking your oille!,el, be sure yobur vehicle has
been shut off for several minutes andis on a level
surface. Check youroil level and bring it to the proper
level. See “Engine Oil”in the Index.
Note: A false CHECKOIL light may. be generated
when
parking on steep grades.
The oil level monitoring system only checks the oil
during the brief period between turning the key on and
engine start. It does not monitor the engine oil level
while the engineis running. Additionally, anoil level
check is only performedif the enginehas been turned
off for a considerable period
of time allowing the oil
normally in circulation to drain back into the oil pan.
Passlock Warning Light
THEFT
SYSTEM
Up-Shift Light (Manual Transaxle)
This light comes on when
you need to shift to the next
higher gear. See “Manual
Transaxle” in the Index.
This light will come on
when you turn the key
towards the START
position.
If the light flashes, the Passlock system has entered a
tamper mode. If the vehicle fails to start, see “Passlock”
in the Index.
If the light comes on continuously while driving and
stays on, there may be a problem with the Passlock
system. Your vehicle will notbe protected by Passlock,
and you should see your dealer.
SHIFT
Check Gages Light
CHECK
GAGES
This light will come on
briefly when you are
starting the engine. If the
light comes on and stays on
while you are driving, check
your various gagesto see if
they are in the warning
zones.
2-75
Fuel Gage
Here are four things that some owners askabout. None
of these show a problem with your
fuel gage:
When the ignition ison,
your fuel gage tells you
about how muchfuel you
have left.
At the service station, the gas pump shuts off before
the gage reads FULL(F).
It takes a little more or less fuel to fill up than the
gage indicated. For example, the gage may have
indicated the tank was halffull, but it actually tooka
little more or less than half the tank’s capacity
to fill
the tank.
The gage moves a little when you turn a corner or
speed up.
When the indicator nearsEMPTY (E), you still have a
little fuel left, but you should get more soon.
The gage doesn’t go back to EMPTY (E) when you
turn off’ the ignition.
For your fuel tank capacity, see “Capacities and
Specifications” in the Index.
2-76
NOTES
2-77
NOTES
2-78
0Section 3
Comfort Controls and Audio Systems
In this section you’ll find out how to operate the comfort
control and audio systems offered with your Chevrolet.
Be sure to read about theparticular systems supplied
with your vehicle.
Standard Climate Control System
Comfort Controls
This section tells you howto make your air system work
for you. The optional climate control system withair
conditioning uses ozone-friendly R- 134a refrigerant.
With these systems, you can control the ventilation
and heating in yourvehicle. Your vehicle also has the
flow-through ventilation system described later in
this section.
3-1
Fan Knob
2 VENT This setting brings in outside air and
The left knob selects theforce of air you want. Turn the
knob clockwise to increase fan speed and
counterclockwise to decrease fan speed.To turn the fan
off, turn the mode knob all the way counterclockwise. In
any other setting, the fan willrun continuously.
directs it through the middle instrument panel outlets.
Temperature Knob
The center knob changes the temperature of the air
coming throughthe system. Turn thisknob toward
red (clockwise) for warmer air. Turn it toward blue
(counterclockwise)for cooler air.
Mode Knob
The right knob has several settings to control the
direction of airflow. For each setting, set the temperature
to a comfortable setting.
3-2
BI-LEVEL: This setting brings in outside air
and directs it two ways.Some air is directed through
the instrument paneloutlets. Most of the airis directed
through the floor ducts anda little to the defrost and
side window vents.
1
2
FLOOR: This setting sends most of the air through
the ducts near the floor. The rest
comes out of the
defroster and side window vents.
I
d
9 DEFOG: This setting allows half of the air to go
to the floorducts and half to thedefroster and side
window vents.
DEFROST This setting directs most of the air
through the defroster and side window vents. Someof
the air goes tothe floor ducts.
Climate
Control System with Air
-.
..
Con
g (Optiol
Temperature Knob
The center knob changes the temperature
of the air
coming through the system.Turn this knob toward
red (clockwise) for warmer air. Turnit toward blue
(counterclockwise) for cooler air.
Mode Knob
The right knob hasseveral settings to control the
direction of airflow. For eachsetting, set the temperature
to a comfortable setting.
0 MAX: This setting recirculates much of theair
Fan Knob
inside your vehicle and sends it through the instrument
panel outlets. The air conditioning compressor will run
automatically in thissetting when it is needed to help
cool the air in the vehicle.
The left knob selects the forceof air you want. Turn the
r;/ VENT This setting brings in outside air and
knob clockwise to increase fan speed and
directs it through the instrument panel.
counterclockwise to decrease fan speed.To turn the fan
off, turn the mode knob all the way counterclockwise. In ' ! ! BI-LEVEL: This setting brings in outside air
and directs it two ways. Some air isdirected through the
any other setting,the fan will run continuously. The fan
instrument
panel outlets. Most of the
air is directed
must be on to run the air conditioning compressor.
through the floor ducts and a littleto the defrost and
side window vents.
3-3
'!!
Air Conditioning (Option)
9 DEFOG: This setting allows half of the air to go
On very hot days, open the windows long enough to
let hot, inside air escape. This reduces the time it
takes for your vehicle to cooldown, which should
help fuel economy.
FLOOR: This setting sends most of the air through
the ducts near the floor.
The rest comesout of the
defroster and side window vents.
to the floor ducts and halfto the defroster andside
window vents.
9DEFROST This setting directs mostof the air
through the defroster andside window vents. Some of
the air goes to the floor ducts. The air conditioning
compressor will run automatically inthis setting when it
is needed to help dry theair in the vehicle.
Air Conditioning Compressor Button
Press the A/C button to operate the air conditioner
compressor. The indicatorlight above the button
will glow when the buttonis pressed. You don't have
to press the buttonto run the compressorin MAX
or DEFROST.
3-4
For quick cool-down on very hot days, use
MAX with
the temperature knob all the way in the blue
area. If this
setting is usedfor long periodsof time, the air in your
vehicle may become too dry.
For normal cooling on hot days, use
VENT with the
temperature knobin the blue area and theA/C button
pushed in. The system will bring in outsideair and cool it.
On cool, but sunny days,the sun may warm your upper
body, but your lower body may not be warm enough.
You can use BI-LEVEL with the temperature knob in
the middle and theA/C button pushed in. The system
will bringin outside air and direct slightly warmerair to
your lower body.You may notice this temperature
difference more at some times than others.
Heating
Ventilation System
On cold days,use FLOOR with the temperatureknob all
the way in the red area. The system will bring in outside
air, heat it and send it to the floor ducts.
For mild outside temperatures when little heatingor
cooling is needed, useVENT to direct outside air through
your vehicle.Your vehicle also has the flow-through
ventilation system described later in this section.
Your vehicle has heat ducts thatare directed toward
the rear seat. Keep the area under the front seats clear
of obstructions so the heated air can reach the rear
seat passengers.
Your vehicle’s flow-through ventilation system supplies
outside air into the vehicle when it is moving. Outside
air will also enter the vehicle when the
air conditioning
If your vehicle has an engine coolant heater, you can use fan is running.
it to help your system provide warmair faster when it’s
cold outside (0°F (-18°C) or lower). An engine coolant
heater warms the coolant your engine and heating
system use to provide heat. See “Engine Coolant
Heater’’ in the Index.
3-5
Ventilation Tips
0
Keep the hood andfront air inlet free of ice, snow or
any other obstruction, such as leaves. The heater and
defroster will work far better?reducing thechance of
fogging theinside of your windows.
0
When you enter a vehicle in cold weather, adjust the
mode knob toFLOOR and the fan to the highest speed
for a fcw moments before drivingoff. This helps clear
the intake ducts of snow and moisture and reduces the
chance of fogging the inside of your windows.
0
Keep the air path under the front seats clear
of objects.
This helps air circulate throughout your vehicle.
3-6
Defogging and Defrosting Windows
Your system has twosettings for clearing the front and
side windows. To defrost the windows quickly, use
DEFROST with the temperatureknob all the wayin
the red area. To warm passengers while keeping the
windows clean, use DEFOG.
To defog the side windows, set the right control
to
BI-LEVEL and the fancontrol to the highest setting.
To defog the side windows while using theair
conditioner, set the right control to BI-LEVEL, the fan
control to the highestsetting, and press the A/C button.
For both systems, aim the side vents toward the side
windows. For increased airflow to the sidevents, close
the center vents.
Rear Window Defogger (Option)
The rear window defogger
uses a warming grid to
remove fog from the
rear window.
Press the buttonto turn
the defogger on. It will
turn itself offafter about
10 minutes.
If you turn it onagain, the defogger will only runfor
about five minutes before turning off.You can also turn
it off by pressing the buttonagain.
Do not attach a temporary vehiclelicense across the
defogger grid on the rear window.
.
Control
Tone
NOTICE:
Audio Systems
Your Delco@audio system has been designed to operate
easily and give years oflistening pleasure. You will get
the most enjoymentout of it if you acquaint yourself
with it first. Find out what your Delco system can do
and how to operate all its controls, to be sure you’re
getting the most out of the advanced engineering that
went into it.
Setting the Clock for Systc
Automatic Tone Control
__
‘. . --
-101
.
Press SET. SET will appear on the display for five
seconds. Withinfive seconds, press and hold the
forward arrow on theSEEK button until thecorrect
minute appears. Press and hold the backward arrow
on
the SEEK button until thecorrect hour appears.
Setting the Clock for Systems with
Automatic
Press and holdHR until the correct hour appears.
Press and holdMN until the correct minute appears.
Don’t use a razor blade or something else sharp
on the insideof the rear window.If you do, you
could cut or damagethe warming grid, and the
repairs wouldn’t be covered by your warranty.
3-7
AM-FM Stereo (Option)
Finding a Station
AM-FM: Press the lower knob to get AM
or FM.
The display shows your selection.
TUNE: Turn the lower knobto choose radio stations.
SEEK: Press the forward or reverse arrow
to go to the
next higher or lower station.
Playing the Radio
VOLUME-BAL-RECALL: This knob turns the
system on and off andcontrols the volume. Turn the
upper knob clockwise to increase volume. Turn it
counterclockwise to decrease volume. Press the upper
knob briefly to recall the station being played
or the
clock display.If you press the button when the ignition
is off, the clock will show
for a few seconds.
SCAN: Press and hold one of the
SEEK arrows, then
press the otherSEEK arrow; SCAN will appearon the
display. Use SCAN to listen to stations for a few
seconds. The radio willgo to a station, stop for arfew
seconds, then go on to the next station.The radio will
scan up or down the radio band, depending on arrow
the
you pressed first. Press both SEEK arrows or the upper
knob to stop scanning.
PUSHBUTTONS: The four numbered pushbuttons
let you returnto your favorite stations. You can setup to
14 stations (seven AM and seven FM).
1. Press AM-FM to select the band.
2. Find the station you want by using TUNEor SEEK.
3. Press SET until the word SET appears on the display.
3-8
*
4. Press and hold one of the four numbered buttons
(within five seconds).
5. The sound will mute. When it returns, release the
button. Whenever youpress that numbered button,
the station you set will return.
In addition to the four stations set as above, up to three
additional stations may be preset on each band by
pressing two adjoining buttons at the same time. Just:
1. Tune in the desired station.
2. Press SET.
3. Press any two adjoining pushbuttons at the same
time (within five seconds).
4. The sound will mute. When it returns, release the
buttons. Whenever you press the same buttons, the
station you set will return.
Setting theTone
BASS: Slide the lever up or down to increase or
decrease bass. The middle position is a detent.
TREB: Slide the lever up or down to increase or
decrease treble. The middle position isa detent. If a
station is weak or noisy, you may want todecrease
the treble.
Adjusting the Speakers
BAL: Turn the control behind the upperknob to move
the sound to the left or right speakers. The middle
position is a detent and balances the speakers.
FADE: Turn the control behind the lower knob to move
the sound tothe front or rear speakers. The middle
position is a detent and balances the speakers.
AM-FM Stereo with CassetteTape Player
(Option)
Finding a Station
AM-FM: Press and release the lower knob
to get AM,
FMl or FM2. The display shows your selection.
TUNE: Turn the lower knob to choose radio stations.
SEEK: Press the forwardor reverse arrowto go to the
next higheror lower station.
PUSHBUTTONS: The four numbered pushbuttons
let you return to your favorite stations.You can set up to
21 stations (seven AM, sevenFMl and seven FM2).
1. Press AM-FM to select the band.
... . . .. .
2. Find the station you want by using TUNEor SEEK.
3. Press SET until the word SET appears on the display.
Playing the Radio
VOLUME-BAL-RECALL: This knob turns the
system on andoff and controls the volume. Turn the
upper knob clockwiseto increase volume. Turnit
counterclockwise to decrease volume. Press the upper
knob briefly to recall the station being played
or the
clock display.If you press the button when the ignition
is off, the clock will showfor a few seconds.
4. Press and release one of the four numbered buttons,
within five seconds.
5. Whenever you press that numbered button, the
station you set will return.
In addition to the four stations set as above, up to three
additional stations may be preset on each band by
pressing two adjoiningbuttons at the same time. Just:
1. Tune in the desired station.
2. Press SET.
3. Press any two adjoining pushbuttons at the same
time (within five seconds).
4. Whenever you press the same buttons, the station
you set will return.
PSCAN: Press both SEEK arrows andP.SCAN will
appear on the display. UseP.SCAN to listento each or
your preset stationsfor a few seconds. The radio will go
to the first preset station, stop for
a few seconds, thengo
on to the next preset station(FM1 and FM2). (If a preset
station has weak reception, it will not stop.) Press either
SEEK arrow, the upper knobor a preset to stop scanning.
Setting the Tone
BASS: Slide the lever up or down to increase or
decrease bass. The middle position is a detent.
TREB: Slide the lever up or down to increase or decrease
treble. The middle position isa detent. If a station is weak
or noisy, you may want to decrease the treble.
Adjusting the Speakers
BAL: Turn thecontrol behind the upper knob to move
the sound to the left or right speakers. The middle
position is a detent and balances the speakers.
FADE: Turn the control behind the lower knob to move
the sound to the front or rear speakers. The middle
position is a detent and balances the speakers.
Playing a Cassette Tape
Your tape player is built to work best with tapes thatare
30 to 45 minutes long oneach side. Tapes longer than
that are so thin they may not work well in
this player.
The longer side with the tape visible goes
in first. If you
hear nothing or hear just a garbled sound, it may not be
in
squarely. Press EJECT to remove
the tape and start over.
While the tape is playing, use the VOLUME,FADE,
BAL, TREB and BASScontrols just as you do forthe
radio. Other controls may have different functions when
a tape is inserted. The display will showan arrow to
show which side of the tape is playing.
Note thatcassette tape adapter kits for portable compact
disc players will not work in your
cassette player. The
adapter cassette will be ejected.
3-11
FWD: Press and release the SEEK forward arrow and
the tape will rapidly advance until you press
this button
again lightly.
AM-FM Stereo with Cassette Tape Player
and AutomaticTone Control (Option)
REV: Press and releasethe SEEK reverse arrow and the
tape will reverse rapidly until you
press and release this
button again.
RECALL: Press this knob to hearthe other sideof a
tape that is playing.
EJECT Press this button to remove the tape.The radio
will play.
CLN: This message mayappear on the display. If it
does, your cassette tape player needs to be cleaned. It
will still play tapes, but you should clean as
it soon as
possible to prevent damageto your tapes and player.
See “Care of Your Cassette Tape Player” in the Index.
After you clean the player, press and hold
EJECT for
five seconds to reset the CLN indicator. The radio will
display --- to show the indicator was reset.
3-12
Playing the Radio
\
PWR: Press this knob to turn the system on and off.
VOL: Turn the upper knob clockwise to increase volume.
The faster theVOL knob is rotated, the quicker the radio
goes to maximum. T u 4 it counterclockwise to decrease
volume. The knob is capable of rotating continuously.
SCV Your system has a feature called
Speed-Compensated-Volume (SCV). With SCV,’ your
audio system adjusts to make up for road and wind noise
as you drive. The volume should always sound the same
level to you as youdrive. The control behind the upper
knob has SCVpositions. The top position has a higher
maximum volume and gets louder faster than the middle
two positions. If you don’t wantto use SCV, turn the
control all the way down.
AM-FM: Press this button to alternate between AM,
FM1 and FM2.The display shows yourselection.
RECALL: Press this button to recall the station being
played. If you press the button when theignition is off,
the clock will show for a few seconds.
TUNE: Press this knob lightly so it extends. ,Turnit to
choose radio stations. Push the knob back in when
you’re not usingit.
SEEK: Press the forward or backward arrowto go to
the next higher or lower station. The sound will be
muted while seeking.
SCAN: Press one of the SEEK arrows for two seconds,
and SCANwill appear on the display. Use SCAN
to
listen to stations for a few seconds.The radio will go to
a station, stop for a few seconds, then go on to the next
station. Press SEEK againto stop scanning. The sound
will be muted while scanning.
P.SCAN: Press this button to listen to each of your
favorite stations stored on yourpushbuttons for a few
seconds. The radio will scan througheach of the stations
stored on yourpushbuttons, except those stations with
weak reception.The AUTO TONE setting stored for
that pushbutton will beautomatically chosen. Press
P.SCAN or one of the pushbuttons again tostop
scanning. P.SCAN will be displayed wheneverthe tuner
is in the P.SCAN mode.The channel number(Pl-P6)
will appear momentarilyjust before the frequency is
displayed. In FM mode, this function will scan through
both FM1 and FM2 preset stations and FM1 or FM2
will appear on the display.
3-13
PUSHBUTTONS: The six numbered pushbuttons
let you returnto your favorite stations. You can set up
to 18 stations (six AM, six FM1 and six FM2).
1. Press AM-FM to select the band.
2. Find the station you want by using TUNEor SEEK.
3. Press AUTO TONEto select the graph that best suits
the typeof station selected.
4. Press and hold oneof the six numbered buttons.
5 . The sound will mute. Whenit returns, release the
button. Whenever you press that numbered button,
the station you set will return and the AUTO TONE
equalization that you selected will
also be
automatically selectedfor that button.
If you manually tuneor use SEEK or SCAN to find
a frequency stored in a preset, the AUTO TONE
equalization stored for that frequency will be recalled.
Always check the display firstto make sure you have
the correct band.
Setting theTone
AUTO TONE: This feature allows youto choose
preset treble and bass equalization settings designed for
classical, news, rock, pop and jazz stations. CLASSIC
will appear on the display when you first press AUTO
TONE. Each time you press it, another setting will appear
on the display. Pressit again after JAZZ appears and
MAN will appear. Tone control will return to the
TREB
and BASS knobs. Also, if you use the
TREB and BASS
knobs, control will return to them
and MAN will appear.
BASS: Press this knob lightly so it extends.
Turn the knob clockwise to increase bass. Turn
it
counterclockwise to decrease bass.The middle position
is adetent. When you use thiscontrol, the radio’s
AUTO TONE setting.wil1 switch
to manual.
TREB: Press this knob lightlyso it extends. Turnthe
knob clockwiseto increase treble.Turn it
counterclockwise to decrease treble. The middle
position is a detent. When you usethis control, the
radio’s AUTO TONE setting will switch
to manual.
Push the knobs backin when you’re not using them.
3-14
Adjusting theSpeakers
BAL: Press this button lightly so it extends. Turn the
knob to move the soundto the left or right speakers.
The middle position is a detent and balances the
speakers. Turn the knob clockwise for right speakers
and counterclockwise for left speakers.
FADE: Press this button lightlyso it extends. Turn the
knob to move the sound to the front
or rear speakers.
The middle position isa detent and balances the speakers.
Turn the knob clockwise to adjust the sound to the front
speakers and counterclockwisefor the rear speakers.
Push the knobs back in when you’re not usingthem.
Playing a Cassette Tape
Press EJECT or RECALL to load a tape with the
ignition off. Then insert the cartridge. If the ignition is
on but the radio is off, the tape will begin playing. A
tape symbol is shown in the
center of the graphic display
whenever a tape is inserted. When a tape is active, the
tape symbol will be accompanied by a direction arrow.
While the tape is playing, use the VOL, FADE, BAL,
TREB and BASScontrols just as you do for the radio.
Other controls may have different functions when a tape
is inserted. The display will showthe tape symbol and
an arrow to show which side of the tape is playing.
The player automatically senses the cartridge for metal
or CrO2 and sets the pre-emphasis. Anytimea tape is
inserted, the top side is selected to play first.
PREV (1): Press this button or the SEEK backward arrow
to search for the previous selectionon the tape. Your tape
must have at least three seconds of silence between each
selection for PREV or SEEK to work. The
tape direction
arrow blinks during PREV or SEEK operation. The sound
is muted during PREV orSEEK operation.
PROG (2): Press this button to play the other side of
tape.
the
NEXT (3): Press this button or the SEEK forward arrow
to search for the next selection on the tape. Your tape
must have atleast three seconds of silence between each
selection for NEXT or SEEK to work.The tape
direction arrow blinks during NEXT or SEEK operation.
The sound is muted during NEXT or SEEK operation.
REV (4): Press this buttonto reverse the tape rapidly.
Press it again to return to playing speed. The radio will
play the last-selected station while the tape reverses.
00 (5): Press this button to reduce background noise.
Note that the double-D symbol will appear on the display.
Dolby@Noise Reduction is manufactured under a
license from Dolby Laboratories Licensing Corporation.
Dolby and the double-D symbol are trademarksof
Dolby Laboratories Licensing Corporation.
3-15
FWD (6): Press this button to advance quicklyto
another partof the tape. Press the button again
to return
to playing speed. The radio will play the last-selected
station while the tape advances.
AM-FM: Press this button to play the radio when a tape
is in the player.
TAPE AUX: Press this button to change to the tape
function whenthe radio is on. The tape symbol with an
arrow will appearon the display whenthe tape is active.
If your system is equipped with a remote playback
device, pressing this button a second time will allow the
remote deviceto play.
EJECT Press this buttonto remove the tape. The radio
will play. EJECT may be activated witheither the
ignition or radio off. Cassettes may be loaded with the
radio off if this buttonis pressed first.
CLN: This message may appear on the display. If it
does, your cassette tape player needsto be cleaned. It
will still play tapes, butyou should clean it as soon as
possible to prevent damage to your tapes and player.
See “Care of Your Cassette Tape Player”in the Index.
After you clean the player, press and hold
EJECT for
five seconds to reset the CLN indicator. The radio will
display --- to show the indicator was reset.
3-16
CD Adapter Kit
It is possible to use a CD adapter kit with your cassette tape
player after activating the bypass feature
on your tape player.
To activate the bypass feature, the ignition must
be on.
Turn your radiooff. Press TAPE/AUX and hold for three
seconds. After three seconds, the tape symbol
in the
display will flash for two seconds indicating the feature
is
active. Turn the radioon and insert the adapter.
This override feature will remain active until EJECT
is pressed.
AM-FM Stereo with Compact Disc Player
and AutomaticTone Control (Option)
Playing the Radio
PWR: Press this knobto turn the systemon and off.
VOL: Turn the upper knob clockwise to increase volume.
The faster theVOL knob is rotated, the quickerthe radio
goes to maximum. Turn it counterclockwise to decrease
volume. The knob is capable
of rotating continuously.
SCV Your system has afeature called
Speed-Compensated-Volume (SCV). With SCV, your
audio system adjusts to make up for road and wind noise
as you drive. The volume should always sound thesame
level to you as you drive. The control behind the upper
knob has SCV positions. The top position has a higher
maximum volume and gets louderfaster than the middle
two positions. If you don’t want to use SCV, turn the
control all the waydown.
AM-FM: Press this button to alternate between AM,
FMl and FM2. The display shows your selection.
RECALL: Press this button to recall the station being
played. If you press the button when the ignition is
off,
the clock will showfor a few seconds.
TUNE: Press this knob lightly so it extends. Turn it to
choose radio stations. Push the knob back in when
you’re not usingit.
SEEK: Press the forwardor backward arrow to go to
the next higher or lowerstation. The sound will be
muted while seeking.
SCAN: Press one of the SEEK arrows for two seconds,
and SCAN will appear on the display. Use
SCAN to
listen to stations for afew seconds. The radio willgo to
a station, stop for a few seconds, thengo on to the next
station. Press SEEK againto stop scanning. The sound
will be muted while scanning.
P.SCAN: Press this buttonto listen to each of your
favorite stations stored on your pushbuttons for a few
seconds. The radio will scan through eachof the stations
stored on your pushbuttons, exceptthose stations with
weak reception. The AUTO TONE setting storedfor
that pushbutton will be automatically chosen. Press
P.SCAN or one of the pushbuttons again tostop
scanning. P.SCAN will be displayed whenever the tuner
is in the P.SCAN mode. The channel number (Pl-P6)
will appear momentarily just before the frequency is
displayed. In FM mode,this function will scan through
both FM 1 and FM2 preset stations and FM1 or FM2 will
appear on the display.
3-17
PUSHBUTTONS: The six numbered pushbuttons
let you return to your favorite stations.You can set upto
18 stations (six AM, six FM1 and six FM2).
1. Press AM-FM to select the band.
2. Find the station you want by using TUNE or
SEEK.
3. Press AUTO TONE to select the graph that best suits
the type of station selected.
4. Press and holdone of the six numbered buttons.
5. The sound will mute. Whenit returns, release the
button. Whenever you press that numbered button,
the station you set will return and the AUTO TONE
equalization that you selected will
also be
automatically selectedfor that button.
If 7 0 fnmually tune or use SEEK or SCAN to find a
frequency stored in a preset, the AUTO TONE
equalization storedfor that frequency will be recalled.
Always check the display first
to make sure you have
the correct band.
3-18
Setting the Tone
AUTO TONE: This feature allowsyou to choose
preset treble and bass equalization settings designed
for
classical, news, rock, pop and
jazz stations. CLASSIC
will appear on the display when you first press AUTO
TONE. Each time you pressit, another setting will appear
on the display. Press it again afterJAZZ appears and
MAN will appear. Tone control will returnto the TFEB
and BASS knobs. Also, if you use the TREB and BASS
knobs, control will return to them and
MAN will appear.
BASS: Press this knob lightlyso it extends.
Turn the knob clockwise to increase bass. Turn
it
counterclockwise to decrease bass. The middle position
is a detent. When you use this control, the radio’s
AUTO TONE setting will switch to manual.
TREB: Press this knob lightly so it extends.
Turn the knob clockwise to increase treble. Turn
it
counterclockwise to decrease treble.The middle
position is a detent. When you use this control, the
radio’s AUTO TONE settingwill switch to manual.
Push the knobs backin when you’re not using them.
Adjusting the Speakers
BAL: Press this button lightlyso it extends. Turn the
knob to move the sound to the left
or right speakers. The
middle position is a detent and balances the speakers.
Turn the knob clockwise for right speakers and
counterclockwise for left speakers.
It is dirty, scratched or wet.
e It is very humid. (If so, wait about an hour and
try again.)
RECALL: Press this buttonto see which track is
playing. Press it again withinfive seconds to see how
long it has been playing (elapsed time).The track
number also appears when a new track starts to play.
FADE: Press this button lightlyso it extends. Turn the
knob to move the sound to the front or rear speakers.
The middle position is a detent and balances the speakers.
Turn the knob clockwise to adjust the sound to the front
speakers and counterclockwise for the rear speakers.
Push the knobs back in when you’re not using them.
PREV (1): Press this buttonor the SEEK arrow
pointing to the leftto go to the start of a current track.
If you hold the buttonor press it more than once, the
player will continue moving back through the disc.
The
sound will be muted while seeking.
Playing a Compact Disc
With the radio on or off, insert a disc partway into the
slot, label side up.The player will pullit in. The disc
should begin playing.The display will showCD and the
CD symbol.
,If you’re driving on a very rough roador if it’s very hot,
the disc may not play and ERR (error) may appear
on
the display. Press RECALLto take ERR off the display.
When things get back to normal, the
disc should play. If
the disc comes out, it could be that:
0 The disc is upside down.
RDM (2): Press this buttonto hear the tracks in random
rather than sequential(1,2,3. . .) order. RANDOM will
show on the display. Press RDM again to return
to
sequential order. RANDOMis set to OFF when thedisc
is ejected.
NEXT (3): Press this buttonor the SEEK arrow
pointing to the right to go to the next track.If you hold
the button or press it more than once, the player will
continue moving forward through the disc.
The sound
will be muted while seeking.
REV (4): Press and hold this buttonto return to a
passage quickly. Releaseit to play the passage.You can
3-19
use the counter readingon the display to locate a
passage more easily.
If you turn off the ignitionor radio with adisc in the
player, it will stay in the player. When you turn on the
it
FWD (6): Press and hold this button to advance quickly ignition or system, the disc will start playing where
was stopped. If you press EJECT but don't remove the
within a track. Release it to resume playing. You can
disc, the player will pull the disc backtoinprotect it
use the counter reading on the displayto locate a
after about one minute.
passage easily.
AM-FM: Press this buttonto play the radio when a
Theft-Deterrent Feature
disc is in the player.The CDdisc symbol will remain on
the display.
THEFTLOCK" is designed to discourage theft of your
radio. It worksby using a secret code to disable all radio
functions whenever battery poweris removed.
CD AUX: Press this buttonto change to the disc
function when the radiois on. The CD disc symbol will
appear on the display when the disc is in the player,
whether it is active or not. If equipped with a remote
cassette, press this button a second time
to activate it.
EJECT Press this buttonto remove the disc. The radio
will play. The disc will startat the first track when you
reinsert it.
If the ignition isoff, you may still press this button to
eject the disc.
3-20
The THEFTLOCK featurefor the radio may be used or
ignored. If ignored, the system plays normally and the
radio is not protected by the feature. If THEFTLOCK is
activated, your radio will not operate
if stolen.
When THEFTLOCK is activated, the radio will display
LOC to indicate a locked condition anytime battery
power is removed.If your battery loses power for any
reason, you must unlock the radio with the secret code
before it will operate.
Activating theTheft-Deterrent Feature
5 . Press MN and 000 will appear on the display.
The instructions which follow explain how to enter your
secret code to activate the THEFTLOCK system. It is
recommended that you read through all ninesteps
before starting the procedure.
6 . Press MN again to make the last two digits agree
with your code.
NOTE: If you allow more than 15 seconds to elapse
between any steps, the radio automaticallyreverts to
time and you muststart the procedure over atStep 4.
8. Press AM-FM after you have confirmed that the
code matches the secret code you have written down.
The display will showREP tolet you know that you
need to repeat Steps 5 through 7 to confirm your
secret code.
1. Write down any three or four digit number from
000 to 1999 and keep it in asafe place separate
from the vehicle.
2. Turn the ignition to the ACCESSORY or
RUN position.
3. Turn the radio off.
7. Press HR to make the first one or two digits agree
with your code.
9. Press AM-FM and this time the display will show
SEC to let you know that your radio issecure. The
indicator by the volume control will begin flashing
when the ignition is turned off.
4. Press the 1 and 4 buttons together. Hold them down
until --- shows on the display. Next you will use the
secret code number which you have written down.
3-21
Unlocking the Theft-Deterrent Feature After a
Power Loss
Enter yoursecret code as follows; pauseno more than
15 seconds between steps:
1. LOC appears when the ignition is on.
Disabling the Theft-Deterrent Feature
Enter your secret codeas follows; pause nomore
than 15 seconds between steps:
1. Turn the ignition to theACCESSORY or
RUN position.
2. Press MN and000 will appear on the display.
3. Press MN againto make the last two digits agree
with your code.
2. Turn the radio off.
4. Press HR to make the first one or two digits agree
with your code.
4. Press MN and000 will appear on the display.
5. Press AM-FM after you have confirmed that the
code matches the secret code you have written down.
The display will showSEC, indicating the radio is
now operable and secure.
If you enter the wrong code eight times, INOP will
appear on the display.You will have to wait an hour
with the ignition on before youcan try again. When you
try again, you will only havethree chances to enter the
correct code before INOP appears.
If you lose or forget your code, contact your dealer.
3. Press the 1 and 4 buttons together. Hold themdown
until SEC shows on the display.
5. Press MN again to make the last two digits agree
with your code.
6. Press HR to make the first one or two digits agree
with your code.
7. Press AM-FM after you have confirmed that the
code matches the secretcode you have written down.
The display will show---,indicating that the radiois
no longer secured.
If the code entered is incorrect,SEC will appear on the
display. The radio will remain secured until the correct
code is entered.
When battery power is given to a secured
radio, the
radio won’t turn on andLOC will appear on the display.
3-22
Understanding Radio Reception
To help avoid hearingloss or damage:
FM Stereo
0
Adjust the volume control to the lowest setting.
0
Increase volume slowly until you hear comfortably
and clearly.
’
FM stereo will give you the best sound. ButFM signals
will reach only about 10 to 40 miles (16 to 65 km). Tall
buildings or hills can interfere with FMsignals, causing
the sound to come and go.
NOTICE:
AM
The range for most AM stations is greater thanfor FM,
especially at night. The longer range, however, can
cause stations to interfere with each other. AM can pick
up noise from things like storms and power lines. Try
reducing the treble to reduce this noise if you ever get it.
Tips About Your Audio System
Hearing damage from loud noise is almost undetectable
until it is too late. Your hearing can adaptto higher
volumes of sound. Sound thatseems normal can be loud
and harmful to your hearing. Take precautionsby
adjusting the volume controlon your radio toa safe
sound level before your hearing adaptsto it.
Before you add anysound equipment to your
vehicle like a tape player, CB radio, mobile
telephone or two-way radio be sure you can add
what you want. If you can, it’s very important to
do it properly. Added sound equipmentmay
interfere with the operation
of your vehicle’s
engine, Delco radio or othersystems, and even
damage them. Your vehicle’s systems may
interfere with the operation
of sound equipment
that has been added improperly.
So, before adding sound eyuipment,check with
your dealer and be sure to check Federal rules
covering mobile radioand telephone units.
--
--
3-23
Care of Your Cassette Tape Player
A tape player that is not cleaned regularly
can cause
reduced sound quality, ruined cassettes
or a damaged
mechanism. Cassette tapes should be stored in their
cases away from contaminants, direct sunlight and
extreme heat. If they aren’t, they may not operate
properly or may cause failure of the tape player.
Your tape player shouldbe cleaned regularly after every
50 hours of use. Yourradio may displayCLN to indicate
that you have usedyour tape playerfor 50 hours without
resetting the tape clean timer.
If you notice a reductionin
sound quality,try a known good cassette to see
if the tape
or the tape player is at fault. If this other cassette has no
improvement in sound quality, clean the tape player.
Cleaning may be done with a scrubbing action,
non-abrasive cleaning cassette with pads which scrub
the tape head as the hubs
of the cleaner cassette turn.
It is normal for the cassette to eject while cleaning
because your unit is equipped with a cut tape feature.
To temporarily override this feature (for one insertion),
turn theradio off and press and hold TAPE AUX until
the tape symbol flasheson the display, then insert the
cassette again. Insert the cassette at least three times to
ensure thorough cleaning. A scrubbing action cleaning
cassette is available through your Chevrolet dealer.
3-24
You may also choose a non-scrubbing action, wet-type
a fabric belt to cleanthe
cleaner which uses a cassette with
tape head. This type of cleaning cassette will not eject. It
may not clean as thoroughly as the scrubbing
type cleaner.
Cassettes are subject to wear and the sound quality
may
degrade over time. Always make sure that the cassette
tape is in good condition before you have your tape
player serviced.
Care of Your Compact Discs
Handle discs carefully. Store them
in their original cases
or other protective cases and away from direct sunlight
and dust.If the surfaceof a disc is soiled, dampen a
clean, soft cloth in a mild, neutral detergent solution and
clean it, wiping from the center to the edge.
Be sure never to touch the signal surface when handling
discs. Pick up discs by grasping the outer edgesor the
edge of the hole and the outer edge.
Fixed Mast Antenna
The fixed mast antennacan withstand most car washes
without being damaged.If the mast should ever become
slightly bent, you can straighten
it out by hand.If the
mast is badly bent, asit might be by vandals, you should
replace it.
Check every once in a while to be sure the mast
is still
tightened to the fender.
NOTES
3-25
NOTES
3-26
0Section 4
Your Driving and the Road
I
Defensive Driving
The best advice anyone can give about driving
is: Drive
defensively.
Please start with a very important safety device in your
Chevrolet: Buckle up. (See “Safety Belts”in the Index.)
Defensive driving really means “be ready
for anything.”
On city streets, rural roads or freeways, it means
“always expect the unexpected.”
Assume that pedestrians or otherdrivers are going to be
careless and make mistakes. Anticipate what they might
do. Be ready for their mistakes.
Here you’ll find information about driving on different
kinds of roads and in varying weatherconditions. We’ve
also included many other usefultips on driving.
Rear-end collisions are about the most preventableof
accidents. Yet they are common. Allow enough
following distance. It’s the best defensive driving
maneuver, in both city and rural driving. You never
know when the vehiclein front of you is going to brake
or turn suddenly.
4-1
Drunken Driving
The obvious way to solve this highway safety problem
is for people never to drink alcohol and then drive. But
Death and injury associated with drinking and driving what if people do? How much
is “too much” if the
is a national tragedy. It’s the number one contributor to driver plans to drive?It’s a lot less than many might
the highway death toll, claiming thousands
of victims
think. Althoughit depends on each person and situation,
every year.
here is some general information
on the problem.
Alcohol affects four things that anyone needs to drive a The Blood Alcohol Concentration (BAC) of someone
vehicle:
who is drinking depends upon four things:
Judgment
The amount of alcohol consumed
0
MuscularCoordination
The drinker’s body weight
Vision
The amount of food that is consumed before and
during drinking
Attentiveness.
Police records show that almost half
of all motor
vehicle-related deaths involve alcohol. In most cases,
these deaths are the result
of someone who was drinking
and driving. In recent years, some18,000 annual motor
vehicle-related deaths have been associated with the use
of alcohol, with more than300,000 people injured.
Many adults -- by some estimates, nearly half the adult
population -- choose neverto drink alcohol, so they
never drive after drinking.
For persons under2 1, it’s
against the law in every
U.S. state to drink alcohol.
There are good medical, psychological and
developmental reasons for these laws.
4-2
The length of time it has taken the drinker to
consume the alcohol.
According to the American Medical Association, a
180-lb. (82 kg) person who drinks three 12-ounce
(355 ml) bottles of beer in an hour will end up with a
BAC of about0.06 percent. The person would reach the
same BAC by drinking three 4-ounce (120 ml) glasses
of wine or three mixed drinksif each had 1-1/2 ounces
(45 ml) of a liquor like whiskey, gin or vodka.
Since alcohol is carried in body water, this means that a
woman generally will reach a higher
BAC level than a
man of her same body weight when each has the same
number of drinks.
The law in manyU.S. states sets the legal limit at
a BAC
of 0.10 percent. In a growing number of
U.S. states, and
throughout Canada, the limit is0.08 percent. In some
other countries, it’s even lower.
The BAC limit for all
commercial drivers in the United States
is 0.04 percent.
The BAC will be over0.10 percent after three to six
drinks (in one hour). Of course, as we’ve seen,it
depends on how much alcohol is in the drinks, and how
quickly the person drinks them.
It’s the amountof alcohol that counts. For example,if
the same person drank three double martinis
(3 ounces
or 90 ml of liquoreach) within an hour, the person’s
BAC would be close to 0.12 percent. A person who
consumes foodjust before or during drinking will havea
somewhat lower BAC level.
There is agender difference, too. Women generally have
a lower relative percentage of body water than men.
But the ability to drive is affected well below
a BAC
of 0.10 percent. Research shows that the driving skills
of many people are impairedat a BAC approaching
0.05 percent, and that the effectsare worse at night. All
drivers are impaired atBAC levels above 0.05 percent.
Statistics show that the chance
of being in a collision
increases sharply for drivers who have aBAC of
0.05 percent or above. A driver with aBAC level of
0.06 percent has doubled his or
her chance of having
a collision. At a BAC level of 0.10 percent, the chance
of this driver having a collision is12 times greater; at a
level of 0.15 percent, the chance is25 times greater!
4-3
The body takes about an hour
to rid itselfof the alcohol
in one drink. No amount of coffee or number of cold
showers will speed thatup. “I’ll be careful” isn’t the
right answer. What if there’san emergency, a need to
take sudden action, as whena child darts into the street?
A person with evena moderate BAC might not be able
to react quickly enough to avoid the collision.
There’s somethingelse about drinking anddriving that
many people don’t know. Medical research shows that
alcohol in a person’s system can make crash injuries
worse, especiallyinjuries to the brain, spinal cordor
heart. This means that when anyone who has been
drinking -- driver or passenger -- is in a crash, that
person’s chanceof being killed or permanently disabled
is higher than if the person had
not been drinking.
4-4
A CAUTION:
Drinking andthen drivingis very dangerous.Your
reflexes, perceptions, attentivenessand judgment
can be affected by even a small amountof alcohol.
You can havea serious or even fatal collision
if you drive after drinking. Pleasedon’t drink and
drive or ride with. a driver who hasbeen drinking.
Ride home in a cab; or if you’re witha group,
designate a driver who will not drink.
--
--
Control of a Vehicle
Braking
You have three systems, that make your
vehicle go where
you want it to go. They are the brakes, the steering and
the accelerator. Allthree systems have to do their work
at the places where the tires meet the road.
Braking actioninvolves perception tiMe &Id
reaction time.
First, you have todecide to push onthe brake pedal.
That’s perception time.Then you have to bring up
vour foot and do it. That’s reaction time.
Average reaction time is about 3/4 of a second. But
that’s only an average. It might be less with one driver
and as long as two or three seconds or more with
another. Age, physical condition, alertness, coordination
and eyesight all play a part. So do alcohol, drugs and
frustration. But evenin 3/4 of a second, a vehicle
moving at 60 mph (100 h/h)
travels 66 feet (20 m).
That could be a lot of distance in an emergency, so
keeping enough space between your vehicle and
others
is important.
And, of course, actual stopping distances vary greatly
with the surface of the road (whether it’s pavementor
gravel); the condition of the road (wet, dry, icy); tire
tread; and the condition of your brakes.
Sometimes, as when you’re driving on snow or ice, it’s
easy to ask more of those control systems than the tires
and road can provide. That means youcan lose control
of your vehicle.
4-5
Avoid needless heavy braking.Some people drive
in spurts -- heavy acceleration followed by heavy
braking -- rather than keeping pace with traffic.
This
is a mistake.Your brakes may nothave time to cool
between hard stops.Your brakes will wear out much
faster if you do a lot of heavy braking. If you keep pace
with the traffic and allow realistic following distances,
you will eliminate a lot of unnecessary braking. That
means better braking and longer brake life.
If your engine ever stops while you’re driving, brake
normally but don’t pump your brakes. If youdo, the
pedal may get harderto push down. If your engine
stops, you willstill have some power brake assist. But
you will useit when you brake. Once the power assistis
used up, it may take longer to stop and the brake pedal
will be harder to push,
4-6
Anti-Lock Brakes
Your vehicle has anti-lock brakes(ABS). ABS is an
advanced electronic braking system that will
help
prevent a braking skid.
When you start your engine,or when you begin to drive
away, your anti-lock brake system will check itself.
You
may hear a momentary motor
or clicking noise while
this test is going on, and you may even notice that your
brake pedal moves alittle. This is normal.
If there’s a problem with the
anti-lock brake system, this
warning light will stayon.
See “Anti-Lock Brake
System Warning Light” in
the Index.
The anti-lock system can change the brake pressure faster
than any driver could.The computer is programmed to
make the mostof available tire and road conditions.
Here's how anti-lock works. Let's say the roadis wet.
You're driving safely. Suddenly an animal
jumps out in
front of you.
You slam on the brakes. Here's what happens withABS.
You can steer around the obstacle while braking hard.
A computer senses that wheels are slowing down. If one
of the wheels is about to stop rolling, the computer will
separately work the brakes at each
front wheel and at the
rear wheels.
As you brake, your computer keeps receiving updates
on
wheel speed andcontrols braking pressure accordingly.
4-7
Remember: Anti-lock doesn’t change the time you need
to get your foot up to the brake pedal
or always decrease
stopping distance.If you get too close to the vehicle in
front of you, you won’thave time to apply your brakes
if that vehicle suddenly slows or stops. Always leave
enough room up aheadto stop, even though you have
anti-lock brakes.
Using Anti-Lock
Don’t pump the brakes. Just hold the brake pedal
down and let anti-lock workfor you. You may feel the
system working,or you may notice some noise, but this
is normal.
Enhanced Traction System
If your vehicle has the optional four-speed automatic
transaxle, it also has an Enhanced Traction System
(ETS) that limits wheel spin. This
is especially useful
in slippery road conditions.The system operates only
when the transaxle shift lever is in the
THIRD (3) or
OVERDRIVE
position and the system senses
that one or both of the front wheelsare spinning or
beginning to lose traction. When this happens, the
system reduces engine power and may also upshift the
transaxle to limit wheel spin.
(a)
LOW
TRAC
This light will comeon
when your Enhanced
Traction System is limiting
wheel spin. See “Enhanced
Traction System Active
Light” in the Index.
You may feel or hear the system working, but this
is normal.
4-8
ETS
OFF
When the transaxle shift
lever is in the THIRD (3) or
OVERDRIVE (Q) position
and the parking brake is
fully released, this warning
light will come on to let you
know if there’s a problem
with the system.
See “Enhanced TractionSystem Warning Light” in the
Index. When this warning lightis on, the system will not
limit wheel spin. Adjust your driving accordingly.
The Enhanced TractionSystem can operate only
when the transaxle shift leveris in the THIRD (3) or
OVERDRIVE (a)position. To limit wheel spin,
especially in slippery road conditions, you should use
the other shift lever positions only when necessary.
See
“Automatic Transaxle” inthe Index. (If your vehicle
ever gets stuck in sand, mud,ice or snow, see “Rocking
Your Vehicle” in the Index.)
When you move the shift leverto a position other than
THIRD (3) or OVERDRIVE (@),the system will turn
off. The Enhanced Traction System warning light will
come on and stay on.If the Enhanced Traction Systemis
limiting wheel spin when you move
the shift lever to
another position,the system won’t turn off right away. It
will wait until there’sno longer a current need to limit
wheel spin.
You can turn the system backon at any time by
moving the shift lever back tothe THIRD (3) or
OVERDRIVE (@)position again. The Enhanced
Traction System warning light shouldgo off.
Braking in Emergencies
Use your anti-lock braking system when you need to.
With anti-lock, youcan steer and brake at the same
time. In many emergencies, steeringcan help you more
than even the very best braking.
Steering
Power Steering
If you lose power steering assist because the engine
stops or the system is not functioning, youcan steer but
it will take much more effort.
4-9
Steering Tips
Driving on Curves
It’s important to take curves ata reasonable speed.
A lot of the “driverlost control”accidents mentioned on
the news happen oncurves. Here’s why:
Experienced driveror beginner, each of us is subject to
the same lawsof physics when driving on curves.The
traction of the tires against the road surface makes it
possible for the vehicleto change its path when you turn
the front wheels. If there’s notraction, inertia will keep
the vehicle going in the same
direction. If you’ve ever
tried to steer a vehicle on wetice, you’ll understand this.
Suppose you’re steering througha sharp curve. Then you
suddenly accelerate. Both control systems-- steering and
acceleration -- have to do their work where the tires meet
the road. Unless you have the Enhanced Traction System
and the transaxle shift leveris in the OVERDRIVE (0)
position, adding the sudden acceleration can demand too
much of those places.You can lose control.
What should you doif this ever happens? Ease up on the
accelerator pedal, steer the vehiclethe way you want it
to go, and slow down.
Speed limit signs near curves warn that you should
adjust your speed.Of course, the postedspeeds are
based on good weather and road conditions. Under less
favorable conditions you’ll wantto go slower.
The traction you can get ina curve depends on the
a
condition of your tires and the road surface, the angle at If you need to reduce your speed as you approach
which the curve is banked, and your speed. While you’re curve, do it before you enter the curve, while your front
wheels are straight ahead.
in a curve, speed is the one factor you can control.
Try to adjust your speed so you can “drive” through the
curve. Maintaina reasonable, steady speed. Wait to
accelerate until you are out
of the curve, and then
accelerate gently into the straightaway.
4-10
Steering in Emergencies
I
I
There are times when steering can be more effective
than bralung. For example, you come over a hilland
find a truck stopped inyour lane, or a car suddenly pulls
out from nowhere, or a child darts out from between
parked cars and stops right in front of you. You can
avoid these problems by braking -- if you can stop in
time. But sometimes you can’t; there isn’t room.
That’s the time for evasive action -- steering around
the problem.
Your Chevrolet can perform very well in emergencies
like these. First apply your brakes.(See “Braking in
Emergencies’’ earlier in this section.) It is better to
remove as much speed as you
can from a possible
collision. Then steer around the problem, to the leftor
right depending on the space available.
An emergency like this requires close attention and a
quick decision. If you are holding the steering wheelat
the recommended 9 and 3 o’clock positions, you can
turn it a full 180 degrees very quickly without removing
either hand. But you have toact fast, steer quickly, and
just asquickly straighten the wheel once you have
avoided the object.
The factthat such emergency situations are always
possible is a good reason to practice defensive driving at
all times and wear safety belts properly.
4-11
Off-Road Recovery
Passing
You may find sometime that your right wheels have
dropped off the edgeof a road onto the shoulder while
you’re driving.
The driver of a vehicle about
to pass another on a
two-lane highway waitsfor just the right moment,
accelerates, moves around the vehicle ahead, then goes
back into the right laneagain. A simple maneuver?
Not necessarily! Passing another vehicle on a two-lane
highway is a potentially dangerous move, since the
passing vehicle occupies thesame lane as oncoming
traffic for several seconds.A miscalculation, anerror in
judgment, or a brief surrenderto frustration or anger can
suddenly put the passing driverface to face with the
worst of all traffic accidents-- the head-on collision.
So here are some tips for passing:
“Drive ahead.” Look down the road, to the sides and
to crossroads for situations that might affect your
passing patterns.If you have any doubt whatsoever
about making a successful pass, wait for a better time.
If the levelof the shoulderis only slightly below the
pavement, recovery should be fairly easy. Ease off the
accelerator and then,if there is nothingin the way, steer
so that your vehicle straddles the edge
of the pavement.
You can turn the steering wheel
up to one-quarter turn
until the right front tire contacts the pavement edge. Then
turn your steering wheel togo straight down the roadway.
4-12
Watch for traffic signs, pavement markings and lines.
If you can see a sign up ahead that might indicate a
turn or an intersection, delay your pass.A broken
center line usually indicates it’sall right to pass
(providing the road ahead is clear). Never cross a solid
line on your sideof the lane ora double solid line,
even if the road seems emptyof approaching traffic.
0
Check your mirrors, glance over your shoulder, and
start your left lane change signal before moving out
of the right laneto pass. When you are far enough
ahead of the passed vehicle tosee its front in your
inside mirror, activate your right
lane change signal
and move backinto the right lane. (Remember that
your right outside mirroris convex. The vehicle you
just passed may seemto be farther away from you
than it really is.)
Do not get too closeto the vehicle you want to
pass while you’re awaiting an opportunity.
For one
thing, following too closely reduces your area
of vision, especially if you’re following a larger
vehicle. Also, you won’t have adequate space
if the
vehicle ahead suddenly slowsor stops. Keep back a
reasonable distance.
When it looks like a chance to pass is coming up,
start to accelerate but stayin the right lane and don’t
get too close. Time your move
so you will be
increasing speed as the timecomes to move into the
other lane. If the way is clear to pass, you will have a
“running start’’ that more than makes up for the
distance you would loseby dropping back. Andif
something happens to cause you to cancel your pass,
you need only slow down anddrop back again and
wait for another opportunity.
If other cars are lined up to pass a slow vehicle, wait
your turn. But take care that someone isn’t trying to
pass you as you pullout to pass the slow vehicle.
Remember to glance over your shoulder and check
the blind spot.
Try not to pass more than one vehicle at a time
on two-lane roads. Reconsider before passing the
next vehicle.
0
Don’t overtake a slowly moving vehicle too rapidly.
Even though the brake lamps are not flashing,
it may
be slowing downor starting to turn.
If you’re being passed, makeit easy for the
following driver to get ahead
of you. Perhaps you
can ease a little to the right.
4-13
Loss of Control
If you do not have the Enhanced Traction System, or
if
the transaxle shiftlever is not in theOVERDRIVE (@)
position, then an acceleration skid
is also best handled
by easing yourfoot off the accelerator pedal.
Let’s review what driving experts say about what
happens when the three control systems (brakes, steering
and acceleration) don’t have enough friction where the
If your vehicle starts to slide, ease your
foot off the
tires meet the roadto do what the driver has asked.
accelerator pedal and quicklysteer the way you want the
In any emergency, don’t give up. Keep trying
to steer and
vehicle to go. If you start steering quickly enough, your
constantly seek an escape route or area
of less danger.
vehicle may straighten out. Always
be ready for a
second skid if it occurs.
Skidding
In a skid, a driver can lose control
of the vehicle.
Defensive drivers avoid most skids by taking reasonable
care suitedto existing conditions, and by not “overdriving”
those conditions. But skids are always possible.
The three typesof skids correspond to your Chevrolet’s
three control systems. In the braking
skid, your wheels
aren’t rolling. In the steering or cornering
skid, too
much speed or steering in a curve causes tires
to slip and
lose cornering force. And in the acceleration skid, too
much throttle causes the driving wheels
to spin.
A cornering skid is best handled
by easing yourfoot off
the accelerator pedal.
If you have the Enhanced Traction System, remember:
It
helps avoid only the acceleration skid.
Of course, traction is reduced when water, snow,
ice,
gravel or other material is
on the road. For safety, you’ll
want to slow down and adjust your drivingto these
conditions. It is important to slow down on slippery
surfaces because stopping distance will be longer and
vehicle control more limited.
While drivingon a surface with reduced traction, try
your best to avoid suddensteering, acceleration or
braking (including engine braking by shifting
to a lower
gear). Any sudden changes could cause the tires
to slide.
You may not realize the surface is slippery until your
vehicle is skidding. Learnto recognize warning
clues -- such as enough water,ice or packed snow on
the road to make a “mirrored surface”-- and slow
down when you have any doubt.
Remember: Any anti-lock brake system (ABS) helps
avoid only the braking skid.
4-14
Driving at Night
Here are some tipson night driving.
e Drive defensively.
0
Don’t drink and drive.
0
Adjust your inside rearview mirror to reduce the
glare from headlamps behindyou.
0
Since you can’t see as well, you may need
to
slow down andkeep more space between you and
other vehicles.
0
Slow down, especially on higher speed roads.Your
headlamps can light up onlyso much road ahead.
0
In remote areas, watch for animals.
0
If you’re tired, pull off the road in a safe place
and rest.
Night driving is more dangerous than day driving. One
reason is that some drivers are likely be
to impaired -- by
alcohol ordrugs, with night vision problems, or by fatigue.
4-15
Night Vision
No one can see as wellat night as in the daytime. But as
we get older these differences increase.A 50-year-old
driver may requireat least twiceas much lightto see the
same thingat night as a 20-year-old.
K&@Y6ur windshield and all the glass on your vehicle
clean -- inside and out. Glare at night is made much
of the glass
worse by dirt on the glass. Even the inside
can build upa film caused by dust. Dirty glass makes
lights dazzle and flash more than clean glass would,
making the pupils of your eyes contract repeatedly.
What you do in the daytime can also affect your night
Remember that your headlamps light up far lessa of
vision. For example,if you spend the day in bright
roadway when youare in a turn or curve. Keep your
sunshine you are wiseto wear sunglasses.Your eyes will
eyes moving; that way, it’s easier
to pick out dimly
have less trouble adjustingto night. Butif you’re
lighted objects.Just as your headlamps should
be
driving, don’t wear sunglassesat night. They maycut
checked regularlyfor proper aim, so should your eyes
down on glare from headlamps, but they also make a lot be examined regularly. Some drivers suffer from night
of things invisible.
blindness -- the inability to see indim light -- and
aren’t even awareof it.
You can be temporarily blindedby approaching
headlamps. It can take a secondor two, or even several
seconds, for your eyes to readjustto the dark. Whenyou
are faced with severe glare (as
from a driver who
doesn’t lower the high beams,or a vehicle with
misaimed headlamps), slow down little.
a
Avoid staring
directly into the approaching headlamps.
4-16
Driving in Rain and onWet Roads
Rain and wet roads can mean driving trouble. aOn
wet
road, you can’t stop, accelerate or turn as well because
your tire-to-road traction isn’t as good as ondry roads.
And, if your tires don’t have much treadleft, you’ll get
even less traction. It’s always wiseto go slower andbe
cautious if rain starts to fall while you are driving. The
surface may get wet suddenly when yourreflexes are
tuned for driving on dry pavement.
The heavier the rain, the harder it is to see. Evenif your
windshield wiper bladesare in goodshape, a heavy rain
can make it harder to see road signs and trafficsignals,
pavement markings, the edge of the road andeven
people walking.
It’s wise to keep your windshield wipingequipment in
good shape and keep your windshield washer tank
filled
with washerfluid. Replace your windshield wiper
inserts when they showsigns of streaking or missing
areas on the windshield, or when strips of rubber start to
separate from the inserts.
4-17
Wet brakes can cause accidents. They won’t work
well in a quick stop and may cause pulling to one
side. You could lose control of the vehicle.
After driving througha large puddle of water or
a car wash, apply your brake pedal lightly until
your brakes work normally.
I
Driving too fast through large water puddles
or even
going through somecar washes can cause problems, too.
The water may affect your brakes. Try to avoid puddles.
But if you can’t, try to slow down before you hit them.
Hydroplaning
Hydroplaning is dangerous. So much water can build up
under yourtires that they can actually ride on the water.
This can happen if the road is wet enoughand you’re
going fast enough. When yourvehicle is hydroplaning,
it has little or no cpntact with the road.
Driving Through Deep Standing Water
NOTICE:
1
~
Hydroplaning doesn’t happen often. But it can if your
tires haven’t much treador if the pressure in one or
more is low. It canhappen if a lot of water is standing on
the road. If you can seereflections from trees, telephone
poles or other vehicles, and raindrops “dimple” the
water’s surface, there could be hydroplaning.
Hydroplaning usually happens at higher speeds: There
just isn’t a hard and fast ruleabout hydroplaning. The
best advice is to slow down whenit is raining.
If you drive too quickly through deep puddles
or standing water, water can come in through
your engine’s air intake’ and badly damage your
engine. Never drive through water that
is slightly
lower than the underbodyof your vehicle.If you
can’t avoid deep puddles or standing water, drive
through them very slowly.
Some Other Rainy Weather Tips
Turn on your low-beam headlamps -- not just
your parking lamps-- to help make you morevisible
to others.
0
Besides slowing down, allow some extra following
distance. And be especially careful when youpass
another vehicle. Allow yourselfmore clear room
ahead, and be preparedto have your view restricted
by road spray.
Have good tires with proper tread depth. (See
“Tires” in the Index.)
4-19
City Driving
One of the biggest problems with city streets
is the
amount of traffic on them. You’ll want
to watch out for
what the other drivers are doing and pay attention to
traffic signals.
4-20
Here are waysto increase your safety in city driving:
0
Know the best way to get to where you
are going. Get
trip into an unknown part of
a city map and plan your
the city just asyou would for a cross-country trip.
0
Try to use the freeways that rim and crisscross most
large cities. You’ll save time and energy. (See the
next part, “Freeway Driving.”)
0
Treat a green lightas a warning signal.A traffic light is
there because the corner is busy enough to need it.
When a lightturns green, and just before you start to
move, check both ways for vehicles that have not
cleared the intersection or maybe running the red light.
Freeway Driving
At the entrance, mere1s usually a ramp that leadsto the
freeway. If you have a clear view of the freeway as you
drive along the entrance ramp, you should begin
to
check traffic. Try to determine where you expectto
blend with the flow. Try to merge
into the gap at close to
the prevailing speed. Switch on your turn signal, check
your mirrors andglance over your shoulder as often
as
necessary. Try to blend smoothly with the trafficflow.
Once you are on the freeway, adjust your speed
to the
posted limit or to the prevailing rate
if it’s slower. Stay
in the right lane unless you want to pass.
Before changing lanes,check your mirrors. Then use
your turn signal.
Just before you leave the lane, glance quickly over your
shoulder to make sure there isn’t another vehicle in your
“blind” spot.
Once you are moving on the freeway, make certain you
allow a reasonable following distance. Expect to move
slightly slower at night.
Mile for mile, freeways (also called thruways, parkways,
expressways, turnpikes or superhighways) are the safest
When you want to leave the freeway, move
to the proper
of all roads. But theyhave their own special rules.
lane well in advance.If you miss your exit,do not,
The most important advice on freeway drivingis: Keep
under any circumstances, stop and back up. Drive on to
up with traffic andkeep to the right. Drive at the same
the next exit.
speed most of the other drivers are driving. Too-fastor
too-slow driving breaks a smooth traffic flow. Treat the The exit ramp can be curved, sometimes quite sharply.
left lane on a freeway as a passing lane.
4-21
The exit speed is usually posted.
Here are some things you can check before
a trip:
Reduce your speed according
to your speedometer, not
to yoursense of motion. After driving for any distance
at higher speeds, you may tendto think you are going
slower than you actually are.
0
Windshield Washer Fluid: Is the reservoir full?
Are all windows clean inside andoutside?
0
Wiper Blades:Are they in good shape?
0
Fuel, Engine Oil, Other Fluids: Have you checked
all levels?
0
Lamps: Are they allworking? Are the lenses clean?
0
Tires: They are vitally important to a safe,
trouble-free trip. Is the tread good enoughfor
long-distance driving? Are the tires all inflated to the
recommended pressure?
Weather Forecasts: What’s the weather outlook
along yourroute? Should you delay yourtrip a short
time to avoid a major storm system?
Maps: Do you have up-to-date maps?
Before Leaving on a Long Trip
Make sure you’re ready. Try to be well rested.If you
must start when you’re not
fresh -- such as aftera day’s
work -- don’t plan to make too many miles
that first part
of the journey. Wearcomfortable clothing and shoes you
can easily drive in.
Is your vehicle readyfor a long trip?If you keep it
serviced and maintained, it’s readyto go. If it needs
service, have it done before starting out. Of course,
you’ll find experienced andable service experts in
Chevrolet dealerships all across North America.They’ll
be ready and willing to
help if you need it.
4-22
0
0
Highway Hypnosis
Hill and Mountain Roads
Is there actually such a condition as “highway
hypnosis”? Or is itjust plain falling asleep at the
wheel? Call it highway hypnosis, lackof awareness,
or whatever.
There is something about an easy stretch
of road with the
same scenery, along with the hum of the tires on the road,
the droneof the engine, and the rush
of the wind against
the vehicle that can make you sleepy. Don’titlet
happen
to you! If it does, your vehicle can leave the roadless
in
than a second, and you could crash and be injured.
What can you do about highway hypnosis? First, be
aware that it can happen.
Then here are some tips:
0
Make sure your vehicle is well ventilated, with a
comfortably cool interior.
0
Keep your eyes moving. Scan the road ahead and to
the sides. Check your rearview mirrors and your
instruments frequently.
0
If you get sleepy, pull off the roadinto a rest, service
or parking area and take a nap, get some exercise, or
both. For safety, treat drowsinesson the highway as
an emergency.
Driving on steep hillsor mountains is different from
driving in flator rolling terrain.
4-23
If you drive regularlyin steep country,or if you’re
planning to visit there, here are some tips that
can make
your trips safer andmore enjoyable.
0
Keep your vehicle in good shape. Check all fluid
levels and also the brakes, tires, cooling system and
transaxle. Theseparts can work hard on mountain
roads.
0
Know how to go down hills. The most important
thing to know is this: let your enginedo some of the
slowing down. Shiftto a lowergear when you go
down a steep or long hill.
I
Coasting downhill in NEUTRAL (N) or with the
ignition off is dangerous. Your brakes w
ill have to
do all thework of slowing down. They could get so
hot that they wouldn’t work well. You would then
have poor braking or even none going down a hill.
You could crash. Always have your engine running
and your vehicle in gear when you go downhill.
Know how to go uphill. You may want to shift down
to a lower gear. The lower gears help cool your engine
and transaxle, and you can climb the hill better.
0 Stay in your own lane when driving
on two-lane
roads in hillsor mountains. Don’t swing wideor cut
across the centerof the road. Drive at speeds that let
you stay in your own lane.
e As you go over the topof a hill, be alert. There couldbe
something in your lane, like a stalled car oran accident.
e You may see highway signs on mountains that warnof
special problems. Examples are long grades, passing
or
no-passing zones, a falling rocks area or winding
roads. Be alert to these and take appropriate action.
0
If you don’t shift down, your brakes could get so
hot that they wouldn’t work well. You would then
have poor brakingor even none going down a hill.
You could crash. Shift down to let your engine
assist your brakeson a steep downhill slope.
4-24
Winter Driving
... .
Here are some tim for winter driving:
Have your uevrolet in good shape for winter.
You may want to put winter emergency supplies in
your trunk.
Include an ice scraper, a small brushor broom, a supply
of windshield washer fluid, a rag, some winter outer
clothing, a small shovel,a flashlight, a red cloth and a
couple of reflective warning triangles. And, if you will
be driving under severeconditions, include a small bag
of sand, a piece of old carpet or a couple of burlap bags
to help provide traction. Be sureyou properly secure
these items in your vehicle.
4-25
What’s the worst time for this? “Wet
ice.” Very cold
snow or ice can be slick and hard to drive on. But wet
Most of the time, those places where your tires meet the ice can be even more trouble becauseit may offer the
road probably have good traction.
least tractionof all. You can get wet ice when it’s about
freezing (32°F; 0”C) and freezing rain begins to fall.
However, if thereis snow or ice between your tires and
the road, you can have a very slippery situation. You’ll Try to avoid drivingon wet ice until salt and sandcrews
can get there.
have a lot less traction
or “grip” and will need to be
very careful.
Whatever the condition-- smooth ice, packed, blowing
or loose snow -- drive with caution.
Driving on Snow or Ice
If you have the Enhanced Traction System, keep the
transaxle shift lever in the OVERDRIVE
(@)position
so the system will be able to operate.
It will improve
your ability to accelerate when drivingon a slippery
road. Even though your vehicle
has this system,you’ll
want to slow down and adjust your driving to the
road conditions. See “Enhanced Traction System” in
the Index.
If you don’t have the Enhanced Traction System,
accelerate gently. Try notto break the fragile traction.If
you accelerate too fast, the drive wheels will spin and
polish the surface under the tires even more.
4-26
Your anti-lock brakes improve your vehicle’s stability
when you makea hard stop on a slippery road. Even
though you have the anti-lock braking system, you’ll
want to begin stopping sooner than you would on dry
pavement. See “Anti-Lock” in the Index.
If You’re Caught in a Blizzard
Allow greater following distance on any
slippery road.
Watch for slippery spots. The road might be fine
until you hit a spot that’scovered with ice. On an
otherwise clear road, ice patches may appear in
shaded areas wherethe sun can’t reach: around
clumps of trees, behind buildings or under bridges.
Sometimes the surface of a curve or an overpass may
remain icy when the surrounding roads are clear. If
you see a patch of ice ahead of you, brake before you
are on it. Try not to brake while you’re actually on
the ice,and avoid sudden steering maneuvers.
If you are stopped by heavy snow, you could bea in
serious situation. You should probably stay with your
vehicle unless you know for sure that you are near
help
and you can hike through the snow. Here are some
things to do to summon help andkeep yourself and your
passengers safe:
Turn on your hazard flashers.
4-27
Tie a red cloth to your vehicle to alert police that
you’ve been stopped by the snow.
0
Put on extra clothing or wrap a blanket aroundyou.
If you have no blanketsor extra clothing, make body
insulators from newspapers, burlap bags, rags, floor
mats -- anything you can wrap around yourself or
tuck under your clothingto keep warm.
You can run the engine to keep warm,
but be careful.
4-28
Snow cantrap exhaust gases under your
vehicle.
This can cause deadly CO (carbon monoxide) gas
to get inside. CO could overcomeyou and kill
you. You can’t see it or smell it,so you might not
know itis in your vehicle. Clear awaysnow from
around the baseof your vehicle, especially any
that is blocking your exhaustpipe. And check
around again from time to timebetosure snow
doesn’t collect there.
Open a window just a little on the side of the
vehicle that’s away from thewind. This will help
keep CO out.
Run your engine only as long as you must. This saves
fuel. When you run the engine, make
it.go a little faster
than just idle. That is, push the accelerator slightly. This
uses less fuel for the heat that you get and it keeps the
battery charged. You will need a well-charged battery to
restart the vehicle, and possibly for signaling later on
with your headlamps.Let the heater run for awhile.
Then, shut the engine off andclose the window almost
all the way to preserve the heat. Start the engine again
and repeat this only when youfeel really uncomfortable
from the cold. But do it as little as possible. Preserve the
fuel as long as you can. To help keep warm, you can get
out of the vehicle anddo some fairly vigorous exercises
every half hour orso until help comes.
Towing Your Vehicle from the Front
(With a Dolly)
€7
m
Recreational Vehicle Towing
You can tow your vehicle behind another vehiclefor use
at your destination. Be sure to use the proper towing
equipment designed for recreational towing. Follow the
instructions for the towing equipment.
Follow these steps:
1. Put the front wheels on a dolly.
2. Set the parking brake.
3. Open the fuse panel on the driver’s side of the
instrument panel. Remove the fuse labeledCLSPCM.
This will keep your battery from draining while towing.
4. Turn the ignition key to OFF to unlock the steering
wheel, see “Ignition Switch’’ in the Index.
4-29
5. Clamp the steering wheel in a straight-ahead position
with a clamping device designed for towing.
Follow these steps:
1. Set the parking brake.
6. Release the parking brake.
When youare finished towing, makesure you replace
the CLS/PCM fuse in the instrument panel fuse block.
Towing Your Vehicle from the Front
(Four-Speed Automatic or Five-Speed
Manual Transaxles Only)
You may tow your vehicle with all four wneels on the
ground if you have a four-speed automatic
or a
five-speed manual transaxle. Follow these steps:
r
2. Turn the ignition key to OFF to unlock the
steering wheel.
3. Open the fuse panel on the driver’s sideof the
instrument panel. Remove thefuse labeled
CLS/PCM. This will keep your battery from draining
while towing.
4. Shift your transaxle to NEUTRAL(N).
5. Release the parking brake.
NOTICE:
Make sure thatthe towing speed does not
exceed 55 mph (90 km/h), or your vehicle could
be badly damaged.
m
*.
4-30
When you are finished towing, make
sure you replace
the CLS/PCM fuse in the instrument panel fuse block.
Towing Your Vehicle from the Rear
Loading Your Vehicle
cm
TIRE-LOADING INFORMATION
OCCUPANTS
VEHICLE CAP. WT.
FRT, CTR. RR.
TOTAL LBS.
KG
\
MAX. LOADING & GVWR SAME AS VEHICLE
CAPACITY WEIGHT
XXX
COLD
TIRE
TIRE SIZE
SPEED
PRESSURE
RTG
PSliKPa
FRT.
RR.
SPA.
IF TIRES ARE HOT, ADD 4PSIi28KPa
SEE OWNER'S MANUAL FOR ADDITIONAL
, INFORMATION
NOTICE:
Do not tow your vehicle from the rear. Your
vehicle could be badly damaged and the repairs
would not be covered by your warranty.
Two labels on your vehicle show how much weight
it
may properly carry.The Tire-Loading Information label
found on the rearedge of the driver's door tells you the
proper size, speed rating and recommended inflation
pressures for the tires on your vehicle. also
It gives you
important information about the number of people that
can be in your vehicle and the total weight that you can
carry. This weight is called the Vehicle Capacity Weight,
and includes the weightof all occupants, cargo and all
nonfactory-installed options.
4-31
MFD BY GENERAL MOTORS CORP
DATE GVWR
GAWR
FRT GAWR RR
THIS VEHICLE CONFORMS TO ALL APPLICABLE U.S. FEDERAL MOTOR VEHICLE
SAFETY, BUMPER, AND THEFT PREVENTION
STANDARDS IN EFFECT ON THE DATE OF
MANUFACTURE SHOWN ABOVE.
The other label is theCertification label, found on the
rear edge of the driver’s door. It tells you the gross
weight capacity of yourvehicle, called the GVWR
(Gross Vehicle WeightRating). The GVWR includes
the weight of the vehicle,all occupants, fuel and cargo.
Never exceed the GVWR for your vehicle, or the Gross
Axle Weight Rating (GAWR)for either the front or
rear axle.
And, if you do have a heavy load, you should spread it
out. Don’t carry more than132 lbs. (60 kg) in your
trunk.
Do not load your vehicle any heavier than
the GVWR, or either the maximum front or
rear GAWR. If you do, parts on your vehicle
can break, orit can change the way your
vehicle handles. These could cause you
to lose
control. Also, overloading can shorten the life
of your vehicle.
If you put thingsinside your vehicle-- like suitcases,
tools, packages, or anything else -- they will go as fast
as the vehicle goes.If you have to stop or turn quickly,
or if there is acrash, they’ll keep going.
A CAUTI-N:
-
Things you put inside your vehicle can strike and
injure people in a sudden stopor turn, or
in a crash.
Put things in thetrunk or rear area
of your
vehicle. In a trunk, put themas far forward
as you can. Try to spread the weight
evenly.
If you have fold-downrear seats, you’ll
find four anchors on the back
wall of your
trunk. You can use these anchors totie
down lighter loads. They’re not strong
enough forheavy things, however, so put
them as far forward
as you can in the trunk
or rear area.
Never stack heavier things, like suitcases,
inside the vehicle so that someof them are
above the topsof the seats.
Don’t leave an unsecured child restraintin
your vehicle.
When you carry something inside the
vehicle, secure it wheneveryou can.
Don’t leave a seat folded down unless you
need to.
I
I
Towing a Trailer (Models with
2.4L Engine a1 1 $-Speed mtomatic
Transaxle)
,A
CAUTION:
If you don’t use the correct equipment and drive
properly, you can lose control whenyou pull a
trailer. For example,if the traileris tooheavy, the
brakes may not work well or even at all. You
and your passengers could
be seriously injured.
Pull a trailer only if you have followed all the
steps in this section.
Ask your Chevrolet dealer
for advice and information abouttowing a trailer
with your vehicle.
--
4-33
NOTICE:
Pulling a trailer improperly can damage your
vehicle and result in costly repairs not covered
by
your warranty.To pull a trailer correctly, follow
the advice in this part, and see your Chevrolet
dealer for important information about towing a
trailer with your vehicle.
Do not tow a trailerif your vehicle is equipped with a
2.2L (Code4) engine. You also cannot tow a trailerif
your vehicleis equipped witha manual or a three-speed
automatic transaxle,or is a convertible model.
Your vehicle can towa trailer if it is equipped with a
2.4L (CodeT)engine, a four-speed automatic transaxle
and proper trailer towing equipment.
To identify what
the vehicle trailering capacityis for your vehicle, you
4-34
should read the informarlon in “Weight of the Trailer’’
that appears later in this section. But trailering is
different thanjust driving your vehicle by itself.
Trailering .meanschanges in handling, durability, and
fuel economy. Successful, safe trailering takes correct
equipment, and it has to be used properly.
That’s the reasonfor this part. Init are many
time-tested, important trailering tips and safety rules.
Many of these are important for your safety and that of
your passengers. So please read this section carefully
before you pull a trailer.
Load-pulling components such asthe engine, transaxle,
wheel assemblies and tiresare forced to work harder
against the dragof the added weight. The engine
is
required to operate at relatively higher speeds and under
greater loads, generating extra heat. What’s more, the
trailer adds considerably to wind resistance, increasing
the pulling requirements.
If You Do Decide To Pull A Trailer
Weight of the Trailer
If you do, here are some important points:
0 There are many different laws, including speed limit
restrictions, having to do with trailering. Make sure
your rig will belegal, not only where youlive but
also where you’ll bedriving. A good source for this
information can be state or provincial police.
Consider using a sway control. You can ask a hitch
dealer about sway controls.
Don’t tow a trailer at all during the first 1,000 miles
(1 600 km)your new vehicle is driven. Your engine,
axle or other parts could be damaged.
0 Then, during the first 500 miles (800 km) that you
tow a trailer, don’t drive over 50 mph (80 km/h) and
don’t make starts at full throttle. This helps your
engine and other parts of your vehicle wear in at the
heavier loads.
Obey speed limit restrictions when towing a trailer.
Don’t drive faster than the maximum posted speed
for trailers (or no more than55 mph (90 km/h)) to
save wear on your vehicle’s parts.
Three important considerations have to do with weight:
the weight of the trailer,
the weightof the trailer tongue
and the total weight on your vehicle’stires.
Your vehicle can tow normally up to 1,000 lbs. (450 kg).
It depends on how you plan to use yourrig. For
example, speed, altitude, road grades, outside
temperature and how much yourvehicle is used to pull a
trailer are all important. And, it canalso depend on any
special equipment that you have on yourvehicle.
You can ask yourdealer for our trailering information or
advice, or you can write us at:
Chevrolet Motor Division
Customer Assistance Center
P.O. Box 7047
Troy, MI 48007-7047
In Canada, write to:
General Motors of Canada Limited
Customer Assistance Center
1908 Colonel Sam Drive
Oshawa, Ontario L1H 8P7
4-35
Weight of the Trailer Tongue
The tongue load(A) of any traileris an important
weight to measure because it affects the total capacity
weight of your vehicle.The capacity weight includes the
curb weight of the vehicle, any cargo you may carry
in
it, and the people who willbe riding in the vehicle. And
if you will tow a trailer, you must subtract the tongue
load from your vehicle’s capacity weight because your
vehicle will be carrying that weight, too.See “Loading
Your Vehicle’’in the Indexfor more information about
your vehicle’s maximum load capacity.
If you’re using a weight-carrying hitch, the trailer
tongue (A) should weigh 10%of the total loaded trailer
weight (B). If you have a weight-distributing hitch, the
trailer tongue (A) should weigh 12%
of the total loaded
trailer weight (B).
After you’ve loaded your trailer, weigh the trailer and
then the tongue, separately,to see if the weights are
proper. If they aren’t, you may be able
to get them right
simply by moving some items around in the trailer.
Total Weight on Your Vehicle’s Tires
Be sure your vehicle’s tires are inflated
to the
recommended pressure for cold tires. You’ll find these
numbers on the Certificationlabel at the rearedge of
the driver’s dooror see “LoadingYour Vehicle”in the
Index. Thenbe sure you don’t go over theGVW
limit for your vehicle, including the weight
of the
trailer tongue.
A
4-36
’
Hitches
Safety Chains
It’s important to have the correct hitch equipment.
.Crosswinds,large trucks going by and rough roads are a
few reasons why you’ll need the right hitch. Here are
some rules to follow:
You should alwaysattach chains between your vehicle
and your trailer. Crossthe safety chains under the tongue
of the trailer so that the tongue will not drop to the road
if it becomes separated from the hitch. Instructions
about safety chains may be providedby the hitch
manufacturer or by the trailer manufacturer. Eollowthe
manufacturer’s recommendationfor attaching safety
chains and do not attach them tothe bumper. Always
leave just enough slack so you can twn with your rig.
And, never allowsafety chains to drag onthe ground.
0
Will you have to make any holes inthe body of your
vehicle when you install a trailer hitch? If you do,
then be sure to seal the holes later when you remove
the hitch. If you don’t seal them, deadly carbon
monoxide (CO) from your exhaust can get into your
vehicle (see “Carbon Monoxide” in the Index). Dirt
and water can, too.
The bumpers on your vehicle are not intended
for hitches. Do not attach rental hitches or other
bumper-type hitches to them. Useonly a
frame-mounted hitch that does not attach to
the bumper.
Trailer Brakes
Does your trailer have its own brakes? Besure to read
and follow the instructions for the trailer brakes so
you’ll beable to install, adjust andmaintain them
properly. Because you have anti-lock brakes,do not try
to tap into your vehicle’s brake system.If you do, both
brake systems won’t work well,
or at all.
4-37
Driving with a Trailer
Passing
You’ll need more passing distanceup ahead when
Towing a trailer requires a certain amount
of experience.
a good deal
Before setting out for the open road, you’ll want to get you’re towing a trailer. And, because you’re
longer, you’ll need to go much farther beyond the
to know your rig. Acquaint yourself with feel
the of
passed vehicle before you can return
to your lane.
handling and braking with the added weight
of the
trailer. And always keep in mind that the vehicle you are
Backing Up
driving is now a good deal longer and not nearlyas
Hold the bottom of the steering wheel with one hand.
responsive as your vehicleis by itself.
Then, to move the trailer to the left,
just move that hand
Before you start, check the trailer hitch and platform
to the left. To move the trailer
to the right, move your
(and attachments), safety chains, electrical connector,
hand to the right. Always back up slowly and,
if
lamps, tires and mirror adjustment.
If the trailer has
possible, have someone guideyou.
electric brakes,start your vehicle and trailer moving and
then apply the trailer brake controller by hand to be sure Making n r n s
the brakes are working. This lets you check your
electrical connection at the same time.
During your trip, check occasionally
to be sure that the
load is secure, and that the lamps and any trailer brakes
are still working.
I NOTICE:
Making very sharp turns while trailering could
cause the trailer to come in contact with the
vehicle. Your vehicle could be damaged. Avoid
Following Distance
Stay at least twice as far behind the vehicle ahead as you making very sharp turns while trailering.
would when driving your vehicle without a trailer.
This
turns than
can help you avoid situations that require heavy braking When you’re turning with a trailer, make wider
and sudden turns.
normal. Do this so your trailer won’t strikesoft shoulders,
curbs, road signs, trees or other objects.
Avoid jerky or
sudden maneuvers.Signal well in advance.
4-38
f i r n Signals When Towing a Trailer
Parking on Hills
The green arrows on your instrument panel will flash
whenever you signal a turnor lane change. Properly
hooked up, the trailer lamps willalso flash, telling other
drivers you’re aboutto turn, change lanes or stop.
You really should not park your vehicle, with a trailer
attached, on a hill. If something goes wrong, your
rig
could start to move. People can be injured, and both
your vehicle and the trailer
can be damaged.
When towing a trailer, the green arrows
on your
But if you ever have to park your rigon a hill, here’s
instrument panel will flashfor turns even if the bulbs on
how to doit:
the trailer are burned out. Thus, you may think drivers
1. Apply your regular brakes, but don’t shift into
behind you are seeing your signal when theyare not.
PARK (P) yet.
It’s importantto check occasionally to be sure the trailer
2. Have someone place chocks under the trailer wheels.
bulbs are still working.
3. When the wheelchocks are in place, release the
Driving On Grades
regular brakes until the chocks absorb
the load.
Reduce speed and shiftto a lower gear before you start
4. Reapply the regular brakes. Then apply your parking
down a long or steep downgrade. If you don’t shift
brake, and then shiftto PARK (P).
down, you might haveto use your brakesso much that
they would get hot and no longer work well.
5. Release the regular brakes.
On a long uphill grade, shift down and reduce your
speed to around45 mph (70 km/h) to reduce the
possibility of engine and transaxle overheating.
4-39
When You Are Ready to Leave After
Parking on a Hill
1. Apply your regular brakes and hold the pedal down
while you:
Start your engine;
Shift into a gear; and
0
Release the parking brake.
2. Let up on the brake pedal.
3. Drive slowly until the trailer is clear of the chocks.
4. Stop and have someone pick up and store the chocks.
Maintenance When Trailer Towing
Your vehicle will need service more often when you’re
pulling a trailer. See the Maintenance Schedule for more
on this. Things that are especially importantin trailer
operation are automatic transaxle fluid (don’t overfill),
engine oil, belt, cooling system and brake adjustment.
Each of these is coveredin this manual, and the Index will
help you find them quickly.
If you’re trailering, it’sa good
idea to review these sections before you
start your trip.
Check periodically to see that allhitch nuts and bolts
are tight.
4-40
Towing A Trailer (Except Models
with 2.4L Engine and 4-Speed
Automatic Transaxle)
Do not tow a trailer with a Cavalier if your vehicleis:
0
a convertible model.
equipped with a 2.2L (Code 4) engine.
equipped with a manual transaxle or a three-speed
automatic transaxle.
Your Cavalier is neither designednor intended to
tow a trailer.
NOTES
4-41
NOTES
4-42
0Section 5
Problemsonthe Road
Here you’ll find what to do about some problems that
can occur on the road.
Hazard Warning Flashers
Your hazard warningflashers let you warn others. They
also let police know you have a problem.
Your front and
rear turn signal lamps will flashon and off.
Move the switch to the right
to make your front and rear
turn signal lamps flash on
and off.
Your hazard warningflashers work no matter what
position your key isin, and even if the key isn’t in.
To turn off the flashers, move the switchto the left.
5-1
When the hazard warning flashers
are on, your turn
signals won’t work.
Other Warning Devices
If you carry reflective triangles, you can set one up at
the side of the road about300 feet (100 m) behind your
vehicle.
Jump Starting
If your battery has rundown, you may want to use
another vehicle and some
jumper cables to start your
Chevrolet. But please follow the steps below do
to
it safely.
I NOTICE:
Ignoring these steps could result in costly
damage to yourvehicle that wouldn’t be covered
by your warranty.
Trying tostart your Chevrolet by pushing
or
pulling it could damage your
vehicle, even if you
have a manual transaxle. Andif you have an
automatic transaxle, itwon’t start that way.
5-2
Batteries can hurt you. They canbe dangerous
because:
They contain acid that can burnyou.
0 They contain gas that can
explode or ignite.
0 They contain enough electricity toburn you.
If you don’t follow these steps exactly, some
or all
of these things canhurt you.
1. Check the other vehicle. It must have a 12-volt
battery with a negative ground system.
I NOTICE:
If the othersystem isn’t a 12-volt system with
a
negative ground, both vehiclescan be damaged.
2. Get the vehicles close enough so the jumper cables
can reach, but be sure the vehicles aren’t touching
each other. If they are, it could cause a ground
connection you don’t want.You wouldn’t be ableto
start your Chevrolet, and the badgrounding could
damage the electrical systems.
You could be injured if the vehicles roll. Set the
parking brake firmly oneach vehicle. Put an
automatic transaxle in PARK (P) or a manual
transaxle in NEUTRAL (N).
3. Turn off the ignition on both vehicles. Unplug
unnecessary accessories plugged into the cigarette
lighter. Turn off all lamps that aren’t neededas well
as radios. This will avoid sparks and help save both
batteries. In addition, it could save your ra&o.
NOTICE:
If you leave your radioon, it could be badly
damaged. The repairs wouldn’t be covered by
your warranty.
4. Open the hoods and locate the batteries.
An electric fan can start up even when the engine
is not running and can injure you. Keep hands,
clothing and tools away from any underhood
electric fan.
5. Find the positive (+) and negative (-) terminals on
each battery.
5-3
6. Check that,thejumper cables don’t have looseor
missing insulation.If they do, you could get a shock.
The vehicles could be damaged, too.
Using a match near a battery can cause battery
gas to explode. People have beenhurt doing this,
and some have been blinded.Use a flashlight if
you need more light.
Be sure the battery has enough
water. You don’t
need to add water to the
Delco Freedom@ battery
installed in everynew GM vehicle. But if a
battery hasfiller caps, be sure the right amount
of fluid is there.If it islow, add water to take care
of that first. If you don’t, explosive gas could
be
present.
you.
Battery fluid contains acid that can burn
Don’t get it onyou. If you accidentally get it in
your eyes or on your skin, flush the place with
water andget medical help immediately.
’
5-4
Before you connect the cables, here are some basic
things you should know. Positive(+) will go to
positive (+) and negative (-) will go to negative (-)
or a metal enginepart. Don’t connect positive(+) to
negative (-) or you’ll get a short that would damage
the battery and maybe other parts, too.
a
\
JTION:
Fans or othermoving engine parts can injureyou
badly. Keep your hands away from
moving parts
once the engines are running.
I
8. Don’t let the other end
touch metal. Connectit
to the positive (+)
terminal of the good
battery. Use a remote
positive (+) terminal if
the vehicle has one.
7. Remove the red plastic cap, and connect the red
positive (+) cable to the positive (+) terminal of
the vehicle with the dead battery. Use a remote
positive (+) terminal if the vehicle hasone.
9. Now connect the
black negative (-)
cable to the
good battery’s
negative (-)
terminal.
~
~
Don’t let the other end touch anything until the next
step. The other end of the negative cable doesn’t go to
the dead battery. It goes to a heavy unpainted metalpart
on the engine of the vehicle with the dead battery.
11. Now start the vehicle withthe good battery and run
the engine for a while.
12. Try to start the vehicle with the dead battery. it
won’t start after a few tries, it probably needs service.
‘
I
f
13. Remove the cables in reverse order to prevent
electrical shorting. Takecare that they don’t touch
each otheror any other metal.
10. Attach the cable at least 18 inches (45 cm) away
from the dead battery, but not near engine
parts that
move. The electrical connection is just as good
there, but the chance of sparks getting back to the
battery is much less.
A. Heavy Metal Engine Part
B. Good Battery
C. Dead Battery
5-6
Towing Your Vehicle
Try to have aGM dealer or a professional towing service
tow your vehicle. They can provide the right equipment
and know how to tow your vehicle without damage.
When the towing service arrives, let the tow operator
know that this manual contains detailed towing instructions
and illustrations. The operator may want to see them.
If your vehicle has been changedor modified since it
was factory-new by adding aftermarket items like fog
lamps, aero skirting, or special tires and wheels, these
instructions and illustrations may not be correct.
Before you do anything, turn on the hazard
warning flashers.
When you call, tell the towing service:
0
That your vehicle cannot be towed with sling-type
equipment.
0
That your vehicle cannot be towedfrom the rear with
the front wheels on the ground.
0
That your vehicle has front-wheel drive.
0
The make, model and year of your vehicle.
Whether you can still move the shift lever.
If there was an accident, what was damaged.
To help avoid injury to you or others:
Never let passengers ride in a vehicle that is
being towed.
Never tow faster than safe or posted speeds.
Never tow with damaged parts not
fully secured.
CAUTION: (Continued)
- - IO
Iontinut
I
Never get under your vehicle after it has
been liftedby the tow truck.
Always secure the vehicle on each side with
separate safety chains when towingit.
Never use J-hooks. Use T-hooks instead.
When your vehicle is being towed, have the ignition
key OFF. The steering wheel should be clamped in a
straight-ahead position, with a clamping device
designed for towing service.Do not use the vehicle’s
steering column lockfor this. The transaxle should be
in NEUTRAL (N) and the parking brake released.
5-8
I
A CAUTION:
A vehicle can fallfrom a car carrierif it isn’t
adequately secured. This can cause
a collision,
serious personal injury andvehicle damage. The
vehicle should be tightly secured with chainsor
steel cables beforeit is transported.
Don’t use substitutes (ropes, leather straps,
canvas webbing, etc.) that canbe cut by sharp
edges underneath thetowed vehicle. Always use
T-hooks insertedin the T-hook slots. Never use
J-hooks. They will damage drivetrain and
suspension components.
I
Front Towing
Attach T-hook chains into the slots in the bottom of the
floor pan, justbehind the front wheels, on bothsides.
These slots are to be used whenloading and securing to
car carrier equipment.
Before hooking up toa tow truck, be sure to read all
the information in “Towing Your Vehicle”earlier in
this section.
5-9
NOTICE:
Do not tow with sling-type equipmentor
fascia/fog lamp damagewill occur. Use wheel-lift
or car carrier equipment. Additional ramping
may be required for car carrier equipment.
Use
safety chainsand wheel straps.
Towing a vehicle over rough surfacescould
damage a vehicle. Damage can occur from
vehicle
to ground orvehicle to wheel-lift equipment. To
help avoid damage, installa towing dolly and
raise vehicle until adequate clearanceis obtained
between the ground and/orwheel-lift equipment.
Do not attachwinch cablesor J-hooks to
suspension components when usingcar carrier
equipment. Always use T-hooks inserted in the
T-hook slots.
5-10
Attach a separate safety chain aroundthe outboard end
of each lower control arm.
Rear Towing
Towing dolly required underfiont wheels when equipped
with automatic transaxleor damage will occur.
Before hooking up to a tow truck, be sure to read all the
information in “TowingYour Vehicle” earlier in this
section, Also be sure to use the proper hook-upfor your
particular vehicle.
Attach T-hook chains on both sides in the slotted holes
in the bottom of the
frame rail, just ahead of therear
wheels. These slots are to be used when loading and
securing to car carrier equipment.
Place the front wheels on a towing dolly or place the
vehicle on acar carrier.
5-11
A
NOTICE:
Do not tow your Cavalier from the rear with
the frontwheels on the ground or your transaxle
can be damaged.
Do not tow with sling-type equipmentor rear
fascia will be damaged. Use wheel lift or car
carrier equipment. Additional ramping
may be
required forcar carrier equipment. Use safety
chains andwheel straps.
Towing a vehicle over rough surfacescould
damage a vehicle. Damage can occur fromvehicle
to ground orvehicle to wheel-lift equipment.To
help avoid damage, installa towing dolly and
raise vehicle until adequate clearanceis obtained
between the ground and/orwheel-lift equipment.
Do not attachwinch cablesor J-hooks to
suspension components when usingcar carrier
equipment. Always use T-hooks inserted in the
T-hook slots.
5-12
I
Attach a separate safety chainto each side of the axle
inboard of the rear shock absorber attachment.(Do not
use the chainas a tie down.)
I
Engine Overheating
You will find a coolant temperature gage anda
low coolant warning lighton your Chevrolet’s
instrument panel.
Steam from an overheated engine canburn you
badly, evenif you just open the hood. Stay away
from the engineif you see or hear steam
coming
from it. Just turn itoff and get everyone away
from thevehicle until it cools down. Wait until
there is no signof steam or coolant before
opening the hood.
If you keep driving when your engine
is
overheated, the liquids in it can catch fire.
You or
others could be badly burned. Stop your engine
if
it overheats, andget out of the vehicle until the
engine iscool.
I NOTICE:
If your engine catches fire because
you keep
driving with no coolant, your
vehicle can be
badly damaged. The costly repairs
would not be
covered by your warranty.
5-13
If No Steam Is Coming From Your Engine
If you get the overheat warning butsee or hear no
steam, the problem may not
be too serious. Sometimes
the enginecan get alittle too hot when you:
Climb a long hill ona hot day.
Stop after high-speed driving.
Idle for long periods in traffic.
Tow a trailer.
If there’s stillno slgn of steam, you can idle the engine
for two or three minutes while you’reparked, to see if
the warning stops. But then, if you still have the
warning, turn o f t h e engine and get everyone out of the
vehicle until it cools down.
You may decide not to lift the hood but to get service
help right away.
When you decide it’ssafe to lift the hood, here’s what
you’ll see:
If you get the overhear warn J wlm no sign of steam,
try thisfor a.minute or so:
1. If you have anair conditioner, turn it off.
2. Turn on your heater to full hot at the highest fan
speed and open the windowas necessary.
3. If you’re in a trafficjam, shift to NEUTRAL (N);
otherwise, shift to the highest gear while
driving -- AUTOMATIC OVERDRIVE (D)
or THIRD (3) for automatic transaxles.
If you no longer have the overheat
warning, you can drive.
Just to be safe, drive slower for about
10 minutes. If the
warning doesn’t come back on, you can drive normally.
If the warning continues,pull over, stop, and park your
vehicle right away.
5-14
2.2L Engine
A C * "TION:
An electric fan under thehood can startup even
when the engine is not running and can injure
you. Keep hands,clothing and tools away from
any underhood electric fan.
If the coolant inside the coolant surge tankis boiling,
don't do anythingelse until itcools down.
2.4L Engine
A. Coolant Surge Tank with Pressure Cap
B. Electric Engine Fan
’A
C * UTION:
- -
I
Heater and radiatorhoses, and otherengine
parts, canbe very hot. Don’t touch them. Ifyou
do, you can be burned.
Don’t run the engineif there is a leak. If you run
the engine, it could lose all coolant. That could
cause an engine fire,and you could be burned.
Get anyleak fixed beforeyou drive thevehicle.
The coolant level should be at the FULL COLD line. If
it isn’t, you may have leak
a in the radiator hoses, heater
hoses, radiator, water pumpor somewhere else in the
cooling system.
I NOTICE:
r
~~
~
Engine damage from running your
engine
without coolant isn’t covered by your warranty.
If there seems to be no leak, with the engineon, check to
see if the electric engine fan is running.If the engine is
overheating, thefan should be running. Ifit isn’t, your
vehicle needs service.
How to Add Coolant to the Coolant Surge
Tank
If you haven’t found a problemyet, but the coolant level
isn’t at theFULL COLD mark, add a50/50 mixture of
clean water (preferably distilled) and DEX-COOL TM
antifreeze at the coolant surgetank, but be sure the
cooling system, including the coolant surge tank
pressure cap, is cool before youdo it. (See “Engine
Coolant” in the Index for more information.)
I
A CAUTION:
when the cooling system, including the coolant
surge tank pressure cap,is hot. Wait for the cooling
system and coolant surge tank pressure cap to cool
if you ever have to turn the pressurecap.
-
Steam andscalding liquids from a hot cooling
system can blow out and burnyou badly. They
are under pressure, and
if you turn the coolant
surge tank pressure cap even a little they
can come out at
high speed. Neverturn the cap
’
CAUTION:
(Continued)
--
--
5-17
A CAUTION:
Adding only plain water to your cooling system
can be dangerous. Plain water,or some other
liquid like alcohol, can
boil before the proper
coolant mix will. Your vehicle's coolant warning
system is set for the proper coolantmix. With
plain water or the wrong mix, your engine could
get too hot but you wouldn't get the overheat
warning. Your engine could catchfire and you or
others could be burned. Use a 50/50 mix of clean
water andDEX-COOL antifreeze.
You can be burned if you spill coolant 01 lot
engine parts. Coolant contains ethyleneglycol
and it will burn if the engine parts arehot
enough. Don't spill coolant on
a hot engine.
TM
I NOTICE:
In cold weather, water can freeze and crack the
engine, radiator, heater coreand other parts.So
use the recommended coolant.
1. You can remove the coolant surge tank pressure cap
when the cooling system, including thecoolant surge
5-18
tank pressure cap and upperradiator hose, is no
longer hot. Turn the pressure cap slowly about
one-quarter turn to the left and then stop.
If you hear a hiss, wait for that to stop. A hiss means
there is still some pressure left.
2. Then keep turning the
pressure cap slowly, and
remove it.
3. Then fill the coolant surge tank with theproper mix,
up to the FULL COLD mark.
5-19
I
By this time, the coolant levelinside the coolant surge
tank may be lower.If the level is lower, add moreof the
proper mix to the coolant surgetank until the level
reaches the FULL COLD mark.
5. Then replace the
pressure cap. Besure the
pressure cap is tight.
I
4. With the coolant surge tank pressure cap
off, start
the engineand let it run until you can feel the upper
radiator hose getting hot. Watch out for the engine fan.
5-20
If a Tire Goes Flr
Changing a Flat Tire
It’s unusual for atire to “blow out” while you’re driving,
especially if you maintain your tires properly. If air goes
out of a tire, it’s much more likely to leakout slowly.
But if you should ever have a “blowout,” here are a few
tips about what to expect and what todo:
If a tire goes rlat, avoid further tire and wheel damage
by driving slowly to a level place. Turn on your hazard
warning flashers.
If a fronttire fails, the flat tire will create a drag that
pulls the vehicle toward thatside. Take your foot off the
accelerator pedal and grip the steering wheel firmly.
Steer to maintain lane position, and then gently brake to
a stop well out of the traffic lane.
A rear blowout, particularly on a curve, acts much likea
skid and mayrequire the same correction you’d use in a
skid. In any rear blowout, remove your foot from the
accelerator pedal. Get the vehicle under control by
steering the way you wantthe vehicle to go. It may be
very bumpy and noisy, but you can still steer. Gently
brake to a stop -- well off the road if possible.
If a tire goes flat, thenext part shows how to use your
jacking equipment to change a flattire safely.
I
Changing a tire can cause an injury. The
vehicle
can slip off the jack and
roll over you or other
people. You and they could bebadly injured.
Find a level place to change yourtire. To help
prevent thevehicle from moving:
1. Set the parking brakefirmly.
2. Put an automatic transaxle
shift lever in
PARK (P), or shift a manual transaxle to
FIRST (1) or REVERSE (R).
3. l b r n off the engine.
To be even more certain thevehicle won’t move,
you can putblocks at the front and
rear of the
tire farthest away from the one
being changed.
That would be the tire on the other side
of the
vehicle, at the oppositeend.
5-21
need is inthe t&. Turn
the center retainer nuton
the compact spare cover
counterclockwise to
remove it.
Lift and remove the cover.See “Compact Spare Tire”
later in this section for more information aboutthe
compact spare.
The following steps willtell you how to usethe jack and
change a tire.
5-22
Remove thejack and wheel wrenchfrom the trunk. Yo1
vehicle’s jack and wheel wrench are stored in a foam
tray. Remove the band around the
jack.
Turn the wing nut
counterclockwise and
remove it. Then lift off the
adapter and remove the
spare tire.
The tools you’ll be using include the
jack (A) and wheel
wrench (B).
5-23
Removing the Fiat Tire and Installingthe
Spare Tire
Remove the wheel nut
caps (you may needto
use the wheel wrenchto
loosen and remove
them, if your fingers do
not fit into this small
area).
2 . Then use the wheel wrench to loosen all the wheel
nuts. Don’t remove them yet.
L 3 A
1-1
18” (46cm)
3. On some models, a cover plate must be removedbto
find the wheel nuts. Carefully use
the wedge endof
the wheel wrench to pry it off.
18” (46cm)
4. Position the jack and raisethe jack head until it fits
firmly into the notch in the vehicle’s frame nearest
the flat tire. Put the compact sparc *re1 LT you.
1
Getting undera vehicle when itis jacked up is
dangerous. If the vehicleslips off the jack, you
could be badly injured or killed. Never get under
a vehicle when itis supported onlyby a jack.
I
I
5-25
II NOTICE:
Raising yourvehicle with the jack improperly
positioned will damage thevehicle or may allow
the vehicle to falloff the jack.Be sure tofit the
jack lift head into the properlocation before
raising yourvehicle.
Do not jack orlift the vehicle usingthe oil pan.
Pans could crack andbegin to leakfluid.
5-26
1
I
A
n
5. Raise the vehicle by rotating the wheel wrench
clockwise. Raise the vehicle far enough
off the ground
so there is enough room for the spare tireto fit.
8. Remove any rust or dirt
6. Remove all of the wheel nuts.
from the wheel bolts,
mounting surfaces and
spare wheel.
A CAUTION:
-
I
-
7. Remove the wheel cover from the wheel, if your
vehicle has them. Then remove the flat tire.
Rust or dirton thewheel, or on the parts to which
it is fastened, can make thewheel nuts become
loose after a time. The wheel could comeoff and
cause an accident. When you change a wheel,
remove any rust or dirtfrom theplaces where the
wheel attaches to thevehicle. In anemergency, you
can use a cloth or a paper towel to dothis; but be
sure touse a scraper orwire brush later, if you
need to, to get all the rust or dirtoff.
5-27
Never use oil or grease on stud! r nuts. If you
do, the nuts might come loose. Your wheel could
fall off, causing a serious accident.
Replace the wheel nuts
with the rounded end
of the nuts toward the
wheel. Tighten each
nut by hand or with
the wheel wrench
until the wheel is held
against the hub.
10. Lower the vehicle by rotating the wheel wrench
counterclockwise. Lower thejack completely.
11. Tighten the wheel nuts
firmly in acriss-cross
sequence, as shown.
NOTICE:
Improperly tightenedwheel nuts can lead to
brake pulsation and rotor damage.
To avoid
expensive brake repairs, evenly tighten thewheel
nuts in the proper sequence and to the proper
torque specification.
A CAU
[ON:
Incorrect wheel nuts or improperly tightened
wheel nuts can cause the
wheel to become loose
and even come off. This could lead toan accident.
Be sure touse the correctwheel nuts. Ifyou have
to replace them,be sure toget new GM original
equipment wheel nuts.
Stop somewhere as soonas you can and have
the nuts tightenedwith a torque wrench to
100 Ib-ft (140 N-m).
Don’t try to put a wheel cover on your compact spare
tire. It won’tfit. Store the wheel cover and wheelnut
caps in the trunk until you have theflat tire repaired
or replaced.
NOTICE:
Wheel coverswon’t fit on your compact spare.
If you try to puta wheel cover onyour compact
spare, you could damage thecover or the spare.
5-29
Storing theFlat Tire and Tools
A CAUTION:
Storing ajack, a tire or other equipment in the
passenger compartmentof the vehicle could
cause injury. In a suddenstop or colli.sion, loose
equipment could strike someone. Store all these
in the proper place.
A.Wrench
E. Extension
B. Jack
E WingBolt
C . Flat Road Tire
G . Cover
D. Adapter
H. Nut
Store the flat tire in the compact spare tire compartment
and securethe adapter, extension and wing bolt
(if required). Store the jack and wheel wrench inthe
foam tray.
5-30
oring thc “,P;
e Tire and Tools
m\
G
F
B
Storing ajack, a tireor other equipment in the
passenger compartmentof the vehicle could
cause injury. In a suddenstop or collision, loose
equipment could strike someone. Store all these
in the proper place.
The compact spare is for temporary use only.Replace
the compact spare tire with a full-size tire as soon as you
can. See “Compact Spare Tire” in the Index. See the
storage instructions label to replace your compact spare
into your trunk properly.
A.Wrench
E. Wing Bolt
B. Jack
E Cover
C. Spare Tire
G. Nut
D. Adapter
5-31
Compact Spare Tire
Although the compactspare tire was fully inflated
when your vehicle was new, can
it lose air after a time.
Check the inflation pressure regularly.It should be
60 psi (420 e a ) .
After installing the compact spare on your vehicle, you
should stop as soon as
possible and make sure your
spare tire is correctly inflated. The compact spare is
made to perform well at posted speed limitsfor
distances up to 3,000 miles (5 000 km), so you can
finish your trip and have yourfull-size tire repaired or
replaced where you want.Of course, it’s best toreplace
your spare witha full-size tire as soon as you can. Your
spare will last longer and be in good shape in
case you
need it again.
NOTICE:
When the compact spareis installed, don’t take
your vehicle through an automaticcar wash with
guide rails. The compact spare can
get caught on
the rails. That can damage the tire and
wheel,
and maybe other partsof your vehicle.
Don’t use your compact spareon other vehicles.
And don’t mix your compact sparetire or wheel with
other wheels or tires. They won’t fit. Keep your spare
tire and its wheel together.
I NOTICE:
Tire chainswon’t fit your compact spare.
Using
them can damage yourvehicle and can damage
the chainstoo. Don’t use tire chains on your
compact spare.
5-32
If You’re Stuck: In Sand, Mud,
Ice or Snow
NOTICE:
What you don’t want to do when your vehicle is stuck is
to spin your wheels too fast. Themethod known as
“rocking” can help you get out when you’re stuck, but
you rr t use caution.
Spinning your wheels can destroy parts
of your
vehicle as well as the tires. If you spin thewheels
too fast while shifting yourtransaxle back and
forth, you can destroy your transaxle.
For informationabout using tire chains on your vehicle,
see “Tire Chains” in the Index.
If you let your tires spinat high speed, theycan
explode, and you or others couldbe injured. And,
the transaxle or other parts
of the vehicle can
overheat. That could causean engine
compartment fire or other damage. When
you’re
stuck, spin the wheels
as little as possible. Don’t
35 mph (55 k d h ) as shown
spin the wheels above
on the speedometer.
Rocking your, vehicle to get it out:
First, turn your steering wheel left and
right. That will
clear the area around yourfront wheels. Then shift back
and forth between REVERSE(R) and a forward gear (or
with a manual transaxle, between mRST (1) or
SECOND ( 2 ) and REVERSE(R)), spinning the wheels
as little aspossible. (If your vehicle hasthe Enhanced
Traction System, shift back and forth between
REVERSE (R) and FIRST (1) or SECOND (2),
spinning the wheels as littleas possible.) Release the
,acceleratorpedal while you shift, and press lightly on
the accelerator pedal when the transaxle is in gear. If
that doesn’t get you out after a few tries, you may need
to be towed out. If you do need to be towedout, see
“Towing Your Vehicle” inthe Index.
5-33
NOTES
5-34
0Section 6
Service and Appearance Care
Here you will find information about the care of your
Chevrolet. This section begins with service andfuel
to check important
information, and then it shows how
fluid and lubricant levels. There is also technical
information about yourvehicle, and apart devoted to its
appearance care.
Service
Your Chevrolet dealer knows your vehicle
best and wants
you to be happy with it. We hope you’ll goto your dealer
for all your service needs.You’ll get genuine GM parts
and GM-trained and supported service people.
We hope you’ll want to keep your GM vehicle all GM.
Genuine GM parts have one of these marks:
Doing Your Own Service Work
If you want to do some of your own service work, you’ll
want .to get the proper Chevrolet Service Manual. It tells
you much more about howto service your Chevrolet than
this manual can.To order the proper service manual, see
“Service and Owner Publications”in the Index.
Your vehicle has an airbag system. Before attempting to
do your own service work, see “ServicingYour Air-Bag
Equipped Chevrolet”in the Index.
You should keep a record with all partsreceipts and list
the mileage and thedate of any service work you
perform. See “Maintenance Record” in the Index.
V
Delco
6-1
could provide improved driveability and emission control
system protection compared to other gasolines.
You can be injured and your vehicle could be
damaged if you tryto do service work on a
vehicle without knowing enough about it.
0 Be sure you have sufficient knowledge,
experience, and the proper replacement
parts and tools before you attempt any
vehicle maintenance task.
0 Be sure to use the proper nuts, bolts and
other fasteners. “English” and “metric”
fasteners can be easily confused.
If you use
the wrong fasteners, parts can later break
or falloff. You could be hurt.
Fuel
Use regular unleaded gasoline rated at 87 octane or higher.
At a minimum,it should meet specifications ASTM D4814
in the United States and CGSB 3.5-M93 in Canada.
Improved gasoline specifications have been developed by
the American Automobile Manufacturers Association
(AAMA) for better vehicle performance and engine ,
protection. Gasolines meeting the AAMA specification
6-2
Be sure the postedoctane is at least 87. If the octane is
less than 87, you may geta heavy knocking noise when
you drive. If it’s badenough, it can damage your engine.
If you’re usingfuel rated at 87 octane or higher and you
still hear heavy knocking, yourengine needs service.
But don’t worryif you hear a little pinging noise when
you’re accelerating or driving upa hill. That’s normal,
and you don’t haveto buy a higher octane fuel to get rid
of pinging. It’s the heavy, constant knock that means
you havea problem.
If your vehicleis certified to meet California Emission
Standards (indicatedon the underhood tune-uplabel), it
is designed to operate on fuels that meet California
specifications. If such fuels are not available instates
adopting California emissions standards, your vehicle
will operate satisfactorily onfuels meeting federal
specifications,but ‘emissioncontrol system performance
may be affected. The malfunction indicator
lamp on
your instrument panel may
turn on and/or your vehicle
may fail a smog-check test. If this occurs, return to your
authorized Chevroletdealer for diagnosis to determine
the causeof failure. In the event it is determined that the;
cause of the conditionis the type of fuels used, repairs
may notbe covered by your warranty.
Fuels in Foreign Countries
In Canada, some gasolines contain an octane-enhancing
additive called MMT. If you use suchfuels, your
emission control system performance may deteriorate
and the malfunction indicatorlamp on your instrument
panel may turn on. If this happens, returnto your
authorized Chevroletdealer for service.
To provide cleaner air, all gasolinesare now required to
contain additives that willhelp prevent deposits from
forming in yourengine and fuel system, allowing your
emission control system to function properly. Therefore,
you should nothave to add anything to the fuel. In
addition, gasolines containing oxygenates, such as ethers
and ethanol, and reformulated gasolines may be
available in yourarea to help clean the air. General
Motors recommends that you use
these gasolines if they
c~ lply with the specifications described earlier.
7NOTICE:
I
I
If you plan on driving in another country outside the
United States or Canada, the proper
fuel may be hardto
find. Never use leaded gasoline
or any other fuel not
recommended in the previous texton fuel. Costly repairs
caused by use of improperfuel wouldn’t be covered by
your warranty.
To check on fuel availability, ask an auto club,or
contact a major oil company that does business in the
country where you’ll be driving.
You can also write us at the following addressfor
advice. Just tell us where you’re going and give your
Vehicle Identification Number (VIN).
General Motors Overseas Distribution Corporation,
North American ExportSales (NAES)
1908 Colonel Sam Drive
Oshawa, Ontario LlH 8P7
Your vehicle was not designed for fuel that
contains methanol. Don’t use it. It
can corrode
metal parts in your fuelsystem and also damage
plastic and rubber parts. That damage wouldn’t
be covered under your warranty.
6-3
Filling Your Tank
The cap is behind a hingeddoor on the rightside of
your vehicle.
While refueling, hang the tethered
cap inside the
fuel door.
Gasoline vapor is highly flammable. It burns
violently, and that can cause very bad injuries.
Don't smoke if you'renear gasoline or refueling
your vehicle. Keepsparks, flames, and smoking
materials away from gasoline.
To take off thecap, turn it slowly to theleft
(counterclockwise).
6-4
-
A
:AUTION:
If you get gasolineon yourself and then
something ignites it,you could be badly burned.
Gasoline can spray out
on you if you open the
fuel filler cap too quickly.This spray can happen
if your tank is nearly full, and is more likely in
hot weather. Open thefuel filler cap slowly and
wait for any“hiss” noise to stop. Then unscrew
the cap all the
way.
Be careful not to spill gasoline. Clean gasoline from
painted surfaces as soon aspossible. See “Cleaning the
Outside of Your Chevrolet” in the Index.
When you put the capback on, turn it to the right until
you hear at least three clicks. Make sure you fully install
the cap. The diagnostic system can determine if the fuel
cap has beenleft off or improperly installed. This would
allow fuel to evaporate into the atmosphere. See
“Malfunction Indicator Lamp” inthe Index.
NOTICE:
If you need a new cap, be sure toget the right
type. Your dealer canget onefor you. If you get
the wrong type, it may not
fit or have proper
venting, and yourfuel tank andemissions system
might be damaged.
6-5
Hood Release
Checking Things Under the Hood
1
An electric fan under thehood can start up and
injure you even when the engineis not running.
Keep hands, clothing andtools away fromany
underhood electric fan.
A
CAUTION:
- Things that burn can get on
hot engine parts and
start a fire. These include liquids likegasoline,
oil, coolant, brake fluid, windshield washer and
other fluids, and plastic or rubber. You or others
could be burned.Be careful not to dropor spill
things that will burn ontoa hot engine.
The following sections tell you how to check fluids,
lubricants and important parts underhood.
6-6
1
To open the hood, first pull
the handle inside the
vehicle.
Lift the hood, release the
hood prop from its retainer
and put the hood prop into
the slot in the hood.
Use the prop rod sleeve
when handlingthe prop rod.
I
'
Before closing the hood, be sure all the filler caps are on
properly. Thenlift the hood to relieve pressure on the
Then go to the front of the vehicle and lift the secondary hood prop. Remove
fie hood prop from theslot in the
hood release handle.
return
the
and
hood
prop
its to retainer. Lower the hood
8 to 10 inches (20 to*25kn) above the vehicle and
To make sure that the secondary hood release handle
release
so that it will latch fully. Check to make sure the
works properly,lubricate the hood latch at least once
hood is closed and repeatif necessary.
a year.
6-7
2.2L Engine (Code 4)
When you open the hood, you’ll see:
A.
B.
C.
D.
Coolant Surge Tank
Power Steering Fluid Reservoir
Automatic Transaxle Fluid Dipstick (if equipped)
Engine Oil FillCapDipstick
E.
F.
G.
H.
I.
Brake Fluid Reservoir
Hydraulic Clutch Fluid Reservoir (if equipped)
Air Cleaner
Battery
Windshield Washer Fluid Reservoir
2.4L Engine (Code T)
When you open the hood, you’ll see:
I
A.
B.
C.
D.
Coolant Surge Tank
Engine Oil Fill Cap
Engine Oil Dipstick
Power Steering Fluid Reservoir
E.
E
G.
H.
I.
Brake Fluid Reservoir
Hydraulic Clutch Fluid Reservoir (if equipped)
Battery
Air Cleaner
Windshield Washer Fluid Reservoir
6-9
Engine Oil
CHECK
OIL
If the CHECK OIL light on
the instrument panel comes
on, it means you need to
check your engineoil level
right away. For more
information, see “Check Oil
Light” in the Index.You
should check your engine
oil level regularly; this is an
added reminder.
It’s a good ideato check your engine oil every time you
get fuel. In orderto get an accurate reading, the
oil must
be warm and the vehicle must be on level ground.
Check the oil here if you
have a 2.2L engine.
Check the oil here if you have a2.4L engine, the
dipstick’s handle will be a yellow ring.
Turn off the engine and give the
oil a few minutesto
drain backinto the oil pan. If you don’t, the oil dipstick
might not show the actual level.
Checking Engine Oil
When to Add Oil
Pull out the dipstick and clean it with a paper towelor
cloth, then push it back in all the way. Remove it again,
keeping the tip down, and check the level.
If the oil is ator below the ADD mark, then you’ll need
to add some oil. But you must use the right kind.
This
part explains what kind
of oil to use. For crankcase
capacity, see “Capacities and Specifications”in the Index.
~~
NOTICE:
Don’t addtoo much oil. If your enginehas so
much oil thatthe oil level gets above the upper
mark that shows the proper operating range,
your enginecould be damaged.
6-11
This is where you addoil if you have a 2.2L engine.
This is where you add
oil if you have a 2.4L engine.
Just fill it enoughto put the level somewhere in the
proper operating range. Pushthe dipstick all the way
back in when you’re through.
6-12
What Kind of Oil to Use
Oils recommended for your vehicle can be identified by
looking for the “Starburst” symbol.This symbol
indicates that the oil has been certified by the American
Petroleum Institute (API). Do not use anyoil which
does not carry this Starburst symbol.
If you change your own oil,
be sure you useoil that has
the Starburst symbol on the
front of the oil container. If
you have youroil changed
for you, be sure theoil put
into your engine is
American Petroleum
Institute certified for
gasoline engines.
RECOMMENDED SAE VISCOSITY GRADEENGINE OILS
FOR BEST FUEL ECONOMY AND COLD STARTING, SELECT THE LOWEST
SAE VISCOSITY GRADE OIL FOR THE EXPECTED TEMPERATURE RANGE.
-
WOK
FOR THIS
SYMBOL
HOT
WEATHER
f°F
+ 100+ BO -
I
-
You should also use the proper viscosityoil for your
vehicle, as shown in the following chart:
‘I
SAE 1UW-30
111
SAE&-~
PREFERRED
WEATHER
DO NOT USE SAE 2OW-50 OR ANY OTHER
GRADE OIL NOT RECOMMENDED
6-13
As shown inthe chart, S A E 5W-30 is best foryour
vehicle. However, you can use SAE 1OW-30 if it’s going
an oil
to be 0°F (-18OC) or above. These numbers on
container showits viscosity, or thickness.Do not use
other viscosity oils, suchas SAE 2OW-50.
NOTICE:
Use only engine oil with the American Petroleum
Institute Certified For Gasoline Engines
46Starburst” symbol. Failureuse
to the
recommended oil can result in engine damage not
covered by your warranty.
GM Goodwrench@oil meets all the requirements for
your vehicle.
Engine Oil Additives
When to Change EngineOil
See if anyone of these is true for you:
0
Most trips areless than 5 to 10 miles (8 to 16 km).
This is particularly important when outside
temperatures are below freezing.
0
Most trips include extensive idling (such as frequent
driving in stop-and-go traffic).
0
Most trips are through dusty areas.
0
You frequently tow a trailer or use a carrier on top
of
your vehicle.
0
The vehicle is used
for delivery service, police, taxi
or other commercial application.
Driving under these conditions causes engine
oil to
break down sooner. If anyone of these is truefor your
vehicle, then you need to change your oil and filter
every 3,000 miles (5 000 km) or 3 months -- whichever
occurs first.
Don’t add anything to your oil. Your Chevrolet dealer is If none of them is true, change the oil and filter every
ready to advise if you think something should be added. 7,500 miles (12 500 km) or 12 months -- whichever
occurs first. Drivinga vehicle with a fully warmed
engine under highway conditions causes engine oil to
break down slower.
6-14
What to Do with Used Oil
Air Cleaner
Did you know that used engine oil contains certain
elements that may be unhealthy
for your skin and could
even cause cancer? Don’t let used oil stay on your skin
for very long. Clean your skin and nails with soap and
water, or a good hand cleaner. Washor properly throw
away clothing or rags containing used engine oil. (See
the manufacturer’s warnings about
the use and disposal
of oil products.)
Used oil can be a real threat to the environment.If you
change your ownoil, be sure to drain all free-flowingoil
from the filter before disposal. Don’t ever dispose
of oil
it on the ground, into
by putting it in the trash, pouring
sewers, or into streams or bodiesof water. Instead,
recycle it by taking it toa place that collects usedoil. If
you have a problem properly disposingof your used oil,
ask your dealer,a service station ora local recycling
center for help.
The air cleaneris located on the driver’s sideof the
engine compartment near the battery.
A CAUTION:
- m
Operating theengine with the aircleaner off can
cause you or others tobe burned. The air cleaner
not only cleans the air, it stops flameif the engine
backfires. If it isn’t there, and theengine
backfires, you could be burned. Don’t drive with
it off, and be careful working onthe engine with
the air cleaner off.
To check or replace the filter, remove the screws that
hold the cover onand lift thecover. Be sure toreinstall
the air cleaner filter and replacethe cover tightly.
Refer to the Maintenance Schedule todetermine when to
replace the air filter.
See “Scheduled Maintenance Services” in the Index.
6-16
I NOTICE:
If the air cleaneris off, a backfire can causea
damaging engine fire. And, dirt caneasily get
into yourengine, which will damage it. Always
have the aircleaner inplace when you’re driving.
I
Automatic Transaxle Fluid
(Except 2.4L CodeT Engine)
When to Check and
~
anee
A good time to check your automauc transaxle fluid
level is when the engine oil is changed.
Change both the fluid and filter every50,000 miles
(83 000 km)if the vehicle is mainly driven under one or
more of these conditions:
In heavy city traffic where the outside temperature
regularly reaches 90°F (32°C) or higher.
In hilly or mountainous terrain.
When doing frequent trailer towing.
Uses such as found in taxi, police or delivery service.
If you do not use your vehicle under any of these
conditions, the fluid and filterdo not require changing.
See “Scheduled Maintenance Services’’ in the Index.
How to Check
Because this operation can be
a little difficult, you may
choose to have this done
at your Chevrolet dealership
Service Department.
If you do it yourself, be sure to follow all the instructions
here, or you could get a false reading on the dipstick.
NOTICE:
Too much or too little fluid can damage your
transaxle. Too much can mean that someof the
fluid could come out and fall on hot engine parts
or exhaust system parts, starting a fire. Be sure
to
get an accurate readingif you check your
transaxle fluid.
Wait at least 30 minutes before checking the transaxle
fluid level if you have been driving:
When outside temperatures are above 90°F (32°C).
At high speed for quite a while.
In heavy traffic -- especially in hot weather.
While pulling a trailer.
To get the right reading, the fluid should be at normal
operating temperature,which is 180”F to 200”F
(82°C to 93°C).
Get the vehicle warmed up by driving about 15 miles
(24 km) when outside temperatures are above50”F
(10°C). If it’s colder than 50°F (lOOC), you may have
to drive longer.
6-17
Checking the Fluid Level
0
Park your vehicle on a level place. Keep the engine
running.
With the parking brake applied, place the shift lever
in PARK (P).
0
With your foot onthe brake pedal, move the shift
lever through each gear range, pausing for about
three seconds in each range. Then, position the shift
lever in PARK (P).
0
Let the engine run at idle forthree to five minutes.
.
2. Push it back in all the way, wait three seconds and
then pull it back out again.
3. Check both sides of
the dipstick, and
read the lower
level. The fluid
level must be in the
cross-hatched area.
Then, without shuttingoff the engine, follow these steps:
1. If you have a
three-speed
automatic
transaxle, the
handle on the
transaxle dipstic.k
is a red ring. Pull
out the dipstick and
wipe it with a clean
rag or paper towel.
6-18
4. If the fluid level is in the acceptable range, push the
dipstick back in all the way.
How to Add Fluid
Refer to theMaintenance Schedule to determine what
kind of transaxle fluid to use. See “Recommended
Fluids and Lubricants” in the Index.
If the fluid level is low, add only enough of the proper
fluid to bring the level into the cross-hatched area on
the dipstick.
1. Pull out the dipstick.
2. Using a long-neck funnel, add enough fluid at the
dipstick hole to bring it to the proper level.
It doesn’t take much fluid, generally less than a pint
(OSL). Don’t overfill. We recommend you use only fluid
labeled DEXRON@-111, because fluid with that
label is made especially for your automatic transaxle.
Damage caused by fluid other than DEXRON@-I11is
not covered by your new vehicle warranty.
0
After adding fluid, recheck the fluid level as
described under “How to Check.”
Automatic Transaxle Fluid
(2.4L Code T Engine Only)
If you have the optional 2.4L Code T engine (see
“Engine Identification” in the Index) and an automatic
transaxle, it is not necessary to check the transaxle fluid
level. A transaxle fluid leak is the only reason for fluid
loss. If a leak occurs, take the vehicle to your Chevrolet
dealer Service Department and have it repaired as soon
as possible. You may also have your fluid level checked
by your dealer or service center when you have your
oil changed.
Manual Transaxle Fluid
When to Check
A good time to have it checked is when the engine oil is
changed. However, the fluid in your manual transaxle
doesn’t require changing.
When the correct fluid level is obtained, push the
dipstick back in all the way.
6-19
How to Check
Because this operationcan be a little difficult,you may
choose to have this done at your Chevrolet dealership
Service Department.
If you do it yourself, be sure to follow all the
instructions here,or you could geta false reading on
the dipstick.
NOTICE:
Then, follow these steps:
1. The manual transaxle
dipstick is located
below the brake
master cylinder,
near therear of the
transaxle case. Flip the
handle up and then
pull out the dipstick
and clean it witha rag
or paper towel.
Too much or too little fluid can damage your
transaxle. Too much can mean that some
of the
2. Push it back in all the way and remove it.
fluid could comeout and fall on hot engine parts
or exhaust system parts, starting a fire. Be sure to
get an accurate reading if you check your
transaxle fluid.
Check the fluid level only when your engine
is off, the
vehicle is parked on a level place and the transaxle
is
cool enough for you to rest your fingers on the
transaxle case.
6-20
How to Add Fluid
Here’s how to add fluid. Refer to the Maintenance
Schedule to determinewhat kind of fluid to use. See
“Recommended Fluidsand Lubricants” in the Index.
1. Remove the dipstick by flipping the handleup and
then pulling the dipstick out.
2. Add fluid at the dipstick hole.
Add only enough fluid tobring the fluid level up to
the FULL mark on the dipstick.
3. Push the dipstick back in all the way; then flip the
handle downto lock the dipstick in place.
Hydraulic Clutch
3. Check both sidesof the dipstick and read the lower
level. The fluid level must be
between the ADD and
FULL marks. (Note: Fluid may appear at the bottom
of the dipstick even when the fluid level is several
pints low.)
The hydraulic clutch linkagein your vehicle is
self-adjusting. The clutch master cylinder reservoiris
filled with hydraulic clutch fluid.
4. If the fluid level is whereit should be, push the
dipstick back in all the way and flip the handle
down. If the fluid levelis low, add more fluid as
described in thenext steps.
A fluid lossin this system could indicatea problem.
Have the system inspected and repaired.
It isn’t a good idea to “top off’ your clutch fluid.Adding
fluid won’t correct a leak.
6-21
When to Check and What to Use
Engine Coolant
The coolingsystem in your vehicleis filled with new
DEX-COOL TM (orange-colored, silicate-free) engine
coolant. This coolant is designed to remain in your
vehicle for 5 years or 100,000miles ( 166 000 km),
whichever occurs first.
The followingexplains your cooling system and how to
add coolant when it is low. If you have a problem with
engine overheating, see “Engine
Overheating” in
the Index.
A 50/50 mixture of water and the proper coolant for
your Chevrolet will:
Give freezing protection down to -34°F (-37OC).
Refer to the Maintenance Schedule to determine how
often you should check the fluid levelin your clutch
master cylinder reservoir and forthe proper fluid. See
“Owner Checks and Services”
and “Recommended
Fluids and Lubricants” in the Index.
How to Check
You do not need to checkthe fluid level unless you
suspect a clutch problem. To check the fluid level,take
the cap off.If the fluid reaches the stepinside the
reservoir, the fluid level is correct.
6-22
e Give boiling protection up to 265 “F (129°C).
0
Protect against rust and corrosion.
e Help keep the proper engine temperature.
e Let the warning lights and gages work as
they should.
NOTICE:
When addingcoolant it is important that you
use DEX-COOL (orange-colored, silicate-free)
coolant meeting GM Specification 6277M.
If silicated coolant is added to thesystem,
premature engine, heater core or radiator
corrosion may result. In addition, the engine
coolant will require change sooner at
30,000 miles (50 000 km) or24 months
whichever occurs first.
TM
--
What toUse
Adding only plain water to yourcooling system
can be dangerous. Plain water, or some other
liquid like alcohol, can boil before the proper
coolant mix will. Your vehicle’scoolant warning
system is set for the propercoolant mix. With
plain water or the wrongmix, your engine could
get too hot butyou wouldn’t get the overheat
warning. Your engine could catch fire andyou or
others could be burned. Use a 50/50 mix of clean
water andDEX-COOL TM (orange-colored,
silicate-free) antifreeze.
Use a mixture of one-half clean water (preferably
distilled) and one-half DEX-COOL (orange-colored,
silicate-free) antifreeze that meetsGM Specification
6277M, which won’t damage aluminum parts. Use
GM Engine Coolant Supplement (sealer)(GM Part
No. 3634621) with any complete coolant change.If you
use this mixture, you don’t need to add anything
else.
TM
6-23
Checking Coolant
NOTICE:
If you use an impropercoolant mix, your engine
could overheat andbe badly damaged. The
repair cost wouldn't be covered by your
warranty. Too much water in the mix can freeze
and crack theengine, radiator, heatercore and
other parts.
If you have to add coolant more than four
times a year,
have your dealer check your coolingsystem.
NOTICE:
If you use the propercoolant, you don't have to
add extra inhibitorsor additives which claim to
improve the system. These can be harmful.
The surge tank is located on the passenger side of the
engine compartment.
I
"urning the surge tankpressure cap when the
engine and radiator are hot can
allow steam and
scalding liquids toblow out and burnyou badly.
Never turn the surge tank pressure capeven a
little when the engine and radiator arehot.
--
6-24
--
When your engine iscold, the coolant level should be at
the FULL COLD mark.
If this light comeson, it
means you’re low on engine
coolant.
See “Low Coolant Light” in
the Index.
‘A
CAUTION:
You can be burned if you spill coolant on hot
engine parts. Coolant contains ethylene glycol,
and itwill burn if the engine pasts are hot
enough. Don’t spill coolant on a hot engine.
When replacing the pressure cap, make sure isit tight.
Surge Tank Pressure Cap
Adding Coolant
If you need more coolant, add the proper mix
theat
surge tank, but only whenthe engine is cool.
Your surge tank capis a 15 psi (105 kPa)
pressure-type cap andmust betightly installed to
prevent coolant loss and possible engine damage
from overheating.
When you replace your surge tank pressure cap,GM
a
cap is recommended.
6-25
Thermostat
When to Check Power Steering Fluid
Engine coolanttemperature is controlled by a thermostat
in the enginecoolant system. The thermostat stops the
flow of coolant through the radiator until the coolant
reaches a preset temperature.
It is not necessary to regularly check powersteering
fluid unless you suspect there is a leak in the system or
you hear an unusual noise. A fluid loss inthis system
could indicate a problem. Have the systeminspected
and repaired.
When you replace your thermostat, an AC’ thermostat
is recommended.
Power Steering Fluid
How To Check Power Steering Fluid
When the engine compartment is cool, unscrew the cap
and wipe the dipstick with a clean rag.Replace the cap
and completely tighten it. Then removethe cap again
and look at the fluid level on the dipstick.
The levelshould be at the C mark. If necessary, add only
enough fluid to bring the level up to the mark.
What to Use
Refer to theMaintenance Schedule to determine what
kind of fluid touse. See “Recommended Fluids and
Lubricants” in the Index. Alwaysuse the proper fluid.
Failure to use the proper fluid can cause leaksand
damage hoses and seals.
6-26
Windshield Washer Fluid
What to Use
When you need windshield washer fluid, be sure to read
the manufacturer’s instructions before use. If you will be
operating your vehicle in an area where the temperature
may fall below freezing, use a fluid that has sufficient
protection against freezing.
NOTICE:
0
0
Adding Washer Fluid
Open the cap labeled
WASHER FLUID ONLY.
Add washer fluid until
the tank is full.
0
0
When using concentrated washerfluid,
follow the manufacturer’s instructions for
adding water.
Don’t mix water with ready-to-use washer
fluid. Water can cause the
solution to freeze
and damage your washer
fluid tank and
other partsof the washersystem. Also,
water doesn’t clean as well as washer fluid.
Fill your washer fluid tankonly 3/4 full
when it’s very cold. This allows for
expansion, which could damage the tankif
it is completely full.
Don’t use radiator antifreeze in your
windshield washer. It can damage your
washer system and paint.
6-27
Brakes
Brake Fluid
Your brake master cylinder
reservoir is here. It is filled
with DOT-3 brake fluid.
So, it isn’t a good idea to “top off’’ your brake fluid.
Adding brake fluid won’t correct a leak. If you add fluid
when your linings are worn, then you’ll have too much
fluid when you get new brake linings. You should add
(or remove) brake fluid, as necessary, only when work is
done on the brake hydraulic system.
If you have too much brake fluid, it can spill on
the engine. The fluid will burn if the engine is hot
enough. You or others could be burned, and your
vehicle could be damaged. Add brake fluid only
when work is done on the brake hydraulic system.
There are only two reasons why the brake fluid level in
the reservoir might go down. The first is that the brake
fluid goes down to an acceptable level during normal
brake lining wear. When new linings are put in, the fluid
level goes back up. The other reason is that fluid is
leaking out of the brake system. If it is,you should have
your brake system fixed, since a leak means that sooner
or later your brakes won’t work well, or won’t work
at all.
6-28
When your brake fluid falls to a low level, your brake
warning light will come on. See “Brake System Warning
Light” in the Index.
What to Add
When you do need brake fluid, use only DOT-3 brake
fluid -- such as Delco Supreme 11 (GM Part
No. 1052535). Use new brake fluid from a sealed
container only, and always clean the brake fluid
reservoir cap before removing it.
NOTICE:
@
I
1
With the wrong kind
of fluid inyour brake
system, your brakes may not work
well, or they
may not even work at all. This could causea
crash. Always use the proper brakefluid.
0
Using the wrong fluid can badly damage
brake system parts. Forexample, just a few
drops of mineral-based oil, such as engine
oil, in your brakesystem can damage brake
system parts so badly that they’ll have to be
replaced. Don’t let someone put in the
wrong kind of fluid.
If you spill brake fluid on your vehicle’s
painted surfaces, the paintfinish can be
damaged. Be careful not tospill brake
fluid onyour vehicle. If you do, wash it off
immediately. See “Appearance Care” in
the Index.
6-29
Brake Wear
Your Chevrolet has front disc brakes and rear
drum brakes.
NOTICE:
Continuing to drive with worn-out brake pads
Disc brake pads have built-in wear indicators that make a could result in costly brake repair.
high-pitched warning sound when the brake pads are
worn and new padsare needed. The sound may come and
Some driving conditions or climates may cause a brake
go or be heard all the time your vehicleis moving (except
when you are pushing on the brake pedal f i i l y ) .
squeal when the brakes are first applied or lightly
applied. This does not mean something is wrong with
your brakes.
The brake wear warning sound means that
sooner or later your brakes won’t work well.
That could lead toan accident. When you hear
the brake wear warning sound, have your
vehicle serviced.
L
Free movement of brake calipers and properly torqued
wheel nuts are necessary to help prevent brake
pulsation. When tires are rotated, inspect brake calipers
for movement, brake pads for wear, and evenly torque
wheel nuts in proper sequence to GM specifications.
Your rear drum brakes don’t have wear indicators, but if
you ever hear a rear brake rubbing noise, have the rear
brake linings inspected. Also, therear brake drums
should be removed and inspected each time the tires
are
removed for rotation or changing. When you have the
front brakes replaced, have the rear brakes inspected, too.
Brake linings should always be replaced as complete
axle sets.
6-30
Brake Pedal Travel
See your dealer if the brake pedal does not return to
normal height, or if there is a rapid increase in pedal
travel. This could be a sign of brake trouble.
Brake Adjustment
Every time you make a moderate brake stop, your disc
brakes adjust for wear. If you rarely make a moderate or
heavier stop, then your brakes might not adjust correctly.
If you drive in that way, then -- very carefully -- make
a few moderate brake stops about every 1,000 miles
(1 600 km), so your brakes will adjust properly.
If your brake pedal goes down farther than normal, your
rear drum brakes may need adjustment. Adjust them by
backing up and firmly applying the brakes a few times.
Replacing Brake System Parts
The braking system on a modern vehicle is complex. Its
many parts have tobe of top quality and work well
together if the vehicle is to have really good braking.
Vehicles we design and test have top-quality GM brake
parts in them, as your Chevrolet does when it is new.
When you replace parts of your braking system -- for
example, when your brake linings wear down and you
have to have new ones put in -- be sure you get new
genuine GM replacement parts. If you don’t, your
brakes may no longer work properly. For example, if
someone puts in brake linings that are wrong for your
vehicle, the balance between your front and rear brakes
can change -- for the worse. The braking performance
you’ve come to expect can change in many other ways if
someone puts in the wrong replacement brake parts.
Battery
Every new Chevrolet has a Delco Freedom@battery.
You never have to add water to one of these. When it’s
time for a new battery, we recommend a Delco
Freedom@battery. Get onethat has the replacement
number shown on the original battery’s label.
6-31
Vehicle Storage
If you’re not going to drive your vehicle for 25 days
or more, take off the black, negative (-) cable from
the battery. This will help keep your battery from
running down.
I
A CAUTION:
Batteries have acid that can burn you and gas
that can explode. You can be badly hurt if you
aren’t careful. See “Jump Starting” in the Index
for tips on working around a battery without
getting hurt.
Contact your dealer to learn how to prepare your vehicle
for longer storage periods.
Also, for your audio system, see “Theft-Deterrent
Feature” in the Index.
6-32
Bulb Replacement
Halogen Bulbs
Halogen bulbs have pressurized gas inside and
can burst if you drop or scratch thebulb. You or
others could be injured. Be sure to read and
follow the instructionson the bulbpackage.
Headlamps
For the type of bulb, see “Replacement Bulbs” in
the Index.
1. Remove the first bolt and carefully pry up the shield
that covers the headlamp assembly. Be careful not to
break the fasteners that hold the shield in place.
2. Remove the other bolt that anchors the headlamp
assembly. Pull the headlamp assembly toward the
front of the vehicle to access the bulb assembly.
3. Twist the bulb assembly one-eighth of a turn
counterclockwise and remove it fromthe
headlamp assembly.
Taillamps
For the type of bulb, see “Replacement Bulbs” in
the Index.
.. .
4. Disconnect the bulb base from the socket by lifting
the plastic locking tab.
5. Snap a new bulb into the socket.
6. Replace the bulb assembly by reversing
Steps 1 through 3.
1. Pull the carpet away from the rear of the trunk.
2. Remove the taillamp bulb assembly by turning it
one-quarter of a turn counterclockwise.
6-34
Windshield Wiper Blade Replacement
3. To remove the bulb, pull it out.
4. Push in new bulb.
5. Reverse all steps to replace the taillamp assembly.
Replacement blades come in different types and are
removed in different ways. For the proper type and
length, see “Capacities and Specifications” in the Index.
Here’s how to remove the Sheppard’s Hook type:
1. Pull the windshield wiper arm away from
the windshield.
2. Push the release lever and slide the wiper assembly
toward the driver’s side of the vehicle.
3. Install a new blade by reversing Steps 1 and 2.
6-35
Tires
We don’t make tires.Your new Chevrolet comes with
If
high-quality tires madeby a leading tire manufacturer.
you ever have questions about your tire warranty and
where to obtain service, see your Chevrolet Warranty
booklet for details.
L
0
0
Poorly maintained and improperly used tires
are dangerous.
0 Overloadingyour tires can cause
overheating as a result of too much friction.
You could havean air-out anda serious
accident, See “Loading Your Vehicle” in
the Index.
CAUTION: (Continued)
-
6-36
Underinflated tires pose the same danger as
overloaded tires. The resulting accident
could. causeserious injury. Check all tires
frequently to maintain the recommended
pressure. Tire pressure should be checked
when your tires arecold.
Overinflated tires are more likely to be
cut, punctured or broken by a sudden
impact such as when you hit a pothole.
Keep tires at the recommended pressure.
Worn, old tires can cause accidents. If your
tread is badly worn,or if your tires have
been damaged, replace them.
--
0
Inflation -- Tire Pressure
The Tire-Loading Information label which on
is the rear
edge of the driver’s door shows the correct inflation
pressures for your tires when they’re cold. “Cold”
means your vehicle has been sittingfor at least three
hours or driven no more than 1 mile (1.6 km).
NOTICE:
Don’t let anyone tell you that underinflation or
overinflation is all right. It’s not. If your tires
don’t have enough air (underinflation), you can
get the following:
Too much flexing
Too much heat
Tire overloading
Bad wear
Bad handling
Bad fuel economy.
NOTICE: (Continued)
NOTICE: (Continued)
If your tires have too muchair (overinflation),
you can get the following:
Unusual wear
Bad handling
Rough ride
Needless damage from road hazards.
When to Check
Check your tires once a month or more.
Don’t forget your compact spare tire.
It should be at
60 psi (420 P a ) .
How to Check
Use a good quality pocket-type gage to check tire
pressure. You can’t tell if your tires are properly inflated
simply by looking at them. Radial tires may look
properly inflated even when they’re underinflated.
Be sureto put the valve caps back on the valve stems.
They help prevent leaks by keeping out
dirt and
moisture.
6-37
Tire Inspection and Rotation
1
Tiresshouldbeinspectedevery 6,000 to 8,000 miles
(10 000 to 13 000 km) for any signsof unusual wear.
If unusual wearis present, rotate your tiresas soon as
possible and check wheel alignment. Also check for
damaged tires or wheels. See “When It’s Time
for New
Tires” and “Wheel Replacement” later in this section
for
more information.
When rotating your tires, always use the Correct rotation
pattern shown here.
in your tire
Don’t include the compact spare tire
rotation.
After the tires have been rotated, adjust the front and
rear inflation pressures as shown on the Tire-Loading
Information label. Make certain that all wheel nuts
are properly tightened. See “Wheel Nut Torque” in
the Index.
A CAUTION:
The purposeof regular rotation is to achieve more
uniform wearfor all tires on the vehicle.
The first
rotation is the most important. See “Scheduled
Maintenance Services”in the Indexfor scheduled
rotation intervals.
Rust or dirton a wheel, or on the parts to
which
it is fastened, can makewheel nuts become loose
after a time. The wheel could come off and cause
an accident. When you change a wheel, remove
any rust or dirt from
places where the wheel
attaches to thevehicle. In anemergency, you can
use a cloth or a paper towel to do this; but be
sure to use a scraper orwire brush later, if you
need to, to get all the rust or dirt
off. (See
“Changing a Flat Tire” in the Index.)
,
6-38
When It’s Time for New Tires
One way to tell when it’s
time for new tires isto
check the treadwear
indicators, which will
appear when your tires have
only 1/16 inch (1.6 mm) or
less of tread remaining.
You need a new tire if any
of the following statements
are true:
0
0
0
0
You can see the indicators at three or more places
around the tire.
You can see cord or fabric showing through the tire’s
rubber.
Buying New Tires
To find out what kind and size
of tires you need, look at
the Tire-Loading Information label.
The tires installed on your vehicle whenit was new had
a Tire Performance Criteria Specification (TPC Spec)
number on each tire’s sidewall. When you get new tires,
get ones with that same TPC Spec number. That way
your vehicle will continue to have tires that are designed
to give proper endurance, handling, speed rating,
traction, ride and other things during normal service on
your vehicle. If your tires have an all-season tread
design, the TPC number will
be followed by an “MS”
(for mud and snow).
If you ever replace your tires with those not having a
TPC Spec number, make sure they are the same size,
load range, speed rating and construction type (bias,
bias-belted or radial) as your original tires.
The tread or sidewall is cracked, cut or snagged deep
enough to show cordor fabric.
The tire has a bump, bulge or split.
The tire has a puncture, cut or other damage that can’t
be
repaired well because of the
size or location of the damage.
6-39
A CAUTION:
Mixing tires couldcause you to lose control while
driving. If you mix tires of different sizes or types
(radial and bias-belted tires), the vehicle may not
handle properly, andyou could have a crash.
Using tires of different
sizes may also cause
damage to your vehicle. Be sure to use the same
size and type tires on all four wheels.
It’s all right to drive with your compact spare,
though. It was developed for use on
your vehicle.
Uniform Tire Quality Grading
The following information relates to the system developed
by the United States National Highway Traffic Safety
Administration, which grades tires by treadwear, traction
and temperature performance. (This applies only to
vehicles sold in the United States.) The grades are molded
on the sidewalls of most passenger car tires.
The Uniform
Tire Quality Grading system does not applyto deep tread,
winter-type snow tires, space-saver or temporary use spare
tires, tires with nominal rim diameters of10 to 12 inches
(25 to 30 cm), or to some limited-production tires.
6-40
While the tires available on General Motors passenger
cars and light trucks may vary with respect to these
grades, they must also conform to Federal safety
requirements and additional General Motors Tire
Performance Criteria (TPC) standards.
Treadwear
The treadwear grade is a comparative rating based on the
wear rate of the tire when tested under controlled conditions
on a specified government test course. For example, a tire
graded 150 would wear one and a half (1 1/2) times as well
on the government course as a tire graded 100. The relative
of
performance of tires depends upon the actual conditions
their use, however, and may depart significantlyfiom the
norm due to variations in driving habits, service practices
and differences in road characteristics and climate.
-
Traction A, B, C
The traction grades, from highest to lowest, areA, B, and
C, and they represent the tire’s ability to stop on wet
pavement as measured under controlled conditions on k
specified government test surfacesof asphalt and concrete.
A tire marked C may have poor traction performance.
Warning: The traction grade assigned to this tire is based
on braking (straightahead) traction tests and does not
include cornering (turning) traction.
-
Temperature A, B, C
The temperature gradesare A (the highest),€3,and C,
representing the tire’s resistance tothe generation of
heat and its ability to dissipate heat when tested under
controlled conditions on a specified
indoor laboratory
test wheel. Sustained high temperature can cause the
material of the tire to degenerate and reduce tire
life, and
excessive temperature can lead to sudden tire failure.
The grade C corresponds to a level
of performance
which all passenger car tires must meet under the
Federal Motor Vehicle Safety StandardNo. 109. Grades
B and A represent higher levelsof performance on the
laboratory test wheel than the minimum required
by law.
Warning: The temperature gradefor this tire is
established for a tire that is properly inflated and not
overloaded. Excessive speed, underinflation, or
excessive loading,either separately or in combination,
can cause heat buildup and possible tire failure.
Wheel Alignment and TireBalare
The wheels on your vehicle were aligned and balancea
the longest tirelife
carefully at the factory to give you
and best overall performance.
In most cases, you will not need to have your wheels
aligned again. However,if you notice unusual tire wear
or your vehicle pulling one way
or the other, the
If you notice your
alignment may need to be reset.
vehicle vibrating when driving
on a smooth road, your
wheels may need to be rebalanced.
I
Wheel Replacement
Replace any wheel thatis bent, cracked,or badly rusted
or corroded.If wheel nutskeep coming loose, the wheel,
If the
wheel bolts and wheel nuts should be replaced.
wheel leaks air, replace it (except some aluminum
wheels, which can sometimes be repaired).See your
Chevrolet dealerif any of these conditions exist.
Your dealer will know the kindof wheel you need.
Each new wheel should havethe same load carrying
capacity, diameter, width, offset and be mounted the
same way as theone it replaces.
If you need to replace any
of your wheels, wheel bolts
or wheel nuts, replace them only with new
GM original
equipment parts. This way, you will be sure to have the
right wheel, wheel bolts and wheel nuts
for your
Chevrolet model.
6-41
Used Replacement Wheels
Using the wrong replacementwheels, wheel bolts
or wheel nuts on your vehicle can bedangerous.
It could affect the braking and handling
of your
vehicle, make your tireslose air and make
you
lose control. You could have a collision in which
you or others could be injured. Always use the
correct wheel, wheelbolts and wheel nuts for
replacement.
A CAUTION:
Putting a used wheel on yourvehicle is
dangerous. You can’t know how it’s been used or
how many miles it’s been driven. It could fail
suddenly and cause an accident. If you have to
replace a wheel, use a new GM original
equipment wheel.
NOTICE:
The wrongwheel can also cause problems
with
bearing life, brake cooling,
speedometer/odometer calibration, headlamp
aim, bumper height, vehicle ground clearance
and tire or tire chain clearance tobody
the and
chassis.
See “Changing a Flat Tire” in the Index for more
information.
6-42
-
Tire Chains
NOTICE:
If your Chevrolet hasP195/65R15 or P205/55R16
size tires, don’t use tire chains. Theycan damage
your vehicle.
If you have other tires, use tire chains only where
legal and only when you must. Use only SAE Class
“S” type chainsthat are the proper
size for your
tires. Install them onthe fronttires and tighten
them as tightly as possible with the endssecurely
fastened. Drive slowly and follow the chain
manufacturer’s instructions. If you can hear the
chains contacting yourvehicle, stop and retighten
them. If the contactcontinues, slow down until it
stops. Driving too fast or spinning the wheels with
chains onwill damage yourvehicle.
Appearance Care
Remember, cleaning products can be
hazardous. Some
are toxic. Others canburst into flame if you strike a
match or get them on a hot part of the vehicle. Some are
dangerous if you breathe their fumes in a closed space.
When you use anything froma container to clean your
Chevrolet, be sure to followthe manufacturer’s
warnings and instructions.And always open your doors
or windows when you’re cleaning the inside.
Never use these to clean your
vehicle:
Gasoline
Benzene
Naphtha
0
Carbon Tetrachloride
Acetone
0
Paint Thinner
Turpentine
LacquerThinner
0
Nail Polish Remover
They can allbe hazardous -- some more than
others -- and a e y can all damage your vehicle,too.
6-43
Don’t use any of these unless this manual says you can.
In many uses, these will damage your vehicle:
0
.
Alcohol
0
Use solvent-type cleaners in a well-ventilated area
only. If you use them, don’t saturate the stained area.
0
If a ring forms after spot cleaning, clean the entire
area immediately or it will set.
Laundry Soap
0
Bleach
Using Foam-Type Cleaner on Fabric
Reducing Agents
0
Vacuum and brush the area to remove any loose dirt.
0
Always clean a whole trim panel or section. Mask
surrounding trim along stitch or welt lines.
0
Mix Multi-Purpose Powdered Cleaner following the
directions on the container label.
0
Use suds only and apply with a clean sponge.
0
Don’t saturate the material.
0
Don’t rub it roughly.
Cleaning the Insideof Your Chevrolet
Use a vacuum cleaner often to get rid of dust and loose
dirt. Wipe vinyl or leather with a clean, damp cloth.
Your Chevrolet dealer has two GM cleaners, a
solvent-type spot lifter and a foam-type powdered
cleaner. They will clean normal spots and stains very
well. Do not use them on vinyl or leather.
Here are some cleaning tips:
0
As soon as you’ve cleaned the section, use a sponge
to remove the suds.
Always read the instructions on the cleaner label.
Clean up stains as soon as you can -- before they set.
0
Rinse the section with a clean, wet sponge.
Use a clean cloth or sponge, and change to a
clean area often. A soft brush may be used if stains
are stubborn.
0
Wipe off what’s left with a slightly damp paper towel
or cloth.
0
Then dry it immediately with a blow dryer.
0
Wipe with a clean cloth.
6-44
Using Solvent-Type Cleaner on Fabric
Special Cleaning Problems
First, see if you have to use solvent-type cleaner at all.
off better withjust
Some spots and stains will clean
water and mild soap.
Greasy orOily Stains
If you need to use a solvent:
Gently scrape excess soil from the trim material with
a clean, dull knife or scraper. Use very
little cleaner,
light pressure and cleancloths (preferably
cheesecloth). Cleaning shouldstart at the outside of
the stain, “feathering” toward the center. Keep
changing to a clean sectionof the cloth.
When you clean a stain from fabric, immediately
to help prevent a
dry the area with a blow dryer
cleaning ring.
Fabric Protection
Stains causedby grease, oil, butter, margarine, shoe
polish, coffee with cream, chewing gum, cosmetic
creams, vegetableoils, wax crayon, tar and asphaltcan
be removed as follows:
0
Carefully scrape off excess stain.
Follow the solvent-type instructions described
earlier.
Shoe polish, wax crayon, tar and asphalt will stain
if left ona vehicle’s seat fabric. They should be
removed as soon as possible. Be careful, because
the cleaner will dissolve them and may cause them
to spread.
Non-Greasy Stains
Your Chevrolet has upholstery that has been treated with
Stains causedby catsup, coffee (black), egg, fruit, fruit
Scotchgard” Fabric Protector, a3M product. It protects
fabrics by repelling oil and water, which are the carriers juice, milk, soft drinks, wine, vomit, urine and blood can
of most stains. Even with this protection, you still need be removed as follows:
to clean your upholstery often to keep it looking new.
Carefully scrape off excess stain, then sponge the
soiled area with cool water.
Further information on cleaning is available
by calling
1-800-433-3296 (in Minnesota, 1-800-642-6 167).
If a stain remains, follow the foam-type instructions
described earlier.
6-45
0
0
If an odor lingers after cleaning vomit or urine,
treat the area with a waterbaking soda solution:
1 teaspoon (5 ml) of baking soda to 1 cup (250 ml)
of lukewarm water.
If needed, clean lightly with solvent-type cleaner.
Combination Stains
Stains causedby candy, ice cream, mayonnaise, chili
be removed as follows:
sauce and unknown stains can
0
Carefully scrape off excess stain, then clean with
cool water and allow to dry.
0
If a stain remains, cleanit with solvent-type cleaner.
Cleaning Vinyl
Use warm water anda clean cloth.
Rub with a clean, damp cloth to remove dirt.You
may have to do it more than once.
.
0
Things like tar, asphalt and shoe polish will stainif
you don’t get them off quickly. Use
a clean cloth and
a GM VinylLeather Cleaner or equivalent product.
Cleaning theTop of the Instrument Panel
Use only mild soap and water to clean the top surfaces
of the instrument panel. Sprays containing silicones or
waxes may cause annoying reflections in the windshield
and even makeit difficult to see through the windshield
under certain conditions.
Care of Safety Belts
Keep belts clean anddry.
IA CAUTION:
I
Do not bleach or dye safety belts. If youdo, it
may severely weaken them.
In a crash they
might not be able to provide adequate protection.
Clean safety belts only with mild
soap and
lukewarm water.
Glass
Glass should be cleaned often. GM Glass Cleaner (GM
Part No. 1050427) or a liquid household glass cleaner
will remove normal tobacco smoke and dust films.
Don’t use abrasive cleaners on glass, because they may
cause scratches. Avoid placing decals on the inside rear
window, since they may have to be scraped off later. If
abrasive cleaners are used on the inside of the rear
window, an electric defogger element may be damaged.
Any temporary license should not be attached across the
defogger grid.
Cleaning the Outside of the
Windshield and Wiper Blades
If the windshield is not clear after using the windshield
washer, or if the wiper blade chatters when running, wax
or other material may be on the blade or windshield.
Clean the outside of the windshield with GM
Windshield Cleaner, Bon-Ami Powder@(GM Part
No. 1050011). The windshield is clean if beads do not
form when you rinse it with water.
Clean the blade by wiping vigorously with a cloth
soaked in full-strength windshield washer solvent. Then
rinse the blade with water.
Wiper blades should be checked on a regular basis and
replaced when worn.
Weatherstrips
Silicone grease on weatherstrips will make them last
longer, seal better, and not stick or squeak. Apply
silicone grease with a clean cloth at least every six
months. During very cold, damp weather more frequent
application may be required. (See “Recommended
Fluids and Lubricants” in the Index.)
Cleaning the Outsideof Your
Chevrolet
The paint finish on your vehicle provides beauty, depth
of color, gloss retention and durability.
Washing Your Vehicle
The best way to preserve your vehicle’s finish isto keep
it clean by washing it often with lukewarmor cold water.
Don’t wash your vehicle in the direct rays of the sun.
Don’t use strong soaps or chemical detergents. Use
liquid hand, dish or carwashing (mild detergent) soaps.
Don’t use cleaning agents that are petroleum based, or
that contain acid or abrasives. All cleaning agents
should be flushed promptly and not allowed to dry on
the surface, or they could stain. Dry the finish with a
6-47
soft, clean chamoisor a 100%cotton towel to avoid
surface scratchesand water spotting.
High pressurecar washes may cause water to enter
your vehicle.
Finish Care
Occasional waxing or mildpolishing of your Chevrolet
by hand may be necessary to remove residue fromthe
paint finish.You can getGM-approved cleaning
products from your dealer. (See “Appearance Careand
Materials” in the Index.)
Your Chevrolet has a “basecoat/clearcoat” paint finish.
The clearcoat gives more depth and gloss
to the colored
basecoat. Always use waxes and polishes thatare
non-abrasive and made for a basecoat/clearcoat paint finish.
NOTICE:
Machine compounding or aggressive polishingon
a basecoatklearcoat paint finish may dull the
finish or leave swirl marks.
Foreign materials such as calcium chlorideand other
salts, icemelting agents, road oil and tar, tree sap, bird
droppings, chemicals from industrial chimneys,
etc. can
6-48
damage your vehicle’s finish if they remain on painted
surfaces. Wash the vehicle as soon as possible. If
necessary, use non-abrasive cleaners that are marked
safe forpainted surfaces to remove foreign matter.
Exterior painted surfaces are subject to aging, weather
and chemical fallout that can take their toll over a period
of years. You can help to keep thepaint finish looking
new by keeping your Chevrolet garaged or covered
whenever possible.
Cleaning Your Convertible Top
Your convertible top should be cleaned often.If you use
an automatic car wash, use one with water jets and
hanging cloths. High pressure car washes may cause
water to enter your vehicle.
When you hand wash the top, do it in partial shade. Use
a mild soap, lukewarm wat.er and a soft sponge. A
chamois or clothmay leave linton the top, and a brush
can chafethe threads in the top fabric. Don’t use
detergents, harsh cleaners, solvents orbleaching agents.
When you clean the top, put onehand under it to
support it. Wet the entire vehicle and wash the top
evenly to avoid spots or rings. Let the soap remain on
the fabric fora few minutes. When the top is really dirty,
use a mild foam-type cleaner. Thoroughly rinse the
entire vehicle, then let the top dry in direct sunlight.
To protect the convertibletop:
0
After you wash the vehicle, make sure the topis
completely dry beforeyou lower it.
0
Don’t get any cleaner onthe vehicle’s painted finish;
it could leavestreaks.
0
If you decide to go through an automatic car wash,
ask the managerif the equipment could damage your
top. Before enteringa car wash, set the climate
control to VENT andthe fan controlto the highest
speed. Thiswill help to prevent water under high
pressure from entering aroundthe convertible top.
All ninvm VV eels (1 So Equipped)
Keep y6Uf wheels clean usmg a soft clean cloth with
mild soap and water. Rinse with cleanwater. After
rinsing thoroughly, dry with a soft clean towel. A wax
may then be applied.
The surface of these wheels is similar to the painted
surface of your vehicle. Don’t use strong soaps,
chemicals, abrasive polishes, abrasive cleaners or
abrasive cleaning brushes on them because you could
damage the surface.
Tin
To clean your tires, use a stiff brush with a tire cleaner.
NOTICE:
When applying a tire dressingalways take care to
wipe off any oversprayor splash from all painted
surfaces on the body
or wheels ofthe vehicle.
Petroleum-based products may damage the
paint finish.
.- .
Sheet Metal Damage
If your vehicle is damaged and requires sheetmetal
repair or replacement, make surethe body repair shop
applies anti-corrosionmaterial to the parts repaired or
replaced to restore corrosionprotection.
Don’t take your vehicle through an automatic car wash
that has silicon carbide tire cleaningbrushes. These
brushes can also damagethe surface of these wheels.
6-49
Finish Damage
Chemical Paint Spotting
Any stone chips, fracturesor deep scratches in the finish Some weather and atmospheric conditions can create a
should be repaired right away. Bare metal will corrode chemical fallout. Airborne pollutants canfall upon and
quickly and may develop into a major repair expense. attack painted surfaces on your vehicle. This damage
can take two forms: blotchy, ringlet-shaped
Minor chips and scratches can be repaired with touch-up
discolorations, and small irregular dark spots etched into
materials available from your dealer or other service
the paint surface.
outlets. Larger areasof finish damage can be corrected
job causes this,
Although no defect in the paint
in your dealer’s body and paint shop.
the
Chevrolet will repair,at no charge to the owner,
Underbody Maintenance
surfaces of new vehicles damaged by this fallout
Chemicals used for ice and snow removal and dust control condition within 12 months or 12,000 miles (20 000 km)
of purchase, whichever occurs first.
If these are not removed,
can collect on the underbody.
accelerated corrosion (rust) can occur on the underbody
parts such as fuel lines,frame, floor pan, and exhaust
system even though they have corrosion protection.
At least every spring, flush these materials from the
underbody with plain water. Clean any areas where mud
and other debris can collect. Dirt packed in closed areas
of the frame should be loosened before being flushed.
Your dealer or an underbody vehicle washing system
can do thisfor you.
6-50
Appearance Care Materials Chart
16 02. (0.473 L)
1052929
Wheel Cleaner
Spray on wheel cleaner
1052930
8 oz. (0.237 L)
Capture Dry Spot Remover
Attracts and absorbs soils
12345002**
16 oz. (0.473 L)
Cleans Vinyl, leather and rubber
Armor All” Cleaner
12345725
12 oz. (0.354 L)tires
Shines
ShineTire
Silicone
See your General Motors Parts Department for these products.
’
* Notrecommended.forpigskinsuedeleather.
See “Fluids and Lubricants”
in the Index.
** Not recommended for use on instrument panel vinyl.
6-51
-
Service Parts Identification Label
Vehicle Identification Number(VIN)
r
L
You’ll find this label on your spare tire cover. It’s very
is:
helpful if you ever need toorder parts. On this label
D lI1111111111111111111111111111111II 111111111111111111111111
SAMPLE4UXTM072675
0
a your VIN,
A
0
the model designation,
0
paint information, and
a a listof all production options and special
This is the legal identifierfor your Chevrolet. It appears
on a platein the frontcomer of the instrument panel, on
the driver’s side.You can see itif you look through the
windshield from outside your vehicle.
The VIN also
appears on the Vehicle Certification and Service Parts
labels and the certificates of title and registration.
Engine Identification
The eighth characterin your VIN is the engine code.
This code will help you identify your engine,
specifications, and replacement parts.
6-52
equipment.
Be sure that this label is not removed from the vehicle.
Electrical System
Add-on Electrical Equipment
NOTICE:
Don’t add anything electrical to your Chevrolet
unless you check with your dealer first. Some
electrical equipment can damage your vehicle and
the damage wouldn’t be covered by your warranty.
Some add-on electrical equipment can keep other
components from workingas they should.
wiper will stop until the moIor cools.If the overloadis caused
by some electrical problem, have it fixed.
Power Windows and Other Power Options
Circuit breakers in the fuse panel protect the power
windows and other power accessories. When
the current
load is too heavy, the circuit breaker opens and closes,
is fixed.
protecting the circuit until the problem
Fuses and Circuit Breakers
The wiring circuits in your vehicle are protected from
short circuitsby a combination of fuses, circuit breakers
and fusible thermal links. This greatly reduces the
chance of damage caused by electrical problems.
Your vehicle has an air bag system. Before attempting to
add anything electrical to your
Chevrolet, see “Servicing
Your Air Bag-Equipped Chevrolet” in the Index.
If the band
Look at the silver-colored band inside the fuse.
is broken or melted, replace the fuse. Be sure you replace
a bad fuse witha new one of the identical size and rating.
Headlamp Wiring
If you ever havea problem on the road and don’t have
a
spare fuse, you can borrow one that has the same
amperage. Just pick some feature
of your vehicle that
you can get along without-- like the radio or cigarette
lighter -- and use itsfuse if it is the correct amperage.
Replace it as soon as you can.
The headlamp wiringis protected by fuses. Should your
headlamps fail to function have your headlamp system
checked right away.
Windshield Wiper Fuse
There are twofuse blocks in your vehicle: the
The windshield wiper motor is protected by
a circuit breaker
and a fuse. If the motor overheats due to heavy snow, etc., theinstrument panel fuse block and the engine compartment
fuse block.
6-53
Instrument PanelFuse Block
TURN -B/U
F/P - INJ
Usage
The fuse panel is located under the left end of the
instrument panel. To open, push the tab on
the access
door to the left and pull the door forward. Makesure to
insert the tabs when replacing the cover.
6-54
ERLS
ALARM
AIR BAG
CRUISE
PCM/IGN
IGN
Fuse
TURN-B/UExterior Lamps, Back-up Lamps
Fuel Pump,Fuel Injectors
F/P-INJ
CLUSTER
Instrument Cluster, Anti-Lock
Brake System
Instrument Cluster, Powertrain
CLS/PCM
Control Module, Daytime
Running Lamps
Rear Window Defogger
RR DFOG
Multiport Fuel Injection
0 2 HTR
Fuse
Usage
WIPER
Windshield
Wipers,
Windshield
Washers
Automatic Transaxle,
ERLS
Brake-Transaxle Shift Interlock,
A/C Compressor, Cruise Control,
Multiport Fuel Injection
AIRBAGSupplementalInflatableRestraint
System
EXT LAMP Exterior Lamps, Instrument Panel
Lights
PWRACC
PowerDoorLocks,Convertible
Top (Convertible Model)
Heater andA/C Control,
HVAC
Anti-Lock Brake System, Engine
Cooling Fan (2.2L Engine),
Engine Vent Heater (2.4L Engine)
Radio, Remote Keyless Entry
RADIO
Alarm Module - Interior Lamps,
ALARM
Warning Chimes
CRUISE
Cruise Control
Fuse
L HDLP
CIG
Usage
Left Headlamp
Cigarette Lighter,Horn, Interior
Lamps, Diagnostic Connector
INST LPS Instrument Panel Lights, Warning
Chimes
STOP/HAZ Exterior Lamps, Anti-Lock Brake
System, Cruise Control
Power Windows, PowerSunroof,
PWR
Convertible Top Controls
WINDOW
(Convertible Model) (Circuit
Breaker)
Powertrain Control Module
PCM/IGN
INT LAMP Alarm Module: Illuminated Entry,
Warning Chimes, Overhead
Lamps, Mapmeading Lamps,
Glove Box Lamp,Trunk Lamp,
Radio, Power Mirrors, Remote
Keyless Entry
FOG LAMP Fog Lamps (2-24 Only)
Engine Ignition
IGN
Right Headlamp
R HDLP
6-55
Engine Compartment Fuse Block
J
The engine compartment fuse block is located on
the
driver’s side of the engine compartment. Liftoff the cover
to check the fuses.
6-56
Fuse
Usage
IGN
Ignition Switch Circuits
BATT 1
Power ACC/Stoplamp Circuits
BATT 2
Lighting Circuits
ABS
Electronic Variable Orifice
Steering, Anti-Lock Brake System
COOLING FAN
Engine Cooling Fan
BLO
Heater and A/C Blower
PCM
Powertrain Control Module
A/C
ABS/EVO
A/C Compressor(2.4L Engine)
Anti-Lock Brake System
Replacement Bulbs
OUTSIDE LAMPS
BULB
Back-up Lamps . . . . . . . . . . . . . . . . . . . . . . . . . 3057
Front Parkingnurn Signal Lamps
3357
BaseModel ...........................
3357NA
2-24Model .........................
Center High-Mount Stoplamp
Inside ................................
1141
912
Outside ...............................
Halogen Headlamps
9005/6
Highbow Beam ......................
FrontSidemarkerLamps . . . . . . . . . . . . . . . . . . . 194
194
Rear Sidemarker Lamps ....................
Stop/Tail/Turn Signal Lamps . . . . . . . . . . . . . . . 3057
Stop/Turn Signal Lamps (Sedan) . . . . . . . . . . . . 3057
TrunkLamp . . . . . . . . . . . . . . . . . . . . . . . . . . . . . 906
Fog Lamps (2-24) .......................
881X
License . . . . . . . . . . . . . . . . . . . . . . . . . . . . . . . . . . 194
INSIDE LAMPS
BULB
Dome Lamp
168
Front .................................
194
Rear ..................................
Reading Lamp (If Equipped) . . . . . . . . . . . . . . .2 12-2
Rear Courtesy Lamp (If Equipped) . . . . . . . . . . . 563
74
Heater and A/C Control .....................
High-BeamIndicator . . . . . . . . . . . . . . . . . . . . . . 194
194
GloveBox ..............................
Capacities and Specifications
Engine Crankcase .....................................
Automatic Transaxle (4-Speed Automatic Transaxle Not Owner Serviceable)
Pan Removal and Replacement ..........................
After Complete Overhaul . . . . . . . . . . . . . . . . . . . . . . . . . . . . . . .
When draining or replacing torque converter, more fluid may be needed.
4.0 quarts (3.8 L)
4.0 quarts (3.8 L)
6.9 quarts (6.6L)
Manual Transaxle
Complete Drain and Refill ..............................
Cooling System
2.2L ...............................................
2.4L
...............................................
Refrigerant (R-l34a), Air Conditioning . . . . . . . . . . . . . . . . . . .
FuelTank ............................................
Tire Pressures, Sizes ...................................
WheelNutTorque .....................................
Windshield Wiper Blade (Sheppard’s Hook Type)
LeftSide ............................................
Rightside ...........................................
2.0 quarts (1.9 L)
10.3 quarts (9.8 L)
10.7 quarts (10.1 L)
See refrigerant charge label under hood.
15.2 gallons (57.5 L)
See Tire-Loading Information
label on driver’s door.
100 lb-ft (140 N-m)
22 inches (56 cm)
17 inches (43 cm)
NOTE: AU capacities are approximate. When adding,
be sure to fiil to the appropriate level,
as recommended in this manual.
Air Conditioning Refrigerants
Not all air conditioning refrigerants are the same. If the air conditioning system in your vehicle needs refrigerant, be
sure the proper refrigerant is used.
If you’re not sure, ask your Chevrolet dealer.
6-58
2.2L Engine Specifications
VIN Engine Code ........................
Type . . . . . . . . . . . . . . . . . . . . . . . . . . . . . . . . . .
Horsepower ............................
Firing Order . . . . . . . . . . . . . . . . . . . . . . . . . . . .
ThermostatTemperature ..................
2.4L Engine Specifications
VIN Engine Code . . . . . . . . . . . . . . . . . . . . . . . .
Type . . . . . . . . . . . . . . . . . . . . . . . . . . . . . . . . . .
Horsepower ............................
Firing Order . . . . . . . . . . . . . . . . . . . . . . . . . . . .
ThermostatTemperature . . . . . . . . . . . . . .
4
14
120
1-3-4-2
195°F (91°C)
T
14
150
1-3-4-2
180°F (82°C)
6.59
,
Normal Maintenance Replacement
Parts
Air Cleaner Element
2.2L ......................
AC Type A-1172C
AC Type A-1172C
2.4L ......................
Engine Oil Filter
2.2L .........................
AC Type PF-47
AC Type PF-44
2.4L .........................
PCV Valve
AC Type CV-900C
2.2L ......................
2.4L ..................................
N/A
Spark Plugs
2.2L ........................
AC Type 41-928
Gap: 1.52 mm (0.060 inch)
2.4L ........................
AC Type 41-910
Gap: 1.52 mm (0.060 inch)
Dimensions
Length
Coupe . . . . . . . . . . . . . . . . 180.3 inches (458.0 cm)
Sedan . . . . . . . . . . . . . . . . . 180.3 inches (458.0 cm)
Convertible . . . . . . . . . . . . 180.3 inches (458.0 cm)
6-60
Dimensions (Continued)
Width
Coupe . . . . . . . . . . . . . . . . . 75.4 inches (191.6 cm)
Sedan . . . . . . . . . . . . . . . . . . 75.4 inches (191.6 cm)
Convertible . . . . . . . . . . . . . 75.4 inches (191.6 cm)
Height
Coupe . . . . . . . . . . . . . . . . . 53.2 inches (135.1 cm)
Sedan . . . . . . . . . . . . . . . . . . 54.9 inches (139.4 cm)
Convertible . . . . . . . . . . . . . 53.9 inches ( 136.9 cm)
Wheelbase
Coupe . . . . . . . . . . . . . . . . . 104.1 inches (264.4 cm)
Sedan . . . . . . . . . . . . . . . . . 104.1 inches (264.4 cm)
Convertible . . . . . . . . . . . . 104.1 inches (264.4 cm)
Front Tread
Coupe . . . . . . . . . . . . . . . . . 57.6 inches (146.2 cm)
Sedan . . . . . . . . . . . . . . . . . . 57.6 inches (146.2 cm)
Convertible . . . . . . . . . . . . . 57.6 inches (146.2 cm)
Rear Tread
Coupe . . . . . . . . . . . . . . . . . 56.8 inches (144.2 cm)
Sedan . . . . . . . . . . . . . . . . . . 56.8 inches (144.2 cm)
convertible . . . . . . . . . . . . . 56.8 inches (144.2 cm)
0Section 7
Maintenance Schedule
I
I
Introduction
IMPORTANT.
KEEP ENGINE OIL
AT THE PROPER
LEVEL AND CHANGE AS
RECOMMENDED
This section covers the maintenance required for your
Chevrolet. Your vehicle needs these services toretain its
safety, dependability and emission controlperformance.'
Your Vehicle and the Environment
Proper vehicle maintenancenot only helps to keep your
vehicle in good working condition, but also helps the
environment. All recommended maintenance procedures
are important. Improper vehicle maintenance can even
affect the quality of the air we breathe. Improperfluid
levels or the wrong tire inflation can increasethe level
of emissions from yourvehicle. To help protect our
environment, and to keep your vehiclein good
condition, please maintain your
vehicle properly.
Have you purchased the
GM Protection Plan? The Plan
supplements your new vehicle warranties.See your
Warranty andOwner Assistance booklet,
or your
Chevrolet dealerfor details.
7-1
The remainderof this section is divided into five parts:
“Part B: Owner Checks and Services” tells you what
should be checked whenever you stop for fuel. It also
explains what you can easily do to help keep your
‘(PartA: Scheduled Maintenance Services” shows
vehicle ingood condition.
what to have doneand how often. Someof these
services canbe complex, so unless you are technically
qualified and have the necessary equipment, you should
let your dealer’s service departmentor another qualified
service center do these jobs.
“Part C: Periodic MaintenanceInspections” explains
important inspections that your Chevroletdealer’s
service department or another qualifiedservice center
should perform.
How This Section is Organized
I
Performing maintenance work on
a vehicle can
be dangerous. In trying to do
some jobs, you can
be seriously injured. Do your own maintenance
work only if you have the required know-how
and the propertools and equipmentfor the job.
If you have any doubt, havea qualified
technician do the work.
If you are skilled enough to do some work on your
vehicle, you will probably want to get the service
information GM publishes. See “Service and Owner
Publications” in the Index.
“Part D: Recommended Fluids and Lubricants”lists
some productsGM recommends tohelp keep your
vehicle properly maintained. These products, or their
equivalents, should be used whether you do thework
yourself or have it done.
“Part E: Maintenance Record” provides a place
for you to record the maintenance performed on your
vehicle. Whenever any maintenance isperformed, be
sure to write it down in this part. This will help you
determine when your next maintenance should be done.
In addition, it is a good idea to keepyour maintenance
receipts. They may be needed to qualify your vehicle for
warranty repairs.
Part A: Scheduled Maintenance
Services
Using Your Maintenance Schedule
We at General Motors want tohelp you keep your
vehicle in good working condition. But
we don’t know
exactly how you’ll drive it.You may drive very short
distances only a few times a week.
Or you may drive
long distances allthe time in veryhot, dusty weather.
You may use your vehiclein making deliveries. Or
you may drive it to work, to
do errands or in many
other ways.
The proper fluids and lubricants to use are listed
in Part D.
Make sure whoever services your vehicle uses these.All
parts should be replaced and all necessary repairs done
before you or anyone elsednves the vehicle.
These schedules are for vehicles that:
carry passengers and cargo within recommended
limits. You will find these limits on your vehicle’s
Tire-Loading Information label. See “Loading
Your
Vehicle” in the Index.
are driven on reasonable road surfaces within legal
driving limits.
0 use the recommended fuel. See “Fuel’’ in the Index.
GM
Because of all the different ways people use their
vehicles, maintenance needs vary.
You may even need
Selecting theRight Schedule
more frequent checks and replacements than you’ll find
First you’ll need to decide which
of the two schedules is
So please read this
in the schedules in this section.
right for your vehicle. Here’s how to decide which
section and note how you drive.
If you have any
schedule to follow:
questions on how to keep your vehicle in good
condition, see your Chevrolet dealer.
This part tells you the maintenance services you should
have done and when you should schedule them.
If you
go to your dealerfor your service needs, you’ll know
that GM-trained and supportedservice people will
perform the work using. genuineGM parts,
7-3
Maintenance Schedule
I Short Trip/City Definition
~~
Follow the Short Trip/City Maintenance Schedule if any
one of these conditions is true for
your vehicle:
0
0
Most trips are less than5 to 10 miles (8 to 16 km).
This isparticularly important when outside
temperatures are below freezing.
Most trips include extensive idling(such as frequent
driving in stop-and-go traffic).
e Most trips are through dusty areas.
0 You frequently tow a trailer or use a carrier ontop of
your vehicle. (With some models, you should never
tow a trailer. See “Towing a Trailer” in the Index.)
e If the vehicle is used for delivery service,police,
taxi, or other commercialapplication.
One of the reasons you should follow this schedule
if you operate your vehicle under anyof these
conditions is thatthese conditions cause engine oil
to break down sooner.
7-4
I
Short Trip/City Intervals
Every 3,000 Miles (5 000 km): Engine Oil and Filter
Change (or3 months, whichever occurs first).
Every 6,000 Miles (10000 km): Chassis Lubrication
(or 6 months, whichever occurs first).
At 6,000 Miles (10 000 km) Then Every
12,000 Miles (20 000 km): Tire Rotation.
Every 15,000 Miles (25 000 km): Air Cleaner Filter
Inspection, if driving in dusty conditions.
Every 30,000 Miles (50 000 km): Air Cleaner Filter
-
Replacement. Fuel Tank, Cap and Lines Inspection.
Exhaust Gas Recirculation (EGR) SystemInspection
(2.2L Code 4 engine only).
Every 50,000 Miles (83 000 km): Automatic Transaxle
Service (severe conditions only).
Every 60,000 Miles(100 000km): Engine Accessory
Drive Belt Inspection.
Every 100,000 Miles (166 000 km): Cooling System
Service (orevery 60 months, whichever occurs first).
Spark PlugWire Inspection. Spark PlugReplacement.
These intervals only summarize maintenance services.
Be sure to followthe complete maintenance schedule on
the following pages.
Maintenance Schedule
Long
Trip/Highway
Definition
h
Follow this maintenance schedule only if none of LIIG
conditions from the Short Trip/City Maintenance
Schedule is true.
Driving a vehicle with a fully warmed engine under
highway conditions causes engine oil to break
down slower.
Long
TriplHighway
Intervals
nvery 7,500 Miles (12 500 km): Engine Oil and Filter
Change (or every 12 months, whichever occurs first).
Chassis Lubrication (or every 12 months, whichever
occurs first).
At 7,500 Miles (12 500 km) Then Every
15,000 Miles (25 000 km): Tire Rotation.
Every 30,000 Miles (50 000 km): Exhaust Gas
Recirculation (EGR) System Inspection (2.2L Code 4
Engine only). Air Cleaner Filter Replacement. Fuel
Tank, Cap and Lines Inspection.
Every 50,000 Miles (83 000 km): Automatic Transaxle
Service (severe conditions only).
Every 60,000 Miles (100000 km): Engine Accessory
Drive Belt Inspection.
Every 100,000 Miles (166 000 km): Cooling System
Service (or every 60 months, whichever occurs first).
Spark Plug Wire Inspection. Spark Plug Replacement.
These intervals only summarize maintenance services.
Be sure tofollow the complete maintenance schedule on
the following pages.
-
7-5
I
I
Short .Trip/City Maintenance Schedule
3,000 Miles (5 000 km)
The services shown in this schedule up to
100,000 miles
(166 000 km) should be performed after 100,000 miles
(166 000 km) at the same intervals.
0Change engine oil and filter (or every
3 months, whichever occurs first).
An Emission Control Service.
Footnotes
The U.S. Environmental Protection Agencyor the
California Air Resources Board has determined that the
failure to perform this maintenance item will not nullify
the emission warranty or limit recall liability prior
to the
completion of the vehicle’s useful life. We, however,
urge that all recommended maintenance services be
performed at the indicated intervals and the maintenance
be recorded.
I
7-6
DATE
ACTUAL
MILEAGE
SERVICED
BY:
I
Short Trip/City Maintenance Schedule
6,000 Miles (10 000 km)
9,000 Miles (15 000 km)
0Change engine oil and filter (or every
0Change engine oil and filter (or every
3 months, whichever occurs first).
3 months, whichever occurs first).
An Emission Control Service.
An Emission Control Service.
0Lubricate the suspension, steering linkage
and the transaxle shift linkage (or every
6 months, whichever occurs first).
0Rotate tires. See “Tire Inspection and
Rotation” in the Index for proper rotation
pattern and additional information. During
tire rotation, check brake calipers for
freedom of movement. Refer to the
appropriate GM service manual for proper
caliper service procedures.
DATE
ACTUAL MILEAGE
SERVICED B Y
7-7
~
__
~
' b h o r tTrip/City Maintenance Schedule
I
0Change engine oil and filter (or every,
15,000 Miles (25000 km)
0Change engine oil andfilter (or every
3 months, whichever-occursfirst).
3 months, whichever occurs first).
An Emission ControlService.
An Emission Control Service.
12,000 Miles (20 000 km)
0Lubricate the suspension, steering linkage
and the transaxle shift linkage (or every
6 months, whichever occurs first).
'
0Inspect air cleaner filter if you are driving
in dusty conditions.Replace filter if
necessary. An Emission Control Service.
DATE
7-8
ACTUAL MILEAGE
SERVICED BY:
1
Short Trip/City Maintenance Schedule
I
18,000 Miles (30 000 km)
21,000 Miles (35 000 km)
0Change engine oil and filter (or every
0Change engine oil and filter (or every
3 months, whichever occurs first).
3 months, whichever occurs first).
An Emission ControlService.
An Emission Control Service.
0Lubricate the suspension, steering linkage
and the transaxle shift linkage (or every
6 months, whichever occurs first).
Rotate tires. See “Tire Inspection and
Rotation” in the Index for proper rotation
pattern and additional information. During
tire rotation, check brake calipers for
freedom of movement. Refer to the
appropriate GM service manual for proper
caliper service procedures.
I
’
ACTUAL MILEAGE
SERVICED BY:
7-9
~~
~~
I
~
[ --ShortTriplCity Maintenance Schedule
24,000 Miles (40 000 km)
0Change engine oil and filter (or
every
3 months, whichever occurs first).
27,000 Miles (45 000 km)
0Change engine oil and filter (or every
3 months, whichever occurs first).
An Emission Control Service.
An Emission Control Service.
0Lubricate the suspension, steering linkage
and the transaxle shift linkage
(or every
6 months, whichever occurs first).
DATE
ACTUAL
MILEAGE
SERVICED BY:
I
DATE
ACTUAL
MILEAGE
SERVICED B E
Short Trip/City Maintenance Schedule
30,000 Miles (50 000 km)
0Change engine oil and filter (or every
3 months, whichever occws first).
An Emission Control Service.
0Lubricate the suspension, steering linkage
and the transaxle shift linkage (or every
6 months, whichever occurs first).
0Replace air cleaner filter.
An Emission
Control Service.
I7 Inspect Exhaust Gas Recirculation (EGR)
system (2.2L Code 4 engine only).
An Emission Control Service.
0Inspect fuel tank, cap and lines for damage
or leaks. Inspect fuel cap gasket any
for
damage. Replace parts as needed.
An Emission Control Service.
0Rotate tires. See “Tire Inspection and
Rotation” in the Index
for proper rotation
pattern and additional information. During
tire rotation, check brake calipers for
freedom of movement. Referto the
appropriate GM service manualfor proper
caliper service procedures.
DATE SERVICED
ACTUAL MILEAGE
BY:
7-11
I
I
Short Trip/City Maintenance Schedule
b
33,000 Miles (55 000 km)
36,000 Miles (60 000 km)
0Change engine oil and filter (or every
0Change engine oil and filter (or every
3 months, whichever occurs first).
3 months, whichever occurs first).
An Emission ControlService.
An Emission Control Service.
0Lubricate the suspension, steering linkage
and the transaxle shift linkage (or every
6 months, whichever occurs first).
DATE
7-12
ACTUAL MILEAGE
SERVICED BY:
DATE
ACTUAL MILEAGE
SERVICED BY:
I
I
I
3
Short Trip/City Maintenance Schedule
39,000 Miles (65 000 km)
42,000 Miles (70 000 km)
0Change engineoil and filter (orevery
3 months, whichever occurs first).
Change engine oiland filter (or every
3 months, whichever occurs first).
An Emission Control Service.
An Emission Control Service..
Lubricate the suspension, steering linkage
and the transaxle shift linkage(or every
6 months, whichever occurs first).
0Rotate tires. See “Tire Inspectionand
Rotation” in the Index for proper rotation
pattern and additional information. During
tire rotation, check brake calipers for
freedom of movement. Refer to the
appropriate GM service manual for proper
caliper service procedures.
.’\
I
DATE
I
ACTUAL MILEAGE
ISERVICED
BY:^
7-13
I
Short Trip/City Maintenance Schedule
I
45,000 Miles (75000 km)
48,000 Miles (80 000 km)
0Change engine oil and filter (or every
0Change engine oil and filter (or every
3 months, whichever occurs first).
3 months, whichever occurs first).
An Emission Control Service.
An Emission Control Service.
Inspect air cleaner filter if you are driving
in dusty conditions. Replacefilter if
necessary. An Emission Control Service.3-
DATE
7-14
ACTUAL MILEAGE
SERVICED BY:
0Lubricate the suspension, steeringlinkage
and the transaxle shiftlinkage (or every
6 months, whicheveroccurs first).
DATE
ACTUAL MILEAGE
SERVICED BY:
[
Short Trip/City Maintenance Schedule
I
50,000 Miles (83 000 km)
0Change automatic transaxle fluid
and filter
if the vehicleis mainly driven under one or
more of these conditions:
- In heavy city traffic wherethe outside
temperature regularly reaches
90OF
(32 O C) or higher.
- In hilly or mountainous terrain.
- When doing frequent trailer towing.
- Uses such as found in taxi, police or
delivery service.
If you do not use your vehicle
under anyof these
conditions, thefluid andfilter do not requirechanging.
Manual transaxle fluid doesn’t require change.
DATE
ACTUAL MILEAGE
SERVICED BY:
7-15
I
I
Short Trip/City Maintenance Schedule
0Change engine oil and filter (or every
54,000 Miles (90 000 km)
0Change engine oil and filter (or every
3 months, whichever occurs first).
3 months, whichever occursfirst).
An Emission Control Service.
An Emission Control Service.
51,000 Miles (85 000 km)
0Lubricate the suspension, steering linkage
and the transaxle shift linkage (or every
6 months, whichever occurs first).
0Rotate tires. See “Tire Inspection and
Rotation” inthe Index for proper rotation
pattern and additional information.During
tire rotation, check brake calipersfor
freedom of movement. Refer tothe
appropriate GM service manualfor proper
caliper service procedures.
DATE
ACTUAL MILEAGE
SERVICED BY:
I
DATE
ACTUAL MILEAGE
SERVICED BY:
I ShortTrip/CityMaintenanceSchedule I
57,000 Miles (95 000 km)
60,000 Miles (100 000 km)
0Change engine oil and filter (or
0Change engine oil and filter (or every
every
3 months, whichever occurs first).
An Emission Control Service.
3 months, whichever occurs first).
An Emission Control Service.
0Lubricate the suspension, steering linkage
and the transaxle shift linkage (or every
6 months, whichever occurs first).
0Inspect engine accessory drive belt.
An Emission Control Service.
0Replace air cleaner filter. An Emission
Control Service.
DATE
i
ACTUAL MILEAGE
SERVICED BY:
(Continued)
7-17
r
I
1
I
Short Trip/City Maintenance Schedule
60,000 MiZes (100 000 km)(Continued)
63,000 Miles (105000 km)
0Inspect fuel tank, cap and lines
for damage
0Change engineoil and filter (or every
or leaks. Inspectfuel cap gasket forany
damage. Replace parts as needed.
3 months, whichever occursfirst).
*
An Emission ControlSewice.
An Emission ControlService.
0Inspect Exhaust Gas Recirculation(EGR)
'
system (2.2L Code 4 engine only).
An EmissionControl Service.
c
ACTUAL MILEAGE
ISERVICED
BY:
I
I
DATE
ACTUAL
MILEAGE
SERVICED
BY:
I
Short TriplCity Maintenance Schedule
I
66,000 Miles (110 000 km)
69,000 Miles (115000 km)
0Change engineoil and filter (or every
0Change engineoil and filter (orevery
3 ‘months, whichever occurs first).
3 months, whichever occurs first).
An Emission ControlService.
An Emission ControlService.
Cl Lubricate
the suspension, steering linkage
and the transaxle shift linkage (or every
6 months, whichever occurs first).
0Rotate tiies. See “Tire Inspectionand
Rotation” in the Index
for proper rotation
pattern and additional information. During
tire rotation, check .brake calipers for
freedom of movement. Refer to the
appropriate CM service manual for proper
caliper service procedures.
ACTUALMILEAGE
ISERVICED B Y
DATE
ACTUAL MILEAGE
SERVICED BY:
7-19
I
Short Trip/City Maintenance Schedule
72,000 Miles (120 000 km)
0Change engineoil and filter (or every
I
75,000 Miles (125 000 km)
3 months, whichever occursfirst).
Change engine oil and filter (or every
3 months, whichever occurs first).
An Emission ControlService.
An Emission Control Service.
0Lubricate the suspension, steering linkage
and the transaxle shift linkage (or every
6 months, whichever occurs first).
0Inspect air cleanerfilter if you are driving
in dusty conditions. Replacefilter if
necessary. An Emission ControlSewice. 3-
DATE
7-20
ACTUAL MILEAGE
SERVICED B Y
I
Short Trip/City Maintenance Schedule
78,000 Miles (130 000 km)
I
1 81,000 Miles (135 000 km)
0Change engine oil and filter (or every
0Change engine oil and filter (or every
3 months, whichever occurs first).
3 months, whichever occursfirst).
An Emission Control Service.
An Emission Control Service.
Lubricate the suspension, steering linkage
and the transaxle shift linkage (or every
6 months, whichever occurs first).
0Rotate tires. See “Tire Inspection and
Rotation” in the Index for proper rotation
pattern and additional information. During
tire rotation, check brake calipers for
freedom of movement. Refer to the
appropriate GM service manual for proper
caliper service procedures.
DATE
ACTUAL MILEAGE
SERVICED BY:
DATE
ACTUAL MILEAGE
SERVICED BY:
7-21
I
Short Trip/City Maintenance Schedu e l
84,000 Miles (140 000 km)
87,000 Miles (145000 km)
0Change engine oil and filter (or every
0Change engine oil and filter (or every
3 months, whichever occurs first).
3 months, whichever occurs first).
An Emission Control Service.
An Emission Control Service.
0Lubricate the suspension, steeringlinkage
and the transaxle shift linkage (or every
6 months, whichever occurs first).
DATE
7-22
I
ACTUAL MILEAGE
ISERVICED
BY:
DATE
ACTUAL MILEAGE
SERVICED B Y
Short Trip/City Maintenance Schedule
90,000 Miles (150 000 km)
0Change
engine oil and filter (or every
3 months, whichever occurs first).
0Inspect Exhaust Gas Recirculation(EGR)
system (2.2L Code 4 engine-only).
An EmissionControl Service.
An Emission ControlService.
0Lubricate
the suspension, steering linkage
and the transaxle shift linkage (or every
6 months, whichever occurs first).
0Replace air cleaner filter.
An Emission Control
0.
Rotate tires.See “Tire Inspection and
Rotation’’ in the Index for proper rotation
pattern and additional information. During
tire rotation, check brake calipers
for
freedom of movement. Refer to the
appropriate GM service manualfor proper
caliper service procedures.
Service.
0Inspect fuel tank, cap and lines for damage
or leaks. Inspectfuel cap gasket for any
damage. Replaceparts as needed.
An Emission ControlService. -f
I
I
DATE
ACTUAL
MILEAGE
SERVICED
1
I
BY:
7-23
Short TriplCity Maintenance Schedule
93,000 Miles (155 000 km)
96,000 Miles (160 000 km)
0Change engine oil and filter (or every
0Change engine oil and filter (or every
3 months, whichever occursfirst).
3 months, whichever occurs first).
An Emission ControlService.
An Emission ControlService.
0Lubricate the suspension, steering linkage
and the transaxleshift linkage (or every
6 months, whichever occurs first).
DATE
ACTUAL MILEAGE
DATE
SERVICED BY:
I
7-24
ACTUAL MILEAGE
I
SERVICED BY:
I
I
Short Trip/City Maintenance Schedule
I
99,000 Miles (165000 km)
100,000 Miles (166 000 km)
0Change engine oil and filter (or
0Drain, flush and refill cooling system
every
3 months, whichever occurs first).
An Emission ControlService.
(or every 60 months since last service,
whichever occurs first). See “Engine
Coolant” in the Index for whatto use.
Inspect hoses. Clean radiator, condenser,
pressure cap and neck. Pressure test cooling
system andpressure cap. An Emission
Control Service.
0Inspect spark plug wires (except2.4L
Code T engine). An Emission ControlService.
Replace spark plugs.An Emission
Control Service.
I
DATE
ACTUAL MILEAGE
SERVICED BY: I
I
(Continued)
7-25
I
Short Trip/City Maintenance Schedule
I
100,000 Miles ( I 66 000 km) (Continued)
0Change automatictransaxle fluid and filter
if the vehicle is mainly driven under oneor
more of these conditions:
- In heavy city traffic where theoutside
temperature regularly reaches90 OF
(32°C) or higher.
- In hilly or mountainous terrain.
- When doing frequent trailer towing.
-
Uses such as found in taxi, police or
delivery service.
If you do not use your vehicle under
any of these
conditions, thefluid andfilterdo not require changing.
Manual transaxle fluid doesn’t require change.
DATE
7-26
ACTUAL MILEAGE
SERVICED BY:
Long Trip/Highway Maintenance Schedule
7,500 Miles (12 500 km)
The services shown in this schedule up 100,000
to
miles
(166 000 km)should be performed after100,000 miles
(166 000 km)at the same intervals.
0Change engine oil and filter (or every
Footnotes
0Lubricate the suspension, steeringlinkage
The U.S. Environmental Protection Agency or the
California Air Resources Board has determined that the
failure to perform this maintenance item will not nullify
the emission warrantyor limit recall liability prior to the
completion of vehicle useful life.We, however, urge that
all recommended maintenance services be performedat
the indicated intervals andthe maintenance be recorded.
and the transaxle shift linkage (or every
12 months, whichever occursfirst).
0Rotate tires. See “Tire Inspection and
Rotation” in the Index for proper rotation
pattern and additional information. During
tire rotation, check brake calipers for
freedom of movement. Refer to the
appropriate GM service manual for proper
caliper service procedures.
12 months, whichever occurs first).
An Emission ControlService.
7-27
I
Long Trip/Highway Maintenance Schedule
I
15,000 Miles (25 000 km)
22,500 Miles (37 500 km)
0Change engine oil and filter (or every
0Change engine oil and filter (or every
12 months, whichever occurs first).
12 months, whicheveroccurs first).
An Emission Control Service.
An Emission Control Service.
0Lubricate the suspension, steering linkage
and the transaxleshift linkage (or every
12 months, whichever occurs first).
DATE
7-28
ACTUAL MILEAGE
SERVICED BY:
0Lubricate the suspension, steering linkage
and the transaxle shiftlinkage (or every
12 months, whicheveroccurs first).
Rotate tires. See “Tire Inspection and
Rotation” in the Index for proper rotation
pattern and additional information. During
tire rotation, check brake calipersfor
freedom of movement. Refer tothe
appropriate GM service manual for proper
caliper service procedures.
DATE
ACTUAL MILEAGE
SERVICED BY:
Long Trip/Highway Maintenance Schedule
30,000 Miles (50000 km)
Change engine oil and filter (or every
12 months, whichever occurs first).
An Emission Control Service.
0Lubricate the suspension, steering linkage
and the transaxle shift linkage (or every
12 months, whichever occurs first).
Replace air cleaner filter. An Emission
0Inspect fuel tank, cap and lines for damage
or leaks. Inspect fuel cap gasket for any
damage. Replace parts as needed.
An Emission Control Service. -f-
0Inspect Exhaust Gas Recirculation (EGR)
system (2.2L Code 4 engine only).
An Emission Control Service.
Control Service.
7-29
1 Long
Trip/Highway Maintenance Schedule
I
37,500 Miles (62 500 km)
0Change
engine oil and filter (or every
12 months, whichever occurs first).
CI Lubricate
the suspension, steering linkage
and the transaxle shift linkage (or every
12 months, whichever occurs first).
D Rotate tires. See“Tire Inspection and
Rotation’’ in the Index for proper rotation
pattern and additional information. During
tire rotation, check brake calipers for
freedom of movement. Refer to the
appropriate GM service manual for proper
caliper service procedures.
DATE
I
~
ACTUAL MILEAGE
12 months, whichever occurs first).
An Emission Control Service.
An Emission Control Service.
~~
45,000 Miles (75 000 km)
0Change engine oil and filter
(or every
SERVICED B E
0Lubricate the suspension, steering linkage
and the transaxle shift linkage (or every
12 months, whichever occurs first).
Long Trip/Highway Maintenance Schedule
50,000 Miles (83 000 km)
Cl Change automatic transaxle fluid and filter
- Uses such as foundin taxi, police or
delivery service.
if the vehicle is mainly driven under one or
more of these conditions:
- In heavy city traffic where the outside
temperature regularly reaches 90 O F
(32°C) or higher.
- In hilly or mountainous terrain.
- When doing frequent trailer towing.
If you do not useyour vehicle under anyof these
conditions, thefluid andfilter do not require
changing.
Manual transaxle fluid doesn’t require change
DATE
I
SERVICED BY:
ACTUAL MILEAGE
I
I
I
7-31
I
Long Trip/Highway Maintenance Schedule
52,500 Miles (87500 km}
60,000 Miles (100 000 km)
0Change engine oil and filter (or every
0Change engine oil and filter (or every
12 months, whicheveroccurs first).
12 months, whicheveroccurs first).
An Emission ControlService.
An Emission ControlService.
0Lubricate the suspension, steering linkage
0Lubricate the suspension, steering linkage
and the transaxle shift linkage (or every
12 months, whichever occurs first).
0Rotate tires. See “Tire Inspection and
Rotation” in the Indexfor proper rotation
pattern and additional information. During
tire rotation, check brake calipersfor
freedom of movement. Refer tothe
appropriate GM service manualfor proper
caliper service procedures.
and the transaxle shift linkage (or every
12 months, whichever occurs first).
0Inspect engine accessory drive belt.
7-32
An Emission Control Service.
0Replace air cleaner filter. An Emission
Control Service.
m
a
y Maintenance Schedule
67,500 Miles (112 500 km)
0Inspect fuel tank, cap and lines for damage
17 Change engine oil and filter (or every
or leaks. Inspect fuel cap gasket for any
damage. Replace parts as needed.
12 months, whichever occursfirst).
An Emission Control Service.
An Emission Control Service.
0Lubricate the suspension, steering linkage
0Inspect Exhaust Gas Recirculation (EGR)
system (2.2L Code 4 engine only).
An Emission Control Service. -f
I
DATE
I
ACTUAL MILEAGE
ISERVICED
and the transaxle shift linkage (or every
12 months, whichever occurs first).
0Rotate tires. See “Tire Inspection and
Rotation” in the Index for proper rotation
pattern and additional information. During
tire rotation, check brake calipers for
freedom of movement. Refer tothe
appropriate GM service manual for proper
caliper service procedures.
BY^
7-33
75,000 Miles (125 000km)
82,500 Miles (137 500 km)
0Change engine oil and filter (or every
IJ Change engine oil and filter (or every
12 months, whicheveroccurs first).
12 months, whichever occurs first).
An Emission ControlService.
An Emission ControlSewice.
c]Lubricate the suspension, steering linkage
0Lubricate the suspension, steeringlinkage
and the transaxle shift linkage (or every
12 months, whichever occurs first).
and the transaxle shiftlinkage (or every
12 months, whichever occurs first).
0Rotate tires. See “Tire Inspection and
Rotation” in the Indexfor proper rotation
pattern and additional information. During
tire rotation, check brake calipersfor
freedom of movement. Refer tothe
appropriate GM service manual for proper
caliper service procedures.
I
DATE
7-34
I
ACTUAL MILEAGE
ISERVICED BY:I
I Long Trip/Highway Maintenance Schedule
90,000 Miles (150 000 km)
0Change engine oil and filter (or every
0Inspect fuel tank, cap and lines for damage
12 months, whichever occurs first).
or leaks. Inspect fuel cap gasket for any
damage. Replace parts as needed.
An Emission Control Service.
An Emission Control Service,
0Lubricate the suspension, steering linkage
and the transaxle shift linkage (or every
12 months, whichever occurs first).
0Replace air cleaner filter. An Emission
0Inspect Exhaust Gas Recirculation (EGR)
system (2.2L Code 4 engine only).
An Emission Control Service.
Control Service.
I
I
DATE
i
1
ACTUAL MILEAGE
SERVICED BY:
7-35
I Long Trip/Highway Maintenance Schedule
97,500 Miles (162 500 km)
c]Change engine oiland filter (or every
12 months, whichever occurs first).
An Emission ControlService.
Lubricate the suspension, steering linkage
and the transaxle shift linkage (or every
12 months, whichever occurs first).
0Rotate tires. See “Tire Inspection and
Rotation” in the Index for proper rotation
pattern and additional information. During
tire rotation, check brake calipers for
freedom of movement. Refer to the
appropriate GM service manual for proper
caliper service procedures.
100,000 Miles (166 000 km)
Drain, flushand refill cooling system
(or every60 months since last service,
whichever occurs first). See “Engine
Coolant” in the Index for what to use.
Inspect hoses. Clean radiator, condenser,
pressure capand neck. Pressure test the
cooling system and pressure cap.
An Emission
Control Service.
Inspect spark plug wires (except2.4L
Code T engine). An Emission ControlService.
Replace spark plugs.An Emission
Control Service.
,L.ongTrip/Highway Maintenance Schedule
-4
0Change automatic transaxle fluid and filter
if the vehicleis mainly driven under oneor
more of these conditions:
- In heavy city traffic where the outside
temperature regularly reaches
90 O F
(32 O C) or higher.
- In hilly or mountainous terrain.
- When doing frequent trailer towing.
I
- Uses such as found in taxi, policeor
delivery service.
lf you do not use your vehicle under any of these
conditions, thefluid andfilter not
do require changing.
Manual transaxle fluid doesn’t require change.
_ --
_- .
DATE
- .--
ACTUAL MILEAGE
SERVICED BY:
7-37
Part B: Owner Checks and Services
Listed below are owner checks and services which
should be performed at the intervals specified to help
ensure the safety, dependability and emission control
perfoJmance of your vehicle.
necessary. See “Windshield Washer Fluid” in the Index
for further details.
At Least Once a Month
Tire Inflation Check
Make sure tires are inflated to
the correct pressures. See
Be sure any necessary repairs are completed at once.
“Tires” in the Indexfor further details.
Whenever any fluids or lubricants are added to your vehicle,
make sure they are the proper ones, as shownPa
inrt D.
Cassette Deck Service
At Each Fuel Fill
Clean cassette deck. Cleaning should be done every
50 hours of tape play. See “Audio Systems” in the
I t is importantfor you or a service station attendant to
Index for further details.
pe$orrn these underhood checks at each fuel fill.
Engine Oil Level Check
Check the engine
oil level and add the proper
oil if necessary.
See ‘Engine Oil”in the Index for further details.
Engine Coolant Level Check
Check the engine coolant level and add the proper
coolant mixif necessary. See “Engine Coolant” in the
Index for further details.
Windshield Washer Fluid Level Check
Check the windshield washer fluid level in the
windshield washer tank and add the proper fluid
if
7-38
At Least Twice a Year
Restraint System Check
Make sure the safety belt reminder light and
all your
belts, buckles, latch plates, retractors and anchorages are
working properly. Lookfor any other loose or damaged
safety belt system parts.If you see anything that might
keep a safety belt system from doing job,
its have it
repaired. Have any torn or frayed safety belts replaced.
Also look for any opened or broken air bag covers, and
have them repaired or replaced. (Theair bag system
does not need regular maintenance.)
Manual Transaxle Check
Check the transaxle fluid level; add
if needed. See
“Manual Transaxle” in the Index. A fluid loss may
indicate a problem. Check the system and repair
if needed.
Automatic TLansaxle Check
(Except 2.4L CodeT Engine)
Check the transaxle fluid level; add
if needed. See
“Automatic Transaxle”in the Index. A fluid loss may
if needed.
indicate a problem. Check the system and repair
At Least Once a Year
Key Lock Cylinders Service
Lubricate the key lock cylinders with the lubricant
specified in Part D.
Body Lubrication Service
Lubricate all body door and rear compartment hinges.
Also lubricate all hinges and latches, including those for
the primary and secondary hood latches, glove box door,
console door and any folding seat hardware.
Part D tells
you what to use. More frequent lubrication may be
required when exposed to a corrosive environment.
Automatic Transaxle Inspection
(2.4L CodeT Engine Only)
If you have the optional 2.4L Code T engine (see “Engine
Identification” in the Index) andan automatic transaxle, it is Starter SwitchCheck
A transaxle
not necessary to check the transaxle fluid level.
fluid leak is the only reason for fluid loss. Check
If a for leaks.
leak occurs, take the vehicle to your Chevrolet dealership
CAUTION:
Service Department and have it repaired
as soon as possible.
You may also have your fluid checked by your dealer or
When youare doing this check, the vehicle could
service center when you have your engine
oil changed.
move suddenly.If it does, you or others could be
injured. Follow the steps below.
HyG lulic ClutchSystemCheck
IA
Check thefluid level inthe clutch reservoir. See
“Hydraulic Clutch Fluid” in the Index.
A fluid loss in
this system could indicate a problem. Have the system
inspected and repaired at once.
1. Before you start, be sure you have enough room
around the vehicle.
2. Firmly apply both the parking brake(see “Parking
Brake” in the Indexif necessary) and the regular brake.
NOTE: Do not use the accelerator pedal, and be
ready to turn off the engine immediately if it starts.
3. On automatic transaxle vehicles, try to start the
engine in each gear. The starter should work only in
PARK (P)or NEUTRAL (N). If the starter works in
any other position, your vehicle needs service.
On manual transaxle vehicles, put the shift lever in
NEUTRAL (N), push the clutch down halfway and
try to start the engine. The starter should work only
when the clutch is pushed down all the way to the
floor. If the starter works when the clutch isn’t
pushed all the way down, your vehicle needs service.
Brake-Tkansaxle Shift Interlock (BTSI) Check
(Automatic Transaxle)
I
When you are doing this check, the vehicle could
move suddenly. Ifit does, you or others could be
injured.
Follow the steps
- below.
7-40
I
1. Before you start, be sure you have enough room around
the vehicle. It should be parkedon a level surface.
2. Firmly apply the parking brake (see “Parking Brake”
in the Index if necessary).
NOTE: Be ready to apply the regular brake
immediately if the vehicle begins to move.
3. With the engine off, turn the key to the RUN position,
but don’t start the engine. Without applying the regular
brake, try to move the shift lever out ofPARK (P)
with normal effort.If the shift lever moves outof
PARK (P), your vehicle’s BTSI needs service.
Steering Column Lock Check
While parked, and with the parking brake set, try to turn
the key to LOCK in each shift lever position.
‘With an automatic transaxle, the key should turn to
LOCK only when the shift lever is in PARK (P).
With a manual transaxle, the key should turn to LOCK
only when the shift lever isin REVERSE (R).
On vehicles with a keyrelease button, try to turn the key
to LOCK without pressing the button. The key should
turn to LOCK only when you press the key button.
On all vehicles, the key should come out only in LOCK.
Turn the steering wheel to the left and to the right. It
should only lock when turned to the right.
:..
Parking Brake and Automatic Transaxle PARK (P)
Mechanism Check
I
When you are doing this check, your vehicle
could begin to move. You or others could be
injured and propertycould be damaged. Make
sure thereis room infront of your vehicle in case
it begins to roll. Be ready to apply the regular
brake at once should the vehicle beginto move.
Park on a fairly steep hill, with the vehicle facing
downhill. Keeping your foot on the regular brake, set the
parking brake.
To check the parking brake: With the engine running
(N), slowly remove foot
and transaxle in NEUTRAL
Do this until
pressure from the regular brake pedal.
the vehicle is held by the parking brake only.
To check the PARK (P) mechanism’s holding ability:
With the engine running, shift to PARK
(P). Then
release all brakes.
Underbody Flushing Service
At least every spring, use plain water to flush any
corrosive materials from the underbody. Take care to
clean thoroughly any areas where mud and other debris
can collect.
7-41
Part C: Periodic Maintenance
Inspections
build-up in the floor pan or could let exhaust fumes into
in the Index.
the vehicle, See “Engine Exhaust”
Radiator and Heater Hose Inspection
Listed below are inspections and services which should
be
performed at least twicea year (for instance, each spring
Inspect the hoses and have them replaced
if they are
and fall). You should let your GM dealer’s service
cracked, swollen or deteriorated. Inspect all pipes,
department or other qualified service center do these jobs. fittings and clamps; replace as needed.
Make sure any necessary repairs are completed at once.
Proper proceduresto perform these services may be
found in a Chevrolet service manual. See “Service and
Owner Publications” in the Index.
Steering, Suspension and Front-Wheel-Drive
Axle Boot and Seal Inspection
Inspect the front and rear suspension and steering system
for damaged, loose or missing parts, signs
of wear, or lack
Throttle Linkage Inspection
Inspect the throttle linkage for interference or binding,
and for damage or missing parts. Replace parts as
needed. Replace any cables that have high effort or
excessive wear.Do not lubricate accelerator and cruise
control cables.
Brake System Inspection
Inspect the complete system. Inspect brake lines and
hoses for proper hookup, binding, leaks, cracks, chafing,
etc. Inspect disc brake pads for wear and rotors for
surface condition.Also inspect drum brake linings for
wear and cracks. Inspect other brake parts, including
drums, wheel cylinders, calipers, parking brake, etc.
Exhaust System Inspection
Check parking brake adjustment.You may need to have
Inspect the complete exhaust system. Inspect the
body near
the exhaust system. Look for broken, damaged, missing or your brakes inspected more often if your driving habits
or conditions resultin frequent braking.
out-of-position parts as well as open seams, holes, loose
connections, or other conditionswhich could cause a heat
of lubrication. Inspect the power steering lines and hoses
for proper hook-up, binding, leaks, cracks, chafing, etc.
Clean and then inspect the drive axle boot seals for
damage, tears or leakage. Replace seals
if necessary.
7-42
Part D: Recommended Fluids and
Lubricants
USAGE
Coolant
Supplement
NOTE: Fluids and lubricants identified below
by name,
part number or specification may be obtained from your Sealer
SM dealer.
Hydraulic Brake
System
FLUID/LUBRICANT
USAGE
Engine Oil
Engine Coolant
Engine oil with the American
Petroleum Institute Certified For
Gasoline Engines “Starburst”
To
symbol of the proper viscosity.
determine the preferred viscosity
for your vehicle’s engine, see
“Engine Oil” in the Index.
50/50mixture of clean water
(preferably distilled) and GM
Goodwrench@ DEX-COOL or
Havoline@ DEX-COOL
(orange-colored, silicate-free)
antifreeze conforming to GM
Specification 6277M. See “Engine
Coolant’’ in the Index.
TM
TM
FLUIDlLUBRICANT
GM Part No. 3634621 or
equivalent with a complete flush
and refill.
Delco Supreme ll@Brake Fluid
(GM Part No. 1052535 or
equivalent DOT-3 brake fluid).
Hydraulic Clutch Hydraulic Clutch Fluid (GM Part
No. 12345347 or equivalent).
System
Power Steering
System
GM Power Steering Fluid
(GM Part NO.1052884 - 1 Pt.,
1050017 - 1 qt., or equivalent).
Manual
Transaxle
Synchromesh Transmission
Fluid (GM PartNo. 12345349
or equivalent).
Automatic
Transaxle
DEXRON@-111 Automatic
Transmission Fluid.
Key Lock
Cylinders
Multi-PuoseLubricant,
Superlube% (GM Part
No. 1234624 1 or equivalent).
I
USAGE
FLUID/LUBRICANT
FLUID/LUBRICANT
USAGE
Manual
Transaxle Shift
Linkage
Chassis lubricant (GM Part
No. 1052497 or equivalent) or
lubricant meeting requirementsof
NLGI Grade 2, Category LB or
GC-LB.
Hood Latch
Assembly Pivots,
Spring Anchor
and Release
Pawl
Clutch Linkage
Pivot Points
Engine oil.
Chassis
Lubrication
Chassis lubricant (GM Part
No. 1052497 or equivalent) or
lubricant meeting requirements
of NLGI Grade 2, Category LB
or GC-LB.
GM Optikleen@Washer
Solvent (GM PartNo. 10515 15)
or equivalent.
HoodandDoorMulti-puoselubricant,
% (GM Part No.
Hinges,
Fuel
Superlube
Door Hinge, Rear 1234624 1 or equivalent).
Compartment Lid
Hinges and Rear
Folding Seat.
Windshield
Washer Solvent
7-44
Lubriplate lubricant aerosol
(GM Part No. 12346293 or
equivalent) or lubricant meeting
requirements of NLGI Grade 2,
Category LB or GC-LB.
Weatherstrip
Dielectric
Silicone
Grease
(GM
Conditioning
Part No. 12345579orequivalent).
See “Replacement Parts” in the Index
for recommended
replacement filters and spark plugs.
Part E: MaintenanceRecord
Any
additional
information
from
“Owner
Checks
and
Services” or “Periodic Maintenance” can be added on
After the scheduled services are performed, record the
the following record pages. Also, you should retain all
date, odometer reading and who performed the service maintenance receipts.
Your owner information portfolio
in the boxesprovidedafterthemaintenanceinterval.isaconvenientplacetostorethem.
7-45
I
Maintenance Record
DATE
7-46
ODOMETER
READING
BY
MAINTENANCE PERFORMED SERVICED
3
Maintenance Record
DATE
ODOMETER
READING
SERVICED BY
MAINTENANCE PERFORMED
7-47
Maintenance Record
ODOMETER
SERVICED BY
7-48
MAINTENANCE PERFORMED
0Section 8
Customer Assistance Information
Here you willfiid out how to contact Chevrolet if you
need assistance. This section also tells you how to obtain
service publicationsand how to report any safety defects.
Customer Satisfaction Procedure
This section includes information on:
0
The Customer Satisfaction Procedure
0
Customer Assistancefor Text Telephone(TTY)
Users
0
Roadside Assistance
0
Courtesy Transportation
0
BBB Auto Line - Alternative Dispute Resolution
Program
0
Reporting Safety Defects
0
Service and Owner Publications
Your satisfaction and goodwill are important
to your
dealer and Chevrolet. Normally, any concern you may
8-1
have with your vehicle can be handled by your selling orFor help outsideof the United States and Canada, call
servicing dealer. Your dealer has the facility, trained
the following numbers as appropriate:
technicians, special tools and up-to-date information to 0 In Mexico: (525) 625-3256
promptly address any issue which may arise. Chevrolet
has empowered its dealers to make decisions and repair 0 In Puerto Rico: 1-800-496-9992 (English) or
1-800-496-9993 (Spanish)
vehicles, and they are eager to resolve your concern to
your complete satisfaction.If your concern has not been 0 In the U.S. Virgin Islands: 1-800-496-9994
resolved to your satisfaction, take the following steps:
0 In the Dominican Republic: 1-800-75 1-4135
STEP ONE -- Discuss your concernwith a member
(English) or 1-800-751-4136 (Spanish)
of dealership management. Normally, concerns can be
0 In the Bahamas: 1-800-389-0009
quickly resolved at that level.If the matter has already
been reviewed with the Sales, Service, or
Parts Manager,
0 In Bermuda, Barbados, Antigua and the British
contact the ownerof the dealership or the General
Virgin Islands: 1-800-534-0 122
Manager.
0 In all other Caribbean countries: 1-809-7631315
STEP TWO -- If after contacting a member
of
dealership management, it appears your concern cannot 0 In other overseas locations, call GM North American
Export Sales in Canada at: 1-905-644-41 12
be resolved by the dealership without further help,
contact the Chevrolet Customer Assistance Center by
calling 1-800-222- 1020.In Canada, contactGM of
Canada Customer Assistance Center in Oshawa
by
calling 1-800-263-3777 (English) or 1-800-263-7854
(French).
4 3
ror prompt assistance, please have
the following
information available to give
the Customer Assistance
Representative:
Your name, address, home and business telephone
numbers
0
Vehicle Identification Number (This is available
from the vehicle registrationor title, or the plate at
the topleft of the instrument panel and visible
through the windshield.)
0
Dealership name and location
0
Vehicle delivery date and present mileage
0
Nature of concern
We encourage you to call us so we can give your inquiry
prompt attention. However,if you wish to write
Chevrolet, write to:
Chevrolet Motor Division
Chevrolet Customer Assistance Center
P.O. Box 7047
Troy, MI 48007-7047
Refer to your Warranty and Owner Assistance
Information bookletfor addresses of Canadian andGM
Overseas offices.
When contacting Chevrolet, please remember that your
concern will likely be resolved
by the dealer, using the
dealer’s facilities, equipment and personnel. That is why
we suggest you followStep One first if you have a
concern.
Customer Assistance forText
Telephone (TTY) Users
To assist customers who are
deaf, hard of hearing, or
(TTYs),
speech-impaired and who use Text Telephones
Chevrolet has TTY equipment available at its Custome
Assistance Center. Any TTY user can communicate wi
Chevrolet by dialing: 1-800-833-CHEV. (TTY users in
Canada can dial1-800-263-3830.)
Chevrolet Roadside Assistance Program Roadside Assistance is available 24 hours a day,
365 days a year, by calling1-800-CHEV-USA
(1-800-243-8872). This toll-free number will provide
you over-the-phone roadside assistance with minor
mechanical problems.If your problem cannot be
resolved over the phone, our advisors have access to a
nationwide networkof dealer recommended service
providers. Roadside membership isfree, however some
services may incur costs.
Roadside offers two levelsof service to the customer,
Basic Care and Courtesy Care:
TM
Toll-free number, 1 -800-CHEV-USA
To enhance Chevrolet’s strong commitment to customer
satisfaction, Chevrolet is excited to announce the
establishment of the Chevrolet/Geo Roadside Assistance
Center. As the ownerof a 1996 Chevrolet/Geo,
membership in Roadside Assistance is free.
0
Free towing for warranty repairs
0
Basic over-the-phone technical advice
Available dealer services at reasonable costs (ie.,
wrecker services, locksmith/key service, glass repair,
etc.)
ROADSIDE Courtesy
0
8-4
TM
Care PROVIDES:
Roadside Basic Care services (as outlined above)
Plus:
FREE Non-Warranty Towing (to the closest dealer
from a legal roadway)
0
FREE Locksmith/Key Service (when keys are lost
on the road or locked inside)
For complete program details, see your Chevrolet/Geo
dealer to obtain a Roadside Assistance Center brochure.
0
FREE Flat Tire Service (spare installed onthe road)
The Roadside Assistance Center uses companies that
will provide you with quality and priority service. When
roadside services are required, our advisors will explain
any payment obligations that may be incurred
for
utilizing outside services.
FREE Jump Start (at home or on the road)
FREE Fuel Delivery ($5 of fuel delivered on
the road)
Chevrolet/Geo offers Courtesy Transportation
for
For prompt assistance when calling, please have the
customers needing warranty service. Courtesy
following available to give to the advisor:
Transportation will be offered in conjunction with the
0 Vehicle Identification Number
coverage provided by the BUMPER-TO-BUMPER
New Vehicle Limited Warranty toeligible purchasers of
0 License plate number
1996 Chevrolet/Geo passenger car and light duty trucks. 0 Vehiclecolor
(Please see your selling dealerfor details.)
Vehiclelocation
Note: Courtesy Care is available to Retail and
Telephone number where you can be reached
Retail Lease Customers operating 1996 and
newer Chevrolet/Geo vehiclesfor a periodof
0 Vehiclemileage
36 months/36,000 miles (60,000 km), whichever occurs
0 Description of problem
first. AllCourtesy Care services mustbe pre-arranged
by Chevrolet Roadside or Dealer Service Management. Please refer to the Roadside Assistance brochure inside
your owner information portfoliofor full program
Basic Care and Courtesy Care are not partof or
details.
included in the coverage provided by
the New Vehicle
Limited Warranty. Chevrolet reservesthe right to
modify or discontinueBasic Care and Courtesy Care
at any time.
8-5
Canadian Roadside Assistance
Vehicles purchased in Canada have an extensive
Roadside Assistance program accessible from anywhere
in Canadaor the United States. Please refer to the
separate brochure provided bythe dealer or call
1-800-268-6800 for emergency services.
Courtesy Transportation
Chevrolet/Geo offers Courtesy Transportationfor
customers needing warranty service. Courtesy
Transportation will be offered in conjunction with the
coverage provided by the BUMPER-TO-BUMPER
of
New Vehicle Limited Warranty to retail purchasers
1996 Chevrolet/Geo passenger cars and light duty
trucks
(please see your selling dealer
for details).
Courtesy Transportation includes:
One way shuttle ride for any warranty repair
completed during the same day.
0
Up to $30 maximum daily vehicle rental allowance
5 days, OR
for any overnight warranty repair up to
Up to $30 maximum daily cab, bus, or other
transportation allowance in lieuof rental for any
overnight warranty repair up 5todays, OR
Up to $10 daily fuel allowance for rides provided by
another person(ie., friend, neighbor, etc.)in lieu of
rental for any Overnight warranty repair up to5 days.
Note: All Courtesy Transportation arrangements will
be administered by your Chevrolet/Geo dealer
service management. Claim amounts should reflect
all actual costs.
0 Chevrolet/Geo Courtesy Transportation is not partof
the BUMPER-TO-BUMPER New Vehicle Limited
Warranty. Chevrolet/Geo reserves the right to make
any changesor discontinue Courtesy Transportation
at any time without notification.
For additional program details, contact your
Chevrolet/Geo dealer.
In Canada, please consult yourGM dealer for
information on Courtesy Transportation.
Some state insurance regulations make it impractical to
rent vehicles to people under 21 years
of age. If you are
under 21 and have difficulty renting a vehicle, Chevrolet
will reimburse you, up to $30/day,
for documented
transportation you receive.
For warranty repairs during the Complete Vehicle
Coverage period in the New Vehicle Limited Warranty,
interim transportation may be available under the
Courtesy Transportation Program. Please consult your
dealer for details. The Roadside Assistance program is
available only in the United States and Canada.
GM Participation in BBB AUTO
LINE - Alternative Dispute
Resolution Program*
*This program may notbe available in all states,
depending on state law. Canadian owners refer to your
Warranty and Owner Assistance Information booklet.
General Motors reserves the right
to change eligibility
in this
limitations and/or to discontinue its participation
program.
Both Chevrolet and your Chevrolet dealer are committed
to making sure you are completely satisfied with your new
vehicle. Our experience has shown that,if a situation
arises where you feel your concern has not been
adequately addressed, the Customer Satisfaction Procedure
described earlier in this section is very successful.
There may be instances where an impartial third party
can assist in arriving at a solution to a disagreement
regarding vehicle repairsor interpretation of the New
Vehicle Limited Warranty. To assistin resolving these
disagreements, Chevrolet voluntarily participates in
BBB AUTO LINE.
BBB AUTO LINE is an out-of-court program
administered by the Better Business Bureau system
to
settle disputes between customers and automobile
manufacturers. This program is available free of charge
to customers who currently own
or lease aGM vehicle.
If you are not satisfied after following the Customer
Satisfaction Procedure, you may contact
the BBB using
the toll-free telephone number, or
write them at the
following address:
BBB AUTO LINE
Council of Better Business Bureaus
4200 Wilson Boulevard
Suite 800
Arlington, VA 22203
Telenhone: 1-800-955-5100
To file a claim, you will be asked to provide your name REPORTING SAFETY DEFECTS
and address, your Vehicle Identification Number (VIN),
TO THE UNITED
and a statement of the nature
of your complaint.
GOVERNMENT
Eligibility is limited by vehicle age and mileage, and
other factors.
If you believe that your vehiclehas a defect which could
or death, you should
cause a crash or could cause injury
We prefer you utilizethe Customer Satisfaction
immediately
inform
the
National
Highway Traffic
Procedure beforeyou resort to AUTOLINE, but you
to
Safety Administration (NHTSA), in addition
may contactthe BBB at any time. TheBBB will attempt
notifying General Motors.
to resolvethe complaint serving asan intermediary
between you and Chevrolet.If this mediation is
If NHTSA receives similar complaints, it may open an
unsuccessful, an informal hearing will be scheduled
in
investigation, and if it finds that a safety defect exists
where eligible customers may present their caseanto
a groupof vehicles, it may order a recall and remedy
impartial third-party arbitrator.
campaign. However, NHTSA cannot become involved
in individual problems between you, your dealer, or
The arbitrator will make a decision which you may
accept or reject.If you accept the decision, GM will be General Motors.
bound by that decision.The entire dispute resolution
To contact NHTSA, you mayeither call the Auto Safety
40 days fromthe
procedure should ordinarily take about
Hotline toll-free at 1-800-424-9393 (or 366-0123 in the
time youfile a claim until a decision
is made.
Washington, D.C. area) or write to:
Some state laws may require you to use this program
NHTSA, U.S. Department of Transportation
before filing a claim with a state-run arbitration program
Washington, D.C. 20590
or in the courts. For further information, contact the
You can also obtain other information about motor
BBB at 1-800-955-5100 or the Chevrolet Customer
vehicle
safety from the Hotline.
Assistance Center at 1-800-222-1020.
STATES
8-8
’
REPORTINGSAFETYDEFECTSTO
THE CANADIAN GOVERNMENT
Service and Owner Publications
If you live in Canada, and you believe that your vehicle
has a safety defect, you should immediately notify
Transport Canada, in addition to notifying General
Motors of Canada Limited.You may write to:
I
Transport Canada
Box 8880
Ottawa, Ontario K1G352
REPORTING SAFETY DEFECTS
TO GENERAL MOTORS
In addition to notifying NHTSA (or Transport Canada)
in a situation like this,we certainly hopeyou’ll notify
us. Please call us at 1-800-222-1020 or write:
Chevrolet Motor Division
Chevrolet Customer Assistance Center
P.O. Box 7047
Troy, Michigan 48007-7047
In Canada, pleasecall us at 1-800-263-3777 (English)
or 1-800-263-7854 (French). Or, write:
General Motorsof Canada Limited
Customer Assistance Center
1908 Colonel Sam Drive
Oshawa, OntarioL1H 8P7
Service manuals, service bulletins, owner’s manuals and
other service literature are available
for purchase for all
current and many past model General Motors vehicles.
Toll-free telephone numbersfor ordering information:
United States
.. . ....
1-800-55 1-4123
Canada . . . . . . . . . . .. 1-800-668-5539
8-9
Service Manuals
Service manuals contain diagnostic and repair
information for all chassis and body systems. They
may be usefulfor owners who wish to get a greater
understanding of their vehicle. They are also useful
for
owners with the appropriate skill level or training who
wish to perform “do-it-yourself” service. These are
authentic General Motors service manuals meant for
professional, qualified technicians.
Service Bulletins
Service bulletins covering various subjects are regularly
sent to all General Motors dealerships.
GM monitors
product performance inthe field. When service methods
are found which promote better service GM
on vehicles,
bulletins are created to help the technician perform
better service. Service bulletins may involve any
8-10
number of vehicles. Some will describe inexpensive
service; others will describe expensive service.Some
will advise of new or unexpected conditions, and others
may help avoid future costly repairs. Service bulletins
are meantfor qualified technicians.In some cases
tools,
bulletins refer to service manuals, specialized
equipment and safety procedures necessary to service
the vehicle. Since these bulletins are issued throughout
is required and
the model year and beyond, an index
published quarterly to help identify specific bulletins.
Subscriptions are available.You can order an index at
the toll-free numbers listed previously, or ask
GMa
dealer to seean index or individual bulletin.
Owner Publications
Owner’s manuals, warranty folders and various owner
assistance booklets provide owners with general
operation and maintenance information.
NOTES
8-11
NOTES
8-12
0 Section 9
Index
Adapter Kits. CD . . . . . . . . . . . . . . . . . . . . . . . . . . . . . . 3-16
AirBag . . . . . . . . . . . . . . . . . . . . . . . . . . . . . . . . . . . . . . . 1-19
How Does it Restrain . . . . . . . . . . . . . . . . . . . . . . . . . . 1-23
How it Works . . . . . . . . . . . . . . . . . . . . . . . . . . . . . . . . 1-21
Location . . . . . . . . . . . . . . . . . . . . . . . . . . . . . . . . . . . .1-21
Readiness Light . . . . . . . . . . . . . . . . . . . . . . . . . 1.20.2.66
Servicing . . . . . . . . . . . . . . . . . . . . . . . . . . . . . . . . . . . 1-24
What Makes it Inflate . . . . . . . . . . . . . . . . . . . . . . . . . . 1-22
What Will You See After it Inflates ............... 1-23
When Should it Inflate . . . . . . . . . . . . . . . . . . . . . . . . . 1-22
Air Cleaner . . . . . . . . . . . . . . . . . . . . . . . . . . . . . . . . . . . .6- 15
AirConditioning . . . . . . . . . . . . . . . . . . . . . . . . . . . . . . . . 3-4
Air Conditioning Refrigerants .....................
6-58
Alignment and Balance. Tire . . . . . . . . . . . . . . . . . . . . . .6-41
Aluminum Wheels. Cleaning ......................6-49
Antenna. Fixed ................................. 3-24
Anti-Lock
Brake System Warning Light . . . . . . . . . . . . . . . . 2.68.4.6
Brakes . . . . . . . . . . . . . . . . . . . . . . . . . . . . . . . . . . . . . .4-6
Anti.Theft. Radio . . . . . . . . . . . . . . . . . . . . . . . . . . . . . .3-20
Antifreeze . . . . . . . . . . . . . . . . . . . . . . . . . . . . . . . . . . . . . 6-22
Appearancecare . . . . . . . . . . . . . . . . . . . . . . . . . . . . . . .6-43
6-5 1
Appearance Care Materials .......................
Arbitration Program ..............................8-7
Ashtrays . . . . . . . . . . . . . . . . . . . . . . . . . . . . . . . . . . . . . .
2-47
Audio Equipment. Adding . . . . . . . . . . . . . . . . . . . . . . . .3-23
Audio Systems .................................. 3-7
Auto-Down Window ............................
2-29
Automatic Overdrive . . . . . . . . . . . . . . . . . . . . . . . . . . . . 2-19
Automatic Transaxle
Check . . . . . . . . . . . . . . . . . . . . . . . . . . . . . . . . . . . . . .7-39
Fluid .................................. 6.17.6.19
Operation . . . . . . . . . . . . . . . . . . . . . . . . . . . . . . . . . . .2-16
Park Mechanism Check . . . . . . . . . . . . . . . . . . . . . . . .7-41
Shifting . . . . . . . . . . . . . . . . . . . . . . . . . . . . . . . . . . . . . 2-16
Startine Your Engine . . . . . . . . . . . . . . . . . . . . . . . . . . 2-12
Battery . . . . . . . . . . . . . . . . . . . . . . . . . . . . . . . . . . . . . . 6.3 1
Charging System Light ........................
2-66
Jump Starting . . . . . . . . . . . . . . . . . . . . . . . . . . . . . . . . .5-2
Replacement. Keyless Entry ..................... 2-6
Saver ......................................2-43
Warnings . . . . . . . . . . . . . . . . . . . . . . . . . . . . . . . . . . . . 5-2
BBB Auto Line . . . . . . . . . . . . . . . . . . . . . . . . . . . . . . . . .8-7
9-1
Better Business Bureau Mediation................... 8-7
Brake
Adjustment ..................................
6-3 1
Fluid .......................................
6-28
Master Cylinder ...............................
6-28
2-23
Parking .....................................
Pedal Travel ..................................6-3 1
Replacing System Parts ........................
6-31
System Warning Light .........................
2-67
Trailer ......................................
4-37
Transaxle Shift Interlock Check.................. 7-40
6-30
Wear .......................................
Brakes. Anti-Lock ...............................
4-6
Braking ........................................
4-5
Braking in Emergencies ...........................4-9
Break-In.NewVehicle ...........................
2-9
Brightness Control ..............................
2-41
BTSICheck ...................................
7-40
BulbReplacement ...... .................. 6-32.6-57
8-6
Canadian Roadside Assistance ....................
6-58
Capacities and Specifications ......................
CarbonMonoxide ............... 2.27.2.28.4.28. 4.37
Cassette Deck Service ...........................
7-38
Cassette Tape Player .......................
3.10.3.12
Cassette Tape Player Care........................
3-24
CD Adapter Kits ...............................
3-16
9-2
.
CD Player Theft-Deterrent Feature ................. 3-20
Center Console Storage Area . . . . . . . . . . . . . . . . . . . . . . 2-45
Center Rear Passenger Position....................
1-31
4-32
Certification Label ..............................
Certificatiooire Label ..................; ....... 4-31
4-37
Chains.Safety .................................
Chains.Tire . . . . . . . . . . . . . . . . . . . . . . . . . . . . . . . . . . .6-43
5-21
Changing a Flat Tire.............................
2-71
Check Engine Light .............................
2-75
CheckGagesLight ..............................
2-74
CheckOilLight ................................
Checking Your Restraint Systems .................. 1-46
6-50
Chemical Paint Spotting..........................
1-35
Child Restraints ................................
Securing in a Rear Outside Seat Position
........... 1-37
Securing in the Center Rear Seat Position.......... 1-39
Securing in the Passenger Seat Position . . . . . . . . . . . 1-40
Securing in the Right Front Seat Position .......... 1-40
1-36
TopStrap ...................................
WheretoPut ................................
1-35
CigaretteLighter ...............................
2-47
Circuit Breakers and Fuses ....................... 6-53
Cleaner. Air . . . . . . . . . . . . . . . . . . . . . . . . . . . . . . . . . . . 6-15
Cleaning ......................................
6-43
Aluminum Wheels ............................
6-49
Convertible Top ..............................
6-48
Fabric ......................................
6-44
6-47
Glass .......................................
Inside of Your Chevrolet .......................
6-44
6-46
InstrumentPanel .............................
6-47
Outside of Your Chevrolet ......................
Special Problems .............................
6-45
6-45
Stains ......................................
Tires . . . . . . . . . . . . . . . . . . . . . . . . . . . . . . . . . . . . . . . 6-49
Vinyl . . . . . . . . . . . . . . . . . . . . . . . . . . . . . . . . . . . . . . . 6-46
Wheels . . . . . . . . . . . . . . . . . . . . . . . . . . . . . . . . . . . . .6-49
Windshield and Wiper Blades . . . . . . . . . . . . . . . . . . . 6-47
Climate Control System. Standard . . . . . . . . . . . . . . . . . . . 3-1
Climate Control System with Air Conditioning. . . . . . . . . 3-3
Clock. Setting the . . . . . . . . . . . . . . . . . . . . . . . . . . . . . . . .3-7
Clutch. Hydraulic ............................... 6-21
Clutch Fluid. Hydraulic . . . . . . . . . . . . . . . . . . . . . . . . . .6-21
Comfort Controls . . . . . . . . . . . . . . . . . . . . . . . . . . . . . . . . 3- 1
Compact Disc Adapter Kits . . . . . . . . . . . . . . . . . . . . . . . 3- 16
Compact Disc Care . . . . . . . . . . . . . . . . . . . . . . . . . . . . .3-24
3- 16
Compact Disc Player ............................
Compact Disc Player Errors. . . . . . . . . . . . . . . . . . . . . . .3- 19
Compact Spare Tire . . . . . . . . . . . . . . . . . . . . . . . . . . . . . 5-32
Control of a Vehicle ..............................
4-5
ConvenienceNet . . . . . . . . . . . . . . . . . . . . . . . . . . . . . . . 2-46
Convertible Top
6-48
Cleaning ....................................
Lowering ...................................
2-49
Lowering Manually . . . . . . . . . . . . . . . . . . . . . . . . . . . 2-57
Raising . . . . . . . . . . . . . . . . . . . . . . . . . . . . . . . . . . . . . 2-53
2-57
Raising Manually .............................
Convex Outside Mirror ..........................
2-45
Coolant .......................................
6-22
Heater.Engine ...............................
2-14
SurgeTank . . . . . . . . . . . . . . . . . . . . . . . . . . . . . . . . . . 5-17
Surge Tank Pressure Cap .......................
6-25
5-17
CoolingSystem ................................
8-6
Courtesy Transportation ...........................
CruiseControl .................................
2-35
Cupholders . . . . . . . . . . . . . . . . . . . . . . . . . . . . . . . . . . . . 2-46
Customer Assistance for Text Telephone Users ......... 8-3
Customer Assistance Information . . . . . . . . . . . . . . . . . . . 8-1
8-1
Customer Satisfaction Procedure ....................
Damage. Finish . . . . . . . . . . . . . . . . . . . . . . . . . . . . . . . 6-50
6-49
Damage. Sheet Metal ............................
2-40
Daytime Running Lamps .........................
DeadBattery ...................................
5-2
Defects. Reporting Safety . . . . . . . . . . . . . . . . . . . . . . . . . 8-8
Defensive Driving ...............................
4-1
Defogger.RearWindow ..........................
3-7
Defogging . . . . . . . . . . . . . . . . . . . . . . . . . . . . . . . . . . . . . 3-6
Defrosting .....................................
3-6
6-60
Dimensions.Vehicle ............................
Dolby@ B Noise Reduction .......................
3-15
2-3
DoorLocks .....................................
2-18
Drive. Automatic Transaxle .......................
DriverPosition .................................
1-11
Driving
City ........................................
4-20
Defensive ....................................4- 1
Drunken ..................................... 4-2
Freeway .................................... 4-21
InaBlizzard .................................4-27
In Foreign Countries ........................... 6-3
In the Rain ..................................
4-17
Night . . . . . . . . . . . . . . . . . . . . . . . . . . . . . . . . . . . . . . 4-15
OnCurves ..................................4-10
On Grades While Towing a Trailer ............... 4-39
On Hill and Mountain Roads .................... 4-23
On Snow and Ice ............................. 4-26
Throughwater ............................... 4-19
WetRoads ..................................4-17
Winter . . . . . . . . . . . . . . . . . . . . . . . . . . . . . . . . . . . . . . 4-25
With a Trailer . . . . . . . . . . . . . . . . . . . . . . . . . . . . . . . . 4-38
DrunkenDriving ................................ 4-2
E a s y Entry Seat ................................ 1-4
Electrical Equipment. Adding . . . . . . 2.13.2.14.3.23. 6.53
Electrical System . . . . . . . . . . . . . . . . . . . . . . . . . . . . . . .6-53
Engine . . . . . . . . . . . . . . . . . . . . . . . . . . . . . . . . . . . . 6.8.6.9
Coolant .....................
!. . . . . . . . . . . . . . . 6-22
Coolant Heater . . . . . . . . . . . . . . . . . . . . . . . . . . . . . . . 2-14
Coolant Level Check . . . . . . . . . . . . . . . . . . . . . . . . . . 7-38
Coolant Temperature Gage . . . . . . . . . . . . . . . . . . . . . 2-70
Exhaust ..................................... 2-27
Fuse Block ..................................
6-56
Identification ................................
6-52
OilLevelCheck .............................. 7-38
Overheating ................................. 5-13
Running While Parked ......................... 2-28
Specifications ................................6-59
Starting Your ................................ 2-12
Engineoil .................................... 6-10
Adding ..................................... 6-11
Additives ...................................
6-14
Checking ................................... 6-11
Used ............................... ......... 6-15
What To Use .................................6-13
Whentochange .............................. 6-14
Enhanced Traction System Active Light .........2-69. 4-8
Enhanced Traction System Warning Light ....... 2-68. 4-9
Ethanol ........................................
6-2
ETS
2.69,4-8
Active Light .............................
WarningLight ...........................
2.68. 4-9
Exhaust. Engine ................................
2-27
6-44
Fabric Cleaning ...............................
Fifth Gear. Manual Transaxle .....................
2-21
6-4
FillingYourTank ................................
Filter. Air ..................................... 6-15
Finish Care . . . . . . . . . . . . . . . . . . . . . . . . . . . . . . . . . . . . 6-48
Finish Damage ................................. 6-50
Frangais
. . . . . . . . . .en
. . . . 2.18.2.20
First Gear. Automatic Transaxle
First Gear. Manual Transaxle ...................... 2-21
5-1
Flashers. Hazard Warning .........................
Flat Tire. Changing . . . . . . . . . . . . . . . . . . . . . . . . . . . . . 5-21
Fluids and Lubricants ............................ 7-43
Floor Mat Retainer . . . . . . . . . . . . . . . . . . . . . . . . . . . . . .2-46
FogLamps . . . . . . . . . . . . . . . . . . . . . . . . . . . . . . . . . . . . 2-41
Foreign Countries. Fuel . . . . . . . . . . . . . . . . . . . . . . . . . . . 6-3
Fourth Gear. Manual Transaxle .................... 2-21
FrenchLanguageManual . . . . . . . . . . . . . . . . . . . . . . . . . . . 11
Front Reading Lamps . . . . . . . . . . . . . . . . . . . . . . . . . . . . 2-42
FrontTowing ................................... 5-9
Fuel .......................................... 6-2
Filling Your Tank . . . . . . . . . . . . . . . . . . . . . . . . . . . . . .6-4
Gage ....................................... 2-76
In Foreign Countries ...........................
6-3
Fuses and Circuit Breakers ....................... 6-53
.I
Gages
Engine Coolant Temperature . . . . . . . . . . . . . . . . . . . . 2-70
Fuel . . . . . . . . . . . . . . . . . . . . . . . . . . . . . . . . . . . . . . .2-76
Speedometer ................................. 2-63
Tachometer .................................. 2-64
GAWR . . . . . . . . . . . . . . . . . . . . . . . . . . . . . . . . . . . . . . .4-32
Gear Positions, Automatic Transaxle................ 2- 16
Gear Positions, Manual Transaxle . . . . . . . . . . . . . . . . . . 2-21
Gross Axle Weight Rating ........................
4-32
Gross Vehicle Weight Rating ......................
4-32
Guide
. . . . . . . . . . . . . . . . . . . . . . . . . . . . . . . . . 1..1
GVWR . . . . . . . . . . . . . . . . . . . . . . . . . . . . . . . . . . . . . . . 4-32
Halogen Bulbs . . . . . . . . . . . . . . . . . . . . . . . . . . . . . . . . 6-32
Hazard Warning Flashers . . . . . . . . . . . . . . . . . . . . . . . . . . 5-1
HeadRestraints .................................
1-4
Headlamps ....................................
2-39
6.32.6.57
BulbReplacement .......................
Highbow Beam Changer ......................
2-32
2-39
On Reminder ................................
Wiring .....................................
6-53
Hearing Impaired. Customer Assistance . . . . . . . . . . . . . . 8-3
Heating . . . . . . . . . . . . . . . . . . . . . . . . . . . . . . . . . . . . . . . . 3-5
High-Beam Headlamps .......................... 2-32
4-23
Highway Hypnosis ..............................
Hill and Mountain Roads . . . . . . . . . . . . . . . . . . . . . . . . .4-23
Hitches. Trailer .................................
4-37
Hood
Checking Things Under .........................
6-6
Prop . . . . . . . . . . . . . . . . . . . . . . . . . . . . . . . . . . . . . . . . 6-7
Release ......................................
6-6
Horn . . . . . . . . . . . . . . . . . . . . . . . . . . . . . . . . . . . . . . . . . 2-29
6-21
HydraulicClutch ...............................
Hydraulic Clutch Fluid . . . . . . . . . . . . . . . . . . . . . . . . . . . 6-21
Hydraulic Clutch System Check ................... 7-39
Hydroplaning . . . . . . . . . . . . . . . . . . . . . . . . . . . . . . . . . . 4-19
9-5
Ignition Switch ................................2-10
Illuminated Entry ............................... 2-42
6-37
Inflation. Tire ..................................
Inside Daymight Rearview Mirror ................. 2-43
Inspections
Brakesystem ................................ 7-42
ExhaustSystems . . . . . . . . . . . . . . . . . . . . . . . . . . . . . 7-42
Front-Wheel-Drive Axle Boot . . . . . . . . . . . . . . . . . . 7-42
Front-Wheel-Drive Axle Seal ................... 7-42
Radiator and Heater Hose . . . . . . . . . . . . . . . . . . . . . .7-42
Steering .................................... 7-42
Suspension .................................. 7-42
Throttle Linkage ..............................7-42
2-60
InstrumentPanel ...............................
Brightness Control .............................2-4 1
Cleaning . . . . . . . . . . . . . . . . . . . . . . . . . . . . . . . . . . . . 6-46
Cluster . . . . . . . . . . . . . . . . . . . . . . . . . . . . . . . . 2-62.2-63
FuseBlock . . . . . . . . . . . . . . . . . . . . . . . . . . . . . . . . . .6-54
Interior Lamps ................................. 2-41
Jack. Tire .................................... 5-21
Jump Starting ...................................5-2
K e y Lock Cylinders Service ..................... 7-39
Key Release Button . . . . . . . . . . . . . . . . . . . . . . . . . . . . . 2- 11
Keyless Entry System . . . . . . . . . . . . . . . . . . . . . . . . . . . . 2-5
Keys .......................................... 2-1
9-6
Labels .................................. 4.31.6.52
Certification .................................4-32
CertificationEire .............................4-31
Service Parts Identification . . . . . . . . . . . . . . . . . . . . . 6-52
Tire-Loading Information ......................
4-31
Vehicle Identification Number . . . . . . . . . . . . . . . . . . .6-52
Lamps ........................................2-39
Fog ........................................ 2-41
Interior . . . . . . . . . . . . . . . . . . . . . . . . . . . . . . . . . . . . .2-41
On Reminder ................................2-39
Latches. Seatback ................................ 1-4
Leaving Your Vehicle ............................. 2-5
Leaving Your Vehicle with the Engine Running ....... 2-25
Lighter ....................................... 2-47
Lights
Air Bag Readiness ....................... 1-20. 2-66
Anti-Lock Brake System Warning ............ 2-68. 4-6
Brake System Warning . . . . . . . . . . . . . . . . . . . . . . . . . 2-67
ChargingSystem . . . . . . . . . . . . . . . . . . . . . . . . . . . . . 2-66
CheckEngine ................................
2-71
CheckGages ................................2-75
CheckOil ....................................2-74
Enhanced Traction System Active ............ 2-69. 4-8
Enhanced Traction System Warning Light . . . . . 2-68. 4-9
ETS Active . . . . . . . . . . . . . . . . . . . . . . . . . . . . . . 2-69. 4-8
ETS Warning .............................2-68. 4-9
Interior . . . . . . . . . . . . . . . . . . . . . . . . . . . . . . . . . . . . . 2-41
Low Coolant Warning . . . . . . . . . . . . . . . . . . . . . . . . .2-70
Oil Pressure Warning .......................... 2-73
........................... 2-75
PasslockWarning
Safety Belt Reminder ......................
1.6.2.65
Up-Shift ....................................
2-75
Loading YourVehicle ...........................
4-31
Locks .........................................2-3
Cylinders ................................... 7-39
Door ........................................ 2-3
Key Lock Cylinder Service . . . . . . . . . . . . . . . . . . . . . 7-39
PowerDoor .................................. 2-4
2-4
Rear Door Security .............................
Steering Column Lock Check . . . . . . . . . . . . . . . . . . . 7-40
2-7
T r ~ n k.......................................
2-70
Low Coolant Warning Light ......................
Lowering the Convertible Top Manually............. 2-57
Lowering Your Convertible Top ................... 2-49
Lubricants and Fluids ............................
7-43
Lubrication Service. Body ........................ 7-39
Maintenance. Normal Replacement parts . . . . . . . . . . . 6-60
MaintenanceRecord . . . . . . . . . . . . . . . . . . . . . . . . . . . . 7-45
Maintenance Schedule . . . . . . . . . . . . . . . . . . . . . . . . . . . .7- 1
Long Tripmighway Definition ................... 7-5
Long Tripmighway Intervals .....................7-5
Owner Checks and Services . . . . . . . . . . . . . . . . . . . . . 7-38
Periodic Maintenance Inspections ................ 7-42
Recommended Fluids and Lubricants ............. 7-43
Scheduled Maintenance Services .................. 7-3
7-4
Short Trip/City Definition .......................
7-4
Short Trip/City Intervals ........................
Maintenance. Underbody .........................
6-50
Maintenance When Trailer Towing ................. 4-40
Malfunction Indicator Lamp ......................
2-71
Manual Front Seat ...............................
1.1
Manual Lumbar Support ..........................
1-2
Manual Remote Control Mirror .................... 2-44
Manual Transaxle . . . . . . . . . . . . . . . . . . . . . . . . . . . . . . .2-12
Check . . . . . . . . . . . . . . . . . . . . . . . . . . . . . . . . . . . . . . 7-39
6-19
Fluid .......................................
Shifting ..................................... 2-20
Starting Your Engine ..........................
2-12
Methanol ......................................
6-2
Mirrors ....................................... 2-44
Convex Outside .............................. 2-45
2-43
Inside Daymight Rearview .....................
Manual Remote Control . . . . . . . . . . . . . . . . . . . . . . . .2-44
Power Remote Control ......................... 2-44
MountainRoads ................................
4-23
Multifunction Lever .............................
2-30
Neutral. Automatic Transaxle . . . . . . . . . . . . . . . . . . . . 2-17
Neutral. Manual Transaxle . . . . . . . . . . . . . . . . . . . . . . . . 2-21
New Vehicle “Break-In” . . . . . . . . . . . . . . . . . . . . . . . . . . 2-9
Nightvision . . . . . . . . . . . . . . . . . . . . . . . . . . . . . . . . . . . 4-16
9- /
Odometer ....................................2-63
Odometer. Trip ................................. 2-64
Off-Road Recovery ............................. 4- 12
Oil. Engine ....................................6-10
2-73
Oil Pressure Warning Light .......................
Overdrive. Automatic Transaxle ................... 2- 19
Overheating Engine ............................. 5- 13
Owner Checks and Services....................... 7-38
Owner Publications. Ordering ......................8-9
Paint Spotting. Chemical ........................ 6-50
Park
Automatic Transaxle .......................... 2- 17
Shifting Into ................................. 2-24
Shifting Out of . . . . . . . . . . . . . . . . . . . . . . . . . . . . . . . 2-26
Parking
At Night ..................................... 2-8
Brake Mechanism Check . . . . . . . . . . . . . . . . . . . . . . . 7-41
Brake ...................................... 2-23
Lots ........................................ 2-8
Over Things That Bum . . . . . . . . . . . . . . . . . . . . . . . . 2-27
WithaTrailer ................................ 4-39
Your Vehicle. Manual Transaxle . . . . . . . . . . . . . . . . . 2-26
Passenger Position . . . . . . . . . . . . . . . . . . . . . . . . . . . . . . 1-25
Passing .......................................4-12
Passlock .....................................2-9
Passlock Warning Light ........................ 2-75
Periodic Maintenance Inspections .................. 7-42
TM
TM
9-8
Power
Door Locks ...................................
2-4
OptionFuses ................................6-53
Remote Control Mirror ........................
2-44
Steering ................................ 4.9.6.26
Steering Fluid ................................ 6-26
Windows ................................... 2-29
1-25
Pregnancy. Use of Safety Belts ....................
Problems on the Road ............................ 5-1
Publications. Service and Owner .................... 8-9
R a d i o Reception .............................. 3-23
Radios ........................................ 3-7
Rain. Driving In ................................ 4-17
Raising the Convertible Top Manually .............. 2-57
Raising Your Convertible Top .....................
2-53
Rear
DoorSecurityLocks ........................... 2-4
Outside Seat Position ..........................1-26
1-29
Safety Belt Comfort Guides .....................
Seatpassengers .............................. 1-25
Towing ..................................... 5-11
Window Defogger .............................3-7
RearTowing ................................... 5-11
Rearview Mirror. Inside Daymight ................. 2-43
Reclining Front Seatbacks .........................
1-2
4-29
Recreational Vehicle Towing ......................
Refrigerants. Air Conditioning ....................
6-58
Remote Trunk Release ............................
2-8
Replacement
Bulbs . . . . . . . . . . . . . . . . . . . . . . . . . . . . . . . . . . . . . . 6-57
Parts .......................................
6-60
Wheel . . . . . . . . . . . . . . . . . . . . . . . . . . . . . . . . . . . . . . 6-41
1-46
Replacing Safety Belts ...........................
Reporting Safety Defects . . . . . . . . . . . . . . . . . . . . . . . . . . 8-8
Restraints
Checking . . . . . . . . . . . . . . . . . . . . . . . . . . . . . . . . . . .1-46
Child . . . . . . . . . . . . . . . . . . . . . . . . . . . . . . . . . . . . . . .1-35
Head . . . . . . . . . . . . . . . . . . . . . . . . . . . . . . . . . . . . . . . . 1-4
Replacing Parts After a Crash . . . . . . . . . . . . . . . . . . . 1-46
Systemcheck ................................
7-38
Reverse, Automatic Transaxle . . . . . . . . . . . . . . . . . . . . . 2- 17
Reverse, Manual Transaxle . . . . . . . . . . . . . . . . . . . . . . . 2-21
Right Front Passenger Position . . . . . . . . . . . . . . . . . . . . 1-25
Roadside Assistance . . . . . . . . . . . . . . . . . . . . . . . . . . . . . . 8-4
Roadside Assistance, Canadian .....................
8-6
Rocking YourVehicle . . . . . . . . . . . . . . . . . . . . . . . . . . . 5-33
Rotation,Tires ................................. 6-38
Safety Belt Extender . . . . . . . . . . . . . . . . . . . . . . . . . . . . 1-46
SafetyBelts . . . . . . . . . . . . . . . . . . . . . . . . . . . . . . . . . . . . 1-6
1-11
Adults ......................................
Care . . . . . . . . . . . . . . . . . . . . . . . . . . . . . . . . . . . . . . . 6-46
Center Rear Passenger Position. . . . . . . . . . . . . . . . . . 1-3 1
Children . . . . . . . . . . . . . . . . . . . . . . . . . . . . . . . . . . . . 1-33
Driver Position . . . . . . . . . . . . . . . . . . . . . . . . . . . . . . .1- 1 1
Extender ....................................
1-46
1- 1 1
How to Wear Properly .........................
IncorrectUsage ....................
1-15, 1-44, 1-45
Lap Belt . . . . . . . . . . . . . . . . . . . . . . . . . . . . . . . . . . . .1-3 1
Lap-Shoulder . . . . . . . . . . . . . . . . . . . . . . . . . . . 1.11. 1-26
LargerChildren .............................. 1-43
Passenger Position . . . . . . . . . . . . . . . . . . . . . . . . . . . . 1-25
Questions and Answers ........................ 1.10
Rear Comfort Guides .......................... 1-29
Rear Seat Outside Passenger Positions ............ 1-26
1-25
Rear Seat Passengers ..........................
ReminderLight . . . . . . . . . . . . . . . . . . . . . . . . . . 1.6.2.65
Replacing After a Crash ........................
1-46
Right Front Passenger Position .................. 1-25
Shoulder Belt Height Adjuster. . . . . . . . . . . . . . . . . . . 1.14
Smaller Children and Babies . . . . . . . . . . . . . . . . . . . . 1-33
Use During Pregnancy .........................
1-25
WhyTheyWork . . . . . . . . . . . . . . . . . . . . . . . . . . . . . . .1-7
Safety Chains . . . . . . . . . . . . . . . . . . . . . . . . . . . . . . . . . . 4-37
8-8
Safety Defects. Reporting .........................
Safety Warnings and Symbols ....................... vi
Scheduled Maintenance Services ....................
7-3
Seatback
Latches ...................................... 1-4
RecliningFront ...............................
1-2
Seats
EasyEntry . . . . . . . . . . . . . . . . . . . . . . . . . . . . . . . . . . . 1-4
ManualFront .................................
1-1
1-2
Manual Lumbar Support ........................
Rear . . . . . . . . . . . . . . . . . . . . . . . . . . . . . . . . . . . . . . . . 1-5
Restraint Systems . . . . . . . . . . . . . . . . . . . . . . . . . . . . . . 1.1
SeatControls . . . . . . . . . . . . . . . . . . . . . . . . . . . . . . . . . 1-1
Securing a Child Restraint ......................
1-36
9-9
Second Gear. Automatic Transaxle ............ 2- 18. 2. 19
Second Gear. Manual Transaxle ................... 2-21
Security System .................................
2-9
Service ........................................ 6-1
8-9
Bulletins. Ordering .............................
Manuals. Ordering .............................
8-9
6-52
Parts Identification Label .......................
Publications. Ordering .......................... 8-9
Work. Doing Your Own ......................... 6- 1
Service and Appearance Care ...................... 6-1
Service and Owner Publications . . . . . . . . . . . . . . . . . . . . 8-9
Service Publications .............................. 8-9
Servicing Your Air Bag-Equipped Chevrolet ......... 1-24
Sheet Metal Damage ............................ 6-49
Shift Lever ............................... 2- 16. 2-20
Shift Light ............................... 2-22. 2-75
Shiftspeeds . . . . . . . . . . . . . . . . . . . . . . . . . . . . . . . . . . .2-22
Shifting
Automatic Transaxle ..........................
2- 16
Into Park (P) ................................. 2-24
OutofPUk . . . . . . . . . . . . . . . . . . . . . . . . . . . . . . . . . . 2-26
Shifting. Manual Transaxle ....................... 2-20
Shoulder Belt Height Adjuster..................... 1-14
SignalingTurns . . . . . . . . . . . . . . . . . . . . . . . . . . . . . . . . 2-31
Skidding ...................................... 4-14
Sound Equipment. Adding . . . . . . . . . . . . . . . . . . . . . . . . 3-23
Spare Tire. Compact . . . . . . . . . . . . . . . . . . . . . . . . . . . . . 5-32
Specifications and Capacities . . . . . . . . . . . . . . . . . . . . . . 6-58
Specifications. Engine . . . . . . . . . . . . . . . . . . . . . . . . . . . 6-59
Speech Impaired. Customer Assistance ............... 8-3
Speedometer ................................... 2-63
SRS .........................................
1-19
Stains. Cleaning ................................
6-45
Starter Switch Check ............................ 7-39
Starting Your Engine ..................2.12.2.13. 2.14
Steam ........................................ 5-13
Steering .......................................
4-9
Column Lock Check ..........................
7-40
In Emergencies ............................... 4-11
Power .................................. 4.9.6.26
Tips ........................................ 4-10
Wheel. Tilt ..................................2-30
Storage Compartments ...........................
2-45
Storage. Vehicle ................................
6-32
Stuck: In Sand. Mud. Ice or Snow ..................5-33
Sunvisors .................................... 2-48
Sunroof ....................................... 2-48
Supplemental Restraint System .................... 1.19
Surge Tank. Coolant ............................. 5-17
Surge Tank Pressure Cap .........................
6-25
Symbols.Vehicle . . . . . . . . . . . . . . . . . . . . . . . . . . . . . . . . viii
Tachometer . . . . . . . . . . . . . . . . . . . . . . . . . . . . . . . . . .2-64
6-34
Taillamp Bulb Replacement .......................
TapePlayerCare . . . . . . . . . . . . . . . . . . . . . . . . . . . . . . . 3-24
Theft . . . . . . . . . . . . . . . . . . . . . . . . . . . . . . . . . . . . . . . . . .2-8
Theft-Deterrent Feature. CD Player ................ 3-20
THEFTLOCK” ................................
3-20
Thermostat . . . . . . . . . . . . . . . . . . . . . . . . . . . . . . . . . . . . 6-26
Third Gear. Automatic Transaxle . . . . . . . . . . . . . . . . . . . 2- 19
Third Gear. Manual Transaxle . . . . . . . . . . . . . . . . . . . . . 2-21
Tilt Steering Wheel . . . . . . . . . . . . . . . . . . . . . . . . . . . . . 2-30
3-7
Time. Setting the ................................
Tire Chains . . . . . . . . . . . . . . . . . . . . . . . . . . . . . . . . . . . . 6-43
TireLoading . . . . . . . . . . . . . . . . . . . . . . . . . . . . . . . . . . . 4-31
Tire-Loading Information Label . . . . . . . . . . . . . . . . . . . 4-3 1
Tires ......................................... 6-36
6-41
Alignment and Balance ........................
BuyingNew ................................. 6-39
6-43
Chains .....................................
Changing a Flat . . . . . . . . . . . . . . . . . . . . . . . . . . . . . . 5-21
Cleaning .................................... 6-49
Compact Spare . . . . . . . . . . . . . . . . . . . . . . . . . . . . . . . 5-32
6-37
Inflation ....................................
7-38
Inflation Check ...............................
Inspection and Rotation . . . . . . . . . . . . . . . . . . . . . . . .6-38
Loading . . . . . . . . . . . . . . . . . . . . . . . . . . . . . . . . . . . . 4-31
Pressure . . . . . . . . . . . . . . . . . . . . . . . . . . . . . . . . . . . . 6-37
6-4 1
Temperature .................................
Traction . . . . . . . . . . . . . . . . . . . . . . . . . . . . . . . . . . . .6-40
Treadwe ar...................................
6-40
Uniform Quality Grading . . . . . . . . . . . . . . . . . . . . . . . 6-40
Used Replacement Wheel ......................
6-42
6-39
Wear Indicators ..............................
Wheel Replacement . . . . . . . . . . . . . . . . . . . . . . . . . . .6-41
6-39
When It’s Time for New .......................
TopStrap . . . . . . . . . . . . . . . . . . . . . . . . . . . . . . . . . . . . .1-36
2-25
Torque Lock ...................................
Torque, Wheel Nut .........................
5-29, 6-58
Towing
From the Front . . . . . . . . . . . . . . . . . . . . . . . . . . . . . . .4-29
From the Rear . . . . . . . . . . . . . . . . . . . . . . . . . . . . . . . 4-31
5-9
Front ........................................
Rear .......................................
5-11
4-29
RecreationalVehicle ..........................
Towing a Trailer . . . . . . . . . . . . . . . . . . . . . . . . . . .4-33. 4-40
Towing Your Vehicle . . . . . . . . . . . . . . . . . . . . . . . . . . . . .5-7
. . . . . . . . . . . . . . . 4-29
Towing Your Vehicle From the Front
Towing Your Vehicle From the Rear . . . . . . . . . . . . . . . . 4-31
Trailer
Brakes . . . . . . . . . . . . . . . . . . . . . . . . . . . . . . . . . . . . . 4-37
4-39
Driving on Grades ............................
4-38
Driving with . . . . . . . . . . . . . . . . . . . . . . . . . . . . . . . . .
4-37
Hitches .....................................
Maintenance When Towing .....................
4-40
Parking on Hills ..............................
4-39
Safety Chains ................................
4-37
Tongueweight . . . . . . . . . . . . . . . . . . . . . . . . . . . . . . . 4-36
4-36
Total Weight on Tires ..........................
Towing . . . . . . . . . . . . . . . . . . . . . . . . . . . . . . . . 4-33, 4-40
Turnsignals ................................. 4-39
Weight . . . . . . . . . . . . . . . . . . . . . . . . . . . . . . . . . . . . . 4-35
Transaxle Fluid
Automatic . . . . . . . . . . . . . . . . . . . . . . . . . . . . . . 6-17. 6-19
Manual ..................................... 6-19
9-11
Transmitters. Keyless Entry ........................
2-5
Transportation.Courtesy . . . . . . . . . . . . . . . . . . . . . . . . . . 8-6
Trip Odometer ................................. 2-64
Trunk Lock ..................................... 2-7
TTYUsers ......................................8-3
Turn Signal and Lane Change Signals............... 2-3 1
Turn SignaVMultifunction Lever ................... 2-30
Turn Signals When Towing a Trailer................ 4-39
Underbody Flushing Service .....................
7-41
UnderbodyMaintenance ......................... 6-50
Up-Shift Light ................................. 2-75
Vehicle
Control ...................................... 4-5
DamageWarnings .............................. vii
Dimensions ................................. 6-60
IdentificationNumber .........................
6-52
Loading .................................... 4-31
Storage ..................................... 6-32
Ventilation System ............................... 3-5
Visors. Sun . . . . . . . . . . . . . . . . . . . . . . . . . . . . . . . . . . . . 2-48
9-12
;
w a r n i n g Devices . . . . . . . . . . . . . . . . . . . . . . . . . . . . . . 5-2
Warning Lights. Gages and Indicators . . . . . . . . . . . . . . . 2-65
Washer Fluid. Windshield ........................ 6-27
Washing Your Vehicle . . . . . . . . . . . . . . . . . . . . . . . . . . . 6-47
Weatherstrips . . . . . . . . . . . . . . . . . . . . . . . . . . . . . . . . . .6-47
Wheel
Alignment . . . . . . . . . . . . . . . . . . . . . . . . . . . . . . . . . .6-41
Nut Torque ............................. 5-29. 6-58
Replacement ................................. 6-41
Used Replacement ............................ 6-42
Wrench . . . . . . . . . . . . . . . . . . . . . . . . . . . . . . . . . . . . . 5-21
Windows ..................................... 2-29
Auto-Down .................................
2-29
Power ...................................... 2-29
WindshieldWasher ............................. 2-34
Fluid ...................................2-34. 6-27
FluidLevelCheck ............................ 7-38
WindshieldWiper ..............................
2-32
BladeReplacement . . . . . . . . . . . . . . . . . . . . . . . . . . . 6-35
Fuse ....................................... 6-53
Winter Driving ................................. 4-25
Wiring.Headlamp . . . . . . . . . . . . . . . . . . . . . . . . . . . . . .6-53
WreckerTowing .................................
5-7
Wrench. Wheel . . . . . . . . . . . . . . . . . . . . . . . . . . . . . . . . . 5-21