1
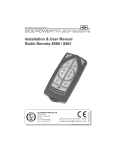
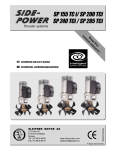
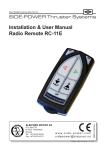
® SIDEPOWER Radio link 8970/ 8975 m GB Installation and user’s manual Installations und Bedienungsanleitung © Sleipner Motor AS 2004 SLEIPNER MOTOR AS P.O. Box 519 N-1612 Fredrikstad Norway Tel: +47 69 30 00 60 Fax: +47 69 30 00 70 www.side-power.com [email protected] Made in Norway D an K ua ee lo pt n his bo ar d! GB Contents Inhalt D Model range ....................................................... 2 Modellübersicht .................................................. 2 Technical specifications ...................................... 3 Technische Daten ............................................... 3 Important precautions ......................................... 3 Vorsichtshinweise ............................................... 3 Receiver and transmitter installation .................. 4 Installation von Empfänger und Sender ..............4 “Visual” wiring diagram ........................................5 Schaltplan - Übersicht .........................................5 Programming additional transmitters ...................6 Programmierung von zusätzlichen Sendern .......7 User precautions ................................................ 8 Benutzerhinweise ............................................. 10 How to use Sidepower thrusters .........................9 Benutzung von Sidepowersystemen .................11 Service Partners .............................................. 12 Service Partner ................................................ 12 GB Model range The radio link operates like a “wireless” control panel. The radio link kit can control a single bow thruster via a standard single control panel or a bow and stern thruster combined via a dual joystick panel (or “Docking panel”). The receiver can receive the signals of up to four radio link or remote control transmitters. Radio link kit (8970) consists of: - Radio link transmitter 8975 - Receiver 8918 - Wire-harness: 6-1295 Any control panels, single or dual must be ordered separatly. Part# 8970 The radio link transmitter and the receiver have the same factory preset code. Additional radio link transmitters Part# 8975 When additional transmitters are to be used, the whole system must be programmed again (please see programming section on page 6). 2 D Modellübersicht Die “Radio Link” Einheit funktioniert prinzipiell wie ein drahtloses Kontrollpanel. Es kann sowohl eine einzelne Bugschraube über ein einfaches Kontrollpanel oder eine Bug- & Heck-schraube gemeinsam über ein Dualpanel oder ein Manövrierpanel steuern. Der Empfänger kann Signale von bis zu vier “Radio link” oder Funkfernbedienungssendern empfangen. Der “Radio link Kit” (8970) bestehend aus: - “Radio link” Sender 8975 - Empfänger 8918 - Kabelsatz: 6-1295 Art.nr. 8970 “Radio link” Sender und Empfänger sind ab Werk auf einen Code eingestellt. Zusätzliche ‘Radio link’ Sender Art.nr. 8975 Werden zusätzliche Sender eingesetzt, muss das gesamte System neu programmiert werden (Programmierung, siehe Seite 7). Sidepower radio remote control V1.0 2004 GB Technical specifications and important precautions Model Power feed Frequency (MHz) Adress range Operation temp. Technology HxWxD (mm) Weight (g) Radio link transmitter 8975 From 12/24 V power system 433,92 65.000 -150C / +550C S.M.T. ----- Receiver 8918 From thruster 433,92 65.000 -150C / +550C S.M.T. 145x60x35 180 You must always install at least one original Sidepower panel to operate the system. With the boat on land, only run the thruster for a fraction of a second, as without resistance it will accelerate very fast to a damaging rpm. This manual is intended to support educated / experienced staff and is therefore not sufficient in all details for the correct installation. When installed in boats approved or classified according to international or special national rules, the installer is responsible for following the demands in accordance with these regulations / classification rules. The instructions in this guide can not be guaranteed to comply with all different regulations / classification rules. The transmitter and the receiver have the same factory preset code. When additional transmitters are to be used the whole system has to be programmed again (please see page 6). If a Sidepower automatic main switch is fitted, the “OFF” button on your control panel will shut off the main switch providing no other control panels are “ON”. D Modell Stromversorgung Frequenz (MHz) Adressenanzahl Betriebstemperatur Technologie HxBxT (mm) Gewicht (g) Technische Daten und Vorsichtshinweise “Radio Link» Sender 8975 Über 12/24 V Bordspannung 433,92 65.000 -150C / +550C S.M.T. ----- Empfänger 8918 Über Thruster 433,92 65.000 -150C / +550C S.M.T. 145x60x35 180 Es muss mind. ein original Sidepower Panel installiert sein um das System betreiben zu können.. Den Thruster an Land nur weniger als eine Sekunde betreiben, da ohne den Wasserwiderstand der Elektromotor beschädigt wird. Dieses Manual ist für Fachleute ausgelegt. Es sind daher nicht alle notwendigen Details für eine korrekte Installation enthalten. Bei Abnahmepflicht nach nationalen oder internationalen Bestimmungen, ist der Installateur für die Einhaltung dieser Bestimmungen verantwortlich. In diesem Leitfaden können zwangsläufig nicht alle weltweit geltenden Bestimmungen berücksichtigt werden. Sender und Empfänger sind ab Werk auf einen Code eingestellt. Werden zusätzliche Sender eingesetzt, muss das gesamte System neu programmiert werden (siehe Seite 7). Ist ein automatischer Sidepower Hauptschalter installiert, wird durch Betätigen der “OFF” Taste auf dem Kontrollpanel der Hauptschalter ausgeschaltet, wenn kein anders Kontrollpanel eingeschaltelt ist. Sidepower radio remote control V1.0 2004 3 Receiver and transmitter installation GB Prior to installation, it is important that the installer reads this guide to ensure necessary acquaintance with this product. Attention ! Install the receiver with at least 1 m distance from high power cables and NMEA cables or other sources of electrical interference. Install the receiver with at least 1 m distance from electro motors and generators. Install the receiver on the bridge area, not in the hull. Do not mount the receiver in fuse boxes made of sheet steel. Install the receiver with at least 0.5 meter away from radar / vhf-radio, depth sounder or their transmitting leads / antennas. Position the receiver in an area so that you can easily connect to the Sidepower control cables. The receiver, electromotor, its components, contacts & plugs or other joints in the control cables must be mounted so that they will keep dry at all time. Mount the receiver by using the 2 screwholes. Additional transmitter(s) should to be programmed before the receiver`s installation (page 6). The transmitter and receiver must have a separate power supply fitted with a 5 A fuse in the positive lead. NB! Faulty installation will render all warranty given by Sleipner Motor AS void. Installation von Empfänger und Sender D Vor der Installation bitte diese Hinweise lesen. Achtung ! Den Empfänger nicht in der Nähe (mind. 1m) von Stromleitungen, NMEA Kabeln oder ande ren Störquellen installieren. Empfänger in einer Entfernung von mind. 1 m zu Elektromotoren und Generatoren anbringen. Empfänger im Kommandobereich / Brücke, nicht im Rumpf installieren. Den Empfänger nicht in Sicherungskästen aus Stahlblech installieren. Den Empfänger mind. 0.5 Meter von Radar / VHF-radio, Echolot, deren Leitungen / Antennen plazieren. Den Empfänger so plazieren, daß die Sidepowerkontrolleitungen leicht anzuschließen sind. Der Empfänger, Elektromotor, Kontakte und Steckverbindungen müssen so installiert werden, daß sie stets trocken bleiben. Den Empfänger durch die 2 Schraubenlöcher befestigen. Zusätzliche Sender sollten vor der Installation des Empfängers programmiert werden (s. Seite 7). Der Sender und Empfänger muß über eine separate Stromversorgung betrieben werden, mit einer 5 A Sicherung in der Plusleitung vorgeschaltet. NB ! Bei falscher Installation besteht keinerlei Garantieanspruch. 4 Sidepower radio remote control V1.0 2004 GB «Visual» wiring diagram D Schaltplan - Übersicht Transmitter unit / Sendereinheit Receiver / Empfänger Sidepower radio remote control V1.0 2004 5 GB Programming the system when using additional radio link transmitters or remote control transmitters The original radio link transmitter and receiver have the same factory preset code. When additional radio link transmitters or remote control transmitters are to be used, the whole system (incl. all transmitters) must be programmed again. 1. Deactivate all transmitters and the receiver (press “OFF” on the control panels(s) / transmitter(s) and turn off the main power switch for the thruster system. 2. Open the receiver. 3. Turn on the main power switch for the thruster system if the system is already installed or connect the receiver and the radio link / control panel unit to a 12/24V power source. 4. Press the “PROG” button at the receiver. The receiver is then in “Program mode”. The LED flashes for about 30 seconds. 5. The transmitter(s) and receiver are programmed by pressing both “ON” buttons for about 2 seconds. The LED at the receiver lights continously for the time the “ON” buttons are being pressed. 6. Additional transmitters must be programmed according to step 5 within the 30 seconds time period when the receiver is in “Program mode”. 7. Wait until the LED stops to flash (total “Program mode” time is about 30 seconds). The programming is now finished. 8. Turn off all radio link / control panel units and transmitters by pressing all “OFF” buttons. 9. Turn off the main power switch for the thruster system if the system is already installed, or turn off the 12/24V power source. 10. Close the receiver. Put the cover back in place and tighten the screws. 6 Sidepower radio remote control V1.0 2004 GB Important user precautions Ensure that you know the location of the main battery switch that disonnects the thruster from all power sources (batteries) so that the thruster can be turned off in case of a malfunction. If a Sidepower automatic main switch is fitted, the “OFF” button will shut off the main switch providing no other control panels are “ON”. The thruster system is activated by pushing the two “ON” buttons if the main power source for the thruster system is turned on. For safety reasons the system turns of automatically appr. after 4 minutes after the last usage. To use the system later, push on the two “ON” buttons (see page 9). Remember to turn of the system by pushing the “OFF” button when you have finished your maneuvering. The maximum continues usage time of the electrical thruster is approx. 3 minutes. The electro motor has a built in thermal cut-off switch that will shut it off when overheating and re-engage it when it has cooled down some. This should be considered when planning your manouvering. Never use a thruster close to somebody in the water, as the thruster will draw objects close by into the tunnel and contact with the rotating propellers will cause serious injuries. Never run a thruster for more that one second when the boat is not in the water, as this can damage the electromotor seriously. If the thruster stops giving thrust while the electromotor is running, chances are that there is a problem in the drive-system. You must then immediately stop trying to run it, and turn it off, as running the electromotor for more than a few seconds without resistance from the propeller, can cause serious damage to the electromotor. When leaving the boat always turn off the main power switch for the thruster. We advice to always keep the main engine(s) running while using a thruster. This will keep the batteries in a good charge condition. This will also give better performance to the thruster, as a higher voltage at the thruster results in a higher torque (power) in the electromotor. Make sure that only one control is used at the same time, if two panels are operated in opposite directions at the same time the thruster will not run at all. If they are operated in the same direction the thruster will run in this direction. 8 Sidepower radio remote control V1.0 2004 Radio link / control panel unit ‘ON’ Turn boat to port Radio link / control panel unit ‘OFF’ Turn boat to starboard Bow+Stern Thruster AUTO-OFF appr. 4 minutes GB How to use Sidepower How to use a bowthruster 1. Turn the main power switch for the bow thruster on. 2. Turn on the radio link transmitter / control panel unit by pushing the two “ON” buttons. The system is now activated for appr. 4 min. and then turns off automatically. 3. Please take some time to exercise thruster usage in open water to avoid damages to your boat. 4. Turn the bow in the desired direction. By pushing the red button for port movement or the green button for starboard movement. How to use a bow & stern thruster combined The combination of a bow and stern thruster offers total manouverability to the boat and the opportunity to move the bow and the stern separately of each other. System deactivation Push the control panel’s “OFF” button. The system deactivates automatically after appr. 4 minutes. If in doubt, try in open water first! Sidepower radio remote control V1.0 2004 9 Argentina Trimer SA Buenos Aires Tel: +54 11 4580 0444 Fax: +54 11 4580 0440 www.trimer.com.ar [email protected] Australia AMI Sales Freemantle, WA Tel: +61 89 337 3266 Fax: +61 89 314 2929 [email protected] Austria G. Ascherl GmbH Hard, Bregenz Tel: +43 5574 899000 Fax: +43 5574 89900-10 www.ascherl.at offi[email protected] Benelux ASA Boot Electro Watergang Tel: +31 20 436 9100 Fax: +31 20 436 9109 [email protected] [email protected] Canada Imtra Corporation New Bedford, MA Tel: +1 508 995 7000 Fax: +1 508 998 5359 www.imtra.com [email protected] Croatia AC Yacht & nautical support Icici Tel: +385 51 704 500 Fax: +385 51 704 600 [email protected] Denmark Gertsen & Olufsen AS Hørsholm Tel: +45 4576 3600 Fax: +45 4576 1772 www.gertsen-olufsen.dk [email protected] Finland Nautikulma OY Turku Tel: +358 2 2503 444 Fax: +358 2 2518 470 www.nautikulma.fi nautikulma@kolumbus.fi France Kent Marine Equipment Nantes Tel: +33 240 921 584 Fax: +33 240 921 316 www.kent-marine.com contact@kent-marine. com Malta S & D Yachts Ltd. Cali Tel: +356 21 339 908 Fax: +356 21 332 259 www.sdyachts.com [email protected] Germany Jabsco GmbH Norderstedt Tel: +49 40 535 373-0 Fax: +49 40 535 37311 New Zealand Lusty & Blundel Ltd. Auckland Tel: +64 9 415 8303 Fax: +64 9 415 8304 www.lusty-blundell.co.nz [email protected] Greece Amaltheia Marine Athens Tel: +30 210 2588 985 Fax: +30 210 2588 986 www.amaltheiamarine. com [email protected] Iceland Merkur HF Reykjavik Tel: +354 594 6000 Fax: +354 594 6001 www.merkur.is [email protected] Ireland Metalcove Marine Dublin Tel: +353 1 668 6046 Fax: +353 1 668 6827 www.metalcove.com Israel Atlantis Marine Ltd. Tel Aviv Tel: +972 3 522 7978 Fax: +972 3 523 5150 www.atlantis-marine.com [email protected] Italy Saim S.P.A. Assago-Milan Tel: +39 2 488 531 Fax: +39 2 488 254 5 www.saim-group.com Japan Global Marine Inc. Hyogo Tel: +81 798 347 345 Fax: +81 798 347 346 www.global-marine.co.jp [email protected] Sweden Sleipner AB Strömstad Tel: +46 526 150 95 Fax: +46 526 152 95 www.sleipnerab.se Switzerland Marineparts Heimgartner Volketswil Tel: +41 1 997 40 90 Fax: +41 1 997 40 94 www.marineparts.ch [email protected] Norway Sleipner Motor AS Fredrikstad Tel: +47 69 30 00 60 Fax: +47 69 30 00 70 www.side-power.com [email protected] Singapore/Malaysia/ Indonesia Alquest Marketing Singapore Tel: +65 6749 9359 Fax: +65 6749 9360 www.alquest.com.sg [email protected] Poland Taurus Sea Power SP. Z.O.O Gdansk Tel: +48 58 344 30 50 Fax: +48 58 341 67 62 Taiwan Mercury Marine Supply Kaohsiung Tel: +886 7 3317 293 Fax: +886 7 3314 232 Portugal Krautli Portugal Lda. Lisboa Tel: +351 21 953 56 00 Fax: +351 21 953 56 01 www.krautli.com [email protected] Turkey Denpar Ltd. Istanbul Tel: +90 212 285 0334 Fax: +90 212 285 0311 bilgebay@superonline. com Russia Standarte Starbeyevo Tel: +7 095 575 67 23 Fax: +7 095 575 39 77 www.standarte.ru [email protected] UK Sleipner AB (UK) Hayling Island Tel: +44 2392 637 337 Fax: +44 2392 466 111 [email protected] Spain Imnasa Marine Products Girona Tel: +34 972 820210 Fax: +34 972 325116 www.imnasa.com [email protected] United Arab Emirates Teignbridge Propulsion Dubai Tel: +971 4 324 0084 Fax: +971 4 324 0153 teignpro@emirates. net.ae USA Imtra Corporation New Bedford, MA Tel: +1 508 995 7000 Fax: +1 508 998 5359 www.imtra.com [email protected] All other: Sleipner Motor AS Sleipner Motor AS, P. O. Box 519, N-1612 Fredrikstad, Norway Tel:+47 69 30 00 60 Fax: +47 69 30 00 70 [email protected] www.side-power.com