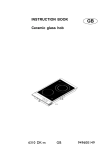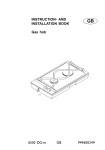
1
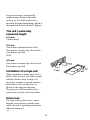
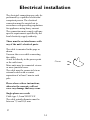
INSTRUCTION BOOK
Model No.
Product No
Serial No.
325 88-1290 Rev. 1-814
ZBX 623 SS
949 600 135
ZANUSSI
1
AUS
NZL
Contents
Page no
Important to know ........................................................................................... 3
Operating instructions ..................................................................................... 6
Maintenance And Cleaning ............................................................................ 8
Tips on the use of the ceramic hob unit ........................................................ 10
Mounting .................................................................................................. 12
Electrical installation ..................................................................................... 14
Technical data ............................................................................................... 15
If the hob does not work ............................................................................... 16
It is important to know how the hob works, for which reason we would ask you to
read these instructions carefully before using it. Only then can we quarantee that
"your new kitchen aid" will fully meet your expectations and requirements that you
had when you chose your Zanussi system.
Sincerely
Zanussi
2
Important to know
For safety's sake, turn pots and pans so
that handles do not protrude, thus
inviting accidents.
Service and repair may only be
performed by the distributor, or by a
service organization approved by the
distributor. Only repair parts delivered
by the distributor may be used.
Never place plastic or paper, etc., on
the unit. If the unit should be switched
on by accident, the paper could burn,
plastic melt, etc.
Please read the warranty.
Avoid pinching the cable.
For hygienic and safety reasons the
unit must be kept clean. Grease, oil
and food spills create unpleasant
odours when burnt, and can in some
cases result in open flames.
The hob unit is intended for ordinary
household cooking purposes. Any
other use can result in damage to the
unit as well as personal injury.
Read - and adhere to - the users
instructions, as well as any instructions
and warnings printed on the labels of
the cleaning agents used.
Use only pots and pans with a rigid,
even contact surface - uneven contact
surface results not only in poor heat
conduction, but also increases the risk
of dangerous spills.
Help to avoid accidents; if the unit
should ever be discarded, render it
useless by removing the cable, or by
cutting the cable as close to the unit as
possible.
During deep-fat frying, sauteeing,
melting of butter, etc., one must always
remain near the unit, due to the danger
of fire. In the event of fire the unit
must be shut off immediately (and the
cooker hood as well, if in use).
Areas if use
The hob is only intended for normal
household use. It is important that you
follow the advice given in these
instructions in order to avoid any risk
of damage to persons and objects.
Used for any other purpose invalidates
the guarantee as well as product
liability.
Make sure that the unit is shut off
when not in use - the knob should rest
at “0”.
The unit becomes dangerously hot
during use, and remain so for a period
of time. They should therefore be
treated with due respect. Keep children
at a distance.
3
Product liability
Unpacking
Our liability is limited to that which is
stipulated by law, and covers only
damage to persons and property, which
results from defects in materials and
workmanship of the unit itself.
This liability extends for a period of 10
years from the date of purchase as a
factory-new unit.
Check to see whether the unit is
damaged.
Reservations
Installation
Our liability does not apply in the
event that the damage in question is
due to any of the following conditions:
The unit has not been installed in
accordance with the instructions set
forth in this pamphlet.
Electrical installation must be
performed by an authorized electric
company. Electrical installation by a
novice can result in damage to persons
or to the unit.
Electrical parts must not be tampered
with.
Distribution damages
Any damages due to transportation by
us or by our representative must be
reported to the dealer not later than
one week after receipt of the unit.
That the safety rules in the instructions
have not been complied with.
That repair has been made by others
than an authorized service technician.
The unoriginal spare parts have been
used. That the damage is caused by
transport at a later date, for instance
during removal or resale.
That the damage is caused by any form
of use contrary to common sense.
Caution: In order to avoid a hazard this
appliance must be installed according
to these instructions for installasion.
Check
If you make a note of the model,
product and serial numbers on receipt
you will always have this information
to hand (See front page).
Positioning
These numbers will be needed for any
service visits.
It is advisable to place the unit near an
out-of-the-way, or closed, corner, with
space on either side on which to rest
hot cooking utensils. The unit should
not be placed at a heavily-trafficked or
open corner, nor in at passageway.
The model number plate is situated on
the bottom of the hob.
4
Before use
Before using the hob unit it is advised
to clean the ceramic surface with the
enclosed cleaning agent.
Use a clean, damp cloth or tissue. Dry
with a clean cloth.
The decorative pattern on the ceramic
surface can become scratched and
marred with use, depending upon how
one uses and maintains the unit, but
does not adversely affect performance.
Note! The warranty does not cover
such blemishes.
5
Operating instructions
Switch symbols (to the left)
Switch for regulating the double
plate at the rear
pilot light
Switch for regulating the small
plate at the front.
Regulating
The regulating of heat is graduation-free
for all plates on a scale from 1 to 12.
“1”
Represents lowest heat
“12” Represents maximum heat.
“0”
Represents “OFF”.
Small circle: When you switch on the
cooking section it will always be the
small circle that is switched on. Choose
the wanted temperature.
From small to big circle (both circles
are on): Turn the button past “12” to
stop. Turn back to the wanted
temperature.
From big to small circle: Turn the
button back to “0”. Switch on again and
choose the wanted temperature.
6
Pilot light
Pilot light is activated when either of
the zones are turned on, and will
remain on until the cooking zones are
switched off.
Residual-Heat indicator
Each plate has a residual heat
indicator which remains on as long as
the temperature of the cooking zone
exceeds 80˚C, even if the cooking zone
is switched off.
7
Maintenance and cleaning
Use Proper Cooking Utensils
Make the most of your new ceramictop hob unit by using proper utensils
of a good quality.
Only pots and pans which are
expressly intended for use on ceramictop hob units may be used. Utensils
must, as a minimum, cover the entire
circle which represents a given burner.
The underside, or bottom, of the
utensil must form a flat, even surface.
Ensure that both contact surfaces - the
utensil as well as the hob unit’s - are
absolutly dry.
Utensils with enamelled bottoms cause
excessive wear on the decorative
pattern of the ceramic surface. Utensils
with painted bottoms must not be used,
as the paint can be transferred to the
ceramic surface, where it will stick
permanently, causing a pocked surface.
Warning!
Utensils with aluminium bottoms can
cause light spots on the ceramic
surface. These can be removed with
the cleaning agent supplied with the
unit.
Cleaning of the ceramic
surface
The ceramic surface must be cleaned
each time that the unit has been in use.
Use a clean cloth, which has been
dipped in warm, soapy water
8
(use liqud AJAX or other diswashing
liquid), and well wrung.
All spills must be cleaned up
immediately, while the burner is still
warm. Use the cleaning agent supplied
with the unit.
Remove spots caused by utensils with
aluminium bottoms, or burned grease,
by polishing with the cleaning agent
supplied with the unit. In extreme
cases polishing may have to be
repeated several times in order to
remove the blemish entirely.
After clean-up of any of the burners,
the entire ceramic surface should be
polished, using the cleaning agent
supplied with the unit.
Cleaning of borders and edges
All borders and edges, including the
front control panel, should be cleaned
in the same manner, and with the same
cleaning agent for example, liquid
AJAX, as the ceramic surface.
Warning!
Never use scouring powder, scouring
sponges, steel wool, or any other
cleaning agent, which can scratch the
ceramic surface.
9
Tips on the use of the
ceramic hob unit
Do not slide saucepans across the
surface of the hob - always lift the pan
when placing it on, or removing it
from the ceramic surface.
Wipe the bottom surface of the pots
and pans with a clean dry cloth before
placing them on the ceramic surface.
This helps to reduce cleaning and
prevents scratching the hob glass.
Wipe off spills whilst the hob is warm.
Select the highest setting for the
cooking zones until the food is brought
to the boil, then reduce the setting.
Use saucepans with an even base. An
uneven based saucepan may increase
the electricity consumption by up to
50%.
The saucepan should match the
cooking zone or be slightly larger.
Use a tightly fitting lid on the saucepan
to reduce electricity consumption.
10
The decorative pattern on the ceramic
surface can become scratched and
marred with use, depending upon
maintenance, but does not adversely
affect performance.
Such blemishes are not covered by the
warranty and do not affect the
operation of the hob.
Spills and melts must be removed
immediately, while the surface is still
warm, using the scraper supplied with
the unit. Especially damaging are melted
plastic, aluminum, or any foodstuff
containing sugar, including natural sugar,
as these can create permanent
“pockmarks” and craters on the ceramic
surface. After scraping polish thoroughly
with the cleaning agent supplied with the
unit.
Utensils which have been in contact with
the above-mentioned melted materials
must be cleaned throughly before used
again on the ceramic-top hob unit.
Defects in the ceramic surface which can
be related to the above are not covered
by the warranty.
Warning:
Aluminum foil and plastic utensils are
not to be placed on hot surfaces.
The surface may not be used for storage.
Do not stare at the heating units when
in operation.
11
Mounting
Caution: In order to avoid a hazard this
appliance must be installed according to
these instructions for installation
Min. 47 mm
The appliance unit can be mounted in
any type of kitchen with a work top
whose thickness is between 28 mm and
40 mm.
Clearance
The distance between the top side of the
work top and the carpentry underneath
must be at least 47 mm.
Fixing
Screw the fixing brackets out to such an
extent that they can be turned in under
the work top. Tighten the brackets on to
the work top with an ordinary
screwdriver.
Minimum distance
to wall:
150 mm
Cut-out measurements
One rectangular hole is sawn out for the
appliance combination chosen.
The depth of the cut-out for any unit is:
490 mm
Length of hole = sum of all units`
externally measured length, less 20 mm.
Reinforcement
beams
Mounting of Reinforcement
Beams
A reinforcement Beam, with supporting
flanges at each end, is included with
each two-burner unit. For unit
combinations, a reinforcement beam
must be used between each unit.
12
Minimum distance
to wall (nonflammable material):
150 mm
It is not necessary to attach the
reinforcement beam to the table
surface, as it is held in place by a
specially designed moulding, which is
incorporated in the hob unit´s flanges.
The unit´s externally
measured length
145 mm:
Cooker hood
290 mm:
Two-burner standard electric hob
Two-burner ceramic-top electric hob
Two-burner gas hob
Grill
580 mm:
Four-burner ceramic-top electric hob
Four-burner gas hob
Installation of a single unit
When mounting a single unit, be it a
half-or full size unit, in a table surface
which is thicker than 30 mm, it is
necessary to make a special notch in
both sides of the cut-out hole, as
shown in the adjacent drawing.
The purpose of these notches is to
create space for the electrical cables.
Glass cover
For units with a glass cover, ensure
that the cover always remains open
while the unit is operating (operation
indicator lamp on).
13
Electrical installation
The electrical connection may only be
performed by a qualified electrician/
competent person. The electrical
connection must be carried out in
accordance with prevailing regulations
for appliances using heavy current.
The connection must comply with any
specific requirements specified by the
local electricity supply authority.
There must be no interference with
any of the unit’s electrical parts.
The cable is mounted in the pegs as
shown.
Unscrew the cover while connecting
the cables.
A unit led directly to the power point
or the outlet rose.
More units may be connected via one
or more junction boxes.
The cable must be connected via an
external switch with a contact
separation of at least 3 mm in each
pole.
Cover
Please observe these instructions,
otherwise the warranty will not
cover any damage that may occur.
Single-phase zero-earth
Cable type 1,5 mm² HO5VV-F.
The cable outside diameter must be
between 7,5 and 10,5 mm.
14
Two-phases zero-earth (max. 10A)
Cable type 1 mm² HO5VV-F.
The cable outside diameter must be
between 7,5 and 10,5 mm.
Technical data
Cell Voltage 240 V
Electrical connection
240V - 50Hz
Total wattage 2900W
Instant heat effect 12/18 cm 700/1700 W
Instant heat effect 14 cm 1200 W
This unit is labelled to indicate
conformity with the lowvoltage directive
(73/23/EEC) and the EMC directive
(89/336/EEC).
15
If the unit does not work
Check to see whether a fuse has
blown.
Check to see whether the relay is
switched off.
by an alternative service organisation,
approved by the distributor. Only spare
parts delivered by the distributor may
be used. Spare parts and service are the
domain of our service network.
If the problem is not with the fuse or
relay, do not attempt to correct it
yourself.
Instead, contact our service network all repairs must be performed by our
service personnel.
Warranty
This unit is warranted against defects
in materials and workmanship, when
used as intended, for a period of one
year from the date of purchase. The
warranty covers both parts and service,
as well as necessary transportation
costs. Keep your proof of purchase.
Reservations
The warranty does not cover damages
which are not due to defects in
materials or workmanship. Repair, or
attempted repair, by any party other
than our authorized service network
will invalidate the warranty. The
warranty does not cover an unjustified
house-call by our service network.
Service and spare parts
Service and repair of this unit must be
carried out by our service personnel, or
16
ZANUSSI
20