1
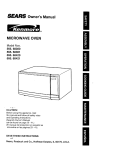
SE_I_
Owner's Manual
®
MICROWAVE OVEN
Model Nos.
565.69300
565.69301
565.69400
565.69401
CAUTION:
Before using thi_ appliance,
read
this manual and follow a_l safety rules
and Operating Instructions.
(Spanish Owner's Manual
can be found on page 29 - 41.}
(El manual del propietario en espaSol se
encuentra en las pa,ginas 29 - 41).
SAVE THESE
INSTRUCTIONS
SearS, Roebuck
and Co., Hoffman
Estates,
IL 60179, U.S.A.
PRECAUTIONS
TO AVOID
POSSIBLE EXPOSURE TO
EXCESSIVE MICROWAVE
ENERGY
(a) Do not attempt to operate
operation
important
this oven with the door open since open-door
can result in harmful exposure to microwave energy. It is
not to defeat or tamper with the safety interlocks.
(b) Do not place any object between the oven front face and the door or allow
soil or cleaner residue to accumulate on sealing surfaces.
(c) Do not operate the oven if it is damaged.
It is particularly
important
that the
oven door closes properly and that there is no damage to the:
(1) DOOR (bent)
(2) HINGES AND LATCHES (broken or loosened)
(3) DOOR SEALS AND SEALING SURFACES
(d) The oven
should not be adjusted
qualified
service
or repaired by anyone
except properly
personnel.
SPECIFICATIONS
Model:
565. 69300/565.
Power Source:
AC 120 V, 60 Hz
AC 120 V, 60 Hz
Power Consumption:
1480W,
1480W, 12.9 Amps
Maximum
1000W*
1000W*
Oven Capacity:
1.3 cu. ft.
1.8 cu. ft.
Turntable
12-5/8 '' (320 mm)
12-5/8 '` (320 mm)
21-5/8" x 12-1/2"x 17-11/16"
23-7/16" X 14-1/4" X 17-11/16"
38.5 Ibs.
42 Ibs.
Output:
Diameter:
Dimensions:
Weight:
(w x h x d)
Approx.
*According
Specifications
to tEC-705
69301
12.9 Amps
565.69400/565.
69401
test procedure
subject to change
without
notice.
FOR YOUR ASSISTANCE...
To make a request for service,
information
or replacement
require the complete Model number and Serial
Copy your Model and Serial numbers.
number of your oven.
Model No.
(Located on the inner left side of control panel)
Serial No.
(Located on the inner left side of control panel)
2
of parts, Sears will
COOKING
SAFETY
GUIDE
Proper and safe use of your oven
4
Cooking Techniques
Important Safety Instructions.
Electrical Grounding Instructions
Utensils .................
5
6
6
Quick Touch TM Cooking .....
Appetizers and Rice ........
Meats, Poultry and Fish .....
Eggs ....................
Baked Goods and Desserts..
8
8
MAINTENANCE
ASSEMBLY
" Names of Oven Parts and
Accessories ..............
Turntable Installation .......
Installation
...............
9
OPERATION
Basic Features
.......
18
19
21
22
24
25
Cleaning .................
Sears Service ............
26
26
Troubleshooting ...........
27
ESPAI[IOL
(Spanish
Control Panel and Features..
10
GARANTIA
.............
Setting Clock .............
Child Lock-Out ............
11
11
SEGURIDAD
............
30
ENSAMBLE
............
33
Kitchen Timer .............
12
OPERACION
............
34
Time Cooking .............
Special Features
12
Quick Touch TM Cooking .....
Automatic Defrost by Weight.
14
15
Quick-On
17
Cooking
.........
Warranty service is available by simply
CONTACTING
THE NEAREST SEARS
STORE OR SERVICE CENTER in the
United States.
For one year from the date of purchase,
if this Kenmore ® Microwave Oven fails
This Warranty applies only while this
product is in use in the United States.
due to a defect in material or
Sears will repair it, free of
The Warranty give you specific legal
rights, and you may also have other
rights which vary from state to state.
KENMORE ® MAGNETRON
FULL
FIVE
YEAR
WARRANTY
For five years from the date of purchase,
if the magnetron in this Kenmore ®
Microwave Oven fails due to a defect in
SEARS, ROEBUCK AND CO.,
D/817 WA,
HOFFMAN ESTATES, IL. 60179
material
For Service Call:
or workmanship,
Sears will
repair it, free of charge.
1 - 800 - 4 - REPAIR
1 - 800 - 473 - 7247
The above warranty coverage applies
only t_icrowave
ovens which are used
for private household
29
(Consulte la p_gina 29 para encontrar
el indice detallado)
KENMORE ® MICROWAVE OVEN
FULL ONE YEAR WARRANTY
workmanship,
charge.
Instructions)
purposes.
3
PROPER
AND SAFEUSE
•
The oven must be level.
•
The turntable
•
Do not attempt to deep-fry
microwave oven.
roller
cooking. See page 8.
microwave oven as it is impossible to
be sure all contents of the jar have
Place the cookware gently on the
turntable and handle it carefully to
reached
household
bag size
TM
Popcorn.
remains off when the door is open.
Do not tamper with these switches.
with no food or food that is extremely
low in moisture can cause fire,
or sparking.
Do not cook bacon directly on the
turntable. Excessive local heating of
may cause it to break.
Do not heat baby bottles or baby
food in the microwave oven. Uneven
heating may occur and could cause
physical injury.
•
Do not heat narrow-necked
containers,
use only.
To prevent delayed eruptive
boiling
of hot liquids and beverages
or
stir again before removing
container.
Do not operate the microwave oven
when empty. Operating the oven
the turntable
oven for
scalding, stir liquid before placing the
container in the oven and again
halfway through cooking time. Let
stand in the oven for a short time and
The oven has several built-in safety
switches to ensure that the power
charring
boiling temperature.
commercial purposes. This
microwave oven is made for
Incorrect use of browning dish may
cause the turntable to break. See
Use only the specified
in this
Do not use this microwave
breakage.
when using Quick Touch
•
in your
Do net do home canning
page 7.
•
OVEN
rest must be in the oven during
avoid possible
•
and turntable
OFYOUR
such as syrup bottles.
4
the
IMPORTANT SAFETY INSTRUCTIONS
When using electrical
should
,_
be followed,
appliances,
including
WARNING
- To reduce the risk of burns, electric shock, fire, injury to
persons or exposure to excessive microwave energy:
•
Read all instructions before use.
•
Read and follow the specific
"PRECAUTIONS
TO AVOID
POSSIBLE EXPOSURE TO
EXCESSIVE
•
basic safety precautions
the following:
•
accordance with the provided
installation instructions.
•
MICROWAVE
ENERGY" on page 2.
As with most cooking appliances,
This oven is specifically designed to
heat or cook food. It is not designed
start:
•
Keep the oven door closed
Turn the oven off, and
•
Disconnect the power cord or shut off
power at the fuse or circuit breaker
panel.
Keep in mind the following
times:
•
or laboratory
use.
As with any appliance, close
supervision is necessary when used
by children.
Do not operate this oven if it has a
damaged cord or plug, if it is not
working properly or if it has been
rules at all
•
damaged or dropped.
This appliance should be serviced
only by qualified service technicians.
Contact the nearest authorized
a) Do not overcook foods. Carefully
attend the appliance if paper, plastic, or
other combustible
materials are placed
inside the oven to facilitate cooking.
b) Do not use the cavity for storage
purposes. Do not store combustible
•
items such as bread, cookies, paper
products, etc. inside the oven.
strikes the power line, the
service facility for examination, repair
or adjustment.
Do not cover or block any vents on
the oven.
•
Do not store or use this appliance
outdoors.
•
Do not use this oven near water,
near a kitchen sink, in a wet
oven may turn on by itself.
c) Remove wire twist-ties and metal
basement or near a swimming
and the like.
handles from paper or plastic
cont_efs/bags
the oven.
or vapors in this appliance.
for industrial
•
•
if lightning
Use this appliance only for its
intended use as described in this
manual. Do not use corrosive
chemicals
close supervision is necessary to
reduce the risk of a fire in the oven
cavity.
If a fire should
Install or locate this oven only in
before placing them in
This oven must be grounded.
Connect only to properly grounded
outlet. See page 6.
Some products
such as whole eggs,
water with oil or fat, sealed containers
and closed glass jars may explode
and therefore should not be heated in
this oven.
pool,
•
Do not immerse
water.
cord or plug in
•
Keep cord away from heated
surfaces.
•
Do not let cord hang over edge of
table or counter.
•
When cleaning surfaces of door and
oven that comes together on closing
the door, use only mild, nonabrasive
soaps or detergents applied with a
sponge or soft cloth. See page 26.
SAVE THESE INSTRUCTIONS
5
ELECTRICAL
GROUNDING
'_DANGER
Electric Shock Hazard
•
Touching some of the
internal components can
cause serious personal
injury or death. Do not
disassemble
this appliance.
,_IL
•
This appliance must be grounded. If there is an
electrical short circuit, grounding reduces the risk of
electric shock by providing an escape wire for the
electric current. This appliance is equipped with a
cord that has a grounding wire with a grounding plug.
The plug must be plugged into an outlet that is
properly installed and grounded.
Consult a qualified
electrician if the
Properly
polarized
grounded
outlet
and
grounding instructions
are not completely
understood as to
WARNING
Electric
INSTRUCTIONS
Shock Hazard
Improper use of the
grounding plug can
result in electric shock,
Do not plug into an outlet
until appliance is
properly installed and
whether the appliance
properly grounded.
is
A short power supply
cord is provided to
reduce the risk of
becoming entangled in
or tripping over a longer
cord.
Three-pronged
(grounding) plug
grounded.
Longer cord sets or extension cords may be used with
following precautions:
• The marked electrical rating of the cord set or
extension cord should be equal to or higher than
• the electrical rating of the appliance.
• The extension cord must be a grounding type
3-wire cord.
•
A longer cord should be arranged so that it will not
drape over the countertop or tabletop where it can
be pulled on by children or tripped over
accidentally.
The electrical power cord must be kept dry and must
not be pinched or crushed in any way.
UTENSILS
_
Personal
•
See following page for further instructions "Materials
you can use in microwave oven or to be avoided in
microwave oven."
CAUTION
Injury Hazard
Tightly-closed
utensils-
could explode.Closed
containers are opened
and plastic pouches
pierced before cooking.
Utensil
1.
2.
3.
Test:
Fill a microwave-safe
container with 1 cup of cold
water (250 mL) along with the utensil in question.
Cook on maximum
power (P100) for 1 minute,
Carefully feel the utensil.
If the empty utensil is warm,
Do not use them for Microwave Cooking.
Do not exceed 1 minute testing time.
CAUTION:
1.
2.
Do not use plastic containers for testing,
Some containers and dishware may be warm (or
hot) in only one area. Do not use a container that
becomes warm anywhere.
6
Materials
you can use in microwave
oven
Utensils
Remarks
Aluminum foil
Shielding only. Small smooth pieces can be used to cover thin
parts of meat or poultry to prevent overcooking. Arcing can
occur if foil is too close to oven walls. The foil should be at
least 1 inch (2.5 cm) away from oven walls.
Browning dish
Follow manufacturer's instructions. The bottom of browning dish
must be at least 3/16 inch (5 mm) above the turntable. Incorrect
usage may cause the turntable to break.
Dinnerware
Microwave-safe only. Follow manufacturer's
use cracked or chipped dishes.
Glass jars
Always remove lid. Use only to heat food until just warm. Most
glass jars are not heat resistant and may break.
Glassware
Heat-resistant oven glassware only. Make sure there is no
metallic trim. Do not use cracked or chipped dishes.
Oven cooking bags
Follow manufacturer's instructions. Do not close with metal tie.
Make slits to allow steam to escape.
Paper plates and cups Use for short-term cooking/warming
unattended while cooking.
instructions.
Do not
only. Do not leave oven
Paper towels
Use to cover food for reheating and absorbing fat. Use with
supervision for a short-term cooking only.
Parchment
Use as a cover to prevent spattering or a wrap for steaming.
paper
Plastic
Microwave-safe only. Follow the manufacturer's instructions.
Should be labeled "Microwave Safe" Some plastic containers
soften as the food inside gets hot.
Plastic wrap
Microwave-safe only. Use to cover food during cooking to retain
moisture. Do not allow plastic wrap to touch food. "Boiling bags"
and tightly closed plastic bags should be slit, pierced or vented
as directed by package.
Thermometers
Microwave-safe
Wax paper
Use as a cover to prevent spattering and to retain moisture.
Materials
to be avoided
only (meat and candy thermometers).
in microwave
oven
Utensils
Remarks
Aluminum tray
May cause arcing. Transfer food into microwave-safe
dish.
Fo_d'¥arton with
metal handle
May cause arcing. Transfer food into microwave-safe
dish.
Metal or metaltrimmed utensils
Metal shields the food from microwave energy. Metal trim may
cause arcing.
Metal twist ties
May cause arcing and could cause a fire in the oven.
Paper bags
May cause a fire in the oven.
Plastic foam cups
Plastic foam may melt or contaminate the liquid inside when
exposed to high temperature.
Wood
Wood will dry out when used in the microwave oven and may
split or crack.
7
NAMES
Remove
OF OVEN PARTS AND ACCESSORIES
the oven and all materials
from the carton.
Your oven comes with the following accessories:
Turntable/Turntable
roller rest/Owner's Manual
Super
EvenWave ® System
The microwaves
reach the embossments
on the interior walls
and then bounce in every direction. As a result, microwave
energy will be reflected from many angles to cook and defrost
more evenly and results in improved
performance.
Door
Interior light
\
0
o
Control panel
o 0
o _o,(ZD:: °
°o
o°
_o
oO
Y
Door release
button
J
/
Press the button to open door.
Safety interlock
system
Shuts off oven power if door is opened
during operation.
TURNTABLE
INSTALLATION
•
Place the roller rest on the cavity
bottom.
•
Tu_'nt-able hub should securely locked
•
When you open the door during cooking
process, the cooking stops but the program will
not be cancelled. Touch START to resume
cooking.
CAUTION:
turntable get very hot, so do not touch
them immediately after use.
in the receptacle. Never place the
turntable
upside down.
The turntable rotation should never
be restricted.
•
Place the turntable
•
rest as shown in the diagram.
Both turntable and roller rest must
•
always be used during cooking.
All food and containers of food are
•
always placed on this turntable for
cooking.
T-hrs turntable rotates clockwise or
counterclockwise;
The inside of the oven and
Tumtable
Hub(underside)
on top of the roller
Roller rest
this is normal.
8
Receptacle
INSTALLATION
Remove
all packing material
and accessories.
Examine the oven for any damage
Do not install if oven is damaged.
1.
such as dents or broken door.
Select a level surface that provides
outlet vents.
enough open space for the intake and/or
A minimum clearance of 3 inches (7.5 cm) is required between the oven and any
adjacent wall. One side must be open.
•
•
•
•
2.
Leave a minimum clearance of 3 inches (7.5 cm) above the oven.
Do not remove the legs from the bottom of the oven.
Blocking the intake and/or outlet openings can damage the oven.
Do not install oven over a range, cooktop or other heat-producing
appliance.
Plug your oven into a standard 120-volt / 60-Hz household outlet.
Be sure the electrical circuit is at least 15 amperes and that your microwave
is the only appliance on the circuit.
27 inch Built-in
oven
Kit
Your oven can be built into a cabinet by
using an optional built-in kit. Contact the
• The oven requires an opening of 25"
(w) x 17" (h) x 21" (d) for installation.
store where you purchased
NOTE: This unit
Hz or any circuit
60-Hz AC circuit.
for countertop or
Model No.
•
your oven.
Built-in Kit Stock No.
56.5,_9300
565.69301
20-69920
20-69921
565.69400
20-69910
565.69401
20-69911
When using the built-in kit, a
minimum clearance of 2 feet is
required between the oven and heatproducing appliance. For example,
next to or above a conventional gas
or electric range or above
conventional wall oven. Leave a
minimum clearance of 2 feet around
the even. If installed near or over a
hee-t, source, the oven could be
damaged and the warranty would be
void.
9
is not designed for 50
other than a 120-volt/
This oven is designed
built-in installation.
CONTROLPANELANDFEATURES
(1)
Display Window
Counts down cooking time in
seconds. Shows clock time when
oven is not in use.
(2)
Indicators
STEP1/STEP2/STEP3:
Cooking stage indicators
AUTO/DEFROST/PAUSE:
Cooking mode indicators
TIME/POWER/SERVING/LB/oz.:
Lights or flashes to enter cooking
time, power setting, food weight or
number of servings.
MORE/LESS:
Lights to indicate MORE/LESS
adjustment has been entered.
QuickTouch
FROZEi'_
ENTREE
ROLL/
MUFFIN
FROZEN
VEGETABLE
PIZZA
SLICE
FRESH
(5)(4)
__
POTATO
BEVERAGE
QUICK
ON
-(3)
M_E
A
_NENE_
SOUP/
VEGETABLE
(3)
POPCORN
L_S
KITCHEN
TIMER
__
(7)
1
Used to adjust cooking time for
Quick Touch TM keypad.
Auto keypads
QUICK
2
3
(4)
(9)-
4
5
6
7
8
9
A
-- CLOCK
-
U
STOP
CLEAI_
D'_)OR
(page 14)
MORE!LESS
DEFROST
FINE
Quick Touch TM keypads
FROZEN ENTREE
ROL½'MUFFIN
POPCORN
FROZEN VEGETABLE
PIZZA SLICE
POTATO
FRESH VEGETABLE
SOUP/BEVERAGE
POWER
START e_--
RELEASE
-(8)
Auto Defrost by Weight (page 15)
FINE DEFROST: Provides
thorough defrosting results.
QUICK DEFROST: Provides faster
defrosting when complete
defrosting is less crucial. This
defrost option is excellent for
thawing items such as frozen
ground meat for use in spaghetti
sauce or for taco meat.
(6)
(10)
(5)
QUICK ON (page 17)
(6)
POWER
(7)
KITCHEN
(8)
Number
keys
(9)
CLOCK
(page 11)
(page 13)
TIMER
(page 12)
(10) START
(11) STOP/CLEAR
Beep Sound
Clears all previous setting if pressed
before cooking starts. During
cooking: touch once to stop oven;
twice to stop and clear all entries.
A beep sounds when a keypad is
pres_sed, to confirm your key
en-r w:
10
SETTING
CLOCK
To set the correct time of day, follow the steps as below.
Example:
To set 3:15:
Procedure
Step
1
2
3
Touch CLOCK.
CLOCK
3
day.
1
5
_1- I _l
Touch CLOCK.
CLOCK
The clock starts counting.
•
•
If the clock (or display) shows any abnormarity, unplug the oven from the AC
outlet. Plug it in again and then reset the clock.
When your oven is plugged in for the first time or when power resumes after a
power interruption, the numbers in the display reset to 0:00.
This is a 12 hour clock.
•
You can use the oven without setting clock.
•
CHILD
LOCK-OUT
The oven has a safety feature which prevents
operation of the oven until cancelled.
To set:
Step
Procedure
Touch START
Note:
LI. Lt Lt
Touch 3, 1, 5 to enter time of
Note:
1
Display
Keypad
4seconds.
display.
•
use by children. The feature locks the
Keypad
Display
and hold for
L appears
in the
START_
/
-'"
_"
'_"_-
)
If any key is touched except STOP/CLEAR, START, KITCHEN TIMER,
CLOCK, E appears and a beep sounds. To correct, touch STOP/CLEAR.
Clock reappears in the display.
To cancel:
Step
Procedure
Touch START
1
4 seconds.
Keypad
Display
and hold for
L disappears
from
START
._.
_1-
IC
t _1
" I_.e- display.
Demo mode setting: Touch STOP/CLEAR
and hold for 4 seconds. L appears in
the display. Microwave energy wilt not be produced during demo mode.
To cancel Demo mode, touch STOP/CLEAR
and hold for 4 seconds. L disappears
from the display.
11
KITCHEN
TIMER
You can use the Kitchen Timer function independently,
even while a cooking
program is going on in the oven,
Example:
To set timer for 3 minutes:
Step
1
2
Touch KITCHEN
Display
Keypad
Procedure
TIMER,
_K
U
KITCHEN
TIMER
Touch 3, 0 and 0 to set 3
minutes.
3
(up to 99 minutes 99 seconds
0
0
_l Lt
n_U K
Touch START.
3
Note:
•
i_aFt K
LI LI
START _,
The timer starts counting and
beeps sound for 7 seconds at
the end.
To check remaining timer time during cooking, touch KITCHEN TIMER.
The remaining time appears in the display for 5 seconds.
To clear a timer setting, touch STOP/CLEAR while the display shows
remaining timer time.
The indicator K flashes when the display shows a cooking time.
The indicator K lights when the display shows a timer time.
To stop beeps of Kitchen Timer, touch KITCHEN TIMER.
Kitchen Timer will not beep if the oven beeps at the same time to indicate
another oven operation (the end of a cooking, for example).
If you do not enter a timer time for 10 seconds after step 1, the setting is
cleared with a beep.
If a cooking completes while you are setting the Kitchen Timer, all settings are
cleared. Restart from step 1.
If no key is touched for 5 seconds after the last key entry at step 2 above, the
timer automatically starts.
•
•
•
•
•
•
•
•
TIME COOKING
This basic microwave
cooking method allows you to cook food for a desired
In addition to the P100 (maximum) power level, you can select different
power from 11 levels, P 0 to P100 (0-100% of total power level).
time.
microwave
Manual Defrosting (Without using Auto Defrost feature):
Us_o_er
level P 30. To speed up the defrosting of dense foods over 1 ib (450 g),
you may start on P100 for 2 minutes,
then reduce to the level P 30.
Delay Start Cooking:
Use power level P 0 for the first stage of multistage
start time by up to 99 minutes 99 seconds.
Multistage
cooking.
You can delay cooking
Cooking
You can program up to 3 stages of cooking in sequence. Each stage can be
programmed with a different power and time setting. To program 2-stage or 3-stage
cooking,
repeat the Time Cooking
steps 1 to 3 and touch START.
The oven
automatically
proceeds to the end of cooking.
• When you cook on P100 power for 1-stage, you must enter POWER,
"t_u can not skip step 2, 3 when setting multistage cooking.
12
1 and 0.
Exam )le: To cook at power level P 80 for 40 seconds:
Step
Procedure
1
Enter 40 seconds by touching
4 and O.
2
Touch POWER. Display
prompt you to enter power
level.
Keypad
4
0
Display
•
LJ/'I
"_
ILl
J
POWER
m
Touch 8 to enter power level
P 80.
Power level
P100 (100%)
P 90 (90%)
P 80 (80%)
P 70 (70%)
P 60 (60%)
P 50 (50%)
P 40 (40%)
P 30 (30%)
P 20 (20%)
P 10 (10%)
P0
(0%)
3
4
Note:
8
Lr Lt
/
Touch START.
START
•
POWER
P100
Press
1,0
9
8
7
6
5
4
3
2
1
0
U_
I LI
Cooking time can be set up to 99 minutes 99 seconds.
When you cook on P100 power, skip step 2 and 3.
Foods with high moisture content should be cooked on P100 power.
To check the power level during cooking, touch POWER.
Power level can also be entered by touching POWER keypad repeatedly until
your desired power level appears in the display.
LEVEL SETTING
GUIDE
• Cooking poultry, vegetables,
and most casseroles. Boiling
water,
• Preheating a browning dish.
P 40-- ,; Reheating rice and pasta.
P 50 • Cooking custards and pasta.
• Cooking rump roast, ham, veal,
lamb.
P 40 • Cooking less tender cuts of meat in
liquid or slow-cooking dishes.
• Completing the cooking cycle of
less tender roasts.
P 80
• Reheating precooked or
prepared food quickly,
• Cooking fish.
P 30 • Completing the cooking cycle of
casseroles, stews, sauces.
• Manual defrosting.
P 70
• Cooking cheese dishes.
P 20 • Softening chocolate.
• clarifying butter.
• Heating breads, rolls, pancakes,
tacos, tortillas, French toast.
P 60 _ • Cooking scrambled eggs.
.-.J • Baking cakes.
P t0
13
• Softening cream cheese, butter.
• Keeping casseroles warm.
QUICK TOUCH
Quick Touch
TM
TM
COOKING
Cooking menu allow you to reheat or cook food automatically.
Simply touch the appropriate
START.
Example:
keypad 1 - 3 times to select desired menu and touch
To reheat 2 servings of soup:
Step
Procedure
i Touch SOUP/BEVERAGE
,twice to enter the number of
1
Display
Keypad
2/
SOUP/
BEVERAGE
serving.
Touch START.
2
START
The time counts down in the
display.
Quick
Touch
m
TM
Cooking
Serving
sizes:
Press keypad
Touch menu pad
FROZEN
once
twice
3 times
6 oz.
9 oz.
20 oz.
1 serving (4 oz.)
2 servings (8 oz.)
3 servings (12 oz.)
3.5 oz.
3.0 oz.
1.75 oz.
5 oz.
10 oz.
16 oz.
2 slices (6 oz.)
3 slices (9 oz.)
ENTREE
ROLL/MUFFIN
POPCORN
FROZEN VEGETABLE
PIZZA SLICE
1 slice
POTATO
1 potato (6 oz.)
FRESH VEGETABLE
KEY
2 potatoes (12 oz.) 3 potatoes (18 oz.)
4 oz.
8 oz.
1 serving (8 oz.)
2 servings (16 oz.)
SOUP/BEVERAGE
MORE/LESS
(3 oz.)
12 oz.
3 servings
(24 oz.)
MORE
DONENESS
%/
LESS
Proper food doneness
varies with each individual. After a few Quick Touch
TM
Cooking trials, you will learn which setting produces the best results for you.
By using this pad, you can adjust cooking time for a longer or shorter time.
Touch MORE/LESS
keypad before touching START.
Touch keypad once: MORE cooking (longer cooking time: 8 - 25%)
• Touch keypad twice: LESS cooking (shorter cooking time: 8 - 25%)
•
The oven automatically
sets to medium doneness
1:)y-touching keypad three times.
Note:
Time depends
on each food.
14
if no selection
is made and/or
AUTOMATIC
DEFROST
BY WEIGHT
The best defrosting time and power levels are automatically determined depending on
the food weight you enter. The feature provides two options:
FINE DEFROST: Use for thorough defrosting of frozen foods, when it is important to have
the center section defrosted as well as the outside. Examples for recommended use are:
whole chicken, roasts and steak.
QUICK DEFROST: Use to assist separation of frozen pieces of chicken or fish that need
preparation prior to cooking. Also, this defrost option is excellent for thawing items
such as frozen ground meat for use in spaghetti sauce or for taco meat.
Example: To thoroughly defrost 1.2 Ib of chicken pieces:
Step
1
Procedure
Keypad
Display
¢eI0ST
Touch FINE DEFROST.
FINE
Enter the weight of food.
mT
Weight must be programmed
in pounds and tenth of a
1
2
I-L
pound.
Conversion
Chart
Convert oz. into tenths of a lb.
e.g. 1 lb. 4 oz., program,
.2 Ibs.
Tenths of
a Pound
0.1
0.2
0.3
0.4
0.5
0.6
0.7
0.8
0.9
Ounces
1 -2
3 -4
5
6- 7
8
9- 10
1 1 - 12
13
14 - 15
Touch START.
3
Total defrost
time appears
m
START
in
$11_
I LI
the display.
Defrosting Techniques:
• Remove food from wrapper to prevent holding steam and juice and place in a
microwave-safe baking dish or a roasting rack to catch drippings.
• Cover thin parts with aluminum foil to prevent overdefrosting.
• Because some food should be still icy in center, it is necessary to have standing time
after defrosting food in the oven to complete defrosting. Leave your food for a while
out of oven. The denser the food such as roasts, the longer standing time is required.
Note: • Weight can be entered up to 5.9 Ibs. If weight is entered more than 5.9 Ibs and
press START, a beep sounds to alert you to enter correct weight.
• The oven selects lib if a weight is not entered.
• Beep tone sounds 5 seconds during the defrosting cycle to signal that
food should be rearranged to improve defrosting performance. Open the
- door and rearrange the food. The oven continues the defrosting cycle to the
end if you do not open the door.
• Food can be defrosted in a styrofoam package.
15
DEFROSTING
CHART
It is necessary to have standing time after defrosting food in the oven to complete
defrosting. The denser the food such as roasts, the longer standing time is required.
Following are standing time for each food for your reference.
Item
During Defrosting
Standing
time
Beef
5 - 10 min.
Ground beef
Turn over. Remove defrosted portion.
Liver
Drain liquid. Separate pieces.
10
15 mm.
Roasts
Turn over. Cover ends with foil.
20
40 ram.
Sirloin steak
Turn over.
5
10 mm.
Rib or T-bone
Turn over.
10
20 rain.
Flank steak
Turn over.
5
10mm.
Stewing meat
Break apart.
5
10 rain.
Ground pork
Turn over. Remove defrosted portion.
5 - 10 rain.
Bacon
Defrost in original wrapper. Turn over.
3 - 5 min.
Chops
Separate and turn over.
Ribs
Turn over.
10 - 20 min.
Roasts
Turn over. Cover ends with foil.
20 - 40 min.
Pork
5 - 10 min.
Lamb
Ground lamb
Turn over. Remove defrosted portion.
5 - 10 min.
Chops
Separate. Turn over.
5 - 10 min.
Ribs
Turn over.
10 - 20 m in.
Roasts
Turn over, Cover end with foil.
20 - 40 min.
Turn over. Cover ends with foil. Rinse
15 - 30 rain,
Poultry
Chicken, whole
under cold water after defrosting.
Pi'e_es
Separate, Turn over.
10 - 15 min.
Cornish hens
Turn over. Cover ends with foil. Rinse
under cold water after defrosting.
15 - 30 min.
Fish and Seafood
Crabmeat,
Break apart.
5 - 10 min.
Fish fillets
Shrimp
Turn over. Rearrange. Rinse under cold
water to separate after defrosting.
5 - 10 min.
Fish whole
Turn over. Cover head and tail with foil.
5 - 10 rain.
Steaks
Turn over.
5 - 10 min.
S,..9,_1o
ps
Break apart. Remove defrosted seafood.
5 - 10 min.
16
QUICK-ON COOKING (P100 POWER)
A time-saving feature, this simplified control lets you quickly set and start microwave
cooking without the need to touch START.
Example: To set Quick-On cooking for 2 minutes:
Step
1
Procedure
Touch QUICK
Display
Keypad
s_
ON.
QUICK
ON
U
Touch 2.
s_
The display shows time
counting down,
2
_
LI L#
J
2
Touch
Cooking time
0
1-9
30 seconds
1 - 9 minutes
Note: This feature only cook at highest power level (P100).
QUICK-ON
Reheating
REHEATING
Amount
AND COOKING
Time
Meat
CHART
Special Notes
Place in microwave-safe
dish.
Chili, stews
2 cups (500 g)
3 - 4 min.
Cover. Stir halfway through cooking
time.
Hamburgers,
meat loaf slices
1 serving
2 servings
I/2 - 1 rain.
1 - 2 min.
Place on microwave-safe
Cover with paper towel.
Turn over once.
2
4
1 - 2 min.
2 - 3 min.
3 - 5 oz.
(85 - 140 g)
1 - 2 min.
61/2 oz. (!85 g)
3 - 5 min.
Cooked rice,
pasta:. -
1 cup (250 mL)
2 cups (500 mL)
1 - 2 min.
2 - 3 min.
Heat in microwave-safe casserole,
covered with plastic wrap.
Canned
vegetable
8 oz. (230 g)
15 oz. (425 g)
1 - 2 min
2 - 3 min.
Use microwave-safe
covered. Stir once.
Cooking
Amount
Time
Special Notes
Mashed
potatoes
instant
4 servings
3 - 5 min.
Follow package directions. Reduce
liquid by 1 tbsp (15 mL).
31/4 oz. (90 g)
4 - 6 min.
1/4 cup (50 mL)
1 - 2 min.
Poultry
Chicken pieces
Chicken, turkey,
sliced
Seafood
Shrimp, crab, or
scallops in sauce,
frozen
Pudding and
pie filling mix
Cereals
Cream of wheat
(rege_r)
17
plate.
Heat on microwave-safe plate.
Cover with wax paper. If fried, cover
with paper towel.
Heat on microwave-safe
Cover with wax paper.
plate.
Pierce pouch and place on
microwave-safe plate.
Flex pouch to mix halfway through
cooking time.
casserole,
Follow package directions.
Stir once.
Add 3/4 cup (t75 mL) of water.
Cook uncovered. Stir once. Let
stand for I minute.
COOKING
Advantages
TECHNIQUES
of microwave
cooking are
speed and efficiency. For warming,
heating, and defrosting, nothing
Delicate
Ingredients
Some foods require special attention
when cooked in the microwave oven.
Delicate foods such as eggs, cheese,
compares. There are a few tips that will
make microwaving
easier and more
enjoyable.
mayonnaise, etc. cook so quickly, they
should be watched carefully.
Microwave
Microwave
Because
Cooking
microwave
Principles
cooking requires
only one-quarter to one-third the time of
conventional cooking, the same cooking
principles become even more important.
Quantity
The more food being cooked, the longer
you will have to cook it. As a general
rule, when doubling a recipe, increase
the cooking time by about 50 percent.
When cutting a recipe in half, reduce the
time by about 40 percent.
Density
Dense foods, such as potatoes, roasts
and carrots, absorb microwave energy
less quickly than porous foods such as
ground beef or mashed
potatoes.
Therefore, denser foods take longer to
cook.
Shape
and
Size
Small pieces cook faster than large
ones. For even cooking, it is important to
have all the pieces the same size.
Evenly shaped pieces, round or
doughnut shaped, microwave best.
When cooking items of varying
thickness, arrange the thick portion near
the outer edge of the dish.
Moisture,
Sugar
and Fat
Food high in moisture, sugar or fat cook
faster than foods that are low in these
substances. Add a minimum of liquid to
moist foods. An excess amount of water
Temperature
Frozen or refrigerated
Techniques
such as eggs, oysters, snails, sausages,
livers, clams and whole vegetables, so
they do not burst.
Covering: Covering
speeds heating
and prevents spattering.
Stirring:To help food cook more quickly
and evenly.
Turning Over: To help larger foods
such as roasts or whole chickens cook
more evenly.
Reheating: Place food that is denser/
larger/thicker to the outer edge and the
smaller/thinner
or more porous food to
the center.
Shielding:To
prevent overcooking, thin
or bony areas can be protected with
small strips of aluminum foil.
Standing Time: Foods continue
cooking even after removal from the
oven. Standing time is necessary to
allow foods to complete cooking.
Converting
Recipes
Microwave recipes will likely call for less
liquid and cooking time.
Safety
Food
Temperatures
For your safety, following temperature is
recommended to avoid potential food
poisoning problems.
160°F (71°C): Meat, Fish, Eggs
165°F (74°C): Reheating foods
170°F (77°C): Poultry (White Meat)
180°F (82°C): Poultry (Dark Meat)
slows cooking.
Starting
Cooking
Arranging: Arrange foods in a circular
pattern, when possible.
Piercing: Pierce the membrane of foods
foods take longer
to £_n_n__crowave
than food at room
temperature.
18
QUICK
TOUCW
M COOKING
COOKING/REHEATING
TIPS
FROZEN ENTREE
•
Foliow package
removing
•
•
directions
for
or venting cover,
piercing
•
package and place them in a
microwave-safe casserole or dish.
pouch, replacing foil, covering with
plastic wrap, etc.
Frozen foods with special packaging
to "crisp" foods such as pizza, french
fries and pocket-type sandwiches
should be cooked according
manufacturer's
directions.
Place a microwave-safe
PIZZA SLICE
•
•
•
plate
•
ROLL/MUFFIN
•
•
•
•
•
refrigeration temperature.
If frozen, defrost 30 - 40 seconds
Pierce with fork.
Place on a paper towel.
Let stand 3 - 5 minutes after cooking.
a
(macaroni and cheese, for example)
that could spill over during heating.
Place on a paper plate or paper
towel.
Roll/Muffin must be room or
Place on a paper plate.
Pizza must be room or refrigerated
temperature.
POTATO
to
underneath if the package contains
cheese sauce in the product
Frozen Vegetables in a pouch :
Remove frozen vegetables from
Arrange in a circular pattern with
heavier ends pointing toward the
outer edge of the turntable.
Potatoes must he room temperature.
Do not place potato in the center of
oven when cooking.
FRESH VEGETABLE
• Place in a bowl or dish.
per
Add 1 tablespoon
Cover.
serving at power level P 30 using
Manual defrosting.
•
POPCORN
water per serving.
Weight shown is for washed,
prepared
vegetables.
•
Bag should be at room temperature.
SOUP/BEVERAGE
•
Do not use this feature if popcorn bag
size is not 3.5 oz, 3.0 oz or 1.75 oz.
•
Liquid must be room or refrigeration
•
temperature.
When cooking canned
remove from can.
FROZEN
•
VEGETABLE
Follow package
directions
for adding
water, piercing pouch, cooking
dish, venting package, etc.
Quick
Touch
TM
in
Cooking/Reheating
I_em/Amount
Press keypad
Lasagna
Macaroni and Cheese
FROZEN
ENTREE
Popcorn
3.5 oz (100 g)
3.0 oz (85 g)
1.75 oz (50 g)
soups,
Add milk or water as directed on can.
Place in a microwave-safe
dish.
Cover.
Guide
Special Notes
Follow package directions.
CAUTION:
1)After popping, open bag carefully.
Popcorn and steam are extremely hot.
2)Do not reheat unpopped kernels or
reuse bag. Overcooking can result in an
oven fire.
3)Never use a brown paper bag for
popping corn.
POPCORN
19
QUICK
TOUCH
Quick Touch
TM
TM
COOKING
(CONT.)
Cooking/Reheating
Item/Amount
Broccoli, Brussels
sprouts, Carrots, Corn,
Cauliflower, Green
beans, Peas, Spinach,
or a mixture of these.
5, 10, 16 oz
FROZEN
VEGETABLE
PIZZA
SLICE
Potatoes,
white, baking,
1 - 3 potatoes
Artichokes, Beans,
Broccoli, Brussels
sprouts, Cabbage,
Carrots, Corn,
Cauliflower, Eggplant,
Mushrooms, Onion,
Okra, Peas, Spinach,
Squash,
Zucchini, or a mixture
of these.
4,8, 12oz
Coffee/Tea
1 - 3 cups
(8 - 24 oz)
Special Notes
Press keypad
Cooked pizza
1 - 3 slices
(3 - 9 oz)
Guide
Follow package directions for adding
water, piercing pouch, cooking in a dish,
venting package, etc.
Place on paper towel or paper plate or
leave in uncovered cardboard box, points
toward center.
CAUTION: Be careful when eating pizza.
The pizza surface and sauce can be very
hot.
Pierce skin. Place on a paper towel.
POTATO
Wash. Prepare and cut into slices, cubes,
wedges, or julienne strips.
Place in a bowl or dish.
FRESH
VEGETABLE
Add 1 tablespoon water per serving.
Cover.
SOUP/
BEVERAGE
No cover. Stir after reheating.
Soup (8 - 24 oz)
1 - 3 servings
SOUP/
BEVERAGE
Cover. Stir after reheating.
M_ (_- 24 oz)
1 - 3 cups
SOUP/
BEVERAGE
No cover. Stir after reheating. For hot
chocolate, etc.
ROLUMUFFIN
Place on paper plate or wrap in paper
towel.
Hamburger buns,
hot dog rolls (4 - 12oz)
1 - 3 servings
Doughnuts, sweet rolls,
muffins
(4 - 12oz)
1 - 3 servings
Place on paper plate or towel.
ROLL/MUFFIN
2O
TIME COOKING
CONVERTING
- APPETIZERS
AND RICE
RECIPES
"
Most hot appetizers adapt well to
microwave cooking, the exception being
those wrapped in pastry. Pastry requires
the hot environment of the conventional
oven to become crisp.
Cover appetizers or dips only when
called for by a recipe. Use casserole
lids, wax paper, plastic wrap, or paper
towel.
•
Appetizers
and dips that contain
Toppings for canapds can be made
ahead and then placed on bread or
cheese, mayonnaise and other
delicate ingredients are usually
heated on power level P 10. A higher
crackers
setting
just before
This guarantees
Reheating
heating.
Guide - Convenience
Power
Meat spread
4 oz (115 g)
P 80
Cocktail franks
4 servings
P 70
Dips, cream
1/2 cup (125 mL)
or
drying.
crispness.
Item
might cause separation
Appetizers
Cooking Time
Special Notes
1 - 11/2 min.
min.
Place on paper towel.
Cover with wax paper.
P 10
2 - 3 min.
Cover with wax paper.
Egg rolls
12 (6 oz - 170 g)
P 70
1 - 2 min.
Place on paper towel or paper
plate.
Mini Tacos
4 - 6 (6 oz - 170 g)
P 50
1 - 2 min.
Place on paper towel or paper
plate.
Cooking
Guide
1/2 -
Transfer to small microwave-safe
bowl.
11/2
- Rice
1 cup (250 mL) rice (Use 3-quart (3 L) microwave-safe casserole. Heat water 4 to 7 min.
to boil. Add rice, salt and butter or margarine. Cover tightly. Let stand for 5 minutes.)
Item
_'ofig-grain
Water
Power
Cooking
Time
13/4 cups (425 mL)
P 30
20 - 25 min.
P 30
22 - 27 min.
÷
Short grain
11/2 cups (375 mL)
21
TIME COOKING
- MEATS,
POULTRY
AND FISH
CHECKING
PREPARATION
DONENESS
Beef: The color inside meat indicates
aloneness. Rare roast should be red
•
Use a microwave-safe
•
•
Defrost Frozen foods completely.
Wash poultry and fish in cool water.
•
Arrange small items in a single layer
in dish, avoid overlapping edges of
food.
Pork: Cooked pork meat should be gray
with clear juice.
Place thick sections toward edge of
the dish.
Use a rack in the dish to elevate meat
Poultry: Juices should be clear yellow
when cooked. Legs should move freely.
Fish and Seafood: Should be opaque
out of the juices.
in color and flake easily.
•
•
•
•
•
dish, etc.
inside. Medium is pink and gray
indicates well done.
Use spices, seasonings as desired.
Add salt after cooking if necessary.
Aluminum foils can be used to cover
To check internal temperature
thin parts of meat or poultry wings
•
and legs to prevent overcooking.
Foils should be applied toward the
•
end of cooking time.
Place meat fat side down.
removing
meat from the oven. Insert the
thermometer
temperatures
thermometer
•
Use wax paper or plastic wrap to stop
•
splattering.
Turn over or rearrange
Beef
4 oz (115 g) each
Hamburgers,
refrigerated
2
oven.
food to oven for a
short period of time at the recommended
power level. Let stand as recommended
in chart. Cover roasts and whole poultry
during stand time.
meat, poultry
cooking
Cooking
Time
Stand
Time
Special Notes
Cook in a shallow dish.
P100
P100
2 - 4 min.
4 - 6 min.
2 min.
2 min.
Hamburgers, frozen
2
"-- 4
P100
P100
4 - 6 min.
7 - 9 min.
3 min.
3 min.
Roasts, tender
1 Ib (450 g)
P 50
4
in the microwave
Return undercooked
Power
Food
avoiding bone or fat. Lower
are found in the center of
the roast or in the muscle close to a large
bone. Never use a conventional
meat
COOKING
and fish halfway through
time.
of various
meats and poultry, use a microwave or
conventional meat thermometer
after
10 - 13 min. 10-15
22
min.
Cover loosely with wax
paper. Turn over halfway,
through cooking.
Turn over and separate
halfway through cooking.
Cover with wax paper.
Shield halfway through
cooking and turn roast
over if necessary. Stand
tented with foil.
Power
Food
Beef
Meat loaf,
(68O g)
11/2
P 50
Ib
P100
PIO0
P100
Pork roast,
1 Ib (450 g)
P 50
PIO0
Sausage links,
Wieners, fresh
1 - 2 oz (30- 55 g) each
2
4
Stand
Time
15 - 20 min.
5 min.
P100
P100
3 - 5 min.
6 - 8 min.
9 - 11 min.
Lamb
Chops, shoulder
1/2.'inch-(1 cm) thick
1
2
Poultry
Chickens, whole,
up to 4 Ib (1.8 kg)
1 Ib (450 g)
Cornish hens
1 Ib (450 g)
Arrange in loaf dish.
Cover with wax paper.
12-15
2 rain.
3 min.
3 min.
min. 10 - 15 min.
7 - 9 min.
5 min.
1/2 - 2 min.
1 - 3 min.
1 min.
1 min.
11/2 - 2 min.
21/2- 4 min.
1 min.
1 min.
Bacon, slices
2
4
Special Notes
Place in a shallow dish.
Cover loosely with wax
paper. Turn over halfway
through cooking.
Pork
Chops, loin 1/2 inch
(1 cm) thick,
7 oz (200 g) each
1
2
4
Ham, slice 1 inch
(2.5 cm) thick,
1 Ib (450 g)
Cooking
Time
P100
P100
Cover with wax paper.
Shield halfway through
cooking and turn roast
over if necessary.
*Approx. temp. after
stand 170°F to 175°F
(77°C to 79°C )
Cover with wax paper.
Turn over halfway
through cooking.
Score or pierce before
cooking.
Cover with wax paper.
Turn over once.
Cook on bacon rack or
line bottom of dish.
Place bacon on paper
towel. Cover loosely with
another paper towel. Do
not turn over bacon.
Cover loosely with wax
paper.
P100
P100
2 - 4 min.
4 - 6 min.
2 min.
5 min.
Place breast-side down
P100
6 - 9 min.
10 min.
P100
5 - 8 min.
10 min.
*Check with conventional thermometer.
23
on a roasting rack in a
dish. Cover with plastic
wrap or wax paper. Turn
over halfway through
cooking. Stand tented
with foil. When cooked,
internal temperature
should be 180°F (82°C)
and juices should run
clear.
Poultry
Chicken pieces,
up to 2 Ib (900 g)
1 Ib (450 g)
Fish and Seafood
Fish fillets, 3/4 Ib (340 g)
Fish steaks 2,
6 oz (170 g) each
Scallops 1 Ib (450 g)
Shrimp, medium size,
shelled and cleaned,
1 Ib (450 g)
Whole fish,
stuffed or unstuffed,
11/2 to 13/4 Ib
(680 - 8OO g)
TIME COOKING
SCRAMBLED
Cooking
Time
Power
Food
P100
5 - 8 min.
5 min.
P100
P 50
4 - 6 min.
6 - 9 min.
3 min.
5 min.
P 7O
P 70
4 - 7 min.
4 - 7 min.
3 min.
3 min.
P100
7 - 10 min.
5 min.
Arrange skin-side up in
a baking dish halfway
through cooking,
meatier portions toward
edge of dish. Cover with
plastic wrap or lid.
Arrange in a single layer
in dish.
Cover with wax paper.
Rearrange or stir shrimp
or scallops halfway
through cooking.
EGGS
Add 1 tablespoon
glass
Eggs
milk and 1 teaspoon
1
butter for each egg. Beat with a fork.
Cook at Power Level P 60 according to
time in the chart, Stir at least once during
cooking time.
Stir after cooking, and let stand for
1 minute,
2
Cooking
Time
3/4 - 11/2 min.
11/2 -
21/2 min.
3
21/4 - 4 min.
4
31/4 - 5 min.
EGGS
Use 6-ounce (170 mL) microwave-safe
custard cup with 1/4 cup (50 mL) water
fQr_ t_o3 eggs.
Use 1-quart (1 L) microwave-safe
Eggs
1
Cooking Time
3/4 - 1 1/2 rain.
dish
with 1 cup (250 mL) water for 4 eggs.
Heat at P10O POWER to bring water to
a boil with 1/8 teaspoon salt and up to
1/4 teaspoon vinegar. Break egg
carefully
Special Notes
- EGGS
Break eggs into a microwave-safe
measure.
POACHED
Stand
Time
into hot water.
Pierce egg several times lightly with
toothpick.
Cover with wax paper.
Cook at Power Level P 50 according
time in the chart. Let stand, covered,
to
1 ._Jr=ute before serving.
24
2
11/2 -
3 min.
3
2 - 31/2 min.
4
3 - 5 min.
TIME COOKING
- BAKED GOODS
AND DESSERTS
Converting
Recipes
When adapting quick bread recipes, you
will find it necessary to reduce the
If a recipe contains buttermilk or sour
cream, do not change the amount of
soda, since it serves to counteract the
amount of leavening (baking powder or
soda) by about one-quarter the normal
amount. A bitter aftertaste is apparent if
sour taste and does not act only as a
leavening
agent.
too much leavening is used in biscuits or
muffins. Since food rises higher in the
When using a mix where leavening
cannot be reduced, allow the dough to
stand about 10 minutes before cooking
microwave oven, you will not see a loss
in volume from the reduction of soda or
in order for some of the gas to be lost.
baking powder.
Breads and rolls should be reheated
only until they are warm to the touch.
Overheating or overcooking makes
bread tough and rubbery.
Cooking/Reheating
Guide
Item
French bread,
Frozen:
Room temp.:
Cooking
Time
Power
1 Ib (450 g)
1 Ib (450 g)
Whole coffee cake,
Frozen: 10- 13 oz (280- 370 g)
Room temp.: 10- 13 oz
(280- 370 g)
P 80
P 80
1 - 2 min.
20 - 30 sec.
P 80
P 80
1 - 2 min.
1/2 - 1 min.
Butter cake
21/4 cups (550 mL) batter
1st stage
2nd stage
P 50
P100
5 - 7 min.
1 - 2 min.
Brownies
2 cups (500 mL) batter
P 50
8 - 11 min.
Muffins,1/4cup(50mL)battereach
2
'_" 6
P 70
P 70
Special Notes
Place on paper plate or
towel.
Place on paper plate or
towel. Let stand for 5 - 10
minutes before serving.
Place on inverted pie plate.
1-
11/2
3-4
25
min.
min. I
Cover with wax paper.
Place on inverted pie plate.
CLEANING
•
Wipe the oven inside and outside with a
soft cloth and a mild detergent solution.
Then rinse and wipe dry. Never use
cleaning powders or rough pads.
Excessive oil splatters on the inside top
will be difficult to remove if left for many
days. Wipe spatters with a wet paper
towel, especially after cooking chicken
or bacon.
REMOVABLE
cleaned
SPECIAL
"WE
roller rest should
be
regularly.
CARE
For best performance and safety,the
inner door panel and the oven front
frame should be free of food or grease
buildup. Wipe them often with a mild
detergent. Then rinse and wipe dry.
Never use cleaning powders or rough
pads.
After cleaning the control panel, touch
STOP/CLEAR to clear any entries that
might have been entered accidentally
while cleaning the panel.
PARTS
Wash in warm (not hot) waterwith a mild
detergent and a soft cloth. Rinse them
well and dry with a soft cloth. Never use
cleaning powders, steel wool or rough
pads.
• The turntable may be cleaned at the
sink. Be careful not to chip or scratch
the edges as this may cause the
turntable to break during use.
SEARS
The turntable
_
CAUTION-
Product Damage Hazard
Uncleaned cavity cover (located in the
right side wall of the oven cavity) will
cause fire, burn or sparking. Clean your
oven with wet towel.
SERVICE
SERVICE
"We Service
WHAT
WE SELL"
inconvenience.
It assures you of
maximum efficiency from your
Microwave Oven.
What We Selr' is our
assurance to you that you can depend
on Sears for service because Sears
Service is nationwide,
Your Sears Kenmore ® Microwave
Here's a comparative
warranty and
Maintenance Agreement chart showing
you the benefits of a Sears Microwave
Oven Maintenance Agreement.
Oven
has added value when you consider that
Sears has a service unit near you,
staffed by Sears Trained
Technicians-professional
technicians
specifically trained on Sears Kenmore ®
Microwave Ovens, having the parts,
tools and equipment to insure that we
me_t"odr pledge to you-"We Service
What We Sell!"
TO FURTHER ADD TO THE VALUE OF
YOUR MICROWAVE
OVEN, BUY A
SEARS MAINTENANCE
AGREEMENT.
Sears Kenmore ® Microwave
Ovens are
designed, manufactured,
and tested for
years of dependable operation, Yet. any
modem appliance may require service
from time to time. A Sears Maintenance
Agreement is more than an extension of
the Warranty.
It p11_ides complete protection from
unexpected repair bills and undue
2 nd Yr.
Years of Ownership
Coverage
1 st Yr.
thru
5 th Yr.
Replacement of
defective parts other
than magnetron
W
MA
Replacement of
magnetron
W
W
Annual preventive
maintennance check
at your request
MA
MA
W - WARRANTY
MA - MAINTENANCE
AGREEMENT
Contact your Sears salesperson or local
Sears Service Center today and
purchase a Sears Maintenance
Agreement.
26
TROUBLESHOOTING
Check your problem by using the chart below and try the solutions for each problem.
If the microwave oven still does not work properly, contact the nearest authorized
;ervice center.
TROUBLE
REMEDY
iCAUSE
When the oven is
plugged into a wall
)utlet for the first time,
it does not work
The microcomputer used in
the oven control may
temporarily become
scrambled and fail to function
properly.
as programmed.
Light reflection around
the outer case.
This light is from the oven
light located outside the oven
cavity.
Noise coming from the
turntable when the
oven is turned on.
How are the boil-overs
Iavoided,
• Unplug the oven from the
wall outlet and then plug it
back in.
• Noise occurs when the
tuntable roller rest and cavity
bottom are dirty.
• Clean the turntable roller
rest cavity bottom.
• Small utensil is used.
• Use a larger utensil than
usual for cooking.
Noise coming from the
oven when reducing
)ower.
• When cooking with a power
other than P100, the oven
cycle to obtain the lower
power level.
The clicking noise can be
heard when the oven cycles.
This is normal.
Oven will not start.
• Electrical cord for oven is not
• Plug into the outlet.
plugged in.
• Door is open.
• Close the door and try
again.
• Wrong operation is set.
• Check instructions,
(pages 11-17)
E (error) appears in the
display window.
* Wrong operation is set.
• Touch STOP/CLEAR.
Arcing or sparking.
• Materials to be avoided in
microwave oven are used.
• Use microwave-safe
cookware only. (page 7)
• The oven is operated when
empty.
• Do not operate with oven
empty.
• Food refuse remains in the
c-avity or inside the cavity is
uncleaned.
Unevenly cooked
foods.
,• Clean cavity with wet
towel.
• Materials to be avoided in
microwave oven are used.
• Use microwave-safe
cookware only. (page 7)
• Food is not defrosted
• Completely defrost food.
completely.
• Cooking time/Cooking
level is not suitable.
power
• Food is not turned or stirred.
27
• Use correct time/cooking
power level.
• Turn or stir food.
CAUSE
TROUBLE
REMEDY
Overcooked foods.
i • Cooking time/Cooking power
level is not suitable,
• Use correct cooking time/
cooking power level.
Undercooked foods.
, • Materials to be avoided in
microwave oven are used.
• Use microwave-safe
cookware only. (page 7)
• Food is net defrosted
• Completely defrost food.
• comptetety.
Oven ventilation ports are
restricted.
0
Improper defrosting.
Cooking time/Cooking
level is not suitable.
power
I • Materials to be avoided in
microwave oven are used.
l•
Cooking time/Cooking
level is not suitable.
power
Food is not turned or stirred.
,° Check to see that oven
ventitation ports are not
restricted.
• Use correct time/cooking
power level.
!o Use microwave-safe
cookware only. (page 7)
• Use correct time/cooking
power level.
• Turn or stir food.
Oven light will not glow. ! • The light bulb has burned out. • Contact your nearest
Sears Service Center.
See Back cover for phone
numbers,
START has not been
touched.
Eggs sometimes
Steam
coming
the
air exhaust
pop.
out
vent.of
i• The egg yolk may pop
because of steam build,up
inside the membrane.
r
Steam is produced during
• cooking, The microwave
oven has been made to vent
this steam.
28
• Touch START.
• Pierce the membrane
with a toothpick before
cooking it.
For in-home major brand repair service:
Call 24 hours a day, 7 days a week
1 -800-4-MY-HOME
Para pedir servicio
de reparacibn
sM (1-800-469-4663)
a domicilio
- 1-800-676-5811
In Canada for all your service and parts needs call
Au Canada pour tout le service ou les pieces" 1-800-665
4455
For the repair or replacement
parts you need:
Call 7 am - 7 pm, 7 days a week
1-800-366-PART
Para ordenar
For the location
(1-800-366-7278)
piezas con entrega a domicilio
- 1-800-659-7084
of a Sears Parts and Service Center
Call 24 hours a day, 7 days a week
in your area:
_1-800-488-1222
For information on purchasing a Sears Maintenance
Agreement
or to inquire about an existing Agreement:
Call 9 am - 5 pm, Monday - Saturday
1 -800-827-6655
TheServiceSideofSearssM
Part No, 16353
6/98 Printed in Singapore