Download SecurityMan ClockCamDVR User`s manual
Transcript
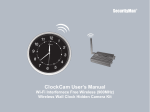
ClockCamDVR User’s Manual
Wall Clock Color Camera
with Micro SD Recorder & Remote Control
© Copyright 2011
This manual is furnished under license and may be used or copied only in accordance
with the terms of such license.
Except as permitted by such license, no part of this publication may be reproduced,
stored in a retrieval system, or transmitted, in any form or any means, electronic, mechanical,
recording, or otherwise, including translation to another language or format, without the
prior written permission of SecurityMan Inc.
The content of this manual is furnished for informational use only, is subject to change
without Notice, and should not be construed as a commitment by SecurityMan Inc.
SecurityMan Inc. assumes no responsibility or liability for any errors or inaccuracies that
may appear in this book.
FCC Information
This device complies with part 15 of the FCC Rules. Operation is subject to the following
two conditions:
(1) This device may not cause harmful interference
(2) This device must accept any interference received, including interference that may
cause undesired operation.
Operation of this equipment in a residential area is likely to cause interference in which
case the user at his/her own risk and expense will be required to correct the interference.
Warranty
SecurityMan Inc. warrants that this product will be free from defects in title, materials and
manufacturing workmanship for one year from the date of the purchase. If the product is
found to be defective then, as your sole remedy and as the manufacturer’s only
obligation, SecurityMan Inc. will repair or replace the product.
This warranty is exclusive and is limited to this product. This warranty shall not apply to
products that have been subjected to abuse, misuse, abnormal electrical or environmental
conditions, or any condition other than what can be considered normal use.
Warranty Disclaimers
SecurityMan Inc. makes no other warranties, express, implied or otherwise, regarding
this product, and specifically disclaims any warranty for merchantability or fitness for a
particular purpose.
The exclusion of implied warranties is not permitted in some states and the exclusions
specified herein may not apply to you. This warranty provides you with specific legal
rights. There may be other rights that you have which vary from state to state.
Limitation of Liability
The liability of SecurityMan Inc. arising from this warranty and sale shall be limited to
a refund of the purchase price. In no event shall SecurityMan be liable for costs of
procurement of substitute products or services, or for any lost profits, or for any
consequential, incidental, direct or indirect damages, however caused and on any theory
of liability, arising from this warranty and sale. These limitations shall apply not
withstanding any failure of essential purpose of any limited remedy.
SecurityMan
4601 E. Airport Drive, Ontario, CA91761, USA
Tel: 888-977-3777 or 909-230-6668
Fax: 909-230-6889
Email: [email protected]
Website: http://www.securitymaninc.com
Operating Restrictions
DO NOT use this product to violate one's privacy. Monitoring one's private activities
without consent is illegal and this product is not designed and manufactured for these
purposes.
DO NOT put this product near any medical equipment. Radio waves might potentially
cause breakdown of electrical medical equipment. This product should be placed at
least 1 foot away from any heart pacemaker. Radio waves might potentially influence
heart pacemaker and lead to respiratory disturbance.
DO NOT use this product for any illegal activities. SecurityMan shall not be
responsible for any consequences of illegal conducts made byusers.
Conditions
• The temperature should be kept between –10˚C and 50˚C (14˚F to 122 ˚F).
The relative humidity should remain from 20% to 80%.
• Avoid putting the product in places where occur might change rapidly in temperature
or humidity.
• Keep it dry, dustless and avoid exposure in it directly in sunlight.
• Keep product away from heat sources such as electric heater.
• Do not use the wireless camera near aggressive chemicals.
Warning
• Do not shake or stricken the product.
• In order to avoid inflammation or electric shock, this camera kit should be kept away
from exposure to rain or moist, and it shall not be put in or near bath-rooms, washing
pools, wash houses , moist basements, or swimming pools, unless it is well shielded.
• In use of sockets set on walls or extension wires, attention should be paid not to
exceed their load capabilities to avoid inflammation or electric shock.
• Do not disassemble the product casings, otherwise the internal parts may get damaged,
or personal injury caused.
• Switch off the power supply in thunder and lightning weather or when not in use for
long periods of time.
• Do not attempt to service the product yourself as opening or removing
covers may expose you to dangerous voltage or other hazards. Refer
all servicing to qualified service personnel.
Table of Contents
Introduction
1
Safety
1
Features
2
Package Contents
3
Product Basics
4
Remote Control
5
Setup and Operation
7
Installation
14
Playback and Backup File
17
Troubleshooting
19
Installation
21
Introduction
Thank you for purchasing SecurityMan’s ClockCamDVR covert product. The ClockCamDVR
is designed for users who want to discreetly monitor their visitors, strangers, and business
activities. ClockCamDVR is a fully functional wall clock with hidden camera and video recorder
that records into a micro SD card, an economical total solution. The video recorder contains
multifunctional features; features such as motion detection recording, pre-recording events
and manual recording. It can be installed in seconds, hassle free of running long video cable.
Simply mount the clock at a desired location, connect the power of the clock-camera, and
ready to record. It is a perfect security product for home and business.
Safety
Please read these instructions before using the product.
• Since this product is controlled by a microcomputer chip, it is normal that system halt may
occur if users operate it incorrectly. In this such case, restart the device by switching the
power to the off position and then unplug the AC adapter for a few minutes to recover.
• This product is not waterproof, weatherproof or dust proof, therefore it can not be
used outdoors or in adverse environment.
1
• Please adopt the original DC power supply provided, to avoid causing device damage,
electric shock and fire hazards.
• Unauthorized dismantlement of the device or replacement of device parts is forbidden.
The manufacturer will not be responsible for any loss arising from such actions.
• Do not put the device in fire, oven, or microwave oven.
• User’s manual may change without notice consent, please check our website for the
latest available manual to download or use actual product as standard.
Features
• Do-it-yourself, easy to setup and use
• Hidden color camera with built-in functional wall-clock
• Crystal clear video quality recording with VGA, D1 or HD in AVI format
• Motion and pre-alarm (3 sec.) recording
• Record to micro SD card (not included, up to 32GB/36hrs)
• Overwrite function when Micro SD card is full
• Date/Time stamp video recording
• Easy playback or download on a PC via micro SD or direct PC connection through USB
2
Package Contents
ClockCamDVR
Remote Control
Adapter
User manual
Video Cable
USB cable
Screws
Warning Stickers x 2
* Micro SD card is not included.
3
Product Basics
Hour Hand
Minute Hand
Second Hand
Camera
Clock
IR for Remote Control
Buzzer
MD On/Off
SYNC
Micro SD Slot
USB port
Video Out
Mount Hole
Clock Adjuster Turner
Battery
Compartment
(Clock)
4
Power Socket
DVR On/Off
Power LED
Record LED
Remote Control
REC
STOP
TRIGGER ON
TRIGGER OFF
Buttons Description:
REC: Press to initiate manual recording.
STOP: Press to stop manual recording.
TRIGGER ON: Press to enable motion detection mode.
TRIGGER OFF: Press to disable motion detection mode.
Be sure to aim the RC (Remote Control) towards the IR receiver module on the clockcamera. Press the REC or TRIGGER ON buttons to activate manual
5
recording or motion recording accordingly. During activation, clock-camera will make two
beeping sound to indicate activation is successful. Press the STOP or TRIGGER OFF
buttons to disable manual recording or disable motion recording accordingly. During
disabling, the clock-camera will beep once to indicate disabling is successful.
Tips:
• The RC uses infrared signal to communicate with the receiver module by direct line of
site, please ensure objects are not hindering when RC is in use.
• RC distance is 10m direct line of site, if the transmitting distance is short and looses
accuracy it is a sigh of low voltage, please replace the battery.
• If clock-camera is not in use please remove the battery from the RC to avoid circuit
damage.
• To replace battery; reference the diagram illustrated at the back side of the RC.
6
Setup and Operation
Insert a Micro SD (not included, support up to 32GB) into the Micro SD slot located at
the back side of the ClockCamDVR as illustrated below. Make sure the Micro SD clicks
in when attempting to insert. Simply press in on the Micro SD again to eject. Insert a
standard AA cell battery (not included) in the clock battery compartment for the clock.
Insert
SD Card
Connect one end of the provided power supply into the “DC 6V” power socket located
at the back side of clock-camera and plug the power transformer into an electrical
power outlet.
7
Use the USB cable provided and plugs one end into the USB port of ClockCamDVR and
plug the other USB end into a PC (Windows 2000, Xp, Vista, and 7). Turn the power
switch to “DVR ON” position to power on the ClockCamDVR (For PC connection plug in
the USB cable before power on DVR as instructed below). A red power LED light indicator
will light up to indicate the camera and recorder is turned on as illustrated below.
DVR ON/OFF switch
Open My Computer and look for a mobile hard disk drive called, “Removable Disk”.
Double click on “Removable Disk (Drive:)” to open the directory and then double click on
“CLOCKCAMDVR.EXE” to enter the system setup window as shown below. System
setting consists of Date, Time, Time/Date Stamp, Motion Sensitvity, Video Standard,
Image Quality, OverWrite, and Button Sound settings.
8
Date: Click into “2010-01-01” and then click the △ or ▽ buttons to adjust to current date.
Time: Click into “00:00:08” and then click the △ or ▽ buttons to adjust to current time.
Time/Date Stamp: Click the ▽ button to select a time/date stamp format of YY/MM/DD,
DD/MM/YY or MM/DD/YY (default MM/DD/YY). The Time/Date Stamp is the time/date
format that will display on live video footage and playback video footage.
Motion Sensitivity: Click the ▽ button to select the motion sensitivity level ranging from
1 to 5 (1 being the most sensitive, 5 is the lease sensitive, default is level 3). Motion
sensitivity level detection distance is best estimated as follow: level 1 detect up to 25ft,
9
level 2 detect up to 23ft, level 3 detect up to 20ft, level 4 detect up to 17ft, and level 5
detect less than 14ft.
Video Standards: Click the ▽ button to select video standards between NTSC and PAL
(default is NTSC). Please check your local listing for video standards used in your country.
For example:. North America, Japan uses NTSC video standards, China, European uses
PAL video standards.
Image Quality: Click the ▽ button to select between High (HD), Medium (D1), and Low
(VGA) resolutions (default value is Medium).
OverWrite: Click the ▽ button to select between overwrite ON or overwrite OFF (default is
ON). When the overwrite setting is set to ON and the memory card is full; the system will
start to overwrite the oldest data that exist in the memory card. This process will continue
for as long as the system is up and running.
10
IMPORTANT: Please remember to STOP the recording process if an important event(s)
occurs to prevent overwriting of file(s). The length of time that it take for overwrite to start
varies and depends on the capacity of the TF card used and methods of recording set.
Be sure to test and know the recording duration to prevent the deletion of important data.
Button Sound: Click the ▽ button to select between button sound ON or button sound
OFF (default is ON). Button sound set to ON means when the buttons on the remote
control is pressed each time there will be a sound coming from the ClockCamDVR system
or vice versa.
SAVE: Click on the SAVE button to save the settings and then press and hold the SYNC
button located at the back side of the ClockCamDVR for 5 seconds to complete the saving
process.
IMPORTANT: After all the settings are confirmed, click the SAVE button and then presshold the SYNC button located at the back side of ClockCamDVR for 5 seconds to save
and synchronize the settings.
EXIT: Click on the EXIT button to exit without saving or changes.
11
To operate the ClockCamDVR use the remote control, press the REC button to start
manual video recording and press the STOP button to stop manual recording (remote
control only).
In manual recording mode, the DVR system will continuously record until the STOP button
is pressed or the system will stop once the Micro SD capacity is full given the Overwrite
option is set to OFF. A new file will automatically be generated when the recorded file
reaches 15 minutes of recording. The DVR will continue to recreate and generate 15
minutes files, non-stop, if the Overwrite option is turned ON.
Press the TRIGGER ON button to initiate motion detection recording based on movement
or motion and press the TRIGGER OFF button turn off motion detection recording. Motion
detection can also be turn ON or OFF by pressing on the DETECT button located at the
back side of the wall clock camera. Press on the DETECT button once to initiate motion
detection recording based on movement or motion and press the DETECT button again
to stop motion detection recording as illustrated below.
In MD (motion detection) mode, the DVR system has a 3 seconds pre-alarm recording
feature. Which means before the alarm trigger and start to record the 15 seconds motion
detection record time, there is a pre 3 seconds recording of the event prior to the start of
the 15 seconds recording, totaling 18 seconds. When detected object(s) is constantly
12
moving within and continues beyond the 15 seconds set; the DVR will accumulates all the
motion events recording as one file which can accumulate up to 15 minutes before
automatically generating another file for motion event recording.
IMPORTANT:
• To avoid false motion-triggering, please avoid installing the product nearby direct light or
areas where there is drastic light change.
• If the product is used to watch out of the window, the motion sensitivity level may need to
be decreased to avoid false recording due to glisten and rapid gloss or reflections off
from the window.
• Increase motion sensitivity may be adjusted in low-light condition or condition where the
moving object(s) has the same color as background.
13
LED light/sound and what they represent:
In Manual Recording: Two quick red flashes of the "Record LED" to no red light means
recording is active, solid red light means stop recording.
In Motion Recording: Two quick red flashes of the "Record LED" to no red light means
motion recording is active; solid red light means motion detection is off.
Enabling motion or manual recording is represented by two beeps. Disabling motion or
manual recording is represented by one beep.
Installation
1. Insert an AA battery (not included) into the battery compartment located on the back of
the wall-clock, to operate the clock and insert a Micro SD (not included, support up to
32GB) into the Micro SD slot for recording. Adjust the clock using the dialer to current
time; turn clockwise to turn the clock back or counter-clockwise to turn the clock forward.
Time Adjuster Dialer
Insert AA battery
(not included)
14
2. Connect one end of the power adapter jack to the ClockCamDVR power socket and
plug the other end into an electrical power outlet as illustrated below. Then turn on the
camera and recorder using the power ON/OFF switch located at the back side.
3. Find a suitable location to mount the ClockCamDVR system, recommended to install
6-7ft high above floor level in an area intended for surveillance monitoring and recording.
For better viewing angle coverage, the hidden camera is fixed at a 20 degree downward
angle. Please adjust the mounting height according to desire view. The camera viewing
coverage is vertical 35° & horizontal 46° (as shown below).
6-7ft high above
floor level
15
IMPORTANT: If unsure of camera angles and projections, please proceed
to step 4 below to connect the video output to a TV or an output source to
adjust the height and camera angles to perfection before securing the system
to the wall. Be sure to test the system thoroughly for functionality before use.
It is very important for the camera angle to display the areas intended for
monitoring and recording.
4. Connect the ClockCamDVR system to a TV or an output source using the video cable
provided to properly adjust the mounting height and camera angle. Change the TV output
to the auxiliary mode, ie VIDEO 1, VIDEO2, LINE1, LINE1, and etc. depending on which
input of the television the video cable is connected into and the following user’s interface will
appear as demonstrated below.
Stand-by
Current/Record Time/Date
Record Duration
16
The recording stand-by
icon will appear the device is standing by for video recording.
The red
recording icon will appear in the top left hand corner during manual recording or
motion detection recording. The time and date shown on the top right hand corner are current
present time and date displaying in white. The time and date will display in yellow color along
with a recording duration time for either manual recording or motion detection recording.
Playback and Backup File
Use the USB cable provided to connect one end into ClockCamDVR (USB Mini) and then
connect the other end into the USB port on the computer. Switch the power switch to DVR
ON position and a mobile hard disk will mount as a driver letter labeled “Removable Disk” in
My Computer. Double click on the driver letter to open and access the recorded AVI video
format files as shown below.
17
Double click on the file to start playback using the windows default media player, ie MS
Windows Media Player, Classic Media Player, and etc. Each file can be copy/paste to backup
to another storage source, delete, select all files to delete, or reformat Micro SD by right clicking
on the mobile drive and choosing “Format…”. Note; please be sure to backup all data before
formatting the Micro SD as formatting will permanently delete all the recorded files.
Another method of playback, file backup, delete/all, or reformat is to move the Micro SD from
the ClockCamDVR’s Micro SD slot and insert it into an external card reader slot if resources is
available (card reader NOT included).
IMPORTANT:
• SecurityMan does not provide any playback software; please use other default
media players that come with the computer system to playback as the AVI file
format used by ClockCamDVR is a universal file format.
18
• Please reference the Media Player(s) help menu or user’s manual for operational
details as needed.
• Do not remove the Micro SD during recording or when the unit is starting, to avoid
damaging the Micro SD, clock-camera system or files corruption.
• This unit has an auto file-overwriting function, and when the memory is full, it will
automatically delete the earliest dated files to continue to record. If there are any important
files, please backup by copy/paste.
Troubleshooting
1. Please do regular maintenance and checkup on the ClockCamDVR for abnormal in
performance and function such as system cannot detect Micro SD, camera does not
display properly, the clock-camera position shifted, and etc. If it is abnormal, try to
power cycling the system by switching the DVR to the OFF position and then unplug the
power jack for 2 minutes. Straighten the clock-camera back to the original position.
2. When connecting ClockCamDVR to a TV or output source and the picture becomes
black and white, try to change the video standard to match your country video standards
code using the software provided to select between NTSC (default) and PAL.
19
3. ClockCamDVR does not mount as a mobile drive when connecting to a computer. Make
sure to plug the USB receptacle into a USB built-in port of the computer and not through
other third party USB hub(s). Ensure the power is switch to the off position, plug in the
USB cable from the clock to the computer first and then turn the power switch back on.
4. If the clock is running behind on time, please check the battery or replace it with a new
standard AA cell battery.
5. The camera angle is too low for the monitoring areas. Since the camera angle has a
fixed angle at 20 degrees by default and cannot be adjusted, please mount the clockcamera in a higher position so monitoring areas will be higher.
20
Installation
Image Sensor
Effective Pixels
Viewing Angle
Recording Video Format
Recording Resolution
Recording Speed (data size)
Pre-Alarm Recording Time
Recording Mode
Video Output
Focal Distance
Memory Slot
USB Port
File Overwrite
RC (Remote Control)
Minimum Illumination
Power consumption
Operation temperature
Operating humidity
Dimensions
Clock Type
Dimensions/Shaft Length
Power
¼” CMOS, Color
1280 x 720 (NTSC)
Vertical 35°, Horizontal 46°
.AVI
HD (1280x720)/D1 (800x592)/VGA (640x480)
30fps, approx 35MB/Min (Default HD quality)
3 seconds
Motion Detection, Manual (by remote control)
1
0.6m-infinity
Micro SD (Supports up to 32GB, not included)
USB 2.0 Mini (PC backup/download)
Yes
up to 10m, CR2025 3V Lithium Battery
1.0 Lux
Max 350mA 6V
14~122ºF (-10—50°C)
20%-80%
Ф365mm
Quartz wall-clock (durable plastic glass)
14.3” (Ø) x 1.75” (D)/ 12mm
Camera: AC 100-240V, Output:6VDC,800mA
Clock: 1.5VDC (AA battery, not included)
21


