1
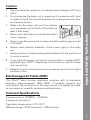
™
DECT digital monitor
Contents
02………………………… Welcome
03………………………… Important Safety Instructions
06………………………… Parts Checklist
07………………………… Quick Reference Guide
09………………………… Preparing Your Baby Monitor
- Default Settings
- Power
- Positioning and Operating Range
13………………………… Baby Monitor Features
- Turning the Units On/Off
- Adjusting Speaker Volume
- Adjusting Microphone Sensitivity
- Sound Level Indicators & Sound Alert
- Paging the Parent Unit
- Playing Lullabies
- Out of Range Alert
17………………………… Troubleshooting
21………………………… Frequently Asked Questions
22………………………… Appendix
- Cleaning and Maintenance
- Storage
- Replacement
- Environmental Notices
- FCC and IC Regulations
- RF Radiation Exposure Statement
25………………………… Assistance
Welcome
Thank you for purchasing the VTech® Crystal SoundsTM DECT
Digital Monitor. VTech® is dedicated to producing reliable
telecommunications, baby gear and toy products that give parents the
reassurance they need. This VTech® baby monitor provides support by
ensuring you can hear your baby clearly within a long range without
any distracting noise and offers you personal settings to help keep
your baby healthy and comfortable.
Welcome
DECT Digital Technology
The DECT (Digital Enhanced Cordless Telecommunications) technology
digitally transmits sound across multiple channels using the newly
available DECT frequency band. This technology guarantees zero
interference from other wireless appliances and a crystal clear signal
between the baby unit and the parent unit.
SAVE THESE INSTRUCTIONS
Important Safety Instructions
1. Do not use this product near water, for example, near a bath tub,
wash bowl, kitchen sink or laundry tub, in a wet basement or near
a swimming pool.
2. Use only the power cord and batteries indicated in this manual.
Do not dispose of batteries in a fire. They may explode. Check
with local codes for possible special disposal instructions.
3. Use only the adaptors included with this product. Incorrect
adaptor polarity or voltage can seriously damage the product.
Baby Unit Adaptor:
Input: 117V AC 60Hz
Output: 6V DC 500mA
Parent Unit Adaptor:
Input: 117V AC 60Hz
Output: 6V DC 300mA
Class 2
4. There is a risk of explosion if the batteries are replaced by an
incorrect type. Dispose of used batteries according to the
instructions.
Use 1.5V AA (AM-3/LR6) alkaline batteries only for baby unit
(batteries not supplied).
Use 1.2V AAA 750mAh Ni-MH rechargeable batteries only for
parent unit (batteries supplied).
One of the following two brands of battery will be supplied for
parent unit:
1) Brand name: BYD
Model No: H-AAA750A-UN
2) Brand name: GP
Model No: GN75AAAHC
Important Safety Instructions
When using your equipment, basic safety precautions should always
be followed to reduce the risk of fire, electric shock and injury to
persons, including the following:
SAVE THESE INSTRUCTIONS
Important Safety Instructions
Warning
Read this user manual carefully before you use the appliance and save
it for future reference.
1. This baby monitor is intended as an aid. It is not a substitute for
responsible and proper adult supervision and should not be used
as such.
2. Never immerse any part of the baby monitor in water or any other
liquid.
3. Check that the voltage indicated on the included adaptors
corresponds to the voltage of your electrical outlets before you
connect the appliance.
4. Only use the included adaptors to connect the parent and baby
units to your electrical outlets.
5. Do not cut off the adaptors to replace them with other plugs, as
this causes a hazardous situation.
6. If the adaptors are damaged, please only replace them with the
same type in order to avoid a hazard. For the correct type of
adaptor, please see the ‘Replacement’ section of this manual.
7. Never use the baby monitor in moist places or close to water.
8. Except for the battery compartments, do not open the housing of
the baby unit or parent unit in order to prevent electric shock.
9. The appliance is not intended for use by persons (including
children) with reduced physical, sensory or mental capabilities, or
lack of experience and knowledge, unless they have been given
supervision or instruction concerning use of the appliance by a
person responsible for their safety.
10. Children should be supervised to ensure that they do not play
with the appliance.
11. Use only the specified type of battery. Warranty is voided if other
batteries are used. Please contact VTech® for a replacement
battery pack. Contact information can be found on the last page
of these instructions.
12. Unplug the rechargeable battery pack when the product is stored
for long periods of non-use.
13. Unplug power cord before replacing batteries.
Caution
1. Use and store the appliance at a temperature between 32°F and
104°F.
2. Do not expose the baby unit or parent unit to extreme cold, heat
or direct sunlight. Do not put the baby unit or the parent unit close
to a heating source.
3 feet (at least)
4. Never place the baby unit inside the baby’s
crib or playpen.
5. Never cover the parent unit or baby unit with anything (eg. a towel
or blanket).
6. Always place alkaline batteries of the correct type in the baby
unit.
7. Always use the included rechargeable batteries for the parent unit
to avoid a hazard.
8. If you place the parent unit next to a transmitter or another DECT
appliance (eg. a DECT telephone), the connection with the baby
unit may be lost.
9. Batteries should not be exposed to excessive heat such as bright
sunshine or fire.
Electromagnetic Fields (EMF)
This VTech® baby monitor appliance complies with all standards
regarding electromagnetic fields (EMF). If handled properly and
according to the instructions in this user manual, the appliance is safe
to use based on scientific evidence available today.
Important Safety Instructions
3. Make sure the baby unit and the adaptor
cord are always out of reach of the baby (at
least 3 feet away).
Technical Specifications
Frequency band: 1920MHz - 1930MHz
Frequency channels: 5
Operating temperature: 32°F-104°F
Effective range: 1000ft (outdoors), 150ft (indoors)
Parts Checklist
Included in this package:
• User’s manual
Parts Checklist
• Baby unit
Model: 1022
Model: 1022C
• Two adaptors
6V DC 300mA
(for parent unit only)
• Ni-MH Rechargeable batteries
2 x AAA (AM-4/LR03), 1.2V, 750mAh
• Parent unit
6V DC 500mA
(for baby unit only)
Quick Reference Guide
Baby Unit
1. On/off button
10. Adaptor
2. PAGE button
11. Large appliance plug
3. Power-on light
12. Socket for large
appliance plug
4. Battery light
13. Speaker
5. Volume (+) button
15. Battery compartment
cover
7. Lullaby button
8. Play/stop button
9. Microphone
1
2
13
3
7
8
9
4
6
ON
!
5
14
10
15
Quick Reference Guide
14. Battery compartment
6. Volume (-) button
12
11
Parent Unit
1. On/off button
2. Secure link indicator
10. Socket for small
appliance plug
3. Battery light
11. Small appliance plug
4. Speaker
12. Rechargeable batteries
compartment
5. Sound level indicators
13. Battery compartment
cover
6. Volume(+) button
Quick Reference Guide
7. Volume(-) button
14. Rechargeable batteries
(included)
8. Sensitivity adjustment
button
15. Belt clip
9. Adaptor
15
5
4
8
2
1
6
3
7
10
12
9
13
11
14
Preparing Your Baby Monitor
Default Settings
Speaker volume setting (baby and parent unit)....page 14
Default: level 3 (out of 5 levels)
Sensitivity setting (parent unit)....page 14
Default: level 3 (out of 5 levels)
Power
The baby unit can be connected to a power source or powered by
batteries. Even if the baby unit is connected to a power source, we
recommend also inserting batteries. This guarantees automatic
backup in case of a power outage.
Technical Specifications:
• Baby Unit
-
1 x AC power adaptor 6V DC 500mA (included)
-
4 x AA (AM-3/LR6) 1.5V alkaline batteries (NOT
included)
• Parent Unit
-
1 x AC power adaptor DC 6V 300mA (included)
-
2 x AAA (AM-4/LR03) 1.2V 750mAh Ni-MH
rechargeable batteries (included)
Operation:
6V DC 500mA
Preparing Your Baby Monitor
The first time you turn on the parent and baby units, they are
operating with default settings. Adjustments can be made. Please see
corresponding sections in this manual for instructions.
6V DC 300mA
• Baby Unit
Adaptor operation
Put the large appliance plug into the baby unit’s
socket, and then plug the adaptor into a wall
socket. The power-on light will glow. The baby
unit is ready for use.
Adaptor
!
Preparing Your Baby Monitor
10
Battery operation
1. The baby unit runs on 4 pcs 1.5V AA (AM-3/LR6) batteries (not
included). Please use alkaline batteries for best performance.
2. Do NOT use rechargeable batteries, as the baby unit does not
have a charging function.
3. Place 4 pcs 1.5V AA (AM-3/LR6) batteries
into the baby unit’s battery compartment,
noting the + and - configuration. Replace the
battery compartment cover. The power-on
light will glow. The baby unit is ready for use.
4. Note the + and – configuration inside the battery compartment
for using alkaline batteries.
Battery level indication
1. Battery light will flash when the baby unit’s
battery power is low.
2. The light will be off when the baby unit batteries
have sufficient charge or it is plugged in to an
electrical outlet.
ON
Low
battery
ON
Full
battery
• Parent Unit
Rechargeable battery operation
1. The parent unit runs on 2 x AAA, 1.2V, 750mAh,
Ni-MH rechargeable batteries.
2. Charge the parent unit before you use it for
the first time or when the battery light indicates
that the battery is low (the battery light glows). The parent unit
indicates that the battery power is low 30 minutes before the
battery power is completely empty.
3. To charge the parent unit, insert the small
appliance plug into the parent unit, then plug
the adaptor into a wall socket. The battery light
flashes while charging.
4. When the batteries in the parent unit are fully charged, the low
battery light goes off. The parent unit is ready for use.
Adaptor
Note:
• When you charge the parent unit for the first time or after a long
period of non-use, turn it off and let it charge continuously for at
least 10 hours.
• Charging normally takes 12-14 hours, but it takes longer when
the parent unit is on while charging. To keep the charging time as
short as possible, turn off the parent unit during charging.
• When the battery power is fully charged, the parent unit can be
used cordlessly for about 24 hours.
• After a long period of non-use, recharge the parent unit before
using.
Battery level indication
1. The light will flash when the parent unit
batteries are low.
2. The light will be off when the parent unit
batteries have sufficient charge.
3. The light will be on steadily when the parent
unit is being charged.
LINK
Low
battery
LINK
Full
battery
LINK
Charging
Positioning and Operating Range
Positioning the Baby Monitor
Place the baby unit at least 3 feet away from your baby. Place the
parent unit within the operating range of the baby unit. Make sure
the parent unit is at least 3 feet away from the baby unit to avoid
acoustic feedback.
Operating Range
The operating range of the baby monitor is about 1000 feet in
open air. Depending on the surroundings and other interfering
factors such as walls, doors and ceilings, the range may be shorter.
Indoors, the operating range is up to 150 feet.
Preparing Your Baby Monitor
11
Technical Specifications:
Material
Thickness
Loss of
Range
Wood, plaster, cardboard, glass
(without metal, wires or lead)
< 12 inches
0-10%
Brick, plywood
< 12 inches
5-35%
Reinforced concrete
< 12 inches
30-100%
Metal grills or bars
< 1/2 inch
90-100%
Metal or aluminium sheets
< 1/2 inch
100%
Preparing Your Baby Monitor
Dry Materials
12
Note:
For wet and moist materials, the loss of range may be up to 100%.
Baby Monitor Features
Turning the Units On/Off
Baby unit
1. Press and hold the on/off button for about 2
seconds to turn on the unit.
2. The ON light on the baby unit will briefly light
up.
!
3. Press and hold the on/off button for about 2
seconds to turn off the unit.
Parent unit
1. Press and hold the on/off button for about 2
seconds to turn on the unit.
!
LINK
2. The light indicators on the parent unit will briefly
light up.
3. The secure link indicator will blink red as the
parent unit searches for a secure connection to
the baby unit.
LINK
LINK
4. If a secure connection is not made within about 30
seconds to one minute, the secure link indicator
will shine steadily red.
Baby Monitor Features
ON
LINK
5. When a secure connection is found, the light will
shine steadily green.
LINK
6. Press and hold the on/off button for about 2
seconds again to turn off the unit.
LINK
13
Adjusting Speaker Volume
1. Press the volume control buttons (+,-) on the parent unit until the
desired speaker volume for the parent unit has been reached.
There are 5 volume levels.
2. The sound level indicators show the volume level during
adjustment:
- OOOOO = Parent unit volume is off
- OOOOO = Minimum volume
- OOOOO = Maximum volume
Note:
If the volume is set to a high level, the parent unit consumes more
power.
Baby Monitor Features
LINK
LINK
LINK
Adjusting Microphone Sensitivity
1. Press the sensitivity adjustment button on the parent unit until
the desired microphone sensitivity for the baby unit has been
reached. There are 5 sensitivity levels.
2. The sound level indicators show the sensitivity level during
adjustment:
- OOOOO = Minimum sensitivity level
- OOOOO = Maximum sensitivity level
Note:
If the microphone sensitivity level is set to a high level, more
sounds are transmitted and the parent unit consumes more
power.
LINK
LINK
Sound Level Indicators & Sound Alert
The baby unit continuously monitors the sound level in your baby’s
room, and the sound level indicators on the parent unit let you know
if there is any activity. If your baby cries, you will see the sound level
14
indicators light up on the parent unit.
1. As long as the baby unit does not detect a sound, the sound level
indicators on the parent unit will not be lit.
2. When the baby unit picks up a sound, one or more sound level
indicators light up on the parent unit. The number of sound level
indicators that light up corresponds to the loudness of the sound
picked up by the baby unit.
Paging the Parent Unit
If you have misplaced the parent unit, you can use the PAGE button
on the baby unit to locate the parent unit.
Note: The paging function only works when the parent unit is on.
1. Press the PAGE button on the baby unit. The parent unit will emit
a paging alert tone.
2. To stop the paging alert tone, press the PAGE button again, or
press any button on the parent unit.
Playing Lullabies
1. When there is no lullaby playing, press the lullaby button or
the play/stop button on the baby/parent unit to start playing
lullabies.
2. Press the play/stop button again to play or stop a lullaby.
Baby Monitor Features
3. For silent baby monitoring, when the baby unit picks up a high
volume of sound, all 5 sound level indicators will light up and the
parent unit will beep as a sound alert.
3. Press the lullaby button to skip to the next lullaby.
4. Press +/- buttons on baby unit to adjust lullaby volume.
Note:
• The lullabies will play continuously for approximately 15 minutes. To
preserve battery life, the unit will automatically stop playing lullabies after
approximately 15 minutes without input. To reactivate the lullabies, press
the lullaby button or play/stop button.
• The lullaby volume on the baby unit cannot be changed using the parent
unit.
15
Baby Monitor Features
Lullabies
1. Brahms Lullaby (with singing voice)
2. Rock-A-Bye, Baby - Traditional
3. Fais Do Do - French Traditional
4. Au Clair de la Lune - French Traditional
5. Berceuse - Chopin
6. Twinkle, Twinkle - Traditional
7. La Berceuse - Brahms
8. Minuet - Mozart
9. Minuet - Bach
10. Canon in D - Pachelbel
11. Sleeping Beauty Waltz - Tchaikovsky
12. A Little Night Music - Mozart
13. Air - Bach
14. Klipp Klapp Gallop - Strauss
15. Beautiful Dreamer - Foster
16. Rondeau - Mouret
17. Minuet - Boccherini
18. Nocturne in Eb #2 - Chopin
19. Piano Concerto A - Mozart
20. Happy Farmer - Schumann
Out of Range Alert
1. When the parent unit is out of range of the baby
unit, the secure link indicator on the parent unit
will flash.
2. After about 20 seconds, the parent unit will beep
and the secure link indicator will shine steadily
red.
LINK
LINK
3. To regain reception move the parent unit closer
to the baby unit.
4. Once the connection between the parent and
baby units has been established, the secure link
indicator will shine steadily green.
16
LINK
Troubleshooting
Secure link
indicator on
parent unit does
not light up when
the on/off button
is pressed.
Possible causes
Solutions
No power from
parent unit.
Recharge parent unit
by connecting it to a
power supply.
No power from
baby unit.
Replace with new
alkaline batteries or
connect the baby
unit to the power
supply.
Baby unit and parent
unit may be out of
range of each other.
Move the parent unit
closer to the baby
unit, but not closer
than 3 feet.
Baby unit and parent
unit may be out of
range of each other.
Reduce the distance
between the units,
but not closer than
3 feet.
Baby unit may be
turned off.
Turn on the baby
unit.
Battery light
on baby unit
flashes.
Alkaline batteries in
baby unit are running
low.
Replace alkaline
batteries or connect
the baby unit to the
power supply.
Battery light
on parent unit
flashes.
Rechargeable
batteries in parent
unit are running low.
Recharge the
parent unit with the
adaptor.
Secure link
indicator on
parent unit
flashes.
Troubleshooting
Problem
17
Problem
Parent unit
beeps.
Possible causes
Parent unit has lost
connection with
baby unit.
Solutions
Reduce the distance
between the units,
but not closer than
3 feet.
Turn on the baby
unit.
Troubleshooting
Rechargeable
batteries in parent
unit are running low.
Baby unit’s sound
level has reach
maximum level.
Monitor emits
a high-pitched
noise.
Cannot hear
sound or baby
cry from parent
unit.
18
Recharge the parent
unit by connecting it
to the power supply.
Baby unit and parent
unit are too close to
each other.
Make sure the parent
unit and baby unit are
at least 3 feet away
from each other.
Parent unit volume is
too high.
Decrease parent unit
volume level.
Parent unit volume is
too low or completely
turned off.
Increase parent unit
volume level.
Baby unit microphone
sensitivity level is too
low.
Use the parent unit
to increase the baby
unit’s microphone
sensitivity level.
Baby unit and parent
unit may be out of
range of each other.
Reduce the distance
between the units,
but not closer than
3 feet.
Possible causes
Solutions
Parent unit reacts
too slowly to
sounds from the
baby unit.
Baby unit microphone
sensitivity level is too
low.
Use the parent unit
to increase the baby
unit’s microphone
sensitivity level.
Parent unit reacts
too quickly to
environmental
sounds.
Baby unit picks up
sounds other than
those of your baby.
Move baby unit
closer to the baby,
but not closer than
3 feet.
Baby unit microphone
sensitivity level is too
high.
Use the parent unit
to decrease the baby
unit’s microphone
sensitivity level.
Baby unit microphone
sensitivity level is too
high and consumes
power quickly.
Use the parent unit
to decrease the baby
unit’s microphone
sensitivity level.
Baby unit volume
level is too high and
consumes power
quickly.
Decrease the baby
unit’s volume level.
Baby unit battery
power drains too
quickly.
Monitor
operating range
is less than the
specified 1000
feet.
Troubleshooting
Problem
The 1000-feet
specified operating
range is only valid
outdoors in open air.
Inside a home, the
number and type of
walls and ceilings
between the baby
and parent units
limit the operating
range. Indoors, the
operating range is up
to 150 feet.
19
Problem
Troubleshooting
Parent unit
operating
time is shorter
than specified
operating time
of at least 24
hours
20
Possible causes
Solutions
Baby unit
microphone
sensitivity level is too
high and consumes
power quickly.
Use the parent
unit to decrease
the baby unit’s
microphone
sensitivity level.
Baby unit volume
level is too high and
consumes power
quickly.
Decrease the baby
unit’s volume level.
Frequently Asked Questions
1. The technical specifications show an operating range of 1000
feet. Why does my monitor lose connection at a much shorter
distance?
The 1000-feet specified operating range is only valid outdoors in
open air. Inside a home, the number and type of walls and ceilings
between the baby and parent units limit the operating range.
Indoors, the operating range is up to 150 feet.
2. The link between the baby and parent units is lost every now
and then, and I’m experiencing sound interruptions.
You may be approaching the outer limits of the operating range.
Try a different location, or decrease the distance between the
units (but not closer than 3 feet). Please note that it takes about
30 seconds to one minute before a new link is established.
3. What happens during a power outage?
If batteries are installed in both the baby and parent units, they
will automatically switch to battery power if the power goes out.
4. Is my DECT baby monitor secure from eavesdropping and
interference?
The 60 channels in the DECT spectrum and the monitor’s secure
channel search technology guarantee no interference from other
appliances.
5. The technical specifications show that a fully charged parent
unit has an operating time of up to 24 hours. Why is my parent
unit out of battery power in much less time?
When the parent unit batteries are charged for the first time, the
operating time will be less than 24 hours. The batteries reach their
full capacity after charging and draining at least 4 times.
The parent unit’s volume level may be too high. When the volume
is set too high, the parent unit consumes more power. Decrease
the volume level.
The baby unit’s microphone sensitivity level may be too high.
When the microphone sensitivity level is high, it picks up more
sounds and transmits them to the parent unit. The parent unit
then consumes more power. Use the parent unit to adjust the
baby unit’s microphone sensitivity level.
Frequently Asked Questions
21
Appendix
Cleaning and Maintenance
Do not immerse the parent unit or the baby unit in water and do
not clean them under the tap. Do not use cleaning spray or liquid
cleaners.
1. Unplug the baby and parent units if they are connected to a power
source.
2. Clean the baby and parent units with a damp cloth. Make sure
they are dry before re-connecting them to a power source.
3. Unplug the adaptors and clean them with a dry cloth.
4. Dispose of used batteries in an environmentally friendly manner.
Appendix
5. If the baby unit is connected to a power supply, check its batteries
for leakage every six months.
Storage
When you are not going to use the baby monitor for some time, remove
the alkaline batteries from the baby unit and remove the rechargeable
batteries from the parent unit. Store in a clean, dry place.
Replacement
Baby Unit
• Batteries
• Adaptor
22
Only replace the baby unit’s batteries with 4 x AA 1.5V (AM-3/LR6)
batteries.
Only replace the adaptor of the baby unit with an adaptor of the
same type. Contact Consumer Services at 1-800-521-2010 in the
US or 1-877-352-8697 in Canada for replacement parts.
Parent Unit
• Batteries
Only replace the rechargeable batteries of the parent unit with
2 x AAA (AM-4/LR03), 1.2V, 750mAh, Ni-MH rechargeable batteries.
• Adaptor
Only replace the adaptor of the parent unit with an adaptor of the
same type. Contact Consumer Services at 1-800-521-2010 in the
US or 1-877-352-8697 in Canada for replacement parts.
Environmental Notices
1. This baby monitor is designed and manufactured with high quality
materials and components that can be recycled and reused.
3. Alkaline batteries contain substances that may pollute the
environment. Do not throw away alkaline batteries with the normal
household waste. Deposit them at an official collection center for
battery recycling.
FCC and IC Regulations
FCC Part 15
This equipment has been tested and found to comply with the limits
for a Class B digital device, pursuant to Part 15 of the FCC Rules and
applicable Industry Canada specifications. These limits are designed
to provide reasonable protection against harmful interference in
a residential installation. This equipment generates, uses and can
radiate radio frequency energy and, if not installed and used in
accordance with the instructions, may cause harmful interference
to radio communications. However, there is no guarantee that
interference will not occur in a particular installation. If this equipment
does cause harmful interference to radio or television reception, which
can be determined by turning the equipment off and on, the user is
encouraged to try to correct the interference by one or more of the
following measures:
Appendix
2. Do not throw away the baby monitor with the normal household
waste. Deposit it at an official collection center for electronics
recycling. Always remove all batteries before recycling the baby
monitor. By doing this, you help to preserve the environment.
1. Reorient or relocate the receiving antenna.
2. Increase the separation between the equipment and receiver.
3. Connect the equipment into an outlet on a circuit different from
that to which the receiver is connected.
23
4. Consult the dealer or an experienced radio/TV technician for
help.
Caution: changes or modifications to this equipment not expressly
approved by the party responsible for compliance could void the
user’s authority to operate the equipment.
This device complies with Part 15 of the FCC rules. Operation is
subject to the following two conditions: (1) this device may not cause
harmful interference, and (2) this device must accept any interference
received, including interference that may cause undesired operation.
This Class B digital apparatus complies with Canadian ICES-003.
For body worn operation, parent unit has been tested and meets
the FCC RF exposure guidelines. Use of accessories may not ensure
compliance with FCC RF exposure guidelines.
Appendix
Industry Canada
Operation is subject to the following two conditions: (1) this device
may not cause harmful interference, and (2) this device must accept
any interference, including interference that may cause undesired
operation.
The term ‘’IC:‘’ before the certification/registration number only
signifies that the Industry Canada technical specifications were met.
This product meets the applicable Industry Canada technical
specifications.
RF Radiation Exposure Statement
Baby Unit complies with FCC RF radiation exposure limits set forth
for an uncontrolled environment. Baby Unit should be installed and
operated with a minimum distance of 7in between the radiator and
your body. For hand held operation, the parent unit has been tested
and meets the FCC RF exposure guidelines. Use of other accessories
may not ensure compliance with FCC RF exposure guidelines. For
body worn operation, the parent unit has been tested and meets the
FCC RF radiation exposure guideline when used with the belt clip.
User must maintain a separation distance of 0.1in between the back of
the unit and the body to ensure compliance. Use of other accessories
may not ensure compliance with FCC RF exposure guidelines. This
transmitter must not be co-located or operating in conjunction with
any other antenna or transmitter. This equipment complies also with
24
Industry Canada RSS-102 with respect to Canada’s Health Code 6 for
Exposure of Humans to RF Fields.
Assistance
If a problem persists, please call our Consumer Services Department
at 1-800-521-2010 in the U.S. or 1-877-352-8697 in Canada, and a
service representative will be happy to help you.
For information on this product’s warranty, please call VTech® at
1-800-521-2010 in the U.S. or 1-877-352-8697 in Canada.
Assistance
Or visit our website: www.vtechkids.com
25
1022/1022C
© 2009 VTech
Printed in China
91-102200-001
26