1
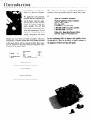
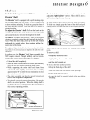
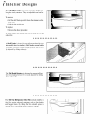
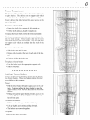
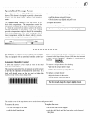
Side by Side
Refrigerator
Guide
UE?1ELIII1LJENN=AIR
Introduction
. .
... 1
. .
...2
.
. .
...3
.....
. .
...4
....
. .
...5
........
. .
.6-l 1
...........
Safety Instructions
Installation
......
Instructions
Features at a Glance
Temperature
Interior
Controls
Designs
Ice Service
.............
. . . 12
Ice and Water Service . . . . . . . . .13-14
. . . . . .14-16
Water Filter Information
Refrigerator
Cleaning
Chart
Storage and Maintenance
. . . . . . 17
. . . . . . . 28
Food Storage Tips . . . . . . . . . , . . . * 19
Food Storage Chart
. . . . . . . . . . . . . 20
Before You Call . . . . . . . . . . . . . . . . 21
Notes
. . . . . . . . . . . . . . . . . . , . . . . . 22
Warranty
. . . . . , . . . . . . . . . . . . . . . . 23
++++++++++++++++e
MCsQh 61004965
Form No. B/l l/O0
Part No. 111072-l
Introduction
444444444444444444444444444444444444444444444444444
1
Congratulations on the purchase of a Jenn-Air refrigerator!
We appreciate your purchase
decision and feel confident you
will be happy with this appliance for years to come. For best
results, we suggest reading this
guide carefully. You will find
instructions on the proper operation and maintenance of your
refrigerator. Additionally, food
storage information has been
included for you.
Should you ever need our future assistance with your
refrigerator, a complete model and serial number recorded
in the spaces below will be extremely helpful. These numbers are found on a data plate inside the refrigerator compartment on the upper surface.
Model Number
Serial Number
Revision Number
Please keep your sales slip or cancelled check. Should any
warranty service be required, proof of original date of purchase is needed. For additional questions, please contact
us:
Jenn-Air Customer Assistance
Maytag Appliances Sales Company
Attn: CAIRO Center
P.O. Box 2370
Cleveland, TN 37320-2370
l-800-688-1100 USA and CANADA
l-800-688-2080 TTY USA
(Mon.-Fri., 8am-8pm Eastern Time)
Internet: http://www.jennair.com
In our continuing effort to improve the quality of our
refrigerators, it may be necessary to make changes to
the appliance without revising this guide.
Important
Safety
Instructions
a844444444*4444444444444444444444~4444444444444~~44
a WARNING
l
l
l
l
l
l
l
-
When using your appliance,
the following:
always
Use the refrigerator only for its intended purpose.
follow
basic precautions,
including
Important:
Child entrapment and suffocation are
not problems of the past. Junked or abandoned
refrigerators are still dangerous.. . even if they will
sit for “just a few days.” If you are getting rid of
your old refrigerator, please follow the instructions
below to help prevent accidents.
Take off the doors.
Leave the shelves in place so that children may not
To prevent possibility of hazard due to electrical shock,
never plug the refrigerator into a receptacle which has
not been grounded adequately and in accordance with
the local and national electrical codes. See the a warning and grounding instructions below.
Unplug the refrigerator before cleaning or replacing a
light bulb.
l
l
easily
In cast of power failure, minimize door openings. If the
power failure is of a long duration, protect the food by
placing blocks of dry ice on top of the packages or check
with a local frozen foods locker about temporary storage. Frozen foods which have thawed completely should
not be refrozen and should be discarded.
climb
inside.
/
Any electrical service cord that becomes frayed or damaged should be immediately repaired or replaced. Never
unplug your appliance by pulling on the power cord.
Your refrigerator should not be operated in the presence
of explosive fumes.
Children should not climb, hang or stand on the shelves
of this refrigerator.
\
- This appliance is designed
aline. WARNING
There should be a separate, grounded
extension
cord.
to open
circuit
Do not use any device that will alter
This appliance is equipped with a three-pronged grounding plug for
your protection against possible electrical shock hazards. It must be
plugged into a grounding receptacle. Where a standard two-prong
wall receptacle is encountered, it is the personal responsibility and
obligation of the customer to have it replaced with a properly
grounded three-prong wall receptacle. Do not under any circumstances, cut or remove the third (ground) prong from the power cord.
Do not use an adapter plug. Do not use an extension cord.
Save
These
:e on a normal 115 volt, 15 amp, 60 cycle
Irving this appliance
only. Do not use an
ie electrical performance
of this appliance.
POWER SUPPLY CORD
WITH 3-PRONG
GROUNDING PLUG
Instructions
GROUNdlNG TYPE
WALL RECEPTACLE
s
Installation
Instructions
Your new refrigerator was packed carefully for shipment. Remove and discard shelf packing clips (if used) located just
above each shelf where they hook onto the frame. To remove plastic clips wiggle the clips sideways and pull straight out.
Location
Refrigerator
l
l
l
l
Allow for a free flow of air through the front base grille.
Install the refrigerator where the room temperature will
not go below 55” E With temperatures below 55”, the
refrigerator will not run frequently enough to maintain
proper temperature in the freezer.
Allow a minimum l/2” clearance on the sides, top and
back for ease of installation. If the refrigerator is placed
with the door hinge side against a wall, you may want to
allow additional space so the door can be opened wider.
Use caution when installing the unit on vinyl or hardwood tloors so as not to mark or otherwise damage the
flooring. A piece of plywood, a rug or other material
should he used to protect the floor while positioning the
unit.
Energy
l
l
l
l
l
l
l
of Your
Saving
Tips
Locate the refrigerator away from heat producing appliances such as the range or dishwasher, heat vents and
direct sunlight.
Leveling
is Important
To enhance appearance and to maintain optimal performance, the refrigerator must be level. Your refrigerator has
wheels which can be adjusted for leveling:
l
l
l
l
l
Remove the lower hinge covers (see fig. 1). To do this,
grasp each cover near the hinge and apply pressure. The
attachment tabs will snap out, allowing removal of the
covers.
Adjust the wheels with a screwdriver (see fig. 2).
To lock the cabinet in place, turn down both
leveling/lock feet, located near the front wheels (see fig.
3). Rear leveling/lock feet are not required.
Replace the hinge covers.
If the floor is not level and it is necessary to raise the
rear of the cabinet, we suggest rolling the rear wheels
onto a piece of plywood or other shim material.
i_i
,g.B----.a
--==-
---
I
1
Fig. 1
Level the refrigerator and do not block ventilation
around the front grille.
TURN CLOCKWISE
TO
RAISE CABINET
CORNER
Keep the freezer full to near capacity so less cold air will
escape during door openings. When the freezer is less
than two-thirds full, place milk cartons half full of water
in the freezer.
Let hot dishes cool slightly before putting into the
refrigerator or freezer.
TURN
Fig. 2
Cover liquids.
Wipe moisture from the outside of containers before
placing them into the refrigerator.
Avoid opening the doors too often.
Fig. 3
COUNTER-CLOCKWISE
TO LOWER CABINET
Features
at a Glance
444444444444444444444444444444444444444444444444444
PuriClean”
Twin
Slide
ice Bin
Fresh”
Control
-
Dairy
Compartment
With Keeper
- Butter
Dish
-ChillKeeper’”
Freezer
Light
> Elevator
Shelves
Freezer
Shelf
Half
Freezer
Basket
Lift Off
Door Bins
7
Drop
- Shelf
Tender
Down
Freezer
Door
Baskets
Fixed
- Tall Bottle
Retainer
Door
Bins
-
StairStep”
Freezer
P~.T!lr.x+r
Lower
Hinge
Covers
Crispers
Features may vary according to model.
Tilt out
Door Bins
m
4
2Temperature
Controls
Your refrigerator has Twin Fresh’” Climate Control. The controls for setting the temperature in the fresh and frozen food
compartments are located at the top front of the fresh food compartment.
To adjust the controls, move the slide to the left or right as desired
Twin
Fresh’” Climate
Control
Settings
l
l
Adjusting
Climate
The refrigerator control has settings from warmest to
coldest. Initially set this control at the midpoint.
l
The freezer control has settings from off/warmest to
coldest. Initially set this control at the midpoint.
l
l
Let the refrigerator run at least 8- 12 hours before adding
food.
l
l
FRESH’*
TWIN
Refrigerator
too Warm
I.....
. . . . . . . . . . . . . . . . . . . . . . . . . . . . . . . . . ..a
b.....
. . . . . . . . . . . . . . . . . . . . . . . . . . . . . . . . . ..a
Refrigerator
too Cold
Freezer too Warm
I.....
Fresh’”
24 hours after adding food, you may decide that one or
both compartments should be colder or warmer. If so,
adjust the control(s) as indicated in the table below.
Except when starting the refrigerator, do not change either
control more than one setting at a time.
I
Allow 24 hours for temperatures to stabilize before resetting.
Changing either control will have some effect on the temperature of the other compartment.
CONTROL
GUIDE
Slide the refrigerator control to next higher setting.
. . . . . .....................................................................
Slide the refrigerator control to next lower setting.
. . . . . .....................................................................
Slide the freezer control to next higher setting.
. . . . . . . . . . . . . . . . . . . . . . . . . . . . . . . . . . . . . . . . . .....................................................................
Freezer too Cold
I.....
CLIMATE
the Twin
Controls
Slide the freezer control to next lower setting.
. . . . . . . . . . . . . . . . . . . . . . . . . . . . . . . . . ..a
Turn Refrigerator
Off
. . . . . .....................................................................
Slide freezer control to OFF.
Note: Sliding the freezer control to OFF stops cooling in BOTH compartments. It does not shut off
power to the refrigerator.
Warm
Cabinet
Surfaces
At times, the front of the refrigerator cabinet may be warm
to the touch. This is a normal occurrence that helps prevent
moisture from condensing on the cabinet. The condition
will be more noticeable when you first start the refrigerator, during hot weather and after excessive or lengthy door
openings.
No
Defrosting
Your refrigerator is designed to defrost automatically.
Note: During the automatic defrost cycle, you may notice
a red glow/reflection
freezer compartment
droplets coming into
is normal during the
in the vents on the back wall of the
and you may hear the sound of water
contact with the defrost heater. This
defrost cycle.
Interior
Designs
444444444444444444444444444444444444444444444444444
6
Shelves
and Door
Fresh Food Compartment
Elevator’”
The fresh food compartment also may be equipped with
adjustable, Spill-Catcher’” shelves. These shelves have a
spill retainer edge for easy clean up.
Shelf
The Elevator’” shelf is equipped with a spill-retaining edge
and the Easy Glide slide-out feature. It can be adjusted up
or down without unloading. To slide out, grasp the front of
the shelf and pull forward. Push the shelf in to return to
original position.
In some models, these shelves have the slide out feature.
To slide out, simply grasp the front of the shelf and pull.
Gently push in to return the shelf to the original position.
To adjust the Elevator’” shelf: Pull out the knob on the
crank handle. Rotate the crank clockwise to raise the shelf,
and counterclockwise to lower the height of the shelf.
To remove: To remove the ElevatoirM shelf for occasional
cleaning, completely unload the shelf and pull the shelf forward. When the shelf stops, press up on the tabs located
underneath its outside edges, then continue pulling forward, clear of the frame.
To replace: Align the shelf to the frame and push it all the
way back. It is not necessary to depress the tabs for reinstallation.
In ordinary use, the Elevator’” shelf frame assembly does
NOT require removal. Though unlikely, and not recommended, the correct removal procedure is as follows:
l
l
l
l
l
Unload the shelf completely.
Slide the shelf forward about two inches and manually
move the two rear latches toward the shelf center.
While supporting the entire shelf and frame from
underneath, lift slightly and rotate the assembly
approximately 30” to allow the rear mechanism to clear
the vertical rear side rails.
The entire assembly can then be moved forward and
clear of the refrigerator compartment.
To reinstall, reverse the removal procedure. Be sure the
shelf is in a level position. When the sliding shelf is
pushed to the rear, it will reposition the rear latches to
their correct operating position.
VERTICAL
RAILS
REAR GUIDES
, LATCHES \
ImI FRAME
ASSEMBLY’I~I
’
PUuC
UU
1
SHELF
(Style may vary)
These shelves can be moved for varying food storage
needs.
To remove a shelf:
l
completely unload the shelf
l
slightly lift up the rear of the shelf
l
pull the shelf straight out
To lock a shelf into another position:
l
tilt up the front edge of the shelf
l
insert the hooks into the desired frame openings
l
let the shelf settle into place
l
be sure the shelf is securely locked at the rear before
reloading
.
The Lift Off Door Bins are roomy enough to handle gallon-plus sized containers. They are adjustable and can be
easily removed.
To remove:
Lift the shelf front up until it clears the retainers on the
door liner.
l
l
Pull the bin straight out
To replace:
l
Reverse the above procedure.
In some models the bottom door bin is fixed, so it is not
adjustable.
l
**************
A Shelf Tender is located in one refrigerator door bin (certain models have two tenders). Shelf tenders secure bottles
and other containers in their upright position and are easily adjusted by sliding sideways.
I
l
**************
The Tall Bottle Retainer is designed to prevent tall bottles from tipping forward. It is easily adjusted by sliding
from side to side.
l
*********+****
The Tilt Out Refrigerator Door Bin (certain models) is
ideal for storing awkward containers such as liter bottles
and bagged items. By tilting the bin outward, space is
opened up to conveniently load or retrieve contents.
Freezer Compartment
The freezer of the model you have chosen has either wire
or glass shelves. The shelves rest on support rails which
are molded into the wall of the freezer. Some models have
freezer shelves that slide forward for easier access to the
rear of the shelf.
To remove a freezer shelf:
l
Empty the shelf of its contents & lift straight up.
l
Tilt the shelf sideways & pull it straight out.
To replace the freezer shelf, reverse the removal procedure.
The freezer compartment also has one or more freezer baskets for food storage. These baskets slide out for more
convenient access to the frozen foods. They rest and slide
on support rails which are molded into the wall of the
freezer.
To remove a freezer basket:
l
l
l
Slide basket out until it stops.
Depress tabs located at the rear of each side of the basket.
Continue sliding the basket out.
To replace a freezer basket:
l
Line the basket up to the appropriate support rails.
l
Slide it into place.
l
**************
StairStep’” Freezer Baskets
Certain models feature StairStep”’ baskets for the bottom
two freezer baskets. These two baskets interact for total
accessibility to their contents.
To use:
l
l
Pull the lower basket forward to gain access to its contents. Continue pulling the lower basket to open the
upper basket as well. Reverse the action to close both
baskets.
Pulling forward the upper basket provides access to its
contents. The lower basket will also move forward
but will not open.
To remove the baskets:
l
Pull forward on the upper basket until it stops.
l
Lift up slightly and continue pulling forward.
l
The baskets are removed together.
To replace:
l
Reverse the above procedure.
Drop Down
Freezer Door Baskets
Two drop down freezer door baskets provide convenient
storage for items that tend to shift or slide (such as bagged
vegetables) when the door is opened and closed.
Specialized Storage Areas
Your refrigerator has an Adjusti-Temp’” meat storage
drawer. This drawer is designed to provide a short term
storage area for fresh meats, cheeses and luncheon
meats.
To remove this drawer for cleaning:
The Adjusti-Temp’” Drawer is the top drawer in the
fresh food compartment. The temperature control for
this drawer is located on the shelf front above the drawer. Slide the control left or right to achieve the desired
internal temperature of the drawer. The “cool” setting
provides a temperature similar to that of the surrounding
fresh food compartment. The “cold” setting provides a
lower temperature within the drawer which is recommended when storing fresh meat, poultry or fish.
To replace the drawer:
l
Humidity
l
pull the drawer out until it stops
lift the drawer up slightly and pull it out
* reverse above procedure
For best results, keep this drawer closed tightly.
**************
The Crispers are ideal for storage of fruit and vegetables.
They are equipped with an automatic humidity control system.
Automatic
l
*Maytag Automatic Humidity Control system features a unique, patented material called Shape Memory Polymer (SMP) that when laminated
to fabric, becomes DIAPLEX.
DIAPLEX
is manufactured by
Mitsubishi.
DiAPLEi
Control
A fabric-like material* covers small air vents in the shelf
insert above the crispers.
This material controls the flow of moisture out of the crisper
to provide the optimum environment for your food. If a
food spill should occur on the air vent or fabric-like
material, wipe with a clean, damp cloth.
To remove a crisper drawer for cleaning:
l
l
To replace a crisper drawer:
l
l
I
l
pull out the crisper until it stops
tilt the drawer front up and pull it out
align the drawer in the tracks
lift the drawer front and slide in
For best results, keep the crispers tightly closed.
**************
The sealed cover of the top drawer serves as the lower refrigerator shelf.
To remove the cover:
l
l
lift the front edge of the shelf
pull the shelf straight out
To replace the cover:
l
l
set the rear bars on the support
push the shelf back until the front edge can be lowered
into place
I
ChillKeeper’”
Use the main compartment of the ChillKeeper” (certain
models) to quick chill items and to store your favorite cold
drinks.
To open the compartment, grasp the opening on the right
side of the compartment cover and swing to the left. The
compartment will automatically latch when the compartment cover is gently closed. If the latching mechanism is
accidentally dislocated, place the eraser end of a pencil
next to the latch and apply gentle pressure to the right.
There is a control for the ChillKeeper’” located on the left
wall of the fresh food compartment. The slide control
allows customization of the temperature within this compartmcnt. The “Cool” setting provides a more moderate
temperature. Sliding the control to “Cold” will provide
colder temperatures within the compartment.
The ChillKeeper’” shelf can be used to create a 2 tier storage area within the compartment. If unneeded, the shelf
can be detached, inverted and snapped onto the upper-most
tabs, out of the way. This creates a larger storage space
within the compartment.
There is a utility drawer located at the bottom of the
ChillKeeper”‘. The lock for this drawer is located on the
left side of the drawer. To open the drawer, move the pin
to the “Unlock” position and the drawer will slide open. To
close, gently slide the drawer back in and move the pin into
the “Lock” position.
+**************
Dairy
Compartment
To use the roomy Dairy Compartment, simply raise the
cover. Depending on which model you have chosen, this
compartment may come equipped with a Tender to secure
compartment contents in place or a Butter Dish.
Slide the Tender from side to side for desired placement.
l
********++****
Egg Caddy
The Egg Caddy (style may vary) holds a “dozen-plus”
eggs. It can be removed to be washed or carried to a work
area.
Nondispenser
Models
The freezer compartment
with ice cube trays and
designed to stack neatly
trays. To release the ice
upside down over the bin
of your refrigerator is equipped
an ice storage bin. The bin is
on top of the stacked ice cube
cubes from a tray, hold the tray
and twist both ends.
Your refrigerator is automatic ice maker ready. The number
for the ice maker kit you need appears on the data plate (see
page 1).
To check the ice level or gain access to the ice bin, lift open
the door on the ice bin.
To remove the bin, first turn off the ice maker. This is done
by opening the door on the ice bin and moving the ice maker
wire lever up to the “off’ position. Then reach under the bin
front and pull down on the back edge. After it snaps free,
pull the bin straight forward. To replace the ice bin, align
the bottom rails to the corresponding shelf grooves and
push it straight back until it stops and latches. Make sure
the tabs, at the back of the bin, that turn the spiral auger are
positioned between the prongs from the auger motor. Turn
the ice maker on by lowering the wire arm.
Beverages and foods should not be placed in the ice storage
bin for quick chilling. These items can block the wire lever
arm, causing the ice maker to malfunction.
Dispenser
Automatic
Models
Ice Maker
After your refrigerator has been connected to the water supply, move the wire lever arm into the down position. This
will start its operation. The ice maker will fill with water
when the freezer reaches the proper temperature. It may be
8 to 12 hours before the ice maker furnishes any usable ice
cubes.
Discard all the cubes from the first two or three batches
made. These initial ice cubes may be irregularly shaped,
discolored, or contain impurities from the new water supply
piping.
When the ice cubes are ejected it is normal for several cubes
to be joined together at the ends. They can easily be broken
apart. The ice maker will continue to make ice until the supply of ice cubes raises the wire lever arm, shutting the ice
maker off.
To manually stop the operation of the ice maker, move the
wire lever arm into the up position.
Certain sounds may accompany the various cycles of the ice
maker.
l
l
l
buzzing of the water valve
running of the water as the tray tills
rattling of the ice cubes falling into an empty ice bin.
If the ice is not used frequently, the ice cubes will become
cloudy, shrink, stick together and taste stale. Empty the ice
storage bin periodically and wash it in lukewarm water. Be
sure to dry the bin before replacing it or the ice cubes will
stick to the metal auger.
For Your Safety
Do not place fingers or hands on the automatic ice
making mechanism while the refrigerator is plugged
in. This will help protect you from possible injury. It
will also prevent interference with moving parts of the
ejector mechanism
and the heating element that
releases the cubes.
Under certain rare circumstances, ice cubes may be
discolored, usually appearing with a green-bluish hue.
The cause of this unusual discoloration is apparently a
combination of factors such as certain characteristics of
local waters, household plumbing and the accumula-
tion of copper salts in an inactive water supply line
which feeds the ice maker.
Continued consumption of such discolored ice cubes
may be injurious to health. If such discoloration
is
observed, discard the ice cubes and contact your dealer from whom the refrigerator was purchased.
Automatic
Dispensing
Ice
and
Water
Dispenser
Water and Ice
To dispense ice or water, position a glass against the top
portion of the actuator pad and press. Hold the glass high
in the dispenser opening to avoid spills.
To stop dispensing, release the pressure on the actuator pad
and hold the container in position momentarily to catch the
last pieces of ice or the last drops of water. The ice delivery door will remain open for a short time. When it closes, a closing sound can be heard.
The control key pads are located on the dispenser control
panel. To select the desired function, press the appropriate
pad. When ice cubes, crushed ice or water are selected, a
light above the selection glows.
Crush
Cube
Dispenser
(certain
Light
When the actuator pad is pressed, the dispenser light automatically illuminates. To manually turn the light on, press
the
pad.
-:Q-
0
To turn the light off, press the pad again.
Dispenser
Lock
To interrupt power to the water and ice dispenser so it cannot be used, press the
pad 3 times within 10 seconds.
Dl
An indicator light above the lock pad is illuminated when
the dispenser is locked. Press the pad 3 times within 10
seconds again to unlock the ice and water service.
Water Filter Change Reminder
Water from the dispenser is not as cold as ice water. For
colder water, simply add ice before dispensing the water.
The first glass or two of water dispensed each time may be
warmer than subsequent glasses. A full glass of water will
be cooler than a partial glass. To prevent splashing, fill the
glass with ice before adding water.
NOTE: When using the ice dispenser for the first time,
discard the first two or three dozen cubes. When using the
water dispenser for the first time, press the actuator pad for
10 minutes to bleed the air from the water line. Discard the
first live to six glasses of water dispensed. This will insure
pure and fresh water for drinking.
models)
(select models)
This feature monitors the life of the PuriClean’” change
Filter. The light on the dispenser pad will illumi$,
nate after a filter has filtered for 12 months, or 416
gallons (whichever happens first). When the light Q
illuminates, replace the filter and manually reset the
control light.
To reset the control light: Press and hold the Dispenser
Light and Lock key pads on the dispenser control panel for
3 seconds until the light flashes. At this point, release the
keys and the control will be reset for another 12 months or
416 gallons.
NOTE: Water Filter Change Reminder light will operate even if filter bypass is in place.
Spill Tray
Do not pour water into the grille at the bottom of the dispenser area. This is a spill area, NOT a drain. Normal,
small spills will evaporate. Larger spills should be wiped
up with a soft cloth or sponge. The grille slides out for
clean up. It is recommended to clean the spill area occasionally to prevent mineral deposits.
TUATOR
PAD
SPILL
TRAY
Water
Ice Dispensing
* Likewise, when changing from crushed ice to cubes,
some crushed ice may be dispensed. This may also happen if irregular sized cubes or ice chips are in the storage
bin.
l
l
If the ice dispenser is not used frequently, ice cubes may
clump together and may need to be broken apart or discarded.
A slight pause may be noticed when dispensing crushed
ice. This is normal because the ice is being channeled to
Water
14
Tips
Some crushed ice may be dispensed even though cubed
ice was selected. This happens occasionally when a few
cubes are accidentally channeled into the crusher.
l
Filter
Filter
(select
models)
The water filter mounts in the upper fresh food compartment, on the underside of the Twin Fresh”’ control housing.
Change the filter cartridge every year, or sooner, if the
water flow to the dispenser or icemaker decidedly decreases, if an objectionable taste or odor returns or the water fiter change reminder illuminates.
Your refrigerator was delivered from the factory with a fiter bypass in place. The filter cartridge can be found packaged inside of the refrigerator. It can be easily installed
without using any additional parts, screws or fasteners.
Note: The ice and water dispenser and the icemaker
should not be operated unless either the filter bypass or
a filter is in place.
Special Notices
It is essential that operation, maintenance and filter
replacement requirements be carried out as scheduled.
This product is for cold water use only.
Do not use with water that is microbiologically unsafe, or
of unknown quality without adequate disinfection before
or after the system. Systems certified for cyst reduction
may be used on disinfected water that may contain filterable cysts.
For your own knowledge and safety, it is recommended
that your water quality be periodically tested. This information also identifies the optimal replacement filter choice
for your refrigerator.
The contaminants or other substances removed or reduced
by this water treatment system are not necessarily in your
water.
The feed water connection must conform to applicable
plumbing codes.
the crusher. Crushed ice pieces will vary in size and
shape.
l
l
l
Do not add ice to the storage bin which was not produced by your ice maker, it may not crush and/or dispense properly.
Avoid operating the ice dispenser continuously for more
than five minutes. Simply remove large quantities from
the bin by hand.
Avoid dispensing ice directly into fine china or delicate
crystal. The pressure of pressing against the actuator pad
and the ice dropping into the container can cause cracking or chipping of delicate items.
Initial
Filter Cartridge
Installation
and installing filters or plugs; this will prevent water
1. Twist the cap of the filter bypass l/4 turn counter-clockwise (as viewed from the bottom) so the ears on the
plug can disengage. Remove the filter bypass from the
filter head apparatus.
Do Not dispose of this filter bypass. It should be stored
for future use, in the event that you choose to use the
water and ice dispenser without a filter.
2. Carefully remove the filter from its packaging.
3. Apply the month sticker to the cartridge as a reminder
to replace the filter within a year.
4. Remove the red cap from the filter.
5. Lubricate the O-ring with food grade vegetable oil.
6. Line up the cartridge ears so it can be inserted into the
filter head. The unlocked symbol will line up with the
indicator line that is molded into the light shield area.
Rotate the cartridge into the head. Twist the cartridge
l/4 turn clockwise to lock it into place. You will feel a
stop and the locked symbol should now be lined up with
the indicator line.
7. Dispense water through the dispenser for 10 minutes.
8. Carefully check for leaks.
Note: A newly installed water filter cartridge may
cause water to temporarily spurt from the dispenser
0 Water
Replacing
Filter
the Filter Cartridge
1Note: Leave the refrigerator door open while removing. 1
and installing filters or plugs; this will prevent water from
flowing through the system and running into the fresh
food compartment.
Periods of Non-Use
If the refrigerator has been out of use for more than 2
weeks (ie: placed in storage or has been moved) the filter
should be replaced when the refrigerator is put back into
service.
Replacement
1. Twist the filter cartridge l/4 turn counterclockwise (as
viewed from the bottom) so that ears on the cartridge are
able to disengage from the head. The unlocked symbol
will be lined up with the indicator line that is molded
into the light shield area. Twist gently until the cartridge
is free from the head, but DO NOT pull. Avoid tipping
the cartridge to prevent spillage. Dispose of the used
cartridge.
2. Carefully remove the replacement filter from its packaging. (Read the label carefully to be sure you have the
correct replacement filter cartridge).
r
Filter Cartridges
For replacement filter cartridges or for service, contact
your local dealer or Maytag Appliances Sales Company,
Jenn-Air Customer Assistance, 1-800-688-l 100:
Replacement
UKF7002AXX
Filter Model Number:
- Taste, odor, chlorine, cysts, and lead
Note: Filter life may be affected by abnormal feed water
conditions or unusual incidents such as hydrant flushes,
reservoir turnover, or varying local water conditions.
3. Follow steps 3 through 8 under Initial Filter Cartridge
Installation. (See page 14).
Note: A newly-installed water filter cartridge may cause
water to temporarily spurt from the dispenser.
US LABEL
The PuriClean’” Water Filter is manufactured for Maytag
Appliances by:
Cuno Incorporated
400 Research Parkway
Meriden, CT 06450
.5 gpm (1.9 L)
33” F (.6” C)
100” F (38” C)
30 psi (207 KPa)
125psi (862 KPa)
Rated Flow:
Min. Op. Temp:
Max. Op. Temp:
Min. Op. Press:
Max. Op. Press:
The filter listed below hasbeentested and certified to NSF International
under ANSI/NSF Standards42 and
53 for the reduction of impurities as
indicated:
@
Taste/Odor
Chlorine
Class 1
Std.42
Turbidity
Std.53
Particulate
Std. 42
UKF'IOOZAXX
Yes
Yes
Yes
Yes
(Class I)
cyst
Std. 53
Yes
Lead
Std. 53
Yes
Capacity
416 gal.
(1574 L)
Function
Chemical
Mechanical
See accompanying Product Data Sheet for further information on the filter.
Refrigerator
Cleaning
Chart
9*89*~*QQ+9144*44**0~~444~~Q444~QO~Q44444Q44~~44~Q44
a
CAUTION=
Disconnect
the power
cord before
cleaning.
Do not touch
refrigerated
surfaces with
wet or damp hands.
Damp objects
stick to cold metal
surfaces.
Before
cleaning
the freezer,
allow
it to warm
up. Allow
glass shelves
to warm
up before
immersing
in warm
water.
Refrigerator
Cleaning
Base grille
........................
No Clean”’
Commercial-Duty
Condenser
........................
Soap and water
Mild liquid sprays
Vac~ium clcancr attachment
. . . . . . . . . . . . . . . . . . . . . . . . . . . . . . . . . ..a
Cleaning
Brush
(Part
No.
2000 10 17) Availahlc
from
your dealer.
....................................
soap
Door handles
Chart
and
Painted metal
surfaces:
Cabinet. doors
. . . . . . . . . . . . ..-.........<
Stainless steel door:
(certain models)
....................................
I,ight cleaning: mild deter~‘c‘nl and waler or :I solution
Z
\z bile \ ino~at- md M atcr.
hloderate soil: Bon Ami.:‘.
Ikcoloratiorn:
Stairlless
.
.
.
.
.
.
.
.
.
.
.
.
.
.
.
.
.
.
.
...“..
(;lass shelves
,........................
Interior
liner
01‘
I)rawers, hins, egg
cradle, etc.
I........................
Automatic ~luniiditj
~‘ontrol mesh/vent
area
.................................................................
Dry with ;L clean, sofi cloth.
Do not wipe the rcf‘rigttrator
with ;I soiled dishwashing
cloth or wet towel. These may leave residue that can
xaratch and weaken the paint. Do not use scouring pads,
powdered cleansers. bleach or cleaners containing
hleach.
These products can scratch and erode the paint finish.
Do not wax plastic or vinyl parts.
,..........................................................~......
! J\e a soft cloth or spon~c.
Al\\~a~ s \L ipe with the ~(Trail1 of the stainless steel.
Do not iiw chlorine hlcach or any cleaning product that
contains chloriiic bleach.
(‘a~lico
After
cleaning. rinse :und dry. To restore luster and I-CIIIOLC
IOllow with Stainless Steel Magic Spray::’ (Jenn-Ail
model :I9 12. Part No. 20000008).
Steel cle~lncl-:~:.
strcahs
U\r l-2 tablespoons
b&in, (7 soda pc:r qu;trt of water.
Hc \LI~ to Lvrinf out cxccss \vatcr from
sponge
01‘ cloth
when cleaning around controls. light?. or electrical pat\.
. . . . . . . . . . . . . . . . . . . . . . . . . . . . . . . ..*...............................
....................................
so;q and Mater
c;1;1\4 I.Ic;LI1cl
Mild liquid sprat>\
....................................
and door
........................
No need for cleaning unless environment
is particularly
c~asy, dustvi or there is significant
pet traflic in the hornc.
c?
walcl-
Mild liquid sprays
....................................
soap ~llld wale1
Mild liquid sprays
. . . . . ..*.................
,..............................................*.................,
....................................
Soap
and
:Ulow the glass to Flat-m np to room temperature
hefore immersing in bfarm water. Ne\er LIP hot u atcr.
.
.
.
..I...........................................................
SW above for baking \oda solution.
DO NOT use abrasi\c cltxncrs.
conamrated
detergent\.
hlexlies.
cleaning ~x’ie\. ~l\ent\
or poli41 cleaner4 to
clean the I-ei‘rigerator interior.
,...............................~................................,
\h';ltcl
. . . . . . . . . . . . . . . . . . . . . . . . . . . . . . . . . . . . . . . . . . . . . . . . . . . . . . . . . . . ..~...
I
Storage
and
******+******************j**************44444444444
Cleaning
Under the Refrigerator
1’81
Maintenance
cartridge. A new cartridge can be installed when the
refrigerator is put back in service.
Your refrigerator can be rolled out for cleaning the floor
underneath. Raise the leveling feet if engaged (see page
3). Pull the refrigerator straight out from the wall.
Note: Disconnecting power to the refrigerator will suspend the 12 month countdown for the water filter change
reminder (select models).
Vacations
If you will be gone for a month or less, leave the controls
at the usual settings.
e) clean and dry the refrigerator thoroughly,
f) leave the doors open to prevent odors.
During longer absences:
4 remove all food,
b) shut off the ice maker (if installed) and the valve where
Moving
When moving, follow steps a-f under Vacations. In addition, remove and carefully pack any items that are easily
removable. Ship the refrigerator in an upright position with
the doors taped shut.
you tapped into the water line to supply the refrigerator,
c) disconnect the refrigerator from the electrical outlet,
4 remove the filter cartridge (certain models) and install
the filter bypass (see page 14-15). Dispose of the used
Replacing a Light Bulb
a CAUTION:
Disconnect
the power cord
protection
against
possible
broken glass.
Always
use a standard
er compartment
bulb.
40 or 60 watt
before
appliance
replacing
bulb
when
light
replacing
bulb(s).
Wear
a fresh
food
gloves
as
or freez-
Refrigerator
Freezer
There are two light bulbs located at the top of the refrigerator compartment, on the underside of the Twin Fresh”’
control housing.
The freezer light is located on the back wall of the freezer
compartment.
To replace a lightbulb(
the control housing:
To replace:
remove the control cover from
unhook the tabs on the top of the light shield by pressing in with the thumb on the center top of the light
shield.
grasp the control cover at the two rear “finger tabs”.
These are located at the upper rear of the fresh food
compartment, behind the light shields.
pivot the shield down.
unscrew the bulb when cool and replace it with a standard 40-watt appliance bulb.
pull down slightly to clear the retainer tabs and slide the
cover forward until it is free.
replace the bulb cover by pivoting it back into place and
snapping the tabs into the appropriate slots.
replace the bulb(s) with a 60-watt, standard base appliance bulb(s).
After replacing the bulb(s), align the control cover on to
the ribs on the control housing and slide it straight back
until it snaps onto the retainer tabs.
On certain models, there is an additional light located
behind the top drawer. To replace:
l
l
l
remove the top drawer and cover as explained on page 10.
carefully reach into the bulb cover and unscrew the
lightbulb.
replace the bulb with a 60-watt appliance bulb.
Dispenser
Light (dispenser
models only)
To replace:
l
Locate the lightbulb in the dispenser area to the left of
the actuator.
l
Unscrew the used bulb and remove.
l
Replace the bulb, using a 12OV, 7-watt bulb.
f9 Food
Fresh
Storage
Food
Tips
Storage
Frozen
l
Food
A fi-wzu- opcratc~s mow eflici(wtlv
h\wtliirtls filtt.
Packaging
l
Fruit and Vegetables
l
Storage
\vlivii it is at Icast
Foods for Freezing
To Irlillinrize delndration and qualitv clcltc~1-ionttiolIuse
atuiiriniim foil, 1Ywwr wrap. free& tqgs or airtiglit
cr)ntaillers. Force as ~I~~IC’I~
air ollt of‘ tlw pxkagw as
possihlr a~ltl lw s11rc‘tlrcy arc’ tiglltl\. seatrd. Trapped ail
cali c31ise tlw food to dry out, ctia;igr~ color alid &~Yop iiil off-flu\nr (lix~zer i)lirii).
Ovvrn-rap
fresh
mrats
and poiiltn
witlr siiithle
freeze1
\vrap prior to freezing.
l
.41\27a\~s \vt-at’
otlor011s
fids
SllCh
as
onions
ad
Glthlg~
l
Do not refreeze
meat that has completely
thawed.
so tli;, otlor ttoc~snot trailsfiv to other timls.
Loading
the Freezer
Meat and Cheese
l
occx~iollatl\~
lrloltt
\\.ill
c.II~Y~s~~s
(Swiss, (~l~c~ltlar,
011 th.
slll-fllcc~
of' IlaId
l’ai-1rrc5air). C:iit of‘f’kit least xi
clcdop
ilrcdr ;L~OIIII(! NIP] I)(~lo\\~tllcl 11rolt1\.area. Kwp \ollr
hlrif;, or illstrllltl(~llt ollt ol‘tll(~ 111ott1
itwlf’. Tlrc wnlainillg C~]I(YW~
\vill lx, safi~mrtl fla\d’ul to cat. 110 NOT tw
to s;L\‘(’ iiItli\~ittlial C~ICY~C~
slices, sof’t clic~w, cotta&
C’lI(‘(‘S(‘, ~‘l-(‘;llll,
SOIl1’
~‘I‘(‘;1111
or
yyp-t
\\h’ll
11101d
;lt’t”‘;l”s.
Dairy Food
l
hlost tlain, f’ootls SIICII as Irrilk, vo:qllrt, SOII~c’rmnl ad
cx)ttagc)c*II(~(w Irau~ fi.c3llilcx clatcs on their cartons fi)r
:ippropi‘i;itc~ l(vi$ll of‘ storagc~.Store, tlrcw fids in tlw
origild c*;ii-toil aid i-c~l’rigwatc~iirrirlcdiatc~l~~aftw piircdiasiilg ;iirtt cxc*l~iiso.
Refer to the Food Storage
approximate
storage times.
Chart
on page
20 for
Food Storage Chart (Storage times are approximate and may vary depending on type of packaging, storage
temperature, and the qua1it!J of the food when purchased. )
Butter
Milk & cream
I month
I week
6-9 months
Not recommended
Cream cheese, cheese spread
& cheese food
Cottage cheese
Sour cream
Hard cheese (Swiss, Cheddar
& Parmesan)
l-2 weeks
Not recommended
Wrap tightly or cover.
Check carton date. Close tightly. Don’t return unused portions to
original container. Don’t freeze cream unless whipped.
Wrap tightly.
3-S days
IO days
I-2 months
Not recommended
Store in original carton. Check carton date.
4-6 months
May become crumbly
Wrap tightly. Cut off any mold.
3 weeks
2-4 days
Not recommended
Y-12 months
Refrigerate small ends down.
For each cup of yolks to be frozen, add I tsp. sugar for use in
sweet, or I tsp. salt for non-sweet dishes.
I month
2-4 days
8 months (cooked)
6 months (whole/peeled)
May also store unripe or hard apples at 60.70°F.
Ripen at room temperature before refrigerating. Bananas & avocados darken when refrigerated.
EGGS
Eggs in the shell.
Leftover yolks or whites
FRUIT
Apples
Bananas
Pears, plums, avocados
Berries, cherries, apricots
Grapes
Citrus fruits
Pineapples, cut
VEGETABLES
3-4
2-3
3-5
l-2
1 2-3
days
days
days
weeks
days
Not recommended
6 months
I month (whole)
Not recommended
6- I2 months
I
May also store at 60.70°F. If refrigerated, store uncovered.
Will not ripen after purchase. Use quickly.
I-2 days
3-5 days
8-10 months
8- IO months
Don’t wash before refrigerating. Store in crisper.
Wrap odorous foods. Leave peas in pods. Store in crisper
1-2 weeks
7- 10 days
IO- I2 months
8- IO months
Wrap odorous foods & refrigerate in crisper.
Remove tops. Wrap odorous foods & refrigerate in the crisper.
7-10 days
Not recommended
Store in crisper.
l-2 days
l-2 days
l-2 days
I2 months
9 months
2-6 months
Keep in original packaging for refrigeration. When freezing
longer than 2 weeks, overwrap with freezer wrap.
Bacon
Beef or lamb, ground
Beef or lamb, roast & steak
Ham, fully cooked, whole
half
slices
7 days
l-2 days
3-5 days
7 days
5 days
3 days
I month
3-4 months
6-9 months
l-2 months
l-2 months
l-2 months
Fresh meats can be kept in original packaging for refrigeration.
Place in the Meat and Cheese Drawer. When freezing longer
than 2 weeks, overwrap with freezer wrap.
Luncheon meat
Pork, roast
Pork, chops
3-5 days
3-5 days
l-2 months
4-6 months
Unopened, vacuum-packed luncheon meat may be kept up to 2
weeks in the Meat and Cheese Drawer.
3-5 days
Sausage, ground
I-2 days
Sausage, smoked
7 days
Asparagus
Brussels sprouts, broccoli,
cauliflower, green peas, lima
beans, peppers
Cabbage, celery
Carrots, parsnips, beets, &
turnips
Lettuce
POULTRY
&
FISH
Chicken and Turkey, whole
Chicken and Turkey, pieces
Fish
MEATS
Veal
3-5 days
4 months
l-2 months
l-2 months
4-6 months
Frankfurters
7 days
I month
Processed meats should be tightly wrapped and stored in the
Meat and Cheese Drawer.
Sources: United States Department of Agriculture; Food Marketing Institute; Cooperative Extension Service, Iowa State University
Before
You
Call
l
l
Won’t run
l
l
..................................................
l
.................................................................................
l
Runs too long/ too
frequently
the tenyratilre
control turned to “Off
the power cord not plugged in
no power at the electrical outlet
the circuit I)rraker tripped or the house filse blown
refrigerator
is in automatic
defrost
l
l
l
modem refrigerators
are larger and run colder, which
to provide nlore stable trqxvxtiires
prolonged door openings
tile hasr grille 1)lockrd
too many door o ,errill s
requires
more running
tilne
l
tile door not sea f.Ing (( FII? to a package
or II container
holdir~g door oprn)
.................................................................................
l
the calCnct not levc~l
I l a wcxuk tloor
,..................................................
Noisy operation
I................................................................................,
,..................................................
I
Odor in cabinet
l
odor
producii~g
fhotls
sli011ld
lw coved
or uuppetl
tllv interior nc~ds cleaning
,................................................................................
,..................................................
Warm air from cabinet bottom
I..................................~...............
Cabinet vibrates
l
l
110rm;d ait- flow for colrdcwsc~r circlll;hon
.................................................................................
l
tire cd,inc~t not lc~\vl
l
ii \vc~tk Iloor
Moisture on inside cabinet walls
Excessive moisture in crisper
Foods dry out
(fresh or frozen)
,..................................................
Cabinet light not working
,................................................
Kefrigerator compartment
too
warm
,..................................................
Refrigerator
compartment too cold
,..................................................
Freezer compartment too warm
,..................................................
I . . . . . . . . . . . . . . . . . . . . . . . . . . . . . . . . . . . . . . . . . . . . . . . . . . . . . . . . . . . . . . . . . . . . . . . . . . . . . . ..~
l
111t\ IIIIII, IHIrlrcYl 011t
l
II0 p’\\“l,1t ill(, oIItl(~t
.................................................................................
l
tllcx u.ft-iL[(~ratot. c.011trol 5(4 too \\;wr1
. p~-olwl~:cYl l1001 ~q”‘llll”:\
,................................................................................
l
tilt, t-(,I’t.il~c,l.;ltc,t- c~olltrol \tat too c~oltl
.................................................................................
l
IIK. l1.(Y’/l.I (YHItrol WI too \\;,I’,,,
l
Ill~olwl~~‘~I (IlliJl. OIN~llill’_‘\
. . . . . . . . . .. . . . . . . . . . . . . . . . . . . . . . . . . . . . . . . . . . . . . . . . . . . . . . . . . . . . . . . . . . . . . . . . . . . . . . .
Sizzling sound in freezer
l
,..................................................
,t riorf11;11 UIIIIKI G~IIUYI In (l~~l't-c~\l\\:d(,r clrifqCrr, 1101, cld.cA
lliWll‘ilil\lli
. . . ..*..........................................................................
Visible glow in the freezer vents
,..................................................
Freezer not freezing properly
,..................................................
\+‘atcr Filter C:hangeI<etninder light (select
comes on when the filter bypass is
in place
................................................... . . .. . . .. . . .. . . .. . . .. . . .. . . .. . . .. . . .. . . .. . .. . . .. . . .. . .. . . . .. . . .. . . .. . . .. . . .. . . .. .
CYIICI ;LII iIIo\iiIcq o\“I
tllc, icv (.11lw\ c’,i1Iv’s ~I~I-IIIL,I~~~~. (~\lxG,dl\
\\ltll Illilittxl
I~\;L~<z”.
Ice cubes evaporate
I‘lli
i5 1101.111dl
.. .. . . . .. . . .. . .. . . . .. . . .. . . .. . .. . . .. . . .. . . .. . .. . . .. . . . . . . . . . . . . . . . . . . . . . . . . . . . . . . . . . . . . . . . . . . . . . . . . . . . . . . . . . . . . . . . . . . . . . . . . . . . . . . . .
tlic, \tol, ;LI-III III OIcIc ~,111,1phitloil
,Automatic ice maker not
1lI(, \\;ltc,l’ \11pp1\ tlIrIcYI
ol‘i’
operating
motlcls)
l
l
l
tlw \\;tt<,1- ,““‘W’“’
IO0 IO\\
tll(‘ II-(T~L(~I- too \\ar711
................................................................................
l
. . . . . . . . . . . . . . . . . . . . . . . . . . . . . . . . . ..*...............
l
I+?ont cabinet surface warm to the touch l Sl)wi,J tl(,\igII to lilillt c~oll(l~~lrs~ttic)t~ tlllrill< fx~t-iocl\ 01 Illqli Illlllliclit\.
. . . . . . . . . . . . . . . . . . . . . . . . . . . . . . . . . . . . . . . . . . . . . . . . . . . I. . . . . . . . . . . . . . . . . . . . . . . . . . . . . . . . . . . . . . . . . . . . . . . . . . . . . . . . . . . . . . . . . . . . . . . . . . . . . . . .
Ice dispenser not operating
Water dispenser not operating
Note:
I;orfiwther
as.si.stance contact
Maytag
Appliances
Sales Company,
Jerrn-Aw
Customer
Asmtance:
I-WIJ-6X+
I J1JCJ
I
4444444444444444444444444444444444444444444444444444
Warranty
8.7Refrigerator
4444444444444444444444444444444444444444444444444444
Full One Year Warranty
For one (1) year from the date of original retail purchase, any part which fails in normal home use will be repaired or replaced free of charge.
Ice Maker - when purchased with the refrigerator and installed by the dealer the ice maker will be considered part of the refrigerator for warranty purposes.
Limited Warranty - Major Refrigeration Components
Second thru Fifth Year:
After the first year from the date of original retail purchase, through the end of the fifth year, Maytag Appliances will repair or replace, at
its option, free of charge for parts and labor, any part of the sealed refrigeration system (consisting of the compressor, evaporator, condenser, drier and connecting tubing) and the cabinet liner (exclusive of the door liner) which fail in normal home use. Mileage and transportation charges, if required, shall be the responsibility of the owner.
Limited Warranty - PuriClean” Water Filter:
With regard to the water filter cartridge, Maytag Appliances will replace any part of the water filter cartridge which fails due to a defect
in workmanship or materials, for a period of Thirty Days from the date of original purchase. This is a full 30 day warranty, and during
this warranty period we will also provide free of charge, all labor and in-home service required to replace the defective part.
Limited Warranty -
Other Parts:
Second Year:
Parts other than major refrigeration components which fail in normal home use during the second year following the date of original retail
purchase will be repaired or provided free of charge for the part itself, with the owner paying all other costs, including labor, mileage and
transportation.
Please note: The full warranty and the limited warranties apply when the refrigerator is located in the United States or Canada. Refrigerators
located elsewhere are covered by the limited warranties only including parts that fail during the first year.
LIMITATIONS
OF LIABILITY
The warrantor shall not be liable for any incidental or consequential damages, including food loss. Some states do not allow the exclusion or limitation of consequential damages, so the above limitation or exclusion may not apply to you.
The specific warranties expressed above are the ONLY warranties provided by the manufacturer.
rights, and you may also have other rights that vary from state to state.
This warranty
gives you specific legal
To Receive Warranty Service
To locate an authorized service company in your area contact the Jenn-Air dealer from whom your appliance was purchased; or call Maytag
Appliances Sales Company, Jenn-Air Customer Assistance at the number listed below. Should you not receive satisfactory warranty service, please
call or write:
Maytag Appliances Sales Company
Attn: CAIR* Center
P.O. Box 2370
Cleveland, TN 37320-2370
U.S. and CANADA
l-800-688-1100
U.S. customers using TTY for deaf, hearing impaired or speech impaired, call 1-800-688-2080.
NOTE:
When writing about an unsolved service problem, please include the following information:
(a) Your name, address and telephone number;
(b) Model number, serial number, and revision number (found on the top front interior of the refrigerator compartment);
(c) Name and address of your dealer and the date the appliance was bought;
(d) A clear description of the problem you are having.
(c) Proof of purchase (sales receipt).
What Is Not Covered By These Warranties:
4. Products purchased for commercial or industrial use.
5. The cost of service or service call to :
a. Correct installation errors.
b. Instruct the user on proper use of the product.
c. Transport the appliance to the servicer.
6. Consequential or incidental damages sustained by any person as
a result of any breach of these warranties.
1. Conditions and damages resulting from any of the following:
a. Improper installation, delivery, or maintenance.
h. Any repair, modification, alteration or adjustment not
authorized by the manufacturer or an authorized servicer.
c. Misuse, abuse, accidents, or unreasonable use.
d. Incorrect electric current, voltage or supply.
e. Improper setting of any control.
2. Warranties are void if the original serial numbers have been
removed, altered, or cannot be readily determined.
3. Light bulbs.
Some states do not allow the exclusion or limitation of
consequential or incidental damages, so the above
exclusion may not apply.
User’s Guides, service manuals and parts catalogs are available from Maytag Appliances Sales Company, Maytag Customer Assistance.
Jenn-Air
l
403 West Fourth
Street
North
l
P.O. Box 39
l
Newton,
Iowa 50208
I