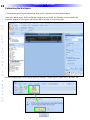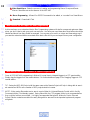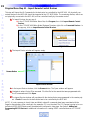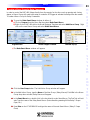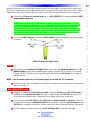
1
CCP Programming Manual
MSC-400 Master System Controller
CCP MSC-400 Programming Manual © 2009 Universal Remote Control, Inc.
The information in this manual is copyright protected. No part of this manual may be copied or reproduced in any
form without prior written consent from Universal Remote Control, Inc.
UNIVERSAL REMOTE CONTROL, INC. SHALL NOT BE LIABLE FOR OPERATIONAL,TECHNICAL OR EDITORIAL
ERRORS/OMISSIONS MADE IN THIS MANUAL.
The information in this manual may be subject to change without prior notice.
Complete Control is a registered trademark of Universal Remote Control, Inc. Entertainment Made Simple is a trademark of Universal Remote Control, Inc. All other brand or product names are trademarks or registered
trademarks of their respective companies or organizations.
500 Mamaroneck Avenue
Harrison, NY 10528
Phone: (914) 835-4484
Fax: (914) 835-4532
Table of Contents
i
INTRODUCTION
1
Product Features
2
What’s Included in the box
2
INSTALLING CCP
ON
VISTA
OR
XP
3
You Need a Personal Computer With a USB Port
3
Installing CCP and the USB Driver
3
Keep Your Database Up to Date — USE LIVE UPDATE
5
INTRODUCING CCP - THE COMPLETE CONTROL PROGRAM
OVERVIEW
OF THE
NEW FEATURES
OF
CCP MSC-400
FOR
MSC-400 AND
MORE...
6
7
Configure Home
7
Properties Window
9
Model Designer Treeview
CUSTOMIZING THE WORKSPACE
10
13
All Windows in the Default Layout can be Moved Around
13
Windows Grouping /Placement Icon
15
Using the Window Auto-Hide Features
16
Complete Control Program MSC-400
M
A
S
T
E
R
S
Y
S
T
E
M
12
All Windows in the Default Layout can be resized
PROGRAMMING TIPS
M
S
C
4
0
0
17
17
C
O
N
T
R
O
L
L
E
R
Table of Contents
ii
U
S
I
N
G
C
C
P
E
D
I
T
O
R
T
O
P
R
O
G
R
A
M
Prior Programming Knowledge Required
17
Program Remote Control Devices First!
17
Use the Program Menu
17
Save a Device file and Import for faster programming
18
Save the MSC-400 File,Then Return to Remote Programming
18
STEP
BY
STEP – PROGRAMMING A TYPICAL MSC-400 SYSTEM
19
Options - New or Existing Files
19
New File - Step by Step
19
PROGRAM MENU STEP #1 - IMPORT REMOTE CONTROL DEVICES
22
PROGRAM MENU STEP #2 - DEVICES & ROUTING
23
Optional Step - Adding IR Devices
25
Adding RS232 Devices - Optional Step
26
Device Properties Window
26
PROGRAM MENU STEP # 3 - IR DATABASE
27
PROGRAM MENU STEP #4 - SERIAL TEMPLATE DATABASE
29
Programming and Saving RS-232 Devices
29
Manually Coding RS232 Commands
30
RS232 Repeat, Ramp Start and Ramp Speed
31
Embedding RS232 Commands in Smart Macros
32
Type
Table
in of
Section
Contents
Title
PROGRAM MENU STEP # 5 - CREATING MACRO GROUPS AND SMART MACROS
iii
33
Macro Groups
33
Adding a Macro Group and Smart Macros
34
Smart Macro Window
35
Programming Smart Macros
36
A Typical Smart Macro
36
Moving Commands in a Smart Macro
37
Recording RS232 Commands in Smart Macros
38
Converting RS232 Commands to a Smart Macro Group
37
Adding Delays To Smart Macros
38
Favorite Channel Macros
39
Programming IF/ELSE Statements
41
Programming Sensor Triggered Macros - Video and Voltage
44
Nesting a Smart Macro Alias
45
Toggle Macros
45
Action Variables
46
Can Variables get “Out of Sync”?
46
An Example of Action Variables at Work
47
Adding Relay Commands to Smart Macros
50
Embedding Relay Commands in a Smart Macro
50
M
S
C
4
0
0
M
A
S
T
E
R
S
Y
S
T
E
M
C
O
N
T
R
O
L
L
E
R
Type in Section Title
iv
U
S
I
N
G
C
C
P
E
D
I
T
O
R
T
O
Creating a Macro Group for Relay Commands
52
Saving And Downloading A MSC-400 Project
54
Downloading a CCP MSC-400 Project
54
Dragging Triggers into CCP MX-6000 or MX-980 Editors
55
USING HYPERTERMINAL TO TEST ASCII RS-232 CODES
Introducing HyperTerminal
56
How to set up HyperTerminal
56
How to use HyperTerminal
59
Tips and Tricks
59
PC KEYBOARD EMULATION
To Program a Remote for PC Keyboard Emulation
PROGRAMMING MASTER/SLAVE SYSTEM
CONFIGURING MSC MASTER AND SLAVE CONTROLLERS
P
R
O
G
R
A
M
56
REFERENCE: FEATURES AND PARTS
60
60
63
63
65
General Information
65
MSC-400 Front Panel Features
65
MSC-400 REAR PANEL FEATURES
66
MSC-400 TOP PANEL FEATURES
67
RFX-250 RF SESNSOR
68
Type in Section Title
v
VS-1006 Voltage Power Sensor
69
VID-6 Video Sensor Cable
70
INSTALLATION
71
System Design
71
Device Control Capabilities And Behavior
71
User Preferences
72
MSC-400 Master System Controller
72
RFX-250 RF Sensor
72
VS-1006 Voltage Power Sensor
73
VID-6 Video Sensor Cable
73
CONNECTIONS
74
Video or Voltage Sensors (1-6)
73
Control Voltage Out/Switched AC Out (VS-1006)
73
Current Sensing AC Outlet (VS-1006)
74
Composite Video (VID-6 Video Sensor Cable)
74
IR Programmable Outputs (1-6)
75
IR or RS232 Programmable Outputs (7-12) – IR
75
IR or RS232 Programmable Outputs (Ports 7-12) – RS232
75
IR In
76
RF In (RFX-250 RF Sensor)
76
M
S
C
4
0
0
M
A
S
T
E
R
S
Y
S
T
E
M
C
O
N
T
R
O
L
L
E
R
Type in Section Title
vi
RF Out
77
U
S
I
N
G
USB2 Keyboard Emulation
77
Relay 1
77
NO (Normally Open)
77
NC (Normally Closed)
78
C
C
P
Relay 2
78
12V Out
78
12VDC
79
Master/Slave Systems
79
E
D
I
T
O
R
T
O
P
R
O
G
R
A
M
TROUBLESHOOTING
81
Introduction
INTRODUCTION
Congratulations and thank you for purchasing the Universal Remote Control MSC-400 Master System
Controller. The MSC-400 enables a professional installer to provide the ultimate in predictable, reliable one
touch control of any audio video system.
One of the most common problems in home theater and whole-house entertainment systems is keeping the
system audio and video components “in sync” as different devices are selected (and turned on and off). The
MSC-400 knows exactly which components are on and off at any given time using a combination of composite video sensors, voltage sensors and discrete IR and RS232 power commands. The ability to send discrete
power commands or sense device status and properly send or not send power commands eliminates user confusion completely.
With IR and RS232 command programmability and two built-in relays, system control is not just limited to A/V
devices. Virtually any device incorporated into a home entertainment system - including lifts, screens, drapes
and lighting - can also be controlled from the MSC-400.
When a MSC-400 system is programmed, something very different happens when the user presses a button on
an MSC compatible remote. Instead of sending a long string of commands in a remote control generated
macro that lasts several seconds (each step vulnerable to corrupting interference), the remote sends a unique
RF Trigger command in a few milliseconds. The MSC-400 receives the “trigger”, identifies it, and generates a
Smart Macro that is directly issued to the components via wired emitters, rear panel IR or RS-232 inputs and/or
relay controls. Since all commands are generated within the MSC-400, there is no possibility of any outside
interference corrupting any of the commands. Timing is perfect and there is no chance of a missed macro step.
The macro is “smart” because it can be programmed to make decisions on the fly. If a component is already
on, the video sensing circuit informs the microcontroller and the MSC-400 will skip the power on command
and any power-on delay. If a component is off, the macro is prefaced with a power on command and the necessary power on delay. This accelerates operation when the system is already powered on, since power-on
delays are skipped. The final result as your client experiences it: seamless perfection with every button push.
The final result for you, the installer; predictable, reliable installations with clients that refer you to every friend
they have!
Programming an MSC-400 system is fast and simple using Complete Control Program. First, in the tab for the
remote control, you program the remote control exactly the way you have in the past, except that you do NO
Macro Programming. Once all IR codes are labeled and arranged the way you want, you save the file, switch
to the MSC-400 tab and import all the codes as “Connected Devices”. After setting the routing and adding any
RS-232 devices to the list of connected devices, you create a list of Smart Macro Names (Watch DVD, Watch
Cable TV, Turn System Off), then program the macros. After saving the file, you switch back to the remote tab
of CCS and drag in the triggers (labeled “Watch DVD”, “Watch Cable TV”, “Turn System Off”) into the correct
buttons on the remote. Download to the MSC-400 and the remote and you are ready to test your work.
This manual provides instruction for all aspects of installation, setup and programming a MSC-400 controlled
system.
Thank you again for purchasing the MSC-400 Master System Controller.
1
M
S
C
4
0
0
M
A
S
T
E
R
S
Y
S
T
E
M
C
O
N
T
R
O
L
L
E
R
Product Features
2
PRODUCT FEATURES
U
S
I
N
G
C
C
P
E
D
I
T
O
R
T
O
P
R
O
G
R
A
M
System Control of up to twelve devices (twenty two in a Master/Slave System)
Power management of up to six devices (twelve in a Master/Slave System)
MSC-400 stores and outputs all system commands and macros eliminating partially executed macros
MSC-400 Outputs IR and RS232 commands
Senses Composite Video and AC or DC voltage for device status
Six Configurable Video or Voltage Sensor inputs
Six dedicated IR Output Ports (twelve in a Master/Slave System)
Six configurable IR or RS232 output Ports (ten in a Master/Slave System)
Rear panel USB Port allows control of a Windows Media Center PC
Remotes can be programmed to emulate Media Center Keyboard for alpha search
IR input for system control via properly programmed and compatible IR remotes and keypads
Narrow-band RFX-250 Sensor filters out interference from remote signals for reliable communication
and control
Up to three RFX-250 Sensors can be connected for extended RF Remote range in large systems
RF Output allows expansion to a second MSC-400 for control of up to 22 devices or connection to a
MRF Series Base Station for control of IR devices located away from the MSC-400
Two internal relays provide additional integration and control of screens, lifts, drapes, amplifiers, etc.
Relays are programmable for Paired Commands, (Normally Open or Normally Closed), Momentary
(Push and Hold) or Timed operation
12 volt ‘convenience’ output provides power supply to internal relays for devices that require voltage
for activation
Programmed with Complete Control Suite
Programmable to output single IR or RS232 commands
Programmable to output Smart Macros of IR and/or RS232 and Relay Commands
Programmable for ‘conditional’ IF/ELSE Smart Macros and Action Variables to output specific commands for specific system settings or user preference
Programmable for Master System ON/OFF macros
Programmable for specific source select settings
Compatible remotes can be programmed with System Status Messages to let the user know when the
MSC-400 is executing Smart Macros and to wait for the macro to execute
What’s Included in the Box
1
1
1
1
6
1
–
–
–
–
–
–
MSC-400 Master System Controller
12V DC 3.5A Power Supply
RFX-250 RF Sensor
10’ RFX-250 Connecting Cable
Standard IR Emitters
3’ USB Programming Cable
Installing
Installing CCP on Vista or XP PCs
You Need a Personal Computer With a USB Port
CCP will run on any Pentium II or faster Windows PC. Your PC should be equipped with an adequate amount
of RAM for the operating system you use. CCP is compatible with the Windows 2000, XP and Vista operating
systems. It is not compatible with Windows ME, 98 or previous versions of Windows.
CCP is installed via a self extracting installer file downloadable from our installer only website:
www.urccontrolroom.com.
Installing CCP and Installing the USB Driver
CCP installs with a companion program for communication, Microsoft ActiveSync. You must install both programs and if un-installing, un-install both programs. To install the two programs, follow these steps:
1 Connect to our installer only website www.urccontrolroom.com and navigate to Software
Downloads, then select CCP to download.
2 A file download Window will open. Click on OPEN.
3 The InstallShield Wizard Window for the CCP will open. Click on NEXT
4 The Install Destination Window will then open. Click on NEXT.
5 The Ready to Install Window will open. Click on INSTALL.
6 The program will install and then show that installation has been completed. Click on FINISH.
7 Now plug in the MSC-400 to the USB port. A Found New Hardware pop up will appear in the system tray.
8 Click on the Found New Hardware pop up. The Found New Hardware
wizard opens.
3
M
S
C
4
0
0
M
A
S
T
E
R
S
Y
S
T
E
M
C
O
N
T
R
O
L
L
E
R
4
Type in
Installing
Section Title
9 Select No, not this time when asked “ Can Windows connect to Windows update to search for the
software?” Click Next.
U
S
I
N
G
C
C
P
E
D
I
T
O
R
10 When prompted “What do you want the wizard to do?” Select install from a list or specific location.
Click Next.
11 The next window will display “Please choose your search and installation options.” Select Don’t
search and click Next.
12 HIghlight the URC USB Sync MSC-400 & 500 driver. Click Next.
T
O
P
R
O
G
R
A
M
13 The Hardware Installation window opens with a message that this driver has not passed Windows
Logo testing. Click Continue anyway.
Type in
Installing
Section Title
5
14 A files needed window will follow. Click on the Browse button and navigate to C:\Program
Files\Universal Remote Control, Inc\Complete Control Program\MSC-400\drivers\Windows
XP\USB7210-2k.sys. Click Open then OK.
M
S
C
4
0
0
15 Once the driver finishes installing then click Finish.
Keep Your Database Up to Date — USE LIVE UPDATE
CCP includes a vast library of IR codes for hundreds of brands and models of A/V components. This database is
constantly growing with the inclusion of new devices every month. Keep your software up to date by using the
Live Update feature. Rather than un-installing and re-installing the software, you download updates to the
software from the internet. Simply follow these steps:
1 Connect to the Internet normally.
2 Open CCP.
3 From the Communications Menu, select Live Update.
4 In the Live Update window, click on “OK” to start the update prcoess. The process will automatically close CCP.
5 Wait for the progress window to indicate “Update Done”, then click on “OK”.
6 CCP is automatically restarted and ready to go. There is no need to restart Windows.
M
A
S
T
E
R
S
Y
S
T
E
M
C
O
N
T
R
O
L
L
E
R
Type
Introducing
in Section
CCP
Title
6
Introducing CCP - The Complete Control Program for MSC-400 and more...
U
S
I
N
G
A
Main Menu and Toolbar
B
C
Home
Designer
Properties/
Tool
Window
C
C
P
E
D
I
T
O
R
T
O
P
R
O
G
R
A
M
D
Select via
E Tabs (E)
Model
Designer
Simulate View
F
Macro
Window
A
Menus and Shortcut buttons for common tasks. The Program Menu activates each task in the correct
order.
B
Home Designer and Model Designer Tree Views of the MSC-400 configuration. Double clicking on
any page enables you to quickly display that page on the simulator view. Right clicking on a device or
page activates a context menu.
C
The MSC-400 Simulate View is used to navigate and to select a button to program, edit or record a
macro.
D
Multi-tabbed Tool window allows access to the “IR Navigator”, “Button, Page and Device Properties”,
“Image Gallery”, “Sound Gallery” and “Serial Database”.
E
The tabs select whether you want Properties or one of the tools displayed in the window above.
F
The Macro window is used to view and edit macros.
Type
New
in Section
Features
Title
Overview of the New Features of CCP MSC-400
Complete Control Program represents a full house philosophy to programming, giving you tools to quickly program multiple remotes and base stations in one file. In addition to a new philosophy, CCP also features a configure home section to quickly build remotes and base stations to many rooms in a home, and also integrates
an indepth look at MSC400 connected Devices, Macro Groups, Smart Macros and a clickable simulator.
Configure Home
You’ll find tree view is now split into two areas, one area called House
Designer, which enables you to select remotes or base stations based on what
room they are in.
To configure a remote or a base station, you must DOUBLE CLICK it in
Home Designer.
The selected remote or base station is then placed into the Model Designer
tree view. To configure properties or a particular remote control page, DOUBLE CLICK it in Model Designer.
Once a remote is selected, clicking on the Program tab will reveal the standard URC programming steps.
Simply move from left to right in sequence to program the remote completely.
To add new rooms, remotes or basestations to your file, you can either:
1 Right Click on Home in House Designer and select Add Room.
This will open the System Configuration window.
OR
7
M
S
C
4
0
0
M
A
S
T
E
R
S
Y
S
T
E
M
C
O
N
T
R
O
L
L
E
R
8
Type
New
in Section
Features
Title
2 Click on the Program tab and select “Configure Home” (House Designer) from the far left of the
Program ribbon.
U
S
I
N
G
This will open the System Configuration window:
C
C
P
E
D
I
T
O
R
T
O
P
R
O
G
R
A
M
NOTE: Drag remotes
or base stations on
top of the room to
add to room. You cannot drag to the items
inside the room
directly.
3 Once the House Designer window is open, simply drag rooms to “Home”, then drag remotes and/or
base stations to each room as needed.
TIP - Don’t add remotes to rooms until your first remote is finished. When adding remotes, you can
copy the first remote you’ve done, which will save effort on your second remote.
Type
New
in Section
Features
Title
9
Properties Window
The Properties window is a new version of the Configuration Menu in the previous MSC Editor and is available
when selecting the various functions below. In the previous editor, the Configuration menu offered the options
of changing the MSC Basestation Name, selecting Master or Slave, an ID for a Primary/Secondary base, configuring and describing the video and voltage sensors, and configuring the serial port device, baud rate, data,
parity, stop bits and the description. It’s contents will differ according to the selection.
MSC-400 Simulator
1 Click on the blue IR/RS232, video, voltage and RF ID ports of the MSC-400 simulator to access and
configure their properties windows.
2 The Properties windows will appear within the Properties/Tools menu. If the properties window is not
visible click on the property tab or go to View and check the Properties box.
M
S
C
4
0
0
M
A
S
T
E
R
S
Y
S
T
E
M
IR/RS232 Programmable
Ports
RF In
Video/Voltage Sensor
3 Make the appropriate changes to the properties windows displayed above.
C
O
N
T
R
O
L
L
E
R
Type
New
in Section
Features
Title
10
Model Designer Treeview
U
S
I
N
G
C
C
P
1 Within the Model Designer Treeview to the right, click on a
Connected Device, Macro Group, Smart Macro or the MSC-400.
2 Once the selection has been made it’s respective property
window will open and allow configuration.
3 Configure the property windows as detailed shown below.
Click on MSC400, a Device (Xbox), a
Macro Group (Source Select Macros) and
a Smart Macro (DVD 2).
E
D
I
T
O
R
T
O
P
R
O
G
R
A
M
Model Designer
Click on a device to change it’s name, port
id, and if it is a serial device designate it’s
Data Type as well as selecting whether or not
a carriage return is needed.
Connnected Device
This property window gives the option to
rename the base station and informs you of it’s
current RFID as well as it’s Master or Slave designation.
MSC-400
Type
New
in Section
Features
Title
11
M
S
C
4
0
0
In the Macro Group property window you can rename the Macro
Group and designate to which base
station or port the macro will be
sent to.
M
A
S
T
E
R
Macro Group
The smart macro property window
has the same features as the macro
group window with the exception
of the Macro Trigger Setting section. This area allows for normal
macros or triggers to occur once a
device is sensed via a video or
voltage sensor.
Smart Macro
S
Y
S
T
E
M
C
O
N
T
R
O
L
L
E
R
Customizing
Type in Section
the Workspace
Title
12
Customizing the Workspace
CCP has some unique layout features that allow you to customize your own personal layout.
U
S
I
N
G
Here is the default layout: Home and Model Designer are on the left, the Simulator is in the middle, the
Properties window is in the upper right and the Macro window is in the lower right.
C
C
P
E
D
I
T
O
R
T
O
P
R
O
G
R
A
M
You can always get back to the default layout by using the “Default Layout” button in the “Window” tab.
Customizing
Type in Section
the Workspace
Title
All Windows in the Default Layout can be resized
To resize a window, move the mouse cursor to the side, top or bottom edge of the window. When you’re in
the right place, the windows “Resize Window” icon will appear. Next, hold down the “Left Click” button on
your mouse and drag the edge to make the window larger or smaller.
All Windows in the Default Layout can be Moved Around
To move a window to a new location, move the mouse cursor to the title bar of the window, hold down the
“Left Click” button on the mouse and drag the window to a new location.
13
M
S
C
4
0
0
M
A
S
T
E
R
S
Y
S
T
E
M
C
O
N
T
R
O
L
L
E
R
14
Customizing
Type in Section
the Workspace
Title
If you grab a window and drag it around the main layout, several new windows “Grouping/Placement
Options” appear. In the example below. I have moved the “Button Properties” window away from its default
position on the left side of the screen. Windows placement icons appear at the top, bottom, left and right side
of the main window, along with a windows grouping icon for the Macro window.
U
S
I
N
G
C
C
P
E
D
I
T
O
R
T
O
P
R
O
G
R
A
M
If you move the “Button Properties” window to the middle of the screen, you’ll see a windows grouping icon
for the middle section of the screen.
If you move the “Button Properties” window to the right side of the screen, into the Model Designer window,
you’ll see a windows grouping icon for the Model Designer window.
Move the “Button Properties”
window into the middle of the
screen
Customizing
Type in Section
the Workspace
Title
15
Windows Grouping /Placement Icon
Windows snap into place when you drag the cursor / title bar of the window you want to move, into one of
the five options in the Windows Grouping Placement Icon.
Move the “Button Properties” window into
the Home Designer Tree
Place the new window above the existing window
Place new window into the
tabbed window grouping
Place the new window to the left
of the existing window
Place the new window to the
right of the existing window
Place the new window below the existing window
In the example to the right, the “Button Properties”
window is being dragged into the “Place Above
Existing Window” icon on the left side of the screen.
This will place the Button Properties window above
the Macro window.
Note: The green outline area shows you where the
new window will appear, relative to the existing window.
In this example, it will appear above the Macro window.
M
S
C
4
0
0
M
A
S
T
E
R
S
Y
S
T
E
M
C
O
N
T
R
O
L
L
E
R
16
Customizing
Type
Type in
in Section
Section
the Workspace
Title
Title
Using the Window Auto-Hide Features
U
S
I
N
G
C
C
P
E
D
I
T
O
R
CCP has another layout feature that allows you to Float, Dock, Automatically Hide or Permanently Hide a
window.
Right click on the down arrow in the window title bar, a drop down menu appears with the following choices: Floating, Dockable, Auto-Hide and Hide.
Floating: Allows the window to float anywhere on your conputers screen. It’s no longer confined to the CCP
application window.
Dockable: Allows the window to snap to a location (Top , Bottom. Right side, Left side) within the confines of
the CCP application window.
Auto-Hide: Automatically hides the window to a toolbar at the Top, Bottm, Right side or Left side of the
screen, depending where the window is docked and provides a tab to access the window. The windows “Pin”
icon in the title bar is turned sideways conveying that the window is “No longer Pinned” in place.
Hide: Removes/ hides the window from the CCP apllication window. To restore the window, you must go into
the main toolbar and select the window from either the “View” tab or the “Tools” tab.
Property window tab created when
this window has been set to “AutoHide”. To open the window, simply
hover your mouse over the tab. The
window remains open until the mouse
is removed from it, then the window
auto-hides.
T
O
P
R
O
G
R
A
M
The Properties window “docked”.
The Properties window “hidden”.
Type
Type
Programming
Programming
inin
Section
Section
Title
Tips
Tips
Title
Programming Tips
Complete Control Program MSC-400
Programming the MSC-400 requires that you have Complete Control Program MSC-400 Editor and the editor
for the remote control (MX-6000, MX-3000, MX-980, MX-950, MX-900, MX-880, MX810 or TX-1000 Editor).
You can download standalone versions of these editors from the URC Control Room,
www.urccontrolroom.com. Entry to the site requires a Registration Code (call your Distributor or Sales
Representative to get one).
Prior Programming Knowledge Required
Programming the MSC-400 requires experience programming any of the MSC-400 compatible remotes, models: MX-6000, MX-3000, MX-980, MX-950, MX-900, MX-880, MX-810 and TX-1000. For better understanding of the MSC-400 and compatible remotes, login to URC Control Room at www.urccontrolroom.com and
sign up for the various tutorials under the Training & Education Tab. These tutorials will provide excellent and
in-depth training for the knowledge needed to successfully program the MSC-400.
Program Remote Control Devices First!
Before starting a MSC-400 Project, be sure all that you have completed programming Devices in the remote
editor. It is much faster to import remote control devices than to create them from scratch in MSC-400 editor.
17
M
S
C
4
0
0
M
A
S
T
E
R
Use the Program Menu
The Program Menu is your lifeline to a fast, easy programming experience. Follow the steps in the order shown
in the Menu for best results. Download and Test has been added to the Program toolbar. Typically, you will
download to the remote control several times throughout the programming process to test what you have done
so far . You’ll also need to download once you’ve completed all your final programming.
It is important to complete all of the tasks for each program step, before moving on to the next step, rather
than jumping back and forth and all over the place.
1
Import Remote Control Devices – Provides fast, easy navigation to where Device and Project files
have been saved for the purpose of importing complete IR Command sets for the devices to be controlled by the MSC-400.
2
Devices & Routing – Assigns IR Commands to dedicated Emitter Ports.
3
IR Database – Opens the window featuring the IR Command Library. This window can be used to
embed IR Commands in Smart Macros when they are not imported with a Device file.
4 Serial Template Database - Opens the window featuring the Serial Command (RS232) Library. This
window can be used to embed Serial Commands in Smart Macros when they are not imported with
a Device file.
S
Y
S
T
E
M
C
O
N
T
R
O
L
L
E
R
Type
Programming
in SectionTips
Title
18
5 Make Smart Macro –Starts the process of creating and programming Macro Groups and Smart
Macros. Smart Macros are the essence of the MSC-400.
U
S
I
N
G
6
Macro Programming – Allows IR or RS232 Commands to be added, or ‘recorded’ to a Smart Macro
7
Download - Download & Test. Save a Device file and Import for faster programming
.
Save a Device file and Import for faster programming
Archive and save your customized device files. Programming systems with similar components gets even faster
when you don’t have to redo your work over and over. You have your own ideas about how buttons should be
labeled and about how they should be arranged. You can save your work in a unique and time saving way if
you save the customized device as a stand alone device file which you can import into any new configuration.
C
C
P
E
D
I
T
O
R
Save the MSC-400 File, Then Return to Remote Programming
T
O
P
R
O
G
R
A
M
Once all CCP MSC-400 programming is finished, it is now time to integrate triggers to a CCP remote editor.
Simply drag the triggers onto the remote buttons. For further details see page 55 for Dragging Triggers to CCP
remote editors.
TIP - Saving the MSC-400 Project with the same name as the Remote Project will help in being able to associate remotes and MSCs as the number of MSC projects starts to increase.
NOTE – When saving files make sure to save to a main folder for Universal Remote Control with in the My
Documents folder, if not already created. Saving files within the CCP program folder is not recommended as
they could be lost from an uninstall. It is highly recommended that specific folders for Device Files and
Project Files be created as a method for easily being able to save and locate important system and programming data.
Creating
Type in
a New
Section
System
Title File
19
Step by Step – Programming a Typical MSC-400 System
M
S
C
4
0
0
Options - New or Existing Files
DEFAULT (1 Remote, 1 Room)- Opens either in a MX-6000 or MX-980 with the option of choosing a
graphical template.
EMPTY(No Rooms and No Remotes) - Opens a blank template
OPEN EXISTING FILE AS TEMPLATE - Open a configuration that you have worked on before and
saved onto the PC hard drive.
New File - Step by Step
1 Click on the File menu tab and select “New” in the toolbar.
2 The “New File” window appears: Select “Default” and the
MSC-400 then click “OK”.
3 Begin programming the MSC-400.
ex. CCP creates a new file with one room called “Home Theater” and one MX-980 remote control.
M
A
S
T
E
R
S
Y
S
T
E
M
C
O
N
T
R
O
L
L
E
R
20
Adding a Base Station using the House Designer
4 Click on the “Configure Home” icon to add rooms or a Base Station(s) to the Home Theater.
U
S
I
N
G
C
C
P
5 The “System Configuration” window opens.
6 First, drag and drop a desired room, ie Home Theater, below “Home” within the Configuration tree
view.
E
D
I
T
O
R
T
O
P
R
O
G
R
A
M
7 Drag and drop a base station, such as the MSC-400, to the same room.
8 Highlight the MSC-400 base station then click on the Properties button located at the bottom left.
Saving
Type inyour
Section
NewTitle
File
9 The Base Station Model Properties window appears.
10 Name the Base Station.
Example: “MSC-400FULL (Home Theater)”
11 Select an RF ID from the RF ID drop-down list.
12 If using a second base, check and choose the second RF ID.
13 Click “OK”
14 Close the System Configuration window by clicking on the “Close” icon in the upper
right hand corner of the window.
15 Save the File. In the main toolbar, select “File” and then click on “Save As”.
16 The “Save As” window appears.
17 Enter a name for the new File, Example: “Smith Residence rev1” and then click on the “Save” button.
21
M
S
C
4
0
0
M
A
S
T
E
R
S
Y
S
T
E
M
C
O
N
T
R
O
L
L
E
R
Import
Type
Remote
in Section
Control
Title
Devices
22
Program Menu Step #1 - Import Remote Control Devices
U
S
I
N
G
This step will import the IR Commands for the devices to be controlled by the MSC-400. All physically connected devices to the MSC-400 should be imported to the CCP MSC Editor. The remaining devices, which are
not physically connected to the MSC-400, will be controlled locally by the remote control.
1 To Import Devices, do any one of:
a) In the CCP MSC-400 Editor Menu Bar, click Program, then click Import Remote Control
Devices.
b) In the CCP MSC-400 Editor Model Designer Treeview, right click on Connected Devices. In
the pop-up, click on Import Remote Control Devices.
C
C
P
E
D
I
T
O
R
T
O
P
R
O
G
R
A
M
Program Menu
Model Designer Treeview
2 The Import Device window will appear, empty.
Browse Button
Import Device Window
3 In the Import Device window, click the Browse button. The Open window will appear.
4. Navigate to where Project Files are saved. Click the file for the remote that was programmed with
the IR commands and click Open.
5 The Import Device window will populate with the devices that were programmed in the remote project. Check all boxes for the devices that are to be controlled by the MSC-400.
NOTE - It is not necessary to check Listen and Watch unless IR commands have been associated with the
Pages for those buttons. Also note that in the example, CD is not checked. The CD Changer is going to be controlled via RS232. RS232 devices will be added and configured in later steps. See Section: Adding and
Programming RS-232 Devices for additional information on creating RS232 controlled devices in CCP MSC
Editor.
Type
Devices
in Section
& Routing
Title
6 Click Save. Then a confirmation window stating how many devices were
imported will appear. The devices will appear under Connected Devices
within the Treeview.
7 Click on Ok. Click on
to close the window.
With this programming, all of the IR commands associated with these devices while setting up the
remote will all now have been imported to the CCP MSC Project.
8 Click on any Connected Device, such as the DVD, to open the device. Then double click on the
Function page. The Connected Device IR Command window will open with a table of all IR commands for that device, broken down by hard keys and lcd pages, also known as soft keys. You’ll use
these Connected Device windows to quickly record smart macros later.
23
M
S
C
4
0
0
M
A
S
T
E
R
S
Y
S
T
E
M
The Connected Device Window opens when you double click the function page in Tree View.
Program Menu Step #2 - Devices & Routing
This section will assign each device to a dedicated IR output on the MSC-400. When assigned, the MSC-400
will ONLY send a Connected Device’s IR Commands to the IR PORT ASSIGNED. This gives much more precise
control over the IR level delivered to the component and enables you to control identical components. There is
an option to send a device’s IR commands to ALL Ports for troubleshooting purposes, however this should be
avoided since all the emitters will be flooding the equipment location with IR, reducing reliability.
TIP - In the example system, AVR (A/V Receiver), Tuner 1 and Tuner 2 are all
assigned Port 1. This particular receiver has two internal tuners and in the system
configuration the tuners have been setup as sources to be directly selected in Listen,
but the IR commands for the tuners must be directed to the AVR, Port 1.
C
O
N
T
R
O
L
L
E
R
Type
Devices
in Section
& Routing
Title
24
U
S
I
N
G
C
C
P
1 To open the Devices & Routing window, do either of:
a) In the CCP MSC Editor menu bar, click Program, then click on Devices & Routing.
b) In the Model Designer Treeview, right click on Connected Devices then select Add Devices.
Program Menu
Model Designer Treeview
2 The Devices & Routing window will appear.
E
D
I
T
O
R
T
O
Devices & Routing
3 The Device Name and Control Via columns are NOT CONFIGURABLE in this window.
P
R
O
G
R
A
M
4 All Connected Devices will default to the Target Model: MSC-400.
5
All Connected Devices will default to PORT: IR 1. Under the PORT # column, click IR 1 and select
the appropriate PORT from the drop down list.
NOTE - In a Master/Slave System, each MSC-400 can only control eleven Connected Devices. Port 12 is used
as a Smart Macro Control Buss.
Type
Adding
in Section
IR Devices
Title
25
Optional Step - Adding IR Devices
Normally, you don’t need to add any devices, since you have already imported them from the remote control.
Use this step should you need to control an IR device that is needed for macros but not needed on the remote
control for the end user (for example a matrix video switcher).
NOTE - Though some steps are similar, there are additional steps to adding and configuring RS232 Devices.
See Section: Adding RS232 Devices for complete instructions on creating RS232 controlled devices in CCP
MSC Editor.
6 In the Devices & Routing window, click the Add New Device button. The New Device window will
appear.
M
S
C
4
0
0
M
A
S
T
E
R
Devices & Routing
New Device
7 In the Device Name field, type the device name as it is to appear in the model designer treeview
under connected devices.
8 In the Device Type field, select IR Database.
9 In the Target section, select IR PORT 1-12 or All as appropriate.
10 Click Ok to Add the New Device. The new device will appear in the Devices & Routing window.
11 In the Devices & Routing window, click Save to save the settings and add the new devices to the
modl designer tree view.
12 Click on the X located at the upper right hand corner of the Devices & Routing window to close.
NOTE - Clicking the close button (X) in the Devices & Routing window will close the window without saving
settings.
S
Y
S
T
E
M
C
O
N
T
R
O
L
L
E
R
Adding
Type inRS232
Section
Devices
Title
26
Adding RS232 Devices - Optional Step
U
S
I
N
G
C
C
P
E
D
I
T
O
R
T
O
P
R
O
G
R
A
M
If your client’s system has a device that you intend to control via RS-232, here is how you add a new connected device that is RS-232. For more information on RS-232, refer to the RS-232 section of this manual.
1 Follow steps 1 - 6 under Program Step #2 of Devices & Routing.
2 Once the New Device window appears, type in a device name in the Device Name field, as it is to
appear in the model designer treeview under Connected Devices.
3 In the Device Type section, select Serial Database.
4 In the Target section, select IR PORT 1-12 or All as appropriate.
NOTE - In Master/Slave Systems only Ports 7-11 will be available for RS232 control.
5 Click Ok to Add the New Device. The new device will appear in the Devices & Routing window.
6 In the Devices & Routing window, click Save to save the settings and add the new devices to the
model designer tree view.
7 Click on the X located at the upper right hand corner of the Devices & Routing window to close.
NOTE - Clicking the close button (X) in the Devices & Routing window will close the window without saving
settings.
Device Properties Window
CCP now offers a new feature within the Properties tool box to configure a MSC base station, remote
control, connected device, macro group and a smart macro. This feature allows for the configuration
of these items via the Properties tab window.
In order to access the Properties tab:
1 Double click on a device within the Model Designer Treeview under the Connected Device
list to see the Properties window. This will give you the option to change the device name,
port, data type and the automatic carriage return. If the properties window is not visible
click on the property tab or go to View and check the Properties box.
TypeIRinDatabase
Section Title
27
Program Menu Step # 3 - IR Database
Using the IR Database - Discrete Codes and Togglesiscrete Codes and Toggles
The Universal Remote database is unique in the industry because it includes “secret” discrete codes that are
not on the actual remote controls for many components. These codes are highly sought after by professional
installers because they make automation of the home theater possible, via reliable macros! Here are the facts
you need to know:
Discrete Commands versus Toggle Commands
When a remote control’s only button to turn on and off a TV set is labeled Power, it is usually a “toggle” command. Test it by pressing the button twice. If the power button turns the TV on, then turns it off, it is a toggle
command. That is a big problem when you are programming macros! If you program a macro for watching TV
with a power toggle, then the macro is essentially point and pray (if the TV was off, it will turn on, if it was
already on, it will turn off). On the other hand, if a macro is programmed with a discrete Power ON command, the macro will work every time (if the TV was off, it will turn on, if it was already on, it will stay on).
So the term “discrete command” or “discrete code” means that the code will only do “ONE THING” to a component. For example:
A single “Input” command is a toggle type command if it simply changes the input to another input
when issued, while separate buttons for Antenna A, Antenna B, Ext 1, Ext 2 and Ext 3 are discrete input
commands if, when issued, the TV goes directly to the named input (and if you give the same command again, it stays on the selected input).
Here are some important facts about Discrete commands:
“Secret” Discrete Codes exist for some components. Why are they secret? Because the manufacturer wants
the remote control that accompanies the component to have the simplest appearance (fewest buttons). Since
toggles reduce the number of buttons, they make the remote control appear easier to operate. Many manufacturers understand the needs of custom installers and build their components to also respond to discrete codes.
They distribute the discrete codes via service remotes, etc. For the first time, those codes are collected and
integrated into our database.
Not all components respond to the discrete codes in the Database. A component has to be BUILT to respond
to discrete codes. The fact that most models from the same manufacturer do respond to discrete codes is the
reason the codes are added to a code set. However, some models will not respond, because the manufacturer
did not build it to respond because of budgetary considerations, time constraints or a simple oversight.
To add IR commands to your devices follow the instructions below.
1 In the CCP MSC Program Menu, click on IR Database.
1
2 The IR Database Window opens.
M
S
C
4
0
0
M
A
S
T
E
R
S
Y
S
T
E
M
C
O
N
T
R
O
L
L
E
R
TypeIRinDatabase
Section Title
28
3 Select your base station from the Target model field.
U
S
I
N
G
4 Click on the Device drop down to select your device.
C
C
P
9 Click Next to save Serial RS232 codes to your devices or click on the X to close the window.
5 Click on the IR Data from drop down to select the type of device.
6 Select the manufacturer of the product from the Brand field.
7 Select the model number of the item from the Model field.
8 Click Save All to save all IR commands to the specified device.
2
E
D
I
T
O
R
8
3
4
5
T
O
6
P
R
O
G
R
A
M
7
Serial
Type
Template
in Section
Database
Title
29
Program Menu Step #4 - Serial Template Database
Programming RS232 Devices
RS232 Command strings can be used to control Connected Devices from a MSC-400. Unlike IR commands,
where the remotes can output both IR and RF to control local devices directly, the RS232 commands must be
programmed into the MSC-400 and triggered with RF Triggers or Sensed Triggers.
RS232 Commands are stored in a Serial Database and created as Connected Devices in a similar fashion to IR
Devices. RS232 Commands can be added to the Database as long as the specific command strings and settings are known. To add RS232 Commands to the Serial Database it will be necessary to acquire the RS232
Protocol for a given device from the manufacturer. This information can sometimes be found in product documentation, the manufacturer’s web site, or sometimes a call to the manufacturer’s Tech Support Department
may be necessary.
NOTE - RS232 Commands can be used as single commands for device function control and can be included
in Smart Macros for System and Device setup.
Saving RS232 Commands to Devices
1
1 In the CCP MSC Program Menu, click on Serial
Template Database.
2 The Serial Database Window opens.
M
A
S
T
E
R
2
9
3 Select your base station from the
Target model field.
3
8
4
4 Click on the Device drop down to
select your device.
5
5 Click on the IR Data from drop
down to select the type of device.
7
6 Select the manufacturer of the
product from the Brand field.
M
S
C
4
0
0
6
7 Select the model number of the item
from the Model field.
8 Click Save All to save all IR
commands to the specified device.
9
9 Click Next to save Serial RS232 codes to your devices or click on the X to close the window.
Manually Coding RS232 Commands
Commands for RS232 controlled devices not found in the Preprogrammed Serial Database can be added to
CCP MSC Editor. In order to add the commands, it is necessary to have the RS232 Protocol and command
data for entry into the database. RS232 protocol and commands can typically be found in product manuals,
on the manufacturer’s website or in some cases it may be necessary to contact the manufacturer’s Tech Support
Department.
S
Y
S
T
E
M
C
O
N
T
R
O
L
L
E
R
Coding
Type RS232
in Section
Commands
Title
30
To Manually Code RS232 Commands:
U
S
I
N
G
C
C
P
1 In CCP MSC Editor Model Designer Treeview, double click the Connected Device for which RS232
commands are to be added. Note: All RS232 devices are represented with an S in front of it and all
IR devices are represented with a IR .
2 Double click on the Function list Funcs. The Connected Device window will appear.
3 In the Connected Device window, double click on a command to open the connected data-serial
window.
E
D
I
T
O
R
T
O
P
R
O
G
R
A
M
Connected Data - Serial
4 Add a description name of the command to the Description field.
5 In the Data Block, select: ASCII, HEX or DECIMAL as defined
in the manufacturer’s protocol, then enter the command string
for the selected function.
NOTE 1 - ASCII must be entered EXACTLY (including spaces) as the
command is to be sent. Use \x to indicate that the characters immediately
following should be interpreted as a hex byte. Example: PWON\x03
NOTE 2 - Hex bytes MUST be separated by a comma. 0x and h notation
may be used but are not necessary. Example: FE,36,20,03 or 0xFE,0x36,0x20,0x03 or FEh,36h,20h,03h
NOTE 3 - Decimal should be entered as values separated by commas. Example: 128, 2, 21
NOTE 4 - If the manufacturers protocol requires a carriage return, double click on the RS232 device within the
Model Designer Treeview and select the Properties window. Check the box to add a carriage return or
uncheck it if the carriage return is not needed.
RS232 Repeat
Type inand
Section
RampTitle
Start/Speed
6 If more functions need to be added to the list, double click on an empty line, and add the Function
Name, Data Type and Command String in the appropriate boxes. Up to 1024 commands can be
added.
NOTE - To TEST manually encoded commands, the PC must be connected to the MSC-400 USB1Port. The
MSC 400 serial port must be designated in the Device Properties window and also must be connected to
the device using an appropriate RS232 CABLE.
NOTE - Serial Port Settings must be downloaded to the MSC-400 before attempting to test an RS232
Command from the Function List.
7 Double click a Command from the Function List.
8 Click the Test button in the Connected Data - Serial window. If the device being tested is a true
two-way device and provides a status response, the response will be displayed in the Test field.
9 Repeat previous steps to make changes or close the Connected Device window when all commands
have been tested and saved.
NOTE - If using a device that has a tuner and the Favorite Channel Tool is to be used to create Favorite
Channel Smart Macros, DO NOT change the functions in Indexes 25-36. These are used for the numeric,
enter and +10 commands when creating the Favorite Channel Smart Macros for RS232 devices. Enter the command strings, but do not change the functions.
RS232 Repeat, Ramp Start and Ramp Speed
Any RS232 Commands such as Volume UP/DOWN, that require a PRESS AND HOLD of a remote button,
need to be configured for Repeat, Ramp Start and Ramp Speed in the Smart Macro Window BEFORE the project is saved and downloaded.
* Repeat – Sets the command to repeat for a predetermined number of times or for as long as the button on
the remote is pressed and held.
* Ramp Start – The amount of time from when the first command is issued to when the command starts to
repeat.
* Ramp Speed – The speed at which the repeating command repeats.
If these settings are not properly configured, either the volume will not ramp at all or will ramp from 0 to deafening in less than a second. Typical commands such as Play, Pause, Stop, etc., do not require this configuration, and are ready for use at this point in programming.
To configure Repeat and Ramp:
1 Within the Smart Macro window, double click the
included RS232 command. The Connected Data window
will appear.
Connnected Data - RS232 Repeat and Ramp
2 The Device, Description and Repeat should all DEFAULT to the proper settings.
31
M
S
C
4
0
0
M
A
S
T
E
R
S
Y
S
T
E
M
C
O
N
T
R
O
L
L
E
R
RS232 Commands
Type in Section
in Smart
Title Macros
32
U
S
I
N
G
C
C
P
E
D
I
T
O
R
3 In the Repeat box, enter the specific number of times a command is to repeat, or check the repeat
while button is pressed box to have the command repeat for as long as the button on the remote is
pressed and held.
4 Set Ramp Start to an appropriate value. The user will be accustomed to instant response from the
system for most commands, so any setting higher than 50 (.5 second) will probably seem slow. The
default is pretty typical for how IR commands behave, and will typically be a good place to start.
The user should be ‘blind’ to whether a command is IR or RS232.
5 Set Ramp Speed to an appropriate value. A good method for gauging this setting is to observe IR
RAMP SPEED for a device and enter a value that will provide similar response.
6 Click Ok to save.
NOTE - These settings ONLY apply to this command in this macro. That is, the command in the Serial
Database for this function will not be modified. Repeat and Ramp will need to be cond for each use of the
command.
7 To TEST the command, SAVE the Project, then DOWNLOAD the Project to the MSC-400 and test
using the REMOTE.
NOTE 1 - The remote must be programmed with the appropriate RS232 Command Smart Macro Triggers to
perform this test.
NOTE 2 - This test must be done using the remote to confirm the press and hold/repeat function, which cannot
be duplicated from the PC.
8 Make changes if necessary to RAMP START and RAMP SPEED. Download and repeat test.
9 To SAVE, in the MENU BAR, click FILE then click SAVE.
T
O
P
R
O
G
R
A
M
Embedding RS232 Commands in Smart Macros
On occasion, it may be necessary to place a single RS232 Command in a Smart Macro. Typically, creating a
Connected Device then recording a command to the macro is the preferred method but embedding a single
command can be done when required. To embed a RS232 Command in a Smart Macro:
1 In the Smart macro window tool bar, click the serial icon.
database window will appear.
The Serial
2 If a command IS available in the serial database:
a) Select the Serial Data from: (DVD, CD, Audio etc) using the pulldown.
b) Select the Brand using the pull-down.
c) Select the Model using the pull-down.
d) Scroll the Function List, click the desired Function.
e) If necessary, increase the repeats of a function.Then click and drag
that command into the smart macro window.
f) To test, with the PC connected to the MSC-400 USB1 Port, and the
device connected to the proper MSC-400 Serial Port, click the Test
button within the macro window.
Macro Type
Groups
in Section
and Smart
TitleMacros
33
NOTE - Serial Port Settings must be downloaded to the MSC-400 before attempting to test Embedded RS232
Commands.
g) Click Ok. The command will appear in the smart macro function list, where it can be moved
and used in smart macros and if/else statements as with any other command.
M
S
C
4
0
0
3 If a command is NOT available in the serial database:
a) Double click on the devices function list from the treeview.
b) Inside the Connected Device window, double click on an empty field to open a connected
data serial window.
c) In the Description box, type the Function Name as it is to appear in the smart macro function list.
d) In the Data Block, select ASCII, HEX or DECIMAL as specified in the manufacturer’s protocol.
e) Type the Command String into the Data box, up to 256 characters.
f) Check Add a carriage return, if appropriate, per manufacturer’s protocol.
g) In the Target Block select master/slave and the serial port as appropriate.
h) To test, with the PC connected to the MSC-400 USB1 Port and the device connected to the
proper MSC-400 Serial port, click the Test button.
NOTE - Serial Port Settings must be downloaded to the MSC-400 before attempting to
test Embedded RS232 Commands.
i) Click Ok. The command will appear in the smart macro function list, where it can be moved
and used in smart macros or if/else statments as with any other command.
Program Menu Step # 5 - Creating Smart Macro Groups and Smart Macros
Macro Groups and Smart Macros are the elements of MSC-400 programming and control that make the user
experience of MSC-400 simple: One button control of System ON/OFF Power; Single button presses to select
Tuner, Cable or Satellite channels; One button to switch from listening to music to activating and configuring
the Home Theater for a specific source, surround mode, video aspect ratio and light settings. All of this is
accomplished with the simplicity of MSC-Editor and flexibility of MSC-400.
Macro Groups
Although all macros can be combined into one Macro Group, it is much easier to keep track of system programming by separating similar type macros into different Macro Groups. These groups could include: System
ON/OFF Macros, Source Select Macros, Sensor Triggered Macros, Favorite Channel Macros and Toggle
Macros. Within a Macro Group are individual Smart Macros. That is, within the System ON/OFF Macro Group
would be of course, the System ON Smart Macro and the System OFF Smart Macro. Within the Source Select
Macro Group would be the DVD 1 and DVD 2 Select Smart Macros, Cable Select Smart Macro and so on. The
Smart Macros can be conditioned with IF/ELSE Statements and Action Variables to add intelligence to system
function.
Macro Groups & Smart Macros
M
A
S
T
E
R
S
Y
S
T
E
M
C
O
N
T
R
O
L
L
E
R
Macro Type
Groups
in Section
and Smart
TitleMacros
34
U
S
I
N
G
NOTE - There are no absolutes in how a MSC-400 has to be programmed, so the following sections are suggestions and guidelines for Macro programming. Every system is different, every user has different preferences
and each installer has a different perspective of how things can be done. However, what is created must be
done correctly for the system to function properly.
Adding a Macro Group and Smart Macros
1 In CCP MSC Editor Model Designer Treeview, right click on the MSC-400.
C
C
P
2 In the pop-up, click Add Macro Group. Macro Group 1 (GRP-01) will appear at the bottom of the
treeview.
3 Right click the Macro Group.
4 In the pop-up, select Rename. The Macro Group Directory will become active. Type the name of
the Macro Group. (System ON/OFF Macros).
E
D
I
T
O
R
T
O
P
R
O
G
R
A
M
5 Click within the Treeview to Save.
6 Right click the Macro Group Directory. In the pop-up, select Add Smart Macro.
7 Right click the Smart Macro. In the pop-up, select Rename. The Smart Macro Directory will become
active. Type the name of the Smart Macro. (System ON Macro).
8 Click anywhere in the treeview to Save.
9 Repeat steps 6-8 to add a System Off Macro.
OR…
1 In the CCP MSC Editor Menu Bar, click Program, then click Make Smart Macro. The Make Smart
Macro window will appear.
2 Click the New Group button. The Add Action Group window will appear.
Make Smart Macro window
Add Action Group window
Macro Type
Groups
in Section
and Smart
TitleMacros
3 In the Name field, type the name of the new Macro Group. (System ON/OFF Macros) It is not necessary to make any other changes in this window at this time.
4 Click Ok. The new Macro Group will appear in the Macro Group box in the Make Smart Macro
window.
5 Double click in the blank space directly below the Smart Macro column header. A Type Tool will
become active.
6 Type the name of the Smart Macro. (System On Macro.)
7 Press Enter on the PC Keyboard or double click in the blank space directly below the System On
Macro. The Type Tool will again become active.
8 Type System Off Macro within the type tool area.
9 Click the Save button.
10 Click the X on the upper right hand corner of the Make Smart macro window to Exit.
11 The Macro Group and Smart Macros will appear at the bottom of the model designer treeview.
Smart Macro Window
The Smart Macro Window is where all programming for MSC-400 Smart Macros is done. IR and RS232
Commands, Delays, IF/ELSE Statements, Action Variables and all steps and conditions are cond in this window
for System ON/OFF Macros, Source Select Macros, etc. The functions of each of the Programming Buttons or
Icons are detailed here for reference. Their specific applications are detailed in the Programming Section of
this Manual.
MSC-400 Editor Smart Macro Window
1 Test – Click this Icon with the PC Connected to the MSC to test Commands and Macros.
2 Record – Click this Icon to add IR or RS232 Commands to a Macro List.
3 Stop – Click this Icon to Stop the Record function when all commands have been added to a Macro.
35
M
S
C
4
0
0
M
A
S
T
E
R
S
Y
S
T
E
M
C
O
N
T
R
O
L
L
E
R
Macro Type
Groups
in Section
and Smart
TitleMacros
36
4 Delete – Click this Icon after selecting a step in a macro to delete the step.
U
S
I
N
G
C
C
P
E
D
I
T
O
R
T
O
P
R
O
G
R
A
M
5 IF/ELSE – Click this Icon to add an IF/ELSE Bracket to a Smart Macro for conditional control of system
devices based upon device status. i.e.: IF ON do nothing. IF OFF turn ON, etc.
6 Toggle Macro – Click this Icon to create special Macros that scroll through commonly used commands such as Favorite Channels, Surround Modes, etc.
7 Delay – Click this Icon to add delay to a Smart Macro to allow different system components to perform a function and be ready to receive additional commands, or add space between commands for
components that are too slow to process fast sequences of commands.
8 IR Data Setting – Click this Icon to open the IR Setting Window. The IR Setting Window enables IR
Learning directly to the MSC, allows editing of IR Command repeat cycles and embedding commands into macros from the IR Database. Learn - Click this icon to learn ir commands from the original manufacturere’s remote control.
9 Serial Output – Click this Icon to open the Serial Command Window. This window enables testing
and embedding RS232 commands into Macros from the Serial Database.
10 Connected Data - Click this Icon to insert any IR or RS232 Command to a Smart Macro for any
device cond to the system. Can also adjust IR Repeats and RS232 Ramp Start and Ramp Speed.
11 Relay – Click this Icon to add and con Relay Commands into Smart Macros.
12 Action Variable – Click this Icon to add Action Variables to Smart Macros.
Programming Smart Macros
There are two ways that Smart Macros can be triggered in a MSC-400 System.
* Normal Macro - A Normal Macro is triggered by an RF Trigger from a remote control. Normal Macros are
typically used for System ON/OFF, Source Select and Favorite Channel Macros.
* Sensor Triggered Macro - A Sensor Triggered Macro is triggered when an appropriately configured Sensor
Input detects a change of state. The trigger mechanism can be set to send the Smart Macro when an ON or
OFF condition is sensed or when a sensor changes from ON to OFF or vice versa. This type of Smart Macro is
typically used for special applications such as automatically turning the system ON/OFF when triggered by a
video game or camcorder.
A Typical Smart Macro
For this example, you’ve decided that the clients are best served with a macro that turns on all system devices
and switches to Cable TV.
Record System ON Commands to Smart Macro
Macro Type
Groups
in Section
and Smart
TitleMacros
1 In CCP MSC Editor Model Designer Treeview, click the ‘+’ next to System On/Off macros to expand
the list then click System On macro.
2 The Macro window is defaulted as a Normal macro.
3 In the model designer treeview, click the ‘+’ next to Connected Devices to expand the list.
4 In the Smart Macro window, click the red Record button.
5 In treeiview, double click the first Connected Device (AVR – A/V Receiver). The Connected Device
IR command window for the AVR will appear.
6 In the IR command window, click the AVR Power On command. (If there is no discrete command
for Power On, click Power.) The command will appear in the smart macro function list.
7 In the IR command window, click the AVR cable input command. This will be used to switch the
AVR to the Cable input as part of the System On Macro.
8 Repeat STEPS 5-6 for ALL Connected Device power commands. For the example system, the homeowners wants all devices On, so Power Commands for all devices will be recorded to the Smart
macro function list.
9 When all commands have been added to the list, click the black Stop button.
37
M
S
C
4
0
0
M
A
S
T
E
R
Moving Commands in a Smart Macro
When creating Smart Macros, it may be necessary to move commands in the list to have specific commands
execute before others. In the Example System ON Macro, the TV is going to be moved to the top of the list,
because it is a CRT that takes a few seconds to warm up before coming on. Putting it at the top of the list will
allow the TV to come on while the other devices are turning on. Other commands should also be put in logical order such as placing the AVR Cable Input select command after the Power ON command, etc.
To move commands in a Smart Macro:
1 In the smart macro function list, click the command to be moved, then drag and drop the command
to the desired position in the list.
2 Repeat as needed until commands are organized in the proper sequence.
Recording RS232 Commands in Smart Macros
Once RS232 Commands have been saved for a Connected Device, recording RS232 Commands to Smart
Macros is done using the exact same steps as recording IR Commands to Smart Macros. In fact, it is actually
best to have all Connected Device IR and RS232 Commands saved before creating any Smart Macros if those
macros are going to have both IR and RS232 Commands. By having all commands ready, Smart Macros can
be created in ‘real time’ by recording commands directly from Connected Devices to the Smart Macros without having to start and stop, search databases and create commands. To use RS232 Commands in Smart
Macros see section: MACRO GROUPS AND SMART MACROS and apply RS232 Commands the same way IR
Commands are recorded, moved and used in IF/ELSE Statements within Smart Macros.
Converting RS232 Commands to a Smart Macro Group
In order for the MSC-400 to output RS232 commands from remote control button presses, RF Triggers must be
S
Y
S
T
E
M
C
O
N
T
R
O
L
L
E
R
Macro Type
Groups
in Section
and Smart
TitleMacros
38
created for the RS232 commands. The RF Triggers will be programmed to the appropriate buttons on the
remote which will then be able to send the triggers to the MSC-400. When the MSC-400 receives one of these
triggers, it will output the associated RS232 command, in the same way it works with IR commands.
U
S
I
N
G
C
C
P
E
D
I
T
O
R
T
O
P
R
O
G
R
A
M
RF Triggers are automatically created every time a Smart Macro is added to a Macro Group. Once a
Connected Device’s RS232 commands are created, they can easily be converted to a Smart Macro Group
which will automatically create all of the RF Triggers for all of the commands in the group.
To convert RS232 Commands to a Smart Macro Group:
1 In CCP MSC Editor Treeview, right click the Connected Device to be controlled via RS232. (ex. CD)
2 In the pop-up, highlight Tools and then click Convert to Smart Macro Group. The new Smart
Macro Group will appear at the bottom of the tree view.
3 To review the group, click the ‘+’ next to the Group name to expand the list.
4 These commands are now ready to be used either as individual commands or in Macros, except for
commands that require press and hold functions such as Volume up or down.
IMPORTANT NOTE - RS232 Volume Commands Must be configured for: Repeat, Ramp Start and most important Ramp Speed. If these settings are not properly configured, either the volume will not ramp at all or the
volume will ramp from “0 to deafening’ in less than a second. See Section; RS232 Repeat, Reamp Start and
Ramp Speed for additional information.
TIP - When working with RS232 Commands, there may be functions that should
be added to the remote Soft Keys, using the LCD Button Editor. By minimizing
both the MSC and MX/TX Editors to fit on screen, the RS232 Smart Macro Group
can be reviewed in MSC-Editor and desired functions can be added to the remote in
MX/TX Editor.
Adding Delays To Smart Macros
Once the commands have been recorded to the Smart Macro Function List, some attention to device behavior
is going to be necessary. Look for things like: When turning on a device, how long does it take to turn on
before it is ready to do anything? Or when already on, how long does a device take to execute a specific command before it is ready to ‘see’ and execute the next command? Most A/V receivers take at least 4-5 seconds,
after receiving the Power ON Command, before they are ready to take any more instructions, such as input
commands (or output audio or video signals) so some duration of delay will typically be added after the Power
ON command for an AV Receiver. All devices vary, so where and when to add delays will depend upon the
devices used and what the specific commands in the macro are for.
To add Delays to Smart Macros:
1 In the Smart Macro Function List, click the command AFTER
the position where the Delay is to be inserted. (In the
Example System a 5 second delay will be added after the
Audio Power On Command to allow the Audio to come on
and be ready to accept the Cable Input Command, so Audio
(Cable) is selected as the insertion point.)
Macro Type
Groups
in Section
and Smart
TitleMacros
39
2 In the Smart Macro Window Tool bar, click the Delay Icon. The Delay Setting Window appear.
M
S
C
4
0
0
3 In the Delay Setting Window, do one of:
a) Select a Delay from the Quick Select Buttons and the window will automatically close. The
delay will be placed in the Macro Function List.
b) Type a value from .1 TO 99.9 Seconds in the Enter Delay Time Box. Click Ok. The delay will
be placed in the Macro Function List.
c) Use the Up/Down arrows to set Delay from .1 TO 99.9 Seconds in the Enter Delay Time Box.
Click Ok. The delay will be placed in the Macro Function List.
M
A
S
T
E
R
4 If necessary, Drag and Drop the Delay to the proper position in the list.
5 To Delete a Delay do one of:
a) Highlight the Delay and click the Delete Icon in the Smart Macro WindowTool bar.
b) Highlight the Delay and press Delete on the PC Keyboard.
6 Test the Smart Macro. With the PC connected to the MSC-400 using the included USB cable, click
the Test Icon in the Smart Macro Window Tool BAR. The MSC will output the commands. Adjust
command order and delay duration as needed.
NOTE - All devices, emitters, etc must be connected to perform this test.
7
To Save the smart macro, in the CCP MSC Editor menu bar, click File, then click Save.
Favorite Channel Macros
Favorite Channel Macros allow the user to press a single button on a remote to tune Cable, Satellite, AM/FM,
XM, Sirius channels, rather than having to press the individual buttons for a given channel, i.e.: Press a single
button for HBO rather than the individual buttons: 5-0-2. These macros will consist of the numeric commands
for tuning with an appropriate Interstep Delay between commands to assure proper response by the Cable or
Satellite Receiver, Tuner, etc.
S
Y
S
T
E
M
C
O
N
T
R
O
L
L
E
R
40
Macro Type
Groups
in Section
and Smart
TitleMacros
To program Favorite Channel Macros:
1 In the CCP MSC-400 Editor Menu Bar, click Program, then click Make Smart Macro.
U
S
I
N
G
2 Add a New Group named Favorite Channels Cable(Satellite, etc), then add the names for the
Favorite Channel Smart Macros to the list. (HBO, Cinemax, ESPN, etc.) See section: Adding a Macro
Group and Smart Macros for additional information.
3 In MSC Editor Treeview, click the ‘+’ next to Favorite Channels to expand the list.
4 Right click a Smart Macro (HBO). In the pop-ups, highlight Tools, then click Favorite Channel. The
Favorite Channel Tool will appear.
C
C
P
E
D
I
T
O
R
Open Favorite Channel Tool
5 If necessary, select Favorite Channels in the Favorite Channel Tool window via the Macro Group pull
down.
T
O
P
R
O
G
R
A
M
Favorite Channel Tool
6 In the Macros box, click a Favorite Channel Smart Macro. (HBO)
7 In the Selected Macro Block, if necessary, click the Interstep Delay button and set an appropriate
duration for the device being controlled, by either typing a value in the box or using the Up/Down
arrows. Some devices may not need a delay but others will be a little slow to process fast sequences
of commands, so a short gap, typically around .3 seconds, between commands is usually a good
idea. Interstep Delay Range: .1 to 32.3 seconds.
Type
IF/Else
in Section
Statements
Title
8 In the Connected Device Block, select the device being controlled (Cable) using the Pull-Down.
9 Sequentially press the Numeric buttons for the channel being cond (502). As ‘0’ and ‘2’ are pressed
the Interstep Delay is automatically inserted into the Favorite Channel Smart Macro.
NOTE - Some Cable Boxes and Satellite Receivers require a ‘0’ or ‘00’ before double or single digit channel
numbers and others may require an ‘Enter’ Command. Be sure to add ‘0s’ and ‘Enters’ when necessary.
10 Repeat Steps 7-8 for each Favorite Channel Smart Macro in the List.
41
M
S
C
4
0
0
11 Click the Close button, (X) when all Favorite Channel Macros have been programmed.
11 To Test, in Treeview, click the ‘+’ next to Favorite Channels Group to expand the list and click a
Smart Macro in the list. The macro will appear in the Smart Macro window.
12 With the PC connected to the MSC-400 USB1 Port, click the Test button in the Smart Macro window.
13 Make corrections to the macros if needed.
14 To Save, In the MSC Editor Menu Bar, click File, then click Save.
TIP - The Favorite Channel Tool can also be used to insert sequences of channel
commands step Delays in any Smart Macro.
M
A
S
T
E
R
S
Y
S
T
E
M
C
O
N
T
R
O
L
L
E
R
Type in Section Title
42
Three Unique Macro Modes
U
S
I
N
G
C
C
P
E
D
I
T
O
R
There are three unique Macro Modes available; True Mode (Normal), Sensor Mode and Variable Mode. Every
button has the potential to do two different macros based on either a variable changing, or how long the user
presses the button. Play with each of the three Macro Modes to get used to them.
Setting the Macro Mode
1 To set the “Macro Mode” of a button, click on the button in the simulator and then click on the
“IF/ElSE” icon in the Macro window toolbar.
2 An “IF/ELSE” statement appears in the Macro window.
3 Double-click on the IF/ELSE statement to open the “IF setting” Macro Mode window.
T
O
P
R
O
G
R
A
M
The proceeding pages describe how to use the three unique modes.
True Mode: If the “True Mode” radio button is selected, the macro will be issued every time the button
is pressed. The IF
Sensor: When the “Sensor” button is selected, the MSC-400 will sense the state of a device whether it
is on or off via the video or voltage sensor and execute the macro.
Variable Mode: In “Variable Mode”, the button can have two different macros. A unique macro will
be issued if the button is pressed when the specified variable is “True”. A different macro will be
issued if the button is pressed when the specified variable is “False”.
Type
IF/Else
in Section
Statements
Title
Programming IF/ELSE Statements
IF Else statement enables you to program a decision into a Macro, making it truly a Smart Macro. What’s the
difference between a normal “stupid” macro and a Smart one? Let’s take a look at how to program a Smart
Macro in MSC-400 Editor:
1 Click on the red Record button, then record a standard macro with the macro steps you need from
the Connected Devices. Afterwards, the macro list for Watch Cable TV (power on the TV, Audio system and the Cable box, then select the correct TV and Audio inputs) might look something like this:
Now, what’s wrong with this macro? Well, it’s not very smart. Here are the problems:
a) It doesn’t know whether the Cable Box is on or off and simply toggles it on or off with a power command. Sometimes the Cable Box will be on, sometimes it will be out of sync and the client will be
extremely irritated.
b) The macro takes a long time because of the 5 second delay before the AUDIO receiver will accept
an Input command. When the system is already on, if the client switches from watching a DVD to
Watching Cable TV, the macro takes more than 5 seconds. Once again, the client is irritated!
OK, let’s fix it. We’ll make this a smart macro by hooking up some sensors to the Cable box and the Audio
receiver. Cable boxes typically have a switched outlet on the rear. Some of them may need you to activate it
via the Cable box setup menu. Place an AC wall adapter (any voltage 3-25v) in the switched outlet and connect it to a URC voltage sensor. Utilize a voltage sensor for the Audio receiver the same way (though many AV
receivers have a 12v trigger built in). Remember you can also use a URC Video Sensor or any of the current,
light or RFI sensors from other manufacturers via a URC voltage sensor. Once you’ve connected the sensor and
noted which input it is connected to, move to the next step.
2 Name and configure the sensors from the Device properties window. Beside the sensor numbers you
use, note the kind of sensor (via the pull down list box shown) and write in a good description to
help you while programming macros by double clicking in the Description field. Click on OK to
close the Configuration window.
3 Double click the Watch Cable TV macro in Tree View. Once it is selected, the Macro Window
should be visible. If it is not, go to the View menu and check the Macro box within the show/hide
area, then double click on the Watch Cable TV macro again in Tree View.
4 In the Smart Macro window tool bar, click the IF/ELSE button. An IF/ELSE bracket will appear at the
bottom of the Macro Window.
43
M
S
C
4
0
0
M
A
S
T
E
R
S
Y
S
T
E
M
C
O
N
T
R
O
L
L
E
R
44
Type
IF/Else
in Section
Statements
Title
5 Drag and drop the IF/ELSE Bracket where you want it. In this case, we want it to sense the Cable
box, so we drag it above the Cable[Power} step in the macro.
U
S
I
N
G
C
C
P
E
D
I
T
O
R
T
O
P
R
O
G
R
A
M
6 Now, drag the Cable (power) step inside the IF statement like this:
After you drag it, the IF statement should look like this:
7 Double click the IF line in the macro window. The IF setting window will appear.
8 In the Type area , select the Sensor radio button.
9 Within the Value area, using the Pull down list boxes, do all of:
a) Select Master from the upper left drop down field. (You would select Slave only in a double
MSC-400 system when you wanted to use the sensors of the 2nd or slave MSC-400)
b) Select the SENSOR from the upper right drop down field. (Sensor 1, Cable Voltage Sensor)
c) Select which state should trigger the IF action within the lower left drop down field. (If the
Cable box is Off), then Click Ok. The configuration will appear in the IF line
in the Macro window.
With these selections, when the Watch Cable TV Macro is triggered, the MSC-400 will look at Master Controller
Sensor Input 1 to determine if the Cable box is OFF. If it is, the MSC-400 will output the TV Power Command.
If the Cable Box is already ON, the MSC-400 will execute the empty ELSE statement (since it is empty, nothing
will happen and the Cable Box will stay on)..
Sensor
Type Triggered
in SectionMacros
Title
Here’s how it looks in the Macro window now:
7 Now let’s take care of the other problem in our macro, the Power On delay for the Audio receiver.
Once again, click on the IF button on the top of the macro window.
8 Drag the Audio power, the Audio input command and the 5 second delay into the If branch.
9 Set the same voltage sensor configuration for the audio receiver as the cable box.
45
M
S
C
4
0
0
M
A
S
T
E
R
10 To Save, click on file within the CCP MSC editor Menu Bar then select Save.
11 To Test, download the MSC Project to the MSC-400. Also see Section: Programming Smart Macro
Triggers to the Remote.
NOTE – Macro Triggers must be programmed to a remote to test Smart Macros from a remote.
Programming Sensor Triggered Macros - Video and Voltage Sensing
Sensor triggered macros are programmed in mostly the same way as normal macros with one key difference.
In the smart macro window under Macro Trigger Setting, instead of selecting normal macro (Step 2 in the
System On Macro, Step 2B in the Source Select Macro examples), select Trigger This Macro When , and set
the appropriate configuration from the pull downs. These are the same settings as in the If Else setting window for a normal smart macro, except here,
rather than being initiated by an RF Trigger from a remote button press, when
the specified condition is sensed, the associated macro is executed. This is
extremely effective for video games. When the game turns on, the presence of
the video game composite video signal on a MSC sensor input will trigger the
associated smart macro, i.e.: Turn the system on if off, select the appropriate
source input for the video game, etc. In addition, one of the sensor inputs will
need to be configured for the sensor of the device triggering the macro. See
section: Properties window for additional information. Otherwise, follow the
steps in System On/Off Macros or Source Select Macros to program a Sensor
Triggered Smart Macro. See Section: Programming Macro Triggers on page 56
for step by step instructions.
Nesting a Smart Macro Alias
This MSC-400 programming feature allows Inserting a Smart Macro within
another Smart Macro as a single line item rather than as individual commands
S
Y
S
T
E
M
C
O
N
T
R
O
L
L
E
R
Type
Toggle
in Section
Macros
Title
46
U
S
I
N
G
C
C
P
and delays. This saves programming time and, when working with long macros, makes reviewing the steps in
the Smart Macro Function List less confusing. This is most useful for programming Toggle Macros. An example
of Nesting Smart Macros has been used in the Toggle Macros section for programming a Toggle Macro for multiple HBO Channels. See Section: Toggle Macros for additional information.
Toggle Macros
Toggle Macros are a way of cycling through multiple similar functions such as surround modes or favorite
channels while using only one button on the remote. That is, if a user has maybe three favorite audio modes
they like to use, the individual commands for those modes can be programmed into a Toggle Macro using the
same process as other macros, but now, when the Macro Trigger Button is repeatedly pressed on the remote,
the MSC-400 will cycle through the list, rather than having to press a separate button for each mode. This
same type of programming can be used for favorite channels. If the user has multiple HBOs available, or just
wants to cycle through a few select favorite channels to ‘see what’s on’, repeated presses of the Toggle Macro
Trigger Button will cycle through the channels. For purpose of example, a Toggle Macro of 6 HBO Channels
will be used. To program Toggle Macros:
1 Create a New Macro Group and appropriate Smart Macros. See Section: Macro Groups and Smart
Macros for additional information.
E
D
I
T
O
R
T
O
P
R
O
G
R
A
M
2 In MSC Editor Model Designer Treeview, click the Toggle Macro to be programmed. (HBO)
3 In the Smart Macro window toolbar, click the Toggle Macro button. A Toggle Macro bracket will
appear in the Smart Macro Function List.
4 To Nest Macros, simply click and drag other smart macros such as the favorite channel macros into
the list of existing commands within the Smart macro window as shown below.
Toggle Macro
5 Repeat Step 4 for all HBO Favorite Channel Smart Macros to be added to the Toggle Macro. (The
‘Favorites’ should have already been tested, so there is no need to test the nested macros at this
point.)
Type
Action
in Section
Variables
Title
6 Save the project and download to the MSC-400. See Section: Saving and Downloading a MSC-400
project for additional information.
7 Open the CCP MSC-400 file and double click on either the CCP MX-980 or MX-6000 remote.
8 Within the CCP MX-980/MX-6000 menu bar, click on View and make sure Hot functions is
checked.
9 Click on the MSC-400’s hot function tab within the property/tool window.
47
M
S
C
4
0
0
10 Select your desired base station from the drop down list.
11 Select a smart macro from the macro group list and drag to a desired button on the simulator of the
MX-980 and MX-6000. Once the smart macro trigger has been dragged a purple T confirmation will
appear on the button. See Section: Programming Macro Triggers to CCP Remotes on page 55 for
additional information.
12 Save the project and download to the remote.
With this programming, the user will be able to cycle through all 5 HBO Channels by repeatedly pressing the
button that the Toggle Macro has been programmed to.
M
A
S
T
E
R
Action Variables
Variables enable the MSC-400 to track the status of a device or a user by “remembering” what state it/he/she is
in.
Think of them as a way for the MSC-400 to take notes while your client uses the system so that when your
client presses a button, the MSC-400 can make a decision on the best thing to do in the Smart Macro.
There are some important rules that will help you use variables:
1 The MSC-400 supports up to 255 variables. Each must be named uniquely to be used. Thus, to create a variable, simply create a unique name for it.
2 A variable can be equal to one of two states: True (1) or False (0)
3 By default, after downloading to the MSC-400 all variables are FALSE.
4 You can do two different things with Variables in Smart Macros:
a) Set a Variable to be either TRUE or FALSE
b) Write an IF/ELSE statement that does one step or series of steps if the Variable is TRUE, and
something else if the Variable is FALSE.
Can Variables get “Out of Sync”? `
Yes they can. Variables are not as trustworthy as actually sensing what state a device is in via Video or Voltage
sensors. There are two dangers, one of which the MSC-400 eliminates perfectly:
1 In a typical macro generated by a remote control tracking power status via variables, any IR command can be easily corrupted or missed so that it doesn’t work. Thus, the remote control “thinks” the
component is on, but in reality it is off- “out of sync”.
S
Y
S
T
E
M
C
O
N
T
R
O
L
L
E
R
Type
Action
in Section
Variables
Title
48
The MSC-400 eliminates this problem, since IR commands are perfectly generated and never miss.
U
S
I
N
G
C
C
P
2 If the client walks up to the device and powers it on manually or with the device’s original remote
control, there is no way for the MSC-400 to track the change. Thus, it will be “out of sync”.
Only you, the installer can eliminate this problem, by training the client to never use the front panel or original
remote control to power on or off a variable tracked device.
An Example of Action Variables at Work
In the example system, the Audio receiver has discrete on and off commands, but requires a 5 second turn on
delay before you can change the Inputs. The client switches from watching cable to watching satellite quite frequently every night, so making the input change quickly is important.
1 Select the Smart Macro to reveal it’s existing programming.
Here you can see that a conventional macro will power on the TV, the Cable box, the Audio receiver, then
delay 5 seconds before setting the TV and Audio inputs. This macro is fine when the Audio receiver was off,
but it is unnecessarily slow when the Audio receiver is already on.
E
D
I
T
O
R
T
O
2 Click on the IF button to add an IF/ELSE line in the macro.
3 Double click on the IF line to open the IF Setting window.
P
R
O
G
R
A
M
The IF Setting window appears:
4 Click on the Action Variable radio button.
5 Click on the New button.
The Action Variable Setting window appears:
6 Type in the name for your new variable here within
the field above the Add and Delete buttons.
Since the variable will be either True or False, name it so that one state is described. In this case, we are track-
Type
Action
in Section
Variables
Title
ing power so we’ve named the variable “Audio is ON”. This state can either be True or False, so
the label is very descriptive.
Now, click on the Add button. You could add as many variables as
needed. When you are finished, click on OK.
7 Now, you complete the IF setting by choosing True or False
using the list box.
8 Now you are using dragging or copy(ctrl +c) and paste(ctrl + v) to create the steps you need in both
the IF branch and the ELSE branch.
When the Smart Macro runs, it will check the state of the variable and only run one branch, either the IF or
the ELSE branch of the macro. Each branch can have as many steps as you need.
Try sounding out the sentence “If Audio is On is True do this: ELSE if Audio is ON is False do this:” Makes
sense. You’d put the Inputs alone in the IF branch and all the power commands, the delay and the inputs in the
ELSE branch.
What if you said “If Audio is ON is False do this: ELSE if Audio is ON is True do this.” That also makes sense,
but you’d now put the power commands, the delay and the inputs in the IF and the inputs alone in the ELSE
statement .
The key is to understand the difference in the logic when you actually program the steps in the IF branch and
the ELSE branch. So sound it out and if it sounds illogical to you, go back to Step 7 and reset the variable state.
It needs to make sense to you, the programmer!
49
M
S
C
4
0
0
M
A
S
T
E
R
S
Y
S
T
E
M
C
O
N
T
R
O
L
L
E
R
50
Type
in Section
Title
Action
Variables
9 Finally, the critical step of setting the variable. This is done by clicking on the Action Variable button
on the Smart Macro toolbar and inserting a Variable setting as a new step in the macro.
U
S
I
N
G
C
C
P
10 Change the state of our “Audio is ON” variable to TRUE. Click on OK to close the window.
E
D
I
T
O
R
T
O
P
R
O
G
R
A
M
11 The new variable setting appears in Smart Macro window. Drag it into place in your IF Else statement .
Remember every place that the Audio Receiver’s power state changes needs to have the variable set correctly.
Now you just need to repeat for all your Smart Macros. Don’t forget the System Off smart macro, since it will
change the Audio Receiver to off, thus the variable Audio is ON needs to be set to FALSE.
Adding Relay Commands to Smart Macros
The MSC-400 has two Dry Contact Relays that can be used for a variety of functions such as opening and closing drapes, operating lifts, screens or activating switched devices such as amplifiers, switched outlets, etc.
There are six switch modes to choose from: Latching ON, Latching OFF, Press and Hold ON, Press and Hold
OFF, Timed ON and Timed OFF. Example: Relay 1 is connected to a mini plug that is connected to the 12V
Type inRelays
Section Title
51
Control IN on a Power Amplifier (it is also connected to the 12V Convenience Terminal on the MSC-400 as the
source of the control voltage). The Relay configuration is Normally Open (NO). When the ON Command is
issued, the Relay will close, 12V will be present on the mini plug and the amplifier will turn ON. When the
OFF Command is issued, Relay 1 will open, the control voltage is cut and the amplifier turns OFF.
M
S
C
4
0
0
The exact opposite would occur if the Normally Closed (NC) configuration were used. When the ON
Command is issued, the Relay will open, interrupting normal operation, and when OFF is issued, the Relay
will close and the normal function will resume.
Both examples are also true of the Press and Hold options, the difference being, with the Latching ON and
OFF commands, the Relay remains open or closed until the next command is issued. With Press and Hold, the
Relay will open and close with the same logic, but now, will remain open or closed only for as long as the
command is being sent from the remote, or, for the duration set in Minimum Press Time.
Relays can be embedded into Smart Macros and will execute as programmed as steps in System ON/OFF or
Source Select Macros without any additional programming. However, in order to control a Relay with a button
press from a remote, a Macro Group: Relay Commands, will need to be setup in order to create the RF Triggers
required for control of the Relay from a remote. To program Relay Commands:
Embedding Relay Commands in a Smart Macro
In a previous section a Source Select Macro was created for DVD 1in the Example System. Mr. and Mrs.
Example have just added a new powered subwoofer to their Home Theater and want to activate it automatically when DVD 1 is selected.
1 In CCP MSC Editor Model Designer Treeview, click the DVD 1 Source Select macro so it is featured
in the Smart Macro window.
2 In the Smart Macro window tool bar, click the Relay button.
3 The Relay Setting window will appear.
Relay Setting On
4 In the Value Block, set the Type of command to be issued in the macro using the pull-down. (ex.
ON).
M
A
S
T
E
R
S
Y
S
T
E
M
C
O
N
T
R
O
L
L
E
R
52
Type inRelays
Section Title
4 In the Target block, select Master/Slave as appropriate, using the pull-down. (ex. Master)
U
S
I
N
G
C
C
P
5 In the Target block, select Relay Port 1 or 2 using the pull-down. (ex. Relay 1)
6 To Test the command, with the PC connected to the USB1 front port on the MSC-400, click the Test
button. There should be an audile ‘click’ as the relay opens or closes in test mode.
7 Click Ok. The command will appear at the bottom of the Smart Macro Function List.
8 Drag the Relay command to the appropriate position in the smart macro inside the If statement.
DVD1
9 Click the Relay command to highlight it. Copy (Ctrl + C) and Paste (Ctrl + V) the command, then
drag it to the appropriate position in the Else statement. This way the sub will activate regardless of
system status.
E
D
I
T
O
R
T
O
P
R
O
G
R
A
M
DVD 1 Source Select Smart Macro With Embedded Relay Commands
10 To Test the edited macro, Save the project and then Download to the MSC-400.
11 If already programmed with a RF TRIGGER for DVD 1 SOURCE SELECT, press the DVD 1 BUTTON
on the remote. If not see section: PROGRAMMING MACRO TRIGGERS TO THE REMOTE. Pg #
TIP - Some additional tweaking of the macro, such as adding some delay or a
mute command while the sub comes on, may be desirable. Each system and set of
components will behave differently.
Type inRelays
Section Title
53
Creating a Macro Group for Relay Commands
In order to control the MSC-400 Relays directly from the remote, for functions such as opening and closing
drapes, a Macro Group will need to be setup to create the RF Triggers to activate the Relays from the remote.
To create a Macro Group for Relay Commands:
1 To open the Make Smart Macro window do either of:
a) Click on Program from the Menu Bar then select Make Smart Macro.
b) Right click on MSC-400 within the Model Designer Treeview and select Add Macro Group. Right
click on the new Macro Group and select Make Smart Macro.
Program Menu
Model Designer Treeview
Treeview Pop up
c) The Make Smart Macro window will appear.
M
S
C
4
0
0
M
A
S
T
E
R
S
Y
S
T
E
M
Make Smart Macro Group
2 Click the New Group button. The Add Action Group window will appear.
3 In the Add Action Group, type the Name of the New Group. (Relay Macros) Click Ok. In the Macro
Group drop down window, Relay Macros will appear.
4 In the Smart Macro box, double click in the box directly under Smart Macro. The Text Tool will activate. Type the name of the Relay Smart Macro. (Enter something meaningful like Relay 2 Drape
Open, etc.)
5 Press Enter on the PC KEYBOARD and type the name of the next Smart Macro. (Relay 2 Drape
Close)
C
O
N
T
R
O
L
L
E
R
Type inRelays
Section Title
54
6 Click Save and click on the X in the upper right hand corner to exit.
U
S
I
N
G
C
C
P
7 The new Macro Group will appear at the bottom of the Model Designer.
8 Click the ‘+’ next to Relay Macros to expand the group.
9 Click the Relay 2 Drape Open Smart Macro then click the Relay button within the smart macro toolbar. The Relay Setting window will appear.
E
D
I
T
O
R
11 In the Value block set the Type of Relay using the pull-down. (ex. Press & Hold On)
T
O
P
R
O
G
R
A
M
12 If appropriate, set a Minimum Press Time from .1 TO 32.3 Seconds. This will have the relay close (or
open) for the duration designated in Minimum Press Time or for the duration of the button press,
whichever is longer. For a purely Press & Hold command set the value at .1 second.
13 In the Target block, set MSC to Master/Slave as appropriate, using the pull-down.
14 In the Target block, set Relay port to Relay 1 or 2.
15 Click Ok.
16 Repeat Steps 9-15 for all other Relay Smart Macros.
17 To Test a Relay command with a Timed Duration (with the PC connected to the MSC400 USB1 front
port) click the Test button. There should be two audible clicks, from the MSC-400, equal to the value set
in Minimum Press Time, indicating the relay is changing state.
18 To test a pure Press & Hold command, or any other Relay commands from the remote, Save and
Download the MSC project. See Section: Saving and Downloading a MSC-400 project for additional
information.
Saving
Type and
in Section
Downloading
Title
19 In MX/TX Editor, program the appropriate buttons for the RF Triggers for the Press & Hold Relay commands or any other Relay commands to be tested from the remote. See Section: Programming
Macro Triggers to CCP Remotes on page 55 for additional information.
20 Save and Download the MX/TX project. See Section: Saving and Downloading a MX/TX Project.
21 Test from the remote by Pressing and Holding the appropriate buttons.
Saving And Downloading A MSC-400 Proejct
When all configuration and programming have been completed, the MSC-400 Project should be saved and
downloaded to the MSC-400.
1 To Save, in the CCP MSC Editor Menu Bar click File, then Save.
TIP - If Saving a Project for the first time, a main Folder titled ‘Universal Remote
Control’ should have already been created in My Documents while configuring the
remote and IR commands. It is highly recommended that specific folders be created
for Device Files and Project Files as a method for easily being able to save and locate
important system and programming data.
Downloading a CCP MSC-400 Project
1 Using the included USB cable, connect a USB port on the PC to the USB 1 front port on the MSC400 Front Panel
2 In the CCP MSC Editor Menu Bar, click Program, then click Download OR click Communications
and Send to Remote.
3 The Download window will appear. Highlight the MSC-400 then click Download to begin the
process. To cancel Download click on Close.
4 When successfully downloaded, the CCP MSC window will appear with the message: The
Download was successful.
5 Click Ok. The MSC-400 is ready for action.
55
M
S
C
4
0
0
M
A
S
T
E
R
S
Y
S
T
E
M
C
O
N
T
R
O
L
L
E
R
56
Type
Dragging
in Section
Triggers
Title
Programming Macro Triggers to CCP Remotes
U
S
I
N
G
C
C
P
E
D
I
T
O
R
Smart Macro Triggers are individual commands sent by a remote to the MSC-400 to initiate the output of a
Normal Macro. Once the MSC-400 has been configured, programmed and tested (and the MSC file is saved),
the Smart Macro Triggers need to be dragged into the correct button on the remote control. When any Smart
Macro is created in CCP MSC Editor, a corresponding trigger is automatically created ‘behind the scenes’. They
must however be manually set to the specific buttons on the remote.
To drag Smart Macro Triggers to buttons on remotes:
1 With the CCP MSC-400 file opened, double click the MX-remote from the Home Designer.
2 On the Menu Bar, click on View and make sure Hot functions is checked.
3 Click on the Base station Hot functions tab within the Property window.
4 Select your desired base station from the drop down list.
5 Select a smart macro from the macro group list and drag either to the desired button on the simulator of the MX-980 or MX-6000 or within the macro window. Once the smart macro trigger has been
dragged a purple T will appear on the button.
T
O
6 Repeat step 5 to program all macro triggers to the appropriate buttons.
P
R
O
G
R
A
M
Simulator window with Triggers represented by purple T’s.
Type
HyperTerminal
in Section Title
Using HyperTerminal to Test ASCII RS-232 Codes
Introducing HyperTerminal
Even the most advanced programmers can sometimes have trouble utilizing RS-232 commands. Poorly
documented instructions can make it very difficult to determine if you are properly coding your commands.
Minor transcription errors can be easily overlooked and even small flaw in the control cable can lead to hours
of frustration as you try to determine where the problem is. To make things easier, we’ve prepared this document that explains how to set up and use HyperTerminal to test your codes and your components.
HyperTerminal is a free program included with Microsoft Windows (get a Vista compliant version here:
http://www.hilgraeve.com/htpe/download.html ) that makes it possible for your computer to send and receive
RS-232 codes. This program will allow you to verify that the RS-232 commands you’ve written for the MSC400 are correct. You can also use HyperTerminal to test the codes being sent out of the MSC-400 when all
other troubleshooting techniques have been exhausted. Keep in mind that this only works for ASCII codes –
we’re researching to find a program that serves this same function for HEX based codes.
While this document will show you how to set-up and use HyperTerminal it is not written as a primer on
RS-232. For further details on what RS-232 is and how to use it in the MSC-400, please view our tutorial now
available on the installer only website.
How to set up HyperTerminal
1 To use HyperTerminal you first need to open the program. Do this by clicking on Start (bottom left
corner of your screen), select All Programs, select Accessories, then select Communications and
finally HyperTerminal. This will open the HyperTerminal program.
57
M
S
C
4
0
0
M
A
S
T
E
R
S
Y
S
T
E
M
2 HyperTerminal opens and immediately a box pops up that asks for a connection description.
C
O
N
T
R
O
L
L
E
R
58
Type
HyperTerminal
in Section Title
3 Create a name – We suggest RS-232 Testing – and then select an icon to use.
U
S
I
N
G
C
C
P
Click on Ok, which will bring up a new option that asks you to select a phone number. We aren’t using a
modem, so a phone number won’t be necessary. Just click on the drop down menu labeled “Connect Using”
and select an open COM port (you may have more or less COM ports than you see in the example below). To
check which COM ports you have available, see Note below
E
D
I
T
O
R
T
O
P
R
O
G
R
A
M
NOTE:If you have a number of COM ports listed and wish to know which is available, there is a way to examine all ports. Follow these clicks:START>CONTROL PANEL>SYSTEM> This will open the System Properties
Box. Select the HARDWARE tab, then select DEVICE MANAGER. Click on PORTS (COM & LPT) and look for
the port labeled COMMUNICATIONS PORT.
4 After selecting your COM port, click on Ok. This brings up a
new box, COM1 PROPERTIES (if you are using a different
COM port its name will appear instead of COM1).
The default values will appear. If you have different communications
requirements (as provided in the manufacturers documentation) you can
enter them here. Click on OK to accept the settings.
Type
HyperTerminal
in Section Title
5 You are now seeing the main HyperTerminal window. This is where you’ll be entering your RS-232
commands for testing and it is also where you can examine RS-232 commands that are sent out by
the MSC-400.
59
M
S
C
4
0
0
M
A
S
T
E
R
Before we can start the testing process, there is one more thing you have to do. By default, feedback (status
return messages) don’t appear in HyperTerminal. To ensure that you have sent out the correct commands it
often helps to see the response from the device you are trying to control. To see those response, you’ll need to
follow the instructions in step 7.
6 Select the File option, then Properties in the HyperTerminal window. This will open a new window
with two tabs, Connect To and Settings. Choose the Settings option.
S
Y
S
T
E
M
C
O
N
T
R
O
L
L
E
R
Type
HyperTerminal
in Section Title
60
7 Click on ASCII Setup. This will bring up another new box, “ASCII” Setup…”. You need to check the
box labeled “Echo typed characters locally”, then click Ok.
U
S
I
N
G
C
C
P
E
D
I
T
O
R
T
O
P
R
O
G
R
A
M
NOTE: In addition, most installers find it helpful to check the boxes labeled “Send line ends with line feeds”
and “Append line feeds to incoming line ends”. These two options make it easier to read the data as you type
it and to easily comprehend any replies the device sends back to your computer.
How to use HyperTerminal
You’ll need a DB9 to DB9 cable that is female on one side (to match your computer) and male or female on
the other side (to match the device you are communicating to). The manufacturer of the device you are trying
to control will state in their RS-232 documentation whether you need a null modem or straight through cable.
Connect your computer to the device with this cable and start typing in commands. Keep in mind:
1 It is not usually necessary to hit the ENTER key to execute those commands.
2 Any responses from the device will appear in HyperTerminal. The documentation you receive from
the device manufacturer will explain how to interpret those responses.
Tips and Tricks
* HyperTerminal is an instant connection to the devices you are controlling. Because of this it is possible that
the program will sometimes send commands too slowly to the device. In our testing with a Denon receiver,
we discovered that we couldn’t type commands fast enough for the receiver to understand them. To fix this
we instead typed the commands into Word Pad (another free program included with Windows) and then used
the Cut and Paste feature to insert them into HyperTerminal. To do this you open Word Pad, type in the command, then hit <Ctrl> V to copy the command. Then use <Ctrl> to paste the commands into HyperTerminal.
This causes the info to instantly be sent to the device and eliminates any timing issue in your test commands.
* You can take one of the RS-232 output ports from the MSC-400 and plug that directly into your computer.
This will allow you to see exactly what message the MSC-400 is sending to a device and verify that it is what
you intended to happen. Just plug the MSC-400 RS-232 control cable into the output for a given RS-232 controlled device and plug the other end into the serial port on your computer. Launch HyperTerminal and con it
to match the communication requirements of the controlled device (usually 9600, 8, N, 1). Pick up the handheld remote that you’ve programmed and push a few buttons for the RS-232 controlled device. HyperTerminal
will display exactly what the MSC-400 sends out and you can now compare that to the information you programmed into it. This is a great way to troubleshoot installations where you suspect that you have a bad RS232 cable or (rarely) a defective MSC-400.
PC
Type
Keyboard
in Section
Emulation
Title
PC KEYBOARD EMULATION
As a convenience, a MSC-400 compatible remote can be programmed as a PC Keyboard emulator for alpha
search commands when used with a Windows Media Center PC. The user should have a proper wireless keyboard for use with the PC, but having alpha search capability from the remote allows additional control capability without having to switch back and forth between the remote and keyboard.
To add this feature, a PC device will need to be created in the remote project and a multi-page ‘zooming keyboard’ will be created that will provide individual letter buttons using the LCD and Soft Keys. Page 1 of the PC
Device will show the letter buttons available on each page.
61
M
S
C
4
0
0
M
A
S
T
E
R
PC Keyboard Emulator Page 1
Zooming to one of the pages (via a Goto Page Command) makes the individual letters available for use. PC
Keyboard Emulator A Jump Command can be added to each letter, to return to Page 1 after each letter is sent
to speed up letter navigation, or if the user prefers, the letter pages can be navigated manually using the Page
UP/DOWN Buttons.
S
Y
S
T
E
M
To Program a Remote for PC Keyboard Emulation
1 In the CCP MSC Editor Menu Bar, click Program, then click Create & Name Devices. Add a device
named PC and add the BLANK SKIN pages via the Layout step. Close the Program window.
2 In CCP Model Designer Treeview, click the ’+’ next to PC to expand the page list.
3 Double click on PAGE 1 to display in simulator.
4 Make sure the Properties tab is highlighted then click on the very top button within the simulator.
5 Back in the Properties tool box, type PC inside the text box within the Text field. If a blank template
was selected then type the alphabet in using the properties button field. Create a Main keyboard
page by entering text within the Text field for the alphabet as shown above in PC keyboard emulator
page 1 with ABCDEF on Button 1, GHIJKL on Button 2, MNOPQR on Button 3, STUVWX on
Button 4, YZ on Button 5 and SPACE on Button 6. (With each press of a letter button returning to
Page 1, a space can be inserted between words when necessary, before selecting the next letter
page.)
C
O
N
T
R
O
L
L
E
R
PC
Type
Keyboard
in Section
Emulation
Title
62
6 In Model Designer Treeview, click the Page 2 icon.
U
S
I
N
G
C
C
P
E
D
I
T
O
R
PC Keyboard Emulator Page 2
7 Using the Button Editor, add the letters A-F to the individual buttons as shown in PC Keyboard
Emulator Page 2 and click Save.
8 Highlight the ’A’ button on page 2 of the PC device.
9 Click the Jump Button.
a) The Jump Setting window will appear.
T
O
P
R
O
G
R
A
M
10 In the Jump Setting window navigate and select PC. Click Ok. Repeat this process for the entire
alphabet.
11 Click on the IR Database Navigator tab from the Properties and Tool window.
PC
Type
Keyboard
in Section
Emulation
Title
12 In the IR Data From field select AUX. In the box directly to the right, enter the Setup Number: 501
for letters or 502 for any special characters that may be desirable for a particular user requirement.
DO NOT make any changes to: Brand, Model or Repeat.
63
M
S
C
4
0
0
M
A
S
T
E
R
13 Double click on PC page 2 of the Model Designer and select the ’A’ button. Drag the ‘A’ from the
Database window to a simulator button. Adding the function to the button also adds the text. Now,
any time the ‘A’ BUTTON is pressed, the ‘A’ will be issued and the remote ‘keyboard’ will return to
PC page 1 for selection of the next letter. (If the user preference is to navigate the letters manually,
omit the Goto page instructions in Steps 10-11.)
14 Repeat Steps 8-14 for the remaining pages, until all letters and a space command have been added
to the PC device.
15 Save the project and Download to the remote. See Section: Saving and Downloading a CCP Project
for additional information.
NOTE - The Media Server PC must be connected to the USB2 Port on the MSC-400 Rear Panel.
S
Y
S
T
E
M
C
O
N
T
R
O
L
L
E
R
64
Master/Slave
Type in Section
Systems
Title
PROGRAMMING MASTER/SLAVE SYSTEMS
U
S
I
N
G
C
C
P
E
D
I
T
O
R
T
O
P
R
O
G
R
A
M
Programming a Master/Slave System is essentially programming a system with two MSC-400s. Each Controller
will be configured for the devices it is sensing and controlling, the main differences are, in Configure Home,
MSC400 Properties controlled by the Master are set to Master and the devices sensed and controlled by the
Slave are set to Slave. Additionally, each Controller is configured with a different RFID. The remote(s) used in a
Master/Slave system are also set up essentially the same as in a single controller system, but are also configured for two RFID’s…one for the Master and one for the Slave.
Smart Macros, in Master/Slave Systems, are programmed exactly the same as with single controller systems. As
long as the individual Connected Device Properties and Sensor Input assignments are correct, Smart Macros
need no additional programming. However, in a Master/Slave system, the two controllers must be connected
via Output Port 12 on both controllers so the Master can communicate with the Slave to tell it when to output
specific commands in Smart Macros. To make this connection work, the PORT 12 TO SLAVE BOX must be
checked when downloading to both controllers. See section: CONNECTIONS/MASTER SLAVE SYSTEMS for
additional information. Pg#
For the purpose of explanation, an Example System with 15 devices will be used. The Master Controller has
eleven A/V Connected Devices, both IR and RS232 Controlled, and the Slave has four automation Devices
also both IR and RS232 controlled. All Smart Macros for this system have already been created and will not be
covered in this section. See section: MACRO GROUPS AND SMART MACROS for additional information.
Configuring MSC Master and Slave Controllers
1 In CCP Editor, select Program then Configure Home.
Master/Slave
Type in Section
Systems
Title
2 Add a second MSC-400 base station.
3 A model property window opens.
4 Select a RFID and check the box for slave of and select the primary MSC-400.
5 Click Ok.
6 Highlight one of the MSC-400 base stations from the House Designer and select a port.
7 To set RFID when using TX-1000 or MX-900 with More than 6 Devices IR Devices on Either controller, set the Primary RFID only. Use any RFID from ID11to 1F for IR Control from Ports 1-11.
8 To set RFID when using MX-3000 or MX-950 with More than 6 IR Devices on Either controller, set
the Primary and Secondary RFIDS. Use any two RFIDS from ID 01 to 0F for IR Control from Ports 111.
NOTE: The Instructions in Steps 6-7 relate to IR Control from Ports 7-11. If RS232 Devices are controlled via
Ports 7-11, then any RFID can be used for any remote and the Secondary RFID does not need to be set in Step
7.
9 Within the Serial Port Setting page, select (check mark) the Port 12 to Slave MSC-400 box. The Port
12 Setting line will gray out.
10 Click Ok.
11 To Save, In the CCP MSC Editor Menu Bar, click File, then click Save.
12 To download to the MSC-400 Master Controller, with the PC connected to the USB1 Port on the
MSC Master, Download by doing either of:
a) In the CCP MSC Editor Menu Bar, click Communications, then click Send to Remote.
b) In the CCP MSC Editor Menu Bar, click Program, then click Download.
65
M
S
C
4
0
0
M
A
S
T
E
R
S
Y
S
T
E
M
C
O
N
T
R
O
L
L
E
R
Reference:
Type inFeatures
Section and
TitleParts
66
GENERAL INFORMATION
U
S
I
N
G
MSC-400 MASTER SYSTEM CONTROLLER
The MSC-400 is the heart and brains of any home entertainment system. All system components, (RFX-250 RF
Sensor, Status Sensors, Emitters, RS232 Cables, and USB to Media Center Cables) are connected to the MSC400. It enables simple, reliable control and provides flexible, comprehensive connections that allow the seamless integration of any system device.
MSC-400 Front Panel Features
C
C
P
MSC-400 Front Panel
E
D
I
T
O
R
T
O
P
R
O
G
R
A
M
1 Power LED – One, blue LED illuminates to indicate MSC-400 power supply is attached and connected to AC power.
2 Status LED – One, blue LED flashes when an RF signal from a MSC compatible remote is received
and understood via the RFX-250 Sensor.
3 USB1 LED – One, blue LED illuminates to indicate that a PC is connected to the MSC-400 front
panel USB1 Programming Port.
4 USB2 LED – One, blue LED illuminates to indicate that a Media Center PC is connected to the MSC400 rear panel USB2 Port.
5 Video Or Voltage Sensor LEDS – Six, green LEDs illuminate to indicate that devices connected to the
corresponding MSC-400 rear panel sensor inputs are ON by sensing the presence of composite
video or AC or DC voltage.
6 IR Learning Sensor – One, IR sensor used to learn IR commands into a MSC Project File when a particular code is not available in the IR Database.
NOTE - Using one of the MSC-compatible remotes connected directly to the PC running CCS is recommend
ed for convenience in learning IR Commands.
7 USB1 Programming Port – One, USB Type B Port connects to a PC running CCS for programming
the MSC-400.
Reference:
Type inFeatures
Section and
TitleParts
MSC-400 Rear Panel Features
MSC-400 Rear Panel
8 IR Programmable Outputs (1-6) – Six, 3.5 mono mini jacks connect to IR emitters for IR control of
Connected Devices. These Ports can be cond as discrete, ‘routed’ outputs that only send IR commands to the specific device that each emitter is attached to. This allows selective control of multiple
same-brand, same-model components, (multiple DVD players, SAT receivers, etc.) and assures accurate control in that a given component’s commands are routed only to it’s dedicated IR output and
emitter, preventing IR splash from multiple emitters flashing at the same time. POLARITY: TIP=IR
data; SLEEVE=GND.
9 IR Or RS232 Programmable Outputs (7-12) – Six, 3.5 mono mini jacks configurable for RS232 or IR
output for control of Connected Devices. When used as RS232 outputs, a special 4-circuit mini plug
to DB9 cable must be used. (Universal Remote Control Part #’s: RS232M-male DB9 and RS232Ffemale DB9). When used as IR outputs, these jacks have the same characteristics as jacks 1-6, but a
special ‘sleeved emitter’ (URC Part # IRS6), should be used to protect the emitters from burning out
due to potential long term exposure to voltage output from the jack pins normally used for RS232.
POLARITY (RS232): TIP=no connection; RING 1=TX (red wire); RING 2=RX (white wire); RING
3=GND (shield). POLARITY (IR): TIP=IR data; SLEEVE=GND.
10 IR In – Three-pin plug-in connector allows MSC-400 control from properly programmed IR keypads
and compatible repeater systems.
11 RF In (Plug-In) – Three-pin plug-in connector allows parallel connection of up to three RFX-250 RF
Sensors for extended range in large systems. Also used for RFID Input from RF OUT on a Master
MSC-400 in a Master/Slave System. (Max number of connected RFX-250 Sensors includes a sensor
connected to the RF IN mini jack.)
12 RF In (Mini Jack) – 3.5 mono mini jack connects to a single RFX-250 using the included 10’ threecircuit mini-mini plug cable. Also used for RFID Input from RF OUT on a Master MSC-400 in a
Master/Slave System. POLARITY: TIP=+5VDC; RING=data; SLEEVE=GND.
13 RF Out – 3.5 mono mini jack connects to the RF IN on a MSC-400 Slave unit in Master/Slave
Systems using two MSC-400 Controllers. This jack can also connect to the RF IN on a MRF Series
Basestation for control of system components located away from the main component area. POLARITY: TIP=data; SLEEVE=GND.
14 USB2 – USB Type B port allows control of a Media Center PC.
15 DC 12V – 2.1mm coaxial jack connects to the included 12VDC, 3.5A power supply. POLARITY:
PIN=+12VDC; SLEEVE=GND.
16 12V Out – Two-pin plug-in connector terminal provides a constant 12VDC supply for MSC-400
Relays 1&2, when used with voltage controlled devices that require external 12VDC to activate.
NOTE: Total draw (Relays 1&2) should not exceed .5A.
17 Relay 2 – Three-pin plug-in connector terminal provides configurable switch closure modes for control of devices that require a switch closure for activation. Discrete Open and Close commands are
67
M
S
C
4
0
0
M
A
S
T
E
R
S
Y
S
T
E
M
C
O
N
T
R
O
L
L
E
R
Reference:
Type inFeatures
Section and
TitleParts
68
U
S
I
N
G
C
C
P
E
D
I
T
O
R
programmable for three modes of operation: Latching, where the relay stays closed until told to
open, (or stays open until told to close), Timed Momentary, where the relay can be set to stay open
or closed for a specific duration, or Momentary, where the relay stays open or closed for as long as
the remote button is pressed and held. DURATION (TIMED MOMENTARY): .1-99.9 seconds. RATING: 30V; .5A. (Total draw of Relays 1&2 cannot exceed .5A.)
18 Relay 1 – Three-pin plug-in connector terminal provides configurable switch closure modes for control of devices that require a switch closure for activation. Discrete Commands for Open and Close
are programmable for three modes of operation: Latching, where the relay stays closed until told to
open, (or stays open until told to close), Timed Momentary, where the relay can be set to stay open
or closed for a specific duration, or Momentary, where the relay stays open or closed for as long as
the remote button is pressed and held. DURATION (TIMED MOMENTARY): .1-99.9 seconds. RATING: 30V; .5A. (Total draw of Relays 1&2 cannot exceed .5A.)
19 Video Or Voltage Sensors – Six, 3.5 mono mini jacks connect to Universal Remote Control VID-6
Video Sensor Cables for sensing composite video or VS-1006 Voltage Power Sensors for sensing
AC/DC voltage. When composite video or voltage is detected, the MSC-400 recognizes that the connected device is ON. System Power ON/OFF macros, conditional IF/ELSE Smart Macros and other
control modes are typically associated with the status of these sensor inputs. When an ON condition
is detected at the sensor input, the corresponding front panel sensor LED will illuminate to indicate
the ON condition.
MSC-400 Top Panel Features
T
O
P
R
O
G
R
A
M
MSC-400 Top Panel
20 IR Output Levels – Twelve, rotary controls allow adjustment of corresponding IR emitter outputs 112 on the MSC-400 Rear Panel. These pots do not adjust output level on jacks 7-12 when they are
cond for RS232 control. RANGE: +X to –X.
Reference:
Type inFeatures
Section and
TitleParts
RFX-250 RF SENSOR
The RFX-250 receives narrow-band radio signals from compatible narrow-band RF remote controls and relays
them via a connecting cable to the MSC-400. The narrow-band RF technology and advanced protocol used in
the RFX-250 improves reliability and extends receiving range. The compact size and detached design enables
the RFX-250 to be placed in discrete locations, away from RF interference generated by system components
(when necessary).
RFX-250 RF Sensor Features
69
M
S
C
4
0
0
M
A
S
T
E
R
RFX-250 RF Sensor
21 Antenna – One flexible antenna, receives RF signals from MSC compatible remotes. The antenna
can be rotated and angled to optimum reception position.
22 RF Out (Mini Jack) – One three-circuit 3.5 mono mini jack provides power to the RFX-250 and
sends understood RF commands to the MSC-400. This jack can be connected to either of the RF IN’s
on the MSC-400 rear panel. POLARITY: TIP=+5VDC; RING=data; SLEEVE=GND.
23 RF Out (Plug-In) – One three-pin plug-in connector terminal provides power to the RFX-250 and
sends understood RF commands to the MSC-400. This terminal can be connected to either RF IN on
the MSC-400 rear panel.
24 RF LED – One red LED flashes when the RFX-250 is receiving RF signals from a MSC compatible
remote. This LED will also turn on in a range from low glow flicker to full on constant, when RF
noise is present. This is useful in troubleshooting for positioning the RF Sensor in a location clear of
RF interference (LED off).
25 Power LED – One red LED illuminates to indicate the RFX is powered from the MSC-400.
S
Y
S
T
E
M
C
O
N
T
R
O
L
L
E
R
70
Reference:
Type inFeatures
Section and
TitleParts
VS-1006 VOLTAGE POWER SENSOR
U
S
I
N
G
The VS-1006 Voltage Power Sensor allows voltage output of a system component to be used to monitor that
component’s ON/OFF status for power management when the device does not have discrete commands or a
composite video output is not available for video sensing. Some components provide 12V Status Outputs
while with other applications, a DC power supply plugged into a component’s switched outlet can be used to
provide device status.
VS-1006 Voltage Power Sensor Features
C
C
P
VS-1006 Voltage Power Sensor
E
D
I
T
O
R
T
O
P
R
O
G
R
A
M
26 Sensor Plug – One four-circuit 3.5 mono mini plug connects to one of the Video or Voltage Sensor
Inputs on the MSC-400 rear panel.
27 Power LED – One red LED illuminates to indicate the VS-1006 is properly connected to and powered from the MSC-400.
28 Sensed Voltage Input – One two-pin plug-in connector terminal connects to the AC or DC voltage
output of the device being sensed. POLARITY: Not critical on VS-1006 end. RATING: 3-25 V AC or
DC. WIRE GAUGE: Up to 14AWG.
Reference:
Type inFeatures
Section and
TitleParts
VID-6 VIDEO SENSOR CABLE
The VID-6 Video Sensor Cable is a special cable assembly that connects the composite video output of a connected device to a Video or Voltage Sensor Input on the MSC-400 rear panel. This method provides excellent
conditional status sensing with devices that feature a switched composite video output. Not all devices turn
the composite video output off when in standby – some switch to a black screen. A black screen looks off and
protects some types of video displays from ‘burn in’, but there is still a sync code present that is not compatible with video sensing for ON/OFF status. For devices that output a black screen, use a VS-1006 Voltage Power
Sensor from a switched outlet (or status output on the device if available), a sensed AC outlet that outputs 12V
or discrete IR ON/OFF codes or RS232 commands.
VID-6 Video Sensor Cable Features
VID-6 Video Sensor Cable
29 RCA Plug – One RCA plug connects to the composite video output of a system Connected Device.
Typically, unless multiple composite outputs are available, a Y adaptor can be used to connect the
device video output to both the video input the signal is being sent to (Video Display) and the MSC400 sensed input with no loss of signal quality.
30 Sensor Plug – One four-circuit 3.5 mono mini plug connects to one of the Video or Voltage Sensor
Inputs on the MSC-400 rear panel.
71
M
S
C
4
0
0
M
A
S
T
E
R
S
Y
S
T
E
M
C
O
N
T
R
O
L
L
E
R
Reference:
Type inFeatures
Section and
TitleParts
72
INSTALLATION
U
S
I
N
G
C
C
P
E
D
I
T
O
R
T
O
P
R
O
G
R
A
M
System Design
The MSC-400 is designed to simplify control of a home entertainment system, from a simple stack of A/V components to an elaborate home theater or a whole-house audio/video distribution system. The two important
parts of installing and programming a MSC-400 system are understanding the system device’s control capabilities and the user’s preferences.
Device Control Capabilities And Behavior
It is vitally important to understand each of the system devices’ control capabilities and how they behave. That
is, how can the devices be controlled and what do they really do when they are on or in standby? The MSC400 has multiple options for both control and sensing, so determining which options to use is critical to system
configuration, installation and programming. (A device’s capabilities, or lack there of, may also determine
which brand or model device is used in a given system.)
The MSC-400 can control a connected device using IR (infrared), RS232, or switch closure. First question for
IR controlled devices: Are separate On/Off commands available for this device? If they are, On/Off sensing
won’t be required for this device. (Sensing a device with discrete commands isn’t necessary for System
ON/OFF, but is still useful, as will be explained in the section on Source Select Smart Macros.) Power management for devices with discrete On/Off commands can be handled in MSC-400 programming.
If a device does not have discrete On/Off commands, the next question is: How is the MSC-400 going to know
if it is on or off? If a device has a Control Out or switched AC outlet, a VS-1006 can provide voltage power
sensing for the On/Off status of that device.
If the device is an A/V (audio/video) component and has a composite video output, the question is: Does the
composite video turn off when the device is in standby? The trick here is to be sure that the device is not outputting a ‘black screen’ that looks like the video is off. A simple test is to connect a VID-6 Video Sensor Cable
to the device composite video out and to one of the Video or Voltage Sensor Inputs on the MSC-400 Rear
Panel. Turn the A/V device ON. The associated green LED on the MSC-400 Front Panel should illuminate. Turn
the device OFF. If the LED turns off, then the composite video out turns off in standby and video sensing can
be used. If the LED does not go out, then the device is outputting video in standby and an alternate method
will need to be incorporated.
For devices that do not have discrete IR commands, are not RS232 compatible and do not have a switched AC
or composite video out, another option for sensing is to use a current sensing AC outlet, as shown in TYPICAL
SYSTEM ILLUSTRATION. This method has a device’s AC power cord connected to a sensed outlet that will
output a 12V signal when current is drawn by the connected device. The 12V signal can then be connected to
a VS-1006 for Voltage sensing.
Another option for control is RS232. Typically, RS232 controlled devices have discrete ON/OFF commands.
Check the RS232 database in the MSC-400 editor first. If a device is not found in the library, check the
device’s manual for a RS232 Command Table, check the product manufacturer’s web site or call their tech support. As with discrete IR Commands, sensing RS232 controlled devices is not necessary for System ON/OFF,
but can be useful for Source Select Smart Macros.
TIP - Keep written notes on how each device is going to be sensed and controlled. This will be most helpful in
making connections during installation. (It is also vital in knowing what parts to have on hand for installation.)
A MSC-400 can sense the ON/OFF Status of up to six devices. When noting which sensing method will be
used, it is also recommended to note which device is going to be connected to which Sensor Input. This will
come in useful in making connections and programming.
Reference:
Type inFeatures
Section and
TitleParts
User Preferences
The second major design consideration for system configuration is user preference or configuring the system
for how the user or users interface with the system. Most of the configuration for preferences will be done in
programming, but it is important to know what the preferences are during installation, to be sure the system
has been properly setup to accommodate all possible control options. Typically, with a one user system, power
management and selective control of each source, (particularly same-brand, same-model devices) are the main
focus. Smart Macro programming makes the user experience with the MSC-400 rewarding by turning appropriate devices on and off at the correct time, as well as selecting sources, turning to specific channels or
selecting surround modes with a single button press.
The best way to know how to program the system is to ask the user or users how they use the system. Each
user will probably have a group of favorite Cable, Satellite TV or Radio channels they want to choose from.
(See Section: Toggle Macros.) Each may have their own zone configuration in a whole-house system with perhaps different local devices. MSC-400, the compatible remotes and CCS all allow the creative flexibility to
truly customize each remote and controller for each user.
After interviewing the users, suggest other options or flexibilities that can be included during installation and
programming that they may not have been aware of. Selecting different surround modes and video aspect
ratios when selecting different video sources, or integrating lighting control for example.
The important point here is to be sure that the system has been designed, installed and connected to accommodate any possibility that may come up. Whether that is during initial installation or upgrading at a later
date, the user will appreciate the ability to add additional flexibility.
INSTALLATION
MSC-400 Master System Controller
System A/V components should be mounted or installed in a normal manner in an equipment cabinet, rack or
closet. The MSC-400 should be mounted in a location that provides easy access to all system devices to be
controlled with the MSC-400. The MSC does not have any particular requirements for ventilation since it does
not run hot, but proper ventilation should always be provided to prevent damage to system components. Leave
plenty of extra space for free airflow after all wires have been pulled and connections made. Also be sure to
have enough ‘play’ (extra length) on wire ends to be able to easily make connections, and move components if
necessary.
RFX-250 RF Sensor
Some care does need to be taken when locating the RFX-250 RF Sensor. Some system devices with microprocessors such as Media Servers, TiVo’s or other devices such as telephone system controllers can create sufficient levels of RF that can interfere with the RFX-250’s reception. A simple test for placement is to simply
power up the entire system, activate all sources and devices (including the MSC-400 with RFX-250 connected)
and check the RF LED on the RFX-250. If it is off, then there is probably no interference in that location. If the
LED is full on or flickering, move the RFX-250 away from the system devices until the LED goes out. Finding a
clean location for the RFX-250 is critical for system installation and operation.
In large installations (large homes and estate properties), up to three RFX-250’s can be connected in parallel to
the RF IN terminals to extend the range of the coverage area. If the MSC-400 is centrally located, it may be
desirable to have one RFX-250 at or near the MSC-400 and install a second at one end of the residence and a
third on the other end to provide complete coverage for RF reception from the remote controls. WIRE: CAT 5
or two conductor shielded 18 gauge ; MAX WIRE LENGTH: 200’
73
M
S
C
4
0
0
M
A
S
T
E
R
S
Y
S
T
E
M
C
O
N
T
R
O
L
L
E
R
Reference:
Type inFeatures
Section and
TitleParts
74
The RFX-250’s can be installed anywhere, including closets or attics, to avoid disturbing the look of a professionally decorated home. Always test a location for RF interference or blockage from large metal devices such
as refrigerators, steel beams, etc prior to installation.
U
S
I
N
G
C
C
P
E
D
I
T
O
R
T
O
P
R
O
G
R
A
M
Once a clean location has been determined, the RFX-250 can be mounted to a cabinet or wall surface using
the slide clip and mounting bracket on the back of the RFX-250.
1 Carefully slide the mounting plate out of the clip track.
2 Position the mounting plate on the surface to which it is going to be mounted.
3 Using a pencil or sharp probe, mark the four screw holes on the wall surface.
4 Drill small starter holes in the marked locations.
5 Using small flat head screws, attach the mounting plate to the wall surface.
6 Slide the RFX-250 over the mounting plate until it clicks into the clip track and locks into position.
VS-1006 Voltage Power Sensor
The VS-1006 should be located near the MSC-400, within the 10’ length of the attached sensor cable. It
should be placed in a location that allows easy access for making connections or troubleshooting if necessary.
It is not susceptible to RF interference. The VS-1006 can be mounted to a cabinet or wall surface using the
same procedure described for the RFX-250, using two screws instead of four. When using multiple VS-100’s,
placing a label on each sensor with both the device (type, brand, model) of the sensed device and the sensor
input number will help keep track of which sensor is which when making connections and troubleshooting.
VID-6 Video Sensor Cable
Take care to not pinch the sensor cable between components. Label each VID-6 Cable to keep track of which
sensor cable is connected to which device. Label the cable for both the device (type, brand and model) as
well as the sensor input number to help keep track of which sensor is which when making connections and
when troubleshooting.
CONNECTIONS
VIDEO OR VOLTAGE SENSORS (1-6)
Control Voltage Out/Switched AC Out (VS-100)
NOTE - When using a switched AC outlet, an AC or DC power supply adapter can be used to trigger a VS1006 Voltage Sensor. Using AC or unregulated DC adapters is recommended given the instant ON/OFF characteristics such supplies. Regulated DC adapters are slower to respond when turned on and off and are therefore
not considered ideal for status sensing. RATING: 3-25V AC or DC.
1 Using two-conductor stranded 24-14AWG wire, connect the Control Voltage Out of the Sensed
Device - or stripped ends of a Power Adapter - to the Two-Pin Plug-In Connector on the VS-1006 as
shown in the Typical System. The VS-1006 can sense AC or DC so polarity is not critical on the VS1006 end.
2 If using a power adapter, plug it in to the switched outlet on the sensed device.
Reference:
Type inFeatures
Section and
TitleParts
3 Connect the 4-Circuit Mini Plug from the VS-1006 to the appropriate Video or Voltage Sensor input
on the MSC-400 rear panel.
4 Once the system has been powered up, the VS-1006 power LED should illuminate red.
5 To test voltage sensing, turn the sensed device on. The Video or Voltage Sensor LED on the MSC-400
Front Panel with the same number as the sensor input should illuminate green. Turn the Sensed
Device Off. The LED should turn Off. If not, check connections and measure the device control out
or power adapter with a volt meter to confirm voltage output.
75
M
S
C
4
0
0
Current Sensing AC Outlet (VS-1006)
1 Connect the power cord from the sensed device to a sensed AC outlet on a current sensing AC outlet
as shown in the Typical System.
2 Using two-conductor stranded 24-14AWG wire, connect the Control Voltage Out of the Current
Sensor to the Two-Pin Plug -In Connector on the VS-1006. The VS-1006 can sense AC or DC so
polarity is not critical.
3 Connect the 4-circuit mini plug from the VS-1006 to the appropriate Video or Voltage Sensor Input
on the MSC-400 Rear Panel.
M
A
S
T
E
R
4 Plug the power cord on the Current Sensing Device into an Unswitched AC Outlet.
5 Once the system has been powered up, the VS-1006 Power LED should illuminate RED.
6 To test Voltage sensing, turn the sensed device on. The Video or Voltage sensor LED on the MSC-400
Front Panel with the same number as the Input to which the Sensor is connected, should illuminate
Green. Turn the Sensed Device Off. The LED should turn Off. If not, check connections and measure
the device control out with a volt meter to confirm voltage output. Also confirm that the Sensed
Device’s Power Cord is connected to a Sensed Outlet.
Composite Video (VID-6 Video Sensor Cable)
1 Connect the Male end of a single male to two female RCA plug ‘Y’ Adapter to the Composite Video
Out on the device to be sensed as shown in the Typical System.
2 Connect the RCA Plug End of the VID-6 Sensor Cable to one of the jacks on the Y adapter.
3 Connect the 4-circuit mini plug end of the VID-6 Cable to the appropriate Video or Voltage Sensor
Input on the MSC-400 Rear Panel.
4 Connect the Second Jack on the Y Adapter to the appropriate Composite Video Input (A/V Receiver
DVD, VCR input, etc) using a shielded RCA to RCA video cable with gold ends.
5 To Test Video Sensing, once the system has been powered up, turn the Sensed Device On. The Video
or Voltage Sensor LED on the MSC-400 Front Panel with the same number as the Input to which the
Sensor Cable is Connected, should illuminate Green. Turn the Sensed Device Off. The LED should
turn Off. If not, check connections and confirm the device is not outputting a ‘black screen’ or some
other video sync information when off.
6 Confirm Video Signal to the A/V Receiver by selecting the input to which the Sesnsed Device is con-
S
Y
S
T
E
M
C
O
N
T
R
O
L
L
E
R
Reference:
Type inFeatures
Section and
TitleParts
76
nected. (Be sure TV or video display is on, connected and switched to the appropriate input.)
IR Programmable Outputs (1-6)
U
S
I
N
G
C
C
P
E
D
I
T
O
R
T
O
P
R
O
G
R
A
M
1 Carefully attach an IR emitter to a device being controlled via infrared after locating the IR eye on
the device front panel and peeling away the adhesive protective strip on the flat side of the emitter.
TIP - If the IR eye is not obvious, refer to the owner’s manual or shine a small flash
light into the display window on the device front panel to locate the eye.
2 Carefully pull the emitter wire back to the MSC-400 and connect it to the appropriate IR programmable output jack.
TIP - This step is critical in that once programmed and cond for discrete output, the
MSC-400 will only send a specific device’s IR commands to that device via the
assigned IR Port. If an emitter is not connected to the proper IR Port, the MSC-400
will be sending commands to the wrong device. Keep written notes of which device’s
emitters are connected to which IR Ports and label each emitter wire at the plug
end for type, brand and model as well as the IR Port number. POLARITY: TIP=Signal,
SLEEVE=GND.
IR or RS232 Programmable Outputs (7-12) – IR
NOTE - The default Configuration for these Ports is RS232. When using these outputs for IR, it is highly recommended that the special URC 6-IRS Sleeved Emitters be used to prevent possible long term damage to the
emitters from contact with voltage connections that are normally used for RS232.
1 Carefully attach the sleeved IR emitter to a device being controlled via infrared after locating the IR
eye on the device front panel and peeling away the adhesive protective strip on the flat side of the
emitter.
TIP - If the IR eye is not obvious, refer to the owner’s manual or shine a small flash
light into the display window on the device front panel to locate the eye.
2 Carefully pull the sleeved emitter wire back to the MSC-400 and connect it to the appropriate ir or
rs232 programmable output jack.
TIP - This step is critical in that once programmed and cond for discrete output, the
MSC-400 will only send a specific device’s IR commands to that device via the
assigned IR Port. If an emitter is not connected to the proper IR Port, the MSC-400
will be sending commands to the wrong device. Keep written notes of which device’s
emitters are connected to which IR Ports and label each emitter wire at the plug
end for type, brand and model as well as the IR Port number. POLARITY (IR):
TIP=Signal, SLEEVE=GND
IR OR RS232 PROGRAMMABLE OUTPUTS (Ports 7-12) – RS232
NOTE - There are two versions of the RS232 cable. The RS232M has a male DB9 connector and the RS232F
has a female DB9 connector. Be sure to verify the proper cable configuration by visually inspecting the RS232
Reference:
Type inFeatures
Section and
TitleParts
terminal on the device to be controlled. Some devices will use other types of connectors such as RJ45 and
mini jacks. Custom cables can be made using the pin-out for the MSC-400 jacks as shown in Typical System.
Please refer to the device owner’s manual for the pin-out of RS232 Terminals that are not DB9 connectors.
1 Connect the 3.5 mono 4 circuit mini plug end of a URC RS232M/F to the appropriate IR or RS232
programmable output jack.
TIP - This step is critical in that once cond and programmed, the MSC-400 will only
send a specific device’s RS232 commands to that device via the assigned RS232 Port.
If an RS232 cable is not connected to the proper RS232 port, the MSC-400 will be
sending commands to the wrong device. Keep written notes of which device’s RS232
cables are connected to which RS232 ports and label each RS232 cable at the plug
end for type, brand and model as well as the RS232 Port number.
2 Connect the DB9 Connector to the device RS232 terminal. Tighten the thumb screws to secure the
connection.
RS232 3.5 Mono Mini Plug Pin-Out
IR In
1 Using appropriate 3-conductor 24-14AWG wire, connect the +12, signal and ground from an IR
repeater system to one of the included three-pin plug-in connectors for IR control of Connected
Devices. The MSC-400 will output IR signals input to this terminal to all IR ports. (No routing for
selective control.)
NOTE - If the IR repeater system has it’s own power supply, do not make the 12V connection.
2 Confirm polarity from the IR system prior to making connections. Be sure there are no loose strands
that can cause shorts.
RF In (RFX-250 RF Sensor)
1 Using the included 10’ 4-circuit mini-mini cable, connect the RF out on the RFX-250 RF sensor to
the RF In on the MSC-400 Rear Panel as shown in Typical System. The RFX-250 can also be connected via three conductor wire, using one of the included 3-pin plug-in connectors.
2 If connecting multiple RFX-250’s, the 3.5 mono jack and plug-in terminal are parallel, so both can
be used. When connecting multiple RF sensors with the plug-in connector, check polarity from each
RFX-250 prior to making connections. Be sure there are no loose wire strands that can cause shorts.
3 Once the system has been powered up, the RFX-250 Power LED should illuminate red.
77
M
S
C
4
0
0
M
A
S
T
E
R
S
Y
S
T
E
M
C
O
N
T
R
O
L
L
E
R
Reference:
Type inFeatures
Section and
TitleParts
78
U
S
I
N
G
4 Be sure to test the RFX-250 location for RF interference as described in Section: RFX-250 installation.
5 Wire: Cat 5 or two conductor shielded 18 gauge; Max Wire Length: 200’
RF Out
1 When using two MSC-400’s in a Master/Slave system, use one of the included 10’ 4-Circuit minimini cables, to connect the RF out on the MSC-400 Master to the RF in on the MSC-400 Slave. The
RF out on the Master unit can also be connected to the RF in on a MRF-350 or MRF-300 for control
of devices located away from the MSC-400.
USB2 Keyboard Emulation
C
C
P
E
D
I
T
O
R
T
O
P
R
O
G
R
A
M
1 Using an appropriate USB cable, connect the USB2 port on the MSC-400 Rear Panel to a USB Port
on a PC. The remote is programmed with Aux code set 501 or Aux 502 (Keyboard commands). The
MSC-400 automatically routes Aux 501 or Aux 502 to the USB 2 port.
NOTE - This port cannot be used for programming the MSC-400.
Relay 1
When connecting the MSC-400 Relays, the controlled device end may be terminated with a plug or connected
to wire terminals. In either case, the connections to the MSC Relays are the same for a given switch closure
configuration.
NO (Normally Open)
1 For a device that provides Voltage for use with a switch closure:
a) Connect the +V terminal on the controlled device to the relay 1 no terminal on the MSC400 rear panel, using one of the included three-pin plug-in connectors.
b) Connect the ground terminal on the controlled device to the Relay 1 Com terminal using
the same plug-in connector.
2 For a device that requires external control voltage.
a) Connect a jumper (24-14 AWG two conductor stranded wire, typical) from the 12V Out terminal on the MSC-400 rear panel to the Relay 1 com terminal as shown in Normally Open
(Relay 2 Shown).
b) Connect the Relay 1 NO terminal to the +V terminal on the controlled device
c) Connect the GND terminal on the controlled device to the GND terminal on the MSC-400
rear panel as shown.
When a properly programmed MSC-400 compatible remote sends an On command, (latching, momentary or
timed) Relay 1 will close and the controlled device will respond (turn on an amplifier or powered sub, raise a
lift, drop a screen, open or close drapes, etc). When the Off command (latching, press and hold or timed) is
sent, Relay 1will Open and the controlled device will respond (reverse previously switched mode). Wire
Gauge: 24-14 AWG two-conductor stranded; Max Load: 30V; .5A.
NOTE - Latching commands initiate an action until another command is sent. Press and hold and timed commands perform the specified action only for as long as the button on a remote is held (press and hold) or for
the duration of the switch closure (timed).
Reference:
Type inFeatures
Section and
TitleParts
79
M
S
C
4
0
0
Relay +12V Normally Open
Relay +12V Normally Closed
NC (Normally Closed)
1 For a device that provides voltage for use with a switch closure:
a) Connect the +V terminal on the controlled device to the Relay 1 NC terminal on the MSC400 Rear Panel, using one of the included three-pin plug-in connectors.
b) Connect the ground terminal on the controlled device to the relay 1 COM terminal using
the same plug-in connector.
2 For a device that requires external control voltage:
a) Connect a jumper (24-14 AWG two conductor stranded wire, typical) from the 12V out terminal on the MSC-400 Rear Panel to the Relay 1 COM terminal as shown in Normally
Closed (Relay 2 Shown).
b) Connect the Relay 1 NC terminal to the +V terminal on the controlled device.
c) Connect the GND terminal on the controlled device to the GND terminal on the MSC-400
Rear Panel as shown.
When a properly programmed MSC-400 compatible remote sends an On command (latching, press and hold
or timed), Relay 1 will Open and the controlled device will respond with an interruption to its normal action.
When the Off Command (latching, press and hold or timed) is sent, RELAY 1 will close and the controlled
device will respond by resuming its normal action. Wire Gauge: 24-14AWG two-conductor stranded; Max
Load: 30V; .5A.
NOTE - Latching commands initiate an action until another command is sent. Press and hold and timed commands perform the specified action only for as long as the button on a remote is held (press and hold) or for
the duration of the switch closure (timed).
Relay 2
1 Follow instructions as detailed in Relay 1 using the Relay 2 terminals.
12V Out
1 See Sections: Connections Relay 1/Relay 2 above for use with the MSC-400 internal relays.
12VDC
1 Connect the included 12VDC 3.5A power supply after all system connections have been made and
confirmed. Polarity: Pin=+12V; Sleeve=GND
M
A
S
T
E
R
S
Y
S
T
E
M
C
O
N
T
R
O
L
L
E
R
Reference:
Type inFeatures
Section and
TitleParts
80
Master/Slave Systems
U
S
I
N
G
Two MSC-400 Controllers can be linked together for control of up to 22 Connected Devices via IR (22) or IR
and RS232 (the number of IR devices will vary by system, 10 RS232 devices max). Other than using IR/RS232
Port 12 for a Smart Macro Control Buss between Controllers, both Controllers are fully capable of all functions. All Sensor Ports are available for Device Status Sensing of up to 12 devices, all Relays are available for
up to 4 switch closure connections and both Controllers can be connected to Media Center PCs. When making connections in a Master/Slave system, follow all previous instructions and include the following connections: See section: Programming Master/Slave Systems for additional information.
C
C
P
E
D
I
T
O
R
T
O
P
R
O
G
R
A
M
Master/Slave System Connections
1 Make all connections for Status sensing, IR and RS232 Control, Switch Closures etc., per Section:
Connections. In addition:
2 Connect the RFX-250 RF sensor to the Master Controller.
3 Connect a MS-01 Master/Slave Cable (4-circuit, 3.5 mono mini plug cable, not included) between
Master IR/RS232 port 12 and Slave IR/RS232 port 12 as shown in.
4 Connect a RFX-250 connecting cable, (3-circuit, 3.5 mono mini plug cable, included) between
Master RF out mini jack and Slave RF in mini jack. (The RF In three pin plug terminal on the slave
can also be used for the RF in connection on the slave end.)
5 Connect on 12 VDC 3.5A power supply (included) to each controller after all system connectsions
have been made and confirmed. Polarity: PIN=+12V; Sleeve=GND
Troubleshooting
TROUBLESHOOTING
PROBLEM
SOLUTION
Power
MSC-400 wil not Power up
a) Confirm connection of Power Adapter to MSC at an unswitched AC
outlet.
b) In a Master/Slave system, both Controllers must have their own power
supply.
MSC Does Not Receive RF Commands From Remote
RFX-250 Connection/Location
a) Confirm proper connection of RFX-250(s) to MSC-400
b) Reposition RFX-250 if RF LED is flickering or illuminated to improve
reception.
RFID Configuration
Confirm configuration of RFIDs in both MX/TX Editor for
remote and MSC Editor for MSC-400.
Remote Configuration
a) Confirm remote programming in RF Setup for IR & RF Output.
b) Confirm device command programming
c) Confirm Macro Trigger programming
MSC Does Not Output IR Commands
Connected Device Configuration
a) Confirm IR Command programming for Connected Devices
b) Confirm IR Port Configuration for Connected Devices
c) Confirm RFID Configuration when Ports 7-12 are used for IR
IR Emitter Connection
a) Confirm emitter connection to assigned IR Port
b) Confirm emitter is properly positioned over IR eye on controlled
device
c) Adjust IR output level
MSC Does Not Output RS232 Commands
Connected Device Configuration
a) Confirm RS232 Command programming for Connected Devices
b) Confirm RS232 Port Configuration
c) Confirm Serial Port Settings have been downloaded to the MSC-400
RS232 Cable Connection
a) Confirm connection to proper RS232 Port
Voltage Sensor
MSC does not detect voltage sensor
a) Confirm sensor connection to sensed device
b) Confirm control voltage from sensed device
c) Confirm sensor connection to proper Sensor Port on MSC-400
d) Confirm Sensor Port Configuration
Video Sensor
MSC does not detect video sensor
a) Confirm sensor connection to sensed device
b) Confirm composite video output from sensed device
c) Confirm sensor connection to proper Sensor Port on MSC-400
d) Confirm Sensor Port Configuration
Video Sensor Status does not turn
OFF
a) Confirm sensed device composite video turns OFF in standby and is
not outputting a black screen or other video signal
81
M
S
C
4
0
0
M
A
S
T
E
R
S
Y
S
T
E
M
C
O
N
T
R
O
L
L
E
R
Troubleshooting
82
TROUBLESHOOTING
U
S
I
N
G
Slave Controller Does Not Output Commands
Master/Slave Connections
Master/Slave Configuration
a) Confirm RF connection between controllers
b) Confirm Port 12 connection between controllers
a) Confirm Master/Slave RFID Configuration
b) Confirm Slave Connected Device Configuration
to Slave
Macro Execution
C
C
P
E
D
I
T
O
R
T
O
P
R
O
G
R
A
M
Smart Macros do not maintain device ON/OFF
sync with system status
a) Confirm Smart macro structure for all commands, IF/ELSE Statements, etc.
b) Confirm Sensor connections and Configuration
Universal Remote Control, Inc.
500 Mamaroneck Avenue
Harrison, NY 10528
Phone: 914.835.4484
Fax: 914.835.4532
Technical Support: 1.800.901.0800
www.universalremote.com
©2009 Universal Remote Control, Inc.
CCP MSC-400 Manual
2Rev 4