1
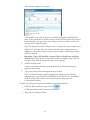
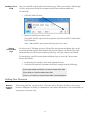
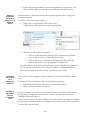
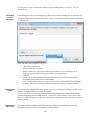
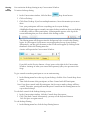
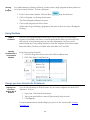
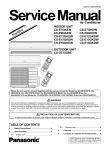
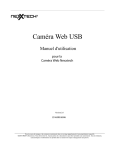
UniComEnterpriseVoice User’sGuide ii Table of Contents Understanding UniCom and Lync.................................................................................................................................. 1 What Is UniCom? ................................................................................................................................................................ 1 What Is Lync? ...................................................................................................................................................................... 1 Who Can Use Lync with UniCom? ....................................................................................................................................... 1 What Is the .edu Federation Registry? ............................................................................................................................... 1 What Options Are Available for UniCom Services? ............................................................................................................ 1 Downloading the Software, Testing the Equipment ...................................................................................................... 2 Getting the Software ........................................................................................................................................................... 2 Setting Up an Account ......................................................................................................................................................... 2 Equipment Needed ............................................................................................................................................................. 3 Testing the Equipment ........................................................................................................................................................ 3 Initiating a Call ............................................................................................................................................................. 3 Making a Call by Name or Username .................................................................................................................................. 3 Making a Call Using a Phone Number .................................................................................................................................. 5 Using the Dial Pad for Internal Authorization Codes or Voice Menus ................................................................................ 5 Answering a Call in Lync ...................................................................................................................................................... 6 Placing a Call On and Removing a Call From Hold .............................................................................................................. 6 Disconnecting the Call ......................................................................................................................................................... 7 Using Instant Messaging ............................................................................................................................................... 7 About Instant Messaging and Conversations ..................................................................................................................... 7 Generating an Instant Message .......................................................................................................................................... 7 Sending a File in an IM ........................................................................................................................................................ 9 Viewing Conversation Logs ................................................................................................................................................. 9 Setting Your Presence .................................................................................................................................................. 9 What are Presence States? ................................................................................................................................................. 9 How Do Presence States Affect Workflow? ...................................................................................................................... 10 Manually Setting Your Presence State .............................................................................................................................. 10 Understanding Privacy Relationships ......................................................................................................................... 11 What Are Privacy Relationships? ...................................................................................................................................... 11 Setting Privacy Relationships for Contacts ........................................................................................................................ 11 Entering and Publishing Alternate Phone Numbers ......................................................................................................... 12 Creating Contacts, Creating Groups, and Changing the View ...................................................................................... 12 Creating Contacts .............................................................................................................................................................. 12 Adding a Contact from the Search Field ........................................................................................................................... 12 Adding a Contact from a Recent Conversation ................................................................................................................. 13 Adding a Federated Contact ............................................................................................................................................. 13 Adding an Out‐of‐network Contact .................................................................................................................................. 13 Default Contact Group Settings ........................................................................................................................................ 14 Creating a New Contact Group ......................................................................................................................................... 14 Moving a Contact to another Group ................................................................................................................................. 14 Pinning a Contact to the Frequent Contacts Group .......................................................................................................... 15 Tagging for Status Change Alerts ...................................................................................................................................... 15 i Calling or Sending Instant Messages to Contacts ........................................................................................................ 15 Calling a Contact................................................................................................................................................................ 15 Initiating an Instant Message to a Contact ....................................................................................................................... 15 Starting a Conference Call or IM to Everyone in a Contacts Group .................................................................................. 16 Initiating a Call or IM to Non‐contiguous Contacts ........................................................................................................... 16 Initiating an IM or Audio Call to a Federated User ........................................................................................................... 16 Call Forwarding .......................................................................................................................................................... 17 Call Forwarding Options .................................................................................................................................................... 17 Forwarding Calls ................................................................................................................................................................ 17 Delegation of Incoming Calls ............................................................................................................................................. 17 Forwarding Calls to Delegates ........................................................................................................................................... 18 Simaltaneous Calling ......................................................................................................................................................... 18 Redirecting a Call in Lync .................................................................................................................................................. 18 Cancelling Call Forwarding Rules ...................................................................................................................................... 19 Using Outlook Voice Mail ........................................................................................................................................... 19 What is UniCom with Outlook Voice Mail? ....................................................................................................................... 19 Setting your Voice Mail Greeting ...................................................................................................................................... 19 Checking Voice Mail in Lync .............................................................................................................................................. 20 Managing E‐mail with Unicom Enterprise Voice............................................................................................................... 21 Viewing Missed Messages in Lync .................................................................................................................................... 21 Directly Calling a Contact’s Voice Mailbox ........................................................................................................................ 22 Team‐Calling in UniCom ............................................................................................................................................. 22 Forwarding Calls to a Team or Group in Lync ...................................................................................................................... 22 Configuring Your Team‐Call Group ...................................................................................................................................... 22 Forwarding Calls to your Team‐Call Group and Adjusting the Ring Delay ............................................................................. 23 Using Presence Status to Redirect Calls ............................................................................................................................ 24 Working with Conference Calls ................................................................................................................................... 25 What is a Conference Call? ............................................................................................................................................... 25 Starting a Conference Call from the Lync Window ........................................................................................................... 25 Starting a Conference Call from Outlook .......................................................................................................................... 26 Inviting Additional Participants to a Current Call .............................................................................................................. 26 Starting a Conference Call to Everyone in a Contacts Group ............................................................................................ 28 Scheduling a Conference Call ............................................................................................................................................ 28 Scheduling a Conference Call using Outlook..................................................................................................................... 29 Joining a Scheduled Conference from Lync ..................................................................................................................... 30 Using Video ................................................................................................................................................................ 31 Making a Video Call ........................................................................................................................................................... 31 Opening Video in an Active Conversation ......................................................................................................................... 31 Using Sharing ............................................................................................................................................................. 31 What Is Sharing? ............................................................................................................................................................... 31 Sharing the Desktop .......................................................................................................................................................... 32 Sharing a Program ............................................................................................................................................................. 33 Using OneNote ........................................................................................................................................................... 33 What is OneNote? ............................................................................................................................................................. 33 Opening OneNote from a Conversation Window ............................................................................................................. 33 ii Using Lync from Outside the IU Network .................................................................................................................... 33 Signing in to Lync from Outside the IU Network ............................................................................................................... 33 Using Lync 2010 Attendee ............................................................................................................................................... 34 Using the Lync Web App ............................................................................................................................................. 34 What is Lync Web App? .................................................................................................................................................... 34 Joining a Meeting using the Lync Web App ...................................................................................................................... 34 Audio Conversations with the Lync Web App ................................................................................................................... 35 Joining an IU Ad Hoc Video Bridge Conference in UniCom .......................................................................................... 36 What is an Ad Hoc Video Conference? ............................................................................................................................. 36 Initiating an Ad Hoc Video Conference in UniCom ........................................................................................................... 36 Joining an Ad Hoc Video Bridge Conference ..................................................................................................................... 37 Getting Help ............................................................................................................................................................... 38 Learning the Basics ............................................................................................................................................................ 38 Getting More Help ............................................................................................................................................................ 38 iii Understanding UniCom and Lync What Is UniCom? UniCom (Unified Communications) is a project at Indiana to bring voice, video, and data together in a unified desktop communication system. UniCom is IU’s implementation of a suite of Microsoft Lync applications that provides instant messaging (IM), telephony, e-mail, desktop sharing, audio and video conferencing. There are two subscription options. This document describes UniCom Enterprise Voice. UniCom Enterprise Voice is available on the Bloomington and Indianapolis campuses of Indiana University. To qualify, you must also have a unique IU phone number and an IU Exchange e-mail account. Then you must also install Microsoft Lync (see Downloading the Software, Testing the Equipment). Lync can be installed locally or may be accessed from a web browser without any installation. What Is Lync? Lync is a client that allows you to communicate easily with others in different locations from your computer's desktop using chat, voice, and video. At IU, the larger system that drives its functionality is called UniCom. UniCom collects information about IU affiliates and combines it all into the Lync interface. In modes other than Basic, UniCom also integrates the phone system with Lync. Thus, with Lync you can talk with others in many ways: PC-to-PC phone calls; chat, audio, and video conferences; desktop sharing; and sharing of documents. Those who subscribe to UniCom Enterprise Voice services can also forward calls, appoint delegates to manage calls, initiate dial-in conferences, take advantage of a myriad of voice mail options, and more. See “What Options Are Available for UniCom Services?” below. Who Can Use Lync with UniCom? At Indiana University, Lync is available to students, faculty, and staff to use in conjunction with UniCom services. Those who have UniCom accounts may use UniCom with certain federated colleges as well. (For more about federated colleges, see “What is the .edu Federation Registry?” below.) At IU, Lync can be downloaded from IUware at http://iuware.iu.edu. What Is the .edu Federation Registry? The OCS .edu Federation Registry is for educational institutions (including Indiana University) to collaborate with peer organizations that are also OCS federation partners. This means you may use UniCom’s powerful communication tools to initiate spontaneous conferences with other people who use AOL, MSN, or belong to several colleges and universities within the federation. (To be a federated partner, institutions must register and meet several infrastructure requirements. To see the list of federated universities and to learn more, see: https://accountmgmt.exchange.iu.edu/OCSEduRegistry/ .) What Options Are Available for UniCom There are two UniCom service options at Indiana University. 1) In UniCom Basic, when you make PC-to-PC calls with Lync, your IU phone 1 Services? line—if you have one—is not involved with UniCom at all. With this service, you can make PC-to-PC calls to only those who are on the UniCom user list. 2) In UniCom Enterprise Voice, all calls are routed exclusively to and from your computer or mobile devices—bypassing the IU phone switch altogether. This allows for maximum integration between phone and computer features. In this mode, you may enable call forwarding or even use Outlook Voice-mail. For UniCom Enterprise Voice, you must have an IU phone number. If you are interested in changing your service, contact your department's Telecommunications Coordinator (See: IU Knowledge Base, “At IU, how do faculty and staff request telephone service in an office?” http://kb.iu.edu/data/allv.html). (For more information on what each service can do, see the IU Knowledge Base at http://kb.iu.edu/data/awxm.html.) Downloading the Software, Testing the Equipment Getting the Software Anyone with an IU username can download Lync from IUware. Note also that all UniCom users can use the web client without installing anything. (See the “Using the Communicator Web Access Interface” section, near the end of this document.) However, using the installed version of Lync provides more functionality than the web client alone offers. To obtain the UniCom software: 1. 2. 3. 4. Browse to http://iuware.iu.edu . Click Communication. Click UniCom Lync Clients. Select either the 32-bit or 64- bit version of Lync; if you are not sure which to use, contact the UITS Help line at 855-6789 or your LSP. 5. Click the Login button. 6. Log in with your IU username and passphrase. If you are new to UniCom, you will need to read and agree to the IU Emergency 911 Acknowledgment Statement before you are able to download the software. See “Setting Up an Account,” below. 7. Once you have read and agreed to the terms, click the Download button. You can either save or install directly from the dialog box. Setting Up an Account If you are new to UniCom, before you can use UniCom’s web interface or download Lync from IUware, you must read and agree to the IU Emergency 911 Acknowledgment Statement (https://accountmgmt.exchange.iu.edu/E911). The statement simply explains that computer-based phone applications have inherent limitations when sending automatic location information to utilities such as emergency 911 services, which may depend on landline information to respond. If you have an account at IU and have already installed the software, setup and sign-in on your computer is automatic. Sometimes, when the application is restarted, you will need to log in manually. As you launch Lync, you should be able to access most UniCom services. 2 Equipment Needed To use the voice communication capabilities of Lync, you'll need a telephone or a headset. If you want to do video conferencing, you'll also need a webcam. If you utilize Unicom Enterprise Voice, you can get a phone specially made for unified VoIP communications. For information about telephones, headsets, and webcams that UITS recommends, see the IU Knowledge Base article at https://kb.iu.edu/data/awgk.html. Testing the Equipment You can test your audio and video equipment from the Lync Menu button. To set up audio and video: 1. Click the Lync Options button . 2. In the Options environment, choose either Audio Device or Video Device… 3. Choose the appropriate settings for your environment. Note: when using UniCom Enterprise Voice, a shortcut appears at the base of the Lync window. The Select Primary Device shortcut button may be found in the lower left corner of the Lync window. Clicking on this button allows you to choose from all audio enabled audio devices, and allows you to switch between them rapidly. Initiating a Call Making a Call by Name or Username You can search for people and call them on your PC using the Lync Search field. The UniCom system searches the IU Global Address List (GAL) and your personal Outlook Contact List (if Outlook is running). 1. To find someone, simply type their name or IU username into the Lync Search field: Search Field 3 You can use common name or username arrangements, for example: John Doe; Doe, John; johdoe; or [email protected]. A list of names appears as you type. 2. To call the person, click the drop-down arrow next to the Call button to the right of the name: A bar parallel to the edge of the user icon will be displayed to the left of the name. If the person has a UniCom account, the bar will be colored. The color of the bar indicates that person’s status, known as their Presence State. If the person does not have a UniCom account, the bar appears empty. The next step will be determined by the Presence State and whether or not the recipient of your call subscribes to UniCom: a. If the recipient has no UniCom subscription, the Lync Call option and the New Number option appear: If you select the Lync Call option, the call aborts. To make a call, click on the New Number option. Type the appropriate number into the dialogue box that opens. b. If the recipient of your call has a UniCom account but an unknown Presence State, a ‘work number’ option appears in addition to those in section a. 4 Make a Lync PC-to-PC call to other UniCom users by clicking the Lync phone icon. Making a Call Using a Phone Number With UniCom Enterprise Voice, you can simply type a number into the Search field to call someone. 1. To manually call any number, simply type the phone number into the Lync Search field: 2. a) For a call outside of the IU network, enter the entire 10-digit phone number including area code (Dashes or parentheses are not necessary and do not type ‘1’ before a long distance number). Press the Enter key. b) If the number is an IU number, you may enter the 5-digit in-network number, as in 46357 for IUPUI, or 54322 for an IUB number. A Conversation Window appears: In UniCom Enterprise Voice, your call is being made using VoIP. It rings on your computer’s audio equipment, headset, or telephone. If the recipient answers the call, the conversation can take place. If the recipient is unavailable, you may leave a voice mail message. Using the Dial Pad for Internal Authorization Codes or Voice Menus You may need to use a PIN number for Voice Mail, an authorization code for long distance calls, or use a multi-option menu when making a call. If you were using your desk phone, you would simply press the numbers on your phone. However, if you are initiating the call using Lync on your computer’s desktop, you may use the Dial Pad in the Conversation Window. 5 When prompted for additional numbers (or if you hear a stuttered dial tone after calling a long distance number from campus): 1. In the open Conversation window, click the Dial Pad button. 2. The Dial Pad appears: 3. To enter authorization or menu-driven numbers into the field, you can use several methods: type with your computer’s keyboard; paste a copied string of numbers; or use your mouse to click the buttons. Answering a Call in Lync When you have an incoming call, the computer headset or your telephone will emit an electronic “ring.” On the lower right corner of your computer screen, just above the System Tray, you will see a small pop-up window (or “toast”) indicating that you have an incoming call: (Note: If the number is in your Contact List, the contact’s name will be displayed along with the number.) To answer a call: Click anywhere in the pop-up except the decline button. The call then connects; if you click on the Decline button, the call will not connect. Placing a Call On and Removing a Call From Hold Using Conversation Windows, you can have several calls open simultaneously. When you answer or initiate a second call while the original is in progress, the original call is muted and the newly generated call becomes active. 6 When you return to the original Conversation Window, you must click on the Resume Call button that appears in any Conversation on hold: Disconnecting the Call In all calling modes, the call is managed in the Conversation Window. To hang up: 1. Click the End Call button in the upper-right corner of the Conversation Window: End Call Button 2. Alternatively, hang up the receiver of your telephone. The call is disconnected and you may close the Conversation Window. If the person on the other end hangs up first, the call disconnects. The Conversation Window remains open until you close it. Using Instant Messaging About Instant Messaging and Conversations When you initiate a chat session in Lync, you generate a new Conversation Window. A Conversation Window is a small window that allows you to chat, screen-share, transfer files, manage PC-to-PC calling, and more. Commonly, people begin conversations with an instant message display and then shift to PC-to-PC calling and desktop sharing. In a single Conversation Window, you can smoothly shift from one mode of communication to another. All these modalities may be used together or separately. Generating an Instant Message There are a number of ways to initiate an IM session, in both Lync and in The IU Exchange Outlook client. To generate an IM session by finding a name in the Communicator window: 3. To find someone, simply type the name or IU username into the Lync Search field: Search Field You can use common name or username arrangements, for example: John Doe; Doe, John; johdoe; or [email protected]. 7 A list of names appears as you type: A bar parallel to the edge of the user icon will be displayed to the left of the name. If the person has a UniCom account, the bar will be colored. The color of the bar indicates that person’s status. If the person does not have a UniCom account, the bar appears empty. Note: The image above shows ‘Picture View.’ You may view your contact list in ‘Name View.’ In Name View, the Contact List does not contain pictures or silhouettes. The Status of your contacts is shown with a small colored square, called a “jellybean.” Important: Using UniCom Basic, you may IM or call only those who have colored icons. (Note, however, that all IU people are eligible to get UniCom accounts; those with the empty bars have yet to sign up). 4. Double-click the name. A new Conversation Window opens in IM mode by default; the IM pane appears at the bottom. 5. Type your text into the bottom pane and press Enter. Note: You do not need to search for people with whom you have already communicated; you will be able to find them in the Contact List. Just doubleclick the name in the Contact List and enter your message into the Conversation Window. To initiate an IM conversation in an existing Conversation Window: 1. Click the Show instant message area icon An IM pane opens in the Conversation Window. 2. Type your text and press Enter. 8 Sending a File in an IM You can send a file securely with an instant message. When you transfer a file through IM, the e-mail quota of both the recipient and the sender remains unaffected. To send a file: 1. Click the Send a file icon: 2. Browse to the file you want to send. If accepted, the file copies into the recipient’s “My Received Files” folder under My Documents. Note: a file cannot be sent to more than one person at a time. Viewing Conversation Logs If you have an IU Exchange account, all your IM conversations and phone logs can be stored in Outlook, inside a folder named Conversation History. By default, Lync will automatically store all IM conversations, phone logs, and Lync contacts in Outlook. To manage how your IM conversations and phone logs are stored in Conversation History in Outlook: 1. In the main Lync window, click on the Options button. 2. Under the Personal tab, determine the desired settings from the following: Setting Your Presence What are Presence States? When using UniCom, you always have a Presence status. Presence describes your activity, location, willingness or ability to communicate, and contact information. You can manually set your presence status in Lync. 9 How Do Presence States Affect Workflow? Presence information helps you, your contacts, and IU colleagues to decide the best way to communicate with each other at the current time. Manually Setting Your Presence State Presence state is indicated by a colored bar next to your name and picture as seen in other people’s Contact Lists (or by the color of the “jellybean” in Name View). When you initiate any communication with someone using Lync at IU (via voice, IM, or video desktop sharing), you can see whether he or she is available to talk. In addition, you can set Access Levels that allow only certain people to interrupt you when you are in “Do not disturb” mode. For example, when your status is set to Do Not Disturb, no one can call or IM you. In Picture View: In Name View: In Lync, you may set your Presence to: If you have an IU Exchange account, the presence state will ordinarily be the same as your Outlook Calendar Free/Busy status. You can manually override your status until it next changes in your Outlook Calendar. To set your status manually in Lync: 1. Press the Presence button. A drop-down menu appears. 2. Choose the presence state. For more help on Presence States, see: "Quick Start: Use instant messaging and presence" at http://office.microsoft.com/client/helppreview.aspx?AssetId=HA101832519&lcid=1033&NS=CO MM14&Version=14&respos=0&CTT=1&queryid=5a5ebe2e6a0c41cfac3fa7934cbfbcc6 10 Understanding Privacy Relationships What Are Privacy Relationships? Lync assigns a Privacy Relationship to every contact. There are five Privacy Relationships: By default, new IU contacts are all at the Colleagues-level Privacy Relationship. Contacts obtained from your Outlook Contact List not associated with IU are assigned to the External Contacts group. However, you can change the Access Level for each contact. This means you can control how much of your information people can see, and how they are able to contact you, depending on your Presence Status. For example, you can share a mobile phone number with your closest coworkers but not make the number available to the entire IU UniCom community. You can also control interruptions. For example, by setting your presence status to Do Not Disturb, you can block all incoming calls and instant messages, except for those from people that you have granted the Workgroup or the Friends and Family access levels. For more information about Privacy Relationships and their interactions with Presence States, refer to the Help menu within the Lync Options environment and search using the term, “Control access to your presence information.” Setting Privacy Relationships for Contacts You can set a Privacy Relationship for any contact. To set a Privacy Relationship for an individual contact: 1. Right-click the contact. 2. Choose Change Privacy Relationship. 3. Select one of the five Privacy Relationships. 11 You may list alternate phone numbers to some of your contacts in Lync. You can choose to publish some of the numbers for your colleagues. Depending on their Privacy Relationship with you, they can see and call your mobile device or other phone. For example: Your home phone number is only visible to your contacts with a Friends & Family designation, whereas your mobile phone number is visible to contacts in the Friends & Family and the Workgroup Privacy Relationships. Entering and Publishing Alternate Phone Numbers To enter additional phone numbers: 1. Click the Options button. The Lync Options environment opens. 2. Click on the Phones side-bar tab. 3. Add phone numbers as you see fit. 4. Ensure the ‘Include in my contact card’ checkbox is marked next to each phone number. Remember, those who do not have access will not be able to see personal numbers. Note: It could take up to 24 hours for other users to see phone number changes. Creating Contacts, Creating Groups, and Changing the View Creating Contacts Your Lync window can store a large set of contacts to enable you to contact them conveniently. You can add anyone from the IU Global Address List (GAL) or your Outlook Personal Contact List by searching by name or e-mail address. In addition, every time you are involved in a peer-to-peer call or IM session, the contact is stored in the Conversations environment. There are several ways you may create contacts, described below. Adding a Contact from the Search Field If you are adding an IU entity or a contact in your personal Outlook Contact List, you can type the name directly in the main Lync window’s Search field. This is the most straightforward method. 1. Click in the search field. There are two types of searches: by Skill and by Name. a. If you are searching for contacts possessing a particular skill, type in that particular skill. b. Then click on the Skill tab below the Search text field. a. b. Or: For a person with IU username, you may type either their e-mail username or their name. Either syntax for a full name—[Firstname Lastname] or else [Lastname, Firstname]—will work. Click on the Name tab below the Search text field. 12 2. The name (or a set of names) appears in the space below the search box. If the person is a UniCom participant, his or her presence state will be indicated with a colored bar. If the person is not a participant or is outside IU, the color bar appears grey, indicating the person is offline. a. You can right-click the name and choose Add to Contact Lists. b. From your list of contact Groups, select one group appropriate for the new contact. You may also create a new Group from this menu. Adding a Contact from a Recent Conversation You can also add a contact from your recent conversations. When you and another person have a phone call or an IM session, the other party in the discussion is not added to a contact list. The Lync Conversation tool records your contacts, and you may add those contacts to your Contact List. To add a contact from a recent conversation: 1. Click the Lync Conversation button. 2. From this list of conversations, right-click on the contact you wish to add to your Contact List. 3. Click on Add to Contact Lists. 4. Select the appropriate Group unto which you will add this contact. Adding a Federated Contact If you want to send instant messages to or use Lync with people who are in a federated organization (including AOL, MSN, or several federated colleges; see “What Is the .edu Federation Registry” section, above), you must first add them to your Outlook Contact List. To add a federated identity, you will add the contact from the Lync Menu button as described above. That contact should have at least a name and an e-mail address. Once you correctly create a contact in Outlook, it will show up in the list of search results in the Lync window. You can then initiate an instant message to the contact. Adding an Out-ofnetwork Contact If you want to add a personal contact that is associated with a phone number (such as a home phone number or someone who is not at IU), you must be using UniCom Enterprise Voice and have an IU Exchange account. To have Lync use the phone number from your Contact List, you need to have a contact in your personal Outlook Contact List by that name or e-mail. To work properly, that contact should have at least a name and a phone number. You may name it anything you want, for example, “Home.” Once created correctly in Outlook, the contact will show up in the list of search results from the Outlook Search window. You may press and drag it over a heading or right-click 13 and choose Add to Contact List. Default Contact Group Settings The default view of your Contact List is the Groups view. Groups include Frequent Contacts and any other Groups you have created. You may also view your contacts by Status and by Relationship. To switch from the Groups view, you may first need to click on the small down-arrow directly beneath the Search field. You will see the three types of Contact List arrangements: In the Status view, your Contact List is sorted by Status, with each color indicating a different Presence State: In the Relationship view, your Contact List sorts by Privacy Relationship levels. To learn more about Privacy Relationships and their settings, read “What Are Privacy Relationships?” in the ‘Introduction to Privacy Relationships’ section. Creating a New Contact Group You may want to create your own groups, such as “Extended Family” or “Work Team.” To create a new custom group, in the Group view in your Contact List: 1. Right-click any Group header. 2. Choose Create New Group. 3. Type the name for the new Group and press Enter. Moving a Contact to another Group A contact that is recognized by Lync as a UniCom participant, a GAL entry, or a member of your Outlook Contact List can be moved into another group in two ways: 1. By pressing and dragging; a. Simply press and drag the contact into another group. 2. By right-clicking: a. Right-click the contact. b. Choose Add to Contact List, and choose the group to which you want to add the contact. 14 Pinning a Contact to the Frequent Contacts Group Default Group settings for your Contact List include Frequent Contacts. Frequent Contacts automatically populates with contacts with which you have had multiple peerto-peer conversations. You may pin any contact you choose permanently to the Frequent Contacts Group irrespective of how often you converse with that contact. To pin a contact to your Frequent Contacts Group: 1. Right-click any contact. 2. From the pop-out menu, choose Pin to Frequent Contacts. Pinned contacts will appear at the top of your Frequent Contacts Group. Tagging for Status Change Alerts If you would like to be notified of a contact’s changes in availability and status, you may tag that contact for status change alerts. When the contact changes Presence States, an alert window will open in the lower right corner of your monitor and show the contact’s name and current state: To tag a contact for status change alert: 1. Right-click any contact. 2. From the pop-out menu, click on Tag for Status Change Alerts. To ‘de-tag’ a contact: 1. Right-click on any contact currently tagged for status change notification. 2. Un-check the Tag for Status Change Alerts option. Calling or Sending Instant Messages to Contacts Calling a Contact The Contacts environment, also known as the Contact List, allows you to store and organize many numbers and lots of information. Once you have entered a person in your Contact List, you can use that information to call them or send an IM. To call a contact: 1. Click the phone icon to the right of the contact: Note: If the contact has several numbers, you can click the drop-down arrow next to the phone icon and choose an alternate number. Initiating an Instant Message to a Contact To initiate an instant message to a contact: 1. Double-click the name in the Contact List. A new Conversation Window opens. 15 2. In the Conversation Window, type in the beginning of your message. Your contact will be able to view the message when you press the Enter key. Starting a Conference Call or IM to Everyone in a Contacts Group You may initiate a conference with an entire group of people at once, using your Contact List groups. To initiate a conference call to a group: 1. Right-click a Group header in the Contact List. A menu opens with options for contacting the Group. 2. Choose one of the conference options: a. Click on ‘Send and Instant Message’ and a Conversation Window opens, ready to receive an IM to the entire Group. b. Click on the ‘Start a Conference Call’ option and then select the number from which you wish to initiate the phone call. For either option, a new Conversation Window opens, with all of the members of the Group contacted by the service. The participants are called immediately by phone or contacted by instant message, depending on your choice. Initiating a Call or IM to Noncontiguous Contacts You can choose non-contiguous contacts from your Contact List and then contact them. Initiating an IM or Audio Call to a Federated User In order to contact a user who is in a federated college or is an AOL or MSN instant message user, you must first create them as a contact in your Contact List (See: “Adding a Federated Contact”). To initiate an IM or a conference call to non-contiguous contacts, 1. Individually Ctrl+click just the contacts you want to contact. 2. Choose one of the conference options. If you want to use PC-to-PC audio calling, your contact must be in a federated college and have Lync. Otherwise, instant messaging works in native AOL or MSN windows. To call or IM a federated user, 16 1. In the Lync Search field, type the e-mail address of the federated contact. The name appears underneath the search field. 2. Follow directions for sending an instant message or initiating a PC-to-PC call, in previous sections. Call Forwarding Call Forwarding Options Lync 2010 Enterprise Voice offers a range of call forwarding options. To view some of these options, in the Lync Options window (click on the Options button Forwarding: ), select Call You may set Lync call forwarding to three different options: Turn off call forwarding; Forward my calls to; and Simultaneous Ring. The ‘Turn off call forwarding’ option restricts all incoming calls to your Lync phone. Alternatively, if you have all your delegates, team-call group members, and alternate phone numbers configured, you can use the Call Forwarding shortcut button which appears in the lower left corner of the Lync window. An action menu opens from which you may choose any of the configured options with a click. Forwarding Calls When a user selects ‘Forward my calls to,’ Lync will send any incoming calls immediately to the number selected. When this option is selected, you will have the opportunity to choose: any of the phone numbers previously saved in your account; Voice Mail; a new phone number; or the phone of one of your Delegates (see section “Forwarding Calls to Delegates”). Delegation of Incoming Calls Call delegation is a feature that enables managers, deans, or faculty members to delegate phone call handling to one or more administrative delegates. When a delegate answers a call, Lync notifies the owner of the account that the call has been answered, along with the name of the delegate answering. Why would you choose to use this feature? Your delegate can screen your calls, transferring the calls when appropriate. Your delegate can create or join a voice conference on your behalf. If you share an Outlook Inbox with a delegate, the delegate can listen to your voice mail and respond. 17 You may direct Lync to send your calls to a Delegate immediately, or after a 5, 10, or 15 second delay. Forwarding Calls to Delegates Forwarding your calls to your Delegate(s) allows you to send incoming calls to someone else. When you click on the ‘Forward my calls to’ option, you can then select to forward your calls to ‘My Delegates.’ First, you must add Delegate(s). To do so: 1. Click on the Add button. A list of your contacts opens. 2. In the Contact List, select one or more of your contacts as your Delegate(s). In UniCom, you may only select persons inside your organization. 3. Click OK. 4. Ensure any of your Delegates that you wish to receive your forwarded calls have checkmarks in the boxes next to their names. Note: To edit this list after you create it the first time, click on the ‘Edit my delegate members’ link in the Call Forwarding environment of the Lync Options window. Simultaneous Calling If you choose the ‘Simultaneous ring’ option, your Lync work phone will ring as will a second number, designated when you select this option. Note: If you choose a long-distance phone number for simultaneous calling, the IU phone system will prompt anyone calling from IU’s system for a long-distance access code. When this occurs, the call bypasses your Lync work-phone completely and goes directly to the longdistance number. Redirecting a Call in Lync If you have additional numbers listed in your Lync Options, you can choose from those numbers to redirect calls (Not Available in UniCom Basic). 18 To redirect an incoming call: 1. In the Incoming Call alert, click the Redirect button: A pop-up list of numbers appears: 2. Click your choice. The redirected call rings on the selected device or directs to Voice Mail. Cancelling Call Forwarding Rules To cancel Call Forwarding and Simultaneous Calling, return to the Call Forwarding section of the Lync Options environment. Click on the ‘Turn off call forwarding’ radio button, then click OK. Using Outlook Voice Mail What is UniCom with Outlook Voice Mail? Setting your Voice Mail Greeting With Outlook with Voice Mail, you can use Lync to configure, retrieve, and manage your voice mail. Using the available features in this service mode, you can receive email messages in Outlook notifying you of missed instant message conversations, phone calls, and other conversations. You may optionally follow up on the missed communications directly from the message in your Outlook Inbox. You can also forward your calls in a variety of ways from the Lync console. When you first configure Voice Mail, you will need to supply a Personal Identification Number (PIN). With UniCom Enterprise Voice, access your Voice Mail and Voice Mail options through the Phone environment. To configure your Voice Mail greetings: 1. In the Lync window, click the Phone environment button environment opens in the Lync window: 19 . The Phone 2. Click on the Voice Mail options button. A menu pops open. 3. Select ‘Change Greetings’ from the menu. 4. Follow the prompts to change your personal greeting. Checking Voice Mail in Lync With UniCom Enterprise Voice, Lync can retrieve your voice mail. Missed calls and voice mail will also continue to arrive in your Outlook account’s Inbox. To check your voice mail from the Lync Window: 1. In the Lync window, click the Phone environment button. The Phone environment opens in the Lync window. Unheard messages appear in the Voice Mail area. 2. Click on the green arrow to play the message. You may also check your voice mail using your phone. If you call from a phone in the IU system, you may use the five-digit number. 1. From your phone, dial the Voice Mail access number. a. From a phone anywhere in the IU system, dial 6-1361. b. From outside of the IU system, dial +1 (812) 856-1361. 2. Enter your unique PIN. 3. Follow the prompts. You can manage Voice Mail with voice commands. 20 Managing E-mail with Unicom Enterprise Voice You can manage Outlook E-mail in a manner similar to Voice Mail. When accessing your Voice Mail using your UniCom phone, you may orally direct the service to check your e-mail. E-mail messages are relayed through the phone, and you may reply, delete, replay, skip, or perform a wide range of functions using this service. Viewing Missed Messages in Lync Even if a missed call does not have an associated voice mail message, you can view the information about the missed message. When you miss a phone call, but there is no concomitant Voice Mail message, Lync alerts you to the missed call by changing the appearance of the Conversations environment button in the Lync window: The number of missed calls appears in a circle on the Conversations button. To view a missed message in Lync: 1. Open the Conversations environment by clicking on the Conversations button in the Lync window: The Conversations environment opens in the Lync window. Missed calls will be labeled as such and have a golden telephone receiver symbol next to the conversation entry: Note: with UniCom Enterprise Voice, all missed messages also appear in your Outlook Inbox by default. To contact the caller directly from the missed conversation, double-click any missed conversation in the window; this method allows you to continue the missed call as an IM, Video chat, or Sharing event. Alternatively, to return a call with a telephone call, just click the Call button to the right of the listing. 21 Directly Calling a Contact’s Voice Mailbox With Lync and UniCom, you can leave a message directly in a contact's voice mailbox, instead of ringing the contact first. To access a contact’s voice mailbox from Lync window: 1. In the Contact List, hover the mouse cursor over the Call button to the right of the contact’s name and information. 2. Click on the drop-down arrow next to the phone icon. 3. Click Voice Mail. Lync will call the contact's voice mail, allowing you to leave a message. Team-Calling in UniCom Forwarding Calls to a Team or Group in Lync You can set up a group of people to answer your incoming calls. This feature may be useful if you are part of a work group in which any of you can accept incoming calls. You can configure team-calling to ring you and your team-call group simultaneously, or you can set a delay so that your calls ring you first and then the rest of the group after a specified number of seconds. When you set up a team of one or more people to answer your calls, you become the “team leader” of your calls. As a team leader: If your Presence is set to Offline or Do Not Disturb, your calls are routed to the team; If your designated team is unable to answer, your missed call goes to your voice mail; and If contacts with the ‘Friends & Family’ privacy relationship call you, the call will not be forwarded to the team-call group. Note: this feature requires that you and all the members of your team-call group are using UniCom Enterprise Voice. Configuring Your Team-Call Group To configure team calling: 1. In the Lync main window, click the Lync Options The Options environment opens. button. 2. Select Call Forwarding from the Options menu sidebar. 3. To set up the members of your team-call group, click on the ‘Edit my teamcall group members’ link. 22 The Call Forwarding – Team-Call Group dialogue box opens. 4. Click on the Add… button. The Add Contacts dialogue box opens. 5. In the new dialogue box, select any number of your contacts to add to your team, or search for your team members in the search field at the top of the Add Contacts dialogue box. 6. Then click OK. The contacts you select appear in the Call-Forwarding – Team-Call dialogue box. 7. Click the OK button. Forwarding Calls to your Team-Call Group and Adjusting the Ring Delay Once you have a team-call group established (See section “Configuring Your TeamCall Group”), you can set the parameters by which Lync will forward your calls to your colleagues. You may adjust the delay after which your calls are forwarded to members of the group, from instantaneous to after several seconds. To turn on teamcalling in Lync: 23 1. In the Lync main window, click the Lync Options The Options environment opens. button. 2. Select Call Forwarding from the Options menu sidebar. 3. Click on the ‘Simultaneous Calling’ radio button. 4. Then, in the drop-down menu for Simultaneous Calling, select the My TeamCall Group option: If you wish to adjust the delay after which your team-call group members receive your incoming calls, you can do so from the Call Forwarding portion of the Lync Options Environment. 1. In the Lync main window, click the Lync Options The Options environment opens. button. 2. Select Call Forwarding from the Options menu sidebar. 3. To adjust the delay after which your team-call group is called, click on the ‘Edit my team-call group members’ link. The Call-Forwarding – Team-Calling dialogue box opens. 4. Below the list of your team-call group members, find the “Ring your teamcall group after this many seconds” drop-down menu and select your delay preference: 5. Then click the OK button. Using Presence Status to Redirect Calls If you designate a team-call group to answer your calls, it is important to pay attention to your presence status. Whilst your status is set to Offline or Do Not Disturb, your calls automatically redirect to your team-call group. However, if an incoming call originates from a contact in your Friends & Family Group, Lync will not forward the call to your team-call group members. 24 Working with Conference Calls What is a Conference Call? Starting a Conference Call from the Lync Window A conference call involves more than two users. In a conference call, participants may talk via phone, chat in the Chat window, share their desktops, and invite others. From the main Lync window, you can initiate a conference with others by e-mail invitation or by selecting a contact. The e-mail option in Meet Now allows non-IU participants or those away from their desks to join via web browser. To initiate a Meet Now conference: 1. Click the Lync Menu button and click Meet Now. A Conversation Window opens: 2. Click the People Options drop-down menu. A set of choices is displayed: 3. To bring someone who utilizes either Lync or Communicator directly into the conference, click Invite by Name or Phone Number. To invite someone who is neither available via Lync nor Communicator, or is a non-IU person, choose Invite by E-mail. This allows both IU and non-IU participants to join. 25 Note: If you use UniCom Basic, when you invite people by e-mail using Lync, those who join using the Lync or Communicator console will be able to take advantage of all features; however, those who join via web are limited to IM conferencing only. The web-based joiners may see the option to join your conference call by phone; even so, the call will be unsuccessful. However, if you have an IU Exchange Outlook client, there is another way to allow people to join your conferences via web and still participate with phone-based audio. See “Starting a Conference Call from Outlook,” below. Starting a Conference Call from Outlook If you have an IU Exchange Outlook client, you may use the Schedule a Conference Call feature in Outlook. Invitees may join using Lync or using a web browser. The invitation that Outlook creates will contain a phone number that people can use to join the conference call. In this case, web-joiners may connect to the conference using both the Lync web application and their own call-in device, or choose either mode alone. To Schedule a Conference Call in Outlook: 1. Click the Schedule a Conference Call button in the Outlook Button bar (if available); or 2. From the Outlook Menu bar, click Conferencing and then click Schedule a Conference Call. For more information about inviting by contacts or e-mail invitation, see step 2 of “Inviting Additional Participants to a Current Call,” below. Inviting Additional Participants to a Current Call In Basic mode, you can invite any UniCom user to join in your current conversation at any time during the call. To add an additional person to a call, in the Conversation Window: 1. Click the People Options drop-down menu: 26 A pop-up window appears, with six options: 2. Choose one of the options: a. Invite by Name or Phone Number – brings up a list of your Lync contacts: i. ii. Type a name into the top field or click a on a name already present. Then Click OK. Note: You may select multiple contacts by clicking on contacts while holding the Ctrl key. b. Invite by E-mail - generates an e-mail message with an invitation. In order to invite new attendees by e-mail, the conversation must be active Note: Any time you directly invite people by e-mail from this drop-down list, your invitees will be prompted for their UniCom account info with the option to “Log in using Corporate Credentials.” If any invitees do not have a UniCom account, they may select the “Log in as Guest” option. i. Click on Invite by E-mail in the pop-up People Options box. If you are using Microsoft Outlook, a new ‘Compose E-mail’ box opens in Outlook. The invitees may opt to join from the Lync Web App or Lync Attendee. ii. Supply the e-mail address(es) for the attendees you wish to invite. iii. Click Send. Note: If you are not using Outlook, when you click on the Invite by Email option the Join Information and Meeting Options pop-up window opens. 27 To send the e-mail invitation using an e-mail client other than Outlook, open your e-mail client; then click on the Copy All Information button in the Join Information and Meetings Options pop-up window. Paste the information into the body of an e-mail to your invitees. The additional party answers, if available. You can invite many people to a conference at once by Ctrl-clicking multiple contacts or clicking a Contact List Group header. For more information, see the “Starting a Conference Call or IM to Everyone in a Contacts Group” section. Starting a Conference Call to Everyone in a Contacts Group You may initiate a conference with an entire group of people at once, using your Contact List groups. To conference-call a group: 1. Right-click a group header in the Contact List. 2. Choose one of the conference options: A new Conversation Window opens with all of the contacts in the group being contacted by UniCom The participants are immediately called by phone. You may choose to open a Conference by Instant Message, by Video Call, or share a program or desktop with the group also. Scheduling a Conference Call If you want to conduct a conference call, even with people who are unaffiliated with IU, you can schedule a meeting from The IU Exchange Outlook client. When you schedule a conference call, you generate an e-mail invitation that contains information about how to join. When you and your invitees receive the invitation, you all click a link in the message in order to enter the call. Depending on your participants’ setup, they can participate in various ways: If the scheduled meeting participants (both IU and non-IU) have Lync, they can join in and take full advantage of chat, audio, video, and desktop sharing. If the participants want to join by phone, they can call a dial-in number (that is local to IUB or IUPUI) and then talk using their chosen phone. If the participants join via web browser (the Lync Web App), they are automatically able to chat and share desktops. If these web invitees want to participate by phone, they must supply a phone number in their conference window. Those who join by web can direct the conferencing service to call 28 them from the web interface if they have a phone number that is local to IUB and IUPUI. For more information on audio options when joining the Lync Web App, please see the section ‘Audio Conversations with the Lync Web App.’ Scheduling a Conference Call using Outlook You may schedule a conference call in Microsoft Outlook using the New Online Meeting tool. You must have an updated version of Microsoft Outlook 2010. 1. Open your Calendar in Outlook. 2. On the Home tab and in the New group, click on the New Online Meeting button. A meeting request opens. 3. Type the e-mail addresses of the people you want to invite to the meeting in the meeting request, in the ‘To’ field. 4. Add a subject in the subject line or the invitation and any additional details in the body of the message. Note: Do not alter any of the information created for the meeting invitation in the body of the message. 5. At this point, you can utilize the Scheduling Assistant to ascertain the availability of your invitees or await their response. You can create a conference call in response to an e-mail. 1. Navigate to the e-mail. It could be an e-mail you received or one that you sent; it can be addressed to many people or to just one. 2. In the Respond group under the Home tab on the Ribbon, click on the Meeting button: A meeting event is generated with clickable links to join the conference; it is addressed to all persons addressed in the e-mail to which you are responding with this meeting. 29 3. To create an online conference, click on the Join Online Meeting. 4. Enter addresses of attendees and type a subject, just as you would with any appointment invitation. 5. Send the message. See “Entering a Scheduled Conference from UniCom,” below, to enter the conference. Joining a Scheduled Conference from Lync To enter the conference scheduled in Outlook, open the message or Calendar appointment. If you have a UniCom account, you may join the conference via Lync or web browser. Those who do not have UniCom accounts may join via web browser. To join a scheduled conference using Lync: 1. Open your Calendar in Microsoft Outlook; open the meeting request you wish to join. 2. To join the meeting, you have a few options: a. Click on ‘Join online meeting’ and a conference Conversation Window opens in Lync. b. Click on ‘Join online meeting’ or the supplied meeting hyperlink and open the Lync Web App (for more information, see ‘Using the Lync Web App’). c. Dial one of the phone numbers listed and join the meeting by voice only. You will then be part of the conference. 30 Using Video Making a Video Call Just as you generate an IM or Lync call, if you have a video camera (or webcam) hooked up to your computer, you can place video calls. Participants who have video cameras will be seen in the Conversation window, while an icon will appear for those who do not have a webcam. To initiate a video call: 1. Double-click the contact you want to call. A conversation Window opens. 2. Click the Video drop-down menu: 3. Click on Start a Video Call. The Conversation Window now shows a large pane and an IM pane in the lower section. Participants who have configured video cameras will be seen in the video pane. Observers of participants without video configurations see a generic image: . Images are seen in picture-in-picture layout; the image of the person who is speaking will be automatically featured as the largest in the window. To initiate a video conference call, follow the same steps combined with those discussed in the ‘Working with Conference Calls’ section of this document. Opening Video in an Active Conversation When you are engaged in an active conversation, you may initiate a video link at any time. To begin add a video aspect to your conversation, click on the Video button in the active conversation window. Using Sharing What Is Sharing? Sharing is a feature in Lync. Directly in any Conversation Window, participants can share their entire computer desktop or a single program with other participants; a user may even allow others to take control. You may Share a program or a desktop in a conference call or IM session. 31 Sharing the Desktop You can initiate desktop sharing in any Conversation Window. To initiate desktop sharing: 1. In the Conversation window, click the Share drop-down button. 2. Click on Desktop. 3. Click Share Desktop. If you have multiple monitors, choose the monitor you want to share. Now, your participants will view everything you do on your desktop. A highlighted frame appears around your entire desktop to indicate that your desktop is currently visible to other participants. A Sharing menu appears at the top of the screen indicating that you are in control of the sharing session: This Sharing menu will disappear into the background a few seconds after Sharing begins. It will reappear if your mouse cursor approaches the top of your desktop. Alternatively, you may ‘pin’ the menu so that it will not disappear by clicking on the thumbtack icon in the Sharing menu bar. A notice will open in the Conversation Window: If you click on the Preview button, a ‘Stage’ opens to the right of the Conversation Window. An image of what your conversation partner(s) may view presents in the Stage. To give control to another participant or a to an entire meeting: 1. In the Sharing menu bar at the top of your desktop, click the Give Control drop-down arrow. 2. Then click the name of the participant, or Share Control with All Participants. Note: If you share control with all participants, the first one to make a change will have control. Thereafter, participants must Request Control from the Sharing menu at the top or their desktops. To take back control of the desktop sharing session: 1. In the Conversation window, click the Control drop-down arrow. 2. Click Take Back Control. Alternatively, you may use the keyboard shortcut Ctrl-Alt-Space to regain control. To end desktop Sharing: 1. In the Sharing menu bar, click the Stop Sharing button. 32 Sharing a Program In a similar manner to sharing a desktop, you may share a single program with any other user in a Conversation Window. To share a program: 1. In the Conversation window, click the Share drop-down button. 2. Click on Program… in the drop-down menu. The Share Programs dialogue box opens. 3. Click on the program you wish to share. All the other steps in Sharing a program are the same as those in section “Sharing the Desktop.” Using OneNote What is OneNote? Opening OneNote from a Conversation Window OneNote is an organizational tool that allows you to take notes and keep things organized. Essentially, OneNote is a virtual notebook that allows you to create tabs and sub-tabs to keep meeting notes or any other information. OneNote can be initiated from any Conversation Window or from the Windows Start Menu, under Microsoft Office. OneNote is available only with Office 2007 and 2010. In any Conversation Window: 1. Click the drop-down arrow next to the Add attachment icon 2. Click Take Notes Using OneNote: Using Lync from Outside the IU Network Signing in to Lync from Outside the IU Network You can take advantage of all the features of Lync from a computer not on the ADS domain to. To do so: 1. Open Lync 2010 from the Start menu. 2. Enter your email address; enter ads\[user name], and password 3. Click Sign In. For more information on downloading Lync, please see the section titled “Getting the Software.” 33 Using Lync 2010 Attendee Lync Attendee is client software of Lync Server. People using computers off the IU network can install the Lync Attendee client without the need for a license. All of the in-meeting features of Lync are available in Lync Attendee, including: Computer audio Video Dial-in and dial-out (“Call me”) audio conferencing Detailed meeting roster Multi-party instant messaging (IM) Desktop and program sharing, including giving control to participants Collaboration features, including with Microsoft PowerPoint presentations, whiteboards, polls, and file sharing Using the Lync Web App What is Lync Web App? If you are using a computer anywhere that has Internet access, you may use the Lync Web App. Lync Web App provides most of all Lync’s utility including viewing and presenting PowerPoint slides; meeting-wide IM; telephone-based audio; file distribution and application; and desktop and program sharing. To use the Lync Web App, you must be invited to a meeting or possess a meeting’s unique URL. Note: To engage in desktop or program sharing, you must be a presenter in the meeting. All meeting attendees may ask permission to take control of a presenter’s desktop or program. Joining a Meeting using the Lync Web App To join the meeting, do the following: 1. At meeting time, open your Online Meeting e-mail invitation, and then click Join online meeting in the e-mail message. 2. In the screen that opens, click the ‘Join online meeting’ hyperlink. A window opens. 34 3. Click on the ‘Join the meeting using your web browser’ button. 4. Users with and Exchange account should log on using their username and passphrase in the ‘Join using corporate credentials.’ Depending upon the supplied credentials, you may be admitted to the meeting immediately. Otherwise, you may have to wait to be admitted by the leader of the meeting. Audio Conversations with the Lync Web App Just as in a normal Lync Conversation, you can initiate audio communication using your phone. 35 1. In the Conversation window for your meeting, click on the Phone tab. 2. Do one of the following: a. To have the conference call you, choose the country code, type your phone number, and then click the Call Me button. b. To call in using your phone, use the dial-in number found in the Join Online Meeting invitation. Joining an IU Ad Hoc Video Bridge Conference in UniCom What is an Ad Hoc Video Conference? Initiating an Ad Hoc Video Conference in UniCom An Ad Hoc Video Conference at IU is a videoconference connection you establish on-thefly with a central multimedia server. You identify your conference code using four numbers of your own choice, and distribute that information to people whom you want to join. Users from anywhere can use your four-digit code to join the conference. At this time, the Ad Hoc Video Conference works on the Windows platform only. For more information, see the IU Knowledge Base article “At IU, how do I create or join a videoconference?” at http://kb.iu.edu/data/ause.html. To initiate your own videoconference: 1. Create a four number sequence. This will be the identifying code for the ad hoc conference. 2. In the search field in the Lync window, type: 22[+four code created in step 1]@vc.iu.edu. 3. The address appears in a blue highlighted area below the search field. 36 4. Right-click the address and choose ‘Start a Video Call’ from the menu. The video conference commences. You do not need video equipment to initiate a videoconference; you will be able to see all who join with video equipment but your colleagues will only see a black screen for you. Joining an Ad Hoc Video Bridge Conference How participants are joining will determine the protocol they use. Users can join your conference in three ways: using point-to-point videoconference equipment (such as that found in conference rooms); using UniCom with an optional web cam; and by calling in via telephone. All methods may be used simultaneously in a conference. To join the Ad Hoc videoconference with Tandberg equipment: 1. On the remote unit, press the Call button. 2. Dial 22[+code] or find the listed conference room in the directory. The videoconference then connects. To join the Ad Hoc videoconference via UniCom: 1. In the search field at the top of the Lync main window, type: 22[+code]@vc.iu.edu. Alternatively, you may be able to find the conference room in the GAL. The address appears in a blue highlighted area below the search field. 2. Right-click the address and choose Start a Video Call. You connect with (optional) video to the conference. You can see all attendees in your Conversation window’s video pod. Proceed to use the audio and camera just as you would in any UniCom call. To join the Ad Hoc videoconference by phone: 1. From any phone, dial 812-856-7070. The conference service answers and prompts you to enter the code. 2. Press “22[+code]#” (pound sign is required). You connect by phone to the conference. 37 Getting Help Learning the Basics Microsoft provides a Lync tour that will help you learn the basics of presence management (determining the information that others see about your availability status), contacting others, and responding when others contact you. You can take the tour online or access it from the Help menu within Lync or at http://office.microsoft.com/client/helphome.aspx?ns=COMM2007&lcid=1033 There are many tutorials and demos available to help you get started with Lync. For more help resources, see the following section on Getting More Help. Getting More Help Demos Lync http://office.microsoft.com/en-us/Lync/HA102402601033.aspx LyncTour http://www.microsoft.com/UC/LMOC/LMOC.html?product=OC&locale=enus&page=0&status=open Help AllHelp: http://office.microsoft.com/client/helphome.aspx?ns=COMM2007&lcid=1033 QuickReferencecardsforContactManagement,Presence,IM,Phoneand VideoConferencing,KeyboardShortcutsandDial‐inConferencing: http://www.microsoft.com/downloads/en/confirmation.aspx?familyId=f19ae8e0311c-4ce1-bba2-5702f32f5409&displayLang=en PrintableHow‐toReferenceMaterials: http://technet.microsoft.com/en-us/library/dd440728(office.13).aspx IU‐specificHelpandResources For forwarding and more, see http://umsweb.iu.edu 38