1
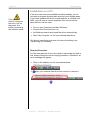
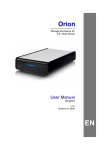
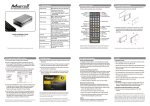
Orion II
Storage Enclosure for
3.5” Hard Drives
User Manual
v1.0
EN
Orion II
User Guide
Table of Contents
CHAPTER 1 - INTRODUCTION
ICON KEY
THE ORION
AVAILABLE INTERFACES
PACKAGE CONTENTS
SYSTEM REQUIREMENTS
PC REQUIREMENTS
MAC REQUIREMENTS
LED INDICATOR
ABOUT DATA BACKUP
1
1
1
1
1
2
2
2
2
2
CHAPTER 2 - INSTALLING THE HDD
USB 2.0 & ESATA
USB 2.0
3
3
5
CHAPTER 3 - SYSTEM SET UP
CONNECTION TO YOUR COMPUTER
DETAILED VIEW
REAR VIEW USB 2.0 & ESATA
REAR VIEW USB 2.0
INSTALLATION ON A PC
REMOVAL PROCEDURE
INSTALLATION ON A MAC
REMOVAL PROCEDURE
PARTITIONING & FORMATTING
PC RUNNING WINDOWS
MAC OS
7
7
7
7
7
8
8
9
9
10
10
11
CHAPTER 4 - APPENDIX
TECHNICAL QUESTIONS
FAQ
ABOUT THIS MANUAL
12
12
12
12
Orion II
User Guide
Chapter 1 - Introduction
Icon Key
Throughout this manual you will see icons on the left margin
that denote either Notes or Special Remarks as outlined below:
General Notes and Tips
Remarks for PC users and Microsoft Windows OS
Remarks for Mac users and Apple Macintosh OS
The Orion
Features mentioned
in this manual may
vary between
different models.
Macpower's Orion II is designed for 3.5” SATA hard drives. A
unique 2 piece aluminium-plastic enclosure fits together
perfectly to secure your valuable data content. Orion stays cool
without a fan or heat sink, keeping the design compact and
virtually silent during operation.
Product Dimensions:
20.6cm x 12.2cm x 3.6cm
8.11” x 4.80” x 1.42”
Available Interfaces
• USB 2.0 High Speed
• eSATA & USB 2.0 High Speed
Package Contents
Package Content
may vary,
depending on
vendor & version.
• Orion storage enclosure
• External Power Adapter;
Input 100-240V, Output +12V/2A
• Interface cables & manual
MS-DOS, Microsoft, Windows 2000/XP/Vista are trademarks of Microsoft
Corporation. Apple Macintosh and Mac are trademarks of Apple Computer.
All other third party brands and names are the property of their respective
owners.
Page 1 / Chapter 1 - Introduction
Orion II
User Guide
System Requirements
PC Requirements
•
•
•
•
•
Minimum Intel Processor III 500MHz, 128MB RAM
USB 1.1 equipped PC; Win2000, WinXP or Windows Vista
USB 2.0 equipped PC; Win2000, WinXP or Windows Vista
eSATA equipped PC; Win2000, WinXP or Windows Vista
Your hardware device must have the correct corresponding
port (eg. USB 2.0 or PCI card)
• eSATA Plug and Play support required for host card driver
Mac Requirements
•
•
•
•
•
Minimum Apple G4 processor, 128MB RAM
USB 1.1 equipped Mac; Mac OS 10.1.5 or above
USB 2.0 equipped Mac; Mac OS 10.2 or above
eSATA equipped Mac; Mac OS 10.3 or above
Your hardware device must have the correct corresponding
port (eg. USB 2.0 or PCI card)
• eSATA Plug and Play support required for host card driver
LED Indicator
The Orion is using a single blue LED.
Blue LED
Status ON, power ON
Status ON, data access
Status OFF
ON
Flickering
OFF
About Data Backup
To protect your files and help prevent the loss of your data, we
strongly recommend that you keep two copies of your data, one
copy on your external drive and a second copy either on your
internal drive or another storage media such as CD, DVD, Tape
or an additional external drive.
Any loss or corruption of data while using the Orion is the sole
responsibility of the user, and under no circumstances will the
manufacturer be held liable for compensation or the recovery of
this data.
Page 2 / Chapter 1 - Introduction
Orion II
User Guide
Chapter 2 - Installing the HDD
Your unit may come with a pre-installed hard drive. Before
opening such an enclosure, please read the warranty and any
other notes from your vendor carefully, as this could void your
warranty.
USB 2.0 & eSATA
1. Remove the 2 screws on the rear panel of the enclosure.
2. Slide and lift the cover off the body.
3. Carefully install the hard drive and connect it.
Be careful not to
damage any
components and
double check the
connection between
the bridge board
and your hard drive
before you close up
the case.
Page 3 / Chapter 2 - Installing the HDD
Orion II
User Guide
4. Mount the drive with the 2 screws from the bottom as seen in
following illustration.
5. Slide the cover back into place.
Be careful not to
damage any
components during
the installation.
6. Fasten the 2 screws on the rear panel to finish the assembly.
7. Use the two stickers to cover the screws and mounting hole
at the bottom of the case.
Page 4 / Chapter 2 - Installing the HDD
Orion II
User Guide
USB 2.0
1. Remove the 2 screws on the rear panel of the enclosure.
2. Slide and lift the cover off the body.
3. Carefully install the hard drive and connect it.
Be careful not to
damage any
components and
double check the
connection between
the bridge board
and your hard drive
before you close up
the case.
4. Mount the drive with the 2 screws from the bottom
Page 5 / Chapter 2 - Installing the HDD
Orion II
User Guide
5. Stick the EMI gasket to the marked spot (roughed up surface)
on the inside of the top cover.
6. Slide the cover back into place.
Be careful not to
damage any
components during
the installation.
7. Fasten the 2 screws on the rear panel to finish the assembly.
8. Use the two stickers to cover the screws and mounting hole
at the bottom of the case.
Page 6 / Chapter 2 - Installing the HDD
Orion II
User Guide
Chapter 3 - System Set Up
Connection to your Computer
A few tips on how to connect your external storage enclosure:
If you buy a spare
power adapter for
your working place
or at home, make
sure the output and
polarity is identical
with the power
adapter supplied!
• Do not cover the Enclosure and leave enough room around
it for the drive to cool down
• Do not expose the product to water or humid conditions
• Always check for visible damage and defects of power and
interface cables before using it
• We recommend using the cables and adapter supplied with
your product
Detailed View
Rear View USB 2.0 & eSATA
1. USB 2.0 port
2. eSATA port
3. Power receptacle
4. ON/OFF switch
1
2
Rear View USB 2.0
1. USB 2.0 port
3. ON/OFF switch
1
3
4
2. Power receptacle
2
3
Note: Always connect the power adapter to your device
BEFORE you plug it into the wall socket.
Page 7 / Chapter 3 - System Set Up
Orion II
User Guide
Installation on a PC
If the system
doesn’t recognise
the drive, turn on
the power first,
before connecting
the interface cable.
If the drive has been pre-installed and setup already, you do
not need to prepare anything else and can use it straight away.
If you have installed the drive yourself and this is a brand new
HDD, you will have to create a partition first and format the
drive before it can be used.
• Turn on your Computer and start Windows
• Connect the Orion and turn it on
• Let Windows search and install the driver automatically
• Open “My Computer” to see your external hard drive
For factory new drives and more info about formatting, see
“Partitioning & Formatting”.
Removal Procedure
For the safe removal of your drive and to assure that no data is
lost, always follow the correct unplug procedure. Otherwise, an
error message will appear.
• Click on the taskbar icon for external hardware
• Choose your external hard drive and confirm to remove it
Page 8 / Chapter 3 - System Set Up
Orion II
User Guide
Installation on a Mac
If the system
doesn’t recognise
the drive, turn on
the power first,
before connecting
the interface cable.
If the drive has been pre-installed and setup already, you do
not need to prepare anything else and can use the unit straight
away. If you have installed the drive yourself and this is a brand
new HDD, you will have to create a partition first and format the
drive before it will show up.
• Turn on your computer and start Mac OS
• Connect the Orion and turn it on
• No driver installation required
• The external drive will mount and show up on your desktop
For factory new drives and more info about formatting, see
“Partitioning & Formatting”.
Removal Procedure
For save removal of your drive and to assure that no data is
lost, always follow the unplug procedure. If not, an error
message will show up.
• Drag the external hard drive icon into the trash bin
• Turn off your device
Page 9 / Chapter 3 - System Set Up
Orion II
User Guide
Partitioning & Formatting
Be aware that this will destroy all your existing data on the drive,
so make sure you have a backup! This step is usually only
required the first time you install a factory new hard drive, if you
change the format or want to erase all data on your drive.
If the drive does not
appear, make sure
the drivers are
installed properly
and the power is
turned on!
PC running Windows
Disk Management Program
• Right click on “My Computer” and choose “Manage”
• Select “Disk Management”
• Choose the drive you want to format and right click on it for
further commands (Choose New Partition or Single Volume)
• Follow the Partition Wizard to setup the drive
Mac OS can not
write to NTFS
formatted drives. To
use your device on
both platforms, we
recommend you to
use FAT32.
For Win2000, WinXP and Windows Vista, we recommend
formatting the drive using the NTFS file system.
If you are using the FAT32 file system to format the drive on
Win2000, WinXP or Windows Vista, the biggest single partition
you can create will be 32GB. To create larger partitions, you
need to use a 3rd party application or change to NTFS format.
Page 10 / Chapter 3 - System Set Up
Orion II
User Guide
Mac OS
For Mac OS X, use the Disk Utility to format and create
partitions on your external disk.
If the drive does not
appear on the
desktop, make sure
there are no
extension conflicts
and the power is
turned on!
• Select “Disk Utility” in the utilities folder
• Choose your external drive and format it according to your
requirement
For Mac OS X, we recommend formatting the drive using the
native Mac file system HFS+ also known as Mac OS Extended.
If you want to use your drive on a PC running Microsoft
Windows as well as on your Mac, we recommend you to use
the FAT32 file system. On your Mac, select MS-DOS when
formatting it. Note: The file size for a single file on FAT32 is
limited to 4GB.
Page 11 / Chapter 3 - System Set Up
Orion II
User Guide
Chapter 4 - Appendix
Technical Questions
Please read your
warranty carefully,
as this may vary
between different
vendors!
For RMA and other questions, please contact your vendor or
check out their online support area!
FAQ
Q: Can I use my device with USB bus power only?
A: No, you will always need to use an external power adapter
for 3.5” hard drives like those used in the Orion enclosure.
Q: What file system should I choose to format my drive?
A: This will depend on how you want to use the drive but in
general, here is what we recommend:
• Win2000, WinXP, Windows Vista Æ NTFS
• Mac OS X Æ HFS+ (Mac OS Extended)
• To use it on both PC and Mac Æ FAT32
About this Manual
This manual covers all interfaces and combinations for the
Orion enclosure. Images and descriptions might therefore
slightly vary between this manual and the actual product you
have.
© Copyright 2007 by Macpower & Tytech Technology Co., Ltd. all Rights Reserved
The information contained in this manual is believed to be accurate and reliable. Macpower & Tytech
Technology assumes no responsibility for any errors contained in this manual. Macpower & Tytech
Technology reserves the right to make changes in the specifications and/or design of this product without
prior notice. The diagrams contained in this manual may also not fully represent the product that you are
using and are there for illustration purposes only. Macpower & Tytech Technology assumes no responsibility
for any differences between the product mentioned in this manual and the product you may have.
Page 12 / Chapter 4 - Appendix