1
AVL GENESIS
PROCALL-X
USER'S GUIDE
AVL GENESIS
PROCALL-X
USER'S GUIDE
Audio,Visual Laboratories, Inq.
CONTENTS
. . .
. . . . .
CHAPTER 1
1.1
1.2
1.3
1.4
1.5
1.6
1.7
1.8
INTRODUCTION .
.I-1
General
. .l-1
.l-1
PROCALL-X Features
Independent Accessing.1-3
Flexible Formatting. .l-4
.l-4
SMPTE Time Code.
. .l-5
AVL Clock-Trak
AVL Posi-Trak
.I-6
Addresses and
. . .l-6
Assignments
Looping
. . .
.l-7
.l-7
Alternates
Getting Help During
Programming
.
.I-8
CHAPTER 2
INDEPENDENT
. . .
ACCESSING
. . .
General. .
Programming Panel. .
The Command Area .
Bank A and Bank B
Status Display Area
The Cue Area .
Accessing Examples .
.
. .
. .
. . .
.
.
.
. .
. . . . .
. . .
9
.
.
.
.
.
CHAPTER 3
3.1
3.2
.2-1
.2-1
.2-1
.2-3
. . .
.2-6
.2-7
.2-8
FORMATTING PROGRAMS.
General. . . . .
Formatting
.
Limitations .
Using The Standard
Format
. . . .
.3-1
.3-1
. .
. .
. .
.3-1
.3-2
Creating A New
Format. . . . . . .
Flexible Formatting.
New Format Examples.
Accessing A
Previously Created
Format. . .
. .
.
CHAPTER 4
CHAPTER 5
5.1
5.2
5.2.1
.
EXCHANGING DOVES AND
INDEPENDENTS . . . .
General. . . . . . .
ESN Command. . . . .
Exchanging Doves And
Independents. . . .
Format 1 . . . . . .
Format 2 . . . . . .
Changing Projectors.
PROCALL-X COMMANDS .
General. . . . . . .
Programming Commands
Commands Entered
Under the Code
Heading . . . . . .
Commands Entered
Under the Screen
Heading . . . . . .
Commands For Editing
Programs. . . . . .
Control Command
Field Entries . . .
Editing Control
Commands . . . . .
.3-4
.3-8
.3-8
3-10
7
Memory/Disk Data
Transfer Commands
Magnetic Tape
Control Commands.
Print Commands .
Commands For
Optional Peripheral
Equipment
.
.
CHAPTER 6
6.1
6.2
6.3
. .
5-34
5-39
. . . . .
5-40
PROGRAMMING EXAMPLES
. .
General
Sample Programs.
Using the Blink
Alternate .
Dissolving Using
.
Blink Alt
Using Looping
.
Commands
Programs Using the
Pyramid Format
.
(Bank B).
. . .
.
. .
. . . .
. . . .
. . . .
. .
CHAPTER 7
5-30
. .
.6-1
.6-1
.6-1
-6-2
.6-2
.6-6
6-12
PROGRAMMING PERIPHERAL
. . . .7-1
EQUIPMENT
General. . . . .
.7-1
X-15 Programming
. . .7-1
Commands.
Using X-15
Programming Commands.?-2
Incorrect X-15
Programming .
. .7-3
Correct Programming. .7-3
.
.
.
. .
. .
.
.
CHAPTER 8
SELECTING THE TIMING
AND CONTROL CODE
.
General. . .
Selecting SMPTE.
Selecting AVL
Clock-Trak. .
.
APPENDIX A
A.l
A.l.l
.
.
.
. .
.
.
.
.
.
.8-1
.8-1
.8-1
.8-2
PROCALL-X COMMANDS
.A-1
Programming Commands .A-1
Commands Entered
Under Code Heading. .A-1
Commands Entered
Under Screen Heading.A-2
Commands For Editing
. .A-3
Programs
Control Command
Field Entries .
.A-4
Editing Control
.A-4
Commands
Memory/Disk Data
.A-5
Transfer Commands
Mag -Tape ControJ
Commands.
.A-5
.A-6
Print Commands . .
X-15 Programming
Commands. . . . . . .A-6
. . . .
. .
. . . . .
.
. . . . .
.
APPENDIX B
SMPTE TIME CODE
. . .B-1
STANDARDS .
General. . . .
. .B-1
Modulation Method. . .B-1
Code Format
. . . .B-1
Boundaries of Address.B-3
Start of Address
.B-3
Use of Binary Groups .B-3
Assigned/Unassigned
Address Bits
. .B-4
Time Discrepancies
.B-5
iv
.
.
.
.
.
. .
. .
.
CHAPTER 1
INTRODUCTION
1.1
GENERAL
AVL's PROCALL-X is a further step toward
total creative freedom for those of you
who
have
been
using
PROCALL
(Programmable Computerized Audio-Visual
Language Library) or PROCALL XI.
PROCALL-X
still
offers
Independent
Accessing (see Chapter 2) as did PROCALL
XI. The main change in PROCALL-X is the
Flexible Formatting configuring table as
described
in Chapter 3. Once
this
feature is understood, you will be able
to quickly design new formats; it is
easy to understand and easy to do.
Chapter
5 lists and
descibes
all
PROCALL-X programming commands, control
command
field entries, editing
and
printing commands.
1.2
PROCALL-X FEATURES
This
paragraph
describes
PROCALL-X
features which apply when using the
AVL's GENESIS computer system.
PROCALL-X:
a.
Has two areas, called Bank A
and Bank B, for configuring
projectors.
b.
Has Total Independent
Accessing, with each projector
being designated by a letter:
A through 0 in each bank.
c.
Has Flexible Formatting
utilizing up to five DOVE X ' s
in each bank.
d.
Has Total Independent
Accessing of AUXILLARY
(A to J).
e.
Has Expanded Independent
Looping with
a
new
LPxx
command. Each
DOVE
X can
contain up to 3 loops, one for
each
projector
or
can
participate in 1, 2, 3, 4 , 5 ,
6 , 7, 8, 9, 10, 11, 12, 13,
14, or 15 and on up to 30
projector
looping. All
dissolve
Alternates, Waits,
and Freezes are valid.
-7
Has a Blink Alternate command
for a more powerful Looping
capability. You can create a
blinking effect in from 1 to
'7
-
30 projectors in any order as
fast as 20 cycles per second
or as slowly as you choose.
The power is in your choosing.
1.3
f.
Has Soft Alternate and Soft
Cut.
g.
Has a HELP key.
h.
Lets you restart and begin
over when creating
a
new
format.
i.
Gives you the ability to exit
from the creation of a new
format and, instead, program
using the standard format.
j.
Has SMPTE and AVL's Clocktrak and Posi-track.
INDEPENDENT ACCESSING
This feature allows each of your 30
possible projectors to be addressed in
an independent manner in a single cue.
Each projector is given an alphabet
letter designation: A thru 0 in Bank A,
and A thru 0 in Bank B. Projectors can
be given commands with either the Independent or screen number, but not both.
This simplifies the addressing of projjectors, making PROCALL-X user friendly.
1.4
FLEXIBLE FORMATTING
Flexible Formatting is used when you are
creating a new format. The idea behind
this powerful feature is to allow you to
set up your projectors in any way and
then to lay them out on the video screen
in the same physical manner so that your
video
screen
reflects
the
actual
projector setup when looked at from the
back. (Refer to Chapter 3.)
-7
1.5 SMPTE TIME CODE
AVL's GENESIS now offers the option
being compatible with SMPTE.
of
The SMPTE (Society of Motion Pictures
and Television Entertainment) time code
is the standard timing and control code
used
by
the
motion
picture
and
television industries today. SMPTE is
used to mark and drive video tape decks,
audio tape decks, and other electronic
devices that interface with video, and
was primarily designed to control film
and video editing. It provides for:
*
Y
Running Shows at speeds up to
30 frames per second.
Running shows using video
decks as well as the multiimage computer system.
7
*
Running shows with all the
components synchronized to one
timing and control code.
SMPTE is like AVL's Clock Trak in that
it is a digital timing code which can be
used to time cues. All rules concerning
AVL Clock Trak programming apply to
SMPTE .
AVL1s GENESIS will accept SMPTE input
and generate SMPTE output, but it will
not convert SMPTE to AVL 'Clock Trak or
vice versa.
'?
R
To change the Clock Output Mode to
SMPTE, enter the Control Command field
and type SMPTE and press RETURN. On the
Status line, AVL C will change to SMPTE.
how
SMPTE
is
Chapter 8 describes
selected. (Also refer to Appendix B.)
1.6 AVL CLOCK-TRAK
AVL's Clock-trak is a digital time cue
which allows time-syncing of cues to the
audio
track. The
AVL Genesis
can
generate
the clock information
for
recording on your show tape. Genesis
can also read the clock information and
use it to synchronize show cues.
Chapter 8 describes how AVL Clock-trak
is selected as the digital timing code.
'7
1.7 AVL POSI-TRAK
Posi-trak locks your program to the
audio
track, and will automatically
resync your show if a tape error occurs.
1.8
ADDRESSES AND ASSIGNMENTS
PROCALL1s, DOVES
are
In
previous
addressed by a number (1-5) and an
Independent such as la, lb, lc, or IT,
lC, lB, or lL,lC, 1R. In PROCALL-X it
is essentially the same thing, except
that the numbers 1 thru 9 are called
screen
numbers,
but
can only
be
addressed as A, B, or C through 0
projectors or by screen numbers.
7
A, B, and C are also used for projector
assignments. For example, an assignment
of "2A" means DOVE #2, top projector.
Again, this is be referred to as an
assignment. The table of
54 unique
positions
is called the configuring
table. It is in this table that you
will 'place the projector assignments.
In this way, you can place any projector
under any screen number as long as no
screen number contains more than six
projectors. You can now see that DOVE
7
?
number
and
screen number
necessarily the same anymore.
are
not
When programming, each assignment is
given an alphabet (Independent) l e t t e r .
Therefore, you program with Independents
and screen numbers. It is no longer
necessary to see the screen assignments.
Each bank works the same way and two
different configurations or formats can
be displayed and cued at the same time.
1.9
LOOPING
Loops
are
defined
in
terms
of
Independents. In this way a loop can be
formed using from 1 TO 3 0 projectors.
Since each projector can be defined in a
loop, a DOVE X can hold three separate
loops: one for each projector. Each
loop has a 1 0 0 cue capability and all
Alternates, Freezes, and Wait states are
valid.
1.10
ALTERNATES
Blink Alternate, Soft Alternate, Soft
Cut - These functions are explained in
detail in Chapter 6.
1.11
GETTING HELP DURING PROGRAMMING
A special HELP key (Fl), located
in the
upper left corner on the keyboard, can
be used at any time during programming
by
simply pressing the key. POCKET
PROCALL will be displayed one page at a
time. To move on to the next page,
press Return. At the end of the help
file, Return will bring you back to your
program.
If you are not interested in seeing each
page, ESC can be pressed at any time to
return
you back to the programming
field.
CHAPTER 2
INDEPENDENT ACCESSING
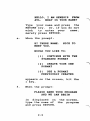
2.1 GENERAL
The paragraphs that follow
in this
chapter describe the programming panel
and presents examples of Independent
Accessing.
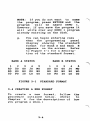
2.2 PROGRAMMING PANEL
-
The Programming Panel consists of three
areas: the Control Command Area, the
Bank A and Bank B Status Display Area,
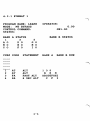
and the Cue Area. For an illustration of
the panel see Figure 2-1.
To get the programming panel up on the
screen, displaying the standard format,
follow the procedure outlined below.
a.
Place the PROCALL-X disk into
Drive A.
b.
Place a storage disk in Drive
B.
c.
Turn AVL Genesis on.
d.
When the following prompt
appears on the screen:
HELLO, I AM GENESIS FROM
AVL. WHAT IS YOUR NAME?
'7
Type your name and press the
RETURN key. Or, if you do not
wish
to enter your
name,
merely press RETURN.
e.
When the prompt:
HI THERE NAME.
MEET YOU.
NICE TO
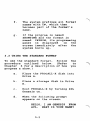
WOULD YOU LIKE TO:
CONTINUE WITH THE
STANDARD FORMAT
(1)
CREATE YOUR OWN
FORMAT
(2)
USE A FORMAT
PREVIOUSLY CREATED
(3)
appears on the screen, hit the
1 key.
f.
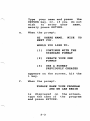
When the prompt:
PLEASE NAME YOUR PROGRAM
AND WE CAN BEGIN
is displayed on the screen,
type the name of the program
and press RETURN.
,-
NOTE: If you do not want to name
the program, press RETURN and the
program will be named DEMO 1.
However, if you save the program
it will write over any DEMO 1
program already existing on the
disk.
A
line-by-line
description
programming panel follows.
2.2.1
of
the
THE COMMAND AREA
TOP LINE
This line contains the program name and
the name of the operator. The space
provided for the program title is 8
characters long and the operator name
space is 25 characters long. If you
skip over the "HELLO" sequence using the
RETURN key, the program
title will
default to DEMO 1, and the operator name
will be blank.
SECOND LINE
,
,
This line contains the Programming MODE
selection. The possible choices are MTB
(Magnetic Tape Bypass),
the default
mode, CEM (Clock Edit Mode), CIM (Clock
Input Mode), COM (Clock Output Mode),
MSV (Mag-Tape Save), MLD
(Mag-Tape
Load), and VER (Verify-MSV only).
The space to the right of MODE selection
is reserved for incoming data display.
When the system receives cue information
from either magnetic tape or another AVL
programmer, this line will display the
word AMP if the data is of sufficient
amplitude. MT POOR is displayed if the
incoming data has some distortion in it,
but the system will still be able to
decode the cue. If the data is so
distorted as to be unreadable by the
system, MT BAD and the cue number of the
distorted cue will be displayed. When
no data is received by the system the
display will remain blank. If
only
POSI-TRAK information is being received
by the system the display will show the
word POSI-TRAK.
CLOCK DISPLAY
The Clock Display is located on the
right hand side of the screen on the
second line. This clock acts as a free
running timer as well as a display for
Clock-trak from magnetic tape in either
CLOCK EDIT or CLOCK INPUT mode. The
clock will begin to run anytime the CUE
(F10) key is depressed and a TIME or
TIME
X
cue is executed. It
will
continue
to
run until a STOP
is
encountered or you push the ESC key.
Additionally, if the end of cue space
(no clock-track data is being received)
/7
is encountered while the clock
running, the clock will stop.
is
free
THIRD LINE
This is the CONTROL COMMAND field and
its features are discussed in Chapter 5 .
THE TPO CONTROL COMMAND
?
TPO (tray position offset) permits you
to set the starting tray position. Once
you
have
saved
a program with a
particular starting tray position the
new position is retained. Anytime you
load that file the starting position
will be reset to that value. Note that
this does not send cues to to the
equipment attached to the system. It
assumes that you actually started with
your trays in the offset position.
This command removes the tray designation and replaces that information with
a DOVE X number and A,B,C projector
assignments,
this
allows
a
rapid
examination of the independent and it's
corresponding projector assignment.
SMPTE
This
changes
compatibility:
Clock-trak
to
SMPTE
the industry standard.
1 '7
I
FOURTH LINE
This line is the Status line. When
certain
normal
features have
been
disconnected by the user, it will be
indicated in this line e.g. RCF (Remote
Cue Off) or POF (Posi-trak Output Off).
This line also functions as a display
for AVL Genesis system comments such as
"STANDBY FOR GOTO".
2.2.2
BANK A/BANK B STATUS DISPLAY AREA
This area is used to give you a constant
display of the projector tray positions
and lamp status. The status area contains two sectors referred to as BANK A
and BANK B . Each bank can have up to 15
projectors, a maximum of 9 screens, and
a possibility of 6 projectors per screen
depending on how the projectors were
formatted. If you have formatted for all
15 projectors, the letters A thru 0 are
used to individually designate each projector. To the right of each letter is
the tray position inverse video if the
lamp is on, and normal if the lamp is
off.
'7
2.2.3
THE CUE AREA
?
This area contains the cue number, cue,
statement, and the BANK A and BANK B
projector commands.
CUE #
With the AVL Genesis programmer, the cue
is previewed before it is executed. The
display shows you the five preceding
cues as well as the five following cues.
CODE
T
This area is for the various programming
codes, as described in Chapter 5 , that
designate what the screen action will
be.
STATEMENT
After the code is entered, the system
will use this area to feed back to you a
more complete statement of what the
action will be. This serves as a check
on the code entry process.
-
BANK A and BANK B PROJECTOR COMMANDS
This area is used to specify
which DOVE
or projector will respond to the code
entries. Screens and independent projectors cannot be used in the same bank.
RUN
This is used to indicate
that the
program in the system is executing.
Runs are initiated by entering an R
while
in
the screen area and are
terminated when they encounter a STOP in
the screen area of a subsequent cue.
While a run is in progress the RUN
heading will appear as reverse video
(black
characters against
a
green
background).
When a run is in progress at a selected
speed of 20 cues per second the area on
the heading line between the SCREENS
title and the RUN title will display
20CPS. When the system is executing the
program at 10 cues per second, this area
will remain blank.
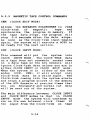
2.3 ACCESSING EXAMPLES
Take time to study the programming panel
illustrated in Figure 2-1.
Notice that we have separate places for
Bank A and Bank B. In this case, your
screen numbers match the DOVE numbers
7
A
for a fifteen projector show.
Therefore, each bank can be viewed as a
separate
channel ;
each
channel
connecting to five DOVE X's.
a.
Notice that projectors are now
labeled as letters A thru 0 , each
projector receiving its own letter.
b.
Press Ctrl/V, notice that the
status display
now
shows
the
corresponding DOVE X designation
with
each
alphabet letter. If
Ctrl/V is pressed again, the status
display
is returned to normal.
This is shown in the example below.
PROGRAM NAME:
MODE: MT BYPASS
CONTROL COMMAND:
STATUS :
0.00
GX1.OO
BANK A STATUS
BANK B STATUS
1
2
3
4
5
A1A D2A G3A J4A M5A
BIB E2B H3B K4B N5B
C1C F2C 13C L4C 05C
1
2
3
4
5
A1A D2A G3A J4A M5A
BIB E2B H3B K4B N5B
ClC F2C 13C L4C 05C
c.
?
OPERATOR :
When programming with DOVE numbers,
projectors sequence according to
the projectors under the screen
you
want
to
use
column. If
independents, program using
the
alphabet letters. There is no need
for presets any more.
NOTE: You cannot use both screen
numbers and letters within the same
cue. But you can have numbers on
Bank 1 and letters on Bank 2 or
vice versa.
d.
Program the following to see how
this operates.
Cue# Code
1
AT
2
AT
3
AT
4
AT
5
AT
6
AT
7
AT
8
AT
9
AT
10
AT
Statement
BankA
Bank B
ALTERNATE
12345
12345
12345
ALTERNATE
12345
12345
ALTERNATE
12345
ALTERNATE
12345
12345
ALTERNATE
ADG J M
ADG J M
ALTERNATE ABC. ..MNO ABC . . .MNO
ALTERNATE
12345
ABCDEF
ALTERNATE
CFILO
AFEHI
ALTERNATE
245
ALTERNATE
AFGLO
Results :
1.
The Top projector lamps on
each screen come ON.
(First in the sequence).
?
The Center projector lamps
come ON and Top go OFF.
(2nd in the sequence.)
The Bottom projector lamps
come ON and Center OFF.
(3rd in the sequence.)
The Top projector lamps come
ON and the Bottom go OFF.
(Sequence starts again).
This is an independent command
and the ALTERNATE action only
affects
those letters that
were designated (ADGJM).
All projector lamps come ON.
All projector lamps go OFF
except the Bottom
row, as
defined in PROCALL-X.
(The
last of a Sequence.)
However, the command to Bank B
is different and all projector
lamps in DOVES 1 and 2 are now
down.
All Bank A projector lamps are
now OFF and Bank B projector
lamps A,E,F,G,J,K,L,M,N,O
are
ON.
Here, RETURN is pressed without any commands to Bank A.
10.
This last command uses
Independents to turn Bank
projector lamps OFF.
B
This simple program illustrated above is
a case in commanding projectors. Notice
that Bank A and Bank B are affected in
each cue. Knowing as much as you now
know, you can probably reprogram 90% of
your old shows using PROCALL-X commands.
r
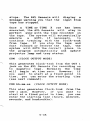
B A N K A STATUS
5
A000GBJBMU
B0EpHpK0NU
C 0 F 0 1 0 1 0 0 6
1
=CUE
2
3
4
ir5
#=coDt=sTAT€MENTIBANK
----------
-------
B A N K B STATUS
AbDOG0JL)MB
BPE P H O K B N O
CUFO I 0 1 0 0 0
AT
BANK BTRUN
1
2
3
4
5
6
I
\
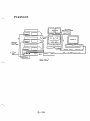
FIGURE 2-1
PROGRAMMING PANEL
NOTES :
CHAPTER 3
FORMATTING PROGRAMS
3.1
GENERAL
This chapter describes the procedures to
be followed when using the standard
format, creating a new format,
and
accessing a previously created format.
3.2
FORMATTING LIMITATIONS
The following programming limitations
apply when you are using PROCALL-X:
a.
It allows you two separate
banks for DOVEs:
Bank A and Bank B.
b.
You can have up to 15
projectors per bank:
30 projectors total.
c.
It provides for up to five
DOVEs per bank:
10 DOVEs total.
d.
You can have up to six
projectors per screen.
e.
It is compatible with AVL1s
DOVE X.
f.
The system prefixes all format
names with C#, which then
becomes part of the format's
name.
g.
If the program is named
SHOWTIME and the format is
named C#SHOW, its programming
panel is displayed
on the
screen immediately after the
system boots up.
3.3 USING THE STANDARD FORMAT
To use the standard format, follow the
to
procedure outlined below. (Refer
Chapter 6 for a description of how you
program a show.)
a.
Place the PROCALL-X disk into
Drive A.
b.
Place a storage disk in Drive
B.
c.
Boot PROCALL-X by turning AVL
Genesis on.
d.
When the following prompt
appears on the screen:
HELLO, I AM GENESIS FROM
AVL. WHAT IS YOUR NAME?
Type your name and press the
RETURN key. Or, i f you do not
wish
to enter your
name,
merely press RETURN.
e.
When the prompt:
HI THERE NAME.
MEET YOU.
NICE
TO
WOULD YOU LIKE TO:
(1)
CONTINUE WITH THE
STANDARD FORMAT
(2)
CREATE YOUR OWN
FORMAT
(3)
USE A FORMAT
PREVIOUSLY CREATED
appears on the screen, hit the
1 key.
f.
When the prompt:
PLEASE NAME YOUR PROGRAM
AND WE CAN BEGIN
is displayed on the screen,
type the name of the program
and press RETURN.
NOTE: If you do not want to name
the program, press RETURN and the
program
will be named DEMO 1.
However, if you save the program It
will write over any DEMO 1 program
already existing on the disk.
g.
You can begin entering cues
when the programming
panel
display showing the standard
format for Bank A and Bank B
appears on the screen. Refer
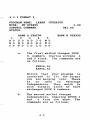
to Figure 3-1 for a description of the standard format.
BANK A STATUS
1
A0
BO
CO
2
DO
EO
FO
7
3
GO
HO
I0
4
JO
KO
LO
FIGURE 3-1
BANK B STATUS
5
MO
NO
00
1
A0
BO
CO
2
DO
EO
FO
3
GO
HO
I0
4
JO
KO
LO
5
MO
NO
00
STANDARD FORMAT
3.4 CREATING A NEW FORMAT
To create a new format, follow the
procedure outlined below. (Refer
to
Chapter 6 for the descriptions of how
you program a show.)
-7
a.
Place the PROCALL-X disk into
Drive A.
b.
Place a storage disk in Drive
B.
c.
Boot PROCALL-X by turning AVL
Genesis on.
d.
When the following prompt
appears on the screen:
HELLO, I AM GENESIS FROM
AVL. WHAT IS YOUR NAME?
Type your name and press the
RETURN key. Or, if you do not
wish
to enter your
name,
merely press RETURN.
e.
When the prompt:
HI THERE NAME.
MEET YOU.
NICE
TO
WOULD YOU LIKE TO:
(1)
CONTINUE WITH THE
STANDARD FORMAT
(2)
CREATE YOUR OWN
FORMAT
(3)
USE A FORMAT
PREVIOUSLY CREATED
appears on
the 2 key.
f.
the screen, press
When the configuration table
(see Figure 3-1) appears on
the
screen, configure
the
format
as
described
in
Paragraphs 3.4.1 and 3.4.2.
below.
'
g.
After the new format is
configured, press the ESC key.
h.
When the following prompt
comes on the screen:
DO YOU WANT TO
FORMAT?
SAVE THIS
enter Y for yes, or N for
and press RETURN.
i.
no,
If you indicated that you did
not want to save the format,
skip to Step k. below.
When the prompt:
WHAT NAME DO YOU
USE?
WANT TO
-3
comes on the screen, type the
name of the program and press
the RETURN key. (The system
name for the format will be
C#NAME, where NAME is the name
you enter here.)
j.
When the GENESIS asks:
WHAT DISK DO YOU
USE :
WANT TO
type B and press RETURN.
k.
When the prompt:
PLEASE NAME YOUR PROGRAM
AND WE CAN BEGIN
is displayed on the screen,
type the name of the program
and
press RETURN. (Special
characters and the use of the
space bar are not permitted in
file names).
NOTE: If you do not want to name
the program, press RETURN and the
program
will be named DEMO 1.
However, if you save the program,
it will write over any DEMO 1
program already stored on the disk.
3.4.1 FLEXIBLE FORMATTING
Flexible Formatting is used when you are
creating a new format.
This powerful
feature allows you to set
up your
projectors in any way and then to lay
them out on the video screen in the same
physical manner so that your
video
screen reflects the actual projector
setup when looked at from the back. You
are given a 54 position grid in which to
place your 15 projectors. This means
you are allowed nine screens per Bank
and six projectors per screen. It does
not mean that you are allowed a total of
54 projectors, just 54 places in which
15
to
choose
the
placement
of
projectors.
When formatting, you must name the DOVE
X and the projector, e.g.: lA, 2B, 3B,
4 C , 5 C , etc.
You may format vertically, horizontally,
or randomly; remember, however, that
what you are looking at on the screen is
the same as if you were looking at a
rear view of the projectors. Refer to
Paragraph 3.4.2 for sample formats.
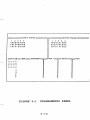
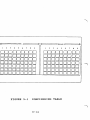
3.4.2 NEW FORMAT EXAMPLES
The
sample
formats
shown
below
demonstrate how easy it is to create a
-
new format using the GENESIS configuring
table. Refer to Figure 3-2 for
an
illustration of the table.
a.
Bank A shows a sample of
vertical
and
horozontal
formatting; while Bank B is an
example of block coding. The
block coding is equal to the
GENESIS' standard format.
BANK A STATUS
BANK B
STATUS
The above sample formatting
would result in the following
program format.
BANK A STATUS
BANK B STATUS
b.
Bank A is an example of
vertical,
horozontal,
and
random formatting; while Bank
B is mostly an example of
random coding.
BANK A STATUS
BANK B STATUS
The above sample formatting
would result in the following
program format.
BANK A STATUS
BANK B STATUS
3.5 ACCESSING A PREVIOUSLY CREATED
FORMAT
To use a previously created format,
follow the procedure outlined below.
7
a.
Place the PROCALL-X disk into
Drive A.
b.
Place a storage disk in Drive
B.
c.
Boot PROCALL-X by turning AVL
Genesis on.
d.
When the following prompt
appears on the screen:
HELLO, I AM GENESIS FROM
AVL. WHAT IS YOUR NAME?
appears on the screen, type
your name and press the RETURN
key. Or, if you do not wish
to enter your name, just hit
RETURN.
e.
When the prompt:
HI THERE NAME.
MEET YOU.
NICE TO
WOULD YOU LIKE TO:
( 1 ) CONTINUE WITH THE
STANDARD FORMAT
(2)
CREATE YOUR OWN
FORMAT
(3)
USE A FORMAT
PREVIOUSLY CREATED
appears on the screen, type 3.
?-
f.
When the prompt:
WHAT NAME DO YOU WANT TO
USE?
appears on the screen, type
the C#NAME (where NAME is the
name of the program) and hit
RETURN.
g.
When the prompt:
WHAT DISK DO YOU WANT T O
USE
comes on the screen, type
and hit RETURN.
h.
B
When the prompt:
PLEASE NAME YOUR PROGRAM
AND W E CAN BEGIN
is displayed on screen, type
the name of the program and
press RETURN.
i.
When the programming panel
appears on the screen, it will
display the requested formats
in the A and B status fields.
7
i.
You can begin entering cues
when the programming
panel
displaying the desired formats
for Bank A and Bank B appears
on the screen.
Chapter 6 describes the procedures used
for entering cues in the cue list when
programming a show.
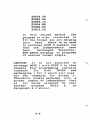
FIGURE 3-1
CONFIGURING TABLE
CHAPTER 4
EXCHANGING DOVES AND INDEPENDENTS
4.1
-
GENERAL
Exchanging (the ESNx,y command) DOVE Xs
and Independents is a very impor'tant
feature under PROCALL-X, especially with
Flexible Formatting. E S N is very useful
when merging two shows with different
formats. It is a powerful
command,
because it eliminates the need for time
consuming editing and reprogramming of a
show with a different format.
It also is used for changing programs to
accomodate more projectors as will be
shown in the accompanying examples.
4.2
ESN COMMAND
The ESN command allows you to change not
only within a single bank, but between
Banks A and B also.
The rules of E S N in order
are as follows:
a.
of importance
You can only exchange DOVE Xs
if they have an equal number
of projectors in them.
b.
You cannot exchange a DOVE X
or
Independent
designation
that
currently
has
programming.
c.
It is necessary to exchange
X numbers
and
both
DOVE
Independents, except
when
merging
two
programs
of
different formats.
d.
ESN is a CONTROL COMMAND
(Ctrl/C).
e.
You may exchange independent
projectors.
f.
You may exchange between
banks.
The ESN command is typed as follows:
a.
For DOVE X exchange:
1.
ESNlA,2A (Exchange DOVE
1 to DOVE 2 in Bank A)
2.
ESNlA,2B (Exchange DOVE
1 in Bank A to DOVE 2 in
Bank B)
b.
For Independent exchange:
1.
ESNAA,BA (Exchange
Projector A to Projector
B in Bank A)
2.
ESNAA,BB (Exchange
Projector A in Bank A to
Projector B in Bank B)
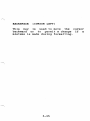
ESN is a versatile feature, as shown in
the
remaining
paragraphs
of
this
chapter.
4.3
?
EXCHANGING DOVES AND INDEPENDENTS
Suppose we want to merge the program in
FORMAT 1 below into a show with the
following format, namely FORMAT 2. This
can easily be done since the DOVES have
the same number of projectors as in
FORMAT 1 of this example (Rule a. in
paragraph 4 . 2 above). We can merge the
program using two different methods.
4.3.1 FORMAT 1
PROGRAM NAME: LEARN
MODE: MT BYPASS
CONTROL COMMAND:
STATUS :
BANK A STATUS
1
3
D 0
E 0
F 0
A 0
B 0
C 0
CUE# CODE
1
2
3
4
AT
AT
FA
8A
OPERATOR:
0.00
GX1.OO
BANK B STATUS
5
G 0
H 0
I 0
STATEMENT
BANK A
ALT
ALT
FAST ALT
8 SEC ALT
1 3 5
BANK B RUN
B E H
ABCDEFGHI
C F I
-
4.3.2 FORMAT 2
PROGRAM NAME: LEARN
MODE: MT BYPASS
CONTROL COMMAND:
STATUS :
1
A 0
B O
C O
BANK A STATUS
4
2
3
D O G O J O
E O H O K O
F O I 0 L O
a.
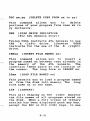
OPERATOR
0.00
GX1.OO
BANK B STATUS
5
M O
N O
0 0
The first method changes DOVE
numbers leaving screens 4
and 5 blank. The commands are
as follows:
X
Notice that your program is
corrected to fit the format
you are merging into. There
is
no
need
to
exchange
Independents. They match in
both formats since we have
exchanged DOVE X numbers.
b.
The second method changes
Independents, removing DOVES 2
and
4 from the show. The
commands are as follows:
ESNDA, GA
ESNEA,AA
ESNFA, I A
ESNGA,MA
ESNHA, NA
ESNIA, OA
In this second method
the
program is also corrected to
fit the format you are merging
into. Here, there is no need
to exchange DOVE X numbers now
that the Independents
have
been
exchanged. Therefore,
ESN makes merging of programs
of similar format simple.
CAUTION: It is not possible to
exchange DOVE 1 with DOVE 3 in this
example. Your programming contains
DOVES
and
commands
for
both
exchanging 1 for 3 would also wipe
out the commands for screen 3.
Therefore, always exchange into a
screen number or independent that
is
not being accessed 'by your
current
program
(Rule
b.
in
Paragraph 4.2 above).
4.4
CHANGING PROJECTORS
-\
,-
Suppose you have a program that is long
enough for projectors to require slide
tray changes and you want to revise this
program to switch to a second set of
projectors rather than changing trays.
Suppose the following is your format and
program :
PROGRAM NAME: LEARN
MODE: MT BYPASS
CONTROL COMMAND:
STATUS :
BANK
1
A 0
B O
C O
A STATUS
2
3
D O
G O
E O
H O
F O
I 0
CUE# CODE
AT
AT
2A
8A
2A
16A
OPERATOR:
0.00
GX1.OO
BANK B STATUS
STATEMENT
BANK A
ALT
ABCDEFGHI
ALT
2 SEC
8 SEC
2 SEC
16 SEC
ALT
ALT
ALT
ALT
BANK B RUN
123
B E H
ABCDEFGHI
123
A D G
Suppose that at cue #2000 you want to
switch to other projectors to save a
tray change, do the following steps.
a.
Boot up AVL Genesis and place
the format above in both Bank
A and Bank B.
b.
Load your program and clear
all cues before cue #2000.
c.
Exchange DOVES and Independents between Bank A and Bank
B which automatically places
the program portion into Bank
B (Rule f. in Paragraph 4.2).
d.
Go to the CONTROL COMMAND
FIELD
and
perform
the
following exchanges (Rule d.
in Paragraph 4.2).
ESNlA,1B
ESN2A,2B
ESN3A,3B
ESNAA,AB
ESNBA,BB
ESNCA,CB
ESNDA ,DB
ESNEA,EB
ESNFA,FB
ESNGA,GB
ESNHA,HB
ESNIA,IB
7
The program should now
follows :
PROGRAM NAME: LEARN
MOPE: MT BYPASS
CONTROL COMMAND:
STATUS :
BANK A STATUS
1
2
3
A 0 D O G O
B O E O H O
C O F O I 0
CUE# CODE
2000 AT
2001 2A
2002 8A
2003 2A
2004 16A
STATEMENT
be
OPERATOR :
0.00
GX1.OO
BANK B STATUS
2
3
A 0 D O G O
B O E O H O
C O F O I 0
1
BANK A
ALT
2 SEC ALT
2 SEC ALT
2 SECALT
16 SEC ALT
BANK B RUN
123
B E H
ABCDEFGHI
123
A D G
e.
Save that program.
f.
Load o.rigina1 program and
clear all cues from #2000
the end.
g.
as
to
Add on the exchanged program.
Using this approach, when the program
reaches cue #2000 the projectors in Bank
B will be commanded and the projectors
in Bank A will be finished.
NOTE: Since the above Program
Commands control projectors by
both screen number and independents, all screen numbers and
independents
must
be exchanged
(Rule c).
NOTE: It is also acceptable to
exchange screen numbers and independents from Bank B to Bank A.
For example ESN lB, 1 A exchanges
screen 1 from Bank B to A.
After doing those examples, the use of
ESN
should
become
clear. It
is
important to understand all of the rules
that have been presented in order to use
this command correctly.
-
CHAPTER 5
PROCALL-X COMMANDS
GENERAL
5.1
This chapter details all the commands
that
are
valid under PROCALL-X. A
shorter version of these same commands
is contained in Appendix A.
PROGRAMMING COMMANDS
5.2
The subparagrahs that follow describe
the commands that are entered in the
columns labeled code and screen.
-
I
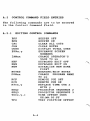
5.2.1
CT
COMMANDS ENTERED UNDER THE CODE
HEADING
(CUT)
This cue turns the lamp ON or OFF
quickly. If the lamp is already ON,
this will turn the lamp OFF and initiate
a tray advance. If the lamp is off it
will then be turned ON. If you wish to
cross
from
one visual to
another
quickly, a CUT will turn the ON lamp OFF
and the OFF lamp ON, and the projector
with the down going lamp will perform a
tray advance. A CUT employs the after
burner effect as described in the note
below.
7
NOTE: A projector lamp does not
turn on or off instantly with the
application or removal of power.
The lamp actually requires a
fraction of a second to heat up or
cool down. This is called the
"thermal lag" of the lamp, and the
lag is different for turning the
lamp on than it is for turning the
lamp off. All AVL computerized
dissolve controls automatically
compensate for this effect.
Cuts and Alternates employ an
"After-burner Effect" which allows
the lamp to reach its full
intensity. Because of the time
involved due to the lamp lag, the
after burner does not allow the
lamp to flash on and off at 20
cues per second. Therefore, the
Fast Alternate was created to
defeat the after burner and to
allow solo flashing and movement
of visuals at 20 cues/second.
SC
(SOFT CUT)
A soft cut is a compromise between a cut
and
a
one
second
dissolve. The
projector with a down lamp will do a
tray advance.
HC
(HARD CUT)
7
hard cut was designed with two things
in mind, first was the desire to move
images
faster, and second was
the
ability to create a sharper, harder
image change on the screen. A hard cut
closes the gate of the slide projector
which shuts off the light before the
lamp is turned OFF. The tray advances
to the next image. That projector is
now ready to be turned ON again with the
next slide. When HARD CUTS are used to
make a transition between 2 visuals the
change is much crisper than a CUT. This
can be used to simulate the flicker of
an old time movie when moving through
many visuals rapidly.
A
-
DISSOLVES
These cues turn the lamp ON or OFF in
the
designated
amount of time
in
seconds, creating a dissolve or a fade
effect, e.g. 2D is a 2 second dissolve.
You can create a cross-fade or dissolve
from one visual to another using a
dissolve in conjunction with 2 or more
projectors. Again, the projector with
the down-going lamp will have a tray
advance.
FA
(FAST ALTERNATE)
This cue turns the lamp ON or OFF as
fast as the lamp allows. It is used to
do alternates at 20 cues per second and
roughly equates to a HARD CUT with no
tray advance.
BA
(BLINK ALTERNATE)
This new feature can best be defined as
a Fast ALT for a loop. If the projector
status states that the lamp is ON, a
BLINK ALT command will act as a FAST ALT
and
turn
the
lamp
ON
and
OFF
instantaneously. If the status says the
lamp is OFF, the BA will not turn the
lamp on whereas FAST ALT will. This
eliminates the popping on of the lamps
at the end of a programmed blinking
dissolve sequence.
Secondly, if Blink Alt, Wait Cues, or
Freezes only are employed in a loop, it
is possible to program a dissolve after
a loop has been started. For example,
suppose we program a three projector
Blinking Loop using the BA command.
This Blinking loop can be dissolved up
and down, similar to methods used with
the older Version 5 BLINK GO command.
AT
(ALTERNATE or ALT)
-\
This cue turns the lamp ON or OFF with
no tray advance. An ALT looks like a
CUT on the screen with no tray advance.
DISSOLVE ALTERNATES
These commands are equivalent to the
dissolves but with no tray advance for
the down-going projector at the end of
the dissolve.
?
SA
(SOFT ALT)
Visually the same as a
without a tray advance.
SOFT
CUT
but
AUXILIARY FOR DOVES
This
command
(A thru J )
is
now
programmed with Independents only. The
letters A thru J are used instead of,
for example, 1L and 1R. The following
table shows the PROCALL-X commands as
compared to the PROCALL commands.
NOTE: We are using the dove number
rather than screen number as our
auxiliary reference.
DOVE
PROCALL-X
#
PROCALL
F Z (FREEZE)
The AVL Genesis has the ability to stop
any dissolve alternate while it is in
progress and hold the light level at any
light intensity. This cue also allows
you to continue the dissolve in the same
direction at the same rate or change the
rate. You are also permitted to change
directions using the same rate or a
different rate. Only dissolve alternates should be used with a FREEZE.
HOME
(PROGRAMMABLE RETURN TO BEGINNING
OF PROGRAM)
Home is used as a program function to
return the program, slide trays, and
lamp statuses to the home (cue # I )
position. Home brings the lamps down
and sends the trays to their original
starting position by the shortest route.
-
NOTE: When Home is part of a
Run Sequence in the program,
the program will assume it is
to continue to run. The program
will execute cue # I and all
subsequent cues in memory until
it encounters a STOP command.
LDxx
(PROGRAMMABLE LOAD OF FILE xx)
This cue automatically executes load
from the disk into memory. When the
LOAD FILE cue is executed in a run mode,
the system will load the file xx. The
program file system will then reset
itself to cue number one and continue to
run from that point. The tray and lamp
status of the projectors will
stay
exactly the way they were before the
load. Keep in mind that while
the
system is loading the file it is totally
occupied. Pick a convenient slow period
when no projector action is needed such
as a wait or long dissolve.
LG
(LOOPGO)
LG with DOVE X dissolves will cause all
specified LOOPS to be repeated until
told to STOP.
LL
(LOAD LOOP)
LL is used to instruct DOVE X's to store
a series of cues (ACTION CUES) in their
memory
as a routine that will
be
repeated.
LPxx
(LOOP REPEAT xx TIMES)
This command specifies the number (xx)
of times a loop is to be repeated. It
acts much like a RPxx but the DOVE X's
independently carry out this action.
LS
(LOOP STOP)
LS will cause all LOOPS in progress on
the designated DOVES to stop.
7
NOTE: Loop commands LL, LG, LS
must designate Independents (A
thru 0) to participate within a
particular loop. Screen numbers
are invalid.
N
(NO OPERATION)
This has no effect on the screen action.
It equals a .1 second wait at 10 cues
per second and a .05 second wait at 20
cues per second. N is also used as a
convenient location for a RUN or STOP
separate from any screen action.
7
PF
(PROJECTOR FORWARD)
This cue, used with an
Independent
projector designation, will move the
assigned projector tray forward
one
position without effecting the
lamp
status. If you use PF with a screen
number designation, the system
will
assume that you want all projectors in
the screen to move FORWARD one position.
You cannot use both a screen number and
an Independent in one cue.
-
PR
(PROJECTOR REVERSE)
This command functions the same as the
PROJECTOR FORWARD command except that it
will REVERSE the trays one position.
RPO
(REPEAT UNTIL TERMINATED)
This cue is used if an undetermined
number of REPEATS is desired. The RPO
can be terminated by pressing the CUE
(F10) key or using a REMOTE CUE. This
command is of use when you are doing the
"live" portions of your program and the
length of a sequence has not
been
predetermined.
RPX
(REPEAT X)
RPX allows you to let the AVL Genesis
determine
the number of times
the
sequence has to repeat. It is used
while you are in the RUN mode and
actually viewing the sequence. Enter
the RPX into the program and start the
sequence
running,
when the desired
number of repeats have taken place on
the screen press the F10 (CUE) key to
move on to the next part of
your
program. The AVL Genesis will resolve
the "Xi' to the number of times the
sequence is repeated.
NOTE:
When you press the CUE
(F10) key to resolve the RPX, the
system will finish the sequence
in progress before moving on.
RPxx
(REPEAT xx)
This command is used to repeat a series
of cues that have a RUN embedded in the
first cue to that sequence. The number
(xx) of times to be repeated can be from
1-255. Up to 10 consecutive (nested) RP
commands are allowed.
NOTE:
When you repeat a sequence
23 times the sequence will actually
take place 24 times. The sequence
will take'place once and then be
repeated 23 times.
With the use of nesting, it is
possible to create a sequence that
has billions of cues. Use nesting
with extreme care
S10
n
(SPEED = 1 0 CUES PER SECOND)
S 1 0 is used to shift speed from 20 cues
per second to 10 cues per second. The
AVL Genesis will automatically select 10
cues per second when the system is first
LOADED, when you CLEAR ALL CUES from
the control command mode or when you
perform a HOME.
S20
(SPEED = 2 0 CUES PER SECOND)
520
is used to increase the
speed to 2 0 cues per second.
running
NOTE: The AVL Genesis can execute a
program (run sequence) at 10 cues
per second or at 2 0 cues per
second. Either speed may be
selected by embedding speed change
cues in the program. At 1 0 cues
per second the AVL Genesis will
wait .1 seconds between the time a
cue is issued and the time a
subsequent cue is issued. At 20
cues per second the system will
wait .05 seconds between cues.
A RUN sequence is initiated by
using a RUN command (stopped by a
STOP command) or with the use of
time cues from the Clock-trak. A
RUN sequence will execute until it
encounters a stop or the next time
cue. Run sequences are used to fire
a series of cues rapidly with
precise timing.
SG
(SMOOTH GO)
SG is a DOVE X command which allows
direction change at any point in a
dissolve curve. This feature enables
the programmer to produce a rippling
effect by cueing other dissolves before
the completion of the previous dissolve.
If this procedure were done without
SMOOTH GO, the previous dissolve would
move to its ending state when another
dissolve is cued in, giving a popping
effect.
SS
(SMOOTH STOP)
SS is used to return all Doves to normal
from SMOOTH state.
1
,-",
TBxx
(TAB XX)
This is a label which may be nested in
the program to mark different sections
of the show, where xx may be any two
characters.
TX
(TIME XI
TX is used to mark the beginning of a
timed (RUN) sequence using the Clocktrak. The X value is resolved when you
press the F10 (CUE) key.
NOTE: TIME (hh:mm:ss:ff) cues in
.O1 second steps may be located in
the program at any desired point.
In this format "hh" is hours, "mm"
is minutes, "ss" is seconds and
"ff" is hundredths of seconds. You
do not have to enter unused fields.
For example:
10
10:
10:
:
Becomes 10 Seconds
Becomes 10 Minutes
Becomes 10 Hours
The maximum value for a time cue is
approximately 11 hours and 39 minutes.
A time cue of 0.00 is not valid. If you
should attempt to enter a time cue less
than or equal to the current time, the
system will reject the cue and issue a
message on the status line. A time cue
\
-
is essentially a null cue, that is,
nothing goes out the mag tape channel
when it is executed. WHEN A MAG TAPE
SAVE (MSV) operation is performed the
time cues are recorded on the tape. A
time cue takes less than .O1 seconds to
execute.
When PROCALL-X encounters a time cue
while in the run mode, it will cause the
program to stop. PROCALL-X will then
wait until the clock equals the value of
the time cue and then put the program
into the RUN mode again.
W.05 thru W10
(WAIT TIMES)
Waits
are computer-generated
timing
links that allow you to time out action
sequences precisely. These times are
entered into the program in the form of
wait cues ranging from .05 seconds up to
10 seconds. If a wait time longer than
10 seconds is desired, you may use
consecutive wait cues to achieve the
desired wait time.
NOTE: Because of the convenience
of using Clock-trak, we strongly
suggest that you use it instead of
WAIT commands for times in excess
of 1.5.
r7
y
WX
(WAIT X )
-\\
This cue is used when the proper timing
of a sequence has not been determined
WX
cue is
before programming. The
resolved to the nearest .05 second when
you are operating at 2 0 cues per second
and to the nearest .1 second when you
are operating at 10 cues per second.
The WAIT X is resolved by pressing the
F 1 0 (CUE) key during the running of the
particular section.
COMMANDS ENTERED UNDER THE SCREEN
HEADING
5.2.2
n
R
(RUN)
RUN is used in the screen area of the
DISPLAY LINE to designate one of the
following:
S
To mark the beginning of a
REPEAT sequence.
2.
To initiate a RUN sequence.
3.
As a reference point.
(STOP)
stop is used in the screen area of the
display line to designate one of the
following:
A
A,
1.
P
1.
To mark the end of a RUN
sequence.
2.
To stop the screen action
when using Clock-trak.
(PROCEED)
When running 20 cues per second, this is
a 1/40th second link between two cues
referencing different Banks. Its purpose
is to approximate being able to make two
separate cues happen at the same time.
For example:
CUE# CODE
---
1 AT
2D
2
STATEMENT BANK A
BANK B RUN
ALT
2 SEC DIS
A C EF
ABCD
P
These two cues are staggered 1/40th
second apart between Out 1 and Out 2, so
that both cues are effectively given in
1/20th of a second. When running 1 0
cues per second, the two
cues are
staggered 1/20th of a second apart on
Out 1 and Out 2. Please note that in
order to maintain PROCEED outputting, a
P must be given on every other cue
otherwise Genesis returns to its normal
output procedure.
SCREEN NUMBERS
Possible screen numbers on OUT 1 (BANK
A) and OUT 2 (BANK B) are 123456789.
INDEPENDENT DESIGNATIONS
Possible Independent designations on OUT
1 (BANK A) and OUT 2 (BANK B) are
ABCDEFGHIJKLMNO.
AUXILIARY DESIGNATIONS
Possible
auxiliary designations
ABCDEFGHIJ. Screen
numbers
are
valid with this command.
T
are
not
NOTE: The use of a screen number
with an Independent is invalid.
5.2.3
COMMANDS FOR EDITING PROGRAMS
Editing is a very important part of
programming. The
commands
described
below will assist you in editing your
program quickly and easily.
'7
Certain keys have dual functions and
some keys are used in conjunction with
the Ctrl key. For purposes of notation,
to indicate that two keys are to be
pressed simultaneously, a slash (1) is
inserted between the names of the keys,
e.g: CTRL/A.
CTRL/A
(ADD A CUE)
This allows you to open up the memory
and insert a cue into your program.
This will move all subsequent cues down
one cue number in the memory. Same as
Ins (Insert) key.
CTRL/B
(REVERSE TO PREVIOUS TAB)
Same as CTRL/TAB.
CTRL/C
(CONTROL COMMAND)
This is the way to enter
Command mode.
the
Control
I
CTRL/D
?
(DELETE CUE)
This will delete (remove) the cue that
is being previewed and will close up the
memory.
CTRL/G, ENTER
(HOME PROJECTORS)
This will issue a HOME cue to the
attached dissolve units and return the
program to CUE #l. The lamps will come
down and the trays will move to their
original
starting position via
the
shortest route. This command functions
the same as typing GOT0 in the Control
Command field.
'7
CTRL/Gxx
(GOT0 CUE xx)
This will issue a command to the AVL
Genesis to GOT0 a specified cue in
memory, where xx is the desired cue
number.
The
lamp status and
tray
position will be updated to the dissolve
units. This cue is used to move from
any cue in memory to any other cue in
memory. Use 9999 as the cue number to
quickly move to the end of your program,
since the GOT0 will stop at the last cue
in memory. Same as typing GOTOxx in
Control Command field
CTRL/G,T,M,
(GOT0 TIME HH:MM:SS:FF:)
This will issue a command to GOT0 the
desired time cue. If there is no time
cue equal to the entered value, the
system will go to the next time cue
greater than the desired cue. Same as
typing GOT0 TIME in the Control Control
field.
CTRL/N
(DISPLAY NOTES/NORMAL)
This is used to display a NOTE stored in
the
note
buffer (the program will
continue to run without interruption).
CTRL/P
(SLIDES DISCONNECT/NORMAL)
This command disconnects or disables any
slide projector cues from going out of
the
AVL Genesis
system. Same
as
typing PD or PN in the Control Command
field.
CTRL/Q
(STEP REVERSE CUE)
This steps you through the program in
the REVERSE direction in the cue each
time the Q is depressed while holding
down the Ctrl key. Reverse scrolling at
10 cues per second is initiated by
depressing the CTRL/Q and repeat keys
simultaneously.
'7
--
1.
t
CTRL/R
7
(REPEAT PREVIOUS CUE)
This repeats the previous cue each time
the CTRL/R is depressed. Cues may be
the
repeated
rapidly by depressing
CTRL/R keys and holding them down. The
AVL Genesis will sense any key held down
for longer than a second and repeat it.
CTRL/S
(STANDBY)
I
This will bring d ~ w nthe lamps of all
projectors. The projectors will respond
to advances and reverses and keep track
of
the lamp and tray statuses. To
return
to
the normal lamp' status,
depress CTRL/S again.
CTRL/T, ENTER
(GOT0 NEXT TAB)
'-7
This allows you to access
quickly.
CTRL/T,xx
the
TAB
cue
(GOT0 TAB xx)
This allows you to GOT0 any desired TAB,
where xx is the desired TAB. Same as
typing GOT0 TB in the Control Command
field.
CTRL/U
(Change Mode)
This command will allow the user to
change assignments to different locations while creating a screen format.
CTRL/X
(AUX DISCONNECT/NORMAL)
This disconnects or disables auxiliary
cues from going out of the AVL Genesis
system. Same as typing AD or AN in the
Control Command field.
This allows the display of the DOVE X
number and projector designations in the
status area. This allows easy reference
to show which Independents correspond to
which projector. Pressing CTRL/V again
returns status to normal.
CUE
(F10)
The CUE key commands the AVL GENESIS
system to execute a cue or run
a
sequence from memory. When you
are
using Clock-trak, the AVL Genesis will
execute a chain of cues from memory
until the next time cue is encountered.
If you are hand cueing or remote cueing
the system, CUE will step the program
one cue at a time or start a run
sequence if that cue has a RUN included
in it. If projectors have been formatted for both BANK A and BANK B, but
you first want to program BANK A only,
use CUE to enter cues because it eliminates having the cursor moving into BANK
B. When booting up the system, CUE will
move directly to the standard format.
REVERSE CUE
".
(F9)
When depressed, this key will
program
(memory)
in
the
direction as explained below.
move the
REVERSE
1.
One cue if you are not in a
RUN condition.
2.
To the previous GO in a RUN
mode.
3.
To the previous TIME cue using
Clock-trak provided there is
not an intervening GO command.
4.
To the previous LL if it is in
a loop mode.
?
RETURN or ENTER
Depressing this key will enter the cue
into the memory of the AVL Genesis. This
key is generally used to enter information into the system. It is essential
to use this key to move through the
flexible
formatting
questions
and
entries.
NOTE: When formatted for BANK A
only, the cursor never enters the
BANK B column.
ESC
(ESCAPE)
This allows you to ESCAPE (stop) any
action that is being carried out by the
AVL Genesis. ESCAPE will turn off the
MAG TAPE INPUT and cause the system to
ignore Clock-trak or data information.
Pressing any key will turn the MAG TAPE
INPU" back on; AVL recommends that you
use the space bar. The ESC key also
returns you to the programming mode from
the Control Command mode.
Q
(STEP CUE)
This will step you through the program
in the FORWARD direction each time you
push the key. Scrolling in the forward
direction at 10 cues per second may be
initiated by depressing the Q key and
holding it down.
TAB
(FORWARD TO NEXT TAB)
SAME as CTRL/T, ENTER.
SPACE BAR
(CURSOR RIGHT)
This key is used to move the cursor to
the right without changing the character
the cursor is moving across.
BACKSPACE
(CURSOR LEFT)
This key is used to move the cursor
backward or to permit a change if a
mistake is made during formatting.
CONTROL COMMAND ENTRIES
5.3
The subparagraphs that follow list and
describe the following listed Control
Command field entries.
*
Editing Control Commands
* Memory/Disk Data Transfer Commands
*
Magnetic Tape Control Commands
*
Serial and Parallel Print Commands
5.3.1
EDITING CONTROL COMMANDS
BPF ENTER
(BEEPER OFF)
This allows you to turn the BEEPER OFF.
BPN ENTER
(BEEPER ON)
Turns the BEEPER back to normally ON.
CAC ENTER
(CLEAR ALL CUES)
This command clears all cues from
memory. A home is also issued to
dissolve units.
the
the
NOTE: Use CAC with caution. Be
sure you have stored the information you are clearing or that you
really do not want the information.
CLN
(CLEAR NOTES)
This permits you to clear
a
NOTE
currently stored in the NOTE buffer.
CUES
(DISPLAY TOTAL CUES)
This displays the total cue storage
capability of the memory and the amount
of cues remaining. Subtracting the two
will give you the total cues used in the
program.
ESN
-,
(EXCHANGE SCREEN NUMBERS)
ESN exchanges both screen numbers and
independents. ESN is entered as: ESN
vx, yz, where v and y are screen numbers
or independents and, where x and z are
either Bank A or Bank B.
IAMxx
(CHANGE OPERATORS NAME TO xx)
This command changes the operator name
on the program in memory to xx (xx may
be up to 25 characters in length).
KBF
'7
(KEYBOARD EDIT OFF)
This command disables the keyboard so
that no direct changes can be made to
the cues of the program. Any of the
features of the AVL Genesis system that
are available to you in the CONTROL
COMMAND mode are still usable.
KBN
(KEYBOAD EDIT ON)
This returns
operation.
NEW
the
keyboard
to
normal
(ESTABLISH NEW HOME POINT)
This tells the system that you want to
use the current projector status as the
home reference point. This
is done
automatically
with
the
cue
of
programmable loads.
NOTES
(EXAMINE AND EDIT NOTES)
This blanks the display and allows the
entry of up to 11 lines of 45 characters
each. A NOTE can store information such
as special set up instructions for a
show.
PGMxx
(CHANGE PROGRAM NAME TO xx)
This permits you to change the name of
the program in memory to xx (xx may be
up to 8 characters in length).
RCF
(REMOTE CUE OFF)
This will turn the REMOTE CUE jack off.
The AVL Genesis system will ignore any
remote cue impulses.
7
RCN
(REMOTE CUE O N )
7
7
This will return the remote cue
back to its normally on ON state.
RTC x.y
jack
(REPLACE TIME CUES WITH TX)
This command will replace all TIME cues
with TIME X cues beginning with the
first cue specified (x) and continuing
until the last cue specified (y) has
been examined.
TOC x,y (TIME OFFSET CUES
HH:MM:SS:FF)
This command allows you
to add or
subtract a time value from either a
range of time cues or from all time cues
in memory. PROCALL-X will use the first
cue number (x) to begin a search for
time cues to be modified and continue
until the last cue specified (y) has
been examined and changed.
TPOX
(TRAY POSITION OFFSET)
This will set a starting tray
for the position status. You
any (x) number from 0 to 80.
position
can use
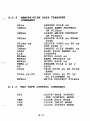
5.3.2
AVL
MEMORY/DISK DATA TRANSFER
COMMANDS
(CLOCK-TRAK)
This command turns AVL1s Clock-trak ON
and
causes the SMPTE indicator
to
disappear from the display line. Clocktrak is the default timing and control
code.
APxx
(APPEND FILE)
This allows you to add a file named xx
from the disk to the end of the program
in the memory of the AVL GENESIS. The
long form "APPEND xx" is the same.
CNPxx
(CLEAR NAME PROTECT)
This command allows a
be renamed.
CWPxx
file
named xx to
(CLEAR WRITE PROTECT)
This command clears the WRITE PROTECT
feature on file named xx and allows you
to then delete the file from the disk.
DELxx
(DELETE FILE FROM THE DISK)
This command permits you to delete a
file named xx from the disk. Deletion
occurs only if the program is not WRITE
PROTECTED. Same as long form DELETE xx.
1
DLC xx,yy
(DELETE CUES FROM xx to yy)
-\
?
,
This command allows you
to
delete
portions of your program from cues xx to
yy inclusive.
DSK
(DISK DRIVE INDICATION
(For AVL Genesis Only))
Typing DSKA instructs AVL Genesis to use
the
A (left) drive. Likewise
DSKB
instructs for the use of the B (right)
drive.
INSxx
(INSERT FILE NAMED xx)
This command allows you to insert a
program named xx between cues already in
the memory of the AVL Genesis. The
insertion takes place at the location of
the cursor. The long form is INSERT xx.
LDxx
(LOAD FILE NAMED xx)
This permits you to load a program named
xx from the disk into memory. The long
form LOAD xx is the same.
LIB
(LIBRARY)
This will display on the video monitor
the file names of all programs stored on
the disk. When a full screen of library
entries has been displayed push any key,
except the ESC or F10 (CUE) keys, to see
the next line of
again at the top
REVERSE CUE (F9)
to see any more
entries. To start over
of the list, push the
key. If you do not wish
entries, push the ESC
'7
key.
NLDxx
(NOTES LOAD xx)
This will load a NOTE file
into the NOTE buffer in the
the AVL Genesis.
NPRxx
titled
memory
(NAME PROTECT xx)
This will protect a file named
being accidently renamed.
NSVxx
xx
of
xx from
(NOTES SAVE xx)
This will save a NOTE currently in the
NOTE buffer in memory on to the disk at
xx (xx may be any two characters).
RNMx,y (RENAME FILE x AS y)
This will rename a file titled x on the
disk as y. Renaming will occur only if
the file is not name protected. Same as
long form RENAME.
SV
(SAVE)
This saves the program in memory on the
disk with the Program Name shown on the
monitor as the file name. ("SAVE")
'7
SVxx
(SAVE CUES xx)
\
This command will save the program in
memory on to the disk with xx assigned
as the file name; xx may be up to 8
characters in length. The long form,
SAVE xx is the same.
SCxx.yy.FILENAME
(SAVE CUES xx TO yy
UNDER FILENAME)
This command allows you to save sections
of cues out of your program onto the
disk under an assigned file name.
SMPTE
7
This command tells Genesis to use SMPTE
as the timing and control code. When
SMPTE is selected, SMPTE is shown an the
display line.
1
I
WPRXX
(WRITE PROTECT
XX)
i
This enables you to protect a file named
xx on the disk from accidental erasure.
5.3.3
CEM
MAGNETIC TAPE CONTROL COMMANDS
(CLOCK EDIT MODE)
Allows the EXPANDED ROADRUNNER to read
Clock-trak
of
magnetic
tape
and
synchronize the program in memory. If
the tape data stops, the program will
stop 0.5 seconds after the data stops.
As soon as the Clock-trak input begins
again, the system will execute a GOT0 to
be ready for the next section.
CIM
(CLOCK INPUT MODE)
This command will put the system into
CLOCK INPUT MODE. The CLOCK TRAK data
on a tape does not resemble normal cues
on a data tape so the AVL Genesis will
ignore Clock-trak data unless you are in
either CLOCK INPUT or CLOCK EDIT mode.
When the system is in either of the two
modes (CIM, CEM), it will accept only
Clock-trak data as a valid input. The
Clock-trak coming into the system starts
and stops a program stored in the memory
of the AVL Genesis at precise times that
you can designate and normal cue data
will be sent out of the system.
The main difference between CLOCK INPUT
and CLOCK EDIT modes is that in CLOCK
INPUT mode the system will continue to
run on its own internal clock timer if
the input from the Clock-trak on tape
T
7
7
stops. The AVL Genesis will
message warning you that the
tape has stopped.
display a
input from
Once a TIME or TIME X cue has been
executed, the AVL Genesis will stay in
perfect sync with the time recorded on
the tape. The system will automatically
execute
a
GOTO, if necessary,
to
continue tracking with the Clock-trak
from tape. If you stop the tape and
fast forward or reverse the tape, the
system will GOT0 the correct place in
the program automatically and update
projector lamp and tray status.
COM
(CLOCK OUTPUT MODE)
This generates Clock-trak from the OUT 1
jack on the AVL Genesis for recording on
to magnetic tape. Normally the time
will begin at time zero. However, if
you want to start at a fixed point in
time, you can enter the starting time
(see next command).
COM hh:mm:ss
(CLOCK OUTPUT MODE)
This also generates Clock-trak from the
OUT 1 jack. However, if you want to
start at a fixed point in time, you can
enter the starting time (hours, minutes,
seconds, and hundredths).
MIF
(MAGNETIC TAPE INPUT OFF)
This will turn OFF any magnetic tape
input and the AVL Genesis will ignore
any data input into the PLAY IN jack.
MIN
(MAGNETIC TAPE INPUT ON)
This turns the magnetic tape input (PLAY
IN) back ON.
MLD
(MAGNETIC TAPE LOAD)
This allows you to load a program into
the memory of the AVL Genesis from any
tape, directly from an AVL Genesis, or
one of AVLts other programmers.
MOF
(MAGNETIC TAPE OUTPUT OFF)
This will prevent the generation of data
information from the OUT 2 jack. When
this occurs only nulls are generated.
(A null is a signal that indicates the
absence of data). Turning the output
off enables you to move through programs
without advancing the projectors.
MON
(MAGNETIC TAPE OUTPUT ON)
This turns on data to
2 jacks.
the Out 1 and OUT
MSV
(MAGNETIC TAPE SAVE)
7
T
This feature allows you to dump the
contents of the memory of
the AVL
Genesis on to magnetic tape in the same
fashion as saving the memory contents
onto the disk. In dumping a program
using both banks of projectors, simply
connect the tape recorder to Out 1.
Both banks are recorded simultaneously
through
Out
1. Therefore,
it
is
possible to load a 30 projector show.
PIF
(POSI-TRAK INPUT OFF)
This tells the AVL Genesis to disregard
any POSI-TRAK being received.
PIN
(POSI-TRAK INPUT ON)
This tells the AVL Genesis to
any POSI-TRAK being received.
POF
process
(POSI-TRAK OUTPUT OFF)
This command is used to instruct the AVL
Genesis to halt POSI-TRAK generation
out. It can still be read into AVL
Genesis.
PON
(POSI-TRAK OUTPUT ON)
This command is used to instruct AVL
Genesis to restore POSI-TRAK generation.
STL
(SET LEVELS)
This command tells the AVL Genesis to
generate a continuous test tone from the
RECORD OUT RCA jack on the rear panel to
enable you to adjust the record level of
your tape recorder. (Adjust for o VU).
VER
(VERIFY (MSV ONLY))
This command allows you to verify
accuracy of the information that
been saved on magnetic tape before
clear the program from memory.
the
has
you
PRINT COMMANDS
5.4
7
7
-\
The following print commands and
parameters are Control Command
entries.
print
Field
NOTE: SPD, PLP, or SLP must be
specified BEFORE the commands PLB
or PRINT are used. If not, AVL
Genesis will automatically select:
SPD 300, NPB, and SLP.
PRINT
This
command
prints Program
Name,
Operator Name, and Cue information on an
external printer.
PLB
(PRINT LIBRARY)
This command will print all directory
information on an external printer.
SPD
(PRINTER SPEED SELECT)
This command selects the Baud rate of
the external printer. (See your printer
manual for suggested Baud rate). The
values that AVL Genesis will accept are
as follows; 75, 110, 150, 300, 600,
1200, 1800, 3600, 4800, 7200 9600. If
not specified, AVL Genesis will default
to BAUD RATE 300.
NPB
(NO PRINTER BUSY)
This command tells AVL Genesis not to
bother to look for a busy signal. This
also I s the default condition if no
other busy commands are given to the AVL
Genesis.
PLP
(PARALLEL LINE PRINTER)
This command depends upon the type of
External
Printer
used. Check
the
printer specifications to determine the
type of input your printer accepts.
(Parallel or Serial)
SLP
(SERIAL LINE PRINTER)
This
is
the default condition
if
Parallel Line Printer is not specified.
5.5
COMMANDS FOR
EQUIPMENT
OPTIONAL
PERIPHERAL
Chapter 7 describes the X-15 programming
commands
used
with
any
optional
peripheral equipment.
7
CHAPTER 6
PROGRAMMING EXAMPLES
6.1
GENERAL
This chapter provides sample programs
and an explanation of how they work. It
is suggested that these examples, with
their new formats, be entered into your
GENESIS and studied in detail for a full
understanding of the commands and their
implementation.
6.2
'7
SAMPLE PROGRAMS
The paragraphs that follow describe the
use
of Blink Alternate and Looping
commands using a square format and using
a pyramid format. For these
sample
programs,
we will place the square
format on Bank A and the pyramid format
on Bank B. This will also serve as an
example for formatting with both Banks.
All of the examples described in this
chapter use the standard format. Refer
to Chapter 3 for setting the standard
format.
6.3 USING THE BLINK ALTERNATE
The use of a BLINK ALT (BA) command is
much the same as using a FAST ALTERNATE
command; the only difference is that the
projector lamps will not pop on after a
dissolve down.
6.4
DISSOLVING USING BLINK ALT
The Blink Alt has a unique feature that
allows easy programming for Blinking
dissolves. If your loop contains only
Blink
Alt and Wait
commands,
any
dissolve can be introduced after the
loop has been executed
To see an example, program as follows:
PROGRAM: BLINK
CUE# CODE
OPERATOR:
STATEMENT
SCREENS
TAB 1
ALT
ABCDEFGHI
8 SEC ALT
ABCDEFGHI
BLINK ALT
BC EF HI
SPEED=20 CPS
NO OPERATION
BLINK ALT
A B DE GH
WAIT 0.05 SEC
BLINK ALT
BC EF HI
WAIT 0.05
RUN
RUN
RUN
BLINK ALT
A CD FG I
REPEAT 66 TIMES
BLINK ALT
BC EF HI
NO OPERATION
TAB 2
ALT
ABCDEFGHI
8 SEC ALT
ABCDEFGHI
BLINK ALT
A D G
NO OPERATION
BLINK ALT
AB DE GH
WAIT 0.05 SEC
BLINK ALT
BC EF HI
WAIT 0.05 SEC
BLINK ALT
A CD FG I
REPEAT 66 TIMES
BLINK ALT
A D G
NO OPERATION
TAB 3
SPEED=10 CPS
8 SEC ALT
ABCDEFGHI
FAST ALT
BC EF HI
FAST ALT
AB DE GH
FAST ALT
BC EF HI
FAST ALT
A CD FG I
REPEAT 66 TIMES
FAST ALT
BC EF HI
8 SEC ALT
ABCDEFGHI
FAST ALT
A D G
FAST ALT
AB DE GH
FAST ALT
BC EF HI
FAST ALT
A CD FG I
REPEAT 66 TIMES
NO OPERATION
TAB 4
8 SEC ALT
A D G
STOP
RUN
RUN
STOP
RUN
RUN
RUN
RUN
STOP
BA
BLINK ALT
A D G
LL
LOOP LOAD
ABCDEFGHI
BA
BLINK ALT
AB DE GH
BA
BLINK ALT
BC EF HI
BA
BLINK ALT
A CD FG I
LP255 LOOP 255 TIMES
N
NO OPERATION
8 SEC ALT
ABCDEFGHI
8A
ABCDEFGHI
16 SEC ALT
16A
ABC
6 SEC ALT
6A
DEFG
8A
8 SEC ALT
HI
1 SEC ALT
1A
A
I
32 SEC ALT
32A
B
H
16 SEC ALT
16A
G
C
8 SEC ALT
8A
D F
6A
6 SEC ALT
E
4A
4 SEC ALT
RUN
'-7
STOP
NOTE: Since there is a format in
Bank B, a Return at the end of a
Bank A Cue shifts the cursor into
Bank B. To eliminate this, use CUE
(F10) to skip the Bank B section.
NOTE: CNTRL/G, RETURN takes you to
cue #l. The "Q" key allows stepping
through the program. "CNTRL/Q1'
allows reverse stepping through the
program. The CUE key allows cueing
with Run Sequences.
Notice that there are four tabs in the
program example shown above.
'-3
T
TAB 1 shows a dissolve while blinking in
an inverted fashion. An inverted Blink
is one where lamps are on and the off
lamp is rotated. TAB 2 shows a similar
dissolve with a normal Blink; A normal
Blink is defined as two lamps off with
an on lamp rotating. TAB 3 shows the
same Blink as Tab 1 , but using the Fast
Alt command.
In each dissolve the programmed Blink
repeats 66 times which is more than
enough for an 8 sec dissolve. This is
done intentionally to show you that with
BA, the lamps do not pop on at the end
of the dissolve.
r'\
TAB 4 shows how a Blinking Sequence
programmed using Blink Alt and no other
Alt commands can accept a dissolve much
like the Blink Go of PROCALL-5.
NOTE: The GENESIS will not allow a
dissolve when a loop is in progress
if other ALT commands are utilized
in that loop.
6.5
USING LOOPING COMMANDS
The
following
program
shows
some
examples of using looping commands. Any
of the alternates, waits and freeze
commands can be used as long as the loop
contains less than 100 cues. Each Dove
will accept three different 100 cue
loops; one for each projector. Since
the loop works on a singular projector
basis, they can only be activated using
independents (alphabet letters).
NOTE: A Loop Load (LL) command
with screen numbers is invalid.
The commands within the loop must
also be given with independents.
The use of screen numbers is
forbidden within any loop.
PROGRAM: LPLGLS
CUE# CODE
OPERATOR :
STATEMENT
SCREENS
RUN
TAB 1
ALT
BLINK ALT
LOOP LOAD
BLINK ALT
BLINK ALT
BLINK ALT
LOOP GO
NO OPERATION
ABCDEFGHI
BC EF HI
ABCDEFGHI
AB DE GH
BC EF HI
A CD FG I
ABCDEFGHI
RUN
STOP
LOOP STOP
ABCDEFGHI
TAB 2
SMOOTH GO
SEC ALT
BC
WAIT 3.0 SEC
LOOP LOAD
ABC
4 SEC ALT
AB
WAIT 3.0 SEC
4 SEC ALT
BC
WAIT 3.0 SEC
4 SEC ALT
A C
WAIT 3.0 SEC
LOOP 12 TIMES
LOOP LOAD
DEF
SOFT ALT
DEF
WAIT 0.5 SEC
LOOP GO
DEF
FAST ALT
HI
LOOP LOAD
G
FAST ALT
G
LOOP GO
G
LOOP LOAD
HI
2 SEC ALT
H
WAIT 1.0 SEC
2 SEC ALT
I
WAIT 1.0 SEC
LOOP 12 TIMES
NO OPERATION
LOOP STOP
EFG
SMOOTH STOP
TAB 3
ALT
A
HI
8 SEC ALT
ABCDEFGHI
FAST ALT
BC EF HI
LOOP LOAD
ABCDEFGHI
RUN
STOP
RUN
FAST ALT
AB DE GH
FAST ALT
BC EF HI
FAST ALT
A CD FG I
LOOP 66 TIMES
WAIT 10.0 SEC
WAIT 7.0 SEC
FAST ALT
BC EF HI
8 SEC ALT
ABCDEFGHI
BLINK ALT
A D G
LOOP LOAD
ABCDEFGHI
BLINK ALT
AB DE GH
BLINK ALT
BC EF HI
BLINK ALT
A CD FG I
LOOP GO
ABCDEFGHI
NO OPERATION
LOOP STOP
ABCDEFGHI
RUN
RUN
STOP
In the above program, TAB 1 shows a
simple repetitive Blinking Loop. Notice,
the GENESIS is free after the looping
commands
are
given. Any
projector
within
the loop
can
be
stopped
independently of the other projectors.
For example:
LS
LOOP STOP
A
would have projector "A" go back to
original status (Lamps On) and "B" would
continue the loop.
TAB 2 shows a loop with .commands other
than BA, FA, or AT. If desired, a 32
Sec Alt can be incorporated. This loop
'7
also has a new feature different from
other loops. The command (LPnn) is used
to tell the DOVES how many times the
loop is to be executed. This command
works like a RPxx command only external
to
the GENESIS. This program
also
demonstrates how loops can be started
with
any number or combination
of
projectors and how they can be stopped
in any order; one projector at a time or
all together. TAB 3 shows a dissolve up
and down using LOOPS, BA, and FA.
NOTE: A Loop will stop at the
status of the projectors at the
time of a loop GO command.
/7
Finally, I have included below another
sample program for this format that may
be done for fun, but also should be done
as an additional example of command
implementation.
PROGRAM: EYEBALL
CUE# CODE
1
2
3
4
n
5
SA
W.6
LL
SA
W.6
OPERATOR:
STATEMENT
SCREENS
A
SOFT ALT
WAIT 0.6 SEC
ABCDEFGHI
LOOP LOAD
SOFT ALT
A D
WAIT0.6SEC
RUN
RUN
SA
W. 6
SA
W.6
SA
W.6
SA
W. 6
SA
W.6
SA
W.6
SA
W.6
LG
16A
W10
W.6
LL
BA
LP26
W2.76
BA
8A
W8
LL
FA
FA
LP13
W2.76
8A
W7
S20
LL
BA
SOFT ALT
D G
WAIT 0.6 SEC
SOFT ALT
GH
WAIT 0.6 SEC
SOFT ALT
HI
WAIT 0.6 SEC
SOFT ALT
F I
WAIT 0.6 SEC
SOFT ALT
C F
WAIT 0.6 SEC
SOFT ALT
BC
WAIT 0.6 SEC
SOFT ALT
AB
WAIT 0.6 SEC
LOOP GO
ABCD FGHI
16 SEC ALT
E
WAIT 10.0 SEC
WAIT 0.6 SEC
E
LOOP LOAD
BLINK ALT
E
LOOP 26 TIMES
WAIT 2.76 SEC
BLINK ALT
E
8 SEC ALT
E
WAIT 8.0 SEC
LOOP LOAD
E
FAST ALT
E
FAST ALT
E
LOOP 13 TIMES
WAIT 2.76 SEC
8 SEC ALT
E
WAIT 7.0 SEC
SPEED=20 CPS
LOOP LOAD
E
E
BLINK ALT
LOOP GO
E
WAIT 1.0 SEC
SPEED=lOCPS
LOOP STOP
B D F H
FAST ALT
B
LOOP LOAD
B D F H
FAST ALT
B
F.
FAST ALT
F H
FAST ALT
D
H
FAST ALT
B D
LOOP GO
B D F H
WAIT 10.0 SEC
E
LOOP STOP
WAIT 6.0 SEC
LOOP STOP
ABCD FGHI
WAIT 10.0 SEC
2 SEC ALT
AB E
6.6
PROGRAMS USING THE PYRAMID FORMAT
(BANK B )
This
format
shows the
flexibility
involved in PROCALL-X. Here the projectors are in the shape of a pyramid and
the video screen shows exactly the same
CNTRL/V
to
check the
thing.
Use
projector assignments.
The following program
this format.
PROGRAM: MARQUE
CUE# CODE
1
2
3
4
5
6
1A
1A
W.3
1A
W.3
1A
shows
the use of
OPERATOR :
STATEMENT
SCREENS
RUN
1 SEC ALT
ABC E G J L NO
1 SEC ALT
123466789
RUN
WAIT 0.3
1 SEC ALT
D F H I K M
WAIT0.3SEC
1 SEC ALT
123466789
'-7
CHAPTER 7
PROGRAMMING PERIPHERAL EQUIPMENT
7.1
GENERAL
PROCALL-X allows you to use two X15s in
line with your dissolve units (one each
on OUT 1 (BANK A) and OUT 2 (BANK B)).
It also allows you to use both the X-15
and dissolve auxiliaries
with their
respective commands. There are, however,
the following limitations:
7.2
XS
a.
All auxiliary cues must
specify
projector
Independents.
b.
You can not have an auxiliary
command for the X-15 and an
auxiliary
in your dissolve
unit in the same cue.
X-15 PROGRAMMMING COMMANDS
(SHORT PULSE)
(50
This will initiate a momentary
millisecond) closure of the contacts.
This amount of contact closure time is
usually sufficient for most auxiliary
equipment.
XL
(LONG PULSE)
This will cause a momentary (1/2 second)
closure of the contacts. This is used
for equipment that requires a longer
contact closure such as KODAK's
AV
projectors.
XN
(LATCH ON)
will keep the selected channels
closed
until interupted by
a
new
command. This permits the relays to be
used as either NORMALLY OPEN or NORMALLY
CLOSED. The new command can be an XS or
XL which will cause the contact to open
momentarily and then close again.
This
XF
(LATCH OFF)
Cancels the LATCH ON status and renders
the assigned channel inactive.
Each of the above X-15 commands can be
used with Independents, not with DOVE X
numbers.
7.3
USING X-15 PROGRAMMING COMMANDS
When programming with X-15 commands,
there
must
be
no
spaces between
i f there
are
spaces
Independents;
imbedded in the Independents, both the
spaces and independent must be uniform.
'7
7.3.1
INCORRECT X-15 PROGRAMMING
The
following
examples
demonstrate
incorrect programming of X-15 commands
under PROCALL-X.
-
XN
A
D
GHJ
XN
AB DE GH JK MNO
You will notice that in the commands
listed
above the groupings of
the
Independents are not uniform, e.g., in
the last line there are four groups of
two Independents followed by a group of
three Independents. This is incorrect,
and will not work.
7.3.2
CORRECT PROGRAMMING
The following examples show the correct
way to program X-15 commands.
XN
XN
XN
XN
XN
XN
A
AB
ABC
A D G J M
AB DE
ABCDEFGHIJKLMNO
In the commands listed above, either
there
are
no
spaces
between the
Independents, or if there are spaces,
the Independent groupings are uniform.
This is correct, and it will work.
7
CHAPTER 8
<-
SELECTING THE TIMING AND CONTROL CODE
8.1 GENERAL
The Society of Motion
Pictures and
Television Entertainment (SMPTE) time
code is like AVL1s Clock-trak in that it
is a digital timing code which can be
used to time cues. SMPTE was primarily
designed to control film and
video
editing .
-,
All of the rules concerning AVL Clocktrak programming apply to SMPTE. AVL1s
Genesis will accept SMPTE input and
generate SMPTE output, but it will not
convert SMPTE to AVL1s Clock-trak or
vice versa.
8.2 SELECTING SMPTE
To
select SMPTE as the
timing and
control code for a multi-image and/or
video presentation, follow the procedure
outlined below.
a.
Simultaneously press CTRL and
the Control
Command field.
C keys to get to
b.
Type SMPTE and press RETURN.
c.
8.3
When the word "SMPTE" appears
on the status line, SMPTE
has been selected as the
timing and control code.
7
SELECTING AVL CLOCK-TRAK
The AVL Genesis generates and reads AVL
Clock-trak time codes when it is not in
the SMPTE mode of operation. AVL Clocktrak allows time-synchronizing of cues
to the audio track.
AVL Clock-trak is the Genesis' default
mode of operation; therefore, whenever
the word "SMPTE" is not displayed on the
status line, AVL Clock-trak will be used
as the timing and control code. If,
however, you are in the SMPTE mode of
operation and wish to select AVL Clocktrak, follow the procedure below.
a.
Simultaneously press CTRL and
C keys (CTRL/C)
b.
With the cursor in the Control
Command field, type AVL and
press RETURN.
c.
When "SMPTE" disappears from
the status line, AVL Clocktrak is selected as the timing
and control code.
'-3
APPENDIX A
PROCALL-X COMMANDS
A.l
PROGRAMMING COMMANDS
The commands for use during
are listed below.
A.l.l
programming
COMMANDS ENTERED UNDER CODE
HEADING
ALTERNATE
FAST ALTERNATE
SOFT ALTERNATE
1 SECOND ALTERNATE
2 SECOND ALTERNATE
3 SECOND ALTERNATE
4 SECOND ALTERNATE
6 SECOND ALTERNATE
8 SECOND ALTERNATE
16 SECOND ALTERNATE
32 SECOND ALTERNATE
CUT
HARD CUT
SOFT CUT
1 SECOND
2 SECOND
3 SECOND
4 SECOND
6 SECOND
8 SECOND
DISSOLVE
DISSOLVE
DISSOLVE
DISSOLVE
DISSOLVE
DISSOLVE
16D
32D
AX
BA
FZ
HOME
LD
LG
LL
LS
LPxx
N
PF
PR
PS
RPO
RPx
RPxx
S10
S20
SG
ss
TBxx
TMxx
TX
W.05
W10
WX
A.1.2
SECOND DISSOLVE
SECOND DISSOLVE
AUXILIARY FOR DISSOLVES
BLINK ALTERNATE
FREEZE
PROGRAMMABLE HOME
PROGRAMMABLE LOAD FILE xx
LOOP GO
LOAD LOOP
LOOP STOP
LOOP (XX=NO.)
NO OPERATION
PROJECTOR FORWARD
PROJECTOR REVERSE
PRESET
REPEAT ZERO
REPEAT (X TO BE RESOLVED)
REPEAT XX TIMES
SPEED -10 CUES PER SECOND
SPEED -20 CUES PER SECOND
SMOOTH GO
SMOOTH STOP
TABxx
TIME IN .O1 SECOND STEPS
TIME (X TO BE RESOLVED)
WAIT IN .05
SECOND STEPS
WAIT (X TO BE RESOLVED)
16
32
COMMANDS ENTERED UNDER SCREEN
HEADING
RUN
STOP
7
P
12345
67890
PROCEED
SCREEN NUMBERS ON OUT 1
SCREEN NUMBERS ON OUT 2
COMMANDS FOR EDITING PROGRAMS
A.1.3
CTRL/A
CTRL/B
CTRL/C
CTRL/D
CTRL/G ENTER
CTRL/G-CTRL/G ,TM
F10
ENTER
ESC
Q
REPEAT
RETURN
F9
BACKSPACE
SPACE BAR
ADD-A-CUE
REVERSE TO LAST TAB
CONTROL COMMAND FLD
DELETE CUE
HOME PROJECTORS
GO TO CUE-GO TO TIME
HH:MM:SS.FF
REVERSE TO PREV. GO
DISPLAY NOTES/NORMAL
SLIDES DISCONNECT
/NORMAL
STEP REVERSE CUE
REPEAT PREVIOUS CUE
STANDBY
GO TO NEXT TAB
GO TO TAB No. xx
AUX DISCONNECT
/NORMAL
CUE
ENTER
ESCAPE
STEP CUE
REPEAT DEPRESSED KEY
SAME AS ENTER
REVERSE CUE
CURSOR LEFT
CURSOR RIGHT
A.2
CONTROL COMMAND FIELD ENTRIES
The following commands are to be entered
in the Control Command Field.
A.2.1
EDITING CONTROL COMMANDS
BPF
BPN
CAC
CLN
CUES
ESNx,y
IAMxx
KBF
KBN
NEW
NOTES
PGMxx
RCF
RCN
RTCx,y
SEQ2
SEQ3
TOCx,y,+
TPO
BEEPER OFF
BEEPER ON
CLEAR ALL CUTS
CLEAR NOTES
DISPLAY TOTAL CUES
EXCHANGE SCREEN
NUMBERS
CHANGE OPERATOR'S
NAME TO xx
KEYBOARD EDIT OFF
KEYBOARD EDIT ON
ESTABLISH NEW HOME
POINT
EXAMINE/EDIT NOTES
CHANGE PROGRAM NAME
TO xx
REMOTE CUE OFF
REMOTE CUE ON
REPLACE TIME CUE x
WITH y
PROJECTOR SEQUENCE 2
PROJECTOR SEQUENCE 3
TIME OFFSET CUES
HH:MM:SS.FF
TRAY POSITION OFFSET
-
A.2.2
MEMORY/DISK DATA TRANSFER
COMMANDS
APxx
CNPxx
CWPxx
DELxx
DLCxx ,yy
DSKx
INSxx
LDxx
LIB
NLDxx
NPRxx
NSVxx
RNMx ,y
sv
svxx
WPRxx
A.2.3
APPEND FILE xx
CLEAR NAME PROTECT
ON FILExx
CLEAR WRITE PROTECT
ON FILExx
DELETE FILE xx FROM
DISK
DELETE CUES xx TO yy
USE DISK x
INSERT FILE NAMED xx
LOAD FILE NAMED xx
LIBRARY
NOTES LOAD xx
NAME PROTECT xx
NOTES SAVE xx
RENAME FILE x AS y
SAVE
SAVE WITH xx AS FILE
NAME
SAVE CUES xx TO y y
AS FILENAME nn
WRITE PROTECT FILExx
MAG TAPE CONTROL COMMANDS
AVL
CEM
CIM
COM
CLOCK-TRAK TIMING
AND CONTROL MODE
CLOCK EDIT MODE
CLOCK INPUT MODE
CLOCK OUTPUT MODE
COM HH:MM:
SS :FF
MIF
MIN
MLD
MOF
MON
MSV
MTD
PIF
P 1.N
POF
PON
SMPTE
STL
VER
A.3
...
PRINT COMMANDS
PRINT
SPDxxx
PLP
SLP
PLB
A.4
CLOCK OUTPUT BEGINING AT TIME HH:
MAG TAPE INPUT OFF
MAG TAPE INPUT ON
MAG TAPE LOAD
MAG TAPE OUTPUT OFF
MAG TAPE OUTPUT ON
MAG TAPE SAVE
MAG TAPE DUMP
POSI-TRAK INPUT OFF
POSI-TRAK INPUT ON
POSI-TRAK OUTPUT OFF
POSI-TRAK OUTPUT ON
SMPTE TIMING AND
CONTROL MODE
SET LEVELS
VERIFY (MSV ONLY)
PRINT CUES AND NOTES
SET BAUD RATE FOR
PRINTER
PARALLEL LINE
PRINTER
SERIAL LINE PRINTER
PRINT LIBRARY
X-15 PROGRAMMING COMMANDS
SHORT PULSE
LONG PULSE
LATCH ON
LATCH OFF
7
APPENDIX B
SMPTE TIME CODE STANDARDS
B.l
-
GENERAL
SMPTE (Society of Motion Picture and
Television Engineers) time code is the
standard
digital
code
format
and
modulation method relating to
input
video and audio magnetic tape recorders
used
by
the
motion
picture
and
television industries today. The code
is used for timing and control purposes.
SMPTE is a predetermined code whose
format can not be altered by the end
user.
B.2
MODULATION METHOD
During modulation, a transition occurs
at the beginning of every bit period.
"One" is represented
by
a
second
transition 1/2 half a bit period from
the
start
of the bit. "Zero"
is
represented when there is no transitlon
within the bit period.
B.3
CODE FORMAT
Each frame is identified by a complete
and unique address. A frame consists of
two television fields or 525 horizontal
1ines .
Each address has 80 bits, numbered
through 79. The frames are numbered
thru 29.
The bits
below.
are
assigned
as
0
0
described
Units of frame
First binary group
Tens of frames
Drop frame flag
Color frame flag
Second binary group
Units of seconds
Third binary group
Tens of seconds
Unassigned address bit ( 0
until assigned by SMPTE)
Fourth binary group
Units of minutes
Fifth binary group
Tens of minutes
Unassigned address bit ( 0
until assigned by SMPTE)
Sixth binary group
Units of hours
Seventh binary group
Tens of hours
Unassigned address bits
0 until assigned by the
SMPTE)
Eighth binary group
64-79
B.3.1
Sychronizing word
64-65
Fixed zero
66-67
Fixed one
78
Fixed zero
79
Fixed one
BOUNDARIES OF ADDRESS
The address starts at the clock edge
before the first address bit (bit zero).
The bits are evenly spaced throughout
the
address period, and they fully
occupy the address period which is one
frame. Consequently, the bit rate is 80
times the frame rate in frames per
second.
A
B.3.2
START OF ADDRESS
The start of the address occurs at the
begininng of line 5 in fields one and
three. The tolerance is plus .or minus
one line.
If color frame identification in the
code is required, the even units of
frame numbers identify frame A and odd
units of frame numbers identify frame B.
B.3.3
-,
The
USE OF BINARY GROUPS
binary
groups
are
intended
for
storage of supplementary data by the
users, and the 32 bits within the eight
groups may be assigned in any fashion
without restrictions. It is anticipated
that the use of these bits will be
standardized in the future.
ASSIGNED AND UNASSIGNED ADDRESS
B.3.4
BITS
Six bits are reserved within the address
groups, two for identifying operational
modes, and four unassigned but reserved
for future assignment and defined as
zeros until further specified by the
SMPTE
.
Bit No. 10
DROP FRAME FLAG
If certain numbers
are being dropped to
resolve the difference between real
time and color
time, a "1" is
recorded.
Bit No. 11
COLOR FRAME FLAG
If color frame
identification has
been intentionally
applied, a "1" is
recorded.
Bit No. 27, 43,
Unassigned Address
Bits; "0" until
assigned by the
58,
59.
7
SMPTE .
-?
B.4
TIME DISCREPANCIES
Real time is defined as the time elapsed
during the scanning of 60 fields (or any
multiple thereof) in an ideal television
system at a vertical field rate of
exactly 60 fields per second.
Color time is defined
as the time
elapsed during the scanning of 60 fields
(or any multiple thereof) in a color
television system at a vertical field
rate of approximately 5 9 . 9 4 fields per
second.
'7
Because the vertical field rate of a
59.94
color signal is approximately
fields
per
second,
straightforward
counting at 30 frames per second (60
fields per second) will yield an' error
of +I08 frames ( + 2 1 6 fields), equivalent
to +3.6 seconds timing error, in one
hour of running time. For correction of
this time discrepancy, two methods of
operation are allowed:
Nondrop Frame
Uncompensated Mode
During a continuous
recording, no
numbers shall be
omitted from the
chain of addresses.
Each address shall
be increased by 1
frame over the frame
number immediately
preceding it. When
this mode is used,
bit No. 10 of each
address shall be a
I1
Drop Frame
Compensated Mode
0I, .
To resolve the color
time error, the
first two frame
numbers (0.1) at the
start of each
minute, except
minutes 0, 10, 20,
30, 40, and 50,
shall be omitted
from the count.
When this mode is
used, bit No. 10 of
each address shall
be a "1".
AVL's SMPTE is programmed to use
nondrop frame mode and can not
changed by the user.
the
be
'7
AVL GENESIS SYSTEM
QUICK REFERENCE GUIDE
Audio Visual Laboratories, Inc.
AVL GENESIS
QUICK REFERENCE GUIDE
-
The
following functions
and
their
descriptions
are
a quick reference
listing of the most used Commands and
Cues. Whenever <Ret> appears after an
entry or Command, it means that the
Return (Enter) key must be pressed to
record the entry or initiate the action.
Index
Page 3
Function List
Projector Designations
Page 4
Programming:
Single Cues
a CUT
a DISSOLVE
an ALTERNATE
an ALTERNATE DISSOLVE
Sequence Programming
Run/Stop
Page 6
Wait Times
Que and Reverse Cue
SlO/S20
Repeats
Page 9
EDITING COMMANDS
Add-A-Cue
Delete-A-Cue
Move To Another Progam Point
Return To Start Of Program
Repeat A Single Cue
Move Thru Program -Lamps Off
Page 11
CONTROL COMMANDS
Clear All Cues
Change Operator Name
Change Program Name
Append a Program
Delete a Program From Disk
Load a Program From Disk
View Library
Save a Program on Disk
Time X
Home
Page 14
EQUIPMENT SETUPS
Page 16
CLOCK-TRAK
FUNCTION LIST
,'7
AT
FA
SA
1A
2A
3A
4A
6A
8A
16A
32A
,
HOME
PI?
PR
W.05
W10
Alternate
Fast Alternate
Soft Alternate
1 Sec. Alt.
2 Sec. Alt.
3 S e c . Alt.
4 Sec. Alt.
6Sec.Alt.
8 Sec. Alt.
16 Sec. Alt.
32 Sec, Alt.
Proj. Home
Proj. Forward
Proj. Reverse
Wait 1/20 Second
Wait 10 Seconds
CT
HC
SC
ID
2D
3D
4D
6D
8D
16D
32D
Cut
Hard Cut
Soft Cut
1 Sec. Dis.
2 Sec. Dis.
3 Sec. Dis.
4 Sec. Dis.
6 Sec. Dis.
8 Sec. Dis.
16 Sec. Dis.
32 Sec. Dis.
N
No Operation
S10 10 Cues/Sec.
S20 20 Cues/Sec.
SYSTEM/INDIVIDUAL STANDARD FORMAT
PROJECTOR DESIGNATIONS
System Designations DOVE Numbers 1 thru 5 on each
Bank.
Projector Designations A thru 0 on each Bank.
To designate a System Cycle Enter the Screen (Dove)
Number - 1 thru 5.
To designate a Specific ProjectorEnter the Projector
Letter A thru 0.
DOVE
Numbers and Projector
cannot be entered in the
same Cue line.
Letters
Enter R for RUN
Enter S for STOP
SINGLE CUE PROGRAMMING
A Single Cue can be used when a single
function is all that is required at one
point in the Program.
NOTE: The <Ret> to the right of
the programming line indicates that
you must press the RETURN key after
making the programming entry.
2D 1 <Ret> <Ret>
We have programmed a
2 Second Dissolve on
Screen 1.
PROGRAMMING A CUT
- CT
System Cut
Indiv. Proj. - CT
1 (Screen)<Ret> <Ret>
A (Proj.) <Ret> <Ret>
PROGRAMMING A DISSOLVE
'-7
Sys tem
Indiv. Proj.
-
2D
2D
1
B
<Ret> <Ret>
<Ret> <Ret>
PROGRAMMING AN ALTERNATE
Sys tern
-AT
Indiv. Proj. - AT
1
C
<Ret> <Ret>
cRet> <Ret>
PROGRAMMING AN ALTERNATE DISSOLVE
Sys tem
Indiv. Proj.
-
2A
2A
1
A
cRet> <Ret>
<Ret> <Ret>
q SEQUENCE PROGRAMMING
We program Sequences or Multi-Step Cues
when a number of functions must occur
continuously and too quickly for manual
operation. Sequences must always contain
a RUN at the beginning to start the
Sequence and a STOP at the end to
terminate the Sequence.
RUN and STOP can be progra~nlned as a
separate Cue using No Operation -
as part of the first Cue in a sequence -
STOP is programmed the same way. Be
certain you have allowed Wait Times
between functions in the sequence.
WAIT TIMES
Wait Times allow us to program the
appropriate
time
delays
between
functions in a Cue sequence. They can be
1/20th
of a second
programmed
in
increments up to 10 full seconds. Should
more than 10 seconds be required, simply
program more than one Wait Time.
CUE/REVERSE CUE
Allows us to move back and forth thru
the Program for editing and verification
purposes.
To control Sequences Forward - F10
To control Sequences Backward - F9
To control Each Step of Programming
Forward Q
To control Each Step of Programming
Backward - Ctrl/Q
-
Holding Q and Ctrl/Q down permits Fast
Forward and Reverse.
GENESIS normally operates at 10 Cues per
Second
unless
you
instruct
it
otheywise. We can switch from 10 Cues
per Second to 20 by simply inserting S20
in the Program. To return to 10 cps
enter S10.
REPEATS
-,The Repeat
function saves many Cue Lines
by allowing us to repeat
a
given
function as often as we wish by simply
adding a Repeat Cue to the Program
following the Cue we wish to repeat. The
Repeat Cue must include the number of
times we wish the function to repeat.
Repeat must be preceded by a RUN Cue.
GENESIS
will repeat
all
functions
starting
with
the
Cue immediately
FOLLOWING a RUN command.
A
-
Important! If a Repeat Cue is entered
without a RUN Cue, GENESIS will search
for the next preceding RUN and will
attempt to Repeat all Cues from that
point. Be certain you include
in the sequence!
a RUN Cue
In this example we have programmed 20
Cuts, 1.5 seconds apart on Screen 1.
'7
EDITING COMMANDS
-\
In any instance where CTRL is used, it
must be held down while pressing the
additional Key.
TO ADD A CUE to the Program. Locate the
Cursor at the point you wish to insert a
Cue then -
The Program will open up to accept your
new Cue.
?
TO DELETE A CUE from the Program. Locate
the Cursor at the Cue you wish to delete
then CTRL/D <Ret>
The Cue will be
deleted. All Cue
numbers change from
this point to the
end of the Program.
TO GO TO ANOTHER POINT IN THE PROGRAM
CTRL/G (CUE # ) <Ret> The Program and
projectors will
relocate to the
desired point.
TO RETURN TO THE START of the Program
CTRL/G
<Ret>
CTRL/G 0 cRet>
-
All projectors
are issued a HOME
Command
and the Program
returns to Cue 1.
TO REPEAT A SINGLE CUE, program the Cue
then CTRL/R
Each time you press these
keys the previous Cue
is repeated.
TO MOVE THROUGH THE PROGRAM
CTRL/S
- LAMPS OFF-
The projectors function
but the lamps are off.
Allows going thru
the
Program without the lamps
flashing.
The
same
Command returns them to
normal operation. While
in the standby mode, SBY
is
displayed
in
the
Control Command Field.
T7
CONTROL COMMANDS
First,
CTRL/C
CLEAR ALL CUES
to enter Command
Field, then -
This function clears
all Cue information
from memory but not
from the Disk.
Be careful! Be
certain to save your
program before using
this feature.
CAC <RET>
-
Allows changing the
Operator's Name.
IAM (Name) <RET>
PROGRAM NAME
-
Allows changing the
Name of the Program.
PGM (Name) <RET>
APPEND
-
Allows adding blocks
of Cues or entire
programs from Disk
onto the end of the
Program displayed on
the Monitor.
AP
DELETE
-
Allows deleting
Programs from the
Disk. Be Careful!
DEL
LOAD
-
-
-
(Name) <Ret>
Used to view all
Programs stored on
the disk.
LIB
SAVE
(Name) CRet>
Is used to recall
Programs from Disk
and load them into
Memory.
LD
LIBRARY
(Name) <Ret>
<Ret>
SAVE is used to
store Programs on
Disk for later
retrieval.
SV
(Name) <Ret>
-
TIME X
-\
HOME
-
This is the Cue used in
conjunction with ClockTrak when a show is
synchronized. See Steps 1
thru 10 of CLOCK-TRAK in
the User's Guide.
HOME is a programmed Cue
at the end of the show
that is used to send the
Program and projectors
back to their starting
point automatically.
HOME <Ret>
EQUIPMENT SETUPS:
Synchronizing
Recording the Data Track
Playback
CLOCK TRAK - To
using Clock Trak.
Synchronize a
Optional.
show
1.
Using ADD-A-CUE,
insert TX into
your Program at each Synchronizing
point in the script.
2.
Connect cable from OUT 1 on GENESIS
to Input of Track 3 on Recorder.
3.
Put GENESIS in Clock Output Mode
(COM)
.
CTRL/C COM <RET>
GENESIS puts out Clock-Trak signal.
4.
At least 5 seconds before sound
starts, record Clock-Trak on Track
3 by starting recorder in Record
Mode and pressing Return.
Record the Clock-Trak beyond the
end of the sound.
5.
Rewind the tape to the beginning of
Clock-Trak.
6.
Press ESC on GENESIS.
7.
Enter CEM <Ret> Clock Edit Mode.
8.
,--..
Reconnect cable from Output of
Track 3 on Recorder to Play In jack
of GENESIS.
9.
With script in front of you, start
the Recorder in Playback Mode
and press F10 at each synchronizing
point in the script.
10.
Stop the tape and rewind it to the
beginning. The Program should be
at Cue 1 and all TX Cues are now
Time Cues.
11.
Start the Recorder in Play Mode:
The show will run by Clock-Trak.
12.
'-7
If some Time Cues are incorrect,
place the Cursor at that Time Cue
and adjust the time by typing in a
new time. Add time to make the Cue
happen later, subtract time to make
it happen earlier.
13.
When all Cues are correctly
synchronized,
connect
a second
cable from Out 1 on GENESIS to the
Input on Track 4 of the Recorder.
14.
Start the Recorder in Play Mode on
Track 3 and Record Mode on Track 4 .
The Synchronized Program will be
recorded on Track 4.
NOTES :
Audio Visual Laboratories
37200080lRO 0