1
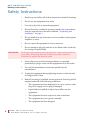
RMT-170-HD 17-Inch High Definition Video Monitor User Guide Part Number 821688, Revision B © 2012 Wohler Technologies, Inc.All rights reserved. This publication is protected by federal copyright law. No part of this publication may be copied or distributed, stored in a retrieval system, or translated into any human or computer language in any form or by any means electronic, mechanical, manual, magnetic, or otherwise, or disclosed to third parties without the express written permission of Wohler Technologies. Reproduction Licensed users and authorized distributors of Wohler Technologies, Inc. products may copy this document for use with Wohler Technologies., Inc. products provided that the copyright notice above is included in all reproductions. Customer Support Wohler Technologies, Inc. 31055 Huntwood Avenue Hayward, CA 94544 www.wohler.com Phone: 510-870-0810 FAX: 510-870-0811 US Toll Free: 1-888-596-4537 (1-888-5-WOHLER) Web: www.wohler.com Sales: [email protected] Support: [email protected] Disclaimers Even though Wohler Technologies, Inc. has tested its equipment and software, and reviewed the documentation, Wohler Technologies, Inc makes no warranty or representation, either express or implied, with respect to software, documentation, their quality, performance, merchantability, or fitness for a particular purpose. In no event will Wohler Technologies, Inc. be liable for direct, indirect, special, incidental, or consequential damages resulting from any defect in the hardware, software, or its documentation, even if advised of the possibility of such damages. Some states do not allow the exclusion or limitation for incidental or consequential damages, so the above exclusion or limitation may not apply to you. Printing This document is intended to be printed on a duplex printer, such that the copy appears on both sides of each page. This ensures that all new chapters start on a right-facing page. This document looks best when printed on a color printer since some images may be indistinct when printed on a black and white printer. Other Technologies and Products Dolby is a registered trademark of Dolby Laboratories, Inc. Microsoft Windows, and Internet Explorer are registered trademarks of Microsoft Corporation. Last Update June 112 2012 ii 821688: R M T- 1 7 0 - H D U s e r G u id e © 2 0 1 2 Wo h l e r Tec h n o l o g i e s , I n c. A l l r i g h t s r e s er ve d . RMT-170-HD User Guide Introduction Overview The RMT-170-HD monitor is an ideal solution for viewing many different types of HD/SD (up to 1080i and 720p) or analog video and computer input. By using a 1920 x 1200 TFT/LCD screen, a perfect medium is reached in the scaling and interpolation process, providing superb imaging regardless of video format. This monitor comes with many in-monitor display features including IMD, tally, time-code, closed captioning, format display, and area/title safe. The RM-170-HD also provides a host of audio tools including level metering and built-in speaker monitoring of its dual stereo analog inputs or SDI embedded audio. Topics Topics Introduction Page 1 Safety Instructions 2 Unpacking and Installation 3 Features 4 Specifications 6 Front Panel Features and Controls 11 Rear Panel Connectors 15 Using the OSD Menu 18 Using the Function (F) Keys 27 Technical Functional Overview 27 8 2 1 6 8 8 : RM T- 1 7 0 - H D Us e r G u i d e © 2 0 1 2 Wo h l e r Tec h n o l o g i e s, I n c. A l l r i g h t s r e s er ved . 1 R M T -1 7 0 -H D U s e r Gu id e S a f e t y I n s tr u c ti o n s Safety Instructions IMPORTANT: 1. Read, keep, and follow all of these instructions; heed all warnings. 2. Do not use this equipment near water. 3. Use only a dry cloth to clean the equipment. 4. Do not block any ventilation openings. Install only in accordance with the instructions in the section entitled, “Unpacking and Installation” on page 3. 5. Do not install near any heat source such as a radiator, heat register, amplifier, or stove. 6. Do not expose the equipment to rain or moisture. 7. Do not attempt to plug the unit into a two-blade outlet (with only two prongs of equal width). By design, these monitors will only plug into a three-prong outlet for your safety. If the plug does not fit into your outlet, contact an electrician to replace the obsolete outlet. 8. Protect the power cord from being walked on or pinched, particularly at plug’s source on the equipment and at the socket. 9. Use only the attachments/accessories specified by the manufacturer. 10. Unplug the equipment during lightning storms or when unused for long periods of time. 11. Refer all servicing to qualified service personnel. Servicing will be required under all of the following conditions: 2 821688: • The equipment has been damaged in any way, such as when the power-supply cord or plug is damaged. • Liquid had been spilled or objects have fallen onto the equipment. • The equipment has been exposed to rain or moisture. • The equipment does not operate normally. • The equipment has been dropped. R M T- 1 7 0 - H D U s e r G u id e © 2 0 1 2 Wo h l e r Tec h n o l o g i e s , I n c. A l l r i g h t s r e s er ve d . RMT-170-HD User Guide Unpacking and Installation Unpacking and Installation Contents Unpack the RMT-170-HD Monitor and inspect for any apparent physical damage that may have occurred in transit. In addition to the monitor, the package should contain: • An AC/DC power adapter, • A power cord, • A warranty card, and • Either: • A table stand using M4 x 10mm screws, or • A rack-mount frame. We recommend you retain the shipping carton for future use. Installing the Monitor 1. When installing a mount option, please place the monitor, face down, on a a soft, non-scratch surface. 2. Using the included M4x10mm screws, attach the table stand, rack ears, or VESA-100 mount. A. B. Table Top Installation 1) Use the M4 x 10mm thumb screws, included with the table stand, to attach the stand to the monitor’s VESA mount. 2) Adjust the vertical spring tensioning screw to support the monitor's weight. Rack Mount Installation: Use the flat head screws supplied with the RMT-170 to Attach the rack ears. 8 2 1 6 8 8 : R M T- 1 7 0 -H D U s e r G u i d e © 2 0 1 2 Woh l er Te c h n o l o g i es , I n c . A ll r i g h t s r e se r ve d . 3 R M T -1 7 0 -H D U s e r Gu id e Compliance C. Alternate Mounting Option: Alternate mountings can be accommodated by the VESA-100 mounting plate (hardware not supplied by Wohler). 3. Place the RMT-170-HD in the required location for operation. 4. Connect the required signals. For BNC connections use 75-rated connectors. 5. Connect the DC adapter plug to the back of the monitor and the other end to power. 6. Finally, press the power (toggle) switch located on the rear of the RMT170-HD above the power connection. Compliance FCC This equipment has been tested and found to comply with the limits for a Class A digital device, pursuant to part 15 of the FCC Rules. These limits are designed to provide reasonable protection against harmful interference when the equipment is operated in a commercial environment. This equipment generates, uses, and can radiate radio frequency energy and, if not installed and used in accordance with the instruction manual, may cause harmful interference to radio communications. Operation of this equipment in a residential area is likely to cause harmful interference in which case the user will be required to correct the interference at his own expense. IC-ECES-003 This Class A digital apparatus complies with Canadian ICES-003. Cet appareil numérique de la classe A est conforme à la norme NMB-003 du Canada. 4 821688: R M T- 1 7 0 - H D U s e r G u id e © 2 0 1 2 Wo h l e r Tec h n o l o g i e s , I n c. A l l r i g h t s r e s er ve d . RMT-170-HD User Guide Features Features The RMT-170-HD is a 17" multiple function TFT-LCD monitor with 1920 x 1200 screen resolution (14:9 native aspect). Interlaced signals are processed by using a 3D comb filter and 3D de-interlacer. Analog signals are internally digitized with a high quality 10-bit over sampled analog to digital converter. Video inputs are provided for serial digital interface (SDI, 2 inputs) and DVI-I digital sources plus VGA (using DVI connector), component (YPrPb), Y/C, and CVBS analog signals. In addition to sixteen channels of SDI embedded audio, four channels of unbalanced analog audio are accepted with unbalanced outputs available for two channels. Up to four bar-graph audio meters per side can be superimposed on the screen for A/V functionality. Two channels are also available for use with internal speakers. The GPI style tri-color tally is provides red/ green/orange indication using an industry standard RJ45 connection. • 1920 x 1200 screen resolution (14:9 native aspect) • Monitors video from SDI, DVI-I, VGA, Component (YPrPb), Y/C, and CVBS analog signals (high quality 10-bit over sampled analog to a digital converter) • Audio monitoring from internal speakers or headphones • Tri-color tally light • Closed-captioning for CVBS signals • Two HD/SD-SDI inputs with selected channel loop out • Four analog audio inputs, two analog audio outputs • Eight audio meters, IMD and time code on screen display • Built-in speakers with headphone mute • Native pixel-to-pixel capability or standard scaling • Audio decoding and display of up to eight channels of SDI • Full gamma color calibration • Displays embedded SDI timecode 8 2 1 6 8 8 : R M T- 1 7 0 -H D U s e r G u i d e © 2 0 1 2 Woh l er Te c h n o l o g i es , I n c . A ll r i g h t s r e se r ve d . 5 R M T -1 7 0 -H D U s e r Gu id e S p e c if i c a ti o n s Specifications Physical Specifications Table 1–1 on page 6 lists the specifications for the RMT-170-HD monitor. Table 1–1 Monitor Specifications Specifications Power Dimensions (Without Stand or Rack Ears) Rack Height Value/Domain 60 W, 100/230 V AC (50 to 60 Hz) 16.00” W x 12.13” H x 2.83” D (414.5 mm x 308 mm x 71.8 mm) 7RU 2 HD/SD-SDI with loop through 1 Video: Component CVSB 1 Configurable Video: Y/C, YPbPr, Composite Inputs 1 Configurable HDMI, VGA, DVI on DVI-I 4 Audio (RCA) GPI on RJ45 RS485 with loop through 1 HD/SD-SDI Re-clocked active loop through Outputs 2 Audio selected embedded or external audio outputs 17” diagonal (14.46” H x 9.04” V Active Viewing Area (367.2 mm H x 229.5 mm V) Resolution 1920 H x 1200 V Pixel Pitch 0.191 mm x 0.191 mm Pixel Response <8 ms Contrast 600:1 Color Depth 16.2 million Brightness 400 cd/m2 Backlight White CCFL Backlight Life (hrs) 10,000 Color Temperature D55, D65, D93 Viewing Angles 70° Left x 70° Right; 70° Up x 20° Down Operating 32° F to 122° F Temperature (0° C to 50° C) 6 821688: R M T- 1 7 0 - H D U s e r G u id e © 2 0 1 2 Wo h l e r Tec h n o l o g i e s , I n c. A l l r i g h t s r e s er ve d . RMT-170-HD User Guide S p e ci f i c a t i o n s Input/Output Specifications Table 1–2 Signal Inputs, Frame Rate, and Color Matrix Signal Type Overscan Input Output NTSC 684x462 PAL 684x548 SECAM 684x548 NTCS-4.43 684x462 PAL-M 684x462 480I60 684x462 576I50 684x548 480P60 684x462 576P50 684x548 720P24/23.97 720P25 720P30/29.97 720P50 720P60/59.94 1035I60 1080I60/59.94 1080I50 1080P24/23.97 1080P25 1080P30/29.97 1080P50 1080P60 1080SF24/23.97 VGA SVGA XGA SXGA UXGA WVGA WXGA WUXGA 1216x684 1216x684 1216x684 1216x684 1216x684 1824x984 1824x1026 1824x1026 1824x1026 1824x1026 1824x1026 1824x1026 1824x1026 1824x1026 — — — — — — — — 1920x1080 1600x1200 1920x1080 1600x1200 1920x1080 1600x1200 1920x1080 1600x1200 1920x1080 1600x1200 1920x1080 1600x1200 1920x1080 1600x1200 1920x1080 1600x1200 1920x1080 1600x1200 1366x768 1366x768 1366x768 1366x768 1366x768 1366x768 1366x768 1366x768 1366x768 1366x768 1366x768 1366x768 1366x768 1366x768 — — — — — — — — Native Input Output 720x480 720x480 720x576 720x576 720x576 720x576 720x480 720x480 720x480 720x480 720x487 720x480 720x576 720x576 720x480 720x480 720x576 720x576 1280x720 1280x720 1280x720 1280x720 1280x720 1920x1035 1920x1080 1920x1080 1920x1080 1920x1080 1920x1080 1920x1080 1920x1080 1920x1080 — — — — — — — — 1280x720 1280x720 1280x720 1280x720 1280x720 1920x1035 1920x1080 1920x1080 1920x1080 1920x1080 1920x1080 1920x1080 1920x1080 1920x1080 — — — — — — — — Full Normal Input Output 1366x768 (16:9), 720x480 1024x768 (4:3) 1366x768, 720x576 1024x768 1366x768, 720x576 1024x768 1366x768, 720x480 1024x768 1366x768, 720x480 1024x768 1366x768, 720x480 1024x768 1366x768, 720x576 1024x768 1366x768, 720x480 1024x768 1366x768, 720x576 1024x768 1280x720 1366x768 1280x720 1366x768 1280x720 1366x768 1280x720 1366x768 1280x720 1366x768 1920x1035 1366x768 1920x1080 1366x768 1920x1080 1366x768 1920x1080 1366x768 1920x1080 1366x768 1920x1080 1366x768 1920x1080 1366x768 1920x1080 1366x768 1920x1080 1366x768 640x480 1366x768 800x600 1366x768 1024x768 1366x768 1280x1024 1366x768 1600x1200 1366x768 800x480 1366x768 1366x768 1366x768 1920x1200 1366x768 Frame Rate Color Matrix 60 601 50 601 50 601 60 601 60 601 60 601/709 50 601 60 601/709 50 709 48 50 30 50 60 60 60 50 48 50 60 50 60 48 60 - 75 60 - 75 60 - 75 60 - 75 60 60 60 60 709 709 709 709 709 709 709 709 709 709 709 709 709 709 — — — — — — — — 8 2 1 6 8 8 : R M T- 1 7 0 -H D U s e r G u i d e © 2 0 1 2 Woh l er Te c h n o l o g i es , I n c . A ll r i g h t s r e se r ve d . 7 R M T -1 7 0 -H D U s e r Gu id e S p e c if i c a ti o n s Table 1–3 below lists the signal formats that can be displayed on the RMT-170e-HD. Table 1–3 Format Usable Input Signals SDI NTSC — PAL — SECAM — — NTCS-4.43 — PAL-M 4080I60 Yes 576I50 Yes — 480P60 — 576P50 720P24/23.97 HDa 720P25 HD 720P30/29.97 HD 720P50 HD 720P60/59.94 HD b 1035I60 HD 1080I60/59.94 HD 1080I50 HD 1080P24/23.97 HD 1080P25 HD 1080P30/29.97 HD 1080P50 — 1080P60/59.94 — 1080SF24/23.97 HD VGA — SVGA — XGA — SXGA — UXGA — WUXGA — a b Vide o Y/C Yes Yes Yes Yes Yes Yes Yes Yes Yes Yes — — — — — — — — — — — — — — — — — — — — — — — — — — — — — — — — — — — — — — — — — — — — — — — — — YPbPr HDMI DVI VGA — — — — — — — — — — — — — — — — — — — Yes Yes Yes Yes Yes Yes Yes Yes Yes Yes Yes Yes Yes Yes Yes Yes Yes Yes — — — — — — Yes Yes Yes Yes Yes Yes Yes Yes Yes Yes Yes Yes Yes Yes Yes Yes Yes Yes — — — — — — — — — — — — — — — — — — — — — — — — — — — — — — — — — — — — — — Yes Yes Yes Yes Yes Yes — — — — Yes Yes Yes Yes Yes Yes All formats marked HD are only supported by the RMT-170e-HD model. The unit supports 1035I60 but the status will indicate 1080I60 format. The functionality of the front panel buttons varies depending on the input terminal and/or the input signal type. The detailed corresponding relationships are listed in Table 1–4 on page 9. 8 821688: R M T- 1 7 0 - H D U s e r G u id e © 2 0 1 2 Wo h l e r Tec h n o l o g i e s , I n c. A l l r i g h t s r e s er ve d . RMT-170-HD User Guide S p e ci f i c a t i o n s Table 1–4 Button/Signal-Terminal Relationships Input Signal Function Video/ Y/C YPbPr SD YPbPr HD SD SDI HD SDI HDMI DVI-D VGA Contrast Yes Yes Yes Yes Yes Yes Yes Yes Bright Yes Yes Yes Yes Yes Yes Yes Yes Chroma Yes Yes Yes Yes Yes Yes — NTSC — — — — — — Phase — NTSC Setup NTSC — — — — — — — Compo Level SMPTE 480I60a SMPTE SMPTE SMPTE SMPTE — — Color Temp. Yes Yes Yes Yes Yes Yes Yes Yes Scan Yes Yes Yes Yes Yes Yes Full Full Aspect Yes Yes — Yes — SD/Yes — — Marker Yes Yes Yes Yes Yes Yes — — Blue Only Yes Yes Yes Yes Yes Yes — — Mono Yes Yes Yes Yes Yes Yes — — H/V Delay — — — Yes Yes — — — Dot Phase — — — — — — — Yes H Position — — — — — — — Yes V Position — — — — — — — Yes Audio Ext Ext Ext Ext/Ebd Ext/Ebd Ext/Ebd — — Time Code — — — Yes Yes — — — UMD Yes Yes Yes Yes Yes Yes — — Audio Meter Yes Yes Yes Yes Yes Yes — — a In the submenu of Menu Configuration Area, the Compo level function is adjustable only when the signal format is Ypbpr: 480I60. For any other signal formats, its default format is SMPTE and can not be adjusted. Table 1–5 Function SETUP Y Pb/Pr SYNC Y Signal Input Component Levels Beta 7.5 SMPTE Beta 0 53.37mV 0mV 0mV 714.29 mV 700.00 mV 714.30 mV Peak Luma,100% White 700.00 mVp-p (75% Color Bars) 933.34 mVp-p (100% Color Bars) -286 mV ) Peak Luma,100% White Peak Luma,100% White 525.00 mVp-p (75% Color Bars) 700.00 mVp-p (100% Color Bars) -300 mV 756.80 mVp-p (75% Color Bars) 1009.0 mVp-p (100% Color Bars) -286 mV ) ) 8 2 1 6 8 8 : R M T- 1 7 0 -H D U s e r G u i d e © 2 0 1 2 Woh l er Te c h n o l o g i es , I n c . A ll r i g h t s r e se r ve d . 9 R M T -1 7 0 -H D U s e r Gu id e S p e c if i c a ti o n s Table 1–6 Analog Video Input Specifications Parameter Impedance Input Level Maximum Input Level Table 1–7 Value 75 1 Vp-p nominal 2.5 Vp-p centered @ 0V SDI Video Input Specifications Parameter SMPTE292M, SMPTE259M, ITU-R BT656; 270Mbps (525/625 SD component) 1485 Mbps (HD) 75 >18dB 5 MHz to 540 MHz Automatic equalizing to 30dB @ 270 Mb/s Signal Standard Impedance Return Loss Equalization Table 1–8 Value SDI Video Output Specifications Parameter Signal Standard Impedance Return Loss Signal Level Overshoot Jitter Rise and Fall Time DC Offset Note: 10 821688: Value SMPTE292M, SMPTE259M, ITU-R BT656; 270Mbps (525/625 SD component) 1485 Mbps (HD) 75 >18dB 5 MHz to 540 MHz 800 mV 10% <10% of amplitude <0.2 UI (740 ps) peak, typical <500 ps 400 to 1500 ps (20% to 80% of amplitude) 0 V 0.5 V All specifications are subject to change without notice. R M T- 1 7 0 - H D U s e r G u id e © 2 0 1 2 Wo h l e r Tec h n o l o g i e s , I n c. A l l r i g h t s r e s er ve d . RMT-170-HD User Guide Front Panel Features and Controls Front Panel Features and Controls The RMT-170-HD monitor provides a variety of in monitor data including signal type, waveform/vectorscope, IMD (In-Monitor Display), audio meters, and time code. It also includes a three-color tally light above the display. Figure 1–1 illustrates the front panel features, and Figure 1–2 on page 12 illustrates the front panel controls. Figure 1–1 Front Panel Features Tally Light Input Signal Waveform Safe Areas Time Code Audio Levels IMD Speakers • Tally Light: This tri-color (red/green/amber) light is controlled through an RJ-45 connector on the rear panel. For more information about the RJ-45 connector, refer to Figure 1–4 on page 15 and Table 1–9 on page 16 for details. • Input Signal: The input signal is automatically detected. • Safe Areas: Multiple safe areas are configurable in the OSD Menu. 8 2 1 6 8 8 : R M T- 1 7 0 -H D U s e r G u i d e © 2 0 1 2 Woh l er Te c h n o l o g i es , I n c . A ll r i g h t s r e se r ve d . 11 R M T -1 7 0 -H D U s e r Gu id e Front Panel Features and Controls • Audio Levels: Levels for audio channels the are displayed on up to eight meters in pairs, as two or four meters on each side. The A model displays two to four meters. • IMD: The OSD Menu provides settings to customize the IMD (In-Monitor Display) text area to show a line of characters, numbers, and/or some symbols. The IMD displays in a 4:3 image and below a 16:9 image. • Speakers: Audio may selected for monitoring through the left and right speakers. • Time Code: The de-embedded time code from the HD/SD-SDI source displays in the bottom right corner. • Waveform: The signal waveform is configurable in the OSD Menu. Figure 1–2 DVI-I Button / Indicator Line 1 & 2 Buttons / Indicators Inhibit Indicator Power Button / Indicator Front Panel Controls F# Key Button / Indicators Scan Button / Indicator Menu Operation Status Button Buttons / Indicator Aspect Button / Indicator SDI Input Buttons / Indicators Brightness Rotary Knob/ Indicator Contrast Chroma Rotary Knob/ Rotary Knob/ Indicator Indicator Volume Phase Rotary Rotary Knob/ Knob/ Indicator Indicator Headphone Jack Button/Indicators • Power (Button/Indicator): As an indicator, the Power button glows green when power is on (switch is on the back panel) and a signal is detected. It glows red when the power is on is in stand-by mode. As a control, it toggles between stand-by and normal display modes. • Inhibit (Indicator): This indicator glows green when the control panel buttons have been locked and the system must be unlocked through the OSD Menu. 12 821688: R M T- 1 7 0 - H D U s e r G u id e © 2 0 1 2 Wo h l e r Tec h n o l o g i e s , I n c. A l l r i g h t s r e s er ve d . RMT-170-HD User Guide Front Panel Features and Controls • SDI Input 1/2 (Button/Indicator): This indicator glows green when this input is selected for display on the monitor. As a control, this button selects the SDI signal for display to the monitor. • Line 1/2 (Button/Indicator): This indicator glows green when this input is selected for display on the monitor. As a control, this button selects the signal for display to the monitor. You can select from three signal types for Line 2 in the USER CONFIG menu of the OSD Menu. • DVI-I (Button/Indicator): This indicator glows green when this input is selected for display on the monitor. As a control, this button selects the signal for display to the monitor. Select from three signal types in the USER CONFIG menu of the OSD Menu. • Aspect (Button/Indicator): This indicator glows green when a nondefault aspect ratio has been selected for this signal. As a control, this button toggles between 4:3 and 16:9 for SD signals. It has no effect on HD signals, which are always 16:9. • F1 through F6 (Buttons/Indicators): These indicators glow green when the associated function is active. • Status (Button/Indicator): Pressing this button toggles the status display (not a menu) on and off to the monitor. If the button is not pressed a second time, the status will disappear after several seconds. OSD Menu Buttons • Menu (Button): Pressing the Menu button displays the OSD menu. Refer to Using the OSD Menu on page 18 for more details. • Up/Down (Buttons): Pressing these buttons after pressing the Menu button navigates through the menus and submenus up or down respectively. Neither of these buttons functions when the OSD Menu is not displayed on the monitor. • Enter (Button): The Enter button selects menus, submenus, and option values in the OSD Menu. When the OSD Menu is not displayed on the monitor, this button displays F1 to F6 functions assignments. 8 2 1 6 8 8 : R M T- 1 7 0 -H D U s e r G u i d e © 2 0 1 2 Woh l er Te c h n o l o g i es , I n c . A ll r i g h t s r e se r ve d . 13 R M T -1 7 0 -H D U s e r Gu id e Front Panel Features and Controls Rotary Knob/Indicators The rotary knobs on the right side of the monitor’s control panel have multiple functions most of which are very similar and are listed immediately below: 1. Pushing the knob: Displays the current setting. Note: Pushing the Volume knob has a different function. See below. 2. Rotating the knob: Increases or decreases the value. 3. Indicator glows amber: If you select a value other than the default. • Phase (Rotary Knob/Indicator): Modifies the sharpness. • Chroma (Rotary Knob/Indicator): Modifies the color saturation. • Brightness (Rotary Knob/Indicator): Modifies the brightness. • Contrast (Rotary Knob/Indicator): Modifies the contrast. • Volume (Rotary Knob/Indicator): Modifies the audio volume. Pushing the Volume knob toggles displaying the current setting, muting the audio, and restoring the music and removing the setting display. Other Front Panel Features Headphone Jack: Monitor the assigned left/right stereo audio channels with stereo headphones from this mini-stereo connector. The speakers will mute when the headphones are plugged in. 14 821688: R M T- 1 7 0 - H D U s e r G u id e © 2 0 1 2 Wo h l e r Tec h n o l o g i e s , I n c. A l l r i g h t s r e s er ve d . RMT-170-HD User Guide Rear Panel Connectors Rear Panel Connectors Figure 1–3 below illustrates the rear panel connectors. Refer to Figure 1–5 on page 16 for an enlarged view of the BNC connectors. Figure 1–3 RMT-170-HD Rear Panel BNC Video I/O Tally Light/GPI Configuration DVI RS-485 Analog Audio I/O DC Power Power Switch • Tally Light Control (GPI - RJ45): This connect provides control to the front panel (tri-color) tally light and other remote functions. Figure 1–4 GPI/Tally Light RJ45 Connector Pin Map 8 2 1 6 8 8 : R M T- 1 7 0 -H D U s e r G u i d e © 2 0 1 2 Woh l er Te c h n o l o g i es , I n c . A ll r i g h t s r e se r ve d . 15 R M T -1 7 0 -H D U s e r Gu id e R e a r P a n e l C o n n e ct o r s Figure 1–5 Table 1–9 BNC Connector Close Up GPI/Tally Lamp Color/Pin Designations Tally Lamp Color Green Red Orange GPI 1 Pin GND Open GND Table 1–10 16 821688: Open GND GND GPI/Tally Lamp Connector Pin Out Pin 1. 2. 3. 4. 5. 6. 7. 8. GPI 2 Pin Function GPI 1 GPI 2 GPI 3 GPI 4 GPI 5 GPI 6 No Connection (NC) Ground R M T- 1 7 0 - H D U s e r G u id e © 2 0 1 2 Wo h l e r Tec h n o l o g i e s , I n c. A l l r i g h t s r e s er ve d . RMT-170-HD User Guide Rear Panel Connectors • SDI Inputs 1 and 2: HD/SD-SDI input signal on BNC jacks. • SDI Output: Output jack for selected SDI signal. • Line 1 (Video): Input jack for analog composite video signal only. • LINE2 (Video/Y): Input jack for analog composite video input signal, or luminance (Y) signal of Y/C or YPrPb. • Line 2 (C/Pb): Input jack for Chroma (C) signal of Y/C or Pb (Blue) component of YPrPb. • Line 2 (Pr): Input jack for Pr (Red) component of YPrPb. • Config I/O (on DB-9): Remote connector for factory programming and configuration access. Figure 1–6 DB-9 Connector Pin-Out • DVI-I (DVI-D/VGA/HDMI): Input jack for DVI analog/digital and requires an adapter for VGA or HDMI input signal. Note: The DVI-I signal type must be set in the USER CONFIG menu of the OSD Menu to function correctly. • RS485 I/O (RJ45): Connector for external control. Figure 1–7 RS485 RJ45 Connector Pin Map 8 2 1 6 8 8 : R M T- 1 7 0 -H D U s e r G u i d e © 2 0 1 2 Woh l er Te c h n o l o g i es , I n c . A ll r i g h t s r e se r ve d . 17 R M T -1 7 0 -H D U s e r Gu id e U s in g t h e O SD M e n u Table 1–11 Pin 1, 2 3 4 5 6 7, 8 RS485 Pin Out RS485 In Terminal Signal GND TxRx+ RxTx+ NC RS485 Out Terminal Signal GND TxRx+ RxTx+ NC • Analog Audio Input 1: Input jacks for the analog audio signal. • Analog Audio Input 2: Input jacks for the analog audio signal. • Analog Audio Output: Output jacks for the analog audio signal. • Power Switch: Toggling the power switch powers the monitor on or off. • DC Power Connector: Connect DC power to this coax connector (12V @ 5A). • AC Power Connector: Connect AC power to the external power adapter using an approved cord compatible with the mains outlet. Using the OSD Menu A description of how to use the OSD Menu follows. Also refer to Table 1–12 below for typical values and domain range. 1. Press the Menu button to display the menu. Note: 2. 18 821688: If you do not press another button for approximately 10 seconds, the menu will disappear from the screen. Use the Up and Down buttons to navigate through the seven sub-menu icons. The sub-menus are: A. STATUS B. COLOR TEMP C. MARKER R M T- 1 7 0 - H D U s e r G u id e © 2 0 1 2 Wo h l e r Tec h n o l o g i e s , I n c. A l l r i g h t s r e s er ve d . RMT-170-HD User Guide Using the OSD Menu D. VIDEO CONFIG E. AUDIO CONFIG F. USER CONFIG G. CONTROL 3. Press the Enter button to enter the parameter selections in the chosen sub-menu. 4. Use the Up or Down buttons to cycle through the sub-menu selections. 5. When the desired option is highlighted, press the Enter button to select it. 6. Use the Up or Down buttons to adjust the parameter value up or down, make a selection, or turn a function on or off. 7. Press the Enter button to save the parameter change and return to the sub-menu level. Press the Menu button to back out of a parameter or sub-menu. Press the Menu button again to remove the menu from the screen. Table 1–12 Menu OSD Menu Structure Parameters Default Value Domain Range FORMAT COLOR TEMP COMPO LEVEL STATUS NTSC SETUP SCAN MODE Display only; Non-selectable. The values vary depending on input signal type and configuration settings. AUTO STANDBY MODEL 8 2 1 6 8 8 : R M T- 1 7 0 -H D U s e r G u i d e © 2 0 1 2 Woh l er Te c h n o l o g i es , I n c . A ll r i g h t s r e se r ve d . 19 R M T -1 7 0 -H D U s e r Gu id e U s in g t h e O SD M e n u Table 1–12 Menu OSD Menu Structure (Continued) Default Value Parameters Domain Range Selects the color temperature that will become the basis for adjustments where: COLOR TEMP D65 • D93 = 9300K • D65 = 6500K • D56 = 5600K COLOR TEMPa • USER RED GAIN GREEN GAIN 128 BLUE GAIN 0 to 255 RED BIAS GREEN BIAS 32 BLUE BIAS RESET Resets gain and bias to their factory presets. MARKER ENABLE ON ON (enabled) or OFF (disabled) Selects the area marker aspect ratio according to the display aspect: • Aspect = 16:9 MARKERb AREA MARKER 15:9 • Off • 4:3 Vertical • 15:9 Vertical • 14:9 Vertical • 13:9 Vertical • 1.85:1 Horizontal • 2.35:1 Horizontal • Aspect = 4:3 CENTER MARKER 20 821688: ON R M T- 1 7 0 - H D U s e r G u id e © 2 0 1 2 Wo h l e r Tec h n o l o g i e s , I n c. A l l r i g h t s r e s er ve d . • Off • 16:9 ON (enabled) or OFF (disabled) RMT-170-HD User Guide Using the OSD Menu Table 1–12 Menu OSD Menu Structure (Continued) SAFETY MARKER (Continued) Default Value Parameters OFF Domain Range • 80% • 85% • 88% • 90% • 93% • 95% • OFF Sets the luminance (white level) to display safety, center and area marker line, where: MARKER LEVEL 1 • 1 = 50% • 2 = 75% • 3 = 100% Sets the area marker matte transparency, where: MARKER MAT OFF • OFF = Normal background, use line for area marker edge only • HALF = 50% Back ground brightness • BLACK = Black VIDEO CONFIG APERTURE 20 0 to 100 Used to select the audio source type, where: AUDIO CONFIG SOURCE TYPE EXT • EXT = Analog audio (Sets SPEAKER L and SPEAKER R to AUD 1L and AUD 1R respectively.) • EBD = Only selectable for SDI and HDMI signal types • NONE (Sets SPEAKER L and SPEAKER R to OFF. 8 2 1 6 8 8 : R M T- 1 7 0 -H D U s e r G u i d e © 2 0 1 2 Woh l er Te c h n o l o g i es , I n c . A ll r i g h t s r e se r ve d . 21 R M T -1 7 0 -H D U s e r Gu id e U s in g t h e O SD M e n u Table 1–12 Menu OSD Menu Structure (Continued) Parameters SPEAKER L Default Value AUD 1L (EBD 1) Domain Range Selects the audio channel assigned to the specified speaker based on the audio source type, where: • If SOURCE TYPE = NONE, then OFF • If SOURCE TYPE = AUD..., then AUD 1L, AUD 1R, AUD 2L, and AUD 2R • If SOURCE TYPE = EBD and the input signal is SDI, then EBD CH1 through EBD CH16 SPEAKER R AUDIO CONFIG • (Continued) If SOURCE TYPE = EBD and the input signal is HDMI, then EBD CH1 through EBD CH8 METER POSITION HORIZONTAL VERTICAL or HORIZONTAL METER DISP OFF ON or OFF METER 1-4DISP METER 5-8DISP 22 821688: 1-4 5-8 R M T- 1 7 0 - H D U s e r G u id e © 2 0 1 2 Wo h l e r Tec h n o l o g i e s , I n c. A l l r i g h t s r e s er ve d . • 1-2 • 1-4 • • OFF 5-6 • 5-8 • OFF RMT-170-HD User Guide Using the OSD Menu Table 1–12 Menu OSD Menu Structure (Continued) Default Value Parameters METER 1 OFF METER 2 METER 3 METER 4 Domain Range Selects the audio channel assigned to the left speaker based on the audio source type, where: • METER 5 METER 6 If SOURCE TYPE = NONE, then OFF • If SOURCE TYPE = AUD..., then METER 7 AUD 1L, AUD 1R, AUD 2L, and AUD 2R AUDIO CONFIG • If SOURCE TYPE = EBD and the input signal is SDI, then EBD 1through EBD 16 METER 8 (Continued) REF LEVEL OVER LEVEL BACKLIGHT -20 DB -10 DB 50 • If SOURCE TYPE = EBD and the input signal is HDMI, then EBD 1 through EBD 8 • -18 DB • • -20 DB -2 DB • -4 DB • -6 DB • -8 DB • -10 DB Adjusts the backlight (0 to 100) Selects the Line 2 input type, where: LINE 2 INPUTC VIDEO • VIDEO (CVBS) • USER CONFIG Y/C • YPBPR (YPbPr) Selects the DVI-I Input type: DVI-I INPUT DVI-D • VGA • DVI-D • HDMI 8 2 1 6 8 8 : R M T- 1 7 0 -H D U s e r G u i d e © 2 0 1 2 Woh l er Te c h n o l o g i es , I n c . A ll r i g h t s r e se r ve d . 23 R M T -1 7 0 -H D U s e r Gu id e U s in g t h e O SD M e n u Table 1–12 Menu OSD Menu Structure (Continued) Default Value Parameters Domain Range Sets the power saving mode (includes backlight and panel power supply, and signal to panel), where: AUTO STANDBY ON • ON = The monitor goes into power saving mode if no signal is input for about one minute. • OFF = The monitor keeps power on regardless of the input signal status. LANGUAGE ENGLISH • ENGLISH • CHINESE (In Chinese) Only for 480i60 component input, where: COMPO LEVEL USER CONFIG SMPTE • SMPTE = 100/0/100/0 signal • BETA0 = 100/0/75/0 signal • BETA7.5 = 100/7.5/75/7.5 signal (Continued) Only available for NTSC signals: NTSC SETUP 0 • 0 =Japan • 709 = North America COLOR MATRIX UMD DISPLAY 601 OFF Only applies to 480I60 and 480P60: • 601 • 709 IMD = In Monitor Display: ON or OFF Color of the text characters: UMD COLOR 24 821688: RED R M T- 1 7 0 - H D U s e r G u id e © 2 0 1 2 Wo h l e r Tec h n o l o g i e s , I n c. A l l r i g h t s r e s er ve d . • RED • GREEN • YELLOW • WHITE RMT-170-HD User Guide Using the OSD Menu Table 1–12 OSD Menu Structure (Continued) Menu Parameters UMD CHARACTER Default Value RMT-170-HD Domain Range A user-definable input of up to 16 alphanumeric characters (also includes some symbols) Displays the time code, where: TC DISPLAY OFF • ON • OFF Displays the waveform: WAVE FORM OFF • VECT100 • VECT75 • WAVE • OFF Determines the location on the monitor where the waveform displays: USER CONFIG WAVE FORM POS TOP LEFT • BOT LEFT • BOT RIGHT (Continued) • TOP LEFT • TOP RIGHT Determines whether the format and scan mode are displayed, where: FORMAT DISPLAY AUTO OFF • ON = Always displayed • AUTO = Displayed for about 10 seconds after change • OFF = Hidden Only available for NTSC (Y/C) signal types: CC OFF • OFF • CC1 through CC4 • TEXT1 through TEXT 4 • XDS 8 2 1 6 8 8 : R M T- 1 7 0 -H D U s e r G u i d e © 2 0 1 2 Woh l er Te c h n o l o g i es , I n c . A ll r i g h t s r e se r ve d . 25 R M T -1 7 0 -H D U s e r Gu id e U s in g t h e O SD M e n u Table 1–12 Menu OSD Menu Structure (Continued) Parameters F1 BUTTON USER CONFIG Default Value MARKER F2 BUTTON AUDIO METER F3 BUTTON H/V DELAY Sets the function for the designated button, where: • MARKER = Turns all markers ON or OFF • AUDIO METER = Turns all audio meter displays ON or F4 BUTTON NATIVE F5 BUTTON AUTO ADJUST (Continued) Domain Range OFF • WAVE FORM = Turns display ON or OFF • H/V DELAY = Toggles the values OFF, H, V, and H/V • AUTO SETUP = Press to autoadjust • NATIVE = Toggles NATIVE and OFF F6 BUTTON BLUE ONLY • BLUE ONLY = Toggles BLUE and NORMAL • MONO = Toggles MONO (monochrome) and NORMAL • UNDEF = No settings USER CONFIG (Continued) CONTROL a b c 26 GPI1 TALLY R GPI2 TALLY G GPI3 SDI 1 GPI4 SDI 2 GPI5 LINE 1 GPI6 LINE 2 KEY INHIBIT OFF TALLY R, TALLY G, SDI1, SDI2, LINE1, LINE2, DVI-I, H/V DELAY, MONO, BLUE ONLY, NORMAL SCAN, OVER SCAN, NATIVE, ASPECT 4:3, ASPECT 16:9, or MARKER ENABLE Inhibits the use of all buttons except Power, Menu, and Volume: ON or OFF To modify the options in the COLOR TEMP menu, COLOR TEMP must be set to USER. MARKER is disabled when SCAN is NATIVE, or the input signal is DVI or VGA. It may be necessary to turn the monitor off for a moment after switching from HDMI to DVI-D or from DVI-D to HDMI to correct momentary translation issues. 821688: R M T- 1 7 0 - H D U s e r G u id e © 2 0 1 2 Wo h l e r Tec h n o l o g i e s , I n c. A l l r i g h t s r e s er ve d . RMT-170-HD User Guide U s in g t h e F u n c t io n ( F ) K e y s Using the Function (F) Keys When the OSD Menu is not displayed, you can press the F keys to quickly adjust the following parameters: Table 1–13 F Key Button Functionality F Button 1 2 3 4 5 6 Function Marker Audio Meter H/V Delay Native Auto Adjust Blue Only Technical Functional Overview Figure 1–8 on page 28 illustrates the overall functionality of the RMT-170-HD monitor. 8 2 1 6 8 8 : R M T- 1 7 0 -H D U s e r G u i d e © 2 0 1 2 Woh l er Te c h n o l o g i es , I n c . A ll r i g h t s r e se r ve d . 27 R M T -1 7 0 -H D U s e r Gu id e Technical Functional Overview Figure 1–8 RMT-170-HD RS-485 Out (UMD, OSD Tally) RS-485 In L R Audio Out LED Tally Audio Source Select 2 Programming 2 Audio In 1 HD/SD-SDI Input 1 SDI Input Select 4 LCD 17” (16:9) with OSD SD-SDI HD/SD-SDI Input 2 HD/SD-SDI Select Out Line 1 Composite Video Composite A/D Video Decoder Video Source Select Audio Channel Select Line 2 Video/Y Line 2 Video/Pr 4-8 for De-embedded, 2-4 for Analog Composite or Component A/D Video Decoder 2 DVI-I Video VGA DVI-D Select 28 821688: RS-232 Interface 2 Audio In 2 Line 2 C/Pb GPI Interface EDID R M T- 1 7 0 - H D U s e r G u id e © 2 0 1 2 Wo h l e r Tec h n o l o g i e s , I n c. A l l r i g h t s r e s er ve d .