1
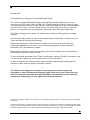
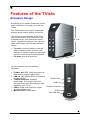
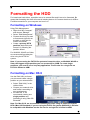
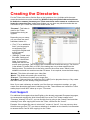
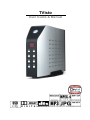
TVisto User Guide & Manual ■ October 2007 Congratulations on buying your TVisto Multimedia Center. The TVisto is a Digital Multimedia Player as well as Data Storage Solution that you can connect to any PC or Mac, either via USB 2.0 or FireWire 400 (plug & play) in order to copy your favourite content (music, movies, pictures, and/or data files). Once you have transferred your data to the TVisto, you can connect it to any TV set to enjoy your movies, music, and photos. You can watch your favourite films in top quality video and Dolby Digital audio. The TVisto is designed for a single 3.5” desktop size hard drive, offering plenty of storage capacity. This document will provide you with full and comprehensive instructions on how to use your TVisto and benefit from its unique features. Please start reading the “TVisto Features” chapter in order to have an overview of the enhanced capabilities of your device. A more technical description of these features is presented in the “Specifications” chapter. Before using the TVisto, be sure that you have received the complete set of accessories by checking the “Package Contents” section. To have a detailed description of the TVisto’s functionality, read the “PC/MAC Connection” and “TV Connection” chapters in order to explore the full set of operations. In order to maintain your TVisto device in safe operating conditions and to guarantee life extension, please read the “Safety Information” section. The TVisto is not designed or intended to, and may not be used to violate any copyrights or other IP (Intellectual Property) rights. Each user of the TVisto may only use it in connection with materials legally owned by or licensed to the user and only extend such ownership or license rights that will permit such use. The diagrams and images contained in this manual may not fully represent the product that you are using and are there for illustration purposes only All rights reserved. Windows is a registered trademark of Microsoft Corporation. Macintosh, Mac, Mac OS are registered trademarks of Apple Computer, Inc. DivX® Certified and DivX® Video are registered trademarks of DivX Networks, Inc. Dolby® and Dolby® Digital are registered trademarks of Dolby Laboratories, Inc. All other trademarks and registered trademarks are property of their respective owners. ■ ■ Table of Contents FEATURES OF THE TVISTO ..................................................................................................1 EXCLUSIVE DESIGN .................................................................................................................... 1 PC CONNECTION ........................................................................................................................ 2 TV CONNECTION ........................................................................................................................ 2 AUDIO FEATURES ....................................................................................................................... 2 VIDEO FEATURES ....................................................................................................................... 2 MULTILINGUAL............................................................................................................................ 2 REMOTE .................................................................................................................................... 3 FIRMWARE UPDATE .................................................................................................................... 3 FORMATTING THE HDD.........................................................................................................4 FORMATTING ON WINDOWS ........................................................................................................ 4 FORMATTING ON MAC OS X ....................................................................................................... 4 CREATING THE DIRECTORIES .............................................................................................5 FONT SUPPORT.......................................................................................................................... 5 COMPUTER CONNECTION....................................................................................................6 SAFE REMOVAL ......................................................................................................................... 7 TV CONNECTION....................................................................................................................8 ANALOGUE AUDIO SETUP .......................................................................................................... 9 DIGITAL AUDIO SETUP ............................................................................................................... 9 THE REMOTE CONTROL ........................................................................................................... 10 UNIQUE CONTROL KEYS ........................................................................................................... 13 MENU FUNCTIONS ...............................................................................................................14 MAIN MENU.............................................................................................................................. 14 MOVIES ................................................................................................................................... 14 MUSIC ..................................................................................................................................... 15 PICTURES ................................................................................................................................ 16 SETTINGS ................................................................................................................................ 17 BACKGROUND IMAGES ............................................................................................................. 20 FILE FORMATS .....................................................................................................................21 .ISO ........................................................................................................................................ 21 XVID........................................................................................................................................ 21 DIVX® ..................................................................................................................................... 22 DIVX® VOD ............................................................................................................................ 22 SPECIFICATIONS .................................................................................................................23 PACKAGE CONTENTS.........................................................................................................24 STANDARD PACKAGE............................................................................................................... 24 OPTIONAL CABLES AND ACCESSORIES .................................................................................... 24 SAFETY INFORMATION .......................................................................................................25 POWER ON/OFF PRECAUTIONS.................................................................................................. 25 LOCATION AND PLACING PRECAUTIONS .................................................................................... 25 ELECTRICITY AND POWER PLUG ................................................................................................ 25 CABLES ................................................................................................................................... 25 FAQ ........................................................................................................................................26 ■ ■ Features of the TVisto Exclusive Design Everything you love about multimedia, movies, music, and photos is brought to you with the TVisto. The TVisto features an elegant, fashionable, and high quality case to protect your device. The buttons on the front panel of the TVisto offer quick access to basic functions for the multimedia player, even without the remote control. Conveniently located on the top is the power on/off switch, with following indicative colours: • • TV mode: blue when power-on and red when in stand-by mode. It “blinks” (red intervals) to confirm a command, whenever a button on the remote control is pressed. PC mode: blue when power-on 15.2 cm 22.2 cm On the rear panel, there are following interfaces: • • • • • FireWire 400: IEEE 1394a connection for data transfer (supports daisy chain) USB 2.0: High Speed USB 2.0 connection for data transfer FireWire 400 TV Multi-Connector: Analogue Audio/Video. This multi-pin connector USB 2.0 provides all the video and analogue audio signals for your TV set. TV Multi-Connector SPDIF: Digital audio output for copper coaxial or optical cable SPDIF Mini DIN Jack: Power supply Mini DIN Jack 4.8 cm ■ 1 ■ PC connection The TVisto can be connected to any PC or Mac via USB or FireWire interface, supporting the following file formats: FAT32, NTFS, HFS+. With high speed USB or FireWire connection, you can quickly move large multimedia files from your computer to the TVisto. Please note that you will always need an external power adaptor. TV connection The TVisto provides the optimum multimedia quality in both audio and video outputs when connected to your TV set and audio system. Audio features • • Audio file formats supported: WMA, WAV, MP3, MPEG-4 (AAC), AC3 (Dolby Digital), OGG Vorbis. Note: Does not support AAC files from Apple’s media player iTunes. Audio Output Formats: Dual Stereo analogue audio, Coaxial/SPDIF digital Audio (supports compressed Dolby Digital 5.1 and DTS pass through). Video features • • Video file formats supported: MPEG-1, MPEG-2 (AVI, VOB, ISO), MPEG-4 (AVI, DivX, DivX VOD, XviD). Note: Does not support high definition media files (HD) such as WMV9 or DivX HD and does not support GMC or Qpel. Video Output Formats: NTSC/PAL composite and S-video, Analogue YPbPr video (progressive or interlaced) scalable up to 1920x1080i or 1280x720p. RGB via SCART. VGA scalable up to 1024x768. DivX compatibility Supports DivX 3.11, 4.x, 5.x, 6.x Supports external text subtitles; SUB (MicroDVD format), SRT (SubRIP format), SMI (SAMI format) Supports any language text subtitles (external font required). Please refer to the “File Formats” chapter for more details. XviD compatibility Please refer to the “File Formats” chapter for more details. DVD (.ISO) compatibility ISO=One Image file backup of the complete DVD. The TVisto will play the ISO file exactly the same as if it was running from the original DVD. Supports .ISO of any size (FAT32/up to 4GB, NTFS/unlimited, HFS+/unlimited). Supports any language subtitles. Only with the TVisto can you create your own Virtual DVD Library by storing your private collection of DVDs (.ISO format) and watch them as if they were running from the original DVDs. Please refer to the “File Formats” chapter for more details. Multilingual The TVisto has been designed to meet everyone’s expectations. With sophisticated Unicode character handling, it supports most of the major languages used in the menu selection and the subtitle feature. Refer to “Font Support” for further details. ■ 2 ■ Remote The TVisto is equipped with an elegant infrared remote control, providing standard DVD functionality buttons and more. Please refer to the chapter “TV Connection” for a detailed description of the remote control. Firmware update You will be able to upgrade your device with new features and capabilities by following the firmware 1 upgrade procedure: • • • • • • • Get the latest update from your vendor’s web site. Connect the TVisto to your computer and copy the firmware file to the “firmware” folder. Connect the TVisto to the TV and choose “Firmware Update” from Settings. Wait a few minutes for the new firmware to be updated. Never disconnect or turn off your unit before the firmware has been completely updated!! Turn off the TVisto by disconnecting the power supply, wait a few seconds, and then connect the power supply again. Wait a few seconds and your TVisto will appear. Done! Powerful Media Processor The heart of your TVisto device is a powerful media processor supporting the demanding MPEG-1, MPEG-2 (AVI, VOB, ISO) and MPEG-4 (AVI, DivX, XviD) decoding. Enjoy The TVisto is the ultimate Digital Multimedia Centre that can be addressed to a wide variety of users: • • • • • • • • • • Home users who want to build a state-of-the-art, versatile home theatre. Stores, Agencies, Exhibitors, and Companies that want audio/visual promotions of their products (indoor advertising). Business people who want to have a presentation. Parents who want to back-up and replay their family videos. Movie and music lovers who want to enjoy their favourites at all times. People downloading large numbers of movies and music from the internet. Everyone who wants to organize their stack of CDs & DVDs. Parents who want to create a “DVD/CD-safe” environment. DivX enthusiasts that want to enjoy their DivX/MPEG4 videos with exceptional Dolby Digital (AC3) sound. Every computer fan owning a TV, home theatre, or other A/V equipment. 1 Firmware is the software stored in the TVisto flash memory that contains the programs running in your device. These programs remain stored even when the system is switched off. ■ 3 ■ Formatting the HDD For brand new hard drives, a partition has to be created first and it has to be formatted. Be aware that formatting the drive will erase all existing data on it! Connect the drive via USB or FireWire connection to your computer and turn it on. Formatting on Windows Using Disk Management: • Right click “My Computer” and choose “Manage” • Select “Disk Management” • Choose the drive you want to format and right click on the disk or drive field for further commands • Create a primary NTFS partition (basic disk) and format it by following the partition wizard For Win2000, WinXP and Vista, we recommend formatting the drive using the NTFS file system. Note: If you are using the FAT32 file system to format the drive on Win2000, WinXP or Vista, the biggest single partition you can create will be 32GB. To create larger partitions, you need to use a 3rd party application. The file size for a single file on FAT32 is limited to 4GB! Formatting on Mac OS X Use the Disk Utility to format your drive and create a single partition on your external disk. • Select “Disk Utility” in the utilities folder • Choose your external drive and format it according to your requirements. • For Mac OS X, we recommend creating one single partition and formatting it using “Mac OS Extended” Note: For Mac OS X, we recommend formatting the drive using its native file system HFS+ (Mac OS Extended). If you are using the FAT32 file system (MS-DOS), it will also be compatible with Windows but the file size for a single file is limited to 4GB! ■ 4 ■ Creating the Directories For the TVisto to be able to find the files on the hard drive, four (4) folders with the exact names shown below must be created first! NONE of the prerequisite folders should ever be deleted or renamed, because your TVisto uses these exact names as a reference to locate the respective files. Inside these folders you can have any sub-directories that are convenient to you. Create the folders as shown below, now. “Firmware”: This folder is used for the TVisto firmware files during an upgrade Depending on your setup, you can create two more subfolders inside of it: • “Font”: For an additional font if your language is not supported (not required for English and most European languages). • “Settings”: Create a text file called “Settings.txt” and store it inside that folder if you want to change the text for the screen saver message. This file has to be a Unicode text file with two strings. The first line is the default TV mode (PAL or NTSC) if the setting has not yet been applied via the Settings menu. The second line is the string used for the screen saver, which is user editable but should not contain more than 16 letters. If not required, leave the folder empty. “Movies”: This folder will contain your video files. “Music”: This folder will contain your music files. “Pictures”: This folder will contain your image files. “AutoBoot”: Optional folder for video files (AVI & MPG) to be played at boot up. Only create this folder when you are actually using this function. Note: If you need a directory to transfer your files from one computer to another, you may create more directories and name it whatever you like. These folders won’t affect the TVisto media player but will NOT show up on your TV screen! Font Support For additional font support other than English or the already supported European languages, we recommend copying the ‘Arial Unicode MS’ font to the “Font” folder located in the “Firmware” directory. On a PC, you can find this font by going to the Control Panel and then selecting Fonts. After copying the font to the TVisto, rename the file “font.ttf”. Example: If the original file name is “arialuni.ttf,” rename it “font.ttf”. You may use any other Unicode true type font (TTF) you have or whatever is available on the internet, but remember to rename the file “font.ttf’ after copying it to the TVisto. ■ 5 ■ Computer Connection The TVisto operates as a standard USB mass storage or FireWire hard disk when connected to a computer. Use the included cables to connect your device to the computer system. Always connect the USB or FireWire cable to your computer first, before you turn on the device. Your system will automatically recognise the TVisto as external hard drive in which you then can copy any file(s) you want (music, movie, picture, and/or data). It is strongly recommended to empty the “Recycle Bin” after your file(s) deletion, in order to free up the HDD space and make sure old files have been erased. The TVisto supports following file formats: FAT32 (Windows & Mac) NTFS (Windows) and HFS+ (Mac). If your computer system does not have a FireWire or USB 2.0 interface but only a slower USB 1.1 connection, you will receive a warning but can still use the device. NOTE: You will always need the external power adapter when connected to the computer. The ON/OFF switch is located at the rear of the unit. When connected to the computer, the ON/OFF button on the front is not in use. NOTE: NONE of the prerequisite folders should ever be deleted or renamed, because your TVisto uses these exact names as a reference to locate the respective files. Inside these folders you can have any sub-directories that are convenient to you. “Firmware”: This is the folder in which you can copy the latest TVisto firmware files when there is a new upgrade available. Inside this folder, you may create two optional subfolders: • “Font” for your external Unicode true type font. • “Settings” for the “Settings.txt” file, which includes your screen saver text. “Movies”: Store all your favourite video clips and movies inside this folder. “Music”: Store all your favourite music files inside this folder. “Pictures”: Store all your favourite images and photos inside this folder. NOTE: Media files stored in different locations will not be recognised by the media player when it is connected to the TV. To backup your files or to transfer data between different computers and platforms, you may create as many new folders in the root directory as you like. These will not affect the TVisto media player and also won’t be seen on the TV screen. ■ 6 ■ Safe Removal In order to safely remove the TVisto from your system, please follow the same procedures as for any external Plug & Play device. PC Double click on the taskbar icon to “Unplug or Eject hardware”. The adjacent dialogue box will appear, displaying the external Plug & Play devices. In the current example, you can see the TVisto as a USB Mass Storage Device. In order to remove it, click the device in the list and then click Stop. Click OK on the next dialogue box. The operating system will automatically stop the device and inform you for its safe removal. If you are using the TVisto (e.g. you are working on a Word document or a picture located in its disk), the operating system will notify you that it is unable to remove the device. In this case, close all the applications affecting or accessing the TVisto and try again. Mac Drag the drive icon into the trash bin to eject and remove the drive. Note: Always follow the safe removal process when disconnecting the device or it might not be recognised on the TV. ■ 7 ■ TV Connection The TVisto provides high quality video and audio output when connected to your TV set and audio system. The TV connection is straightforward. Just connect the TVisto to your TV set (NTSC or PAL) using the included AV cable, plug in the power supply and turn it on. When using the default AV Cable provided with the TVisto, you have Composite video signal, S-Video, and stereo (Left/Right) analogue audio out connected to your TV set. If your TV does not have Composite or S-Video, then use the optional SCART adapter to connect it to the SCART port on your TV. You have the choice to purchase the following optional cables: • • • • AV Cable with Analogue YPbPr video (progressive or interlaced) scalable up to 1920x1080i or 1280x720p AV Cable with full SCART (RGB) support VGA AV adaptor for VGA interface SPDIF optical audio cable Both YPbPr and VGA video cables provide analogue L/R audio. The VGA cable provides VGA out scalable up to 1024x768. From best to worst in regards to the video quality and connection, the order is as follows: • • • • • • Component YPbPr 1080i Component YPbPr 720p Component YPbPr 480p SCART RGB S-Video Composite ■ 8 ■ The TVisto offers the option for two kinds of audio connection, analogue and digital. Use the analogue connection when connected directly to the TV, or if you don’t own a stereo amplifier. Use the digital connection when you want to listen to digital surround sound on your home entertainment system. Analogue Audio Setup The simplest configuration is when the analogue audio system on your TV set is used. In this case, no matter what type of AV cable you use (the default providing Composite/S-Video signal, one of the optional cables providing Video Component YPbPr, or SCART), the analogue audio is provided to the stereo input of your TV by the Left/Right RCA jacks. TV S-Video, Composite, Component YPbPr or SCART Video Analogue L-R Audio This configuration uses only one AV cable connected to the multi-connector port on the TVisto. TVisto With this simple setup, you can get the highest video quality, but the audio remains stereo analogue quality provided by the TV set’s built in speakers. Digital Audio Setup This configuration provides the best mix of video and audio quality. TV S-Video, Composite, Component YPbPr or SCART Video In this setup, you can connect any of the available AV cables except the stereo L/R RCA jacks to the TV set speakers. Instead, you use the Digital Audio Port of the TVisto. Connect this port using the SPDIF copper coaxial or the optional optical audio cable to the digital input of your Dolby Digital or DTS Home Theatre Receiver/Processor. Digital Audio Out (SPDIF) TVisto Provided the quality of this receiver and the correct setup of the 5.1 Speaker System, you can experience optimum multimedia quality in both audio and video. 5.1 Speaker System Dolby Digital or DTS Home Theatre Receiver/Processor ■ 9 ■ The Remote Control The TVisto remote has all the functional capabilities to fully control your device and enjoy your multimedia files. The next figure describes each button’s function. HOME, displays the main menu POWER On/Off PLAY PLAY ALL Files SHUFFLE, play all files randomly FAST FORWARD REVERSE PLAY PAUSE/STEP NEXT TRACK PREVIOUS TRACK STOP PLAYBACK NAVIGATION BUTTONS ROTATE picture DVD TITLE RETURN, to the previous menu DVD MENU ZOOM to image AUDIO, toggle audio language VOL +, increase volume External SUBTITLE position MUTE SUBTITLE, toggle subtitle language VOL -, decrease volume NUMERICAL PAD INFO, displays details during playback SEARCH for Time or Title/Chapter MUSIC, jumps to Music folder PICTURES, jumps to Pictures folder MOVIES, jumps to Movie folder SETTINGS, jumps to Settings TV out, toggle video output format SLOW forward function THUMBNAILS On/Off ANGLE, view DVD with different angle REPEAT chapter or title A2, not used REPEAT between points A-B A1, not used ■ 10 ■ Buttons HOME Functionality Movies Music Displays the main menu Displays the main menu POWER POWER On/Off POWER On/Off SHUFFLE Play all files randomly Play all files randomly PLAY/ENTER SELECT/PLAY movie SELECT/PLAY song PLAY ALL PLAY ALL Files PLAY ALL Files REVERSE PLAY REVERSE PLAY REVERSE 10 seconds of the song PAUSE/STEP PAUSE/STEP PAUSE FAST FORWARD FAST FORWARD FORWARD 10 seconds of the song PREVIOUS TRACK PREVIOUS TRACK (.ISO), PREVIOUS 5 MIN (DivX), PREVIOUS page in file list Select PREVIOUS song and display PREVIOUS page in file list STOP PLAYBACK STOP PLAYBACK STOP PLAYBACK NEXT TRACK NEXT TRACK (.ISO), NEXT 5 MIN (DivX), NEXT page in file list Select NEXT song and display NEXT page in file list ROTATE N/A N/A ZOOM Use arrow keys to stretch image, then press Enter and use arrow keys to scroll N/A RETURN Return to the previous menu Return to the previous menu TITLE DVD TITLE (.ISO files only) N/A MENU DVD MENU (.ISO files only) N/A MUTE Mute Mute VOL + Increase volume Increase volume Decrease volume VOL - Decrease volume AUDIO Toggle audio language N/A SUBTITLE Toggle subtitle language N/A SUBTITLE cd Text SUBTITLE position for DivX files N/A NUMERICAL PAD Use for Time Search Use for Time Search INFO Displays file information (e.g. size, format, etc) Displays file information (e.g. size, format, etc) SEARCH SEARCH for Time or Title/Chapter applicable ONLY for .ISO files Search for Time MOVIES Go to top folder Jump to Movies folder MUSIC Jump to Music folder Go to top folder PICTURES Jump to Pictures folder Jump to Pictures folder SETTINGS Jump to Settings Jump to Settings SLOW SLOW forward function (.ISO files only) N/A ANGLE View DVD with different angle (.ISO files only) N/A THUMBNAILS N/A N/A TV OUT VIDEO OUTPUT, toggle video out format. You can switch between the individual video outputs pressing this button. The video output selected at any time will be shown on the screen. If you cannot see the correct image on the TV or VGA screen, press this button until the image appears. VIDEO OUTPUT, toggle video out format. You can switch between the individual video outputs pressing this button. The video output selected at any time will be shown on the screen. If you cannot see the correct image on the TV or VGA screen, press this button until the image appears. REPEAT REPEAT chapter or title, applicable ONLY for .ISO files N/A REPEAT A-B REPEAT between points A-B, applicable ONLY for .ISO files N/A A1 N/A N/A A2 N/A N/A INFO 0 1 2 RETURN By pressing the buttons consecutively: INFO 0 1 2 RETURN, the unit is set to factory default By pressing the buttons consecutively: INFO 0 1 2 RETURN, the unit is set to factory default ■ 11 ■ Buttons HOME Functionality Pictures Settings Displays the main menu Displays the main menu and saves new settings POWER POWER On/Off POWER On/Off (not during Firmware update) SHUFFLE Play all files randomly N/A PLAY/ENTER SELECT/DISPLAY image SELECT PLAY ALL PLAY ALL Files N/A REVERSE PLAY N/A N/A PAUSE/STEP N/A N/A FAST FORWARD N/A N/A PREVIOUS TRACK Select PREVIOUS image and display PREVIOUS page in file list N/A STOP PLAYBACK STOP DISPLAY N/A NEXT TRACK Select NEXT image and display NEXT page in file list N/A ROTATE Rotate picture N/A ZOOM ZOOM IN (using ⇒ key), ZOOM OUT (using ⇐ key), press Enter and use arrow keys to scroll N/A RETURN Return to the previous menu Return to the previous menu and cancel command TITLE N/A N/A MENU N/A N/A MUTE N/A N/A VOL + N/A N/A VOL - N/A N/A AUDIO N/A N/A SUBTITLE N/A N/A N/A SUBTITLE cd N/A NUMERICAL PAD N/A N/A INFO Displays file information (e.g. size, format, etc) N/A SEARCH N/A N/A MOVIES Jump to Movies folder N/A N/A MUSIC Jump to Music folder PICTURES Go to top folder N/A SETTINGS Jump to Settings Leave Settings and go to Home SLOW N/A N/A ANGLE N/A N/A THUMBNAILS Image preview ON/OFF N/A TV OUT VIDEO OUTPUT, toggle video out format. You can switch between the individual video outputs pressing this button. The video output selected at any time will be shown on the screen. If you cannot see the correct image on the TV or VGA screen, press this button until the image appears. VIDEO OUTPUT, toggle video out format. You can switch between the individual video outputs pressing this button. The video output selected at any time will be shown on the screen. If you cannot see the correct image on the TV or VGA screen, press this button until the image appears. N/A REPEAT N/A REPEAT A-B N/A N/A A1 N/A N/A A2 N/A N/A By pressing the buttons consecutively: INFO 0 1 2 RETURN, the unit is set to factory default By pressing the buttons consecutively: INFO 0 1 2 RETURN, the unit is set to factory default (not when you select Firmware update) INFO 0 1 2 RETURN ■ 12 ■ Unique Control Keys The TVisto’s Remote Control has a full set of buttons in order to provide the user with complete control of the device. The following paragraphs describe the functions of some important buttons; while in the previous table, there is a list of all the keys and their functions. This key toggles the video out format. You can switch between the individual video outputs pressing this button. The video output selected at any time will be shown on the screen. If you cannot see the correct image on the TV or VGA screen, press this button until the image appears. The video indication banner appears for a few seconds each time you press the TV OUT button and also each time you switch on the TVisto. Toggling TV OUT does not save the video settings. To do so, select the “Video Settings” from the Settings menu. This key allows you to position the external subtitles of XviD movies. When it is pressed, a dual set of white template lines will appear for you to position using the c d keys. Press the button again when done positioning. Use the same button to also adjust the font size for the external subtitles. After pressing this button, use the efkeys to increase or decrease the size. Press the button again when done resizing. Pressing this key, turns the image preview of your photos ON or OFF. Pressing this key will shuffle all the content in the present folder randomly and start playing back all files inside the folder continuously. INFO, 0, 1, 2, RETURN To return to factory default settings, press the above keys successively. 0 INFO 0 and 1 INFO 1 Press the HOME button to go to the main screen and then press 0 INFO 0 to temporarily turn off the on-screen display (OSD). To turn it back on, press the HOME button and then press 1 INFO 1. As an example, before a slideshow presentation, this function can be used to turn off all on-screen messages. This setting will reset itself to “enabled” after the unit has been rebooted. ■ 13 ■ Menu Functions This paragraph presents the various menus and their functions when operating the TVisto. Main Menu This is the main page that appears when you turn on the TVisto media player. You have four (4) main selections that you can access with the navigation buttons and by pressing ENTER: • • • • Movies Music Pictures Settings Please see following paragraphs for a more detailed description of individual menus. Movies Selecting the Movies menu or pressing the Movies button on your remote control will bring you to the Movies folder. On the right side, you will see the directory list of the video clips that are stored in your Movies folder on the device’s hard disk. Each directory is named under left/right brackets: “[“, “]”. For example, in the directory “[XviD]” we have stored various XviD video clips. You can make any directory you want with your desired name and store any movie you want in it (use your computer to create and change directories!). Please note that every directory can contain one or more sub-directories, depending on your own preferences. By using the navigation buttons and the PLAY/ENTER key on your remote control, you can select the files you want to play. If you have more files than can fit on the first page, you can either scroll down to access the next page or use the NEXT and PREVIOUS buttons on your remote control to jump to the next page. ■ 14 ■ Music Selecting the Music menu or pressing the Music button on your remote control will bring you to the Music folder. On the right side you will see the directory list of the music clips that are stored in your Music folder on the device’s hard disk. Each directory is named under left/right brackets: “[“, “]”. You can make any directory you want with your desired name and store any music file you want in it. Please note that every directory can contain one or more sub-directories, depending on your own preferences (use your computer to create and change the sub-directories!). By using the navigation buttons and the PLAY/ENTER keys on your remote control, you can select the music file you want to play. Use the INFO button during playback for further details of your present song or see the progress bar on the left side. Music Playlist Inside a folder, you can select certain individual songs you like and create a playlist. 1. Use the up/down keys to highlight the song 2. Press the right arrow key to add or remove the file from the playlist 3. Add as many songs in the same folder as you like 4. When finished, press the PLAY ALL or SHUFFLE button to start the playback NOTE: You can only create a playlist with files in the same folder. Once you turn off the power, the playlist will be reset. Background Music To listen to music during a slideshow presentation, select one music folder that contains the songs you want to hear (only MP3 songs with a bit rate of up to 128kbps). Use the up/down keys to highlight the folder and then press the right arrow key to select it. Press the right arrow key again to deselect. ■ 15 ■ Pictures Selecting the Pictures menu will bring you to the Pictures folder. On the right side you will see the directory list of the images that are stored in your Pictures folder on the device’s hard disk. Each directory is named under left/right brackets: “[“, “]”. You can make any directory you want with your desired name and store any pictures you want in it. Please note that every directory can contain one or more sub-directories, depending on your own preferences (use your computer to create and change the sub-directories!). By using the navigation buttons and the PLAY/ENTER keys on your remote control, you can select the photos that you want to display. Press the THUMBNAILS button to turn on the image preview on the left corner of your screen (depending on the file size, the preview will slow down the file access). During playback, you can use the ZOOM, PAN and ROTATE function. Picture Playlist Inside a folder, you can select certain individual images you like and create a playlist. 1. Use the up/down keys to highlight the image 2. Press the right arrow key to add or remove the file from the playlist 3. Add as many images in the same folder as you like 4. When finished, press the PLAY ALL or SHUFFLE button to start the playback NOTE: You can only create a playlist with files in the same folder. Once you turn off the power, the playlist will be reset. If you like to listen to some music during the slideshow presentation, go to the Music menu and select a folder that contains the songs you would like to use as background music. See previous page for more details. ■ 16 ■ Settings The TVisto Settings menu is extremely important in order to correctly configure your device and benefit from its advanced features. In the following paragraphs, there are detailed descriptions of the various settings and parameters. Languages The TVisto provides the unique feature to support a multilingual audience. With sophisticated Unicode character handling, it supports most of the major languages used in the menu selection and the subtitle feature of movies. Refer to the “Font Support” paragraph for further details on how to enable languages other than English. Use the ▲▼ navigation buttons to select your language and press the PLAY/ENTER button to activate it. Press the HOME button on your remote control to save the language setting. Once activated, all the menu selections and wording will switch to the selected language. Audio Settings These settings configure the provided audio output format: • Analogue for the dual Stereo audio • Digital for the optical SPDIF digital audio (supports compressed Dolby Digital 5.1 and DTS pass through). Use the ▲▼ navigation buttons to select your audio setting and press the PLAY/ENTER button to activate it. Press the HOME button on your remote control to save the audio setting. Selecting analogue audio out will output the stereo audio to the L/R RCA jack from your AV cable. Selecting digital audio output will provide digital sound through its SPDIF digital audio port. In this case, you have to connect this port using the SPDIF optical cable to the digital input of your Dolby Digital or DTS Home Theatre Receiver/Processor in order to take advantage of the high audio quality. ■ 17 ■ Video Settings These settings configure the provided video output format: • • • • • • NTSC Composite/S-Video PAL Composite/S-Video NTSC Component PAL Component NTSC SCART PAL SCART • High Definition output at 480p • High Definition output at 720p • High Definition output at 1080i • VGA at 1024x768 Use the ▲▼ navigation buttons to select your Video setting. Press the PLAY/ENTER button to activate it. Press the HOME button on your remote control to save the setting. Once activated, the video out will switch to the selected format. Please note that you should have already connected the correct cable before configuring the video settings; otherwise, the TV screen may not display properly. For example, before enabling the “NTSC SCART” option, you should have already connected the SCART cable. In case of any setting errors (e.g. the simple Composite AV cable is connected and you setup NTSC Component with no display on the TV screen), press the “TV out” key on the remote control repeatedly until you see the correct display. You can then choose the right video output via “Settings” and save it by pressing the HOME button. TV Type Select one of the listed types of TV display aspect ratios and press the HOME button on your remote control to save the setting. 16:9 Wide Screen 4:3 Letter Box 4:3 Pan Scan Screen Saver Select the time interval to enable the screen saver when your TVisto is idle. There are three (3) predefined time intervals of 5, 10, and 30 minutes, and one to disable the screen saver. Use the ▲▼ navigation buttons to select your screen saver. Press the HOME button on your remote control to save the setting. NOTE: The unit automatically goes into stand-by mode when idle for more than 30 minutes. ■ 18 ■ Firmware Update This setting performs the firmware update procedure by reading the firmware binary files located in the “Firmware” directory of you device. Never delete or rename this folder! Provided that you have already copied the latest firmware files to this directory, press the ENTER key to start the process. From the menu, you can verify the revision number of the installed version and the revision of the new release. The firmware update procedure takes approximately 1 minute. Once completed, turn off your device by using the power switch on the TVisto media player. Wait for a few seconds and then turn it back on. The new firmware is now ready and in use. NOTE: NEVER TURN OFF THE BOX OFFICE DURING THE FIRMWARE UPDATE PROCEDURE. THIS MAY DAMAGE YOUR DEVICE. IF FOR ANY REASON (E.G. POWER SUPPLY FAILURE DURING FIRMWARE UPDATE) THE PROCEDURE FAILS, YOU MAY NOT BE ABLE TO OPERATE YOUR DEVICE. IN THIS CASE, YOUR DEVICE MUST BE REPLACED WITH A FUNCTIONAL UNIT BY YOUR VENDOR. To return to factory default settings press successively: INFO, 0, 1, 2, RETURN DIVX(R) VOD Your TVisto supports the DivX® Video-On-Demand (VOD) feature. With this feature, you have the possibility to purchase or rent DivX VOD movies, downloaded from the internet, and playback on your TVisto DivX Certified device. From the “DivX(R) VOD” option of the “Settings” menu you can see the registration code of your device. This is a unique 8-digit code, assigned to each DivX certified device (like your TVisto). Please refer to the sub-sequent paragraph entitled DivX® VOD, for more details on this feature of your device. ■ 19 ■ Background Images The background images seen on your TV can be customised! To do so, connect your TVisto to the computer and create a new folder inside the Firmware directory called “img”. Prepare your new background images and save them inside the “img” folder. The files have to be saved as JPG and the dimension should be 720x480 with a DPI of 72. Name them exactly as followed: Main.jpg, Movies.jpg, Music.jpg, Photos.jpg and Settings.jpg. If one of these images is missing or not spelled exactly as seen above, none of the customised images will appear on your TV screen! If you don’t like the new look, either change the images or simply delete the folder, empty the trash bin and the original background images will show up again. ■ 20 ■ File Formats Following is an introduction to some of the file formats, which are supported by the TVisto media player. .ISO Only with the TVisto can you create your own Virtual DVD Library by storing your private collection of DVDs (using the .ISO format) and watch them as if they were running from the original DVDs. Once the movies are stored in the TVisto as .ISO files, you can play them just like an original DVD with full DVD functions: Menu, Chapter selection, Audio stream selection, Subtitle selection, Fast Forward, Fast Backward, Slow, Pause, Step Forward, Repeat and Search are all included. An ISO file is the image file on a DVD disk. ISO image files are widely used to store, then transfer DVD contents through the Internet. ISO is a common DVD image format for DOS, Windows, Mac OSX, Linux and other operating systems. The TVisto can play the .ISO file exactly the same as if it was running from the original DVD. The produced files are huge in size, but this is not a limitation for the TVisto, as it supports any of the FAT32, NTFS or HFS+ file systems. Note: The largest single file size on FAT32 is 4GB! If your ISO is bigger then that, you will have to format your hard drive using NTFS or HFS+. The adjacent figure depicts various .ISO movies that have been produced in less than 12 min each. The TVisto is not designed or intended to, and may not be used to violate any copyrights or other IP (Intellectual Property) rights. Each user of the TVisto may only use it in connection with materials legally owned by or licensed to the user, and only extend such ownership or license rights that will permit such use. XviD XviD is an ISO MPEG-4 compliant video codec. It is not a product; it is an open source project which is developed and maintained by groups of people all over the world. The TVisto is fully compatible with XviD format and can play any movie encoded with this compression format except files encoded using GMC or Qpel. ■ 21 ■ DivX® DivX® is a new format for digital video. The DivX® codec is based on the MPEG-4 compression standard, which is so advanced that it can reduce an MPEG-2 video (the same format used for DVD) to ten percent of its original size. The TVisto is fully compatible with DivX® format and can play any movie encoded with this compression format no matter which version of the encoder used: 3.11, 4.x, 5.x. GMC and Qpel encoding is not supported on the TVisto. If you want to use external text subtitles, we recommend saving them as .srt or .sub text files. Please pay attention that in order for the TVisto to display the subtitles, both “movie.avi” and “movie.srt” should be placed in the same directory. In order for the TVisto to display the subtitles, the subtitle file should be a Unicode file. To do so, open the .sub, .smi or .srt file with the notepad text editor, select “Save As” and choose the Unicode option from the Encoding combo box. See adjacent image for details. DivX® VOD Your TVisto device supports the new DivX® Video-On-Demand (VOD) feature. With this feature, you have the possibility to purchase or rent DivX VOD movies, downloaded from the internet, and playback on your TVisto DivX Certified device. Follow the next steps to access and playback DivX VOD movies: 1) On your TVisto, select the DivX® VOD option from “Settings” and press ENTER to see the registration code of your device. This is a unique 8-digit code, assigned to each DivX certified device. 2) Go to the DivX® Video-On-Demand (VOD) page at http://www.divx.com/vod/ and register your TVisto device, providing the unique 8-digit registration code. 3) Download your favourite DivX® video content, selecting the rental or buy option and save it directly to the TVisto. 4) Your favourite downloaded videos can now be played ONLY on your TVisto! ■ 22 ■ Specifications Supported Audio Files Formats WMA, WAV, MP3, AAC, AC3, OGG Vorbis Supported Audio Outputs Formats Dual stereo analogue audio, SPDIF digital audio (supports compressed Dolby Digital 5.1 and DTS pass through). Supported Video Files Formats MPEG-1, MPEG-2 (AVI, VOB, ISO), MPEG-4 (AVI, DivX, DivX VOD, XviD). Supported Video Output Formats NTSC/PAL composite and S-video, analogue YPbPr video (progressive or interlaced) scalable up to 1920x1080i or 1280x720p. RGB via SCART. VGA scalable up to 1024x768 Languages Supported English, French, German, Italian, Spanish, Dutch, Swedish, Hungarian, Czech, Polish, Greek and Turkish. Korean, Traditional Chinese, Japanese and Thai require an external font Supported Interfaces FireWire 400, USB 2.0, SPDIF, CIR Output Ports AV multi-connector supporting four (4) cables: • Composite RCA, Left Audio RCA, Right Audio RCA, S-Video Mini DIN • RGB Colour Component Video 3 RCA, Left Audio RCA, Right Audio RCA • SCART (Europe) with RGB support • VGA at 1024x768 USB 2.0 and FireWire 400 (for data transfer to and from computer) Transmitter Fiber Optic 8MBps with Copper Jack. Input Ports USB 2.0 and FireWire 400 (for data transfer to and from computer) IR @ 38KHz Storage Capacity Single 3.5” Hard Drive File Systems Supported FAT32, NTFS, HFS+ (Mac OS Extended) Power Input AC: 100-240V, 1.2A, 50-60Hz DC: +5V/2A, +12V/2A Dimensions 22.2cm x 15.2cm x 4.8cm Weight 550 grams (enclosure only) Operating Temperature/Humidity 0 C to 40 C / 10% to 90% non condensing Storage Temperature/Humidity 10 C to 30 C / 10% to 90% non condensing ■ 23 ■ Package Contents Standard Package 1) Your TVisto multimedia centre. (no hard drive included!) 2) Power adapter 110/240V auto switching, +5V/2A, +12V/2A 3) Infrared remote control 4) Composite AV cable (composite RCA, S-Video mini DIN, left audio RCA, right audio RCA) 5) SCART to composite RCA, L/R Audio RCA adapter (Europe only) 6) Coaxial audio cable (RCA to mini jack) 7) USB 2.0 High Speed cable 8) FireWire 400 (IEEE 1394a), 6 to 6-pin cable 9) USB Driver CD (only for IDE HDD model) 10) User guide & manual in hard copy Note: Package content may vary, depending on vendor & version. The diagrams may also not fully represent the product that you are using and are there for illustration purposes only. Optional Cables and Accessories 11) YPbPr AV cable (YPbPr colour component video, 3 RCA, Left Audio RCA, Right Audio RCA) 12) VGA AV cable (15-pin female VGA, Left Audio RCA, Right Audio RCA) 13) SCART AV cable (for Europe with RGB support) 14) SPDIF optical audio cable Note: Package content may vary, depending on vendor & version. The diagrams may also not fully represent the product that you are using and are there for illustration purposes only. ■ 24 ■ Safety Information Before starting your TVisto, please carefully read the following paragraphs relating to the safety issues on your device in order to extend its life. Power on/off precautions The TVisto Remote Control provides the POWER ON/OFF button that controls the power status of your device when connected to the TV. It is highly recommended to switch the unit off when not in use. In any case, the TVisto will switch to stand-by mode if idle for more than 30 minutes. When the TVisto switches to stand-by, it will change the indication colour from BLUE to RED. To remove the TVisto and connect it to the computer, turn off the device using the on/off switch at the back of the TVisto first! Location and placing precautions Set the TVisto unit up in a vertical position and DO NOT place heavy objects on top of it. Do not place any other objects on top of the unit. Do not place the unit on an amplifier or other equipment that can become hot. Avoid positioning your TVisto device in the following places: • Locations with direct sunlight, next to radiators, other sources of heat, or in vehicles that are parked directly in the sun with the windows and doors closed. • Locations with very high temperature (more than 35° C) or humidity (more than 90%). • Very dusty or sandy locations. • Locations subject to vibration, shock, or with a sloping base. Electricity and power plug Careful attention must be paid to the following points in order to avoid operational faults with the equipment and to prevent electric shock, fire, and injury: • When removing the power cable from the socket, always pull on the plug and never on the cable. Do not connect or remove the power cable with wet hands. Keep the power cable away from heaters. Never try to repair the power cable yourself or to modify it in any way. Clean dust, dirt, and etc. from the power plug at regular intervals. If the unit is dropped or becomes damaged in any other way, unplug the power cable. If the unit should emit smoke, unusual smell, or noise, switch it off and unplug the power cable. In such cases, please contact your dealer. If the unit is not used for an extended period of time, then the power plug should be removed from the socket. Cables Use only the cables supplied or recommended by your vendor in order to avoid the risk of malfunction, electric shock, and possible interference of the device. ■ 25 ■ FAQ Q: No Files Found! A: This message may occur for several reasons. Please check following: • Does the folder contain any files at all? • Are the files in the correct folder (example: JPG Æ Pictures) • Did you setup all of the 4 prerequisite folders and name them correctly? • Did you format the hard drive using a PRIMARY partition? • Did you connect the drive properly (MASTER for IDE drives) and is it working on USB? • Did you use the safe removal process on the computer when disconnecting it? • If none of the above help turn off the device, remove the power supply and connect it once more before you contact your vendor for technical support. Q: Scrambled file names □□□□ A: The Unicode font is missing on your hard drive. See page 5 “Font Support”. Q: Blue Screen A: Please confirm that your device is plugged into the correct input on your TV set. Make sure you have selected the above input to display on the TV set. If this does not solve the problem, use the “TV out” on your remote control of your TVisto and toggle through the different video output formats until an image appears on the TV set. Toggling “TV out” does not save the video settings. To do so, select the "Video Settings" from the Settings menu, choose the correct output and press “Home” to save your new settings. Keep in mind that it takes about 5-8 seconds for the TVisto to show up on your TV set after the power has been turned on. Q: No sound A: By default, the TVisto is using the analogue audio output. If you are using a digital amplifier with digital input, go to “Settings” and change the audio output to digital. Q: Playback of HD (High Definition) files A: This device does not support playback of HD (High Definition) files like DivX HD or WMV9. Q: Playback of DAT files A: DAT files can not be played back on the TVisto but you can rename the “.dat” extension to “.mpg” on your computer and playback the file as MPEG-1 movie. Q: How to get the best video quality A: From best to worst in regards of the video quality and connection, the order is as followed: • Component YPbPr 1080i • Component YPbPr 720p • Component YPbPr 480p • SCART RGB • S-Video • Composite S-Video and Composite cables are included in the standard package. For additional and optional SCART or Component cables, please contact your vendor. The video quality will also depend on your content, whereas MPEG-2 and 4 will be superior to MPEG-1. ■ 26 ■ Technical Questions For RMA and other questions, please contact your vendor or check out their online support area! Make sure to include as much detail as possible and explain the problem to your vendor. Before you contact your vendor, read through the FAQ on the previous page and make sure you are using the latest firmware. About this Manual This manual was written using the model TVisto and the firmware version v2.0.6.62. Images and descriptions might slightly vary between this manual and the actual product you have. October 22, 2007 - v1.3 © Copyright 2007 by Macpower & Tytech Technology Co., Ltd. All Rights Reserved The information contained in this manual is believed to be accurate and reliable. Macpower & Tytech Technology assumes no responsibility for any errors contained in this manual. Macpower & Tytech Technology reserves the right to make changes in the specifications and/or design of the above mentioned product without prior notice. The diagrams contained in this manual may also not fully represent the product that you are using and are there for illustration purposes only. Macpower & Tytech Technology assumes no responsibility for any differences between the product mentioned in this manual and the product you may have. ■ 27