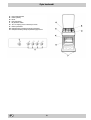
1
Kuchnia Instalacja i obs³uga Cooker Installation and use Aragaz Instalare ºi utilizare K3G2/U K3G20/U Kuchnia z piekarnikiem gazowym Instrukcja instalacji i obs³ugi 3 Cooker with gas oven Instructions for installation and use 15 Aragaz cu cuptor pe gaz ºi grill pe gaz Instrucþiuni pentru instalare ºi utilizare 24 Zalecenia eksploatacyjne W celu zapewnienia SPRAWNEGO i BEZPIECZNEGO dzia∏ania urzàdzenia nale˝y: – korzystaç wy∏àcznie z us∏ug AUTORYZOWANYCH serwisów – stosowaç tylko ORYGINALNE cz´Êci zamienne 1. Niniejsze urzàdzenie przeznaczone jest do zastosowaƒ domowych oraz nieprofesjonalnych. 2. Niniejsza instrukcja dotyczy urzàdzenia Klasy 1 (instalowanego niezale˝nie) lub urzàdzeƒ klasy 2 – podklasy 1 (instalowanych mi´dzy dwoma szafkami). 3. Przed przystàpieniem do u˝ytkowania urzàdzenia, nale˝y starannie zapoznaç si´ z podr´cznikiem u˝ytkownika. Zawiera on wa˝ne zalecenia dotyczàce bezpieczeƒstwa instalacji, obs∏ugi oraz konserwacji kuchenki. Podr´cznik nale˝y zachowaç do póêniejszego u˝ytku. 4. Po rozpakowaniu kuchenki nale˝y sprawdziç czy w trakcie transportu nie uleg∏o ono uszkodzeniu i czy nie brakuje ˝adnych cz´Êci. W przypadku jakichkolwiek wàtpliwoÊci nale˝y zasi´gnàç porady wykwalifikowanego technika. Wszelkie elementy opakowania (torby plastykowe, pianka poliestrowa, gwoêdzie, itp.) nale˝y przechowywaç w miejscach, do których nie majà dost´pu dzieci, poniewa˝ elementy te mogà byç dla nich niebezpieczne. 5. Urzàdzenie powinno byç instalowane zgodnie z zaleceniami producenta, przez wykwalifikowanego specjalist´. Niew∏aÊciwa instalacja mo˝e byç przyczynà niebezpiecznych wypadków i innego rodzaju zagro˝eƒ zdrowia ludzi, zwierzàt lub innych obiektów. Za zagro˝enia tego typu producent urzàdzenia nie bierze odpowiedzialnoÊci. 6. Instalacja elektryczna urzàdzenia b´dzie bezpieczna wy∏àcznie wtedy, gdy kuchenka zostanie przy∏àczona do sprawnej instalacji uziemiajàcej, spe∏niajàcej obowiàzujàce wymagania bezpieczeƒstwa. W przypadku wàtpliwoÊci, co do posiadanej przez Paƒstwa instalacji uziemiajàcej zalecamy konsultacj´ wykwalifikowanego specjalisty. Producent urzàdzenia nie bierze odpowiedzialnoÊci za szkody spowodowane przez urzàdzenie, które nie zosta∏o w∏aÊciwie uziemione. 7. Przed pod∏àczeniem urzàdzenia do zasilania nale˝y sprawdziç czy dane podane na tabliczce znamionowej odpowiadajà parametrom sieci zasilajàcej. 8. Nie nale˝y pozostawiaç urzàdzenia w∏àczonego bez potrzeby. Je˝eli urzàdzenie nie jest u˝ywane nale˝y wy∏àczyç je wy∏àcznikiem g∏ównym i zakr´ciç dop∏yw gazu. 9. Niniejsze urzàdzenie mo˝e byç stosowane wy∏àcznie do celów, do jakich zosta∏o zaprojektowane. Wszelkie inne zastosowania (na przyk∏ad – ogrzewanie pomieszczeƒ) nale˝y uznaç za niew∏aÊciwe a tym samym niebezpieczne. Producent nie bierze odpowiedzialnoÊci za szkody i zniszczenia wynik∏e z niew∏aÊciwego i nieodpowiedniego lub niedba∏ego u˝ytkowania urzàdzenia. 10. Nale˝y w instalacji dodatkowo zamontowaç jednobiegunowy wy∏àcznik sieciowy o odleg∏oÊci styków, co najmniej 3 mm i odpowiadajàcy obowiàzujàcym przepisom bezpieczeƒstwa. 11. Je˝eli wtyczka nie pasuje do gniazda zasilajàcego, uprawniony technik powinien wymieniç przewód zasilajàcy na przewód z w∏aÊciwà wtyczkà. Zastosowany przewód musi mieç odpowiednie przekroje ˝y∏, dopasowane do mocy urzàdzenia. 12. Wszelkie otwory i szczeliny wentylacyjne i odprowadzajàce ciep∏o z ty∏u i pod panelem kontrolnym nigdy nie mogà byç zas∏aniane. 13. Korzystanie z kuchenek elektrycznych wymaga przestrzegania kilku podstawowych zasad. W szczególnoÊci: • nie wolno dotykaç urzàdzenia mokrymi lub wilgotnymi d∏oƒmi ani stopami • nie wolno pracowaç przy urzàdzeniu boso • nie zaleca si´ stosowania przed∏u˝aczy; lecz jeÊli zastosowanie ich jest konieczne nale˝y zachowaç szczególnà ostro˝noÊç • podczas od∏àczania urzàdzenia od sieci zasilajàcej nie wolno ciàgnàç za kabel • nie wolno nara˝aç urzàdzenia na dzia∏anie czynników atmosferycznych (deszcz, s∏oƒce, itp.) • z urzàdzania nie powinny korzystaç bez nadzoru dzieci ani osoby niedoÊwiadczone 14. Przed przystàpieniem do czyszczenia lub innych prac konserwacyjnych nale˝y zawsze, za pomocà g∏ównego wy∏àcznika lub wyjmujàc wtyczk´ kabla zasilajàcego z gniazdka, od∏àczyç urzàdzenie od zasilania. 15. Je˝eli urzàdzenie uleg∏o awarii lub pracuje niew∏aÊciwie, nale˝y od∏àczyç je od zasilania, zakr´ciç kurek gazu i pozostawiç je w spokoju do czasu przybycia wezwanego technika. Wszelkie naprawy powinny byç wykonywane wy∏àcznie przez autoryzowany punkt serwisowy. Nale˝y zawsze ˝àdaç stosowania oryginalnych cz´Êci zamiennych. Nieprzestrzeganie powy˝szych zasad mo˝e przyczyniç si´ do zmniejszenia bezpieczeƒstwa urzàdzenia. 16. W przypadku, gdy zrezygnujà Paƒstwo z u˝ywania kuchenki lub innych elektrycznych urzàdzeƒ domowego u˝ytku, dobrze b´dzie, po od∏àczeniu od zasilania, zabezpieczyç je przez odci´cie kabla zasilajàcego. Wykonanie tych czynnoÊci zmniejszy mo˝liwoÊç ulegni´cia nieszcz´Êliwym wypadkom przez dzieci, które mog∏yby u˝ywaç urzàdzenia jako zabawki. 17. Do wk∏adania i wyjmowania naczyƒ do i z piekarnika nale˝y stosowaç r´kawice kuchenne, chroniàce skór´ d∏oni, nadgarstków i ràk. 18. Podczas u˝ytkowania urzàdzenie staje si´ goràce. Zaleca si´ zachowywaç ostro˝noÊç, aby uniknàç dotykania goràcych elementów wewnàtrz piekarnika. 19. Jednym z najcz´stszych rodzajów nieszcz´Êliwych wypadków, które majà miejsce podczas korzystania z kuchenek i piekarników sà oparzenia dzieci. Mogà one powstaç w przypadku: a) dotkni´cia przez dziecko goràcych elementów kuchenki b) rozlania goràcych p∏ynów c) Êciàgni´cia przez dziecko naczynia stojàcego na kuchence i oblania si´ goràcym p∏ynem 20. Nie nale˝y stosowaç z niestabilnych naczyƒ i patelni, gdy˝ mog∏oby to groziç rozlaniem ich goràcej zawartoÊci. 21. Patelnie nale˝y ustawiaç na Êrodku elektrycznych p∏ytek grzewczych lub palników gazowych. Niecentralne ustawienie patelni mo˝e groziç rozlaniem goràcej zawartoÊci. 3 22. Szczególnej uwagi nale˝y do∏o˝yç podczas korzystania z naczyƒ do sma˝enia frytek itp., aby uniknàç mo˝liwoÊci rozlania goràcego oleju. Naczyƒ takich nie wolno w ˝adnym wypadku pozostawiaç bez nadzoru, poniewa˝ przegrzany olej móg∏by zaczàç si´ gotowaç i zapaliç na goràcym elemencie grzewczym lub od p∏omienia palnika. 23. W pobli˝u w∏àczonego urzàdzenia nie wolno u˝ywaç ∏atwopalnych p∏ynów, jak na przyk∏ad benzyna lub inne ∏atwopalne rozpuszczalniki. 24. Aby zapobiec mo˝liwoÊci przypadkowego rozlania goràcej zawartoÊci do gotowania na palnikach gazowych lub p∏ytkach elektrycznych nie nale˝y u˝ywaç garnków z nierównym lub zdeformowanym dnem. 25. Podczas u˝ywania ma∏ych urzàdzeƒ elektrycznych AGD w pobli˝u kuchni nale˝y uwa˝aç, aby ich kable zasilajàce nie dotyka∏y goràcych cz´Êci kuchni. 26. Je˝eli urzàdzenie nie jest u˝ywane nale˝y upewniç si´ czy wszystkie pokr´t∏a ustawione sà w po∏o˝eniu (”/”O”. 27. Nie nale˝y pozwalaç dzieciom na zbli˝anie si´ do kuchenki, zw∏aszcza podczas korzystania z grilla lub piekarnika, poniewa˝ cz´Êci te podczas pieczenia stajà si´ bardzo goràce. 28. Do poprawnego dzia∏ania kuchenek gazowych konieczna jest w∏aÊciwa wymiana powietrza w pomieszczeniu, w którym sà one zainstalowane. Nale˝y sprawdziç czy wymagania przedstawione w rozdziale „Ustawianie kuchenki” sà spe∏nione. 29. Niektóre modele kuchni wyposa˝one sà w szklanà pokryw´ blatu. Nie nale˝y jej zamykaç zanim wszystkie palniki nie ostygnà gdy˝ ciep∏o z palników mog∏oby doprowadziç do p´kni´cia szyby. 30. Do szuflady kuchni nie wolno wk∏adaç goràcych naczyƒ 31. Kuchni´ nale˝y ustawiç na pod∏odze. W przypadku instalowania na cokole nale˝y jà w szczególny sposób zabezpieczyç przed przewróceniem. Instalacja Poni˝sze instrukcje przeznaczone sà dla wykwalifikowanego specjalisty instalujàcego urzàdzenie. Instrukcje te majà na celu zapewnienie mo˝liwie najbardziej profesjonalnego i doÊwiadczonego wykonania czynnoÊci zwiàzanych z instalacjà i konserwacjà urzàdzenia. Wa˝ne: wszelkie prace regulacyjne lub konserwacyjne nale˝y przeprowadzaç po od∏àczeniu kuchenki od zasilania. Kuchnia ma nast´pujàcà technicznà specyfikacj´: Kat. II2ELs3B/P Klasa 1 Ponadto konieczne jest przestrzeganie zaleceƒ podanych poni˝ej: a) pomieszczenie, w którym ma byç zainstalowana kuchnia powinno byç wyposa˝one w system wentylacji odprowadzajàcy na zewnàtrz spaliny powstajàce podczas spalania. Instalacja ta powinna sk∏adaç si´ z okapu lub wentylatora elektrycznego, który w∏àcza si´ automatycznie za ka˝dym razem, gdy uruchamiana jest kuchnia. Klasa 2 podklasa 1 komin lub rozga∏´ziony kana∏ dymowy (w przypadku kuchenek) bezpoÊrednio na zewnàtrz Ustawianie kuchenki Wymagania dla pomieszczeƒ kuchennych. Przed przystàpieniem do instalowania kuchni gazowej w pomieszczeniu kuchennym itp., nale˝y upewniç si´, czy spe∏nia ono stawiane mu wymagania. Podstawa prawna, w oparciu, o którà oceniamy przydatnoÊç pomieszczenia do zainstalowania w nim kuchni gazowej, jest Rozporzàdzenie Ministra Gospodarki Przestrzennej i Budownictwa z dnia 14 grudnia 1994 r. w sprawie warunków technicznych, jakim powinny odpowiadaç budynki i ich usytuowanie, b´dàce aktem wykonawczym do Prawa budowlanego z dnia 7 lipca 1994 r. (Dz. U. Nr 75 z dnia 16.12.2002, poz. 690). Wa˝ne: niniejsze urzàdzenie mo˝e byç instalowane i wykorzystywane wy∏àcznie w pomieszczeniach z trwa∏à wentylacjà, zgodnie z obowiàzujàcymi przepisami technicznymi. b) Pomieszczenie powinno równie˝ umo˝liwiaç dop∏yw powietrza, które niezb´dne jest do w∏aÊciwego spalania gazu. Dop∏yw powietrza powinien byç nie mniejszy ni˝ 2 m3/h na jeden kW mocy palników. Powietrze mo˝e byç dostarczane bàdê w wyniku bezpoÊredniego przep∏ywu z zewnàtrz przez kana∏ o przekroju, co najmniej 100 cm2, którego konstrukcja musi uniemo˝liwiaç przypadkowe zablokowanie (Rysunek A). Ewentualnie dop∏yw powietrza mo˝e odbywaç si´ poÊrednio z sàsiednich pomieszczeƒ, które wyposa˝one sà w kana∏y wentylacyjne wychodzàce na zewnàtrz, spe∏niajàce wymagania dla kana∏ów opisane powy˝ej. Wszystko to przy za∏o˝eniu, ˝e sàsiednie pomieszczenia nie sà pomieszczeniami wspólnymi, sypial- 4 Szczegó∏ A Rysunek A przyk∏ady otworów wentylacyjnych pomieszczenie sàsiednie pomieszczenie, które ma byç wentylowane Instalacja kuchni • Kuchnia gazowa pod wzgl´dem ochrony przed przegrzaniem otaczajàcych powierzchni jest przyrzàdem klasy X i jako taka mo˝e byç zbudowana w ciàgu meblowym tylko do wysokoÊci p∏yty roboczej tj. 850 mm od posadzki. Zabudowa powy˝ej tego poziomu jest zabroniona. • Odleg∏oÊç pomi´dzy palnikami nawierzchniowymi, a okapem nadkuchennym powinna wynosiç min. 650 mm. Okap nale˝y – w przypadku braku w pomieszczeniu zblokowanej wentylacji nawiewno-wywiewnej – u˝ywaç jako poch∏aniacz. Rysunek B Powi´kszenie szczeliny wentylacyjnej pomi´dzy oknem i pod∏ogà Uwaga: Kuchnia zabudowana w klasie X nie mo˝e byç zabudowana wysokim meblem. Jednak w ka˝dym przypadku meble do zabudowy muszà mieç ok∏adzin´ oraz klej do jej przyklejenia odporny na temperatur´ 100°C. Niespe∏nienie tego warunku mo˝e spowodowaç zdeformowanie powierzchni lub odklejenia ok∏adziny. Je˝eli nie mamy pewnoÊci, co do odpornoÊci termicznej mebli, kuchni´ nale˝y zabudowaç meblami zachowujàc odst´p ok. 2 cm. Przyk∏ad ustawienia kuchni (rys. C). Âciana znajdujàca si´ za kuchnià powinna byç uodporniona na wysokie temperatury. Podczas korzystania z kuchni, jej tylna Êciana mo˝e rozgrzaç si´ do temperatury oko∏o 50°C, ponad temperatur´ otoczenia. W∏aÊciwa instalacja kuchni wymaga uwzgl´dnienia poni˝szych kwestii: a) kuchni´ mo˝na ustawiç w kuchni, kuchnio-jadalni lub pokoju spe∏niajàcym warunki techniczne wynikajàce z przytoczonych przepisów; nie wolno jej instalowaç w ∏azience ani w pomieszczeniu z prysznicem, b) meble znajdujàce si´ obok kuchni, które wystajà powy˝ej powierzchni kuchni, powinny znajdowaç si´ w odleg∏oÊci, co najmniej 600 mm od kraw´dzi p∏yty z palnikami. c) okapy nale˝y montowaç zgodnie z instrukcjami podanymi w do∏àczonych do nich instrukcjach obs∏ugi, ale nie ni˝ej ni˝ 650 mm niami ani nie wyst´puje w nich zagro˝enie po˝arowe (Rysunek B). c) JeÊli kuchnia jest wykorzystywana intensywnie I d∏ugo, to mo˝e okazaç si´ konieczne otworzenie okna dla poprawienia wentylacji. d) Gaz p∏ynny jest .02.99, ci´˝sze od powietrza i w zwiàzku z tym ma tendencje do gromadzenia si´ na dolnych poziomach. Pokoje, w których zainstalowano butle z gazem p∏ynnym, powinny byç wyposa˝one w kana∏y wentylacyjne wyprowadzone z pomieszczenia na zewnàtrz, umo˝liwiajàce wydostawanie si´ gazu w przypadku nieszczelnoÊci. Z tego samego powodu butle z gazem, zarówno puste jak i cz´Êciowo nape∏nione, nie powinny byç ani instalowane ani przechowywane w pomieszczeniach usytuowanych pod powierzchnià ziemi (piwnice, itp.). Dobrà praktykà jest przechowywanie w pomieszczeniu kuchennym jedynie tego zbiornika, który jest aktualnie wykorzystywany, pod warunkiem, ˝e nie znajduje si´ on zbyt blisko êróde∏ ciep∏a (piecyki, kominki, piekarniki, itp.), które mog∏yby zwi´kszyç temperatur´ we wn´trzu zbiornika powy˝ej 50°C. Poziomowanie kuchenki Kuchenka wyposa˝ona jest w nó˝ki o zmiennej wysokoÊci umo˝liwiajàce odpowiednie wypoziomowanie urzàdzania. JeÊli jest to konieczne nale˝y wkr´ciç lub wykr´ciç nó˝ki znajdujàce si´ w naro˝nikach podstawy kuchenki a˝ do uzyskania w∏aÊciwego wypoziomowania. Monta˝ nó˝ek (niektóre modele) Przyrzàd do montowania nó˝ek w podstawie kuchni 420 mm 420 mm Min. 600 mm Min. Min. min. 650 mm z okapem min. 700 mm bez okapu OKAP Rysunek C d) szafki sàsiadujàce z okapem powinny znajdowaç si´ w odlag∏oÊci, co najmniej 420 mm od powierzchni kuchni. Minimalna odleg∏oÊç nad poziomem palników, w jakiej mogà byç mocowane elementy umeblowania kuchni wykonane z materia∏ów niezabezpieczonych termicznie wynosi 700 mm, e) Êciana stykajàca si´ z tylnà Êcianà kuchni powinna byç wykonana z materia∏u ˝aroodpornego. Tylna Êciana kuchenki mo˝e si´ rozgrzaç podczas pracy do temperatury wy˝szej o 50°C od temperatury otoczenia. 5 Pod∏àczenie gazu do kuchni kuchenka zasilana jest gazem p∏ynnym nale˝y zastosowaç regulatory ciÊnienia, które spe∏niajà krajowe przepisy techniczne. Wewn´trzna Êrednica w´˝a powinna wynosiç: • 8 mm, w przypadku zasilania gazem p∏ynnym Sprawdziç czy wà˝ jest ÊciÊle dopasowany na obu koƒcach. Do zamocowania w´˝a u˝yç standardowych zacisków, G∏ównymi postanowienia obowiàzujàcych norm technicznych przewidujà, ˝e: • wà˝ nie powinien w ˝adnym punkcie stykaç si´ z „goràcymi” elementami kuchenki; • wà˝ nie powinien byç d∏u˝szy ni˝ 1,5 metra • wà˝ nie powinien byç w ˝adnym miejscu zgi´ty ani naciàgni´ty, na ca∏ej swojej d∏ugoÊci nie powinien równie˝ posiadaç ciasnych zakr´tów ani zw´˝eƒ • na ca∏ej swojej d∏ugoÊci wà˝ powinien byç dost´pny, tak, aby mo˝liwa by∏a kontrola jego zu˝ycia • w przypadku wykrycia nieszczelnoÊci wà˝ powinien byç ca∏kowicie wymieniony; naprawianie nieszczelnego w´˝a jest zabronione Uwaga: CzynnoÊç ta mo˝e byç wykonana jedynie przez technika z odpowiednimi uprawnieniami, autoryzowanego przez producenta. Pod∏àczyç kuchni´ do butli gazowej lub rury instalacji gazowej, przestrzegajàc obowiàzujàcych przepisów, wy∏àcznie po uprzednim ustaleniu, czy kuchnia mo˝e byç zasilana gazem wyst´pujàcym w danej instalacji. JeÊli jest inaczej, nale˝y wykonaç zalecania podane w cz´Êci „Dostosowywanie kuchenki do ró˝nych rodzajów gazów”. Niektóre modele kuchenki umo˝liwiajà pod∏àczenie instalacji gazowej z lewej lub prawej strony kuchenki – aby zmieniç stron´ zasilania nale˝y zamieniç po∏o˝enie uchwytu w´˝a i korka zamykajàcego oraz wymieniç uszczelk´ (do∏àczonà do kuchni). W przypadku pod∏àczenia do butli z gazem p∏ynnym nale˝y zastosowaç regulator ciÊnienia, spe∏niajàcy obowiàzujàce przepisy. Wa˝ne: nale˝y sprawdziç czy ciÊnienie gazu w instalacji zgodne jest z zaleceniami podanymi w tabeli 1 zatytu∏owanej „Parametry dysz I palników”. Zapewni to bezpiecznà prac´ kuchni, w∏aÊciwe zu˝ycie gazu oraz przed∏u˝y czas bezawaryjnej pracy kuchni. Sprawdzanie szczelnoÊci Wa˝ne: Po zakoƒczeniu instalacji kuchenki nale˝y sprawdziç szczelnoÊç wszystkich po∏àczeƒ stosujàc do tego wod´ z myd∏em. Do sprawdzania szczelnoÊci nie wolno w ˝adnym wypadku stosowaç ognia! Pod∏àczenie do elastycznego przewodu stalowego W przypadku instalowania kuchni zgodnie z za∏o˝eniami dla klasy 2, podklasa1, do pod∏àczenia kuchni do instalacji gazowej nale˝y u˝yç przewodu elastycznego wy∏àcznie metalowego, odpowiadajàcego obowiàzujàcym przepisom. Z∏àcze doprowadzajàce gaz do kuchenki to z∏àcze m´skie z gwintem 1/2” do rur gazowych o przekroju okràg∏ym. Do pod∏àczenia nale˝y stosowaç wy∏àcznie rury i uszczelki odpowiadajàce aktualnie obowiàzujàcym normom. Maksymalna d∏ugoÊç przewodu elastycznego nie mo˝e przekraczaç 2000 mm. Upewniç si´, czy przy∏àcze nie b´dzie si´ stykaç z ˝adnymi cz´Êciami ruchomymi, które mog∏yby je uszkodziç. Pod∏àczenie kuchenki gazowej do instalacji elektrycznej (niektóre modele) Na kablu zasilajàcym nale˝y zamontowaç standardowà wtyczk´, odpowiadajàcà maksymalnemu obcià˝eniu, które podano na tabliczce znamionowej. Ewentualnie, pod∏àczyç urzàdzenie bezpoÊrednio do instalacji elektrycznej. W tym przypadku nale˝y dodatkowo zamontowaç jednobiegunowy wy∏àcznik sieciowy o odleg∏oÊci styków, co najmniej 3 mm i odpowiadajàcy obowiàzujàcym przepisom bezpieczeƒstwa (p[przewód uziemiajàcy nie mo˝e byç roz∏àczany przez wy∏àcznik). Wy∏àcznik ten b´dzie odcina∏ kuchenk´ od zasilania. Kabel zasilajàcy powinien byç u∏o˝ony w taki sposób, aby temperatura w ˝adnym punkcie jego powierzchni nie mog∏a przekroczyç temperatury pokojowej powi´kszonej o 50°C. Przed wykonaniem po∏àczenia nale˝y sprawdziç czy: • bezpiecznik oraz instalacja elektryczna wytrzymajà obcià˝enie kuchenki • instalacja elektryczna wyposa˝ona jest w skuteczny system uziemiajàcy spe∏niajàcy wymagania aktualnych standardów i przepisów • czy wtyczka lub wy∏àcznik sieciowy b´dà ∏atwo dost´pne. Pod∏àczenie do sztywnej instalacji rurowej Z∏àcze doprowadzajàce gaz do kuchni to z∏àcze m´skie z gwintem 1/2”, na które nale˝y nakr´ciç nakr´tk´ redukcyjnà. Pod∏àczenie do instalacji gazowej powinno byç wykonane w taki sposób, który nie wywo∏uje napr´˝eƒ w ˝adnym punkcie instalacji, ani na ˝adnej cz´Êci urzàdzenia. Pod∏àczenie w´˝em elastycznym Kuchni´ gazowà pod∏àczamy w´˝em elastycznym tylko w przypadku zasilania gazem p∏ynnym z butli gazowej. W celu po∏àczenia króçca kuchni z w´˝em elastycznym nale˝y zastosowaç, co najmniej 0.5 m odcinek rury stalowej instalacyjnej, która uniemo˝liwi zetkni´cie si´ w´˝a z goràcymi Êcianami kuchni. Do pod∏àczenia nale˝y zastosowaç wà˝ gazowy odpowiadajàcy wymaganiom okreÊlonym przez krajowe normy. JeÊli UWAGA: Do zasilania kuchenki nie nale˝y stosowaç transformatorów, przejÊciówek ani boczników, gdy˝ mogà si´ one nadmiernie nagrzewaç lub zapaliç. 6 Dostosowywanie kuchenki do innych rodzajów gazów CzynnoÊç ta mo˝e byç wykonana jedynie przez technika z odpowiednimi uprawnieniami, autoryzowanego przez producenta. b) regulacja ustawienia minimalnego p∏omienia palnika piekarnika (rys. A): JeÊli gaz, którym ma byç zasilana kuchenka ró˝ni si´ od gazu przewidzianego dla kuchenki w wersji fabrycznej (G20 (GZ50) – 20 mbar) nale˝y wymieniç dysze palnika i przeprowadziç regulacj´ minimalnej wielkoÊci p∏omienia. Wymiana dysz palników, minimalnej wielkoÊci p∏omienia i regulacja dop∏ywu powietrza a) palniki blatu kuchenki • zdemontowaç ruszty i wysunàç palniki z kuchni • za pomocà specjalnego klucza nasadowego 7 mm odkr´ciç dysze i wymieniç je na nowe, odpowiednie do gazu nowego typu (patrz Tabela 1). • z∏o˝yç palniki z powrotem i na∏o˝yç ruszty. Rysunek C Rysunek D Rysunek E • zapaliç palnik • ustawiç pokr´t∏o termostatu piekarnika w po∏o˝eniu Max na czas oko∏o 10 minut a nast´pnie przekr´ciç je w po∏o˝enie Min • zdemontowaç pokr´t∏o • za pomocà Êruby regulacyjnej znajdujàcej si´ z boku trzpienia pokr´t∏a ustawiç ma∏y i regularny p∏omieƒ; b) regulacja minimalnej wielkoÊci p∏omienia • ustawiç zawór gazu w po∏o˝eniu najmniejszego p∏omienia • Zdemontowaç pokr´t∏o i przekr´ciç Êrub´ regulacyjnà (znajdujàcà si´ bàdê po jednej ze stron trzonka lub w jego Êrodku – Rysunek A) . Przekr´ciç Êrub´ w kierunku zgodnym z ruchem wskazówek zegara, do po∏o˝enia, w którym p∏omieƒ b´dzie ma∏y i stabilny. • Sprawdziç czy p∏omieƒ nie gaÊnie podczas szybkiego kr´cenia zaworem UWAGA: W przypadku zasilania gazem p∏ynnym, Êruba regulacyjna powinna byç ca∏kowicie wkr´cona do samego koƒca. c) regulacja dop∏ywu powietrza: Zastosowane palniki nie wymagajà regulacji powietrza Rysunek A Adaptacja piekarnika do ró˝nych rodzajów gazu • przekr´cajàc szybkim ruchem pokr´t∏o z po∏o˝enia Max W celu dostosowania piekarnika do innego rodzaju gazu (piekarnik zosta∏, przez producenta, dostosowany do gazu G20 (GZ50)) nale˝y post´powaç w sposób podany poni˝ej: a) wymiana palnika piekarnika • Wyjàç dolnà szuflad´ lub ca∏kowicie uchyliç klapk´ (mo˝na jà zdjàç) • Wysunàç pokryw´ „A” (patrz Rysunek C) • wykr´ciç Êrub´ „V” a nast´pnie palnik piekarnika (patrz Rysunek D). W celu u∏atwienia podejÊcia zaleca si´ zdemontowanie drzwi piekarnika; • odkr´ciç dysz´ palnika piekarnika korzystajàc z klucza nasadowego do dysz (patrz rysunek E) lub lepiej za pomocà klucza nasadowego 7 mm, nast´pnie wymieniç jà na dysz´ odpowiednià do gazu nowego typu (patrz Tabela 1); • ponownie zamocowaç zdemontowane cz´Êci, wykonujàc czynnoÊci opisane powy˝ej w odwrotnej kolejnoÊci do Min lub szybko otwierajàc i zamykajàc drzwiczki piekarnika sprawdziç czy p∏omieƒ w piekarniku nie gaÊnie Regulacja dop∏ywu powietrza pierwotnego do palnika piekarnika Nale˝y zwróciç uwag´ na w∏aÊciwe u∏o˝enie przewodów zabezpieczenia przeciwwyp∏ywowego. Po zakoƒczonej regulacji, nale˝y zmieniç nalepk´ z opisem rodzaju gazu, do jakiego kuchnia jest przystosowana. JeÊli ciÊnienie gazu w instalacji ró˝ni si´ od wartoÊci, podanych w niniejszej instrukcji, nale˝y zastosowaç regulator ciÊnienia Po zakoƒczonej regulacji, nale˝y zmieniç nalepk´ z opisem rodzaju gazu, do jakiego kuchnia jest przystosowana. 7 Parametry dysz i palników Tabela Tabela 1 dla C 61 Gaz naturalny G20 (GZ50) GZ350 (GZ35) Przep∏yw* Przep∏yw* Dysza Dysza l/h l/h 1/100 1/100 (mm) (mm) 128 286 158 397 Gaz p∏ynny G30 (GPB) Moc termiczna Dysza Przep∏yw* g/h 1/100 (p.c.i*) (mm) 3,40 87 247 Ârednica (mm) Moc termiczna (p.c.i*) Szybki (du˝y – R) 100 3,00 Âredniej pr´dkoÊci (Êredni – S) 75 1,90 104 181 143 251 2,20 70 160 Pomocniczy (ma∏y – A) 51 1,00 76 95 106 132 1,30 52 95 Piekarnik – 3,1 132 296 190 410 3,50 85 254 Palnik CiÊnienie gazu 16 20 25 Minimalne Nominalne (mbar) Maksymalne * przy gazie suchym 15°C 1013 mbar G20 (GZ50) p.c.i. 37,78 Mj/m3 GZ350 (GZ35) p.c.i. 27,20 Mj/m3 G30 (GPB) p.c.i. 125,81 Mj/m3 S S A R K3G2/U K3G20/U 8 10 13 16 29 36 44 Dane techniczne Wymiary wewn´trzne piekarnika szerokoÊç g∏´bokoÊç wysokoÊç 39 cm 44 cm 34 cm Obj´toÊç robocza piekarnika: 58 litry Palniki: odpowiednie do ka˝dego z typów gazu, które podano na tabliczce znamionowej • Wymiary szuflady do podgrzewania ˝ywnoÊci: szerokoÊç g∏´bokoÊç wysokoÊç 42 cm 44 cm 17 cm Uwaga: Tabliczka znamionowa w zale˝noÊci od modelu umieszczona jest na: • wewn´trznej stronie drzwiczek schowka • wewn´trznej stronie lewego boku kuchni widoczna po wysuni´ciu szuflady Napi´cie i cz´stotliwoÊç zasilania: patrz tabliczka znamionowa 104 Niniejsze urzàdzenie spe∏nia poni˝sze dyrektywy Unii Europejskiej: 90/396/EEC z dn. 29/06/90 (Gazowa) wraz z póêniejszymi zmianami 50 60 85/90 9 Opis kuchenki A B D E F G K M N P∏yta podpalnikowa Palnik gazowy Ruszt Panel kontrolny Regulowane nó˝ki Taca na kapiàcy t∏uszcz lub do pieczenia Kratka piekarnika Pokr´t∏o kurka gazowego palnika piekarnika Pokr´t∏o kurków gazowych palników p∏yty kuchni 10 Funkcje kuchenki i jej obs∏uga Poszczególne funkcje kuchenki obs∏ugiwane sà za pomocà pokr´te∏ znajdujàcych si´ na panelu sterujàcym. Pokr´t∏a do regulacji p∏omieni palników blatu kuchenki (N) F Przyporzàdkowanie palników do pokr´te∏ przedstawione jest na rysunkach znajdujàcych si´ przy pokr´t∏ach. Zaczerniony prostokàt oznacza aktywny palnik. Palnik zapala si´ za pomocà zapa∏ki lub zapalniczki wciskajàc i przekr´cajàc pokr´t∏o palnika w kierunku przeciwnym do ruchu wskazówek zegara w po∏o˝enie maksymalne oznaczone symbolem . Ka˝de pokr´t∏o mo˝e byç ustawione w po∏o˝eniu odpowiadajàcym p∏omieniowi maksymalnemu, minimalnemu oraz w po∏o˝eniach poÊrednich. Pokr´t∏o mo˝e wskazywaç ró˝ne symbole: • – pozycja wy∏àczona – po∏o˝enie maksymalne – po∏o˝enie minimalne W kuchniach wyposa˝onych w urzàdzenie zabezpieczajàce nale˝y przytrzymaç pokr´t∏o wciÊni´te przez oko∏o 6 sekund, do momentu a˝ czujnik urzàdzenia zabezpieczajàcego nagrzeje si´ i zacznie podtrzymywaç p∏omieƒ. Temperatur´ pieczenia wybiera si´ przez takie ustawienie pokr´t∏a aby wybrana temperatura pokrywa∏a si´ ze znacznikiem umieszczonym na Êciance kuchenki. Pe∏en zakres temperatur przedstawiono na poni˝szym rysunku: Aby wy∏àczyç palnik nale˝y przekr´ciç pokr´t∏o w kierunku zgodnym z ruchem wskazówek zegara do p∏o˝enia oznaczonego kropkà. Min • 140 145 150 • 180 160 • 200 220 Max 250 Piekarnik nagrzewa si´ do ustawionej temperatury, której poziom b´dzie utrzymywany automatycznie przez termostat. Wa˝ne: • Problem z zapaleniem p∏omienia mo˝e byç spowodowany obecnoÊcià powietrza w przewodach gazowych. • JeÊli p∏omieƒ palnika zgaÊnie przypadkowo nale˝y zakr´ciç pokr´t∏em dop∏yw gazu i odczekaç oko∏o 1 minuty przed podj´ciem próby jego ponownego rozpalenia. • Je˝eli urzàdzenie nie jest u˝ywane nale˝y upewniç si´ czy wszystkie pokr´t∏a ustawione sà w po∏o˝eniu „•”. Wa˝ne: Podczas korzystania z piekarnika lub grilla nale˝y uniemo˝liwiç dzieciom dost´p do urzàdzenia. Drzwiczki piekarnika podczas pieczenia rozgrzewajà si´ do bardzo wysokiej temperatury. Uwaga: W celu wysuni´cia pokrywy „A” nale˝y uprzednio wykr´ciç Êrub´ „S”. Przed ponownym przykr´ceniem pokrywy „A” nale˝y upewniç si´, ˝e jest we w∏aÊciwej pozycji. Uwaga: Przed pierwszym u˝yciem piekarnika i grilla nale˝y urzàdzenie wygrzaç. Wygrzewanie powinno trwaç oko∏o pó∏ godziny. W tym czasie piekarnik powinien byç pusty, termostat powinien byç ustawiony na najwy˝szà temperatur´, drzwi powinny byç otwarte. Nale˝y równie˝ zapewniç odpowiednià wentylacj´ kuchni. Zapach, który odczuwany jest za zwyczaj podczas wygrzewania kuchenki, zwiàzany jest z parowaniem substancji wykorzystywanych do zabezpieczenia piekarnika na czas magazynowania. S Uwaga: Dolnà pó∏k´ nale˝y wykorzystywaç podczas pieczenia na ro˝nie. W przypadku innych opcji piekarnika nie nale˝y stosowaç dolnej pó∏ki. Nie nale˝y nic k∏aÊç na dolnej cz´Êci piekarnika podczas pracy urzàdzenia – mo˝e to spowodowaç uszkodzenie emalii. Do pieczenia nale˝y u˝ywaç wy∏àcznie kratk´ piekarnika A Szuflada/schowek kuchni Pod piekarnikiem znajduje si´ szuflada lub schowek (w zale˝noÊci od modelu) przeznaczone do przechowywania garnków i akcesoriów kuchennych. Ponadto, w czasie pieczenia mogà byç wykorzystywane do trzymania potraw w cieple. Drzwi schowka otwiera si´ przez lekkie uniesienie i obrócenie ku do∏owi. Pokr´t∏o piekarnika (M) Pokr´t∏o to s∏u˝y do wyboru ró˝nych funkcji oraz do ustawiania temperatury pieczenia potraw w piekarniku, wybranej z temperatur oznaczonych na pokr´tle (od Min do Max). Palnik piekarnika zapala si´ przez wsuni´cie zapalonej zapa∏ki do otworu „F” i przekr´cenie pokr´t∏a piekarnika w kierunku przeciwnym do ruchu wskazówek zegara w po∏o˝enie „Max”. Uwaga: W szufladzie/schowku nie nale˝y przechowywaç rzeczy ∏atwopalnych. 11 (patrz tabela). Dzi´ki temu p∏omieƒ podgrzewa∏ b´dzie jedynie dno naczynia i nie b´dzie opala∏ jego boków; • Nale˝y zawsze stosowaç garnki o p∏askich dnach, i przykrywaç je pokrywkami; • Gdy zawartoÊç naczynia zacznie si´ gotowaç nale˝y zmniejszyç p∏omieƒ przekr´cajàc pokr´t∏o w po∏o˝enie „niski p∏omieƒ”. Praktyczne porady dotyczàce korzystania z palników Palnik Poni˝sze wskazówki umo˝liwià Paƒstwu uzyskanie najlepszych rezultatów w u˝ytkowaniu kuchenki: • Na ka˝dym z palników nale˝y stawiaç garnki i naczynia o rozmiarach odpowiednich do rozmiaru palnika Êrednica naczyƒ (cm) pomocniczy (A) 10 – 14 pó∏-szybki (S) 16 – 20 szybki (R) 24 – 26 Wskazówki dotyczàce pieczenia Pieczenie ryb i mi´sa. Kuchenka umo˝liwia Paƒstwu przyrzàdzanie potraw na wiele ró˝nych sposobów, umo˝liwiajàc wybór najlepszej metody dla danego rodzaju dania. Z czasem nauczà si´ Paƒstwo najlepszych sposobów wykorzystania tego niezwykle wygodnego urzàdzenia. Przedstawione poni˝ej wskazówki sà jedynie ogólnymi zaleceniami, które mogà byç zmieniane odpowiednio do w∏asnego doÊwiadczenia. Aby mi´so za bardzo nie wysch∏o, jego porcja powinna wa˝yç co najmniej jeden kilogram. Podczas pieczenia mi´s bia∏ych, drobiu i ryb, nale˝y korzystaç z niskich temperatur (150°C-175°C). Pieczenie mi´s czerwonych, które majà byç dobrze wypieczone z zewnàtrz i pozostaç kruche i soczyste w Êrodku, nale˝y rozpoczàç od ustawienia wysokiej temperatury (200°C-220°C) na krótki czas a nast´pnie zmniejszyç jà. Ogólnà zasadà jest: im d∏u˝sze pieczenie tym ni˝sza temperatura. Mi´so nale˝y ustawiaç na Êrodku pó∏ki a pod spodem umieÊciç tac´, na którà skapywaç b´dzie wytapiany t∏uszcz. Kratk´ nale˝y wsunàç na Êrodkowy poziom piekarnika. Je˝eli wymagane jest bardziej intensywne opiekanie od do∏u nale˝y u˝yç ni˝szych poziomów. Pieczenie ciast Pieczenie ciast nale˝y zawsze rozpoczynaç od wst´pnego rozgrzania piekarnika (ok. 10-15 min). Zasadniczo, ciasta pieczone sà w temperaturze oko∏o 160°C/200°C. Podczas pieczenia nie nale˝y otwieraç drzwiczek piekarnika, gdy˝ mog∏o by to spowodowaç opadni´cie ciasta. Przygotowane do pieczenia ciasto nie powinno byç zbyt p∏ynne – zwi´kszy∏oby to znacznie czas jego pieczenia: Ogólnie: Gdy ciasto jest zbyt suche Nast´pnym razem ustawiç temperatur´ wy˝sza o 10°C i zmniejszyç czas pieczenia Ciasto zapad∏o si´ U˝yç mniej p∏ynów lub zmniejszyç temperatur´ o 10°C. Wierzch ciasta przypieka si´ UmieÊciç ciasto na ni˝szej pó∏ce, zmniejszyç temperatur´ i przed∏u˝yç czas pieczenia. Ciasto dobrze wypieczone jest w Êrodku, ale klejàce z zewnàtrz U˝yç bardziej g´stego ciasta, zmniejszyç temperatur´ i przed∏u˝yç czas pieczenia. Ciasto przykleja si´ do tortownicy Nat∏uÊciç tortownic´ i posypaç jà màkà 12 Pieczenie w piekarniku – porady praktyczne Potrawa Waga (kg) po∏o˝enie pó∏ki, Temperatura od do∏u (°C) Czas rozgrzewania wst´pnego (min.) Czas pieczenia (min.) Produkty màczne lazania cannelloni kluski zapiekane 2,5 2,5 2,5 3 3 3 210 200 200 10 10 10 60-75 40-50 40-50 Mi´sa ciel´cina kurczak indyk kaczka królik wieprzowina baranina 1,7 1,5 3,0 1,8 2,0 2,1 1,8 3 3 3 3 3 3 3 200 220 Max 200 200 200 200 10 10 10 10 10 10 10 85-90 90-100 95-100 100-110 70-80 70-80 90-95 Ryby makrela dentex karp pieczony w papierze 1,1 1,5 1,0 3 3 3 180-200 180-200 180-200 10 10 10 35-40 40-50 40-45 Pizza napolitana 1,0 3 220 15 15-20 Ciasta herbatniki pierogi ciasto czekoladowe ciasta dro˝d˝owe 0,5 1,1 1 1 3 3 3 3 180 180 180 165 15 15 15 15 30-35 30-35 45-50 35-40 Uwaga: podane czasy pieczenia sà przybli˝one i mogà byç ró˝ne w zale˝noÊci od indywidualnych upodobaƒ. 13 Konserwacja i czyszczenie piekarnika Przed przystàpieniem do czyszczenia lub innych prac konserwacyjnych nale˝y zawsze od∏àczyç urzàdzenie od zasilania, za pomocà g∏ównego wy∏àcznika lub wyjmujàc wtyczk´ kabla zasilajàcego z gniazdka. UWAGA Nie wolno zamykaç pokrywy kuchenki zanim palniki kuchenki nie wystygnà Wa˝ne: nale˝y okresowo sprawdzaç zu˝ycie w´˝a gazowego i w przypadku zauwa˝enia jakichkolwiek usterek wymieniç go; zalecamy wymian´ w´˝a co 5 lat. Aby zapewniç d∏ugà ˝ywotnoÊç kuchenki nale˝y jà regularnie czyÊciç pami´tajàc, ˝e: • Do czyszczenia piekarnika zabrania si´ stosowania urzàdzeƒ czyszczàcych parà. • Powierzchnie emaliowane i samo-czyszczàce powinny byç przemywane ciep∏à wodà – nie wolno u˝ywaç substancji Êcierajàcych ani ˝ràcych; • Wn´trze piekarnika nale˝y czyÊciç mo˝liwie cz´sto; mycie takie nale˝y przeprowadzaç gdy piekarnik jest wcià˝ ciep∏y stosujàc do tego ciep∏à wod´ ze Êrodkiem myjàcym, na koniec piekarnik dobrze sp∏ukaç i wytrzeç do sucha • Korony palników nale˝y myç mo˝liwie cz´sto w goràcej wodzie, stosujàc Êrodek myjàcy usuwajàcy osad; sprawdziç czy otwory wylotowe gazu w koronie nie zatka∏y si´; • Nale˝y okresowo czyÊciç elektrycznà zapalark´ (je˝eli wyst´puje) i nale˝y sprawdzaç czy otwory w palnikach nie sà zapchane resztkami jedzenia. • je˝eli elementy ze stali nierdzewnej poddane zostanà dzia∏aniu agresywnych detergentów (zawierajàcych fosfor) lub wody o du˝ym st´˝eniu wapna zostanà one nara˝one na korozje. Zaleca si´ przemywanie tych cz´Êci oraz osuszanie ich zaraz po umyciu. Dobrà praktykà b´dzie równie˝ wycieranie do sucha wszelkich rozlanych p∏ynów, kropli i plam wody; Smarowanie zaworów gazu Po pewnym czasie korzystania z kuchenki zawory gazu mogà zabrudziç si´. Przejawem tego b´dà trudnoÊci w ich obracaniu lub ich zaklejanie si´. W takiej sytuacji konieczna jest wymiana na nowy. Uwaga: CzynnoÊç ta mo˝e byç wykonana jedynie przez technika z odpowiednimi uprawnieniami, autoryzowanego przez producenta. Demonta˝ górnej pokrywy Pokryw´ kuchni mo˝na w ∏atwy sposób zdjàç. Trzymajàc oburàcz nale˝y jà tylko lekko unieÊç do góry. 14 Important To maintain the EFFICIENCY and SAFETY of this appliance, we recommend: • call only the Service Centers authorized by the manufacturer • always use original Spare Parts has been damaged or needs replacement. 15 This appliance must be used for the purpose for which it was expressly designed. Any other use (e.g. heating rooms) is considered to be improper and consequently dangerous. The manufacturer declines all liability for damage resulting from improper and irresponsible use. 16 A number of fundamental rules must be followed when using electrical appliances. The following are of particular importance: • Do not touch the appliance when your hands or feet are wet. • Do not use the appliance barefooted. • Do not use extensions, but if they are necessary, caution must be exercised. • Never pull the power supply cable or the appliance to unplug the appliance plug from the mains. • Never leave the appliance exposed to atmospheric agents (rain, sun etc.) • Do not allow children or persons who are not familiar with the appliance to use it, without supervision. 17 Always unplug the appliance from the mains or switch off the main switch before cleaning or carrying out maintenance. 18 In the case of problems and/or faulty operation, switch off the appliance, close the gas cock and do not tamper with the appliance. For repairs, contact only authorised after-sales service centres and request the use of original spare parts only. Failure to comply with the above may compromise the safety of the appliance. 19 If you are no longer using an appliance of this type, remember to make it unserviceable by unplugging the appliance from the mains and cutting the supply cable. Also make all potentially dangerous parts of the appliance safe, above all for children who could play with the appliance. 20 To avoid accidental spillage do not use cookware with uneven or deformed bottoms on the burners or on the electric plates. Turn the handles of pots and pans inwards to avoid knocking them over accidentally. 21 Some parts of the appliance, in particular the hot plates, remain heated for a long time after use. Make sure not to touch them. 22 Never use flammable liquids such as alcohol or gasoline, etc. near the appliance when it is in use. 23 When using small electric appliances near the hob, keep the supply cord away from the hot parts. 24 Make sure the knobs are in the “•”/”¡” position when the appliance is not in use. 25 When the appliance is in use, the heating elements and some parts of the oven door become extremely hot. Make sure you don't touch them and keep children well away. 26 Gas appliances require regular air exchange to ensure trouble-free performance. When installing the cooker, follow the instructions provided in the paragraph on “Positioning” the appliance. 27 The glass top (only on certain models) can shatter if it is overheated. Therefore, all of the burners or hot plates must be turned off before the top is closed. 28 If the cooker is placed on a pedestal, take the necessary precautions to prevent the same from sliding off the pedestal itself. 1 This appliance is intended for non-professional use within the home. 2 These instructions are only for those countries whose symbols appear in the booklet and on the serial no. plate of the appliance. 3 This owner’s manual is for a class 1 appliance (insulated) or class 2, subclass 1 appliances (installed between two cabinets. 4 Before using your appliance, read the instructions in this owner’s manual carefully since it provides all the information you need to ensure safe installation, use and maintenance. Always keep this owner’s manual close to hand since you may need to refer to it in the future. 5 When you have removed the packing, check that the appliance is not damaged. If you have any doubts, do not use the appliance and contact your nearest Ariston Service Centre. Never leave the packing components (plastic bags, polystyrene foam, nails, etc.) within the reach of children since they are a source of potential danger. 6 The appliance must be installed only by a qualified technician in compliance with the instructions provided. The manufacturer declines all liability for improper installation, which may result in personal injury and damage to property. 7 The electrical safety of this appliance can only be guaranteed if it is correctly and efficiently earthed, in compliance with regulations on electrical safety. Always ensure that the earthing is efficient. If you have any doubts, contact a qualified technician to check the system. The manufacturer declines all liability for damage resulting from a system which has not been earthed. 8 Before plugging the appliance into the mains, check that the specifications indicated on the date plate (on the appliance and/or packaging) correspond with those of the electrical and gas systems in your home. 9 Check that the electrical capacity of the system and sockets will support the maximum power of the appliance, as indicated on the data plate. If you have any doubts, contact a qualified technician. 10 An omnipolar switch with a contact opening of at least 3 mm or more is required for installation. 11 If the socket and appliance plug are not compatible, have the socket replaced with a suitable model by a qualified technician, who should also check that the cross-section of the socket cable is sufficient for the power absorbed by the appliance. The use of adaptors, multiple sockets and/or extensions, is not recommended. If their use cannot be avoided, remember to use only single or multiple adapters and extensions which comply with current safety regulations. In these cases, never exceed the maximum current capacity indicated on the individual adaptor or extension and the maximum power indicated on the multiple adapter. 12 Do not leave the appliance plugged in if it is not in use. Switch off the main switch and gas supply when you are not using the appliance. 13 The openings and slots used for ventilation and heat dispersion must never be covered. 14 The user must not replace the supply cable of this appliance. Always contact an after-sales service centre which has been authorised by the manufacturer if the cable 15 Installation All instruction on the following pages must be carried out by a competent person (corgi registered) in compliance with gas safety (installation and use) regulation 1984. Important: disconnect the cooker from the electrycity and gas supply when any adjustment, etc. d) The liquefied petroleum gases, which are heavier than air, stagnate towards the ground. Therefore, the rooms containing LPG cans must have openings towards the outside in order to allow the venting from the ground of eventual gas leak. Thus, the LPG cans must not be installed or settled in rooms that are below the ground level, (cellar, etc.) whether the cans are empty or partially full. It is advisable to keep in the room only the can which is being used, and it must be placed away from direct heat sources (ovens, fireplaces, stoves, etc.) that could make the can reach temperatures higher than 50°C. Positioning your appliance Your cooker is designed with a degree of protection against overheating in class X; the appliance can therefore be installed next to cabinets, provided the height does not exceed that of the hob. The wall touching the back panel of the cooker should be non-inflammable. Remember that during use, the back panel of the cooker may reach a temperature up to 50°C above that of the room temperature. Important: this appliance may be installed and used only in permanently ventilated rooms in compliance with current directives. The following precautions should be taken: a) The room must be provided with an external exhaust system obtained with a hood or with an electric ventilator that goes on automatically each time the unit is switched on. Levelling your appliance (only on a few models) Your cooker is supplied with feet for levelling the appliance. If necessary, these feet can be screwed into the housings in the corners of the cooker base. Mounting the legs (only on a few models) Press-fit legs are supplied which fit under the base of your cooker. In the case of chimneys or flues with branches (for cookers) Directly to the exterior b) The room must be provided with a system for air inflow which is necessary for a regular combustion. The air flow necessary for the combustion should be at least 2 m3/h for kW of installed power. The system may be realized by drawing the air directly from outside the building through a pipe that has at least a 100 cm2 useable section and which must not be accidently obstructed (Fig. A). And further it may be realized indirectly from other adjacent rooms which are provided with a ventilation pipe for the expulsion of the fumes to the outside of the building as foresaid, and which must not be part of the building in common use or rooms with risk of fire, or bedrooms (Fig. B). Detail A Adjacent room Installation of the cooker The cooker is prepared with protection degree against excessive heating of type X, the appliance can therefore be installed next to cabinets, provided the height does not exceed that of the hob. If the cooker is placed touching walls or sides of neighbouring cabinets, these must be capable of withstanding a temperature rise of 50°C above room temperature. For a correct installation of the cooker the following precautions must be followed: a) The cooker may be located in a kitchen, a kitonen/ diner or bed sitting room, but not in a bathroom or shower room. b) Kitchen cabinets installed next to the cooker that are higher than the top of the hob, must be at least 200 mm from the edge of the hob itself. c) The hoods must be installed according to the requirements in the hood handbook. d) Wall cabinets may be fitted in line with the sides of the base units, providing that the lower edge of the wall cabinet is a minimum of 420 mm. above the worktop. The minimum distance combustible material kitchen Room to be ventilated A Fig. A Examples of ventilation openings for the comburent air Fig. B Increased opening between the door and and floor c) During prolonged use of the appliance you may consider it necessary to open a window to the outside to improve ventilation. 16 units can be fitted directly above the worktop is 700 mm. e) The wall in contact with the back of the cooker must be of flameproof material. Only use pipes and gaskets complying with current National Regulations. The full length of the pipe must not exceed 2000 mm. Once the connection has been made, ensure that the flexible metal pipe does not touch any moving parts and is not crushed. Once the connection has been made, ensure that the flexible metal pipe does not touch any moving parts and is not crushed. 420 mm. 420 mm. Min. 600 mm. Min. Min. min. 650 mm. with hood min. 700 mm. without hood HOOD Checking that the Connection is Tight Important: When installation has been completed, check the pipe fittings for leaks using a soapy solution. Never use a flame. Connecting the supply cable to the mains Install a normalised plug corresponding to the load indicated on the data plate. When connecting the cable directly to the mains, install an omnipolar circuit-breaker with a minimum contact opening of 3 mm between the appliance and the mains. The omnipolar circuit breaker should be sized according to the load and should comply with current regulations (the earth wire should not be interrupted by the circuit breaker). The supply cable should be positioned so that it does not reach a temperature of more than 50°C with respect to the room temperature, along its length. Before making the connection, check that: • the limiter valve and the home system can support the appliance load (see data plate); • the mains is properly earthed in compliance with current directives and regulations; • there is easy access to the socket and omnipolar circuit breaker, once the hob has been installed. N.B: never use reducers, adaptors or shunts since they can cause heating or burning. Connecting the gas The appliance should be connected to the mains or to a gas cylinder in compliance with current directives. Before making the connection, check that the cooker is regulated for the gas supply you are using. If not, follow the instructions indicated in the paragraph “Adapting to different types of gas”. On some models the gas supply can be connected on the left or on the right, as necessary; to change the connection, reverse the position of the hose holder with that of the cap and replace replace the gasket (supplied with the appliance). When using liquid gas from a cylinder, install a pressure regulator which complies with current directive. Important: check that the supply pressure complies with the values indicated in table 1 “Characteristics of the burners and nozzles” since this will ensure safe operation, correct consumption and ensure a longer life to your appliance. Connection with a Hose Make the connection using a gas hose that complies with requirements set forth by the current National Regulations. When installing the hose, remember to take the following precautions: • No part of the hose should touch parts whose temperature exceeds 50°C; • The length of the hose should be less than 1500 mm; • The hose should not be subject to twisting or pulling, and should not have bends or kinks. • The hose should not touch objects with sharp edges, moving parts, and it should not be crushed; • The full length of the hose should be easy to inspect in order to check its condition. Check that the hose fits firmly into place at the two ends and fix it with clamps complying with current National Regulations. If any of the above recommendations can not be followed, flexible metal pipes should be used. If the cooker is installed in compliance with the requirements for class 2, subclass 1, it is highly recommended that the gas connection be made with a flexible metal pipe in compliance with current safety standards. Adapting the cooker to different types of gas In order to adapt the cooker to a different type of gas with respect to the gas for which it was produced (indicated on the label attached to the lid), follow these steps: a) Replacing the burner nozzles on the hob: • remove the grids and slide the burners from their housings; • unscrew the nozzles using a 7 mm socket spanner, and replace them with nozzles for the new type of gas (see table 1 “Burner and nozzle characteristics”). • replace all the components by repeating the steps in reverse order. b) Minimum regulation of the hob burners: • turn the tap to minimum; • remove the knob and adjust the regulation screw, which is positioned in or next to the tap pin, until the flame is small but steady. Connecting a Flexible, Jointless, Stainless Steel Pipe to a Threaded Attachment The hose holder fitted on the appliance. The gas supply pipe fitting is a threaded 1/2 gas conic male attachment. 17 N.B.: in the case of liquid gas, the regulation screw must be screwed in to the bottom. • check that the flame does not turn off when you turn the tap quickly from high to low. c) Regulating the primary air of the burners: The primary air of the burners requires no regulation. • • • Adapting the gas oven to different types of gas a) Replacing the oven burner nozzle: • remove the warming drawer or open the flap (remove it if necessary); • remove the sliding protection “A” (see Fig.C); • remove the screw and then the oven burner “V”(see Fig. D). Remove the oven door to facilitate this operation. • unscrew the oven burner nozzle using the special socket spanner for the nozzles (see Fig. E), or better still a 7 mm socket spanner, and replace it with a nozzle suited to the new type of gas (see table 1). the knob to the Min setting; remove the knob; regulate the screw positioned outside the thermostat pin until the flame is small but steady. N.B.: in the case of liquid gas, the regulation screw must be screwed in to the bottom. check that the burner does not turn off when you turn the knob from Max to Min and and when you open and close the oven door quickly. Pay particular attention to the plug wires and thermocouple tubes. V Important On completion of the operation, replace the old rating sticker with one indicating the new type of gas used. This sticker is available from our Service Centres. A Fig. C Note Should the pressure of the gas used be different (or vary) from the recommended pressure, it is necessary to fit a suitable pressure regulator onto the inlet pipe in compliance with current National Regulations relative to “regulators for channelled gas”. Fig. D Fig.E b) Minimum regulation of the gas oven burner with thermostat (see fig.): • light the burner as described in the paragraph “the oven knob” of the instruction booklet. • turn the knob to Max for about 10 minutes and then turn 18 Burner and nozzle characteristics Table 1 G30 (GPB-B) Burner Diameter (mm) Thermal power kW (p.c.s.*) By-pass Nozzle 1/100 1/100 (mm) (mm) Reduc. Thermal power kW (p.c.s.*) Thermal power kW (p.c.s.*) Flow * g/h Nominal Injector 1/100 GZ350 (GZ35) Flow* l/h (mm) Injector 1/100 Flow* l/h (mm) Nominal Fast (large) (R) 100 0.70 41 87 3.40 247 3.00 128 286 158 397 Semi-fast (medium) (S) 75 0.40 30 70 2.20 160 1.90 104 181 143 251 Auxiliary (Small) (A) 51 0.40 30 52 1.30 95 1.00 76 95 106 132 Oven - 1.00 46 85 3.50 254 3.10 132 295 190 410 Supply pressure * G20 (GZ50) 36 29 44 Nom. Min. Max. 13 10 16 20 16 25 At 15°C and 1013 mbar- dry gas G30 (GPB-B) P.C.S. = 49,47 MJ/Kg G20 (GZ50) P.C.S. = 37,78 MJ/m3 GZ350 (GZ35) P.C.S. = 27,20 MJ/m3 K 3G2/U K 3G20/U S S A R Technical Specifications Inner dimensions of the oven: Width: 39 cm Depth: 44 cm Height: 34 cm Inner Volume of the Oven: 58 lt Inner Dimensions of the Food Warmer: Width: 42 cm Depth: 44 cm Height: 17 cm 104 60 50 Voltage and Frequency of Power Supply: see data plate 85/90 Burners: adaptable for use with all the types of gas indicated on the data plate situated inside the flap or, once the dishwarmer drawer has been opened, on the inside wall of the left-hand side panel. 19 The cooker with gas oven A. B. D. E. F. G. K. M. N. Tray for Catching Overflows Gas Burner Top Grate Control Panel Adjustable Feet or Legs Dripping Pan or Baking Sheet Oven Rack Oven Control Knob Control Knobs for Gas Burners on Hob A B E D K M G N F The different functions and uses of the oven The various functions included in the cooker are selected by operating the control devices located on the cooker control panel. on the bottom of the oven when it is in operation because this could damage the enamel. Always place your cookware (dishes, aluminium foil, etc. etc.) on the grate provided with the appliance inserted especially along the oven guides. Control Knobs for the Gas Burners on the Hob (N) The position of the gas burner controlled by each one of the The oven knob (M) This knob is used to select the different functions of the oven and choose the right cooking temperature for the food to be prepared in the oven among the temperatures shown on the knob (from Min to Max). To light the oven burner, hold a lighted match or lighter near hole “F” and turn the oven knob counter anti clockwise up to the Max position. • knobs is shown by a symbol of a solid ring: . To light one of the burners, hold a lighted match or lighter near the burner. Press down and turn the corresponding knob in the counter- clockwise direction to the maximum - setting. Each burner can be operated at its maximum, minimum or intermediate • power. Shown on the knob are the different symbols for off (the knob is on this setting when the symbol lines up with the reference mark on the control panel), for maximum - and minimum +. To obtain these settings, turn the knob counter-clockwise with respect to the off position. To turn off the burner, turn the knob clockwise until it stops (corresponding again with the symbol). • F Notice: The first time you use your appliance, we recommend that you set the thermostat to the highest setting and leave the oven on for about half an hour with nothing in it, with the oven door shut. Then, open the oven door and let the room air. The odour that is often detected during this initial use is due to the evaporation of substances used to protect the oven during storage and until it is installed. The models equipped with a safety device on oven burner, the knob must be kept pressed in for about 6 seconds to activate the flame failure device. The cooking temperature is selected by matching the desired temperature with the permanent reference on the panel; the complete range of temperatures is shown below: Attention: Only use the bottom shelf of the oven when using the rotisserie to cook (where present). For all other types of cooking, never use the bottom shelf and never place anything 20 Min • 140 145 150 • 180 160 • 220 200 Caution: this storage recess must not be used to store inflammable materials. Max 250 The selected temperature is reached automatically and it is kept constant by the knob-controlled thermostat. Attention Avoid the children touch the oven door because it is very hot during the cooking. WARNING To remove the sliding protection “A”, unscrew screw “S”. When you have finished, replace the protection and lock it in place with screw “S”. Before using the oven, make sure the sliding protection “A” is fastened in the correct position. Practical advice for burner use In order to get the maximum yield it is important to remember the following: • Use appropriate cookware for each burner (see table) so as to avoid flames overshooting the edges. • At boiling point turn the knob to minimum. • Use cookware with lids. • Always use cookware with flat bottoms. S Burner A ø Cookware diameter (cm) Fast (R) 24 - 26 Semi Fast (S) 16 - 20 Auxiliary (A) 10 - 14 Storage recess below the oven (only a few models) Below the oven a recess can be used to contain cooking pans and cooker accessories. Moreover, during oven operation, it may be used to keep food warm.To open the storage is necessary turn it downwards. Cooking advice The oven offers a wide range of alternatives which allow you to cook any type of food in the best possible way. With time you will learn to make the best use of this versatile cooking appliance and the following directions are only a guideline which may be varied according to your own personal experience. Pastry is too dark on top Place it on a lower rack, lower the temperature, and increase the cooking time. Cooked well on the inside but sticky on the outside Baking cakes The oven should always be warm before putting in cakes wait till the end of preheating (about 10-15 min.). Cakebaking temperatures are normally around 160°C/200°C. Do not open the oven door during the baking process as this could cause the cake to sink.In general: Use less liquid, lower the temperature, and increase the cooking time. The pastry sticks to the pan Grease the pan well and sprinkle it with a dusting of flour. Pastry is too dry Increase the temperature by 10°C and reduce the cooking time. Cooking fish and meat When cooking white meat, fowl and fish use low temperatures. (150°C-175°C). When red meat must be superficially well-cooked but succulent inside, it is advisable to start with a high temperature (200-220°C) for a short time, and then to reduce it at a later point. Generally speaking, the more meat there is, the lower the temperature and the longer the cooking time should Pastry dropped Use less liquid or lower the temperature by 10°C. 21 be.Place the meat in the centre of the grid and put a spilltray underneath to catch grease drips. Insert the grid so that it is in the middle of the oven. If more heat from below is required, use the 1° bottom shelf. Cooker routine maintenance and cleaning Before each operation, disconnect the cooker from the electricity.To assure the long life of the cooker, it must be thoroughly cleaned frequently, keeping in mind that: Greasing the Taps The taps may jam in time or they may become difficult to turn. If so, the tap itself must be replaced. N.B.: This operation must be performed by a technician authorised by the manufacturer. • Do not use steam equipment to clean the appliance. • the enamelled parts and the self-cleaning panels are washed with warm water without using any abrasive powders or corrosive substances which could ruin them; • the inside of the oven should be cleaned fairly often while it is still warm using warm water and detergent, followed by careful rinsing and drying; • the flame spreaders should be washed frequently with hot water and detergent taking care to eliminate any scale; • in cookers equipped with automatic lighting, the terminal part of the electronic instant lighting devices should be cleaned frequently and the gas outlet holes of the flame spreaders should be checked to make sure they are free of any obstructions; • Stainless steel may become marked if it comes into contact with very hard water or harsh detergents (containing phosphorous) for long periods of time. After cleaning, it is advisable to rinse thoroughly and dry. It is also recommended to dry any water drops; • On models with glass covers, the covers should be cleaned with hot water; the use of rough cloths or abrasives is to be avoided. N.B: avoid closing the cover while the gas burners are still warm. Remove any liquid from the lid before opening it. Important: periodically check the wear of the gas hose and substitute it if there are any defects; we recommended changing it every year. Removing the lid The cooker lid can be removed to facilitate cleaning. To remove the lid, first open it completely and pull it upwards (see figure) 22 Cooking advice Wt. (Kg) Cooking position of shelves from bottom Temperature (°C) Pre-heating time (min) Cooking time (min.) Pasta Lasagne Cannelloni Pasta bakes au gratin 2.5 2.5 2.5 3 3 3 210 200 200 10 10 10 60-75 40-50 40-50 Meat Veal Chicken Duck Rabbit Pork Lamb 1.7 1.5 1.8 2.0 2.1 1.8 3 3 3 3 3 3 200 220 200 200 200 200 10 10 10 10 10 10 85-90 90-100 100-110 70-80 70-80 90-95 Fish Mackerel Dentex Trout baked in paper 1.1 1.5 1.0 3 3 3 180-200 180-200 180-200 10 10 10 35-40 40-50 40-45 Pizza Neapolitan 1.0 3 220 15 15-20 Cake Biscuits Tarts Savoury pie Raised Cakes 0.5 1.1 1.0 1.0 3 3 3 3 180 180 180 165 15 15 15 15 30-35 30-35 45-50 35-40 Food to be cooked NB: cooking times are approximate and may vary according to personal taste. 23 Important: Pentru a garanta eficienta si siguranta acestui aparat de uz casnic: adresati-va exclusiv centrelor de asistenta tehnica autorizate utilizati numai piese de schimb originale 1 Acest aparat a fost conceput pentru uz de tip neprofesional în interiorul unei locuinte. 2 Aceste instructiuni sunt valabile doar pentru tarile care figureaza în manualul de instructiuni si pe tablita cu date tehnice a aparatului. 3 Acest manual se refera la un aparat de clasa 1 (izolat) sau a 2 a, sub- categoria 1 (încastrat între 2 piese de mobilier). 4 Înainte de a folosi aparatul, cititi cu atentie instructiunile continute în acest manual, întrucât furnizeaza indicatii importante cu privire la siguranta instalarii, folosirii si întretinerii. Pastrati cu grija acest manual pentru orice consultare ulterioara. 5 Dupa scoaterea din ambalaj, verificati integritatea aparatului. În caz de neclaritati, nu folositi aparatul, ci adresativa celui mai apropiat Centru de Asistenta Ariston. Elementele ambalajului (pungi de plastic, polistiren expandat, cuie etc.) nu trebuie sa fie lasate la îndemâna copiilor întrucât constituie potentiale surse de pericol. 6 Instalarea trebuie sa fie efectuata în functie de instructiunile fabricantului, de catre persoane calificate din punct de vedere profesional. Instalarea gresita poate cauza vatamarea persoanelor sau animalelor sau deteriorarea obiectelor, fata de care constructorul îsi declina orice responsabilitate. 7 Protectia electrica a acestui aparat este garantata doar când acesta a fost conectat în mod corect la o priza cu împamântare, conform normelor de siguranta electrica în vigoare. Asigurati-va ca împamântarea este eficienta. În caz de neclaritati, consultati un electrician calificat profesional, pentru a verifica instalatia. Fabricantul nu poate fi considerat responsabil de eventualele daune cauzate de lipsa de împamântare a instalatiei electrice. 8 Înainte de a conecta aparatul, asigurati-va ca datele de pe tablita (situata pe aparat si/sau pe ambalaj) corespund celor ale retelei de distributie electrica si de gaz. 9 Verificati ca parametrii electrici ai instalatiei si ai prizelor de curent sa corespunda cu puterea maxima a aparatului, indicata pe tablita. În caz de neclaritati, adresati-va persoanelor calificate profesional. 10 În momentul instalarii este necesara dotarea cu un întrerupator multipolar, cu deschiderea contactelor egala sau mai mare de 3 mm. 11 În caz de incompatibilitate între priza si stecarul aparatului, cereti înlocuirea acesteia cu una adecvata, de catre o persoana calificata profesional. Electricianul va trebui sa se asigure în special ca sectiunea cablurilor de la priza este potrivita pentru puterea absorbita de aparat. În general nu este recomandata folosirea adaptoarelor, prizelor multiple si/sau a prelungitoarelor. Daca nu este posibil, amintiti-va sa folositi numai prelungitoare sau adaptoare simple (sau multiple) conforme cu normele de siguranta în vigoare. În orice caz, nu depasiti niciodata capacitatea maxima indicata pe prelungitor sau pe adaptoarele simple si puterea maxima indicata pe adaptoarele multiple. 12 Nu lasati aparatul în priza în mod inutil. Opriti aparatul de la întrerupatorul principal si închideti robinetul de gaz atunci când nu folositi aparatul. 13 Nu obstructionati orificiile sau fantele de aerisire sau de iesire a caldurii. 14 Cablul de alimentare al acestui aparat nu trebuie sa fie înlocuit de proprietar. În caz de deteriorare sau înlocuire a cablului, adresativa unui Centru de Asistenta autorizat de fabricant. 15 Acest aparat va trebui sa fie folosit numai în scopul pentru care a fost conceput. Orice alta utilizare (de exemplu: încalzirea locuintei) este considerata improprie si deci periculoasa. Fabricantul îsi declina orice responsabilitate în caz de daune provenite din utilizarea improprie, gresita sau irationala a aparatului. 16 Folosirea oricarui aparat electric implica respectarea unor reguli fundamentale. În special: nu atingeti aparatul atunci când aveti mâinile sau picioarele umede sau ude nu folositi aparatul atunci când sunteti în picioarele goale nu folositi prelungitoare, decât cu foarte multa grija nu trageti de cablul de alimentare sau de aparat, pentru al scoate din priza. nu lasati aparatul expus la agentii atmosferici (ploaie, soare, etc.) nu permiteti ca aparatul sa fie folosit de copii sau de persoane handicapate fara supraveghere 17 Înainte de a efectua orice fel de operatie de curatire sau de întretinere, debransati aparatul de la instalatia electrica, fie scotândul din priza, fie de la întrerupator. 18 În caz de defectiune si/sau functionare necorespunzatoare a aparatului, este necesar sa închideti robinetul de gaz si sa nu interveniti asupra aparatului. Pentru repararea sa, adresati-va unui centru de asistenta tehnica autorizat si solicitati folosirea pieselor de schimb originale. Nerespectarea indicatiilor de mai sus poate periclita siguranta aparatului. 19 În cazul în care va decideti sa nu mai folositi aparatul, se recomanda scoaterea lui din functiune taindui cablul de alimentare, dupa ce în prealabil a fost scos din priza. Se mai recomanda scoaterea din uz a acelor parti ale aparatului care pot constitui un pericol, în special pentru copiii care ar putea folosi aparatul în mod neadecvat, la joaca. 20 Pe ochiuri sau pe plitele electrice nu trebuie asezate oale instabile sau deformate, pentru a evita accidentele cauzate de o posibila rasturnare. Asezati oalele pe aragaz astfel încât mânerele sa fie orientate spre interior, pentru a evita lovirea accidentala. 21 Unele componente ale aparatului, în special plitele electrice, ramân calde mult timp dupa folosire. Fiti atenti sa nu le atingeti. 22 Nu utilizaþi lichide inflamabile (alcool, benzinã, etc) în apropierea aparatului, atunci când este în funcþiune. 23 Dacã apropiaþi alte aparate electrocasnice de aragaz, fiþi atenþi ca ºi cablul lor de alimentare sã nu atingã ochiurile sau plitele. 24 Controlaþi întotdeauna ca butoanele sã fie în poziþia stins, l/¡, atunci când aparatul este oprit. 25 În timpul folosirii aparatului, componentele de încalzire si anumite componente ale usii cuptorului se încalzesc. Fiti atenti sa nu le atingeti; îndepartati copiii de aragaz. 26 Aparatele pe gaz au nevoie, pentru o mai buna functionare, de o aerisire adecvata. Asigurati-va ca, în timpul montajului, au fost respectate instructiunile descrise în paragraful referitor la « Pozitionare ». 27 Daca se încalzeste excesiv, capacul de sticla se poate sparge (numai pe anumite modele). Stingeti ochiurile sau plitele înainte de a aseza capacul. 28 Daca asezati aragazul pe un piedestal, fiti atenti sa nu alunece. 24 RO Instalare c) Daca folositi aparatul timp îndelungat, poate veti avea nevoie de o aerisire suplimentara, data, de ex., de o fereastra. d) Gazele de petrol lichefiate, mai grele decât aerul, stagneaza în partea de jos. Deci, încaperile care contin butelii cu GPL trebuie sa fie prevazute cu o fereastra de deschidere spre exterior, astfel încât sa permita evacuarea gazelor stagnante, în cazul unei eventuale scapari de gaz. Din acest motiv, buteliile GPL, atât goale cât si umplute partial, nu trebuie instalate sau depozitate în încaperi sau camere situate sub nivelul solului (pivnite, etc.). Este deci indicat sa tineti în casa numai o butelie, cea pe care o utilizati, amplasata departe de alte surse de caldura (cuptoare, seminee, sobe, etc) care ar putea sa o încalzeasca la peste 50°C. Toate instructiunile din paginile urmatoare trebuie sa fie executate de persoane calificate profesional (certificat CORGI) în conformitate cu dispozitiile normei din 1984 în materie de siguranta aparatelor pe gaz (instalare si utilizare). Important: în timpul operatiilor de reglare, etc, debransati aragazul de la alimentarea electrica si de alimentarea cu gaz . Pozitionarea aparatului Aragazul este prevazut cu un grad de protectie împotriva încalzirii excesive clasa X; este deci posibila instalarea lânga acesta a mobilelor a caror înaltime nu o depasesc pe aceea a blatului de lucru. Peretele care se afla în contact cu latura posterioara a aragazului trebuie sa fie realizat din material neinflamabil. Amintiti-va ca, în timpul folosirii, panoul posterior al aragazului poate atinge o temperatura mai mare cu 50 °C fata de temperatura încaperii unde se afla. Important: Acest aparat trebuie sa fie instalat si utilizat numai în încaperi vine aerisite, conform normelor si directivelor în vigoare. În acest sens, este necesar sa respectati indicatiile : a) Încaperea trebuie sa fie dotata cu un sistem de evacuare a gazelor de ardere adecvat, ori cu ajutorul unei hote, ori al unui ventilator electric care sa intre în functiune ori de câte ori se aprinde aragazul. Punere la nivel (doar pe anumite modele) Pentru a putea pune la nivel aragazul, sunt furnizate picioare de reglare. Daca este necesar, aceste picioare pot fi însurubate în respectivele orificii de la baza aragazului. În caz de seminee sau cosuri de fum ramificate (pentru bucatarii) Direct afara b) Încaperea trebuie sa permita intrarea suficienta a aerului pentru a asigura arderea normala. Debitul de aer necesar pentru ardere nu trebuie sa fie sub 2 m3/h pe kW de putere instalata. sistemul poate fi realizat tragând aer direct din exteriorul edificiului printr-o conducta de cel putin 100 cm 2, cu o sectiune utila care sa elimine riscul înfundarii accidentale (Fig. A). În alternativa, poate fi realizat tragând aer indirect, din încaperile alaturate, dotate cu o conducta de aerisire pentru evacuarea gazelor de ardere în afara edificiului, dupa descrierea anterioara; aceste încaperi nu pot fi spatii comune ale edificiului sau locuri cu pericol de incendiu, sau dormitoare (Fig. B). Detaliul A Încapere adiacenta Montarea picioarelor (doar pe anumite modele) Picioarele din dotare pot fi introduse în locasurile lor prin apasare (sub aragaz). Instalarea aragazului Aragazul este prevazut cu grad de protectie împotriva încalzirii excesive clasa X; este deci posibila instalarea lânga acesta a mobilelor a caror înaltime nu o depasesc pe aceea a blatului de lucru. Daca încastrati aragazul între corpurile de mobila, temperatura acestuia va putea creste cu 50°C peste temperatura încaperii unde se afla. Pentru o instalare corecta a aragazului, trebuie respectate urmatoarele precautii: a) Aparatul poate fi amplasat în bucatarie, în sala de masa sau într-o garsoniera fara pereti despartitori, dar niciodata în baie. b) Mobilele situate lateral, a caror înaltime o depaseste pe cea a blatului de lucru, trebuie sa fie situate la o distanta de cel putin 200 mm de marginea acestuia. c) Eventualele hote trebuie sa fie instalate conform Încaperea de aerisit A Fig. A Exemple de canale de aerisire pentru aerul de ardere RO Fig. B Majorarea spatiului dintre usa si podea 25 indicatiilor continute în manualul de instructiuni ale acestora. d) În cazul în care aragazul se instaleaza sub un raft, acesta din urma va trebui sa fie situat la o distanta minima de 420 mm de blatul de lucru. Distanta minima la care pot fi amplasate mobilele inflamabile, fata de aragaz, mai ales daca se pun deasupra acestuia., este de 700 mm. e) Peretele care se afla în contact cu latura posterioara a aragazului trebuie sa fie realizat din material neinflamabil. recomandam sa utilizati numai tevile metalice flexibile, în conformitate cu normele corespunzatoare în vigoare. Racordarea cu teava flexibila din otel inoxidabil, pe perete, cu cuplari filetate Cuplarea furtunului de cauciuc a aparatului Racordul prin care se realizeaza alimentarea aparatului cu gaz, filetat, este de ½, mufa tata, conica. Utilizati numai tuburi si garnituri care corespund normelor nationale în vigoare. Lungimea tubului nu trebuie sa depaseasca 2000 mm. Dupa efectuarea legaturii, asigurativa ca tubul metalic flexibil nu vine în contact cu parti mobile si nu este strivit. Dupa efectuarea racordului, asigurativa ca tubul metalic flexibil nu vine în contact cu parti mobile si nu este strivit. HOOD 420 mm. Min. Controlul etanseitatii Important: dupa terminarea instalarii, controlati etansarea tuturor racordurilor folosind o solutie de sapun; nu folositi niciodata o flacara. min. 650 mm. with hood min. 700 mm. without hood 420 mm. 600 mm. Min. Min. Legarea cablului de alimentare la retea Montati o priza shuko adecvata sarcinii de suportat; aceasta este indicata pe placuta cu caracteristici. Daca veti efectua conectarea direct la reteaua electrica, este necesar sa echipati cablul cu un întrerupator omnipolar cu deschiderea contactelor de minim 3 milimetri. Întrerupatorul omnipolar trebuie sa fie dimensionat în baza sarcinii de suportat si trebuie sa corespunda normelor în vigoare (firul de împamântare nu trebuie sa fie sectionat de întrerupator). Cablul de alimentare trebuie sa fie pozitionat astfel încât sa nu atinga în nici un punct o temperatura cu 50°C peste temperatura mediului ambiant. Înainte de a efectua legatura, asigurativa ca: valva limitatoare si instalatia electrica a locuintei pot suporta consumul de putere al aparatului (vezi tablita cu caracteristici); instalatia de alimentare este dotata cu o împamântare eficienta, conform normelor si dispozitiilor legale; priza sau întrerupatorul omnipolar sunt usor accesibile, si dupa montarea blatului. NB:nu folositi reductii, adaptoare sau derivatoare, întrucât acestea ar putea provoca încalzirea sau arderea. Racordarea la gaze Racordarea aparatului la instalatia de gaz sau la o butelie va trebui sa respecte normele în vigoare. Înainte de a efectua racordare, asigurati-va ca aragazul este prevazut pentru alimentarea cu gazul pe care îl veti utiliza. În caz contrar, efectuati operatiunile indicate la paragraful Adaptarea la diverse tipuri de gaz. Pe anumite modele, alimentarea cu gaz se poate face si pe dreapta, si pe stânga, de la caz la caz. Pentru a schimba latura de alimentare, închideti racordul pe care se fixeaza furtunul cu capacul respectiv si înlocuiti garnitura de etansare (din dotarea aparatului). Daca doriti sa utilizati o butelie cu gaz, folositi de asemenea si un regulator de presiune în conformitate cu normele în vigoare. Important:pentru o functionare sigura, pentru o folosire adecvata a energiei si o durabilitate sporita a aparaturii, asigurativa ca presiunea de alimentare respecta valorile indicate în tabelul 1 Caracteristicile arzatoarelor si duzelor. Racordarea cu tub flexibil Efectuati racordul cu un tub flexibil (furtun) pentru gaz care sa respecte caracteristicile indicate în normele nationale în vigoare. Pentru montarea unui astfel de tub, respectati urmatoarele indicatii: Furtunul nu trebuie sa intre, în nici un punct, în contact cu partile care pot ajunge la temperaturi peste 50°C; furtunul trebuie sa aiba o lungime sub 1500 mm; acesta nu trebuie sa fie supus nici unui fel de forte de tractiune si de torsiune si, în afara de aceasta, nu trebuie sa fie curbat excesiv sau îngustat; furtunul nu trebuie sa intre în contact cu obiecte sau colturi ascutite sau cu parti mobile; nu trebuie presat; trebuie sa fie usor accesibil, pe tot traseul, cu scopul de a-l putea controla. Asigurativa ca tubul sa fie bine introdus la capete si fixat prin intermediul unor coliere de fixare, în conformitate cu normele nationale în vigoare. Daca una sau mai multe din aceste conditii nu se respecta, este absolut necesar sa utilizati tevi flexibile din metal. Daca instalati aragazul conform cerintelor pentru clasa a 2 a, sub-categoria 1, va Adaptarea plitei la diverse tipuri de gaz Pentru a adapta aragazul la un tip de gaz diferit de cel pentru care a fost prevazut (indicat pe eticheta fixata pe capac), este necesara efectuarea urmatoarelor operatiuni: a) Înlocuirea duzelor arzatoarelor: înlaturati gratarul si extrageti arzatoarele din sediul lor; desurubati duzele, folosinduva de o cheie tubulara de 7 mm, si înlocuitile cu cele adecvate pentru noul tip de gaz (vezi tabelul 1 Caracteristicile arzatoarelor si duzelor). 26 RO înlocuiti toate componentele repetând operatiile, în sens invers. b) Reglarea nivelului minim al arzatoarelor: rotiti busonul în dreptul pozitiei minim; scoateti busonul si rotiti surubul de reglare (din interiorul sau de lânga tija centrala) pâna când obtineti o flacara mica, constanta; NB: în cazul unui gaz lichefiat, surubul de reglare trebuie sa fie însurubat complet. asigurati-va ca flacara nu se stinge nici daca rotiti rapid busonul de la maxim la minim. b) Reglarea aerului primar al arzatoarelor: Arzatoarele nu au nevoie de nici o reglare, în acest caz. b) Reglarea la minim a arzatorului cuptorului pe gaz, cu termostat (vezi Fig): aprindeti arzatorul dupa indicatiile din paragraful butoanele cuptorului din acest manual; rotiti busonul pe Max si asteptati 10 minute; rotiti-l apoi pe Min; scoateti busonul; rotiti surubul de reglare de lânga tija termostatului pâna când obtineti o flacara mica, constanta; NB: în cazul unui gaz lichefiat, surubul de reglare trebuie sa fie însurubat complet. verificati daca, rotind repede busonul de la Max la Min sau daca închideti si deschideti repede usa cuptorului, flacara ramâne aprinsa; Adaptarea cuptorului la diverse tipuri de gaz a) Înlocuirea duzei arzatorului din cuptor: scoateti sertarul pentru pastrarea alimentelor la cald sau capacul rabatabil (daca este necesar, demontati-l); scoateti protectia glisanta A (vezi Fig. C); scoateti surubul si apoi arzatorul V" (vezi Fig. D). Operatia va fi înlesnita daca demontati usa cuptorului. desurubati duza arzatorului folosind o cheie tubulara pentru duze (vezi Fig.E) sau o cheie tubulara de 7 mm si înlocuiti-o cu cea adecvata, în functie de tipul de gaz (vezi tabelul 1). Fiti foarte atenti la cablurile de la priza si la tuburilor de termocuplare. V Important: Dupa terminarea operatiei, înlocuiti eticheta veche, de reglare, cu cea corespunzatoare noului gaz utilizat. Eticheta se gaseste la Centrele noastre de Asistenta tehnica. Nota: Daca presiunea gazului utilizat este diferita de cea prevazuta (sau variaza) este necesar sa instalati pe tuburile de alimentare un regulator de presiune, în conformitate cu normele nationale în vigoare referitoare la regulatoarele pentru gaz canalizat. A Fig. C Fig. D Fig. E RO 27 Caracteristicile arzatoarelor si duzelor Tabelul 1 Arz ãtor Diametru (mm) Putere termic ã kW (p.c.s.*) By-pass 1/100 Gaz licheflat Duz ã Debit* 1/100 g/h Gaz natural Duz ã Debit* 1/100 g/h (mm) (mm (mm) Nomin. Redus 100 3.00 0.7 41 Semirapid (mediu) (S) 75 1.90 0.4 Auxiliar (mic) (A) 51 1.00 - 3.10 Rapid (mare) (R) Cuptor ** 87 218 214 128 286 30 70 138 136 104 181 0.4 30 52 73 71 76 95 1.0 46 85 225 221 132 295 28-30 20 35 37 25 45 Nom. Min. Max Presiuni de alimentare * ** *** *** A 15°C si 1013 mbar - gaz uscat Propan P.C.S. = 50,37 MJ/Kg Butan P.C.S. = 49,47 MJ/m3 Natural P.C.S. = 37,78 MJ/m3 20 16 25 K 3G2/U K 3G20/U S S A R Caracteristici Tehnice Dimensiunile interne ale cuptorului: Latime: 39 cm Adâncime: 44 cm Înaltime: 34 cm Volum camera interna cuptor: 58 l Dimensiunile interne ale sertarului de pastrare a alimentelor la cald: Latime: 42 cm Adâncime: 44 cm Înaltime: 17 cm 104 Tensiunea si frecventa de alimentare a se vedea placuta de caracteristici 60 50 85/90 Arzatoare: pot fi adaptate pentru orice tip de gaz din tabelul lipit pe capacul rabatabil sau, deschizând sertarul, pe peretele din stânga. 28 RO Aragaz cu cuptor pe gaz A. Blat de colectare a eventualelor reziduuri B. Arzator pe gaz D. Gratar de pe blatul de lucru E. Bord F. Picioare sau suporti reglabili G. Ochi sau plita K. Gratar-raft cuptor M. Buson comanda cuptor N. Busoane comanda ochiuri A B E D K M G N F Utilizarea si functiile cuptorului Selectarea diferitelor functii ale aragazului se face utilizând dispozitivele si organele de comanda de pe bordul acestuia. din aluminiu, etc) pe gratarul din dotarea aparatului, prevazut special în acest scop. Busoanele de comanda ale arzatoarelor pe gaz care corespund ochiurilor aragazului (N) În dreptul fiecarui buson este indicata (cu un cerc evidentiat) l pozitia arzatorului comandat de busonul respectiv. Pentru a aprinde unul din arzatoare, apropiati de acesta o flacara sau o bricheta de aragaz. Apasati busonul si rotiti-l în sens Busonul cuptorului (M) Este dispozitivul care permite selectarea diferitelor functii ale cuptorului si alegerea temperaturii adecvate în functie de alimentele de pregatit; gama de temperaturi este indicata chiar pe buton (de la Min la Max). Pentru a aprinde arzatorul cuptorului, apropiati o flacara sau o bricheta de aragaz de orificiul Fsi rotiti busonul cuptorului în sens contrar acelor de ceasornic, pâna în pozitia Max. contrar acelor de ceasornic, în pozitia maxim E Fiecare arzator poate functiona la puterea maxima, minima sau intermediara. Pentru a facilita identificarea pozitiilor amintite, pe buson, în afara pozitiei stins (reprezentata de simbolul l), sunt prevazute niste caneluri, care indica si pozitiile maxim E si minim C . Acestea se selecteaza rotind busonul în sens contrar acelor de ceasornic, fata de pozitia stins. Pentru a opri arzatorul, este necesar sa rotiti busonul în sens orar, pâna la capat (indicat de simbolul l). F Atentie: La prima aprindere, va recomandam sa lasati cuptorul sa functioneze în gol timp de aproximativ ½ ora, cu termostatul la maxim si usa închisa. Dupa acest interval de timp, puteti sa îl opriti, sa deschideti usa cuptorului si sa aerisiti camera. Mirosul care poate aparea în timpul acestei operatii este datorat evaporarii unor substante care au fost utilizate pentru a proteja cuptorul de la fabricarea sa pâna la punerea în functiune. Daca modelul dvs este dotat cu un dispozitiv de siguranta, este necesar sa tineti apasat busonul timp de 6 secunde circa, pentru a activa acest dispozitiv, care intervine în eventualitatea unor scapari de gaz. Selectarea temperaturii se obtine rotind busonul cu temperatura dorita în dreptul reperului de pe bord; temperaturile disponibile sunt urmatoarele: Temperatura aleasa se va obtine automat si va fi mentinuta constanta cu ajutorul termostatului comandat de buson. Atentie:Utilizati primul raft de jos al cuptorului numai pentru rotisor (daca este prevazut). Pentru o alta folosinta, nu utilizati primul raft de jos si, în general, nu asezati niciodata vasele pe fundul cuptorului, în timpul functionarii, deoarece se poate deteriora smaltul aplicat. Asezati recipientele (vase, casolete RO 29 Min • 150 • 180 • 220 Max 140 145 160 200 250 Atentie: Nu lasati copiii sa atinga usa cuptorului pentru ca aceasta se supraîncalzeste în timpul functionarii. ATENTIE Pentru a scoate protectia culisanta, A , desurubati surubul S. La terminarea operatiilor, montati la loc protectia culisanta si fixati-o cu surubul S. Înainte de a utiliza cuptorul, verificati daca protectia culisanta A este fixata corect. Sfaturi practice pentru utilizarea arzatoarelor Pentru a obtine un randament maxim, este important sa respectati urmatoarele indicatii : • folositi recipiente adecvate pentru fiecare arzator (vezi tabelul), pentru a evita ca flacara sa depaseasca fundul acestor recipiente. • Dupa ce alimentele au ajuns la fierbere, reglati flacara la minim. • Utilizati întotdeauna recipiente cu capac. • Utilizati întotdeauna recipiente cu fund plat. S Set usa cuptor Pentru ca usa cuptorului sa ramâna la o temperatura mai mica decât a cuptorului, si pentru a reduce consumul de energie, este disponibil un set suplimentar de protectie. Acesta ar trebui montat, A rz ã t o r A Sertar sub cuptor (numai pe anumite modele) Sub cuptor se afla un sertar care poate fi utilizat pentru a pastra vasele si accesoriile de bucatarie. În timpul utilizarii cuptorului, acest sertar poate fi folosit pentru a mentine alimentele la cald. Sertarul se deschide în partea de jos. Atentie: acest sertar nu trebuie sa fie utilizat pentru a pastra materiale inflamabile. ø D ia m e t ru re c ip ie n t e (c m ) R a p id (R ) 24 – 26 S e m ira p id (S ) 16 – 20 A u x ilia r (A ) 10 – 14 în general, în toate locuintele cu copii. Pentru a achizitiona setul de protectie, apelati la un vânzator autorizat sau la Centrul de Asistenta tehnica, cerând articolul cu codul 076650 din lista cu piese de schimb furnizata. Recomandari pentru coacerea alimentelor Cuptorul va pune la dispozitie o gama larga de posibilitati, care va vor permite sa coaceti alimentele în mod optimal. Cu timpul, veti putea realiza cu acest aparat cele mai mari performante; de aceea, indicatiile urmatoare sunt cu titlu indicativ, dvs putând sa amplificati rezultatele în functie de experienta dvs personala. Crusta deserturilor este prea închisã Aºezaþi recipientul mai jos, reduceþi temperatura ºi mãriþi timpul de coacere. Copt bine în interior; în exterior lipicios Pregatirea deserturilor Cuptorul trebuie sa fie deja cald înainte de a introduce un desert; asteptati deci ca acesta sa se preîncalzeasca (aprox. 10-15 min). Temperatura de coacere a deserturilor variaza de la 160°C la 200°C. Nu deschideti usa cuptorului în timpul coacerii unui desert, deoarece riscati ca acesta sa nu creasca. În general: Deserturi prea tari Mãriþi temperatura cu 10°C ºi reduceþi timpul de coacere Deserturile nu cresc Folosiþi mai puþin aluat sau micºoraþi temperatura cu 10°C. Utilizaþi mai puþin aluat, reduceþi temperatura ºi mãriþi timpul de coacere. Desertul se lipeºte de tavã Ungeþi bine tava ºi adãugaþi ºi un strat de fãinã. Pregatirea pestelui si carnii Pentru carnea alba (pui, peste), folositi o temperatura mica. (150°C-175°C). Pentru carnea rosie, daca doriti sa obtineti o crusta la exterior iar în interior sa pastrati carnea suculenta, este bine sa plecati de la o temperatura mare (200-220°C), de mentinut pentru scurt timp, pe care sa o reduceti treptat. Pe scurt, cu cât cantitatea de carne este mai mare, cu atât mai scazuta va fi temperatura si cu atât 30 RO timpul de coacere va fi mai îndelungat. Asezati carnea în centru, pe gratar si, sub ea, un recipient pentru a colecta grasimea care se topeste. Introduceti gratarul în mijlocul cuptorului. Daca aveti nevoie de o temperatura mai mare sub recipient, folositi-va de primul raft al cuptorului. Întretinere curenta si curatarea aragazului Înainte de orice operatie, scoateti stecarul aragazului din priza. Pentru o mai lunga durata de viata a aragazului, este indispensabil sa îl curatati frecvent si cu minutiozitate. Gresarea busoanelor Cu timpul, se poate întâmpla ca busoanele sa se blocheze sau sa se roteasca mai greu. În acest caz, este necesar sa îl înlocuiti. N.B.: Aceasta operatie trebuie sa fie executata numai de un instalator autorizat de fabricant. • Nu folositi la curatire aparate cu aburi; • componentele smaltuite si panourile de autodegresare, daca sunt disponibile pe modelul dvs., se spala cu apa calda, fara prafuri abrazive, ce le-ar putea deteriora; • cuptorul va fi curatat în interior frecvent, când este cald, cu apa calda si detergent; apoi se clateste bine si se sterge; • gratarul aragazului se spala frecvent, cu apa calda si detergent, având grija sa se elimine toate depunerile; • daca aparatul dvs are aprindere automata, este necesar sa îl curatati cât mai des - în special capatul dispozitivelor de aprindere instantanee si sa verificati daca orificiile prin care iese gazul nu sunt înfundate; • otelul inox poate ramâne patat daca intra des în contact cu apa, mai ales daca are un continut mare de calcar, sau cu detergentii agresivi (care contin fosfor) ; Dupa fiecare spalare, se recomanda sa îl clatiti bine si sa îl stergeti. Este oportun în acelasi timp sa stergeti si eventualele urme de apa; • daca aragazul dvs are capac din cristal, acesta se va curata cu apa calda; nu utilizati lavete tari sau substante abrazive. NB: evitati sa închideti capacul daca arzatoarele sunt calde înca. Eliminati eventualele reziduuri de lichid de pe capac, înainte de a-l deschide. Important: verificati periodic starea tubului flexibil de racordare la gaze si înlocuiti-l imediat ce observati o anomalie; în general, se recomanda înlocuirea sa anuala. RO Scoaterea capacului Pentru a a facilita operatiile de întretinere, puteti demonta capacul. Pentru aceasta, este necesar sa îl deschideti si sa îl ridicati (vezi figura). 31 Recomandari pentru coacerea alimentelor Alimente de pregãtit Paste fãinoase Lasagne (Foi de aluat dispuse în straturi, umplute) Cannelloni (macaroane groase umplute) Paste gratinate Carne Viþel Pui Raþã Lepure Porc Miel Peºte Scrumbie Dentex dentex Pãstrãv în folie de aluminiu Pizza Napoletana Deserturi Biscuiþi Tarte Tarte sãrate Dulciuri din aluat dospit Greutate (Kg)) Poziþia rafturilor, de jos în sus Temperaturã (°C) Preîncãlzire (minute) Durata ciclului (minute) 2,5 2,5 2,5 3 3 3 210 200 200 10 10 10 60-75 40-50 40-50 1,7 1,5 1,8 2,0 2,1 1,8 3 3 3 3 3 3 200 220 200 200 200 200 10 10 10 10 10 10 85-90 90-100 100-110 70-80 70-80 90-95 1,1 1,5 1,0 3 3 3 180-200 180-200 180-200 10 10 10 35-40 40-50 40-45 1,0 3 220 15 15-20 0,5 1,1 1,0 1,0 3 3 3 3 180 180 180 165 15 15 15 15 30-35 30-35 45-50 35-40 N.B: timpul de coacere este indicativ ºi poate fi modificat în baza exigenþelor personale. 32 RO Indesit Company spa Cucina con forno gas 10/05 - 195045092.01 Viale Aristide Merloni 47 60044 Fabriano Italy Tel +39 0732 6611 Fax +39 0732 662501 www.merloni.com