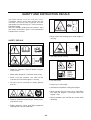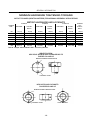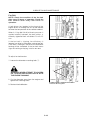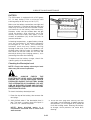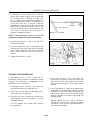
1
TRACTOR OPERATOR'S MANUAL
MODEL
CM314
CM374
IHI Shibaura Machinery Corporation
I H I GROUP
CONTENTS
SAFETY ……………………………………………………………………………0-2
SECTION1-GENERAL INFORMATION ………………………………………1-1
SECTION2-OPERATION…………………………………………………………2-1
SECTION3-LUBRICATION AND MAINTENANCE ……………………………3-1
SECTION4-SPECIFICATIONS …………………………………………………4-1
PREDELIVERY SERVICE ………………………………………………………4-5
TO THE OWNER:
This manual contains information concerning the operation, adjust, and maintenance of the CM Mower.
You have purchased a dependable machine, but only by proper care and operation can you expect to
receive the performance and long service built into this Mower. Please have all operators read this
manual carefully and keep the manual available for reference.
Your SHIBAURA dealer will instruct you in the general operation of your Mower.(Refer to the "Delivery
Report" at the back this of this manual.) Your dealer's staff of factory-trained service technicians will be
glad to answer any questions that may arise regarding the operation of you Mower.
Your SHIBAURA dealer carries a complete line of genuine SHIBAURA parts.These parts are
manufactured and carefully inspected to insure high quality and accurate fitting of any necessary
replacement parts.
CAUTION:THIS SYMBOL IS USED THROUGHOUT THIS BOOK WHENEVER PERSONAL SAFETY
IS INVOLVED. TAKE TIME TO READ AND FOLLOW THE INSTRUCTIONS. BE CAREFUL!
CAUTION:PICTURES IN THIS MANUAL MAY SHOW PROTECTIVE SHIELDING OPEN OR
REMOVED TO BETTER ILLUSTRATE A PARTICULAR FEATURE OR ADJUSTMENT.
BE CERTAIN, HOWEVER, TO CLOSE OR REPLACE ALL SHIELDING BEFORE OPERATING THE
MACHINE.
IMPROVEMENTS
IHI-SHIBAURA is continually striving to improve its products. We reserve the right to make improvements
or changes when it becomes practical and possible to do so, without incurring any obligation to make
changes or additions to the equipment sold previously.
0-1
SAFETY RULES
1. SAFETY RULES
- When people, especially children, or pets
are nearby.
Please pay particular attention to all boxedparts in the text which have the sign
.
This sign warns you to be careful when carrying
out certain functions.
- If the operator has taken medicine or
substances that can affect his ability to
react and concentrate.
DANGER:
Indicates serious injury or death will result if
instruction are not followed.
5) Keep in mind that the operator or user is
responsible for accidents or hazards
occurring to other people or their property.
WARNING:
Indicates a strong possibility that serious injury
or death could result if instructions are not
followed.
6) Do not carry passengers.
7) The operator of a Front Mower must carefully
follow the driving instructions, particularly:
- The need for care and concentration when
using Front Mowers;
CAUTION:
Indicates a possibility that minor injury can result
if instructions are not followed.
- That control of a Front Mower sliding on a
slope will not be regained by the application of the brake.
NOTE: Gives helpful information.
Labels attached to certain parts of the Front
Mower give important safety information.
The main reasons for loss of control are:
Please read them carefully. Should a label
detach itself or become illegible, contact your
dealer for a replacement.
- Insufficient wheel grip;
SAFETY INSTRUCTIONS
- Inadequate braking;
A) TRAINING
- The type of machine is unsuitable for its
task;
- Being driven too fast;
1) Read the instructions carefully. Be familiar
with the controls and the proper use of the
equipment. Learn how to stop the engine
quickly.
- Lack of awareness of the effect of ground
conditions, especially slopes;
- Incorrect hitching and load distribution.
2) Only use the Front Mower for the purpose for
which it was made, that is, the cutting and
collection of grass. Any use not specifically
indicated in the instruction handbook can be
dangerous and result in damage to the
machine, and will also result in the annulling
of the warranty and the manufacturer declining all responsibility.
8) The Front Mower is equipped with a series of
safety microswitches and devices which
must never be removed, altered or tampered
with. Removing these devices invalidates the
warranty and the manufacture declines any
responsibility.
B) PREPARATION
3) Never allow children or people unfamiliar with
these instructions to use Front Mower. Local
regulations may restrict the age of the
operator.
1) While mowing, always wear substantial
footwear and long trousers. Do not operate
the equipment when barefoot or wearing
open sandals.
4) Never use the Front Mower.
0-2
SAFETY RULES
parking brake.
2) Thoroughly inspect the area where the
equipment is to be used and remove all
objects which may be thrown by the
machine (stones, sticks, metal wire, bones,
etc.)
5) Do not use on slopes of more than 10°(17%).
6) Remember there is no such thing as a “safe”
slope.
3) WARNING: Engine fuel is highly flammable:
Travel on grass slopes requires particular
care. To guard against overturning:
- Store fuel in containers specifically
designed for this purpose.
- It is advisable to use a rear counterweight
(supplied on request);
- Refuel using a funnel and outdoors only. Do
not smoke while refuelling or whenever
handling the fuel.
- Do not stop or start suddenly when going
up or downhill;
- Add fuel before starting the engine. Never
remove the cap of the fuel tank or add fuel
while the engine is running or when the
engine is hot.
- Always keep the machine in gear,
especially when traveling downhill;
- Machine speeds should be kept low on
slopes and during tight turns;
- If fuel is spilled, do not attempt to start the
engine but move the machine away from
the area of spillage and avoid creating any
source of ignition until the fuel has
evaporated and the fumes dispersed.
- Stay alert for humps and hollows and other
hidden hazards;
- Never mow across the face of the slope.
- T ighten caps of all fuel tanks and
containers securely.
7) Stop the blades rotating before crossing
surfaces other than grass. When moving the
Front Mower away from the lawn disengage
the blades and put the cutting plate into the
highest position.
4) Replace faulty silencers.
5) Before using, always carry out visual
inspection, particularly of the blades, seeing
that the screws and cutter assembly are not
wor n or damaged. Replace worn or
damaged blades and screws in sets to
preserve balance.
8) Never operate the Front Mower as a Mowerdeck with defective guards, or without safety
devices, for example deflectors and/or grass
catchers, in place.
9) Do not change the engine governor settings
or overspeed the engine. Operating the
engine at excessive speed can increase the
hazard of personal injury.
6) Before mowing, attach the discharge
opening guards (grass-catcher or deflector).
7) Take care as the rotation of one blade can
cause the other blade to turn.
10) Before leaving the operator’s position:
C) OPERAITON
- Disengage the blades and lower the
Mower-deck.
1) Do not operate the engine in a confined
space where dangerous carbon monoxide
fumes can collect.
- Charge into neutral and set the parking
brake.
- Stop the engine and remove the key.
2) Mow only in daylight good artificial light.
3) Avoid operating the equipment in wet grass,
where feasible.
11) Disengage blades, stop the engine and
remove key:
4) Before starting the engine, disengage the
blades, shift into neutral and engage the
- Before carrying out any work beneath the
cutting deck or unclogging the chute;
0-3
SAFETY RULES
D) MAINTENANCE AND STORAGE
- Before checking, cleaning or working on
Front Mower;
1) Keep all nuts, bolts and screws tight to be
sure the equipment is in safe working
condition. Regular maintenance is essential
for safety and for maintaining performance
levels.
- After striking a foreign object. Inspect the
Front Mower for damage and make
repairs before restarting and operating the
Front Mower;
2) Never store the equipment with fuel in the
tank inside a building where fumes may
reach a flame or a spark or a source of
extreme heat.
- If the Front Mower starts to vibrate
abnormally (immediately check and
remove the cause of the vibration)
12) Disengage drive to blades when transporting or not in use. Disengage the blades for
them to stop before emptying the grasscatcher.
3) Allow the engine to cool before storing in an
enclosed space.
4) To reduce the fire hazard, keep the engine,
exhaust silencer, battery compartment and
fuel storage area free of grass, leaves, or
excessive grease. Always empty the grasscatcher and do not leave garden rubbish
containers within a room.
13) Stop the engine and disengage blades:
- Before refuelling.
- Every time the grass-catcher is removed
or replaced.
5) Check the deflector and grass-catcher
frequently for wear and deterioration.
- Before making height adjustment.
6) For reasons of safety, do not use the
equipment with worn or damaged parts.
Parts are to be replaced and not repaired.
Use genuine spare parts. Parts which are not
of an equivalent quality can damage the
equipment and be dangerous for your safety.
14) Reduce the throttle setting during engine
shut down and turn the fuel off at the
conclusion of mowing, following the
instructions in the handbook.
15) Do not put hands or feet near or under
rotating parts. Keep clear of the discharge
opening at all times.
7) If the fuel tank has to be drained, this should
be done outdoors and when the engine is
cool.
8) Wear strong work gloves when removing and
reassembling the blades.
16) Use care when pulling loads of using heavy
equipment.
- Use only approved drawbar hitch paints.
9) Check the blades’ balance after sharpening.
- Limit loads to those you can safely
control.
10) Take care as the rotation of one blade can
cause the other blade to turn.
- Do not tur n sharply. Use care when
reversing.
11) When the machine is to be parked, stored
or left unattended, lower the cutting means.
17) Watch out for traffic when crossing or near
roadways.
12) The ignition key must never be left inserted
in the machine, or where children or
persons not familiar to the machine may
reach them.
Before any maintenance or repair, remove
the ignition key.
18) When using any attachments, never direct
discharge of material toward bystanders nor
allow anyone near the machine while in
operation.
0-4
SAFETY AND INSTRUCTION DECALS
You Front-tractor must be used with care.
Therefore, decals have been placed on the
machine, to remind you pictorially of main
precautions to take during use. Their meaning is
explained below.
We also strongly recommend to carefully read
the safety instructions given in the concerned
chapter of this manual.
• Never reach into rotating parts while engine is
running.
SAFETY DECALS
• Stay clear of hot surface.
• Read this Operator’s Manual before using the
Front-tractor.
• Keep other people at a distance while using.
• Make sure that children stay clear of the
machine all time when engine is running.
• Use diesel fuel.
• Do not use this machine on slopes greater
than 10°.
• Diesel fuel is flammable.
• Add diesel fuel before starting the engine.
• Never remove the fuel tank cap or add diesel
fuel while the engine is running or when the
engine is hot.
• Refuel outdoors only and do not smoke while
refuelling.
• Batteries produce explosive gas. Keep sparks
and flames away.
• Battery contains sulfuric acid. Wear protective
clothing and use eye protection.
0-5
SAFETY AND INSTRUCTION DECALS
• Do not depress the brake pedal quickly.
Quick brake will cause upset of the machine.
• Always lock ROPS in upright position unless it
has to be folded down to allow operation
underneath trees or bushes.
• Always wear seat belt expect for ROPS is
lowered.
• Do not attach ropes or chains to ROPS for
pulling purposes.
Use of ROPS and seat belt reduce the
chance of injury or death if rollover or upset
occurs.
• Do not open when hot.
• Contents under pressure.
• While driving on slopes, always use
Permanent/Full Time 4WD.
0-6
SAFETY AND INSTRUCTION DECALS
INSTRUCITON DECALS
Parking Brake
A Parking Brake
B “Lock” Position
C “Release” Position
C
B
A
C
Key Switch
B
A Engine “HEAT” Position
B Engine “STOP” or “OFF” Position
C Engine “ON” Position
D Engine “START” Position
A
D
Weight Transfer
A Continuously variable
B Increase
C Decrease
A
C
0-7
B
SAFETY AND INSTRUCTION DECALS
MACHINE IDENTIFICATION PLATE
A CE Conformity Mark
B Year of Manufacture
C Weight in kgs
D Name and Address of Manufacturer
E Type of Front Mower
F Serial Number
G Engine Power
H Engine Number
E
B
H
F
G
C
GUARANTEED SOUND POWER LEVEL
MARK
Guaranteed Sound Power Level According to
Directive 2000/14/EC
0-8
A
D
SECTION 1
GENERAL INFORMATION
PLEASE READ CAREFULLY:
For a complete list of the pre-delivery service
checks performed by your dealer, refer to the
PRE-DELIVERY SERVICE checklist found at the
back of this manual. Keep one copy as your
record of the service performed. The other copy
should be removed from the manual and kept
by your dealer. MAKE SURE THAT BOTH
COPIES ARE COMPLETED AND THAT YOU
AND THE DEALER SIGN BOTH COPIES.
A PRODUCT IDENTIFICATION PLATE is located
in the front transmission case under the front
body of the mower.
The numbers on the plate are important in the
event your mower should require future service.
For your convenience, have your dealer record
these numbers in the appropriate spaces below.
IHI Shibaura Machinery Corporation is
continually striving to improve its products. We
reserve the right to change prices, specification,
or equipment at any time without notice.
All data given in this book is subject to
production variations. Dimensions and weights
are approximate only, and the illustrations do
not necessarily depict Mower in standard
condition. For exact information about any
particular Mower, please consult your
SHIBAURA dealer.
This Mower has been designed for doing light
work, such as mowing, blowing snow. Don not
attempt to use implements that were not
designed for this mower, as they may cause
damage to the mower.
1-1
GENERAL INFORMATION
MINIMUM HARDWARE TIGHTENING TORQUES
IN FOOT POUNDS (NEWTON-METERS) FOR NORMAL ASSEMBLY APPLICATIONS
METRIC HARDWARE AND LOCKNUTS
CLASS 5.8
NOMINAL
SIZE
UNPLATED
CLASS 8.8
PLATED
W/ZnCr
UNPLATED
CLASS 10.9
PLATED
W/ZnCr
UNPLATED
PLATED
W/ZnCr
LOCKNUT
CL.8
W/CL8.8
BOLT
M4
15*(1.7)
19*(2.2)
23*(2.6)
30*(3.4)
33*(3.7)
42*(4.8)
M6
51*(5.8)
67*(7.6)
79*(8.9)
102*(12)
115*(13)
150*(17)
56*(6.3)
M8
124*(14)
159*(18)
195*(22)
248*(28)
274*(31)
354*(40)
133*(15)
M10
21 (28)
27 (36)
32 (43)
41 (56)
45 (61)
58 (79)
22 (30)
M12
36 (49)
46 (63)
55 (75)
72 (97)
79 (107)
102 (138)
39 (53)
M16
89 (121)
117 (158)
137 (186)
177 (240)
196 (266)
254 (344)
97 (131)
M20
175 (237)
226 (307)
277 (375)
358 (485)
383 (519)
495 (671)
195 (265)
M24
303 (411)
392 (531)
478 (648)
619 (839)
662 (897)
855 (1160)
338 (458)
NOTE: Torque values shown with * are inch pounds.
IDENTIFICATION
HEX DCAP SCREW AND CARRIAGE BOLTS
CLSSES 5.6 AND UP
MANUFACTURER’S IDENTIFICATION
PROPERTY CLASS
HEX NUTS AND LOCKNUTS
CLASSES 05 AND UP
MANUFACTURER’S IDENTIFICATION
PROPERTY CLASS
CLOCK MARKING
1-2
16*(1.8)
GENERAL INFORMATION
INTERNATIONAL SYMBOLS
As a guide to the operation of your tractor, various international symbols have been used on instruments
and controls. These symbols are depicted and described below.
Hours Recorded
Neutral
Engine Water
Temperature
Diesel Fuel
Air Filter
Glow
Power Take-off
(OFF)
Engine Oil
Pressure
Engine Stop
“Tortoise”-SLOW
or Minimum Setting
Full Tiem 4WD
Engine Oil
“Hare”-FAST
or Maximum Setting
Auto 4WD
Engine Start
Warning
Continulusly
Variable
Parking Brake
Control Lever
Hold
Increase
Lock
Decrease
Battery
Power Take-off
(ON)
Rock Shaft
(Raised)
Release Lock
Rock Shaft
(Lowered)
Differential Lock
Remote Cylinder
(Retracted)
Vloume Empty
Remote Cylinder
(Extended)
Fuel Level
High Range
Low Range
Volume Full
1-3
SECTION 2
OPERATION
CONTROLS AND INSTRUMENTS
SEAT, SEAT BELT AND ROPS
OPERATORS SEAT
Flip-up armrest
Your seat is adjustable to obtain the most
comfortable position.
Seat Belt
Seat Travel Lever
By tilting the Seat Travel Lever outward, the seat
can be moved in a range of 6.50 in. (165 mm) in
forward and backward direction, and it can be
fixed in a position as you like.
Seat Flotation
To adjust for operator weight, turn the flotation
adjuster knob: turn it to the right and it will be
for move (+), and turn it to the left, it will be for
less (-).
Seat Travel Lever
IMPORTANT: If not adjusted properly, the seat
switch will not close to allow engine to start.
Flotation adjuster knob
WARNING: DO NOT ATTEMPT BYPASS
SEAT SAFETY INTERLOCK SWITCH.
Reclining Lever
By tilting the reclining lever forward, the
inclination of the back of the seat can be
changed to any position you like.
Reclining Lever
Seat Belt
Always fasten the seat belt before starting.
Flip-up Armrest
Pocket
The armrest is used by tilting it forward.
Pocket
A storage pocket is located at the rear of the
seat. This is the recommended storage area for
the operator’s Manual.
2-1
OPERATION
STEERING WHEEL
ADJUSTING THE STEERING WHEEL
A
The CM mower is equipped with an adjustable
steering wheel which can telescope and tilt.
To telescope the wheel, turn the wheel hub A
to the left and raise or lower the steering wheel
to the desired height. Then turn the hub to the
right to lock it into position.
NOTE: When locking the hub into position,
do not overtighten.
To tilt the wheel, pull up on the lever B and
move the steering wheel fore or aft the desired
position. If the wheel is not held in position when
the lever is raised, the steering wheel will spring
to its most forward position. Use this feature to
gain additional clearance when mounting and
dismounting the CM mower.
B
ROLL OVER PROTECTIVE STRUCTURE
(ROPS)
A Roll Over Protective Structure (ROPS) and
seat belts are standard equipment.
DO NOT remove a ROPS and seat belts. ROPS
when used with seat belt is effective in reducing
injuries during unit overtur n accidents.
Overturning the unit without a ROPS can result
in serious injury or death.
ADJUSTMENT THE STEERING WHELL
WARNING! WHEN IMPROPERLY OPERATED, THE UNIT CAN ROLL OVER OR
UPSET! FOR LOW CLEARANCE USE ONLY,
THE ROLL BAR CAN BE LOWERED. NO
PROTECTION IS PROVIDED WHEN THE
COMMERCIAL MOWER IS OPERATED WITH
THE ROLL BAR IN THE LOWERED
POSITION. ALWAYS RAISE THE ROLL BAR
IMMEDIATELY AFTER LOW CLEARANCE
USE. WHEN THE UNIT IS BEING DRIVEN TO
AND FROM A LOW CLEARANCE JOB, THE
ROLL BAR SHOULD BE IN THE RAISED
POSITION. WHEN THE ROLL BAR IS
LOWERED, USE OF THE SEAT BELT IS NOT
RECOMMENDED. ALWAYS USE THE SEAT
BELT WHEN THE ROLL BAR IS RAISED.
SEAT BELTS SAVE LIVES WHEN THEY ARE
USED.
ROLL OVER PROTECTIVE STRUCTURE (ROPS)
2-2
OPERATION
DO NOT weld on ROPS, or use a damaged
ROPS. Replace ROPS if cracked or damaged.
If the seat belt is to be cleaned, use soap and
water. Do not use carbon tetrachloride,
naphtha, etc., as these will weaken the
webbing. For the same reason, do not bleach or
dye the webbing. Replace seat belt if worn or
damaged.
Roll Over Protective Structure (ROPS), and seat
belts are available from your SHIBAURA Dealer.
Foldable ROPS
The ROPS can be folded by removing right and
left retaining rings and by pulling out the pins.
Operate with the ROPS in the“UP”position
whenever possible. Use the ROPS in the
“folded”position only when it is absolutely
necessary.
WARNING: DO NOT OPERATE THE MOWER
WITH THE ROLLOVER PROTECTIVE
STRUCTURE FOLDED AS A STANDARD
OPERATING MODE. A FOLDED ROPS DOES
NOT PROVIDE ROLLOVER PROTECTION.
WARNING: ALWAYS WEAR THE SEAT BELT
WHEN THE MOWER IS EQUIPPED WITH A
ROPS. HOWEVER, IF THE ROPS HAS BEEN
REMOVED FROM THE MOWER, OR IF THE
ROPS IN THE FOLDED POSITION, THE SEAT
BELT SHOULD NOT BE USED.
WARNING: ALWAYS PULL FROM THE
MOWER DRAWBAR. DO NOT ATTACH
CHAINS OR ROPES TO THE ROPS FOR
PULLING PURPOSES, AS THE MOWER CAN
TIP BACKWARDS.
WARNING: WHEN DRIVING THROUGH
DOOR OPENINGS OR UNDER LOW
OVERHEAD OBJECTS, MAKE SURE THERE
IS SUFFICIENT CLEARANCE FOR THE
ROPS.
2-3
OPERATION
INSTRUMENT PANEL
B
A
C
A Engine Proof Meter
B Temperature Gauge
C Fuel Gauge
D Glow Plug Warning Light
E Engine Oil Pressure Warning Light
F Battery Charge Warning Light
G Air Cleaner Restriction Warning Light
H Parking Brake Warning Light
H
G
F
E
D
PROOF - METER
WARNING LIGHTS
The Proof-Meter is located on the left side of the
instrument panel.
Proof-Meter indicates hours of operation, and
the figures after the decimal point express 0.1
hour.
Use the Proof-Meter as a guide to determine
hourly service and maintenance intervals.
When the key start switch is turned“ON”the oil
pressure and charge lights come on. After the
engine has been started, the lights should go
out within a few seconds. If they do not go out:
Glow plug indicator warning light: This
light comes on when turning the key switch
to the “HEAT”position or”START”position.
This light will stay on for approximately 5
seconds in the “HEAT”Position.
TEMPERATURE GAUGE
When the needle is in the middle area, the
engine is at its normal operating temperature.
The needle at the“H”end indicates an
overheated engine.
Engine oil pressure warning light: Stop
the engine immediately and investigate the
cause. It is important to remember that this
light indicates oil pressure only. The
operator must regularly check the
crankcase for proper oil level.
Charge indicator warning light: This is an
indication that charging system is not
operating normally. Investigate the cause as
soon as possible, otherwise the battery will
become fully discharged.
WARNING: THE COOLING SYSTEM
OPERATES UNDER PRESSURE WHICH IS
CONTROLLED BY THE RADIATOR CAP. IT IS
DANGEROUS TO REMOVE THE CAP WHILE
THE SYSTEM IS HOT.
Air Cleaner Restriction Warning Light:
When the air cleaner element is clogged by
foreign substance such as Dust and clear
air is restricted to the engine, this light will
illuminate.
ALWAYS COVER THE CAP WITH A THICK
CLOTH AND TURN THE CAP SLOWLY
COUNTER-CLOCKWISE TO THE FIRST
STOP. ALLOW ALL PRESSURE TO ESCAPE
BEFORE
REMOVING
THE
CAP
COMPLETELY.
Parking brake light: Is illuminated when
the parking brake is applied.
FUEL GAUGE
The needle indicates the amount of fuel in the
tank.
2-4
OPERATION
SWITCHES
For safe operation, always check to make
certain the range shift lever and lift control lever
are in neutral before attempting to start engine.
Refer to page 2-12 for complete starting
instructions.
KEY START SWITCH
IMPORTANT: The key start switch must remain
in the “ON” position while operating the engine.
The warning lights and battery charging system
will not function with the switch in the “OFF”
position.
A B
C
D
KEY START SWITCH
1. ‘Off’ Position
2. ‘On’ Position
3. Heat Position
4. Starter Position
HEAD LIGHT SWITCH
Turning the key right to the “ON” position
activates the warning lights and instruments.
The pre-heat system is activated when the key
is turned further to the right to the “HEAT”
position, and the engine starts when the key is
turned to the extreme right. The key spring
returns to the“ON”position when released.
A
PRE - HEATING THE SYSTEM
Your CM mower has a diesel engine. Before
starting a cold engine, the precombustion
chambers must be heated.
The head light switch A, is located under the
instrument panel. Push switch“in”and key
in“ON”position to illuminate headlight.
To pre-heat the engine, turn the key switch to
the“HEAT”position and hold the key in this
position for approximately 5 seconds. The glow
plugs heat the precombustion chambers during
this time, and the engine will start.
The starting circuit can only be activated when:
1. Operator is seated.
2. HST foot pedals are released.
3. PTO lever is in the“OFF”position.
4. Master brake pedal is depressed or parking
brake lever is locked.
2-5
OPERATION
THROTTLE CONTROL
DUAL PEDAL TURNING BRAKE PEDALS
(OPTIONAL)
The independent brake pedals are used to
assist in turning in confined spaces at slow
speed. The right brake pedal is used to brake
the right front wheel. The left brake pedal is use
to brake the left front wheel.
A
B
PARKING BRAKE
The parking brake should be applied whenever
the CM Mower is parked or when the operator
is out of the seat.
The parking brake will be applied by raising up
the parking brake lever A.
Releasing of the parking brake is made by
lowering the lever while pressing down the
button B.
HAND THROTTLE CONTROL LEVER
A. Increase Engine RPM
B. Decrease Engine RPM
B
Push the throttle forward to increase engine
rpm. Pull the throttle rearward to decrease
engine rpm. Always operate mower deck or
other attachment at full engine rpm.
A
BRAKE CONTROLS
MASTER BRAKE PEDAL
Depress the master brake pedal to stop the
unit.
The cruise control switch (OPTIONAL) will be
returned to the“OFF”position by depressing the
master brake pedal, if the cruise control switch
is in the“SET”position. Refer to page 2-8 for
cruise control switch instructions.
PARKING BRAKE
WARNING: DO NOT PARK ON AN INCLINE.
IF NECESSARY TO PARK ON AN INCLINE
BE SURE TO CHOCK THE WHEELS TO
PREVENT ACCIDENTAL ROLLING OF THE
MACHINE.
BRAKE PEDALS
2-6
OPERATION
DIFFERENTIAL CONTROL
DIFFERENTIAL LOCK PEDAL
Depressing the pedal, locks the front axle shafts
together, providing additional traction in wet or
loose soil. Refer to page 2-17 for differential lock
operating information.
WARNING: THE CM MOWER IS VERY
DIFFICULT TO STEER WITH DIFFERENTIAL
LOCK APPLIED.
DIFFERENTIAL LOCK PEDAL
TRANSMISSION AND PTO CONTROLS
A
HST FOOT PEDALS
The ground speed of the unit is continuously
variable from zero to full rated speed in each
range.
The ground speed is controlled by HST foot
pedals. Depress the forward travel pedal A to
progressively increase forward speed. For
reverse travel, depress the reverse travel pedal
B.
NOTE: THE HST FOOT PEDALS MUST BE IN
NEUTRAL TO START THE ENGINE.
HTS FOOT PEDALS
1. Forward Travel Pedal
2. Reverse Travel Pedal
2-7
B
OPERATION
CRUISE CONTROL SWITCH
WARNING: TO AVOID INJURY, THE SWITCH
SHOULD NOT BE PUT IN THE“ON” POSITION WHEN OPERATING AT TRANSPORT
SPEED OR WHEN IN REVERSE.
A
The cruise control switch A, may be used to
maintain a constant forward speed when
desired. After attaining the desired speed with
the forward travel pedal, put the switch to
the“ON”position, and the unit will maintain the
set speed even if the pedal in released.
CRUISE CONTROL SWITCH
To cancel the speed setting or stop the unit, put
the cruise control switch to the“OFF”position or
firmly depress the master brake pedal.
HST RANGE SELECTOR LEVER
Range Selector Lever and Four-Wheel Drive
(FWD) Selector Lever are activated by the same
lever.
A
The range selector lever A, on the left side of
the seat, can be shifted when the HST foot
pedal is in the Neutral position to select, High
range (“H”), Low range (“L”) or Neutral.
Range
Forward
Low km/h 0-10.0
High Km/h 0-24.5
Reverse
0- 6.5
0-15.8
HST RANGE SELECTOR LEVER
2-8
OPERATION
AUTOMATIC OR PERMANENT FOUR
WHEEL DRIVE (FWD) SELECTOR LEVER
Four Wheel Drive (FWD) Selector Lever A is
activated by the same lever as the one that
activates the Range Selector Lever.
When the lever is located in the position of
Range Selector Lever, the tractor will run in
Automatic FWD mode.
When the lever is brought to the outer slot, the
mower will run in Permanent FWD mode.
A
The PERMANENT FWD selector lever activates
rear axle drive for improved traction in adverse
conditions.
FWD SELECTION
1. Lever
A. Permanent FWD
B. Auto FWD
WARNING: WHILE DRIVEING ON SLOPES,
ALWAYS USE PERMANENT /FULL TIME
4WD.
NOTE: When mower is in Permanent FWD
mode, ONLY low range is engaged.
PTO CONTROL LEVER
The lever engages and disengages the PTO.
Move the lever forward and hold it to engage
the PTO. Move the lever rearward to disengage
the PTO.
NOTE: PTO must be in disengaged position
to start the engine.
IMPORTANT: Do not repeat the lever engages
and disengage the PTO when Mower becomes
clogged. Doing so may cause PTO clutch
failure. If Mower becomes clogged, stop the
engine, remove starter key and clean underside
of deck.
A
PTO SELECTION LEVER
A. Disengaged
B. Engaged
2-9
OPERATION
HYDRAULIC LIFT SYSTEM CONTROLS
LIFT CONTROL LEVER
The front mounted equipment can be raised
and lowered by the lift control lever. Place
handle in the forward position to lower and to
the rearward position to raise front mounted
equipment.
To lower and float the equipment, pull the lever
forward. To raise the equipment, pull the lever
rearward and hold it until the equipment is
raised to the desired position.
WARNING: TO AVOID PERSONAL INJURY,
DISENGAGE THE PTO CONTROL LEVER
BEFORE OPERATING THE LIFT CONTROL
LEVER.
LIFT CONTROL LEVER
WEIGHT TRANSFER CONTROL
This feature enables the operator to transfer the
weight of the mower or other equipment to the
tractor unit.
Turn the knob clockwise, the effort of weight
transfer is increased, refer to page 2-18 for
weight transfer operating instructions.
WEIGHT TRANSFER VALVE
2-10
OPERATION
BREAK-IN PROCEDURES
Your CM Mower will provide long and
dependable service if given proper care during
the first 50-hour break-in period. During the first
50 hours of operation:
1. Avoid“lugging”the engine. Operating in too
high a gear under heavy load may cause
engine lugging, which is indicated when the
engine will not respond to a throttle increase.
2. Use the lower gear ratios when pulling heavy
loads and avoid continuous operation at
constant engine speeds. You will save fuel
and minimize engine wear by selecting the
correct gear ratio for a particular operation.
Operating the tractor in low gear with a light
load and high engine speed wastes fuel.
3. Avoid prolonged operation at either high or
low engine speeds without a load on the
engine.
4. Check the instruments frequently and keep
the radiator and oil reservoirs filled to
recommended levels. Daily checks include
the engine oil level, radiator coolant, and air
cleaner.
5. After the first 50 hours of use, be sure to
perform the maintenance items listed in the
maintenance schedule.
2-11
OPERATION
STARTING THE ENGINE
SAFETY STARTING DEVICE
A B
C
Your CM Mower is equipped with four safety
switches;
•
HST foot pedals are released
•
PTO lever is disengaged
•
Depressing the master brake pedal or
applying the parking brake
•
D
HST foot pedals, PTO lever, master brake pedal
and seat. The engine can be started only when;
KEY SWITCH
1. ‘STOP’ Position
2. ‘Run’ Position
3. ‘Cold Start’ Position
4. ‘starter’ Position
Operator is in seat.
For safe operation the front mounted equipment
should be lowered prior to starting the engine.
WARNING: NEVER ATTEMPT TO START THE
ENGINE WHILE STANDING BESIDE THE
UNIT-ALWAYS SIT IN THE SEAT WHEN
STARTING THE ENGINE.
IMPORTANT: DO NOT ENGAGE THE STARTING MOTOR CONTINUOUSLY FOR MORE
THAN 30 SECONDS; DOING SO MAY CAUSE
STARTING MOTOR FAILURE.
WARM WEATHER STARTING
3. Turn the key switch to the“start”position.
When the engine starts, release the key.
Check to be sure the warning lights go out. If
the engine fails to start after cranking for
approximately 10 seconds, refer to the
following “COLD WEATHER STARTING”
information.
To start a cold engine in warm weather or to
start an engine that is warm;
1. Depress the master brake pedal fully and
move the PTO and transmission shift levers
to the off and neutral positions.
2. Move the hand throttle forward to a near half
open position.
2-12
OPERATION
COLD WEATHER STARTING
If the engine fails to start using the preceding
warm weather starting procedure or when
starting the engine in cold weather;
1. Depress master brake pedal fully and move
the PTO and transmission shift levers to the
off and neutral positions.
2. Move the hand throttle forward to the fullopen position.
3. Turn the key switch to“HEAT”to preheat the
precombustion chamber and wait until the
glow plug indicator warning light on the
instrument panel goes out (approximately 5
seconds).
4. Turn the key switch to the“START”position.
When the engine starts, release the key.
Check to be sure the warning lights go out.
IMPORTANT: IN COLD WEATHER BELOW
23°F(-5°C) START THE ENGINE AFTER
HOLDING THE KEY SWITCH TO THE “HEAT”
POSITION FOR APPROXIMATELY 10
SECONDS EVEN IF THE GLOW PLUG
INDICATOR WARNING LIGHT HAS GONE OUT.
WARNING: DO NOT USE ETHER WITH THE
THERMOSTAT STARTING AID.
STARTING THE ENGINE WITH JUMPER
CABLES
WARNING: START ENGINE ONLY FROM THE
OPERATOR‘S SEAT.
If it is necessary to use jumper cables to start
the engine, follow the instructions below.
1. Shield eyes.
Battery
2-13
OPERATION
STOPPING THE ENGINE
2. Connect one end of the jumper cable to the
battery positive (+) terminal and the other to
the auxiliary battery positive (+) terminal.
Connect one end of the other cable first to
the auxiliary battery (-) negative terminal, and
the other end to the (-) negative terminal.
Follow the starting procedures above after
the jumper cables are connected as
instructed.
Stopping the engine should be done according
to the following procedures;
1. Push the throttle lever fully rearward.
2. Release the HST foot pedals.
3. Apply the parking brake.
Idle the engine and turn on all electrical
equipment, then disconnect the cables in
reverse order of the connecting procedure
above. This will help protect the alternator from
damage due to extreme load changes.
4. Place the range selector and lift control levers
in the“N”position.
5. Turn the key start switch to the“OFF”position.
6. Remove the key.
IMPORTANT: Failure to turn the key start switch
to the“OFF” position, after the engine stops,
will allow the warning lights to remain on,
causing the battery to discharge.
WARNING: BATTERIES CONTAIN SULFURIC ACID AND PRODUCE EXPLOSIVE
GASES. FOLLOW THE INSTRUCTIONS
BELOW TO PREVENT PERSONAL INJURY.
•
Wear eye and skin protection.
•
Keep sparks and flame away.
•
Always have adequate ventilation while
charging or using the battery.
•
If ice is present or the battery is cracked, DO
NOT ATTEMPT TO“JUMP START”vehicle.
•
Follow the battery manufacturer’s instructions
which are shown on the battery.
•
Bring helper vehicle with a battery of the
same voltage as disabled machine within
easy cable reach.“THE VEHICLES MUST
NOT TOUGH”.
IMPORTANT: Do not stop the engine
immediately after hard or extended operation.
Keep the engine running at slow idle for about 2
minutes to allow engine to cool down.
ENGINE WARM-UP
In cold weather, run the engine at half throttle for
a few minutes to allow engine oil and
transmission oil to warm-up.
WARNING: ALWAYS APPLY THE PARKING
BRAKE, WHEN LEAVING THE SEAT.
2-14
OPERATION
OPERATING THE HYDROSTATIC
TRANSMISSION AND PTO
A
HYDROSTATIC TRANSMISSION
The hydrostatic transmission is controlled by the
HST foot pedals A, cruise control switch B,
and range selector lever C.
When operating the range selector lever, place
the HST foot pedals in the neutral position. If it
is difficult to engage, slightly depress the
Forward or Reverse foot pedal for smooth
engagement.
Never engage or disengage the shift lever when
the unit is in motion.
B
With the shift lever in“H”range, ground speed
can be varied from zero to maximum by
depressing the forward or reverse travel pedal.
In “L” range, speeds are about 60% of “H”
range. Maximum speeds in reverse are about a
65% of maximum forward speeds.
HST FOOT PEDALS AND SPEED CONTROL LEVER
1. HST Foot Pedasl
2. Cruise Control Switch
To stop the unit, release the pedal gradually
(except on an emergency). When release, the
pedal retur ns to the Neutral position
automatically, stopping the unit. Sudden release
can result in an abrupt, and possible dangerous
stop.
C
For prolonged operation at a fixed forward
speed, use the forward travel pedal to attain the
desired speed, then move the cruise control
switch to the“ON” position. Speed will remain at
the set value when the pedal is released.
To cancel the speed setting or stop, push the
switch to the“OFF”position.
RANGE SELECTION
3. Range Selector Lever
2-15
OPERATION
AUTOMATIC OR PERMANENT FOURWHEEL DRIVE (FWD)
The lever is used to select automatic FourWheel Drive or permanent Four-Wheel Drive.
Four Wheel Drive (FWD) Selector Lever is
activated by the same lever as the one that
activates the Range Selector Lever.
When the lever is located in the position of
Range Selector Lever, the tractor will run in
Automatic FWD mode.
When the lever is brought to the outer slot, the
tractor will run in Permanent FWD mode and
low range.
When in motion, always bring the unit to a
complete stop before moving the selector lever.
FWD SELECTION LEVER
A. Permanent FWD
B. Auto FWD
Automatic Four-Wheel Drive (FWD) means that
the four-wheel drive line is engaged
automatically when the front wheels start to slip,
but, in normal mowing, reverts to 2WD, this
provides sharp and smooth turn without
damaging turf.
Permanent Four-Wheel Drive should be used
when additional traction is required while
operating in loose soil, wet, slippery conditions
or slopes.
The steering (rear) axle will not drive in reverse
when mower is operating in Automatic FWD.
POWER TAKE-OFF OPERATION
The power take-off (PTO) transfers engine
power directly to the PTO equipment.
PTO is controlled through the PTO lever A. To
engage the PTO, push the lever forward. To
disengage the PTO, pull the lever rearward.
WARNING! TO AVOID PERSONAL INJURY,
KEEP CHILDREN AND OTHERS AWAY
WHEN OPERATING PTO EQUIPMENT.
A
NOTE: The PTO lever must be placed in the
disengaged position to start the tractor.
PTO ENGAGEMENT
1. PTO Control lever
2-16
OPERATION
OPERATING THE DIFFERENTIAL LOCK
A
The differential lock is engaged by depressing
the pedal A. Depressing the pedal locks both
differential gears together, preventing one wheel
from rotating independently of the other. The
lock should be used to obtain additional traction
from the opposite wheel whenever one wheel
begins to slip in wet or loose soil.
Do not engage the differential lock when ground
speed is above 8 kmh.
DIFFERENTIAL LOCK
1. Differential lock pedal
WARNING: DO NOT ENGAGE THE DIFFERENTIAL LOCK WHEN TURNING THE
UNIT. IF THE LOCK IS ENGAGED WHEN
TURNING, A LOSS OF STEERING CONTROL WILL RESULT.
To operate the differential lock depress and hold
down the pedal until the lock is positively
engaged. It is best to engage the differential
lock while the wheels are turning slowly to
minimize shock loads to the drive line. If a wheel
spins at high speed, as on ice, reduce engine
speed to idle before engaging the lock, or
damage may occur. The differential lock is
released when the pedal releases as the loads
equalise on both drive wheels.
NOTE: In some instances the lock may
remain engaged after the pedal is released.
This may occur if one front wheel tends to
turn at a faster speed than the other. Should
this happen, the lock may be disengaged by
either of two ways:
•
Decrease the drawbar pull by raising or
disengaging the implement so that neither
wheel tends to slip.
− OR −
•
Rapidly apply and release a light braking load
to the slipping front wheel.
2-17
OPERATION
OPERATING THE HYDRAULIC LIFT
SYSTEM
The hydraulic lift system provides accurate,
smooth, and instant hydraulic power for raising
front mounted equipment whenever the engine
is running.
To raise the front mounted equipment, pull the
lift control lever A rearward and hold it until the
desired equipment height is reached.
To lower the equipment, push the lever forward.
When pushed all the way forward, the lever will
remain in a lowered float detent position.
A
IMPORTANT: Always set the lift control lever in
the float detent position when mowing.
HYDRAULIC LIFT CONTROL
1. Lift control lever
WARNING: MAKE SURE THE AREA IS
CLEAR OF PEOPLE BEFORE RAISING OR
LOWERING EQUIPMENT.
WARNING: ALWAYS LOWER THE HYDRAULIC LIFT AND EQUIPMENT BEFORE
STOPPING THE UNIT.
NOTE: Set the Lift Control Lever to RAISE
position, and the PTO will be disengaged
automatically.
WEIGHT TRANSFER VALVE
The valve is used to transfer the mower deck
weight to the tractor unit to reduce equipment
weight on turf and prevent damage and improve
traction.
Weight Transfer Valve Knob
2-18
OPERATION
OPERATION SHUT-OFF DEVICES
The weight transfer valve should be used
according to the following procedures;
The CM Mower is equipped with two operation
shut-off devices. One is the engine stop system
and the other one is the PTO stop system.
1. With the engine running, push the hydraulic
lift lever forward to the floating position.
ENGINE STOP SYSTEM: Raising off the seat,
the engine will stop whenever operating PTO
driven equipment such as the mower deck. Also
the engine will stop when raising off the seat
unless the parking brake or master brake pedal
is applied.
2. Turn the adjusting knob clockwise until the
mower or other equipment lifts off the
ground.
3. Turn the adjusting knob counter-clockwise
slowly until the mower deck front gauge
wheels or other equipment just touches the
ground, then turn the knob counterclockwise 1/4 turn more.
IMPORTANT: Before operating the unit always
adjust the seat flotation properly in accordance
with the operator’s weight for correct function of
the engine stop device.
PTO STOP SYSTEM: While operating PTO
driven equipment such as a mower deck, the
PTO will disengage automatically when the
equipment is raised by the lift control lever.
4. Operate, the unit, over uneven terrain at
desired travel speed and observe the mower
deck’s front gauge wheels. If the wheels or
equipment do not follow ground contour, the
operation will be affected.
NOTE: The PTO control lever remains in the
engaged position after activating the PTO
stop device. To re-engage the PTO, the PTO
control lever must be moved to the
“OFF”position, then pushed forward again.
5. To correct this condition, turn the knob 1/4
turn clockwise at a time until the mower
deck’s front gauge wheels follow the ground
contour.
WARNING: FOR SAFE OPERATION, DO NOT
ATTEMPT TO OVERRIDE OR BYPASS
EITHER OF THESE SYSTEMS. IF EITHER
SYSTEM FAILS TO FUNCTION, IT SHOULD
BE REPAIRED BEFORE USING THE UNIT.
AUXILIARY VALVE (OPTIONAL)
The Auxiliary Valve is available from your
SHIBAURA Dealer, as an option. If you use the
Auxiliary Valve, keep the lift control lever in
neutral.
2-19
OPERATION
CM MOWER WEIGHTING (OPTIONAL)
Rear end weights are recommended to increase
stability, steering, traction on slopes or slippery
surfaces, and help prevent rear-end tip up.
Recommended
30kg Quantity (5) max
Optional Rear Weight Bracket needed
WEIGHTING
Rear End Weights
WARNING: IMPROPER OPERATION ON
SLOPES CAN CAUSE INJURY. INSTALL
REAR END WEIGHTS TO INCREASE
STABILITY. USE EXTREME CARE WHEN
OPERATING ON SLOPES.
DRIVING THE CM MOWER
•
Stay alert for holes, rocks, roots and other
hidden hazards in the terrain. Keep away
from drop-offs.
•
Do not park on slopes.
•
Avoid quick stops especially when an
attachment is not installed or raised. Quick
stops will cause upsets.
•
Use extreme care when operating on slopes.
WARNING: TO PREVENT PERSONAL
INJURY, OBSERVE THE FOLLOWING
PRECAUTIONS WHEN DRIVING THE UNIT.
•
•
Watch where you are going - especially at
row ends, on roads, and around the trees.
Reduce speed before turning or applying
brakes.
•
Avoid sudden starts and stops on slopes.
•
Be careful when changing direction on
slopes.
2-20
OPERATION
OVERHEAT AND ENGINE OIL
PRESSURE ALARM BUZZER
SEAT BELT ANCHOR
Check if there is any looseness or damage in
the seat belt anchors located on both right and
left sides.
The coolant temperature fluctuates depending
on ambient temperatures and working loads. If
the needle at the“H”end indicates during
operation, the overheat alarm buzzer sounds.
This time take the following steps.
1. Set the PTO of the mower to the OFFposition.
2. Wipe the air intake panel of chaff and dirt by
hand.
3. Run the engine idle until the meter needle
comes back to the middle area.
4. Stop the engine and check the coolant level
in the reservoir tank.
(1) If the coolant level is lower than LOW
mark, add clean water or antifreeze
solution as necessary.
(2) If there is no coolant left in the reservoir
tank, remove the radiator cap and visually
check the level of the coolant. If the
coolant level is just below the bottom of
the filler neck, add clean water or
antifreeze solution as necessary.
CELLULAR PHONE SOCKET
•
When you need power, for example, for
using the cellular phone for a long time, the
power can be taken from this socket.
•
A current up to 12V and 20A can be taken
for other power requirements from the
cellular phone outlet.
The plug and cord are provided as standard
accessories and housed in the rear seat pocket.
WARNING: THE COOLING SYSTEM OPERATES UNDER PRESSURE WHICH IS
CONTROLLED BY THE RADIATOR CAP. IT IS
DANGEROUS TO REMOVE THE CAP WHILE
THE SYSTEM IS HOT. ALWAYS COVER THE
CAP WITH A THICK CLOTH AND TURN THE
CAP SLOWLY COUNTERCLOCKWISE TO
THE FIRST STOP. ALLOW ALL PRESSURE
TO ESCAPE BEFORE REMOVING THE CAP
COMPLETELY.
ENGINE OIL PRESSURE
When oil pressure falls below 29.4 kPa, the
alarm buzzer will sound same as overheat
situation above 110°C degrees.
NOTE: The alarm buzzer will sound when
engine stops with key left inserted at“ON”
position. In order to stop the alarm buzzer,
return the key to“STOP”position.
2-21
OPERATION
WORKING LIGHTS (OPTIONAL)
The work lights are available as a dealer
installed accessory from your SHIBAURA dealer.
CANOPY (2-post ROPS) (OPTIONAL)
The canopy for a 2-post ROPS is available as a
dealer installed accessory from your SHIBAURA
dealer.
SIDE PTO (OPTIONAL)
The side PTO is available as a dealer installed
option From your SHIBAURA dealer.
Side PTO is used to power optional grass
catcher blower..
2-22
OPERATION
Dual Pedal Turning Brakes Kit
(OPTIONAL)
The dual pedal turning brakes kit is available as
a dealer installed Option from your SHIBAURA
dealer.
AUDIBLE BACKUP ALARM (OPTIONAL)
The audible backup alarm is available as a
dealer installed option from your SHIBAURA
dealer.
2-23
SECTION 3
LUBRICATION AND MAINTENANCE
This section gives full details of the service procedures necessary to maintain your CM Mower at peak
efficiency while the lubrication and maintenance charts provide ready reference to these requirements.
NOTE: Ensure that the unit is on level ground and that all hydraulic rams are extended, where
applicabel before checking oil levels.
To prevent contamination when changing oils or filters etc., always clean the area around the
filler, level and drain plugs, dipsticks and filters. Ensure that oil contained within remote cylinders
is clean, has not broken down due to long storage and is of the correct grade.
After the first 50 hours of operation of your CM mower the following maintenance is required:
50-HOUR SERVICE
INOPERATIVE SERVICE CHECKS
OPERATIVE SERVICE CHECKS
PERFORMANCE SERVICE CHECKS
1.
2.
3.
4.
5.
6.
7.
1. Lights and Instruments for proper
operation, and fuel shut down with key
switch off
2. Fluid and oil leaks
3. Maximum no-load speed and idle
speed adjustments
4. Starting and starter switches
5. Hydraulic system:
・Lift control lever operation
6. Operation of safety devices:
・PTO disengagement system
・Engine stop system
1. Engine operation including throttle and
governor operation
2. HST transmission
3. Steering control
4. Differential lock engagement and
disengagement
5. Brake action
6. All optional equipment and accessories
Tire pressure
Check air cleaner hose connection
Replace diesel fuel filter(s)
Tighten injector line fittings
Radiator coolant level
Fan belt tension
Battery cleanliness and vent openings,
electrolyte level and charge
8. All electrical cables, terminals and
wires
9. Drain and refill engine oil
10. Replace engine oil filter
11. Transmission and front axle oil level
12. Rear axle oil level
13. Replace HST oil filter
14. Replace hydraulic system oil filter
15. ROPS and seat belt
PROPERLY MAINTAINED EQUPMENT
IS SAFE EQUIPMENT
3-1
LUBRICATION AND MAINTENANCE
LUBRICATION AND MAINTENANCE CHART
U
G
JS
DE
BC
F
A
R
O
Q
M
N
L
No.
LUBRICATION &
MAINTENANCE
ITEMS
1
2
3
20
Engine Oil Level
Air Cleaner
Radiator Coolant
Radiator screen
4
5
1,6
7
8
9
−
Hydraulic Filter
H.S.T. Filter
Engine Oil & Filter
Tire Pressure
Fuel Filter
Wheel Bolt Torque
All Fluid Levels
C
H
E
C
K
×
×
×
C
L
E
A
N
L
U
B
E
C
H
A
N
G
E
A
D
J
U
S
T
×
×
×
×
×
×
×
×
10 Battery
8 Fuel Filter
×
D R A I N
11 Fan Belt
12 Transmission Oil
×
×
13
14
15
16
17
I
K
T
SERVICE
INTERVALS
No.
Every
10
Hours or
Daily
1,6 Engine Oil & filter
2 Air Cleaner
Element
8 Fuel Filter
18 Rear Axle 4WD Oil
21 PTO Control Lever
First
50
Hours
LUBRICATION &
MAINTENANCE
ITEMS
19 Fuel Filter Element
11 Fan Belt
9 Wheel Bolt Torque
×
7 Tires Pressure
Lubrication
Fittings:
Lift arm
Lift cylinder
Brake Pedal Shaft
Power Steering
Cylinder
Dif. Lock Pedal Shaft
P
H
Every
50
Hours
×
×
×
×
×
3-2
C
H
E
C
K
C
L
E
A
N
×
×
L
U
B
E
C
H
A
N
G
E
A
D
J
U
S
T
×
SERVICE
INTERVALS
Every
100
Hours
×
×
×
×
×
Every
200
Hours
4 Hydraulic Filter
5 H.S.T. Filter
×
×
Every
300
Hours
12 Transmission Oil
18 Rear Axle 4WD Oil
×
×
Every
600
Hours
2 Air Cleaner
Element
3 Radiator Coolant
×
Seasonal
2 Safety Air Filter
Element
×
×
Every 3rd
Primary
Element
Change or
Every
1000
Hours,
Whichever
Comes
First
LUBRICATION AND MAINTENANCE
LUBRICATION
To lubricate these points:
Adequate lubrication and maintenance on a
regular schedule is vital to maintaining your CM
mower. To ensure long service and efficient
operation, follow the lubrication and maintenance schedules outlined in this section. The
use of proper fuels, oils, and filters, as well as
keeping the systems clean, will also extend
machine and component life.
1. Wipe away all old grease and dirt from the
lubrication fittings to prevent dirt or foreign
material from entering as new grease is
applied.
2. Use a high pressure grease gun to force in
the new grease. Apply pressure until clean
grease oozes from each lubrication point.
3. Wipe away any excess grease.
ATTENTION: Always use genuine SHIBAURA
replacement filters to ensure proper filtration of
engine and hydraulic systems.
DIESEL FUEL
RECOMMENDED LUBRICANTS
•
Use clean, quality No. 1-D or No. 2-D fuel
Engine Oil................... Service Grade CD
•
Use No. 1-D fuel if the ambient temperature
is expected to be lower than 4°C or if the
loader is to be used at an altitude exceeding
1524 m.
•
Use No. 1-2 diesel fuel with a pour point of at
least -12°C below the expected ambient
temperature to prevent fuel flow problems in
cold weather.
NOTE: CM Mower are originally shipped with
10W-30 oil.
•
Keep dirt from entering the fuel tank.
Transmission Oil..........ISO VG 46
•
Sulfur content of the fuel should be no more
than 0.5%.
•
Sediment and water content should not
exceed 0.05%.
•
Minimum cetane number is 40. Low
temperature or high altitude operation may
require use of fuel with a higher octane
number.
•
Use properly mixed winter fuel when
temperatures are extremely cold. In most
areas, diesel fuel is properly blended for
summer and winter grades as ambient
temperatures change. In winter, use winter
grade diesel fuel only. Otherwise, the fuel
may cloud and block the fuel system.
Ambient Temp (ı)
Recommended Oil
+5°-50°
SAE 30W
-15°-50°
SAE 15W-40
-25°-50°
SAE 10W-30
-30°-15°
SAE 5W-30
Grease.........................High Viscosity Lithium
Base-NLG 1 # 2
LUBRICATION FITTINGS
NOTE: After every 50 hours of normal
operation, apply a good quality grease to the
lubrication points listed below (refer to the
Recommended Lubricants chart). When
operating under extremely dirty conditions,
lubricate more frequently than every 50
hours.
•
Lift cylinder
•
Front Lift arm
•
Power Steering Cylinder
•
Brake pedal shaft
•
Dif. Lock pedal shaft
3-3
LUBRICATION AND MAINTENANCE
Fuel Usage Safety
•
UNDER NO CIRCUMSTANCES should
gasoline, alcohol, or gasohol be added to
diesel fuel. These combinations can create
an increased fire or explosive hazard.
•
Never remove the fuel cap or refuel the
tractor while the engine is running or hot.
•
Never smoke while refueling or anywhere
near fuel.
•
When filling the tank, maintain control of the
nozzle.
•
Do not fill the fuel tank to capacity. Allow
room for expansion.
•
Wipe up spills immediately.
•
Always tighten the fuel cap securely.
•
If the original fuel tank cap is lost, always
replace it with a SHIBAURA approved cap.
A“will-fit”cap may not be safe.
•
Keep equipment properly maintained.
•
Do not drive equipment near open fires.
•
Never use gasoline for cleaning parts.
WARNING: FUEL OIL IN THE INJECTION
SYSTEM IS UNDER HIGH PRESSURE AND
CAN PENETRATE THE SKIN. UNQUALIFIED
PERSONS SHOULD NOT REMOVE OR
ATTEMPT TO ADJUST A PUMP INJECTOR,
NOZZLE, OR ANY PART OF THE FUEL
INJECTION SYSTEM.
•
DO NOT USE YOUR HAND TO CHECK
FOR LEAKS. USE A PIECE OF
CARDBOARD OR PAPER TO SEARCH
FOR LEAKS.
•
IF ANY FLUID IS INJECTED INTO THE
SKIN, OBTAIN MEDICAL ATTENTION
IMMEDIATELY OR GANGRENE MAY
RESULT.
FAILURE TO FOLLOW THESE INSTRUCTION
CAN RESULT IN SERIOUS INJURY.
3-4
LUBRICATION AND MAINTENANCE
Refueling the Tractor
The fuel tank filler cap A is located at the left
side of the tractor hood. Before removing the
cap, wipe all dust and dirt from around the cap
to prevent debris from falling into the tank while
filling.
A
Use an approved fuel container and check the
inside of the container periodically for
cleanliness. Fuel tank capacity is 50.5L.
NOTE: The fuel cap is a vented-type. Use
only an approved SHIBAURA replacement
cap to prevent fuel system-related problems.
If there is no filter on the storage tank or fuel
container, filter the fuel through a 100-mesh or
finer screen when filling the mower fuel tank.
Keep the mower tank as full as possible (without
filling to capacity) to minimize condensation.
NOTE: It is a good practice to fill the fuel
tank at the end of each day, as this will
reduce overnight condensation.
3-5
LUBRICATION AND MAINTENANCE
SERVICE ACCESS
A
OPENING HOOD
Loosen the Bolt B by tool, allowing to unlock
the hood latch A and raise the hood holding
the hood handle.
Close the hood and tighten the Bolt B by tool,
allowing to lock the hood latch after lubrication
and maintenance.
B
CAUTION: TO AVOID PERSONAL INJURY
FROM CONTACT WITH MOVING PARTS;
•
NEVER OPEN THE HOOD AND SEAT
WHILE THE ENGINE IS RUNNING.
•
DO NOT TOUCH MUFFLER OR EXHAUST
PIPER WHILE THEY ARE HOT; SEVERE
BURNS COULD RESULT.
3-6
LUBRICATION AND MAINTENANCE
FUEL AND LUBRICANT SERVICE PROCEDURES
ENGINE
Checking the Engine Oil Level
B
NOTE: Check the engine oil level daily or
after every 10 hours of operation.
A
A
1. After the engine has been stopped for a
period of time and with the Mower standing
level, check the oil level using the dipstick A.
ENGINE OIL LEVEL DIPSTICK AND FILTER
1. Dipstick
A. Low Mark (Top up)
B. Full Mark
2. If the oil level is low, remove the filler cap A,
and add oil through the filler hole, Add
enough oil so that he level registers between
the two marks on the dipstick. Do not overfill.
3. Install the oil filler cap.
A
OIL
Changing the Engine Oil
ENGINE OIL FILLER CAP
1. Filler Cap
NOTE: Change the engine oil and filter after
the first 50 hours of operation, then every
100 hours thereafter. If theCM mower is
operated for extended periods of time at
maximum rated power and speed, or under
other types of continuous, severe operating
conditions, the engine oil and filter should be
changed at 70-hour intervals following the
initial oil change.
To change the engine oil:
1. Place a suitable container beneath the drain
opening to catch the used oil. With the CM
mower engine off but at normal operating
temperature, Remove the drain plug A.
Reinstall the plug after all the oil has been
drained.
A
ENGINE OIL DRAIN
1. Drain Plug
3-7
LUBRICATION AND MAINTENANCE
2. Next, place a container below the oil filter A
to catch the used oil and unscrew the oil filter.
Discard the used oil and filter.
A
3. Coat the gasket on the new filter with a film of
clean oil. Screw the filter into place until the
gasket contacts its mating surface, then turn
the filter approximately three-quarters of a
turn by hand Don not overtighten.
4. Add the proper type and level of new oil, then
start the engine and check the filter for leaks.
Recommended Oils
ENGINE OIL FILTER
Ambient Temp (ı)
Recommended Oil
+5°-50°
SAE 30W
-15°-50°
SAE 15W-40
-25°-50°
SAE 10W-30
-30°-15°
SAE 5W-30
NOTE: CM Mower are originally shipped with
10W-30 oil.
FUEL FILTER
Draining the Fuel Filter
O
NOTE: The fuel filter should be drained after
every 100 hours of operation.
A
C
1. Make sure there is adequate fuel in the fuel
tank and close the fuel shutoff valve A (the
handle should be pointing to the“C”position.)
Remove the fuel sediment bowl B.
B
2. Open the fuel shutoff valve until all water has
been removed and only fuel flows from the
filter base.
FUEL FILTER
1. Shut-off Valve
2. Sediment Bowl
O: Open C: Closed
3. Install the fuel sediment bowel. The Fuel
system is auto bleeding And does not require
any manual bleeding procedures.
NOTE: Valve is shown in open position.
3-8
LUBRICATION AND MAINTENANCE
Changing the Fuel Filter:
NOTE: Change the diesel fuel filter after the
first 50 hours of operation, then following
every 200 operating hours thereafter.
B
1. Close the shutoff valve (the handle should be
pointing to the“C”position),
C
E
2. Remove the sediment bowl by rotating the
retaining nut A.
D
3. Open the fuel shutoff valve B, to drain any
remaining water from the tank.
A
4. Discard the oil element C, and install a new
element.
5. Inspect the O rings D and E and replace if
necessary.
6. Install and securely tighten the sediment
bowl.
7. Open the fuel shutoff valve (the handle should
be pointing to the“O”position), B, so fuel will
flow to the filter.
8. Bleed the fuel filter and injection pump as
described below in“Bleeding the Fuel
System.”
WARNING: FUEL OIL IN THE INJECTION
SYSTEM IS UNDER HIGH PRESSURE AND
CAN PENETRATE THE SKIN.
UNQUALIFIED PERSONS SHOULD NOT
REMOVE OR ATTEMPT TO ADJUST A PUMP
INJECTOR, NOZZLE OR ANY PART OF THE
FUEL INJECTION SYSTEM.
BLEEDING THE FUEL SYSTEM
The CM Mower fuel system is designed to bleed
automatically.
DO NOT USE YOU HAND TO CHECK FOR
LEAKS. USE A PIECE OF CARDBOARD OR
PAPER TO SEARCH FOR LEAKS.
1. When the fuel tank is empty
Fill until the fuel level of the tank is at least half
full, then wait about one minute for air to
dissipate.
IF ANY FLUID IS INJECTED INTO THE SKIN,
OBTAIN MEDICAL ATTENTION IMMEDIATELY OR GANGRENE MAY RESULT.
2. When the fuel filter has been replaced:
After replacing the filter, open the fuel shutoff
valve. Air will dissipate for about one minute
FAILURE TO FOLLOW THESE INSTRUCTIONS CAN RESULT IN SERIOUS INJURY.
NEVER FAIL TO CHECK THE FUEL LINE
PERIODICALLY. THE FUEL LINE IS SUBJECT TO WEAR AND AGING, FUEL MAY
LEAK ONTO THE RUNNING ENGINE,
CAUSING A FIRE.
NOTE: Fuel tank fuel level must be half full or
more for auto bleed system to function
correctly.
NOTE: The CM mower has auto bleeding
system. No manual bleeding procedures
needed.
3-9
LUBRICATION AND MAINTENANCE
AIR CLEANER
The air cleaner is accessed by opening the
tractor hood.
The air cleaner assembly contains two
elements: an outer primary element and an inner
safety element.
To remove the primary element, loosen the
spring clamps and remove the end cap from the
air cleaner body to expose the primary element.
Air Cleaner Primary Element
NOTE: Clean the primary element after every
100 hours of service. Extremely dusty
conditions may require more frequent
service intervals.
19983672
1. Pull the primary element from the canister.
Clean any loose dirt from the canister and
inspect the end of the canister for dirt which
may prevent the new element from sealing
properly.
2. Clean the primary element using low air
pressure (207 kPa or less). Blow dust from
the inside to the outside of the element
(opposite to normal air flow through element).
IMPORTANT: Be careful not to rupture the filter
element. Maintain a safe distance between the
air nozzle and the filter element when directing
air up and down the clean air side of the
element pleats.
19981867
3-10
LUBRICATION AND MAINTENANCE
3. After cleaning the element, check the inner
diameter seals for damage. If damage is
present, replace the primary element.
Change the element after six cleanings or
once a year.
4. Reinstall the primary element by inserting it
into the canister and pushing on the end of
the element until it is seated against the
canister.
NOTE: Place a light inside the element to
check for paper leaks or for bonding of
the paper to the end plate. If any leaks are
found, replace the element.
NOTE: If element is not inserted far
enough into canister, the end cap cannot
be installed.
5. Place the end cap onto the canister body and
attach spring clamps. Make sure the end cap
is locked in place and not loose.
To remove the inner safety element, pull it out of
the canister body.
IMPORTANT: Never tap the element with
hard objects or against a hard surface. This
may dent or break the element end cap
seals.
To install the new element, push it into the
canister until seated.
ATTENTION: Failure to obtain a good seal
between elements and the canister may
cause major engine damage.
A
Air Cleaner Inner Safety Element
NOTE: for maximum engine protection and
air cleaner service life, install a new inner
safety element every third primary element
change or after every 1000 hours of
operation, whichever comes first.
The air cleaner inner safety element A cannot
be cleaned. It must be replaced once it
becomes partially clogged. A clogged element
will cause an air restriction resulting in a loss of
engine power or excessive black exhaust
smoke.
19981867
IMPORTANT: Clean any dirt from the canister
before installing the inner safety element. Check
element inner diameter seals for damage and
replace the safety element if seal damage is
present.
NOTE: Conduct a visual inspection of the
inner safety element by placing a light inside
the element. Little or no light will shine
through the element if it is partially clogged.
ATTENTION: Failure to obtain a good seal
between the filter and canister may cause major
engine damage.
3-11
LUBRICATION AND MAINTENANCE
LIFTING SEAT
By holding the grip of the tilting seat locking
lever on the lower part at the back of the seat
and lifting it up, the lock is released and the seat
can be pull down frontward while holding the
grip.
IMPORTANT: Before operating, after lubrication
and maintenance, the hood must be closed and
locked.
TILTING SEAT LOCKING LEVER
TRANSMISSION, FRONT AXLE AND
HYDRAULIC SYSTEM
B
A
B
A
Checking Oil Level: Check the oil level every
50 hours.
1. With the Tractor standing level and the engine
off, check the oil level with the dipstick.
2. The oil is at the correct level when the oil level
is within the mark at the lower end of the
dipstick. If low, add ISO VG46 hydraulic oil,
through the filler hole. Do not fill beyond the
mark on the stick, as the transmission will be
overfilled.
TRANSMISSION, FRONT AXLE AND HYUDRAULIC OIL
1. Filler hole
A. Low Mark (TOP UP)
2. Dipstick
B. Full Mark
3. Install the dipstick.
Changing Oil: Change the oil every 600
hours.
3-12
LUBRICATION AND MAINTENANCE
1. With the oil at normal operating temperature
(Caution“Hot”oil!), drain and discard the oil by
removing the transmission drain plug.
Reinstall the plug after the oil has drained.
2. Check the oil and if necessary replace the
hydraulic oil filter.
A
TRANSMISSION, FRONT AXLE AND HYDRAULIC
SYSTEM OIL DRAIN
1. Plug
3. Remove the filler plug, and fill with ISO VG46
hydraulic oil.
4. The transmission is filled to the correct level
when the oil level is within the mark at the
lower end of the dipstick. Do not fill beyond
the mark on the stick, as the transmission will
be overfilled.
5. Install the dipstick and filler plug.
IMPORTANT: The transmission, front axle and
hydraulic system operate from a common oil
sump. Special attention must be given to
keeping oil clean.
3-13
LUBRICATION AND MAINTENANCE
HYDRAULIC OIL FILTER (SUCTION & HST)
C
The hydraulic system is equipped with spin-on
type oil filters.
NOTE: Replace the filters after the first 50
hours of operation and every 300 hours
thereafter following the procedure below:
1. Remove the drain plug A of the front gear
case and discharge the HST oil.
2. Unscrew the oil filter B, C and discard.
B
3. Coat the gasket on the new filter with a film of
oil. Screw the filter into place until the gasket
contacts the sealing surface, then tighten the
filter approximately 3/4 of a turn by hand. Do
not over tighten.
HYDRAULIC OIL FILTER
2. Hydraulic Oil Filter
3. HST Oil Filter
4. Install the oil filter in place and supply new
HST oil from the oil inlet D.
5. Start the engine and check the hydraulic oil
filter for leaks.
6. Stop the engine and check the hydraulic oil
level. Replenish if necessary.
B
HYDRAULIC OIL FILTER
D
TRANSMISSION, FRONT AXLE AND HYDRAULIC OIL
C
A
TRANSMISSION, FRONT AXLE AND HYDRAULIC
SYSTEM OIL DRAIN
HST OIL FILTER
3-14
LUBRICATION AND MAINTENANCE
REAR AXLE DIFFERENTIAL CASE AND
FINAL REDUCTION GEAR CASES
A
Checking Oil Level: Check the oil level every
100 hours.
1. With the engine off and the tractor standing
level, check the oil level using the combined
dipstick/filler plug A. The oil is at the correct
level when it reads between the two marks
on the dipstick.
↑↑
NOTE: place the dipstick/filler plug A
horizontally over the oil inlet and measure
the oil level. Do not screw dipstick into
housing when Checking oil level.
ADD FULL
MARK MARK
REAR AXLE DIFFERENTIAL LUBRICATION
1. Level / Filler Plug
2. If the level is low, add ISO VG46 hydraulic oil
through the filler hole. Do not fill above the
dipstick full mark.
3. Reinstall the dipstick/filler plug A.
Changing Oil: Change the oil every 600
hours.
1. With the oil at normal operating temperature,
drain the oil by removing the rear axle
differential A and final reduction gear case
drain plugs B. Reinstall the plugs after the oil
has drained. Discard the oil.
2. Supply new ISO VG46 hydraulic oil into the fill
hole A.
NOTE: By this method, it takes much time
until the oil is spread fully into the final
reduction gear case. The oil can be supplied
by the following method also.
B
1. Remove the right and left rear wheels.
REAR AXLE DIFFERENTIAL / FINAL REDUTION
LUBRICATION DRAIN PLUG
2. Drain Plug
2. Oil supply plugs are located on the front side
of the right and left final reduction gear case.
Remove the plugs.
3. By supplying the hydraulic oil from the plug
holes, the final reduction gear case can be
filled more quickly, reducing the oil supply
time.
3-15
LUBRICATION AND MAINTENANCE
GENERAL MAINTENANCE
COOLING SYSTEM
The CM mower engine must operate at the
correct temperature to obtain maximum
efficiency and service life. This is dependent on
the cooling system.
Always fill the system with a 50/50 solution of
permanent antifreeze and clear water.
Checking the Coolant Level
NOTE: Check the coolant level daily or after
every 10 hours of operation. The engine
should be cold when coolant level is
checked.
Open the hood, and check the coolant recovery
reservoir located next to the battery. The fluid
should be between the low and the full marks
on the reservoir.
COOLANT RESERVOIR
If the coolant recovery reservoir is empty,
remove the radiator cap A and add a 50/50
solution of water and antifreeze until the radiator
is full. Then add the water antifreeze solution to
the coolant recovery reservoir until it is to the full
level.
A
WARNING: THE COOLING SYSTEM OPERATES UNDER PRESSURE CONTROLLED
BY THE RADIATOR CAP. IT IS DANGEROUS
TO REMOVE THE CAP WHILE THE SYSTEM
IS HOT. ALWAYS COVER THE CAP WITH A
THICK CLOTH AND TURN IT SLOWLY
COUNTERCLOCKWISE TO THE FIRST
STOP. ALLOW ALL PRESSURE TO ESCAPE
BEFORE REMOVING THE CAP COMPLETLEY.
COOLANT SYSTEM
1. Radiator Cap
If the coolant level is below the low mark on the
reservoir, add a 50/50 solution of water and
antifreeze to the coolant recovery reservoir
bringing the level to the full mark.
Be sure that the radiator fins are clear of chaff
and dirt to allow free air monement.
3-16
LUBRICATION AND MAINTENANCE
Draining and flushing the Cooling system
NOTE: Drain and flush the radiator and
engine block every 12 months. Refill with a
50/50 mixture of permanent antifreeze and
clear water.
To drain the cooling system:
1. Use a suitable receptacle to catch the used
coolant. Remove the radiator cap and open
the drain valve, A, on the left-hand more
frame to drain the radiator and engine block.
A
2. After the coolant has drained, place a water
hose in the radiator filler neck and run water
through the system. When water is flowing
from the block drain valve, start the engine.
When the water flowing from the drain valve,
is free of discoloration and sediment, stop the
engine and remove the hose. Allow all water
to drain from the system through the drain
valves.
COOLING SYSTEM
1. Radiator Drain Valve
B
3. Close the drain valve and slowly refill the
system with a 50/50 solution of permanent
antifreeze and clear water. Fill until the
coolant level is approximately 3.8 cm-5 cm
below the bottom of the filler neck. Do not fill
beyond this level.
4. Clean the radiator cap and cap seal and
install the cap.
2. Radiator Screen
5. Fill the coolant recovery reservoir bringing the
fluid level up until it is between the full and
low marks on the reservoir.
C
6. Pull down the seat frontward, tilt the front
screen C frontward and remove chaff, dust,
or other foreign substances. The foreign
substances can be dropped onto the ground
through the rubber at the lower part.
7. Pull out the radiator screen B sideways and
clean it.
8. Run the engine until normal operating
temperature is reached, then stop the engine.
Recheck the coolant level when the engine is
cold and add additional coolant as
necessary.
3. Front Screen
IMPORTANT: Never run the engine when the
cooling system is empty. Do not add cold water
or cold antifreeze solution if the engine is hot.
3-17
LUBRICATION AND MAINTENANCE
Fan Belt
NOTE: Check the condition of the fan belt
after every 50 hours of operation. Check fan
belt tension after every 200 hours of
operation.
A belt-driven fan located at the front of the
engine draws air through the fins of the radiator
to lower the temperature of the radiator coolant.
When 9-11 kg (88-108 N) of thumb pressure is
applied midway between the belt pulleys, a
correctly tightened belt will deflect 10 mm-15
mm.
19983638
FAN BELT
If the fan belt is slipping, fan efficiency is
lowered, resulting in the engine running too hot.
If the belt is too tight, the life of the alternator
bearing will be shortened. If the fan belt shows
signs of cracking or fraying, install a new one.
To adjust fan belt tension:
1. Loosen the alternator mounting bolts A.
A
WARNING: NEVER ATTEMPT TO LOOSEN
OR TIGHTEN MOUNTING BOLTS WITH
THE ENGINE RUNNING.
2. Pry the alternator away from the engine and
tighten the mounting bolts.
19983638
ALTERNATOR BELT TENSION ADJUSTMENT
1. Alternator Mounting Bolts
3. Recheck belt deflection.
3-18
LUBRICATION AND MAINTENANCE
ALTERNATOR
The CM mower 40-amp alternator is belt-driven
from the engine crankshaft pulley. It is important
that belt slippage does not occur, or the
charging system will be affected. To adjust the
belt, see the instructions previously given under
the“Fan Belt”section.
Other than belt adjustment, the only alternator
maintenance required is to periodically inspect
the terminals to ensure they are clean and tight.
The alternator cooling fan should also be
cleaned periodically.
19983638
When working on or checking the alternator,
adhere to following precautions or alternator
damage may occur:
•
Do not UNDER ANY CIRCUMSTANCES
short the field terminal of the alternator to
ground.
•
Don not disconnect the alternator output
lead or battery cables while the alternator is
operating.
•
Do not remove the alternator from the tractor
without first disconnecting the negative (-)
bettery cable. When removing the battery,
disconnect the negative (-) cable first.
•
To install a battery, MAKE SURE that the
positive (+) cable is connected first and that
the negative terminal is connected to ground.
Reverse polarity will destroy the rectifier
diodes in the alternator.
ALTERNATOR
If the battery charge warning light illuminates,
indicating that the alternator is not charging the
battery, check the fan belt and the wiring
connections. If these items are in satisfactory
condition and the warning light continues to
indicate no charge, consult your SHIBAURA
Dealer.
3-19
LUBRICATION AND MAINTENANCE
FUSE BLOCK
A BC D E F
The fuse block, is located on the left side of the
mower compartment. Always replace blown
fuses with the size specified for that circuit.
1
Fuse size
10 amp
2
10 amp
3
4
5
10 amp
20amp
20amp
6
20amp
Circuit protected
Temperature gauge, fuel gauge
Fuel pump, monitor lamp,
Alarm buzzer & relay
Head lamp, meter back light,
stop solenoid, safety SW,
starter, cruise control (opt.)
Spare
Cellular-phone socket
Auxiliary P.T.O
Wark lamp (opt.)
Back buzzer (opt.)
Spare
FUSE BLOCK
FUSIBLE LINK
A fusible link wire A is used to protect the
mower’s entire electrical system. If too much
amperage passes through this wire it will melt
down so that it will no longer allow current to
pass (similar to the way a fuse works). The
fusible link wire is a red wire that goes from the
starter terminal to a connector that links into the
main wiring harness.
A
To replace the fusible link wire:
1. Disconnect the negative battery cable from
the battery.
2. Unplug the connector linking the wire to the
main wiring harness.
ELECTRICAL SYSTEM PROTECTION
1. Fusible Link
3. Remove the old fusible link wire from the
starter terminal.
4. Replace the old fusible link wire with a new
one-first attaching to starter terminal, and
then connecting into the main wire harness.
IMPORTANT: Always replace the fusible link wire
with the appropriate fusible link wire for this
Mower (part No. 385603370).
3-20
LUBRICATION AND MAINTENANCE
HEAD LAMP
A
If a head lamp fails to operate, the bulb must be
replaced. To change the bulb:
1. Pull out the lower cover A frontward and
remove it.
2. Turn the socket anti-clockwise and remove
the socket from the headlamp housing.
3. Remove the bulb.
4. Install a new bulb in the socket and install the
socket with bulb in the housing.
HEADLAMP BULB REPLACEMENT
1. Front Cover
Bulb
5. Install the front cover.
Head Lamp Bulb Type
JIS S25 BA15 12V 23W
(Part No. 385120700)
INSTRUMENT LIGHTS
To change a burned out instrument bulb:
1. Remove lower cover.
2. Remove 4 screws from the dashboard.
3. Remove the front cover of the dashboard.
4. Turn the bulb together with the socket half a
turn counterclockwise and pull it out.
5. Replace the bulb with new one and return the
valve and socket to the original place.
INSTRUMENT PANEL AND WARNING LIGHTS
Bulbs
Indicator Bulb Type
(Q’ty 5) JIS T6.4 14V 3W
(Part No. 385470301)
(Q’ty 1) JIS T5 13.5V 2W
(Part No. 385470302)
3-21
LUBRICATION AND MAINTENANCE
BATTERY
The CM mower is equipped with a BCI group
35, 12-bolt battery with a minimum cold
cranking ability of 490 amps at-18°C (0°F)
Make sure the battery connections are tight and
free of corrosion. A solution of baking soda and
water may be used to wash the outside surface
and terminals of the battery when necessary.
However, make sure the solution does not get
inside the battery. After cleaning, wash the
battery with clean water, then apply a small
amount of petroleum jelly to the terminals to
prevent corrosion.
BATTERY
In freezing temperatures, a good battery charge
must be maintained. If the battery becomes
discharged or run down, the electrolyte
becomes weak and may freeze, causing
damage to the case. If you must add water, use
distilled water. Add the water just before using
the tractor so that the water will mix with the
electrolyte during the charging process, thus
preventing the water from freezing.
To determine the battery charge, check the
specific gravity of the electrolyte.
Checking the Electrolyte Level
NOTE: Check the battery electrolyte level
after every 50 hours of operation.
WARNING:
ALWAYS
CHECK
THE
ELECTROLYTE LEVEL WITH THE MOWER
ENGINE OFF, AS AN EXPLOSIVE GAS IS
PRODUCED INSIDE THE BATTERY WHEN
THE ALTERNATOR IS CHARGING. DO NOT
USE AN EXPOSED FLAME AND DO NOT
SMOKE WHEN CHECKING THE BATTERY
ELECTROLYTE LEVEL.
To check the battery electrolyte level:
1. Clean the top of the battery, then remove the
vent plugs.
3. Install the vent plug after making sure the
vent holes are not blocked. At below freezing
temperatures, run the engine for a period of
time after adding water, allowing the battery
to charge, which prevents the water form
freezing.
2. Add distilled water if the electrolyte level is
low. The level is correct when the liquid is
6.35 mm (1/4”) above the plates.
NOTE: Keep distilled water in a
nonmetallic container that is clean and
well-covered.
3-22
LUBRICATION AND MAINTENANCE
MAINTENANCE AND INSPECTION OF
THE ROLLOVER PROTECTIVE
STRUCTURE (ROPS)
NOTE: Inspect the ROPS after the first 20
hours of operation. Following the initial
inspection, check the ROPS after every 500
hours of operation or every six months,
whichever comes first.
1. Check the torque of the ROPS mounting
bolts, A. Tighten the bolts to the correct
torque of 97 N·m if necessary.
A
LIFT SIDE ROPS MOUNTING BOLTS
2. Inspect the operator’s seat and the mounting
parts for the seat belt. Tighten the bolts, A,
to the correct torque of 50.0 N·m if necessary
and replace parts that show wear or damage.
POSSIBLE DAMAGE TO THE ROPS
If the unit has rolled over or the ROPS has been
in some other type of accident (such as hitting
an overhead object during transport), the ROPS
must be replaced to retain the best protection.
A
SEAT BELT MOUNTING BOLTS
Following an accident, check the ROPS, the
operator’s seat, and the seat belt and seat belt
mountings for possible damage, Before
operating the machine, replace all damaged
parts.
IMPORTANT: Do not attempt to weld or
straighten the ROPS.
WARNING: IF THE ROPS OR CAB IS
REMOVED OR REPLACED, MAKE SURE
THAT THE PROPER HARDWARE IS USED
AND THE RECOMMENDED TORQUE
VALUES ARE APPLIED TO THE ATTACHING
BOLTS.
WARNING: ALWAYS PULL FROM THE
MOWER DRAWBAR. NEVER ATTACH
CHAINS, ROPES, OR CABLES TO THE
ROPS OR CAB FOR PULLING PURPOSES
OR THE MOWER WILL TIP BACKWARDS.
WARNING: ALWAYS WEAR YOUR SEAT
BELT UNLESS THE MOWER IS NOT
EQUIPPED WITH A ROPS OR SAFETY CAB.
IN THIS CASE, THE SEAT BELT SHOULD
NEVER BE WORN.
3-23
LUBRICATION AND MAINTENANCE
TIRES
•
NEVER INFLATE TO OVER 240 kPa (2.4 bar)
TO SEAT BEADS. If beads have not been
seated by the time pressure reaches 240
kPa (2.4 bar), deflate the assembly,
reposition the tire on the rim, relubricate both
tire bead and rim flanges, and reinflate.
Inflation beyond 240kPa (2.4bar) with
unseated beads may break the bead or rim
with explosive force sufficient enough to
cause serious injury.
•
After seating the beads, adjust inflation
pressure to recommended operating
pressure.
•
Do not inflate a tire unless the rim is mounted
on the Mower or is secured so that will not
move if the tire or rim should suddenly fail.
•
Do not weld, braze, otherwise repair, or use
a damaged rim.
•
Never attempt tire repairs on a public road or
highway.
•
Use jack stands or other suitable blocking to
support the Mower while repairing tires.
•
Ensure jack has adequate capacity to lift
your Mower.
•
Place jack on a firm, level surface.
•
Do not place any part of your body beneath
the Mower or start the engine while the
Mower is on the jack.
•
Before adding ballast to the tires, refer to the
information in this manual on“Mower
Weighting.”
NOTE: Check tire pressure after every 50
hours of operation or weekly.
Tire inflation pressure affects the amount of
weight a tire can carry. Check the air pressure in
your Mower tires, refer to“T ire Inflation
Pressures”. If necessary, adjust the tire
pressure, being careful not to overinflate or
underinflate. Observe the following guidelines:
•
•
•
Do not inflate a tire above the maximum
pressure shown on the tire. If the tire is not
marked, do not exceed the maximum
pressure shown in the Tire Inflation chart
found in this manual.
Do not reinflate a tire that has been run flat or
seriously underinflated until the tire has been
inspected for damage by a qualified person.
When checking tire pressure, inspect the tire
for damaged sidewalls and tread cuts.
Neglected damage leads to early tire failure.
WARNING:INFLATING OR SERVICING TIRES
CAN BE DANGEROUS. TRAINED PERSONNEL SHOULD SERVICE AND/OR
MOUNT TIRES WHENEVER POSSIBLE.
If you must inflate or service tires, follow these
safety precautions to avoid injury or fatality.
•
Make sure the rim is clean and free of rust.
•
Lubricate both tire beads and rim flanges
with soap solution. Do not use oil or grease.
•
Use a clip-on tire chuck with a remote hose
and gauge. This allows the operator to stand
clear of the tire while inflating.
CM TIRE INFLATION PRESSURS
Inflation Pressure
kPa
80
100
120
140
160
180
190
200 220
240
260
bar
0.8
1.0
1.2
1.4
1.6
1.8
1.9
2.0
2.2
2.4
2.6
24x13.00-12 6PR
kg
620 680
785
840
910
975 1020
-
-
-
-
20x 8.00-10 6PR
kg
270 300
320
370
400
430
510
530
Tire Size
445
460 485
NOTE: Do not underinflate or overinflate tires. Do not exceed maximum inflation pressure listed.
3-24
LUBRICATION AND MAINTENANCE
WHEEL BOLT TORQUE
Tighten the wheel bolts to the specified torque
anytime the wheel assembly is removed from
the mower or the wheel bolts are loosened.
Front Wheel Torque
132±16 N·m
NOTE: Torque for the front wheels is the
same for 2WD and FWD axles.
Rear Wheel Torque
50±5.9 N·m
Check wheel bolt torque daily until torque
stabilized.
PTO CONTROL LEVER ADJUSTMENT
Note: Adjust the PTO control lever linkage
every 100 hours.
1. The PTO control lever must move easily (soft),
through the first 20% of travel. The remaining
80% of control lever travel must have a
resistance (hard).
3-25
LUBRICATION AND MAINTENANCE
2. At the point of resistance (20% into the
control lever stroke), attach a pull scale to the
PTO control lever. A reading of 5 kgf (11.5
Lbs.) is correct at the point of resistance (20%
into the control lever stroke). A reading of 1213 kg (26.4-28.6 lbs.) is correct at the full
engagement point (the final 80% of control
lever travel). If the control lever stroke is not
correct, or the amount of resistance on the
pull scale at the point of resistance is
incorrect, proceed to step 3.
NOTE: The adjustment bolt on the PTO
adjustment linkage uses left-hand threads.
3. Loosen the locknuts, 1 and 2, on the PTO
adjustment linkage.
4. Turn the adjustment rod, 3 and recheck the
resistance on the pull scale and the control
lever stroke. Repeat this step until the control
lever stroke and the pull resistance are
correct.
5. Tighten the locknuts, 1 and 2.
STORING THE MOWER UNIT
A CM Mower that is to be stored for an
extended period should be protected during
storage. The following is a suggested list of
operations to be carried out.
4. Lubricate the unit. Drain and refill the
transmission, hydraulic system and front axle
with new oil. Drain the engine oil and refill
with new lubricating oil. Also clean the air
cleaner.
1. Thoroughly clean the unit. Use touch-up
paint where necessary to prevent rust.
5. If the CM Mower is stored or removed from
operation for an extended period, special
precautions should be taken to protect the
fuel injection pump and the injector nozzle
against corrosion and gumming during the
storage period.
2. Check the unit for worn or damaged parts.
Install new parts as required.
3. Raise the lift arms hydraulically to their fully
raised position so the lift cylinder is in a fully
retracted position.
•
This will protect the cylinder rod surfaces
from corrosion.
3-26
Before storing, the fuel system should be
flushed with a special oil, a quantity of which
will remain in the system when the engine is
shut down for storage.
LUBRICATION AND MAINTENANCE
•
•
1. Inflate the tires to the recommended
pressures, and remove the blocking.
Special diesel fuel system flushing oils are
available from most oil companies. If special
flushing oil is not readily obtainable, mix 0.5
liters of SAE 10 non-detergent engine oil with
10 liters or No. 2 diesel fuel.
2. Check the oil level in the engine crankcase,
the common sump (for the hydraulic lift,
transmission, front axle and power steering),
and rear axle.
Drain the fuel tank and pour 7 liters of the
special flushing oil (or lubricating mixture) in
the fuel tank.
3. Install a fully charged battery.
•
•
Run the engine for 10 minutes to ensure
complete distribution of the special oil
through the injection pump and fuel injectors.
There is no need to remove the injector
nozzles.
4. Check the cooling system for proper level of
50/50 solution of antifreeze and clear water.
5. Start the engine and allow it to idle a few
minutes. Be sure the engine is receiving
lubrication and that each control is
functioning correctly.
Fill the fuel tank with No. 1 diesel fuel.
IMPORTANT: Do no use No. 2 diesel fuel for
winter storage because of wax separation and
setting at low temperature.
6. Drive the unit without a load and check to be
sure its operating satisfactorily.
6. Open the drain valve of the radiator and the
engine block. Flush the system, close the
drain valve, and fill with a 50/50 solution of
permanent antifreeze and clear water.
CAUTION: TO AVOID PERSONAL INJURY:
7. Remove the battery and clean it thoroughly.
Be sure that it is fully charged, and that the
electrolyte is at the proper level. Place it in
storage in a cool, dry place above freezing
temperature. The battery should be charged
periodically during storage.
8. Place blocking under the front and rear axles
to remove the weight from the tires.
A Commercial Mower that has been placed in
storage should be completely serviced in the
following manner before using.
3-27
•
TO REDUCE FIRE HAZARDS, ALLOW
THE ENGINE AND EXHAUST SYSTEM TO
COOL BEFORE STORING THE VEHICLE
IN AN ENCLOSED SPACE OR NEAR
COMBUSTIBLE MATERIALS.
•
DO NOT CLEAN THE MACHINE WITH
ENGINE RUNNING.
•
WHEN STORING, REMOVE THE KEY
FROM THE KEY SWITCH TO AVOID
UNAUTHORISED PERSONS FROM
OPERATING THE MACHENE AND
GETTING INJURED.
SECTION 4
SPECIFICATION
ENGINE
Type …………………………………
Engine Gross Horsepower …………
Cylinders ……………………………
Bore …………………………………
Stroke ………………………………
Displacement ………………………
Compression Ratio …………………
Firing Order …………………………
Low idle Speed ……………………
Rated Speed ………………………
Valve Clearance (Cold):
intake………………………………
Exhaust ……………………………
CM314
CM374
Diesel
22.4 kw (30HP)
3
84 mm
90 mm
1.496 liters
22.2 : 1
1- 2- 3
1200 rpm
2700 rpm
Diesel
26.8 kw ( 36HP)
3
84 mm
100 mm
1.662 liters
23.1 : 1
1- 2- 3
1200 rpm
2700 rpm
0.20 mm
0.20 mm
0.20 mm
0.20 mm
50.5 liters
5.1 liters
50.5 liters
5.3 liters
4.8 liters
5.0 liters
4.8 liter
5.0 liters
21.0 liters
21.0 liters
2.3 liters
2.3 liters
Pressurized Liquid
with Re circulating
Bypass
Pressurized Liquid
with Re circulating
By pass
Centrifugal
V- Belt
Centrifugal
V- Belt
10 mm-15 mm
when 9-11 kg thumb
pressure is applied
midway between
belt pulleys
10 mm-15 mm
when 9-11 kg thumb
pressure is applied
midway between
belt pulleys
360 mm
360 mm
80~84 °C
93 °C
0.9 bar
80~84 °C
93 °C
0.9 bar
CAPACITIES
Fuel Tank ……………………………
Cooling System ……………………
Engine Crankcase:
Less Filter…………………………
With Filter Change ………………
Front Axle &
Transmission ……………………
(includes Hydraulics)
Rear Axle
Center Case & Final Case ………
COOLING SYSTEM
Type …………………………………
Water Pump:
Type ………………………………
Drive ………………………………
Belt
Deflection…………………………
Fan Diameter ………………………
Thermostat :
Start to Open ……………………
Fully Open ………………………
Radiator Cap ………………………
4-1
SPECIFICATION
ELECTRICAL SYSTEM
Alternator ……………………………
Battery ………………………………
12-volt, Heavy Duty,40 amps
12-volt, 53.9 amp hour rating
w / negative ground, 490 CCA
Stating Motor ………………………
Solenoid Pre-Engaged Reduction
FUEL SYSTEM
Fuel Type ……………………………
Type of Fuel to Use if Above 5°C …
Type of Fuel to Use if Below 5°C …
Injection Pump:
Type …………………………………
Timing ………………………………
Diesel
No.2-Diesel
Cetane Rating:
Minimum 40
No.1-Diesel
Cetane Rating:
Minimum 40
Diesel
No.2-Diesel
Cetane Rating:
Minimum 40
No.1 -Diesel
Cetane Rating:
Minimum 40
In- Line
21.0° BTDC
In-Line
21.0° BTDC
Wet Disc Final Brake
155 mm x 123 mm
155 mm x 123 mm
BRAKES
Type …………………………………
Disc 2 Diameter ……………………
STEERING
Type …………………………………
Lock-to-Lock: ………………………
Toe- in ………………………………
Turning Radius
Inside Front tire( w/o Brakes)……
R 2.1
0~5 mm
Tilt. Telescopic Hyd Power
L 2.5
0~5 mm
750 mm
750 mm
Wet multi plates
25.4 Φ spline
2209 rpm
15.7 kw (21 HP)
Wet multi plates
25.4 Φ spline
2209 rpm
18.8 kw ( 25.2 HP)
Type …………………………………
Shaft: PTO …………………………
PTO RPM (Engine Speed at 2700 rpm)
Horsepower PTO (Observed ) ……
Live
20 Φ 6 mm key way
2700 rpm
7.4 kw (10 HP)
Live
20 Φ 6 mm key way
2700 rpm
7.4 kw (10 HP)
HYDRAULIC LIFT SYSTEM
Type …………………………………
Pump Type …………………………
Pump Capacity (at Eng 2700 rpm)
System Relief Valve Setting ………
Open Center
Gear
9.1 l / min
9.8 Mpa
Open Center
Gear
9.1 l / min
9.8 Mpa
FRONT POWER TAKE - OFF
Type …………………………………
Shaft: PTO …………………………
PTO RPM (Engine Speed at 2700 rpm)
Horsepower PTO (Observed ) ……
MID POWER TAKE - OFF
4-2
SPECIFICATION
TRANSMISSION
Type …………………………………
HST with 2 Range Gear Drive
4 WD Drive …………………………
Auto 4WD or Full 4WD
Speed
With STD Tire at 2700 rpm Engine Speed
Gear position
Forward ; L ………………………
0~10.0 Km/h
0~10.0 Km/h
Forward ; H ………………………
0~24.5 Km/h
0~24.5 Km/h
Reverse ; L…………………………
Reverse ; H ………………………
60%~70% of Forward Speeds
60%~70% of Forward Speeds
TIRES
FRONT ; STD ………………………
REAR ; STD ………………………
24 x13.00-12 6PR
20 x 8.00-10 6PR
24 x13.00-12 6PR
20 x 8.00-10 6PR
132 ± 16 N-m
50 ± 5.9 N-m
132 ± 16 N-m
50 ± 5.9 N-m
157 ± 9.8 N-m
50 ± 5.9 N-m
157 ± 9.8 N-m
50 ± 5.9 N-m
ALENGTH …………………………
2145 mm
2145 mm
BWHEEL BASE ……………………
1250 mm
1250 mm
CHEIGHT:
Center of Steering Wheel (return position)
STD Tire …………………………
1415 mm
1415 mm
DTop of ROPS
STD Tire
Up Position ………………………
Down Position ……………………
1935 mm
1225 mm
1935 mm
1225 mm
1190 mm
1190 mm
1305 mm
1365 mm
1305 mm
1365 mm
150 mm
150 mm
WHEEL BOLT TORQUES
Front ; STD …………………………
Rear ; STD …………………………
ROPS ATTACHING BOLT TORQUES
ROPS to Lower ROPS ……………
Seat Belt ……………………………
GENERAL DIMENSION
EWIDTH
Rear Axle Outside to Outside:
Dished In only …………………
Front Axle Outside to outside
STD tire
Dished In ………………………
Dished Out ……………………
FMINIMUM GROUND CLEARANCE:
STD Tires ………………………
4-3
SPECIFICATION
WHEEL TREAD SETTNGS:
FRONT:
STD Tire
Dished In …………………………
Dished Out…………………………
REAR STD …………………………
990 mm
1050 mm
995 mm
990 mm
1050 mm
995 mm
755 kg
770 kg
WEIGHT:
STD Tire with ROPS: ………………
CAST IRON WEIGHTS
Rear End (Optional) ………………
30 kg x 5 (max)
4-4
30 kg x 5 (max)
SPECIFICATION
TEST DATA
SOUND MEASUREMENTS
Sound Power
Cutting Attachment : CM-180P
CM314 ・・・・・・・105dB(A) @2100 rpm
CM374 ・・・・・・・105dB(A) @2100 rpm
Cutting Attachment : CM-180L
CM314 ・・・・・・・105dB(A) @2100 rpm
CM374 ・・・・・・・105dB(A) @2100 rpm
Cutting Attachment : CM-150P
CM314 ・・・・・・・105dB(A) @2400 rpm
CM374 ・・・・・・・105dB(A) @2400 rpm
Cutting Attachment : SCM60S
CM314 ・・・・・・・105dB(A) @2500 rpm
CM374 ・・・・・・・105dB(A) @2500 rpm
Sound Pressure (at operators ear)
Cutting Attachment : CM-180P
CM314・・・・・・・・87dB(A) @2100 rpm
CM374・・・・・・・・87dB(A) @2100 rpm
Cutting Attachment : CM-180L
CM314・・・・・・・・85dB(A) @2100 rpm
CM374 ・・・・・・・85dB(A) @2100 rpm
Cutting Attachment : CM-150P
CM314・・・・・・・・86dB(A) @2400 rpm
CM374・・・・・・・・87dB(A) @2400 rpm
Cutting Attachment : SCM60S
CM314・・・・・・・・86dB(A) @2500 rpm
CM374・・・・・・・・87dB(A) @2500 rpm
VIBRATION
Whole body ・・・・・below 0.32m/s2
Hand / arm ・・・・・below 2.5m/s2
Vibration evaluated base on EN836 (Annex G)
(without grasscollector)
4-5
Wiring Diagram
4-6
INDEX
Key Switch ………………………………………2-5
Lift Control ………………………………………2-10
Lighting……………………………………………2-5
Lubrication ………………………………………3-3
Lubrication Fittings ………………………………3-3
Lubrication and Maintenance …………………3-1
Lubrication and Maintenance Chart ……………3-2
Maintenance and Lubrication …………………3-1
Maintenance and Lubrication Chart ……………3-2
Maintenance and Storage ………………………0-4
Mower Hydraulics ………………………………2-15
Oil
Engine …………………………………………3-7
Final Reduction Gear Case …………………3-15
Front Axle Differential Case …………………3-12
Hydraulic System ……………………………3-12
Power Steering ………………………………3-12
Rear Axle ………………………………………3-15
Transmission …………………………………3-12
Oil filter, Hydraulic System ………………………3-14
Operation …………………………………………0-3,
2-1
Operating the Mower ……………………………0-3
Operation of the PTO ……………………………2-16
Overheat Alarm Buzzer …………………………2-21
Parking Brake Control …………………………2-6
Predelivery Service ………………………………4-11
Preparation ………………………………………0-2
PTO Control Lever ………………………………2-9
PTO, Operation …………………………………2-16
Range Lever, H.S.T ……………………………2-8
Rear Axle …………………………………………3-15
Reclining Lever …………………………………2-1
Recommened Lubricants ………………………3-3
Refueling the Mower ……………………………3-5
ROPS ……………………………………………2-2,
3-23
Safety ……………………………………………0-2
Safety Decals ……………………………………0-5
Safety Frame (ROPS) ……………………………2-2
Seat ………………………………………………2-1
Seat Belt …………………………………………2-1
Seat Belt Anchor …………………………………2-21
Seat Lifting ………………………………………3-12
Service ACCES …………………………………3-6
Side PTO …………………………………………2-22
Sound Measurements …………………………4-5
Specifications ……………………………………4-1
Speed Control, H.S.T ……………………………2-7
Starting the Engine ………………………………2-12
Air Cleaner ………………………………………3-10
Alternator …………………………………………3-19
Audible Backup Alram …………………………2-23
Armrest……………………………………………2-1
Battery ……………………………………………3-22
Bleeding the Fuel System ………………………3-9
Brake Controls …………………………………2-6
Brake Pedals ……………………………………2-6
Break-in Procedures ……………………………2-11
Canopy……………………………………………2-22
Cast Iron Weights ………………………………2-20
Cellular Phone Socket …………………………2-21
Cold Weather Starting …………………………2-13
Contents …………………………………………0-1
Controls and Instruments ………………………2-1
Cooling System …………………………………3-16
Diesel Fuel ………………………………………3-3
Differential Control ………………………………2-17
Driving the Mower ………………………………0-3,
2-20
Dual Pedal Turning Brake Kit……………………2-23
Engine ……………………………………………3-7
Engine Oil…………………………………………3-7
Engine, Starting …………………………………2-12
Engine, Stopping…………………………………2-14
Fan Belt …………………………………………3-18
Final Reduction Gear Case ……………………3-15
Foot Pedal, H.S.T ………………………………2-7
Front Axle differential Case ……………………3-12
Fuel Filter …………………………………………3-8
Fuel Shutoff Valve ………………………………3-8
Fuse Block ………………………………………3-20
Fusible Link ………………………………………3-20
General Information ……………………………1-1
General Maintenance ……………………………3-16
Hardware Torque Charts ………………………1-2
Head Lamp ………………………………………3-21
Head Light Switch ………………………………2-5
Hood Latch ………………………………………3-6
Hydraulic Lift Control ……………………………2-10
Hydraulic Lift System ……………………………2-18
Hydraulic System Oil ……………………………3-12
Hydraulic System Oil filter ………………………3-14
Hydrostatic Transmission ………………………2-15
Identification Plate ………………………………1-1
Instruction Decals ………………………………0-7
Instruments and Controls ………………………2-1
Instrument Lights ………………………………3-21
Instrument Panel …………………………………2-4
International Symbols ……………………………1-3
4-7
Steering Wheel …………………………………2-2
Stopping the Engine ……………………………2-14
Storing the Mower Unit …………………………3-25
Symbols …………………………………………1-3
Test Data …………………………………………4-5
Throttle Controls …………………………………2-6
Tightening Torque ………………………………1-2
Tire Pressure ……………………………………2-25
Tires ………………………………………………3-24
Transmission, Hydrostatic ………………………2-15
Transmission Oil …………………………………3-12
Transmission PTO Control ………………………2-7
Transmission Range Lever………………………2-8
Vibration …………………………………………4-5
Warning Lights …………………………………2-4
Warm Weather Starting …………………………2-12
Weighting …………………………………………2-20
Wheel Bolt Torque ………………………………3-25
Wiring Diagram …………………………………4-5
Work Lights ………………………………………2-22
4-8
PRE-DELIVERY SERVICE
CHECK AND ADJUST AS REQUIRED
INOPERATIVE SERVICE CHECKS
1. Tire pressure ・・・・・・・・・・・・・・・・・・・・・・□
2. Air cleaner element and hose
connections ・・・・・・・・・・・・・・・・・・・・・・・□
3. Radiato coolant level ・・・・・・・・・・・・・・・・・□
4. Fan belt tension ・・・・・・・・・・・・・・・・・・・・□
5. BAttery cleanliness, vent openings,
electrolyte level, and charge ・・・・・・・・・・・・・□
6. Engine oil level ・・・・・・・・・・・・・・・・・・・・・□
7. Transmission and front axle oil level ・・・・・・・・□
8. Brake adjustment and pedal
equalizaion ・・・・・・・・・・・・・・・・・・・・・・・□
9. Front whell hub bolts for tightness ・・・・・・・・・□
10. Rear wheel spindle nuts for tightness ・・・・・・・□
11. Rear wheel toe-in ・・・・・・・・・・・・・・・・・・・□
12. Fuel level ・・・・・・・・・・・・・・・・・・・・・・・・・□
13. Sheet metal and paint condition ・・・・・・・・・・□
14. Drain diesel fuel filter ・・・・・・・・・・・・・・・・・□
SAFETY ITEMS CHECKS
1.
2.
3.
4.
Safety decals installed ・・・・・・・・・・・・・・・・□
Neutral start switch operation ・・・・・・・・・・・・□
Parking brake & latch operation ・・・・・・・・・・□
Operator's Manual ・・・・・・・・・・・・・・・・・・・□
INSPECTION PERFORMED
WARRANTY EXPLAINED
MODEL
OWNER'S SIGNATURE
DATE
PERFORMANCE SERVICE CHECKS
All opeating checks are to be performed with the Front
Mower at normal operating temperature.
1. Lights and instruments for proper
operation, and fuel shut down
with key switch OFF ・・・・・・・・・・・・・・・・・・□
2. Fluid and oil leaks ・・・・・・・・・・・・・・・・・・・□
3. Maximum no-load speed and idle
speed adjustments ・・・・・・・・・・・・・・・・・・□
4. PTO engagement and
disengagement ・・・・・・・・・・・・・・・・・・・・・□
5. Hydraulic system:
・Lift control lever operation ・・・・・・・・・・・・□
・Weight transfer valve operation ・・・・・・・・・□
6. Full-time-FWD operation ・・・・・・・・・・・・・・・□
7. Operation of HST ・・・・・・・・・・・・・・・・・・・□
8. HST speed control level ・・・・・・・・・・・・・・・□
9. Operation of safety devices:
・PTO disengagement system ・・・・・・・・・・・□
・Engine stop system (seat)・・・・・・・・・・・・・□
SERIAL NO. DEALER'S SIGNATURE
DATE
50-HOUR SERVICE
CHECK AND ADJUST AS REQUIRED
INOPERATIVE SERVICE CHECKS
1.
2.
3.
4.
5.
6.
7.
8.
9.
10.
11.
12.
13.
Tire pressure ・・・・・・・・・・・・・・・・・・・・・・□
Check air cleaner hose connection ・・・・・・・・□
Replace diesel fuel filter(s) ・・・・・・・・・・・・・・□
Tighten injector line fittings ・・・・・・・・・・・・・・□
Radiato coolant level ・・・・・・・・・・・・・・・・・□
Fan belt tension ・・・・・・・・・・・・・・・・・・・・□
Battery cleanliness and vent openings,
electrolyte level and charge ・・・・・・・・・・・・・□
All electrical cables, terminals
and wires ・・・・・・・・・・・・・・・・・・・・・・・・□
Drain and refill engine oil ・・・・・・・・・・・・・・・□
Replace engine oil filter ・・・・・・・・・・・・・・・・□
Transmission and front axle oil level ・・・・・・・・□
Rear axle oil level ・・・・・・・・・・・・・・・・・・・・□
Replace hydraulic system oil filter ・・・・・・・・・□
OPERATIVE SERVICE CHECKS
OPERATIVE SERVICE CHECKS
1. Lights and instruments for proper
operation, and fuel shut down
with key switch OFF ・・・・・・・・・・・・・・・・・・□
2. Fluid and oil leaks ・・・・・・・・・・・・・・・・・・・□
3. Maximum no-load speed and idle
speed adjustments ・・・・・・・・・・・・・・・・・・□
4. Starting and starter safety switches ・・・・・・・・□
5. Hydraulic system:
・Lift control lever operation ・・・・・・・・・・・・□
6. Operation of safety devices:
・PTO disengagement system ・・・・・・・・・・・□
・Engine stop system ・・・・・・・・・・・・・・・・□
1. Engine operation including throttle
and governor operation・・・・・・・・・・・・・・・・□
2. HST tansmission ・・・・・・・・・・・・・・・・・・・・□
3. Steering control ・・・・・・・・・・・・・・・・・・・・□
4. Differential lock engagement and
disengagement ・・・・・・・・・・・・・・・・・・・・・□
5. Brake action ・・・・・・・・・・・・・・・・・・・・・・□
6. All optional equipment and
accessories ・・・・・・・・・・・・・・・・・・・・・・・□
INSPECTION PERFORMED
SERIAL NO. MODEL
OWNER'S SIGNATURE
DATE
DEALER'S SIGNATURE
4-9
DATE
PRE-DELIVERY SERVICE
CHECK AND ADJUST AS REQUIRED
INOPERATIVE SERVICE CHECKS
1. Tire pressure ・・・・・・・・・・・・・・・・・・・・・・□
2. Air cleaner element and hose
connections ・・・・・・・・・・・・・・・・・・・・・・・□
3. Radiato coolant level ・・・・・・・・・・・・・・・・・□
4. Fan belt tension ・・・・・・・・・・・・・・・・・・・・□
5. BAttery cleanliness, vent openings,
electrolyte level, and charge ・・・・・・・・・・・・・□
6. Engine oil level ・・・・・・・・・・・・・・・・・・・・・□
7. Transmission and front axle oil level ・・・・・・・・□
8. Brake adjustment and pedal
equalizaion ・・・・・・・・・・・・・・・・・・・・・・・□
9. Front whell hub bolts for tightness ・・・・・・・・・□
10. Rear wheel spindle nuts for tightness ・・・・・・・□
11. Rear wheel toe-in ・・・・・・・・・・・・・・・・・・・□
12. Fuel level ・・・・・・・・・・・・・・・・・・・・・・・・・□
13. Sheet metal and paint condition ・・・・・・・・・・□
14. Drain diesel fuel filter ・・・・・・・・・・・・・・・・・□
SAFETY ITEMS CHECKS
1.
2.
3.
4.
Safety decals installed ・・・・・・・・・・・・・・・・□
Neutral start switch operation ・・・・・・・・・・・・□
Parking brake & latch operation ・・・・・・・・・・□
Operator's Manual ・・・・・・・・・・・・・・・・・・・□
INSPECTION PERFORMED
WARRANTY EXPLAINED
MODEL
OWNER'S SIGNATURE
DATE
PERFORMANCE SERVICE CHECKS
All opeating checks are to be performed with the Front
Mower at normal operating temperature.
1. Lights and instruments for proper
operation, and fuel shut down
with key switch OFF ・・・・・・・・・・・・・・・・・・□
2. Fluid and oil leaks ・・・・・・・・・・・・・・・・・・・□
3. Maximum no-load speed and idle
speed adjustments ・・・・・・・・・・・・・・・・・・□
4. PTO engagement and
disengagement ・・・・・・・・・・・・・・・・・・・・・□
5. Hydraulic system:
・Lift control lever operation ・・・・・・・・・・・・□
・Weight transfer valve operation ・・・・・・・・・□
6. Full-time-FWD operation ・・・・・・・・・・・・・・・□
7. Operation of HST ・・・・・・・・・・・・・・・・・・・□
8. HST speed control level ・・・・・・・・・・・・・・・□
9. Operation of safety devices:
・PTO disengagement system ・・・・・・・・・・・□
・Engine stop system (seat)・・・・・・・・・・・・・□
SERIAL NO. DEALER'S SIGNATURE
DATE
50-HOUR SERVICE
CHECK AND ADJUST AS REQUIRED
INOPERATIVE SERVICE CHECKS
1.
2.
3.
4.
5.
6.
7.
8.
9.
10.
11.
12.
13.
Tire pressure ・・・・・・・・・・・・・・・・・・・・・・□
Check air cleaner hose connection ・・・・・・・・□
Replace diesel fuel filter(s) ・・・・・・・・・・・・・・□
Tighten injector line fittings ・・・・・・・・・・・・・・□
Radiato coolant level ・・・・・・・・・・・・・・・・・□
Fan belt tension ・・・・・・・・・・・・・・・・・・・・□
Battery cleanliness and vent openings,
electrolyte level and charge ・・・・・・・・・・・・・□
All electrical cables, terminals
and wires ・・・・・・・・・・・・・・・・・・・・・・・・□
Drain and refill engine oil ・・・・・・・・・・・・・・・□
Replace engine oil filter ・・・・・・・・・・・・・・・・□
Transmission and front axle oil level ・・・・・・・・□
Rear axle oil level ・・・・・・・・・・・・・・・・・・・・□
Replace hydraulic system oil filter ・・・・・・・・・□
OPERATIVE SERVICE CHECKS
OPERATIVE SERVICE CHECKS
1. Lights and instruments for proper
operation, and fuel shut down
with key switch OFF ・・・・・・・・・・・・・・・・・・□
2. Fluid and oil leaks ・・・・・・・・・・・・・・・・・・・□
3. Maximum no-load speed and idle
speed adjustments ・・・・・・・・・・・・・・・・・・□
4. Starting and starter safety switches ・・・・・・・・□
5. Hydraulic system:
・Lift control lever operation ・・・・・・・・・・・・□
6. Operation of safety devices:
・PTO disengagement system ・・・・・・・・・・・□
・Engine stop system ・・・・・・・・・・・・・・・・□
1. Engine operation including throttle
and governor operation・・・・・・・・・・・・・・・・□
2. HST tansmission ・・・・・・・・・・・・・・・・・・・・□
3. Steering control ・・・・・・・・・・・・・・・・・・・・□
4. Differential lock engagement and
disengagement ・・・・・・・・・・・・・・・・・・・・・□
5. Brake action ・・・・・・・・・・・・・・・・・・・・・・□
6. All optional equipment and
accessories ・・・・・・・・・・・・・・・・・・・・・・・□
INSPECTION PERFORMED
SERIAL NO. MODEL
OWNER'S SIGNATURE
DATE
DEALER'S SIGNATURE
4-11
DATE
4-13
4-14