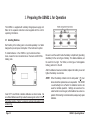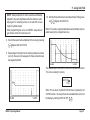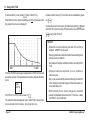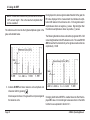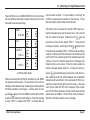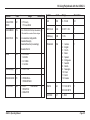
1
Operating Manual
for
Model USN52 L
Ultrasonic Flaw Detector
with
On Board Data Logger
Data Set Memory & High Resolution LCD Display
Part No. 021-002-140 Rev.F
Software Revision L5
Copyright 1998 Krautkramer
Important Notice
Important Notice
Training
Please read the following information prior
to use of any Krautkramer instruments.
The customer must provide for adequate
training of the operators to assure competence in the operation of the equipment and
in the associated factors. The operator must
be trained both in general ultrasonic testing
procedure and in the set-up and performance of a particular test or application.
The requirements for formalized training,
qualification, and certification of operators
are included, for example, in SNT-TC-1A,
and are referenced in many other industry
specifications.
General Warning
The correct and effective use of ultrasonic
test equipment requires the interaction of
three essential factors:
• The test equipment itself
•
•
The specific test applications
The operator
The principal purpose of this operating
manual will be to give instructions in the
basic set-up and functional operation of the
test equipment. Such information is covered in detail within the manual.
Other variable factors, some of which are
noted below, and the actions necessary to
control them, are the responsibility of the
customer/user. Details regarding these factors are beyond the scope of the operating
manual.
USN52 L Operating Manual
Ultrasonic Theory
Knowledge of soundwave propagation
theory, including the effects of velocity of
sound, attenuation, reflection, and the limitation of the sound beam must be understood by the operator.
Test Application Requirements
These include a definition of the test problem, selection of suitable techniques, adequate probes, proper couplant, evaluation
of discovered conditions in the test material, and the selection of acceptance or rejection limits. Knowledge of the probability
of occurrence of defective conditions is often based on experience as well as engineering knowledge of the system and its
stresses.
Customer engineers should supply specific
test application requirements to the operator.
Coverage and Location of Test
In ultrasonic testing, the information obtained instantaneously represents only the
data from within the limits of the sound
beam. Selection of test locations as well
as the degree of scanning or coverage of
the part, is based on customer knowledge
of expected defective areas, material being tested, environment and similar factors.
Geometry of the part, or presence of flaws
or other interfaces, may shadow certain
areas located deeper in the test material,
even though within the limits of the sound
beam, thus preventing detection of possible
conditions in the shadowed area.
Page 1
Important Notice
In testing extended areas beyond the expected sound beam path, extrapolations or
other assumptions are sometimes based
on statistical and other modifications of actual data obtained. Such results and their use
and interpretation are the sole responsibility of the user.
Flaw Size Evaluation
In present test practice there are basically
two methods of assessing flaws. If the diameter of the sound beam is smaller than
the extent of the flaw, then the beam can
be used to explore the boundaries of the
flaw to determine its area.
If, however, the diameter of the sound beam
is greater than the size of the flaw, the maximum echo response from the flaw must be
compared with the maximum echo response from an artificial flaw provided for
comparison purposes.
Flaw Boundary Method: The smaller the
diameter of the sound beam, the more accurately the boundaries can be determined.
Page 2
If, however, the sound beam is relatively
broad, the flaw area determination can differ from the actual. Care should be taken
to select a probe with sufficiently narrow
beam at the position of the flaw.
Echo Comparison Method: The echo from
a small natural flaw is usually smaller than
the echo from an artificial comparison flaw
of the same size. This is often due to irregularity or oblique orientation of the flaw surface. This fact should be considered when
evaluating flaw size to avoid underestimating size.
In cases of very jagged or fissured flaws,
e.g. shrink holes in castings, an echo may
not be detected. In such cases a different
method may be required, such as measuring loss of transmission through the piece.
When testing large parts, distance of the
flaw from the probe is significant. It is important to choose an artificial comparison
flaw that is as near as possible the same
distance as the flaw being assessed.
Ultrasound is subject to attenuation as it
passes through any material. Some materials attenuate less than others. However,
if the sound travels a long distance through
the medium, then even at low attenuation,
a large effect can result.
The danger here is that natural flaws may
be underassessed. Therefore, an estimate
should be made of the effect of attenuation
on test results and appropriate corrections
applied.
If the test part has a rough surface, part
of the incident sound energy will be scattered at the surface and lost to the test
instrument. The larger this scattering,
the smaller the echoes, and greater the
underestimation of detected flaws. It is important to make allowance for surface
roughness and apply a correction to observed echo heights.
USN52 L Operating Manual
Important Notice
Specifications and Procedures
The customer must understand and provide
for interpretation and compliance with the
specifications covering its work, generated
by such groups as in-house Quality Assurance, Technical Societies, Industry Groups,
or Government Agencies.
Ultrasonic Thickness Measurements
Ultrasonic thickness measurements are the
result of the mathematical product of the
velocity of sound in a material and the transit time of the soundwaves through the
material. The transit time is the data obtained by the ultrasonic equipment.
Velocity of Sound
The accuracy of ultrasonic thickness measurements and of flaw location depends to
a major degree on the velocity of sound
through the material. This velocity value is
dependent on characteristics of the material being tested, and is generally independent of the operation of the test instrument.
USN52 L Operating Manual
This manual describes means for calibrating the instrument and its internal calculations for the velocity of sound value of the
test material when it is known, or for finding
the velocity of sound empirically using test
blocks of the test material which are accessible for concurrent mechanical thickness measurement. No claim, explicit or
implied, is included as to the uniformity of
the velocity of sound throughout any given
part or batch of parts. Any non-uniformity
of velocity of sound in the test material may
result in erroneous thickness measurements.
Temperature Dependence
Velocity of sound is affected to varying degrees by the temperature of the material
through which the sound travels. When temperature variables are expected, frequent
checks must be made to maintain instrument calibration for the changing test conditions. Velocity changes due to temperature variation may affect the material being
inspected, transducer delay lines and other
equipment components.
Doubling of Thickness Readings
When measuring relatively thin walls, with
thicknesses below the minimum thickness
specified for a particular instrument/probe
combination, down to about half the specified minimum thickness, the first echo may
occur while the instrument is electronically
blocked to prevent false triggering. When
this occurs, under certain combinations of
thin wall dimensions, surface conditions, instrument, probe parameters, etc., the second echo or other echo signal combinations
may produce a readable signal. The instrument reading and apparent thickness are
up to about twice the actual value, resulting
in a condition that is sometimes called “doubling”.
Krautkramer instruments have conservative
specifications in this regard, which in most
cases will prevent misreadings. When using a A-scan readout, the condition is usually apparent to the trained operator. Readings using instruments with only analog or
digital meter indicators, in this thinner range,
should be further evaluated when the read-
Page 3
Important Notice
ing value is between the specification minimum and about twice that value. Confirmation of the real thickness can usually be
obtained using an ultrasonic flaw detector
with CRT presentation, suitably calibrated,
whereby individual echo signals can more
readily be identified and evaluated.
The following example shows graphically
the relationship of several thicknesses.
MINIMUM SPECIFIED THICKNESS FOR
INSTRUMENT/PROBE COMBINATION
MINIMUM
THICKNESS
MINIMUM
THICKNESS
TIMES 2
0
ELECTRONIC BLOCKING RANGE
PROBABLE MINIMUM THICKNESS TO
PRODUCE ANY USEABLE ECHO
RANGE IN WHICH FIRST ECHO SIGNAL WILL NOT PRODUCE TRUE
READING
RANGE OF READING FOR WHICH
ALTERNATE CONFIRMATION MAY
BE DESIRABLE
Page 4
RELATIVE THICKNESS (TYPICAL)
USN52 L Operating Manual
Contents
Important Notice ............................................................ 1
Table of Contents ........................................................... 5
Warranty / Service .......................................................... 8
6. USN52 L Menu Structure ................................................ 30
6.1 Menu Related Keypad Controls ............................ 30
6.2 USN52 L Menu Guide ............................................ 31
1. Introduction ....................................................................... 9
1.1 How to Use This Manual ........................................... 9
1.2 Features of the USN52 L ......................................... 10
7. USN52 L Menu Functions .............................................. 33
7.1 BASIC Menu ............................................................ 33
7.2 RCVR Menu ............................................................. 35
7.3 PULS Menu ............................................................. 36
7.4 GATE Menu ............................................................. 37
7.5 S-CAL Menu ............................................................ 38
7.6 MEM Menu ............................................................... 39
7.7 TCG Menu ............................................................... 40
7.8 Menu 8 - Lower Level ............................................. 41
7.9 Menu 9 - Lower Level ............................................. 44
7.10 Menu 10 - Lower Level ......................................... 49
2. USN52 L Accessories and Peripherals .......................... 12
3. Preparing the USN52 L for Operation ........................... 14
3.1 Installing Batteries ................................................. 14
3.2 Connecting Ultrasonic Transducers .................... 15
3.3 Setting Language and Unit of Measure ................ 15
3.4 What To Do Next ..................................................... 15
4. Front Panel of the USN52 L ............................................ 16
4.1 Keyboard Controls ................................................. 17
4.2 Displays and Indicators ......................................... 21
5. Quick Start - Basic Familiarization ................................. 25
5.1 Preparation ............................................................. 25
5.2 Navigating Through the Menus ............................. 25
5.3 Using Functions and Keypad Controls ................ 26
USN52 L Operating Manual
8. Using the Data Set Memory ............................................ 52
8.1 Overview of the Memory Function ......................... 52
8.2 Using STORE and RECALL .................................... 52
8.3 Memory Flag for Filled Data Sets .......................... 52
8.4 Memo Screen Header Setup .................................. 53
8.5 Entering Data Set Memo Information ................... 54
8.6 Naming Data Sets .................................................... 57
Page 5
Contents
8.7 Data Set Directory ................................................... 59
8.8 A-Scan Preview ........................................................ 60
9. Calibrating the A-scan Display ....................................... 61
9.1 General Notes on Calibration ................................ 61
9.2 Initial Instrument Settings ..................................... 62
9.3 Calibration - Single Element Probe ...................... 62
9.4 Calibration - Dual Element (TR) Probe ................. 64
9.5 Calibration - Angle Beam Probe............................ 66
10. Using the Flaw Alarm / Measurement Gate ................. 68
10.1 Purpose of the Gate ............................................. 68
10.2 Setting Gate Logic................................................. 68
10.3 Adjusting Gate Parameters ................................. 69
10.4 Frozen Screen Evaluation ................................... 70
11. Using DAC/TCG ............................................................. 71
11.1 Description of DAC/TCG ....................................... 71
11.2 Using DAC/TCG .................................................... 71
12. Using dB REF ................................................................ 75
12.1 Description of dB REF ......................................... 75
12.2 Using dB REF ....................................................... 75
Page 6
13. Calibrating for Digital Measurement ............................ 77
13.1 Preparing to Calibrate .......................................... 77
13.2 0 TO 1st - Single Element Contact ...................... 78
13.3 0 TO 1st - Single Element Delay .......................... 80
13.4 0 TO 1st - Dual Element Probe ............................ 81
13.5 MULTECHO - Single Element Contact ................ 84
13.6 MULTECHO - Single Element Delay .................... 87
13.7 MULTECHO - Using RF Display Mode ................ 90
13.8 Angle Beam Testing - Flaw Location .................. 92
13.9 TOF Mode - FLANK and PEAK ............................ 94
13.10 AUTOCAL Feature .............................................. 94
14. Digital Thickness / Distance Measurement ................. 97
14.1 Before Taking Measurements ............................. 97
14.2 Taking Digital Measurements .............................. 97
15. Operating the On-board Data Logger .......................... 99
15.1 Introduction .......................................................... 99
15.2 Setting Number of Files ..................................... 100
15.3 Selecting a File ................................................... 102
15.4 Logging Readings into Memory ........................ 103
15.5 Selecting Locations and Reviewing Readings 104
15.6 Clearing and Replacing Readings .................... 105
USN52 L Operating Manual
Contents
15.7 Clearing Selected Files ...................................... 106
15.8 Clearing All Files ................................................. 106
15.9 Permanent Storage ............................................ 107
16. Using Peripherals with the USN52 L .......................... 108
16.1 RS-232 I/O Interface ........................................... 108
16.2 Connecting a Peripheral Device ....................... 109
16.3 Printing a HARD COPY of the Display .............. 110
16.4 Printing a Data Logger Report .......................... 111
16.5 Transferring Files to a Personal Computer ..... 114
16.6 Printing Display and Parameters ...................... 115
16.7 Sending Readings to the DR1 Data Recorder . 116
16.8 Sending Readings to Other Devices ................ 118
16.9 Analog Output..................................................... 120
16.10 Remote Control of the USN52 L ...................... 121
17. Technical Specifications ............................................. 128
18. Worldwide Service Centers ........................................ 132
Index ................................................................................... 133
USN52 L Operating Manual
Page 7
Warranty / Service
Warranty
Service
When used in accordance with the manufacturer’s written instructions and under normal operating conditions, Krautkramer’s USN52
L test instruments are conditionally guaranteed to be free from
defects in material and workmanship for a period of two (2) years
from date of shipment. Free second year warranty requires the
instrument to be recertified by a designated Krautkramer Service
Center or by an authorized representative or distributor, within 13
months of the date of purchase. A normal recalibration and recertification fee will apply.
Every effort has been made to provide you with a reliable product.
However, should service become necessary, Krautkramer has established a number of Factory Trained Service Centers. For the
location of the nearest facility, refer to Chapter 18 or contact:
All repair work will be made FOB Lewistown, Pennsylvania, or at a
Factory Trained Service Center as advised by Krautkramer, provided the defective unit is returned properly packed with all transportation charges prepaid. Any and all equipment replacement
will be at the sole discretion of Krautkramer.
Manager of Customer Service
Krautkramer
50 Industrial Park Road
P.O. Box 350
Lewistown, PA 17044
Telephone:
(717) 242-0327
(717) 242-0331
Telex:
842-354
Telefax:
(717) 248-7211
This warranty shall not apply to equipment subjected to misuse or
abuse, improper installation, alteration, neglect, or accident. Excluded from this warranty are expendable items such as transducers, interconnecting cables, and batteries. Accessory items such
as recorders, etc. will be covered under the original manufacturer’s
warranty as given to Krautkramer.
This warranty is limited to the original purchaser and is not transferable. No other warranty, expressed or implied, is made.
Page 8
USN52 L Operating Manual
1. Introduction
1.1 How to Use This Manual
This manual describes the features and operation of the USN52 L Portable Ultrasonic Flaw Detector manufactured by
Krautkramer.
Throughout this manual, certain conventions will be used to identify key presses as follows:
Symbol
or
Required Action
Press either key individually
Press both keys simultaneously
Press either key individually
Press both keys simultaneously
or
Press either key individually
Press both keys simultaneously
After reading Chapter 1 of this manual, first time users should
proceed directly to Chapter 3 to prepare the USN52 L for opera-
USN52 L Operating Manual
tion. Then, perform the familiarization exercises in Chapter 5.
This will be the most efficient means of getting acquainted with the
many features and operations of the instrument.
Chapter 2 provides a listing of standard and optional accessories
available for the USN52 L.
Chapter 4 presents an overview of the front panel of the instrument. The function of each key in the keypad and the various
parts of the electroluminescent display are described briefly. Status indicators, symbols that appear in the display to indicate certain instrument conditions are also explained.
Chapter 6 summarizes the keypad controls used to access and
adjust menu functions and provides a menu “map” to assist when
accessing menus and functions.
Chapter 7 provides a complete reference to all menu functions,
grouped according to menu.
Chapters 8 through 16 provide detailed explanations of, and
step by step procedures for the many operations that are
available with the USN52 L.
Page 9
1. Introduction
1.2 Features of the USN52 L
•
RF display mode improves signal evaluation and bond inspection of dissimilar materials and assists crack tip detection and
sizing.
•
Selectable rep rate minimizes phantom echoes caused by wrap
around noise.
•
Four step damping control provides transducer matching for
broader range of applications.
•
Four step frequency control provides selectable amplifier
bandpass for optimum signal to noise.
Because functions are selected from menus and controlled by simply pressing a key, the unit is easy to learn and operate. Important
control settings are saved when the instrument is turned off and
restored when the power is turned on again.
•
Amplitude and time of flight analog output enables recording
via strip chart or digitizing device.
•
Magnification window displays measurement value in large,
easy to read digits.
Other important features of the USN52 L:
•
40 dB dynamic DAC/TCG enables correction for distance/
amplitude variations due to material loss and beam spread.
Meets or exceeds all current industry requirements for TCG.
•
Angle beam trigonometric functions display sound path, projection, and depth measurements to flaw.
•
On-board thickness data logger stores a total of 2500 readings
in up to 99 configurable files.
The USN52 L is a very lightweight, microprocessor controlled, ultrasonic flaw detector. It may be used on a wide variety of materials for:
•
locating and evaluating material discontinuities, and
•
measuring wall thickness from one side of the part.
Its compact size and full range of features provide a combination
of versatility and portability never before available in an ultrasonic
flaw detector.
•
5.98 pounds total weight with batteries
•
High visibility, LCD display with backlight (480 x 320 pixels)
•
Sealed case and membrane keypad are rugged and easy to
clean.
•
60 Hz A-scan update rate in all ranges at high PRF
•
Operates with an external Power Supply/Charger or 6 “D” size
alkaline or NiCad batteries in a detachable housing.
Page 10
USN52 L Operating Manual
1. Introduction
•
RS-232 bi-directional interface for transferring data, A-scan
displays, and reports to a printer, computer, or recorder, and
for remote control
•
Stores 100 ready-to-use instrument control data sets in memory
for quick and repeatable calibration.
•
Gate monitors amplitude and soundpath distance for both flaw
and thickness applications.
•
Multi-echo or interface-to-first thickness measurement mode,
with selectable flank or peak detection
•
A-scan freeze, freeze peak, and zoom functions
•
Lock key prevents accidental change of settings.
•
Alphanumeric naming of all datasets.
•
Directory of all datasets.
•
A-scan preview function for stored datasets.
•
Memory flag for filled datasets.
•
Alphanumeric memo function.
•
Curvature correction.
•
Frozen screen evaluation.
USN52 L Operating Manual
Page 11
2. USN52 R Accessories and Peripherals
2. USN52 L Accessories and Peripherals
Product Code
Alpha Code
Description
021-010-073
022-506-390
SNBD
BPSN
Six (6) “D” size, 5.0 amp hour rechargeable NiCad batteries
Detachable battery housing / charging frame
021-010-107
022-506-232
022-900-162
BCSN
ECASN
BBPSN
USN52 L multi rate battery charger / AC adapter
External charging adapter cable
Battery belt pack
022-506-053
021-026-315
CCSN
LCC-315
Combination soft shell carry case, sun shield, and shoulder neck strap
Hard shell transport case, internal foam compartments
021-382-639
022-506-841
022-505-518
EXASN
PCCBL-841
PRTCBL-518
External audible plug-in alarm
9 pin RS-232 interface cable for personal computer
25 pin serial printer cable
021-002-146
OPSN
USN52 L Operating Manual
Accessories
Page 12
USN52 L Operating Manual
2. USN52 L Accessories and Peripherals
Peripherals
021-471-005
Software
Epson FX 870 desk top graphic printer with serial interface
022-103-150
UltraDoc Documentation software - downloads instrument data sets and A-scan images to IBM compatible computer files; provides instrument control; allows conversion
of data to word processing and graphic formats
Transducer Kits
118-450-020
118-450-030
118-450-500
Basic Contact Kit
Angle Beam Kit
AWS Weld Inspection Kit
118-450-510
118-450-520
118-450-530
Multi Purpose Contact Kit
Corrosion Survey Kit
High Temperature Kit
USN52 L Operating Manual
Page 13
3. Preparing the USN52 L for Operation
3. Preparing the USN52 L for Operation
The USN52 L is supplied with a battery charger/power supply unit.
Refer to the separate instruction sheet supplied with the unit for
operating information.
3.1 Installing Batteries
Each battery in the battery pack is mounted separately in a holder
designed to prevent power interruption if the instrument is jolted.
To install batteries in the USN52 L, lay the instrument face
down, loosen the four knurled knobs on the back and lift off the
battery pack.
Be sure to set the switch inside the battery compartment (preceding
illustration) for the correct type of battery. For alkaline batteries, set
the switch to the right. For NiCad, or other type of rechargeable
battery, position it to the left.
After the batteries have been installed, replace the battery cover and
tighten the battery cover knobs.
Insert 6 “D” size NiCad or alkaline batteries as shown below. Be
sure that all batteries are firmly seated to assure good contact. Check
that battery positive “button” is properly centered and seated in red
contact ring.
Page 14
NOTE: When the battery indicator is in the last quarter ( ), batteries should be replaced as soon as possible. The USN52
L automatically turns off when the batteries become too
weak for reliable operation. Settings are saved and restored when turned on again, after batteries have been replaced. When testing in remote locations, always carry spare
batteries.
USN52 L Operating Manual
3. Preparing the USN52 L for Operation
3.2 Connecting Ultrasonic Transducers
5. Press
to return to the BASIC menu and A-scan display.
Transducer (probe) connectors are located at the lower right corner
of the front panel. Connect single element probes to the one on the
right (Receive). For dual element probes, connect the Transmit
side to the left connector and the Receive side to the right.
3.4 What To Do Next
Next, set the pulser as follows:
To become familiar with USN52 features and operations, proceed
to Chapter 5 for some “quick start” exercises.
1. Turn on the USN52 L:
2. Select PULS menu by pressing .
, aligned with PULSER function, to select
3. Use either
the desired setting:
For an itemized description of keyboard controls, displays, and indicators, proceed to Chapter 4.
For an explanation of the menu structure of the USN52 L, refer to
Chapter 6.
For a detailed description of all menu functions, refer to Chapter 7.
SINGLE - Single element probe
3.5 Screen Saver Mode
DUAL - Dual element probe (or two probes)
3.3 Setting Language and Unit of Measure
Factory settings are English and Inch. To change either language or
unit of measure, proceed as follows:
1. Press
to display the lower menu level.
or
to display menu number 8, which con2. Press either
tains both functions, LANGUAGE and MEAS. UNITS.
3. Press
to frame the center column.
USN52 L Operating Manual
Your USN has been equipped with a screen saver mode to
extend the usual life of your display. If your equipment is on, and
you have not pressed a key,and no positive gate violation has
occurred for 30 minutes the text/graphics portion of the display
will be erased and only a live A-scan trace will be displayed. If a
frozen image is being displayed when the unit goes into screen
saver mode, the frozen image will be lost. To exit the screen
saver mode, you must press a key or have a positive gate
violation. The keypress to exit screen saver mode will not change
any instrument settings. When screen saver mode is exited, the
screen will return to the display which was present before.
Page 15
4. Front Panel of the USN52 L
USN52 R
• For a description of USN52 L keyboard controls, refer to Section 4.1.
• For an explanation of the USN52 L display and indicators, refer to Section 4.2.
Page 16
USN52 L Operating Manual
4. Front Panel of the USN52 L
4.1 Keyboard Controls
The ON/OFF switch controls instrument power. When turned off, current control settings are saved. When switched
on, the menu displayed initially is always BASIC, and previous instrument control settings are restored.
The left and right SCROLL/SELECT keys perform several functions:
Enlarged Display: When MEASURE function is enabled, and GATE LOGIC ≠ OFF they select the value from the
measurement Line to be displayed in enlarged digits in the upper right corner of the A-scan display. Scrolling off the
measurement line disables the enlarged display or, when the ANGLE function is enabled in menu 9, displays the
amplitude of the highest echo signal in the gate.
Graticule Scaling: On the lower menu level, if the MEASURE or GATE LOGIC function is OFF, they toggle
between graticule scaling (0, 2, 4, 6, 8, 10) and displaying current DELAY/RANGE status. When the latter is
selected, the DELAY value will be displayed at the extreme left of the measurement line as an inch/mm at the
current velocity and the current RANGE + DELAY in inch/mm will be displayed at the far right.
Menu Select: On the lower menu level, SCROLL/SELECT keys select the menu to be displayed.
Cursor Position: In MEMO and DATA SET naming screens, SCROLL/SELECT keys position cursor in the text,
allowing corrections.
Data Logger Review and Clear: When the data logger is enabled for storing measurements, the SCROLL/
SELECT keys scroll through the location numbers of the selected file, displayed in the measurement line. To clear
the value stored in the selected location, simultaneously press and hold both keys for 3 seconds.
Clear Held Measurement: Clears measurement value (#=) held in the measurement line.
Press this key to switch between upper and lower menu levels.
USN52 L Operating Manual
Page 17
4. Front Panel of the USN52 L
On the upper menu level, press the right or left MENU key to display the desired menu. Functions in the displayed
). The seven upper level menus are displayed
menu are controlled by the INCREMENT/DECREMENT keys (
sequentially as the menu key is pressed. Pressing both keys simultaneously changes menu level (same as
).
On the lower menu level, each menu is divided into three columns of functions. The MENU keys select the active
column. Functions in the active column are controlled using the INCREMENT/DECREMENT keys (
).
Press the HOME key at any time to immediately display the BASIC menu, which contains the functions GAIN,
RANGE, MTL VEL (material velocity), and DELAY.
Pressing HOME while on the lower menu level restores the A-scan and BASIC menu displays.
Each function in the displayed menu has its own INCREMENT/DECREMENT key. Press the right arrow to increase, and the left arrow to decrease the displayed value. For functions with a large range of values, the rate of
change accelerates as the key is held. If the key is released for less than 1 second, adjustment resumes at an
accelerated rate.
Gain is always adjusted in discrete steps. The dB STEP key sets the amount of the step in dB. Six steps are
available: 6.0, 2.0, 1.0, 0.5, 0.1, and a user defined step, where the user sets the size of the step using the “dB
STEP” function in the lower menu level. The current step is displayed as a small number in the GAIN function box.
Page 18
USN52 L Operating Manual
4. Front Panel of the USN52 L
The dB REF key stores a selected reference echo signal for comparison against echoes from discontinuities.
Reference and incremental gain levels are also stored and displayed in the GAIN function box, as shown below.
Note that the incremental gain value replaces the word “GAIN”.
Reference GAIN is the instrument gain setting at the time that dB REF is enabled.
Incremental GAIN shows any change, relative to reference gain, since dB REF was enabled. A positive value
(+xx.x dB) indicates an increase in gain. A negative value (-xx.x dB) indicates a decrease.
Refer to Chapter 12 for detailed instructions on using dB REF.
The FREEZE key activates and deactivates the particular freeze mode selected via the FREEZE MODE function in
the lower menu level. If FREEZE ALL is selected, the entire A-scan display is frozen. FREEZE PEAK holds the
highest echo amplitude until deactivated. Chapter 7 provides details on all menu functions. The symbol appears
in the Status Line while Freeze is active.
Freeze is released on any key press or change in menu parameters, except for the following:
,
,
,
,
,
, DATA SET, STORE, FILE NUMBER, LOCATION, FILE MODE, BAUD RATE, LENGTH, PARITY, COPY MODE, aTHRESH, a-START, a-WIDTH.
USN52 L Operating Manual
Page 19
4. Front Panel of the USN52 L
The MAGNIFY key expands the gated portion of the A-scan to fill the entire width of the display. A second press
returns the display to the normal A-scan presentation.
Press ZOOM key to expand the A-scan display horizontally. Menu functions are not available when the display is
ZOOMed because the A-scan occupies the menu area of the display. Press ZOOM again to return to the standard
display.
Use the COPY key to transmit information to an external device via the RS-232 I/O port, or to save measurement
readings in the on-board data logger. Type of output must be specified using the COPY MODE function in the lower
menu level. Refer to Chapter 7 for details on all menu functions.
The COPY key is enabled only when an external device is connected or when COPY MODE, in the lower menu
level, is set to DATA LOGGER.
Press the LOCK key to inhibit the adjustment of most menu functions. While LOCK is enabled, the symbol
displayed in the status line. A second press of LOCK releases all functions.
The following keys are not disabled by LOCK:
,
is
,
The following menu functions are not disabled by LOCK: dB STEP, FILE NUMBER, LOCATION, and FILE MODE.
The BACKLIGHT key toggles the LCD backlight ON and OFF.
The CONTRAST keys adjust the contrast of the LCD display. The contrast should be set for optimum viewability.
Page 20
USN52 L Operating Manual
4. Front Panel of the USN52 L
4.2 Displays and Indicators
A-SCAN DISPLAY
MENU DISPLAY
6.0
GAIN
42.0 dB
RANGE
FUNCTION
2.500 in
CURRENT SETTING
MTL VEL
.2330/ s
UNIT OF MEASURE
DELAY
MEASURMENT LINE
0.000
2.500
0.000
s
STATUS LINE
MENU SELECT LINE
BASIC RCVR PULS GATE S-CAL MEM
SELECTED MENU
A-scan Display:
TCG
BATTERY INDICATOR
The A-scan area of the screen displays echo signals during an inspection. The graticule divides the Ascan area into 5 horizontal and 5 vertical divisions.
The Gate Bar shows the position, width, and threshold settings of the a-gate. The a-gate is both a flaw
monitor/alarm and distance measurement circuit. When set for thickness measurement in multi-echo
mode, a second b-gate is also displayed.
USN52 L Operating Manual
Page 21
4. Front Panel of the USN52 L
Menu Display:
Most functions are controlled via menus displayed in this area of the screen. The seven upper level and
three lower level menus are described in Chapter 6. The Menu Select Line displays the names of the
seven upper level menus with the currently selected menu highlighted. These menus are the most frequently used. Lower level menus contain three columns of functions and fill the entire display area when
selected.
Measurement Line:
Content of this line depends on the setting of certain menu functions described below. The unit automatically displays the appropriate information for the current settings.
Measurement Line content will be:
When these functions are set to:
Horizontal Graticule Scaling - 0 through 10 fixed:
GATE LOGIC or MEASURE or GRATICULE = OFF
Horizontal Sweep Range - current RANGE setting:
GATE LOGIC, MEASURE and GRATICULE ≠ OFF
Soundpath and Amplitude Data as follows:
S=
Measurement from ZERO to first echo in gate
when TOF is set to FLANK
S= Measurement from ZERO to highest echo in gate
when TOF is set to PEAK
#= “Held” measurement value (no echo in gate)
H= Amplitude of highest echo in gate
Page 22
GATE LOGIC ≠ OFF and
MEASURE = 0 to 1st and
ANGLE = OFF
USN52 L Operating Manual
4. Front Panel of the USN52 L
S= Measurement between first two echoes in gate
#= “Held” measurement value (no echo in gate)
H= Amplitude of highest echo in gate
Measurement Line content will be:
GATE LOGIC ≠ OFF and
MEASURE = MULTECHO and
ANGLE = OFF
When these functions are set to:
Current Data Logger Information as follows:
S=
P=
D=
#=
Angle beam soundpath distance to discontinuity
Projection (surface) distance to discontinuity
Depth of discontinuity relative to sound entry surface
All three values held when no signal is in the gate
LOC: Current file location where reading will be stored
VAL: Contents of current file location (LOC:)
Enlarged Value Display:
GATE LOGIC ≠ OFF and
MEASURE ≠ OFF and
ANGLE ≠ OFF
MEASURE ≠ OFF and
GATE LOGIC ≠ OFF and
FILE MODE = THICKNESS and
COPY MODE = DATA LOGGER and
ANGLE = OFF
A value highlighted in the measurement line using
is displayed in this area. Scrolling out of the
measurement line disables the enlarged value display. When the angle beam (trigonometric) flaw location
function, ANGLE, is enabled, scrolling out of the measurement line automatically displays the highest
amplitude echo signal in the gate.
When the data logger is enabled the measurement value is displayed in this area.
Status Line:
USN52 L Operating Manual
A variety of symbols may appear in this line to show the status of certain functions. Status line
indicators are illustrated and explained on the next page.
Page 23
4. Front Panel of the USN52 L
Status Line Symbol:
Description:
Freeze mode has been activated by pressing
.
MEASURE function set to “0 to 1st”; TOF set to “FLANK”.
MEASURE function set to “MULTECHO”; TOF set to “FLANK”.
MEASURE function set to “0 to 1st”; TOF set to “PEAK”.
MEASURE function set to “MULTECHO”; TOF set to “PEAK”.
REJECT function has been turned on.
PULSER has been set to SINGLE.
PULSER has been set to DUAL
TCG has been turned on (TCG menu).
∅
Page 24
Most functions have been locked by pressing
.
The battery indicator shows remaining battery life. When the indicator is in the last quarter (),
batteries should be replaced as soon as possible. The USN52 L automatically turns off when the
batteries become too weak for reliable operation.
Soundpath Leg
Behind the Freeze mode
Curvature Correction
In MULTECHO thickness mode, arrow points to initial pulse
USN52 L Operating Manual
5. Quick Start - Basic Familiarization
5. Quick Start - Basic Familiarization
5.1 Preparation
Use the step-by-step exercises in this chapter to become familiar
with some of the basic features and operations. Before you begin,
prepare the instrument by following the procedures in Chapter 3.
You will need a contact type ultrasonic transducer (probe), a test
block (preferably 1 inch thick steel, such as an IIW block), and
some couplant for these exercises. Connect the probe and set the
pulser to SINGLE or DUAL if necessary (ref. Section 3.4).
These exercises will tell you which keys to press. Certain areas of
the display will be referred to by name, for example, the measurement line. If you need help, the illustration at the beginning of
Section 4.2 shows the location of the various parts of the display.
5.2 Navigating Through the Menus
. The current instrument software reviTurn on the USN52 L:
sion is displayed briefly. The initially selected menu is always BASIC. The selected menu is displayed in the Menu Display area
and its name is highlighted in the Menu Select Line.
USN52 L Operating Manual
Press
once to select the RCVR menu. A new set of functions
appears and RCVR is highlighted in the Menu Select Line.
or
until you have seen all 7 menus in the
Continue to press
upper level. Note that the GAIN function is available from all 7
menus.
After you have reviewed the 7 menus, press
to the BASIC menu.
to return directly
Now select the first lower level menu by pressing . Lower level
menus fill the entire screen with 3 columns of functions.
Press
or
a few times to frame each column. The corresponding INCREMENT/DECREMENT key - controls each
function in the framed column.
or
to select another menu on the lower level.
Press either
There are only 3 on the lower level.
Press
(or
) to return to the upper menu level and restore the
A-scan display.
Page 25
5. Quick Start - Basic Familiarization
5.3 Using Functions and Keypad Controls
To begin this exercise, the selected menu should be BASIC. If
necessary, select the BASIC menu:
.
Press
The second item in the BASIC menu is RANGE. It controls the
horizontal range of the A-scan display. Press
of the
corresponding INCREMENT/DECREMENT key to view the 9
discrete RANGE steps from 0.200 to 200.0 inches of test
material. This is coarse mode.
(aligned with RANGE) with your right thumb and
Now cover
simultaneously press both arrows to switch to fine mode. “RANGE”
is now “range” (lower case).
. Notice that now the range value
Press and hold either
changes in 0.001 inch steps. The rate accelerates as you hold the
key. If you release the key for less than a second, adjustment
resumes at an accelerated rate.
Switch back to coarse RANGE mode (press both arrows of
simultaneously) and set RANGE to 2.500 inches:
Page 26
Now find MTL VEL (material velocity). The unit is factory preset at
2330in/s (233,000 inches per second; a 102 multiplier is implied).
.
. Velocity has changed to 1320in/s. This is the second
factory preset value. In coarse mode pressing
the material velocity between these 2 values.
simply toggles
Now cover
(aligned with MTL VEL) with your right thumb and
simultaneously press both arrows to switch to fine mode (lower
case “mtl vel”). Pressing
ments of 1.
now changes the value in incre-
Switch back to coarse MTL VEL mode (press both arrows of
simultaneously) and set velocity to 2330in/s:
.
Apply some couplant to your test block and couple the probe. If
you are using a 1 inch thick steel block, the backwall echo should
be at about the 4th vertical division in the A-scan.
Find the GAIN function and press
a few times. Amplitude
changes are large because dB STEP is at the default value of
6.0, as indicated by the small number in the upper right corner of
the GAIN box.
USN52 L Operating Manual
5. Quick Start - Basic Familiarization
Press
until the dB STEP value reads 1.0.
Use
to set amplitude of the 1 inch backwall echo at 80% of
screen height (8 divisions high).
Now switch to the lower menu level by pressing
.
Find the GATE LOGIC function in the center column of menu 8
and frame that column of functions: .
GATE LOGIC should be POSITIVE. If not, use
TIVE logic.
to set POSI-
Select the MEASURE function (lower menu level) and set it to “0
to 1st”. Values now appear in the measurement line. S=x.xxx in,
soundpath distance to the first echo in the gate is not exact because the unit has not been precisely calibrated. Calibration procedures are provided in Chapters 9 through 12.
H=xx% is the amplitude of the highest echo in the gate. Increase
GAIN and observe the H value. The unit monitors amplitude up to
127% maximum. Decrease echo amplitude to about 80% again.
Press
. The gated portion of the A-scan fills the entire display.
Press
again to restore the A-scan.
. Identify
Press . The soundpath distance has been highlighted in the
measurement line and enlarged in the upper right corner of the Ascan display. Press
to scroll out of the measurement line and
disable the enlarged value display.
Set gate threshold level (a-THRESH) to 50%, leading edge
(a-START) to 0.750 in, and width (a-WIDTH) to 0.500 in. Use
Now select the MEM menu: or . You can STORE the current
instrument settings in a DATA SET and RECALL them at any time.
The unit has memory capacity to store 140 data sets. Because
the displayed A-scan image is stored with the data set, this feature
is useful for storing, previewing, and recalling flaw images, as well
as calibration setups.
Return to the upper menu level and A-scan:
or
the gate bar displayed in the A-scan.
Use
or
to select the GATE menu.
to make these adjustments.
Couple the probe again. The 1 inch backwall echo should be
roughly centered in the gate bar. Since the backwall echo amplitude exceeds gate threshold, the alarm LEDs on the front panel
have been activated.
USN52 L Operating Manual
Page 27
5. Quick Start - Basic Familiarization
To free the hand holding the probe, optimize the 1 inch backwall
echo and then press
.
Now you can uncouple the probe without losing either the A-scan
image or the measurement values. This operation is not required
but it demonstrates one benefit of the FREEZE key.
Press
to redisplay the enlarged soundpath measurement so
that the enlarged value display will be stored and recalled. Some
keys and menu functions may be used while the display is frozen
(Section 4.1).
Now find the DATA SET function and select data set number 9:
. To store current settings and A-scan image in data set 9,
press either
Again, observe the flashing prompt at the bottom of the screen.
Recalling a data set automatically changes all of the current
USN52 L control settings to the settings stored in the data set. To
recall the data set, press
.
Recalled images are always frozen (
Press
symbol in the status line).
to deactivate freeze mode.
Return to the BASIC menu:
.
Couple the probe to the 1 inch thick block. Press and hold
aligned with DELAY and observe the A-scan. This function is like
the sweep delay control of an analog flaw detector. Set DELAY to
0.000 µs by simultaneously pressing
.
aligned with the STORE function.
Press
Observe the flashing prompt at the bottom of the screen. Requiring confirmation helps prevent an accidental overwrite of an existing data set. To store the data set, press
.
to expand the A-scan display horizontally.
Although left and right limit settings (DELAY and RANGE) are unchanged, zoom mode improves horizontal display resolution. Press
to disable zoom.
To RECALL stored instrument settings, reselect DATA SET 9:
if a change was made. Recall the stored settings and image by
pressing
Page 28
aligned with RECALL.
The next procedure demonstrates the use of the DAC/ TCG function by programming a DAC curve using a series of backwall echo
multiples to simulate echoes from discontinuities at depths of 1 to
3 inches.
USN52 L Operating Manual
5. Quick Start - Basic Familiarization
Set RANGE to 5.000 in:
Increase GAIN, if necessary, until the echo just exceeds gate threshold level:
Couple the probe to the block and adjust GAIN to put the first
backwall echo at 80% screen height:
Select the GATE menu and set a-WIDTH to 1.000 in:
or
, then
.
Record the second echo amplitude for the curve by pressing
aligned with DAC ECHO.
Adjust a-START so that the third backwall echo is the only signal in
the gate:
Set a-THRESH to 40%:
Increase GAIN, if necessary, until the echo just exceeds gate thresh-
Press
old level:
or
to select the TCG menu.
Activate DAC RECORD mode by simultaneously pressing
aligned with the DAC/TCG function.
Record the third and final echo amplitude by pressing
aligned with DAC ECHO.
Adjust a-START so that the first backwall echo (at 80% screen
Activate TCG by pressing
height) is the only signal in the gate:
This completes the familiarization exercises.
aligned with DAC/TCG.
Record the first echo amplitude for the curve by pressing
aligned with DAC ECHO function.
Adjust a-START so that the second backwall echo is the only signal in the gate:
USN52 L Operating Manual
Page 29
5. Quick Start - Basic Familiarization
6. USN52 L Menu Structure
6.1 Menu Related Keypad Controls
Pressing
Functions of the USN52 L are grouped into menus. There are 10
menus in all, 7 on the upper and 3 on the lower level. Organization
of menus and functions is shown on the next page. The upper
menu level contains the most frequently used functions.
is displayed until
The currently selected upper level menu is displayed to the right of
the A-scan display area as explained in Section 4.2. The names
of the 7 upper level menus are displayed in the Menu Select Line
at the bottom of the screen, with the selected menu highlighted.
expands the A-scan display horizontally and no menu
is deactivated.
Lower level menus contain up to 12 functions and fill the entire
display when selected. The A-scan is temporarily hidden while a
lower level menu is active.
To select a menu from the lower level, press:
or
to change menu levels
To select a different menu from the upper level, simply highlight
the name of the desired menu using:
or
to select another lower level menu
or
to select the desired function column
to move the cursor to the left.
to move the cursor to the right.
to jump directly to the BASIC menu.
Page 30
Once the desired menu is selected from either level, use
adjust the displayed functions.
USN52 L Operating Manual
to
6. USN52 R Menu Structure
6.2 USN52 L Menu Guide
USN52 L menus and their respective functions
are shown below.
BASIC
RCVR
PULS
UPPER LEVEL MENUS
GATE
S-CAL
MEM
TCG
GAIN
30.0 dB
GAIN
30.0 dB
GAIN
30.0 dB
GAIN
30.0 dB
GAIN
30.0 dB
GAIN
30.0 dB
GAIN
30.0 dB
RANGE
2.500 in.
FREQ.
.4-10 MHz
PULSER
SINGLE
a-THRESH
50%
a-START
0.750 in.
RECALL
OFF
DAC/TCG
OFF
MTL VEL
.2330 in/ µs
DAMPING
50
REJECT
0%
a-START
0.600 in
MTL VEL
.2330 in/µs
SET #150
MY STUFF
a-START
0.750 in
DELAY
0.0 µs
RECTIG.
RF
REP-RATE
HIGH
a-WIDTH
1.000 in
ZERO
0.0 us
STORE
OFF
DAC ECHO
0
Press
or
simultaneously to change menu levels
(Lower level menus are shown on the next page.)
USN52 L Operating Manual
Page 31
6. USN52 L Menu Structure
LOWER LEVEL MENUS
or
GRATICULE
ON
AMPLITUDE
% SCREEN HT
FREEZE MODE*
FREEZE ALL
or
AUTO CAL
ON
GATE LOGIC
POSITIVE
MEASURE
0 TO 1st
TOF
FLANK
Page 32
to frame active column
VELOCITY #1
.2330/ µs
VELOCITY #2
.1320 / µs
dB STEP
24.0 dB
GATE LOGIC
POSITIVE
FILE NUMBER
ACTIVE 1
LOCATION
1
VALUE
0.248 in
FILE MODE
THICKNESS
or
ASCAN
HOLLOW
LANGUAGE
ENGLISH
DATA SET DIREC
OFF
DATA SET NAME
TEST #1
to frame active column
BAUD RATE
9600
LENGTH
8 DATA BITS
PARITY
DISABLED
COPY MODE
DATA LOGGER
ANGLE
OFF
THICKNESS
1.000 in.
X-VALUE
0.000 in
O-DIAM
6.80 in
to frame active column
EVALUAT. MODE
TCG
MEMO
OFF
MEAS. UNITS
INCH
USN52 L Operating Manual
7. USN52 L Menu Functions
7.1 BASIC Menu
Function
Description
GAIN adjusts vertical amplitude of
echo signals in the A-scan display.
GAIN function is available from all
upper level menus.
Adjustment Range / Options
0.0 to 110.0 dB
Steps of 0.1, 0.5, 1.0, 2.0, 6.0, or
user set (see note at right). Step
at left is 1.0.
RANGE sets horizontal width of
the A-scan in inches or millimeters
of test material.
Coarse: 0.200, 0.300, 0.400,
0.500, 1.000, 2.500, 5.000, 10.00,
50.00, 100.0, and 200.0 inches
When in coarse mode, “RANGE”
(upper case) is displayed.
(5, 10, 25, 50, 100, 125, 200, 250,
500, 1000, and 5000 mm)
When in fine mode “range” (lower
case) is displayed.
Fine: 0.200 to 200.0 inches
(5.0 to 5000. mm)
Continuously adjustable
Controls
- decrease
- increase
- change step size
Note: Use dB STEP function,
menu 8, to select “user set”
step.
- decrease
- increase
- toggle Fine/Coarse
Note: Maximum RANGE setting
may be limited by current MTL
VEL setting.
USN52 L Operating Manual
Page 33
7. USN52 L Menu Functions
Function
MTL VEL
.2330 in/ µs
Description
MTL VEL = velocity of sound in
test material; reference value
only (not intended for precision
velocity measurement).
When in coarse mode,
“MTL VEL” (upper case) is
displayed.
When in fine mode “mtl vel”
(lower case) is displayed.
DELAY adjusts timing of sweep
start and, thus, horizontal position
of signals, gate ,etc. in A-scan
display.
Page 34
Adjustment Range / Options
Coarse: 2 user selectable
values; factory settings are
.2330 and 1320 in/µs (10 2
multiplier implied)
(5918 and 3353 m/s)
Fine: 430 to 3930 in/s
(1000 to 9999 m/s)
Continuously adjustable
-20.00 to 999.0 µs
Increment is 0.1 µs
Controls
- decrease
- increase
- toggle Fine/Coarse
Note: Use Velocity #1 and
Velocity #2 functions, menu
8, to set coarse MTL VEL
values
- decrease (right)
- increase (left)
- jump to 0.000 µs
USN52 L Operating Manual
7. USN52 L Menu Functions
7.2 RCVR Menu
Function
FREQ
.4-10 MHz
Description
Adjustment Range / Options
Controls
Sets frequency and bandwidth
of the receiver
.3-4 MHz, .4-10MHz, 2-8MHz,
3-10MHz
- display desired
option
Sets receiver damping
50, 1K, 150, 75 (ohms)
- display desired
option
Sets rectification mode for echo
signals.
FULL - Fullwave
NEG HALF - Negative
Halfwave
POS HALF - Positive Halfwave
RF - RF display
USN52 L Operating Manual
- display desired
option
NOTES on RF Mode:
1. Cannot be enabled if
display range exceeds
11.65" of steel (50µs).
2. Screen blanks briefly
when switching in and out
of RF display mode.
Page 35
7. USN52 L Menu Functions
7.3 PULS Menu
Function
SINGLE
Page 36
Description
Adjustment Range / Options
PULSER selects single
element or dual.
Enables separate Transmit/
Receive for dual element
probe, or 2 probes.
SINGLE, DUAL
REJECT suppresses unwanted low amplitude signals, such
as electrical or material noise.
0% to 80% of full screen height
Increment is 1%
Sets pulse repetition rate
HIGH, LOW
Controls
- display desired
option
- decrease
- increase
- display desired
option
USN52 L Operating Manual
7. USN52 L Menu Functions
7.4 GATE Menu
Function
Description
a-THRESH adjusts threshold
level of gate a.
b-THRESH adjusts threshold
level of gate b.
Adjustment Range / Options
a-THRESH and b-THRESH:
10% to 90% screen height;
±5% to ±45% in RF mode
Increment is 1%
Controls
- decrease
- increase
- toggle a / b
Note: Use GATE LOGIC
function, menu 8, to enable
gate and select positive or
negative logic.
a-START adjusts horizontal
position of leading edge
(start) of gate a bar.
0.000 to 200.0 inches
(0.0 to 5000. mm)
Continuously adjustable
b-START adjusts horizontal
position of leading edge
(start) of gate b bar.
Start 10 to 90% of a-WIDTH
after a-START
Increment is 1%
a-WIDTH adjusts horizontal
position of trailing edge
(width) of gate a bar.
0.050 to 200.0 inches
(1.0 to 5000. mm)
Continuously adjustable
- decrease (left)
- increase (right)
- toggle a / b
Note: Use GATE LOGIC
function, menu 8, to enable
gate and select positive or
negative logic.
- decrease (left)
- increase (right)
-Set gate width at 2090% of A-scan width
USN52 L Operating Manual
Page 37
7. USN52 L Menu Functions
7.5 S-CAL Menu
Function
MTL VEL
.2330 in/ µs
0.000 µs
Page 38
Description
Adjustment Range / Options
Controls
- decrease (left)
a-START adjusts horizontal
position of leading edge
(start) of gate bar.
0.000 to 200.0 inches
(0.0 to 5000. mm)
MTL VEL = velocity of sound
in test material; reference
value only (not intended for
precision velocity measurement).
Coarse: 2 user selectable
values; factory settings are
2330 and 1320 in/s (102
multiplier implied)
(5918 and 3353 m/s)
Fine: 430 to 3930 in/s
(1000 to 9999 m/s)
Continuously adjustable
ZERO adjusts the horizontal
position of the acoustic zero
(starting) point for taking
measurements in 0 TO 1st
MEASURE mode.
0 to 999 µs
- decrease
Continuously adjustable
- increase
- jump to 0.000 µs
Continuously adjustable
- increase (right)
- toggle a / b*
* See b-START, Section 7.4
- decrease
- increase
- toggle Fine /Coarse
USN52 L Operating Manual
7. USN52 L Menu Functions
7.6 MEM Menu
Function
Description
RECALL activates instrument
control settings and displays
frozen A-scan image stored in
selected DATA SET no.
WARNING!
All current settings will be
replaced by the recalled
settings.
SET #
1
NAME
USN52 L Operating Manual
Adjustment Range / Options
OFF, ON
Note: Attempting to recall an
empty or corrupted data set
causes an error message:
“Data set error! Cannot
recall...”.
DATA SET selects data set to
store instrument settings and
A-scan image or to recall
stored settings and A-scan
image.
1 to 100
Increment is 1
STORE saves instrument
control settings and current Ascan display in selected DATA
SET number.
OFF, ON
Controls
- recall data set
- confirm recall
- enter/exit A-SCAN
preview mode
- decrease
- increase
- store data set
- confirm store
Page 39
7. USN52 L Menu Functions
7.7 TCG Menu
Function
OR
Description
Adjustment Range / Options
DAC/TCG enables DAC
record mode and TCG and
DAC functions.
REC, OFF, TCG, DAC
a-START adjusts horizontal
position of leading edge
(start) of gate bar.
0.000 to 200.0 inches
(0.0 to 5000. mm)
Continuously adjustable
In REC mode, DAC ECHO
shows current reference echo
number and records reference amplitude.
In DAC or OFF mode, shows
number of recorded reference
points in the curve.
1 to 10
Increment is 1
Controls
- Erase current curve,
enable record mode
- select OFF, TCG, or
DAC
- decrease (left)
- increase (right)
- toggle a/b*
* see b-START, Section 7.4
- record DAC echo
When DAC/TCG is set to TCG, the DAC ECHO box is replaced with the CURVE box.
CURVE
ON
Page 40
CURVE enables and disables
the calculated DAC curve
display.
OFF, ON
-toggle ON, OFF
USN52 L Operating Manual
7. USN52 L Menu Functions
7.8 Menu 8 - Lower Level
Function
Description
Adjustment Range / Options
Enables, disables horizontal
and vertical display markers.
ON, OFF
AMPLITUDE sets method of
amplitude display (H value in
the measurement line) of
highest echo signal in the
gate.
% SCREEN HT - Expressed
as percent of screen height.
dB THRESHOLD (dB REF not
active) - Expressed in dB
relative to gate threshold (dBA)
Controls
- display desired option
- display desired option
dB THRESHOLD (dB REF
active) - Shows dB relative to
stored reference echo (dBR)
FREEZE MODE selects
freeze mode activated by
.
USN52 L Operating Manual
FREEZE ALL - Freezes entire
A-scan display.
FREEZE PEAK - Holds the
highest echo signal amplitude
until deactivated.
- display desired option
Page 41
7. USN52 L Menu Functions
Function
dB STEP
24.0 dB
Description
Adjustment Range / Options
VELOCITY #1 sets first
velocity for MTL VEL function
in coarse mode.
430 to 3930 in/s
(1000 to 9999 m/s)
Continuously adjustable
VELOCITY #2 sets second
velocity for MTL VEL function
in coarse mode.
430 to 3930 in/s
(1000 to 9999 m/s)
Continuously adjustable from
dB STEP sets size of user
programmable step option for
24.0 to 6.5 dB
Increment is 0.1 dB
Page 42
- decrease
- increase
- decrease
- increase
- decrease
- increase
.
GATE LOGIC enables and
disables gate and sets gate
logic.
Note: When gate is disabled,
no gate bar is displayed in Acan.
Controls
OFF - Gate is disabled.
POSITIVE - Gate enabled;
alarm activates when signal
exceeds threshold in gate.
NEGATIVE - Gate enabled;
alarm activates when signal
drops below gate threshold.
MEASURE - Gate enabled
for measurement only;
positive gate logic; alarm
disabled.
- display desired option
USN52 L Operating Manual
7. USN52 L Menu Functions
Function
Description
Controls
When memory is clear, FILE
NUMBER selects number of
files and configures on-board
data logger. If files have been
configured, selects one file, or
all files, for logging or printing
data.
If no files configured:
ALL CLEAR or SET #1 to 99
- decrease
If files have been configured:
1 to 99 or ALL FILES
File numbers preceded by
status of selected file:
EMPTY - No stored readings
ACTIVE - Contains readings
FULL - No available locations
- increase
- configure memory
(when a number is
displayed)
- clears files
(ALL FILES displayed,
hold for 3 sec.)
LOCATION selects location
number in file selected via
FILE NUMBER above.
1 to last location number
Note: Number of locations
depends on number of files
(Section 15.2).
VALUE displays contents of
selected file/location number.
Clears selected location.
FILE MODE enables/disables
data logger.
Note: To enable, COPY
MODE must also be set to
DATA LOGGER.
USN52 L Operating Manual
Adjustment Range / Options
EMPTY - No reading stored
x.xxx in (xx.x mm) - Value
stored in selected location
ERROR - Corrupted reading.
OFF - Data logger disabled.
- decrease
- increase
- jump to loc. #1
- clear reading
(after 3 seconds)
- display desired option
THICKNESS - Data logger
enabled.
Page 43
7. USN52 L Menu Functions
7.9 Menu 9 - Lower Level
Function
DATA SET DIREC
OFF
DATA SET NAME
#1
NONE
Page 44
Description
Adjustment Range / Options
Controls
ASCAN selects outlined or
fully illuminated echo signal
display.
HOLLOW - Signals outlined
SOLID - Signals fully
illuminated
Selects LANGUAGE for
displays and reports.
ENGLISH, FRENCH,
ITALIAN, SPANISH, PORTUGUESE, GERMAN,
SWEDISH, DANISH,
NORWEGIAN, FINNISH,
DUTCH, RUSSIAN
Turns on directory of Data
Set Names
OFF/data set name display
- turns on directory
Provides access to alphanumeric naming of data sets
and selection of current
data set.
Data set #1-140
- enter data set
naming screen
- display desired option
- display desired option
- select data set
USN52 L Operating Manual
7. USN52 L Menu Functions
Function
Description
BAUD RATE sets speed of
RS-232 data transfer to
match receiving device.
USN52 L Operating Manual
Adjustment Range / Options
300, 600, 1200, 2400, 4800,
9600
Sets word LENGTH for RS232 data transfer.
7: 7 data bits
8: 8 data bits
PARITY sets RS-232 error
detection method.
DISABLED, EVEN, ODD
Controls
- display desired option
- display desired option
- display desired option
Page 45
7. USN52 L Menu Functions
Function
Description
COPY MODE sets type of
internal or external (RS-232C)
data communication to be
initiated by
.
Printouts are formatted for
either EPSON FX 850 dot
matrix printer with Intelligent
Serial Interface No. 8148, or
SEIKO DPU 411 (user
selectable).
Adjustment Range / Options
HARD COPY - Printout of
entire display contents,
including A-scan and menus.
REPORT - Printout of data
logger report showing file
contents and related data.
THICKNESS - Sends
thickness value in measurement line via RS-232C.
When ANGLE function is on,
sends S=, P= and D= values.
DATA LOGGER - Saves S=/
#= value in selected file/
location in internal memory.
Controls
- display desired option
- initiates output
- activate PRINTER
SELECT
- select printer driver
when PRINTER
SELECT is active
DISP + PDUMP - Printout of
A-scan, plus 1 page report
with settings and space for
user supplied information.
PARAMETER DUMP: Sends
list of most remote codes with
the current values returned.
MEMO DUMP: Sends list of
all defined memos.
Page 46
USN52 L Operating Manual
7. USN52 L Menu Functions
Function
Description
ANGLE of beam propagation
in trigonometric flaw location
(illustration next page).
THICKNESS (for angle beam
flaw location) is the dimension
from the sound entry surface
to the opposite side of the
object being tested (see
illustration below).
X-VALUE (for angle beam
flaw location) is the measured
distance from the beam index
point to the front of the angle
beam probe or wedge (see
illustration below).
When a non-zero X-VALUE is
entered, Projection distance
(PR= value) displayed in the
measurement line is from the
front of the probe or wedge,
rather than from the beam
index point.
USN52 L Operating Manual
Adjustment Range / Options
10.0 to 90.0 (degrees), in 0.1
degree steps
Note: Function is disabled by
decreasing value below 10.
0.004 to 200.0 inches
(0.1 to 5080 mm)
Continuously adjustable
0.000 to 200.0 inches
(0.0 to 5080 mm)
Continuously adjustable
Controls
- decrease
- increase
- disable flaw location
- decrease
- increase
- decrease
- increase
Trigonometric Flaw Location Functions
Page 47
7. USN52 L Menu Functions
Function
O-DIAM
6.80 in
Page 48
Description
O-DIAM (for curvature
correction) is needed when
tests are conducted on
circular curved surfaces. To
correct the projection
distance and depth for this
curvature, enter the test
object’s outside diamater.
Adjustment Range / Options
2.048″-78.77″
(52-2000 mm)
Continuously adjustable
Controls
-decrease
-increase
-set to INFINITY (flat
plate)
USN52 L Operating Manual
7. USN52 L Menu Functions
7.10 Menu 10 - Lower Level
Function
AUTOCAL
ON
GATE LOGIC
OFF
USN52 L Operating Manual
Description
Adjustment Range / Options
AUTOCAL calibrates ASCAN display by performing
adjustments to MTL VEL and
ZEROwith just a few key
presses by the operator.
ON/OFF
GATE LOGIC enables and
disables gate and sets gate
logic.
Note: When gate is disabled,
no gate bar is displayed in Ascan.
OFF - Gate is disabled.
POSITIVE - Gate enabled;
alarm activates when signal
exceeds threshold in gate.
NEGATIVE - Gate enabled;
alarm activates when signal
drops below gate threshold.
MEASURE - Gate enabled
for measurement only;
positive gate logic; alarm
disabled.
Controls
- display desired option
- display desired option
Page 49
7. USN52 L Menu Functions
Function
Description
MEASURE selects method
for soundpath distance and
thickness measurements.
When set to 0 TO 1st or
MULTECHO, measurement
line displays measurement
values or data logger info.
Adjustment Range / Options
OFF - No soundpath measurement
0 TO 1st - Measure from set
zero point to first echo in gate
above threshold.
Controls
- display desired option
MULTECHO - Measure
between first 2 echo signals in
gate above threshold.
- display desired option
TOF selects measurement
mode for time of flight /
distance measurement.
DATA SET DIREC
OFF
Page 50
DSD displays a directory of
data set names with corresponding numbers and filled
status
FLANK - Measurement
occurs at point where leading
edge of echo signal crosses
threshold.
PEAK - Measurement occurs
at peak of echo signal.
Displays groups of 12 names
out of 140 data sets
- previous 12
- next 12
- ASCAN SCRN
- ASCAN SCRN
- for 1/12 makes data
set the current data set
USN52 L Operating Manual
7. USN52 L Menu Functions
Function
Description
EVALUAT. MODE
TCG
MEMO
OFF
MEAS. UNITS
INCH
USN52 L Operating Manual
Adjustment Range / Options
Base unit is fixed in TCG
mode.
Note: If DGS option is
purchased, this control
allows selection between
TCG and DGS modes.
None
Enables/Disables Memo
Dump function and automatic display of memo
screen when storing a data
set.
ON/OFF
MEAS. UNITS selects unit
of measure.
INCH, METRIC
Controls
None
- display desired option
- display memo screen
- display desired option
Page 51
8. Using the Data Set Memory
8.1 Overview of the Memory Function
The USN52 L has the capability to STORE and RECALL its current parameter settings and A-SCAN DISPLAY in any of 100 DATA
SETS, and provides a DATA SET DIRECTORY of stored readings. Names can be added to stored DATA SETS at any time for
easier identification. The PREVIEW function displays stored ASCANs without recalling the data sets. This is useful for browsing
through the data sets while keeping the current settings.
or
to select the MEM
menu. From here, pressing
corresponding with DATA
SET selects the data set to STORE or RECALL. If the selected data set is in use, you will see a MEMORY FLAG ( )
below the word “RECALL”. If so, it will need to be cleared
before data can be stored in the data set. (See section 8.3
below) Pressing
Page 52
Similarly, pressing
corresponding to RECALL replaces your
current display and parameter settings with the contents of the
selected data set. Recalled data sets come up in FREEZE mode,
visible on the status line. Pressing
with
mode.
8.2 Using STORE and RECALL.
From the top level menu, use
for confirmation stores your
the function, and pressing
current readings, including the A-SCAN display and all parameter settings into the data set. If the data set was in use,
its contents are erased by the STORE function.
corresponding to STORE activates
deactivates freeze
8.3 Memory Flag for Filled Data Sets.
A flag is displayed for any data set that has user data stored in it.
The MEMORY FILLED FLAG is a small filled box which is displayed in either of two locations: the RECALL box for any filled
data set displayed in the DATA SET box under the MEM menu
and also in the DIRECTORY OF ALL DATA SETS in any data
set that has stored information in it.
USN52 L Operating Manual
8. Using the Data Set Memory
The memory flag can be cleared from a data set as follows:
Access the MEM menu, double key press the INCREMENT/DECREMENT keys corresponding to the RECALL box. A flashing
message will appear as: press “HOME” to clear data set. Pressing HOME will remove the memory flag assigned to the data set.
This data set can now be utilized for a new configuration of stored
data. Please note: at this point the original data stored in the
indicated data set is still present even though the memory flag
has been removed. Storing any new data will overwrite the original data and restore the memory flag to this data set. The alphanumeric name of the data set will remain the same. If a new
name is derived, the alphanumeric name function must be accessed.
The original data can again be restored to this data set by pressing the STORE key and then the HOME key as prompted. The
original data will remain until it is overwritten by a STORE action
with new data.
NOTE:
A means of clearing all datasets at the same time is
provided. This clearing function will remove all
USN52 L Operating Manual
stored information in all 100 data set memory locations and return all datasets to their original factory default settings. To access this function, make sure that the instrument is turned off,
and then press and hold the HOME, FREEZE, and ON/OFF keys
simultaneously. Continue holding these keys until the A-scan
appears on the display (approximately 20 seconds). All user stored
information in all datasets will be deleted.
8.4 Memo Screen Header Setup
Header information is input during instrument setup using
the UltraDOC utility. The two header lines will appear
when the memo screen is activated. Each of the two
header lines contains 40 spaces which can be separated
into data fields. The combined 80 spaces can support up
to 20 data fields. Note that header fields are separated as
shown in Figure 1.
Each header line is matched with a corresponding memo
text line. Memo text lines are automatically segmented to
match each header field. Each memo field can contain as
many spaces as the corresponding header field. Note that
in Figure 1, header field one has been defined with ten
spaces (the eight letters in the word “OPERATOR” plus one
space and the character [labeled Field Division in Figure
1]). This means that ten spaces of memo text will be
automatically matched to header field one.
Page 53
8. Using the Data Set Memory
Note that fields may be designated as active during header
setup, which will prevent the user from entering information
in the memo field. Instead, the instrument will directly input
designated data directly into the active field as directed during header setup.
If the header has not been formatted with the UltraDOC utility, it will automatically become one blank field of 80 characters which can not be modified from the memo screen.
8.5 Entering Data Set Memo Information
This section explains how to enter information into the two
memo text lines on the memo screen. This is an optional
operation and is not required when naming, storing and recalling data sets. The memo screen is accessed in two different ways:
1. The memo screen will appear when a data set store
operation is performed with the memo enabled from the
lower level menu.
2. The memo screen will appear following a double press
of
box.
The memo screen contains two memo text lines and two
rows of selection characters. The memo text lines can contain up to 40 characters each (for a total of 80 characters).
Any of the selection characters can be inserted anywhere in
the memo text lines except where a specific memo text field
was designated as active during the memo screen header
setup.
IMPORTANT: Look at Figure 1 while you read these instructions.
There are two flashing cursors visible on the memo screen.
The block cursor is visible on one of the two memo screens
and is moved by using the increment/decrement keys that
correspond to the desired memo text line (
keys 1 and
2). The second cursor is the underline cursor. It can be
found flashing under one of the selection characters and is
also moved with the corresponding increment/decrement keys
(
Page 54
keys corresponding to the memo enable menu
keys 3 and 4).
USN52 L Operating Manual
8. Using the Data Set Memory
HEADER
LINE 1
MEMO
LINE 1
HEADER
LINE 2
MEMO
LINE 2
SELECTION
CHARACTERS
LINES 1 AND 2
BLOCK CURSOR
OPERATOR
HEADER FIELD
DATA
X-COORD
FIELD DIVISION
Y-COORD
A
1
K
MPL
S-PATH
27 ß
ß
P-DIST
DEPTH
KEY 1
COMMENT
KEY 2
1.O35 IN
TAB
1
2
3
4
5
6
7
8
9
0
.
#
*
-
/
A
B
C
D
E KEY
F 3
SPA
G
H
I
J
K
L
M
N
O
P
Q
R
S
T
U
V
W
X
Y
Z KEY 4
LINE CURSOR
MENU SELECT KEYS
MENU LEVEL SELECT KEY
Figure 1: Data Set Memo Screen Features
Each
key moves the corresponding cursor in either di-
rection on the line that’s located next to the specific
the pressed key. For example, pressing
key 2 while
the block cursor is on memo line 1 will cause the block cursor
to move to memo line 2.
key. If an
key is pressed when the corresponding cursor is on another line, the cursor will move to the line next to
USN52 L Operating Manual
Page 55
8. Using the Data Set Memory
To enter characters on memo line 1:
Leave the block cursor in it’s initial position on line 1
•
•
•
key 3 or 4) to the
Move the underline cursor (using
desired character.
When the desired character is selected (by placing the
underline cursor under the character) note that the block
cursor on memo line 1 contains that selected character.
Now move the block cursor to the next character position
(to the right) using
key 1. Note that each time you
move the block cursor to the right, the selected character
will be written at the new character position as well as the
previous position.
• When the block cursor reaches the end of line 1, it will
automatically “wrap around” and drop to line 2. However,
when the line cursor reaches the end of line 3 (for instance), it will return to the beginning of line 3.
• To write a different character in the next memo-line
position, move the block cursor to the new position (using
select
using
Page 56
key 1 or one of the menu select keys) and then
the desired character with the underline cursor
key 3 or 4.
•
To move the block cursor without writing a character on
the memo line, use one of the menu select keys or the
decrement key corresponding to the memo text line.
• To move the block cursor from one memo field to another
(remember that memo fields will only be defined to correspond with header fields installed using the UltraDOC
utility), select the TAB character by using the
key 3
to place the underline cursor below TAB. When TAB is
selected, each time you press
key 1, the block cursor will move to the next accessible memo field. Remember that memo fields designated as active in the
header setup will not be accessible from the memo screen.
To enter characters on memo line 2:
• Move the block cursor from it’s position on memo line 1 to
memo line 2 by pressing
key 2.
• Move the underline cursor (using
key 3 or 4) to the
desired character.
• All movement of the block cursor on line 2 is controlled by
key 2.
• Proceed to input data onto line 2 in the same way data
was input onto line 1.
USN52 L Operating Manual
8. Using the Data Set Memory
To change characters entered on memo lines 1 or 2
• The menu select keys (Figure 1) allow you to move the
block cursor to the left or right without writing characters
on the memo text line.
• To replace a character on one of the memo lines, move
the block cursor to the position to be modified by using
key or by using either menu select key. When
the left
the block cursor is in the desired position, select the
replacement character using
keys 3 or 4. When
the replacement character is selected, it will be written in
the block cursor. To return the block cursor to the desired
position without modifying the existing characters, use the
right or left menu select key.
To exit the memo screen
• Press the Home key or or the menu level select key.
• The saved memo screen will be associated with the
current data set.
• Pressing the Power Off key while the memo screen is
active will cause the instrument to exit the memo screen
and will NOT save any new information entered in the
memo screen.
USN52 L Operating Manual
8.6 Naming Data Sets
The Data Set Naming screen is accessed by using the menu
select keys to indicate the data set menu box and then simultaneously pressing the corresponding
key. When
the Data Set Naming screen appears, it contains one dataset-name line and two lines of selection characters which
are very similar in appearance and operation to those on the
Memo screen.
IMPORTANT: Read these instructions
There are two flashing cursors visible on the data set naming
screen. The block cursor is visible on the data-set-name line
and is moved by using the increment/decrement keys that
correspond to the line (
key 2). The second cursor is
the underline cursor. It can be found flashing under one of
the selection characters and is also moved with the corresponding increment/decrement keys (
keys 3 and 4).
Page 57
8. Using the Data Set Memory
To enter characters on the data-set-name line
• Leave the block cursor in it’s initial position on the dataset-name line
key 3 or 4) to the
Move the underline cursor (using
desired character.
• When the desired character is selected (by placing the
underline cursor under the character) note that the block
cursor on the data-set-name line contains that selected
character.
• Now move the block cursor to the next character position
•
(to the right) using
key 2. Note that each time you
move the block cursor to the right, the selected character
will be “written” on the data-set-name screen at the new
and previous character position.
• The data-set-name line will accept up to 8 characters.
• To write a different character in the next data-set-name line position, move the block cursor to the new position
(using
•
key 2) and then select the desired character
with the underline cursor using
key 3 or 4.
To move the block cursor without writing a character on
the data-set-name line, use one of the menu select keys
or the decrement key corresponding to the memo text
line
Page 58
•
To enter a character in the first position of the data-setname line, the underline cursor must first be moved
from it’s initial starting point (under the character 1). To
write a “1” in the first position of the data-set-name line,
use
key 3 to move the underline cursor at least one
character to the right, then return it to the position below
the character “1”.
To change characters entered on the data-set-name line
• The menu select keys allow you to move the block cursor
to the left or right without writing characters on the dataset-name line.
• To replace a character on the data-set-name line, move
the block cursor to the position to be modified by using
the left
key or by using either menu select key.
When the block cursor is in the desired position, select
the replacement character using
keys 3 or 4. When
the replacement character is selected, it will appear in
the block cursor. To return the block cursor to the desired
position without modifying the existing characters, use the
right or left menu select key.
USN52 L Operating Manual
8. Using the Data Set Memory
8.7 Data Set Directory
A directory of all data sets is provided: the directory will
show the data set number, the assigned alphanumeric name
if any and a flag (Û) to indicate whether or not the data set is
filled with user data.
Access to the DATA SET DIRECTORY is provided on the
LOWER LEVEL MENU. Locate and highlight the DATA SET
DIRECTORY box. Press the bottom INCREMENT/DECREMENT key
to turn on the directory.
This action will cause a display similar to Figure 2 to be shown:
13 DENNIS
17 ANYNAME
21 MEASURE
14 GRID #A8
18 BLOCK #10
22 MARK #3
15 TEST #7
19 2 FLAWS
23 REPAIRED
16 THICKNES
20 NEW L20
24 DAN@L2
Figure 2 Directory Display
Twelve data set names each with the data set number and filled
memory flag, if appropriate, will appear in 3 columns of four names
each. All data sets can be viewed in groups of 12. Pressing the
left key
will display the previous 12 data sets. Pressing
USN52 L Operating Manual
the right key
will display the next 12 data sets, up to the
maximum number of data sets.
To select a data set from the directory, highlight the appropriate
column using either arrow keys:
and then press the
Page 59
8. Using the Data Set Memory
INCREMENT/DECREMENT key corresponding to the highlighted
data set.
Double key press the INCREMENT/DECREMENT key (
)
corresponding to this box, to access A-SCAN PREVIEW. The
top display box will now show DATA SET PREVIEW: A-scans
Selecting a data set from the directory will cause that data set to
appear in the DATA SET NAME box and also in the UPPER
LEVEL MENU A-scan display under the MEM select function.
The DATA SET DIRECTORY will also be closed with this action.
It should be noted that selecting a data set from the directory
does not recall the data set: this must be done in a separate
operation.
stored in all data sets can now be viewed by pressing
corresponding to the DATA SET PREVIEW box. The left key will
scroll down the data set numbers and the right key will scroll up
the data set numbers. All previewed A-scans will appear in the
frozen mode. The freeze mode symbol will be displayed on the
status line to remind the user that the display is only a static representation.
The DATA SET DIRECTORY can also be exited by pressing either the HOME key or the
key.
8.8 A-Scan Preview
The A-SCAN PREVIEW feature allows viewing of a frozen image of all A-scans stored in the Data Sets. Access to the ASCAN PREVIEW is provided from the upper level A-scan display (i.e. press the HOME key) under the MEM menu. With the
select cursor on MEM, the DATA SET box with an alphanumeric
name, if appropriate, will be shown.
Page 60
A previewed data set can be recalled from memory by pressing
the RECALL key. This action will recall all parameters and Ascan settings making this stored data set now available for use.
To exit the DATA SET PREVIEW mode without recalling any of
the data sets, double key press the
keys corresponding
to the DATA SET box again. This action will turn off the preview
mode and return the settings to their original conditions.
The A-SCAN PREVIEW feature can be accessed at any time
during instrument operation from the MEM menu.
USN52 L Operating Manual
9. Calibrating the A-scan Display
9.1 General Notes on Calibration
Before the USN52 L can be used for flaw detection or thickness
measurement, the horizontal and vertical axes of the A-scan display must be calibrated.
Calibration assures that:
1. horizontal range of the A-scan display is adequate to display
the entire thickness of the test object,
2. horizontal position of echo signals can be used to determine
distance to discontinuity or backwall,
3. vertical amplitude of signals is adequate to detect the smallest required flaw, and
4. flaw size can be evaluated by comparison with known reflectors, for example, flat bottom holes.
Calibration is accomplished using a reference standard (test block).
USN52 L controls are adjusted until horizontal positions and vertical amplitudes of echo signals from known test block reflectors
are correctly displayed. The specific test block used depends on
the application.
USN52 L Operating Manual
NOTE: All USN52 L calibration procedures require a reference standard of the same material, velocity of sound, and
temperature as the material to be inspected.
It is beyond the scope of this operating manual to provide detailed
procedures for specific applications. This chapter provides the
steps commonly required to perform basic, horizontal axis (thickness/distance) calibrations for three general classes of ultrasonic
testing applications:
1. Straight beam inspection with a single element contact probe
2. Straight beam inspection with a dual element (TR) probe
3. Angle beam inspection with an angle beam (shear wave)
contact probe
After the general procedure for each class of application in this
chapter, a specific example is given that uses a commonly available test block.
Page 61
9. Calibrating the A-scan Display
9.2 Initial Instrument Settings
9.3 Calibration - Single Element Probe
Prior to calibrating the USN52 L, set the functions below as shown.
General procedure:
Menu
BASIC
RCVR
PULS
S-CAL
Function
DELAY
RECTIF.
REJECT
ZERO
Setting
0.0 µs
Best image
OFF
0.0 µs
1. Turn on the USN52 L and set initial instrument settings per
Section 9.2.
2. Set PULSER (PULS menu) to SINGLE:
3. Set RANGE (BASIC menu) to at least the maximum thickness or distance to be displayed in the A-scan:
NOTE: DELAY should be used only when no digital measurement is needed. When digital measurements are required, use the ZERO function to adjust the horizontal position of echoes.
ZERO establishes the acoustic zero, i.e. the point in time
when sound enters the part under test.
Lower Level
Lower Level
MEASURE
GRATICULE
OFF
ON
For delay line and immersion probes, adjust ZERO so that the
interface echo from delay tip or water/part interface is at the far
left vertical marker. The initial pulse (main bang) will be off screen
to the left.
Page 62
,
4. Couple the probe to the test block.
5. Adjust GAIN until reference echo signals are at their desired
amplitude:
,
6. Adjust ZERO (S-CAL menu) to place the leading edge of the
first (from left) reference echo signal at its correct horizontal
position:
7. Adjust MTL VEL (S-CAL menu) to place the leading edge of
the last reference echo at its correct horizontal position:
,
8. Repeat steps 6 and 7 until all reference echoes are correctly
positioned.
USN52 L Operating Manual
9. Calibrating the A-scan Display
Sample specific procedure:
9. Adjust ZERO to place the leading edge of the backwall echo
signal at the second vertical graticule division (see illustration
NOTE: The following procedure is an example only. It requires a steel, 1 inch thick test block (for example, an IIW or
step block), couplant, and a single element contact probe.
The A-scan will be calibrated to a depth range of 5 inches of
steel.
1. Turn on the USN52 L and set initial instrument settings per
Section 9.2.
2. Select the PULS menu:
at right):
10. Adjust MTL VEL to place the leading edge of the fourth
backwall multiple at the tenth vertical division (see illustration
below):
,
11. If necessary, repeat steps 9 and 10 until all echo signals are
positioned horizontally as shown in the following illustration.
or
3. Set PULSER to SINGLE:
4. Select the BASIC menu:
5. Set RANGE to 5.000 in:
6. Select the S-CAL menu:
or
7. Couple the probe to the test block.
8. Adjust GAIN as necessary throughout this procedure to keep
reference echo signals at suitable levels (see illustration at
right):
,
USN52 L Operating Manual
A-scan Calibrated for 5 Inch Range
Page 63
9. Calibrating the A-scan Display
8. Adjust GAIN until the thick section backwall echo signal is at
a suitable amplitude:
,
9.4 Calibration - Dual Element (TR) Probe
General procedure:
NOTE: This procedure requires either two test blocks of
different thickness or a stepped block. Reference thicknesses should cover the range of thicknesses or distances
to be inspected.
1. Turn on the USN52 L and set initial instrument settings per
Section 9.2.
2. Set PULSER (PULS menu) to DUAL:
3. Set RANGE (BASIC menu) to at least the maximum thickness or distance to be displayed in the A-scan:
,
4. Couple the probe to the thin section or test block.
5. Adjust GAIN until the thin section backwall echo signal is at a
,
suitable amplitude:
6. Adjust ZERO (S-CAL menu) to place the leading edge of the
thin section backwall echo signal at its correct horizontal position:
9. Adjust MTL VEL (S-CAL menu) to place the leading edge of
the thick section backwall echo signal at its correct horizontal
position:
,
10. Repeat steps 4 through 9 until both backwall echo signals
are correctly positioned.
Sample specific procedure:
NOTE: The following procedure is an example only. It requires a steel test block with thicknesses of 0.100 and 0.500
inch, couplant, and a dual element probe. The A-scan will
be calibrated to a depth range of 0.5 inch of steel.
1. Turn on the USN52 R and set initial instrument settings per
Section 9.2.
2. Select the PULS menu:
or
3. Set PULSER to DUAL:
4. Select the BASIC menu:
7. Couple the probe to the thick section or block.
5. Set RANGE to 0.500 in:
Page 64
USN52 L Operating Manual
9. Calibrating the A-scan Display
6. Couple the probe to the 0.100 inch thick section.
7. Adjust GAIN until the echo signal is at a suitable amplitude
(see illustration at right):
,
NOTE: When measuring thickness using a low A-scan
range, it is sometimes helpful to use REJECT (PULS menu)
to produce a sharply rising leading edge on significant echo
signals.
8. Adjust ZERO (S-CAL menu) to place the leading edge of the
backwall echo at the second vertical division (see illustration
at right):
9. Couple the probe to the 0.500 inch thick section.
10. Adjust GAIN until the echo signal is at a suitable amplitude
(see illustration at right):
A-scan Display - 0.100 Inch Thickness
,
11. Adjust MTL VEL (S-CAL menu) to place the leading edge of
the backwall echo at the tenth vertical division (see illustration
at right):
,
12. Repeat steps 6 through 11 until both backwall echo signals
are correctly positioned as shown in the illustrations at right.
A-scan Display - 0.500 Inch Thickness
USN52 L Operating Manual
Page 65
9. Calibrating the A-scan Display
9.5 Calibration - Angle Beam Probe
7. Adjust MTL VEL (S-CAL menu) to place the leading edge of
the second reference echo signal at its correct horizontal
General procedure:
NOTE: This procedure requires a test block, suitable for
use with angle beam probes, which will produce reference
echo signals at two different, known, soundpath distances
from the probe. Commonly used standard blocks include
IIW, DSC, DC, and Angle Beam Calibration Block.
1. Turn on the USN52 L and set initial instrument settings per
Section 9.2.
3. Set RANGE (BASIC menu) to at least the maximum thick,
4. Couple the probe to the test block.
5. Adjust GAIN until reference echo signals are at their desired
amplitude:
,
NOTE: Factory setting of coarse velocity #2 is close to the
shear wave velocity in steel, as measured on typical steel
test blocks.
8. Repeat steps 6 and 7 until both reference echoes are correctly positioned.
Sample specific procedure:
2. Set PULSER (PULS menu) to SINGLE:
ness or distance to be displayed in the A-scan:
position:
,
6. Adjust ZERO (S-CAL menu) to place the leading edge of the
first (from left) reference echo signal at its correct horizontal
NOTE: The following procedure is an example only. It requires a steel, IIW Type 1 test block, couplant, and a single
element angle beam probe. The A-scan will be calibrated
to a depth range of 10 inches of steel.
1. Turn on the USN52 L and set initial instrument settings per
Section 9.2.
2. Select the PULS menu:
or
3. Set PULSER to SINGLE:
position:
4. Select the BASIC menu:
Page 66
USN52 L Operating Manual
9. Calibrating the A-scan Display
5. Set RANGE to 10.00 in:
Probe
6. Couple the probe to the IIW block as shown at right and optimize the echo signal from the 4 inch radiused surface.
7. Adjust GAIN as necessary throughout this procedure to keep
reference echo signals at suitable levels (see illustration at
right):
,
8. Set MTL VEL to 1320 in/s:
,
9. Adjust ZERO (S-CAL menu) to place the leading edge of the
first echo signal from the 4 inch radius at the fourth vertical
Probe Position for Step 6
graticule division (see illustration at right):
10. If necessary, switch to fine MTL VEL and place the leading
edge of the second echo signal from the 4 inch radius at the
ninth vertical division (see illustration at right):
,
11. If necessary, repeat steps 9 and 10 until both echo
signals are positioned horizontally as shown in the
illustration at right.
Echo Signals at Divisions 4 and 9
USN52 L Operating Manual
Page 67
10. Using the Flaw Alarm / Measurement Gate
10. Using the Flaw Alarm / Measurement Gate
10.1 Purpose of the Gate
The gate circuit of the USN52 L, displayed as a horizontal bar in
the A-scan, monitors a selected depth range in the material under
test and serves two important functions:
•
It activates the built-in alarm when an echo signal in the
gate exceeds (positive logic) or drops below (negative logic)
the user set threshold amplitude.
•
It provides time of flight measurements for conversion to
thickness or distance values. Digital measurement values
are displayed in the measurement line and, optionally, in
the enlarged value display area.
10.2 Setting Gate Logic
NEGATIVE - Gate is enabled and gate bar displayed in the Ascan to show its starting point and width. Alarm activates when no
echo exceeds threshold in the gate.
MEASURE - This setting is for thickness or distance measurement only. The visual alarm LEDs are disabled; they will not illuminate. Gate is enabled and gate bar displayed in the A-scan to
show its starting point and width. Gate logic is automatically set to
positive.
OFF - Gate is disabled and no gate bar displayed.
NOTE: Digital measurement can be performed with either
positive or negative gate logic.
Set GATE LOGIC or disable the gate as follows:
Use the GATE LOGIC function, in lower level Menu 8, to enable
the gate and select the logic for triggering the alarm. There are 4
possible GATE LOGIC settings:
1. Switch to the lower menu level:
POSITIVE - Gate is enabled and gate bar displayed in the A-scan
to show its starting point and width. Alarm activates when an echo
exceeds threshold in the gate.
3. Frame the middle column of functions:
Page 68
or
2. Select Menu 8, if necessary (GATE LOGIC function is at the
or
bottom of the middle column):
or
4. Select the desired GATE LOGIC setting:
USN52 L Operating Manual
10. Using the Flaw Alarm / Measurement Gate
10.3 Adjusting Gate Parameters
If the gate is enabled, the following parameters must be set based
on the requirements of the application:
a-THRESH - To assure activation of the flaw alarm and valid measurement data the threshold must be set to a level that any significant echo signal will violate.
a-START - The leading (left) edge of the gate bar must be positioned so that any flaw or measurement echo signal will occur to
its right in the A-scan display. For many applications, this will be as
close as possible to the acoustic zero point, i.e. the initial pulse
(main bang) or an interface echo.
a-WIDTH - The trailing (right) edge of the gate bar must be positioned so that any flaw or measurement echo signal will occur to
its left in the A-scan display. For many applications, this will be as
close as possible to the backwall echo.
To set the parameters of gate a, proceed as follows:
1. Calibrate the A-scan display by following the appropriate procedure in Chapter 9.
2. If necessary, switch to the upper menu level and A-scan display:
or
3. Select the GATE menu:
USN52 L Operating Manual
4. Adjust threshold, a-THRESH, level:
Level is shown as percent of screen height and vertical position of the gate bar.
5. Position the leading edge, a-START:
Position is shown in inches (mm) of test material and by horizontal position in the A-scan display.
6. Set width, a-WIDTH, to cover the depth/thickness range to
be monitored:
Simultaneously pressing
automatically sets leading and
trailing edges at 20% and 90% of current A-scan width, respectively.
Width is shown in inches (mm) of test material and by the
length of the gate bar in the A-scan display.
NOTE: When used for flaw monitoring or 0 TO 1st thickness measurement, a single gate bar (gate a) is displayed.
If MEASURE is set to MULTECHO a second bar (gate b)
appears. Purpose and operation of gate b are described n
Chapter 13.
or
Page 69
Using
the Flaw Alarm / Measurement Gate
11.10.
Using
DAC/TCG
10.4 Frozen Screen Evaluation
If either gate start, threshold, or width is modified while the
A-scan is frozen, the movable-gate screen freeze mode (behind the freeze) is entered. When this mode is selected, a
gate bar will appear under the freeze symbol.
When the screen is placed in freeze mode, gate start, gate
width, and gate threshold (and their remote commands) will
continue to function while allowing the screen to remain in
freeze mode.
Other gate parameters such as TOF mode or gate logic mode
will function as before and will kill freeze mode if changed.
Measurement line values will be updated to reflect changes
in the position of the gate or gates. The resolution of the time
of flight measurement will be the range divided by 200 in
normal A-scan mode.
In RF mode, when moving the gates with a frozen screen,
the amplitude display on the measurement line will be limited to values below 50% screen height. If the amplitude is
greater than 49%, the measurement line will indicate “> 49%.”
Page 70
USN52 L Operating Manual
11. Using DAC/TCG
11. Using DAC/TCG
11.1 Description of DAC/TCG
11.2 Using DAC/TCG
The USN52 L is equipped with Time Corrected Gain (TCG) and
Distance Amplitude Curve (DAC) functions, located in the TCG
menu.
A DAC curve is programmed using a series of echo signals at
various depths covering the range of depths to be inspected in the
test material. Because near field and beam spread vary according to transducer size and frequency, and materials vary in attenuation and velocity, DAC/TCG must be programmed differently for
different applications.
TCG adjusts the gain at different locations in the A-scan display,
corresponding to different material depths, to compensate for signal loss (or variation) due to attenuation, beam spread, or other
factors. TCG is typically used to display reflectors of equal size at
equal amplitudes, regardless of their depth in the test material.
Alternatively, the DAC function displays all echoes at their true
amplitude with no depth compensation. A Distance Amplitude
Curve, however, is superimposed on the A-scan.
Both TCG and DAC displays are illustrated in Section 11.2.
DAC/TCG can be programmed with up to 10 data points (material
depths). The dynamic range of the DAC/TCG function is 40 dB.
Maximum curve slope is 6 dB per microsecond. Successive data
points do not have to decrease in amplitude. That is, the DAC/
TCG curve does not have to have a constantly descending slope.
USN52 L Operating Manual
Before programming a DAC/TCG curve, instrument parameters,
e.g. RANGE, MTL VEL, RECTIF, PULSER, etc., should be set
according to the requirements of the test. PULSER and RECTIF
functions, in particular, should not be changed after the DAC/TCG
curve has been programmed, because these parameters affect
signal amplitude and, therefore, the accuracy of inspection results.
Only one curve may be programmed at any given time. However,
when a data set is stored (MEM menu), the current DAC/TCG
curve and status (OFF, TCG, or DAC) will be stored with the data
set. When recalled, curve status will be the same as when it was
stored. For example, if TCG is active when a data set is stored, it
will be active when that data set is recalled.
Page 71
11. Using DAC/TCG
When programming a TCG/DAC curve, data points may be entered in any order. The first point recorded is the amplitude reference echo (see note below). Calibrate the A-scan (Chapter 9)
and proceed as follows:
1. Couple the probe to the reference block or test piece and
optimize the first (reference) echo.
2. Use GAIN to adjust the reference echo signal to the desired
amplitude:
NOTE: All subsequent data points will be automatically
later adjusted to the same amplitude as the first reference
echo.
Reference echoes cannot exceed 100% screen height. This
is the maximum amplitude that can be evaluated by the
instrument during DAC/TCG recording.
3. If necessary, adjust gate parameters so that the reference
echo is the only signal in the gate and exceeds threshold, as
illustrated below.
4. Activate DAC RECORD mode by simultaneously pressing
aligned with the DAC/TCG function.
5. Record the first echo amplitude for the curve in DAC memory
aligned with the DAC ECHO function. Note
by pressing
that DAC ECHO displays the number of echoes (points) recorded.
6. Optimize the echo for the second data point.
7. If necessary, adjust GAIN so that amplitude of the reference
echo signal exceeds gate threshold.
Page 72
USN52 L Operating Manual
11. Using DAC/TCG
NOTE: Data points after the first one will be automatically
adjusted to the same amplitude as the first reference echo.
Adjust gain for remaining echoes to at least 80% screen
height for optimal results.
While programming the curve, the USN52 L keeps track of
gain relative to the first reference echo.
10. After the final point has been recorded, activate TCG by pressing
aligned with DAC/TCG.
When TCG is active, signal amplitudes are automatically compensated based on the programmed curve:
8. Record the second echo amplitude for the curve by pressing
aligned with DAC ECHO.
9. Repeat steps 6 through 8 for all remaining reference echoes
(up to 9). Be sure to increase gain for those echoes that are
below gate threshold:
The asterisk next to the DAC/TCG function indicates that a DAC/
TCG curve is stored in memory:
DAC/TCG
TCG
When TCG is active, the DAC ECHO function is replaced by the
CURVE function. You may remove the calculated DAC curve from
the display by setting CURVE to OFF:
USN52 L Operating Manual
Page 73
11. Using DAC/TCG
To activate DAC (curve) press
next to DAC/TCG.
When DAC is active, signal amplitudes are not compensated, but
the programmed curve is displayed:
remains in DAC memory, TCG or DAC can be reactivated by pressing
.
aligned
To erase the curve from memory, simultaneously press
with DAC/TCG (record mode). Either record a new curve or press
to turn DAC/TCG off.
NOTES:
1. Remember or record reference gain after TCG or DAC is
enabled. dB REF can be used.
2. Changing parameters that affect instrument sensitivity also
influence echo amplitude.
Set pulser and display rectification before recording DAC/
TCG.
The DAC ECHO function again replaces the CURVE function and
shows the number of echoes that were used to calculate the DAC
curve:
DAC
ECHO
3
Turn DAC/TCG off by a third press of
.
The asterisk remains displayed next to DAC/TCG to show that a
curve is stored in DAC memory. As long as the curve
Page 74
3.
Displayed distance amplitude curve is relative to
reference gain.
4. DAC curve is automatically extended through the last 20%
of the display’s horizontal range with the same slope as
at the last data point.
5. ZERO function (S-CAL menu) changes the horizontal
position of displayed echoes and DAC/ TCG curve. Gates
and DELAY are not affected.
USN52 L Operating Manual
11. Using DAC/TCG
12. Using dB REF
12.1 Description of dB REF
dB REF stores, as a reference echo, the amplitude of the highest
echo signal in the gate for comparison against echoes from
discontinuities.
Reference and incremental gain values are also stored and displayed in the GAIN function box, as shown below. Note that the
incremental gain value replaces the word “GAIN”.
Incremental GAIN shows any change, relative to reference gain,
since dB REF was enabled. A positive value (+xx.x dB) indicates
an increase. A negative value (-xx.x dB) indicates a decrease in
the GAIN setting.
When dB REF is enabled, the H= value in the measurement line
shows the amplitude of the highest echo in the gate as “+xx.x dBR”
or “-xx.x dBR” relative to the reference echo. A positive (+) value
indicates that the discontinuity echo is higher in amplitude than the
reference echo. A negative (-) value means the discontinuity signal is lower in amplitude.
12.2 Using dB REF
Calibrate the A-scan display (Chapter 9), and set gate delay, width,
and threshold according to test requirements (Chapter 10). Activate the measurement line by setting the MEASURE function
(MEAS menu) to 0 TO 1st. Then proceed as follows:
1. Couple the probe to the reference block or test piece and
optimize the reference echo.
Reference GAIN is the instrument gain setting at the time dB REF
is enabled.
2.
Use GAIN to adjust the reference echo signal to the desired
amplitude:
USN52 L Operating Manual
Page 75
12. Using db REF
NOTE: Reference and discontinuity echoes cannot exceed
127% screen height. This is the maximum amplitude that
can be evaluated.
The reference echo must be the highest amplitude signal in the
gate, as illustrated below.
During inspection, when a signal violates threshold in the gate, the
H= value displayed in the measurement line indicates its amplitude in dB relative to the reference echo. Echo signals lower in
amplitude are shown as negative (-) values. Signals higher than
the reference amplitude are shown as positive (+) values.
The following illustration shows a discontinuity signal at 90% of full
screen height relative to the 80% reference echo. The value H=+1.0
dBR shows that the discontinuity echo signal exceeds reference
amplitude by 1.0 dB.
3. Activate dB REF and store reference echo amplitude and
reference GAIN by pressing
.
All subsequent echoes in the gate will be compared against
the reference echo.
Page 76
Changing GAIN while dB REF is enabled does not affect the displayed H= value. Incremental gain values are shown in the GAIN
function box as explained in Section 12.1.
USN52 L Operating Manual
13. Calibrating for Digital Measurement
13.1 Preparing to Calibrate
Before calibrating for digital thickness or flaw distance measurements, the A-scan display must be calibrated. Follow the procedures in Chapter 9 to prepare initial instrument settings and calibrate the A-scan display for the type of probe to be used.
To obtain correct digital thickness or distance measurements the
USN52 L must be calibrated for the specific material to be measured.
NOTE: All calibration procedures require a calibration standard (test block) of the same material, velocity of sound,
and temperature as the material to be tested, and whose
precise thickness is known. Some additional test block requirements are included with the procedures in this chapter.
GATE LOGIC must be set to POSITIVE or NEGATIVE (ref. Section 10.2) and TOF and MEASURE modes selected that are appropriate for the type of probe and measurements to be taken.
Section 13.9 provides information on FLANK and PEAK TOF
modes.
USN52 L Operating Manual
If MEASURE is set to 0 TO 1st (zero to first echo), the USN52 L
measures thickness or flaw distance by measuring the distance
(time) from the acoustic zero point to the first echo whose amplitude exceeds threshold (a-THRESH) in the gate. Position of the
zero point is set using the ZERO function.
If MEASURE is set to MULTECHO (multiple echo), the unit measures the distance (time) between the first two echoes that exceed
threshold level in gate a.
Refer to Chapter 10 for detailed instructions on gate operation.
Calibration procedures in this chapter cover the following MEASURE mode and probe combinations:
•
•
•
•
•
0 TO 1st - Single Element Contact Probe
0 TO 1st - Single Element Delay Line Probe
0 TO 1st - Dual Element Probe
MULTECHO - Single Element Contact Probe
MULTECHO - Single Element Delay Line Probe
Page 77
13. Calibrating for Digital Measurement
13.2 0 TO 1st - Single Element Contact Probe
0 TO 1st mode can be used for measuring either thickness or
distance to flaw. Calibration requires a test block of the same
material, velocity of sound, and temperature as the material to be
measured. Precise thickness or distance to artificial flaws must be
known.
Use the following procedure to calibrate in 0 TO 1st mode, using a
single element contact probe.
1. Calibrate the A-scan display according to Sections 9.2 and
9.3. Use the same test block for both A-scan and digital
calibration.
2. Set MEASURE function (lower level) to 0 TO 1st:
,
or
,
or
,
3. Select the GATE menu:
,
or
4. Adjust a-START to place the leading edge of the gate bar
slightly to the left of the horizontal position in the A-scan that
corresponds to the smallest measurement to be taken:
5. Adjust a-WIDTH to place the trailing edge of the gate bar
to the right of the horizontal position that corresponds to the
6. Couple the probe to the test block and optimize the reference echo (backwall, flat bottom hole, etc.) that represents
the upper limit of the expected measurement range.
7. Use GAIN to adjust the reference echo amplitude to a suitable level:
NOTE: If you are using multiple backwall echoes to calibrate, temporarily adjust a-START to the right so that the
multiple that represents the upper limit of the measurement
range is the first echo in the gate.
8. Adjust a-THRESH, gate threshold level:
For flaw applications, set level based on desired alarm sensitivity relative to flaw size.
For thickness measurement, set level just high enough to remain above nonrelevant indications.
9. Select the S-CAL menu:
10. Observe the S= value in the measurement line and obtain a
stable reading.
If desired use the enlarged display:
or
greatest measurement to be taken:
Page 78
USN52 L Operating Manual
13. Calibrating for Digital Measurement
11. Adjust the MTL VEL until the displayed S= value matches
the thickness (or flaw distance) of test block:
12. Optimize the echo that represents the lower end of the expected measurement range. Assure that the correct echo
appears within the gate and exceeds threshold level. If necessary, adjust GAIN.
surements will occur within the gate. If necessary, adjust aSTART and a-WIDTH until these conditions are met.
Below is a typical A-scan and measurement line display for 0 TO
1st measurement with a contact probe.
NOTE: If you are using multiple backwall echoes to calibrate, adjust a-START to the left so that the multiple that
represents the lower limit of the measurement range is the
first echo in the gate.
13. While the probe is coupled, adjust ZERO until the displayed
S= value matches the known thickness (distance) of the test
block:
NOTE: Adjusting ZERO changes the horizontal position of
displayed echoes (and DAC/TCG curve). It has no effect
on gate position or DELAY setting.
The USN52 L is now calibrated and ready to perform thickness or
distance measurements, within the calibrated range, on parts of
the same material, velocity of sound, and temperature as that of
the test block. S= values displayed represent the distance between the manually set zero point and the first echo signal within
the gate that exceeds threshold level.
14. Repeat steps 6 through 13 until no further calibration is
needed.
15. Recheck the position and width of the gate to assure that
echo signals from the smallest and greatest expected mea-
USN52 L Operating Manual
Page 79
13. Calibrating for Digital Measurement
13.3 0 TO 1st - Single Element Delay Probe
Calibrating the USN52 L for 0 TO 1st digital measurement with a
delay line probe is the same as with a contact probe, except that
the initial pulse is separated from the acoustic zero point by the
delay line.
In the A-scan display, the acoustic zero point corresponds to the
echo signal from the interface between the delay line and surface
of the test object (see illustration on page 76). The same principle
applies to immersion testing, where the delay is the water path.
Use the following procedure to calibrate in 0 TO 1st mode, using a
single element delay line probe.
1. Calibrate the A-scan display according to Sections 9.2 and
9.3. Use the same test block for both A-scan and digital
calibration.
2. Set MEASURE function (lower level) to 0 TO 1st:
,
or
,
or
,
3. Select the GATE menu:
,
or
4. Adjust a-START to place the leading edge of the gate bar
slightly to the left of the horizontal position in the A-scan that
corresponds to the smallest measurement to be taken:
Page 80
5. Adjust a-WIDTH to place the trailing edge to the right of the
horizontal position that corresponds to the greatest measurement to be taken:
6. Couple the probe to the test block and optimize the reference echo (backwall, flat bottom hole, etc.) that represents
the upper limit of the expected measurement range.
7. Use GAIN to adjust the reference echo amplitude to a suitable level:
NOTE: If you are using multiple backwall echoes to calibrate, temporarily adjust a-START to the right so that the
multiple that represents the upper limit of the measurement
range is the first echo in the gate.
8. Adjust a-THRESH, gate threshold level:
For thickness measurement, set level just high enough to remain above nonrelevant indications.
9. Select the S-CAL menu:
10. Observe the S= value in the measurement line and obtain a
stable reading.
If desired use the enlarged display:
or
USN52 L Operating Manual
13. Calibrating for Digital Measurement
11. Adjust the MTL VEL until the displayed S= value matches
the known thickness (or flaw distance) of the test block:
12. Optimize the reference echo that represents the lower end
of the expected measurement range. Check to assure that
the correct echo appears within the gate and has sufficient
amplitude to exceed threshold level. If necessary, adjust
GAIN.
surements will occur within the gate. If necessary, adjust aSTART and a-WIDTH until these conditions are met.
The next illustration shows a typical A-scan and measurement line
display for 0 TO 1st measurement with a delay line probe.
NOTE: If you are using multiple backwall echoes to calibrate, adjust a-START to the left so that the multiple that
represents the lower limit of the measurement range is the
first echo in the gate.
13. While the probe is coupled, adjust ZERO until the displayed
S= value matches the known thickness (distance) of the test
block:
13.4 0 TO 1st - Dual Element Probe
NOTE: Adjusting ZERO changes the horizontal position of
displayed echoes (and DAC/TCG curve). It has no effect
on gate position or DELAY setting.
Because multiple echoes do not typically occur with dual element
probes, 0 TO 1st mode must be used for thickness or distance to
flaw digital measurement.
14. Repeat steps 6 through 13 until no further calibration is
needed.
15. Recheck the position and width of the gate to assure that
echo signals from the smallest and greatest expected meaUSN52 L Operating Manual
Page 81
13. Calibrating for Digital Measurement
Calibration requires a test block of the same material and velocity
of sound as the material to be measured. At least two thicknesses
are required, representing the upper and lower ends of the expected measurement range. The precise thickness, or distance
to artificial flaws, must be known.
Use the following procedure to calibrate in 0 TO 1st mode, using a
dual element probe.
1. Calibrate the A-scan display according to Sections 8.2 and
8.4. Use the same test block for both A-scan and digital
calibration.
2. Set MEASURE function (lower level) to 0 TO 1st:
,
or
,
or
,
3. Select the GATE menu:
,
or
4. Adjust a-START to place the leading edge of the gate bar
slightly to the left of the horizontal position in the A-scan that
corresponds to the smallest measurement to be taken:
5. Adjust a-WIDTH to place the trailing edge to the right of the
horizontal position that corresponds to the greatest measure-
6. Couple the probe to the test block and optimize the reference echo (backwall, flat bottom hole, etc.) that represents
the upper limit of the expected measurement range.
7. Use GAIN to adjust the reference echo amplitude to a suitable level:
NOTE: When measuring thickness using a low A-scan
range, it is sometimes helpful to use REJECT (PULS menu)
to produce a sharply rising leading edge on significant echo
signals.
8. Adjust a-THRESH, gate threshold level:
For flaw applications, set level based on desired alarm sensitivity relative to flaw size.
For thickness measurement, set level just high enough to remain above nonrelevant indications.
9. Select the S-CAL menu:
10. Observe the S= value in the measurement line and obtain a
stable reading.
If desired use the enlarged display:
or
ment to be taken:
Page 82
USN52 L Operating Manual
13. Calibrating for Digital Measurement
11. Adjust the MTL VEL until the displayed S= value matches
the known thickness (or flaw distance) of the test block:
The next illustration shows a typical A-scan and measurement line
display for 0 TO 1st measurement with a dual element probe.
12. Optimize the reference echo that represents the lower end
of the expected measurement range. Check to assure that
the correct echo appears within the gate and has sufficient
amplitude to exceed threshold level. If necessary, adjust
GAIN.
13. While the probe is coupled, adjust ZERO until the displayed
S= value matches the known thickness (distance) of the test
block:
NOTE: Adjusting ZERO changes the horizontal position of
displayed echoes (and DAC/TCG curve). It has no effect
on gate position or DELAY setting.
14. Repeat steps 6 through 13 until no further calibration is
needed.
15. Recheck the position and width of the gate to assure that
echo signals from the smallest and greatest expected measurements will occur within the gate. If necessary, adjust
a-START and a-WIDTH until these conditions are met.
USN52 L Operating Manual
Because of the separate transmit and receive elements, there is
no interface echo signal at the acoustic zero point, enabling resolution of very thin sections or detection of near surface
discontinuities.
The USN52 L is now calibrated and ready to perform thickness or
distance measurements, within the calibrated range, on parts of
the same material, velocity of sound, and temperature as that of
the test block. S= values displayed represent the distance between the manually set zero point and the first echo signal within
the gate that exceeds threshold level.
Page 83
13. Calibrating for Digital Measurement
13.5 MULTECHO - Single Element Contact Probe
MULTECHO mode is intended primarily for thickness measurement using multiple backwall echoes. Calibration requires a test
block of the same material, velocity of sound, and temperature as
the material to be measured. The precise thickness must be known
and, for best results, should be equal to, or slightly greater than the
greatest thickness to be measured.
The second gate bar “b” that appears in the A-scan display
provides the following advantages:
• Independent threshold levels for the two echo signals that
determine the measurement improves measurement accuracy in FLANK TOF mode.
• Adjustable b-START prevents false readings due to the width
of the first echo in gate a or ringing.
Use the following procedure to calibrate in MULTECHO mode,
using a single element contact probe.
These considerations will be covered in detail later in this procedure.
1. Calibrate the A-scan display according to Sections 9.2 and
9.3. Use the same test block for both A-scan and digital
calibration.
NOTE: Because MULTECHO mode requires two successive backwall echoes in the gate, calibrate the A-scan so
that the thickness range covered is at least two times the
greatest thickness to be measured. For example, if the greatest measurement will be 0.500 inch, set RANGE to 1.000
inch.
2. Set MEASURE function (lower level) to MULTECHO:
or
Page 84
,
or
,
3. Select the GATE menu:
4. Adjust a-START and a-WIDTH so that two successive
backwall echoes from both the thinnest and thickest sections
to be measured will occur in the gate:
5. Couple the probe to the test block and optimize the reference (backwall) echoes.
6. Use GAIN to adjust the reference echo amplitudes to a suitable level:
,
7. Adjust a-THRESH, gate a threshold level:
Set level just high enough to remain above nonrelevant indications.
USN52 L Operating Manual
13. Calibrating for Digital Measurement
8. Select b-THRESH by simultaneously pressing
with a-THRESH.
aligned
b-START is set as a percent of the current a-WIDTH setting. For
example, if a-WIDTH is 0.300 inch and b-START is 10%, then
gate b starts 0.030 inch beyond the leading edge of gate a when
no signal is in the gate, as shown in the following illustration.
9. Adjust b-THRESH, gate b threshold level:
When TOF mode is FLANK, measurement is determined by
the point where each signal’s leading edge (flank) crosses
gate threshold level. In the A-scan, this corresponds to the
intersection of the signal flank and gate bar.
Since the second echo is typically lower in amplitude than the
first, gate b threshold should be set so that points of intersection correspond, as shown in the illustration below.
When an echo signal occurs in gate a, the start of gate b automatically changes to the b-START interval after the first echo in gate a.
In the example above, an echo signal at 0.040 inch in gate a causes
gate b to start 0.030 inch (10% of a-WIDTH)) after the first echo in
gate a, or at 0.070 inch. This is shown in the next illustration.
10. Select b-START by simultaneously pressing
with a-START.
USN52 L Operating Manual
aligned
Page 85
13. Calibrating for Digital Measurement
WARNING!
To avoid false readings, do not allow the first echo signal, or
any nonrelevant indications, to encroach on gate b. Measurement will be determined by the first intersection between any
signal (leading or trailing edge) and gate bar.
12. Select the S-CAL menu:
13. Observe the S= value in the measurement line and obtain a
stable reading.
If desired use the enlarged display:
False readings are often caused by excessive ringing of the first
echo or nonrelevant signals between the first and second backwall
echoes. The b-START feature prevents false readings by blocking the measurement during the b-START interval immediately after
the first measurement echo.
or
14. Adjust MTL VEL until the displayed S= value matches the
known thickness of the test block:
Following is a typical A-scan and measurement line display for
MULTECHO measurement with a single element contact probe.
11. Set b-START as close as possible to the trailing edge of
the first measurement echo:
Page 86
USN52 L Operating Manual
13. Calibrating for Digital Measurement
Use the following procedure to calibrate in MULTECHO mode,
using a single element delay probe.
1. Calibrate the A-scan display according to Sections 8.2 and
8.3. Use the same test block for both A-scan and digital
calibration.
The USN52 L is now calibrated and ready to perform thickness
measurements, within the calibrated range, on parts of the same
material, velocity of sound, and temperature as that of the test
block. S= values displayed represent the distance between the
first two echo signals within gate a that exceed threshold level.
13.6 MULTECHO - Single Element Delay Probe
MULTECHO mode is intended primarily for thickness measurement using multiple backwall echoes. Calibration requires a test
block of the same material, velocity of sound, and temperature as
the material to be measured. The precise thickness must be known
and, for best results, should be equal to, or slightly greater than the
greatest thickness to be measured.
USN52 L Operating Manual
NOTE: Because MULTECHO mode requires two successive backwall echoes in the gate, calibrate the A-scan so
that the thickness range covered is at least two times the
greatest thickness to be measured. For example, if the greatest measurement will be 0.500 inch, set RANGE to 1.000
inch.
2. Set MEASURE function (lower level) to MULTECHO:
or
,
or
,
,
A second gate bar “b” appears in the A-scan display for the
following advantages:
• Independent threshold levels for the two echo signals that
determine the measurement improves measurement accuracy.
• Adjustable b-START prevents false readings due to the width
of the first echo in gate a or ringing.
Page 87
13. Calibrating for Digital Measurement
These considerations will be covered in detail later in this procedure.
3. Select the GATE menu:
Since the second echo is typically lower in amplitude than the
first, gate b threshold should be set so that points of intersection correspond, as illustrated below.
4. Adjust a-START and a-WIDTH so that two successive
backwall echoes from both the thinnest and thickest sections
to be measured will occur in the gate:
5. Couple the probe to the test block and optimize the reference (backwall) echoes.
6. Use GAIN to adjust the reference echo amplitudes to a suitable level:
7. Adjust a-THRESH, gate a threshold level:
Set level just high enough to remain above nonrelevant indications.
8. Select b-THRESH by simultaneously pressing
with a-THRESH.
aligned
9. Adjust b-THRESH, gate b threshold level:
When TOF mode is FLANK, the measurement is determined
by the point where each signal’s leading edge (flank) crosses
gate threshold level. In the A-scan, this corresponds to the
intersection of the signal flank and gate bar.
Page 88
MULTECHO Measurement Points
10. Select b-START by simultaneously pressing
with a-START.
aligned
b-START is set as a percent of the current a-WIDTH setting. For
example, if a-WIDTH is 0.300 inch and b-START is 10%, then
USN52 L Operating Manual
13. Calibrating for Digital Measurement
gate b starts 0.030 inch beyond the leading edge of gate a when
no signal is in the gate, as illustrated below.
When an echo signal occurs in gate a, the start of gate b automatically changes to the b-START interval after the first echo in gate a.
In the example above, an echo signal at 0.040 inch in gate a causes
gate b to start 0.030 inch (10% of a-WIDTH)) after the first echo in
gate a, or at 0.070 inch. This is shown in the next illustration.
USN52 L Operating Manual
False readings are often caused by excessive ringing of the first
echo or nonrelevant signals between the first and second backwall
echoes. The b-START feature prevents false readings by blocking the measurement during the b-START interval immediately after
the first measurement echo.
11. Set b-START as close as possible to the trailing edge of the
first measurement echo:
Page 89
13. Calibrating for Digital Measurement
WARNING!
To avoid false readings, do not allow the first echo signal,
or any nonrelevant indications, to encroach on gate b.
Measurement will be determined by the first intersection
between any signal (leading or trailing edge) and gate bar.
12. Select the S-CAL menu:
13. Observe the S= value in the measurement line and obtain a
stable reading.
The unit is now calibrated and ready to perform thickness measurements, within the calibrated range, on parts of the same ma14. Adjust MTL VEL until the displayed S= value matches the terial, velocity of sound, and temperature as that of the test block.
S= values displayed represent the distance between the first two
known thickness of the test block:
echo signals within gate a that exceed threshold level.
Following is a typical A-scan and measurement line display for
MULTECHO measurement with a single element delay line probe. 13.7 MULTECHO - Using RF Display Mode
If desired use the enlarged display:
or
The RF display mode (RCVR menu, RECTIF. function) of the
USN52 L can be useful in MULTECHO mode when measuring
very thin materials, for example, thin skin composites.
Page 90
USN52 L Operating Manual
13. Calibrating for Digital Measurement
By positioning the gate bars, a and b on opposite sides of the
midline (above and below), thinner measurements may be enabled
by setting b-START to a smaller value.
The advantage of the RF display in applications of this type can be
seen in the following idealized illustration.
NOTES:
1. Adjustment range for a-THRESH and b-THRESH are as
follows (- = below midline):
+5% to +45%
-5% to -45%
2. RF mode cannot be enabled if display range exceeds 11.65
inches of steel (50µs).
3. The screen blanks momentarily when switching in and out of
RF display mode.
The two echo signals shown are typical of many applications using
a highly damped delay line transducer to inspect very thin materials.
Although the echoes are partially merged, their primary half-cycles
are on opposite sides of the midline. A delamination in a multilayered material may produce this type of display presentation.
Positioning gates a and b as shown allows measurement between
corresponding flanks of the two echoes, even though they are very
close together.
USN52 L Operating Manual
Page 91
13. Calibrating for Digital Measurement
13.8 Angle Beam Testing - Flaw Location
USN52 L trigonometric functions provide information in the
measurement line as to the location of a discontinuity detected
during an angle beam test.
If TOF mode (Section 13.9) is set to FLANK, displayed measurement values relate to the first echo signal in the gate that violates
alarm threshold level. In PEAK TOF mode, displayed measurement values are for the highest amplitude signal in the gate.
used. The X-VALUE function will be explained later in
this section.
D= Depth of the detected discontinuity relative to the surface
where the sound beam enters the part under test.
#= “Held” readings. When there is no signal in the gate, the
last measurement values are held in the display, preceded
by this symbol.
When the trigonometric functions are enabled, the measurement
line displays the following values:
S= Sound path distance to the detected discontinuity, that is,
the first or the highest amplitude signal in the gate, as
explained in the preceding paragraph.
P= Projection (surface) distance is the projected distance along
the surface of the part under test to a point that intersects
the plane in which the detected discontinuity lies.
Projection distance is measured either from the beam
index (exit) point of the probe or wedge, or from the front,
depending on whether or not the X-VALUE function is
Page 92
Trigonometric Values in Measurement Line
USN52 L Operating Manual
13. Calibrating for Digital Measurement
Use the following procedure to calibrate for angle beam flaw location:
NOTE: All USN52 L calibration procedures require a reference standard of the same material, velocity of sound, and
temperature as the material to be inspected.
1. Calibrate the A-scan display according to Sections 9.2 and
9.5. Use the same test block for both A-scan and digital
calibration.
2. Set MEASURE function (lower level) to 0 TO 1st:
,
or
,
or
,
3. Select GATE menu and adjust a-START and a-WIDTH to
span the range to be monitored for flaw indications : ,
or
,
4. Adjust gain and alarm threshold (a-THRESH) according to
test sensitivity requirements:
5. Set GATE LOGIC (lower level) to positive:
,
or
,
or
,
6. Frame the trigonometric functions (lower level) ANGLE,
THICKNESS, and X-VALUE:
,
USN52 L Operating Manual
7. Set ANGLE; enter the refracted (usually shear wave) angle
of the probe or wedge. For accurate measurements, probe
angle should be measured using an IIW block, or equivalent:
8. Enter THICKNESS, that is, the dimension from the sound
entry surface to the opposite side of the object being tested
(see illustration on the preceding page):
9. Enter X-VALUE if projection distance (P=) is to be measured
from the front of the probe or wedge rather than from beam
index point. X-VALUE is the measured distance from the
beam index point to the front of the angle beam probe or
wedge (see illustration on the preceding page):
10. Enter O-DIAM for curved surfaces. O-DIAM is the outside
diameter of the test object. For flat test objects the O-DIAM
value should be set to INFINITY. The USN52 L uses the
O-DIAM value to calculate the corresponding corrections of
projection distance and depth for the curved surface. Use
for setting the O-DIAM value.
11. Switch to the A-scan display:
or
The USN52 L is now calibrated and will display flaw location information in the measurement line, as described in this section.
Page 93
13. Calibrating for Digital Measurement
NOTE: Recalibrate if a probe or wedge with a different
ANGLE or X-VALUE is put into use.
To disable angle beam flaw location and remove S=, P= and D=
from the measurement line, turn the ANGLE function (menu 9)
OFF: ,
13.9 TOF Mode - FLANK and PEAK
The TOF, time of flight function (lower level menus) determines
the way in which the USN52 L measures thickness or distance.
When TOF mode is set to FLANK, the measurement is determined by the point where each signal’s leading edge (flank) crosses
gate threshold level. In the A-scan, this corresponds to the intersection of the signal flank and gate bar.
When TOF is in PEAK mode, measurements are made to the
peaks (highest amplitude point) of the echo signals. If an echo
exceeds 127% screen height, measurement is made to the next
highest half-cycle peak.
13.10 AUTOCAL Feature
The USN52 L provides an automatic calibration feature in which
the instrument calculates and performs the necessary adjustments with minimal user intervention.
Access to the AUTOCAL feature is provided on the LOWER
LEVEL MENU: locate and highlight the AUTOCAL box. Pressing
turns on the AUTOCAL feature.
During the AUTOCAL feature, the operator will need to input two
reference thicknesses (S-REF1 and S-REF2) which will be determined by the test block(s) used. Default values for S-REF1 and
S-REF2 are 1.000 inch and 4.000 inch.
From the same LOWER LEVEL MENU where AUTOCAL is turned
ON, select “POSITIVE” in the GATE LOGIC box and “0 TO 1st” in
the MEASURE box. The TOF box can be set to either “PEAK” or
“FLANK.” Press the HOME key to access the UPPER LEVEL
MENUS and select the S-CAL position.
Measurement accuracy in FLANK mode can be reduced if echo
signals vary greatly in amplitude. Therefore, PEAK is the preferred
mode for most applications, provided measurement echoes have
clearly defined peaks and remain under 127% screen height.
Page 94
USN52 L Operating Manual
13. Calibrating for Digital Measurement
When AUTOCAL is on, the MENU BOXES for the S-CAL Menu
will be modified by replacing the material velocity and zero menu
boxes with boxes as shown below.
GAIN
30.00 Db
CAL
a-START
1.000 in.
S-REF
1.000 in.
AUTOCAL Menu Boxes
When the user begins the AUTOCAL procedure, the CAL MENU
box appears as shown above. The second line of the CAL box
indicates current calibration step. It starts empty, meaning that the
AUTOCAL operation has not begun. A double press of corresponding
keys for the CAL MENU box instructs the USN to
record the time of flight for the first reference. When the recording
is made, “REC 0” is replaced with “REC 1” to indicate that one
USN52 L Operating Manual
echo has been recorded. If no gate violation is occurring, the
AUTOCAL sequence will not advance to the next step. If more
than one violation exists, the first echo will be used.
After the first echo is recorded, the second S-REF must be entered and the gate moved over the second echo. There must be
key will
only one violation of the gate. Pressing the CAL
record the second echo and display “REC 2.” At this point all
key will record
recording is complete. Another press of the
the second echo and display “REC 2.” At this point all recording is
complete. Another press of the increment or decrement keys will
exit the AUTOCAL mode and perform the calculations and error
checking. If an error is detected, there will be no changes to the
material velocity or zero values. When the mode is exited, the
blank line will again appear under CAL. If at any point in the sequence,
are simultaneously pressed, the mode will be exited, a blank line under CAL will be displayed, and no calibration
calculations will be performed. After a successful AUTOCAL operation the material velocity will be in its fine range, in the basic
menu “mtl vel” rather than “MTL VEL” will appear. Upon completion of the AUTOCAL operation, the mode will be exited and the
special menus de-installed. The AUTOCAL mode will remain in
effect if the calibration results in an error message.
Page 95
13. Calibrating for Digital Measurement
If an error is detected when the calculations are performed, the
following message will be written to the screen and AUTOCAL will
be ended. “AutoCal error! Hit KEY to continue.”
If any of the following conditions are detected at calculation time,
an error message will be displayed and the calculations will be
aborted.
•
•
•
•
•
•
•
S-ref = value entered by operator corresponding to test block
thickness.
TOF = time of flight recorded by the USN for the test block.
The zero and material velocity values calculated will be retained
after AUTOCAL until changed by the operator or until another
AUTOCAL is performed.
S-REF1 equals S-REF2
the second echo is the same as the first
the calculated material velocity exceeds 9999m/sec
the calculated material velocity is less then 1000m/sec
the calculated zero exceeds 1600 µsec.
the calculated zero is less than 1.4 µsec.
the calculated values will not fit in the A-SCAN display
AUTOCAL records the time of flight for the two references and
calculates the material velocity and zero values according to the
following equations.
Material velocity = (2 * (S−REF2 −S−REF1))
(TOF2 - TOF1)
zero = ((S−REF2 * TOF1)−(S−REF1 * TOF2))
(S−REF2−S−REF1)
Page 96
USN52 L Operating Manual
14. Digital Thickness / Distance Measurement
14.1 Before Taking Measurements
The measurement line of the USN 52 L provides a digital display
of wall thickness or distance to flaw along the soundpath.
Before digital readings can be taken:
1. Select a probe that is suitable for the application.
14.2 Taking Digital Measurements
NOTE: This procedure applies to measurement of parts at
ambient temperature. Special procedures may be required
for objects with elevated surface or internal temperatures.
Use the following procedure when measuring wall thickness or
distance to a discontinuity:
2. Select the proper MEASURE mode, 0 TO 1st or
MULTECHO. See Section 13.1 for descriptions.
1. Remove any dirt, loose scale, or flaking from the test surface.
3. Select TOF mode, PEAK or FLANK. Refer to Section 13.9
for selection criteria.
2. Apply a small amount of couplant to the surface of the part.
4. If thickness measurements only will be taken, and the visual
alarm is not needed, set GATE LOGIC function (lower level)
to MEASURE (ref. Section 10.2, Setting Gate Logic).
5. Calibrate the A-scan display according to the applicable procedure in Chapter 9.
3. Place the probe on the surface with even, but not excessive,
pressure.
4. Observing the A-scan display and S= value in the measurement line, obtain maximum echo signal amplitude and a stable
digital readout.
5. Read the digital measurement.
6. Calibrate the digital measurement display according to the
procedure in Chapter 13 for the selected probe type and
MEASURE mode.
USN52 L Operating Manual
Page 97
14. Digital Thickness/Distance Measurement
When using MULTECHO mode, be sure to observe gate b to verify
that the correct backwall multiple has been detected. Purpose
and operation of gate b are described in detail in Sections 13.5
through 13.7.
To assure the best measurement in FLANK TOF mode, amplitude of significant backwall or discontinuity echo signal(s) of the
test object should be approximately the same as the amplitude of
the corresponding echo signal(s) from the test block during calibration. For example, if backwall echo amplitude from the test
block was 100%, then the amplitude of the backwall echo of the
part under test should be adjusted to approximately 100%.
To display measurements in the enlarged display area, press
or
until the S= value is highlighted in the measurement line.
Displayed measurement values may be stored in the on-board
data logger of the USN52 L or transmitted via RS-232C to a printer,
computer, or other RS-232 compatible device.
Proceed to Chapter 15 for instructions on recording measurements
in the on-board data logger.
Proceed to Chapter 16 for instructions on transmitting measurements to an external device via RS-232C.
Page 98
USN52 L Operating Manual
15. Operating the On-board Data Logger
15.1 Introduction
The on board Data Logger of the USN52 L provides a simple and
reliable way to record thickness readings. Displayed readings are
stored in one or more files by pressing
or optional Remote
Send Switch.
A file is a group of Data Logger memory locations for storing readings, one reading per location, and reporting measurement data.
File size is determined automatically when the operator sets the
desired number of files, up to a maximum of 99. The USN52 L
divides the total memory capacity of 2500 readings by the number
of files specified and creates the maximum number of files, with
an equal number of locations allowed by capacity (see Table 15-1
in Section 15.2).
USN52 L Operating Manual
The first reading is stored in each file starting with location number
1, unless the operator selects a different starting location. The
data logger automatically indexes to the next location and subsequent readings are stored sequentially until all locations have been
filled or another location or file is selected to receive readings.
Location numbers and stored readings can be viewed and edited
either from the A-scan display or menu 8 (lower level). Readings in
individual file locations, entire files, or all of memory can be cleared.
Individual readings, the selected file and the entire data logger
memory can be transmitted via the RS-232 interface for documentation, storage and analysis.
A built-in report format outputs selected file(s) or the entire data
logger memory, file by file, to a PC or compatible serial printer, in a
24-column ASCII format, in the selected language.
As with the instrument control settings, stored readings are retained
indefinitely in memory, even when the batteries are removed.
Page 99
15. Operating the On-board Data Logger
15.2 Setting Number of Files
Readings can not be stored in the Data Logger until the desired
number of files has been set and one file has been selected to
receive readings. Number of files can only be set when Data Logger memory is clear.
Use the following procedure to set number of files:
1. Switch to the lower level menus:
or
2. Frame the column containing the Data Logger functions
shown at right:
or
,
If the FILE NUMBER function displays ALL CLEAR memory
is clear and the number of data files can be set. If memory is
not clear, see Section 15.8 for instructions on clearing memory.
3. Press
(descending) or
(ascending) aligned with FILE
NUMBER to display the desired number of files. Set #01 = 1
file, Set #02 = 2 files, etc.
simulta4. When the desired option is displayed press
neously. Configuring is displayed briefly while memory is
being set up.
The number of files determines the number of available locations
in each file. Table 15-1 on the next page lists the number of locations per file for each option.
Page 100
NOTE: Configuring memory automatically enables the following menu function settings:
•
FILE MODE is set to THICKNESS
•
MEASURE is set to 0 TO 1st
•
GATE LOGIC is set to POSITIVE
•
COPY MODE is set to DATA LOGGER
These default settings may be changed individually by the
normal procedure.
When configured, the menu will display:
FILE
NUMBER
LOCATION
1
VALUE
EMPTY
FILE MODE
THICKNESS
Recording starts in File 1, Location 1 automatically, unless another
location or file is selected.
USN52 L Operating Manual
15. Operating the On-board Data Logger
No. of Locations = INT (2500 ÷ No. of Files)
Table 15-1: Locations per File Based on Number of Files
# Files
01
02
03
04
05
06
07
08
09
10
11
12
13
14
15
16
17
18
19
20
21
22
23
24
25
# Loc. per File
2500
1250
833
625
500
416
357
312
277
250
227
208
192
178
166
156
147
138
131
125
119
113
108
104
100
USN52 L Operating Manual
# Files
26
27
28
29
30
31
32
33
34
35
36
37
38
39
40
41
42
43
44
45
46
47
48
49
50
# Loc. per File
96
92
89
86
83
80
78
75
73
71
69
67
65
64
62
60
59
58
56
55
54
53
52
51
50
# Files
51
52
53
54
55
56
57
58
59
60
61
62
63
64
65
66
67
68
69
70
71
72
73
74
75
# Loc. per File
49
48
47
46
45
44
43
43
42
41
40
40
39
39
38
37
37
36
39
35
35
34
34
33
33
# Files
76
77
78
79
80
81
82
83
84
85
86
87
88
89
90
91
92
93
94
95
96
97
98
99
# Loc. per File
32
32
32
31
31
30
30
30
29
29
29
28
28
28
27
27
27
26
26
26
26
25
25
25
Page 101
15. Operating the On-board Data Logger
15.3 Selecting a File
Before readings can be stored in the Data Logger, one of the files
created by the procedure in Section 15.2 must be selected to receive the data.
The USN52 L automatically returns to the last selected file when
the instrument is switched on or when the data logger column in
menu 8 is accessed.
To select a different file number:
1. Switch to the lower level menus:
or
2. Frame the column containing the Data Logger functions:
or
Incrementing above the maximum file number loops the display to
ALL FILES (all files) and back to File 1. Decrementing below File
1 loops to ALL FILES and then to the maximum set file number.
The status of each file is indicated in the display:
• EMPTY files contain no readings.
• ACTIVE files contain at least one reading but are not full.
• FULL files have all locations filled.
The number following the status indicates the number of the selected file (1 to 99).
For the displayed FILE NUMBER, the currently active LOCATION
number and stored VALUE are also displayed in this menu column.
,
The FILE NUMBER function shows the currently selected
file number. If no file has been previously selected, EMPTY
1 is displayed. If FILE NUMBER displays ALL CLEAR, no
files exist. Number of files must be set (Section 15.2).
3. Press
(descending) or
A few additional function settings are required before readings can
be logged into the selected Data Logger file. Proceed to Section
15.4 for further instructions.
(ascending) aligned with FILE
NUMBER to select the desired file number.
Page 102
USN52 L Operating Manual
15. Operating the On-board Data Logger
15.4 Logging Readings into Memory
Displayed measurement line values are as follows:
To store thickness or distance measurements in the Data Logger,
the following functions must be set as shown:
LOC: The active location number in the selected file. The next
reading will be stored in this location.
• FILE NUMBER function must be set to EMPTY XX or ACTIVE XX, that is, a file with at least one empty location must
be selected.
VAL: Value stored in the displayed location (LOC:).
To record a displayed thickness value in the current location, LOC:,
• FILE MODE function must be set to THICKNESS.
• COPY MODE function must be set to DATA LOGGER.
press
or remote copy switch.
• MEASURE function must be set to 0 TO 1st or MULTECHO.
• ANGLE function must be OFF.
The Data Logger is disabled when FILE MODE is OFF or when
COPY MODE, in lower level menu, is set to any selection other
than DATA LOGGER.
The USN 52 will not record the displayed value if it is zero (0), or if
the current file location already contains a reading. VAL: must be
EMPTY.
To find and select an empty location in the currently selected file,
refer to Section 15.5.
After setting the required function settings above, return to the
BASIC menu and A-scan display:
To select a different file number, refer to Section 15.3.
The thickness (TOF) reading is automatically displayed in the enlarged value display in the upper right corner of the A-scan.
USN52 L Operating Manual
Page 103
15. Operating the On-board Data Logger
15.5 Selecting Locations and Reviewing Readings
From the A-scan Display:
Any location in the currently selected file number, and the value
stored in that location, can be selected and viewed either from the
A-scan display or by selecting menu 8 from the lower menu level.
When the Data Logger is enabled, the measurement line shows
the current location number (LOC:) and the value (VAL:) stored in
that location.
The value presently stored in a file location is displayed in one of
three ways:
Press
to scroll through locations in descending order or
to
scroll through locations in ascending order. Holding the key causes
the rate to accelerate.
EMPTY
No measurement has been stored.
X.XXX in
(XX.X mm)
The value presently stored in the
displayed location number. Stored readings are
always displayed in the current unit of measure,
set using the MEAS. UNITS function in menu
9.
ERROR
The reading has been corrupted in memory and
must be retaken. This condition is unlikely.
Follow the applicable procedure in this section to select file locations and review stored readings.
As each location (LOC:) is displayed, the value stored in that location (VAL:) is simultaneously displayed.
From Menu 8 Display:
Use
or
to frame and activate the column that contains the
Data Logger functions.
Press
aligned with the LOCATION function to scroll through
locations in descending order or
to scroll through locations in
ascending order. Holding the key causes the rate to accelerate.
As each location number is displayed in the LOCATION function
box, the value stored in that location is simultaneously displayed in
the VALUE function box.
Page 104
USN52 L Operating Manual
15. Operating the On-board Data Logger
15.6 Clearing and Replacing Readings
The value stored in any location in the currently selected file number can be cleared from memory either from the A-scan display or
by selecting menu 8 from the lower menu level.
Follow the applicable procedure in this section to clear (erase) a
stored reading from Data Logger memory.
WARNING!
Clearing a stored reading permanently erases it from memory.
It cannot be recovered.
From the A-scan Display:
When the Data Logger is enabled, the measurement line in the Ascan display shows the current location number (LOC:) and the
value (VAL:) stored in that location.
Only the displayed VAL: value will be cleared. If the reading to be
cleared is not displayed, use the procedure in Section 15.5 to select the desired location and stored value.
To clear the displayed VAL: value, simultaneously press both
and
and hold them for approximately 3 seconds until EMPTY
appears next to VAL:.
A new reading may now be logged into the cleared file location by
pressing
.
From Data Logger Menu Display:
or
to frame and activate the column that contains the
Use
Data Logger functions.
If necessary, use the procedure in Section 15.5 to select the location to be cleared.
To clear the value displayed in the VALUE function, simultaneously
and hold them for approximately 3 secpress both arrows of
onds until EMPTY appears in the VALUE function box.
After returning to the A-scan display, a new reading may be logged
into the cleared location:
USN52 L Operating Manual
Page 105
15. Operating the On-board Data Logger
15.7 Clearing Selected Files
All locations of the selected file have been cleared and are available for recording of measurement data.
To clear an entire file, Data Logger menu (lower level) must be
displayed. A file cannot be cleared from the A-scan display.
All data in the cleared file will be permanently lost. However, the
contents of one file or all files may be transferred to a dot matrix
printer or personal computer prior to clearing. Refer to Chapter 16
for instructions.
To select and clear a file:
1. Display Data Logger menu:
,
or
2. Frame the Data Logger functions:
or
3. Select FILE NUMBER to be cleared:
WARNING!
Clearing a selected file will permanently erase all readings
stored in that file number.
15.8 Clearing All Files
To clear the contents of the entire Data Logger memory, the Data
Logger menu must be displayed. No files can be cleared while the
A-scan display is enabled.
All data in the Data Logger will be permanently lost. However, the
contents one file or all files may be transferred to a dot matrix
printer or personal computer prior to clearing. Refer to Chapter 16
for instructions.
To clear the entire Data Logger:
1. Display Data Logger menu:
,
or
2. Frame the Data Logger functions:
or
3. Set FILE NUMBER to ALL FILES:
4. Simultaneously press both arrows of
aligned with FILE
NUMBER and hold them for approximately 3 seconds until
file status changes from ACTIVE XX or FULL XX to EMPTY
XX.
Page 106
USN52 L Operating Manual
15. Operating the On-board Data Logger
WARNING!
Clearing the Data Logger will permanently erase all data
stored in all files.
For extended storage, files should be transferred to a computer
for storage on disk or tape. Data transfer utility software is available from Krautkramer for this purpose. Contact your local
Krautkramer representative for information.
4.
Chapter 16 provides information needed to interface the USN52 L
with an external device, such as a printer or computer, for file storage.
Simultaneously press both arrows of aligned with FILE NUMBER and hold them for approximately 3 seconds until file
status changes from ALL FILES to ALL CLEAR.
The entire Data Logger memory has been cleared. Measurement
values cannot be logged into memory until new files have been
configured.
Follow the procedure in Section 15.2, Setting Number of Files, to
create new files and prepare the Data Logger to record readings.
15.9 Permanent Storage
The USN52 L stores readings in memory indefinitely, even when
the batteries have been removed.
However, data could be lost or corrupted if the instrument were
damaged or exposed to extreme environmental conditions.
USN52 L Operating Manual
Page 107
16. Using Peripherals with the USN52 L
16. Using Peripherals with the USN 52
16.1 RS-232 I/O Interface
Table 16-1: RS-232 Output via COPY Key
The RS-232 I/O port is a 7-pin Lemo #0B connector located on
the rear panel (see illustration next page). It is used to transmit
data to an external device, such as a printer, an IBM compatible
personal computer, or Krautkramer’s DR1 Data Recorder.
Connected
Device
COPY MODE
Output Description Function SettingWhen COPY Pressed
No device
DATA LOGGER
NOTE: The AUX (analog output) port next to the RS-232
port is described in Section 16.9.
The USN52 L is also capable of receiving input from a remote
computer or terminal. All keypad controls and menu functions are
accessible.
UltraDoc utility software is available for communications with a
PC. The utility software can be used with any IBM PC or compatible running Windows 3.1/95/NT. Contact Krautkramer or your
local representative for information.
Reports and other data are transmitted by pressing the COPY
key. The COPY MODE function determines how the unit responds
when the COPY key is pressed.
Table 16-1 summarizes RS-232 output operations.
Epson compatible HARD COPY
serial printer
USN 50 display,
including A-scan
Epson compatible REPORT
serial printer
Data logger report
showing files and
statistics
Epson compatible DISP + PDUMP
serial printer
Current A-scan image
plus functions
and current settings
Krautkramer
Model DR1
Data Recorder
THICKNESS
Displayed digital
measurement value
RS-232 Device
(PC, printer,
data logger,...)
THICKNESS
Displayed digital
measurement value
Epson compatible PDUMP
serial printer
Page 108
Logs displayed measurement in memory
Remote codes plus
functions and current
settings
USN52 L Operating Manual
16. Using Peripherals with the USN52 L
Epson compatible MEMO DUMP
All non-empty MEMOS
(If MEMO function is
enabled)
NOTE: A special cable is required for each type of device.
Refer to Chapter 2 or applicable section of this chapter.
16.2 Connecting a Peripheral Device
Peripheral devices are connected to the RS-232 I/O port on the
rear of the USN52 L. Special cables, available from Krautkramer,
must be used. The specific cable required for each type of device
is specified in the applicable section of this chapter and in Chapter
2, Accessories and Peripherals.
Location of the RS-232 I/O port is shown below.
Rear Panel of the USN52 L
To enable communication between the USN52 L and peripheral,
RS-232 protocol must set to match the connected device.
For printers, a printer driver must also be selected. The operating manual of the connected device will give required protocol settings.
Select the appropriate printer driver as follows:
1. Turn on the USN52 L and select the lower level menus:
;
2. Frame the column containing the COPY MODE function:
or
,
or
3. Activate the PRINTER SELECT function:
4. Select the compatible printer name:
5. Return to the COPY MODE function:
RS-232 protocol is preset at the factory as follows:
BAUD RATE: 9600
LENGTH: 8 DATA BITS
PARITY: DISABLED
USN52 L Operating Manual
Page 109
16. Using Peripherals with the USN52 L
To change the RS-232 protocol:
1. If necessary, select lower level menu:
Connect the printer to the RS-232 I/O port of the USN52 L, using
the cable specified in the note above. If necessary, set RS-232
protocol by following the procedure in Section 16.2.
2. Frame the column containing the RS-232 protocol functions:
or ;
or
To print a HARD COPY of the display:
3. Select BAUD RATE, LENGTH, and PARITY to match the
requirements of the device connected to the RS-232 I/O port:
1. Select lower level menu:
2. Frame the column, which contains the COPY MODE funcor ;
or
tion,
3. Set COPY MODE to HARD COPY:
16.3 Printing a HARD COPY of the Display
NOTE: Output is formatted for the Epson FX-850 dot
matrix printer, with Intelligent Serial Interface Number 8148,
and other fully compatible printers.
Required cable: Product Code 022-505-518
This operation prints a facsimile of the USN52 L display at the time
is pressed.
4. Return to the A-scan display:
or
5. Prepare the display to be printed. There are a number of
possibilities. You may:
a. Select the menu, if any, that should appear with the Aor
scan in the printout:
b. Expand the A-scan horizontally:
c. Display the gated portion of the A-scan:
d. Display measurement data or data logger status in the
measurement line and enlarged value display areas.
Page 110
USN52 L Operating Manual
16. Using Peripherals with the USN52 L
6. With the desired image and data in the USN52 L display,
initiate the printout:
The USN52 L “captures” the image at the instant the COPY key is
pressed. Although the A-scan display remains active, the printed
image will show the display as it was when the COPY key was
pressed. USN52 L keypad controls are disabled until the printout
has been completed.
while the A-scan is displayed. Only the currently selected file will
be reported.
Reports showing other files, or all files, must be selected and printed
using the Data Logger functions (lower level menu).
To print a report from the A-scan display, showing contents and
statistics from the currently selected file (Data Logger must be
enabled, with LOC: and VAL: values displayed in the measurement line):
1. Select lower level menu:
16.4 Printing a Data Logger Report
USN52 L Data Logger files are transmitted in an ASCII text format
to a compatible serial printer. The 24 column report format is compatible with any 24, 40, 80 or 132 column serial printer, provided
the proper cable is used.
2. Frame the column, which contains the COPY MODE function,
or ;
or
3. Set COPY MODE to REPORT:
4. Return to the A-scan display:
or
Reports are printed in the language selected via the LANGUAGE
function (lower level menu).
5. Initiate printing:
Before printing, connect the printer to the RS-232 I/O port. For
most serial printers, use the standard USN 50 - Serial Printer cable.
If the Data Logger is enabled (ref. Section 15.4) a Data Logger
report showing contents of the currently selected file can be printed
USN52 L Operating Manual
Page 111
16. Using Peripherals with the USN52 L
Data Logger Report Format
To print a Data Logger Report showing one file or all files:
1. Select lower level menu:
2. Frame the column, which contains the COPY MODE function:
or ;
or
3. Set COPY MODE to REPORT:
4. Frame the Data Logger functions (lower level menu):
;
or
Report format is the same, whether data is sent to a printer or to a
personal computer. The procedure for transmitting data to a computer is in Section 16.5.
The next page shows a sample Data Logger report and provides a
brief description of the information provided in each section of the
report.
or
5. Under the FILE NUMBER function, select the desired
file, ACTIVE XX or FULL XX. To print all files select ALL
FILES:
6. Initiate printing:
Empty file locations and empty files will not be printed.
Printed files remain in memory after printing has been completed.
To clear files, refer to Section 15.7 To clear the entire memory,
refer to Section 15.8.
Page 112
USN52 L Operating Manual
16. Using Peripherals with the USN52 L
KRAUTKRAMER
USN52 L REPORT
THICKNESS DATA LOGGER
——— FILE HEADER ————
COMPANY:
FILE NUMBER:
1
FILE NAME:
SERIAL NUMBER: 00007935
REVISION:
A.10
OPERATOR ID:
PROBE ID:
DATE:
COMMENTS:
—— FILE STATISTICS ——
READINGS
10
MINIMUM
0.100 in
AT LOC
1, 6
MAXIMUM
0.500 in
AT LOC
5, 10
RANGE
0.400 in
MEAN
0.300 in
——— READINGS ———
1
0.100 in
2
0.200 in
3
0.300 in
4
0.400 in
5
0.500 in
6
0.100 in
7
0.200 in
8
0.300 in
9
0.400 in
10
0.500 in
FILE HEADER: File number, instrument serial number, and software revision number are automatically provided. Space is provided for the operator to write company name, file name, operator ID, the
type of probe used, date, and comments.
FILE STATISTICS: The USN52 L analyzes the thickness data and transmits statistics as shown. If a
large number of readings have been recorded, a transmission delay may occur while statistics are
calculated. If a reading has been damaged or corrupted in memory, it is not used in the calculations and
“ERROR” is transmitted in the readings section of the report in place of the original value.
“READINGS” is the number of valid stored thickness readings.
“MINIMUM” and “MAXIMUM” are the smallest and greatest readings stored in the file. “AT LOC” is the
location number(s) of each. If the same value occurs in more than one location, all locations are
reported.
“RANGE” is the difference between the MAXIMUM and MINIMUM readings in the file.
“MEAN” is the sample mean (average) of all readings in the file.
READINGS: All readings are transmitted sequentially, according to location number. Each reading
line has three parts:
1. File location number.
2. Thickness value stored in the file location. Empty locations are not transmitted.
3. IN (inches) or MM (millimeters). Values are transmitted in the unit of measure to which the
USN52 L is set at the time the report is transmitted.
END OF REPORT
The USN52 L uses a parity flag to test the validity of each reading as it is recalled for transmission. Any
reading that has been damaged in memory is thus detected and “ERROR” is transmitted in its place.
Damaged readings are not used in calculating statistics.
USN52 L Operating Manual
Page 113
16. Using Peripherals with the USN52 L
16.5 Transferring Files to a Personal Computer
Data Logger files can be transmitted, via the RS-232 I/O port, to
an IBM compatible personal computer. Files are automatically
formatted and transmitted as ASCII text files.
Once saved on disk, data can be viewed on screen, printed, or
transferred to standard word processing, data base, spreadsheet,
and applications software. Custom applications software, such as
Krautkramer’s DATAMATE Thickness Data Control Programs and
PIPE+ Corrosion Inspection Program, can also be used for more
extensive analysis and corrosion rate prediction.
An optional USN52 L Data Transfer Utility Program, simplifies the
transfer of data to the PC. The Utility Program has a language
selection feature.
Connect the RS-232 I/O port of the USN52 L to the serial port of
the computer using the proper cable. For 25 pin serial ports use
Krautkramer product code 022-505-516. For 9 pin serial ports, an
additional adapter, product code 021-382-565, is required.
can be transmitted while the A-scan is displayed. Only the currently selected file will be transmitted.
Reports showing other files, or all files, must be selected and transmitted using the Data Logger functions in lower level menu.
To transmit a report from the A-scan display, showing contents
and statistics from the currently selected file (Data Logger must be
enabled, with LOC: and VAL: values displayed in the measurement line):
1. Select lower level menu:
2. Frame the column, which contains the COPY MODE function:
or ;
or
3. Set COPY MODE to REPORT:
4. Return to the A-scan display:
or
5. Initiate data transmission:
If the Data Logger is enabled (ref. Section 15.4) a Data Logger
report showing contents of the currently selected file
Page 114
USN52 L Operating Manual
16. Using Peripherals with the USN52 L
To transmit a Data Logger Report showing one file or all files:
Data Logger Report Format
1. Select lower level menu:
Refer to Section 16.4 for a detailed description.
2. Frame the column, which contains the COPY MODE function:
or ;
or
16.6 Printing Display and Parameters
3. Set COPY MODE to REPORT:
4. Frame the Data Logger functions (lower level menu):
;
or
or
5. Under the FILE NUMBER function, select the desired
file, ACTIVE XX or FULL XX. To print all files select ALL
NOTE: Output is formatted for the Epson FX-850 dot matrix printer, with Intelligent Serial Interface Number 8148,
and other fully compatible printers.
Required cable: Product Code 022-505-518
This operation prints a single page report showing a facsimile of
the A-scan image and instrument control parameters at the time
FILES:
is pressed.
5. Initiate transmission:
Empty file locations and empty files will not be sent.
Additional space is provided for user supplied information, such as
operator and equipment identification, job name, comments, and
date.
Files remain in memory after transmission has been completed.
To clear files, refer to Section 15.7 To clear the entire memory,
refer to Section 15.8.
Connect the printer to the RS-232 I/O port using the cable specified in the note above. If necessary, set RS-232 protocol by following the procedure in Section 16.2.
USN52 L Operating Manual
Page 115
16. Using Peripherals with the USN52 L
To print the display + parameter report:
1. Select lower level menu:
2. Frame the column, which contains the COPY MODE function:
or ;
or
3. Set COPY MODE to DISP + PDUMP:
4. Return to the A-scan display:
16.7 Sending Readings to the DR1 Data Recorder
NOTE: Output is formatted for Krautkramer model DR1
Data Recorder.
Required cable: Product Code 022-505-519
Individual digital measurements, displayed in the measurement line
S= value, can be recorded using the DR1 Data Recorder.
or
5. Optimize the A-scan image to be printed with the report. You
may also:
a. Expand the A-scan horizontally:
b. Display the gated portion of the A-scan:
6. With the desired image in the USN52 R display, initiate the
printout:
Although the on board Data Logger of the USN52 L is suitable for
a wide range of digital measurement recording applications, the
more extensive capabilities of the DR1 Data Recorder may be
preferred for some applications.
The DR1 can store up to 7000 readings and offers grid (matrix)
and custom file formats in addition to a sequential (automatic) format. Other capabilities include alphanumeric location and file identifiers, keypad entry and editing of data, on board statistical analysis and reports, and a 32 character display for easy, menu-guided
operation.
The USN52 L “captures” the A-scan image at the instant the COPY
key is pressed. Although the A-scan display remains active, the
report will show the image as it was when the COPY key was
pressed. USN52 L keypad controls are disabled until the printout
has been completed.
Page 116
USN52 L Operating Manual
16. Using Peripherals with the USN52 L
Connect the DR1 to the RS-232 I/O port using the cable specified
in the note above. Set up the DR1 according to the instructions in
the DR1 Operating Manual. Be sure the DR1 is on and ready to
receive either a material velocity or a thickness reading in the desired file and location.
4. Frame the Data Logger functions (lower level menu):
;
or
or
5. Set FILE MODE to OFF:
This disables the on-board Data Logger.
RS-232 protocol of the USN52 L must be set to match that of the
DR1. Follow the procedure in Section 16.2 to set RS-232 protocol
as follows:
BAUD RATE: 1200
LENGTH: 8 DATA BITS
PARITY: DISABLED
NOTE: ANGLE function in menu 8 must be OFF.
To send the currently displayed measurement line S= value to the
DR1:
1. Select lower level menu:
6. Return to the A-scan display:
or
7. Obtain the desired digital measurement in the measurement
line S= value. (Refer to Chapter 14 for digital measurements
procedures.)
8. Send the reading to the DR1:
The DR1 beeps to indicate that the reading has been
accepted. After the reading has been sent , the USN52 L is
ready to take another measurement.
2. Frame the column, which contains the COPY MODE function:
or ;
or
3. Set COPY MODE to THICKNESS:
USN52 L Operating Manual
Page 117
16. Using Peripherals with the USN52 L
16.8 Sending Readings to Other Devices
Digital measurements displayed in the measurement line can be
transmitted via the RS-232 I/O port to any compatible device, such
as a personal computer, printer, or other RS-232 recording instrument.
In most cases, the displayed thickness (S=) value will be sent.
However, when a value is entered in the ANGLE function (lower
level menus), enabling trigonometric flaw location for angle beam
testing, the three measurement line values, S=, P= and D=, will be
transmitted together.
In all cases, the correct cable will be required. Refer to Chapter 2
for a listing of available cables. Non-standard cables are also available. Contact your nearest Krautkramer representative.
If necessary, set RS-232 protocol (Section 16.2).
To send the displayed measurement line value(s):
4. Frame the Data Logger functions (lower level menu):
;
or
or
5. Set FILE MODE to OFF:
This disables the on-board Data Logger.
6. Return to the A-scan display:
or
7. Obtain the desired digital measurement(s) in the measurement line. (Refer to Chapter 14 for digital measurement procedures.)
8. Send the reading(s):
The table on the next page shows single reading formats of measurement (S=) values transmitted by the USN52 L. Specific format depends on unit of measure and the measurement resolution.
1. Select lower level menu:
2. Frame the column, which contains the COPY MODE function:
or ;
or
3. Set COPY MODE to THICKNESS:
Page 118
USN52 L Operating Manual
16. Using Peripherals with the USN52 L
Byte #
USN52 L Operating Manual
X.XXX IN
XX.XX IN
XX.XX MM
XXX.X MM
1
2
Space
Digit
Space
Digit
Space
Digit
Space
Digit
3
D.P.
Digit
Digit
Digit
4
Digit
D.P.
D.P.
Digit
5
6
Digit
Digit
Digit
Digit
Digit
Digit
D.P.
Digit
7
Space
Space
Space
Space
8
I
9
10
N
Space
N
Space
M
Space
M
Space
11
Space
Space
Space
Space
12
CR
CR
13
LF
I
M
CR
LF
LF
D.P.: Decimal Point
CR: Carriage Return LF: Line Feed
M
CR
LF
Page 119
16. Using Peripherals with the USN52 L
16.9 Analog Output
Amplitude and time of flight (distance) analog outputs are provided
via the 7-pin AUX port shown below.
Amplitude output is scaled so that 2.5 volts corresponds to a
signal of 128% of screen height and 0 volts corresponds to no
signal in the gate. In RF display mode, 1.25 volts corresponds to a
signal of either +64% or -64% of screen height.
Distance output depends on the selected measurement mode,
the width of gate a and where the signal occurs in the gate.
In 0 to 1st mode, voltage out is based on the ratio of distance in
the gate to the width of the gate. No signal in the gate produces
2.5 volts (maximum) output. A signal occurring at half the width of
the gate causes 1.25 volt output, and so on.
Rear Panel of the USN52 L
Outputs are 0-2.5 volts DC (1.25 volts in RF display mode) that
measure the following:
•
•
In MULTECHO mode, voltage out is the ratio of measured thickness to the width of the gate a. No signal in gate b produces 2.5
volts (maximum) output. A distance equal to half the width of gate
a causes 1.25 volt output, and so on.
A 4 foot long cable is supplied with the USN52 L for use with the
analog output port. Pin connections and wire colors are shown in
the following diagram.
Amplitude of the highest signal in the gate
Time of flight (distance) to the first signal in the gate
Page 120
USN52 L Operating Manual
16. Using Peripherals with the USN52 L
This section provides general instructions on command sequence
format. Function codes, along with the values for the options associated with the functions, are provided in tables in this section.
To execute a keypad operation or adjust the setting of a menu
function, transmit the required escape sequence using the format
below. Refer to the tables later in this section for the 2 digit code,
acceptable value range, and resolution.
«[Esc]»«Code»«Space»«Value»«[Return]»
16.10 Remote Control of the USN52 L
The USN52 L is capable of receiving coded instructions from a
personal computer or terminal connected to the RS-232 I/O port.
Instructions must be transmitted to the USN52 L as escape sequences, that is, a series of keystrokes, the first of which is always
the Escape key (ASCII 27). The Escape key will be identified in
this manual as [Esc].
Every key press and menu function of the USN52 L can be operated by remote control. In addition, the current value (setting) of a
particular function may be requested.
USN52 L Operating Manual
[Esc] = Escape Key - CHR$(27)
Code = 2 digit code from the tables
Space = Space bar
Value = Desired value from the tables*
[Return] = Enter Key - CHR$(13)
Values must be entered as a multiple of the resolution shown in
the table for each function. As an example, the following sequence
would adjust the RANGE of the USN52 L to 5.000 inches:
«[Esc]»«DW»«Space»«5.000»«[Return]»
Page 121
16. Using Peripherals with the USN52 L
The GAIN function is an exception. Values are entered in steps of
0.1 as follows:
To set:
18.0 dB
39.1 dB
Enter value:
18
39.1
To request the present status, or value, of any function, use the
following sequence:
«[Esc]»«Code»«[Return]»
The USN52 R will respond by transmitting the current value to the
PC or terminal. As an example, to request the current threshold
level of gate a, send the following sequence:
The tables in this section show all functions, their related codes,
values and resolution. An explanation of table organization and
content follows.
All functions are listed alphabetically in the tables by the names
that appear in the menus.
Keypad controls are also listed alphabetically in the same tables.
If necessary, refer to Section 4.1 for assistance in identifying keypad controls by name.
“Code” is the 2 digit code to activate the particular function, as
explained earlier in this section.
«[Esc]»«AT»«[Return]»
“Range” is either the adjustment range of the function or a list options. In either case, values from the Range column are used in
the “Value” portion of the escape sequence.
The unit will answer with the threshold value, expressed as a multiple of the resolution shown in the table. In this case, a response
or 40 would indicate a threshold level of 40%, because the resolution is 1.
“Resolution” specifies the smallest increment for choosing the
value above.
Commands can be sent using either a user written program, or a
commercially available serial communications program. There are
many such inexpensive programs for terminal and modem communications.
Page 122
USN52 L Operating Manual
16. Using Peripherals with the USN52 L
Function
Code
Range
A-scan
amplitude points
DA
220 points
zoom: 250 points
RF mode: 2 times
number of points
Resolution
Function
Code
Range
Resolution
BAUD RATE
BR
1: 300
2: 600
3: 1200
4: 2400
5: 4800
6: 9600
1
a-START
AD
0 - 200 in
0 - 5000 mm
0.001"
0.1mm
a-THRESH
AT
10 - 90%
-45 - 45% in RF
Calibration
Mode
CR
1
0: Cal mode inactive 1
1: REC Mode
2: REC echo #1
3: REC echo #2
a-WIDTH
AW
.05 - 200 in
1.0 - 5000 mm
0.001
0.1mm
COPY (key)
CO
0: OFF
1: ON
1
COPY
MODE
CM
0: HARD COPY
1: REPORT
2: THICKNESS
3: DATA LOGGER
4: DISP + PDUMP
5: PDUMP
6: MEMO DUMP
1
DAC CURVE
DC
0: OFF 1: ON
1
AMPLITUDE
SA
0: % 1: dB Threshld. 1
ANGLE
PA
0: OFF
10.0 - 90.0
0.1
Autocal
Reference
SR
0.004 in - 200.0 in.
0.1 mm - 5000 mm
.001 in
0.1 mm
b-START
BD
1 - 90%
1
b-THRESH
BT
10 - 90%
-45 - 45% in RF
1
USN52 L Operating Manual
Page 123
16. Using Peripherals with the USN52 L
Function
Code
Range
Resolution
DAC/TCG
Mode=TCG
DAC ECHO
(key)
DE
0: OFF 1: ON
1
DAC/TCG
Mode
DM
1
DAMPING
DI
0: OFF
1: TCG
0: 1K
1: 150
DATA LOGGER
CONFIG
DL
0: ALL CLEAR
1: DATA LOGGER
CONFIGURED
1
DATA SET
ND
1 - 100
1
DATA SET NAME
(requires DS#
parameter)
NA
Up to 8 characters
1
dB REF (key)
DR
0-1
dB STEP
DS
6.5 - 24 dB
Page 124
2: DAC
3: REC
2: 75
3: 50
1
0.1
Function
Code
dB STEP (key)
ST
DELAY
ZE
-20 - 999 µs
0.1
DEPTH
(Query only)
DP
X.X.X.X in, mm
Trig mode must
be active)
0.001 to
9.999 in;
000.1 to
500.0 mm
DISTANCE
(Query only)
TK
X.X.X.X in, mm
S= value
0.001 to
9.999 in;
000.1 to
500.0 mm
DOWNLOAD
DD
DATA SET TO
PC: (requires
DSW parameter)
Range
Resolution
0: 0.5 3: 6.0
1: 1.0 4:PROGRAM2: 2.0
MABLE
5: 0.1
1
768 bytes
USN52 L Operating Manual
16. Using Peripherals with the USN52 L
Function
Code
EVALUATION
MODE
EV
FILE NUMBER
FN
Range
Resolution
0: TCG only
1: TCG and DGS
0: ALL CLEAR,ALL FILES (no file selected)
1
1
Function
Code
Range
Resolution
GAIN
DB
0 - 110 dB
0.1
GRATICULE
GR
0: OFF 1: ON
1
HOME (key)
HM
1: ON
1
LANGUAGE
DG
1:
2:
3:
4:
5:
6:
7:
8:
9:
10:
11:
12:
German
English
French
Italian
Spanish
Portuguese
Swedish
Danish
Norwegian
Finish
Dutch
Russian
1
LENGTH
LE
7: 7 DATA BITS
8: 8 DATA BITS
1
LOCATION
LT
1 - 2500
1
1-99:selected file or number of files to configure
FILE STATUS
FS
0 :no selected or configured file
1:selected file empty
2:selected file active (has readings)
1
3:selected file full
FREQ
FR
0: .4-10 MHz
1: 2-8 MHz
2: 3-10 MHz
3: .3-4 MHz
1
FREEZE (key)
FC
0: OFF 1: ON
1
FREEZE MODE
PC
0: FREEZE ALL
1: FREEZE PEAK
1
GATE LOGIC
AM
0: OFF
1: POSITIVE
2: NEGATIVE
1
USN52 L Operating Manual
3:MEASURE
Page 125
16. Using Peripherals with the USN52 L
Function
Code
Range
Resolution
PRF
RR
0: HIGH
1: LOW
1
1
PROJ
DISTANCE
(Query only)
PR
X.X.X.X in or mm
0.001 to
9.999 in;
0.1 to 500 mm
1
PULSER
PG
1: SINGLE
2: DUAL
1
39400 - 394000 in/µs; 1
1000 - 9999 m/s
RANGE
DW
.2 - 200 in
5 - 5000 mm
.001 in
0.1 mm
OD
2.048 - 78.77 in
52 mm - 2000 mm
.001 in
0.1 mm
RECALL
RD
0: OFF
1: ON
1
PARITY
PY
0: DISABLED
1: EVEN
2: ODD
1
RECTIFY
RF
0: RF
1: NEG HW
2: POS HW
3: FULL
1
PEAK
(Query only)
PK
10 - 127%
1
Function
Code
Range
Resolution
LOCK (key)
LO
0: open 1: close
1
MAGNIFY (key)
MA
0: OFF 1: ON
1
MEAS MODE
MM
0: OFF
1: 0 to 1st
2: Multi-echo
MEAS UNITS
UN
0: METRIC
1: INCH
MTL VEL
SV
OUTER
DIAMETER
Page 126
USN52 L Operating Manual
16. Using Peripherals with the USN52 L
Function
Code
Range
Resolution
Function
Code
Range
Resolution
REJECT
RJ
0 - 80 %
1
VERSION
VR
XX
STORE
SD
0: OFF
1: ON
1
X-VALUE
XV
0 - 200 in
.001
ZERO
DZ
TH
.004 - 200 in
.001
0 - 1600 µs
0.1
THICKNESS
TOF MODE
TF
0: FLANK 1: PEAK
1
ZOOM
ZO
UPLOAD DATA
SET FROM PC
UD
768 bytes
VALUE
(Query only)
VA
EMPTY
ERROR
X.X.X.X in or mm
VELOCITY #1
V1
39400 - 394000 in/s
1000 - 9999 m/s
1
VELOCITY #2
V2
39400 - 394000 in/s
1000 - 9999 m/s
1
USN52 L Operating Manual
0: OFF 1: ON
1
0.001 to
9.999 in;
0.1 to
500 mm
Page 127
17. Technical Specifications
NOTE: Adjustment ranges and increments for all menu functions are given in Chapter 7.
Pulser Type:
Spike / excitation pulse
Pulse Repetition Frequency:
Based on HIGH or LOW REP-RATE selection and RANGE setting as follows:
HIGH setting:
LOW setting:
Rep Rate
905 Hz
452 Hz
226 Hz
113 Hz
452 Hz
226 Hz
113 Hz
56 Hz
RANGE (inches of steel, .2330 in/µs)
0.182 to 11.65
11.66 to 23.2
23.3 to 46.4
46.5 to 231
0.182 to 11.65
11.66 to 23.2
23.3 to 46.4
46.5 to 231
Test Modes:
Pulse-echo and Transmit/Receive (Dual)
Damping:
Selectable - 50 Ω, 75 Ω, 150 Ω and 1K Ω
Page 128
USN52 L Operating Manual
17. Technical Specifications
Frequency Range (-3 dB points):
0.25 MHz to 4.9 MHz
0.4 MHz to 10.2 MHz
2.3 MHz to 10.8 MHz
1.7 MHz to 8.2 MHz
Unit of Measure:
Selectable inch or metric
Language:
Selectable English, French, Spanish, Italian, Portuguese, German, Swedish, Danish, Norwegian, Finnish, Dutch, and Russian
Gain:
0 to 110 dB controllable in 0.1 dB steps; selectable gain steps of 0.1, 0.5, 1.0, 2.0, 6.0, and
a user programmable step of 6.5 to 24 dB
Range:
0.2 to 200 inches (5 to 5000 mm) @ velocity in steel; selectable in fixed steps or continuously variable
Material Velocity:
Continuously adjustable from 39,400 to 393,000 in/s (1000 to 9999 m/s); 2 programmable
fixed velocities feature
Delay:
-20 to 999 microseconds
Zero offset:
0 to 1600 microseconds
Display Type:
High resolution LCD display; 480 x 320 pixels; integral backlight; HOLLOW and SOLID Ascan presentation; enlarged measurement value selectable; instrument status symbols for
battery, pulser, measurement mode, lock, and menu selection, electronic grid with 50%
screen markers
Screen Refresh Rate:
60 Hz when REP-RATE is HIGH; 30 Hz when REP-RATE is LOW
Horizontal Display Resolution:
0.5% of full screen width
USN52 L Operating Manual
Page 129
17. Technical Specifications
Vertical Display Resolution:
1% of full screen height
Measurement Modes:
Zero to first echo, 0.001 inch resolution to 9.999 inches;
0.2 inch to 9.99 resolution 0.001 inches;
10 inches to 99.9 inches resolution 0.01 inches;
100 inches+ resolution 0.1 inch;
From 5 mm to 999.9 mm resolution 0.1 mm;
1000 mm+ resolution 1 mm;
Multiple echo in gate with controllable second threshold;
Time of flight to peak or flank in gate;
Amplitude evaluation as % screen height or dB above threshold to 127%;
dB reference shows reference gain and gain changes as + or - values
Gate Delay:
Time based; controllable over entire sweep range in 0.001 inch increments; separate gate
start control for gate b in MULTECHO mode with controlled blocking and first echo start
Resolution is same as measurement modes.
Gate Width:
Time based; controllable over entire sweep range in 0.001 inch increments
Resolution is same as measurement modes.
Alarm:
Alarm indication via flashing LEDs; selectable positive and negative gate logic
Gate Threshold:
10% to 90% of full screen height; separate threshold control for gate b in MULTECHO
measurement mode
Noise Suppression:
Controllable 0% to 80%; absolutely linear
Echo Display Rectification:
Full wave, positive half-wave, negative half-wave, or RF display
Page 130
USN52 L Operating Manual
17. Technical Specifications
Data Set Storage:
Up to 140 data sets including A-scan image and all instrument parameters; RECALL resets
instrument to stored parameters and displays stored A-scan (frozen) for review and print;
optional naming of data sets
Data Logger:
Storage capacity of 2500 digital measurement values; sequential storage with clear, review, and direct report features; configurable up to 99 files; readings per file determined by
number of files configured
Interface:
RS-232C bi-directional interface for data transfer and remote control; printouts formatted
for Epson FX-850 dot matrix printer with Intelligent Serial Interface number 8148
Outputs:
Gate threshold violation; digital thickness value via RS-232 interface, TOF analog, amplitude analog, sync, TTL Go/No Go
Probe Connectors:
BNC or Lemo, specified at time of order
Power Supply:
AC or 6 D-size NiCad, lead acid, or alkaline batteries
Battery Life:
10 hours on a single charge with NiCad batteries
Dimensions:
9.8" W x 5.25" D x 5.75" H (248.9 mm x 133.4 mm x 146.1 mm)
Weight:
5.98 lbs (2.718 kg) total weight with NiCad batteries; 3.10 lbs (1.41 kg) without batteries
and detachable battery pack
Environmental Temperature:
Operating temperature: 0° C to 55° C (-20° C to +70° C survivable)
Storage temperature: -40° C to +75° C
USN52 L Operating Manual
Page 131
18. Worldwide Service Centers
Krautkramer
Service Manager
50 Industrial Park Road
Lewistown, PA 17044
Telephone: (717) 242-0320
Fax:
(717) 248-7211
Buehler Krautkramer
Univ. of Warwick Science Park
Millburn Hill Road
Coventry, England CV4 7HS
Telephone: 011-44-1-203-690069
Fax:
011-44-1-203-693032
Krautkramer
Cincinnati Service Center
11503 Springfield Pike
Lower Level
Cincinnati, OH 45246-3550
Telephone: (513) 772-4745
Fax:
(513) 772-4746
Krautkramer France Ltd.
ZAC Sans Souci
68 chemin des Ormeaux
F . 69760 Limonest
Lyon, France
Telephone: 011-33-47-217-9220
Fax:
011-33-47-847-5698
Krautkrämer GMBH
Robert-Bosch-Strasse 3
D-5030 Hüreth (Efferen)
Germany
Telephone: 011-49-2233-6010
Fax:
011-49-2233-601402
Krautkramer Japan Ltd.
No. 5 - 5
Sakuragawa I - Chome
Itabashi - Ku
Tokyo 174, Japan
Telephone:
011-81-3-3937-9494
Fax:
011-81-3-3937-9454
Page 132
USN52 L Operating Manual
Index
Page
Page
0
B
0 TO 1st measurement ............................................50
b-START ..................................................... 37, 84, 87
b-THRESH .................................................. 37, 85, 88
BASIC Menu ...................................................... 31, 33
Batteries ................................................................... 14
battery indicator .................................................. 24
Battery indicator ...................................................... 24
BAUD RATE ............................................................. 45
A
A-scan Display ........................................................21
a-START ............................................................ 37, 69
a-THRESH ......................................................... 37, 69
a-WIDTH ............................................................ 37, 69
AC Voltage ............................................................... 14
Accessories ............................................................. 12
AMPLITUDE ............................................................. 41
Analog Output ....................................................... 120
ANGLE ............................................................... 23, 47
Flaw Location ............................................... 90, 92
ASCAN ...................................................................... 44
AUTOCAL .......................................................... 49, 94
AUX Port ................................................................ 120
USN52 L Operating Manual
C
Calibration
AUTOCAL ............................................................. 94
Calibration, A-scan ................................................. 61
Angle Beam .......................................................... 66
Dual Element ........................................................64
Single Element .....................................................62
Calibration, digital ................................................. 77
0 TO 1st - Contact ................................................ 78
0 TO 1st - Delay ................................................... 80
Page 133
Index
Page
0 TO 1st - Dual .....................................................82
MULTECHO - Contact .......................................... 84
MULTECHO - Delay .............................................. 87
Computer
remote control of USN52 L ............................... 121
sending readings ............................................... 118
transfer Data Logger files ................................. 114
COPY key .................................................................20
COPY MODE ............................................................ 46
CURVATURE CORRECTION ...................................48
D
DAC ..........................................................................40
DAC/TCG .................................................................. 71
damping ................................................................... 35
Data Logger ............................................................. 99
Clearing a File ..................................................... 106
Clearing All Files ............................................... 106
Clearing Readings ............................................. 105
Configuring ........................................................ 100
Locations per File (table) .................................. 101
Logging Readings ............................................. 103
Number of Files .................................................. 100
Permanent Storage ............................................ 107
Page 134
Page
Report ................................................................. 111
Selecting a File .................................................. 102
Transferring Files ............................................... 114
DATA LOGGER (COPY MODE) ............................... 46
DATA SET .................................................................39
MEMO ................................................................... 54
NAME ....................................................................44
DATA SET DIREC .................................................... 50
dB REF key ..............................................................19
Using dB REF ...................................................... 75
dB STEP (Menu 7) ................................................... 42
dB STEP key ............................................................ 18
DELAY ...................................................................... 34
Digital measurement ...............................................97
DISP + PDUMP ................................................ 46, 116
Displays and Indicators .......................................... 21
DR1 Data Recorder ................................................ 116
DUAL ........................................................................ 36
E
Enlarged Value Display .......................................... 23
Escape sequences, remote control ..................... 121
USN52 L Operating Manual
Index
Page
F
FILE MODE ..............................................................43
FILE NUMBER .......................................................... 43
FLANK ..................................... 50, 85, 88, 92, 94, 98
FREEZE ALL ............................................................ 41
FREEZE key ............................................................. 19
FREEZE MODE ........................................................41
FREEZE PEAK ......................................................... 41
FREQ ........................................................................ 35
Frozen Screen Evaluation ......................................70
Fullwave rectification ............................................. 35
G
GAIN ......................................................................... 33
Gate ..........................................................................68
GATE LOGIC .............................................. 42, 49, 68
GATE Menu ....................................................... 31, 37
GRATICULE ............................................................. 41
H
HARD COPY .................................................... 46, 110
HOLLOW .................................................................. 44
USN52 L Operating Manual
Page
HOME key ................................................................ 18
I
INCREMENT/DECREMENT key .............................. 18
K
Keyboard Controls ..................................................17
Menu Related ....................................................... 30
L
Language .......................................................... 15, 44
LENGTH ................................................................... 45
LOCATION ............................................................... 43
LOCK key .................................................................20
M
MAGNIFY key ........................................................... 20
MEAS. UNITS ..................................................... 15, 51
MEASURE ................................................................ 50
Measurement, digital .............................................. 97
Measurement Line ................................................... 22
MEM Menu ............................................................... 31
Page 135
Index
Page
MEMORY Menu ........................................................39
Menu Display ...........................................................22
Menu Functions ...................................................... 33
Menu Guide ............................................................. 31
MENU key .................................................................18
Menus - Lower Level .......................... 32, 41, 44, 49
Menus - Upper Level ...............................................31
MTL VEL .................................................................. 34
MULTECHO measurement ......................................50
N
Negative Halfwave rectification ............................. 35
O
O-DIAM ..................................................................... 48
ON/OFF switch ........................................................17
P
PARITY ..................................................................... 45
PEAK ................................................................. 50, 94
Positive Halfwave rectification .............................. 35
Power Supply
Batteries ............................................................... 14
Page 136
Page
Printing
Data Logger Report ........................................... 111
Display and Parameters .................................... 115
Display HARD COPY ......................................... 110
PRINTER SELECT ...............................................46
PULS Menu ....................................................... 31, 36
Pulse Repetition Rate ............................................. 36
PULSER ............................................................. 15, 36
R
RANGE ..................................................................... 33
RCVR Menu ...................................................... 31, 35
Readings
send format ........................................................ 119
sending ............................................................... 118
sending to DR1 .................................................. 116
RECALL ....................................................................39
RECTIF ..................................................................... 35
Rectification (A-scan display) ................................ 35
reference thicknesses ............................................. 93
REJECT .................................................................... 36
remote control of USN52 L ................................... 121
Rep Rate ................................................................... 36
USN52 L Operating Manual
Index
Page
REPORT .......................................................... 46, 111
RF display ......................................................... 35, 90
RS-232
BAUD RATE .......................................................... 45
LENGTH ................................................................ 45
Output (table) ...................................................... 108
PARITY .................................................................. 45
Protocol .............................................................. 109
RS-232 I/O port ...................................................... 109
S
S-CAL Menu ...................................................... 31, 38
S-REF .......................................................................94
SCROLL/SELECT key ............................................. 17
Service ...................................................................... 8
Service Centers ...................................................... 132
SINGLE ..................................................................... 36
SOLID .......................................................................44
Specifications ......................................................... 128
Status indicators .................................................... 24
STORE ...................................................................... 39
Page
THICKNESS ..................................... 46, 47, 117, 118
TOF ............................................................. 50, 85, 94
U
Unit of Measure ...................................................... 15
V
VALUE ...................................................................... 43
VELOCITY #1 ........................................................... 42
VELOCITY #2 ........................................................... 42
W
Warranty ..................................................................... 8
X
X-VALUE ................................................................... 47
Z
ZERO ........................................................................ 38
ZOOM key ................................................................ 20
T
TCG Menu 31, 40 ........................................................
USN52 L Operating Manual
Page 137