1
MODEL: MX-2300G
MX-2300N
MX-2700G
MX-2700N
Scanner Guide
MX-3500N
MX-3501N
MX-4500N
MX-4501N
TABLE OF CONTENTS
ABOUT THIS MANUAL . . . . . . . . . . . . . . . . . . . . . . . . 3
• MANUALS PROVIDED WITH THE MACHINE . . . 4
1
3
BASIC PROCEDURE FOR
TRANSMISSION IN SCAN MODE
SCANNING TO E-MAIL, FTP, DESKTOP, AND
NETWORK FOLDER . . . . . . . . . . . . . . . . . . . . . . . . . 27
BEFORE USING THE MACHINE AS A
NETWORK SCANNER
CHANGING THE EXPOSURE AND EXPOSURE
MODE . . . . . . . . . . . . . . . . . . . . . . . . . . . . . . . . . . . . . 31
NETWORK SCANNER FUNCTION . . . . . . . . . . . . . . . 5
CHANGING THE RESOLUTION . . . . . . . . . . . . . . . . 33
PREPARATIONS FOR USE AS A NETWORK
SCANNER . . . . . . . . . . . . . . . . . . . . . . . . . . . . . . . . . . 6
• MAKE SURE THE MAIN POWER SWITCH IS
IN THE "ON" POSITION. . . . . . . . . . . . . . . . . . . . . 6
• CHECKING THE DATE AND TIME . . . . . . . . . . . . 6
• STORING SENDER INFORMATION . . . . . . . . . . . 7
• SETTINGS REQUIRED IN THE WEB PAGE. . . . . 7
• STORING DESTINATION ADDRESSES FOR
EACH SCAN MODE IN THE ADDRESS BOOK. . . 8
• STORING A DESTINATION FOR SCAN TO
DESKTOP . . . . . . . . . . . . . . . . . . . . . . . . . . . . . . . 9
AUTOMATICALLY SCANNING BOTH SIDES OF
AN ORIGINAL (2-Sided Original) . . . . . . . . . . . . . . . 34
SPECIFYING THE ORIGINAL SCAN SIZE AND
SEND SIZE (Enlarge/Reduce). . . . . . . . . . . . . . . . . . 35
• SPECIFYING THE SCAN SIZE OF THE
ORIGINAL . . . . . . . . . . . . . . . . . . . . . . . . . . . . . . 36
• SPECIFYING THE SEND SIZE OF THE
ORIGINAL . . . . . . . . . . . . . . . . . . . . . . . . . . . . . . 38
CHANGING THE COLOUR MODE . . . . . . . . . . . . . . 39
CHANGING THE FILE FORMAT . . . . . . . . . . . . . . . . 40
BASE SCREEN . . . . . . . . . . . . . . . . . . . . . . . . . . . . . 10
• BASE SCREENS . . . . . . . . . . . . . . . . . . . . . . . . . 11
• ADDRESS BOOK SCREEN. . . . . . . . . . . . . . . . . 14
• CHANGING THE DISPLAY OF ONE-TOUCH
KEYS IN THE ADDRESS BOOK SCREEN . . . . . 15
CHANGING THE SUBJECT, FILE NAME,
REPLY-TO, AND MESSAGE . . . . . . . . . . . . . . . . . . . 42
4
SCANNING AND TRANSMISSION SEQUENCE. . . . 16
ORIGINAL SIZES . . . . . . . . . . . . . . . . . . . . . . . . . . . . 18
• ORIGINAL SIZES THAT CAN BE
TRANSMITTED . . . . . . . . . . . . . . . . . . . . . . . . . . 18
• THE SIZE OF THE PLACED ORIGINAL . . . . . . . 18
BASIC PROCEDURE FOR
SCANNING IN USB MEMORY MODE
SCANNING TO USB MEMORY . . . . . . . . . . . . . . . . . 45
CHANGING THE EXPOSURE AND EXPOSURE
MODE . . . . . . . . . . . . . . . . . . . . . . . . . . . . . . . . . . . . . 50
CHANGING THE RESOLUTION . . . . . . . . . . . . . . . . 52
2
AUTOMATICALLY SCANNING BOTH SIDES OF
AN ORIGINAL (2-Sided Original) . . . . . . . . . . . . . . . 53
ENTERING DESTINATIONS
SPECIFYING THE ORIGINAL SCAN SIZE AND
SEND SIZE (Enlarge/Reduce). . . . . . . . . . . . . . . . . . 54
• SPECIFYING THE SCAN SIZE OF THE
ORIGINAL . . . . . . . . . . . . . . . . . . . . . . . . . . . . . . 55
• SPECIFYING THE SEND SIZE OF THE
ORIGINAL . . . . . . . . . . . . . . . . . . . . . . . . . . . . . . 57
SPECIFYING DESTINATIONS IN THE ADDRESS
BOOK . . . . . . . . . . . . . . . . . . . . . . . . . . . . . . . . . . . . . 19
• CALLING UP A DESTINATION . . . . . . . . . . . . . . 20
• CHECKING AND DELETING THE SELECTED
DESTINATIONS . . . . . . . . . . . . . . . . . . . . . . . . . . 21
USING A SEARCH NUMBER TO SPECIFY A
DESTINATION . . . . . . . . . . . . . . . . . . . . . . . . . . . . . . 22
CHANGING THE COLOUR MODE . . . . . . . . . . . . . . 58
ENTER THE ADDRESS MANUALLY . . . . . . . . . . . . 23
CHANGING THE FILE FORMAT . . . . . . . . . . . . . . . . 59
CALLING UP A DESTINATION FROM A
GLOBAL ADDRESS BOOK. . . . . . . . . . . . . . . . . . . . 24
ENTERING THE FILE NAME . . . . . . . . . . . . . . . . . . . 61
USING THE RESEND FUNCTION . . . . . . . . . . . . . . . 26
1
5
SCANNING MANY ORIGINALS AT ONCE (Job
Build) . . . . . . . . . . . . . . . . . . . . . . . . . . . . . . . . . . . . 103
BASIC PROCEDURE FOR
TRANSMISSION IN INTERNET FAX
MODE
SCANNING ORIGINALS OF DIFFERENT SIZES
(Mixed Size Original) . . . . . . . . . . . . . . . . . . . . . . . . 106
SENDING A FAX IN INTERNET FAX MODE. . . . . . . 62
SCANNING THIN ORIGINALS (Slow Scan Mode) . 109
CHANGING THE EXPOSURE . . . . . . . . . . . . . . . . . . 65
STORING SCAN OPERATIONS (Programs) . . . . . 111
CHANGING THE RESOLUTION . . . . . . . . . . . . . . . . 66
FORWARDING A RECEIVED INTERNET FAX TO
AN E-MAIL ADDRESS (Inbound Routing
Settings) . . . . . . . . . . . . . . . . . . . . . . . . . . . . . . . . . . 114
AUTOMATICALLY SCANNING BOTH SIDES OF
AN ORIGINAL (2-Sided Original) . . . . . . . . . . . . . . . 67
SPECIFYING THE ORIGINAL SCAN SIZE AND
SEND SIZE (Enlarge/Reduce). . . . . . . . . . . . . . . . . . 68
• SPECIFYING THE SCAN SIZE OF THE
ORIGINAL . . . . . . . . . . . . . . . . . . . . . . . . . . . . . . 69
• SPECIFYING THE SEND SIZE OF THE
ORIGINAL . . . . . . . . . . . . . . . . . . . . . . . . . . . . . . 71
8
RECEIVING AN INTERNET FAX . . . . . . . . . . . . . . . 115
• MANUALLY RECEIVING INTERNET FAXES . . 116
PRINTING FAXES RECEIVED TO MEMORY . . . . . 117
CHANGING THE FILE FORMAT . . . . . . . . . . . . . . . . 72
SENDING TWO PAGES AS A SINGLE PAGE
(2in1). . . . . . . . . . . . . . . . . . . . . . . . . . . . . . . . . . . . . 118
CHANGING THE SUBJECT, FILE NAME, AND
MESSAGE . . . . . . . . . . . . . . . . . . . . . . . . . . . . . . . . . 73
6
CHANGING THE PRINT SETTINGS FOR THE
TRANSACTION REPORT (Transaction Report) . . 121
• CHECKING THE ACTIVITY LOG (Image
Sending Activity Report) . . . . . . . . . . . . . . . . . . . 124
• INFORMATION APPEARING IN THE RESULT
COLUMN . . . . . . . . . . . . . . . . . . . . . . . . . . . . . . 124
CHECKING THE STATUS OF
TRANSMISSION/RECEPTION JOBS
JOB STATUS SCREEN . . . . . . . . . . . . . . . . . . . . . . . 75
• JOB QUEUE SCREEN AND COMPLETED
JOB SCREEN. . . . . . . . . . . . . . . . . . . . . . . . . . . . 76
• OPERATION WHEN A JOB IN THE JOB
QUEUE IS COMPLETED . . . . . . . . . . . . . . . . . . . 79
• CHECKING COMPLETED JOBS . . . . . . . . . . . . . 80
SENDING AN INTERNET FAX FROM A
COMPUTER (PC-I-Fax) . . . . . . . . . . . . . . . . . . . . . . 125
9
STOPPING A SCAN JOB BEING TRANSMITTED
OR WAITING TO BE TRANSMITTED . . . . . . . . . . . . 81
SCANNING FROM A COMPUTER (PC
SCAN MODE)
BASIC SCANNING PROCEDURE . . . . . . . . . . . . . . 126
GIVING PRIORITY TO A SCAN TRANSMISSION
JOB . . . . . . . . . . . . . . . . . . . . . . . . . . . . . . . . . . . . . . . 82
7
INTERNET FAX FUNCTIONS
CONVENIENT FUNCTIONS
SENDING THE SAME IMAGE TO MULTIPLE
DESTINATIONS (Broadcast Transmission) . . . . . . 83
• BROADCAST TRANSMISSIONS THAT
INCLUDE INTERNET FAX DESTINATIONS . . . . 86
ERASING PERIPHERAL SHADOWS ON THE
IMAGE (Erase) . . . . . . . . . . . . . . . . . . . . . . . . . . . . . . 88
SCANNING AN ORIGINAL AS TWO SEPARATE
PAGES (Dual Page Scan) . . . . . . . . . . . . . . . . . . . . . 91
SENDING AN IMAGE AT A SPECIFIED TIME
(Timer Transmission) . . . . . . . . . . . . . . . . . . . . . . . . 94
WHITENING FAINT COLOURS IN THE IMAGE
(Suppress Background) . . . . . . . . . . . . . . . . . . . . . . 97
SCANNING BOTH SIDES OF A CARD ONTO A
SINGLE PAGE (Card Shot) . . . . . . . . . . . . . . . . . . . 100
2
ABOUT THIS MANUAL
This manual explains the procedures for using scan mode, Internet fax mode, USB memory mode, and PC scan mode
on the machine.
Please note
• To use the Internet fax function, the Internet fax expansion kit must be installed.
• To use the network scanner function on the MX-2300G/2700G, the network scanner expansion kit and 256 MB expansion
memory board must be installed. The Internet fax function can be used on these models even if the network scanner expansion
kit is not installed.
• For information on installing the drivers and software cited in this manual, please refer to the Software Setup Guide and the
manuals that are provided with the expansion kits.
• To use the network scanner function, basic network scanner settings, server settings including SMTP and DNS server settings,
and destinations must be configured in the Web pages. Configure and store the settings as explained in this manual. These
settings require a knowledge of your network environment and therefore must be configured by your network administrator.
• For information on your operating system, please refer to your operating system manual or the online Help function.
• The explanations of screens and procedures in this manual are primarily for Windows® XP. The screens may vary in other
versions of Windows.
• Wherever "MX-xxxx" appears in this manual, please substitute your model name for "xxxx".
• Where this manual shows the "MX-2300/2700 series" or the "MX-3500/4500 series", the following models are indicated:
MX-2300/2700 series: MX-2300G, MX-2300N, MX-2700G, MX-2700N
MX-3500/4500 series: MX-3500N, MX-3501N, MX-4500N, MX-4501N
• This manual contains references to the fax function. However, please note that the fax function is not available in some
countries and regions.
• Considerable care has been taken in preparing this manual. If you have any comments or concerns about the manual, please
contact your dealer or nearest authorised service representative.
• This product has undergone strict quality control and inspection procedures. In the unlikely event that a defect or other problem
is discovered, please contact your dealer or nearest authorised service representative.
• Aside from instances provided for by law, SHARP is not responsible for failures occurring during the use of the product or its
options, or failures due to incorrect operation of the product and its options, or other failures, or for any damage that occurs due
to use of the product.
Warning
• Reproduction, adaptation or translation of the contents of the manual without prior written permission is prohibited, except as
allowed under copyright laws.
• All information in this manual is subject to change without notice.
Illustrations and the operation panel and touch panel shown in this manual
The peripheral devices are generally optional, however, some models include certain peripheral devices as standard equipment.
The explanations in this manual assume that a right tray and stand/2 x 500 sheet paper drawer are installed on the MX-2700N
(equipped standard with an automatic document feeder).
To further explain certain functions and uses, some explanations assume that additional peripheral devices are installed.
The display screens, messages, and key names shown in the manual may differ from those on the actual machine
due to product improvements and modifications.
3
MANUALS PROVIDED WITH THE MACHINE
Printed manuals and manuals stored in PDF format on the machine's hard drive are provided with the machine. When
using the machine, read the appropriate manual for the feature you are using.
Printed manuals
Manual name
Contents
Safety Guide
This manual contains instructions for using the machine safely and lists the specifications of the machine
and its peripheral devices.
Software Setup
Guide
This manual explains how to install the software and configure settings to use the machine as a printer or
scanner.
Quick Start Guide
This manual provides easy-to-understand explanations of all the functions of the machine in a single volume.
Detailed explanations of each of the functions can be found in the manuals in PDF format.
Troubleshooting
This manual explains how to remove paper misfeeds and provides answers to frequently asked questions
regarding the operation of the machine in each mode. Refer to this manual when you have difficulty using
the machine.
Facsimile Quick
Reference Guide
This manual explains the basic procedures for using the fax function of the machine, and provides an
overview of the features of the fax function, troubleshooting procedures, and specifications.
For detailed information on using the fax function and the system settings for fax, see the "Facsimile
Guide" in PDF format.
Operation manuals in PDF format
The manuals in PDF format provide detailed explanations of the procedures for using the machine in each mode. To
view the PDF manuals, download them from the hard drive in the machine. The procedure for downloading the manuals
is explained in "How to download the manuals in PDF format" in the Quick Start Guide.
Manual name
Contents
User's Guide
This manual provides information, such as basic operation procedures, how to load paper, and machine
maintenance.
Copier Guide
This manual provides detailed explanations of the procedures for using the copy function.
Printer Guide
This manual provides detailed explanations of the procedures for using the printer function.
Facsimile Guide
This manual provides detailed explanations of the procedures for using the fax function and the "System
Settings" that are related to fax.
Scanner Guide
(This manual)
This manual provides detailed explanations of the procedures for using the scanner function and the
Internet fax function.
Document Filing
Guide
This manual provides detailed explanations of the procedures for using the document filing function. The
document filing function allows you to save the document data of a copy or fax job, or the data of a print
job, as a file on the machine's hard drive. The file can be called up as needed.
System Settings
Guide
This manual explains the "System Settings", which are used to configure a variety of parameters to suit the aims
and the needs of your workplace. Current settings can be displayed or printed out from the "System Settings".
Icons used in the manuals
The icons in the manuals indicate the following types of information:
This alerts you to a situation where there
is a risk of machine damage or failure.
This provides a supplemental
explanation of a function or procedure.
This explains how to cancel or correct
an operation.
This indicates the name of a system setting and a provides a brief
explanation of the setting. For detailed information on each system
setting, see the System Settings Guide.
When "System Settings:" appears:
A general setting is explained.
When "System Settings (Administrator):" appears:
A setting that can only be configured by an administrator is explained.
4
1
BEFORE USING THE MACHINE
AS A NETWORK SCANNER
This chapter provides basic information that is necessary to use the machine as a network scanner.
NETWORK SCANNER FUNCTION
The network scanner function of the machine can be used to scan an original, create an image file, and send the file
over a network to a computer, FTP server, or other destination. Scanning is also possible from your computer using a
TWAIN-compliant application.
The network scanner function provides the following scanning modes.
Scan modes
☞ 3. BASIC PROCEDURE FOR TRANSMISSION IN SCAN MODE (page 27)
Scan to FTP*1
Scan to Desktop*2
Scan to Network Folder*3
The scanned file is sent to a
specified directory of an FTP
server.
The scanned file is sent to a
specified folder on your
computer.
The scanned file is sent to a
shared folder on a Windows
computer on the same
network as the machine.
Scan to E-mail
The scanned file is sent by
e-mail.
USB memory mode
The scanned file is sent to and stored in a
USB memory device connected to the
machine.
☞ 4. BASIC PROCEDURE FOR SCANNING IN USB
MEMORY MODE (page 45)
Internet fax mode
PC scan mode*4
The scanned file is sent as an Internet
fax. Reception of Internet faxes is also
possible.
☞ 5. BASIC PROCEDURE FOR
TRANSMISSION IN INTERNET
FAX MODE (page 62)
A TWAIN-compliant application on
a computer connected to the same
network as the machine is used to
scan a document or image.
☞ 9. SCANNING FROM A
COMPUTER (PC SCAN MODE) (page 126)
*1 When the file is sent, it is also possible to send an e-mail to a previously stored e-mail address to inform the recipient
of the location of the file. (This is called "Scan to FTP (Hyperlink)".)
*2 To use Scan to Desktop, software must be installed from the "Sharpdesk/Network Scanner Utilities" CD-ROM that
accompanies the machine (or that accompanies the network scanner expansion kit when the MX-2300G/2700G is
used). For the procedures for installing the software, see the "Sharpdesk Installation Guide".
*3 Transmission is possible to computers running the following operating systems: Windows 98/NT 4.0/2000/XP/Server 2003
*4 The scanner driver must be installed from the "Software CD-ROM" provided with the machine. Operating systems that can
be used are Windows 98/Me/2000/XP/Server 2003.
5
PREPARATIONS FOR USE AS A NETWORK
SCANNER
MAKE SURE THE MAIN POWER SWITCH IS IN THE
"ON" POSITION
The main power is "on" when the main power indicator on the right side of the operation panel is lit.
If the main power indicator is not lit, the main power is off. Switch the main power switch to the "on" position and press
the [POWER] key (
) on the operation panel.
If the Internet fax function will be used, and in particular if reception or timer transmission will take place at night, always
keep the main power switch in the "on" position.
When the [POWER SAVE] key indicator light is blinking, the machine is in auto power shut-off mode. If the [POWER SAVE]
key is pressed when the indicator is on, the indicator will turn off and the machine will return to the ready state after a brief
interval.
Main power switch
Main power indicator
"On"
position
LOGOUT
[POWER SAVE] key / indicator
CHECKING THE DATE AND TIME
To check if the date and time are set correctly in the machine, follow the steps below.
1
System Settings
2
Press the [SYSTEM SETTINGS] key.
SYSTEM
SETTINGS
Admin Password
Total Count
Default Settings
List Print
(User)
Paper Tray
Settings
Address Control
Fax Data
Receive/Forward
Printer Condition
Settings
Document Filing
Control
USB-Device Check
Touch the [Default Settings] key.
Exit
6
Touch the [Clock] key.
System Settings
OK
Default Settings
Display Contrast
3
Clock
Keyboard Select
Check the date and time.
System Settings
OK
Clock Adjust
4
Year
Month
Day
Hour
Minute
2005
08
01
10
50
• If the date and time are correct, touch the [OK] key.
• To change the date and time, touch the [Year], [Month],
[Day], [Hour], and/or [Minute] keys and use the
keys to adjust each value. When the correct date and time
appear, touch the [OK] key.
Date Format
Daylight Saving Time Setting
STORING SENDER INFORMATION
Before using Scan to E-mail
Store the default sender name in "Sender Name" and the reply e-mail address in "Reply Address". These will be used
when a sender name is not selected.
System Settings (Administrator): Default Sender Set
This is used to store the sender name and e-mail address that is used when a sender is not selected.
Before using Internet fax
Store the sender name in "Name" and the sender Internet fax address in "Own Address".
System Settings (Administrator): I-Fax Own Name and Address Set
Use this setting to program the sender's name and sender's address.
SETTINGS REQUIRED IN THE WEB PAGE
In order to use the network scanner function, basic network scanner settings, server settings including SMTP and DNS
server settings, and the sender's address must be configured in the Web pages.
• Basic network scanner settings
To configure network scanner settings, click [Application Settings] and then [Network Scanner Settings] in the Web
page menu. (Administrator rights are required.)
• Server settings
To configure server settings, click [Network Settings] and then [Services Settings] in the Web page menu.
(Administrator rights are required.)
7
STORING DESTINATION ADDRESSES FOR EACH
SCAN MODE IN THE ADDRESS BOOK
To use Scan to FTP, Scan to Desktop, and Scan to Network Folder, destinations must be stored in the address book.
Although destinations for Scan to E-mail and Internet fax do not need to be stored in the address book (they can be
entered directly or looked up in a global address book at the time of transmission), storing these destinations in the
address book makes it easier to specify them. Store each type of destination as explained below.
Scan mode destinations
• Scan to FTP:
Click [Address Book] in the Web page menu, and click the [Add] button that appears. Select
[FTP] in [Address Type] and then store the sender name and address.
• Scan to Network Folder: Click [Address Book] in the Web page menu, and click the [Add] button that appears. Select
[Network Folder] in [Address Type] and then store the sender name and address.
• Scan to E-mail:
Click [Address Book] in the Web page menu, and click the [Add] button that appears. Select
[E-mail] in [Address Type] and then store the address. The address can also be stored in the
system settings.
• Scan to Desktop:
See "STORING A DESTINATION FOR SCAN TO DESKTOP" (page 9). The sender name
and sender address can also be stored in the Web pages. Click [Address Book] in the Web
page menu, and click the [Add] button that appears. Select [Desktop] in [Address Type] and
then store the sender name and address.
Internet fax mode: Click [Address Book] in the Web page menu, and click the [Add] button that appears. Select
[Internet Fax] in [Address Type] and then store the sender name and address. The address can
also be stored in the system settings.
System Settings: Direct Address/Program
This is used to store destination addresses for Scan to E-mail and Internet fax.
8
STORING A DESTINATION FOR SCAN TO DESKTOP
To store your computer in the machine as the destination of Scan to Desktop, Network Scanner Tool must be installed
from the "Sharpdesk/Network Scanner Utilities" CD-ROM that accompanies the machine (or that accompanies the
network scanner expansion kit when the MX-2300G/2700G is used). To scan an image to your computer, the Network
Scanner Tool must be running on your computer.
INSTALLING THE NETWORK SCANNER TOOL
To install Network Scanner Tool, see the "Sharpdesk Installation Guide" that accompanies the machine (or that
accompanies the network scanner expansion kit when the MX-2300G/2700G is used). When a standard installation is
performed, Network Scanner Tool is installed with Sharpdesk.
When you restart your computer after installing the Network Scanner Tool, the Setup Wizard will start automatically.
Follow this wizard to set up the Network Scanner Tool. This will store your computer in the machine as a destination for
Scan to Desktop. The stored destination will be displayed as one-touch keys in the Address Book screen.
The following window appears while the Network Scanner Tool is being set up. The item selected in "My Profiles" (C) will
be the name of the one-touch key.
Ready to send.
Resend
Scan
Mode Switch
Address Book
Image
Settings
Address Entry
Send Settings
Special Modes
File
(A)
Quick File
(B)
To
Cc
AAA AAA
BBB BBB
Comp-DESKTOP
DDD DDD
EEE EEE
Freq.
Condition
Settings
Bcc
1/1
Address Review
Global
Address Search
FFF FFF
ABCD
EFGHI
JKLMN
OPQRST UVWXYZ
Sort Address
(B)
(C)
(D)
The profile name is determined by the combination of the text entered in "Prefix" (A) and the profile*.
The one-touch key is assigned to an index tab in the Address Book screen based on the text entered in "Initial" (B).
* This defines how an image sent to your computer is processed. For more information, see profile explanation (D).
ADDING DESTINATIONS
See the number of licences indicated in the "Sharpdesk Installation Guide" to know how many computers can be stored
in the machine as destinations of Scan to Desktop. To store more destinations, a licence kit is required. Store Scan to
Desktop destinations by installing the Network Scanner Tool on each computer.
9
BASE SCREEN
Scan mode, Internet fax mode, USB memory mode, and PC scan mode are operated by selecting settings and
commands in the base screens of these modes. To display the base screen of a mode, press the [IMAGE SEND] key
and then touch the [Mode Switch] key to select the desired mode.
PRINT
READY
DATA
DOCUMENT
FILING
LINE
DATA
IMAGE SEND
COPY
SYSTEM
JOB STATUS SETTINGS
LOGOUT
Ready to send.
Resend
Scan
Mode Switch
Image
Settings
Address Book
Image
Settings
Address Entry
Send Settings
Special Modes
Send Settings
Fax
Scan
Mode Switch
Address Book
Address Entry
Internet Fax
Special Modes
USB Mem. Scan
File
PC Scan
Data Entry
Quick File
File
Modes that cannot be used because the
required options are not installed are greyed
out to prevent selection.
Quick File
When sending an image, you can use a transmission destination stored in the Address Book. The Address Book screen
is shared by scan mode, Internet fax mode, and fax mode.
Touch the [Address Book] key in the base screen to switch to the Address Book screen. Touch the [Condition Settings]
key in the Address Book screen to switch to the base screen.
Base screen of scan mode
Ready to send.
Resend
Scan
Mode Switch
Address Book
Image
Settings
Address Entry
Send Settings
Special Modes
File
Quick File
Address Book screen
To
Cc
AAA AAA
BBB BBB
CCC CCC
DDD DDD
EEE EEE
FFF FFF
Frequent Use
ABCD
Condition
Settings
Bcc
EFGHI
1/1
Address Review
Global
Address Search
JKLMN
OPQRST UVWXYZ
Sort Address
The procedures in this manual assume that the base screen of scan mode appears when the [IMAGE SEND] key is pressed.
System Settings (Administrator): Default Display Setting
One of the following screens can be selected for the initial screen that appears when the [IMAGE SEND] key is pressed.
• Base screen of each mode (scan mode, Internet fax mode and fax mode)
• Address book screen (alphabetical/custom index)
10
BASE SCREENS
Settings are selected in the base screen of each mode.
Base screen of scan mode
(1)
(5)
(6)
Ready to send.
Resend
(2)
Scan
Mode Switch
Address Book
(7)
(3)
(4)
Image
Settings
Address Entry
(8)
Send Settings
Special Modes
File
(9)
Quick File
(10)
Base screen of USB memory mode
(1)
Base screen of Internet fax mode
(5)
Ready to send.
Ready to send.
(1)
(2)
USB Mem. Scan
Mode Switch
(3)
(11)
Image
Settings
File Name
Special Modes
Resend
(6)
(2)
Internet Fax
Mode Switch
Address Book
(7)
(3)
(4)
(12)
Image
Settings
Address Entry
(8)
Send Settings
Special Modes
Manual RX
File
(9)
Quick File
(9)
(1)
Various messages are displayed here.
The icon of the selected mode appears on the left.
(2)
[Mode Switch] key
Use this key to change the mode of the image send
function.
☞ BASE SCREEN (page 10)
(3)
[Image Settings] key
Touch this key to select scan settings (exposure,
resolution, original size, colour mode, format, special
modes)
☞ [Image Settings] key (page 13)
(4)
[Send Settings] key
Touch this key to change the subject, file name, reply-to,
or message text, which have been previously stored in
the Web page.
☞ Scan mode:
CHANGING THE SUBJECT,
FILE NAME, REPLY-TO, AND
MESSAGE (page 42)
Internet fax mode: CHANGING THE SUBJECT, FILE
NAME, AND MESSAGE (page 73)
11
(5)
key
Touch this key to search for a destination using a search
number.*
* 3-digit number assigned to a destination when it is stored.
☞ USING A SEARCH NUMBER TO SPECIFY A
DESTINATION (page 22)
(6)
[Resend] key / [Next Address] key
The destinations of the most recent eight transmissions
by Scan to E-mail, fax and/or Internet fax are stored. To
select one of these destinations, touch the desired
destination. After a destination is selected, this key
changes to the [Next Address] key.
☞ USING THE RESEND FUNCTION (page 26)
☞ CALLING UP A DESTINATION (page 20)
(7)
[Address Book] key
Touch this key to use a one-touch key or a group key.
When the key is touched, the Address Book screen
appears.
☞ SPECIFYING DESTINATIONS IN THE ADDRESS
BOOK (page 19)
(8)
[Address Entry] key
Touch this key to manually enter an destination address
instead of using a one-touch key.
☞ ENTER THE ADDRESS MANUALLY (page 23)
(9)
(10)
Customized keys
The keys that appear here can be changed to show
settings or functions that you prefer. The keys are
changed in "Customize Key Setting" in the system
settings (administrator). The following keys appear by
factory default:
• [Special Modes] key
Touch this key to use a convenient special mode. This
is the same [Special Modes] key that appears when
the [Image Settings] key is touched.
• [File] key, [Quick File] key*
Touch one of these keys to use the File function or
Quick File function of document filing mode. For more
information on the document filing function, see the
Document Filing Guide.
* These do not appear in the base screen of USB
memory mode.
key
This key appears when a special mode or two-sided
scanning is selected. Touch the key to display the
selected special modes.
☞ Checking what special modes are selected (page 13)
(11) [File Name] key
Touch this key to store or change a file name. A file name
previously stored in the Web pages can also be changed.
(12) [Manual RX] key
Touch this key to receive an Internet fax manually.
☞ MANUALLY RECEIVING INTERNET FAXES (page
116)
This manual uses the base screen of scan mode as an example when operations common to all modes are explained.
Customizing displayed keys (customized keys)
You can select the keys that appear in the lower right corner of the base screen. Keys that can be selected include keys
of convenient functions (Special modes). Set these keys to functions that you frequently use to access the functions with
a single touch. The customized keys are configured using "Customize Key Setting" in the system settings
(administrator). The [Special Modes] key, the [File] key* and the [Quick File] key* appear by factory default.
*These do not appear in the base screen of USB memory mode.
Example: Displaying the Dual Page Scan, Erase and Address Review keys as customized keys.
Ready to send.
Scan
Mode Switch
Scan
A4
Resend
Send
Address Book
Auto
Image
Settings
Address Entry
Send Settings
Dual Page Scan
Erase
These three keys can be changed as desired.
Address Review
• If the [Special Modes] key is not displayed as a customized key, touch the [Image Settings] key in the base screen to
display the [Special Modes] key.
• The functions that can be selected for the customized keys vary depending on the mode.
System Settings (Administrator): Customize Key Setting
These are used to select the keys that appear in the base screen.
12
[Image Settings] key
When the [Image Settings] key is touched, the [Special Modes] key and keys for selecting scan settings appear.
The current setting of each scan setting key appears in the top of the key.
(1)
(2)
(3)
Scan
Mode Switch
Auto
Exposure
Image
Settings
Address Book
Mono2/Auto
Colour Mode
(4)
Address Entry
Send Settings
200X200dpi
Resolution
Auto
A4
Original
PDF/PDF
File Format
Special Modes
File
Special Modes
(5)
(6)
Quick File
(1)
(2)
(3)
[Exposure] key
Touch this key to select the exposure for scanning.
☞ Scan mode:
CHANGING THE EXPOSURE AND EXPOSURE
MODE (page 31)
USB memory mode:
CHANGING THE EXPOSURE AND EXPOSURE
MODE (page 50)
Internet fax mode:
CHANGING THE EXPOSURE (page 65)
[Resolution] key
Touch this key to select the resolution for scanning.
☞ Scan mode:
CHANGING THE RESOLUTION (page 33)
USB memory mode:
CHANGING THE RESOLUTION (page 52)
Internet fax mode:
CHANGING THE RESOLUTION (page 66)
[Original] key
Touch this key to select the original size, the original
orientation, two-sided scanning, and the send size.
☞ Scan mode:
AUTOMATICALLY SCANNING BOTH SIDES OF
AN ORIGINAL (2-Sided Original) (page 34)
SPECIFYING THE ORIGINAL SCAN SIZE AND
SEND SIZE (Enlarge/Reduce) (page 35)
USB memory mode:
AUTOMATICALLY SCANNING BOTH SIDES OF
AN ORIGINAL (2-Sided Original) (page 53)
SPECIFYING THE ORIGINAL SCAN SIZE AND
SEND SIZE (Enlarge/Reduce) (page 54)
Internet fax mode:
AUTOMATICALLY SCANNING BOTH SIDES OF
AN ORIGINAL (2-Sided Original) (page 67)
SPECIFYING THE ORIGINAL SCAN SIZE AND
SEND SIZE (Enlarge/Reduce) (page 68)
(4)
[Colour Mode] key
Touch this key to select the colour mode for scanning.
This key does not appear in Internet fax mode.
☞ Scan mode:
CHANGING THE COLOUR MODE (page 39)
USB memory mode:
CHANGING THE COLOUR MODE (page 58)
(5)
[File Format] key
Touch this key to change the file format (file type) for the
scanned image file.
☞ Scan mode:
CHANGING THE FILE FORMAT (page 40)
USB memory mode:
CHANGING THE FILE FORMAT (page 59)
Internet fax mode:
CHANGING THE FILE FORMAT (page 72)
(6)
[Special Modes] key
Touch this key to use a convenient special mode. Open
the special modes screen from here when "Customize
Key Setting" in the system settings (administrator) has
been changed so that the [Special Modes] key is not
displayed in the base screen.
Checking what special modes are selected
The
The
key appears in the base screen when a special mode or two-sided scanning is selected.
key can be touched to display the selected special modes. To close the screen, touch the [OK] key.
Ready to send.
Scan
Mode Switch
Resend
Address Book
Image
Settings
Address Entry
Send Settings
Special Modes
OK
Function Review
Erase
: Edge:10mm
Centre:10mm
Timer
: Day of the Week:Monday
Time:21:30
Job
Build
: On
File
Quick File
13
1/3
ADDRESS BOOK SCREEN
This screen is used to select transmission destinations.
(2)
(3)
(4)
(5)
(6)
AAA AAA
[email protected]
To
(1)
Cc
AAA AAA
BBB BBB
CCC CCC
DDD DDD
EEE EEE
Frequent Use
Condition
Settings
Bcc
1/1
Global
Address Search
FFF FFF
ABCD
EFGHI
JKLMN
OPQRST UVWXYZ
(1)
One-touch key display
The destinations (one-touch keys) stored in each index
are displayed. This manual refers to keys in which
destinations and groups are stored as one touch keys.
☞ CALLING UP A DESTINATION (page 20)
(2)
This shows the selected destination.
(3)
[To] key
Touch this key to enter the selected destination (one-touch key).
☞ CALLING UP A DESTINATION (page 20)
(4)
[Cc] key
When using Scan to E-mail, touch the [Cc] key when you
wish to send a "Carbon copy" of the e-mail to an
additional destination.
(5)
[Bcc] key
When using Scan to E-mail, touch the [Bcc] key when
you wish to send a "Blind carbon copy" of the e-mail to an
additional destination.
When an address is specified as a Bcc recipient, other
recipients will not know that the address is a recipient.
This key only appears when Bcc has been enabled using
"Bcc Setting" in the system settings (administrator).
(8)
(9)
(10)
Sort Address
(12)
(11)
(6)
Address Review
(7)
(7)
[Condition Settings] key
Touch this key to select send settings. When the key is
touched, the base screen appears.
☞ BASE SCREEN (page 10)
(8)
[Address Review] key
Touch this key to view a list of the selected destinations.
Destination selections can be changed.
☞ CHECKING AND DELETING THE SELECTED
DESTINATIONS (page 21)
(9)
[Global Address Search] key
When the use of an LDAP server has been enabled in
the machine's Web page, an address for a transmission
can be obtained from a global address book.
☞ CALLING UP A DESTINATION FROM A GLOBAL
ADDRESS BOOK (page 24)
(10) Page change keys
Use these keys to change pages when more one-touch
keys have been stored than can be displayed on one page.
(11) Index tab
Touch this to change indexes.
☞ Index display (page 15)
key
Touch this key to search for a destination using a search number*.
* A 3-digit number assigned to a one-touch key or group
key when it is stored.
☞ USING A SEARCH NUMBER TO SPECIFY A
DESTINATION (page 22)
(12) [Sort Address] key
Touch this key to change the index tabs to custom
indexes or to display one-touch keys by send mode.
☞ CHANGING THE DISPLAY OF ONE-TOUCH KEYS
IN THE ADDRESS BOOK SCREEN (page 15)
• Icons appear in the one-touch keys in the address book to indicate which mode is used for transmission.
☞ SPECIFYING DESTINATIONS IN THE ADDRESS BOOK (page 19)
• The Scan to Desktop destination is stored when Network Scanner Tool is installed from the CD-ROM that accompanies
the machine (or that accompanies the network scanner expansion kit when the MX-2300G/2700G is used). The sender
name and sender address can also be stored in the Web pages. Click [Address Book] in the Web page menu, and click the
[Add] button that appears. Select [Desktop] in [Address Type] and then store the sender name and address.
☞ STORING A DESTINATION FOR SCAN TO DESKTOP (page 9)
• For information on storing addresses in the address book, see "STORING DESTINATION ADDRESSES FOR EACH
SCAN MODE IN THE ADDRESS BOOK" (page 8).
• System Settings: Address Control
This can be used to store addresses of Scan to E-mail and Internet fax destinations in one-touch keys.
• System Settings (Administrator): The Number of Direct Address Keys Displayed Setting
This is used to change the number of one-touch keys displayed in the Address Book screen.
• System Settings (Administrator): Bcc Setting
This setting enables or disables Bcc delivery. When enabled, the [Bcc] key appears in the Address Book screen.
• System Settings (Administrator): Default Display Setting
One of the following screens can be selected for the initial screen that appears when the [IMAGE SEND] key is pressed.
• Base screen of each mode (scan mode, Internet fax mode and fax mode)
• Address book screen (alphabetical/custom index)
14
CHANGING THE DISPLAY OF ONE-TOUCH KEYS IN
THE ADDRESS BOOK SCREEN
You can show only destinations of a specific transmission mode in the Address Book screen, or change the displayed index tabs
from the alphabetical tabs to the custom tabs. The procedure for selecting destinations does not change.
To
1
Cc
AAA AAA
BBB BBB
CCC CCC
DDD DDD
EEE EEE
Touch the [Sort Address] key.
Condition
Settings
Bcc
1/1
Address Review
Global
Address Search
FFF FFF
Frequent Use
ABCD
Tab Switch
Address Type
ABC
User
EFGHI
JKLMN
OPQRST UVWXYZ
Sort Address
All
E-mail
Internet Fax
Group
FTP/Desktop
Fax
2
Change the display mode.
OK
(1) Touch the key of the mode or tab that you
wish to display.
• To show only the one-touch keys of a particular send
mode, touch the desired mode key under "Address Type".
• To change the index tabs to the custom indexes, touch
the [User] key under "Tab Switch".
Network Folder
(1)
(2)
(2) Touch the [OK] key.
Index display
Indexes make it easy to search for a destination (one-touch key). Destinations are grouped on alphabetical index tabs. To
display a stored destination, touch the appropriate index tab. It is convenient to have frequently used destinations appear in
the [Frequent Use] index. Specify that a destination be displayed in the [Frequent Use] index when you store the destination.
To
Cc
AAA AAA
BBB BBB
CCC CCC
DDD DDD
EEE EEE
FFF FFF
Frequent Use
ABCD
Condition
Settings
Bcc
EFGHI
1/1
Address Review
Global
Address Search
JKLMN
OPQRST UVWXYZ
Sort Address
Index tab
The destinations can be displayed in alphabetical order by initial.
Each time the displayed index tab is touched, the display order changes in the following order: search numbers (page
22), ascending names, descending names, search numbers... When the display order is changed, the display order of
the other index tabs also changes.
Ordered by search number (default)
Frequent Use
ABCD
Ascending names
Frequent Use
ABCD
Descending names
Frequent Use
ABCD
Index names can be changed using "Custom Index" in the system settings, allowing you to create groups of one-touch
keys that can be easily recognized. For more information on "Custom Index", see the System Settings Guide.
System Settings: Custom Index
This setting is used to store custom index names. The custom index where a one-touch key appears is specified when the
transmission destination is stored in the key.
15
SCANNING AND TRANSMISSION SEQUENCE
This section explains the basic procedure for scanning and transmission. Select settings in the order shown below to
ensure smooth transmission.
For the detailed procedures for selecting the settings, see the explanation of each setting in this manual.
Place the original
1
Place the original in the document feeder tray of the automatic
document feeder, or on the document glass.
☞ 3. BASIC PROCEDURE FOR TRANSMISSION IN SCAN
MODE (page 27)
☞ 4. BASIC PROCEDURE FOR SCANNING IN USB
MEMORY MODE (page 45)
☞ 5. BASIC PROCEDURE FOR TRANSMISSION IN
INTERNET FAX MODE (page 62)
Change the mode
Mode Switch
Scan
Image
Settings
Internet Fax
Send Settings
Fax
Address Book
Address Entry
Special Modes
USB Mem. Scan
File
PC Scan
Data Entry
Quick File
Select the mode that you wish to use for scanning and
transmission.
☞ BASE SCREEN (page 10)
• Scan modes:
Scan to E-mail, Scan to FTP, Scan to Desktop,
Scan to Network Folder
☞ 3. BASIC PROCEDURE FOR TRANSMISSION IN
SCAN MODE (page 27)
• Internet fax mode: Internet fax transmission
☞ 5. BASIC PROCEDURE FOR TRANSMISSION IN
INTERNET FAX MODE (page 62)
• USB memory mode:
Store scanned data in a USB memory device
☞ 4. BASIC PROCEDURE FOR SCANNING IN USB
MEMORY MODE (page 45)
• PC Scan mode:
Use a scanner driver to scan from a computer
☞ 9. SCANNING FROM A COMPUTER (PC SCAN
MODE) (page 126)
Select original settings
Scan
Mode Switch
Image
Settings
Send Settings
Auto
Exposure
Mono2/Auto
Colour Mode
200X200dpi
Resolution
PDF/PDF
File Format
Address Book
Address Entry
Auto
A4
Original
Special Modes
Special Modes
File
Quick File
Settings can be selected for scanning the original.
• Exposure • Resolution
• Scan size • Send size
• Scanning of two-sided original • Colour mode
• File format • Special Modes • Advanced send settings
☞ [Image Settings] key (page 13)
☞ 7. CONVENIENT FUNCTIONS (page 83)
☞ Scan mode: CHANGING THE SUBJECT, FILE NAME,
REPLY-TO, AND MESSAGE (page 42)
Internet fax mode: CHANGING THE SUBJECT, FILE
NAME, AND MESSAGE (page 73)
16
Select convenient special modes
Ready to send.
Scan
Mode Switch
Scan
A4
Resend
Send
Address Book
Auto
Image
Settings
Address Entry
Send Settings
Special Modes
Convenient special modes and document filing settings can be
selected.
☞ 7. CONVENIENT FUNCTIONS (page 83)
File
Quick File
Enter the destination
Ready to send.
Scan
Mode Switch
Scan
A4
Resend
Send
Address Book
Auto
Image
Settings
Address Entry
Send Settings
Special Modes
File
Quick File
Specify the destination of the scan transmission.
• [Address Book] key: Select a destination that is stored in
the Address Book or look up a
destination in a global address book.
☞ SPECIFYING DESTINATIONS IN
THE ADDRESS BOOK (page 19)
☞ CALLING UP A DESTINATION
FROM A GLOBAL ADDRESS
BOOK (page 24)
• [Address Entry] key: Manually enter an address for Scan to
E-mail or Internet fax.
☞ ENTER THE ADDRESS
MANUALLY (page 23)
•
key: Use a search number to specify an address
stored in the Address Book.
☞ USING A SEARCH NUMBER TO SPECIFY
A DESTINATION (page 22)
• [Resend] key: The destinations of the most recent eight
transmissions by Scan to E-mail, fax and/or
Internet fax are stored. These destinations
can be selected.
☞ USING THE RESEND FUNCTION (page 26)
Start scanning and transmission
Start scanning and transmission.
Start colour scanning
Start black and
white scanning
If the original is placed on the document glass, follow these
steps to start scanning and transmission:
(1) Press the [COLOUR START] key (
) or the [BLACK
& WHITE START] key (
).
(2) When scanning is finished, replace the original with the
next original.
(3) Press the [COLOUR START] key (
) or the [BLACK
& WHITE START] key (
).
(4) Repeat (2) and (3) until all originals have been scanned.
(5) Touch the [Read-End] key.
• The [COLOUR START] key (
) cannot be used in Internet fax mode.
• After the original is scanned, the settings revert to the default settings.
To cancel scanning...
Press the [STOP] key (
) to cancel the operation.
17
ORIGINAL SIZES
ORIGINAL SIZES THAT CAN BE TRANSMITTED
The following original sizes can be transmitted
Minimum original size
Using the automatic document feeder
A5: 210 mm (width) x 148 mm (length)
(8-1/2" (width) x 5-1/2" (length))
A5R: 148 mm (width) x 210 mm (length)
(5-1/2" (width) x 8-1/2" (length))
Using the document glass
Maximum original size
297 mm (width) x 800 mm* (length)
(11-5/8" (width) x 31-1/2"* (length))
*A long original can be transmitted.
(Scanning will take place in Mono 2 at a
resolution of 300X300dpi or less.)
297 mm (width) x 432 mm (length)
(11-5/8" (width) x 17" (length))
THE SIZE OF THE PLACED ORIGINAL
When a standard size original is placed, the original size is automatically detected and displayed in the base screen as
the "Scan" size.
When the automatic original detection function is operating and the original is a non-standard size, the closest standard
size may be displayed or the original size may not appear. In this event, manually set the correct original size.
☞ Scan mode:
SPECIFYING THE SCAN SIZE OF THE ORIGINAL (page 36)
USB memory mode: SPECIFYING THE SCAN SIZE OF THE ORIGINAL (page 55)
Internet fax mode: SPECIFYING THE SCAN SIZE OF THE ORIGINAL (page 69)
STANDARD SIZES
The standard sizes are set in "Original Size Detector Setting" in the system settings (administrator).
List of original size detector settings
Detectable original sizes
Selections
Document glass
Document feeder tray (automatic document feeder)
AB-1
A3, A4, A4R, A5, B4, B5, B5R
A3, A4, A4R, A5, B4, B5, B5R, 8-1/2" x 11",
8-1/2" x 14", 11" x 17"
AB-2
A3, A4, A4R, A5, B5, B5R, 216 mm x 330 mm
A3, A4, A4R, A5, B4, B5, B5R, 8-1/2" x 11",
11" x 17", 216 mm x 330 mm
AB-3
A4, A4R, A5, B4, 8K, 16K, 16KR
A3, A4, A4R, A5, B4, 8K, 16K, 16KR, 8-1/2" x 11",
11" x 17", 216 mm x 330 mm
Inch-1
11" x 17", 8-1/2" x 14", 8-1/2" x 11", 8-1/2" x 11"R,
5-1/2" x 8-1/2"
11" x 17", 8-1/2" x 14", 8-1/2" x 11", 8-1/2" x 11"R,
5-1/2" x 8-1/2", A4, A3
Inch-2
11" x 17", 8-1/2" x 13", 8-1/2" x 11", 8-1/2" x 11"R,
5-1/2" x 8-1/2"
11" x 17", 8-1/2" x 13", 8-1/2" x 11", 8-1/2" x 11"R,
5-1/2" x 8-1/2", A4, A3
18
2
ENTERING DESTINATIONS
This chapter explains how to specify destination addresses, including selecting an address from the Address Book and
retrieving an address by entering a search number.
SPECIFYING DESTINATIONS IN THE
ADDRESS BOOK
The Address Book screen shows destinations as one-touch keys.
The destinations are displayed in order by search number. To make it easy to find a destination, the destinations are
grouped on alphabetical index tabs.
To
Cc
AAA AAA
BBB BBB
CCC CCC
DDD DDD
EEE EEE
Frequent Use
Condition
Settings
Bcc
1/1
Address Review
Global
Address Search
FFF FFF
ABCD
EFGHI
JKLMN
OPQRST UVWXYZ
Sort Address
The Address Book screen shows the destinations of all modes of the image send function. Each one-touch key shows
the name of the destination and an icon indicating the mode to be used.
Icon
Mode used
Fax
Group key with multiple destinations, such as Scan to E-mail and Internet fax destinations
Scan to E-mail
Internet fax
Scan to FTP
Scan to Network Folder
Scan to Desktop
• The Scan to Desktop destination is stored when Network Scanner Tool is installed from the CD-ROM that accompanies
the machine (or that accompanies the network scanner expansion kit when the MX-2300G/2700G is used). The sender
name and sender address can also be stored in the Web pages. Click [Address Book] in the Web page menu, and click the
[Add] button that appears. Select [Desktop] in [Address Type] and then store the sender name and address.
☞ STORING A DESTINATION FOR SCAN TO DESKTOP (page 9)
• For information on storing addresses in the address book, see "STORING DESTINATION ADDRESSES FOR EACH
SCAN MODE IN THE ADDRESS BOOK" (page 8).
System Settings: Address Control
This is used to store addresses of Scan to E-mail and Internet fax destinations in one-touch keys.
19
CALLING UP A DESTINATION
A destination is called up by selecting its one-touch key.
Ready to send.
Scan
Mode Switch
1
Resend
Scan
Send
Touch the [Address Book] key.
Address Book
Auto
A4
Image
Settings
Address Entry
Send Settings
Special Modes
File
Quick File
To
2
Cc
AAA AAA
BBB BBB
CCC CCC
DDD DDD
EEE EEE
Condition
Settings
Bcc
1/1
Address Review
Touch the index tab where the
destination is stored.
Global
Address Search
FFF FFF
Frequent Use
ABCD
EFGHI
JKLMN
OPQRST UVWXYZ
Sort Address
It is convenient to store frequently used destinations in the [Frequent Use] index. Specify that a destination be
displayed in the [Frequent Use] index when you store the destination.
To
Cc
AAA AAA
BBB BBB
CCC CCC
DDD DDD
EEE EEE
1/1
Address Review
Global
Address Search
Specify the destination.
(1) Touch the one-touch key of the desired
destination.
FFF FFF
Frequent Use
3
Condition
Settings
Bcc
(1)
ABCD
EFGHI
JKLMN
(2)
OPQRST UVWXYZ
If you select an incorrect destination, touch the key again
to cancel the selection.
Sort Address
(2) Touch the [To] key.
This enters the selected destination.
To continue specifying other destinations...
It is possible to specify multiple scan mode (Scan to E-mail, Scan to FTP, Scan to Desktop), Internet fax, and fax
mode destinations when performing a "broadcast" transmission (maximum of 500 destinations). Repeat steps 2 and 3.
When performing Scan to E-mail, you can select a one-touch key and then touch the [Cc] key or the [Bcc] key to send
Cc or Bcc copies of the e-mail.
• System Settings (Administrator): Bcc Setting
This setting enables or disables Bcc delivery. When enabled, the [Bcc] key appears in the Address Book screen.
• System Settings (Administrator): Must Input Next Address Key at Broadcast Setting
This setting determines whether or not the [Next Address] key can be omitted before specifying the next destination.
Factory default setting: the [Next Address] key can be omitted.
• System Settings (Administrator): Disable Switching of Display Order
This is used to disable switching of the order of display of the one-touch keys in the Address Book screen. The currently
selected display order will be the order that is used after this setting is enabled.
20
CHECKING AND DELETING THE SELECTED
DESTINATIONS
When multiple destinations have been selected, you can display and check the destinations. You can also delete a
destination from the list (cancel selection of the destination).
To
1
Cc
AAA AAA
BBB BBB
CCC CCC
DDD DDD
EEE EEE
Frequent Use
Condition
Settings
Bcc
1/1
Address Review
Global
Address Search
FFF FFF
ABCD
EFGHI
JKLMN
OPQRST UVWXYZ
Sort Address
OK
Address Review
001 AAA AAA
002 BBB BBB
003 GGG GGG
004 HHH HHH
005 III III
006 JJJ JJJ
To
Touch the [Address Review] key.
Cc
Check the destinations.
1/2
Bcc
2
To check Cc or Bcc destinations, touch the corresponding tab.
To cancel a specified destination...
Touch the one touch-key of the destination that you wish to cancel. A message will appear to confirm the deletion.
Touch the [Yes] key.
OK
Address Review
3
001 AAA AAA
002 BBB BBB
003 GGG GGG
004 HHH HHH
005 III III
006 JJJ JJJ
To
Cc
1/2
Touch the [OK] key.
You will return to the address review screen.
Bcc
21
USING A SEARCH NUMBER TO SPECIFY A
DESTINATION
A destination stored in the Address Book can be called up using the
any of the modes or in the Address Book screen.
Ready to send.
Scan
Mode Switch
1
Scan
A4
Resend
Send
key. This can be done in the base screen of
Touch the
key.
Address Book
Auto
Image
Settings
Address Entry
Send Settings
Special Modes
File
Quick File
Enter the 3-digit search number of the
address with the numeric keys.
When the 3-digit search number is entered, the stored address
is called up and specified as a destination.
2
• The search number is the number that was stored when the destination was stored in the address book.
• If you do not know the search number, print the one-touch address list using "Sending Address List" in the system
settings.
• When entering search numbers such as "001" and "011", "0" can be omitted. For example to enter "001", enter "1"
and touch the
key or the [Next Address] key.
If an incorrect search number is entered...
Press the [CLEAR] key (
) to clear the number and enter the correct number.
22
ENTER THE ADDRESS MANUALLY
Destination addresses for Scan to E-mail and Internet fax can be entered manually.
1
Fax
Mode Switch
Scan
Image
Settings
Internet Fax
Send Settings
Address Book
Address Entry
Special Modes
USB Mem. Scan
File
PC Scan
Data Entry
Quick File
(1)
(1) Touch the [Mode Switch] key.
(2) Touch the key of the mode that you wish to
use.
(2)
Ready to send.
Scan
Mode Switch
2
Change the mode.
Resend
Scan
A4
Send
Touch the [Address Entry] key.
Address Book
Auto
Image
Settings
Address Entry
Send Settings
Special Modes
File
Quick File
Enter the destination address.
Select addressee type.
To
Cc
Bcc
(1) If scan mode is selected, select the type of
delivery.
Normally the [To] key is touched. This specifies the e-mail
address that will be entered as the recipient.
(2) Enter the destination address on the text
entry screen that will appear.
Enter the destination address and touch the [OK] key in
the text entry screen.
For the procedure for entering text, see "6. ENTERING
TEXT" in the User's Guide.
3
• If you wish the destination to be a Cc destination, touch the [Cc] key.
• The [Bcc] key only appears when Bcc has been enabled using "Bcc Setting" in the system settings (administrator).
If you wish the destination to be a Bcc destination, touch the [Bcc] key.
• When Internet fax mode is selected, you will return to the base screen after entering the destination address;
however, if "I-fax Reception Report On/Off Setting" is enabled in the system settings (administrator), the I-fax
reception report settings screen will appear. If you wish to receive a report, touch the [Yes] key. If not, touch the [No]
key.
• System Settings (Administrator): I-Fax Reception Report On/Off Setting
This setting is used to request a reception report when an Internet fax is sent. When the destination is specified by directly
entering the address, a message will appear asking you if you wish to receive a report.
• System Settings (Administrator): Bcc Setting
This setting enables or disables Bcc delivery. When enabled, the [Bcc] key appears in the Address Book screen and the
delivery type selection screen.
23
CALLING UP A DESTINATION FROM A
GLOBAL ADDRESS BOOK
When an LDAP server is configured in the Web page, you can look up an address in a global address book and retrieve
the address for Scan to E-mail or Internet fax transmission.
Ready to send.
Scan
Mode Switch
1
Resend
Scan
Send
Touch the [Address Book] key.
Address Book
Auto
A4
Image
Settings
Address Entry
Send Settings
Special Modes
File
Quick File
To
2
Cc
AAA AAA
BBB BBB
CCC CCC
DDD DDD
EEE EEE
Condition
Settings
Bcc
1/1
Touch the [Global Address Search] key.
Address Review
Global
Address Search
FFF FFF
Frequent Use
ABCD
EFGHI
JKLMN
OPQRST UVWXYZ
Sort Address
If only one LDAP server is configured, the global address search screen will appear. Go to (2) in step 3.
Search for the destination.
Server Change
Cancel
OK
(1) Select the LDAP server.
Server 1
Touch the key of the LDAP server that you wish to use
and then touch the [OK] key.
1/2
Server 2
Server 3
Server 4
(2) Search for the destination on the text entry
screen that will appear.
Enter the initial letters of the name of the destination and
touch the [Search] key in the text entry screen. After a
brief interval the results will appear.
For the procedure for entering text, see "6. ENTERING
TEXT" in the User's Guide.
3
How to search
Enter the initial letters of the name (maximum of 64 characters). The system will look for names starting with the
entered letters.
An asterisk
can be used as follows:
XXX : Names beginning with "XXX".
XXX: Names that end with "XXX".
XXX : Names that include "XXX".
AA XX: Names that start with "AA" and end with "XX".
24
Select the destination.
Ready to send.
To
Cc
XXX
(2)
Condition
Settings
Bcc
Detail
XXX AAA
[email protected]
XXX BBB
[email protected]
XXX CCC
[email protected]
(1) Touch the key of the desired destination.
If there are more destinations than can be displayed in the
screen, touch the
keys to change pages.
Address Review
Search Again
Address Book
(2) Touch the [To] key.
This enters the selected destination.
If you wish to enter another destination, repeat steps (1)
and (2) above.
(1)
• If no names are found that match the search letters, a message will appear. Touch the [OK] key to close the
message and touch the [Search Again] key to search again.
4
• If more than 30 matches are found, a message will appear in the screen. Touch the [OK] key to close the message.
Up to 300 matches can appear. If no names are found that match the search letters, touch the [Search Again] key to
search again using more search letters.
• To check the information stored in a destination...
(1) Touch the key of the destination that you wish to check.
(2) Touch the [Detail] key.
The stored information appears.
(3) Touch the [OK] key.
You will return to the search results screen.
• If a screen for selecting the address to be used appears...
If the selected destination includes a fax number, telephone number, or other contact information in addition to the
e-mail address or Internet fax address, you will need to select which address you wish to use. Touch the [E-mail]
key or the [Internet Fax] key to retrieve the address for Scan to E-mail or Internet fax transmission.
• The [Detail] key can be touched to display information on the selected destination. To store the selected destination
in the Address Book, touch the [Register] key.
25
USING THE RESEND FUNCTION
The last 8 destination addresses used for Scan to E-mail and Internet fax transmissions are saved in memory and can
be selected to resend to those destinations.
Ready to send.
Scan
Mode Switch
1
Scan
A4
Resend
Send
Touch the [Resend] key.
Address Book
Auto
Image
Settings
Address Entry
Send Settings
Special Modes
File
Quick File
Cancel
2
No.01
AAA AAA
No.02
BBB BBB
No.03
CCC CCC
No.04
DDD DDD
No.05
EEE EEE
No.06
FFF FFF
No.07
GGG GGG
No.08
HHH HHH
Touch the key of the desired address.
The last 8 addresses used for transmission are displayed.
• When the [Resend] key is touched and a destination selected, the mode of the selected destination is automatically
selected.
• The following types of addresses are not stored for resending.
• A one-touch key in which multiple destinations are stored (group key).
• Scan to FTP, Scan to Desktop, and Scan to Network Folder destinations
• Broadcasting destinations
• Addresses used only for BCC delivery
• Destinations transmitted to using a program
26
3
BASIC PROCEDURE FOR
TRANSMISSION IN SCAN MODE
SCANNING TO E-MAIL, FTP, DESKTOP,
AND NETWORK FOLDER
This section explains the basic procedure for transmission in scan mode (Scan to E-mail, Scan to FTP, Scan to
Desktop, and Scan to Network Folder).
When a default address is configured in "Default Address Setting" in the system settings (administrator), the mode cannot be
changed, the destination cannot be changed, and destinations cannot be added. If you wish to change the mode or
destination, touch the [Cancel] key in the touch panel and then follow the procedure below.
Place the original.
1
Original size
detector
• When placing the original, orient it as explained below.
Document glass
Original
Document feeder tray
Place the originals face up.
Place the original face down and align the
corner with the tip of the arrow mark
in the
top left corner of the document glass scale.
Portrait orientation*
1
1
1
1
Landscape orientation
1
1
1
* To place a large portrait-oriented original, place it as shown above in "Landscape orientation" and specify the
placement orientation in step 4.
• Place A5 (5-1/2" x 8-1/2") size originals in portrait (vertical) orientation ( ).
If placed in landscape (horizontal) orientation (
), an incorrect size will be detected. For an A5R (5-1/2" x 8-1/2"R)
size original, enter the original size manually.
• Originals cannot be scanned in succession from both the automatic document feeder and the document glass and
sent in a single transmission.
Do not place any objects under the original size detector. Closing the automatic document feeder with an object
underneath may damage the original size detector plate and prevent correct detection of the document size.
27
2
Fax
Mode Switch
Scan
Image
Settings
Internet Fax
Send Settings
Address Book
Address Entry
Special Modes
USB Mem. Scan
Change to scan mode.
(1) Touch the [Mode Switch] key.
(2) Touch the [Scan] key.
File
PC Scan
Data Entry
Quick File
(1)
(2)
Scan
Mode Switch
Image
Settings
Address Book
Auto
Exposure
Mono2/Auto
Colour Mode
200X200dpi
Resolution
PDF/PDF
File Format
Special Modes
Special Modes
File
Address Entry
Send Settings
Auto
A4
Original
Display the original settings screen.
(1) Touch the [Image Settings] key.
(2) Touch the [Original] key.
Quick File
3
(1)
(2)
The current settings of the [Exposure], [Resolution], [Original], [Colour Mode], and [File Format] keys appear in the top
half of each key. Touch each key to change the settings.
☞ CHANGING THE EXPOSURE AND EXPOSURE MODE (page 31), CHANGING THE RESOLUTION (page 33),
AUTOMATICALLY SCANNING BOTH SIDES OF AN ORIGINAL (2-Sided Original) (page 34), SPECIFYING THE
ORIGINAL SCAN SIZE AND SEND SIZE (Enlarge/Reduce) (page 35), CHANGING THE COLOUR MODE (page
39), CHANGING THE FILE FORMAT (page 40), 7. CONVENIENT FUNCTIONS (page 83)
Scan
Original
100%
Scan Size
Auto
A4
2-Sided
Booklet
Specify the orientation in which the
original is placed.
OK
Send Size
Auto
To enable the original to be scanned in the correct orientation
(the orientation of the top edge of the original that is shown at
the top of the display), specify the orientation in which the
original was placed in step 1.
Image Orientation
2-Sided
Tablet
(1)
(2)
(1) Touch the appropriate orientation key.
4
If the top edge of the original is up, touch the
the top edge of the original is to the left, touch the
key. If
key.
(2) Touch the [OK] key.
You will return to the screen of step 3. Touch the [Image
Settings] key to close the menu.
The original orientation is initially set to
Ready to send.
Scan
Mode Switch
5
Scan
A4
. If the original was placed with the top edge up, this step is not necessary.
Resend
Send
Touch the [Address Book] key.
Address Book
Auto
Image
Settings
Address Entry
Send Settings
Special Modes
File
Quick File
28
(2)
To
Cc
BBB BBB
CCC CCC
DDD DDD
EEE EEE
FFF FFF
ABCD
Condition
Settings
Bcc
AAA AAA
Frequent Use
Specify the destination.
(1)
EFGHI
1/1
Address Review
(1) Touch the one-touch key of the desired
destination.
The icon on the key indicates the type of destination
stored in the key.
: Scan to E-mail
: Scan to FTP
: Scan to Network Folder
: Scan to Desktop
Global
Address Search
JKLMN
OPQRST UVWXYZ
Sort Address
(2) Touch the [To] key.
The destination is specified.
6
• After a one-touch key is touched, if the screen is changed without touching the [To] key, the destination is
automatically specified.
• When performing Scan to E-mail, you can also send Cc or Bcc copies to other destinations. Touch the desired
destination and then touch the [Cc] key or the [Bcc] key.
• Multiple destinations can be specified. To specify multiple destinations, repeat steps (1) and (2). Note that multiple
destinations cannot be specified when a Scan to Network Folder destination is specified.
• You can also select multiple one-touch keys and then touch the [To] key (or the [Cc] or [Bcc] key) to enter all of the
selected keys as destinations at once.
• In addition to selecting a one-touch key, a destination can also be specified by entering a search number. For a
Scan to E-mail destination, it is possible to enter a destination manually or retrieve it from a global address book.
For more information, see "2. ENTERING DESTINATIONS" (page 19).
System Settings (Administrator): Bcc Setting
This setting enables or disables Bcc delivery. When enabled, the [Bcc] key appears in the Address Book screen.
or
Press the [COLOUR START] key (
or the [BLACK & WHITE START] key (
)
).
Scanning begins.
• If the original is placed on the document glass, the
[Read-End] key appears in the touch panel. To scan only one
original, go to step 9. To scan multiple originals, go to the
next step.
• If the original was inserted in the document feeder tray, a
beep will sound when scanning is completed and
transmission will take place.
7
• To scan in full colour, press the [COLOUR START] key (
). To scan in black and white, press the [BLACK &
WHITE START] key (
). If the colour mode of the [COLOUR START] key (
) is set to [Auto], the colour of
the original will be detected automatically and scanning in full colour, greyscale or Mono 2 will take place.
• If the file type is [Encrypt PDF], a password entry screen will appear when the [START] key is pressed.
Please enter encrypt PDF
password.
Cancel
Entry
Touch the [Entry] key to open the keyboard screen, enter a password (maximum of 32 characters), and touch the
[OK] key. The recipient must use the password entered here to open the encrypted PDF file.
To cancel encrypted PDF, touch the [Cancel] key. The format settings screen will appear to let you change the file
type. Select a new file type and press the [START] key to begin transmission.
29
or
8
If the original was placed on the
document glass, replace it with the next
original and press the [COLOUR START]
key (
) or the [BLACK & WHITE
START] key (
).
Repeat until all originals have been scanned.
The exposure, resolution, and scan size/send size can be changed for each original page that is scanned.
Place next original.
(Pg.No.x)
Press [Start].
When finished, press [Read-End]
Read-End
Touch the [Read-End] key.
A beep will sound to indicate that the operation is completed.
Open the automatic document feeder and remove the original.
9
If no action is taken for one minute after the confirmation screen appears, scanning automatically ends and the
transmission is reserved.
• When all originals have been scanned, "Job stored." will be displayed together with a job control number. This number can
be used to locate the job in the Transaction Report or in the Image Sending Activity Report. If the job is a broadcast
transmission, this number will also appear in the key of the job in the job status screen. For this reason, making a note of
the number is useful for checking the result.
• If the memory becomes full while the originals are being scanned, a message will appear and scanning will stop.
• When performing Scan to E-mail, take care not to send a file that is too large. In particular, multi-page files tend to be large.
When sending a multi-page file or other large file, it may be necessary to reduce the number of scanned pages or reduce
the send size.
• Storing a mail signature
You can have preset text automatically added at the end of e-mail messages as a mail signature. This is convenient when
you wish to have a corporate policy or other preset text appear at the bottom of e-mail messages. To store the text for the
mail signature, click [Application Settings] and then [Network Scanner Settings] in the Web page menu. (Administrator
rights are required.) Up to 900 characters can be entered. (The mail signature is not included in the maximum number of
characters that can be entered in the e-mail message.)
Use "Pre-Setting Mail Signature" in the system settings (administrator) to specify whether or not a mail signature is added.
To cancel scanning...
Press the [STOP] key (
) to cancel the operation.
• System Settings (Administrator): Scan Settings
Scanner transmission settings can be configured, including the default resolution and exposure settings, the default colour
mode and file format, the file compression method for broadcasting, the file size limit for Scan to E-mail, and the default
sender and destination.
• System Settings (Administrator): Pre-Setting Mail Signature
Use this setting to specify whether or not a mail signature is added at the end of e-mail messages. By factory default, a
mail signature is not added.
30
CHANGING THE EXPOSURE AND
EXPOSURE MODE
The exposure can be changed to match the darkness of the original. The exposure mode can be changed to match the
original type.
Scan
Mode Switch
Image
Settings
1
Address Book
Auto
Exposure
Mono2/Auto
Colour Mode
200X200dpi
Resolution
PDF/PDF
File Format
Special Modes
Special Modes
File
Address Entry
Send Settings
Auto
A4
Original
Display the exposure setting screen.
(1) Touch the [Image Settings] key.
(2) Touch the [Exposure] key.
Quick File
(1)
(2)
Read the displayed message and touch
the [OK] key.
When Fax/I-Fax address is included,
exposure setting shared among Fax/
I-Fax/ Scanner mode is selected.
OK
2
If a broadcast transmission is performed that includes both scan mode destinations and Internet fax destinations, the
exposure settings for Internet fax mode will have priority.
(1)
Scan
Exposure
(4)
OK
Moiré Reduction
Auto
Text/
Prtd.Photo
Text/Photo
Text
Photo
Printed
Photo
Map
Manual
1
3
3
(2)
Select the exposure and exposure mode.
(1) Touch the [Manual] key.
(2) Adjust the exposure with the
keys.
When the exposure is set to [Auto], the
keys
cannot be used.
The exposure darkens when the
key is touched,
and lightens when the
key is touched.
To return to auto exposure adjustment, touch the [Auto] key.
5
(3)
(3) Select the exposure mode.
Touch the original type key that matches the original type.
(4) Touch the [OK] key.
• When the exposure is set to [Auto], the exposure modes [Photo], [Printed Photo], and [Map] do not appear.
• To reduce the moiré effect when scanning printed matter, touch the [Moiré Reduction] checkbox so that a
checkmark
appears.
When using the document glass to scan multiple original pages, the exposure setting can be changed each time you change
pages. When using the automatic document feeder, the exposure setting cannot be changed once scanning has begun.
(However, when the special mode "Job Build" is used, the exposure can be changed each time a new set of originals is
inserted.)
System Settings (Administrator): Default Exposure Settings
This is used to change the default exposure setting.
31
How to select the exposure
Exposure
Auto
When to select
This setting automatically adjusts the exposure for light and dark parts of the original.
Manual
1 to 2
Select this setting when the original consists of dark text.
3
Select this setting for a normal original (neither dark nor light).
4 to 5
Select this setting when the original consists mostly of faint text.
How to select the exposure mode
Setting
Description
Text/Prtd. Photo
This mode provides the best balance for scanning an original which contains both text and
printed photographs, such as a magazine or catalogue.
Text/Photo
This mode provides the best balance for scanning an original which contains both text and
photographs, such as a text document with a photo pasted on.
Text
Use this mode for regular text documents.
Photo
Use this mode to scan photos.
Printed Photo
This mode is best for scanning printed photographs, such as photos in a magazine or
catalogue.
Map
This mode is best for scanning the colour shading and fine details found on most maps.
32
CHANGING THE RESOLUTION
The resolution setting can be selected.
Scan
Mode Switch
Image
Settings
Send Settings
1
Address Book
Auto
Exposure
Mono2/Auto
Colour Mode
200X200dpi
Resolution
PDF/PDF
File Format
Special Modes
Special Modes
File
Address Entry
Auto
A4
Original
Display the resolution setting screen.
(1) Touch the [Image Settings] key.
(2) Touch the [Resolution] key.
Quick File
(1)
Scan
Resolution
(2)
Select the resolution.
100X100dpi
(1) Touch the key of the desired resolution.
200X200dpi
300X300dpi
2
(2) Touch the [OK] key.
400X400dpi
600X600dpi
(1)
(2)
How to select the resolution
When scanning a regular text document, a resolution setting of 200X200dpi will create a sufficiently legible image. When
scanning a photo or illustration, a high resolution setting (such as 600X600dpi) will produce a sharp and clear image.
However, a high resolution setting will result in a large file, and if the file is too large, transmission may not be possible.
In this event, reduce the size of the image file (for example, by reducing the number of scanned pages).
When using the automatic document feeder, the resolution setting cannot be changed once scanning has begun. However,
when the document glass or the "Job Build" special mode is used, the resolution can be changed each time a new original or
set of originals is placed.
System Settings (Administrator): Initial Resolution Setting
This is used to change the default resolution setting.
33
AUTOMATICALLY SCANNING BOTH SIDES
OF AN ORIGINAL (2-Sided Original)
The automatic document feeder can be used to automatically scan both sides of an original.
Scan transmission
Two-sided original
Scan
Mode Switch
Image
Settings
1
Front and reverse sides are scanned
Address Book
Auto
Exposure
Mono2/Auto
Colour Mode
200X200dpi
Resolution
PDF/PDF
File Format
Special Modes
Special Modes
File
Address Entry
Send Settings
Auto
A4
Original
Display the original settings screen.
(1) Touch the [Image Settings] key.
(2) Touch the [Original] key.
Quick File
(1)
(2)
Scan
Original
2-Sided
Booklet
Scan Size
Auto
A4
100%
Send Size
Auto
OK
Image Orientation
2-Sided
Tablet
(1)
Specify whether the binding style of the
two-sided original is book style or tablet
style.
(1) Touch the [2-Sided Booklet] key or the
[2-Sided Tablet] key.
(2)
A book and a tablet are bound as shown below.
Book
2
A J
E
C L
G
(2) Touch the [OK] key.
To cancel two-sided scanning, touch the highlighted key so that it is no longer highlighted.
Two-sided scanning automatically turns off after scanning and transmission are finished.
34
Tablet
A B
E F
K L
SPECIFYING THE ORIGINAL SCAN SIZE
AND SEND SIZE (Enlarge/Reduce)
When the original is placed, its size is automatically detected and displayed in the base screen.
The size of the placed original is indicated as the scan size, and the size to be transmitted is indicated as the send size.
Ready to send.
Scan
Mode Switch
Scan
A4
Resend
Send
Address Book
Auto
Image
Settings
Address Entry
Send Settings
Special Modes
File
Quick File
In the above screen, the scan size (the placed original) is A4 (8-1/2" x 11") and the send size is auto. For example, if the
scan size is A4 (8-1/2" x 11") and the send size is B5 (5-1/2" x 8-1/2"), the image will be reduced before transmission.
"Scan Size"
"Send Size" is
set to B5
(5-1/2" x 8-1/2")
Transmission
The image is reduced to
B5 (5-1/2" x 8-1/2")
before transmission
A4 (8-1/2" x 11")
• Only standard original sizes can be automatically detected.
• If the original is a non-standard size, you must set the scan size manually.
35
SPECIFYING THE SCAN SIZE OF THE ORIGINAL
If the original is a non-standard size or you wish to change the scan size, touch the [Original] key to specify the original
size manually. Place the original in the document feeder tray or on the document glass and follow the steps below.
Specifying the size using paper sizes
Scan
Mode Switch
Image
Settings
1
Address Book
Auto
Exposure
Mono2/Auto
Colour Mode
200X200dpi
Resolution
PDF/PDF
File Format
Special Modes
Special Modes
File
Address Entry
Send Settings
Auto
A4
Original
Display the original settings screen.
(1) Touch the [Image Settings] key.
(2) Touch the [Original] key.
The automatically detected size appears at the top of the
[Original] key.
Quick File
(1)
(2)
Scan
Original
2
100%
Scan Size
Auto
A4
2-Sided
Booklet
Send Size
Auto
OK
Touch the [Scan Size] key.
OK
Specify the scan size.
Image Orientation
2-Sided
Tablet
Scan
Original
AB
Inch
Auto
A5
B5R
B4
Manual
A5R
A4
A3
B5
A4R
Long Size
(1) Touch the appropriate original size key.
(2) Touch the [OK] key.
Manual
Size Input
Standard Size
3
(1)
(2)
• If you are sending a long original, touch the [Long Size] key. Use the automatic document feeder to scan a long
original. (When the automatic document feeder is not installed, the [Long Size] key does not appear.) The maximum
length that can be scanned is 800 mm (31-1/2") (the maximum width is 297 mm (11-5/8")).
• To specify an inch size for the scan size, touch the [AB
scan size.
Scan
Original
4
2-Sided
Booklet
Scan Size
B5
100%
Send Size
Auto
OK
Inch] key to highlight the [Inch] side and then specify the
Touch the [OK] key.
Image Orientation
2-Sided
Tablet
When [Long Size] is selected, the two-sided scanning setting and send size cannot be changed. In addition, scanning will
take place in Mono 2 mode.
36
Specifying the size by entering numerical values.
When scanning a non-standard size original such as a postcard or card, follow these steps to specify the original size.
The width can be from 64 mm to 432 mm (2-1/2" to 17"), and the length can be from 64 mm to 297 mm (2-1/2" to 11-5/8").
Scan
Mode Switch
Image
Settings
1
Address Book
Auto
Exposure
Mono2/Auto
Colour Mode
200X200dpi
Resolution
PDF/PDF
File Format
Special Modes
Special Modes
File
Address Entry
Send Settings
Auto
A4
Original
Display the original settings screen.
(1) Touch the [Image Settings] key.
(2) Touch the [Original] key.
The automatically detected size appears at the top of the
[Original] key.
Quick File
(1)
(2)
Scan
Original
2
100%
Scan Size
Auto
A4
2-Sided
Booklet
Send Size
Auto
OK
Touch the [Scan Size] key.
OK
Enter the scan size (original size).
Image Orientation
2-Sided
Tablet
Scan
Original
Auto
X
Manual
X
64
(64
mm
432)
Y
64
(64
mm
297)
Y
Manual
(2) Touch the [X] key and enter the X
(horizontal) dimension with the
keys.
Size Input
Standard Size
3
(1) Touch the [Size Input] tab.
(2), (3)
(1)
(4)
(3) Touch the [Y] key and enter the Y (vertical)
dimension with the
keys.
(4) Touch the [OK] key.
System Settings (Administrator): Original Size Detector Setting
This is used to set the size entry screen to "mm units" or "inch units".
Scan
Original
4
2-Sided
Booklet
Scan Size
X64 Y64
Send Size
Auto
OK
Touch the [OK] key.
The specified size appears in the [Scan Size] key.
Image Orientation
2-Sided
Tablet
• When the scan size is specified by numerical values, the send size cannot be specified.
• When the automatic document feeder is used, an original longer that 432 mm (17") can be scanned (maximum length 800
mm (31-1/2")). To scan a long original, touch the [Standard Size] tab in the screen of step 3 and then touch the [Long Size]
key.
☞ Specifying the size using paper sizes (page 36)
37
SPECIFYING THE SEND SIZE OF THE ORIGINAL
Specify the send size as a paper size. If a send size bigger than the scan size is selected, the image will be enlarged. If
a send size smaller than the scan size is selected, the image will be reduced.
The send size cannot be specified when [Long Size] is selected for the scan size, or when the scan size is specified by
numerical values.
Scan
Mode Switch
Image
Settings
1
Address Book
Auto
Exposure
Mono2/Auto
Colour Mode
200X200dpi
Resolution
PDF/PDF
File Format
Special Modes
Special Modes
File
Address Entry
Send Settings
Auto
A4
Original
Display the original settings screen.
(1) Touch the [Image Settings] key.
(2) Touch the [Original] key.
Quick File
(1)
(2)
Scan
Original
2
100%
Scan Size
Auto
A4
2-Sided
Booklet
Send Size
Auto
OK
Touch the [Send Size] key.
OK
Specify the send size.
Image Orientation
2-Sided
Tablet
Scan
Original
AB
Inch
Auto
A5
B5R
B4
Manual
A5R
A4
A3
B5
A4R
(1) Touch the desired send size key.
(2) Touch the [OK] key.
A4
3
(1)
(2)
• Size keys that cannot be specified for the send size are greyed out to prevent selection.
• To specify an inch size for the send size, touch the [AB
send size.
Scan
Original
4
2-Sided
Booklet
Scan Size
Auto
A4
141%
Send Size
A3
Image Orientation
OK
Inch] key to highlight the [Inch] side and then specify the
Touch the [OK] key.
The ratio used for reduction or enlargement of the original will
appear between the "Scan Size" and the "Send Size".
2-Sided
Tablet
38
CHANGING THE COLOUR MODE
This procedure is used to change the colour mode used to scan the original when the [COLOUR START] key (
or the [BLACK & WHITE START] key (
) is pressed.
Start key
Mode
Scanning method
Auto
The machine detects whether the original is colour or black and white and
automatically selects full colour or black and white (Mono 2 or Greyscale)
scanning.
Full Colour
The original is scanned in full colour. This mode is best for full colour
originals such as catalogues.
Mono2
Colours in the original are scanned as black or white. This mode is best for
text-only originals.
Greyscale
The colours in the original are scanned in black and white as shades of
grey (greyscale).
[COLOUR START]
key
[BLACK & WHITE
START] key
Scan
Mode Switch
Image
Settings
1
Send Settings
Address Book
Display the colour mode screen.
Auto
Exposure
Mono2/Auto
Colour Mode
Address Entry
200X200dpi
Resolution
PDF/PDF
File Format
(1) Touch the [Image Settings] key.
Special Modes
File
(2) Touch the [Colour Mode] key.
Special Modes
Auto
A4
Original
Quick File
(1)
(2)
Scan
Colour Mode
Colour
B/W
Colour Mode
Auto
Mono2
Full Colour
Greyscale
Mono2
Greyscale
OK
B/W Mode
(1)
(2)
Select the colour mode.
(1) Touch the key of the mode to be used when
the [COLOUR START] key (
) is
pressed.
You can select whether black & white scanning will take
place in Mono 2 or greyscale when [Auto] is selected and
a black and white original is scanned. Note that if the file
format is set to JPEG, scanning will take place in
greyscale.
(3)
2
(2) Touch the key of the mode to be used when
the [BLACK & WHITE START] key (
) is
pressed.
(3) Touch the [OK] key.
• System Settings (Administrator): Default Colour Mode Settings
The default colour mode can be changed.
• System Settings (Administrator): Disable Change of B/W Setting in Auto Mode
This prohibits selection of the black and white original scanning setting when [Auto] is selected for the colour mode.
39
)
CHANGING THE FILE FORMAT
The file format (file type and compression method / compression ratio) for sending a scanned image is specified when
the destination is stored in a one-touch key; however, you can change the format at the time of transmission. In addition,
if the scanned originals are divided into separate files, the number of pages per file can be changed.
Scan
Mode Switch
Image
Settings
1
Address Book
Auto
Exposure
Mono2/Auto
Colour Mode
200X200dpi
Resolution
PDF/PDF
File Format
Special Modes
Special Modes
File
Address Entry
Send Settings
Auto
A4
Original
Display the format setting screen.
(1) Touch the [Image Settings] key.
(2) Touch the [File Format] key.
Quick File
(1)
(2)
Read the displayed message and touch
the [OK] key.
Select a file format to apply it to
all scan destinations.
2
OK
Set the format.
● Scanning in Mono 2
File Type
Compression Mode
TIFF
PDF
OK
None
Encrypt PDF
MH (G3)
Programmed
MMR (G4)
Specified Pages per File
(1)
B/W
(1) Select the file type.
(2) Select the compression mode.
Colour/Grey
(1-99)
(2)
● Scanning in colour/greyscale
3
File Type
Compression Ratio
PDF
TIFF
Low
Encrypt PDF
JPEG
Medium
OK
B/W
(1) Touch the indicated key to select
[Colour/Grey] mode.
When [Colour/Grey] is highlighted, [Colour/Grey] mode is
selected.
Colour/Grey
High
Programmed
Specified Pages per File
(2)
(1-99)
(3)
(2) Select the file type.
(1)
(3) Select the compression ratio.
High compression results in a smaller file size, however,
the image quality is slightly degraded.
• When this screen is displayed, the setting screen of [B/W] mode initially appears.
• The format set for [B/W] mode will be the file format that is used when the [BLACK & WHITE START] key (
) is
pressed with the B/W Mode set to [Mono2].
) is
• The format set for [Colour/Grey] mode will be the file format that is used when the [COLOUR START] key (
pressed, or when the [BLACK & WHITE START] key (
) is pressed with the B/W Mode set to [Greyscale].
• The file type of [B/W] mode and the file type of [Colour/Grey] mode are linked. The file type cannot be set separately for each.
(When [JPEG] is selected for [Colour/Grey] mode, [TIFF] is automatically selected for [B/W] mode.)
40
Compression Ratio
File Type
PDF
TIFF
Low
Encrypt PDF
JPEG
Medium
OK
B/W
Colour/Grey
High
Programmed
Specified Pages per File
(1)
4
1
(1) Touch the [Specified Pages per File]
checkbox so that a checkmark
appears.
(1-99)
(2)
To change the number of pages per file,
enter the number of pages and exit the
format settings.
(3)
(2) Set the number of pages per file with the
keys.
(3) Touch the [OK] key.
• When a checkmark does not appear in the [Specified Pages per File] checkbox
scanned pages.
, one file is created for all
• When [Specified Pages per File] is selected, consecutive numbers are added to the created file names.
• When [JPEG] is selected for the file type, one file is created for each page (a file cannot be created for multiple
pages). For this reason, the [Specified Pages per File] checkbox does not appear.
When [Encrypt PDF] is selected, a password entry screen will appear when the [START] key is pressed to begin scanning
and transmission.
Touch the [Entry] key in the displayed screen to open the keyboard screen. Enter a password (maximum of 32 characters)
and touch the [OK] key. Scanning and transmission will begin.
System Settings (Administrator): Initial File Format Setting
This sets the default file format setting for scanner transmission.
41
CHANGING THE SUBJECT, FILE NAME,
REPLY-TO, AND MESSAGE
The subject, file name, reply-to, and message can be changed when performing a scan transmission. Preset items can
be selected or text can be directly entered.
• When performing Scan to FTP, Scan to Desktop, or Scan to Network Folder, only the file name is used.
• If the subject and file name are not changed, the settings in the Web page are used.
• If the sender name is not changed, the name set in "Default Sender Set" in the system settings is used. If this is not
configured, the administrator name in the Web pages is used.
• Selections for the subject, file name, and message are configured by clicking [Application Settings] and then [Network
Scanner Settings] in the Web page menu. (Administrator rights are required.)
• For the procedure for entering text, see "6. ENTERING TEXT" in the User's Guide.
Ready to send.
Scan
Mode Switch
1
Scan
Resend
Send
A4
Address Book
Auto
Image
Settings
Address Entry
Send Settings
Special Modes
Touch the [Send Settings] key.
If you are sending to a Scan to FTP, Scan to Desktop, or Scan
to Network Folder destination, go to step 4.
File
Quick File
OK
Send Settings
Subject
2
To change the subject, touch the
[Subject] key.
File Name
Reply-To
Body Text
Add 'Reply to' to Cc
(1)
(2)
Cancel
Pre-Set
OK
1/5
No.01 Sub: Schedule coordinat No.04
No.02 Sub: Monthly Schedule
Enter the subject.
(1) Touch a Pre-Set text key.
(2) Touch the [OK] key.
No.05
No.03 Sub: Minutes of plannin No.06
3
Direct Entry
• If you wish to directly enter the text, touch the [Direct Entry] key to open the text entry screen. Enter the text and
touch the [OK] key. Up to 54 characters can be entered.
• The text in a pre-set text key can be edited by touching the pre-set text key and then the [Direct Entry] key. The text
entry screen will appear with the selected pre-set text entered. (When a destination is stored using the Web page,
up to 80 characters can be entered. However, only 54 characters will appear and can be edited in the touch panel.)
42
Subject
To change the file name, touch the [File
Name] key.
OK
Send Settings
Sub: Schedule coordination meeting
File Name
• The file name is entered in the same way as the subject.
• If you are sending to a Scan to FTP, Scan to Desktop, or
Scan to Network Folder destination, go to step 9.
Reply-To
4
Body Text
Add 'Reply to' to Cc
Up to 54 characters can be entered for the file name.
Subject
File Name
To change "Reply-To", touch the
[Reply-To] key.
OK
Send Settings
Sub: Schedule coordination meeting
Material for planning meeting
Reply-To
5
Body Text
Add 'Reply to' to Cc
If user authentication is being used, the information of the user that logged in will be applied, and thus "Reply-To"
cannot be changed.
6
Cancel
BBB BBB
AAA AAA
Specify a user for "Reply-To" and touch
the [OK] key.
OK
1
10
CCC CCC
DDD DDD
EEE EEE
FFF FFF
Global
Address Search
GGG GGG
HHH HHH
Address Entry
All Sender
ABCD
EFGHI
JKLMN
OPQRST UVWXYZ
ABC
• Touch the key that you wish to use for "Reply-To".
• You can also touch the [Global Address Search] key to
specify a user stored in a global address book for "Reply-To".
You can also touch the [Address Entry] key to directly enter
an e-mail address.
User
To specify the return address, touch the
key and enter one of the user numbers that have been previously
stored using "User Registration" in the system settings (administrator).
OK
Send Settings
Subject
7
Sub: Schedule coordination meeting
File Name
Material for planning meeting
Reply-To
AAA AAA
Add 'Reply to' to Cc
To change the message, touch the
[Body Text] key.
Body Text
43
Clear All
Body Entry
Enter the message and touch the [OK]
key.
OK
Thank you for your continuous support. We have attached scanned data,
which you have requested.
• To select a pre-set message previously stored in the Web
page, touch the [Pre-Set Select] key.
• To directly enter the message, touch the [Edit] key.
Pre-Set Select
Edit
8
• 1800 characters can be entered. (A line break counts as one character.)
• To clear all the entered text, touch the [Clear All] key. This key clears not only the selected line but also the entire
message.
• Each line of the entered text can be selected with the
keys. To edit the selected line, touch the [Edit] key.
The text entry screen will appear with the selected text entered.
Subject
9
Touch the [OK] key.
OK
Send Settings
Sub: Schedule coordination meeting
File Name
Material for planning meeting
Reply-To
AAA AAA
Add 'Reply to' to Cc
Body Text
The [Add 'Reply to' to Cc] checkbox can be selected
to send a Cc copy to the sender.
When storing pre-set text for the subject and file name in the Web page, up to 80 characters can be entered.
• System Settings (Administrator): The Number of File Name/Subject/Body Keys Displayed Setting
This is used to select the number of subjects and file names displayed in one screen (3 or 6).
• System Settings: Default Sender Set
This is used to store the sender name and e-mail address that is used when a sender is not selected.
44
4
BASIC PROCEDURE FOR
SCANNING IN USB MEMORY
MODE
SCANNING TO USB MEMORY
Follow the steps below to send a scanned file to a commercially available USB memory device that has been connected
to the machine. This stores the file in the USB device.
• Consult your dealer or retailer for USB memory devices that can be used.
• When a default address is configured in "Default Address Setting" in the system settings (administrator), the mode cannot
be changed. To switch to USB memory mode, touch the [Cancel] key in the touch panel and then follow the steps below.
Connect the USB memory to the USB
connector (Type A) on the machine.
1
System Settings: USB-Device Check
This is used to check the connection of a USB device to the machine.
45
Place the original.
1
Original size
detector
• When placing the original, orient it as explained below.
Document glass
Document feeder tray
Original
Place the originals face up.
Place the original face down and align the
corner with the tip of the arrow mark
in the
top left corner of the document glass scale.
Portrait orientation*
2
1
1
1
Landscape orientation
1
1
1
* To place a large portrait-oriented original, place it as shown above in "Landscape orientation" and specify the
placement orientation in step 5.
• Place A5 (5-1/2" x 8-1/2") size originals in portrait (vertical) orientation ( ).
If placed in landscape (horizontal) orientation (
), an incorrect size will be detected. For an A5R (5-1/2" x 8-1/2"R)
size original, enter the original size manually.
• Originals cannot be scanned in succession from both the automatic document feeder and the document glass and
sent in a single transmission.
Do not place any objects under the original size detector. Closing the automatic document feeder with an object
underneath may damage the original size detector plate and prevent correct detection of the document size.
Mode Switch
Scan
Image
Settings
Internet Fax
Send Settings
Fax
Address Book
Address Entry
Special Modes
USB Mem. Scan
Change to USB memory mode.
(1) Touch the [Mode Switch] key.
(2) Touch the [USB Mem. Scan] key
File
PC Scan
Data Entry
Quick File
3
(1)
(2)
• When scanning to USB memory, there is no need to specify the destination.
• If a destination of another mode has been previously specified, a message will appear when you change to USB
memory mode indicating that the destination setting will be cleared. Touch the [OK] key in the message screen and
go to the next step.
46
USB Mem. Scan
Mode Switch
Image
Settings
File Name
Auto
Exposure
Mono2/Auto
Colour Mode
200X200dpi
Resolution
PDF/PDF
File Format
Auto
A4
Original
4
(1)
Display the original settings screen.
(1) Touch the [Image Settings] key.
Special Modes
(2) Touch the [Original] key.
Special Modes
(2)
The current settings of the [Exposure], [Resolution], [Original], [Colour Mode], and [File Format] keys appear in the top
half of each key. Touch each key to change the settings.
☞ CHANGING THE EXPOSURE AND EXPOSURE MODE (page 50), CHANGING THE RESOLUTION (page 52),
AUTOMATICALLY SCANNING BOTH SIDES OF AN ORIGINAL (2-Sided Original) (page 53), SPECIFYING THE
ORIGINAL SCAN SIZE AND SEND SIZE (Enlarge/Reduce) (page 54), CHANGING THE COLOUR MODE (page
58), CHANGING THE FILE FORMAT (page 59), 7. CONVENIENT FUNCTIONS (page 83)
USB Mem. Scan
Scan Size
Original
Auto
A4
2-Sided
Booklet
100%
Send Size
Auto
OK
To enable the original to be scanned in the correct orientation
(the orientation of the top edge of the original that is shown at
the top of the display), specify the orientation in which the
original was placed in step 2.
Image Orientation
2-Sided
Tablet
(1)
Specify the orientation in which the
original is placed.
(2)
(1) Touch the appropriate orientation key.
If the top edge of the original is up, touch the
key. If
the top edge of the original is to the left, touch the
key.
5
(2) Touch the [OK] key.
You will return to the screen of step 4. Touch the [Image
Settings] key to close the menu.
The original orientation is initially set to
necessary.
. If the original was placed with the top edge up, this step is not
47
Press the [COLOUR START] key (
or the [BLACK & WHITE START] key (
or
)
).
Scanning begins.
• If the original is placed on the document glass, the
[Read-End] key appears in the touch panel. To scan only one
original, go to step 8. To scan multiple originals, go to the
next step.
• If the original was inserted in the document feeder tray, a
beep will sound when scanning is completed and
transmission will begin. Go to step 9.
6
Do not disconnect the USB memory until "Sending data has been completed." appears in the touch panel.
• To scan in full colour, press the [COLOUR START] key (
). To scan in black and white, press the [BLACK &
WHITE START] key (
). If the colour mode of the [COLOUR START] key (
) is set to [Auto], the colour of
the original will be detected automatically and scanning in full colour, greyscale or Mono 2 will take place.
• If the file type is [Encrypt PDF], a password entry screen will appear when the [START] key is pressed.
Please enter encrypt PDF
password.
Cancel
Entry
Touch the [Entry] key to open the keyboard screen, enter a password (maximum of 32 characters), and touch the
[OK] key. The recipient must use the password entered here to open the encrypted PDF file.
To cancel encrypted PDF, touch the [Cancel] key. The format settings screen will appear to let you change the file
type. Select a new file type and press the [START] key to begin transmission.
or
7
If the original was placed on the
document glass, replace it with the next
original and press the [COLOUR START]
key (
) or the [BLACK & WHITE
START] key (
).
Repeat until all originals have been scanned.
The exposure, resolution, and scan size/send size can be changed for each original page that is scanned.
Place next original.
(Pg.No.x)
Press [Start].
When finished, press [Read-End]
Read-End
Touch the [Read-End] key.
A beep will sound to indicate that the operation is completed.
Open the automatic document feeder and remove the original.
8
If no action is taken for one minute after the confirmation screen appears, scanning automatically ends and the
transmission is reserved.
48
When "Sending data has been
completed." appears in the touch panel,
disconnect the USB memory.
9
Do not disconnect the USB memory while "Processing data." or "Sending data." appear in the touch panel.
• When transmission to USB memory is completed, "Sending data has been completed." is displayed. After a brief interval
the message is cleared and the base screen of image send mode reappears. (The base screen of image send mode is the
screen that appears when the [IMAGE SEND] key on the operation panel is pressed.)
• If the USB memory becomes full during scanning...
If JPEG is selected for the file format or the "Specified Pages per File" checkbox is selected, a message will appear and
scanning will stop. In this case, only the pages that were completely scanned will be stored in the USB device (except
when multiple pages per file are specified).
• To cancel scanning...
Press the [STOP] key (
) to cancel the operation.
• To cancel scanning to USB memory...
While scan data is being stored in the USB memory, the message "Sending data." and the [Cancel] key appear in the
touch panel. To cancel the storing operation, touch the [Cancel] key.
• System Settings (Administrator): Scan Settings
This is used to set the default colour mode and file format.
• System Settings (Administrator): Disable Scan Function
The use of PC scan mode and USB memory mode can be prohibited.
49
CHANGING THE EXPOSURE AND
EXPOSURE MODE
The exposure can be changed to match the darkness of the original. The exposure mode can be changed to match the
original type.
USB Mem. Scan
Mode Switch
Image
Settings
File Name
1
Auto
Exposure
Mono2/Auto
Colour Mode
200X200dpi
Resolution
PDF/PDF
File Format
Auto
A4
Original
(1)
Display the exposure setting screen.
(1) Touch the [Image Settings] key.
Special Modes
(2) Touch the [Exposure] key.
Special Modes
(2)
(1)
USB Mem. Scan
Exposure
(4)
OK
Moiré Reduction
Text/
Prtd.Photo
Auto
Text/Photo
Manual
Text
1
3
(1) Touch the [Manual] key.
(2) Adjust the exposure with the
keys.
When the exposure is set to [Auto], the
keys
cannot be used.
The exposure darkens when the
key is touched,
and lightens when the
key is touched.
To return to auto exposure adjustment, touch the [Auto]
key.
Photo
5
Printed
Photo
(2)
Select the exposure and exposure mode.
Map
(3)
2
(3) Select the exposure mode.
Touch the original type key that matches the original type.
(4) Touch the [OK] key.
• When the exposure is set to [Auto], the exposure modes [Photo], [Printed Photo], and [Map] do not appear.
• To reduce the moiré effect when scanning printed matter, touch the [Moiré Reduction] checkbox so that a
checkmark
appears.
When using the document glass to scan multiple original pages, the exposure setting can be changed each time you change
pages. When using the automatic document feeder, the exposure setting cannot be changed once scanning has begun.
(However, when the special mode "Job Build" is used, the exposure can be changed each time a new set of originals is
inserted.)
System Settings (Administrator): Default Exposure Settings
This is used to change the default exposure setting.
50
How to select the exposure
Exposure
Auto
When to select
This setting automatically adjusts the exposure for light and dark parts of the original.
Manual
1 to 2
Select this setting when the original consists of dark text.
3
Select this setting for a normal original (neither dark nor light).
4 to 5
Select this setting when the original consists mostly of faint text.
How to select the exposure mode
Setting
Description
Text/Prtd. Photo
This mode provides the best balance for scanning an original which contains both text and
printed photographs, such as a magazine or catalogue.
Text/Photo
This mode provides the best balance for scanning an original which contains both text and
photographs, such as a text document with a photo pasted on.
Text
Use this mode for regular text documents.
Photo
Use this mode to scan photos.
Printed Photo
This mode is best for scanning printed photographs, such as photos in a magazine or
catalogue.
Map
This mode is best for scanning the colour shading and fine details found on most maps.
51
CHANGING THE RESOLUTION
The resolution setting can be selected.
USB Mem. Scan
Mode Switch
Image
Settings
File Name
1
Auto
Exposure
Mono2/Auto
Colour Mode
200X200dpi
Resolution
PDF/PDF
File Format
Auto
A4
Original
(1)
USB Mem. Scan
Resolution
Display the resolution setting screen.
(1) Touch the [Image Settings] key.
Special Modes
(2) Touch the [Resolution] key.
Special Modes
(2)
Select the resolution.
100X100dpi
200X200dpi
(1) Touch the key of the desired resolution.
300X300dpi
2
(2) Touch the [OK] key.
400X400dpi
600X600dpi
(1)
(2)
How to select the resolution
When scanning a regular text document, a resolution setting of 200X200dpi will create a sufficiently legible image. When
scanning a photo or illustration, a high resolution setting (such as 600X600dpi) will produce a sharp and clear image.
Note that the high-resolution setting will result in a larger file size and transmission may not be successful if there is not
enough space in the USB memory. In this event, reduce the size of the image file (for example, by reducing the number
of scanned pages).
When using the automatic document feeder, the resolution setting cannot be changed once scanning has begun. However,
when the document glass or the "Job Build" special mode is used, the resolution can be changed each time a new original or
set of originals is placed.
System Settings (Administrator): Initial Resolution Setting
This is used to change the default resolution setting.
52
AUTOMATICALLY SCANNING BOTH SIDES
OF AN ORIGINAL (2-Sided Original)
The automatic document feeder can be used to automatically scan both sides of an original.
Scan transmission
Two-sided original
USB Mem. Scan
Mode Switch
Image
Settings
1
File Name
Auto
Exposure
Mono2/Auto
Colour Mode
200X200dpi
Resolution
PDF/PDF
File Format
Auto
A4
Original
(1)
Front and reverse sides are scanned
Display the original settings screen.
(1) Touch the [Image Settings] key.
Special Modes
(2) Touch the [Original] key.
Special Modes
(2)
USB Mem. Scan
Scan Size
Original
Auto
A4
2-Sided
Booklet
100%
Send Size
Auto
OK
Image Orientation
2-Sided
Tablet
(1)
Specify whether the binding style of the
two-sided original is book style or tablet
style.
(1) Touch the [2-Sided Booklet] key or the
[2-Sided Tablet] key.
(2)
A book and a tablet are bound as shown below.
Book
2
A J
E
C L
G
(2) Touch the [OK] key.
To cancel two-sided scanning, touch the highlighted key so that it is no longer highlighted.
Two-sided scanning automatically turns off after scanning and transmission are finished.
53
Tablet
A B
E F
K L
SPECIFYING THE ORIGINAL SCAN SIZE
AND SEND SIZE (Enlarge/Reduce)
When the original is placed, its size is automatically detected and displayed in the base screen.
The size of the placed original is indicated as the scan size, and the size to be transmitted is indicated as the send size.
Ready to send.
USB Mem. Scan Scan
Mode Switch
A4
Image
Settings
Send
Auto
File Name
Special Modes
In the above screen, the scan size (the placed original) is A4 (8-1/2" x 11") and the send size is auto. For example, if the
scan size is A4 (8-1/2" x 11") and the send size is B5 (5-1/2" x 8-1/2"), the image will be reduced before transmission.
"Scan Size"
"Send Size" is
set to B5
(5-1/2" x 8-1/2")
Transmission
The image is reduced to
B5 (5-1/2" x 8-1/2")
before transmission
A4 (8-1/2" x 11")
• Only standard original sizes can be automatically detected.
• If the original is a non-standard size, you must set the scan size manually.
54
SPECIFYING THE SCAN SIZE OF THE ORIGINAL
If the original is a non-standard size or you wish to change the scan size, touch the [Original] key to specify the original
size manually. Place the original in the document feeder tray or on the document glass and follow the steps below.
Specifying the size using paper sizes
USB Mem. Scan
Mode Switch
Image
Settings
1
File Name
Auto
Exposure
Mono2/Auto
Colour Mode
200X200dpi
Resolution
PDF/PDF
File Format
Auto
A4
Original
(1)
(1) Touch the [Image Settings] key.
Special Modes
(2) Touch the [Original] key.
Special Modes
The automatically detected size appears at the top of the
[Original] key.
(2)
USB Mem. Scan
Scan Size
Original
Auto
A4
2
Display the original settings screen.
100%
2-Sided
Booklet
Send Size
Auto
OK
Touch the [Scan Size] key.
OK
Specify the scan size.
Image Orientation
2-Sided
Tablet
USB Mem. Scan
Original
AB
Inch
Auto
A5
1/2
B5R
B4
Manual
A5R
1/2
A4
A3
B5
A4R
Long Size
(1) Touch the appropriate original size key.
(2) Touch the [OK] key.
Manual
Size Input
Standard Size
3
(1)
(2)
• If you are sending a long original, touch the [Long Size] key. Use the automatic document feeder to scan a long
original. (When the automatic document feeder is not installed, the [Long Size] key does not appear.) The maximum
length that can be scanned is 800 mm (31-1/2") (the maximum width is 297 mm (11-5/8")).
• To specify an inch size for the scan size, touch the [AB
scan size.
USB Mem. Scan
Scan Size
Original
B5
4
2-Sided
Booklet
100%
Send Size
Auto
OK
Inch] key to highlight the [Inch] side and then specify the
Touch the [OK] key.
Image Orientation
2-Sided
Tablet
When [Long Size] is selected, the two-sided scanning setting and send size cannot be changed. In addition, scanning will
take place in Mono 2 mode.
55
Specifying the size by entering numerical values.
When scanning a non-standard size original such as a postcard or card, follow these steps to specify the original size.
The width can be from 64 mm to 432 mm (2-1/2" to 17"), and the length can be from 64 mm to 297 mm (2-1/2" to 11-5/8").
USB Mem. Scan
Mode Switch
Image
Settings
File Name
1
Auto
Exposure
Mono2/Auto
Colour Mode
200X200dpi
Resolution
PDF/PDF
File Format
Auto
A4
Original
(1)
(1) Touch the [Image Settings] key.
Special Modes
(2) Touch the [Original] key.
Special Modes
The automatically detected size appears at the top of the
[Original] key.
(2)
USB Mem. Scan
Scan Size
Original
Auto
A4
2
Display the original settings screen.
100%
2-Sided
Booklet
Send Size
Auto
OK
Touch the [Scan Size] key.
OK
Enter the scan size.
Image Orientation
2-Sided
Tablet
USB Mem. Scan
Original
(1) Touch the [Size Input] tab.
Auto
X
Manual
X
64
(64
mm
432)
Y
64
(64
mm
297)
Y
Manual
Size Input
Standard Size
3
(2) Touch the [X] key and enter the X
(horizontal) dimension with the
keys.
(2), (3)
(1)
(4)
(3) Touch the [Y] key and enter the Y (vertical)
dimension with the
keys.
(4) Touch the [OK] key.
System Settings (Administrator): Original Size Detector Setting
This is used to set the size entry screen to "mm units" or "inch units".
USB Mem. Scan
Scan Size
Original
X64 Y64
4
2-Sided
Booklet
Send Size
Auto
OK
Touch the [OK] key.
The specified size appears in the [Scan Size] key.
Image Orientation
2-Sided
Tablet
• When the scan size is specified by numerical values, the send size cannot be specified.
• When the automatic document feeder is used, an original longer that 432 mm (17") can be scanned (maximum length 800
mm (31-1/2")). To scan a long original, touch the [Standard Size] tab in the screen of step 3 and then touch the [Long Size]
key.
☞ Specifying the size using paper sizes (page 55)
56
SPECIFYING THE SEND SIZE OF THE ORIGINAL
Specify the send size as a paper size. If a send size bigger than the scan size is selected, the image will be enlarged. If
a send size smaller than the scan size is selected, the image will be reduced.
The send size cannot be specified when [Long Size] is selected for the scan size, or when the scan size is specified by
numerical values.
USB Mem. Scan
Mode Switch
Image
Settings
1
File Name
Auto
Exposure
Mono2/Auto
Colour Mode
200X200dpi
Resolution
PDF/PDF
File Format
Auto
A4
Original
(1)
(1) Touch the [Image Settings] key.
Special Modes
(2) Touch the [Original] key.
Special Modes
(2)
USB Mem. Scan
Scan Size
Original
Auto
A4
2
Display the original settings screen.
100%
2-Sided
Booklet
Send Size
Auto
OK
Touch the [Send Size] key.
OK
Specify the send size.
Image Orientation
2-Sided
Tablet
USB Mem. Scan
Original
AB
Inch
Auto
A5
B5R
B4
Manual
A5R
A4
A3
B5
A4R
(1) Touch the desired send size key.
(2) Touch the [OK] key.
A4
3
(1)
(2)
• Size keys that cannot be specified for the send size are greyed out to prevent selection.
• To specify an inch size for the send size, touch the [AB
send size.
USB Mem. Scan
Scan Size
Original
Auto
A4
4
2-Sided
Booklet
141%
Send Size
A3
Image Orientation
OK
Inch] key to highlight the [Inch] side and then specify the
Touch the [OK] key.
The ratio used for reduction or enlargement of the original will
appear between the "Scan Size" and the "Send Size".
2-Sided
Tablet
57
CHANGING THE COLOUR MODE
This procedure is used to change the colour mode used to scan the original when the [COLOUR START] key (
or the [BLACK & WHITE START] key (
) is pressed.
Start key
Mode
Scanning method
Auto
The machine detects whether the original is colour or black and white and
automatically selects full colour or black and white (Mono 2 or Greyscale)
scanning.
Full Colour
The original is scanned in full colour. This mode is best for full colour
originals such as catalogues.
Mono2
Colours in the original are scanned as black or white. This mode is best for
text-only originals.
Greyscale
The colours in the original are scanned in black and white as shades of
grey (greyscale).
[COLOUR START]
key
[BLACK & WHITE
START] key
USB Mem. Scan
Mode Switch
Image
Settings
File Name
1
Auto
Exposure
Mono2/Auto
Colour Mode
200X200dpi
Resolution
PDF/PDF
File Format
Auto
A4
Original
(1) Touch the [Image Settings] key.
Special Modes
(2) Touch the [Colour Mode] key.
Special Modes
(1)
(2)
USB Mem. Scan
Colour Mode
Colour Mode
B/W Mode
2
Display the colour mode screen.
(1)
Colour
B/W
Auto
Mono2
Full Colour
Greyscale
Mono2
Greyscale
(2)
OK
Select the colour mode.
(1) Touch the key of the mode to be used when
the [COLOUR START] key (
) is
pressed.
You can select whether black & white scanning will take
place in Mono 2 or greyscale when [Auto] is selected and
a black and white original is scanned. Note that if the file
format is set to JPEG, scanning will take place in
greyscale.
(3)
(2) Touch the key of the mode to be used when
the [BLACK & WHITE START] key (
) is
pressed.
(3) Touch the [OK] key.
• System Settings (Administrator): Default Colour Mode Settings
The default colour mode can be changed.
• System Settings (Administrator): Disable Change of B/W Setting in Auto Mode
This prohibits selection of the black and white original scanning setting when [Auto] is selected for the colour mode.
58
)
CHANGING THE FILE FORMAT
The file format (file type and compression method / compression ratio) for sending a scanned image can be changed at
the time of transmission. In addition, if the scanned originals are divided into separate files, the number of pages per file
can be changed.
USB Mem. Scan
Mode Switch
Image
Settings
File Name
1
Auto
Exposure
Mono2/Auto
Colour Mode
200X200dpi
Resolution
PDF/PDF
File Format
Auto
A4
Original
Display the format setting screen.
(1) Touch the [Image Settings] key.
Special Modes
(2) Touch the [File Format] key.
Special Modes
(1)
(2)
Set the format.
● Scanning in Mono 2
Compression Mode
File Type
OK
(1) Select the file type.
B/W
(2) Select the compression mode.
None
TIFF
PDF
MH (G3)
Encrypt PDF
Colour/Grey
MMR (G4)
Specified Pages per File
(1)
(1-99)
(2)
● Scanning in colour/greyscale
File Type
2
Compression Ratio
PDF
TIFF
Low
Encrypt PDF
JPEG
Medium
OK
B/W
(1) Touch the indicated key to select
[Colour/Grey] mode.
When [Colour/Grey] is highlighted, [Colour/Grey] mode is
selected.
Colour/Grey
High
Specified Pages per File
(2)
(1-99)
(2) Select the file type.
(3)
(1)
(3) Select the compression ratio.
High compression results in a smaller file size, however,
the image quality is slightly degraded.
• When this screen is displayed, the setting screen of [B/W] mode initially appears.
• The format set for [B/W] mode will be the file format that is used when the [BLACK & WHITE START] key (
pressed with the B/W Mode set to [Mono2].
• The format set for [Colour/Grey] mode will be the file format that is used when the [COLOUR START] key (
is pressed, or when the [BLACK & WHITE START] key (
) is pressed with the B/W Mode set to [Greyscale].
) is
)
• The file type of [B/W] mode and the file type of [Colour/Grey] mode are linked. The file type cannot be set separately
for each. (When [JPEG] is selected for [Colour/Grey] mode, [TIFF] is automatically selected for [B/W] mode.)
59
Compression Ratio
File Type
PDF
TIFF
Low
Encrypt PDF
JPEG
Medium
OK
B/W
Colour/Grey
High
Specified Pages per File
(1)
3
1
(1) Touch the [Specified Pages per File]
checkbox so that a checkmark
appears.
(1-99)
(2)
To change the number of pages per file,
enter the number of pages and exit the
format settings.
(3)
(2) Set the number of pages per file with the
keys.
(3) Touch the [OK] key.
• When a checkmark does not appear in the [Specified Pages per File] checkbox
scanned pages.
, one file is created for all
• When [Specified Pages per File] is selected, consecutive numbers are added to the created file names.
• When [JPEG] is selected for the file type, one file is created for each page (a file cannot be created for multiple
pages). For this reason, the [Specified Pages per File] checkbox does not appear.
When [Encrypt PDF] is selected, a password entry screen will appear when the [START] key is pressed to begin scanning
and transmission.
Touch the [Entry] key in the displayed screen to open the keyboard screen. Enter a password (maximum of 32 characters)
and touch the [OK] key. Scanning and transmission will begin.
System Settings (Administrator): Initial File Format Setting
This sets the default file format setting for scanner transmission.
60
ENTERING THE FILE NAME
The file name can be directly entered when performing a scan transmission.
If the file name is not changed, the settings in the Web page are used.
Ready to send.
USB Mem. Scan Scan
Mode Switch
A4
Image
Settings
Send
Auto
File Name
Special Modes
Touch the [File Name] key. A text entry screen will appear. Enter the file name and touch the [OK] key. Up to 54
characters can be entered. For the procedure for entering text, see "6. ENTERING TEXT" in the User's Guide.
The entered file name will appear below the [File Name] key in the base screen.
61
BASIC PROCEDURE FOR
TRANSMISSION IN INTERNET FAX MODE
5
SENDING A FAX IN INTERNET FAX MODE
When a default address is configured in "Default Address Setting" in the system settings (administrator), the mode cannot be
changed, the destination cannot be changed, and destinations cannot be added. To switch to Internet fax mode, touch the
[Cancel] key in the touch panel and follow the steps below.
Place the original.
Place the original face up in the document feeder tray, or face
down on the document glass.
1
Original size
detector
Do not place any objects under the original size detector. Closing the automatic document feeder with an object
underneath may damage the original size detector plate and prevent correct detection of the document size.
• Place A5 (5-1/2" x 8-1/2") size originals in portrait (vertical) orientation ( ).
If placed in landscape (horizontal) orientation (
), an incorrect size will be detected. For an A5R (5-1/2" x 8-1/2"R)
size original, enter the original size manually.
1
• Image rotation
A4, B5R, and A5R (8-1/2" x 11" and 5-1/2" x 8-1/2"R) originals are rotated 90 degrees and transmitted in A4R, B5,
or A5 (8-1/2" x 11"R or 5-1/2" x 8-1/2") orientation. (A4R, B5, and A5 (8-1/2" x 11"R and 5-1/2" x 8-1/2") originals
cannot be rotated for transmission.)
Transmission
• Originals cannot be scanned in succession from both the automatic document feeder and the document glass and
sent in a single transmission.
System Settings (Administrator): Rotation Sending Setting
This is used to select whether or not a scanned original image is rotated before transmission.
The default setting is: rotate A4 (8-1/2" x 11") to A4R (8-1/2" x 11"R), and B5R or A5R (5-1/2" x 8-1/2"R) to B5 or A5
(5-1/2" x 8-1/2").
2
Mode Switch
Scan
Image
Settings
Internet Fax
Send Settings
Fax
USB Mem. Scan
Address Book
Change to Internet fax mode.
Address Entry
(1) Touch the [Mode Switch] key.
Special Modes
(2) Touch the [Internet Fax] key.
File
PC Scan
Data Entry
Quick File
(1)
(2)
62
Internet Fax
Mode Switch
Auto
Exposure
Image
Settings
200X100dpi
Resolution
Send Settings
Manual RX
Address Book
Auto
A4
Original
Display the original settings screen.
Address Entry
TIFF-F
File Format
(1) Touch the [Image Settings] key.
Special Modes
File
(2) Touch the [Original] key.
Special Modes
Quick File
3
(1)
(2)
The current settings of the [Exposure], [Resolution], [Original], and [File Format] keys appear in the top half of each
key. Touch each key to change the settings.
☞ CHANGING THE EXPOSURE (page 65), CHANGING THE RESOLUTION (page 66), AUTOMATICALLY
SCANNING BOTH SIDES OF AN ORIGINAL (2-Sided Original) (page 67), SPECIFYING THE ORIGINAL SCAN
SIZE AND SEND SIZE (Enlarge/Reduce) (page 68), CHANGING THE FILE FORMAT (page 72),
7. CONVENIENT FUNCTIONS (page 83)
Internet Fax
Scan Size
Original
Auto
A4
100%
2-Sided
Booklet
Specify the orientation in which the
original is placed.
OK
Send Size
Auto
When specifying the orientation of the image to be transmitted,
specify the orientation of the original placed in step 1.
Image Orientation
2-Sided
Tablet
(1) Touch the appropriate orientation key.
(1)
4
If the top edge of the original is up, touch the
the top edge of the original is to the left, touch the
(2)
key. If
key.
(2) Touch the [OK] key.
You will return to the screen of step 3. Touch the [Image
Settings] key to close the menu.
The original orientation is initially set to
necessary.
Ready to send.
5
. If the original was placed with the top edge up, this step is not
Resend
Internet Fax Scan
Mode Switch
A4
Image
Settings
Send
Touch the [Address Book] key.
Address Book
Auto
Address Entry
Send Settings
Special Modes
Manual RX
File
Quick File
(2)
To
Cc
AAA AAA
1/1
EFGHI
The
icon appears in one-touch keys in which Internet
fax addresses are stored.
Address Review
(2) Touch the [To] key.
FFF FFF
ABCD
(1) Touch the key of the desired destination.
Global
Address Search
DDD DDD
EEE EEE
Frequent Use
Condition
Settings
Bcc
BBB BBB
CCC CCC
6
Specify the destination.
(1)
JKLMN
OPQRST UVWXYZ
The destination is specified.
Sort Address
• After a one-touch key is touched, if the screen is changed without touching the [To] key, the destination is
automatically specified.
• In addition to selecting a one-touch key, a destination can also be specified by entering it manually or retrieving it
from a global address book. For more information, see "2. ENTERING DESTINATIONS" (page 19).
63
Press the [BLACK & WHITE START] key
(
).
Scanning begins.
• If the original is placed on the document glass, the [Read-End]
key appears in the touch panel. To scan only one original, go
to step 9. To scan multiple originals, go to the next step.
• If the original was inserted in the document feeder tray, a
beep will sound when scanning is completed and
transmission will take place.
7
If the original was placed on the
document glass, replace it with the next
original and press the [BLACK & WHITE
START] key (
).
8
Repeat until all originals have been scanned.
The exposure, resolution, and scan size/send size can be changed for each original page that is scanned.
Place next original.
(Pg.No.x)
Press [Start].
When finished, press [Read-End]
Read-End
Touch the [Read-End] key.
A beep will sound to indicate that the operation is completed.
Open the automatic document feeder and remove the original.
9
If no action is taken for one minute after the confirmation screen appears, scanning automatically ends and the
transmission is reserved.
• When all originals have been scanned, "Job stored." will be displayed together with a job control number. This number can
be used to locate the job in the Transaction Report or in the Image Sending Activity Report. If the job is a broadcast
transmission, this number will also appear in the key of the job in the job status screen. For this reason, making a note of
the number is useful for checking the result.
• If the memory becomes full while the originals are being scanned, a message will appear and scanning will stop.
• Storing a mail signature
You can have preset text automatically added at the end of e-mail messages as a mail signature. This is convenient when
you wish to have a corporate policy or other preset text appear at the bottom of e-mail messages. To store the text for the
mail signature, click [Application Settings] and then [Network Scanner Settings] in the Web page menu. (Administrator
rights are required.) Up to 900 characters can be entered. (The mail signature is not included in the maximum number of
characters that can be entered in the e-mail message.)
Use "Pre-Setting Mail Signature" in the system settings (administrator) to specify whether or not a mail signature is added.
To cancel scanning...
Press the [STOP] key (
) to cancel the operation.
• System Settings (Administrator): I-Fax Send Settings
This is used to select Internet fax transmission settings such as the receive report setting, rotation setting, size restriction
setting, and sender information attachment setting.
• System Settings (Administrator): Pre-Setting Mail Signature
Use this setting to specify whether or not a mail signature is added at the end of e-mail messages. By factory default, a
mail signature is not added.
64
CHANGING THE EXPOSURE
The exposure can be changed to match the darkness of the original.
Internet Fax
Mode Switch
Image
Settings
Address Entry
200X100dpi
Resolution
Send Settings
1
Address Book
Auto
Exposure
Manual RX
Auto
A4
Original
TIFF-F
File Format
Special Modes
Special Modes
File
Display the exposure setting screen.
(1) Touch the [Image Settings] key.
(2) Touch the [Exposure] key.
Quick File
(1)
(2)
Internet Fax
Exposure
OK
Auto
(1) Touch the [Manual] key.
Manual
1
2
(1)
3
Select the exposure.
(2) Adjust the exposure with the
5
(2)
keys.
When the exposure is set to [Auto], the
keys
cannot be used.
The exposure darkens when the
key is touched,
and lightens when the
key is touched.
To return to auto exposure adjustment, touch the [Auto]
key.
(3)
(3) Touch the [OK] key.
When using the document glass to scan multiple original pages, the exposure setting can be changed each time you change
pages. When using the automatic document feeder, the exposure setting cannot be changed once scanning has begun.
(However, when the special mode "Job Build" is used, the exposure can be changed each time a new set of originals is
inserted.)
System Settings (Administrator): Default Exposure Settings
This is used to change the default exposure setting.
How to select the exposure
Exposure
Auto
Manual
When to select
This setting automatically adjusts the exposure for light and dark parts of the original.
1 to 2
Select this setting when the original consists of dark text.
3
Select this setting for a normal original (neither dark nor light).
4 to 5
Select this setting when the original consists mostly of faint text.
65
CHANGING THE RESOLUTION
The resolution setting can be selected.
Internet Fax
Mode Switch
Image
Settings
Send Settings
1
Manual RX
Address Book
Auto
Exposure
Address Entry
200X100dpi
Resolution
Auto
A4
Original
TIFF-F
File Format
Special Modes
Special Modes
File
Display the resolution setting screen.
(1) Touch the [Image Settings] key.
(2) Touch the [Resolution] key.
Quick File
(1)
(2)
Internet Fax
Resolution
OK
200X100dpi
200X200dpi
Select the resolution.
(1) Touch the key of the desired resolution.
200X400dpi
(2) Touch the [OK] key.
Half Tone
400X400dpi
600X600dpi
2
(1)
(2)
When a resolution other than [200X100dpi] is selected, the [Half Tone] key can be touched to select halftone. When
the original has many gradations of light and dark such as a photo or colour illustration, halftone provides a more
attractive image than regular transmission.
How to select the resolution
For normal text originals, 200X100dpi produces an image that is sufficiently legible. For photos and illustrations, a high
resolution setting (600X600dpi, etc.) or halftone setting will produce a sharp image. However, a high resolution setting or
halftone setting will result in a large file, and if the file is too large, transmission may not be possible. In this event,
reduce the number of pages scanned or take other measures to decrease the file size.
• When using the automatic document feeder, the resolution setting cannot be changed once scanning has begun.
However, when the document glass or the "Job Build" special mode is used, the resolution can be changed each time a
new original or set of originals is placed.
• When [TIFF-S] is selected for the format, only [200X100dpi] or [200X200dpi] can be selected.
System Settings (Administrator): Initial Resolution Setting
This is used to change the default resolution setting.
66
AUTOMATICALLY SCANNING BOTH SIDES
OF AN ORIGINAL (2-Sided Original)
The automatic document feeder can be used to automatically scan both sides of a two-sided original.
Scan transmission
Two-sided original
Internet Fax
Mode Switch
Image
Settings
Send Settings
1
Manual RX
Auto
Exposure
Front and reverse sides are sent
Address Book
Address Entry
200X100dpi
Resolution
Auto
A4
Original
TIFF-F
File Format
Special Modes
Special Modes
File
Display the original settings screen.
(1) Touch the [Image Settings] key.
(2) Touch the [Original] key.
Quick File
(1)
(2)
Internet Fax
Scan Size
Original
Auto
A4
2-Sided
Booklet
100%
Send Size
Auto
OK
Image Orientation
2-Sided
Tablet
(1)
(2)
(3)
Specify whether the binding style of the
two-sided original is book style or tablet
style and the orientation in which the
original is placed.
(1) Touch the [2-Sided Booklet] key or the
[2-Sided Tablet] key.
A book and a tablet are bound as shown below.
Book
A J
E
C L
G
2
Tablet
A B
E F
K L
(2) Touch the "Image Orientation" key with the
same orientation as the original image.
If this setting is not correct, a suitable image may not be
transmitted.
(3) Touch the [OK] key.
To cancel two-sided scanning, touch the highlighted key so that it is no longer highlighted.
Two-sided scanning automatically turns off after the Internet fax is transmitted.
67
SPECIFYING THE ORIGINAL SCAN SIZE
AND SEND SIZE (Enlarge/Reduce)
When the original is placed, its size is automatically detected and displayed in the base screen.
The size of the placed original is indicated as the scan size, and the size to be transmitted is indicated as the send size.
Ready to send.
Internet Fax Scan
Mode Switch
A4
Image
Settings
Resend
Send
Address Book
Auto
Address Entry
Send Settings
Special Modes
Manual RX
File
Quick File
In the above screen, the scan size (the placed original) is A4 (8-1/2" x 11") and the send size is auto. For example, if the
scan size is A4 (8-1/2" x 11") and the send size is B5 (5-1/2" x 8-1/2"), the image will be reduced before transmission.
"Scan Size"
"Send Size" is
set to B5
(5-1/2" x 8-1/2")
Transmission
A4 (8-1/2" x 11")
The image is reduced to
B5 (5-1/2" x 8-1/2")
before transmission
• Only standard original sizes can be automatically detected.
• If the original is a non-standard size, you must set the scan size manually.
68
SPECIFYING THE SCAN SIZE OF THE ORIGINAL
If the original is a non-standard size or you wish to change the scan size, touch the [Original] key to specify the original
size manually. Place the original in the document feeder tray or on the document glass and follow the steps below.
Specifying the size using paper sizes
Internet Fax
Mode Switch
Image
Settings
Send Settings
1
Manual RX
Auto
Exposure
Address Book
Address Entry
200X100dpi
Resolution
Auto
A4
Original
TIFF-F
File Format
Special Modes
Special Modes
File
Display the original settings screen.
(1) Touch the [Image Settings] key.
(2) Touch the [Original] key.
The automatically detected size appears at the top of the
[Original] key.
Quick File
(1)
(2)
Internet Fax
Scan Size
Original
Auto
A4
2
100%
2-Sided
Booklet
Send Size
Auto
OK
Touch the [Scan Size] key.
OK
Specify the scan size.
Image Orientation
2-Sided
Tablet
Internet Fax
Original
AB
Inch
Auto
A5
B5R
B4
Manual
A5R
A4
A3
B5
A4R
Long Size
1/2
(1) Touch the appropriate original size key.
(2) Touch the [OK] key.
Manual
Size Input
Standard Size
3
(1)
(2)
• If you are sending a long original, touch the [Long Size] key. Use the automatic document feeder to scan a long
original. (When the automatic document feeder is not installed, the [Long Size] key does not appear.) The maximum
length that can be scanned is 800 mm (31-1/2") (the maximum width is 297 mm (11-5/8")).
• To specify an inch size for the scan size, touch the [AB
scan size.
Internet Fax
Scan Size
Original
B5
4
2-Sided
Booklet
100%
Send Size
Auto
OK
Inch] key to highlight the [Inch] side and then specify the
Touch the [OK] key.
Image Orientation
2-Sided
Tablet
When [Long Size] is selected, the two-sided scanning setting and send size cannot be changed.
69
Specifying the size by entering numerical values.
When scanning a non-standard size original such as a postcard or card, follow these steps to specify the original size.
The width can be from 64 mm to 432 mm (2-1/2" to 17"), and the length can be from 64 mm to 297 mm (2-1/2" to 11-5/8").
Internet Fax
Mode Switch
Image
Settings
Send Settings
1
Manual RX
Auto
Exposure
Address Book
Address Entry
200X100dpi
Resolution
Auto
A4
Original
TIFF-F
File Format
Special Modes
Special Modes
File
Display the original settings screen.
(1) Touch the [Image Settings] key.
(2) Touch the [Original] key.
The automatically detected size appears at the top of the
[Original] key.
Quick File
(1)
(2)
Internet Fax
Scan Size
Original
Auto
A4
2
100%
2-Sided
Booklet
Send Size
Auto
OK
Touch the [Scan Size] key.
OK
Enter the scan size.
Image Orientation
2-Sided
Tablet
Internet Fax
Original
(1) Touch the [Size Input] tab.
Auto
X
Manual
X
64
(64
mm
432)
Y
64
(64
mm
297)
Y
Manual
Size Input
Standard Size
3
(2) Touch the [X] key and enter the X
(horizontal) dimension with the
keys.
(2), (3)
(1)
(4)
(3) Touch the [Y] key and enter the Y (vertical)
dimension with the
keys.
(4) Touch the [OK] key.
System Settings (Administrator): Original Size Detector Setting
This is used to set the size entry screen to "mm units" or "inch units".
Internet Fax
Scan Size
Original
X64 Y64
4
2-Sided
Booklet
Send Size
Auto
OK
Touch the [OK] key.
The specified size appears in the [Scan Size] key.
Image Orientation
2-Sided
Tablet
• When the scan size is specified by numerical values, the send size cannot be specified.
• When the automatic document feeder is used, an original longer that 432 mm (17") can be scanned (maximum length 800
mm (31-1/2")). To scan a long original, touch the [Standard Size] tab in the screen of step 3 and then touch the [Long Size]
key.
☞Specifying the size using paper sizes (page 69)
70
SPECIFYING THE SEND SIZE OF THE ORIGINAL
Specify the send size as a paper size. If a send size bigger than the scan size is selected, the image will be enlarged. If
a send size smaller than the scan size is selected, the image will be reduced.
• The send size cannot be specified when [Long Size] is selected for the scan size, or when the scan size is specified by
numerical values.
• The send size cannot be specified when [TIFF-S] is selected for the format. (The send size is fixed at A4R (8-1/2" x 11"R).)
Internet Fax
Mode Switch
Image
Settings
Send Settings
1
Manual RX
Auto
Exposure
Address Book
Address Entry
200X100dpi
Resolution
Auto
A4
Original
TIFF-F
File Format
Special Modes
Special Modes
File
Display the original settings screen.
(1) Touch the [Image Settings] key.
(2) Touch the [Original] key.
Quick File
(1)
(2)
Internet Fax
Original
2
100%
Scan Size
Auto
A4
2-Sided
Booklet
Send Size
Auto
OK
Touch the [Send Size] key.
OK
Specify the send size.
Image Orientation
2-Sided
Tablet
Internet Fax
Original
AB
Inch
Auto
A5
B5R
B4
Manual
A5R
A4
A3
B5
A4R
(1) Touch the desired send size key.
(2) Touch the [OK] key.
A4
3
(1)
(2)
• Size keys that cannot be specified for the send size are greyed out to prevent selection.
• To specify an inch size for the send size, touch the [AB
send size.
Internet Fax
Scan Size
Original
Auto
A4
2-Sided
Booklet
141%
Send Size
A3
OK
Image Orientation
(1)
Specify the orientation in which the
original is placed.
(1) Touch the "Image Orientation" key with the
same orientation as the original image.
2-Sided
Tablet
4
Inch] key to highlight the [Inch] side and then specify the
If this setting is not correct when sending an image with a
changed ratio, a suitable image may not be transmitted.
(2)
(2) Touch the [OK] key.
The ratio used for reduction or enlargement of the original will appear between the "Scan Size" and the "Send Size".
71
CHANGING THE FILE FORMAT
The file format for sending an Internet fax is normally set to [TIFF-F]. If the destination Internet fax machine does not
support full mode (it only supports simple mode), follow the steps below to select [TIFF-S].
Internet Fax
Mode Switch
Image
Settings
1
Send Settings
Manual RX
Auto
Exposure
200X100dpi
Resolution
Auto
A4
Original
Address Book
Display the format setting screen.
Address Entry
TIFF-F
File Format
(1) Touch the [Image Settings] key.
Special Modes
File
(2) Touch the [File Format] key.
Special Modes
Quick File
(1)
(2)
Internet Fax
File Format
OK
(1) Touch the key of the desired format.
TIFF-F
TIFF-S
Select the file format.
2
(2) Touch the [OK] key.
(1)
(2)
When [TIFF-S] is selected, the transmission settings are restricted as follows:
• Resolution: The selections are [200X100dpi] and [200X200dpi]. If [TIFF-S] is selected after [200X400dpi], [400X400dpi] or
[600X600dpi] is selected, the resolution automatically changes to [200X200dpi].
• Send size: Always A4R (8-1/2" x 11"R). If [TIFF-S] is selected after the send size is changed, the send size is
automatically changed to A4R (8-1/2" x 11"R). If a size larger than A4 (8-1/2" x 11") is scanned, the size will
automatically be reduced to A4R (8-1/2" x 11"R). When this format is included in a broadcast transmission, the
image will be transmitted to all destinations at A4R (8-1/2" x 11"R).
• Special modes: When a ratio setting is selected and the original size is entered, Dual Page Scan, Card Shot, 2in1, and
Mixed Size Original cannot be used.
72
CHANGING THE SUBJECT, FILE NAME,
AND MESSAGE
The subject, file name, and message can be changed when performing an Internet fax transmission. Preset items can
be selected or text can be directly entered.
• If the subject and file name are not changed, the settings in the Web page are used.
• Selections for the subject, file name, and message are configured by clicking [Application Settings] and then [Network
Scanner Settings] in the Web page menu. (Administrator rights are required.)
• For the procedure for entering text, see "6. ENTERING TEXT" in the User's Guide.
Ready to send.
1
Internet Fax Scan
Mode Switch
A4
Image
Settings
Touch the [Send Settings] key.
Resend
Send
Address Book
Auto
Address Entry
Send Settings
Special Modes
Manual RX
File
Quick File
To change the subject, touch the
[Subject] key.
OK
Send Settings
Subject
2
File Name
Body Text
(1)
Cancel
Pre-Set
(1) Touch a Pre-Set text key.
OK
1/5
No.01 Sub: Schedule coordinat No.04
No.02 Sub: Monthly Schedule
Enter the subject.
(2)
(2) Touch the [OK] key.
No.05
No.03 Sub: Minutes of plannin No.06
Direct Entry
3
• If you wish to directly enter the text, touch the [Direct Entry] key to open the text entry screen. Enter the text and
touch the [OK] key. Up to 54 characters can be entered.
• The text in a pre-set text key can be edited by touching the pre-set text key and then the [Direct Entry] key. The text
entry screen will appear with the selected pre-set text entered. (When a destination is stored using the Web page,
up to 80 characters can be entered. However, only 54 characters will appear and can be edited in the touch panel.)
Subject
To change the file name, touch the [File
Name] key.
OK
Send Settings
Sub: Schedule coordination meeting
File Name
4
The file name is entered in the same way as the subject.
Body Text
Up to 54 characters can be entered for the file name.
73
OK
Send Settings
Subject
File Name
Sub: Schedule coordination meeting
To change the message, touch the
[Body Text] key.
Material for planning meeting
5
Body Text
Clear All
Body Entry
OK
Thank you for your continuous support. We have attached scanned data,
which you have requested.
Enter the message and touch the [OK]
key.
• To select a pre-set message previously stored in the Web
page, touch the [Pre-Set Select] key.
• To directly enter the message, touch the [Edit] key.
Pre-Set Select
Edit
6
• 1800 characters can be entered. (A line break counts as one character.)
• To clear all the entered text, touch the [Clear All] key. This key clears not only the selected line but also the entire
message.
• Each line of the entered text can be selected with the
keys. To edit the selected line, touch the [Edit] key.
The text entry screen will appear with the selected text entered.
OK
Send Settings
Subject
7
File Name
Touch the [OK] key.
Sub: Schedule coordination meeting
Material for planning meeting
Body Text
When storing pre-set text for the subject and file name in the Web page, up to 80 characters can be entered.
System Settings (Administrator): The Number of File Name/Subject/Body Keys Displayed Setting
This is used to select the number of subjects and file names displayed in one screen (3 or 6).
74
6
CHECKING THE STATUS OF
TRANSMISSION/RECEPTION
JOBS
This chapter explains how to check the status of reserved transmission jobs and received Internet faxes.
JOB STATUS SCREEN
The job status screen is displayed when the [JOB STATUS] key on the operation panel is pressed. The job status
screen shows the status of jobs by mode. When the [JOB STATUS] key is pressed, the job status screen of the mode
that was being used before the key was pressed appears.
Example: Pressing the key in scan mode
JOB STATUS
Pages
Job Queue
Address
Set Time
Broadcast0001
10:00 11/01 000/003 Connecting
Status
AAA AAA
10:05 11/01 000/001 Waiting
BBB BBB
10:22 11/01 000/004 Waiting
Priority
CCC CCC
10:30 11/01 000/010 Waiting
Stop/Delete
1/1
Complete
Detail
Print Job
Scan to
Fax Job
Internet Fax
Reserved transmissions and received Internet faxes are referred to as jobs here.
The left edge of the job status screen appears at the left edge of the touch panel when the base screen is displayed. The left
edge of the job status screen can be touched to display the job status screen without pressing the [JOB STATUS] key.
Ready to send.
Resend
Scan
Mode Switch
Address Book
Image
Settings
Address Entry
Send Settings
Special Modes
File
Quick File
75
JOB QUEUE SCREEN AND COMPLETED JOB SCREEN
The job status screen consists of two screens: the job queue screen that shows reserved jobs and the job currently in
progress, and the completed jobs screen. To switch between the two screens, touch the job status screen selector key
((2) below).
Job queue screen
Complete screen
(1)
(7)
Pages
Job Queue
Address
Set Time
Broadcast0001
10:00 11/01 000/003 Connecting
Status
AAA AAA
10:05 11/01 000/001 Waiting
BBB BBB
10:22 11/01 000/004 Waiting
Priority
CCC CCC
10:30 11/01 000/010 Waiting
Stop/Delete
1/1
Complete
Detail
Print Job
Scan to
Fax Job
(2)
(3)
(4)
(5)
(6)
Job queue screen
(7)
Job status screen selector key
(8)
Job queue screen [Detail] key
10:08 11/01 001/001 Send OK
DDD DDD
10:30 11/01 001/001 Send OK
Scan to
Fax Job
Complete
(2)
Detail
(8)
Call
(9)
Internet Fax
Mode switch keys
Completed jobs screen
Completed jobs screen [Detail] key
This shows detailed information on the results of
completed broadcast transmissions and jobs that used
the document filing function. Select the key of the desired
job in the completed jobs screen (7) and then touch the
[Detail] key.
☞ CHECKING COMPLETED JOBS (page 80)
[Priority] key
(9)
Touch this key to give priority to a selected job.
GIVING PRIORITY TO A SCAN TRANSMISSION
JOB (page 82)
☞
(5)
10:05 11/01 050/005 Send OK
Broadcast0003
1/8
This shows up to 99 completed transmission or reception
jobs in each mode. A description of the job and the result
(status) are shown.
A broadcast transmission job is shown as a key.
This shows detailed information on broadcast
transmission jobs and the status of jobs. Select the key of
the desired job in the job queue screen (1) and then
touch the [Detail] key.
(4)
Broadcast0002
Job Queue
Status
Use these keys to change the job status screen mode.
Touch this key to switch between the job queue screen
and the completed jobs screen.
(3)
10:00 11/01 990/010 NG000000
(6)
Jobs are shown as keys in the order they were reserved.
Each key shows information on the job and its current
status.
☞ Job key display (page 77)
(2)
Start Time Pages
Broadcast0001
Print Job
Internet Fax
(6)
(1)
Address
[Call] key
Touch this key to call up and use a transmission or
reception job stored with the document filing function.
[Stop/Delete] key
Touch this key to stop or delete a selected job.
☞ STOPPING A SCAN JOB BEING TRANSMITTED
OR WAITING TO BE TRANSMITTED (page 81)
76
Job key display
The following information is shown in the job queue keys and completed job keys that appear in the job status screen.
AAA AAA
(1) (2)
(1)
10:22 11/01 000/004 Waiting
(3)
(6)
Displays the number (position) of the job in the job
queue.
(6)
Status
Shows the job status.
• Job in progress
When the job currently being transmitted is finished, the
job moves up one position in the job queue.
This number does not appear in keys in the completed
jobs screen.
(2)
(5)
(4)
Display
Mode icon
Status
"Connecting"
Connecting to the destination.
"Sending"
Sending data.
"Receiving"
Receiving an Internet fax.
"Stopped"
The job has been stopped.
"Error"
An error occurred while the job was
being executed.
This indicates the type of job.
Icon
Job type
Scan to E-mail
Scan to FTP
• Job waiting to be executed
Display
Scan to Network Folder
Scan to Desktop
"Waiting"
The job is waiting to be executed.
"Retry Mode"
The job is being re-attempted due
to a communication error or other
problem.
"Stopping"
The job has been stopped.
"Report Wait"
An Internet fax has been sent for
which a receive report was
requested, and the machine is
waiting for the receive report.
A day and
time is
displayed
Timer transmission job (the
specified time is displayed)
Internet fax transmission
Internet fax reception
PC-I-Fax transmission
Broadcast transmission
(3)
Name of communicating party (address)
• Completed job
For a transmission, the name or address of the
destination. For a reception, the address of the sending
party.
For a broadcast transmission, the function name and a
broadcast control number (4-digits).
(4)
(5)
Status
Display
Status
"Send OK"
Transmission was completed.
"In Memory"
An Internet fax has been received
but has not yet been printed.
In the job queue screen, the date and time the job was
reserved. In the completed jobs screen, the date and
time the job was started.
"Printed"
A received Internet fax has been
printed.
Number of pages
"Forward OK"
Shows the number of pages transmitted / total number of
original pages.
A received Internet fax has been
forwarded.
"Holding"
Received Internet fax held by print
hold.
"Stopped"
The job was stopped.
Time reserved / Time started
77
Display
Status
"Number of
successful
transmission
destinations /
Total
destinations
OK"
A broadcast transmission has been
completed.
If transmission to 3 destinations
was successful out of a total of 5,
"003/005 OK" will appear.
"No
Response"
An error occurred because there
was no response from the
destination.
"OK Report"
A receive report was requested for
a transmission, the transmission
was completed normally, and the
receive report was received from
the destination.
"NG Report"
A receive report was requested for
a transmission, however, the
transmission did not take place
correctly and a transmission failed
report was received.
"No Report"
An e-mail was received without an
attached file and thus printing was
not possible.
"Received"
An e-mail was received, however,
the attached file was not a TIFF-F
file or there was no attached file,
and thus printing was not possible.
"Rejected"
An Internet fax was sent from a
party that is blocked.
"NGxxxxxx"
Transmission/reception was not
successful because a
communication error occurred (a
6-digit error code appears in
xxxxxx.
"Error"
An error occurred while the job was
being executed.
78
OPERATION WHEN A JOB IN THE JOB QUEUE IS
COMPLETED
When a normal transmission job is completed, it moves to the completed jobs screen and "Send OK" appears in the
status column.
Received Internet faxes, timer transmission jobs, and forwarding jobs are handled in the job status screen as explained
below.
Internet fax reception jobs
While an Internet fax is being received, "Receiving" appears.
When reception is completed, the job moves to the completed jobs screen and "In Memory" appears.
When printing is finished, the status changes to "Printed" and the job is completed.
Timer transmission jobs
A timer transmission job appears at the bottom of the job queue until the specified time arrives.
When the specified time arrives, the job is executed. If another job is in progress, the timer job is started when the other
job is completed.
Internet fax transmission jobs that request a receive report
After completion of an Internet fax transmission job that requests a receive report, the job is placed on standby at the
bottom of the job queue screen. "Report Wait" appears in the status column. When the receive report is received from
the destination, or if the report is not received within the timeout time, the job moves to the completed jobs screen.
Reception jobs when "Inbound Routing Settings" are enabled
When "Inbound Routing Settings" are enabled, reception jobs are handled as follows depending on the print setting.
☞ FORWARDING A RECEIVED INTERNET FAX TO AN E-MAIL ADDRESS (Inbound Routing Settings) (page 114)
• Received Internet fax is not printed
"Receiving" appears while the Internet fax is being received. When reception is completed, the job moves to the job
queue of the job status screen of scan mode.
• Received Internet fax is printed
When reception is completed, the job moves to the completed jobs screen and "In Memory" appears. When printing
ends, the status changes to "Printed" and the job is completed. In addition, the job is added to the job queue of the job
status screen of scan mode. When forwarding received Internet faxes is finished, "Forward OK" appears.
79
CHECKING COMPLETED JOBS
You can check a list of the destinations, the destinations for which transmission failed, and other detailed information on
completed broadcast transmission jobs and jobs that used document filing function. Touch the key of the job for which
you wish to display information in the completed jobs screen and touch the [Detail] key. The job detail screen (see
below) will appear.
Detail of
Broadcast0001
OK
Address
Start Time
Status
002
BBB BBB
10:01 11/01
NG000000
010
CCC CCC
10:10 11/01
NG000000
File
Failed
Retry
1/ 1
All Destinations
The job name appears at the top of the job detail screen.
To view details on the job, touch one of the tabs. The following information appears on each tab.
Tab name
Information displayed
File
Shows information on a transmission/reception that used document filing function.
To call up the file and use it, touch the [Call] key.
Failed
Shows information on addresses for which communication failed.
Address: Address name or number
Start time: Time at which communication began.
Status: Description of failure (error)
The [Retry] key can be touched to re-attempt transmission to that address.
All Destinations
Shows all addresses specified in the job.
Address: Address name or number
Start time: Time at which communication began.
Status: Communication result
The [Retry] key can be touched to transmit to all addresses again.
80
STOPPING A SCAN JOB BEING
TRANSMITTED OR WAITING TO BE
TRANSMITTED
Follow the steps below to stop a job that is being transmitted or is waiting to be transmitted.
Press the [JOB STATUS] key.
JOB STATUS
1
Address
Set Time
Broadcast0001
10:00 11/01 000/010 Connecting
Pages
AAA AAA
10:05 11/01 000/005 Waiting
Job Queue
Status
1/1
Detail
2
BBB BBB
10:22 11/01 000/004 Waiting
Priority
CCC CCC
10:30 11/01 000/010 Waiting
Stop/Delete
Print Job
Scan to
(2)
Internet Fax
Fax Job
(1)
(3)
(1) Touch the mode key of the job to be
stopped.
(2) Touch the key of the job to be stopped.
(3) Touch the [Stop/Delete] key.
(1)
Touch the [Yes] key.
Delete the job?
BBB BBB
Select the job that you wish to stop.
Complete
10:22 11/01
No
Yes
3
If you do not want to stop the selected job...
Touch the [No] key.
Printing of a received Internet fax cannot be stopped.
81
GIVING PRIORITY TO A SCAN
TRANSMISSION JOB
When multiple jobs are waiting to be transmitted, the jobs are normally transmitted in the order they were reserved. If
you need to give priority to a job and send it ahead of the other jobs, follow the steps below.
Press the [JOB STATUS] key.
JOB STATUS
1
Pages
Job Queue
Address
Set Time
Broadcast0001
10:00 11/01 000/010 Connecting
Status
AAA AAA
10:05 11/01 000/005 Waiting
BBB BBB
10:22 11/01 000/004 Waiting
Priority
CCC CCC
10:30 11/01 000/010 Waiting
Stop/Delete
1/1
Complete
Detail
2
Print Job
(2)
Scan to
(1)
Fax Job
(3)
Internet Fax
(1)
Select the job to which you wish to give
priority.
(1) Touch the mode key of the job to be given
priority.
(2) Touch the key of the job to be given priority.
(3) Touch the [Priority] key.
The selected job moves up to the position immediately
following the job in progress. The job will be executed
when the job in progress is completed.
82
7
CONVENIENT FUNCTIONS
This chapter explains convenient functions for performing scan transmissions. These functions make it easy to perform
scan transmissions for a variety of purposes.
SENDING THE SAME IMAGE TO MULTIPLE
DESTINATIONS (Broadcast Transmission)
The same scanned image can be sent to multiple scan mode destinations (Scan to E-mail, Scan to FTP, Scan to
Desktop), Internet fax mode destinations, and fax mode destinations in a single operation. Up to 500 destinations
(including a combined maximum of 200 Scan to FTP and Scan to Desktop destinations) can be selected for one
broadcast operation.
Transmission
Originals
If you frequently use broadcasting to send images to the same group of destinations, it is convenient to store those
destinations in a group key.
Place the original.
1
1
Place the original face up in the document feeder tray, or face
down on the document glass.
83
Ready to send.
Scan
Mode Switch
2
Resend
Scan
Send
Address Book
Auto
A4
Image
Settings
Address Entry
Send Settings
Special Modes
Touch the [Address Book] key.
To directly enter a destination address, touch the [Address
Entry] key.
File
Quick File
(2)
To
Cc
BBB BBB
CCC CCC
DDD DDD
EEE EEE
FFF FFF
ABCD
Condition
Settings
Bcc
AAA AAA
Frequent Use
Specify the destination.
(1)
EFGHI
1/1
Address Review
Global
Address Search
(1) Touch the one-touch key of the desired
destination.
(2) Touch the [To] key.
The destination is specified.
JKLMN
OPQRST UVWXYZ
Sort Address
(3) Repeat steps (1) and (2) until all addresses
are selected.
3
• To add Cc or Bcc recipients, select a recipient and touch the [Cc] key or the [Bcc] key.
• If "Must Input Next Address Key at Broadcast Setting" is enabled in the system settings (administrator), touch the
[Next Address] key before specifying the next destination.
• One-touch keys that cannot be used for broadcast transmission are greyed out to prevent selection.
• If a Scan to FTP (Hyperlink) address is specified in a broadcast transmission, hyperlink e-mail transmission will not
take place.
• If you frequently use broadcasting to send images to the same group of destinations, it is convenient to store those
destinations in a group key.
To
4
Cc
AAA AAA
BBB BBB
CCC CCC
DDD DDD
EEE EEE
Frequent Use
Condition
Settings
Bcc
1/1
Address Review
Touch the [Address Review] key in the
Address Book screen.
Global
Address Search
FFF FFF
ABCD
EFGHI
JKLMN
OPQRST UVWXYZ
Sort Address
84
Check the destinations.
OK
Address Review
001 AAA AAA
002 BBB BBB
003 GGG GGG
004 HHH HHH
005 III III
006 JJJ JJJ
To
(1) Check the destinations.
1/1
(2) Touch the [OK] key.
Cc
Bcc
(1)
(2)
If the transmission includes Cc or Bcc destinations, touch the [Cc] tab or the [Bcc] tab to check those destinations.
To cancel a specified destination...
5
(1) Touch the key of the destination that you
wish to cancel.
OK
Address Review
001 AAA AAA
002 BBB BBB
003 GGG GGG
004 HHH HHH
005 III III
006 JJJ JJJ
To
1/1
(2) Touch the [Yes] key.
Cc
If you do not wish to cancel the destination, touch the [No]
key.
Bcc
(3) Touch the [OK] key.
(1)
Deselect the address?
JJJ JJJ
No
Yes
(2)
OK
Address Review
001 AAA AAA
002 BBB BBB
003 GGG GGG
004 HHH HHH
1/1
005 III III
To
Cc
Bcc
(3)
Press the [COLOUR START] key
(
) or the [BLACK & WHITE
START] key (
).
or
Scanning begins.
• If you inserted the original pages in the document feeder tray,
all pages are scanned.
A beep will sound to indicate that scanning is finished.
• If you are scanning the original on the document glass, scan
each page one page at a time.
When scanning of one page finishes, replace it with the next
page and press the [COLOUR START] key (
) or the
[BLACK & WHITE START] key (
). Repeat until all pages
have been scanned and then press the [Read-End] key.
A beep will sound to indicate that scanning is finished.
6
If fax or Internet fax destinations are included in the broadcast transmission, the [COLOUR START] key (
cannot be pressed. Scanning will take place in Mono 2.
To cancel scanning...
Press the [STOP] key (
) to cancel the operation.
85
)
BROADCAST TRANSMISSIONS THAT INCLUDE
INTERNET FAX DESTINATIONS
When a broadcast transmission includes both scan mode and Internet fax mode destinations, the Internet fax mode
settings (original orientation and other settings) are given priority. When performing this type of broadcast transmission,
note the information below.
Original placement orientation
The orientation of Internet fax mode is given priority. When "Rotation Sending
Setting" is enabled in the system settings (administrator), the image is rotated 90
degrees. For this reason, in some cases the image may not be displayed in the
correct orientation.
Send size
When the file format is set to [TIFF-S] in Internet fax mode, transmission is only
possible in A4R (8-1/2" x 11"R) size.
Exposure
The Internet fax settings are given priority.
When the file format is set to [TIFF-S] in Internet fax mode and a high resolution
setting is selected in scan mode, the resolution will be changed to [200X200dpi].
Resolution
File compression mode
Colour scanning
Special
modes
Scan file size
2in1
The compression mode will be changed to the compression mode set in
"Compression Mode at Broadcasting" in the system settings (administrator).
Scanning will take place in Mono 2 regardless of the colour mode setting.
This cannot be selected in scan mode, however, if selected in Internet fax mode, it will
also be applied to scan destinations.
If a broadcast transmission is performed that includes destinations for which an
attachment size limit has been set using "Maximum Size of E-mail Attachments
(E-mail)" or "Maximum Size of Data Attachments (FTP/Desktop/Network Folder)" in
the system settings (administrator), the limit will also apply to destinations for which a
limit is not set. (The limitation setting of Scan to E-mail or Internet fax is given priority.)
86
Resending to unsuccessful broadcast transmission destinations
The results of a completed broadcast transmission can be checked in the job status screen. If transmission to any of the
addresses failed, resend the image to those addresses.
Press the [JOB STATUS] key.
JOB STATUS
1
Pages
Job Queue
Address
Set Time
Broadcast0001
10:00 11/01 000/003 Connecting
Status
AAA AAA
10:05 11/01 000/001 Waiting
1/1
Complete
Detail
2
BBB BBB
10:22 11/01 000/004 Waiting
CCC CCC
10:30 11/01 000/010 Waiting
Print Job
Scan to
Display the jobs completed screen.
(1) Touch the key of the mode that you wish to
display.
Priority
Stop/Delete
Fax Job
(1)
(2) Touch the [Complete] key.
Internet Fax
(2)
(1)
If the broadcast transmission included destinations of different modes, the same broadcast transmission key will
appear in each of those modes.
Address
Start Time Pages
Broadcast0001
10:00 11/01 990/010 NG
Broadcast0002
10:05 11/01 050/005 Send OK
Broadcast0003
10:08 11/01 001/001 Send OK
DDD DDD
10:30 11/01 001/001 Send OK
Job Queue
Status
000000
1/8
Complete
Detail
3
Print Job
Scan to
(1) Touch the key of the completed broadcast
transmission.
Call
Internet Fax
Fax Job
(1)
Display details on the broadcast
transmission.
(2) Touch the [Detail] key.
(2)
"Broadcastxxxx" will appear as the address of the broadcast job key. The job control number that appeared in the
touch panel when scanning ended appears in "xxxx".
Detail of
Broadcast0001
Resend the image to the unsuccessful
destinations.
OK
Address
Start Time
Status
002
BBB BBB
10:01 11/01
NG000000
010
CCC CCC
10:10 11/01
NG000000
Retry
1/ 1
(1) Touch the [Failed] tab.
(2) Touch the [Retry] key.
File
Failed
(1)
4
All Destinations
(2)
• Operation after the [Retry] key is touched differs depending on whether or not the document filing function is used.
Not using document filing
You will return to the base screen with the unsuccessful destinations entered. Place the original and perform the
steps of the broadcast transmission.
Using document filing
You will return to the document filing resend screen with the unsuccessful destinations entered. Perform the
document filing resend procedure. (There is no need to rescan the original.)
• If the [All Destinations] tab is touched in (1), all of the destinations will be displayed. The [Retry] key that appears in
the screen can be touched to resend to all the destinations.
87
ERASING PERIPHERAL SHADOWS ON THE
IMAGE (Erase)
The erase function is used to erase shadow lines on images produced when scanning thick originals or books on the
document glass. (This function erases the parts of the image where shadows tend to form. The function does not detect
shadows and erase only the shadows.)
Scanning a thick book
Not using the erase
function
Using the erase
function
Shadows appear here
Shadows appear in the
image.
No shadows appear.
Erase modes
Edge erase
Centre erase
Edge + Centre erase
• Shadows at the edges of the original can also be erased when the automatic document feeder is used.
• When using USB memory mode, connect the USB memory device to the machine before performing the procedure below.
Place the original.
Place the original face up in the document feeder tray, or face
down on the document glass.
2
1
1
Fax
Mode Switch
Scan
Image
Settings
Internet Fax
Send Settings
Address Book
Address Entry
Special Modes
USB Mem. Scan
File
PC Scan
Data Entry
Select the mode that you wish to use.
(1) Touch the [Mode Switch] key.
(2) Touch the key of the mode that you wish to
use.
Quick File
(1)
(2)
88
Ready to send.
Scan
Mode Switch
3
Resend
Scan
Send
Touch the [Special Modes] key.
Address Book
Auto
A4
Image
Settings
Address Entry
Send Settings
Special Modes
File
Quick File
Scan
Special Modes
4
OK
1/2
Dual Page
Scan
Program
Erase
Timer
Suppress
Background
Card Shot
OK
Special Modes
Erase
Edge
Erase
Cancel
Centre
Erase
Edge+Centre
Erase
Touch the [Erase] key.
OK
Select the erase settings.
(1) Touch the desired erase mode.
Edge
10
(0
mm
Select one of the three erase modes.
20)
(2) Set the erasure width with the
5
keys.
0 mm to 20 mm (0" to 1") can be entered.
(1)
(2)
(3)
(3) Touch the [OK] key.
Touch the [OK] key next to the [Cancel] key to complete the setting and return to the screen of step 4.
Ready to send.
Scan
Mode Switch
Resend
Scan
Send
Address Book
Auto
A4
Image
Settings
Address Entry
Send Settings
Special Modes
Touch the [Address Book] key.
To directly enter a destination address, touch the [Address
Entry] key.
☞ ENTER THE ADDRESS MANUALLY (page 23)
File
6
Quick File
• When scanning to USB memory, there is no need to specify the destination. Go to step 8.
• You can touch the
key to display a list of the selected special mode settings or two-sided scanning. To return
to the previous screen after checking the settings, touch the [OK] key.
To
Cc
AAA AAA
Specify the destination.
• Touch the one-touch key for the desired destination and then
the [To] key.
☞ SPECIFYING DESTINATIONS IN THE ADDRESS
BOOK (page 19)
• To specify a destination address in a global address book,
touch the [Global Address Search] key and specify the
address.
☞ CALLING UP A DESTINATION FROM A GLOBAL
ADDRESS BOOK (page 24)
Address Review
Global
Address Search
DDD DDD
EEE EEE
7
1/1
BBB BBB
CCC CCC
Frequent Use
Condition
Settings
Bcc
FFF FFF
ABCD
EFGHI
JKLMN
OPQRST UVWXYZ
Sort Address
89
Press the [COLOUR START] key
(
) or the [BLACK & WHITE
START] key (
).
or
Scanning begins.
• If you inserted the original pages in the document feeder
tray, all pages are scanned.
A beep will sound to indicate that scanning is finished.
• If you are scanning the original on the document glass, scan
each page one page at a time.
When scanning of one page finishes, replace it with the next
page and press the [COLOUR START] key (
) or the
[BLACK & WHITE START] key (
). Repeat until all pages
have been scanned and then press the [Read-End] key.
A beep will sound to indicate that scanning is finished.
8
If the destination is an Internet fax destination, press the [BLACK & WHITE START] key (
To cancel scanning...
Press the [STOP] key (
).
) to cancel the operation.
When the erase function is used, erase takes place at the edges of the original image. If you also use a reduction or an
enlargement setting, the erase width will change according to the selected ratio. For example, if the erase width setting is 20
mm (1") and the image is reduced to 50%, the erase width will be 10 mm (1/2").
To cancel the erase setting...
Touch the [Cancel] key in the screen of step 5.
System Settings (Administrator): Erase Width Adjustment
The default erase width setting is linked to the copy mode system setting, and can be set from 0 mm to 20 mm (0" to 1"). The
factory default setting is 10 mm (1/2").
90
SCANNING AN ORIGINAL AS TWO
SEPARATE PAGES (Dual Page Scan)
The left and right sides of an original can be scanned as two separate pages. This function is useful when you wish to
successively scan each page of a book or other bound document.
Example: Scanning the left and right pages of a book
Book or bound document
The pages are scanned as two separate pages.
Original scan size
Transmitted image
A3 (11" x 17") x 1 page
A4 (8-1/2" x 11") x 2 pages
• When using dual page scan, the original must be placed on the document glass.
• The send size cannot be changed.
• When using USB memory mode, connect the USB memory device to the machine before performing the procedure below.
Place the original face down on the
document glass.
Size mark
The page on this side
is scanned first.
A4 81/2
1
Centreline of original
A4 (8-1/2" x 11") A3 (11" x 17")
Place the original with the page that you wish to scan first on
the right on the document glass. Align the centreline of the
original with the size mark.
2
Fax
Mode Switch
Scan
Image
Settings
Internet Fax
Send Settings
Address Book
Address Entry
Special Modes
USB Mem. Scan
File
PC Scan
Data Entry
Quick File
(1)
Select the mode that you wish to use.
(1) Touch the [Mode Switch] key.
(2) Touch the key of the mode that you wish to
use.
(2)
91
Ready to send.
Scan
Mode Switch
3
Resend
Scan
Send
Touch the [Special Modes] key.
Address Book
Auto
A3
Image
Settings
Address Entry
Send Settings
Special Modes
File
Quick File
Scan
Special Modes
4
OK
Erase
Timer
Suppress
Background
Card Shot
(1)
Ready to send.
Scan
Mode Switch
1/2
Dual Page
Scan
Program
Send
(2)
Address Book
Auto
A3
(1) Press the [Dual Page Scan] key so that it is
highlighted.
(2) Touch the [OK] key.
Resend
Scan
Select Dual Page Scan.
Image
Settings
Address Entry
Send Settings
Special Modes
Touch the [Address Book] key.
To directly enter a destination address, touch the [Address
Entry] key.
☞ ENTER THE ADDRESS MANUALLY (page 23)
File
5
Quick File
• When scanning to USB memory, there is no need to specify the destination. Go to step 7.
• You can touch the
key to display a list of the selected special mode settings or two-sided scanning. To return
to the previous screen after checking the settings, touch the [OK] key.
To
Cc
AAA AAA
Specify the destination.
• Touch the one-touch key of the desired destination and then
the [To] key.
☞SPECIFYING DESTINATIONS IN THE ADDRESS BOOK
(page 19)
• To specify a destination address in a global address book,
touch the [Global Address Search] key and specify the
address.
☞CALLING UP A DESTINATION FROM A GLOBAL
ADDRESS BOOK (page 24)
Address Review
Global
Address Search
DDD DDD
EEE EEE
6
1/1
BBB BBB
CCC CCC
Frequent Use
Condition
Settings
Bcc
FFF FFF
ABCD
EFGHI
JKLMN
OPQRST UVWXYZ
Sort Address
92
Press the [COLOUR START] key
(
) or the [BLACK & WHITE
START] key (
).
or
Scanning begins.
When scanning finishes, place the next two open pages and
press the [COLOUR START] key (
) or the [BLACK &
WHITE START] key (
). Repeat until all pages have been
scanned and then press the [Read-End] key.
A beep will sound to indicate that scanning is finished.
7
If the destination is an Internet fax destination, press the [BLACK & WHITE START] key (
To cancel scanning...
Press the [STOP] key (
).
) to cancel the operation.
To erase shadows caused by the binding of a book or other bound document, use the erase function. (Centre Erase and
Edge + Centre Erase cannot be used together.)
To cancel the dual page scan setting...
Touch the [Dual Page Scan] key in the screen of step 4 so that it is no longer highlighted, and touch the [OK] key.
93
SENDING AN IMAGE AT A SPECIFIED TIME
(Timer Transmission)
This function lets you specify a time at which a transmission or broadcast transmission will automatically take place.
Transmission begins automatically at the specified time.
Set a transmission to take place at 20:00
At 20:00, the transmission begins
automatically
• When a timer transmission is stored, keep the main power switch in the "on" position. If the main power switch is in the "off"
position at the specified time, transmission will not take place.
• When performing a timer transmission, you must scan the original into memory when you set up the transmission. It is not
possible to leave the document in the auto document feeder or on the document glass and have it scanned at the specified
time of transmission.
• Settings selected for a timer transmission (exposure, resolution, special modes, etc.) are automatically cleared after the
transmission is finished. (However, when the document filing function is used, the scanned original and settings are stored
on the built-in hard drive. For more information on the document filing function, see the Document Filing Guide.)
• This function cannot be used in USB memory mode.
Place the original.
Place the original face up in the document feeder tray, or face
down on the document glass.
1
1
Mode Switch
Image
Settings
2
Send Settings
Scan
Fax
Address Book
Address Entry
Internet Fax
Special Modes
USB Mem. Scan
File
PC Scan
(1)
Data Entry
Select the mode that you wish to use.
(1) Touch the [Mode Switch] key.
(2) Touch the key of the mode that you wish to
use.
Quick File
(2)
94
Ready to send.
Scan
Mode Switch
3
Scan
Resend
Send
Touch the [Special Modes] key.
Address Book
Auto
A4
Image
Settings
Address Entry
Send Settings
Special Modes
File
Quick File
Scan
Special Modes
OK
Erase
Timer
Suppress
Background
4
1/2
Dual Page
Scan
Program
Card Shot
Special Modes
OK
Cancel
Timer
Day of the Week
Touch the [Timer] key.
OK
Set the time with the
keys.
(1) Specify the day.
Time
---
0
(1)
00
hh.
(2)
If you do not wish to specify a day, select [---]. In this
case, transmission will begin when the time specified in
(2) arrives.
mm.
(3)
(2) Specify the time (hour, minute)
Select the time in 24-hour format.
5
(3) Touch the [OK] key.
• When this screen is opened, the setting will show the current time. If the time is not correct, press the [CLEAR ALL]
key (
) to cancel the operation. Correct the time in the system settings and then perform the timer transmission
procedure.
☞CHECKING THE DATE AND TIME (page 6)
• Touch the [OK] key next to the [Cancel] key to complete the setting and return to the screen of step 4.
Ready to send.
Scan
Mode Switch
6
Scan
A4
Resend
Send
Address Book
Auto
Image
Settings
Address Entry
Send Settings
Special Modes
Touch the [Address Book] key.
To directly enter a destination address, touch the [Address
Entry] key.
☞ ENTER THE ADDRESS MANUALLY (page 23)
File
Quick File
You can touch the
key to display a list of the selected special mode settings or two-sided scanning. To return to
the previous screen after checking the settings, touch the [OK] key.
95
To
Cc
AAA AAA
Specify the destination.
• Touch the one-touch key for the desired destination and then
the [To] key.
☞SPECIFYING DESTINATIONS IN THE ADDRESS BOOK
(page 19)
• To specify a destination address in a global address book,
touch the [Global Address Search] key and specify the
address.
☞CALLING UP A DESTINATION FROM A GLOBAL
ADDRESS BOOK (page 24)
Address Review
Global
Address Search
DDD DDD
EEE EEE
7
1/1
BBB BBB
CCC CCC
Frequent Use
Condition
Settings
Bcc
FFF FFF
ABCD
EFGHI
JKLMN
OPQRST UVWXYZ
Sort Address
or
Press the [COLOUR START] key
(
) or the [BLACK & WHITE
START] key (
).
Scanning begins.
• If you inserted the original pages in the document feeder
tray, all pages are scanned.
A beep will sound to indicate that scanning is finished.
• If you are scanning the original on the document glass, scan
each page one page at a time.
When scanning finishes, place the next original and press
the [COLOUR START] key (
) or the [BLACK &
WHITE START] key (
). Repeat until all pages have been
scanned and then press the [Read-End] key.
A beep will sound to indicate that scanning is finished.
8
• If the destination is an Internet fax destination, press the [BLACK & WHITE START] key (
).
• The original is scanned into memory. The original cannot be scanned at a specified time.
• The time can be specified up to a week in advance.
• Up to 94 timer transmissions can be stored at once.
• If another transmission is in progress when the specified time arrives, the timer transmission will begin after that
transmission is finished.
• Other transmissions can be performed as usual after a timer transmission is stored.
• A timer transmission can be deleted in the job status screen.
• If a timer transmission is given priority in the job status screen, the time specification is cancelled. The transmission will
begin as soon as the job in progress is completed.
96
WHITENING FAINT COLOURS IN THE IMAGE
(Suppress Background)
This feature is used to suppress light background areas.
Level [+]
The lightness level at which
suppression takes place
can be adjusted.
Level [-]
• This function cannot be used in Internet fax mode.
• When using USB memory mode, connect the USB memory device to the machine before performing the procedure below.
Place the original.
Place the original face up in the document feeder tray, or face
down on the document glass.
2
1
1
Fax
Mode Switch
Scan
Image
Settings
Internet Fax
Send Settings
Address Book
Address Entry
Special Modes
USB Mem. Scan
File
PC Scan
Data Entry
Select the mode that you wish to use.
(1) Touch the [Mode Switch] key.
(2) Touch the key of the mode that you wish to
use.
Quick File
(1)
(2)
Ready to send.
Scan
Mode Switch
3
Scan
A4
Resend
Send
Touch the [Special Modes] key.
Address Book
Auto
Image
Settings
Address Entry
Send Settings
Special Modes
File
Quick File
97
Scan
Special Modes
OK
Erase
Timer
Suppress
Background
4
1/2
Dual Page
Scan
Program
Touch the [Suppress Background] key.
Read the message that appears and then touch the [OK] key.
Card Shot
OK
Special Modes
Cancel
Suppress Background
OK
Select the suppress background setting.
(1) Adjust the background suppression level.
Light areas of the original may be suppressed as background.
1
Three levels are available for the contrast. Touch the
key to make the background lighter, or the
key to
make the background darker.
3
5
(1)
(2)
(2) Touch the [OK] key.
Touch the [OK] key next to the [Cancel] key to complete the setting and return to the screen of step 4.
Ready to send.
Scan
Mode Switch
Resend
Scan
Send
Address Book
Auto
A4
Image
Settings
Address Entry
Send Settings
Special Modes
Touch the [Address Book] key.
To directly enter a destination address, touch the [Address
Entry] key.
☞ ENTER THE ADDRESS MANUALLY (page 23)
File
6
Quick File
• When scanning to USB memory, there is no need to specify the destination. Go to step 8.
• You can touch the
key to display a list of the selected special mode settings or two-sided scanning. To return
to the previous screen after checking the settings, touch the [OK] key.
To
7
Cc
AAA AAA
BBB BBB
CCC CCC
DDD DDD
EEE EEE
FFF FFF
Frequent Use
ABCD
Condition
Settings
Bcc
EFGHI
1/1
Specify the destination.
• Touch the one-touch key for the desired destination and then
the [To] key.
☞SPECIFYING DESTINATIONS IN THE ADDRESS BOOK
(page 19)
• To specify a destination address in a global address book,
touch the [Global Address Search] key and specify the
address.
☞CALLING UP A DESTINATION FROM A GLOBAL
ADDRESS BOOK (page 24)
Address Review
Global
Address Search
JKLMN
OPQRST UVWXYZ
Sort Address
98
Press the [COLOUR START] key
(
) or the [BLACK & WHITE
START] key (
).
or
Scanning begins.
• If you inserted the original pages in the document feeder
tray, all pages are scanned.
A beep will sound to indicate that scanning is finished.
• If you are scanning the original on the document glass, scan
each page one page at a time.
When scanning finishes, place the next original and press
the [COLOUR START] key (
) or the [BLACK &
WHITE START] key (
). Repeat until all pages have been
scanned and then press the [Read-End] key.
A beep will sound to indicate that scanning is finished.
8
If the colour mode setting of the [BLACK & WHITE START] key (
) is [Mono2], the suppress background function
will not operate if the [BLACK & WHITE START] key (
) is pressed.
To cancel scanning...
Press the [STOP] key (
) to cancel the operation.
To cancel the background suppression setting...
Touch the [Cancel] key in the screen of step 5.
99
SCANNING BOTH SIDES OF A CARD ONTO
A SINGLE PAGE (Card Shot)
This function lets you send the front and reverse sides of a card as a single page, without the need to send each side
separately.
Scanned image
Original
Transmission
Front
Back
Example of an A4 (8-1/2" x 11")
Example of an A4 (8-1/2" x 11") size landscape scan transmission
size portrait scan transmission
• When using card shot, the original must be placed on the document glass.
• When using USB memory mode, connect the USB memory device to the machine before performing the procedure below.
Place the original face down on the
document glass.
1
2
Fax
Mode Switch
Scan
Image
Settings
Internet Fax
Send Settings
Address Book
Address Entry
Special Modes
USB Mem. Scan
File
PC Scan
Data Entry
Quick File
(1)
(1) Touch the [Mode Switch] key.
(2) Touch the key of the mode that you wish to
use.
(2)
Ready to send.
Scan
Mode Switch
3
Select the mode that you wish to use.
Resend
Touch the [Special Modes] key.
Address Book
Image
Settings
Address Entry
Send Settings
Special Modes
File
Quick File
100
Scan
Special Modes
Program
Erase
Timer
Suppress
Background
4
1/2
Dual Page
Scan
Card Shot
Special Modes
Cancel
Card Shot
X
Touch the [Card Shot] key.
OK
X
86
(25
mm
210)
54
(25
mm
210)
OK
Specify the original size.
OK
(1) Enter the original size.
Size Reset
• Touch the [X] key and enter the horizontal dimension
(X) of the original with the
keys.
• Touch the [Y] key and enter the vertical dimension (Y)
of the original with the
keys.
(A) To return the original size to the default size, touch the
[Size Reset] key.
(B) To automatically enlarge or reduce the image to fit the
send size, touch the [Fit to Send Size] key. If you wish
to scan the original at the entered original size, there
is no need to touch this key.
Y
Y
(1)
5
Fit to
Send Size
(A)
(2)
(B)
Y
(2) Touch the [OK] key.
X
• The send size will be selected automatically based on the entered original size. The send size can be changed
manually.
• Touch the [OK] key next to the [Cancel] key to complete the setting and return to the screen of step 4.
Scan
Mode Switch
Image
Settings
Send Settings
Auto
Exposure
Mono2/Auto
Colour Mode
200X200dpi
Resolution
PDF/PDF
File Format
X86 Y54
Original
Special Modes
Touch the [Address Book] key.
Address Book
To directly enter a destination address, touch the [Address
Entry] key.
☞ ENTER THE ADDRESS MANUALLY (page 23)
Address Entry
Special Modes
File
Quick File
• To change the original scan size or send size, touch the [Original] key. When the [Original] key is touched, the
following screen appears.
6
Scan
Original
Scan Size
X86
Y54
2-Sided
Booklet
100%
Send Size
Auto
B5
OK
Image Orientation
2-Sided
Tablet
Touch the "Scan Size" key to display the screen of step 5. Touch the "Send Size" key to display the send size
selection screen.
• When scanning to USB memory, there is no need to specify the destination. Go to step 8.
• You can touch the
key to display a list of the selected special mode settings or two-sided scanning. To return
to the previous screen after checking the settings, touch the [OK] key.
101
To
Cc
AAA AAA
Address Review
Global
Address Search
DDD DDD
EEE EEE
7
1/1
BBB BBB
CCC CCC
Frequent Use
Condition
Settings
Bcc
FFF FFF
ABCD
EFGHI
JKLMN
OPQRST UVWXYZ
Sort Address
Specify the destination.
• Touch the one-touch key for the desired destination and then
the [To] key.
☞SPECIFYING DESTINATIONS IN THE ADDRESS BOOK
(page 19)
• To specify a destination address in a global address book,
touch the [Global Address Search] key and specify the
address.
☞CALLING UP A DESTINATION FROM A GLOBAL
ADDRESS BOOK (page 24)
Press the [COLOUR START] key
(
) or the [BLACK & WHITE
START] key (
) to scan the front side
of the card.
or
8
If the destination is an Internet fax destination, press the [BLACK & WHITE START] key (
9
or
).
Turn the card over and press the
[COLOUR START] key (
) or the
[BLACK & WHITE START] key (
) to
scan the reverse side of the card.
Press the same [START] key that was used to scan the front
side.
10
Place next original.
(Pg.No.x)
Press [Start].
When finished, press [Read-End]
Touch the [Read-End] key in the touch
panel.
Read-End
The ratio cannot be specified and the Rotation Sending Setting cannot be selected.
To cancel the card shot...
Touch the [Cancel] key in the screen of step 5.
102
SCANNING MANY ORIGINALS AT ONCE
(Job Build)
When you have a large number of originals to transmit, this function lets you separate the originals into sets. The sets
are scanned in the automatic document feeder one set at a time and then sent together as a single transmission. Use
this function when the number of originals that you wish to scan exceeds the maximum number of sheets that can be
inserted in the automatic document feeder at once.
When scanning originals that are separated into sets, scan the set that has the first page first. The settings that you
select for the first set can be used for all remaining sets.
Originals are
scanned in
separate sets
Originals
1
1
Transmission
1
101
When using USB memory mode, connect the USB memory device to the machine before performing the procedure below.
2
Indicator
line
Fax
Mode Switch
Scan
Image
Settings
Internet Fax
Send Settings
Place the originals face up. Insert the originals all the way into
the document feeder tray. The stack must not be higher than
the indicator line.
1
1
Insert the originals face up in the
document feeder tray.
Address Book
Address Entry
Special Modes
USB Mem. Scan
File
PC Scan
Data Entry
Quick File
(1)
(1) Touch the [Mode Switch] key.
(2) Touch the key of the mode that you wish to
use.
(2)
Ready to send.
Scan
Mode Switch
3
Select the mode that you wish to use.
Scan
A4
Resend
Send
Touch the [Special Modes] key.
Address Book
Auto
Image
Settings
Address Entry
Send Settings
Special Modes
File
Quick File
103
Scan
Special Modes
OK
Mixed Size
Original
Job
Build
4
File
Slow Scan
Mode
2/2
Select job build mode.
(1) Touch the
the screens.
keys to switch through
If you selected Internet fax mode, go to the 3rd screen.
Quick File
(2)
(3) (1)
(2) Touch the [Job Build] key so that it is
highlighted.
(3) Touch the [OK] key.
Ready to send.
Scan
Mode Switch
Resend
Scan
Send
Address Book
Auto
A4
Image
Settings
Address Entry
Send Settings
Special Modes
Touch the [Address Book] key.
To directly enter a destination address, touch the [Address
Entry] key.
☞ ENTER THE ADDRESS MANUALLY (page 23)
File
5
Quick File
• When scanning to USB memory, there is no need to specify the destination. Go to step 7.
• You can touch the
key to display a list of the selected special mode settings or two-sided scanning. To return
to the previous screen after checking the settings, touch the [OK] key.
To
Cc
AAA AAA
Address Review
Global
Address Search
DDD DDD
EEE EEE
Frequent Use
1/1
BBB BBB
CCC CCC
6
Condition
Settings
Bcc
FFF FFF
ABCD
EFGHI
JKLMN
or
OPQRST UVWXYZ
Sort Address
Specify the destination.
• Touch the one-touch key for the desired destination and then
the [To] key.
☞ SPECIFYING DESTINATIONS IN THE ADDRESS
BOOK (page 19)
• To specify a destination address in a global address book,
touch the [Global Address Search] key and specify the
address.
☞ CALLING UP A DESTINATION FROM A GLOBAL
ADDRESS BOOK (page 24)
Press the [COLOUR START] key
(
) or the [BLACK & WHITE
START] key (
) to scan the first set of
originals.
7
If the destination is an Internet fax destination, press the [BLACK & WHITE START] key (
To cancel scanning...
Press the [STOP] key (
) to cancel the operation. All scanned data will be cleared.
104
) in the touch panel.
1
10
or
Insert the next set of originals and press
the [COLOUR START] key (
) or
the [BLACK & WHITE START] key (
).
Press the [START] key pressed in step 7.
Repeat until all originals have been scanned.
8
The exposure and resolution can be changed between sets of originals.
Place next original.
(Pg.No.x)
Press [Start].
When finished, press [Read-End]
Touch the [Read-End] key in the touch
panel.
Read-End
9
If no action is taken for one minute after the confirmation screen appears, scanning automatically ends and the
transmission is reserved.
If the memory becomes full during scanning, a message will appear and the transmission will be cancelled.
To cancel the job build function....
Touch the [Job Build] key in the screen of step 4 so that it is not highlighted.
105
SCANNING ORIGINALS OF DIFFERENT
SIZES (Mixed Size Original)
This feature lets you scan originals of different sizes at the same time; for example, B4 (8-1/2" x 14") size originals
mixed together with A3 (11" x 17") size originals. When scanning the originals, the machine automatically detects the
size of each original.
Originals
(B4 (8-1/2" x 14") original mixed in
with A3 (11" x 17") originals)
Files created
1st page
B4
A3
2nd to 4th pages
B4
A3
Scanned in at B4
(8-1/2" x 14") size
Scanned in at A3
(11" x 17") size
This feature can only be used with the following combinations of original sizes:
A3 and B4, A3 and B5, A4 and B4, A4 and B5, A4R and B5, B4 and A4R, B4 and A5, B5 and A5
(11" x 17" and 8-1/2" x 14", 11" x 17" and 8-1/2" x 13", 11" x 17" and 5-1/2" x 8-1/2")
When using USB memory mode, connect the USB memory device to the machine before performing the procedure below.
Place the originals with
the corners aligned
together in the far left
corner.
1
B4
(8-1/2" x 14")
B4
(8-1/2" x 14")
A3 (11" x 17")
2
Fax
Mode Switch
Scan
Image
Settings
Internet Fax
Send Settings
Address Book
Address Entry
Special Modes
USB Mem. Scan
File
PC Scan
Data Entry
Quick File
(1)
Insert the originals face up in the
document feeder tray.
Insert the originals with the corners aligned together in the far
left corner of the document feeder tray.
The following combinations of sizes of originals can be placed
together in the document feeder tray: A3 and B4, A3 and B5,
A4 and B4, A4 and B5, A4R and B5, B4 and A4R, B4 and A5,
B5 and A5 (11" x 17" and 8-1/2" x 14", 11" x 17" and
8-1/2" x 13", 11" x 17" and 5-1/2" x 8-1/2")
Select the mode that you wish to use.
(1) Touch the [Mode Switch] key.
(2) Touch the key of the mode that you wish to
use.
(2)
106
Ready to send.
Scan
Mode Switch
3
Resend
Scan
Send
Touch the [Special Modes] key.
Address Book
Auto
A3
Image
Settings
Address Entry
Send Settings
Special Modes
File
Quick File
Scan
Special Modes
OK
Mixed Size
Original
Job
Build
File
2/2
Slow Scan
Mode
Select the mixed size original setting.
(1) Touch the
the screens.
If you selected Internet fax mode, go to the 3rd screen.
Quick File
4
keys to switch through
(2)
(3)
(1)
(2) Touch the [Mixed Size Original] key so that
it is highlighted.
(3) Touch the [OK] key.
If an original scan size has been specified, a message will appear when the [Mixed Size Original] key is touched. To
enable the Mixed Size Original setting, change the scan size setting to auto and then touch the [Mixed Size Original]
key again.
Ready to send.
Scan
Mode Switch
Resend
Scan
Send
Address Book
Auto
A3
Image
Settings
Address Entry
Send Settings
Special Modes
Touch the [Address Book] key.
To directly enter a destination address, touch the [Address
Entry] key.
☞ ENTER THE ADDRESS MANUALLY (page 23)
File
5
Quick File
• When scanning to USB memory, there is no need to specify the destination. Go to step 7.
• You can touch the
key to display a list of the selected special mode settings. To return to the previous screen
after checking the settings, touch the [OK] key.
To
6
Cc
AAA AAA
BBB BBB
CCC CCC
DDD DDD
EEE EEE
FFF FFF
Frequent Use
ABCD
Condition
Settings
Bcc
EFGHI
1/1
Address Review
Global
Address Search
JKLMN
OPQRST UVWXYZ
Sort Address
Specify the destination.
• Touch the one-touch key for the desired destination and then
the [To] key.
☞SPECIFYING DESTINATIONS IN THE ADDRESS BOOK
(page 19)
• To specify a destination address in a global address book,
touch the [Global Address Search] key and specify the
address.
☞CALLING UP A DESTINATION FROM A GLOBAL
ADDRESS BOOK (page 24)
107
Press the [COLOUR START] key
(
) or the [BLACK & WHITE
START] key (
).
or
Scanning begins. A beep will sound to indicate that scanning is
finished.
7
If the destination is an Internet fax destination, press the [BLACK & WHITE START] key (
To cancel scanning...
Press the [STOP] key (
).
) to cancel the operation.
• If an original scan size is specified after selecting the Mixed Size Original setting, the original scan size setting will be
enabled and the Mixed Size Original setting will be cleared.
• When the Mixed Size Original setting is selected, automatic two-sided scanning cannot be used. (except when using the
MX-3501N/4501N)
To cancel the mixed size original setting...
Touch the [Mixed Size Original] key in the screen of step 4 so that it is not highlighted.
System Settings (Administrator): Original Feeding Mode
The original feeding mode can be set to always scan mixed size originals.
108
SCANNING THIN ORIGINALS (Slow Scan
Mode)
Use this function when you wish to scan thin originals using the automatic document feeder. This function helps prevent
thin originals from misfeeding.
A
A
B
C
D
B
C
D
When using USB memory mode, connect the USB memory device to the machine before performing the procedure below.
Insert the originals face up in the
document feeder tray.
1
Adjust the original guides slowly.
1
If the originals are inserted with too much force, they may crumple and misfeed.
2
Fax
Mode Switch
Scan
Image
Settings
Internet Fax
Send Settings
Address Book
Address Entry
Special Modes
USB Mem. Scan
File
PC Scan
Data Entry
Select the mode that you wish to use.
(1) Touch the [Mode Switch] key.
(2) Touch the key of the mode that you wish to
use.
Quick File
(1)
(2)
Ready to send.
Scan
Mode Switch
3
Scan
A4
Resend
Send
Touch the [Special Modes] key.
Address Book
Auto
Image
Settings
Address Entry
Send Settings
Special Modes
File
Quick File
109
Scan
Special Modes
Select slow scan mode.
OK
2/2
Job
Build
4
Mixed Size
Original
File
(1) Touch the
the screens.
Slow Scan
Mode
keys to switch through
If you selected Internet fax mode, go to the 3rd screen.
Quick File
(2)
(2) Touch the [Slow Scan Mode] key so that it is
highlighted.
(3) (1)
(3) Touch the [OK] key.
Ready to send.
Scan
Mode Switch
Touch the [Address Book] key.
Resend
Scan
Send
To directly enter a destination address, touch the [Address
Entry] key.
☞ ENTER THE ADDRESS MANUALLY (page 23)
Address Book
Auto
A4
Image
Settings
Address Entry
Send Settings
Special Modes
File
5
Quick File
• When scanning to USB memory, there is no need to specify the destination. Go to step 7.
• You can touch the
key to display a list of the selected special mode settings or two-sided scanning. To return
to the previous screen after checking the settings, touch the [OK] key.
To
Cc
AAA AAA
6
CCC CCC
DDD DDD
EEE EEE
FFF FFF
Frequent Use
1/1
BBB BBB
ABCD
EFGHI
Specify the destination.
Condition
Settings
Bcc
• Touch the one-touch key for the desired destination and then
the [To] key.
☞ SPECIFYING DESTINATIONS IN THE ADDRESS
BOOK (page 19)
• To specify a destination address in a global address book,
touch the [Global Address Search] key and specify the address.
☞ CALLING UP A DESTINATION FROM A GLOBAL
ADDRESS BOOK (page 24)
Address Review
Global
Address Search
JKLMN
OPQRST UVWXYZ
Sort Address
Press the [COLOUR START] key
(
) or the [BLACK & WHITE
START] key (
).
or
Scanning begins. A beep will sound to indicate that scanning is
finished.
7
If the destination is an Internet fax destination, press the [BLACK & WHITE START] key (
To cancel scanning...
Press the [STOP] key (
) to cancel the operation.
When this function is selected, automatic two-sided scanning is not possible.
To cancel the slow scan mode...
Touch the [Slow Scan Mode] key in the screen of step 4 so that it is not highlighted.
System Settings (Administrator): Original Feeding Mode
This is used to have scanning always take place at slow scan mode.
110
).
STORING SCAN OPERATIONS (Programs)
A destination, original settings, and functions can be stored in a program. When you wish to use those settings for a
scan transmission, they can be called up with ease.
For example, suppose A4 (8-1/2" x 11") size documents are scanned into a file and sent to each branch office once a
month.
(1) The same documents are sent to each branch office
(2) Each page of a bound document is successively transmitted
(3) Smudges on the edges of the documents are erased before transmission
When a job program is not stored
When a job program is stored
Enter the address of each branch office.
Touch a stored program key.
Dual Page Scan settings
Erase settings
Press the [START] key.
The originals are scanned and transmitted.
Press the [START] key.
The originals are scanned and transmitted.
Considerable time is required to send the documents each
month because the above settings must be selected.
In addition, mistakes may occasionally be made when
selecting the settings, so incorrect transmissions may occur.
When a program is used, settings are selected with ease by
simply pressing the stored key.
In addition, transmission takes place based on the stored
settings so there are no chances for mistakes.
• Programs are stored, edited, and deleted using "Address Control" in the system settings. See "Storing a
program" in the System Settings Guide.
• Programs can also be stored in the Web pages. Click [Job Programs] and then [Program Registration] in the Web page
menu.
• The settings stored in a program will be retained even after the program is used for transmission. The same settings can
be used repeatedly for transmission.
• The following settings can be stored in programs.
• Image send mode: Scan, Internet fax
• Destinations
• Original settings: Exposure, resolution
• Special modes: Erase, Dual Page Scan, Suppress Background, 2in1
• Up to 48 programs can be stored.
• Up to 500 destinations can be stored in one program.
• This function cannot be used in USB memory mode.
111
Place the original.
1
1
Place the original in the document feeder tray or on the
document glass as appropriate for the functions stored in the
program.
Ready to send.
Scan
Scan
Mode Switch
2
A4
Resend
Send
Touch the [Special Modes] key.
Address Book
Auto
Image
Settings
Address Entry
Send Settings
Special Modes
File
Quick File
Scan
Special Modes
3
OK
Program
Erase
Timer
Suppress
Background
1/2
Dual Page
Scan
Card Shot
OK
Program
4
Program 1
Program 2
Program 3
Program 4
Program 5
Program 6
Program 7
Program 8
1/6
Send Settings
Call up the stored program.
(1) Touch the desired program key.
(2) Touch the [OK] key.
(1)
Program:Program 4
[email protected]
Scan
Scan
Mode Switch
A4
Image
Settings
Touch the [Program] key.
(2)
Select additional settings.
Send
Auto
Special Modes
File
Quick File
5
Select any settings or functions that cannot be stored in a
program. The following items can be selected.
• Image Settings : Original Scan Size, Send Size, Two-Sided
Scanning, Format, Colour Mode
• Send settings
• Special modes : Timer Transmission, Card Shot, Job Build,
Slow Scan Mode, File, Quick File,
Transaction Report
• You can touch the
key to display a list of the selected special mode settings or two-sided scanning. To return
to the previous screen after checking the settings, touch the [OK] key.
• The screen that appears will vary depending on the destination stored in the program.
• The mode cannot be changed here.
• Functions stored in the program cannot be cancelled here.
112
or
6
Press the [COLOUR START] key
(
) or the [BLACK & WHITE
START] key (
).
Scanning begins.
• If you inserted the original pages in the document feeder
tray, all pages are scanned.
A beep will sound to indicate that scanning is finished.
• If you are scanning the original on the document glass, scan
each page one page at a time.
When scanning finishes, place the next original and press
the [COLOUR START] key (
) or the [BLACK &
WHITE START] key (
). Repeat until all pages have been
scanned and then press the [Read-End] key.
A beep will sound to indicate that scanning is finished.
113
FORWARDING A RECEIVED INTERNET FAX
TO AN E-MAIL ADDRESS (Inbound Routing
Settings)
Received Internet faxes can be automatically forwarded to a specified E-mail address. This function can be used to
forward received Internet faxes directly to an e-mail address without printing the Internet faxes.
The machine
Forwarding
Received Internet fax
To configure inbound routing settings, click [Application Settings] and then [Inbound Routing Settings] in the Web page
menu. (Administrator rights are required.)
The format of the forwarded file is TIFF-F.
114
8
INTERNET FAX FUNCTIONS
This chapter explains Internet fax communication functions, including the basic procedure for receiving Internet faxes
and the procedure for selecting conditions for printing a transaction report.
RECEIVING AN INTERNET FAX
The Internet fax function periodically* connects to the mail server (POP3 server) and checks whether or not Internet
faxes have been received. If so, the faxes are automatically retrieved and printed.
*The default setting is once in five minutes.
If faxes will be received at night, keep the main power switch in the "on" position.
Beep
1
Internet faxes are received
automatically.
When reception ends, a beep sounds and printing begins.
The faxes are printed.
2
If the machine is out of paper or there is no paper that matches the size of the received fax, a message will appear in the
touch panel. Follow the instructions in the message to load an appropriate size of paper.
• System Settings: Internet Fax Data Forward
When printing is not possible because the machine has run out of paper or toner, received Internet faxes can be forwarded
to and printed by another previously stored Internet fax machine.
• System Settings (Administrator): I-Fax Default Settings
These settings determine the handling of received faxes when the [POWER] key (
) is "off" (the main power switch is
"on"), the volume of the beep that sounds when reception ends, and whether or not received e-mail messages are printed.
• System Settings (Administrator): I-Fax Receive Settings
Settings related to Internet fax reception can be configured such as the interval for checking for received faxes, duplex
reception, output settings, auto reduction printing, and storing reject reception addresses.
115
MANUALLY RECEIVING INTERNET FAXES
If the interval for checking for received faxes is somewhat long and you wish to check immediately, you can manually
initiate reception.
1
Mode Switch
Scan
Image
Settings
Internet Fax
Send Settings
Fax
USB Mem. Scan
Address Book
Change to Internet fax mode.
Address Entry
(1) Touch the [Mode Switch] key.
Special Modes
(2) Touch the [Internet Fax] key.
File
PC Scan
Data Entry
Quick File
(2)
(1)
Ready to send.
Internet Fax
Mode Switch
2
Resend
Address Book
Image
Settings
Address Entry
Send Settings
Special Modes
Manual RX
Touch the [Manual RX] key.
The machine connects to the mail server and begins reception
of new faxes.
File
Quick File
If POP3 server settings are not configured in the Web pages, the [Manual RX] key is greyed out to prevent selection.
System Settings: Internet Fax Manual Reception
This setting is used to hide the [Manual RX] key that appears in the base screen of Internet fax mode. When the [Manual RX]
key is hidden, manual reception is begun by touching the [Reception Start] key in the "Internet Fax Manual Reception"
screen.
116
PRINTING FAXES RECEIVED TO MEMORY
"Hold Setting for Received Data Print" in the system settings (administrator) can be enabled to have faxes received to
memory without being printed. To print the faxes, a password must be entered. When this function is enabled, a
password entry screen appears in the touch panel when Internet faxes are received.
Received data is stored.
Enter password via the 10-key.
Cancel
When the previously programmed 4-digit password is entered with the numeric keys, printing begins.
The [Cancel] key can be touched to close the password entry screen; however, the data in memory key (
) will blink
in the touch panel. The password entry screen will reappear when you touch the blinking key (
) or change modes.
• The received faxes will be retained in memory regardless of whether they were received automatically or manually. If a
transaction report is set to print when a fax is received, the transaction report will also be retained in memory.
• If "Internet Fax Data Forward" is enabled in the system settings so that received faxes are forwarded to another machine,
the data retained in memory is also forwarded. At that time, the same password entry screen will appear as for printing.
Forwarding will not take place unless the password is entered.
System Settings (Administrator): Hold Setting for Received Data Print
Enable this setting to have faxes received to memory without being printed. This setting is also used to program the
password that must be entered to print the faxes.
117
SENDING TWO PAGES AS A SINGLE PAGE
(2in1)
Two original pages can be reduced to half their original size and sent together as a single page.
Portrait-oriented originals
Transmission
1
1
2
2
Landscape-oriented originals
Transmission
1
1
2
2
1
Place the original(s).
• The 2in1 function cannot be used when the originals are larger than A4 (8-1/2" x 11") size.
• When placing the originals, orient them as explained below.
Originals
Document glass
Place the original face up.
Place the originals face down.
Portrait orientation
1
1
1
2
1
2
118
1
Landscape orientation
1
1
Document feeder tray
2
Mode Switch
Scan
Image
Settings
Internet Fax
Send Settings
Fax
Address Book
USB Mem. Scan
Change to Internet fax mode.
Address Entry
(1) Touch the [Mode Switch] key.
Special Modes
(2) Touch the [Internet Fax] key.
File
PC Scan
Data Entry
Quick File
(2)
(1)
Ready to send.
3
Resend
Internet Fax Scan
Mode Switch
A4
Image
Settings
Send
Touch the [Special Modes] key.
Address Book
Auto
Address Entry
Send Settings
Special Modes
Manual RX
File
Quick File
Internet Fax
Special Modes
OK
Program
4
Timer
2in1
Card Shot
(1)
Internet Fax
Mode Switch
Image
Settings
Send Settings
5
Manual RX
1/3
Dual Page
Scan
Erase
(2) Touch the [OK] key.
Address Book
Address Entry
Auto
A4
Original
(1) Touch the [2in1] key so that it is
highlighted.
(2)
Auto
Exposure
200X100dpi
Resolution
Select 2in1.
TIFF-F
File Format
Special Modes
Special Modes
File
Display the original settings screen.
(1) Touch the [Image Settings] key.
(2) Touch the [Original] key.
Quick File
(1)
(2)
Internet Fax
Scan Size
Original
Auto
A4
2-Sided
Booklet
6
100%
Send Size
Auto
OK
Image Orientation
(1) Touch the "Image Orientation" key with the
same orientation as the original image.
2-Sided
Tablet
(1)
Specify the orientation in which the
original is placed.
If this setting is not correct, a suitable image may not be
transmitted.
(2)
(2) Touch the [OK] key.
119
Ready to send.
Send
To directly enter a destination address, touch the [Address
Entry] key.
☞ ENTER THE ADDRESS MANUALLY (page 23)
Address Book
Auto
Address Entry
Send Settings
7
Touch the [Address Book] key.
Resend
Internet Fax Scan
Mode Switch
A4
Image
Settings
Special Modes
Manual RX
File
Quick File
You can touch the
key to display a list of the selected special mode settings or two-sided scanning. To return to
the previous screen after checking the settings, touch the [OK] key.
To
Cc
AAA AAA
BBB BBB
CCC CCC
DDD DDD
EEE EEE
8
Frequent Use
Specify the destination.
Condition
Settings
Bcc
1/1
• Touch the one-touch key of the desired destination and then
the [To] key.
☞SPECIFYING DESTINATIONS IN THE ADDRESS BOOK
(page 19)
• To specify a destination address in a global address book,
touch the [Global Address Search] key and specify the
address.
☞CALLING UP A DESTINATION FROM A GLOBAL
ADDRESS BOOK (page 24)
Address Review
Global
Address Search
FFF FFF
ABCD
EFGHI
JKLMN
OPQRST UVWXYZ
Sort Address
Press the [BLACK & WHITE START] key
(
).
Scanning begins.
• If you inserted the original pages in the document feeder
tray, all pages are scanned.
A beep will sound to indicate that scanning is finished.
• If you are scanning the original on the document glass, scan
each page one page at a time.
When scanning finishes, place the next original and press
the [BLACK & WHITE START] key (
). Repeat until all
pages have been scanned and then press the [Read-End]
key.
A beep will sound to indicate that scanning is finished.
9
To cancel scanning...
Press the [STOP] key (
) to cancel the operation.
Transmission is not possible at a size smaller than the original size.
To cancel the 2in1...
Touch the [2in1] key in the screen of step 4 so that it is not highlighted.
120
CHANGING THE PRINT SETTINGS FOR THE
TRANSACTION REPORT (Transaction Report)
A transaction report is automatically printed out to alert you when an Internet fax transmission fails or when a broadcast
transmission is performed. The transaction report contains a description of the transmission (date, start time, name of
other party, time required, number of pages, result, etc.).
Transaction reports are printed based on conditions set in the system settings; however, you can temporarily select
different conditions for a transmission. To change the transaction report print conditions at the time of transmission,
follow the steps below.
Place the original.
Place the original face up in the document feeder tray, or face
down on the document glass.
2
1
1
Mode Switch
Scan
Image
Settings
Internet Fax
Send Settings
Fax
USB Mem. Scan
Address Book
Change to Internet fax mode.
Address Entry
(1) Touch the [Mode Switch] key.
Special Modes
(2) Touch the [Internet Fax] key.
File
PC Scan
Data Entry
Quick File
(2)
(1)
Ready to send.
3
Internet Fax Scan
Mode Switch
A4
Image
Settings
Send Settings
Manual RX
Resend
Send
Touch the [Special Modes] key.
Address Book
Auto
Address Entry
Special Modes
File
Quick File
Internet Fax
Special Modes
OK
2/3
Transaction
Report
4
Select Transaction Report.
(1) Touch the
the screens.
keys to switch through
(2) Touch the [Transaction Report] key.
(2)
(1)
121
(2)
(1)
OK
Special Modes
Cancel
Transaction Report
Always Print
5
Print at Error
OK
Select print conditions.
(1) Select the print conditions.
(2) Touch the [OK] key.
Do not Print
Print Original Image
• When the [Print Original Image] checkbox is selected
transaction report.
, part of the transmitted original is included on the
• Touch the [OK] key next to the [Cancel] key to complete the setting and return to the screen of step 4.
Ready to send.
Resend
Internet Fax Scan
Mode Switch
A4
Image
Settings
Send
Address Book
Auto
Address Entry
Send Settings
6
Special Modes
Manual RX
Touch the [Address Book] key.
To directly enter a destination address, touch the [Address
Entry] key.
☞ ENTER THE ADDRESS MANUALLY (page 23)
File
Quick File
You can touch the
key to display a list of the selected special mode settings or two-sided scanning. To return to
the previous screen after checking the settings, touch the [OK] key.
To
Cc
AAA AAA
Address Review
Global
Address Search
DDD DDD
EEE EEE
7
1/1
BBB BBB
CCC CCC
Frequent Use
Condition
Settings
Bcc
FFF FFF
ABCD
EFGHI
JKLMN
OPQRST UVWXYZ
Sort Address
Specify the destination.
• Touch the one-touch key of the desired destination and then
the [To] key.
☞SPECIFYING DESTINATIONS IN THE ADDRESS BOOK
(page 19)
• To specify a destination address in a global address book,
touch the [Global Address Search] key and specify the
address.
☞CALLING UP A DESTINATION FROM A GLOBAL
ADDRESS BOOK (page 24)
122
Press the [BLACK & WHITE START] key
(
).
Scanning begins.
• If you inserted the original pages in the document feeder
tray, all pages are scanned.
A beep will sound to indicate that scanning is finished.
• If you are scanning the original on the document glass, scan
each page one page at a time.
When scanning finishes, place the next original and press
the [BLACK & WHITE START] key (
). Repeat until all
pages have been scanned and then press the [Read-End]
key.
A beep will sound to indicate that scanning is finished.
8
To cancel scanning...
Press the [STOP] key (
) to cancel the operation.
For a broadcast transmission, changes to the transaction report print conditions apply to all destinations.
• System Settings (Administrator): Transaction Report Print Select Setting
This is used to set the conditions for printing transaction reports.
The factory default settings for printing are indicated by
below.
Single Sending:Print Out All Report/ Print Out Error Report Only /No Printed Report
Broadcasting:
Print Out All Report /Print Out Error Report Only/No Printed Report
Receiving:
Print Out All Report/Print Out Error Report Only/ No Printed Report
• System Settings (Administrator): Original Print on Transaction Report
This is used to have part of the transmitted original printed on the transaction report.
123
CHECKING THE ACTIVITY LOG (Image Sending Activity
Report)
You can have the machine print a log of recent image sending activity (date, name of other party, time required, result,
etc.). The Image Sending Activity Report contains useful information such as the types of errors that occurred.
The most recent 199 transactions are included in the report.
You can have the machine print the Image Sending Activity Report each time the number of transactions reaches 200,
or at a specified time (once a day only).
The contents of the Image Sending Activity Report are erased when the report is printed, and thus it cannot be reprinted.
System Settings (Administrator): Activity Report Print Select Setting
This is used to set the conditions for printing activity reports. The factory default setting is not to print.
The Image Sending Activity Report can be set to print each time the number of transactions reaches 200, or at a specified
time (once a day only).
INFORMATION APPEARING IN THE RESULT COLUMN
Error types and other information are printed in the result column of transaction and activity reports. When a transaction
report or activity report is printed, check the result of the transaction in the result column and take action as needed.
Examples of messages that are printed in the result column
Message
Explanation
OK
The transaction was completed normally.
OK REPORT
A receive report was requested for a transmission, the transmission was completed normally, and
the receive report was received from the destination.
CANCEL
A transmission was stopped while in progress, or a reserved transmission job was cancelled.
MEM. FULL
The memory became full during reception.
REJECTED
An Internet fax was sent from a party that is blocked.
NG REPORT
A receive report was requested for a transmission, however, the transmission did not take place
correctly and a transmission failed report was received.
No REPORT
A receive report was requested for a transmission, however, a report was not received within the
timeout time.
NG LIMIT
Transmission was not possible because the file size exceeded the machine's file size limit setting.
RECEIVED
An e-mail was received, however, the attached file was not a TIFF-F file or there was no attached
file, and thus printing was not possible.
FAIL xx (xxxx)
The transaction failed due to a communication error.
First two digits of communication error number: Error code from 00 to 99.
Last four digits of communication error number: Code for use by service technicians.
124
SENDING AN INTERNET FAX FROM A
COMPUTER (PC-I-Fax)
A file on a computer can be sent via the machine as an Internet fax (PC-I-Fax function). Internet faxes are sent using the
PC-I-Fax function in the same way as documents are printed. Select the PC-Fax driver as the printer driver for your
computer and then select the Print command in the software application. Image data for transmission will be created and
sent as an Internet fax.
PC-I-Fax
transmission
For information, see the PC-Fax driver Help.
• To send an Internet fax using the PC-I-Fax function, the PC-Fax driver must be installed and then updated using the
CD-ROM that accompanies the Internet fax expansion kit. For more information, see the Software Setup Guide.
• This function can only be used when your computer is a Windows computer.
• This function can only be used for transmission. Internet faxes received on the machine cannot be received to a computer
that is connected to the machine.
125
SCANNING FROM A COMPUTER
(PC SCAN MODE)
9
BASIC SCANNING PROCEDURE
You can install the scanner driver on your computer from the CD-ROM that accompanies the machine, and use a
TWAIN* compliant application to execute scanning from your computer.
Scanning from your computer is most useful for scanning a single original such as a photo, particularly when you want to
adjust scan settings as you scan. By contrast, scanning at the machine is most useful for continuous scanning of
multiple originals.
* An interface standard used for scanners and other image input devices. When the scanner driver is installed on your
computer, you can use any TWAIN-compliant application to scan an image.
• Scanning in PC scan mode is only possible when the scanner driver has been installed from the "Software CD-ROM"
using the integrated installer. For the procedures for installing the scanner driver and configuring settings, see the
Software Setup Guide.
• This function cannot be used when it has been disabled using "Disable Scan Function" in the system settings
(administrator).
• The procedures for selecting the scanner driver and starting scanning vary depending on the TWAIN-compliant
application. For more information, see the manual for the application or Help.
• When a large image is scanned at high resolution, the amount of data will be very large and scanning will take a long time.
Be sure to select appropriate scan settings for the original (text, photo, etc.).
As an example, the procedure for scanning from the "Sharpdesk" application that accompanies the machine (or that
accompanies the network scanner expansion kit when the MX-2300G/2700G is used) is explained below.
[At the machine]
Place the original.
Place the original face up in the document feeder tray, or face
down on the document glass.
1
1
Mode Switch
Scan
Image
Settings
Internet Fax
Send Settings
Change to PC Scan mode.
Fax
Address Book
Address Entry
Special Modes
USB Mem. Scan
(1) Touch the [Mode Switch] key.
(2) Touch the [PC Scan] key.
File
PC Scan
2
Data Entry
Quick File
(1)
(2)
When PC scan mode is selected, only the [Exit] key displayed in the touch panel can be used on the machine; no
other keys can be used.
126
[At your computer]
Start the TWAIN-compliant application
on your computer and select [Select
Scanner] from the [File] menu.
3
Select the scanner driver of the
machine.
(1) Select [SHARP MFP TWAIN K].
(2) Click the [Select] button.
4
(1)
(2)
Select [Acquire Image] from the [File]
menu.
The scanner driver opens.
5
127
Preview the image.
(1) Select the location where the original is
placed.
"Scanning Source" menu:
• If the original is a one-sided original and is placed in the
document feeder tray, select [SPF(Simplex)].
• If the original is a two-sided original and is placed in the
document feeder tray, select [SPF(Duplex - Book)] or
[SPF(Duplex - Tablet)] depending on whether the
original is a book-style or tablet-style original. In
addition, select [Left edge is fed first] or [Top edge is
fed first] depending on the orientation of the original.
(2) Select scan settings.
6
(1) (2)
"Scanning Mode" menu:
Switch between the "Standard" screen and the
"Professional". In the "Standard" screen, select "Monitor",
"Photo", "FAX" or "OCR" depending on the original type
and your scanning purpose.
If you wish to change the initial settings of any of the four
buttons or select the resolution or other advanced
settings, change to the "Professional" screen.
"Image Area" menu:
Select the scan area. If "Auto" is selected, the original size
detected by the machine will be scanned. You can also
set the scanning area in the preview window with your
mouse.
(3)
(3) Click the [Preview] button.
The preview image will appear in the scanner driver.
If you are not satisfied with the preview image, repeat (2)
and (3).
If the [Zoom Preview] checkbox is selected before the
[Preview] button is clicked, the selected area will be
enlarged in the preview window. If the checkmark is
removed, the preview image will return to normal. Note
that if SPF is selected in the "Scanning Source" menu, the
[Zoom Preview] function cannot be used.
• For further information on the scan settings, click the
open scanner driver Help.
button in the preview image screen in step 7 to
• If the [Preview] button is clicked when scanning from the document feeder tray, only one original page will be
scanned for the preview image. If you wish to include that original in the scan, return it to the document feeder tray.
128
Select scanning settings while viewing
the image.
7
[Rotate] button:
Each time this button is clicked, the preview image rotates 90
degrees. This lets you change the orientation of the image
without picking up and placing the original again. The image file
will be created using the orientation that appears in the preview
window.
[Image Size] button:
Click this button to specify the scan area by entering numerical
values. Pixels, mm, or inches can be selected for the units of
the numerical values. If a scanning area has already been
specified, the entered numbers will change the area relative to
the top left corner of the specified area.
button:
To automatically set the scanning area to the entire preview
image, click the
button with the preview image displayed
and a scanning area not specified.
• For further information on the scan settings, click the
button to open scanner driver Help.
• If the originals are placed in the document feeder tray, only the top page will be previewed. The top page will be
delivered to the original exit tray. Be sure to return the previewed page to the document feeder tray before
previewing again or scanning.
Click the [Scanning] button.
Scanning begins. The image appears in your application.
Assign a file name to the scanned image and save it as
appropriate in the software application you are using.
8
129
[At the machine]
This machine is in the PC scan mode.
Do not remove the original.
9
Scanner IP address:250.160.102.106
Exit
Touch the [Yes] key.
PC scan in progress.
Finish PC scan mode?
10
Touch the [Exit] key in the touch panel.
No
Yes
130
Scanner Guide
MODEL: MX-2300G
MX-2300N
MX-2700G
MX-2700N
MX-3500N
MX-3501N
MX-4500N
MX-4501N
MX4500-EX-SCN-Z1
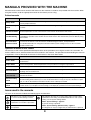
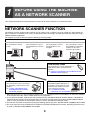
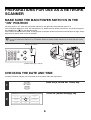
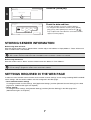
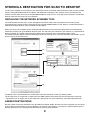
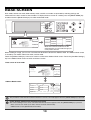

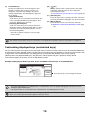
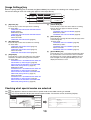
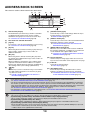
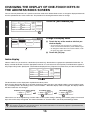


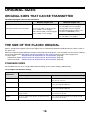
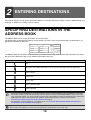
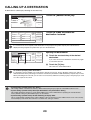

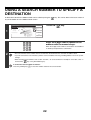
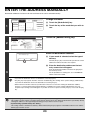
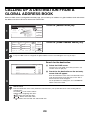


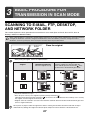
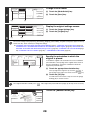
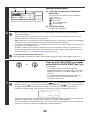
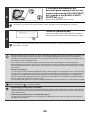
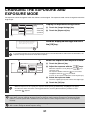
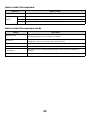
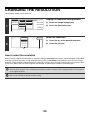
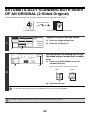
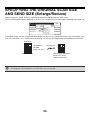
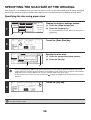
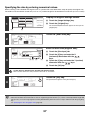
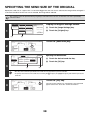
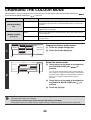
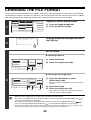
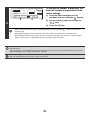
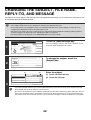
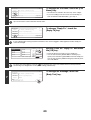


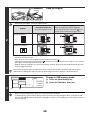
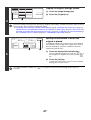
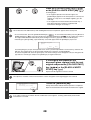
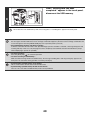
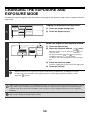

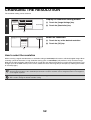
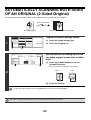

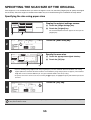
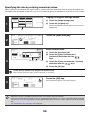
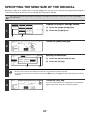

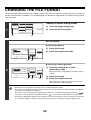

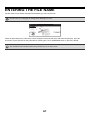
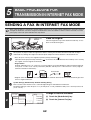


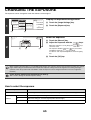


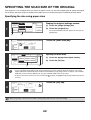
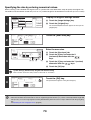
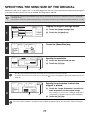
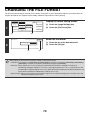
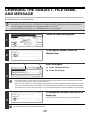
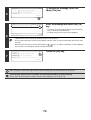
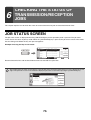
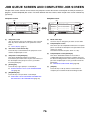
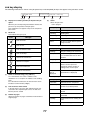
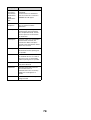
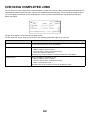

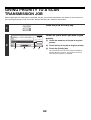
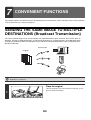
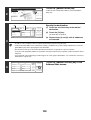

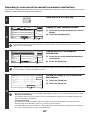
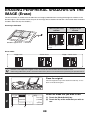
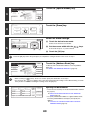
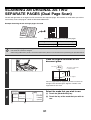
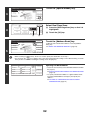

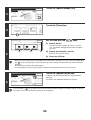

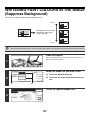
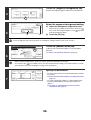
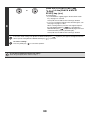
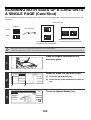

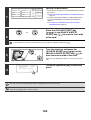
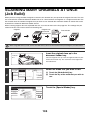

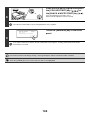

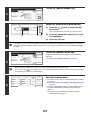
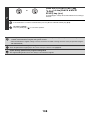
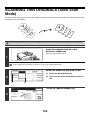
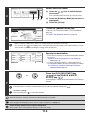
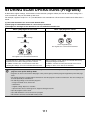
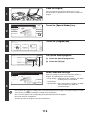
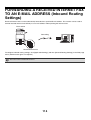
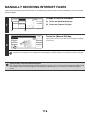
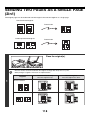
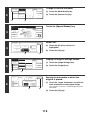
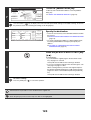
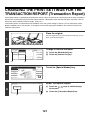
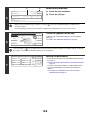
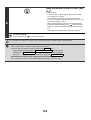
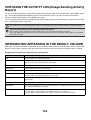


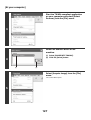
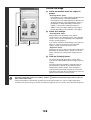
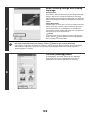


![2 Appuyez sur la touche [OK].](http://vs1.manualzilla.com/store/data/006375112_1-113b6d7be7675b26487a7e650bd0b9b3-150x150.png)