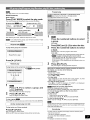
1
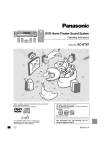
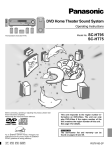
Panasonic
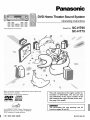
DVD Home Theater Sound System
Operating
Model No.
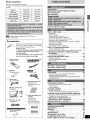
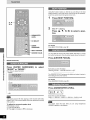
The illustration shows SC-HT75.
Before connecting, operating or adjusting this product, please read
these instructions completely.
Please keep this manual for future reference.
[DIGITAL VIDEO]
AUDIO/VIDEO
As an ENERGY
STAR ® Partner,
Panasonic
has
Instructions
SC-HT95
SC-HT75
This unit responds to the region number information on DVD-Video. The unit can only
play DVD-Video if the region number of the
disc matches the region number of this unit.
See page 5 for details.
The servicenter list and warranty
found on pages 38 and 39.
can
be
determined that this product meets the ENERGY
®
STAR guidelines for energy efficiency.
[J_
_
_
_
RQT6183-2P
THE FOLLOWING
CAUTION!
THIS PRODUCT UTILIZES A LASER.
USE OF CONTROLS OR ADJUSTMENTS
OR PERFORMANCE OF PROCEDURES OTHER THAN THOSE SPECIFIED HEREIN MAY RESULT IN HAZARDOUS RADIATION
EXPOSURE.
DO NOT OPEN
COVERS
AND DO NOT REPAIR
YOURSELF.
REFER
SERVICING
TO
QUALIFIED
PERSONNEL.
WARNING:
TO REDUCE THE RISK OF FIRE, ELECTRIC
SHOCK OR PRODUCT DAMAGE, DO NOT
EXPOSE THIS APPARATUS TO RAIN, MOISTURE, DRIPPING OR SPLASHING AND THAT
NO OBJECTS FILLED WITH LIQUIDS, SUCH
AS VASES, SHALL BE PLACED ON THE
APPARATUS.
u_
(5
APPLIES ONLY IN THE U.S.A.:
CAUTION:
This equipment has been tested and found to comply with the
limits for a Class B digital device, pursuant to Part 15 of the
FCC Rules.
These limits are designed to provide reasonable protection
against harmful interference in a residential installation. This
equipment generates, uses and can radiate radio frequency
energy and, if not installed and used in accordance with the
instructions, may cause harmful interference to radio communications. However, there is no guarantee that interference
will not occur in a particular installation. If this equipment does
cause harmful interference to radio or television reception,
which can be determined by turning the equipment off and on,
the user is encouraged to try to correct the interference by
one or more of the following measures:
eReorient or relocate the receiving antenna.
elncrease the separation between the equipment and receiver.
• Connect the equipment into an outlet on a circuit different
from that to which the receiver is connected.
CAUTION!
• Consult the dealer or an experienced radio/TV technician for
help.
oDO NOT INSTALL, OR PLACE THIS UNIT, IN A BOOKCASE, BUILT-IN CABINET OR IN ANOTHER CONFINED
SPACE. ENSURE THE UNIT IS WELL VENTILATED. TO
PREVENT
RISK OF ELECTRIC
SHOCK
OR FIRE
Any unauthorized changes or modifications to this equipment
would void the user's authority to operate this device.
HAZARD DUE TO OVERHEATING,
ENSURE THAT CURTAINS
AND ANY
OTHER
MATERIALS
DO NOT
OBSTRUCT THE VENTILATION VENTS.
eDO
NOT OBSTRUCT
THE
UNIT'S
VENTILATION
OPENINGS
WITH
NEWSPAPERS,
TABLECLOTHS,
CURTAINS, AND SIMILAR ITEMS.
eDO NOT PLACE SOURCES OF NAKED FLAMES, SUCH
AS LIGHTED CANDLES, ON THE UNIT.
eDISPOSE OF BATTERIES IN AN ENVIRONMENTALLY
FRIENDLY MANNER.
THE FOLLOWING
CANADA:
APPLIES
ONLY IN THE
This device complies with Part 15 of the FCC Rules. Operation is subject to the following two conditions: (1) This device
may not cause harmful interference, and (2) this device must
accept any interference received, including interference that
may cause undesired operation.
THE FOLLOWING
APPLIES
ONLY IN THE U.S.A. AND CANADA:
CAUTION
U.S.A. AND
CAUTION:
CAUTION"
TO PREVENT ELECTRIC
SHOCK MATCH
WIDE BLADE OF PLUG TO WIDE SLOT,
FULLY INSERT.
TO REDUCE THE RISK OF ELECTRIC
SHOCK, DO NOT REMOVE SCREWS.
NO USER-SERVICEABLE
PARTS
INSIDE.
REFER SERVICING TO QUALIFIED
SERVICE PERSONNEL.
The lightning flash with arrowhead
For units with PX printed on the outer packaging
THIS UNIT IS INTENDED
FOR USE IN MODERATE
CLIMATES.
For Latin America
THIS UNIT IS INTENDED
CLIMATES.
FOR
USE
IN
symbol, within
,_an
to the presence of uninsulated "dangerous voltage"
within the product's enclosure that may be of suffiequilateral triangle, is intended to alert the user
cient magnitude to constitute a risk of electric shock
to persons.
,_The
is intended to alert the user to the presence of
important operating and maintenance (servicing)
exclamation
within accompanying
an equilateral triangle
instructions
in the point
literature
the appliance.
TROPICAL
For areas except U.S.A. and Canada
CAUTION:
The AC voltage is different according to the area.
Be sure to set the proper voltage in your area before use.
For areas except U.S.A. and Canada
(For details, please refer to page 9.)
DANGER
- VISIBLE AND INVISIBLE LASER RADIATION WHEN OPEN.
AVOID DIRECT EXPOSURE TO BEAM.
(FDA 21 CFR)
CAUTION
- VISIBLE AND INVISIBLE LASER
AVOID EXPOSURE TO BEAM.
CLASS
I
LASER
PRODUCT
RADIATION WHEN OPEN.
(IEC60825-1)
ATTENTION - RAYONNEMENT LASERV_SIBLE ET INVISIBLE EN CAS D'OUVERTURE.
EXPOSITION DANGEREUSE AU FAISCEAU.
ADVARSEL-
RQT6183
SYNLIG OG USYNLIG LASERSTI_,LING
UNDGA UDS_ETTELSE FOR STRAUNG.
VED ,_BNING.
VARO!
- AVATTA_SA
0 LET &L_711NA N,_K'_V._, JA N_,KYM,_T(_ N
LASERSATEILYLLE.
ALA KATSO SATEESEEN.
VARNING
- SYNUG OCH OSYNLIG LASERSTRALNING
,_R (_PPNAD. BETRAKTA EJ STR,_LEN.
ADVARSEL
- SYNLI(_ OG USYNUG LASERSTPJt, LING NAR DEKSEL APNES.
UNNGA EKSPONERING
FOR STRALEN.
VORSICHT
- SICHTBARE UND UNS_CHTBARE LASERSTRAHLUNG,WENN
GE_FFNET NICHT DEM ETRAHL AUSSETZEN
_!
- _- _-_m < _ =-3"_I_F
=-J_l_ I_ -'_-
N,_R DENNA
_li_=
_ •
DEL
ABDECKUNG
(Inside of product)
(Back of product)
Dear customer
Thank you for purchasing this product•
For optimum performance and safety, please read these instructions
carefully.
SC-HT95
System
SC-HT75
Main unit
SA-HT95
SA-HT75
Front speakers
SB-AFC286
SB-AFC95
Center speaker
SB-AFC286
SB-PC89
SB-AFC95
SB-AFC95
SB-W81
SB-W95
Surround
speakers
Subwoofer
Accessories ..............................
IMPORTANT SAFETY INSTRUCTIONS
Disc information ..........................
Disc handling .............................
3
4
5
5
........
Control reference guide ....................
11
DiscsmBasic
play .........................
12
Playing MP3 ......................................
Resume function ...................................
Skipping chapters or tracks ...........................
Fast forward and rewind--SEARCH
....................
Slow-motion play/Frame-by-frame
viewing ...............
Starting play from a selected track .....................
Disc skip/Cinema/Marking
places to play again--MARKER...
Using the disc manager ..............................
Selecting groups to play .............................
Selecting still pictures--Page
Skip .....................
13
13
13
13
13
14
14
15
15
15
L_
I_"=_11:indicates features applicable to SC-HT95 only.
• SC-HT75 only.
Accessories
Please check and identify the supplied accessories. Use numbers indicated in parentheses
when asking for replacement parts•
(Only for U.S.A.)
To order accessories contact 1-800-332-5368
Discs--Convenient
or web site (http://www.panasonic.com),
(For other areas)
To order accessories,
call the dealer
Changing soundtracks,
subtitle
and angles .............................
from
whom you have made your purchase.
[]
1 Remote control
[]
Sou ndtracks/Su btitles/Angles
Using On-Screen
1 AC power supply cord
(EUR7502XF0)
functions
...............
16
A-B repeat play/Repeat play ..........................
AIt group play/Program play/Random play/All disc random play..
languages
18
.........................
Menu Icons
16
17
18
...............
19
Common procedures ................................
Disc information/Unit information ......................
Shuttle screen .....................................
19
20
21
The radio: manual tuning ...................
The radio: preset tuning ....................
22
23
Sound field ...............................
24
(RJA0065-1 D)
[]
2 Batteries
for remote control
(RJA0019-2X)
DOLBY DIGITAL and DTS/DOLBY PRO LOGIC ...........
Changing sound field and quality ......................
SUPER SURROUND/SEAT
POSITION/CENTER
FOCUS
Adjusting the bass ..................................
[]
1 Video cable
(RJL1P016B15A)
[]
1 Sheet of speaker
(RFA0631A-K)
Replacements
sets of 4.
[]
feet
sold in
1 AM loop antenna set
Convenient
functions
......................
Muting the volume/Turning off the display ................
Timer functions ....................................
Using headphones .................................
Changing
(RSA0012)
settings .........................
Common procedures ................................
Entering a password (Ratings)/Changing
the delay time ....
Using the remote control with other equipment
[]
[]
1 FM indoor antenna
(RSA0006-J)
1 Sheet of speaker-cord
stickers
(12 stickers)
One set is extra•
The sheet cannot be
purchased
[]
..
25
25
26
26
1 Power plug adaptor
(SJ P5213-2)
Operating a television/Operating
a video cassette recorder..
Changing the remote control code .....................
27
27
27
27
28
29
29
.. 30
30
31
Listening to an external source/
Recording to other equipment
.............
Optional antenna connections ...............
32
33
Troubleshooting
guide .....................
Maintenance .............................
Glossary .................................
34
35
36
separately•
Language code list .................................
Specifications
............................
Servicenter List (U.S.A.) ....................
Limited Warranty (U.S.A.) ...................
Product Service (U.S.A. and Canada) .........
36
37
38
39
39
RQT6183
Read these operating
instructions
carefully before using the unit. Follow the safety instructions
below. Keep these operating instructions
3,
1. Power source--Connect
the unit to a power source of the type
described in these instructions or as marked on the unit.
2.
€5
listed
Power lines--Take
care when setting up an outdoor antenna
that it is not near overhead power lines, electric lights, or electrical circuits, and that there is no danger of the antenna falling on
power lines, electric lights, or electrical circuits. When installing
an outdoor antenna, take extreme care not to touch such power
lines or circuits, as contact with them can be fatal.
Polarization--The
unit is equipped with a polarized power plug
where one blade is wider than the other. This safety feature ensures that the plug fits into your household AC outlet only one
way. If the plug doesn't fit one way, try reversing it. If the plug
still doesn't fit, contact an electrician to replace the obsolete out-
3.
on the unit and the safety precautions
handy for future reference.
4,
Outdoor antenna grounding--If
you connect an outdoor antenna, ground the antenna system to protect against voltage
surges and built-up static charges. Section 810 of the National
let. Do not attempt to defeat the safety purpose of the plug.
Power cord protection--Route
the AC power supply cord so
that it will not be walked on or pinched by items placed on or
Electrical Code, ANSI/NFPA No. 70-1990, provides information
about grounding of the mast and supporting structure, grounding of the lead-in wire to an antenna discharge unit, size of
against it. Never take hold of the plug or cord with wet hands.
Always grasp the plug body firmly when connecting and disconnecting it.
grounding conductors, location of antenna-discharge
unit, connection to grounding electrodes,
and requirements
for the
grounding electrode. Refer to this diagram.
4. Overloading--When
connecting the AC power supply cord, be
careful not to overload the household AC outlet, extension cord,
or outlet from any other device as this can result in fire or electric shock.
-_..,.....---
GROUND
5. Nonuse periods--Turn
the unit off when it is not in use. Unplug
the unit from the household AC outlet if it is not to be used for a
long time. Unplug the unit during lightning storms.
6. Attachments
and accessories--Use
only the attachments
accessories recommended in these operating instructions.
ANTENNA
and
/ r
I DISCHARGE
UNIT
___ ANTENNA
(NEC SECTION
" GROUNDING
i'-"
=
"'_
\
G RO(NNECS EJTIpOsN 810 -21)
POWER
Placement
]
810-20)
CONDUCTORS
SERVICE
ELECTRODE
GROUNDING
SYSTEM
(NEC ART 250, PART H)
1. Ventilation--Situate
the unit so that it receives proper ventilation. Do not install in a confined space such as a bookcase or
cabinet. Allow at least 10 cm (4 inches) clearance from the rear
of the unit. To prevent the risk of electric shock or fire due to
overheating ensure curtains and other materials do not obstruct
the unit's ventilation.
2.
Foreign material--Ensure
objects and liquids do not get into
the unit. Avoid exposing the unit to excessive smoke, dust, mechanical vibration, and shock.
3.
Magnetism--Situate
the unit away from equipment and devices
that generate strong magnetic fields.
4. Stacking--Do
not place heavy objects on top of this unit.
5. Surface--Place
the unit on a flat, level surface.
6.
Carts and stands--Use
the unit only with carts
and stands recommended by the manufacturer.
Move carts with care. Sudden stops, excessive
force, and uneven surfaces can cause carts to
overturn.
7. Wall and ceiling mounting--Do
not mount the unit on walls or
ceilings unless specified in the instructions.
Environment
1. Water
2,
and moisture--Do
NEC--NATIONAL
near a bathtub or swimming pool. Avoid damp basements.
Heat--Situate
the unit away from heat sources, such
radiators.
Do not situate where temperatures
above 35°C (95°F).
as
fall below 5°C (41°F) or rise
Unplug the unit from the household AC outlet before cleaning.
Clean with a damp cloth.
Do not use abrasive pads, scouring powders, or solvents.
1. Damage requiring service--The
unit should be serviced by
qualified service personnel if:
(a) The AC power supply cord or the plug has been damaged;
or
(b) Objects or liquids have gotten into the unit; or
(c) The unit has been exposed to rain; or
(d) The unit does not operate normally or exhibits a marked
change in performance; or
(e) The unit has been dropped or the cabinet damaged.
2. Servicing--Do
not attempt to service the unit beyond that described in these operating instructions. Refer all other servicing
to authorized servicing personnel.
3.
Replacement
parts--When
parts need replacing ensure the
servicer uses parts specified by the manufacturer or parts that
have the same characteristics as the original parts. Unauthorized substitutes
hazards.
4. Safety
check--After
may result
in fire,
electric
shock,
or other
repairs or service, ask the servicer to per-
form safety checks to confirm
condition.
RQT6183
CODE
(See page 35 for details.)
]
not use the unit near water, such as
ELECTRICAL
that the unit is in proper working
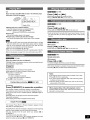
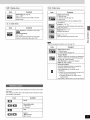
Do not use irregularly shaped discs, such as heart-shaped.
• Discs that can be played
Disc type
These can damage the unit.)
Logo
Indication used in
instructions
Im_Vjm]f:l
DVD-Audio
AUDIO
• How to hold a disc
DVD-Video
Do not touch the recorded surface.
I=lrj =]Lri
't:l
la
VIDEO
ll)
DVD-R
L_
• If the surface is dirty
Wipe it with a damp cloth and then wipe dry.
R
R4.7
Audio CD
(Including CD-R/RW
and discs recorded
DIGITAL AUDIO
with MP3)
Video CD
• If the disc is brought from a cold to a warm
environment, moisture may form on the disc
Wipe with a soft, dry, lint-free cloth before using the disc.
• Discs that cannot be played
PAL discs (the audio on DVD-Audio can be played), DVD-ROM,
DVD-RAM, CD-ROM, CDV, CD-G, +RW, DVD-RW, CVD, SVCD,
SACD, Divx Video Discs and Photo CD.
• Handling precautions
• Do not write on the label side with a ball-point pen or other writing
instrument.
eDo not use record cleaning sprays, benzine, thinner, static electric-
• Region Management Information
(DVD-Video only)
ity prevention liquids or any other solvent.
eDo not attach labels or stickers to discs. (Do not use discs with
exposed adhesive from tape or left over peeled-off stickers.)
This unit responds to the Region Management Information recorded
on DVD-Video. You cannot play the disc if the region number on the
• Do not use scratch-proof protectors or covers.
• Do not use discs printed with label printers available on the market.
DVD-Video does not correspond to the region number on the unit.
Read the disc's instructions carefully.
| llii_AWIl;.li
!1. II f1.!111. I iII
_1
t.'liYIll
I1
l_lll]
d IiI
(=ll Ill
i I
I I l'-Ill]
!11:1 illt;.
Iit
:_ IIII
I Ill
eThe region number of this unit is "1".
eYou can play discs with labels containing the region number "1" and
"ALL".
• Do not place or store discs in the following
places
• Locations exposed to direct sunlight
• Humid or dusty locations
• Locations directly exposed to a heat vent or heating appliance
• To prevent damage
• Load only 1 disc per tray.
*The region number of this unit is "4".
*You can play discs with labels containing the region number "4" and
"ALL".
• Playing DVDs and Video CDs
The producer of these discs can control how they are played so you
may not always be able to control play as described in these operating instructions. Read the disc's instructions carefully.
• CD-R and CD-RW discs
• Load discs as shown in figure.
....
iiiiiT)]iiiiiTiJ_JJiiiiiiii_
....
8 cm
(3")
This unit can play CD-DA (digital audio) and video CD format audio
CD-R and CD-RW that have been finalized (a process that enables
CD-R/CD-RW players to play audio CD-R and CD-RW) upon completion of recording.
It may not be able to play some CD-R or CD-RW due to the condition
......
ii;}i)iiiiii%JiiJiiiiiiiii_
.............
(5")
of the recording.
Panasonic DVD-R recorded and finalized on a Panasonic DVD video
• An adaptor is not needed with 8 cm (3") discs (singles).
• Set the system on a flat, level surface.
Do not set it on top of magazines, inclined surfaces, etc.
recorder are played as DVD-Video on this unit.
It may not be possible to play these discs in all cases due to the type
• Do not move the system while trays are opening/closing,
loaded.
of disc or condition of the recording.
• Do not put anything except discs in trays.
• DVD-R discs
• Do not use cleaning
cracked.
or when
discs or discs which are badly warped
or
RQT6183
SB-AFC286
SB-AFC286
SB-AFC95
oThe left and right speakers are the same.
oYou can rotate the brand plate of SB-AFC286
cally.
Main
verti-
oVibration caused by the center speaker can disrupt the picture if it
is placed directly on the television. Put the center speaker on a
rack or shelf.
Subwoofer
((_)) _
SB-W81
SB-W95
Place near the television, on the floor or a sturdy shelf so
that it won't cause vibration.
unit
Keep your speakers
at least 10 mm (l_j,)
away from the system
for proper ventilation.
cA woofer unit is located on the side of the subwoofer.
Leave 10-cm (4") clearance for it to be effective.
Place the fron
round speakers at approximately
the
dlsta--.
_
,seat __,
ing position.Same
The angles in the dia-
_
_
_
"
gram are approximate.
'
Surround
_
_'_
,,
_
speakers
Front ((_)@)/surround
_)
(_@)
_Laying
speakers
((_) Left @ Right)
SB-AFC95
"_
Place either side of listening position, or slightly to the rear,
about 1 meter (3 feet) higher than ear level.
oThe left and right speakers are the same.
--
Attaching
the speaker
feet
Attach these speaker feet to prevent vibration causing the speakers to move orfall over.
(
SB-PC89
oYou can also put this speaker directly under the television.
oDo not place the center speaker on the main unit as sound quality
will be affected.
down_
Center speaker (_)
_,_
Positioning
for best effect
How you set up your speakers can affect the bass and the sound
field. Note the following points.
oPlace speakers on flat secure bases.
oPlacing speakers too close to floors, walls, and corners can result
in excessive bass. Cover walls and windows with thick curtain.
/I k
,_
Caution
oUse the speakers
only with the recommended system. Failure to do so may lead
to damage
to the amplifier and/or the
Consult
qualified
servicein person
speakers, a and
may result
the risk ifofdamfire.
sudden change in performance.
oDo not attempt to attach these speakers to
age
occurred
if youthan
experience
a
walls has
using
methodsor other
those described in this manual.
If irregular
coloring occurs on your television
These speakers are designed to be used close to a television, but
the picture may be affected with some televisions and setup combinations.
If this occurs, turn the television off for about 30 minutes.
The television's demagnetizing
function should correct the
problem. If it persists, move the speakers further away from the
television.
Speakercords
At_rst0thespeake_'cords.
.
Twistthevinyltipandpulloff.
X
_])
_
_
-Connectthecordstotheterminalsofsamecolorsothenumbersonthestickersmatchthenumbersundertheterminals.
oNever
short-circuit positive (+) and negative (-) speaker wires.
oBe sure to connect only positive (red or gray) wires to positive
(+) terminals and negative (black or gray with blue stripe) wires
to negative (-) terminals.
Incorrect connection can damage the speakers.
• After you have completed setup and connection, wind the excess cord and keep together with string.
• The speaker nets cannot be removed.
Black
Notes on speaker
use
• You can damage your speakers and shorten their useful life if
you play sound at high levels over extended periods.
Front speaker (left)
Front speaker (right)
Surround
O Red
O Black
speaker (left)
Surround speaker (right)
Center speaker
Subwoofer
Attaching
to a wall
Front and surround speakers can be attached to a wall.
Attach four speaker feet to each speaker, ensuring they do not
cover the holes.
Set the speaker
into position.
onto screws and slide through bracket to lock
I,III_H
Speaker feet (included)
Attaching
to speaker stands
Ensure the following conditions are met when you purchase your
speaker stands.
• Observe the diameter and length of the screws and the distance
between screws as shown in the diagram.
oThe stands must be able to support over 10 kg (22 lb.) for
SB-AFC286 and 5 kg (11 lb.) for SB-AFC95.
• The stands must be stable even if the speakers are in a high
position.
5 mm (1_A4"),
pitch 0.8 mm
Screw (not included)
-
V
_"_
_(i-nP_d)",/Lo_
_';
mm
30-3,5 mm
-/////A
7. 9 mm,,
/ 106
mm (41½4")
Screw (not included)
Attach the stands
Plate thickness
with
these
ho,es,
p,us
7K!0mmI
r_
(plus %2" to 2%4") I_
/
Speaker stand
(not included)
The method for attaching speakers to a wall is the same except
that there is only one bracket.
The wall or pillar on which the speakers are to be attached should
be capable of supporting 10 kg (22 lb.) for SB-AFC286 and 5 kg
(11 lb.) for SB-AFC95 per screw.
L
(223_4 '')
Simple setup
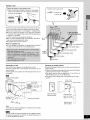
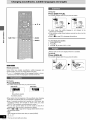
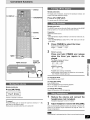
Television
The illustration shows SC-HT95.
Connect directly to your television.
Do not connect the unit through a video cassette recorder, because the picture may not be played correctly due to the copy guard.
To listen
to the televi-
Television
I
(not included)
/
S1:::
h:::
g::_
1: unit[
terminals
Audio
cable (not included)
cable (included)
i
i
For better images
S-VIDEO
OUT terminal
For better images
The S-VIDEO OUT terminal achieves a more vivid picture
than the VIDEO OUT terminal by separating the chrominance (C) and luminance (Y) signals before transmitting
them to the television.
COMPONENT
VIDEO OUT terminal
(see below)
These terminals can be used for either interlace or progressive output and provide a purer picture than the S-VIDEO OUT terminal.
Connection using these terminals outputs the color difference
signals (PB/PR) and luminance signal (Y) separately in order to
achieve high fidelity in reproducing colors.
1111_].1
(Actual results depend on the television.)
Television
Television
S video cable (not included)
_D
_[_=_©
SVIDEO
IN
J
Video cable (not included)
,__
Y
[--I_,-_
PR
COMPONENT
VIDEO IN
[_11#].1
COMPONENT
VIDEO
OUT
terminal
oThe description of the component video input terminals depends on the television or monitor (e.g. Y/PB/PR, Y/B-Y/R-Y,
Y/CB/CR). Connect to terminals of the same color.
oAfter making this connection, change the black level for a better
picture (-_ page 28, Video--Black
Level Control).
To enjoy progressive
video
1. Connect to the component video (480p) input terminals on a
television compatible with this unit's copy guard system.
2. Press [PROGRESSIVE
OUT] on the front panel so the
indicator lights (-_ page 12).
NOTE
This unit does not output
video signals
VIDEO OUT and S-VIDEO OUT terminals
"PROGRESSIVE
OUT" indicator is on.
from
when
the
the
oThe screen may shift off center when using progressive output.
Adjust the position of the screen if this occurs (-_ page 21,
Video--Horizontal
position).
oVideo will not be displayed correctly if you connect to a television that is incompatible with this unit's copy guard system.
oThis unit does not output video signals from the VIDEO OUT
and S-VIDEO OUT terminals when the "PROGRESSIVE OUT"
indicator is on.
For your reference
All televisions manufactured by Panasonic and that have 480p
input terminals are compatible. Consult the manufacturer if you
have another brand of television.
AC power supply cord
(included)
To household AC outlet
The included AC power supply cord is for use with this unit only. Do not use
it with other equipment.
Conserving
power
Before
connecting
the
AC power supply cord
The unit consumes power (for U.S.A. and Canada: approx. 0.28 W, for Latin
America and others: approx. 0.8 W) even when it is turned off with [_]. To save
power when the unit is not to be used for a long time, unplug it from the household AC outlet. Remember to reset the radio stations and any other memory
items before using the unit again.
Set the voltage.
For your
VOLT ADJ
reference
Information you enter into the unit's memory remains intact for up to a week
after the AC power supply cord is disconnected.
If the power plug will not fit your AC outlet
Use the power plug adaptor (included).
If it still doesn't fit, contact an electrical parts distributor for assistance.
(Bottom panel)
--127
V_ 110V_ 220V-230V_240 V
Use a flat-head
screwdriver
to turn the
voltage selector on the bottom of the unit
to the appropriate position for the area in
which this system is used.
If the power supply in your area is 115 V
or 120 V, please set the voltage selector
as follows:
eFor 115 V: Set to 110 V.
eFor 120 V: Set to 127 V.
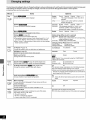
Simple setup
The remote control
Do not;
omix old and new batteries.
• Batteries
ouse different types at the same time.
cheat or expose to flame.
otake apart or short circuit.
oattempt to recharge alkaline or manganese batteries.
ouse batteries if the covering has been peeled off.
Mishandling of batteries can cause electrolyte leakage which can
damage items the fluid contacts and may cause a fire.
R6, AA, UM-3
iiiiiiiiiiiiiiii
iiiiiiiiiiiiiiii
iiiiiiiiiiiiiiiiiiiiiiiiiiiiiiii
Remove if the remote control is not going to be used for a long
period of time. Store in a cool, dark place.
elnsert so the poles (+ and -) match those in the remote control.
oDo not use rechargeable type batteries.
• Use
Aim at the sensor, avoiding obstacles,
at a maximum
7 m (23 feet) directly in front of the unit.
range
iiiiiiiiii
of
iiiiiiiii
iiiiiiiii
iiiiiiiii
iiiiiiiii
iiiiiiiii
Selecting TV screen type
3
4
' iiii
Press [4, I_] to select the "Video"
tab.
iiiiiiii
iiiiiiiiiiiiiiiiii
!!!!!!!!!!!!!!!!
Press [A, V] to select "TV Aspect"
and press [ENTER].
5
Press [&, V] to select the item and
press [ENTER].
o4:3 Pan&Scan (Factory preset)
Select if you have a regular
television and to view 16:9 software
iiiiiiiiiii
,I
iiiiiiiiiiiiiiiiiiiiiiiiii
I
I
in the pan and scan style.
iiiiiiiiiiiiiiiiii
16:9 software prohibited from being shown in the pan
and scan style will appear in the letterbox style despite the setting here.
o4:3 Letterbox
Select if you have a regular
television and to view 16:9 software
in the letterbox style.
o16:9
Select if you have a widescreen (16:9) television.
Use the television's screen modes to change the way the
picture is shown.
2-I
Remote control
6
only
Press
[ACTION]
to end the settings.
Change the setting to suit your television.
The menu language is set to English, but you can change it
to French or Spanish (=, page 28, Display--Menu
Language).
English is used in the examples.
Preparation
Turn on the television and select the appropriate
the television to suit the connections for the unit.
1
Press
[DVD/CD]
to turn on the unit.
The unit comes on automatically
ed as the source.
2
Press
[ACTION]
video input on
and "DVD/CD" is select-
to showthe
menus.
To return to the previous
Press [RETURN].
screen
[,111_]d
• When viewing video made for a standard 4:3
aspect television on a wide 16:9 aspect
television using progressive output
This unit shows the correct aspect when playing wide 16:9
aspect software, but when showing standard 4:3 aspect software, the picture is stretched horizontally to fill the screen.
olf your television can change the aspect when input is
progressive
Use the television to change the aspect to the correct one.
olf your television
cannot change the aspect when input
is progressive
Press [PROGRESSIVE
OUT] so the "PROGRESSIVE
OUT" indicator goes out. Output will now be interlace.
NOTE
This unit does not output
video signals
VIDEO OUT and S-VIDEO OUT terminals
"PROGRESSIVE
OUT" indicator is on.
from
when
the
the
iiiiiiiiiiiii
iiiiiiiiiiiiiiiiiiiiiiiiii
iiiiiiiiiiiiiiiiiiiiiiiiii
iiiiiiiiiiiiiiiiiiiiiiiiii
iiiiiiiiiiiiiiiiiiiiiiiiii
iiiiiiiiiiiiiiiiiiiiiiiiii
iiiiiiiiiiiiiiiiiiiiiiiiii
iiiiiiiiiiiiiiiiiiiiiiiiii
iiiiiiiiiiiiiiiiiiiiiiiiii
iiiiiiiiiiiiiiiiiiiiiiiiii
iiiiiiiiiiiiiiiiiiiiiiiiii
iiiiiiiiiiiiiiiiiiiiiiiiii
iiiiiiiiiiiiiiiiiiiiiiiiii
iiiiiiiiiiiiiiiiiiiiiiiiii
iiiiiiiiiiiiiiiiiiiiiiiiii
iiiiiiiiiiiiiiiiiiiiiiiiii
iiiiiiiiiiiiiiiiiiiiiiiiii
iiiiiiiiiiiiiiiiiiiiiiiiii
iiiiiiiiiiiiiiiiiiiiiiiiii
iiiiiiiiiiiiiiiiiiiiiiiiii
iiiiiiiiiiiiiiiiiiiiiiiiii
iiiiiiiiiiiiiiiiiiiiiiiiii
iiiiiiiiiiiii
Page
@
@
@
@
®
@
®
@
@
@
®
@
@
@
®
®
@
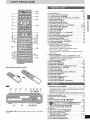
How to open the remote control
[_11#],1
Buttons O and (_) function the same as the controls on the remote
control.
(_
(_)
(_
@
(_
(_
(_
(_
(_)
(_
@
@
_)
@
(_)
(_)
(_)
@
@
Power button [_] .................................
FL display button [FL DISPLAY]
....................
Top menu button [TOP MENU] ......................
Cursor buttons [A V, _1, I_]/Enter button [ENTER] ....
Display button [DISPLAY] ..........................
Basic operation buttons
Disc skip button [DISC SKIP] .......................
Sound field control button [SFC] ....................
Channel select buttons [^, v, CHANNEL] .........
23,
Initial settings button [ACTION] ..................
10,
Subtitle button [SUB TITLE] ........................
Group button [GROUP] ............................
Page button [PAGE]
..............................
Numbered buttons (1-9, 0, _->10/ENTER) ..............
Disc button [DISC] ................................
Disc manager button [DISC MANAGER]
..............
Play mode button [PLAY MODE] ....................
Cinema button [CINEMA]
..........................
TV volume buttons [-- TV VOL -I-] ...................
Position memory button [P.MEMORY]
...............
Timer button [TIMER]
.............................
Equipment buttons and indicators
Select the equipment you want to operate.
=Press [DVD/CD] to operate this unit.
=Press [VCR] to operate a video cassette recorder.
=Press [TV] to operate a television.
These buttons light for a few seconds to indicate the remote
control mode.
@ Input select buttons
[DVD/CD, MAIN UNIT, VCR, TV, TUNER/BAND, AUX]
Pressing [DVD/CD] or [TUNER/BAND] also turns the unit
[TUNER/BAND] also switches radio bands.
(_ TV/Video button [TV/VIDEO] .........................
@ Menu button [MENU] ...............................
Return button [RETURN]
.......................
@ Muting button [MUTING] ...........................
Subwoofer level button [SUBWOOFER LEVEL] ........
Volume buttons [+, --, VOLUME] .................
Angle button [ANGLE]
............................
Audio button [AUDIO] .............................
@ Speaker channel select button [CH SELECT] ..........
@ Marker button [MARKER] ..........................
Test button [TEST] ...............................
@ Sound field and effect buttons ...................
_) Cancel button [CANCEL]
..........................
@ Mix 2ch button [MIX 2ch] ..........................
Repeat buttons [REPEAT, A-B REPEAT]
.............
12
27
12
10
19
14
25
30
29
18
15
15
12
12
15
17
14
30
13
27
u)
L_
on.
30
12
10, 29
27
26
12, 22
18
18
25
14
25
25, 26
14
25
16
@ Standby/on switch [POWER]
.......................
12
Press to switch the unit from on to standby mode or vice versa.
In standby mode, the unit is still consuming a small amount of power.
Standby/on
indicator [_/I]
When the unit is connected to the AC mains supply, this indicator
lights red in standby mode and lights green when the unit is turned on.
Disc indicators
[DISC 1-5] .........................
12
Wake timer indicator [WAKE] .......................
27
@ Display
@ Stop, tune mode button [W, TUNE MODE]
.........
12, 22
@ Pause, FM mode button [11, FM MODE]
...........
12, 22
@ I_
Progressive out indicator [PROGRESSIVE OUT] .. 12
_) I_
Progressive out button [PROGRESSIVE OUT] ....
12
Sound field control button [SFC] ...............
25
@ Volume control [VOLUME, DOWN, UP] ............
12, 22
@ Disc tray ........................................
12
Open/close button [_ OPEN/CLOSE]
................
12
Play, memory button [1_, MEMORY]
..............
12, 23
@ Skip/search, tuning buttons
[1_141/_14, I_1_/1_1_1, v TUNING A] ...............
13, 22
@ Headphone jack [PHONES]
........................
27
@ Remote control signal sensor
@ Input select button [SELECTOR]
....................
12
RQT6183
2
Press [DISC SKIP] to select a tray.
The indicator lights.
Play starts if a disc is in the tray. (One touch play)
Remote control:
1
Press [DISC] and then press [1]-[5] corresponding to the required tray.
3
TOP
Press [_] to open the disc tray and insert a disc.
Press again to close and start play.
_,_
ENTER
IRN
b-bSLOW/SEARCH
I<<1,
SKIP
_
abel must face upward.
(With double-sided discs,
load so the label for the side
you want to play faces up.)
I I PAUSE
4
Repeat steps 2 and 3 to insert other discs.
If play doesn't start after step 3
Press [I_] (PLAY).
Lights during play.
2
Center
speaker
Front
buttons
speakers
Lights if disc is
DVD-Video.
5
Adjust
Lights when Dolby
Digital is detected.
I
Surround speakers
the volume.
• To stop play
only
PROGRESSIVE
OUT indicator
(_/I
POWER
Disc
indicators
Disc
tray
3
_
only
PROGRESSIVE
OUT
•
Press [11](-_ page 13, Resume function).
• To pause play
Press [I I] during play.
Press [1_] (PLAY) to restart play.
5
"4
1
elf "Q" appears on the television
The operation is prohibited by the unit or disc.
eThe disc continues to rotate while the menu is displayed even after
you finish playing an item. Press [m] when you finish to preserve
the unit's motor and your television screen.
eVolume may be lower when playing DVDs than when playing other
discs or during television broadcasts.
If you turn the volume up, be sure to reduce the volume again before playing other sources so that a sudden increase in output does
not occur.
I<I<1/ <1<1, I_1_/
When a menu appears on the television
wm
Preparation
eTurn on the television and select the appropriate video input on the
television to suit the connections for the player.
ePress [_/I POWER] to turn on the unit.
1
Press [SELECTOR]
to select "DVD/CD".
Each time you press the button:
DVD/CD-_FM-_AM-_TV-_VCR-_AUX
I"
Remote control:
I
Press [DVD/CD].
1,I11_],1
For progressive output:
Press [PROGRESSIVE OUT] so the indicator lights.
NOTE
This unit does not output video signals from the VIDEO
OUT
and
S-VIDEO
OUT
terminals
when
the
"PROGRESSIVE
OUT" indicator is on.
RQT6183
W
_
vc_0j
Remote control only
Press the numbered buttons to select an item.
To select a 2-digit number
Example: To select item 23, press [->10/ENTER] =, [2] =, [3].
eWhen playing DVDs, you can also use [A, _', <, I_] to select
items. Press [ENTER] to confirm your selection.
Play of the selected item now begins.
Other buttons used to operate menus
Read the disc's instructions for further details about operation.
[1_1_1]: Shows the next menu.
[1<<]: Shows the previous menu.
[RETURN]: Shows the menu screen.
[TOP MENU]: Shows the first menu screen. _
[MENU]: Shows the menu screen.
]
wm
Discs recorded using MP3 differ to CDs in the following ways.
eStructure of the disc (example)
Title
Press [ I<<1] or [ IH I ].
eEach press increases the number of skips.
ePress [1<1<1/<14, IH_/IH_I] on the main unit.
]
F(Folder)q[--
Title
_ ......
123456789
J
......
Chapter (File)
/
I_gD I_WFa
J
During play
eStarting play from a selected chapter
Press the numbered buttons and press [ENTER].
Example: Chapter 23: [2] =, [3] =, [ENTER]
Press [<<]
or
ePress and hold [1<1<1/<1<1,IH_/IH_I]
(Pressing [_->10/ENTER] is unnecessary.)
eRepeat play
You can use chapter repeat or title repeat.
eAudio will be heard during the first forward search speed. You can
turn this audio off if you want to (=, page 28, Audio--Audio
during
u)
r,
_,
Search).
eProgram play, random play and disc manager
You cannot use program play, random play or disc manager.
elf you play an MP3 track that includes still picture data, it will take
some time before the music itself starts playing and the elapsed
time will not be displayed during this time. Even after the track
starts, the correct play time will not be displayed.
eThis unit is not compatible with ID3 tags.
eThis unit is not compatible with files with a sampling rate of 32 kHz.
Refer to the glossary on page 36 for more information
on the main unit.
While paused
Press [<<]
or
ePress and hold [1<1<1/<1<1,IH_/IH_I]
on the main unit.
about MP3.
Remote control only
wm
While paused
(When the elapsed play time is displayed)
"RESUME" lights on the display when the unit has recorded the position at which you stopped play.
Press [<1] or
The frame changes each time you press the button.
eThe frames change in succession if you press and hold the button.
• Pressing [! !] also activates forward frame-by-frame.
Press [1_] (PLAY) to start play from that position.
(When playing DVD-Video _* Chapter Preview below)
eThe position is cleared when:
-The unit is turned off.
Notes
• The speed of search and slow-motion increases up to 5 steps.
• Press [1_] (PLAY) to restart play.
• You cannot move backwards with Video CD during frame-
-The disc is changed or removed.
-A source other than DVD/CD is selected.
ePress [m] to clear the position.
Position Memory function
_
by-frame and slow-motion.
• Frame-by-frame and slow-motion
picture parts of DVD-Audio.
_....
only work on the moving
During play
Press [P.MEMORY]
to memorize
a position.
The message "Position memorized" appears on the television.
This position is saved if you turn the unit off or change the source.
When you turn the unit on or reselect DVD/CD, "RESUME" lights on
the display.
Press [1_] (PLAY) to start play from the memorized position.
The position is cleared.
(When playing DVD-Video -_ Chapter Preview below)
When playing Video CDs with playback
control
Pressing buttons to perform skip, search or slow-motion
may
take you to a menu screen.
Chapter Preview
The message "Press PLAY to Preview Chapters"
appears immedi-
ately after you press [1_] (PLAY).
Press [1_] (PLAY) while the message is displayed and the beginning
portions of each chapter up to the current one are played.
Full play resumes from the point where you pressed
[P.MEMORY].
(This feature works only within a title.)
If you do not press [1_] (PLAY), the message disappears
starts from where you pressed [m] or [P.MEMORY].
[m]
or
and play
RQT6183
_
____t_
¸____ :::::
___;,___;
;;;;;;;;_;; ;
iiiiii
iiiii
iiiii
iiiiii
iiiii
iiiii
iiiiii
iiiii
iiiii
iiiiii
iiiii
iiiii
iiiiii
iiiii
iiiii
[ii!_i!iii!i!_!i_i_!iii_!i
;;;;;;;_;tttt;;
;;; ;;;;;_i ;
;;_
i_i_i!ll !ii_iiiiii
I!iiiii_!iJ!i_!_ii!ii!ii!
ii!ii!ii
!ii!ii!i
i!ii!ii!
ii!ii!ii
!ii!ii!i
i!ii!ii!
ii!ii!ii
!ii!ii!i
i!ii!ii!
ii!ii!ii
!ii!ii!i
i!ii!ii!
ii!ii!ii
!ii!ii!i
i!ii!ii!
ii!ii!ii
!ii!ii!i
i!ii!ii!
ii!ii!ii
!ii!ii!i
i!ii!ii!
ii!ii!ii
!ii!ii!i
i!ii!ii!
ii!ii!ii
!ii!ii!i
i!ii!ii!
ii!ii!ii
!ii!ii!i
i!ii!ii!
ii!ii!ii
!ii!ii!i
i!ii!ii!
ii!ii!ii
!ii!ii!i
i!ii!ii!
ii!ii!ii
!ii!ii!i
i!ii!ii!
ii!ii!ii
!ii!ii!i
i!ii!ii!
ii!ii!ii
!ii!ii!i
i!ii!ii!
ii!ii!ii
!ii!ii!i
i!ii!ii!
ii!ii!ii
!ii!ii!i
i!ii!ii!
ii!ii!ii
!ii!ii!i
i!ii!ii!
ii!ii!ii
!ii!ii!i
i!ii!ii!
ii!ii!ii
!ii!ii!i
i!ii!ii!
ii!ii!ii
!ii!ii!i
i!ii!ii!
ii!ii!ii
!ii!ii!i
i!ii!ii!
ii!ii!ii
!ii!ii!i
i!ii!ii!
ii!ii!ii
!ii!ii!i
i!ii!ii!
ii!ii!ii
!ii!ii!i
i!ii!ii!
ii!ii!ii
!ii!ii!i
i!ii!ii!
ii!ii!ii
!ii!ii!i
i!ii!ii!
ii!ii!ii
!ii!ii!i
i!ii!ii!
ii!ii!ii
!ii!ii!i
i!ii!ii!
ii!ii!ii
!ii!ii!i
i!ii!ii!
ii!ii!ii
!ii!ii!i
i!ii!ii!
ii!ii!ii
!ii!ii!i
i!ii!ii!
ii!ii!ii
!ii!ii!i
i!ii!ii!
ii!ii!ii
!ii!ii!i
i!ii!ii!
ii!ii!ii
!ii!ii!i
i!ii!ii!
ii!ii!ii
!ii!ii!i
i!ii!ii!
ii!ii!ii
!ii!ii!i
i!ii!ii!
ii!ii!ii
!ii!ii!i
i!ii!ii!
ii!ii!ii
!ii!ii!i
i!ii!ii!
ii!ii!ii
!ii!ii!i
i!ii!ii!
ii!ii!ii
!ii!ii!i
i!ii!ii!
ii!ii!ii
!ii!ii!i
i!ii!ii!
ii!ii!ii
!ii!ii!i
i!ii!ii!
ii!ii!ii
!ii!ii!i
i!ii!ii!
ii!ii!ii
!ii!ii!i
i!ii!ii!
ii!ii!ii
!ii!ii!i
i!ii!ii!
ii!ii!ii
!ii!ii!i
i!ii!ii!
ii!ii!ii
!ii!ii!i
i!ii!ii!
ii!ii!ii
!ii!ii!i
i!ii!ii!
ii!ii!ii
!ii!ii!i
i!ii!ii!
ii!ii!ii
!ii!ii!i
i!ii!ii!
ii!ii!ii
!ii!ii!i
i!ii!ii!
ii!ii!ii
!ii!ii!i
i!ii!ii!
ii!ii!ii
!ii!ii!i
i!ii!ii!
ii!ii!ii
!ii!ii!i
i!ii!ii!
ii!ii!ii
!ii!ii!i
i!ii!ii!
ii!ii!ii
!ii!ii!i
i!ii!ii!
ii!ii!ii
!ii!ii!i
i!ii!ii!
ii!ii!ii
!ii!ii!i
i!ii!ii!
ii!ii!ii
!ii!ii!i
i!ii!ii!
ii!ii!ii
!ii!ii!i
i!ii!ii!
ii!ii!ii
!ii!ii!i
i!ii!ii!
ii!ii!ii
!ii!ii!i
i!ii!ii!
ii!ii!ii
!ii!ii!i
i!ii!ii!
ii!ii!ii
!ii!ii!i
i!ii!ii!
ii!ii!ii
!ii!ii!i
i!ii!ii!
ii!ii!ii
!ii!ii!i
i!ii!ii!
ii!ii!ii
!ii!ii!i
i!ii!ii!
ii!ii!ii
!ii!ii!i
i!ii!ii!
ii!ii!ii
!ii!ii!i
i!ii!ii!
ii!ii!ii
!ii!ii!i
i!ii!ii!
ii!ii!ii
!ii!ii!i
i!ii!ii!
ii!ii!ii
!ii!ii!i
i!ii!ii!
ii!ii!ii
!ii!ii
i!iiii
wm
Press [DISC SKIP].
Play starts from the beginning of the disc in the next tray.
You will skip to tray 1 when the current tray is 5.
[DISC SKIP] does not work during program and random play or while
the disc manager is on.
ENTER
_I<1,
SKIP
• STOP
u)
Remote control
DISC SKIP
only
You can change the picture quality for movie viewing.
Press
PAGE
GROUP
[CINEMA].
MARKER
1-5--Each time you press the button:
C: Mellows images and enhances detail in dark scenes.
Numbered
buttons
DISC
DISC
N: Normal mode (Factory preset)
CANCEL
For your reference
You can make finer adjustments to the picture if desired (=, page 21,
Digital picture mode--User
mode).
REPEAT
wm
(When the elapsed play time is displayed)
Remote control only
Remote control only
1
2
3
You can mark up to 5 points on a disc to return to later.
Press [DISC].
Press [1]-[5]
During play
Press [MARKER].
to select a disc.
Wait for the disc to change and play to start
Press the numbered
the track.
buttons
to select
To select a 2-digit number
Example: To select track 23, press [=>10/ENTER] =, [2] =, [3].
2
Press [ENTER]
to mark.
at the point you want
To select another marker, press [<,
I_].
Play starts from the selected item.
To play from a marked position
Press [<, I_] to select a marker number and press [ENTER].
This works only when stopped with some discs.
To clear a marker
Press [<,
I_] to select a marker number and press [CANCEL].
=Some subtitles may fail to appear around the marker.
=All the markers are cleared when:
-The unit is turned off.
-The disc is changed or removed.
-A source other than DVD/CD is selected.
RQT6183
I mivjm_:_
Remote control only
Remote control only
The disc manager allows you to choose one track or disc to play or to
play all five discs in succession.
The tracks on DVD-Audio are divided into groups. How these groups
are played differs with the disc so read the instructions that came
with the disc for further details.
1
While stopped
Press [DISC MANAGER]
desired method.
to select the
1
Press [GROUP].
The group number changes each
Each time you press the button:
(1-TRACK):
time you press the button.
One track play
4,
(1-DISC): Plays one disc.
2
3
Press [ENTER].
Press the numbered
buttons to select
the track number and press [ENTER].
4,
',_
: _ -
i (ALL-DISC):
_.
The selected group and track begin to play.
Plays five discs in succession.
ALL DiSCi
4,
Playing all the groups in succession (= page 17, All group play)
(NORMAL):
Normal play (off)
[
2
Select the disc and track.
oWhen selecting "l-DISC",
press [DISC] and [1]-[5].
oWhen selecting "l-TRACK",
press the numbered buttons.
To select a 2-digit number
Example: To select track 23: press [_->10/ENTER] m [2] m [3].
You can also select the track by pressing [ 14_1] and [1_1_1].
3
Press [11_](PLAY).
To cancel disc manager
Press [m].
To play a track or disc repeatedly
Press [REPEAT] during disc manager play.
oYou cannot use the disc manager while "RANDOM" or "PRGM" are
on.
oWhen playing video CDs with playback control in the "A" or "ALL
DISC" mode, you can play the disc without having to operate the
disc's menus.
oThe disc manager skips any DVD and MP3 discs that are loaded.
Playing bonus groups
]
Some discs contain bonus groups. To enjoy these groups you may
have to enter a password. Refer to the disc's jacket.
1. Press [GROUP] to select the bonus group and press [ENTER].
2. Enter the 4-digit password with the numbered buttons and press
[ENTER].
• If you enter the wrong password, you can erase a digit by pressing [CANCEL].
3. Press the numbered buttons to select a track and press [ENTER].
• The password is cleared when:
-The unit is turned off.
-The disc is changed or removed.
-A source other than DVD/CD is selected.
I mivjm_:_
Remote control only
During play
Press [PAGE].
The page changes each time you press the button.
RQT6183
)i_i_i
_i_i_
i_i_i
_i_i_i
_i_i_
i_i_i
_i_i_i
_i_i_
i_i_i
_i_i_i
_i_i_
i_i_i
_i_i_i
_i_i_
i_i_i
_i_i_i
_i_i_
i_i_i
_i_i_i
_i_i_
i_i_i
_i_i_i
_i_i_
i_i_i
_i_i_i
_i_i_
i_i_i
_i_i_i
_i_i_
i_i_i
_i_i_i
_i_i_
i_i_i
_i_i_i
_i_i_
i_i_i
_i_i_i
_i_i_
i_i_i
_i_i_i
_i_i_
i_i_i
_i_i_i
_i_i_
i_i_i
_i_i_i
_i_i_
i_i_i
_i_i_i
_i_i_
i_i_i
_i_i_i
_i_i_
i_i_i
_i_i_i
_i_i_
i_i_i
_i_i_i
_i_i_
i_i_i
_i_i_i
_i_i_
i_i_i
_i_i_i
_i_i_
i_i_i
_i_i_i
_i_i_
i_i_i
_i_i_i
_i_i_
i_i_i
_i_i_i
_i_i_
i_i_i
_i_i_i
_i_i_
i_i_i
_i_i_i
_i_i_
i_i_i
_i_i_i
_i_i_
i_i_i
_i_i_i
_i_i_
i_i_i
_i_i_i
_i_i_
i_i_i
_i_i_i
_i_i_
i_i_i
_i_i_i
_i_i_
i_i_i
_i_i_i
_i_i_
i_i_i
_i_i_i
_i_i_
i_i_i
_i_i_i
_i_i_
i_i_i
_i_i_i
_i_i_
i_i_i
_i_i_i
_i_i_
i_i_i
_i_i_i
_i_i_
i_i_i
_i_i_i
_i_i_
i_i_i
_i_i_i
_i_i_
i_i_i
_i_i_i
_i_i_
i_i_i
_i_i_i
_i_i_
i_i_i
_i_i_i
_i_i_
i_i_i
_i_i_i
_i_i_
i_i_i
_i_i_i
_i_i_
i_i_i
_i_i_i
_i_i_
i_i_i
_i_i_i
_i_i_
i_i_i
_i_i_i
_i_i_
i_i_i
_i_i_i
_i_i_
i_i_i
_i_i_i
_i_i_
i_i_i
_i_i_i
_i_i_
i_i_i
_i_i_i
_i_i_
i_i_i
_i_i_i
_i_i_
i_i_i
_i_i_i
_i_i_
i_i_i
_i_i_i
_i_i_
i_i_i
_i_i_i
_i_i_
i_i_i
_i_i_i
_i_i_
i_i_i
_i_i_i
_i_i_
i_i_i
_i_i_i
_i_i_
i_i_i
_i_i_i
_i_i_
i_i_i
_i_i_i
_i_i_
i_i_i
_i_i_i
_i_i_
i_i_i
_i_i_i
_i_i_
i_i_i
_i_i_i
_i_i_
i_i_i
_i_i_i
_i_i_
i_i_i
_i_i_i
_i_i_
i_i_i
_i_i_i
_i_i_
i_i_i
_i_i_i
_i_i_
i_i_i
_i_i_i
_i_i_
i_i_i
_i_i_i
_i_i_
i_i_i
_i_i_i
_i_i_
i_i_i
_i_i_i
_i_i_
i_i_i
_i_i_i
_i_i_
i_i_i
_i_i_i
_i_i_
i_i_i
_i_i_i
_i_i_
i_i_i
_i_i_i
_i_i_
i_i_i
_i_i_i
_i_i_
i_i_i
_i_i_i
_i_i_
i_i_i
_i_i_i
_i_i_
i_i_i
_i_i_i
_i_i_
i_i_i
_i_i_i
_i_i_
i_i_i
_i_i_i
_i_i_
i_i_i
_i_i_i
_i_i_
i_i_i
_i_i_i
_i_i_
i_i_i
_i_i_i
_i_i_
i_i_i
_i_i_i
_i_i_
i_i_i
_i_i_i
_i_i_
i_i_i
_i_i_i
_i_i_
i_i_i
_i_i_i
_i_i_
i_i_i
_i_i_i
_i_i_
i_i_i
_i_i_i
_i_i_
i_i_i
_i_i_
_i_i_
i_i_i
_i_i
_i_
i_i_
_i_
_i
i_
__i
During play
Press [REPEAT].
Each time you press the button:
Im_Vhm__*l
A_
Track ---+Whole group ---+OFF
I
V m
<,_
ENTER
I<14, _
SKIP
I_1_
SLOW/SEARCH
T
_
))_))
)_))
) _)()
_(
CL) _)() _))
+
i
During Allgroup, Program,
played instead of "G".
u)
or Random
play mode, "A" is dis-
(MP3 disc)
Chapter ------_ Title --------->OFF
I
r_
÷
I
Numbered
buttons
DISC
PLAY
MODE
Repeat on_-->OFF
CANCEL
GER setting (=, page 15).
an
tracks
as follows depending
rmalrepeat
or
1-TRACK
ALL-DISC
REPEAT
REPEAT
I
is c
i ,_
...........
_
ALL
_
i
DISC
..............
J
J
If the Video CD has playback control
1. Press [m].
2. Press the numbered buttons to select a track to start play (-_
page 14).
3. Press [REPEAT] (-_ above).
You can repeat a section between
track.
points A and B within a title or
You cannot use repeat play to repeat an entire DVD-Video or an entire MP3 disc.
During play
Press [A-B REPEAT] at the starting
point (A).
Press [A-B
point (B).
REPEAT]
at the finishing
A-B repeat starts.
To cancel
Press [A-B REPEAT] until "_"
is displayed.
=Some subtitles recorded around point A or B may fail to appear.
eThe unit automatically determines the end of a title/track as point B
when the end of the title/track is reached.
RQT6183
',
(When the elapsed play time is displayed)
Remote control only
2
T
on the DISC_'_
• To repeat only your favorite tracks
Start program play (-_ page 17) and press [REPEAT] to display the
repeat mode you like.
IDIVJD___
Program
(There is no on-screen display.)
Remote control
]
play
To play a maximum of 24 tracks in a programmed order
I_
Select tracks from the disc in the play position.
Select tracks from any disc.
only
While stopped
Press [PLAY MODE] to select the play mode.
_LAY:M_DE
e.g. I_
The mode changes as follows each time you press the button.
All group
play (15_J5_31only)
t
Program
play (e.g.
All disc random play
Normal play
(
_
only)
)
_Random play
1
After selecting the mode, follow the steps for the mode.
Press the numbered
If you select bonus groups, you will have to enter a 4-digit
password
play
To play all the groups
2
in succession
steps 1 and 2 to program other tracks.
Step I is unnecessary when programming tracks on the same disc.
• I_'Tj_31 To select a track using the cursor buttons
Press [ENTER] and [A, T'] to select a group or track, then
press [ENTER] again to register the number.
All the tracks in the selected group are selected when you
select "ALL".
Press PLAY to start
Press [1_] (PLAY).
3
play
Press [I_](PLAY).
Play now begins in the programmed
To play tracks on the current disc randomly
e.g. I_
(three groups)
1
i
the display, you can also do the following.
• To add tracks
Repeat steps 1 and 2.
• To check program contents
Press [ 14<1] or [ IH_I ].
• To clear tracks
3
Press [CANCEL] to clear the last track in the program, or press
[1<<] or [IH_I] to select a track and press [CANCEL].
• To clear the whole program
Press [I] so "CLEAR" is displayed. (If "CLEAR" is not displayed,
start and stop play, then press [i] again.)
I o]kvJ
_._
Press
press
2
2
sequence.
When play is stopped and the program contents are shown on
Choose a group or groups.
All
to select
Press [DISC] and [1]-[5] to select the disc.
Press the numbered buttons to select
a track.
*Repeat
Random
buttons
a group.
(= page 15).
All group
II]kvJI_._l
[,4,
I_] to select
a group
and
[ENTER].
*You can select more than one group.
Press [1_] (PLAY).
Play now begins in random order.
To clear a group
Press [4, I_] to select the group you want to clear, then press [ENTER].
All disc random
To play tracks
on all discs
play
randomly
(Follow the on-screen instructions.)
To add or change groups or tracks
Press [A, T] to select an available item, then repeat steps 1 and 2.
To move to the page before or after the one shown
Press [<4] or [IH_].
To clear a track
1. Select the item you want to clear.
2. Select "Clear" with [A T, <, I_] and press [ENTER].
To clear the whole program
Select "Clear all" with [A, T, 4, I_] and press [ENTER].
Groups, discs or tracks the unit cannot find can be programmed but are
canceled during play. This is also the case if you program DVD-Audio,
DVD-Video and MP3 discs.
Press [1_] (PLAY).
[
Play now begins in random order.
=DVD and MP3 discs are skipped during all disc random play.
The play mode is canceled (normal play mode is restored) when:
-The unit is turned off.
Normal
play
]
-The disc is changed or removed.
-A source other than DVD/CD is selected.
The program is retained in memory.
RQT6183
During play
Press [SUB TITLE].
The number changes each time you press the button.
ove
oln some cases, the subtitle
selected one immediately.
u)
Je t'aime
language
is not changed
to the
olf the subtitles overlap closed captions recorded on discs, turn the
subtitles off.
oRefer to []
on page 20 for language abbreviations.
SUB
To clear/display
c_
the subtitles
1. Press [SUB TITLE].
2. Press [1_].
3. Press [A, Y] to select "OFF" or "ON".
"ANGLE" lights on the unit's display when this is available.
During
Press
play
[ANGLE].
The number changes each time you press the button.
wm
Remote control only
Some DVDs
have multiple
soundtracks,
subtitle
languages
and
camera angles, and you can change these during play.
o"-" or "--" is displayed instead of the language number in circumstances such as when no language is recorded on the disc.
During play
Press [AUDIO].
The number changes each time you press the button.
DVD-Audio
DVD-Video
_selected
Soundtrack playing
oPlay restarts from the beginning of the soundtrack when changing
DVD-Audio soundtracks that are accompanied by still pictures.
oEven if a second soundtrack isn't recorded on a DVD-Audio, two
soundtrack numbers will normally be shown when you press
[AUDIO]. The soundtrack currently playing is number 1.
oYou can also use this button to turn the vocals on and off on
karaoke discs. Read the disc's instructions for details.
oRefer to []
and []
on page 20 for language abbreviations
dio signal type details.
o_
Audio changes as follows each time you press [AUDIO]:
LR-+L-+R
¢___J
RQT6183
This may not work with some discs.
and au-
2
IUnit information only I
While the leftmost icon is highlighted
Press
[A,
V]
to select
the menu,
Each time you press the button:
e.g. DVD-Video
-->Play menu
A, T, <1, I_-ENTER
Display menu
Audio menu
e)
-+Video
3
4
menu
Press [<,
I_] to select the item.
Press [&,
V] to select the setting.
oltems with "A" or ","
Numbered
buttons
above and below can be changed
by
[A, ,].
oPress [ENTER] if the setting does not change after pressing
[A, _].
CANCEL
oSome items require different operations.
tions on the following pages.
Read the explana-
For your reference
oDepending on the condition of the unit (playing, stopped, etc.) and
the type of software you are playing, there are some items that you
cannot select or change.
oWhen numbers are displayed (e.g. title No.), the numbered buttons
are also effective for setting. After entering the numbers, press
wm
Remote control only
On-Screen
[ENTER] to register the setting.
Menu Icons are menus that contain information about the
disc or unit. These menus allow you to perform operations by changing this information.
To clear the menus
Press [RETURN] until the menus disappear.
• To change the position
of the menus
1. Press [_1, I_] to select the rightmost icon.
2. Press [A, _'] to move the menus.
1
(There are 5 positions.)
Press [DISPLAY].
Each time you press the button:
e.g. DVD-Video
-->Disc information
Unit information
Shuttle
_
_
n_
n_
(= step 2)
[]
_mu_
H
screen
--Original display
oThe screens depend on disc contents.
RQT6183
e.g. DVD-Video
Icon
Icon
Content
Subtitle language
(See [] below for language
abbreviations.)
Content
Subtitles
I_
Group number
I_
I_
Track number
Title number
I_
Chapter number
on/off
ON_--_OFF
Angle number
u)
Time
[]
Select a position to start play by
specifying a time with the
numbered buttons.
Changing the time display
Press [A, _] to show the elapsed
play time, remaining time for the
track, or remaining time for the
group.
®
Still picture number
Selected picture is shown during
play.
Soundtrack
Soundtrack
language
(See [] at right for language
abbreviations.)
Audio signal type
(See []
Audio/Subtitle
ENG:
FRA:
DEU:
ITA:
ESP:
NLD:
English
French
German
Italian
Spanish
Dutch
Icon
OFF, VI+V2,
1: Center
2: Front left+Front
3: Front left+Front
V1 or V2
Content
CHI:
KOR:
MAL:
VIE:
THA:
:
Chinese
Korean
Malay
Vietnamese
Thai
Others
0: No surround
1: Mono surround
2: Stereo surround (left/right)
(Karaoke DVD only)
Solo: OFF or ON
Duet:
Swedish
Norwegian
Danish
Portuguese
Russian
Japanese
.1: Subwoofer signal
(not displayed if there is no subwoofer signal)
at right for details.)
Karaoke vocal on/off
I OFFI
SVE:
NOR:
DAN:
POR:
RUS:
JPN:
[] Signal type/data
LPCM/PPCM/rlrlDigital/DTS:
Signal type
k (kHz):
Sampling frequency
b (bit):
Number of bits
ch (channel): Number of channels
Example:
3/2. lch
®
il r.3
language
right
right+Center
Icon
Content
A-B repeat (= page 16)
[ENTER] (start point) = [ENTER] (finish point)
To cancel: [ENTER]
I_
Play mode display
--Normal play
RND: Random play
PGM: Program play
ALL: All group play
Repeat play (= page 16)
Marker (=, page 14)
You can mark up to 5 positions to play again.
[ENTER] (The unit is now ready to accept markers,)
Track (T)+---_Whole
group (G)+---_OFF
During All group, Program, or Random play
mode, "A" is displayed instead of "G".
To mark a position
[ENTER] (at the desired point)
To mark another position: [_1, I_] =, [ENTER]
_lvJ_HvJ
Chapter (C)+---_Title (T)+---_OFF
RQT6183
To recall a marker:
[_1, I_] =, [ENTER]
To erase a marker:
[_1, I_] =, [CANCEL]
_°
[_
Display menu
Icon
Content
Video menu
]
Icon
I/P/B display (-_ page 36)
ON_--_OFF
Displays the picture type (I/P/B) in the still
picture mode.
Content
Digital picture mode
N: Normal mode
C: Cinema mode (= page 14)
U: User mode
The following items are also displayed when
you select "U".
_ Audio menu
Contrast (-7 to +7)
Increases the contrast between white and black
Icon
Content
parts of the picture.
Brightness
(Dolby Digital/DTS, 3-channelor over only)
(0 to +15)
Brightens the picture.
ImlVjm]LvJ
Dialogue Enhancer
ON_-_OFF
Color (-7 to +7)
Adjust the shade of the picture's color.
The volume of the dialogue from the center
channel is raised when you select "ON".
When the progressive indicator is on (= page 12):
Icon
Content
Digital picture mode
N: Normal mode
C: Cinema mode (= page 14)
Transfer
MODE
Select the method of conversion for progressive
output to suit the type of material being played
(_, page 36, "Film and video").
Auto (normal): for viewing film material
Video: for video material
n
Horizontal position
Press the numbered buttons to change the
horizontal position of the picture.
After highlighting the icon shown at left:
1. Press [1].
2. Press [1] to move the picture to the left or [3]
to move the picture to the right.
• Pressing [2] returns the position to the
factory preset.
This position is saved even if you turn the unit off.
There are five speeds for both backward and forward slow-motion
and search.
The numbers on either side of the shuttle screen indicate the maximum speeds of the search.
Icon
Content
Pause
_
Slow-motion
-1: Backward
I,-: Forward
play
Play
Search
_
<4: Backward
I,_1_: Forward
RQT6183
3
Press [TUNING (v or ^)]
frequency
of the required
to select the
station.
Displayed when a stereo FM broadcast
is being received.
TUNER/BAND
Displayed when a radio station is tuned.
Press and hold [TUNING (V or ix )] until the frequency starts
scrolling to start automatic tuning. Tuning stops when a station is found.
4
Adjust the volume.
Jr',
VOLUME
If noise
is excessive
]
in FM
Main unit only
u)
Press [FM MODE] to display
_/I
POWER
TUNE MODE
FM MODE
VOLUME
DOWN, UP
"MONO".
This mode improves sound quality if reception
casts are heard in monaural.
is weak but broad-
Press [FM MODE] again to cancel the mode.
The mode is also canceled when you changed the frequency.
Turn "MONO" off for normal listening.
Stereo and monaural broadcasts are automatically
are received.
V TUNING/k
played as they
SELECTOR
Allocation
Radio stations can be tuned manually by selecting the station's
frequency or they can be preset into channels to make it easy to tune
Main unit only
(=, page 23).
Unless otherwise indicated, frequency display examples shown are
from the model for the U.S.A., Canada, and units with PX printed on
system.
settings
Each country allocates broadcast
]
bands according to their particular
the outer packaging.
You can change the FM step. The step is factory-set to 0.2 MHz, but
you can change it to receive broadcasts allocated 0.1-MHz steps.
Preparation
Press [_/I POWER] to turn on the unit.
1
Press
[SELECTOR]
to select
"FM"
or
"AM".
Each time you press the button:
DVD/CD-_ FM-_AM-_TV-*VCR-_AUX
f
You can change the AM step. The step is factory-set to 9 kHz, but
you can change it to receive broadcasts allocated 10-kHz steps.
(_ Press [SELECTOR] to select "FM" (for either band).
(_) Press and hold [SELECTOR].
I
After a few seconds, the current minimum frequency flashes on
the display. Continue to hold the button down. The minimum fre-
eRemote control: Press [TUNER/BAND].
quency changes and the step is changed.
To return to the original step, repeat the above steps.
2
Press
[TUNE
"MANUAL".
MODE]
Each time you press the button:
MANUALHPRESET
RQT6183
to
select
Preset in channels (FM and AM) will be changed
Preset them again.
by this procedure.
1
2
Tune to "FM 87.50 MHz" (-_ page 22).
Press and hold [MEMORY].
The FM stations the unit can receive are preset.
TUNER/BAND
3
4
Tune to "AM 522 kHz" (or "AM 520 kHz")
(=, page 22).
Press and hold [MEMORY].
The AM stations the unit can receive are preset.
A, V
CHANNEL
+,
VOLUME
The last station to be preset is displayed when presetting finishes.
Main unit only
a
Preset the stations one at a time.
buttons
MEMORY
VOLUME
DOWN, UP
1
Tune to the station
2
Press [MEMORY]
3
Press [TUNING
channel.
4
Press [MEMORY].
(=, page 22).
twice.
(v
or A)]
to select a
The station occupying a channel is erased if another station is preset
in that channel.
V TUNING
A
SELECTOR
There are two methods of presetting stations.
1
Automatic presetting: The stations the tuner can receive are preset.
Manual presetting:
You can select the stations to preset and the
order they are preset in.
Press [TUNER/BAND]
or "AM".
to select
"FM"
oMain unit: Press [SELECTOR].
Each time you press the button:
DVD/CD-_FM-_AM-_TV-_VCR-_AUX
Up to 12 stations can each be set in the FM and AM bands.
I
Main unit only
1
Tune to "FM 87.9 MHz" (or"FM 87.5 MHz")
2
(= page 22).
2
Press
and hold
4
Tune to "AM 520 kHz"
buttons
to select
or
the
To select a 2-digit number
[MEMORY].
Example: To select channel 12, press [_->10/ENTER] =_ [1] =_[2].
oMain unit: Press [TUNING (VorA)]
while "PRESET" is
selected.
The FM stations the unit can receive are preset.
3
Press
the
numbered
[CHANNEL
(^ or v)]
channel.
(-_ page 22).
Press and hold [MEMORY].
The AM stations the unit can receive are preset.
3
Adjust the volume.
The last station to be preset is displayed when presetting finishes.
RQT6183
ii_i
_i
_i_i
_i
_i_i
_i
_i_i
_i
_i_i
_i
_i_i
_i
_i_i
_i
_i_i
_i
_i_i
_i
_i_i
_i
_i_i
_i
_i_i
_i
_i_i
_i
_i_i
_i
_i_i
_i
_i_i
_i
_i_i
_i
_i_i
_i
_i_i
_i
_i_i
_i
_i_i
_i
_i_i
_i
_i_i
_i
_i_i
_i
_i_i
_i
_i_i
_i
_i_i
_i
_i_i
_i
_i_i
_i
_i_i
_i
_i_i
_i
_i_i
_i
_i_i
_i
_i_i
_i
_i_i
_i
_i_i
_i
_i_i
_i
_i_i
_i
_i_i
_i
_i_i
_i
_i_i
_i
_i_i
_i
_i_i
_i
_i_i
_i
_i_i
_i
_i_i
_i
_i_i
_i
_i_i
_i
_i_i
_i
_i_i
_i
_i_i
_i
_i_i
_i
_i_i
_i
_i_i
_i
_i_i
_i
_i_i
_i
_i_i
_i
_i_i
_i
_i_i
_i
_i_i
_i
_i_i
_i
_i_i
_i
_i_i
_i
_i_i
_i
_i_i
_i
_i_i
_i
_i_i
_i
_i_i
_i
_i_i
_i
_i_i
_i
_i_i
_i
_i_i
_i
_i_i
_i
_i_i
_i
_i_i
_i
_i_i
_i
_i_i
_i
_i_i
_i
_i_i
_i
_i_i
_i
_i_i
_i
_i_i
_i
_i_i
_i
_i_i
_i
_i_i
_i
_i_i
_i
_i_i
_i
_i_i
_i
_i_i
_i
_i_i
_i
_i_i
_i
_i_i
_i
_i_i
_i
_i_i
_i
_i_i
_i
_i_i
_i
_i_i
_i
_i_i
_i
_i_i
_i
_i_i
_i
_i_i
_i
_i_i
_i
_i_i
_i
_i_i
_i
_i_i
_i
_i_i
_i
_i_i
_i
_i_i
_i
_i_i
_i
_i_i
_i
_i_i
_i
_i_i
_i
_i_i
_i
_i_i
_i
_i_i
_i
_i_i
_i
_i_i
_i
_i_i
_i
_i_i
_i
_i_i
_i
_i_i
_i
_i_i
_i
_i_i
_i
_i_i
_i
_i_i
_i
_i_i
_i
_i_i
_i
_i_i
_i
_i_i
_i
_i_i
_i
_i_i
_i
_i_i
_i
_i_i
_i
_i_i
_i
_i_i
_i
_i_i
_i
_i_i
_i
_i_i
_i
_i_i
_i
_i_i
_i
_i_i
_i
_i_i
_i
_i_i
_i
_i_i
_i
_i_i
_i
_i_i
_i
_i_i
_i
_i_i
_i
_i_i
_i
_i_i
_i
_i_i
_i
_i_i
_i
_i_i
_i
_i_i
_i
_i_i
_i
_i_i
_i
_i_i
_i
_i_i
_i
_i_i
_i
_i_i
_i
_i_i
_i
_i_i
_i
_i_i
_i
_i_i
_i
_i_i
_i
_i_i
_i
_i_i
_i
_i_i
_i
_i_i
_i
_i_i
_i
_i_i
_i
_i_i
_i
_i_i
_i
_i_i
_i
_i_i
_i
_i_i
_i
_i_i
_i
_i_i
_i
_i_i
_i
_i_i
_i
_i_i
_i
_i_i
_i
_i_i
_i
_i_i
_i
_i_i
_i
_i_i
_i
_i_i
_i
_i_i
_i
_i_i
_i
_i_i
_i
_i_i
_i
_i_i
_i
_i_i
_i
_i_i
_i
_i_i
_i
_i_i
_i
_i_i
_i
_i_i
_i
_i_i
_i
_i_i
_i
_i_i
_i
_i_i
_i
_i_i
_i
_i_i
_i
_i_i
_i
_i_i
_i
_i_i
_i
_i_
_i
_i_
_i
_i
____
• Dolby Pro Logic and Super Surround cannot be used if headphones are connected.
• You may experience a reduction in sound quality when these sound field systems and effects are used with some sources. If this occurs, turn the
sound field system or effect off.
eo,ures
• Dolby Digital and DTS are digital
encoding systems used on DVD to
carry surround sound. Both were
originally developed for use in cinemas.
• This unit automatically recognizes
and decodes these systems.
So,wore
O,,ere,,eo,
Software encoded with Dolby
Digital can be identified with this
mark.
nB
DIGITAL
Software encoded with DTS can
be identified with this mark.
Seat position
Center focus
DIGITAL
SURROUND
• DVD
identified
Seat position
Center focus
e)
to stereo sources.
surround speakers to get the best
surround effect.
0
to movie software that hasn't been
recorded with the above systems.
surround speakers to get the best
surround effect.
Center focus (-,
page
26)
• This mode helps maintain
the sound position even if
the listening position itself
is changed.
• This mode makes
the sound
from
it seem like
the center
speaker is coming from within
the television.
You can select one of two levels.
• The center speaker should
placed above the television.
RQT6183
c_
Seat position (-, page 26)
be
1
Press [DD PRO LOGIC].
2
Play a Dolby Surround
source.
A,T
To cancel
Press [DD PRO LOGIC].
Turn Dolby Pro Logic off when playing a DVD recorded with Dolby
Digital or DTS. The surround effects will not be reproduced correctly
if this is left on.
Speaker level adjustments
--CH
SELECT
]
If the level of the speakers appears to be different while listening to a
source, adjust the level of the speakers to the same apparent level.
--TEST
--DD
PRO LOGIC
Preparation
DOLBY DIGITAL and DTS: Turn off the other sound field systems.
DOLBY PRO LOGIC:
Press [rid PRO LOGIC].
(_ Remove the discs (or select an empty tray).
O Press [TEST] to output a test signal.
--MIX
2ch
Remote control only
Play a DOLBY
DIGITAL
u_
or DTS source.
"rid DIGITAL" or "DTS" lights.
or
Lch: Front left (-16 dB to 0 dB)
Cch: Center (+6 dB to -10 dB)
Rch: Front right (-16 dB to 0 dB)
RSch: Right surround (+6 dB to -10 dB)
LSch: Left surround (+6 dB to -10 dB)
oThe surround channel for Dolby Pro Logic is monaural so the
indicator appears as "Sch" instead.
(_ Press [A] (to increase) or [_'] (to decrease).
To stop the test signal, press [TEST] again.
O
To adjust speaker
level during play
1. Press [CH SELECT] to select the speaker.
Lch-_Cch-_Rch-_RSch-_LSch-_SWch
I
SWch: Subwoofer (+ 10 dB to -10 dB)
Dolby Pro Logic
oThe surround channel is monaural so the indicator appears as
"Sch" instead.
o"SWch" does not appear.
2. Press [A] (to increase) or [_'] (to decrease).
To add power to the bass from the subwoofer =_ page 26.
Press [SFC] to select a setting.
To down-mix Dolby Digital or DTS (5.1 ch) signals to
2 channels (Front L/R)
Press [MIX 2ch]during play.
To cancel, press [MIX 2ch]again.
When "MIX2ch"
is flashing
The DVD-Audio disc you are playing contains multiple-channel signals that cannot be down-mixed ("NO DOWN-MIX" also appears).
Each time you press the button:
HEAVY:Adds punch to rock (factory preset).
CLEAR: Clarifies higher sounds.
SOFT: For background music.
DISCO: Reverberates sound to make you feel like you were in a disco.
LIVE:
Makes vocals more alive.
HALL:
FLAT:
Expands sound to make you feel like you were in a hall.
Canceled (no effect is added).
RQT6183
iiiiiiiiiiiiiiiiiiiiiiiiiiiiiiiiiiiiiiiiiiiiiiiiii
ill¸ii;!;ii i;i;i¸iil;
i;i¸i;i;i;i;i;i;i;ii
iiili!i¸ii;
ii!ii!
i_i_i_
i_i_i_
i_i_i_i_i_
i_i_i_
i_i_i_i_i_
i_i_i_
i_i_i_i_i_
i_i_i_
i_i_i_i_i_
i_i_i_
i_i_i_i_!_!
i_!_!ii_ilaiii_i_iiii!
i!i!_ili_ii
'iiiilililil
ilililililili!i
ilililililili!i
ilililililili!i
ilililililili!i
ilililililili!i
ilililililili!i
ilililililili!i
ilililililili!i
ilililililili!i
ilililililili!i
ilililililili!i
ilililililili!i
ilililililili!i
ilililililili!i
ilililililili!i
ilililililili!i
ilililililili!i
ilililililili!i
ilililililili!i
ilililililili!i
ilililililili!i
ilililililili!i
ilililililili!i
ilililililili!i
ilililililili!i
ilililililili!i
ilililililili!i
ilililililili!i
ilililililili!i
ilililililili!i
ilililililili!i
ilililililili!i
ilililililili!i
ilililililili!i
ilililililili!i
ilililililili!i
ilililililili!i
ilililililili!i
ilililililili!i
ilililililili!i
ilililililili!i
ilililililili!i
ilililililili!i
ilililililili!i
ilililililili!i
ilililililili!i
ilililililili!i
ilililililili!i
ilililililili!i
ilililililili!i
ilililililili!i
ilililililili!i
ilililililili!i
ilililililili!i
ilililililili!i
ilililililili!i
ilililililili!i
ilililililili!i
ilililililili!i
ilililililili!i
ilililililili!i
ilililililili!i
ilililililili!i
ilililililili!i
ilililililili!i
ilililililili!i
ilililililili!i
ilililililili!i
ilililililili!i
ilililililili!i
ilililililili!i
ilililililili
i!!
Using this function makes you feel like you are sitting in the ideal
seating position (in the center of the circle formed by the speakers),
even if you cannot due to the layout of your room.
1
Press [SEAT POSITION].
2
While "1_" is flashing
A_
Press [A,
tion,
V,
<,
--SUBWOOFER
LEVEL
--CH
a posi-
SEATPOSITION
SELECT
--SUPER
SURROUND
--SEAT
To cancel
Press [SEAT POSITION] to clear "1_".
POSITION
--CENTER
u)
I_] to select
FOCUS
You can make the sound of the center speaker seem like it is coming
from within the television. Place the center speaker above the television.
Press
[CENTER
FOCUS].
Remote control only
O
Press
[SUPER
SURROUND]
"MUSIC" or "MOVIE".
to
select
Each time you press the button:
-->MUSIC
Each time you press the button:
CENTER FOCUS 1-+CENTER FOCUS 2-+OFF
I
The CENTER FOCUS 2 enhances the effect and makes it easier to
hear dialogue even at low volume.
O
cO
To cancel
Press [CENTER FOCUS] to clear "1_".
MOVIE
Press [SUBWOOFER
LEVEL].
--(off)
Each time you press the button:
SUB W 1-+SUB W 2-+SUB
W 3-+SUB
W 4-+SUB
Turn super surround off when playing a DVD recorded with Dolby
Digital or DTS. The surround effects will not be reproduced correctly
if this is left on.
To adjust the surround
speaker
level
While playing a source
Press [CH SELECT].
@ Press [A] (to increase) or [_'] (to decrease).
RQT6183
You cannot adjust the bass while
("ERROR" appears on the display).
you are
W 0 (off)
I
using
headphones
DVD/CD
Remote control only
The display and all indicators, except for the standby/on indicator, are
turned off for better television viewing.
FL DIS
TUNER/BAND
Press [FL DISPLAY].
To cancel, press [FL DISPLAY] again.
Remote control only
The SLEEP timer can turn the unit off after a set time and the WAKE
timer can turn it on. You can use only one timer at a time.
Preparation
Select the desired source.
oDisc
Press [DVD/CD] to display "DVD/CD", and insert an Audio CD, etc.
oThe radio
Press [TUNER/BAND]
sired station.
1
Press
to select "FM" or "AM" and tune in the de-
[TIMER]
to select
the timer.
Each time you press the button:
SLEEP -----> WAKE-----> OFF
I
2
Within
5 seconds,
Press and hold [TIMER] and release
when the timer you require
is displayed.
TIMER
The display changes as follows:
VOLUME
WAKE
indicator
DOWN,
eSLEEP (in minutes)
30----->60----->90
I
UP
u)
oWAKE (in hours)
5H----_7H----->
9H
I
A
oSLEEP starts working immediately.
oWAKE starts working when you switch the unit to standby.
(The "WAKE" indicator lights up.)
O
To cancel the timer
Press [TIMER]to select "OFF".
To check the setting
Press [TIMER] once.
olf you set SLEEP, the time remaining appears.
olf you set WAKE, the setting appears.
Remote control only
Press [MUTING].
To change the setting
Repeat the procedure from the beginning.
Volume is reduced to minimum.
1
Reduce
the volume
headphones
Headphone
To cancel
Press [MUTING] again or reduce the volume to minimum (-then raise it to the required level.
Muting is also canceled when the unit is turned off.
dB),
2
and connect
the
(not included).
plug type: 6.3 mm (¼") stereo
Adjust headphone volume with [VOLUME].
Audio is automatically
switched to stereo (2-channel). If sound is dis-
torted, turn on dynamic range compression
Range Compression).
(=_ page 28, Audio--D.
Avoid listening for prolonged periods of time to prevent hearing damage,
RQT6183
This chart shows the settings for this unit. Change the settings to suit your preferences and to suit the unit to the environment in which it is being used.
These settings are retained in memory until they are changed, even if the unit is turned off. See page 29 for details on menu operation.
oUnderlined items are the factory preset.
Menus
Disc
Items
Options
Audio _
Choose the preferred audio language.
Original:
French
Spanish
Original
Other _k
The original language of each disc will be
selected.
Other _k_k_k_k: Input a code number with the numbered
buttons (_, page 36).
Subtitle I_
I_
Choose the preferred subtitle language.
Automatic
Automatic:
Menus _
Choose the preferred language for disc menus.
Video
English
French
Spanish
Other >k_k_k
If the language selected for "Audio" is not
available, subtitles of that language will
automatically appear if available on that disc.
French
Spanish
Ratings _
(_, page 29)
Set a ratings level to limit DVD-Video play.
oThe password screen is shown if you choose levels O to 7 or if
you choose "Ratings" when levels Oto 7 have been selected.
oSelect "Level O" to prevent play of discs that do not have ratings
levels recorded on them.
Setting ratings (When level 8 is selected)
8 No Limit : All DVD-Video can be played.
1 to 7:
Prohibits play of DVD-Video with corresponding
ratings recorded on them.
O Lock All: Prohibits play of all DVD-Video.
TV Aspect (= page 10)
Choose the setting to suit your television and preference.
4:3 Pan&Scan
4:3 Letterbox
16:9
Still Mode (=_page 36)
Specify the type of picture shown when paused.
Automatic
Field
Frame
Black Level Control
Li_
Darker
Change the black level of the picture.
I,III_H
Changing ratings (When level 0-7 is selected)
Unlock Player
Change Level
Change Password
Temporary Unlock
Select "Darker" if you connected
VIDEO OUT terminals.
Audio
O
Display
Others
using the COMPONENT
Speaker Setting _
(=_ page 29) (Dolby Digital only)
Set the delay time for your center and surround speakers.
Center:
Surround (L/R):
D. Range Compression
_
(Dolby Digital only)
Change the dynamic range for late night viewing.
Of._f
On
Turn dynamic range compression on in the following cases.
oFor clear dialogue when listening at low volume.
oWhen sound is distorted while playing multi-channel DVD
through two channels (when headphones are connected or
when using the MIX 2ch mode.)
Audio during Search I_
I_
Choose whether to have sound during search.
On
Off: Audio will still be heard during search with some DVDAudio.
Menu Language
Choose the preferred language for these menus and the onscreen messages.
_
Fran(;ais
On-Screen Messages
Choose whether to show on-screen messages
O._D_n
Off
DVD-Video
Mode
-The disc is changed or removed.
-A source other than DVD/CD is selected.
0/1.3/2.6/3.9/5.3 ms
0/5.3/10.6/15.9 ms
EspaSol
or not.
Select how to play pictures contained on some DVD-Audio.
The setting returns to "Off" when:
-The unit is turned off.
RQT6183
Other >_>_>_>_
Of._f:DVD-Audio are played as DVD-Audio.
On: DVD-Video contents found on DVD-Audio can be played.
DVD/CD
I=lrj=]Lr4
The password screen is shown when you select levels 0 to 7.
1. Input a 4-digit password with the numbered buttons and press [ENTER].
• If you enter a wrong number, press [CANCEL] to erase it before
you press [ENTER].
A, T, <1, I_-ENTER
2.
• The lock symbol appears closed to show the rating is locked.
• Do not forget your password.
Press [ENTER] to confirm the 4 digits.
E
Now, when you insert a DVD-Video that exceeds the ratings
limit you set, a message appears on the television.
Follow the on-screen instructions.
(Dolby Digital, center and surround speakers only)
For optimum listening with 5.1-channel sound, all the speakers, except
ACTION
for the subwoofer, should be the same distance from the seating position. If you have to place the center or surround speakers closer to the
seating position, adjust the delay time to make up for the difference.
Center delay time
Numbered
buttons
CANCEL
Exit
-1
Surround delay time
Changing the delay time
1. Press [A, V, "4, I_] to select the delay time box and press
Remote control only
[ENTER].
2. Press [A, V] to adjust the delay time and press [ENTER].
See page 28 for menu and option details.
Preparation
Press [DVD/CD] to select "DVD/CD".
1
Press [ACTION]
r......_
Center speaker
to show the menus.
ACT!QN
speaker
2
Values
Press [<,
I_] to select the menu's
The screen changes to display the menu.
Disc
Video
Audio
Display
tab.
Others
If distance (_ or _ is greater than or equal to distance G, set to "0".
If distance _) or O is less than distance (_, set as follows.
_) Center speaker
Difference
3
4
Press [&, T] to select the item you
want to change and press [ENTER].
Press [&, V] to select the option
press [ENTER].
The screen now shows the menu again.
To return to the previous screen
Press [RETURN].
When you are finished
Press [ACTION].
and
Setting
Approx. 50 cm (1½ feet)
1.3 ms
Approx. 100 cm (3 feet)
2.6 ms
Approx. 150 cm (5 feet)
3.9 ms
Approx. 200 cm (6 feet)
5.3 ms
Surround
speakers
Difference
Setting
Approx. 200 cm (6 feet)
5.3 ms
Approx. 400 cm (12 feet)
10.6 ms
Approx. 600 cm (18 feet)
15.9 ms
When you are finished
Press [<] to select "Exit" and press [ENTER].
RQT6183
Remote control only
DVD/CD
VCR
¢--
Switching to television operation mode
Press [TV].
The button lights.
The main unit also switches to television input.
Turning the television on/off
Press [_].
<1<1,I_1_
PLAY
Changing
channels
Press [CHANNEL (AorV)].
You can also select the channel with the numbered buttons.
To select a 2-digit number
Example: To select channel 23, press [_->
10/ENTER] -_ [2] -_ [3].
Adjusting the volume
Press [TV VOL (-- or +)].
A, V
CHANNEL
Switching the television's video input mode
Press [W/VIDEO].
Numbered
buttons
Switching
to video cassette
recorder
Press [VCR].
The button lights.
The main unit also switches to VCR input.
operation
mode
TV VOL -tTurning the video cassette recorder on/off
Press [I(.D].
u_
Changing channels
Press [CHANNEL (AorV)].
Channels 1 to 10 can also be selected with the numbered buttons.
[0] selects channel 10.
Starting play
Press [1_] (PLAY).
O
Fast-forwarding and rewinding
Press ['<4] or [IH_].
To stop play
Press [11].
oSome models cannot be operated by this remote control.
oTo prevent accidental operation, press [DVD/CD] after operation so the unit is ready to operate this unit.
RQT6183
VCR
This remote control can operate Panasonic and Technics audiovisual equipment that have remote control sensors. You may need to
change the remote control code.
It can also operate some other brands of televisions and video cassette recorders. Check the table for the brand and enter the code as
follows.
Aiming
corder,
the remote control at the television
carefully
and slowly
While pressing
and holding
press the numbered
code number.
The remote
If the code
If it doesn't,
control
outputs
buttons
the on/off
or video
cassette
[TV] or [VCR],
to enter
the
signal.
is correct, the equipment
turns
try entering
another
code.
on or off.
oNote that this remote control cannot operate some equipment
that it may not be able to perform some operations.
oReenter
re-
and
the codes after you change the batteries.
Numbered
buttons
u_
0
Television code list
Panasonic:
Sony:
Fisher:
01, 02, 26
04
14
G-E:
Gold Star:
Hitachi:
JVC:
02, 03, 07, 09
07, 15
05, 07
12
LXI:
03, 06, 07, 10,
14, 15
06, 07, 11, 15,
22
Magnavox:
Mitsubishi:
NEC:
07, 15, 16, 21
07, 15
Video cassette recorder code list
Philco:
Philips:
Pioneer:
Quasar:
RCA:
Sanyo:
Sharp:
Sylvania:
Symphonic:
Toshiba:
Zenith:
06,07
O6
Panasonic:
Sony:
02,10,19
O2
Fisher:
03,07,09,13,
23,24,25
14
08,21
06,07,15
17
10,21
18,20
01,02, 09, 33
05,06, 07, 35,
36,37
13,14, 15, 18,
34
Funai:
G-E:
Gold Star:
08,30
02, 03, 11
27
Hitachi:
JVC:
09, 10,
19,25,
39,40
10,13,
18,27,
02,09,
21,22,
LXh
Magnavox:
Mitsubishi:
NEC:
Philco:
Philips:
Pioneer:
Quasar:
RCA:
11
31, 38,
Sanyo:
Sharp:
Shintom:
14, 15,
Sylvania:
30
12
Symphonic:
Toshiba:
28, 29
Zenith:
19,25,31,38
02,09,12,
30
02,09,12
09
01,02,09,33
02,03,04,09,
10,11,12,23,
24,26
14,18,34
16,17
32
02,09,12,
30
30
23,24
20
RQT6183
DVD/CD
VCR
oTurn the unit off before making connections.
oRefer to the manual of the other unit for details.
(Cables and equipment
not included.)
Audio cable (not included)
TUNER/BAND
AUX
White
Red
(L) _
(R)
I_
Video cassette recorder (not included)
-o_
[_n[_,=
You can playback the sound from a video cassette recorder
_J
through this unit's speaker.
1
Press [VCR].
oMain unit: Press [SELECTOR].
,UDI(
OUT
Each time you press the button:
DVD/CD--> F M-->AM--> TV-,VC R-->AUX
I
2
u)
[]
1
Start
play.
You can playback the sound from a tape deck/laser
disc player, etc., through this unit's speaker.
Press [AUX].
oMain unit: Press [SELECTOR].
Each time you press the button:
DVD/CD--> F M-->AM--> TV-,VCR
O
2
[]
1
V
J
Start play.
You can record sound from the radio or discs, etc. to a
tape deck.
eDisc
Press [DVD/CD]
CD".
_
-->AUX
I
to select
"DVD/
eThe radio
Press [TUNER/BAND]
"FM" or "AM".
e.g. Tape deck (not included)
eMain unit =, see above.
When connecting
a record player
We recommend using a record playerwith a built-in phono equalizer.
If your player doesn't have a built-in equalizer, connect it first to a
separate equalizer and then connect that to this unit.
RQT6183
2
Start recording
and play.
to select
Use outdoor antennas if radio reception is poor.
[]
FM outdoor antenna (Using a television antenna)
eDisconnect the FM indoor antenna.
oThe antenna should be installed by a competent
[]
technician.
AM outdoor antenna (Using a vinyl wire)
Run a piece of vinyl wire horizontally across a window or other
convenient location.
Leave the loop antenna connected.
Disconnect
the outdoor antenna when the unit is not in use.
Do not use the outdoor antenna during an electrical storm.
FM outdoor antenna
-EXT
75 £2 coaxial cable
(not included)
__/_
\'
f
@ Remove
a piece of the outer insulator.
a0 mm (13Ad')
(_) Twist the shield braid.
Shield braid
(_ Expose the core wire.
u)
15 mm (1%2")
_"
Core wire
e
O
AMoutdoorantenna
5-12 m
(16-39
feet)
AM loop antenna
k.
J
RQT6183
Before requesting service, make the below checks. If you are in doubt about some of the check points, or if the remedies indicated in the chart do
not solve the problem:
In the U.S.A., contact the Panasonic Customer Call Center at 1-800-211-7262,
or e-marl [email protected],
or
web site (http://www.panasonic.com).
In Canada, contact Panasonic Canada Inc. Customer Care Centre at 1-800-561-5505, web site (www. panasonic.ca), or an authorized
Servicentre closest to you.
In other areas, consult your dealer.
Reference pages are shown as black circled numbers Q.
Power
Operation
No operations can be performed
with the remote control.
• Check the batteries are installed correctly. (_)
oThe batteries are depleted: Replace them with new ones. (_)
ePoint the remote control at the remote control sensor and operate.
olt may be in the television or video cassette recorder operation mode. Press [DVD/CD] to operate
this unit.
elf the remote control doesn't operate the television or video cassette recorder, try changing the
code. This remote control cannot operate some televisions or video cassette recorders. • _)
Alternative
selected.
languages fail to be
• An alternative language is not selected with discs which do not contain more than one language.
oln the case of some discs, the alternative language cannot be selected with [AUDIO] or [SUB
TITLE]. Try selecting it from the disc's menu if one is available. (D
No subtitles.
oSubtitles
oSubtitles
Angle cannot be changed.
oThis function is dependent on software availability. Even if a disc has a number of angles
recorded, these angles may be recorded for specific scenes only. (D
You have forgotten your ratings
password.
Reset all the settings to Factory Preset.
oWhile stopped, press and hold [n] on the unit and [->10/ENTER] on the remote control for about
3 seconds until "Initialized" disappears from the television. Turn the unit off and on again.
All settings will return to the default values.
appear only with discs that contain them.
are cleared from the television. Display the subtitles. (D
Sound
Humming heard during play.
RQT6183
oAn AC power supply cord or fluorescent light is near the cables. Keep other appliances and cords
away from this unit's cables.
olf possible in your area, turn the AC power supply cord's plug or connector over to reverse the
plug's polarity.
Picture
Picture distorted.
oSome distortion is normal during SEARCH.
The picture shown on the
television is not normal.
oEnsure that the unit is connected directly to the television, and is not connected through a video
cassette recorder.
oGo to the Video menu in the ACTION screen, and change "TV Aspect" to suit your television. You
may also need to change the screen mode on the television itself. _)
[_11#],1
If your television cannot change the aspect when input is progressive
Press [PROGRESSIVE OUT] so the indicator goes out. Output will now be interlace.
Picture quality is poor.
oCheck the settings in the On-Screen
Menu Icons' video menu. G)
The picture on the television
disappears or stripes appear on
the screen.
oThe location and orientation of the antenna are incorrect. If you are using an indoor antenna,
change to an outdoor antenna, t_)
oThe television antenna wire is too close to the unit. Separate the antenna wire of the television
from the unit.
Listening to the radio
A beat sound is heard.
oTurn the television off or separate it from the unit.
Unit displays
This unit's display is off.
oPress [FL DISPLAY] to turn the display on. i_)
(b
oThe disc is dirty. Wipe it with a soft cloth. O
"DVD HDD"
E3E3stands for a number.
oTrouble is likely to have occurred. The number following "H" depends on the status of the unit.
Reset procedure:
Press [_] to switch the unit to the standby mode and then back to ON. Alternatively, press [_] to
switch the unit to the standby mode, disconnect the AC power supply cord, and then reconnect it.
olf the service numbers fail to clear, note the service number and contact a qualified service person.
Television displays
No on-screen display,
oGo to Display in the ACTION menus, and select "On" for "On-Screen Messages". 1_)
The disc's menu is displayed in a
different language.
oGo to Disc in the ACTION menus, and select the preferred language for "Menus". l_)
To clean this unit, wipe with a soft, damp cloth.
oNever use alcohol, paint thinner or benzine to clean this unit.
oBefore using chemically treated cloth, read the instructions
came with the cloth carefully.
that
RQT6183
Bitstream
Interlace
This is the digital form of multiple channel audio data (e.g., 5.1 channel) before it is decoded into its various channels.
NTSC, the video signal standard, has 480 interlaced (i) scan lines,
whereas progressive scanning uses twice the number of scan lines.
This is called 480p.
Decoder
The 480i video signals output from this unit's COMPONENT VIDEO
OUT terminals (Y, PB, PR) allow you to enjoy higher quality pictures
than if the signals were output from the video output terminal or SVIDEO OUT terminal. The COMPONENT VIDEO OUT terminals are
A decoder restores the coded audio signals on DVDs to normal. This
is called decoding.
Dolby
Digital
This is a method of coding digital signals developed by Dolby Laboratories. Apart from stereo (2-channel) audio, these signals can also
be 5.1-channel audio. A large amount of audio information can be
recorded on one disc using this method.
Dolby
Pro Logic
Theater
Systems)
This surround system is used in many movie theaters around the
world. There is good separation between the channels, so realistic
sound effects are possible.
Dynamic
range
Dynamic range is the difference
between the lowest level of sound
that can be heard above the noise of the equipment and the highest
level of sound before distortion occurs.
also able to handle 480p (progressive)
even greater resolution.
video signals which are of
I/P/B
h
Intra coded picture (I-picture)
This is the standard picture and is a complete picture in itself.
This means it has the best picture quality and is the best to use
when adjusting the picture.
P: Predictive coded picture (P-picture)
This picture is calculated based on past I or P-pictures.
B: Bidirectionally-predictive coded picture (B-picture)
This picture is calculated by comparing past and future I and Ppictures so it has the lowest volume of information.
Linear
PCM
(pulse
code modulation)
These are uncompressed digital signals, similar to those found on
CDs.
MP3
Film and video
DVDs are recorded using either film or video. Usually, film is recorded at 24 frames per second, the rate movies are filmed at, while
video is recorded at 30 frames per second.
Frame
output
MPEG 2, the video compression standard adopted for use with DVDVideo, codes frames using these 3 picture types.
A surround system where a 4-channel audio track is recorded as
2 channels and then is restored to 4 channels for play. The surround
channel is monaural and can reproduce up to 7 kHz.
DTS (Digital
and progressive
still and field
still
Frames are the still pictures that go together to make a moving picture. There are about 30 frames shown each second.
One frame is made up of two fields. A regular television shows these
fields one after the other to create frames.
A still is shown when you pause a moving picture. A frame still is
made up of two alternating fields, so the picture may appear blurred,
but overall quality is high.
A field still is not blurred, but it has only half the information of a
frame still so picture quality is lower.
A method of compressing audio, MPEG Audio Layer 3 (MP3) allows
audio to be reduced to up to one tenth its original size without overtly
hurting audio quality.
When creating MP3 files to play on this unit
oDisc formats: ISO9660 level 1 and level 2 (except for extended formats)
Files: MP3 files with the suffix ".mp3" or ".MP3"
oTo have this unit play files in a certain order, prefix folder and file
names with numbers in the order you want to play them. This may
not work in all cases.
Not compatible
with multi-session
recordings
If you record MP3 onto CD-R/CD-RW over a number of sessions,
this unit can play only the recordings made in the first session.
Playback
control (PBC)
If a Video CD has playback control, you can select scenes and information with menus.
Language code list
Abkhazian:
Afar:
Afrikaans:
Albanian:
Ameharic:
Arabic:
Armenian:
Assamese:
Aymara:
Azerbaijani:
Bashkir:
Basque:
Bengali; Bangla:
Bhutani:
Bihari:
Breton:
Bulgarian:
Burmese:
Byelorussian:
Cambodian:
Catalan:
RQT6183
6566
6565
6570
8381
6577
6582
Chinese:
Corsican:
Croatian:
Czech:
Danish:
Dutch:
7289
6583
6588
6590
English:
Esperanto:
Estonian:
Faroese:
6665
6985
6678
6890
Fiji:
Finnish:
French:
Frisian:
6672
6682
6671
7789
6669
Galician:
Georgian:
German:
Greek:
Greenlandic:
7577
Guarani:
6765
Gujarati:
9O72
6779
7282
6783
6865
7876
6978
6979
6984
7079
7074
7073
7082
7089
7176
7565
6869
6976
7576
7178
7185
Hausa:
Hebrew:
Hindi:
7265
7387
7273
Hungarian:
Icelandic:
Indonesian:
7285
7383
7378
Interlingua:
Irish:
7365
7165
Italian:
Japanese:
Javanese:
Kannada:
Kashmiri:
Kazakh:
7384
7465
7487
7578
7583
7575
Kirghiz:
Korean:
Kurdish:
Laotian:
Latin:
7589
7579
7585
7679
7665
Latvian, Lettish:
7686
Lingala:
7678
Lithuanian:
Macedonian:
7684
7775
Romanian:
Russian:
Samoan:
Sanskrit:
Scots Gaelic:
Serbian:
Serbo-Croatian:
Shona:
Sindhi:
8279
8285
8377
8365
7168
8382
8372
8378
8368
Malagasy:
Malay:
7771
7783
Malayalam:
Maltese:
Maori:
7776
7784
7773
Marathi:
Moldavian:
7782
7779
Mongolian:
Nauru:
7778
7865
Singhalese:
SIovak:
SIovenian:
Somali:
8373
8375
8376
8379
Nepali:
7869
Norwegian:
Oriya:
Pashto, Pushto:
Persian:
Polish:
7879
7982
8083
7065
8076
Spanish:
Sundanese:
Swahili:
Swedish:
6983
8385
8387
8386
Portuguese:
Punjabi:
Quechua:
Rhaeto-Romance:
8084
Taga log:
8476
8065
8185
8277
Tajik:
Tamil:
Tatar:
8471
8465
8484
Telugu:
Thai:
Tibetan:
8469
8472
6679
Tigrinya:
8473
Tonga:
Turkish:
Turkmen:
Twi:
Ukrainian:
Urdu:
Uzbek:
Vietnamese:
8479
8482
8475
8487
8575
8582
8590
8673
VolapQk:
Welsh:
Wolof:
8679
6789
8779
Xhosa:
Yiddish:
Yoruba:
Zulu:
8872
7473
8979
9085
AMPLIFIER SECTION
SPEAKER
FTC TTL POWER OUTPUT
120 Hz-20 kHz, 1.0 % total harmonic distortion
FRONT
30
CENTER
SURROUND
38
45 Hz-120 Hz, 1.0 % total harmonic distortion
SUBWOOFER
RMS TTL POWER OUTPUT
1 kHz, 10 % total harmonic distortion
FRONT
46
CENTER
SURROUND
56
100 Hz, 10 % total harmonic distortion
SUBWOOFER
Input sensitivity/input
impedance
AUX
360 W
W per ch (6 £2)
80 W (6 £2)
W per ch (6 £2)
144 W (6 £2)
500 W
W per ch (6 £2)
106 W (6 £2)
W per ch (6 £2)
190 W (6 £2)
250 mV, 10 k£)
AMPLIFIER SECTION
FTC TTL POWER OUTPUT
120 Hz-20 kHz, 1.0 % total harmonic distortion
FRONT
30
CENTER
SURROUND
35
45 Hz-120 Hz, 1.0 % total harmonic distortion
SUBWOOFER
RMS TTL POWER OUTPUT
1 kHz, 10 % total harmonic distortion
FRONT
46
CENTER
SURROUND
46
100 Hz, 10 % total harmonic distortion
SUBWOOFER
Input sensitivity/input
impedance
AUX
300 W
W per ch (6 £2)
35 W (6 £2)
W per ch (6 £2)
135 W (6 £2)
400 W
W per ch (6 £2)
46 W (6 £2)
W per ch (6 £2)
170 W (6 £2)
250 mV, 10 k£)
AMPLIFIER SECTION
RMS TTL POWER OUTPUT
1 kHz, 10 % total harmonic distortion
FRONT
CENTER
SURROUND
100 Hz, 10 % total harmonic distortion
SUBWOOFER
PMPO TTL POWER OUTPUT
Input sensitivity/input
AUX
400 W
41 W per ch (6 £2)
42 W (6 £2)
52 W per ch (6 £2)
172 W (6 £2)
2300 W
impedance
I =t_JilJl_'__,ll=_,l
Antenna terminals
87.9-107.9 MHz (200 kHz steps)
87.5-108.0 MHz (100 kHz steps)
87.50-108.00
MHz (50 kHz steps)
75 £2 unbalanced
AM TUNER SECTION
Frequency
range
520-1710
kHz (10 kHz steps)
522-1629 kHz (9 kHz steps)
520-1630 kHz (10 kHz steps)
Surround speakers
Front and surround speakers
1 way 1 speaker Bass-ref.
Dimensions
Mass
(WxHxD)
8 cm (3%") cone type
6£)
60 W (music)
79 dB/W (1.0 m)
80 Hz-22 kHz (-16 dB)
110 Hz-20 kHz (-10 dB)
88x 135x 112 mm (31%2"x 51½2"x4¾6 ")
Approx. 0.8 kg (1.8 lb.)
I SB-AFC2861
Front and center speakers
Type
2 way 2 speaker Bass-ref.
Speaker unit
Woofer
10 cm (4") cone type
Tweeter
6 cm (2¾") cone type
6£)
Impedance
Input power
110 W (music)
Output sound pressure level
83 dB/W (1.0 m)
4 kHz
Cross over frequency
Frequency range
67 Hz-22 kHz (-16 dB)
92 Hz-20 kHz (-10 dB)
Dimensions (WxHxD)
120x208x 163 mm (4¾"x8¾6"x6¾6")
Mass
Approx. 1.9 kg (4.2 lb.)
I_"1_1
_
Center speaker
Type
Speaker
Full range
Impedance
Input power
Output sound pressure level
Frequency range
Dimensions
Mass
(WxHxD)
8 cm (3%") cone type
6£)
60 W (music)
79 dB/W (1.0 m)
80 Hz-22 kHz (-16 dB)
110 Hz-20 kHz (-10 dB)
112 mm (5t½2"x 31%2"x4¾6 ")
Approx. 0.8 kg (1.8 lb.)
135x88x
_
Subwoofer
Type
Speaker unit
Woofer
Impedance
Input power
Output sound pressure level
Frequency range
(WxHxD)
1 way 1 speaker Bass-ref.
200x450x
1 way 1 speaker Bass-ref.
17 cm (6¾") cone type
6£)
200 W (music)
80 dB/W (1.0 m)
41 Hz-l.8 kHz (-16 dB)
45 Hz-l.6 kHz (-10 dB)
300 mm (7%"x 172%2"x 111¾6")
Approx. 5.9 kg (13.0 lb.)
¾
_
Subwoofer
Type
Speaker unit
Woofer
Impedance
Input power
Output sound pressure level
Frequency range
Dimensions
Mass
(WxHxD)
173x315x300
1 way 1 speaker Bass-ref.
17 cm (6¾") cone type
6£)
200 W (music)
80 dB/W (1.0 m)
42 Hz-1.5 kHz (-16 dB)
46 Hz-900 Hz (-10 dB)
mm (61¾6"x 1213_2"x111¾6")
Approx. 4.0 kg (8.8 lb.)
GENERAL I =._l,_..'_.__,_._
,,,I[_.._,
_.[,.=
DISC SECTION
Compatible
SECTION
Type
Speaker
Full range
Impedance
Input power
Output sound pressure level
Frequency range
Dimensions
Mass
range
=r4, r, _,l =[, _TJq=[=__1
_
_
250 mV, 10 k£)
FM TUNER SECTION
Frequency
I_
disc types
DVD-AUDIO
DVD-VIDEO
DVD-R (DVD-VIDEO formatted)
CD (CD-DA), VIDEO-CD
CD-R/RW (CD-DA, VIDEO-CD, or MP3 format)
Audio
Number of channels
Video
Signal system
Output terminal
Progressive
scan _
Pick up
Beam Source
Wavelength
CDNCD
DVD
8.1 (FL, FR, SL, SR, C, SW)
NTSC
RCA (composite video)
S terminal (Y, C)
RCA (component video)
Semiconductor
Laser
790 nm
658 nm
Power supply
Power con su mption
Dimensions
(WxHxD)
Mass
430x114x368
AC 120 V, 60 Hz
190 W
mm (161¾6"x4½"x 14½")
Approx. 8.4 kg (18.5 lb.)
GENERAL
Power supply
AC 110 V/127 V/220 V-230 V/240 V, 50/60 Hz
Power consumption
171 W
Dimensions (WxHxD)
430x114x368
mm (161¾6"x4½"x 14½")
Mass
Approx. 8.4 kg (18.5 lb.)
Power consumption
in standby mode
0.28 W
0.80 W
1. Specifications are subject to change without notice.
Mass and dimensions are approximate.
2. Total harmonic distortion is measured by the digital spectrum analyzer.
RQT6183
Panasonic
1-800-332-5368
Panasonic
(Customer
Services
Company
Orders
Technics
qu ar
Only)
20421
84th Avenue
South,
Kent, WA
98032
(6 am to 5 pm Monday-Friday;
6 am to 10:30 am Saturday; PST)
(Visa, MasterCard,
Discover Card, American
Express, Check)
CALIFORNIA
6550 Katella Avenue
Cypress, CA 90630
GEORGIA
8655 Roswell Road
Suite 100
Atlanta, GA 30350
MINNESOTA
7850-12 thAvenue South
TEXAS
Airport Business Center
Bloomington, MN 55425
Suite 101
13615
Welch
Farmers
Road
Branch
TX 75244
800 Dubuque
Avenue
S. San Francisco
CA 94080
ILLINOIS
1709 North Randall Road
Elgin, IL 60123
3878
Ruffin
Suite
A
San Diego,
North
Suite
102
Hollywood,
2236 Waycross Road
Civic Center Plaza
WASHINGTON
Forest Park, OH 45240
Kent, WA
20425-84
th Avenue
South
98032
Road
CA 92123
FLORIDA
3700
OHIO
MASSACHUSETTS
60 Glacier Drive
Suite G
PENNSYLVANIA
Westwood,
Suite B
MA 02090
2221
Cabot
Langhorne,
Blvd. West
PA 19047
29 th Avenue
FL 33020
HAWAII
99-859
Aiea,
Phone
Iwaiwa
Hawaii
Street
96701
(808) 488-1996
Fax (808) 486-4369
F08130
RQT6183
As of AUG '01
Panasonic Consumer Electronics Company,
Division of Matsushita Electric Corporation of America
One Panasonic Way Secaucus, New Jersey 07094
Panasonic Sales Company, Division of Matsushita Electric
of Puerto Rico, Inc.
Ave. 65 de Infanteria, Km. 9.5
San Gabriel Industrial Park, Carolina, Puerto Rico 00985
Panasonic/Technics
Limited
Panasonic
Consumer
Electronics
Company
lectively
referred to as "the Warrantor")
will
or refurbished
parts or equivalent
product,
Rico, in the event
periods commence
or Panasonic
Sales
Company
repair or replace this product
free of charge in the U.S.A.
of a defect
in materials
or workmanship
from the date of original purchase):
AUDIO PRODUCTS--labor
and parts for one (1) year.
ALL AUDIO RACKS (cabinets)--parts
only 30 days.
TECHNICS
STAND ALONE
SPEAKERS
SUBWOOFER
as follows
Audio
Warranty
(col-
with new
or Puerto
(all
time
USB READER-WRITER
applicable)--exchange
SPEAKERS--labor
and
ERS--labor
and parts for ninety
RECHARGEABLE
MEMORY
ble)--exchange
battery packs
Carry-in
CARDS
Non-rechargeable
batteries
RECHARGEABLE
service
PACKS--(when
(90) days.
can be obtained
item
number
Servicenter.
Carry-in or mail-in
warranty
period by calling the
listed
This warranty
other proof
rendered.
in the Servicenter
is extended
of date
of original
will
A purchase
before
warranty
peri-
receipt
service
AND
anline
or a PASC
authorized
Servicenter,
or
EXCLUSIONS
are no express
warranties
WARRANTOR
SHALL
LIMITATION,
DAMAGE
IMPLIED
WARRANTIES,
TY, AND
PLICABLE
except
NOT
as listed
above.
BE LIABLE
FOR
or limitation
how long an implied
apply to you.
or
is
TO TAPES,
INCLUDING
INCIDENTAL
OR
CONSE-
OF THIS PRODUCT,
OR
INCLUDING
WITHOUT
RECORDS
OR DISCS. ALL EXPRESS
AND
THE WARRANTIES
OF MERCHANTABILI-
FITNESS
FOR A PARTICULAR
PURPOSE,
ARE LIMITED
TO THE APWARRANTY
PERIOD
SET FORTH ABOVE.
Some states do not allow
the exclusion
This warranty
which vary from
of incidental
warranty
lasts,
gives you specific
state to state.
or consequential
so the above
legal
rights
damages,
exclusions
and you may
or limitations
or limitations
also have
on
may not
other
rights
If a problem
with this product
develops
during or after the warranty
period,
you
may contact
your dealer or Servicenter.
If the problem
is not handled to your satisfaction,
dicated
I
abuse,
malad-
improper voltage supply, lightning damage,
commercial
use, such as; hotel,
restaurant,
or other business or rental use of the product, or service by any-
QUENTIAL
DAMAGES
RESULTING
FROM THE USE
ARISING
OUT OF ANY BREACH
OF THIS WARRANTY,
Non-rechargeable
during the warranty
purchaser.
be required
which result from accident,
misuse,
misapplication,
set-up adjustments,
one other than a PASC Factory Servicenter
damage that is attributable
to acts of God.
THE
Directory.
purchase
does not cover
by products
not
justment
of consumer
controls,
improper
operation
or maintenance,
improper
tenna, inadequate
signal reception
or pick-up, alteration,
modification,
power
There
applica-
service in Puerto Rico can be obtained
Panasonic
Sales Company
telephone
only to the original
installed
cartridge
or stylus. The warranty
in shipment
or failures
which are caused
for
od by contacting
a Panasonic
Services
Company
(PASC) Factory Servicenter
listed in the Servicenter
Directory.
Or call toll free, 1-800-211-7262
to locate a PASC
authorized
during the
and workmanship
to the stylus (when
ADAPT-
are not warranted.
BATTERY
in the U.S.A.
defective
or a dealer
which occur
by the warrantor,
or failures
mishandling,
faulty installation,
LIMITS
applicable)--exchange
defective
item for new one for ninety
are not warranted.
or mail-in
MICROPHONES
(1)
(90) days.
BATTERIES--(when
new one for ten (10) days.
SD
CARTRIDGES.
applicable)
damages
surge,
office,
PERSONAL
COMPUTER
CARD
ADAPTERS--(when
defective
unit with a new or refurbished
one for one
year.
ACCESSORIES--HEADPHONES,
This warranty
only covers failures
due to defects in materials
which occur during normal use and does not cover normal wear
supplied
neglect,
parts for three (3) years.
Products
then write
above.
to the Consumer
Affairs
Department
at the company
address
in-
Carefully pack and send it prepaid, adequately insured and preferably in the original carton.
Attach a postage-affixed letter, detailing the complaint,
to the
If you ship
the outside
product of the carton.
Do NOT send the product to the Executive or Regional Sales offices. They are NOT equipped to make repairs
1. Damage requiring service--The
unit should be serviced by qualified service personnel if:
(a) The AC power supply cord or AC adaptor has been damaged; or
(b) Objects or liquids have gotten into the unit; or
(c) The unit has been exposed to rain; or
(d) The unit does not operate normally or exhibits a marked change in performance; or
(e) The unit has been dropped or the cabinet damaged.
2. Servicing--Do
not attempt to service the unit beyond that described in these operating instructions. Refer all other servicing to authorized
servicing personnel.
3. Replacement parts--When
parts need replacing ensure the servicer uses parts specified by the manufacturer or parts that have the same
characteristics as the original parts. Unauthorized substitutes may result in fire, electric shock, or other hazards.
4. Safety check--After
repairs or service, ask the servicer to perform safety checks to confirm that the unit is in proper working condition.
The servicer will require all components to service your system.
Therefore, should service ever be necessary, be sure to bring the entire system.
Product information
For product information or assistance with product operation:
In the U.S.A., contact the Panasonic Customer Call Center at 1-800-211-7262, or e-mail [email protected],
or web site
(http://www.panasonic.com).
In Canada, contact Panasonic Canada Inc. Customer Care Centre at 1-800-561-5505, web site (www.panasonic.ca),
or an authorized Servicentre
closest to you.
RQT6183
Listening caution
®
m
b_
Selecting fine audio equipment such as the unit you've just purchased is only the start of your musical enjoyment. Now it's time to consider
how you can maximize the fun and excitement your equipment offers. This manufacturer and the Electronic Industries Association's Consumer Electronics Group want you to get the most out of your equipment by playing it at a safe level. One that lets the sound come through
loud and clear without annoying blaring or distortion--and,
We recommend
most importantly,
you to avoid prolonged exposure to excessive
without affecting your sensitive hearing.
noise.
Sound can be deceiving. Over time your hearing "comfort level" adapts to higher volumes of sound. So what sounds "normal" can actually be
loud and harmful to your hearing.
Guard against this by setting your equipment at a safe level BEFORE your hearing adapts.
To establish a safe level:
*Start your volume control at a low setting.
*Slowly increase the sound until you can hear it comfortably
and clearly, and without distortion.
Once you have established a comfortable sound level:
*Set the dial and leave it there.
Taking a minute to do this now will help to prevent hearing damage or loss in the future. After all, we want you listening for a lifetime.
This product may receive radio interference caused by mobile telephones during use. If such interference is apparent,
please increase separation between the product and the mobile telephone.
User memo:
Manufactured under license from Dolby Laboratories.
"Dolby", "Pro Logic" and the double-D symbol are trademarks
of Dolby Laboratories.
DATE OF PURCHASE
DEALER NAME
DEALER ADDRESS
TELEPHONE
NUMBER
The model number and serial number of this product can be
found on either the back or the bottom of the unit.
Manufactured under license from Digital Theater Systems,
Inc. US Pat. No. 5,451,942, 5,956,674, 5,974,380, 5,978,762
and other world-wide patents issued and pending. "DTS" and
Please note them in the space provided below and keep for
future reference.
"DTS Digital Surround" are registered trademarks of Digital
Theater Systems, Inc. @ 1996, 2000 Digital Theater Systems, Inc. All rights reserved.
MODEL NUMBER
Apparatus
licensed for limited viewing uses only.
Claims of U.S. Patent Nos. 4,631,603, 4,577,216, and 4,819,098,
This product incorporates
copyright protection technology
SERIAL NUMBER
that is protected by method claims of certain U.S. patents and other intellectual
property rights owned by Macrovision Corporation and other rights owners. Use of this copyright protection technology must be authorized
by Macrovision Corporation, and is intended for home and other limited viewing uses only unless otherwise authorized by Macrovision
Corporation. Reverse engineering or disassembly is prohibited.
Panasonic Consumer Electronics
Company, Division of Matsushita
Electric Corporation of America
One PanasonicWay Secaucus,
New Jersey07094
http://www.panasonic,corn
Ili[*]
dl!
I i I I £11*_vl
_| IlJ m.J*'ll
Matsushita
o] d Ii | (:'4_ I[i']_lJ
Electric
Office
! I ('4 dl o_ [*.] :_ lo I I I [o I_
Industrial
Corporate
Management
the Americas
Sales
I I ['4[*]
for North
Panasonic Sales Company,
Division of Matsushita Electric
of Puerto Rico, Inc. ("PSC")
Ave. 65 de Infanteda, Km. 9.5
San Gabriel Industrial Park, Carolina,
Puerto Rico 00985
Co., Ltd.
Division
for
America
Tokyo Panasonic
Sales Section
32nd Floor, World Trade Center 4-1,
Hamamatsu-cho, 2-Chome, Minato-Ku,
Tokyo 105-6132, Japan
@ 2002 Matsushita
Panasonic Marketing Europe
G.M.B.H. Wiesbaden N.
(a Division of Panasonic
Marketing G.M.B.H.)
Military Sales Department
6200 Wiesbaden-Biebrich,
Hagenauerstr.43
Germany
Panasonic
Canada
5770 Ambler Drive
Mississauga,
L4W 2T3
Inc.
Ontario
www.panasonic,
ca
Matsushita Electric Industrial Co., Ltd.
Web Site: http://www.panasonic.co.jp/global/
Electric Industrial Co., Ltd.
RQT6183-2P
Printed in Singapore
F0102NK2042