1
FAX Option Type 4000
Operating Instructions
Facsimile Reference (option)
<Advanced Features>
ZC HH0 10 N. eps
Read this manual carefully before you use this product and keep it handy for future
reference.
For safety, please follow the instructions in this manual.
FAX Option Type 4000 Operating Instructions
Printed in Japan
UE USA B383-8657A
Available Options
•
Expansion Memory (FAX Feature Expander Type 450)
•
Optional Hard Disk (FAX Feature Expander Type 4000)
•
400 dpi Option (FAX 400dpi Option Type 450)
•
ISDN Unit (ISDN Option Type 450)
•
Stamp Unit (FAX Stamp Type 4000)
•
Handset (Handset Type 4000)
Supplies
•
Marker Ink (Marker Type 30 is recommended for the best performance)
NOTICE
R CAUTION:
Use of controls, adjustments or performance of procedures other than those
specified herein may result in hazardous radiation exposure.
Shielded interconnect cables must be employed with this equipment to ensure
compliance with the pertinent RF emission limits governing this device.
Direct (or indirect) reflected eye contact with the laser beam may cause serious eye damage. Safety precautions and interlock mechanisms have been designed to prevent any possible laser beam
exposure to the operator.
Note
❒ Some illustrations may be slightly different from your machine.
❒ Certain options may not be available in some countries. For details, please
contact your local dealer.
- Notice about the Telephone Consumer Protection Act (Valid in USA
only).
The Telephone Consumer Protection Act of 1991 among other things makes it
unlawful for any person to send any message via a telephone fax machine unless
such message clearly contains in a margin at the top or bottom of each transmitted page or on the first page of the transmission, the date and time it is sent and
an identification of the business, other entity, or other individual sending the
message and the telephone number of the sending machine or such business,
other entity or individual. This information is transmitted with your document
by the TTI (Transmit Terminal Identification) feature. In order for you to meet
the requirement, your machine must be programmed by following the instructions in the accompanying Operation Manual. In particular, please refer to the
chapter of Installation. Also refer to the TTI (Transmit Terminal Identification)
programming procedure to enter the business identification and telephone
number of the terminal or business. Do not forget to set the date and time.
Thank you.
i
- ENERGY SAVING INFORMATION
As an Energy Star Partner, we have determined that this fax model meets Energy Star guidelines for energy efficiency. This product was designed to reduce the
environmental impact associated with fax equipment. This is accomplished by
means of energy saving features such as Low Power mode. Please see applicable
sections of operating instructions for details.
M006.eps
Note to users in the United States of America
- Notice:
This equipment has been tested and found to comply with the limits for a Class
B digital device, pursuant to Part 15 of the FCC Rules. These limits are designed
to provide reasonable protection against harmful interference in a residential installation. This equipment generates, uses and can radiate radio frequency energy and, if not installed and used in accordance with the instructions, may cause
harmful interference to radio communications. However, there is no guarantee
that interference will not occur in a particular installation. If this equipment does
cause harmful interference to radio or television reception, which can be determined by turning the equipment off and on, the user is encouraged to try to correct the interference by one more of the following measures:
• Reorient or relocate the receiving antenna.
• Increase the separation between the equipment and receiver.
• Connect the equipment into an outlet on a circuit different from that to which
the receiver is connected.
• Consult the dealer or an experienced radio /TV technician for help.
- Warning
Changes or modifications not expressly approved by the party responsible for
compliance could void the user's authority to operate the equipment.
ii
Important Safty Instructions
Caution
When using your telephone equipment, basic safety precautions should always
be followed to reduce the risk of fire, electric shock and injury to persons, including the following:
• Do not use this product near water, for example, near a bath tub, wash bowl,
kitchen sink or laundry tub, in a wet basement or near a swimming pool.
• Avoid using a telephone during an electrical storm. There may be a remote
risk of electric shock from lightning.
• Do not use a telephone in the vicinity of a gas leak to report the leak.
• Use only the power cord and batteries indicated in this manual. Do not dispose of batteries in a fire. They may explode. Check with local codes for possible special disposal instructions.
Save these instructions.
Certalnes mesures de sécurité doivent être prises pendant l'utilisation de matérial téléphonique afin de réduire les risques d'incendle , de choc électrique et de
blessures. En voici quelquesunes:
• Ne pas utiliser l'appareil près de l'eau, p.ex., près d'une balgnoire, d'un lavabo, d'un évier de cuisine, d'un bac à laver, dans un sous-sol humide ou près
d'une piscine.
• Éviter d'utiliser le téléphone (sauf s'il s'agit d'un apparell sans fil) pendant un
orage électrique. Ceci peut présenter un risque de choc électrique causé par la
foudre.
• Ne pas utiliser l'appareil téléphonique pour signaler une fulte de gaz s'il est
situé près de la fuite.
• Utiliser seulement le cordon d'alimentation et le type de piles indiqués dans
ce manual. Ne pas jeter les piles dans le feu: elles peuvent exploser. Se conformer aux ègrlements pertinents quant à l'élimination des piles.
Conserver ces instructions.
iii
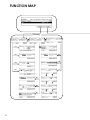
FUNCTION MAP
ND0x01e7.eps
[ Mode ]
08
01
09
02
10
03
11
04
05
06
07
iv
eps
[ Info. ]
1
3
7
4
8
Select the file
Delete
Print
Check
1
5
2
3
6
2
v
TABLE OF CONTENTS
1. Transmission Features
Handy Dialing Functions ..........................................................................
Chain Dial......................................................................................................
Telephone Directory......................................................................................
Redial ............................................................................................................
Subaddress ...................................................................................................
On-hook Dial ..............................................................................................
Manual Dial.................................................................................................
1
1
1
2
3
5
6
Changing the Line Type............................................................................ 7
Transmission Features ............................................................................. 8
Stamp............................................................................................................ 8
ID Transmission (Closed Network) ............................................................... 8
F Code (SUB)................................................................................................ 9
F Code (PWD)............................................................................................. 10
JBIG Transmission...................................................................................... 10
More Transmission Functions ............................................................... 11
Auto Fax Reception Power-up .................................................................... 11
Dual Access ................................................................................................ 11
Transmission with Image Rotation .............................................................. 11
Printed Report.......................................................................................... 12
Memory Storage Report.............................................................................. 12
Transmission Result Report (Memory Transmission) ................................. 12
Communication Failure Report ................................................................... 12
Transmission Result Report (Immediate Transmission) ............................. 13
2. Reception Features
Reception .................................................................................................
Immediate Reception ..................................................................................
Memory Reception ......................................................................................
Substitute Reception ...................................................................................
Screening Out Messages from Anonymous Senders .................................
When the Receive File Indicator is Lit.........................................................
When the Confidential File Indicator is Lit or Blinking .................................
Where Incoming Messages are Delivered Output Tray When the 3–bin
Sorter is Installed ......................................................................................
Reception Functions ...............................................................................
Transfer Station...........................................................................................
Transfer Result Report................................................................................
ID Reception (Closed Network)...................................................................
F Code (SEP)..............................................................................................
F Code (PWD).............................................................................................
JBIG Reception ...........................................................................................
vi
15
15
15
16
17
18
18
18
19
19
20
20
20
22
22
Printing Functions...................................................................................
Print Completion Beep ................................................................................
Checkered Mark..........................................................................................
Center Mark ................................................................................................
Reception Time ...........................................................................................
2-Sided Printing...........................................................................................
180 Degree Rotation Printing......................................................................
Multi-copy Reception...................................................................................
Image Rotation............................................................................................
Combine 2 Originals....................................................................................
Page Separation and Length Reduction (Not Available in Some Countries) ....
Reverse Order Printing ...............................................................................
Page Reduction...........................................................................................
TSI Print ......................................................................................................
CIL/TID Print ...............................................................................................
FAX Print Color ...........................................................................................
2nd Color Choice ........................................................................................
When There is No Paper of the Correct Size..............................................
Having Incoming Messages Printed on Paper From the Bypass Tray........
23
23
23
23
23
24
25
25
25
26
26
27
27
28
28
28
28
29
31
3. Advanced Transmission Features
Overview................................................................................................... 33
Sending at a Specific Time (Send Later) ............................................... 34
Confidential Transmission ..................................................................... 36
Personal Code Transmission ................................................................. 38
Sending an Auto Document ................................................................... 39
2-Sided Transmission (Double-Sided Transmission) .......................... 41
Book Fax .................................................................................................. 43
Choosing the Area to be Scanned Yourself (Irregular Scan Area) ....
Polling Transmission ..............................................................................
Polling Transmission Clear Report..............................................................
Polling Reception ....................................................................................
Polling Reserve Report ...............................................................................
Polling Result Report ..................................................................................
Transfer Request .....................................................................................
Specifying an End Receiver ........................................................................
Transmission Options.............................................................................
Selecting Transmission Options for a Single Transmission ........................
45
47
49
50
51
51
52
54
55
56
4. Communication Information
Checking and Canceling Transmission Files .......................................
Canceling a Transmission...........................................................................
Printing a File ..............................................................................................
Checking and Editing a File ........................................................................
59
59
60
61
vii
Printing a List of Files in Memory (Print TX File List) .......................... 64
Checking the Transmission Result (TX File Status) ............................ 65
Checking the Reception Result (RX File Status) .................................. 66
Printing a Confidential Message ............................................................ 67
Confidential File Report............................................................................... 68
Printing a File Received with Memory Lock.......................................... 69
Printing the TCR ...................................................................................... 71
Displaying the Memory Status ............................................................... 72
5. Facsimile User Tools
Accessing the User Tools.......................................................................
Exiting User Tool mode...............................................................................
Register/Delete Menu ..............................................................................
Storing Keystroke Programs .......................................................................
Deleting a Keystroke Program ....................................................................
Registering an Auto Document ...................................................................
Deleting an Auto Document ........................................................................
Printing an Auto Document .........................................................................
Registering an Irregular Area ......................................................................
Deleting an Irregular Area ...........................................................................
Reports/Lists............................................................................................
73
74
75
75
78
79
81
82
83
85
86
Initial Setup TX.........................................................................................
Initial Setup RX ........................................................................................
To Set the Bypass Paper Size ....................................................................
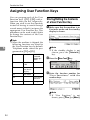
Assigning User Function Keys ..............................................................
Storing/Editing the Contents of a User Function Key..................................
Utilizing a User Function Key ......................................................................
Functions You Can Store in User Function Keys........................................
88
90
92
94
94
95
96
6. Key Operator Setting
Changing Key Operator Settings ........................................................... 97
Personal Codes........................................................................................... 97
ECM .......................................................................................................... 102
Memory Lock............................................................................................. 103
Multistep Transfer ..................................................................................... 105
Forwarding ................................................................................................ 108
Treating Message from Certain Senders Differently (Specified Senders) .... 115
Authorized Reception................................................................................ 120
Registering the Economy Transmission Time .......................................... 124
ID Code ..................................................................................................... 125
G3 Digital Line........................................................................................... 126
G4 Digital Line........................................................................................... 128
Changing the User Parameters................................................................. 130
viii
Date/Time..................................................................................................
Summer Time............................................................................................
Counters....................................................................................................
Auto Reset ................................................................................................
Paper Feed Selection................................................................................
RDS (Remote Diagnostic System)............................................................
136
137
137
138
139
139
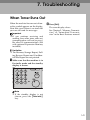
7. Troubleshooting
When Toner Runs Out........................................................................... 141
When an Error Report is Printed.......................................................... 142
When Power is Turned off or Fails ...................................................... 143
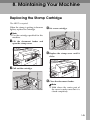
8. Maintaining Your Machine
Replacing the Stamp Cartridge ............................................................ 145
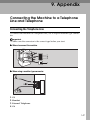
9. Appendix
Connecting the Machine to a Telephone Line and Telephone..........
Connecting the Telephone Line ................................................................
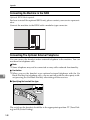
Connecting the Machine to the ISDN .......................................................
Connecting The Optional External Telephone ..........................................
Selecting the Line Type.............................................................................
Optional Equipment ..............................................................................
Expansion Memory and Hard Disk............................................................
400 dpi Option (FAX 400dpi Option Type 450) .........................................
ISDN Unit (ISDN Option Type 450)...........................................................
Stamp (FAX Stamp Type 4000) ................................................................
Specifications ........................................................................................
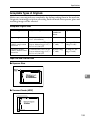
Acceptable Types of Originals ..................................................................
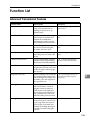
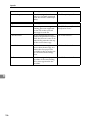
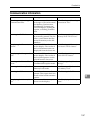
Function List ..........................................................................................
Advanced Transmission Features.............................................................
Communication Information ......................................................................
User Tools.................................................................................................
147
147
148
148
149
150
150
151
151
151
152
153
155
155
157
158
INDEX...................................................................................................... 162
ix
x
1. Transmission Features
Handy Dialing Functions
Chain Dial
Telephone Directory
This allows you to compose a telephone number from various parts,
some of which may be stored in
Quick Dials or Speed Dials and some
of which may be input using the
number keys.
This feature lets you find a stored
Speed Dial quickly by just entering a
single letter, for example, the first lett er o f t h e n am e s t o r e d fo r t h at
number.
Preparation
To use the Telephone Directory
feature, you need to register a
search letter when you program
Speed Dials. See Chapter3, “Speed
Dial” in the Basic features manual.
Limitation
❒ Maximum length of telephone or
fax number: 254 digits
Note
❒ For Memory Transmission and Immediate Transmission, insert a
pause between numbers. For Onhook Dial and Manual Dial, no
pause is needed.
- (Example) 01133-1-555333
Assume that 01133 is stored in Quick
Dial 01 and that 1 is stored in Speed
Dial 01.
A Place the original and select any
scan settings you require.
B Press the Quick Dial key {01}.
C Press the {Pause/Redial} key.
D Press the {Speed Dial} key and {0}
and {1} using the number keys (if
the optional Expansion Memory is
installed, three digits are reeded to
specify a Speed Dial).
E Enter {5}, {5}, {5}, {3}, {3} {3}
with the number keys.
F Press the {Start} key.
Limitation
❒ Speed Dial codes cannot be
searched for by symbol or number.
❒ Names enclosed within brackets
are not searched for.
A Set your original and select any
scan settings you require.
B Press the {Speed Dial}} key.
LTWO240E.eps
Speed Dial
On Hook Dial
Pause /
Redial
Tone
1
Transmission Features
C Press [Tel.Dir.].
❒ If you make a mistake, press the
{Clear/Stop} key to try again.
❒ If you wish to dial another destination, press [Add] and dial another fax number.
❒ If the optional Expansion Memory is installed, codes 000 to 999
become available.
Us53-1.tif
1
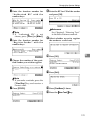
D Enter the search letter by pressing
one of the Quick Dial keys (A to
Z).
F Press the {Start}} key.
ND2L05E1.eps
01
06
07
A
B
C
D
E
F
G
08
01
10
11
12
13
14
H
I
K
L
M
N
15
02
J
18
05
20
21
O
P
Q
R
S
T
U
23
24
25
26
27
28
X
Y
Z
W
17
04
22
V
16
03
19
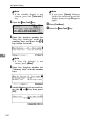
Redial
ND2L05E1
Us53-2.tif
The machine memorizes the last 10
destinations that have been dialed. If
you wish to send a message to a destination which you faxed to recently,
the Redial feature saves you finding
and entering the number again.
A Press the {Pause/Redial}} key.
LTWO220E.eps
Speed Dial
The names or fax numbers registered in Speed Dials are shown in
numerical order on the display.
On Hook Dial
Pause /
Redial
Us53-3.tif
Tone
E Enter the two digit code (00 to 99)
of speed dial for the destination
with number keys.
B A list of previously dialed numbers will flash up. If you cannot
see the number you need use the
[↑
↑Prev.] and [↓
↓Next] keys to scroll
through them. Then enter the
code for the number you wish to
redial for example, “01”.
Us53-3.tif
Us57-1.tif
Note
❒ If the list does not contain the
d e s ir e d d e s t i n a t io n , p re s s
↓Next].
[↑
↑Prev.] or [↓
2
Handy Dialing Functions
Limitation
❒ The following kinds of destinations are not memorized:
• Quick Dials
• Speed Dials
• Group Dials
• Destinations dialed by a Program
• Destinations dialed as End
Receivers for Transfer Request
• Forwarding terminal of the
substitute reception
• Destination of Memory File
Transfer
• Destinations dialed using the
external telephone or optional handset keypad
• Destinations dialed by Redial (regarded as already memorized)
• Any destinations after the
first number if multiple destinations were dialed
❒ Do not dial any digits before
you press the {Pause/Redial}
key. If you press the {Pause/Redial} key after entering digits using the number keys, a pause
will be entered instead.
Note
❒ If the receiver uses a fax machine of the same manufacturer
that is capable of registering the
RTI, that name may be shown
on the display instead of the fax
number.
Subaddress
The optional ISDN Unit is required.
1
ISDN allows two or more terminals
(such as a fax machine and digital telephone) to be connected to a single
line. These terminals are identified by
their subaddress numbers. If the terminals connected to the line at a destination are assigned subaddresses,
dialing a subaddress allows you to direct your fax message to a particular
terminal at the destination.
Limitation
❒ Subaddresses can only be used
with ISDN.
Note
❒ You need to program a User Function key with the Subaddress function.⇒ P.94 “Assigning User
Function Keys”
❒ You can program a subaddress in
Quick Dial or Speed Dial.
A Set your original and select any
scan settings you require.
B Select either G4 or G3 (ISDN).
Note
❒ When the optional ISDN Unit is
installed, the line used for G3 is
set to ISDN.
C Dial
the fax number with the
number keys.
3
Transmission Features
D Press
the User Function key
({
{F1}
}- {F5}
}) in which the Subaddress function has been registered.
1
LTWO800E.eps
Communicating
Start
Manual RX
Receive
File
TX File
Status
Confidential
File
TEL
Mode
Standard
Detail
Super Fine
Immediate
Trans.
Memory
Trans.
“/” will appear on the display.
Us48-1.tif
E Enter the destination subaddress
with the number keys.
F Press the {Start}} key.
4
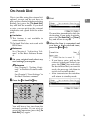
On-hook Dial
On-hook Dial
This is just like using the external telephone, except you do not have to
pick up the external telephone before
dialing. Just press the {On Hook Dial}
key and dial the number. If you hear
a voice, you can pick up the external
telephone and speak with the other
party.
Limitation
❒ This feature is not available in
some countries.
❒ On-hook Dial does not work with
ISDN lines.
Reference
See Chapter4, “Adjusting Volume” in the Basic Features manual.
C Dial.
1
Us35-1.tif
The machine immediately dials the
destination. If you make a mistake,
press the {On Hook Dial} or {Reset}
key and return to step B.
D When the line is connected and
you hear a high-pitched tone,
press the {Start}
} key.
Us37-2.tif
A Set your original and select any
• If you hear a voice, pick up the
external telephone before you
press the {Start} key and notify
the destination that you want to
send a fax message (ask them to
switch to Facsimile mode).
• After transmission the machine
will return to standby mode.
scan settings you require.
Reference
See Chapter2, “Setting Originals” in the Basic Features manual.
See Chapter2, “Scan Settings” in
the Basic Features manual.
Us35-1.tif
B Press the {On Hook Dial}} key.
LTWO230E.eps
Speed Dial
On Hook Dial
Pause /
Redial
Tone
You will hear a low tone from the
internal speaker. If you wish to
cancel this operation, press the {On
Hook Dial} key again.
5
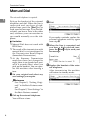
Transmission Features
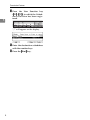
Manual Dial
The external telephone is required.
1
Pick up the handset of the external
telephone and dial. When the line is
connected and you hear a highpitched tone, press the {Start} key to
send your fax message. If, on the other hand, you hear a voice at the other
end, continue your conversation as
you would normally over the telephone.
Limitation
❒ Manual Dial does not work with
ISDN lines.
❒ The result of the transmission with
manual dial is not mentioned in
the Transmission Result Report
(Immediate Transmission).
❒ At the Economy Transmission
mode have been just changed to
night, there is no sounds for a period of 4 seconds (Max) when you
pick up the handset. You can operate the machine after hearing a
tone.
A Set your original and select any
scan settings you require.
Reference
See Chapter2, “Setting Originals” in the Basic Features manual.
See Chapter2, “Scan Settings” in
the Basic Features manual.
B Pick up the external telephone.
You will hear a tone.
6
C Dial.
Us35-1.tif
If you make a mistake, replace the
external telephone and try again
from step B.
D When the line is connected and
you hear a high-pitched tone,
press the {Start}
} key to send your
fax message.
Us37-2.tif
E Replace the handset of the external telephone.
After transmission the machine
will return to standby mode.
Us35-1.tif
Changing the Line Type
Changing the Line Type
The optional ISDN Unit is required.
When the optional ISDN Unit is installed, you can connect to up to a
maximum of 2 lines.
This machine comes with a single Analog (PSTN) line connection for G3
communication as standard.
Press the {F4} key to change the line
type.
Note
❒ When sending a fax, you can select
the line type if dialing with the
number keys or Chain Dial.
When only the optional ISDN Unit is
installed
A Press the {F4}} key to switch between G3 and G4.
LTWO180E.eps
Communicating
Start
Manual RX
Receive
File
TX File
Status
Confidential
File
TEL
Mode
Standard
Detail
Super Fine
Immediate
Trans.
Memory
Trans.
1
Limitation
❒ If you select G4 mode, JBIG
compression is not available.
-Which Line is Used for G3
Transmissions?
ISDN lines can be used for G3 communication as well as G4 communications, however, this machine is set by
default, to use the ISDN line for G3
transmissions.
Note
❒ When you use G3 with ISDN, you
can set the subaddress.
❒ If you wish to use the digital (ISDN) line for G3 transmissions,
please contact your service representative.
Us28-1.tif
-Auto Identification
Note
❒ When the {F4} key is lit, G4 is
selected.
Us43-2.tif
❒ G3 is selected after power up or
when the machine is reset.
❒ Whether the PSTN or ISDN line
is used depends on the settings
explained later in this section.
This feature used when G4 is selected.
The machine first tries a G4 communication and if it cannot connect because the receiver is not a G4
terminal, it automatically switches to
G3 and redials.
Note
❒ If the G3 line at the destination is
connected to the ISDN via a TA
(Terminal Adapter) or a PBX, since
the called number is on ISDN, it is
regarded as G4 and the Auto Identification feature may not automatically switch this machine to G3.
7
Transmission Features
Transmission Features
Stamp
1
ARDF and Stamp Unit are required.
When sending a fax message using
the Document Feeder (ADF), the machine can stamp a circle mark at the
top of the original. When sending a
double sided document, they are
marked at top left of the front page
and top right of the rear page. This
stamp indicates that the original has
been successfully stored in memory
for Memory Transmission, or that it
has been successfully sent for Immediate Transmission.
LCSTAP01GB.eps
❒ When the stamp starts getting
lighter, replace the cartridge. ⇒
P.145 “Replacing the Stamp Cartridge”
❒ If a page was not stamped even
though the Stamp feature is turned
on, you need to re-send that page.
❒ By default, Stamp is turned off. If
you use this feature often, you can
adjust the User Parameters so that
the home setting is on. In this case,
Stamp can easily be turned off for
any single transmission by pressing the {F5} key. ⇒ P.130 “Changing the User Parameters”(Switch00,
Bit0)
A Press the {F5}} key.
LTWO150E.eps
Communicating
Start
Manual RX
Receive
File
TX File
Status
Confidential
File
TEL
Mode
Standard
Detail
Super Fine
Immediate
Trans.
Memory
Trans.
The Stamp indicator will light.
Pressing the {F5} key again will
turn it off.
8
Limitation
❒ Stamp only works when scanning
from the Document Feeder (ARDF).
❒ You cannot turn the Stamp feature
on or off while a document is being
scanned.
❒ Do not open the document feeder
(ARDF) while scanning the document. Document jam could occur.
ID Transmission (Closed
Network)
Note
❒ When the Stamp Unit is installed,
{F5} key is automatically assigned
as the Stamp key.
Note
❒ The default setting is off. Turn this
feature on with the User Parameters. ⇒ P.130 “Changing the User
Parameters”(Switch01, Bit1)
This feature allows you to restrict
transmission of messages only to machines of the same make, and only to
those machines that have the same
Polling ID. The transmission options
let you switch ID transmission on and
off for each separate transmission.
Transmission Features
F Code (SUB)
B Dial the destination fax number
using the number keys.
Us28-1.tif
Normally you can only use Confidential Transmission to send to fax machines of the same make that have the
Confidential Reception feature. However, if the other machine supports a
similar feature called “F Code”, you
can send fax messages to the other
party using this method instead.
1
C Press
the User Function key assigned with the F Code feature.
LTWO800E.eps
Preparation
You need to assign the F Code feature to a User Function key beforehand. ⇒ P.94 “Assigning User
Function Keys”
Limitation
❒ You can only use this feature with
G3 communications.
❒ You cannot use Chain Dial with
this feature.
❒ You cannot select this function
when carrying out standard Confidential Transmission
Communicating
Start
Manual RX
Receive
File
TX File
Status
Confidential
File
TEL
Mode
Standard
Detail
Super Fine
Immediate
Trans.
Memory
Trans.
D Enter
the function number for
SUB(S) on the number keys.
Usfax-new008.tif
E Enter
the SUB code with the
number keys.
Usfax-new13.tif
Note
❒ The ID can be up to 20 digits long
and consist of spaces, * and # .
❒ Make sure the ID matches the
specification of the fax you are
sending to.
❒ You can store IDs in Quick Dials,
Speed Dials, Groups and Programs.
❒ Messages you send using this feature are marked “SUB” on all reports.
A Set your document and make any
changes to the scan settings if necessary.
F Press the {Start}} key.
Usfax-new14.tif
Note
❒ If you use Immediate Transmission and the destination fax machine does not support the F
Code feature, a message will appear on the display to inform
you of this. In this case, press
[OK] to cancel the transmission.
9
Transmission Features
F Code (PWD)
There are times when you may wish
to use a password when sending confidential faxes with the F Code “SEP“
feature.
1
Limitation
❒ You can enter a password up to 20
digits long.
Note
❒ Messages you send using this feature are marked “PWD” on all reports.⇒ P.86 “Reports/Lists”
JBIG Transmission
FAX 400dpi option is required.
If you use JBIG (Joint Bi-level Image
Experts Group) compression you can
send photographic originals faster
than the other compression method.
You can only use this feature with
G3/IG3 of line type.
Limitation
❒ If ECM is turned off, JBIG Transmission is not available.
❒ This feature requires that the other
party's fax machine has both the
JBIG function and ECM function
(G3 communication only).
10
More Transmission Functions
More Transmission Functions
Auto Fax Reception Power-up
This machine can be set to shut down
automatically if nobody has used the
it for a while. In these situations, even
though the operation switch is off, the
machine can still receive incoming
messages as long as the Main Power
switch is on.
Important
❒ Reception is not possible if both
the operation switch and Main
Power switch are turned off.
Note
❒ By default, messages are printed as
soon as they are received (Immediate Reception). To change this, see
P.130 “Changing the User Parameters”(Switch14, Bit0)
Transmission with Image
Rotation
1
For most purposes, set A4/LT originals in the landscape direction (L). If
you set an A4/LT original in the portrait direction (K), the image will be
sent rotated by 90°. Providing the receiver has A4/LT landscape paper
(L), the message will be printed the
same size as the original.
Limitation
❒ This feature is not available with
Parallel Memory Transmission or
Immediate Transmission.
❒ When Image Rotation is used, all
messages are sent by normal Memory Transmission.
Dual Access
The machine can scan other messages
into memory even while sending a
fax message from memory, receiving
a message into memory , or automatically printing a report. Since the machine starts sending the second
message immediately after the current transmission terminates, the line
will be used efficiently.
Note that during Immediate Transmission or when in User Tools mode,
the machine cannot scan an original.
11
Transmission Features
Printed Report
Memory Storage Report
1
This report is printed after an original
is stored in memory. It helps you review the contents and the destinations of stored originals. Even if the
machine is set up not to print this report, it is still printed if an original
could not be stored.
Note
❒ You can turn this report on and off.
By default, it is not printed. ⇒
P.130 “Changing the User Parameters”(Switch03, Bit2)
❒ You can choose whether to include
part of the original image on the report (part of the image is printed
by default). ⇒ P.130 “Changing the
User Parameters”(Switch04, Bit7)
Transmission Result Report
(Memory Transmission)
This report is printed when a Memory Transmission is completed so you
can check the result of the transmission. If two or more destinations are
specified, this report is printed after
the fax message has been sent to all
the destinations. If the machine is set
up not to print this report and the fax
message could not be successfully
transmitted, the Communication Failure Report is printed. ⇒ P.12 “Communication Failure Report”
12
Note
❒ By default, this function is turned
on. You can turn it off with the
User Parameters. ⇒ P.130 “Changing the User Parameters”(Switch03,
Bit0)
❒ You can choose whether to include
part of the original image on the report (by default, part of the image
is printed).⇒ P.130 “Changing the
User Parameters”(Switch04, Bit7)
❒ The “Page” column gives the total
number of pages. The “Not Sent”
column gives the number of pages
that could not be sent successfully.
Communication Failure Report
This report is only printed if the
Transmission Result Report is turned
off and a message could not be successfully transmitted with Memory
Transmission. Use it to keep a record
of failed transmissions so you can
send them again.
Note
❒ You can choose whether to include
part of the original image on the report (by default, part of the image
is printed). ⇒ P.130 “Changing the
User Parameters”(Switch04, Bit7)
❒ The “Page” column gives the total
number of pages. The “Not Sent”
column gives the number of pages
that could not be sent successfully.
Printed Report
Transmission Result Report
(Immediate Transmission)
1
If you turn this report on, a report will
be printed after every Immediate
Transmission so you have a record of
whether the transmission was successful or not. If the machine is set up
not to print this report and the fax
message could not be successfully
transmitted, the Error report is printed instead.
Note
❒ You can switch this report on or off
using the User Parameters. ⇒
P.130 “Changing the User Parameters”(Switch03, Bit5)
❒ If the page was sent successfully,
the “Page” column gives the total
number of pages that were sent
successfully. The “Not Sent” column gives the number of pages
that could not be sent successfully.
13
Transmission Features
1
14
2. Reception Features
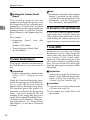
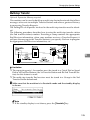
Reception
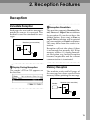
Immediate Reception
-Reception Resolution
Each page of a received fax message is
printed as soon as it is received. This
method is used for standard fax messages.
Nd1x00e2.eps
Receiver (your machine)
Sender
ND1X00E2
- Display During Reception
The sender's RTI or CSI appears on
the first line.
Us15-1.tif
This machine supports Standard, Detail, Fine and Super Fine resolutions
for reception. If you do not have the
400dpi option, faxes sent at Fine or
Super Fine resolution will be printed
on your machine at Detail resolution.
This may differ from the sender's intention.
Reception will not take place if there
is not enough free memory left. If free
memory reaches 0% during Immediate Reception, any further reception
becomes impossible and the current
communication is terminated.
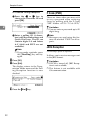
Memory Reception
The machine waits until all pages of
the message have been received into
memory before printing the message.
Nd1x00e3.eps
Receiver (your machine)
Sender
ND1X00E3
15
Reception Features
This method is used with the following features:
• Combine 2 originals ⇒ P.26 “Combine 2 Originals”
• Multi-copy when set to multiple
copies ⇒ P.25 “Multi-copy Reception”
• Reverse Order Printing ⇒ P.27
“Reverse Order Printing”
• Substitute Reception ⇒ P.16 “Substitute Reception”
• 2-sided Printing⇒ P.24 “2-Sided
Printing”
2
Important
❒ All the messages stored in memory
are deleted if the power is
switched off for more than one
hour.
❒ The machine may not be able to receive large numbers of messages
or messages with a high data content. In such cases, we recommend
you switch the above features off
or add a memory card.
Limitation
❒ The machine may not be able to receive fax messages when the free
memory space is low.
Note
❒ If the memory free space reaches
0% during Memory Reception, the
machine can no longer receive the
current fax message and stops
communicating.
16
Substitute Reception
If any of the conditions listed below
are met, the machine automatically
switches to Memory Reception mode
and stores messages in memory instead of printing them. This reception
mode, in which a received fax message is stored in memory unprinted,
is called Substitute Reception. Messages received using Substitute Reception are automatically printed
when the condition which caused the
machine to use Substitute Reception
is rectified. Substitute Reception takes
place when:
• Paper runs out
• Toner runs out
• Paper is jammed
• A cover is open
• A fax is received during a copy or
print run
Limitation
❒ Reception may not take place if
there is not enough free memory
left.
Note
❒ The Receive File indicator lights to
let you know when message(s)
have been received using Substitute Reception.
❒ If free memory reaches 0% during
Substitute Reception, any further
reception becomes impossible and
the current communication is terminated.
Reception
Screening Out Messages from
Anonymous Senders
To help you screen out unwanted
messages that may fill up machine
memory, the machine can be programmed to only use Substitute Reception under the following
conditions.
Four settings are available:
• “When RTI or CSI is received”
• “Free”
• “disable”
Note
❒ The default setting is “When RTI
or CSI is received”, only storing
messages when the RTI/CSI is
present. You can change this with
the User Parameters. ⇒ P.130
“Changing the User Parameters”(Switch05, Bit2,1)
❒ Even if the sender does not have an
RTI or CSI, the machine will still
receive messages using Substitute
Reception if:
• Paper becomes jammed while
the power switch is on
• For some reason printing is not
possible for example when copy
job is in progress
-When RTI or CSI is Received
The machine switches to Substitute
Reception only when the sender has
programmed their RTI or CSI. If the
power is switched off for more than
an hour, all the messages received
into memory are deleted. In that case,
the Power Failure Report or the TCR
can be used to identify which messages are lost so you can ask the senders
to transmit them again.
2
Important
❒ If a sender has not programmed
their RTI or CSI, the machine may
reject an important fax message.
We recommend that you ask important senders to register an RTI
or CSI in advance.
-Free
The machine switches to Substitute
Reception regardless of whether or
not the sender has programmed their
RTI or CSI.
17
Reception Features
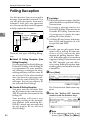
When the Receive File Indicator is Lit
If the Receive File indicator is blinking, a message has been received and stored
in memory with Memory Lock. You need to print it out manually. ⇒ P.69 “Printing a File Received with Memory Lock”
If the Receive File indicator is lit, a message has been received but could not be
printed for some reason. The message was stored in memory (Substitute Reception). When you solve the problem, the message will be automatically printed
out. The table below lists some problems that could have caused Substitute Reception to take place and their solutions.
2
Why Substitute Reception Indication/Status
Occurred
Paper has run out
Toner is empty
Solution
B and/or {Fax} indicator
is lit red.
Add paper.
D is lit
Replace the toner cartridge.
⇒See "Loading Paper" in the Copy
Reference manual.
⇒See "Adding Toner" in the Copy
Reference manual.
Paper is jammed
x is lit
Remove the jammed paper.
See "Clearing Misfeeds" in the Copy
Reference manual.
Cover is open
The message “Doors/Cov- Close the cover.
ers open” appears.
A cover other than the Document
Feeder (ARDF) or front cover is
open.
Machine is busy printing
with other function
The machine is printing
with other function.
The message will be printed after the
current job finishes automatically.
When the Confidential File Indicator is Lit or Blinking
If this indicator is lit, a message has been received into memory with Confidential Reception. You need to print it out manually. ⇒ P.67 “Printing a Confidential
Message”
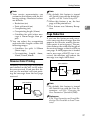
Where Incoming Messages are Delivered Output Tray When the
3–bin Sorter is Installed
To change where incoming messages are delivered, adjust the output tray setting. You can set each tray with function of copy, fax, printer when the optional
3–bin sorter is installed.
Reference
See “Changing the Machine's settings” in the Copy reference.
18
Reception Functions
Reception Functions
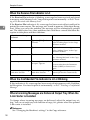
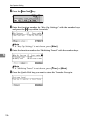
Transfer Station
Transfer Stations allow you to expand
the standard features of your fax machine to set up complex networks.
Transfer Stations must be machines of
the same make.
The diagram below may make the
concept clearer.
Nd1x00e4.eps
End Receiver
Requesting Transfer station
party
End Receiver
Transfer
result report
End Receiver
ND1X00E4
The following terminology is used in
this section.
❖ Requesting Party
The machine where the message
originates from, i.e. the machine
making a Transfer Request.
❖ Transfer Station
The machine that forwards the incoming message to another destin a t io n , i . e . t h e m ac h i n e t h at
receives the Transfer Request. In
this section this refers to your machine.
❖ End Receiver
The final destination of the message, i.e. the machine that the
Transfer Station sends to. End Receivers must be programmed into
Quick Dials, Speed Dials or
Groups in the Transfer Station
(this machine).
Limitation
❒ Polling ID's of the Requesting Party and Transfer Station must be
identical for this feature to work.
❒ If your line number is not registered at the Transfer Station, reception will not take place.
❒ This machine will not receive a Transfer Request unless it has enough free
memory to store two or more destinations dialed from the number keys.
❒ If the Requesting Party specifies a
Group for the End Receivers and
the total number of End Receivers
exceeds 200 the Transfer Station
cannot transfer the message and
sends a Transfer Result Report to
the Requesting Party.
2
Reference
P.52 “Transfer Request”
-Multistep Transfer
The principles of Transfer Stations can
be used to build up a multi-step facsimile network where messages are
passed through several Transfer Stations. By programming the end receivers in a Transfer Station Group, you
can enable this machine to transfer
messages onto other Transfer Stations.
For more information, contact your
service representative.
This feature can only be used if the machines are made by the same maker.
Limitation
❒ Optional Expansion Memory is required for using this feature.
Reference
P.105 “Multistep Transfer”
19
Reception Features
- Sending the Transfer Result
Report
T his machine c omp ares t he fax
number of the Requesting Party with
the Requesting Party's number programmed in a Quick Dial or Speed
Dial, If the lower five digits of the two
numbers match, it sends the Transfer
Result Report to the Requesting Party.
For example:
• Requesting Party's own dial
number:
001813-11112222
• Transfer Station's Quick Dial:
03-11112222
2
Transfer Result Report
This reports whether transmission to
the End Receivers was successful or
not.
Preparation
Register the own fax number in advance. ⇒ P.7 “Changing the Line
Type”
When the Transfer Station has transferred the message to all End Receivers, it sends the Transfer Result
Report back to the Requesting Party.
The machine prints the report if it
cannot be sent back to the Requesting
Party. You must program the fax
number of the requesting party in a
Quick Dial or Speed Dial in the Transfer Station. See Chapter3, “Registering QuickDials” or “Registering
SpeedDials” in the Basic Features
manual.
20
Note
❒ By default, a portion of the original
image is printed on this report.
You can turn this off with the User
Parameters. ⇒ P.130 “Changing the
User Parameters”(Switch04, Bit7)
ID Reception (Closed Network)
If you wish to limit reception of messages from those with the same machines of the same make and with the
same Polling ID, contact your service
representative to turn this feature on.
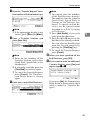
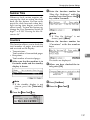
F Code (SEP)
Normally you can only use Polling
Reception to receive faxes from machines that have the Polling Recept i o n fe a t u r e o f t h e sa m e m a ke .
However, if the other machine of another make supports a polling reception, you can receive fax messages
from the other party using this method instead.
Preparation
You need to assign the F Code feature to a User Function key beforehand. ⇒ P.94 “Storing/Editing the
Contents of a User Function Key”
Limitation
❒ You can only use this feature with
a G3 line (not with G4).
❒ You cannot use Chain Dial with
this feature.
Reception Functions
Note
❒ The ID can be up to 20 digits long
and consist of digits.
❒ Make sure the ID matches the
specification of the fax you are
sending to.
❒ You can store IDs in Quick Dials,
Speed Dials, Groups and Programs with number keys, space, #
and *.
❒ Messages you receive using this
feature are marked “SEP” on all reports.
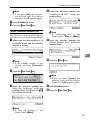
E Press [Mode].
The Transmission Mode menu is
displayed.
L2GB002.tif
2
F Enter
the function number for
“Polling RX” on the number keys.
Us79-1.tif
A Make sure that the machine is in
Facsimile mode and the standby
display is shown. Then enter the
fax number.
Note
❒ If you cannot see the function
number, search for it using the
[↑
↑Prev.] and [↓
↓Next] arrow keys.
Us28-1.tif
Us94-2.tif
B Press
the User Function key assigned with the F Code feature.
LTWO800E.eps
Communicating
Start
Manual RX
Receive
File
TX File
Status
Confidential
File
TEL
Mode
Standard
Detail
Super Fine
Immediate
Trans.
Memory
Trans.
G Depending
which method you
are using, choose one of the following procedures:
C Enter
the function number for
SEP(P) on the number keys.
Default ID Polling Reception
Usfax-new008.tif
A Press the < or > key to
change the Default ID and
press [OK].
Us98-3.tif
D Enter
the SEP code with the
number keys.
L2GB001.tif
21
Reception Features
ID Override Polling Reception
A Press the < or > key to
change the Override ID and
press [OK].
Us98-4.tif
2
F Code (PWD)
There are times when you may wish
to use a password when receiving
faxes by polling with the F Code
“SEP” feature. ⇒ P.20 “F Code (SEP)”
Limitation
❒ You can enter a password up to 20
digits long.
B Enter a polling ID (4 characters) with the number keys and
Quick Dial keys. The ID can
contain digits 0–9 and letters
A-F (0000 and FFFF are not
available).
Note
❒ If you make a mistake, press
the {Clear/Stop} key and try
again.
H Press [OK].
I Press [Exit].
The display returns to the Transmission Mode menu and the Polling Reception function is now
checked.
Us99-1.tif
J Press the {Start}} key.
22
Note
❒ Messages you send using this feature are marked "PWD" on all reports.
JBIG Reception
FAX 400dpi option is required.
It allows you to receive messages sent
in the JBIG format.
Limitation
❒ If ECM is turned off, JBIG Reception is not available.
❒ This feature is not available with
G4 communication.
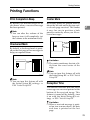
Printing Functions
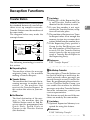
Printing Functions
Print Completion Beep
Center Mark
By default, the machine beeps to let
you know when a received message
has been printed.
By default, marks are printed halfway
down the left side and at the top center of each page received. This makes
it easy for you to position a hole
puncher correctly when you file received messages.
Note
❒ You can alter the volume of the
beep or turn it off completely (set
the volume to the minimum level).
2
Nd1x00e6.eps
Checkered Mark
By default, a checkered mark is printed on the first page of fax messages to
help you separate them.
Nd1x00e5.eps
ND1X00E6
Limitation
❒ The center mark may deviate a little from the exact center of the
edge.
ND1X00E5
Note
❒ You can turn this feature off with
the Initial Setup RX settings. ⇒
P.90 “Initial Setup RX”
Note
❒ You can turn this feature off with
the Initial Setup RX. ⇒ P.90 “Initial
Setup RX”
Reception Time
You can have the date and time when
a message was received printed at the
bottom of the received image. This
feature is turned off by default—turn
it on with the Initial Setup RX settings. ⇒ P.90 “Initial Setup RX”
Limitation
❒ When a received message is printed on two or more sheets, the date
and time is printed on the last
page.
23
Reception Features
Note
❒ The date and time when the message was printed can also be recorded on the message. If you need
this feature, please contact your
service representative.
2
❒
nd0x03n3GB.eps
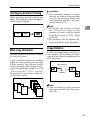
2-Sided Printing
You can have a received message
printed on both sides of the paper. By
default, this feature is turned off.
Switch it on with the Initial Setup RX
settings. ⇒ P.90 “Initial Setup RX”
CP69.eps
1
2
1
2
Limitation
❒ To use this function all pages of
the received document must be of
the same size—inform the sending
party of this beforehand if necessary. You must also have paper set
in your machine of the same size
as that sent by the sending party
(81/2"×11"→81/2"×11", 81/2"×14"→
81/2"×14", A4→A4, B4→B4 are typical examples, whether A3 and B5
sizes are correctly scan in will depend on the fax machine). This machine will scan in correctly
landscape 11"×17", 81/2"×14", 81/2"
×11", A3, B4, A4, B5 and portrait
81/2"×11", 51/2"×81/2, "A4, B5 and
A5. The table below shows the results that can be achieved when
sending and receiving using this
machine.
24
❒ This feature works only when all
pages are of the same width and
are received into memory.
❒ Note that the machine will use Memory Reception for 2-Sided Printing.
❒ This feature cannot be used with
Combine 2 originals.
❒ Printouts may vary depending on
how the sender set them.
❒ If another party sends you a fax and
their machine is not able to detect
the size of the original correctly, the
message may come out truncated,
separated or containing excess white
space when printed at your end. For
example, if the sending machine
thinks a B5 original is a B4 original, it
will be printed at your end on B4
size paper even if you have B5 paper
available in your machine.
Note
❒ You can choose to have messages
only from selected senders printed
in this way. ⇒ P.115 “Treating Message from Certain Senders Differently
(Specified Senders)”
Printing Functions
180 Degree Rotation Printing
When printing on both sides of the
paper, this machine rotates images as
shown in the diagram.
CP2B02E0.eps
Limitation
❒ The maximum number of copies
that can be made of each message
is 10. If you are using Multi-copy
with Specified Senders, the maximum number is 10.
2
1
2
1
Note
❒ By default, this feature is turned
off. Switch it on and set the
number of copies with the Initial
Setup RX settings. ⇒ P.90 “Initial
Setup RX”
❒ The machine will use Memory Reception for Multi-copy Reception.
2
CP2B02E0
Image Rotation
Multi-copy Reception
Optional Expansion Memory is required
for using this feature.
If you switch this feature on, multiple
copies of each incoming fax message
will be printed. You can also choose
to have multiple copies made of messages from particular senders. ⇒ P.90
“Initial Setup RX”, P.115 “Treating
Message from Certain Senders Differently (Specified Senders)”
If you have installed paper in the cassette portrait K, incoming fax messages will be rotated automatically to
fit on the paper.
Nd1x00e9.eps
your machine
Nd1x00e7.eps
ND1X00E9
Note
❒ You can choose to have received
messages printed from the specified tray.
ND1X00E7
25
Reception Features
Combine 2 Originals
When two messages of the same size
and direction are received consecutively, they are printed on a single
sheet when you turn this feature on.
This can help you economize on paper.
• Two A5K messages are printed
side by side on a sheet of A4L.
• Two B5K messages are printed
side by side on a sheet of B4L.
• Two A4K messages are printed
side by side on a sheet of A3L.
• Two 81/2"×51/2"K messages are
printed side by side on a sheet of
81/2"×11"L.
• Two 81/2"×11"K messages are printed side by sid e on a she et o f
11"×17"L.
2
ND1x01e0.eps
ND1X01E0
Limitation
❒ This feature does not work with
messages larger than A5K, 51/2"×
81/2"K, B5K, A4K or 81/2"×11"K.
When A5K, 51/2"×81/2"K,B5K,
A4K, or 81/2"×11"KK size paper
is loaded in the machine, each page
of the received message is output
on a single sheet.
❒ If paper matching the size and direction of a received document is
not available, Combine 2 originals
is not possible.
26
❒ When "Combine 2 originals" and
"2-Sided Printing" are selected at
the same time, combine 2 originals
takes priority and 2–sided printing
is canceled.
Note
❒ By default, this feature is turned
off. Switch it on with the User Parameters. ⇒ P.130 “Changing the
User Parameters”(Switch10, Bit1)
❒ This feature uses Memory Reception.
Page Separation and Length
Reduction (Not Available in
Some Countries)
When the size of a received message
is longer than the paper loaded in the
machine, each page of the message
can be split and printed on several
sheets, or reduced and printed on a
single sheet. For example, this feature
splits the message if the length exceeds 20mm or more, by reducing
within 20mm. When a message is
split, the split mark (*) is inserted at
the split position and about 10mm of
the split area is duplicated on the top
of the second sheet.
Nd1x01e1.eps
ABC
(Document)
ND1X01E1
Printing Functions
Note
❒ Your service representative can
customize this feature with the following settings. Bracketed values
are defaults.
• Reduction (on)
• Print split mark (on)
• Overprinting (on)
• Overprinting length (10mm)
• Guideline for split (when message is 20mm longer than paper)
❒ You can adjust the overprinting
and reduction lengths within the
following ranges:
• Guideline for split: 0∼155mm
(5mm steps)
• Overprinting length: 4mm,
10mm, 20mm, 40mm
Note
❒ By default, this feature is turned
off. Switch it on with the Initial Setup RX. ⇒ P.90 “Initial Setup RX”
❒ When this feature is on, the first
page will be printed last.
❒ This feature uses Memory Reception.
2
Page Reduction
If you turn this feature on and you receive a message that is longer than the
paper in the cassette, usually the machine prints it on two pages. The machine reduces the width and length of
the received image so that it will fit on
one page. If A4L paper size is loaded
and a message of B4 L size is received, the machine will reduce the
message to a single A4L sheet.
Nd1x01e3.eps
Reverse Order Printing
your machine
Normally, received pages are printed
and stacked on the tray in the order
they are received. If you turn this feature on, the machine will start printing the message from the last page
received.
(B4 size)
reduction
(A4 size)
Nd1x01e2.eps
ND1X01E3
your machine
Note
❒ By default, this feature is turned
off. Switch it on with the User Parameters. ⇒ P.130 “Changing the
User Parameters”(Switch10, Bit3)
Print
ND1X01E2
Reference
P.26 “Page Separation and Length Reduction (Not Available in Some Countries)”
27
Reception Features
2
TSI Print
FAX Print Color
Usually the sender's TTI is printed on
received messages. If the sender has
not programmed their TTI, you will
not be able to identify them. However,
if you turn this feature on, the sender's
RTI or CSI is printed instead so you
can find out where the message came
from. See Chapter3, “G3 Analog
Line“ in the Basic Features manual.
You can specify a color for any received message, list on report. You
can choose the color of toner from
Black, Cyan, Magenta.
Note
❒ You can turn it on or off with the
User Parameters. ⇒ P.130 “Changing
the User Parameters”(Switch01, Bit5)
Note
❒ By default, the color of toner is
Black. You can change the color
with INITIAL Setup RX.
CIL/TID Print
2nd Color Choice
The optional ISDN Unit is required.
If this feature is specified, the machine can print with 2nd Color when
the machine has run out of default
toner. It is useful that the 2nd toner
use as a reserve of toner.
Two features are provided for identification of messages received by G4
(ISDN). If turned on, this information
will be printed on every page.
The CIL (Call Identification Line) refers to the combination of the receiver's own fax number, name, the
sender's own fax number and name,
time, and page number. The default
setting is on. The TID refers to the
name registered by the sender in their
TTI. The default setting is off.
Limitation
❒ These features are available only
when receiving in G4 mode.
❒ If the sender's TID contains double-byte characters (for example
Chinese characters), the TID will
not be printed even if TID Print is
turned on.
28
Note
❒ You can turn CIL and TID on or off
with the User Parameters. ⇒ P.130
“Changing the User Parameters”(Switch02, Bit5 or Bit6)
Limitation
❒ The color specified for 2nd Color
Choice cannot be used as a on FAX
Print Color.
Limitation
❒ The color specified for FAX Print
Color cannot be used as a on 2nd
Color Choice.
❒ If the machine has run out of 2nd
Color, there is no additional substitution.
Note
❒ By default, 2nd Color is not specified. You can turn it on and select
the color with INITIAL Setup RX.
Printing Functions
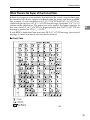
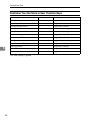
When There is No Paper of the Correct Size
If there is no paper in your machine that matches the size of a received message,
the machine will choose a paper size based upon the paper you have available.
For example, if your machine has LG (81/2"×14")L and DLT (11"×17")L installed and you receive a LT (81/2"×11")L size message, check the LT (81/2"×11")
column of the table below. The paper size at the top has the highest priority. In
this case, since LG (81/2"×14")L is a higher priority than DLT (11"×17")L, the
message is printed on LT (81/2"×11")L.
If only B5L is loaded and you receive an DLT (11"×17")L message, the received
message is stored in memory and will not be printed.
2
❖ Priority Table
GfrxpseGB.eps
29
Reception Features
Page Reduction
Disabled
Reduction in Sub-scan Direction
Enabled
Page Separation Threshold
20mm
Width or Length Priority
Width
• KK and LL indicate that the message is split over two pages of paper with
the orientation and size shown.
2
Limitation
❒ Paper placed in the bypass tray is not usually selected for printing a received
message. However, you can use this tray if you select the bypass tray as the
main paper tray using Reception with Specified Senders. ⇒ P.115 “Treating
Message from Certain Senders Differently (Specified Senders)”
❒ The paper size used to print a received message may be different from the size
of the sent original.
Note
❒ Widths that this machine can receive are A4, B4, LT, LG, and A3. Any messages narrower than A4 or LT are sent as A4 or LT width with the length unchanged.
Reference
P.26 “Page Separation and Length Reduction (Not Available in Some Countries)”
P.27 “Page Reduction”
P.25 “Image Rotation”
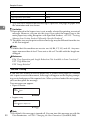
”Just Size” Printing
If you turn this feature on and no paper tray is stocked with paper of a suitable
size to print a received document, a message will appear on the display prompting you to load paper of the required size. When you have loaded the new paper,
you can then print the message.
Two messages can appear:
• Paper Cassette
ND0X04E0.eps
Paper designated to print FAX/Lists are
empty.
Refill A4 paper.
OK
ND0X04E0
• Bypass Tray
nd0x01e6.eps
Paper designated to print FAX/Lists are
empty.
Refill A4 paper to Bypass tray.
OK
ND0X01E6
30
Note
❒ By default, this message is turned off. You can turn this message on with the
User Parameters. ⇒ P.130 “Changing the User Parameters”(Switch05, Bit5)
Printing Functions
Out of paper display message
If the paper tray runs out of paper, you can have a message appear on the display asking you to add more paper.
Note
❒ By default, this message is turned off. You can turn it on with the User Parameters. ⇒ P.130 “Changing the User Parameters”(Switch05, Bit7)
2
Having Incoming Messages Printed on Paper From the Bypass
Tray
You can have messages sent from Specified Senders printed on paper from the
Bypass Tray. This is useful if you need messages printed on a size of paper not
stocked in the paper cassette(s).
Limitation
❒ Print area is determined with Optional Expansion Memory, Resolution, and
vertical length of originals.
Note
❒ Before you can use this feature, you need to turn on Authorized Reception
(Initial Setup RX settings), program the Specified Senders (Key Operator Settings) along with the Paper Tray set to “Bypass Tray”. ⇒ P.90 “Initial Setup
RX”, P.115 “Treating Message from Certain Senders Differently (Specified Senders)”
❒ When you set paper sizes other than A4 landscape, B4 landscape and portrait,
A3 landscape and portrait in the Bypass Tray, specify the paper size. This size
should match the bypass paper size for copying or a paper jam may occur. To
change the bypass paper size for copying, see the chapter titled "COPY FROM
THE BYPASS TRAY" in the copy reference manual. ⇒ P.92 “To Set the Bypass
Paper Size”
❒ If the specified paper size and the size of paper set in the Bypass Tray do not
match, paper jams may occur and the image may be truncated.
❒ If you use this feature, Image Rotation is not possible.
31
Reception Features
2
32
3. Advanced Transmission
Features
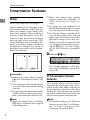
Overview
This feature describes various options that you can choose when sending a fax
message. The selections you make will only apply to the current fax message.
33
Advanced Transmission Features
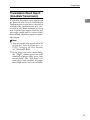
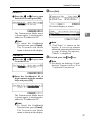
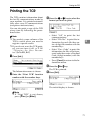
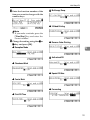
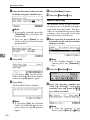
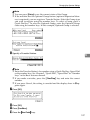
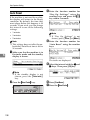
Sending at a Specific Time (Send Later)
Using this feature, you can instruct
the machine to delay transmission of
your fax message until a later time
which you specify. This allows you to
take advantage of off-peak telephone
charges without having to be by the
machine at the time.
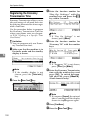
B Press [Mode].
Us28-1.tif
Nd1x01e4.eps
The Transmission Mode menu appears.
3
Transmitter
C Enter
the “Send Later” function
number with number keys.
Receiver
Us79-1.tif
Send Later
at 21:00 (9:00PM)
ND1X01E4
For convenience, you can program
the time when your phone charges
become cheaper as the Economy
Transmission time. ⇒ P.124 “Registering the Economy Transmission Time”
Then if you have a non urgent fax,
just select Send Later with Economy
Transmission when you scan it. Faxes
will be queued in memory and will
start being sent at Economy Transmission time.
Note
❒ You can not specify a time more
than 24 hours.
❒ If you wish to use Economy Transmission, program the time when
your phone charges are cheaper.
⇒ P.124 “Registering the Economy
Transmission Time”
❒ This feature is only available with
Memory Transmission.
A Set your original and select any
scan settings you require.
34
D Enter the time with the number
keys. To change AM/PM, press
[AM←
←→PM] (North America only)
or press [Economy TX].
Gbfax-001.tif
Note
❒ If the current time shown on the
display is not correct, change it.
⇒ P.136 “Date/Time”
❒ When entering numbers smaller than 10, add a leading zero.
❒ If you make a mistake, press the
{Clear/Stop} key and try again.
❒ To cancel Send Later, press
[Cancel] and the display will return to the Transmission Mode
menu.
Sending at a Specific Time (Send Later)
E Press [OK].
The Transmission Mode menu is
shown on the display. A check
mark is added to “Send Later”.
F Press [Exit].
Us79-3.tif
3
The initial display is shown.
Note
❒ “Send Later” is shown on the
display. If you set up another
advanced transmission function
(except Polling Reception),
“Others” is displayed.
G Dial and press the {Start}} key.
Note
❒ You can cancel a message transmission set up for Send Later. ⇒
P.59 “Canceling a Transmission”
35
Advanced Transmission Features
Confidential Transmission
If you do not want your message to be
picked up casually at the other end,
use this feature. The message will be
stored in memory at the other end
and will not be printed until an ID is
entered.
Nd1x01e5.eps
Transmitter
3
Receiver
ND1X01E5
Preparation
If you install the optional Expansion Memory or Hard Disk option,
program the Confidential ID.⇒
P.125 “ID Code”
Limitation
❒ The destination machine must be
of the same make and have the
Confidential Reception feature.
❒ The destination machine must
have enough memory available.
Note
❒ If optional Expansion Memory is
installed, we recommend that you
program the Confidential ID beforehand.
❒ An ID can be any 4 digit number
except 0000.
A Set your original and select any
scan settings you require.
B Press [Mode].
Us28-1.tif
There are two types of Confidential
Transmission:
❖ Default ID
The other party can print the message by entering the Confidential
ID programmed in their machine.
❖ ID Override
Should you wish to send a confidential message to a particular person at the other end, you can
specify the Confidential ID that
person has to enter to see that message. Before you send the message,
do not forget to tell the intended
receiver the ID that must be entered to print.
36
The Transmission Mode menu appears.
C Enter the “Confidential TX” func-
tion number with the number
keys.
Us79-1.tif
D Depending
on the Confidential
Transmission type, use one of the
following procedures:
Confidential Transmission
Default ID
E Press [Exit].
Us82-3.tif
A Press the < or > key to turn
Default ID on and press [OK].
Us81-3.tif
The initial display is shown.
Us28-1.tif
The Transmission Mode menu
is shown again. A check mark is
added to “Confidential TX”.
Note
❒ To cancel the Confidential
Transmission, press [Cancel].
T h e T ra n s m is s io n M o d e
menu is shown on the display.
Override ID
A Press the < or > key to turn
Override ID on.
Us81-3.tif
3
Note
❒ “Conf.Trans” is shown on the
display. If you set up another
advanced transmission function
(except Polling Reception),
“Others” is displayed.
F Dial and press the {Start}} key.
Note
❒ For details on deleting a Confidential Transmission⇒ P.36
“Confidential Transmission”
B Enter the Confidential ID (4
digit number) with the number
keys and press [OK].
Us82-2.tif
The Transmission Mode menu
is shown again. A check mark is
added to “Confidential TX”.
Note
❒ To Cancel the Confidential
Transmission, press [Cancel].
T h e T ra n s m is s io n M o d e
menu is shown on the display.
37
Advanced Transmission Features
Personal Code Transmission
Personal Codes allow you to keep
track of machine usage (for example,
for billing purposes). If everybody
uses a Personal Code when they use
the fax machine, the codes or the
names programmed for the codes will
be printed in the TCR and other reports. This will help you to check up
on who has been using the machine
and how often. ⇒ P.71 “Printing the
TCR”
3
Limitation
❒ Personal codes may be any 4 digit
number except 0000 (0001 through
9999). You can program up to 20
personal codes (50 personal codes
w ith o p tion al Fax E xp ansion
Memory installed).⇒ P.97 “Personal Codes”
A Set your original and select any
D Enter
a personal code (4 digit
number) with the number keys.
Us83-3.tif
Note
❒ If a personal code is programmed
with a name, it is shown below
the personal code on the display.
❒ If you make a mistake, press the
{Clear/Stop} key and try again.
❒ To cancel Personal Code Transmission, press [Cancel]. The
Transmission Mode menu is
shown on the display.
E Press [OK].
The Transmission Mode menu is
shown again. A check mark is added to “Personal Code”.
scan settings you require.
B Press [Mode].
F Press [Exit].
Us28-1.tif
Us84-1.tif
The Transmission Mode menu appears.
C Enter the “Personal Code” func-
The initial display is shown.
Us84-2.tif
tion number with the number
keys.
Us79-1.tif
Note
❒ Personal Code number is shown
on the display. If you set up another advanced transmission
function (except Polling Reception), “Others” is displayed.
38
G Dial and press the {Start}} key.
Sending an Auto Document
Sending an Auto Document
If you often have to send a particular
page to people (for example a map, a
standard attachment or a set of instructions), store it as an Auto Document assigned to a Quick Dial key.
Then, when you need to send that
page to somebody, just press the
Quick Dial key that you assigned it,
instead of having to scan the whole
page in again.
Preparation
You need to program an Auto Document.
You can fax an Auto Document by itself, or attach it to a normal fax message.
A Set your original and select any
scan settings you require.
B Press [Mode].
Us102-1.tif
3
The Transmission Mode menu appears.
C Enter the “Auto Document” func-
tion number with the number
keys.
Us79-1.tif
Important
❒ Whenever you store or change an
Auto Document, we recommend
that you print the Auto Document
list for reference. ⇒ P.81 “Auto
Document list”
Limitation
❒ You can attach one Auto Document to each transmission.
D Enter
the number of the “Auto
Document” you want to send with
the number keys then press [OK].
Us86-1.tif
❒ You can store up to 6 Auto Documents (up to 18 with optional Expansion Memory installed).⇒ P.79
“Registering an Auto Document”
Note
❒ Originals with Auto Documents
are sent by Memory Transmission.
❒ When sending an Auto Document
with another original, the Auto
Document is sent first.
❒ Storing Auto Documents reduces
the amount of free memory slightly.
Unless you delete the document,
free memory will not return to 100%.
❒ You can print an Auto Document
or a summary of Auto Documents
currently stored in memory. ⇒
P.86 “Reports/Lists”
Note
❒ If the list does not contain the
Auto Document you want to
send, press [↑
↑Prev.] or [↓
↓Next] .
❒ If you make a mistake, press the
{Clear/Stop} key and try again.
❒ To cancel the Auto Document,
press [Cancel]. The Transmission Mode menu is shown.
39
Advanced Transmission Features
E If you are sending just the Auto
Document, press [#
#]. If you wish
to send it along with another original, press [OK].
Us86-2.tif
The Transmission Mode menu is
redisplayed. A check mark is added to “Auto Document”.
3
F Press [Exit].
Us86-3.tif
The initial display is shown.
Us86-4.tif
Note
❒ “Auto Doc.” is shown on the
display. If you set up another
advanced transmission function
(except Polling Reception),
“Others” is displayed.
G Dial and press the {Start}} key.
40
2-Sided Transmission (Double-Sided Transmission)
2-Sided Transmission (Double-Sided
Transmission)
Use this feature to send 2-sided originals from the Document Feeder (ARDF). Both sides of an original will be
scanned. The front and back of the
scanned original will be printed in order on separate sheets at the other
end. Note that the orientation of alternate sheets may be reversed at the
other end.
C Enter the “2-Sided Trans.” func-
Limitation
❒ The front and back of a 2-sided
document are scanned in different
directions. This means that when
the front and back sheets of each
page are printed at the other end,
they may be upside-down in relation to each other.
Note
❒ If the appropriate display is not
shown, press [↑
↑Prev.] or [↓
↓Next].
Note
❒ If the first page is a single-sided
cover sheet, you can choose to
have this page sent using singlesided transmission. The remaining
pages will be sent with the 2–sided
Transmission feature.
❒ You can confirm whether both
sides were properly scanned in
with the Stamp feature. ⇒ P.8
“Stamp”
A Set your original in the Document
tion number with the number
keys.
Us87-2.tif
3
D Press the < or > key to select the
first page that you want to be
scanned on both sides.
Usfax-new050.tif
Note
❒ If your document contains a single-sided cover letter as the first
page, select “From 2nd sheet”
so that the machine scans both
sides from the second page.
E Press [OK] .
Usfax-new051.tif
Feeder (ARDF) and select any
scan settings you require.
B Press [Mode].
Us28-1.tif
The Transmission Mode menu appears.
41
Advanced Transmission Features
F Press [Exit].
The initial display is shown.
Usfax-new052.tif
Note
❒ “2-Sided TX” is shown on the
display. If you set up another
advanced transmission function
(except Polling Reception),
“Others” is displayed.
The Transmission Mode menu is
redisplayed. A check mark is added to “2-Sided Trans.”.
3
G Dial and press the {Start}} key.
42
Book Fax
Book Fax
Use to send book originals from the
exposure glass. Pages are scanned in
the order shown below.
Note that depending on the paper sizes available on the destination machine, the message may be reduced
when printed at the other end.
C Enter
the “Book Fax” function
number with the number keys.
Us87-2.tif
THYS980e.eps
3
Note
❒ If the appropriate display is not
shown, press [↑
↑Prev.] or [↓
↓Next].
Exposure glass
THYS980E
Note
❒ You can have bound originals
scanned in left page first or right
page first. By default, the machine
scans in the left page first but you
can change this setting with the
User Parameters. ⇒ P.130 “Changing the User Parameters”(Switch06,
Bit6)
D Press the < or > key to select the
size of the original.
Gbfax-002.tif
Note
❒ To cancel this mode, press [Cancel]. The Transmission Mode
menu is shown on the display.
❒ If you choose A3, the original
will be sent using Image Rotation Transmission.
A Set your original on the exposure
glass and select any scan settings
you require.
B Press [Mode] .
Us28-1.tif
SPages] to toggle between
E Press [S
pages 1 and 2 (see the second display line on the right).
Note
❒ Select “From Page 1” to send a
book original from the first
page.
❒ Select “From Page 2” if you
want to send a cover letter as the
first page.
The Transmission Mode menu appears.
Gbfax-003.tif
43
Advanced Transmission Features
F Press [OK].
The Transmission Mode menu is
shown. A check mark is added to
“Book Fax”.
Us88-2.tif
G Press [Exit].
3
The initial display is shown.
Us88-3.tif
Note
❒ “Book Fax” is shown on the display. If you set up another advanced transmission function
(except Polling Reception),
“Others” is displayed.
H Dial and press the {Start}} key.
44
Choosing the Area to be Scanned Yourself (Irregular Scan Area)
Choosing the Area to be Scanned Yourself
(Irregular Scan Area)
Usually the machine automatically
detects the size of an original when it
is scanned. However, you may wish
to override this and choose the area to
be scanned yourself.
C Enter the “Irreg. Scan Area” func-
tion number with the number
keys.
Us87-2.tif
ND0x01E3.eps
3
ADF
Note
❒ If the appropriate display is not
↓Next].
shown, press [↑
↑Prev.] or [↓
exposure glass
ND0X01E3
You can either choose one of the
standard paper sizes ( 81/2×11"KL,
8 1 / 2 "×14"L, 11"×17"L, A4KL,
A3L, B4L) or one of two custom sizes programmed in advance (Area 1
and Area 2).
Although you can specify a different
scan area for each page when using
the exposure glass, only one size is allowed when scanning from the Document Feeder (ARDF).
D Press the <or > key to select the
paper size.
Gbfax-004.tif
Note
❒ To see which paper sizes have
already been programmed,
press [Status].
❒ To cancel the Irreg. Scan Area,
press [Cancel].
A Set your original and select any
scan settings you require.
B Press [Mode].
Us28-1.tif
E Press
[OK]. The Transmission
Mode menu is shown. A check
mark is added to “Irreg. Scan Area”.
Us90-1.tif
The Transmission Mode menu appears.
45
Advanced Transmission Features
F Press [Exit].
The initial display is shown.
Us90-2.tif
Note
❒ “Irreg.Area” is shown on the
display. If you set up another
advanced transmission function
(except Polling Reception),
“Others” is displayed.
3
G Dial and press the {Start}} key.
46
Polling Transmission
Polling Transmission
Use Polling Transmission when you
want to leave an original in the machine's memory for others to pick up.
The message will be sent when the
other party calls you up.
Nd1x01e7.eps
Transmitter
(This machine)
Transmission Receiver
Request
ND1X01E7
There are three types of Polling
Transmission.
❖ Free Polling Transmission
Anybody can poll the message
from your machine. The machine
sends it regardless of whether Polling ID's match.
❖ Default ID Polling Transmission
The message will only be sent if the
Polling ID of the machine trying to
poll your message is the same as
the Polling ID stored in your machine. Make sure that both machines' Polling IDs are identical in
advance.
❖ Override ID Polling Transmission
You must enter an Override Polling ID unique to this transmission.
This ID overrides that stored in the
Polling ID. The user must supply
this ID when they poll your machine and if the IDs match, the
message is sent. Make sure the other end knows the ID you are using
in advance.
Limitation
❒ Polling Transmission is allowed
only if the receiver's machine has
the Polling Reception feature.
❒ Free Polling and ID Polling Transmission allow only one file to be
stored in memory.
❒ Personal ID Polling Transmission
allows a file to be stored in memory for each ID; a total of up to 200
files for varying ID's can be stored.
❒ Before using “Default ID Polling”
and “Override ID Polling”, you
need to program the polling ID.
❒ A polling ID may be any string of
four numbers (0 to 9) and characters (A to F) except 0000 and FFFF.
3
Note
❒ Usually, you can only send using
ID Polling Transmission to machines of the same make that support the Polling Reception
function. However, if the other
party's fax machine supports the
"SEP" feature, you can still carry
out polling transmission with an
ID.
❒ The communication fee is charged
to the receiver.
A Set your original and select any
scan settings you require.
B Press [Mode].
Us28-1.tif
The Transmission Mode menu appears.
47
Advanced Transmission Features
C Enter the
“Polling TX” function
number with the number keys.
Free Polling Transmission
A Press the < or > key to select
“Free Poll.”.
Us94-2.tif
Us94-3.tif
Note
❒ If the appropriate display is not
shown, press [↑
↑Prev.] or [↓
↓Next].
3
B Press [S
SFile] and specify whether
to save the stored original or not.
Each time you press the key, the
text at the middle right corner of
the display toggles between
“Save” and “Use once”.
D Depending on the Polling Trans-
mission type, use one of the following procedures:
Default ID Polling Transmission
Note
❒ To delete the original immediately after transmission, select “Use once”.
❒ To repeatedly send the original, select “Save”.
A Press the < or > key to select
“Default ID”.
Us94-3.tif
Us94-4.tif
B Press [S
SFile] and specify
whether to save the stored original or not.
Each time you press the key, the
text at the middle right corner of
the display toggles between
“Save” and “Use once”.
Note
❒ To delete the original immediately after transmission, select “Use once”.
❒ To repeatedly send the original, select “Save”.
Us95-2.tif
48
ID Override Polling Transmission
A Press the < or > key to select
ID Override.
Us94-3.tif
Polling Transmission
B Enter the 4 character Polling ID
with letter keys/ number keys.
F Press [Exit].
The initial display is shown.
Us95-4.tif
Us96-2.tif
Note
❒ If you make a mistake, press
the {Clear/Stop} key and try
again.
0000 and FFFF is not available.
C Press [S
SFile] and specify whether to save the stored original.
Each time you press the key, the
text at the middle right corner of
the display toggles between
“Save” and “Use once”.
Us95-6.tif
Note
❒ “Polling TX” is displayed. If
you set up another advanced
transmission function (except
Polling Reception), “Others” is
displayed.
3
G Press the {Start}} key.
Polling Transmission Clear
Report
This report allows you to verify
whether Polling Transmission has
taken place.
Note
❒ To delete the original immediately after transmission, select “Use once”.
❒ To repeatedly send the original, select “Save”.
E Press [OK].
The Transmission Mode menu is
shown. A check mark is added to
“Polling TX”.
Us96-1.tif
Note
❒ To cancel the Polling Transmission, press [Cancel]. The Transmission Mode menu is shown.
Limitation
❒ This report is not printed if the
User Parameters are set to allow
the stored originals to be repeatedly sent (Save). ⇒ P.130 “Changing
the User Parameters”(Switch11,
Bit7)
Note
❒ This report is turned on by default.
You can turn it off if you wish. ⇒
P.130 “Changing the User Parameters”(Switch11, Bit7)
❒ By default, a portion of the sent image is printed on the report. You
can turn this off with the User Parameters. ⇒ P.130 “Changing the
User Parameters”(Switch04, Bit7)
❒ You can also check the result of a
Polling Transmission with the
TCR.
49
Advanced Transmission Features
Polling Reception
Use this function if you want to poll a
message from another terminal. You
can also poll documents from many
terminals with only one operation
(use Groups and Keystroke Programs
to fully exploit this feature).
Nd1x01e8.eps
Receiver
Sender
(This machine)
Transmission
Request
3
ND1X01E8
There are two types of Polling Reception.
❖ Default ID Polling Reception (Free
Polling Reception)
Use this method for Free Polling or
Default ID Polling. If the Polling ID
is programmed in your machine,
any messages waiting in the transmitting machine with the same ID
are received. If the other machine
does not have any messages waiting with the same Polling ID, any
messages that do not require ID
are received (Free Polling).
❖ Override ID Polling Reception
You must enter an Override Polling ID unique to this transmission.
This ID overrides that stored in the
Polling ID.
Your machine will receive any
messages waiting in the transmitting machine with matching ID's.
If no ID's match, any messages that
do not require ID are received
(Free Polling).
50
Limitation
❒ Polling Reception requires that the
other machine can perform Polling
Transmission.
❒ To receive a message sent by any
Default ID Polling Transmission or
Override ID Polling Transmission,
it is necessary to specify the same
polling ID as the sender's.
❒ A Polling ID may be any four numbers (0 to 9) and characters (A to F)
except 0000 and FFFF.
Note
❒ Usually, you can only receive documents with a polling ID from machines of the same make that
support the polling function. However, if the other party's fax machine
supports Polling Transmission and
the "SEP" function, you can still receive using Polling Reception from
another party's fax machine that has
a stored IDs.
A Press [Mode].
Us28-1.tif
The Transmission Mode menu appears.
B Enter the “Polling RX” function
number with the number keys.
Us94-2.tif
Note
❒ If the appropriate display is not
shown, press [↑
↑Prev.] or [↓
↓Next].
Polling Reception
C Depending
Note
❒ To cancel the Polling Reception,
press [Cancel]. The Transmission Mode menu is shown.
which method you
are using, choose one of the following procedures:
Default ID Polling Reception
A Press the < or > key to select
the Default ID.
E Press [Exit].
The following display is shown.
Us99-2.tif
Us98-3.tif
3
ID Override Polling Reception
A Press the < or > key to select
the Override ID.
Us98-4.tif
Note
❒ “Polling RX” is displayed.
F Dial and press the {Start}} key.
Polling Reserve Report
This report is printed after Polling Reception has been set up.
B Enter a polling ID (4 characters) with the number keys and
the letter (A–F).
Note
❒ If you make a mistake, press
the {Clear/Stop} key and try
again.
❒ 0000 and FFFF is not available.
D Press [OK].
The Transmission Mode menu is
shown. A check mark is added to
“Polling RX”.
Us99-1.tif
Note
❒ By default, this report is turned off.
Turn it on with the User Parameters. ⇒ P.130 “Changing the User
Parameters”(Switch03, Bit3)
Polling Result Report
This report is printed after a Polling
Reception has been completed and
shows the result of the Polling Reception.
Note
❒ You can also check the result of a
Polling Reception with the TCR.
❒ By default, this report is turned on.
Turn it off with the User Parameters. ⇒ P.130 “Changing the User
Parameters”(Switch03, Bit4)
51
Advanced Transmission Features
Transfer Request
Transfer Request allows fax machines
that have this feature to automatically
distribute incoming messages onto
multiple fax destinations. This feature
helps you save costs when you send
the same message to more than one
place in a distant area, and saves time
since many messages can be sent in a
single operation.
The diagram below may make the
concept clearer.
The Transfer Stations you specify
must be machines of the same make
as this machine and have the Transfer
Station function.
3
Nd1x01e9.eps
Requesting
party
End Receiver
Transfer
Station
End Receiver
Transfer
Result Report
End Receiver
ND1X01E9
Preparation
Before you can use this feature,
you must program the Polling ID.
⇒ P.125 “ID Code”
Polling ID's of the requesting party
(this machine) and Transfer Stations must be identical.
The following terminology is used in
this section.
❖ Requesting Party
The machine where the message
originates from, that is, the machine making a Transfer Request
(in this section, this machine).
52
❖ Transfer Station
The machine that forwards the incoming message to another destination, that is, the machine that
receives the Transfer Request.
❖ End Receiver
The final destination of the message, that is, the machine that the
Transfer Station sends to. End Receivers must be programmed into
Quick Dials, Speed Dials or
Groups in the Transfer Station.
Limitation
❒ You can specify up to 99 Transfer
Stations in a Transfer Request.
However, you can only specify up
to 50 Transfer Stations from the
number keys.
❒ You can have up to 30 End Receivers per Transfer Station. If you
specify a Transfer Station Group,
the Group counts as a single receiver.
❒ The combined total of End Receivers and Transfer Stations you specify with the number keys cannot
exceed 99.
A Set an original and select any scan
settings you require.
B Press [Mode].
Us28-1.tif
The Transmission Mode menu appears.
Transfer Request
C Enter the “Transfer Request” func-
Note
❒ You cannot enter the numbers
of the End Receivers directly.
The numbers must be stored in
Quick Dials, Speed Dials or
Groups in the Transfer Station(s). To specify an End Receiver, use the special format
described in. ⇒ P.54 “Specifying
an End Receiver”
❒ Press [Add RcvStn] if you wish
enter more End Receivers.
❒ Press the < or > key to see the
End Receivers already entered.
You can select an End Receiver
from this list and cancel it by
pressing the {Clear/Stop} key.
❒ To cancel the Transfer Request,
press [Cancel].
tion number with the number keys.
Us94-2.tif
Note
❒ If the appropriate display is not
shown, press [↑
↑Prev.] or [↓
↓Next].
D Enter
a Transfer Stations and
press [Recv. Stn].
L2GB003.tif
Note
❒ Enter the fax numbers of the
Transfer Stations with either
Quick Dials, Speed Dials or the
number keys.
❒ If you make a mistake, press the
{Clear/Stop} key and try again.
❒ To cancel the Transfer Request,
press [Cancel]. The Transmissio n M o d e m en u i s sh o w n
again.
E Enter one or more End Receivers.
L2GB004.tif
3
F When you have specified all the
End Receivers, press [OK].
G If you want to enter an additional
Transfer Station, press [Yes] and
repeat steps D to F.
Us103-1.tif
If you press [No], the Transmission
Mode menu is shown and a check
mark is added to “Transfer Request”.
53
Advanced Transmission Features
H Press [Exit].
Us103-2.tif
The following display is shown.
Us103-4.tif
3
Note
❒ The numbers of Transfer Stations and End Receivers are displayed.
I Press the {Start}} key.
Specifying an End Receiver
When you make a Transfer Request,
you must specify the final destinations (End Receivers) for your message.
You cannot enter the numbers of the
End Receivers directly. Instead, enter
a simple code that describes where
the numbers are stored in the Transfer Station (in Quick Dials, Speed Dials or Groups).
The numbers must first have been
stored in Quick Dials, Speed Dials or
Groups in the Transfer Station(s).
❖ Quick Dial
E nter {q } follo we d by th e
number (2 digits) of the Quick Dial
where the End Receiver is stored.
For example, to choose the number
stored in Quick Dial 01 in the
Transfer Station, enter: {q} {0}
{1}
54
❖ Speed Dial
Enter {q}, {p} followed by the
Speed Dial code (2 or 3 digits).
For example, to choose the number
stored in Speed Dial 12 in the
Transfer Station, enter: {q} {p}
{1} {2}
❖ Group Dial
Enter {q} , {p}, {p} followed
by the Group number (2 digits).
For example, to choose the number
stored in Group 04 in the Transfer
Station, enter: {q} {p} {p} {0}
{4}
Transmission Options
Transmission Options
This section describes various features that you can switch on and off
for any particular transmission by following the procedure at the end of
this section.
In addition, if you frequently use a
certain configuration of options, you
can change the default home position
(on or off) of each option with the
User Parameters. ⇒ P.130 “Changing
the User Parameters”
- TTI (Transmit Terminal
Identification) Print
❒ Program the receiver's name and
number in a Quick Dial or Speed
Dial then Label Insertion turned on
with the User Parameters. ⇒ P.130
“Changing the User Parameters”(Switch01, Bit0)
3
-Auto Reduction
By default, if the receiver's paper is
smaller than the paper you are sending on, the message is automatically
reduced to fit onto the paper available
at the other end.
Nd1x02e0.eps
By default, the machine adds your
TTI identification to each message
you send so it appears on the printed
fax at the other end. See Chapter3,
“RTI/TTI” in the Basic Features manual.
Note
❒ You can switch this feature off
with the User Parameters. ⇒ P.130
“Changing the User Parameters”(Switch01, Bit5)
Transmitter
(This machine)
Receiver
Reduction
ND1X02E0
Important
❒ If you turn this feature off, the
scale of the original is maintained
and some parts of the image may
be deleted when printed at the other end.
Nd1x02e1.eps
- Label Insertion
With this feature you can have the receiver's name printed on the message
when it is received at the other end.
The name will be printed at the top of
the page and will be preceded by
“To”.
Note
❒ If you select Label Insertion, the label might be printed over a portion
of the image when received at the
other end.
ND1X02E1
Note
❒ You can switch this feature on and
off with the User Parameters. The
default setting is on. ⇒ P.130
“Changing the User Parameters”(Switch01, Bit2)
55
Advanced Transmission Features
- ID Transmission
D Press the < or > key to switch
TTI Print on or off.
Us107-1.tif
If you turn this feature on, transmission will only take place if the destination's Polling ID is the same as yours.
This feature can stop you from accidentally sending information to the
wrong place (you need to co-ordinate
Polling ID's with the other party).
3
Note
❒ You can switch this feature on and
off with the User Parameters. The
default setting is off. ⇒ P.130
“Changing the User Parameters”(Switch01, Bit1)
Note
❒ The default setting is on.
E If you want to set another option,
press [↓
↓Next].
Note
❒ To finish, go to step L.
F Press the < or > key to switch
Label Insertion on or off.
Selecting Transmission
Options for a Single
Transmission
A Set
the original and select any
scan settings you require.
B Press [Mode].
Us28-1.tif
Us107-2.tif
Note
❒ The default setting is off.
❒ To cancel the changes, press
[Cancel]. The Transmission
Mode menu is shown.
G If you want to set another option,
press [↑
↑Prev.] or [↓
↓Next].
The Transmission Mode menu appears.
C Enter
the “Options” function
number with the number keys.
Us94-2.tif
56
Note
❒ If “Options” is not shown, press
[↑
↑Prev.] or [↓
↓Next].
Note
❒ To finish, go to step L.
Transmission Options
H Press the < or > key to switch
Auto Reduction on or off.
M Press [Exit].
Us94-5.tif
Us107-3.tif
The initial display is shown.
Us28-1.tif
Note
❒ The default setting is on.
❒ To cancel the setting, press [Cancel]. The Transmission Mode
menu is shown.
I If you want to set another option,
press [↑
↑Prev.] or [↓
↓Next].
Note
❒ To finish, go to step L.
J Press the < or > key to switch
Closed Network on or off.
3
Note
❒ “Options” is shown. If you set
up another advanced transmission function (except Polling
Reception), “Others” is shown.
N Dial and press the {Start}} key.
Us108-1.tif
Note
❒ The default setting is off.
❒ To cancel the changes, press
[Cancel]. The Transmission
Mode menu is shown.
K If you want to set another option,
press [↑
↑Prev.].
Note
❒ To finish, go to step L.
L Press [OK].
The Transmission Mode menu is
shown. A check mark is added to
“Options”.
57
Advanced Transmission Features
3
58
4. Communication
Information
Checking and Canceling Transmission
Files
Transmission files are originals that
have been stored in memory and are
awaiting transmission. The features
that produce transmission files are
Memory Transmission, Confidential
Transmission, Transfer Request, Polling Reception and Polling Transmission. These features are described in
detail elsewhere in this document.
This section describes how you can:
• Delete a file (cancel transmission)
• Print a file *1
• Check the destination(s) and options selected
• Alter when a file will be sent
• Resend a file
• Change destinations
• Delete destinations
• Add destinations
*1
Canceling a Transmission
A Press [Info.].
Us102-1.tif
The Information menu is shown.
B Enter
the “Check/Cancel TX
Files” function number with the
number keys.
Us111-5.tif
Note
❒ If “Check/Cancel TX Files” is
not shown, press [↑
↑Prev.] or [↓
↓Next].
This does not apply to Polling Reception or Confidential Transmission.
Limitation
❒ If you cancel a file being sent, the
communication is immediately
stopped and the file is canceled. A
page which has already been sent
cannot be canceled.
❒ You cannot change the start time
add/delete a destination while a
file is being sent.
C Press the < or > key until the
file you want to delete is shown
and press [Delete].
Gbfax-000.tif
59
Communication Information
D Press [Yes].
B Enter
the “Check/Cancel TX
Files” function number with the
number keys.
Us111-1.tif
Us111-5.tif
The file is erased.
E Press [Exit].
Note
❒ If “Check/Cancel TX Files” is
not shown, press [↑
↑Prev.] or [↓
↓Next].
Us111-2.tif
4
C Press the < or > key until the
Note
❒ To delete another file, repeat
steps C and D.
file you want to print is shown
and press [Print].
Gbfax-000.tif
F Press [Exit].
Us111-5.tif
D Press the {Start}} key.
Us111-7.tif
The initial display is shown.
Printing a File
The file is printed.
If you wish to check the contents of a
fax that is stored in memory and has
not been sent yet, use this procedure
to print it out.
A Press [Info.].
Us102-1.tif
Note
❒ Press [Cancel] to stop printing
the file and return to the step C
display.
E Press [Exit].
Gbfax-000.tif
The Information menu is shown.
60
The Information menu is shown
again.
Checking and Canceling Transmission Files
F Press [Exit] twice.
Note
❒ If you wish to check only the
transmission status, press [Exit]
to return to standby mode.
Us111-5.tif
D Depending
on the setting you
want to check or change, use one
of the following procedures.
The initial display is shown.
Checking and Editing a File
Checking Destinations
(Destination List)
Use this procedure to check or edit
destination(s), check options selected
or alter the transmission time.
A Enter the “Destination List”
number with the number keys.
4
Gbfax-006.tif
A Press [Info.].
Us102-1.tif
The total number of destinations and the fax number or
e ach de stination' s n am e is
shown.
The Information menu is shown.
B Enter
Us113-2.tif
the “Check/Cancel TX
Files” function number with the
number keys.
Us111-5.tif
Note
❒ To see hidden destinations,
press [↑
↑Prev.] or [↓
↓Next].
Note
❒ If “Check/Cancel TX Files” is
not shown, press [↑
↑Prev.] or [↓
↓Next].
C Press the < or > key until the
Changing the Transmission Time
A Enter the “Change Start Time”
number with the number keys.
Gbfax-006.tif
file you want to check or edit is
shown. Then press [Check].
Gbfax-000.tif
61
Communication Information
B Enter the transmission time (4
digits) with the number keys.
Gbfax-007.tif
Us114-1.tif
Use 24-hour or 12-hour format
depending on your area. For 12hour format, press [AM ↔ PM] to
switch between AM and PM
(North America only).
Note
❒ You can not specify a start
time more than 24 hours.
❒ When changing the time, select AM or PM before entering the time.
❒ To start transmission immediately, press [Immediate]. If
memory contains other files
queued for transmission,
those files are sent first.
4
A Enter the “Retransmit ” number
with the number keys.
B Press [Yes].
Us114-2.tif
Note
❒ If you do not want to send
the file, press [No].
C Enter the “Change Start Time”
number with the number keys.
Gbfax-006.tif
D Enter the start time with the
number keys and press [Exit].
Re-sending a File
This function is valid when the machine is set up with the User Parameters to save messages that
could not be sent in memory.
If you select the failed transmission file, you can resend it. This
feature allows you to transmit a fax
message again. These files will be
kept for either up to 24 or 72 hours
depending on how you program
this feature. ⇒ P.130 “Changing the
User Parameters”(Switch24, Bit1,0)
62
Gbfax-007.tif
Note
❒ You can not specify a start
time more than 24 hours.
❒ To start transmission immediately, press [Immediate]. If
memory contains other files
queued for transmission,
those files are sent first.
Checking and Canceling Transmission Files
Changing a Destination
G Press [Exit].
Gbfax-000.tif
You can delete or add destinations.
A Enter the “Change Dest.”
number with the number keys.
Gbfax-006.tif
The Information menu is shown.
H Press [Exit].
Us111-5.tif
B Change the destination.
Us114-5.tif
4
The initial display is shown.
Note
❒ To cancel a destination, press
the < or > key until the destination you want to cancel is
shown and press the {Clear/
Stop} key.
❒ To add a destination, press
[Add ] and en ter t he fax
number with the number
keys. Destinations can be
specified only by using the
number keys. The destination
is added to the end of the list.
❒ If you change a destination of
a file that is automatically being dialed or awaiting redial,
redial is canceled so you will
need to resend that file. ⇒
P.62 “Re-sending a File”
E Press [Exit].
F Press [Exit].
Gbfax-006.tif
63
Communication Information
Printing a List of Files in Memory (Print TX
File List)
Print this list if you wish to find out
which files are stored in memory and
what their file numbers are. Knowing
the file number can be useful (for example when erasing files).
Note
❒ The contents of an original stored
in memory can also be printed. ⇒
P.60 “Printing a File”
4
Note
❒ Press [Cancel] to stop printing
the file list and return to the Information Menu display.
D Press [Exit].
Us111-5.tif
A Press [Info.].
Us102-1.tif
The initial display is shown.
The Information menu is displayed.
B Enter
the “Print TX File list ”
function number with the
number keys.
Us111-5.tif
Note
❒ If “Print TX File list ” is not
shown, press [↑
↑Prev.] or [↓
↓Next].
C Press the {Start}} key.
Us116-3.tif
The transmission file list is printed.
When the printing is completed,
the Information menu is shown.
64
Checking the Transmission Result (TX File Status)
Checking the Transmission Result (TX File
Status)
If you wish to find out whether a file
was sent successfully, you do not
have to always print the TCR. With
this function you can browse through
the last 50 completed transmissions
on the display.
Limitation
❒ Only the last 50 communications
are shown. Earlier transmissions
are not available.
❒ If a transmission is completed
while you are using this function,
the result will not be shown until
you exit TX File Status and start it
again.
C Press [↑↑Prev.] or [↓↓Next] to scroll
through the list.
Gbfax-010.tif
The results are shown two at a time
with the most recent above.
4
D Press [OK].
The initial display is shown.
E Press [Exit].
A Press [Info.].
Us28-1.tif
The Information menu is shown.
B Enter
the “TX Status” function
number with the number keys.
Usfax-new063.tif
Note
❒ If “TX Status” is not shown,
press [↑
↑Prev.] or [↓
↓Next].
65
Communication Information
Checking the Reception Result (RX File
Status)
This function lets you check up on the
last 50 messages received without
having to print the TCR. You can
browse through the received messages on the display.
Limitation
❒ Only the last 50 communications
are displayed. Earlier messages are
not available.
❒ If a message is received while you
are using this function, the result
will not be shown until you exit RX
File Status and start it again.
4
A Press [Info.].
Us28-1.tif
The Information menu is shown.
B Enter
the “RX Status” function
number with the number keys.
Usfax-new063.tif
Note
❒ If “RX Status” is not shown,
press [↑
↑Prev.] or [↓
↓Next].
66
C Press [↑↑Prev.] or [↓↓Next] to scroll
through the messages.
Gbfax-011.tif
The results are shown two at a time
with the most recent above.
D Press [OK].
The initial display is shown.
E Press [Exit].
Printing a Confidential Message
Printing a Confidential Message
Optional Expansion Memory is required for using this feature.
This feature is designed to prevent
messages being picked up casually by
anyone when they are received. If
someone sends you a message using
Confidential Transmission, it is
stored in memory and not automatically printed. To print the message
you have to enter the Confidential ID
code. When your machine has received a confidential message, the
Confidential File indicator lights.
Preparation
Before using this function, program your Confidential ID. ⇒
P.125 “ID Code”
B Enter the “Print Conf. RX” func-
tion number with the number
keys.
Usfax-new063.tif
4
Note
❒ If “Print Conf. RX” is not
shown, press [↑
↑Prev.] or [↓
↓Next].
C Enter the Confidential ID (4 digit
number) with the number keys.
Us119-3.tif
Important
❒ If the Main Power switch is off
more than an hour, all Confidential Messages are deleted. In that
case, use the Power Failure Report
to identify which messages have
been deleted. ⇒ P.143 “When Power is Turned off or Fails”
Note
❒ If you receive a fax by Confidential ID Override Reception, enter the override Confidential ID.
❒ You need to obtain the override
Confidential ID from the sender.
Limitation
❒ You must program the Confidential ID for Confidential Reception
to work.
A Press [Info.].
D Press the {Start}} key.
Us102-1.tif
The received messages are printed.
When printing has finished, the Information menu is shown.
Usfax-new063.tif
The Information menu is shown.
67
Communication Information
Note
❒ If no Confidential Messages
have been received, the message “No reception file(s) exists.” is shown. Press [Exit].
L2fxex108.tif
❒ If the Confidential IDs or Personal Confidential IDs do not
match, the message “No file(s)
exist for this Confidential ID.” is
displayed. Press [Exit] to cancel
the operation, check the Confidential ID or Personal Confidential ID with the other party
and try again.
4
L2fxex109.tif
E Press [Exit].
Usfax-new063.tif
The initial display is shown.
Confidential File Report
By default, this report is printed
whenever your machine receives a
Confidential Message.
Note
❒ You can turn this report off with
the User Parameters. ⇒ P.130
“Changing the User Parameters”(Switch04, Bit0)
68
Printing a File Received with Memory Lock
Printing a File Received with Memory Lock
This is a security feature designed to
prevent unauthorized users from
reading your messages. If Memory
Lock is switched on, all received messages are stored in memory and are
not automatically printed. To print
the messages, you have to enter the
Memory Lock ID code. When your
machine has received a message with
Memory Lock, the Receive File indicator blinks.
Preparation
Before you start, program your
Memory Lock ID.⇒ P.125 “ID
Code”
Note
❒ Messages received by Polling Reception are automatically printed
even if this feature is switched on.
❒ If the Main Power switch is turned
off for more than an hour, all messages protected by Memory Lock
will be deleted. In that case, the
Power Failure Report will be printed so you can confirm which messages have been deleted. ⇒ P.143
“When Power is Turned off or Fails”
❒ You can also apply Memory Lock
to messages that come only from
certain senders. ⇒ P.115 “Treating
Message from Certain Senders Differently (Specified Senders)”
B Enter
the “Print Mem. Lock”
function number with the
number keys.
Usfax-new063.tif
Note
❒ If “Print Mem. Lock” is not
shown on the display, press
[↑
↑Prev.] or [↓
↓Next].
4
C Enter the Memory Lock ID (4 digit number).
Us122-1.tif
D Press the {Start}} key.
The received messages are printed.
When the printing is completed,
the Information menu is shown.
Usfax-new063.tif
A Make sure that the Receive File
indicator blinks. Press [Info.].
Us102-1.tif
The Information menu is shown.
69
Communication Information
Note
❒ If no messages have been received, while Memory Lock is
switched on, the message “No
rece pt ion file(s) exists.” is
shown. Press [Exit].
L2fxex108.tif
❒ If the Memory Lock ID does not
match, the message “Wrong
Memory Lock ID.” is shown.
Press [Exit] and retry after
checking the Memory Lock ID.
4
L2fxex111.tif
E Press [Exit].
Usfax-new063.tif
The initial display is shown.
70
Printing the TCR
Printing the TCR
The TCR contains information about
the last 50 communications made by
your machine. It is printed automatically after every 50 communications
(receptions+transmissions).
You can also print a copy of the TCR
at any time by following the procedure below.
C Press the < or > key to select the
format you want to print.
Gbfax-013.tif
• Select “All” to print the last
communications.
• Select “File No.” to print the information for each file then enter a 4 digit file number with the
number keys.
• Select “Pers. Code” to print the
information for files of each personal code then enter a Personal
Code (4 digit number) with the
number keys.
• Press [Cancel] to return to the Information menu.
Note
❒ The sender's name column of the
TCR is useful when you need to
register a special sender.
❒ If you do not want the TCR printed, you can turn it off. ⇒ P.130
“Changing the User Parameters”(Switch03, Bit7)
A Press [Info.].
Us28-1.tif
4
D Press the {Start}} key.
The TCR is printed.
The Information menu is shown.
B Enter
the “Print TCR” function
number with the number keys.
E Press [Exit].
Gbfax-012.tif
Gbfax-012.tif
The initial display is shown.
Note
❒ If “Print TCR” is not shown,
press [↑
↑Prev.] or [↓
↓Next].
71
Communication Information
Displaying the Memory Status
Use this function to display a summary of current memory usage. Items
shown are the percentage of free
memory space, the number of received confidential messages, the
number of files to be sent, and the
number of received messages to be
printed.
Note
❒ If “Others” is displayed, it means
that one or more Auto Documents have been stored. ⇒ P.79
“Registering an Auto Document”
❒ Memory can hold up to about
160 pages (up to about 480 pages with optional Expansion
Memory installed/up to about
3,000 pages with both the optional Expansion Memory and
optional Hard Disk installed).
A Press [Info.].
Us102-1.tif
4
D Press [Exit].
Gbfax-012.tif
The Information menu is shown.
B Enter the “Memory Status” function number with the number
keys.
Gbfax-012.tif
Note
❒ If “Memory Status” is not
↓Next].
shown, press [↑
↑Prev.] or [↓
C The
usage is displayed. When
you have finished, press [OK].
Us125-3.tif
72
The initial display is shown.
5. Facsimile User Tools
Accessing the User Tools
The User Tools allow you to program
the machine with your identification,
store frequently used numbers and
settings, and customize the default
settings to match your needs.
So you can find the User Tool you
want quickly and easily, they are
grouped by function:
❖ Register/Delete
Use to program or delete: Quick
Dials, Groups, Speed Dial, Keystroke Programs, Auto Documents, Irregular scan Area
❖ User Functions
Use to program settings you frequently use into the User Function
Keys
❖ Key Operator Settings
U se t o p rog ram /ch eck : y our
name, your fax number, line type,
various ID codes, Adjusting Volume, date and time, number of
transmitted/received documents
Preparation
Some menus will not fit on the display. Press [↑
↑Prev.] and [↓
↓Next] to
scroll through them if you cannot
see the item you need.
❖ Reports/Lists
Use to print: the TCR, Group list,
Keystroke Program list, Speed Dial
list, Auto Document list, Quick
Dial list, Quick Dial label and Auto
Documents
Press [PrevMenu] to return to the
Previous menu.
Items that are currently selected
appear highlighted.
Press [OK] to accept the new settings.
Note that the changes will not be
made if you do not press [OK].
Press [OK] or [Cancel] to return to
the previous display.
❖ Initial Setup TX
Use to set defaults for: Transmission mode (Memory/Immediate),
scanning conditions (Resolution,
Auto Image Density and Original
Type).
❖ Initial Setup RX
Use to turn on or off: Reverse Order, Printing, Checkered Mark,
Center Mark, Print RX Time, Multi-copy Reception, Authorized Reception, Special RX Nos., 2-sided
printing and Forwarding
• Change the Reception Mode
• Set the Bypass Paper Size Setting
• Select the 2nd Color Choice and
FAX Print Color
A Make sure that the machine is in
Facsimile mode and the standby
display is shown.
Us28-1.tif
Note
❒ If the standby display is not
shown, press the {Facsimile}
key.
73
Facsimile User Tools
B Press the {User Tools}} key.
LTWO120E.eps
Exiting User Tool mode
Interrupt
Screen Contrast
User Tools Adjustment
Program
Clear Modes Energy Saver
C Enter
the number that matches
the category you require.
Us137-2.tif
Note
❒ If you select Key Operator Settings, you must enter the function number for “Key Op.
Settings” with number keys and
press the {#} key within 3 seconds.
5
D Enter the function number of the
User Tool you require.
Us137-3.tif
Note
❒ Function numbers are different
dep ending on the m ac hine
model and options attached.
E Follow
the instructions on the
display.
For more details on each User
Tool, see the relevant pages of this
manual.
74
A When you have made your chang-
es and pressed [OK], press the {User Tools}
} key to return to standby
mode.
Note
❒ To exit “Key Op. Settings”, you
need to return to the Facsimile
User Tools initial display. Press
[PrevMenu] on each display until
you reach the main menu, then
press the {User Tools} key.
Register/Delete Menu
Register/Delete Menu
Storing Keystroke Programs
If you regularly send messages to a
particular destination or transmit using the same features, you can save a
lot of repetitive keypad operations by
storing this information in a Keystroke Program.
Keystroke Programs can be recalled
by just pressing a Quick Dial key. The
following procedure can be used to
program a new Keystroke Program or
overwrite an old one.
You can register the following items
in Keystroke Programs:
• Memory Transmission, Immediate
Transmission, destinations (up to
200 numbers), Resolution, Original
Type, G3 or G4 communication
mode, Stamp, Send Later, Confidential Transmission, Personal
Code transmission, Auto Document, Book Fax, Irregular Scan Area, Send First, Polling Transmission,
Polling Reception, Transfer Request, 2–sided transmission and optional functions
• Program name (up to 20 characters)
Important
❒ We recommend that you print the
Keystroke Program list and keep it
when you register or change a
function. ⇒ P.86 “Reports/Lists”
❒ When a registered program key is
being used for a Memory Transmission on standby, the message
“This destination is in use
for standby transmission file.
Please modify/delete after
transmission.” is displayed and
you cannot change the function for
this key.
A Make sure that the machine is in
Facsimile mode and the standby
display is shown.
Us28-1.tif
5
Note
❒ If the standby display is not
shown, press the {Facsimile}
key.
B Press the {User Tools}} key.
LTWO120E.eps
Interrupt
Screen Contrast
User Tools Adjustment
Program
Clear Modes Energy Saver
C Enter
the function number for
“Register/Delete” with the
number keys.
Us137-2.tif
Limitation
❒ The maximum number of programs you can register is 56.
❒ You cannot register a program in a
Quick Dial key used for another
function.
75
Facsimile User Tools
D Enter
G Carry out the sequence of opera-
Us146-1.tif
Us154-1.tif
the function number for
“Store Program” with the number
keys.
tions you wish to store in this program, then press [OK].
Note
❒ If “Delete Speed Dial” is not
shown, press [↑
↑Prev.] or [↓
↓Next].
Note
❒ If you press the {Reset} key, the
display returns to that shows in
step A.
❒ For example, say you wish to
use Send Later to destination
number 0123456789. The sequence of operations would be:
• Enter “0123456789” using the
number keys.
• Press [Mode].
• Enter the function number
for “Send Later” using the
number keys.
E Press
the Quick Dial key you
want to register the program in.
The “Store Program” display is
shown.
5
Us153-2.tif
Note
❒ If you make a mistake, press
[Cancel] and try again.
❒ You can press [Status] to see the
status currently programmed.
Us79-1.tif
Usfax-new036.tif
F Press [Feature].
Us153-4.tif
76
• Set Send Later ⇒ P.34 “Sending at a Specific Time (Send
Later)”
❒ If a program is already stored in
the Quick Dial key, the function
name is shown on the display. If
you want to change the program, press the {Reset} key and
program the function again.
Register/Delete Menu
H Press [OK].
L Press [OK].
L2fxex158.tif
The program is stored.
Us154-4.tif
I Press [Name].
Us154-2.tif
Note
❒ If you press [Cancel], the Keystroke Program is canceled and
the display shown in step F appears again.
Note
❒ You must register a name for
the program.
M Press [Exit].
Us153-2.tif
5
J Enter the program name.
Us139-2.tif
The screen shown in step E appears again.
N Press the {User Tools}} key.
Note
❒ If a program name is already
registered in the Quick Dial key,
the name is shown on the display. If you wish to change the
program name, press the {Clear/
Stop} key and enter another
name.
Reference
See Chapter3, “Entering Text”
in the Basic Features manual.
K Press [OK].
The function and program name
are shown on the display.
Keystroke Program list
The Keystroke Program list allows
you to print and check functions registered in keystroke programs.⇒ P.86
“Reports/Lists”
Using a Keystroke Program
For example execute a program
using Send Later for the fax number
“0123456789.”
A Set your original.
Note
❒ If the destination, resolution,
contrast and/or original type
are not registered in the program, adjust these settings now.
77
Facsimile User Tools
B Press the Quick Dial key containing the Keystroke Program.
A Make sure that the machine is in
Facsimile mode and the standby
display is shown.
Us155-1.tif
Us28-1.tif
In this example, the program name
“WEEKLY” is shown on the display.
Note
❒ If the standby display is not
shown, press the {Facsimile}
key.
C Press [Exit] then the {Start}} key.
The machine starts scanning the
original.
L2fxex158.tif
B Press the {User Tools}} key.
LTWO120E.eps
Interrupt
Screen Contrast
5
User Tools Adjustment
The message will be sent at the
specified time.
Program
Clear Modes Energy Saver
C Enter
the function number for
“Register/Delete” with the
number keys.
Us137-2.tif
Deleting a Keystroke Program
Limitation
❒ When a registered program is being used for a standby Memory
Transmission, the following message appears and you cannot delete
the program: “This destination
is in use for standby transmission file. Please modify/
delete after transmission.”
Note
❒ If you delete a program, the registered program name is also deleted.
78
D Enter
the function number for
“Delete Program” with the
number keys.
Us153-1.tif
Note
❒ If “Delete Program” is not
shown, press [↑
↑Prev.] or [↓
↓Next].
Register/Delete Menu
E Press the Quick Dial key contain-
ing the program you wish to delete.
Registering an Auto Document
Us156-2.tif
The contents of the program are
shown on the display.
Note
❒ If you make a mistake, press
[No] and try again.
❒ To view the contents of a key,
press [Status].
Usfax-new065.tif
F Press [Yes].
Us156-4.tif
Note
❒ If you press [No], the program is
not deleted and the display
shown in step E appears again.
G Press [Yes].
Us140-5.tif
If you find that you often have to send
a particular page to people (for example, a map, a standard attachment, or
a set of instructions), store that page
in memory as an Auto Document.
This saves re-scanning the original
every time you wish to send it.
Use the following procedure to program a new Auto Document or overwrite an existing one.
Important
❒ You can store up to 6 Auto Documents (18 with the optional Expansion Memory installed). Each Auto
Document can contain one page.
❒ You can store the following items
in an Auto Document:
• Scan settings (Resolution, Original Type, and Image Density)
• Irregular Scan Area
• Document name (up to 10 characters)
❒ We recommend that you print the
Auto Document list and keep it
when you register or change an Auto
document. ⇒ P.86 “Reports/Lists”
5
Limitation
❒ You can only send one Auto Document per transmission.
A Make sure that the machine is in
Facsimile mode and the standby
display is shown.
Us28-1.tif
The program is deleted.
Note
❒ If you press [No], the program is
not deleted and the display
shown in step E appears again.
H Press the {User Tools}} key.
Note
❒ If the standby display is not
shown, press the {Facsimile} key.
79
Facsimile User Tools
B Press the {User Tools}} key.
F Press [Name].
LTWO120E.eps
Us158-2.tif
Interrupt
Screen Contrast
User Tools Adjustment
Program
Clear Modes Energy Saver
C Enter
the function number for
“Register/Delete” with the
number keys.
Note
❒ You must register a name for
the auto Document.
Us137-2.tif
G Enter the Auto Document name.
Us139-2.tif
D Enter
the function number for
"Reg. Auto Doc." with the number
keys.
5
Note
❒ If the name is already registered, it is shown on the display.
If you want to change the document name, press the {Clear/
Stop} key and enter another
name.
Us153-1.tif
Note
❒ If “Reg. Auto Doc.” is not
shown, press [↑
↑Prev.] or [↓
↓Next].
E Enter
the number of the Auto
Document you want to register
with the number keys.
Reference
See Chapter3, “Entering Text”
in the Basic Features manual.
H Press [OK].
Note
❒ If you are storing a standard
size document, go to step K.
Us158-1.tif
I If you original is of a non-standard size, press [Size].
Us158-2.tif
80
Note
❒ If you make a mistake with the
first digit, press the {Clear/Stop}
key and re-enter it. If you make
a mistake with the second digit,
press [Cancel] and re-enter it.
❒ If a document is already registered, the name is shown on the
display.
Register/Delete Menu
J Select a size using the < or >
key and press [OK].
Deleting an Auto Document
Gbfax-004.tif
The document name and original
size are shown on the display.
K Set
your original and press the
{Start}
} key.
Limitation
❒ You cannot delete an Auto Document waiting to be transmitted.
Delete it after the transmission,
cancel the transmission on standby
then delete the Auto Document.
A Make sure that the machine is in
Facsimile mode and the standby
display is shown.
Us159-1.tif
Us102-1.tif
5
The machine starts scanning the
original.
Note
❒ If the standby display is not
shown, press the {Facsimile}
key.
L When the original has been completely scanned in, press [Exit].
The Auto Document is stored. The
display shown in step E appears
again.
B Press the {User Tools}} key.
LTWO120E.eps
Interrupt
Screen Contrast
M Press the {User Tools}} key.
Auto Document list
The Auto Document list allows you to
print and check stored Auto Document names. To print this list, follow
the steps shown in “Reports/Lists”.
⇒ P.86 “Reports/Lists”
User Tools Adjustment
Program
Clear Modes Energy Saver
C Enter
the function number for
“Register/Delete” with the
number keys.
Us137-2.tif
81
Facsimile User Tools
D Enter the function number “Delete Auto Doc.” with the number
keys.
G Press [Yes].
Us140-5.tif
Us153-1.tif
The Auto Document is deleted.
Note
❒ If you press [No], the document
is not deleted and the display
shown in step E appears again.
Note
❒ If “Delete Auto Doc.” is not
shown, press [↑
↑Prev.] or [↓
↓Next].
E Enter
the number of the Auto
Document you want to delete
with the number keys.
Us160-1.tif
5
H Press the {User Tools}} key.
Printing an Auto Document
To check on stored Auto Documents,
you can print them out.
A Make sure that the machine is in
The stored document is shown on
the display.
Facsimile mode and the standby
display is shown.
Us102-1.tif
Note
❒ If you make a mistake with the
first digit, press the {Clear/Stop}
key and re-enter it.
F Press [Yes].
Note
❒ If the standby display is not
shown, press the {Facsimile}
key.
Us160-2.tif
B Press the {User Tools}} key.
LTWO120E.eps
Interrupt
Note
❒ If you press [No], the document
is not deleted and the display
shown in step E appears again.
82
Screen Contrast
User Tools Adjustment
Program
Clear Modes Energy Saver
Register/Delete Menu
C Enter the function number for “Reports/Lists” with the number keys.
Registering an Irregular Area
Us137-2.tif
D Enter
the function number for
"Auto Doc. orig." with the
number keys.
When you select Irregular Area to
scan a non-standard size original, two
custom sizes of original are available
(Area 1 and Area 2). Use this function
to register these custom sizes in advance.
To change an existing Irregular Scan
size, just use the following procedure
to overwrite it.
L2fxex172.tif
Important
❒ When registering or changing an
original size, we recommend that
you make a memo of the new size.
Note
❒ If “Reg. Auto Doc.” is not
shown, press [↑
↑Prev.] or [↓
↓Next].
E Enter
the number of the Auto
Document you wish to print out
with the number keys.
L2fxex173.tif
5
Limitation
❒ For the vertical length (width),
s e le c t “A u t o ”, “8 1 / 2 in c h” ,
“1 1i n c h ”, “8 . 3i n c h ( A 4L ) ” ,
“10.1inch(B4L)”or “11.7inch(A3L)”.
❒ For the horizontal length, specify
from 128 to 432mm or from 51/2 to
17 inches.
A Make sure that the machine is in
Facsimile mode and the standby
display is shown.
Us102-1.tif
F Press the {Start}} key.
L2fxex174.tif
When printing is completed, the
display shown in step D appears
again.
Note
❒ If you press [Cancel] before
printing starts, the printing
stops and the display shown in
step D appears again.
Note
❒ If the standby display is not
shown, press the {Facsimile}
key.
B Press the {User Tools}} key.
LTWO120E.eps
Interrupt
Screen Contrast
User Tools Adjustment
Program
Clear Modes Energy Saver
G Press the {User Tools}} key.
83
Facsimile User Tools
C Enter
G Select a size you wish to register
Us137-2.tif
Gbfax-014.tif
the function number for
“Register/Delete” with the
number keys.
using the < or > key and press
[OK].
The specified size is shown on the
display.
D Enter
the function number for
“Reg. Irreg. Area” with the
number keys.
Note
❒ When you select “Auto”, “---” is
shown on the display.
Us161-1.tif
H Press [Horiz.].
Gbfax-015.tif
5
Note
❒ If “Reg. Irreg. Area” is not
shown, press [↑
↑Prev.] or [↓
↓Next].
E Press [Area 1] or [Area 2].
I Enter the length with the number
keys and press [OK].
Us161-2.tif
Gbfax-016.tif
Note
❒ If a size is already registered, it
is shown on the display.
F Press [Vert.].
Us161-3.tif
84
The specified size is shown on the
display.
Note
❒ Each time you press [mm ↔
inch], the units change between
“inch” and “mm” alternately. If
you enter a length and change
the unit by pressing [mm ↔
inch], the length is converted automatically according to the
unit (fractions are rounded off).
For example, when you enter
{2}, {5}, and {0} in millimeters
and change to “inch”, the length
“9.8inch” is shown on the display. If you press [mm ↔ inch]
again, “249mm” is displayed.
Register/Delete Menu
J Press [OK].
D Enter
the function number for
“Delete Irreg.Area” with the
number keys.
Gbfax-017.tif
Us161-1.tif
K Press the {User Tools}} key.
L2fxex181.tif
Note
❒ If “Delete Irreg.Area” is not
shown, press [↑
↑Prev.] or [↓
↓Next].
The registered sizes are displayed.
Deleting an Irregular Area
E Press [Area 1] or [Area 2].
L2GB005.tif
5
A Make sure that the machine is in
Facsimile mode and the standby
display is shown.
Us28-1.tif
Note
❒ If you make a mistake, press
[No] and try again.
F Press [Yes].
Us140-5.tif
Note
❒ If the standby display is not
shown, press the {Facsimile}
key.
B Press the {User Tools}} key.
LTWO120E.eps
Interrupt
Screen Contrast
User Tools Adjustment
C Enter
Program
Clear Modes Energy Saver
the function number for
“Register/Delete” with the
number keys.
The Irregular Area is deleted.
Note
❒ If you press [No], the Irregular
Area is not deleted and the display shown in step E appears
again.
G Press the {User Tools}} key.
Us137-2.tif
85
Facsimile User Tools
Reports/Lists
This function allows you to print the
following reports and lists manually.
Select a report or list as needed.
• TCR ⇒ P.71 “Printing the TCR”
• Quick Dial list
See Chapter3, “Quick Dial” in the
Basic Features manual.
• Group Dial list
See Chapter3, “Groups” in the Basic Features manual.
• Keystroke Program list
⇒ P.77 “Keystroke Program list”
• Speed Dial list
See Chapter3, “Sped Dial” in the
Basic Features manual.
• Auto Document list
⇒ P.81 “Auto Document list”
5
C Enter
the function number for
“Reports/Lists” with the number
keys.
Us137-2.tif
Printing the TCR
A Enter the function number for
“TCR” with the number keys.
Gbfax-019.tif
A Make sure that the machine is in
Facsimile mode and the standby
display is shown.
Note
❒ If you make a mistake, press
[Cancel] and try again.
Us28-1.tif
Printing the Quick Dial List
Note
❒ If the standby display is not
shown, press the {Facsimile}
key.
A Enter the function number for
“Quick Dial List” with the
number keys.
Gbfax-019.tif
B Press the {User Tools}} key.
LTWO120E.eps
Interrupt
Screen Contrast
User Tools Adjustment
Program
Note
❒ If you make a mistake, press
[Cancel] and try again.
B Select the type of the list using
the < or > key.
Clear Modes Energy Saver
L2fxex183.tif
86
Reports/Lists
Printing the Speed Dial List
A Enter the function number for
“Speed Dial List” with the
number keys.
Gbfax-019.tif
Note
❒ If you make a mistake, press
[Cancel] and try again.
Printing the Group Dial List
5
A Enter the function number for
“Group Dial List” with the
number keys.
Gbfax-019.tif
Note
❒ If you make a mistake, press
[Cancel] and try again.
D Press the {Start}} key.
When printing is completed, the
display shown in step C appears
again.
Note
❒ If you press [Cancel] before
printing starts, the printing
stops and the display shown in
step C appears again.
E Press the {User Tools}} key.
87
Facsimile User Tools
Initial Setup TX
When you turn on the machine or return to Copy mode, the machine returns to the home settings. You can
change these home settings so that
the machine starts with your most frequently used features selected.
This procedure can be used to change
the home settings for the transmission mode (Memory/Immediate
Transmission) and scan settings (Resolution, Photo Original(Original
Type), Auto Image Density, and Fax
Auto Reset).
Note
❒ You can also choose whether the
machine returns to the home settings after each communication. ⇒
P.130 “Changing the User Parameters”(Switch01, Bit7)
5
C Enter
the function number for
“ I n i t i a l S et u p T X” w i th t h e
number keys.
Us137-2.tif
The “Initial Setup TX” menu is
shown on the display.
Note
❒ If “Initial Setup TX” is not
shown, press [↑
↑Prev.] or [↓
↓Next].
D Enter the function number of the
mode whose home setting you
wish to change.
Us165-1.tif
A Make sure that the machine is in
Facsimile mode and the standby
display is shown.
Us28-1.tif
Note
❒ If you make a mistake, press
[Cancel] and enter the correct
number.
Note
❒ If the standby display is not
shown, press the {Facsimile}
key.
E Select the home setting with the
< or > key then press [OK].
❖ Transmission Mode
Us165-2.tif
B Press the {User Tools}} key.
LTWO120E.eps
Interrupt
Screen Contrast
User Tools Adjustment
88
Program
Clear Modes Energy Saver
Initial Setup TX
❖ Resolution
Us165-3.tif
❖ Photo Original
L2fxex188.tif
❖ Auto Image Density
L2fxex189.tif
5
Note
❒ If you want to change other
home settings, repeat steps D
and E.
F Press the {User Tools}}key.
89
Facsimile User Tools
Initial Setup RX
The Initial Setup Reception function
allows you to turn the following reception functions on or off.
• Reception Mode
See Chapter2, “Selecting the Reception Mode” in the Basic Features manual.
• Checkered Mark
⇒ P.23 “Checkered Mark”
• Center Mark
⇒ P.23 “Center Mark”
• Print RX Time
⇒ P.23 “Reception Time”
• Multi-copy Reception (with the
optional Expansion Memory installed).
⇒ P.25 “Multi-copy Reception”
• 2-sided Printing
⇒ P.24 “2-Sided Printing”
• Reverse Order Printing
⇒ P.27 “Reverse Order Printing”
• Authorized RX
⇒ P.120 “Authorized Reception”
• Special RX Nos.
⇒ P.115 “Treating Message from
Certain Senders Differently (Specified
Senders)”
• Forwarding
⇒ P.108 “Forwarding”
• Bypass Paper Size setting
⇒ P.31 “Having Incoming Messages
Printed on Paper From the Bypass
Tray”
• FAX Print Color
⇒ P.28 “FAX Print Color”
• 2nd Color Choice
⇒ P.28 “2nd Color Choice”
5
90
A Make sure that the machine is in
Facsimile mode and the standby
display is shown.
Us28-1.tif
Note
❒ If the standby display is not
shown, press the {Facsimile}
key.
B Press the {User Tools}} key.
LTWO120E.eps
Interrupt
Screen Contrast
User Tools Adjustment
Program
Clear Modes Energy Saver
C Enter
the function number for
“ I n i ti al S e tu p RX ” w it h t h e
number keys.
Us137-2.tif
The “Initial Setup RX” menu is
shown on the display.
Note
❒ If “Initial Setup RX” is not
shown, press [↑
↑Prev.] or [↓
↓Next].
Initial Setup RX
D Enter the function number of the
❖ Multi-copy Recp.
L2fxex196.tif
item you want to change with the
number keys.
Gbfax-020.tif
❖ 2-Sided Printing
L2fxex197.tif
Note
❒ If you make a mistake, press the
{Clear/Stop} key and enter the
correct number.
E Change the setting using the < or
> key and press [OK].
❖ Reverse Order Printing
L2fxex198.tif
❖ Reception Mode
5
Usfax-new033.tif
❖ Authorized RX
L2fxex199.tif
❖ Checkered Mark
Gbfax-021.tif
❖ Special RX Nos.
L2fxex200.tif
❖ Center Mark
L2fxex194.tif
❖ Forwarding
L2fxex201.tif
❖ Print RX Time
L2fxex195.tif
91
Facsimile User Tools
❖ Fax Print Color
ColorFaxPrint.tif
To Set the Bypass Paper Size
A Enter
the function number for
“P p r. S ize- B yp ass ” w ith th e
number keys.
L2fxex202.tif
❖ 2nd Color Choice
Color2nd.tif
B Press the
< or > key to select
“Auto”.
Note
❒ If you wish to change other
functions, repeat steps D and E.
5
❒ Select on or off for Checkered
Mark, Center Mark, Print RX
Time, 2-Sided Printing, Authorized RX, Special RX Nos., and
Reverse Printing.
❒ For “Multi-copy Recp.” enter
the number of copies with the
number keys.
❒ For Forwarding, select the messages to forward, either from all
the senders, from specified
senders or nothing.
❒ Selsct the name of color or off
for Fax Print Color and 2nd
Color Choice. You can not select
the same color for Fax Print
Color and 2nd Color Choice.
F Press the {User Tools}} key.
Usfax-new058.tif
C Press [Ppr.Size].
Usfax-new059.tif
D Press [Vert.].
Gbfax-022.tif
E Press the < or > key to select the
vertical size and press [OK].
Gbfax-023.tif
F Press [Horiz.].
92
Initial Setup RX
G Enter the horizontal size with the
number keys and press [OK].
Gbfax-016.tif
H Press [OK].
Gbfax-100.tif
I Press [OK].
J Press the {User Tools}} key.
5
93
Facsimile User Tools
Assigning User Function Keys
You can program each of the User
Function keys ({F1} –{F5}) with a
function that you use frequently.
When you wish to use that function,
instead of having to search through
several menus to find it, just press the
appropriate User Function key. This
procedure can be used to edit, delete
or change the contents of the User
Function keys.
Storing/Editing the Contents
of a User Function Key
A Make sure that the machine is in
Facsimile mode and the standby
display is shown.
Us28-1.tif
Note
❒ When the machine is shipped, the
following functions are stored in
the User Function keys by default.
Telephone mode cannot be programmed in {F1} or {F3}.
5
Key
Standard
With ISDN
Unit and
Stamp options
F1
Start Manu- ←
al RX
F2
Transmission Result
Display
←
F3
TEL Mode
←
F4
-
G3/G4 Line
Selection
F5
-
Note
❒ If the standby display is not
shown, press the {Facsimile}
key.
B Press the {User Tools}} key.
LTWO120E.eps
Interrupt
Screen Contrast
User Tools Adjustment
Program
Clear Modes Energy Saver
C Enter
the function number for
“User Functions” with the
number keys.
Usfax-new062.tif
Stamp
Note
❒ If “User Functions” is not
shown, press [↑
↑Prev.] or [↓
↓Next].
94
Assigning User Function Keys
D Press
the User Function key
({
{F1}
}—{
{F5}
}) you want to use.
Usfax-new032.tif
Utilizing a User Function Key
A Press
the User Function Key
({
{F1}
}–{
{F5}
}) in which the function
you want to use is stored.
The stored function's display is
shown.
Note
❒ If you make a mistake, press
[Cancel] and press the correct
key.
❒ You can press [Status] to see
how the User Function keys are
currently programmed.
❒ If you have the optional ISDN
Unit is installed, you can not reassign User Function key { F4}.
❒ If the optional stampunit is installed, you can not assign User
Function key { F5}.
❖ For example, “Print TCR”
Gbfax-013.tif
5
E Enter
the function number you
want to register into the User
Function key with the number
keys and press [OK].
Gbfax-029.tif
Note
❒ If appropriate display is not
shown, press [↑
↑Prev.] or [↓
↓Next].
❒ If you wish to store more functions, repeat steps D and E for
other keys.
❒ If you press [Cancel], the function is not stored and the display shown in step D appears
again.
F Press the {User Tools}} key.
95
Facsimile User Tools
Functions You Can Store in User Function Keys
5
Function Name
Default Key
Note
Manual Reception
F1
Registrable/editable
Transmission Result
F2
Registrable/editable
Reception Mode Select
F3
Registrable/editable
G3/G4 Line Select*
(F4)
Automatically assigned
Stamp*
(F5)
Automatically assigned
Optional Group
Registrable/editable
Sub-address/UUI
Registrable/editable
F Code
Registrable/editable
Reception Result Display
Registrable/editable
Auto Document
Registrable/editable
Print TCR
Registrable/editable
Personal Code Transmission
Registrable/editable
*G4 and stamp is option.
96
6. Key Operator Setting
Changing Key Operator Settings
Use to program/check: your name,
your fax number, line type, various
ID codes, Adjusting Volume, date
and time, number of transmitted/received documents
Personal Codes
This function allows you to keep
track of machine usage. When Personal Codes are programmed and
Personal Code Access is turned on users have to enter their Personal Code
before they send a fax. ⇒ P.135
“Printing the User Parameter list”
Important
❒ We recommend that you print the
Personal Code list and keep it
when you register or change a Personal Code. ⇒ P.86 “Reports/Lists”
Note
❒ To enter a Personal Code when
send a fax, follow the steps shown
in “Personal Code Transmission”.
⇒ P.38 “Personal Code Transmission”
❒ If Personal Code Access is
switched on, users cannot use the
facsimile feature unless they enter
their Personal Code. ⇒ P.100 “Personal Code Access”
Registering Personal Codes
You can register the following items
in a Personal Code:
• Personal Code (any 4 digit number
except 0000)
• Name (up to 20 characters)
To change an existing Personal code,
just overwrite it with a new one.
Limitation
❒ On a standard model you can register up to 20 codes. If you install
the Fax Feature Expander option,
the maximum number of personal
codes you can register is 50.
A Make sure that the machine is in
Facsimile mode and the standby
display is shown.
Us28-1.tif
Note
❒ If the standby display is not
shown, press the {Facsimile}
key.
B Press the {User Tools}} key.
LTWO120E.eps
Interrupt
Screen Contrast
User Tools Adjustment
Program
Clear Modes Energy Saver
97
Key Operator Setting
C Enter
Note
❒ If you enter a wrong number for
the first, second, or third digit,
press the {Clear/Stop} key and
try again. If you enter a wrong
value for the fourth digit, press
Cancel and enter the correct
number from the first digit.
❒ If you enter a Personal code that
has already been programmed,
the contents appear on the display. If you wish to change the
name, press [Name] and enter
another name. If you wish to
program another code, press
[Cancel] and enter the new code.
❒ You can press [Status] to see
which codes have been already
programmed.
the function number for
“Key Op. Settings” using the
number keys and press the { #}
}
key within 3 seconds.
Usfax-new062.tif
Note
❒ If “Key Op. Settings” is not
shown, press [↑
↑Prev.] or [↓
↓Next].
D Enter
the function number for
“Personal Code” using the
number keys.
Us169-1.tif
Us170-2.tif
6
E Enter
the function number for
“Re g. P ers . Co de” u sin g th e
number keys.
Us169-2.tif
G Press [Name].
Us170-3.tif
F Enter a Personal Code using the
number keys.
H Enter the name.
Us139-2.tif
Us170-1.tif
Note
❒ If the name has already been
programmed, it appears on the
display. If you wish to change
the name, press the {Clear/Stop}
key and enter another name.
98
Changing Key Operator Settings
Reference
See Chapter3, “Entering Text”
in the Basic Features manual.
B Press the {UserTools}} key.
LTWO120E.eps
Interrupt
Screen Contrast
I Press [OK].
The entered Personal Code and
name are shown on the display.
J Press [OK] to register the code and
User Tools Adjustment
C Enter
Program
Clear Modes Energy Saver
the function number
“Key Op. Settings” using
number keys and press the
key within 3 seconds.
name.
Us170-5.tif
for
the
{ #}
}
Usfax-new062.tif
Note
❒ If you press [Cancel], the entered
Personal Code is canceled and
the display shown in step F appears again.
K Press [Exit].
The display shown in step F appears again.
Note
❒ If “Key Op. Settings” is not
shown, press [↑
↑Prev.] or [↓
↓Next].
6
D Enter
the function number for
“Personal Code” using the
number keys.
Us169-1.tif
L Press [PrevMenu] 3 times.
M Press the {UserTools}} key.
Deleting a Personal Code
A Make sure that the machine is in
Facsimile mode and the standby
display is shown.
E Enter
the function number for
"Delete Pers. Code" using the
number keys.
Us169-2.tif
Us28-1.tif
Note
❒ If the standby display is not
shown, press the {Facsimile}
key.
99
Key Operator Setting
F Enter the Personal Code you want
to delete using the number keys.
Us171-3.tif
I Press [PrevMenu] 3 times.
J Press the {UserTools}} key.
Personal Code Access
Note
❒ If you make a mistake, press the
{Clear/Stop} key and enter the
correct code.
❒ You can press [Status] to see
which codes have been already
programmed.
The machine can be set up so that users cannot use it without entering a
registered Personal Code. This prevents an unauthorized person from
sending a fax message and helps
track the activity of each user.
A Make sure that the machine is in
Facsimile mode and the standby
display is shown.
Us28-1.tif
Us171-4.tif
6
G Press [Yes].
Note
❒ If the standby display is not
shown, press the {Facsimile}
key.
Us171-5.tif
B Press the {UserTools}} key.
LTWO120E.eps
Interrupt
Screen Contrast
If you press [No], the Personal
Code is not deleted and the display
shown in step F appears again.
H Press [Yes].
The Personal Code is deleted.
User Tools Adjustment
Program
Clear Modes Energy Saver
C Enter
the function number for
“Key Op. Settings” using the
number keys and press the { #}
}
key within 3 seconds.
Us140-5.tif
Usfax-new062.tif
Note
❒ If you press [No], the Personal
Code is not deleted and the display shown in step F appears
again.
100
Note
❒ If “Key Op. Settings” is not
shown, press [↑
↑Prev.] or [↓
↓Next].
Changing Key Operator Settings
D Enter
the function number for
“Personal Code” using the
number keys.
Accessing the Personal Code
Access
The machine can be set up so that
nobody can use it without entering
a personal code. This prevents unauthorized people from sending
fax messages and can be used to
track fax machine use by giving a
personal code to each user.
Us169-1.tif
E Enter
the function number for
“Pers.Code Access” using the
number keys.
Note
❒ You can store up to 20 personal
codes (If the optional Expansion
Memory is installed, you can
store up to 50 personal codes).
❒ Register personal codes and
turn Personal Code Access on.
The default setting is off. P.100
“Personal Code Access”
❒ Even if Restricted Access is enabled, the machine can receive
and print a fax message.
A If Personal Code Access is
turned on, the following display appears:
Us169-2.tif
F Switch access on or off using the
< or > key and then press [OK].
Us172-3.tif
6
Us83-3.tif
Note
❒ If you press [Cancel], the previous setting is not changed and
the display shown in step E appears again.
G Press [PrevMenu] twice.
H Press the {UserTools}} key.
B Enter an 4-digit personal code
using the number keys, and
press [#
#].
Us28-1.tif
The display returns to the Personal
Code screen.
Note
❒ If a user enters a personal
code that is not registered,
the machine returns to step A.
101
Key Operator Setting
Printing the Personal Code List
Print this list to find out the registered
Personal Codes and their names.
E Enter
the function number for
“Print Pers. Code” using the
number keys.
Us169-2.tif
A Make sure that the machine is in
Facsimile mode and the standby
display is shown.
Us28-1.tif
F Press the {Start}} key.
When printing is completed, the
display shown in step 4 appears
again.
Note
❒ If the standby display is not
shown, press the {Facsimile} key.
B Press the {UserTools}} key.
LTWO120E.eps
Interrupt
6
Screen Contrast
User Tools Adjustment
Program
Clear Modes Energy Saver
C Enter
the function number for
“Key Op. Settings” using the
number keys and press the { #}
}
key within 3 seconds.
Usfax-new062.tif
Note
❒ If “Key Op. Settings” is not
shown, press [↑
↑Prev.] or [↓
↓Next].
D Enter
the function number for
“Personal Code” using the
number keys.
Us169-1.tif
102
Note
❒ If you press [Cancel] before
printing starts, the printing
stops and the display shown in
step F appears again.
G Press [PrevMenu] twice.
H Press the {UserTools}} key.
ECM
If a part of a transmission fails because of a line problem, the lost data
is automatically resent. For this feature to work, the other machine must
have ECM. By default, ECM is turned
on, but you can change this with the
following procedure.
Limitation
❒ If you turn ECM off, you cannot
use the following features:
• JBIG Transmission
• Super G3 Communication
Changing Key Operator Settings
A Make sure that the machine is in
Facsimile mode and the standby
display is shown.
E Switch ECM on or off using the
< or > key and press [OK].
Us174-2.tif
Us28-1.tif
Note
❒ If you press [Cancel], the previous setting is not changed and
the display shown in step D appears again.
Note
❒ If the standby display is not
shown, press the {Facsimile}
key.
B Press the {User Tools}} key.
LTWO120E.eps
Interrupt
Screen Contrast
User Tools Adjustment
Program
F Press [PrevMenu].
G Press the {User Tools}} key.
Clear Modes Energy Saver
Memory Lock
C Enter
the function number for
“Key Op. Settings” with the
number keys and press the { #}
}
key within 3 seconds.
Usfax-new062.tif
Note
❒ If “Key Op. Settings” is not
shown, press [↓
↓Next].
D Enter
the function number for
“ECM” with the number keys.
Us169-1.tif
6
Optional Expansion Memory is required
for this feature.
When you switch Memory Lock on,
received messages are stored in memory and not printed automatically.
When a message is received in Memory Lock mode, the Receive File indicator blinks. To print this message,
enter the Memory Lock ID. A user
who does not know the ID cannot
print the message. This prevents an
unauthorized person from seeing the
message.
To use Memory Lock, program the
Memory Lock ID and switch it on.
A Make sure that the machine is in
Facsimile mode and the standby
display is shown.
Us28-1.tif
Note
❒ If “ECM” is not shown, press
[↑
↑Prev.] or [↓
↓Next].
103
Key Operator Setting
Note
❒ If the standby display is not
shown, press the {Facsimile}
key.
B Press the {User Tools}} key.
LTWO120E.eps
Interrupt
Screen Contrast
User Tools Adjustment
Program
Clear Modes Energy Saver
C Enter
the function number for
“Key Op. Settings” with the
number keys and press the { #}
}
key within 3 seconds.
Usfax-new062.tif
6
Note
❒ If “Key Op. Settings” is not
shown, press [↓
↓Next].
D Enter
the function number for
“Memory Lock” with the number
keys.
Us169-1.tif
E Switch Memory Lock on or off using the < or > key then press
[OK].
Us175-1.tif
104
Note
❒ If you press [Cancel], Memory
Lock is not switched on and the
display shown in step D appears
again.
F Press [PrevMenu].
G Press the {User Tools}} key.
Changing Key Operator Settings
Multistep Transfer
Optional Expansion Memory required.
This machine can be used to build up a multi-step facsimile network that allows
messages to be sent via multiple Transfer Stations and achieve greater efficiency
in processing Transfer Requests.
The Polling IDs of all parties involved in the multi-step transfer must be identical.
The following procedure describes how to enter the multi-step transfer station
(the 2nd transfer station) number. Providing a Group contains the appropriate
End Receiver information, when your machine receives a Transfer Request, it
will pass the message to the Transfer Station(s) you specify. For how to program
the appropriate End Receiver information, see .
Gfmlti1e.eps
6
Limitation
❒ The requesting party's fax number must be stored in a Quick Dial or Speed
Dial in all Transfer Stations (the 1st Transfer Station and the 2nd Transfer Station) for this feature to work.
❒ The multi-step transfer End receiver must be stored in a Group in the 2nd
Transfer Station beforehand.
A Make sure that the machine is in Facsimile mode and the standby display
is shown.
Us28-1.tif
Note
❒ If the standby display is not shown, press the {Facsimile} key.
105
Key Operator Setting
B Press the {User Tools}} key.
LTWO120E.eps
Interrupt
Screen Contrast
User Tools Adjustment
Program
Clear Modes Energy Saver
C Enter the function number for “Key Op. Settings” with the number keys
and press the {#}
} key within 3 seconds.
Usfax-new062.tif
Note
❒ If “Key Op. Settings” is not shown, press [↓
↓Next].
D Enter the function number for “Multistep Transf” with the number keys.
Us169-1.tif
6
Note
❒ If “Multistep Transf” is not shown, press [↑
↑Prev.] or [↓
↓Next].
E Press the Quick Dial key you want to store this Transfer Group in.
Us175-3.tif
106
Changing Key Operator Settings
Note
❒ You can press [Status] to see the current status of the Group.
❒ If the machine has the Optional Group feature (optional Expansion Memory is required), you can register a Transfer Station. Select the Group type
you wish to register using the number keys. To select a Group, press a
Quick Dial key. To select an Optional Group, enter the Optional Group
code using the number keys. In this example, Optional Group is selected.
Us176-1.tif
Us176-2.tif
F Specify a Transfer Station.
6
Usfax-new056.tif
Note
❒ Enter the Transfer Station's fax number using a Quick Dial key, Speed Dial
or the number keys. See Chapter2, “Quick Dial”, “Speed Dial” or “Number
keys” in the Basic features manual.
❒ If you make a mistake, press the {Clear/Stop} key and enter the correct
number.
❒ If you press Cancel, the setting is canceled and the display show in E appears again.
G Press [OK].
Us176-4.tif
H Press [OK].
I Press [PrevMenu].
J Press the {UserTools}} key.
107
Key Operator Setting
Forwarding
Optional Expansion Memory is required
to use this function.
Using this feature, you can select
messages from Specified Senders to
be printed on your machine and then
sent on to another fax machine.
This is useful if, for example, you are
visiting another office and would like
a copy of your messages sent to that
office so you can read them.
In this section, the machines that messages are forwarded to are referred to
as Forwarding Stations. The locations
from which you would like messages
forwarded from are referred to as
Specific Senders.
You can register:
• 5 Forwarding Stations (up to 32
digits for each number)
• 50 Specific Senders (maximum 10
per Forwarding Station, up to 20
characters each with G3 and 24
with G4)
• Wild Cards
6
Important
❒ We recommend that you print the
Forwarding/Sender list and keep
it when you register or change a receiver or sender. ⇒ P.86 “Reports/
Lists”
Limitation
❒ This feature only works if the incoming message is from another
party that has been programmed
as a Specific Sender.
❒ The Forwarding function does not
forward messages received with
Confidential Reception, Memory
Lock, Polling Reception mode, or
messages received by Transfer Request.
108
❒ You cannot register a sender who
does not have an RTI or CSI.
❒ You can register up to 50 senders
for Forwarding, Special Reception
Numbers, and Authorized Reception functions. You sometimes cannot register 50 senders depending
on the number of senders registered with other functions. ⇒
P.115 “Treating Message from Certain Senders Differently (Specified
Senders)”, P.120 “Authorized Reception”
Note
❒ You can print a forwarding mark
on forward messages. ⇒ P.135
“Printing the User Parameter list”
❒ To register a sender, use an RTI or
CSI. When you communicate with
a sender using G4, register the G4
TID.
❒ You can find out the RTI or CSI of
a sender by looking in the destination name column of the TCR.
❒ Before using the Forwarding function, register Forwarding Stations
and select the messages to forward. ⇒ P.90 “Initial Setup RX”
❒ You can specify whether or not to
print forwarded messages. This
feature is called “Local Printing”.
The default setting is on. ⇒ P.130
“Changing the User Parameters”(Switch11, Bit6)
Registering Forwarding Stations
A Make sure that the machine is in
Facsimile mode and the standby
display is shown.
Us28-1.tif
Changing Key Operator Settings
Note
❒ If the standby display is not
shown, press the {Facsimile}
key.
F Choose
a receiver (Forwarding
Station) to program be entering
the its code number.
Us178-3.tif
B Press the {User Tools}} key.
LTWO120E.eps
Interrupt
Screen Contrast
User Tools Adjustment
Program
Clear Modes Energy Saver
C Enter
the function number for
“Key Op. Settings” with the
number keys and press the { #}
}
key within 3 seconds.
Note
❒ If you make a mistake, press
[Cancel] and try again.
G Enter
the Forwarding Station's
fax number with the number
keys.
Usfax-new062.tif
Us178-4.tif
6
Note
❒ If “Key Op. Settings” is not
shown, press [↓
↓Next].
Note
❒ If you make a mistake, press the
{Clear/Stop} key and try again.
❒ If you have the optional ISDN
Unit select the line type to be
used before specifying a fax
number. ⇒ P.7 “Changing the
Line Type”
D Enter
the function number for
“Forwarding” with the number
keys.
Us178-1.tif
H Press [OK].
I Press [Exit].
Us178-5.tif
Note
❒ If “Forwarding” is not shown,
press [↑
↑Prev.] or [↓
↓Next].
E Enter
the function number for
“Reg. Receiver” with the number
keys.
Us178-2.tif
J Press [PrevMenu] 3 times.
K Press the {User Tools}} key.
109
Key Operator Setting
Note
❒ If “Forwarding” is not shown,
press [↑
↑Prev.] or [↓
↓Next].
Deleting a Forwarding Station
A Make sure that the machine is in
Facsimile mode and the standby
display is shown.
E Enter
the function number for
“Delete Receiver” with the
number keys.
Us28-1.tif
Us178-2.tif
Note
❒ If the standby display is not
shown, press the {Facsimile}
key.
B Press the {User Tools}} key.
F Choose the receiver (Forwarding
Station) to delete by entering its
code number.
Us179-1.tif
LTWO120E.eps
Interrupt
Screen Contrast
6
User Tools Adjustment
Program
Clear Modes Energy Saver
Note
❒ If you make a mistake, press
[No] and try again.
C Enter
the function number for
“Key Op. Settings” with the
number keys and press the { #}
}
key within 3 seconds.
G Press [Yes].
Us179-2.tif
Usfax-new062.tif
Note
❒ If “Key Op. Settings” is not
shown, press [↓
↓Next].
D Enter
the function number for
“Forwarding” with the number
keys.
Us178-1.tif
110
Note
❒ If you press [No], the Forwarding Station is not deleted and
the display shown in step D appears again.
Changing Key Operator Settings
H Press [Yes].
C Enter
the function number for
“Key Op. S ettings ” with the
number keys and press the { #}
}
key within 3 seconds.
The Forwarding Station is deleted.
Us179-3.tif
Usfax-new062.tif
Note
❒ When you press [No], the Forwarding Station is not deleted
and the display shown in step D
appears again.
I Press [PrevMenu] 3 times.
J Press the {User Tools}} key.
Note
❒ If “Key Op. Settings” is not
shown, press [↓
↓Next].
D Enter
the function number for
“Forwarding” with the number
keys.
Us178-1.tif
Registering Specific Senders
(Forwarding)
6
A Make sure that the machine is in
Facsimile mode and the standby
display is shown.
Note
❒ If “Forwarding” is not shown,
press [↑
↑Prev.] or [↓
↓Next].
Us28-1.tif
E Enter
the function number for
“Register Sender” with the
number keys.
Us178-2.tif
Note
❒ If the standby display is not
shown, press the {Facsimile}
key.
B Press the {User Tools}} key.
LTWO120E.eps
F Choose a Specific Sender to register by entering its code number.
Interrupt
Screen Contrast
Us180-1.tif
User Tools Adjustment
Program
Clear Modes Energy Saver
Note
❒ If you make a mistake, press the
{Clear/Stop} key and try again.
111
Key Operator Setting
G Press [RTI/CSI].
L Press [OK].
Us180-2.tif
Us181-2.tif
H Register an RTI or CSI of a sender
Note
❒ If you press [Cancel], the sender
is not registered and the display
shown in step F appears again.
and press [OK].
Us185-1.tif
M Press [Exit].
Us190-2.tif
Reference
See Chapter3, “Entering Text”
in the Basic Features manual.
I Select whether or not to register
6
the sender as a wild card.
Us15-4.tif
N Press [PrevMenu] 3 times.
O Press the {User Tools}} key.
Deleting a Specific Sender (Forwarding)
A Make sure that the machine is in
Reference
See Chapter3, “Wild Cards” in
the Basic Features manual.
Facsimile mode and the standby
display is shown.
Us28-1.tif
J Press [Receiver].
Us180-5.tif
K Choose
the Forwarding Station
you want to assign this Specific
Sender to: enter its code number
and press [OK].
Note
❒ If the standby display is not
shown, press the {Facsimile}
key.
B Press the {User Tools}} key.
LTWO120E.eps
Interrupt
Screen Contrast
Us181-1.tif
User Tools Adjustment
112
Program
Clear Modes Energy Saver
Changing Key Operator Settings
C Enter
Note
❒ If you make a mistake, press the
{Clear/Stop} key and try again.
❒ If you have a mistake with the
second digit, press [No] and enter the number again.
the function number for
“Key Op. Settings” with the
number keys and press the { #}
}
key within 3 seconds.
Usfax-new062.tif
G Press [Yes].
Us182-1.tif
Note
❒ If “Key Op. Settings” is not
shown, press [↓
↓Next].
D Enter
the function number for
“Forwarding” with the number
keys.
Note
❒ If you press [No], the sender is
not deleted and the display
shown in step F appears again.
Us178-1.tif
H Press [Yes].
6
The sender is deleted.
Us140-5.tif
Note
❒ If “Forwarding” is not shown,
press [↑
↑Prev.] or [↓
↓Next].
E Enter
the function number for
“Delete Sender” with the number
keys.
Us178-2.tif
Note
❒ If you press [No], the sender is
not deleted and the display
shown in step D appears again.
I Press [PrevMenu] 3 times.
J Press the {User Tools}} key.
F Choose the Specified Sender you
want to delete by entering its code
with the number keys.
Us181-4.tif
113
Key Operator Setting
Specified Sender/Forwarding Station list
Print this list to find out which Specific Senders are assigned to which Forwarding Stations.
D Enter
the function number for
“Forwarding” with the number
keys.
Us178-1.tif
A Make sure that the machine is in
Facsimile mode and the standby
display is shown.
Us28-1.tif
Note
❒ If “Forwarding” is not shown,
press [↑
↑Prev.] or [↓
↓Next].
E Enter
Note
❒ If the standby display is not
shown, press the {Facsimile}
key.
the function number for
“Print Sender List” with the
number keys.
Us178-2.tif
B Press the {User Tools}} key.
6
LTWO120E.eps
Interrupt
Screen Contrast
User Tools Adjustment
Program
Clear Modes Energy Saver
F Press the {Start}} key.
L2fxex279.tif
C Enter
the function number for
“Key Op. Settings” with the
number keys and press the { #}
}
key within 3 seconds.
Usfax-new062.tif
Note
❒ If “Key Op. Settings” is not
shown, press [↓
↓Next].
114
Note
❒ If you press [Cancel] before
printing starts, the printing
stops.
G Press [PrevMenu] twice.
H Press the {User Tools}} key.
Changing Key Operator Settings
Treating Message from Certain
Senders Differently (Specified
Senders)
Special Reception numbers (Special
RX Nos.) allow you to treat incoming
messages from certain locations differently.
For example, you might want messages from your branch offices printed on a different color paper to
identity them at a glance. In this case,
program the branch office RTI/CSIs
as Specified Senders and select a paper tray loaded with colored paper.
• Multi-copy (Number of prints setting)⇒ P.25 “Multi-copy Reception”
You can have several copies of
messages printed. Optional Expansion Memory is required for
using this feature.
• Cassette Select (tray from which
messages are printed)
You can choose the paper cassette
used when printing messages. If
you set different color paper in this
cassette, you will be able to recognize messages from certain senders at a glance.
Note
❒ If you receive a fax with a paper
size different from that set in the
paper cassette, the printout will
be split across several pages or
reduced to fit on the paper.
❒ If you choose the Bypass Tray,
make sure the size you programmed for this tray matches
the paper size in this tray. For
more details, see ⇒ P.153 “Acceptable Types of Originals”..
• Memory Lock ⇒ P.69 “Printing a
File Received with Memory Lock”
You can have messages received
into memory. optional Expansion
Memory is required for using this
feature.
• 2-Sided Printing⇒ P.24 “2-Sided
Printing”
Print on both sides of the paper.
• Reverse Order Printing ⇒ P.27
“Reverse Order Printing”
You can have pages printed in the
opposite order in which they were
received.
You can adjust the following settings for this function:
• Specified Senders (maximum of
30, up to 20 characters each with
G3, up to 24 characters each
with G4) ⇒ P.120 “Authorized
Reception”
• Wildcards
6
Important
❒ We recommend that you print the
Sender/Specified Number list and
keep it when you register or change
a sender. ⇒ P.86 “Reports/Lists”
Limitation
❒ The Special Reception Numbers
function cannot used to treat messages received from a Specific
Senders if they are received with
Polling Reception or Free Polling.
❒ You cannot register a Specific Sender who does not have an RTI or CSI.
❒ You can register up to 30 senders for
Forwarding, Special Reception
Numbers, and Authorized Reception functions. You sometimes cannot register 30 senders depending
on the number of senders registered
with other functions (up to 50 senders with optional Expansion Memory installed). ⇒ P.108 “Forwarding”,
P.120 “Authorized Reception”
115
Key Operator Setting
Note
❒ To register a sender, use an RTI or
CSI. When you communicate with
a sender using G4, register a G4 TID
❒ You can find the RTI or CSI of a
sender by looking in the destination name column of the TCR
❒ Before using the Special RX Nos.
function, switch this function on
by following the steps shown in Initial Setup RX. ⇒ P.90 “Initial Setup
RX”
Note
❒ If “Key Op. Settings” is not
shown, press [↓
↓Next].
D Enter
the function number for
“Special RX Nos.” with the
number keys.
Us178-1.tif
Note
❒ If “Special RX Nos.” is not
shown, press [↑
↑Prev.] or [↓
↓Next].
Registering Specified Senders (Special
RX Nos.)
A Make sure that the machine is in
E Enter
the function number for
“Register Sender” with the
number keys.
Facsimile mode and the standby
display is shown.
6
Us184-2.tif
Us28-1.tif
Note
❒ If the standby display is not
shown, press the {Facsimile}
key.
F Choose the number of the Specified Sender you wish to register.
Us184-3.tif
B Press the {User Tools}} key.
LTWO120E.eps
Interrupt
Screen Contrast
User Tools Adjustment
C Enter
Program
Clear Modes Energy Saver
the function number for
“Key Op. Settings” with the
number keys and press the { #}
}
key within 3 seconds.
Usfax-new062.tif
116
Note
❒ If you make a mistake, press the
{Clear/Stop} key and reenter a
correct value. If you enter a
wrong value for the second digit, press [Cancel] and enter it
again.
G Press [RTI/CSI].
Changing Key Operator Settings
H Enter an RTI or CSI of a sender
❖ Memory Lock
Us185-5.tif
and press [OK].
Us185-1.tif
❖ Reverse Order Printing
Us185-7.tif
Reference
See Chapter3, “Entering Text”
in the Basic Features manual.
I Select whether or not to register
the sender as a wild card.
❖ 2-Sided Printing
Us15-4.tif
Us186-1.tif
6
J Press [RX Mode].
Us185-3.tif
K Select any features for this Specified Sender. You can scroll
through them by pressing [↑
↑Prev.]
or [↓
↓Next]. Then press [OK ].
Note
❒ Select only items you want to
change.
❒ If you press [Cancel], the specified
setting is canceled and the display
shown in step J appears again.
L Press [OK].
M Press [OK].
Us185-3.tif
❖ Multi-copy
Us185-4.tif
N Press [Exit].
Us186-3.tif
❖ Tray Select
Us185-6.tif
O Press [PrevMenu] 3 times.
P Press the {User Tools}} key.
117
Key Operator Setting
Note
❒ If “Special RX Nos.” is not
shown, press [↑
↑Prev.] or [↓
↓Next].
Deleting a Specific Sender
A Make sure that the machine is in
Facsimile mode and the standby
display is shown.
E Enter
the function number for
“Delete Sender” with the number
keys.
Us28-1.tif
Us184-2.tif
Note
❒ If the standby display is not
shown, press the {Facsimile}
key.
B Press the {User Tools}} key.
F Enter the number of the Specified
Sender you wish to delete with
the number keys.
Us186-4.tif
LTWO120E.eps
Interrupt
Screen Contrast
6
User Tools Adjustment
Program
Clear Modes Energy Saver
Note
❒ If you make a mistake, press the
{Clear/Stop} key and try again.
C Enter
the function number for
“Key Op. Settings” with the
number keys and press the { #}
}
key within 3 seconds.
G Press [Yes].
Us187-1.tif
Usfax-new062.tif
Note
❒ If “Key Op. Settings” is not
shown, press [↓
↓Next].
D Enter
the function number for
“Special RX Nos.” with the
number keys.
Note
❒ If you press [No], the sender is
not deleted and the display
shown in step D appears again.
H Press [Yes].
The sender is deleted.
Us178-1.tif
Us140-5.tif
118
Changing Key Operator Settings
Note
❒ If you press [No], the sender is
not deleted and the display
shown in step D appears again.
I Press [PrevMenu] 3 times.
J Press the {User Tools}} key.
Note
❒ If “Key Op. Settings” is not
shown, press [↓
↓Next].
D Enter
the function number for
“Special RX Nos.” with the
number keys.
Us178-1.tif
Specified Sender list
Print this list to see the currently programmed Specific Senders.
A Make sure that the machine is in
Note
❒ If “Special RX Nos.” is not
shown, press [↑
↑Prev.] or [↓
↓Next].
Facsimile mode and the standby
display is shown.
E Enter
Us28-1.tif
the function number for
“Print Sender List” with the
number keys.
6
Us184-2.tif
Note
❒ If the standby display is not
shown, press the {Facsimile}
key.
B Press the {User Tools}} key.
F Press the {Start}} key.
When the printing job is completed, the display shown in step E appears again.
LTWO120E.eps
Interrupt
Screen Contrast
Us184-2.tif
User Tools Adjustment
Program
Clear Modes Energy Saver
C Enter
the function number for
“Key Op. Settings” with the
number keys and press the { #}
}
key within 3 seconds.
Usfax-new062.tif
Note
❒ If you press [Cancel] before
printing starts, printing stops
and the display shown in step E
appears again.
G Press [PrevMenu] twice.
H Press the {User Tools}} key.
119
Key Operator Setting
Authorized Reception
This feature helps you to reject junk
mail. It lets you specify which terminals you wish to receive fax messages
from; the others will be shut out. This
is useful if you are very annoyed with
someone.
You can register the following:
• 30 Specified Senders (up to 20
characters for each sender with G3,
24 characters with G4)
• Wild Card
❒ You can specify whether to only
receive messages from Specified
Senders, or to receive all messages
except those from Specified Senders. The default setting is “Receive
from Authorized Senders”. ⇒
P.130 “Changing the User Parameters”(Switch08, Bit2)
Programming specified senders
A Make sure that the machine is in
Facsimile mode and the standby
display is shown.
Us28-1.tif
Important
❒ We recommend that you print the
Sender/Authorized Reception list
and keep it when you register or
change a sender. ⇒ P.86 “Reports/
Lists”
6
Limitation
❒ You cannot register a Specified
Sender who does not have an RTI
or CSI.
❒ You can register up to 30 senders
for Forwarding, Special Reception
Numbers, and Authorized Reception functions. You sometimes cannot register 30 senders depending
on the number of senders registered with other functions (up to
50 senders with optional Expansion Memory installed). ⇒ P.115
“Treating Message from Certain
Senders Differently (Specified Senders)”, P.120 “Authorized Reception”
120
Note
❒ To register a sender, use an RTI or
CSI. If you communicate with a
sender using G4, register the G4 TID.
❒ To find out a senders RTI/CSI,
check the TCR.
❒ You need to switch Authorized Reception on. ⇒ P.90 “Initial Setup
RX”
Note
❒ If the standby display is not
shown, press the {Facsimile}
key.
B Press the {User Tools}} key.
LTWO120E.eps
Interrupt
Screen Contrast
User Tools Adjustment
Program
Clear Modes Energy Saver
C Enter
the function number for
“Key Op. S ettings ” with the
number keys and press the { #}
}
key within 3 seconds.
Usfax-new062.tif
Note
❒ If “Key Op. Settings” is not
shown, press [↓
↓Next].
Changing Key Operator Settings
D Enter
the function number for
“Authorized RX” with the
number keys.
H Enter the RTI or CSI of the sender
and press [OK].
Us185-1.tif
Us178-1.tif
Note
❒ If “Authorized RX” is not
shown, press [↑
↑Prev.] or [↓
↓Next].
E Enter
the function number for
“Register Sender” with the
number keys.
Reference
See Chapter3, “Entering Text”
in the Basic Features manual.
I Select whether or not to register
the sender as a wild card.
Us15-4.tif
Us184-2.tif
6
J Press [OK].
Us190-1.tif
F Choose the number of the specified Sender you wish to register.
Us189-3.tif
K Press [Exit].
Us190-2.tif
Note
❒ If you make a mistake, press the
{Clear/Stop} key and reenter a
correct value.
G Press [RTI/CSI].
Us189-4.tif
L Press [PrevMenu] 3 times.
M Press the {User Tools}} key.
121
Key Operator Setting
Note
❒ If “Authorized RX” is not
shown, press [↑
↑Prev.] or [↓
↓Next].
Deleting a Specific Sender (Authorized
Reception)
A Make sure that the machine is in
Facsimile mode and the standby
display is shown.
E Enter
the function number for
“Delete Sender” with the number
keys.
Us28-1.tif
Us184-2.tif
Note
❒ If the standby display is not
shown, press the {Facsimile}
key.
F Choose the sender to delete by en-
tering its code. The RTI/CSI will
flash up.
Us190-3.tif
B Press the {User Tools}} key.
LTWO120E.eps
Interrupt
6
Screen Contrast
User Tools Adjustment
Program
Clear Modes Energy Saver
Note
❒ If you make a mistake, press the
{Clear/Stop}key and enter a correct number.
C Enter
the function number for
“Key Op. Settings” with the
number keys and press the { #}
}
key within 3 seconds.
G Press [Yes].
Us190-4.tif
Usfax-new062.tif
Note
❒ If you press [No], the sender is
not deleted and the display
shown in step F appears again.
Note
❒ If “Key Op. Settings” is not
shown, press [↓
↓Next].
D Enter
the function number for
“Authorized RX” with the
number keys.
H Press [Yes].
The sender is deleted.
Us178-1.tif
Us140-5.tif
122
Changing Key Operator Settings
Note
❒ If you press [No], the sender is
not deleted and the display
shown in step D appears again.
D Enter
the function number for
“Authorized RX” with the
number keys.
Us178-1.tif
I Press [PrevMenu] 3 times.
J Press the {User Tools}} key.
Sender (Authorized Reception) List
Print this list to find out which Specific Senders are currently programmed.
A Make sure that the machine is in
Note
❒ If “Authorized RX” is not
shown, press [↑
↑Prev.] or [↓
↓Next].
E Enter
the function number for
“Print Sender List” with the
number keys.
Facsimile mode and the standby
display is shown.
Us184-2.tif
Us28-1.tif
6
Note
❒ If the standby display is not
shown, press the {Facsimile}
key.
F Press the {Start}} key.
L2fxex267.tif
B Press the {User Tools}} key.
LTWO120E.eps
Interrupt
Screen Contrast
User Tools Adjustment
Program
Clear Modes Energy Saver
C Enter
the function number for
“Key Op. Settings” with the
number keys and press the { #}
}
key within 3 seconds.
Note
❒ When you press [Cancel], the
printing stops and the display
shown in step C appears again.
G Press [PrevMenu] twice.
H Press the {User Tools}} key.
Usfax-new062.tif
Note
❒ If “Key Op. Settings” is not
shown, press [↓
↓Next].
123
Key Operator Setting
Registering the Economy
Transmission Time
Economy Transmission allows you to
take advantage of off-peak line rates
by delaying transmission of messages
until a later time.
Use the procedure below to program
the Economy Transmission Time for
when your phone rates are cheaper.
⇒ P.34 “Sending at a Specific Time
(Send Later)”
Limitation
❒ You can program only one Economy Transmission time.
A Make sure that the machine is in
C Enter
the function number for
“Key Op. S ettings ” with the
number keys and press the { #}
}
key within 3 seconds.
Usfax-new062.tif
Note
❒ If “Key Op. Settings” is not
shown, press [↓
↓Next].
D Enter
the function number for
“Economy TX” with the number
keys.
Us193-3.tif
Facsimile mode and the standby
display is shown.
6
Us28-1.tif
Note
❒ If “Economy TX” is not shown,
press [↑
↑Prev.] or [↓
↓Next].
Note
❒ If the standby display is not
shown, press the {Facsimile}
key.
B Press the {User Tools}} key.
E Enter the Economy Transmission
time with the number keys and
press [OK]. To switch between
AM and PM, press [AM ↔ PM]
(North America only).
Gbfax-025.tif
LTWO120E.eps
Interrupt
Screen Contrast
User Tools Adjustment
Program
Clear Modes Energy Saver
Note
❒ If you press [Cancel], the entered
time is canceled and the display
shown in step D appears again.
F Press [PrevMenu].
G Press the {User Tools}} key.
124
Changing Key Operator Settings
ID Code
Use this procedure to register the following kinds of ID codes.
A Make sure that the machine is in
Facsimile mode and the standby
display is shown.
Us28-1.tif
❖ Confidential ID
This ID is usually required for
printing a message received with
Confidential Reception. ⇒ P.67
“Printing a Confidential Message”
❖ Polling ID
This ID is required for using the
Transfer Request (P.52 “Transfer
Request”), Transfer Station (P.19
“Transfer Station”), Default ID Polling Transmission (P.47 “Polling
Transmission”), Default ID Polling
Reception (P.50 “Polling Reception”), ID Transmission (P.8 “ID
Transmission (Closed Network)”),
and ID Reception (P.20 “ID Reception (Closed Network)”) functions.
❖ Memory Lock ID
This ID is required for printing a
message received using Memory
Lock. ⇒ P.69 “Printing a File Received with Memory Lock”
Limitation
❒ When you use Transfer Request,
Transfer Station, or ID Transmission, register the same ID code as
that registered on the sender's machine.
Note
❒ A Polling ID can be any combination of digits (0 - 9) and letters (A F) except for 0000 and FFFF.
❒ A Confidential ID and Memory
Lock ID can be any a four digit numeric code except for 0000.
❒ For Confidential ID and Memory
Lock ID, the optional Expansion
Memory is required.
Note
❒ If the standby display is not
shown, press the {Facsimile}
key.
B Press the {User Tools}} key.
LTWO120E.eps
Interrupt
Screen Contrast
User Tools Adjustment
Program
Clear Modes Energy Saver
6
C Enter
the function number for
“Key Op. S ettings ” with the
number keys and press the { #}
}
key within 3 seconds.
Usfax-new062.tif
Note
❒ If “Key Op. Settings” is not
shown, press [↓
↓Next].
D Enter
the function number for
“ID Code” with the number keys.
Us193-3.tif
Note
❒ If “ID Code” is not shown, press
[↑
↑Prev.] or [↓
↓Next].
125
Key Operator Setting
E Choose the ID you wish to program with the number keys.
Us197-1.tif
G Press [PrevMenu] twice.
H Press the {User Tools}} key.
G3 Digital Line
F Enter an ID code and press [OK].
Us197-2.tif
Note
❒ For a Confidential ID and a
Memory Lock ID, use the
number keys to enter an ID code.
For a Polling ID, use the number
keys and letter keys (A to F).
❒ If you make a mistake, press the
{Clear/Stop} key and enter a correct code.
❒ If you press [Cancel], the entered
ID is canceled.
6
❖ Confidential ID
Us197-3.tif
This function must be set when you
connect the machine to an ISDN G3
digital line.
You can register the following items.
• Own Digital Number (up to 29
digits) ⇒ P.3 “Subaddress”
• CSI (up to 20 digits) See Chapter3,
“G3 Analog Line“ in the Basic Features manual.
Note
❒ Optional ISDN Unit required.
❒ You need to register the CSI and
your own digital number. See
Chapter3, “G3 Analog Line“ in the
Basic Features manual.
❒ If you wish to change your subaddress, contact your service representative.
❒ Program a User Function key for
the subaddress function. ⇒ P.3
“Subaddress”
A Make sure that the machine is in
Facsimile mode and the standby
display is shown.
Us28-1.tif
❖ Polling ID
Us197-2.tif
❖ Memory Lock ID
Us197-4.tif
126
Note
❒ If the standby display is not
shown, press the {Facsimile}
key.
Changing Key Operator Settings
B Press the {User Tools}} key.
To Enter the CSI
LTWO120E.eps
Interrupt
A Enter the function number for
“CSI” with the number keys.
Screen Contrast
User Tools Adjustment
Program
Clear Modes Energy Saver
Us200-2.tif
C Enter
the function number
“Key Op. Settings” with
number keys and press the
key within 3 seconds.
for
the
{ #}
}
Usfax-new062.tif
B Enter the CSI and press [OK].
Usfax-new003.tif
Note
❒ If “Key Op. Settings” is not
shown, press [↓
↓Next].
To Enter the Your Own digital
Number
D Enter
6
A Enter the function number for
“Own Digital Number” with
the number keys.
the function number for
“G3 Digital Line” with the
number keys.
Us200-2.tif
Us200-1.tif
Note
❒ If “G3 Digital Line” is not
shown, press [↑
↑Prev.] or [↓
↓Next].
B Enter your own digital number
and press [OK]
Usfax-new004.tif
E Press [PrevMenu] twice.
F Press the {User Tools}} key.
127
Key Operator Setting
C Enter
G4 Digital Line
This function must be set when you
connect the machine to the ISDN digital line.
You can register the following items:
• TID (up to 22 digits)
• Own Digital Number (up to 29
digits)
the function number for
“Key Op. S ettings ” with the
number keys and press the { #}
}
key within 3 seconds.
Usfax-new062.tif
Note
❒ If “Key Op. Settings” is not
shown, press [↓
↓Next].
Note
❒ Optional ISDN Unit required.
❒ You can use a G4 TID if you use the
ISDN. The G4 TID is information
to be printed on a destination machine when you send a fax using
G4 down the ISDN.
D Enter
the function number for
“G4 Digital Line” with the
number keys.
Us200-1.tif
A Make sure that the machine is in
6
Facsimile mode and the standby
display is shown.
Us28-1.tif
Note
❒ If “G4 Digital Line” is not
shown, press [↑
↑Prev.] or [↓
↓Next].
Note
❒ If the standby display is not
shown, press the {Facsimile} key.
B Press the {User Tools}} key.
LTWO120E.eps
Interrupt
Screen Contrast
User Tools Adjustment
128
Program
Clear Modes Energy Saver
To Enter the TID
A Enter
the function number for
“TID” with the number keys.
Us201-2.tif
Changing Key Operator Settings
To Enter the Country Code
To Enter the Terminal Name
A Enter the “Country Code” code
with the number keys.
A Enter the “Terminal Name”
code with the number keys.
Us201-3.tif
Us201-3.tif
B Enter your Country Code with
the number keys and press
[OK].
B Enter the Terminal Name and
press [OK].
Us202-2.tif
Us201-4.tif
To Enter the Your Own Digital
Number
A Enter the “Own Digital
Number” code with the
number keys.
B Press [PrevMenu] three times.
C Press the {User Tools}} key.
6
To Enter the Your Own Digital
Number
A Enter
the function number for
“Own Digital Number” with the
number keys.
Us201-3.tif
Us201-2.tif
B Enter your own digital number
and press [OK].
Us202-4.tif
B Enter your fax number and press
[OK].
Usfax-new004.tif
C Press [PrevMenu] three times.
D Press the {User Tools}} key.
129
Key Operator Setting
Changing the User Parameters
The User Parameters allow you to customize various settings to match your
needs.
To change the function settings, set the user parameter switches.
Preparation
Access to some User Parameter Settings requires installation of optional
equipment or that other settings be made beforehand.
- Switches and Bits
User Parameters are divided into Switches and each switch is divided into eight
bits. The right most bit is bit 0 and the left most is bit 7.
Switch
00
6
130
0
1
0
0
0
0
0
0
↓
↓
↓
↓
↓
↓
↓
↓
7
6
5
4
3
2
1
0
Changing Key Operator Settings
- User Parameter List
The User Parameter switches are outlined below.
* : Default Settings
Switch
00
Bit
Item
0 Stamp home position
0
1
*Off
On
3, 2, 1 Image density adjustment level home position (the higher level,
the greater image density)
*000: Auto Image Density, 001: Level 1 (lightest),
010: Level 2, 011: Level 3, 100: Level 4, 101: Level 5 ,
5,4 Character size (resolution) home position
00: Standard, 01:Detail, 10: Super fine
01
6 Transmission Mode home
position
*Memory Transmission
Immediate
Transmission
0 Label Insertion home position
*Off
On
1 ID Transmission home position
*Off
On
2 Auto Reduction home position
Off
*On
5 TTI Print home position
Off
*On
7 Return the machine to the
home settings after each
communication (Return to
default after transmission)
Off
*On
0 Forwarding Mark
Off
*On
1 Center Mark
Off
*On
2 Print RX Time
*Off
On
3 TSI Print
*Off
On
6
4,3 Original type home position
*00: Text, 01: Photo/Text, 10: Photo
02
4 Checkered Mark
Off
*On
5 CIL Print
Off
*On
6 TID Print
*Off
On
131
Key Operator Setting
Switch
03
04
6
05
Bit
0
1
0 Automatic printing of the
Memory TX Result Report
Item
Off
*On
2 Automatic printing of the
Memory Storage Report
*Off
On
3 Automatic printing of the
Polling RX Reserve Report
*Off
On
4 Automatic printing of the
Polling RX Result Report
Off
*On
5 Automatic printing of the
Immediate TX Result Report
Off
*On
6 Automatic printing of the
Polling TX Clear Report
Off
*On
7 Automatic printing of the
TCR
Off
*On
0 Automatic printing of the
Confidential File Report
Off
*On
7 Include a portion of the image on the Transmission
Result Report (Memory
Transmission), Memory
Storage Report, Communication Failure Report, or
Transfer Result Report (Inclusion of part of image)
Off
*On
Possible (Substi0 Receive Service Call (SC)
Condition (Substitute Re- tute RX)
ception during service call)
2, 1
Not possible (Reception off)
Receive when the machine can not print (Substitute reception
during printer error)
*00: Enabled unconditionally (Free),
01: Enabled for RTI/CSI is received,
10: Enabled for Polling ID match,
11: Disabled (Reception off)
132
4 Personal Code Access
*Off
On
5 Just Size Printing
*Off
On
6 Scanning in Mixed Paper
Size Available
*Off
On
7 Empty cassette alert (Paper
Empty Warning indication)
*Off
On
Changing Key Operator Settings
Switch
06
Bit
Item
1 Fax communication mode
home position (Line)
0
1
*G3
G4
5 Selecting the Sheet to Print
the Quick Dial Label
*Paper label
sheet
Transparent label
sheet
6 First page scanned for
book originals
*From the left
page
From the right
page
07
2 Parallel Memory Transmission
08
2 Authorized Reception type *Only receive
from specified
senders
09
0 Reverse Printing (Optional
3-bin Sorter is required)
*Off
10
1 Combine 2 Originals
*Off
On
3 Page Reduction when
printing
*Off
On
1 Send PB/UUI to ISDN
UUI
*PB
6 Local Print when Forwarding
Off
*On
11
14
15
*Off
On
Optional 3-bin
Sorter required
On
7 Polling file after sending
(Polling transmission
standby time)
*Delete (Use
Once)
Standby (Save)
0 Print documents received
with Auto Power-On Reception (Night Printing
mode)
*Immediate
printing (Off)
When turning on
the Operation
switch (On)
2 Batch Transmission
Off
*On
3 Reset when function
changed
*Off
On
7 System Parameter List TX
*Off
On
5 Fixed Input tray
On
*Off
2 Paper Size Priority when
receiving A4
*A3
B4
1, 0
6
Select paper feed tray to fix
01: First, 10: Second, 11: Third
16
24
1, 0
Store a message in memory which could not be transmitted
00: Off, 01: Store for 24 hours, 11: Store for 72 hours
25
4 RDS
*Off
On
7 Summer Time
*Off
On
133
Key Operator Setting
Changing the User Parameters
• We recommend that you print the
User Parameter list and keep it
when you register or change a user
parameter. ⇒ P.135 “Printing the
User Parameter list”
• Do not change any bit switches
other than those shown on the previous pages.
A Make sure that the machine is in
Facsimile mode and the standby
display is shown.
D Enter the “User Parameters” code
with the number keys.
Us200-1.tif
Note
❒ If “User Parameters” is not
shown, press [↑
↑Prev.] or [↓
↓Next].
E Select a number for a switch you
wish to change by pressing
[↑
↑Switch] or [↓
↓Switch].
Us28-1.tif
Us206-2.tif
6
Note
❒ If the standby display is not
shown, press the {Facsimile}
key.
B Press the {User Tools}} key.
LTWO120E.eps
Interrupt
Program
G When
you have finished, press
Clear Modes Energy Saver
C Enter
the function number for
“Key Op. Settings” with the
number keys and press the { #}
}
key within 3 seconds.
Usfax-new062.tif
Note
❒ If “Key Op. Settings” is not
shown, press [↓
↓Next].
134
ing to the bit number you wish to
change for example, press {0}
} to
change bit 0.
[OK].
Screen Contrast
User Tools Adjustment
F Press a number key correspond-
Note
❒ If you press [Cancel], the specified settings are canceled and
the display shown in step D appears again.
H Press [PrevMenu].
I Press the {User Tools}} key.
Changing Key Operator Settings
Printing the User Parameter list
Print this list to see the current User
Parameter settings.
D Enter the “Prt.U.Parameters” code
with the number keys.
Us200-1.tif
A Make sure that the machine is in
Facsimile mode and the standby
display is shown.
Us28-1.tif
Note
❒ If “Prt.U.Parameters” is not
shown, press [↑
↑Prev.] or [↓
↓Next].
E Press the {Start}} key to print the
list.
Note
❒ If the standby display is not
shown, press the {Facsimile}
key.
Us207-2.tif
B Press the {User Tools}} key.
6
LTWO120E.eps
Interrupt
Screen Contrast
User Tools Adjustment
Program
Clear Modes Energy Saver
C Enter
the function number for
“Key Op. Settings” with the
number keys and press the { #}
}
key within 3 seconds.
Note
❒ If you press [Cancel] before
printing starts, the printing
stops and the display shown in
step D appears again.
F Press [PrevMenu].
G Press the {User Tools}} key.
Usfax-new062.tif
Note
❒ If “Key Op. Settings” is not
shown, press [↓
↓Next].
135
Key Operator Setting
D Enter the “Date/Time” code with
Date/Time
the number keys.
Usfax-new005.tif
Use this function to set your machine's internal clock to the current
time and date. This time is shown on
the display, printed on pages and
used for various features, such as
Send Later.
If the current date and time are
wrong, use this procedure to correct
them.
A Make sure that the machine is in
Note
❒ If “Date/Time” is not shown,
press [↑
↑Prev.] or [↓
↓Next].
E Select an item you want to change
using the < or > key, enter the
month using [↑
↑ Prev.] or [↓
↓ Next]
and enter the correct date or time
with the number keys.
Facsimile mode and the standby
display is shown.
Us28-1.tif
Gbfax-027.tif
6
Note
❒ If the standby display is not
shown, press the {Facsimile}
key.
Gbfax-028.tif
B Press the {User Tools}} key.
LTWO120E.eps
Interrupt
Screen Contrast
User Tools Adjustment
Program
Clear Modes Energy Saver
C Enter
the function number for
“Key Op. Settings” with the
number keys and press the { #}
}
key within 3 seconds.
Usfax-new062.tif
Note
❒ If “Key Op. Settings” is not
shown, press [↓
↓Next].
136
Note
❒ When you enter a date, the day
is set automatically.
❒ Depending on your area, your
machine will either except the
date in 12 hours format or 24
hours format.
F Press [OK].
G Press [PrevMenu].
H Press the {User Tools}} key.
Changing Key Operator Settings
C Enter
Summer Time
Whenever local custom requires advancing the clock or setting the clock
back, use this feature. You can easily
move the clock forwards when daylight saving time begins, and back
when it ends. To turn this feature on,
change the User Parameter Switch 25
digit 7. ⇒ P.135 “Printing the User Parameter list”
Counters
This function allows you to check the
total number of pages transmitted
and received on the display.
• Transmissions:
Total number of transmitted pages
• Receptions:
Total number of received pages
A Make sure that the machine is in
Facsimile mode and the standby
display is shown.
the function number for
“Key Op. S ettings ” with the
number keys then press the {#}
}
key within 3 seconds.
Usfax-new062.tif
Note
❒ If “Key Op. Settings” is not
shown, press [↓
↓Next].
D Enter
the function number for
“Counters” with the number
keys.
Usfax-new005.tif
6
The totals are displayed.
E When you have checked the totals, press [OK].
Us28-1.tif
Us209-2.tif
Note
❒ If the standby display is not
shown, press the {Facsimile}
key.
F Press [PrevMenu].
G Press the {User Tools}}
B Press the {User Tools}}key.
LTWO120E.eps
Interrupt
Screen Contrast
User Tools Adjustment
Program
Clear Modes Energy Saver
137
Key Operator Setting
C Enter
Auto Reset
If the machine is not used for a while,
the display will return to the Ready
condition. By default, the time that
must elapse before this happens is 30
seconds. If you wish, you can change
this interval to one of the following
settings:
• 1 minute
• 3 minutes
• 5 minutes
Note
❒ This settings does not affect for onhook dial. Auto Reset time is left in
30 seconds.
the function number for
“Key Op. Settings” using the
number keys and press the { #}
}
key within 3 seconds.
Usfax-new062.tif
Note
❒ If “Key Op. Settings” is not
shown, press [↑
↑Prev.] or [↓
↓Next].
D Enter
the function number for
“Auto Reset” using the number
keys.
Usfax-new005.tif
A Make sure that the machine is in
Facsimile mode and the standby
display is shown.
6
Us28-1.tif
The totals are displayed.
E Select the interval with the < and
> keys. Then press [OK] key.
Usfax-new006.tif
Note
❒ If the standby display is not
shown, press the {Facsimile}
key.
B Press the {UserTools}} key.
LTWO120E.eps
Interrupt
Screen Contrast
User Tools Adjustment
138
Program
Clear Modes Energy Saver
F Press [PrevMenu].
G Press the {UserTools}}.
Changing Key Operator Settings
Paper Feed Selection
Using this feature, you can select
which tray to print out the message.
⇒ P.130 “Changing the User Parameters”(Switch15, Bit1,0)
RDS (Remote Diagnostic
System)
If your machine has a problem, a
service representative can perform
various diagnostic tasks over the telephone line from the service station to
try to find out what is wrong with
your machine. The service technician
can also use RDS to change some of
your machine's settings if you request
it.
If you wish to use this feature, change
User Parameter Switch 25 digits 4. ⇒
P.130 “Changing the User Parameters”(Switch25, Bit4)
6
139
Key Operator Setting
6
140
7. Troubleshooting
When Toner Runs Out
When the machine has run out of toner the symbol appears on the display.
Note that even if there is no toner left
you can still send fax messages.
Important
❒ If you continue receiving and
sending faxes after toner runs out,
communication will not be possible after 200 communications (900
with optional Expansion Memory
installed).
B Press [Exit].
The error display closes.
See Chapter2, “Memory Transmission” or “Immediate Transmission” in the Basic Features manual.
Limitation
❒ The Memory Storage Report, Polling Reserve Report and Confidential File Report are not printed.
A Make sure that the machine is in
Facsimile mode and the standby
display is shown.
LTWO251E.eps
Dial
k Dial
Note
❒ If the standby display is not
shown, press the {Facsimile}
key.
141
Troubleshooting
When an Error Report is Printed
An error report is printed when a message could not be successfully sent or received.
Possible causes include a problem with your machine or the receiver's, noise on
the telephone line etc. If an error occurs during transmission, re-send the original. If an error occurs during reception, ask the sender to re-send the message.
Note
❒ If the error happens frequently, contact your service representative.
❒ The “Page” column gives the total number of pages. The “Page Not Sent” column gives the number of pages that were not sent or received successfully.
7
142
When Power is Turned off or Fails
When Power is Turned off or Fails
Even if the Main Power switch is turned off, the contents of the machine's memory (programmed numbers etc.) will not be lost. However, if power is lost for
about 1 hour through the Main Power switch being turned off, a power cut or
the power cable being removed, contents of the Fax memory will be lost. Lost
items will include any fax messages stored in memory using Memory Transmission or Reception.
If a file has been deleted from memory, a Power Failure Report is automatically
printed as soon as power is restored. This report can be used to identify lost files.
If an original stored for Memory Transmission was lost, re-send it. If a message
received by Memory Reception or Substitute Reception was lost, ask the sender
to re-send it. If an Auto Document was lost, you will need to store it in memory
again.
Important
❒ Make sure that 100% is shown on the display before you unplug the machine.
If a lower value is shown, some data is currently stored in memory.
❒ Right after a power failure, the internal battery needs to be sufficiently recharged to guard against future data loss. Please keep the machine plugged
in and the Main Power switch on for about 24 hours after the power loss occurs.
7
143
Troubleshooting
7
144
8. Maintaining Your Machine
Replacing the Stamp Cartridge
The ARDF is required.
When the stamp is getting to become
lighter, replace the cartridge.
C Set a new cartridge.
LCID0602.eps
Note
❒ Use the cartridge specified for this
machine.
A Lift
the document feeder and
open the stamp cover.
LCID0500.eps
LCID0602
D Replace the stamp cover until it
clicks.
LCID0501.eps
B Pull out the cartridge.
Lcid0600.eps
E Close the document feeder.
LCID0600
Note
❒ Hold down the center part of
the cover to make sure that it is
closed completely.
145
Maintaining Your Machine
8
146
9. Appendix
Connecting the Machine to a Telephone
Line and Telephone
Connecting the Telephone Line
To connect the machine to a telephone line, use a snap-in modular type connector.
Important
❒ Make sure the connector is the correct type before you start.
❖ Where to connect the machine
ZCHH050N.eps
❖ When using a modular type connector
ZCHH060N.eps
1. G3
2. Handset
3. External Telephone
4. G4
147
Appendix
Connecting the Machine to the ISDN
Optional ISDN Unit required.
For how to install the optional ISDN unit, please contact your service representative.
Connect the machine to the ISDN with a modular type connector.
ZCHH070N.eps
Connecting The Optional External Telephone
You can connect the handset and an external telephone to the machine. You can
use them for telephone calls.
Note
❒ Some telephone may not be connected or may suffer reduced functionality.
Limitation
❒ When you use the handset or an optional external telephone with the On
Hook Dial key for telephone calls, you can not talk with the other party without pressing the On Hook Dial key after taking off the receiver.
9
❖ Specifying the handset line type
Nd1x00e0.eps
TT
DP
ND1X00E0
The switch on the handset should be in the appropriate position-TT (Tone Dialing) or DP (Pulse Dialing).
148
Connecting the Machine to a Telephone Line and Telephone
❖ Adjusting the handset bell volume
Nd1x00e1.eps
0
1 2 3
4 5 6
7 8 9
Ringer
ND1X00E1
Adjust the handset ringer volume using the volume switch.
Selecting the Line Type
Select the line type to which the machine is connected. There are two types: tone
and pulse dial.
Select the Line Type using “PSTN Line Type” in ”Key Operator Settings”. The
default settings is ”Tone”. See Chapter3, “G3 Analog Line“ in the Basic Features
manual.
9
149
Appendix
Optional Equipment
Expansion Memory and Hard Disk
A Expansion Memory and a 80–Mbytes hard disk can be added. By installing
them, you can increase the memory. With the Expansion Memory, features of
Multicopy RX, 2–Sided Printing, Confidential reception, Memory Lock, MultiStep Transfer, Forwarding, Memory Lock ID, Confidential ID are available.
- Memory Capacity
• With Fax Feature Expander Type 450 (+4MB, total 6MB):
480 pages
• With Fax Feature Expander and 80–Mbytes hard disk:
3,000 pages
Measured using a ITU-T#1 chart (Slerexe letter) at standard resolution.
Note
❒ If you would like to install both of these, please contact your service representative.
- Extended Features
You can extend the following features.
9
150
Function
Standard
With Expansion
Memory
With Expansion
Memory + HDD
Speed Dials
100
1,000
←
Personal Codes
20
50
←
Memory Capacity for
Memory Transmission/Reception
160 sheet
480 sheets
3000 sheets
Memory Transmission files
200
1,000
←
Auto Documents
6
18
←
Communication Result
last 200 communications
last 900 communications
←
Specific Senders
30
50
←
Optional Equipment
400 dpi Option (FAX 400dpi Option Type 450)
This allows you to send and receive fax messages at high resolution . JBIG compression is also available with this option.
ISDN Unit (ISDN Option Type 450)
This allows you to send and receive messages via ISDN (Integrated Service Digital Network).
Stamp (FAX Stamp Type 4000)
Single-sided documents you send from the Document Feeder (ARDF) have a
mark stamped on the top of the scanned side after they are scanned in. Doublesided documents you send from the Document Feeder (ARDF) have a mark
stamped on top and bottom of one scanned side. Use these marks to check
whether a document was properly stored in memory when using Memory
Transmission, or if the originals were properly sent when using Immediate
Transmission.
9
151
Appendix
Specifications
Standard
Resolution
G3, G4 (option)
G3:
8×3.85/mm•200×100dpi (Standard), 8×7.7/
mm•200×200dpi (Detail), 8×15.4/
mm•200×400dpi (Fine), 16×15.4/
mm•400×400dpi (Super Fine: optional Expansion Memory required)
G4:
200×100dpi (Standard), 200×200dpi (Detail),
400×400dpi (Super Fine: optional Expansion
Memory required)
Transmission Time
G3: 3 seconds at 28,800bps, Standard resolution
G4: 3 seconds, Detail resolution
Data Compression Method
MH, MR, MMR, JBIG (optional Expansion
Memory required)
Maximum Original Size
Standard size: A3/DLT Irregular size:
304×432mm
Maximum Scanning Size
297×432mm/11"×17"
Print Process
Printing on standard paper using the laser
Transmission Speed
G3:
33,600/31,200/28,800/26,400/24,000/21,600/
19,200/16,800/14,400/12,000/9,600/7,200/
4,800/2,400bps (auto shift down system)
G4:
64/56kbps (auto speed matching)
9
❖ Power Consumption
152
Energy Saver (Auto Off) mode
13W
Standby mode
260W
Transmission
272W
Reception
244W
Printing (Average)
485W
Maximum Power Consumption
1440W
Specifications
Acceptable Types of Originals
Make sure your originals are completely dry before setting them in the machine.
Originals containing wet ink or correcting fluid will mark the exposure glass and
resulting image will be affected.
Acceptable Original Sizes
Where Original is Set Acceptable Original Size
Maximum
Number of
Sheets
1
Paper Thickness
Exposure glass
Maximum A3 (297×420mm),
11"×17" (279×432mm)
----
Document Feeder
(ARDF), single-sided
document
Fax transmission: A5 L to A3
L(up to 432mm long) 8"×51/2"
L to 11"×17"(DLT)L
50 sheets (80g/
m2, 20lb)
52–128g/m2 (45–
110kg, 11-34lb)
Document Feeder
Fax transmission: A5 L to A3
(ARDF), double-sided L (up to 432mm long) 8"×51/2"
document
L to 11"×17"(DLT)L
50 sheets (80g/
m2, 20lb)
52–105g/m2 (45–
90kg, 14–28lb)
Paper Size and Scanned Area
❖ Exposure Glass
cp01ae1e.eps
9
❖ Document Feeder (ARDF)
Tfardf0e.eps
153
Appendix
Limitation
❒ There may be a difference in the size of the image when it is printed at the destination.
❒ If you set an original larger than DLT /A3 on the exposure glass, only an area
of DLT /A3 is scanned.
Note
❒ Even if an original is correctly placed on the exposure glass or in the Document Feeder (ARDF), a margin of 3mm around each edge of the original may
not be sent.
❒ If the receiver uses paper narrower than the original, the image will be reduced to fit the paper width.
❒ The machine detects paper sizes in the following ways.
• When you set an original in the Document Feeder (ARDF), an original wider than about 10.4" (263mm) is scanned as 11"×17" size.
An original narrower than about 9.1" (230mm) will be sent as 81/2"×11" or
81/2"×14" size.
Originals up to 17” (432mm) in length can be scanned.
• Refer to the table below for the sizes the machine can detect when you set
an original on the exposure glass. Because the machine scans in non-standard size documents as one of the standard sizes, parts of the image may be
truncated depending on the length of the document. For how to set nonstandard size documents, see P.45 “Choosing the Area to be Scanned Yourself
(Irregular Scan Area)”.
Length
width
9
∼”9.80
”9.80∼ ”10.79 ”10.79∼
”12.44
”12.44∼
∼”9.57
not detected
LTL
LTL
LGL
”10.55∼
LTK
DLTL
DLTL
DLTL
- Maximum Scan Area
Memory Transmission/Immediate Transmission
• From the Document Feeder (ARDF): 11"×17"/297×432mm (W×L)
• From the exposure glass: 11"×17"/297×432mm (W×L)
154
Function List
Function List
Advanced Transmission Features
Feature name
Description
Reference
Send Later
Sets the machine to automatically start transmission or
polling reception at an appointed time.
P.34 “Sending at a Specific Time
(Send Later)”
Confidential Transmission
Sends a confidential message. P.36 “Confidential TransmisThis feature is divided into
sion”
Default ID Confidential
Transmission and Override
ID Confidential Transmission.
Personal Code TX
This will help you to check up
on who has been using the
machine and how often.
Auto Document
Stores a commonly used orig- P.39 “Sending an Auto Docuinal and prints or sends it di- ment”
rectly.
2-Sided Transmission
Use to send 2-Sided originals P.41 “2-Sided Transmission
(double-sided original) from
(Double-Sided Transmission)”
the Document Feeder (ARDF).
Book Fax
When sending a book-type
original, this feature scans and
sends the right and left pages
one by one.
Irregular Scan Area
When sending a non-standard P.45 “Choosing the Area to be
size original, this feature spec- Scanned Yourself (Irregular
ifies the length and width. The Scan Area)”
machine scans the original in
the specified size.
Polling Transmission
Upon request from a destination, the machine sends an
original stored in memory.
This feature is divided into
Free Polling, Default ID Polling Transmission, and Override ID Polling Transmission.
P.47 “Polling Transmission”
Polling Reception
Sends a transmission request
to the other party and receives
a message from the receiver.
This feature is divided into
Default ID Polling Reception
and ID Override Polling Reception.
P.50 “Polling Reception”
P.38 “Personal Code Transmission”
P.43 “Book Fax”
9
155
Appendix
9
156
Feature name
Description
Transfer Request
Sends an original to a destina- P.52 “Transfer Request”
tion via a facsimile equipped
with the transfer station capability.
Reference
Options
Description
Reference
TTI Print
You can print a message including the name registered
as the TTI on the received
message for each file.
P.55 “TTI (Transmit Terminal
Identification) Print”
Label Insertion
P.55 “Label Insertion”
If you register the receiver's
name in a Quick Dial or Speed
Dial, the receiver's name is automatically printed at the top
of the received message.
Auto Reduction
If the receiver uses paper nar- P.55 “Auto Reduction”
rower than the message, it is
reduced to fit a paper size
available on the receiving party's machine before being
sent.
ID Transmission
Sends an original only to the
machine of the same Polling
ID as that registered in the
machine.
P.56 “ID Transmission”
Function List
Communication Information
Feature name
Description
Reference
Checking and Canceling the
Transmission Files
This feature cancels, confirms,
or changes a file (reservation)
for Memory Transmission,
Confidential Transmission,
Transfer Request, Polling Reception, or Polling Transmission.
P.59 “Checking and Canceling
Transmission Files”
Printing the TX File List
The transmission file list can
be manually printed. This list
allows you to know the files
stored in memory or the file
numbers.
P.64 “Printing a List of Files in
Memory (Print TX File List)”
Displaying the Transmission
Result
Part of the TCR can be shown
on the display. The results of
the last 50 transmissions are
displayed from the latest one.
P.65 “Checking the Transmission Result (TX File Status)”
Displaying the Reception Result
Part of the TCR can be shown
on the display. The results of
the last 50 receptions are displayed from the latest one.
P.66 “Checking the Reception
Result (RX File Status)”
Printing a Confidential Document
Prints messages received in
Confidential Reception mode.
P.67 “Printing a Confidential
Message”
Printing the Memory Lock
Prints messages received in
Memory Lock mode.
P.69 “Printing a File Received
with Memory Lock”
Printing the TCR
The TCR can be manually
P.71 “Printing the TCR”
printed. This report shows the
results of the last 50 communications.
Displaying the Memory Status
The status of the memory is
shown on the display.
9
P.72 “Displaying the Memory
Status”
157
Appendix
User Tools
9
Feature name
Description
Reference
Register/Delete Quick Dial
When you register a destination in a Quick Dial, you can
specify the destination only
by pressing the Quick Dial
key.
See Chapter3, “Quick Dial” in
the Basic Features manual.
Register/Delete Group Dial
If you program a several desti- See Chapter3, “Groups” in the
nations into a Group, you can Basic Features manual.
dial with just a few keystrokes.
Register/Delete Opt. Group
Dial
When you register several
destinations as an optional
group, you can specify all the
destinations by entering the
two-digit group number after
pressing the optional group
dial key (F1–F5).
See Chapter3, “Groups” in the
Basic Features manual.
Register/Delete Speed Dial
When you register a destination in a speed dial, you can
specify the destination by entering the two-digit or threedigit Speed Dial code after
pressing the {Speed Dial} key.
See Chapter3, “Speed Dial” in
the Basic Features manual.
Store/Delete Keystroke Program
Allows you to store a frequently used function or destination in a Quick Dial key.
P.75 “Storing Keystroke Programs”
Register/Delete Auto Document
Allows you to store a frequently used original in the
machine's memory. You can
print or send the original directly as necessary.
P.79 “Registering an Auto Document”
Register/Delete Irregular
Area
Registers a frequently used
original size in advance when
you send a message with the
Irregular Scan Area function.
P.83 “Registering an Irregular
Area”
REPORTS/LISTS
This feature allows you to
print various reports and lists
manually. You can print the
following reports and lists:
P.86 “Reports/Lists”
• TCR
• Quick Dial list
• Group Dial list
• Speed Dial list
• Keystroke Program list
• Auto Document list
158
Function List
Feature name
Description
Reference
INITIAL SETUP TX
Default transmission mode
and scan settings.
P.88 “Initial Setup TX”
INITIAL SET UP RX
Allows you to switch the following reception functions to
on or off:
P.90 “Initial Setup RX”
• Reception Mode
• Checkered Mark
• Center Mark
• Print RX Time
• Multi-copy Reception
• 2-Sided Printing
• Reverse Order Printing
• Authorized RX
• Special RX Nos.
• Forwarding
• Paper Size Bypass
• FAX Print Color
• 2nd Color Choice
Assigning User Function Keys Stores a frequently used func- P.94 “Assigning User Function
Keys”
tion in a User Function Key
({F1} to { F5}).
Key Operator Settings/Personal Code
Registers personal codes for
P.97 “Key Operator Setting”
each user. When each user enters a personal code when
sending messages, you can
check the machine usage by
user.
RTI/TTI
Registers information (RTI) to See Chapter3, “RTI/TTI” in
be shown on the display and the Basic Features manual.
printed in a report by a receiver's or sender's machine. This
feature also registers information (TTI) to be printed from a
destination machine when
you send a fax.
Memory Lock
Switch the Memory Lock on
or off. To use it, register an ID
for printing a message received in Memory Lock mode.
P.103 “Memory Lock”
Counters
Check the transmission, reception, and totals on the display.
P.137 “Counters”
Adjusting Volume
Adjusts the volume of monitoring and beeper sounds
from the speaker inside the
machine.
See Chapter4, “Adjusting Volume” in the Basic Features
manual.
9
159
Appendix
Feature name
Description
Reference
Economy Transmission
Economy Transmission
means to send a fax when
communication charges are
lower. The Economy TX feature registers this time.
P.124 “Registering the Economy
Transmission Time”
ID Code
P.125 “ID Code”
Registers an ID required for
Transfer Request, Transfer
Station, Default ID Polling
Transmission, Default ID Polling Reception, or ID Transmission.
Multistep Transfer
Registers a transfer station in a
Group Dial. This allows the
message to be transmitted via
multiple transfer stations
more efficiently when the requesting party sends a transfer request to your machine.
P.105 “Multistep Transfer”
Special RX Nos.
Allow messages from Specified Senders to be treated differently.
P.115 “Treating Message from
Certain Senders Differently
(Specified Senders)”
Authorized Reception
When you register Specified
Senders in advance, you can
restrict senders from whom
you receive message.
P.120 “Authorized Reception”
Forwarding
Transfers received messages
to a registered receiver (forwarding destination).
P.108 “Forwarding”
ECM
If a part of transmission fails
due to a telephone line fault,
this feature resends the failed
part automatically.
P.102 “ECM”
G3 Analog Line
Register a line type and CSI
when you connect the machine to the G3 analog line.
See Chapter3, “G3 Analog
Line“ in the Basic Features
manual.
G3 Digital Line
Register your own fax numbers, and CSI, and subaddress
when you connect the machine to the ISDN.
P.126 “G3 Digital Line”
G4 Digital Line
Register your own fax
number, TID (Terminal ID)
and subaddress when you
connect the machine to a G4
digital line.
P.128 “G4 Digital Line”
Date/Time
Adjusts the date and the time
as a reference.
P.136 “Date/Time”
9
160
Function List
Feature name
Description
Reference
Changing User Parameters
Allows you to change the
function settings to meet your
needs.
P.130 “Changing the User Parameters”
Printing User Parameter List
Allows you to print and check
User Parameter settings.
P.135 “Printing the User Parameter list”
Auto Reset
Set the interval returning to
the standby mode.
⇒ P.138 “Auto Reset”
9
161
INDEX
180 Degree Rotation Printing, 25
2nd Color Choice, 28
2-Sided Printing, 16, 24, 117
2-Sided Transmission, 155
2-sided Transmission, 41
A
Acceptable Types of Originals, 153
Adjusting Volume, 160
Authorized Reception, 120, 160
Authorized Reception list, 123
Auto Document, 39, 79, 155, 158
Auto Document list, 81
Auto Fax RX Power-up, 11
Auto Identification, 7
Auto Reduction, 55, 156
Auto Reset, 138
B
Book Fax, 43, 155
Bypass Paper Size, 92
C
Canceling a Transmission, 59
Center Mark, 23
Chain Dial, 1
Changing a Destination, 63
Changing Key Operator Settings, 97
Changing the Line Type, 7
Changing the Transmission Time, 61
Checkered Mark, 23
Checking/Canceling TX Files, 59, 157
Checking/Editing a File, 61
Checking the Transmission Result
(TX File Status), 65
CIL, 28
CIL/TID Print, 28
Closed Network, 8
Combine 2 originals, 16, 26
Communication Failure Report, 12
Communication Information, 157
Confidential File, 18
Confidential File Indicator, 18
Confidential File Report, 68
Confidential ID, 125
162
Confidential Message, 67
Confidential Transmission, 36, 155
Counters, 137, 160
D
Date/Time, 136, 161
Default ID Polling Reception, 21, 50
Default ID Polling Transmission, 47, 48
Destination List, 61
Displaying the Memory Status, 157
Displaying the Reception Result, 157
Displaying the Transmission Result, 157
Dual Access, 11
E
ECM, 102, 160
Economy Transmission Time, 34, 124, 160
End Receiver, 19, 52, 54
Error Report, 142
Expansion Memory and Hard Disk, 150
F
FAX 400dpi Option Type 450, 151
FAX Print Color, 28
FAX Stamp Type 4000, 151
F Code, 9
Forwarding, 108, 160
Forwarding Station, 108
Free Polling Transmission, 47, 48
Function List, 155
Function Map, iv
G
G3 Analog Line, 160
G3 Digital Line, 126, 161
G3/G4 Line Selection, 94
G4 Digital Line, 128, 161
Group Dial, 158
Group Dial List, 87
H
Handy Dialing Functions, 1
I
P
ID Code, 125, 160
ID Override Polling Reception, 22
ID Override Polling Transmission, 48
ID Reception, 20
ID Transmission, 8, 56, 156
Image Rotation, 25
Immediate Reception, 15
Initial Setup RX, 73, 90, 159
Initial Setup TX, 73, 88, 159
Irregular Area, 83, 158
Irregular Scan Area, 45, 155
ISDN, 148
ISDN Unit (ISDN Option Type 450), 151
J
JBIG, 10, 22
JBIG Reception, 22
JBIG Transmission, 10
K
Key Operator Settings, 73, 97
Keystroke Program, 75, 158
Keystroke Program List, 77
L
Label Insertion, 55, 156
M
Maintaining Your Machine, 145
Manual Dial, 6
Memory Lock, 69, 103, 117, 160
Memory Lock ID, 125
Memory Reception, 15
Memory Status, 72
Memory Storage Report, 12
More Transmission Functions, 11
Multi-copy, 16, 117
Multi-copy Reception, 25
Multistep Transfer, 19, 105, 160
O
On-hook Dial, 5
Opt. Group Dial, 158
Output Tray, 18
Override ID Polling Reception, 50
Override ID Polling Transmission, 47
Page Reduction, 27
Page Separation and Length Reduction, 26
Paper Feed Selection, 139
Personal Code, 97, 159
Personal Code Access, 100, 101
Personal Code List, 102
Personal Code Transmission, 38
Personal Code TX, 155
Polling ID, 125
Polling Reception, 50, 155
Polling Reserve Report, 51
Polling Result Report, 51
Polling Transmission, 47, 155
Polling Transmission Clear Report, 49
Print Completion Beep, 23
Printed Report, 12
Printing a Confidential Document, 157
Printing a File, 60
Printing an Auto Document, 82
Printing Functions, 23
Printing the Memory Lock, 157
Printing the TCR, 157
Printing the TX File List, 157
Print TX File List, 64
PWD, 10, 22
Q
Quick Dial, 158
Quick Dial List, 86
R
RDS, 139
Receive File Indicator, 18
Reception, 15
Reception Features, 15
Reception Functions, 19
Reception Time, 23
Redial, 2
Register/Delete, 73, 75
Reports/Lists, 73, 86, 159
Requesting Party, 19, 52
Re-sending a File, 62
Resolution, 88
Reverse Order Printing, 16, 27
Reverse Printing, 117
RTI/TTI, 159
RX File Status, 66
163
S
Selecting the Line Type, 149
Sender Reception list, 123
Sending at a Specific Time (Send Later), 34
Send Later, 155
SEP, 20
Special RX Nos., 116, 160
Specifications, 152
Specific Senders, 111
Specified Sender/Forwarding Station list, 114
Specified sender list, 119
Speed Dial, 158
Speed Dial List, 87
Stamp, 8, 145
SUB, 9
Subaddress, 3
Substitute Reception, 16, 18
Summer Time, 137
Switches and Bits, 130
T
TCR, 71, 86, 157
Telephone Directory, 1
Telephone Line, 147
TID, 28, 128
Toner, 141
Transfer Request, 52, 156
Transfer Result Report, 20
Transfer Station, 19, 52
Transmission Features, 1, 8
Transmission Mode, 88
Transmission Options, 55
Transmission Result Display, 94
Transmission Result Report (Immediate TX), 13
Transmission Result Report (Memory TX), 12
Transmission with Image Rotation, 11
Tray Select, 117
Treating Message from Certain Senders
Differently (Specified Senders), 115
Troubleshooting, 141
TSI, 28
TSI Print, 28
TTI Print, 55, 156
U
User Function Keys, 94, 96, 159
User Functions, 73
User Parameter List, 131, 161
User Parameters, 130, 161
User Tools, 73, 158
164
UE
USA
B383