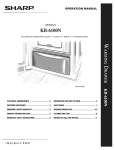
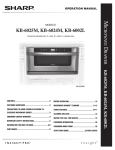
Download Sharp KB-6100NS Installation manual
Transcript
Operation Manual
Models
KB-6100N
Followed by indicating color: K = black, W = white, S = stainless steel
Warming Drawer
KB-6100NS
Information You Need To know..........................6
Customer Assistance.......................................3
Part Names....................................................7
CONSUMER LIMITED warranty.............................4
Warming Drawer Use.................................... 8-9
PRODUCT INFORMATION CARD...............................4
Cleaning and Care......................................... 10
Important safety instructions.........................5
Before you call for service........................... 11
KB-6100N
Electrical Requirements.................................3
Customer Assistance
To assist in reporting this appliance, please record below the model number and serial number located on the unit. We also
suggest you record all the information listed and retain for future reference.
MODEL NUMBER
SERIAL NUMBER
DATE OF PURCHASE
/
/
Dealer
Telephone
Servicer
Telephone
TO PHONE:
DIAL
TO WRITE:
1-800-BE-SHARP (237-4277) for:
SERVICE (for your nearest Sharp Authorized Servicer)
PARTS (for your authorized parts distributor)
ADDITIONAL CUSTOMER INFORMATION
Sharp Electronics Corporation
Customer Assistance Center
1300 Naperville Drive
Romeoville, IL 60446-1091
Please provide the following information when you write or call: model number, serial number, date of purchase, your complete
mailing address (including zip code), your daytime telephone number (including area code), your email address and description
of the problem.
TO ACCESS INTERNET: www.sharpusa.com
Electrical Requirements
A 120V, single phase, 60 Hz, AC only 15 or 20 amp electrical supply,
properly grounded in accordance with the National Electric code and
local codes and ordinances is required.
IMPORTANT The appliance is equipped with a three-prong
grounding plug for protection against possible electric shock hazards.
It must be plugged into a dedicated, grounded, electrical outlet. If only
a two-prong electrical outlet is available, it is the responsibility of
the customer to have it replaced with a dedicated, properly grounded
three-prong electrical outlet. Do not under any circumstances:
• Cut or remove the third (ground) prong from the powercord.
• Use a power cord that is frayed or damaged.
Name Plate
Location
• Connect the appliance to an extension cord.
• Do not use an adaptor to fit plug to outlet.
Note: Use of a ground fault interrupter (GFI) is not recommended.
3
* Serial Number is located on Name Plate
CONSUMER LIMITED warranty
SHARP ELECTRONICS CORPORATION warrants to the first consumer purchaser that this Sharp brand product (the “Product”),
when shipped in its original container, will be free from defective workmanship and materials, and agrees that it will, at its
option, either repair the defect or replace the defective Product or part thereof with a new or remanufactured equivalent at no
charge to the purchaser for parts or labor for the period(s) set forth below.
This warranty does not apply to any appearance items of the Product nor to the additional excluded item(s) set forth below nor
to any Product the exterior of which has been damaged or defaced, which has been subjected to misuse, abnormal service or
handling, or which has been altered or modified in design or construction.
In order to enforce the rights under this limited warranty, the purchaser should follow the steps set forth below and provide
proof of purchase to the servicer.
The limited warranty described herein is in addition to whatever implied warranties may be granted to purchasers by law.
ALL IMPLIED WARRANTIES INCLUDING THE WARRANTIES OF MERCHANTABILITY AND FITNESS FOR USE
ARE LIMITED TO THE PERIOD(S) FROM THE DATE OF PURCHASE SET FORTH BELOW. Some states do not allow
limitations on how long an implied warranty lasts, so the above limitation may not apply to you.
Neither the sales personnel of the seller nor any other person is authorized to make any warranties other than those described
herein, or to extend the duration of any warranties beyond the time period described above on behalf of Sharp.
The warranties described herein shall be the sole and exclusive warranties granted by Sharp and shall be the sole and exclusive
remedy available to the purchaser. Correction of defects, in the manner and for the period of time described herein, shall
constitute complete fulfillment of all liabilities and responsibilities of Sharp to the purchaser with respect to the Product, and
shall constitute full satisfaction of all claims, whether based on contract, negligence, strict liability or otherwise. In no event shall
Sharp be liable, or in any way responsible, for any damages or defects in the Product which were caused by repairs or attempted
repairs performed by anyone other than an authorized servicer. Nor shall Sharp be liable or in any way responsible for any
incident or consequential economic or property damage. Some states do not allow the exclusion of incidental or consequential
damages, so the above exclusion may not apply to you.
THIS WARRANTY GIVES YOU SPECIFIC LEGAL RIGHTS. YOU MAY ALSO HAVE OTHER RIGHTS WHICH VARY
FROM STATE TO STATE.
Your product model number &
description
KB-6100N Home Use Warming Drawer. (Be sure to have this information available
when you need service for your Product.)
Warranty period for this
product:
One (1) year parts and labor including in-home service.
Where to obtain service:
From a Sharp Authorized Servicer located in the United States. To find the location
of the nearest Sharp Authorized Servicer, call Sharp toll free at 1-800-BE-SHARP
(1-800-237-4277).
Additional item(s) excluded
Non-functional accessories.
from warranty coverage (if any):
What to do to obtain service:
In-home service is provided for one year from date of purchase. In-home service can be
arranged by calling 1-800-BE-SHARP. Be sure to have Proof of Purchase available.
TO OBTAIN SUPPLY, ACCESSORY OR PRODUCT INFORMATION, CALL 1-800-BE-SHARP or visit www.sharpusa.
com. SAVE THE PROOF OF PURCHASE AS IT IS NEEDED SHOULD YOUR Warming Drawer EVER REQUIRE
WARRANTY SERVICE.
PRODUCT INFORMATION CARD
The Product Information Card should be completed within ten days of purchase and returned. We will keep it on file and help
you access the information if needed. This will also enable us to contact you in the unlikely event that any adjustments or
modifications are ever required for your Warming Drawer.
4
Important safety instructions
READ ALL INSTRUCTIONS BEFORE USING
When using the appliance, basic safety precautions should be followed, including the following:
WARNING
1
2
3
4
5
6
7
8
9
To reduce the risk of burns, electric shock, fire or injury to persons:
Read all instructions before using the appliance.
10 Do not immerse cord or plug in water.
This appliance must be properly grounded. See separate
Installation Instructions for grounding instructions.
11 Keep cord away from heated surfaces.
12 Do not climb or sit on the appliance.
Install or locate this appliance only in accordance with
the provided Installation Manual.
13 Be sure that fingers or other objects or materials are
not around the appliance opening when the appliance
is closed.
Use this appliance only for its intended use as described
in this manual. Do not use corrosive chemicals or
vapors, or flammable liquids in this appliance. This
appliance is specifically designed to heat or dry food in
the home. It is not designed for industrial, commercial
or laboratory use.
14 Do not put fingers or clothes around the drawer guides
when the appliance is opened or closed. They could be
caught in the guides when the appliance is closed.
15 Be sure that the food and container are shorter than the
drawer before closing it. You can refer to the height of
the side walls of the drawer.
Do Not Leave Children Alone – Children should not
be left alone or unattended in area where appliance is
in use. They should never be allowed to sit or stand on
any part of the appliance.
16 When cleaning appliance sealing surfaces that
come together on closing the drawer, use only mild,
nonabrasive soaps or detergents applied with a sponge
or soft cloth. See cleaning instructions on page 10.
Do not operate this appliance if it has a damaged cord
or plug, if it is not working properly or if it has been
damaged or dropped.
17 To reduce the risk of fire in the appliance cavity, do
not use the appliance for storage purposes. Do not
leave paper products, cooking utensils, or food in the
appliance when not in use.
This appliance should be serviced only by qualified
service personnel. Contact nearest Sharp Authorized
Servicer for examination, repair or adjustment.
18 Wear Proper Apparel – Loose-fitting or hanging
Do not cover or block any openings on the appliance.
garments should never be worn while using the
appliance.
Do not store or use this appliance outdoors. Do not use
this product near water—for example, near a kitchen
sink, in a wet basement, near a swimming pool or
similar locations.
19 Do Not Heat Unopened Food Containers – Build-up
of pressure may cause container to burst and result in
injury.
SAVE THESE INSTRUCTIONS
5
Information You Need To know
WARNING
ANTI-TIP Block REQUIRED
ABOUT CHILDREN AND THE Warming
Drawer
To reduce the risk of tipping of the drawer, the Anti-Tip
block must be properly installed. Refer to the Installation
Instructions for placement.
Children below the age of 7 should use the Warming Drawer
only with a supervising person very near to them. For children
between the ages of 7 and 12, the supervising person should
be in the same room. The child must be able to reach the
Warming Drawer comfortably.
Burn Hazard
• Do not touch any of the surfaces inside or outside the
Warming Drawer during or immediately after use. After
use, make sure these surfaces have had sufficient time to
cool before touching them.
At no time should anyone be allowed to lean or swing on the
Warming Drawer.
Children should be taught all safety precautions: use dry
potholders, remove coverings carefully, pay special attention
to packages that crisp food because they may be extra hot.
• Exercise caution when opening the drawer. Let hot air or
steam escape before looking or reaching into the Warming
Drawer.
Don't assume that because a child has mastered one cooking
skill he/she can cook everything.
• Use only dry pot holders when removing food and
cookware from the Warming Drawer. Wet pot holders can
cause steam burns.
Children need to understand that the Warming Drawer is
not a toy.
Aluminum Foil Usage
Food Safety
• Do not use aluminum foil to line any part of the
Warming Drawer. Using a foil liner could result in a fire
hazard or the obstruction of the flow of heat and ventilation
air. Foil is an excellent heat insulator and heat will be
trapped underneath it. This trapped heat can upset the
performance of the Warming Drawer parts.
The purpose of the Warming Drawer is to hold hot cooked
foods at serving temperature. Always start with hot food; cold
food cannot be heated or cooked in the Warming Drawer.
When warming foods in oven safe glass and/or glass ceramic
container, a higher temperature setting may be needed
compared to heating in metal containers
• To avoid excess condensation inside the drawer, foods may
be covered with aluminum foil. This will also help keep
the food from drying out.
Opening the drawer during use and/or adding more items
will allow the hot air to escape and may require more time
for the temperature in the drawer to stabilize.
Maximum Capacity
Be sure to maintain safe food temperature. The USDA recommends holding hot food at 140˚F or warmer.
• Do not place more than 50 pounds in the drawer.
To keep several foods hot together, set the temperature
according to the food needing the highest setting. Place items
needing highest temperature on the bottom of the drawer and
food needing less heat on the tray.
Other
• Never use your appliance for warming or heating the
room.
• The use of accessory attachments not recommended by
Sharp may cause injuries.
• Never leave the drawer open and unattended.
About Utensils and Coverings
for safe Warming and reheating
• Always use oven-safe dishes and cookware in this
appliance.
• Cover food with an oven-safe lid or aluminum foil.
• Check with manufacturer of dishes and cookware for their
maximum heat tolerance.
About Unpacking and Examining
Your WARMING Drawer
1 Remove all packing materials from inside the Warming
Drawer.
2 Remove the feature sticker, if there is one. Check the
DO NOT USE
drawer for any damage, such as misaligned or bent drawer,
damaged drawer seals and sealing surfaces, broken or loose
drawer guides and dents inside the cavity or on the front
side of the drawer. If there is any damage, do not operate
the Warming Drawer and contact your dealer or a SHARP
AUTHORIZED SERVICER.
• Plastic wrap or bags.
• Plastic containers or lids.
Melted plastic may NOT be removable.
• Paper plates, paper towels or any other combustable
material.
ACCESSORIES
A serving pan kit is available through Authorized Sharp
Dealers.
6
Part Names
Warming Drawer
KB-6100N
Rubber Gasket
Rack
Air Vents/Variable
Humidity Control
Name Plate
Drawer Guides
Electronic Touch
Controls
Power Light
8
POWER
On/Off
Air Vents
8
Temp.
90° Proof
125° Low
150°
175° Med.
200°
230° High
8
Time
1/2 Hour
1 Hour
2 Hours
3 Hours
Variable Humidity Control
for moisture adjustment.
Slides to open and close.
Numbers next to the electronic touch controls illustration indicate
pages on which there are feature descriptions and usage information.
7
4 Hours
8
Continuous On
Warming Drawer Use
Electronic Touch Controls
Continuous On Mode
• Press POWER to turn the Warming
Drawer on and off. Signal light will indicate
when unit is on.
When the Warming Drawer is in Continuous On mode, it will
remain on until turned off manually. To avoid a fire hazard or
burns, exercise caution when operating the unit in Continuous
On mode. Touch POWER to turn the unit off.
To Select Desired
Temperature
POWER
On/Off
Temp.
• Select temperature by pressing TEMP
until indicator light is on next to desired
temperature.
To select Desired Time
Auto Shut-Off
90° Proof
Do not block the humidity vents on the back of the drawer
front and along the left and right sides of the drawer. Excessive
heat buildup can occur.
125° Low
150°
175° Med.
200°
Rack
230° High
• Select from five preset times or Continuous
On by pressing TIME until light is on next
to desired time.
A wire rack is included
to use for double stacking
items.
Time
1/2 Hour
• Use caution when selecting Continuous On.
Unit will need to be turned off using the
POWER key.
1 Hour
Preheating
Continuous On
The rack will fit from front
to back or from side to
side.
2 Hours
3 Hours
4 Hours
• Preheat with the rack in place.
Allow time for the drawer to preheat.
• The use of accessory attachments not recommended by
Sharp may cause injuries.
For best results, preheat your Warming Drawer according to
the chart below before use. If you put hot food into a cool,
confined area, any steam that is present will condense. If you
preheat your Warming Drawer, there will be less chance of
water due to condensation. Preheat times vary depending on
the temperature setting.
Temperature
Settings
APPROXIMATE TIME
90˚
Proof
Preheat Not Required
125˚
150˚
Low
175˚
Medium
230˚
High
200˚
• Always place racks in desired position while drawer is cool.
If racks must be removed while Warming Drawer is hot, do
not let the potholder contact the heating elements.
• DO NOT USE aluminum foil to line any part of the
Warming Drawer. Using a foil liner could result in a fire
hazard, or the obstruction of the flow of heat and ventilation
air. Foil is an excellent heat insulator and heat will be
trapped underneath it. This trapped heat can upset the
performance of the Warming Drawer parts.
8 minutes
12 minutes
• DO NOT place more than 50 pounds in the drawer.
19 minutes
Plastic containers or plastic wrap can melt if
in direct contact with the drawer or a hot utensil. Items may
melt and cause damage to the Warming Drawer or injury.
16 minutes
CAUTION
24 minutes
8
Warming Drawer USE
• You may preheat empty serving dishes while preheating
the drawer. It is not necessary to preheat the Warming
Drawer when warming dishes or plates.
Variable Humidity Control
The slide control is located on the inside front of the
drawer.
OPEN
• Place empty serving dishes on the high rack and food on
the bottom of the drawer when holding hot cooked foods
together while warming empty serving dishes.
CLOSED
CRISP
MOIST
• Do not drag dishes or plates across the drawer to avoid
scratching the surface.
Dishes may be hot. Use pot holders or mitts
when removing hot dishes.
CAUTION
To proof Yeast Bread Dough
Yeast dough can be proofed in the Warming Drawer.
(Facing the drawer.)
• Place the dish on the bottom of the Warming Drawer.
• Press TEMP until the indicator light is on next to 90º
Proof.
• Press TIME until the indicator light is on next to 1 hour.
• Close the Variable Humidity Control.
Air Vents
• Lightly oil the top of the dough. The bowl should be large
enough to allow the dough to double in size. Cover the
bowl with a cloth.
Slide control for
moisture adjustment
• Preheating is not required.
• Check after 40 minutes. The dough should double in
size. Adjust the time as needed for the dough to double
in size and a gentle touch of a finger results in a slight
depression.
To keep foods moist
Slide the Variable Humidity Control to the "Moist" setting.
This closes the vent and seals the moisture inside the drawer.
With the vent closed, hot foods stay moist and soft. In this
setting, condensation may occur around the inside edge of
the drawer.
Temperature and Humidity
Control Setting Guidelines
Different foods require different temperature and humidity
settings. Use the chart on the following page as a guide.
To keep foods crisp
Slide the variable Humidity Control to the "Crisp" setting.
This opens the vents and allows the moisture to escape.
You can set the Warming Drawer temperature to any of the
6 settings. Cover the food if desired to maintain heat and
moisture.
CAUTION With the vents open, it is normal for moisture
to collect on surfaces above the Warming Drawer.
When keeping several types of food hot, choose the setting
based on the highest recommended temperature. Place those
foods needing the highest temperature on the bottom of the
drawer, those requiring lower temperature on the rack.
To Crisp Stale Items
• Place food in low sided dishes or pans.
• Preheat on LOW setting and open the vent.
It is not recommended to hold foods in the Warming Drawer
for longer than 1 hour. Smaller quantities and/or heat sensitive
foods such as eggs should not be held for more than 30
minutes.
• Check crispness after 45 minutes. Add time as needed.
To Warm Serving Bowl and Plates
Warm serving bowls and plates at the LOW setting.
Food must be cooked and be at serving temperature before
being placed in the Warming Drawer.
• Use heat-safe dishes only. Place the empty dishes on the
rack. Check with the manufacturer if you want to heat to
a higher temperature or when heating fine china or other
delicate items.
9
Cleaning and Care
Temperature & Humidity Control
Setting chart
Food Type
Control
Setting
Stainless Steel Surface (KB-6100NS)
The exterior should be wiped often with a soft damp cloth and
polished with a soft dry cloth to maintain its beauty. There is
also a variety of products designed especially for cleaning and
shining the stainless exterior of the drawer. We recommend
that the cleaner be applied to a soft cloth and then carefully
used on the stainless exterior rather than sprayed directly on
it. Follow package directions carefully.
HUMIDITY
CONTROL
Setting
CRISP
Bacon
HIGH
OPEN
Fried foods
HIGH
OPEN
Pizza
HIGH
Bread, hard rolls
Pies, two crusts
Potatoes, baked
Tortilla Chips
MED
MED
HIGH
LOW
OPEN
Touch Control Panel
OPEN
Wipe the panel with a cloth dampened slightly with water
only. Dry with a soft cloth. Do not scrub or use any sort of
chemical cleaners. Be sure power is off before and after
cleaning.
OPEN
OPEN
OPEN
MOIST
Interior
Beef, medium and
well done*
MED
CLOSED
Bread, soft rolls
Casseroles
MED
Cooked cereal
MED
CLOSED
MED
CLOSED
Eggs
Fish, seafood
Fruit
Gravy, cream sauces
Ham
Lamb
MED
MED
MED
MED
MED
MED
Pancakes, waffles
HIGH
Pork
MED
Pies, one crust
Potatoes, mashed
Poultry
Vegetables
MED
MED
HIGH
MED
To clean the interior surfaces, including drawer sealing
surfaces, wipe with a soft damp cloth. DO NOT USE ABRASIVE OR HARSH CLEANERS OR SCOURING PADS.
For heavier soil, use mild soap; wipe clean with a soft damp
cloth. Do not use any chemical oven cleaners.
CLOSED
CLOSED
Warming Drawer
Guides
CLOSED
Remove the food crumbs
from the Warming Drawer guides. Wipe with a
soft dry cloth in order to
keep the Warming Drawer opening and closing
smoothly.
CLOSED
CLOSED
CLOSED
CLOSED
CLOSED
CLOSED
Warming Drawer Guides
CLOSED
How to clean the rack
CLOSED
Clean the rack with detergent and water. After cleaning, rinse
the rack with clean water and dry with a clean cloth.
CLOSED
CLOSED
Removing the Drawer from the
Appliance
* USDA/FSIS recommends an internal temperature of 145°F.
as the minimum doneness for beef. Use a portable meat
thermometer to check internal temperatures.
• Allow the drawer to cool before attempting to remove it.
• Pull the drawer out to the fully open position.
Be sure power is off and all surfaces are cool before cleaning
any part of the Warming Drawer.
• Push in on the locking tab on one side as you pull the
drawer up.
• When the drawer comes loose from the slide, repeat the
same process on the opposite side.
Exterior
Unless your model has stainless steel exterior, the outside
surface is precoated metal and plastic. Clean the outside with
mild soap and water; rinse and dry with a soft cloth. Do not
use any type of household or abrasive cleaner.
• Grip the drawer on both sides and pull it free.
• For safety, push both drawer slides into the drawer
opening.
10
Before you call for service
Please check the following before calling for service. It may save you time and expense.
Problem
1 Part or all of Warming
Drawer does not operate.
Possible cause
Solution
• Power cord of Warming Drawer is not • Make sure the power cord is tightly connected
completely connected to the electrical
to the outlet.
outlet.
• Check house lights to be sure. Call your local
• Power outage.
electric company for service.
• Fuse blown/circuit breaker tripped.
• Replace the fuse or reset the circuit breaker.
2 Food in Warming Drawer is • No power to the appliance.
not heated.
• Drawer controls improperly set.
• See SOLUTION for PROBLEM 1.
3 Warming Drawer light does • Light bulb is loose or burned out.
not work.
• Call for service.
4 Touch controls will not
operate.
• Check if the controls have been properly
set.
• Power cord of Warming Drawer is not • Make sure the power cord is tightly connected
completely connected to the electrical
to the outlet.
outlet.
• Check house lights to be sure. Call your local
• Power outage.
electric company for service.
• Fuse blown/circuit breaker tripped.
• Replace the fuse or reset the circuit breaker.
5 Power light off.
• Power failure.
• If the Warming Drawer was in use, you must
reset the heating function.
6 Drawer does not slide
smoothly or drags.
• Ball bearings are out of alignment.
• Fully extend the drawer and push it all the way
in. See the Care and Cleaning section.
• Drawer over-loaded or load unbalanced.
• Drawer not replaced properly after removal. • Reduce weight to less than 50 pounds.
Redistribute drawer contents.
• Remove drawer and replace again.
7 Excessive condensation.
• Liquid in Warming Drawer.
• Uncovered foods.
• Temperature setting too high.
• Incorrect Humidity setting.
• Remove liquid.
• Cover food with lid or aluminum foil. Do
not use aluminum foil to line any part of
the Warming Drawer.
• Reduce temperature setting.
• Set the Variable Humidity Control to the open
vent setting to allow venting.
8 No heat in the proof setting. • Room temperature may prevent the thermostat • Press TEMP to select LOW and then select
from tripping on.
PROOF.
9 Food dries out.
• Moisture escaping.
• Cover food with lid or aluminum foil. Do
not use aluminum foil to line any part of
the Warming Drawer.
• Set the Variable Humidity Control to the
closed vent settings to prevent venting.
11
T I N S E B 52 0 M R K0
SHARP ELECTRONICS CORPORATION
Sharp Plaza, Mahwah, New Jersey 07495-1163
1-800-BE-SHARP (237-4277)
Printed in USA


