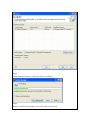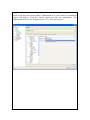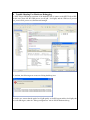
1
User Manual KPIT Eclipse IDE Table of Contents 1 Introduction ..................................................................................................... 4 2 About KPIT Eclipse ........................................................................................ 4 3 System Requirements ...................................................................................... 5 3.1 Systems Requirement (Windows Host environment)...................................................... 5 3.2 Targets Supported............................................................................................................ 5 3.3 Toolchains Supported ...................................................................................................... 6 3.4 How to Install/Uninstall the KPIT Eclipse IDE .............................................................. 6 3.4.1 Install / Un-install And Setup Procedure ................................................................. 6 3.4.2 Install the KPIT Eclipse IDE on Windows Host ..................................................... 7 3.4.3 Side By Side Installations of KPIT Eclipse ........................................................... 29 3.4.4 Uninstall the KPIT Eclipse IDE from Windows Host ........................................... 29 3.4.5 Install KPIT Eclipse IDE on Linux Host ............................................................... 32 3.4.6 Uninstall KPIT Eclipse IDE from Linux Host ...................................................... 32 3.4.7 Install KPIT Eclipse Plugins In Generic Eclipse ................................................... 34 3.4.8 Install KPIT Eclipse Plugins In Generic Eclipse on Windows.............................. 34 3.4.9 Install KPIT Eclipse IDE in Generic Eclipse on Linux ......................................... 53 3.5 4 KPIT Eclipse IDE Directory Structure .......................................................................... 58 Using the KPIT Eclipse IDE ......................................................................... 59 4.1 KPIT Eclipse IDE Description ...................................................................................... 59 4.2 Launching KPIT Eclipse On Windows ......................................................................... 59 4.3 Launching KPIT Eclipse on Linux ................................................................................ 62 4.4 Project Creation in KPIT Eclipse .................................................................................. 63 4.5 Project Files Description ............................................................................................... 64 4.6 Toolchain Management In KPIT Eclipse ...................................................................... 66 4.7 Software Update Feature In KPIT Eclipse .................................................................... 68 4.8 Creating GNURX Projects ............................................................................................ 69 4.8.1 Creating and Building a Sample Project Using GNURX Toolchain ..................... 69 4.8.2 Setting and Modifying Build Options ................................................................... 76 4.9 Creating GNUH8 Projects ............................................................................................. 87 4.9.1 Creating and Building a Sample Project Using GNUH8 Toolchain ..................... 87 4.9.2 Setting and Modifying Build Options ................................................................... 93 4.10 Creating GNUSH Projects ........................................................................................... 100 4.10.1 Creating and Building a Sample Project Using GNUSH Toolchain ................... 100 4.10.2 Setting and Modifying Build Options ................................................................. 107 4.11 Creating V850 Projects................................................................................................ 114 4.11.1 Creating and Building a Sample Project Using GNUV850 Toolchain ............... 114 4.11.2 Setting and Modifying Build Options ................................................................. 120 4.12 Creating SHC Projects ................................................................................................. 129 4.12.1 Creating and Building a Sample Project Using Renesas SHC Toolchain ........... 129 4.12.2 Setting and Modifying Build Options ................................................................. 139 4.13 Creating RXC Projects ................................................................................................ 140 4.13.1 Creating and Building a Sample Project Using Renesas RXC Toolchain ........... 140 4.13.2 Setting and Modifying Build Options ................................................................. 153 4.14 Renesas Quick Settings ............................................................................................... 154 4.14.1 Usage of Renesas quick settings.......................................................................... 154 5 Debugging Features in KPIT Eclipse ........................................................ 159 5.1 Hardware Debugging In KPIT Eclipse ........................................................................ 159 5.2 Debugging Using KPIT Eclipse Simulator ................................................................. 187 5.3 Debugging Eclipse Generated Code in HEW Environment ........................................ 194 5.3.1 Creating HEW Debug Configuration Project ...................................................... 194 5.3.2 Debugging In HEW ............................................................................................. 199 5.4 Debugging Samples in KPIT Eclipse IDE .................................................................. 203 5.5 Debugging Using Custom Debugger ........................................................................... 206 6 Trouble Shooting For Hardware Debugging ............................................ 208 7 Limitations ................................................................................................... 210 8 Support ......................................................................................................... 211 9 Glossary ........................................................................................................ 211 10 Revision History ....................................................................................... 211 1 Introduction KPIT Eclipse is an Eclipse based IDE that provides a development environment for embedded applications targeted at Renesas microcontrollers for RX, SH, H8 and V850 families. KPIT Eclipse supports integration of Renesas and KPIT GNU toolchains. Users can create and build projects using Renesas RXC, Renesas SHC toolchains, KPIT GNURX, KPIT GNUSH, KPIT GNUH8 and KPIT GNUV850 toolchains all in single KPIT Eclipse IDE. 2 About KPIT Eclipse The KPIT Eclipse IDE is packaged in ready to use Windows and Linux Installers along with release notes, user manuals, tutorials and samples. The KPIT Eclipse IDE is an extension of the software developed for eclipse.org. The IDE is based on Eclipse SDK version 3.5.2 [Galileo] and CDT version 6.0.2. Terms of Use KPIT Eclipse Parts Copyright (C) 2010-2011 KPIT Cummins Infosystems Limited. KPIT Eclipse IDE is an extension of software developed for eclipse.org. Source code for the Eclipse Foundation plug-ins is available from www.eclipse.org, under the Eclipse Public License („EPL‟, see http://www.eclipse.org/org/documents/epl-v10.php). If you use KPIT Tools to develop your application, you should NOT have to release the source code of your application. See http://www.kpitgnutools.com/licenses-faq.php for full details. The KPIT Eclipse IDE is distributed in the hope that it will be useful, but WITHOUT ANY WARRANTY; without even the implied warranty of MERCHANTABILITY or FITNESS FOR A PARTICULAR PURPOSE. Free technical support is http://www.kpitgnutools.com. available Visit the website for more information. for KPIT Tools across the world at 3 System Requirements KPIT Eclipse IDE provides an integrated development environment on Windows and Linux hosts. It is assumed that the user has working knowledge of Renesas SHC, RXC and KPIT GNU ELF toolchains. 3.1 Systems Requirement (Windows Host environment) System Requirement 3.2 System Parameters Intel architecture (i586/i686) PC Windows Operating Systems Windows XP service pack 2, Windows Vista service pack 1 & Windows 7 (32bit) Linux Operating Systems Fedora Core 10, Fedora Core 11, Fedora Core 12 CPU Clock Rate 200 MHz or higher Minimum System RAM 128 MB Free Disk Space 600 MB Targets Supported KPIT Eclipse IDE supports RX, SH, H8 and V850 targets. Toolchain Target Variants Renesas RXC toolchain RX600 : RX610/RX62N/RX62T Renesas SHC toolchain SH-1, SH-2, SH-2E, SH-2A, SH2AFPU, SH2-DSP, SH-3, SH3-DSP, SH-4, SH-4A, SH4AL-DSP GNUSH toolchains SH-1, SH-2, SH-2A, SH2A (No-FPU), SH-2E, SH-3, SH-3E, SH-4, SH-4A, SH4AL-DSP GNUH8 toolchains H8300, H8300L, H8300H, H8/S2000, H8/S2600, H8/SX GNURX toolchains RX600 RX610/RX62N/RX62T/RX630 : RX200 : Other GNUV850 toolchains 3.3 V850ES-Jx2, V850ES-Jx3, V850ESJx3-E, V850ES-Jx3-H, V850ES-Jx3L, V850ES-Jx3-U, V850, V850E, V850E1, V850E2, V850E2v3 Toolchains Supported KPIT GNUSH v0902(ES) and above KPIT GNUH8 v0902(ES) and above KPIT GNURX v10.01 and above KPIT GNUV850 v11.01 and above Renesas SHC toolchain 9.3.00 and above Renesas RXC toolchain 1.0.00 and above 3.4 How to Install/Uninstall the KPIT Eclipse IDE This section describes the KPIT Eclipse IDE installation procedure, configuration and tools usage. Further documentation and help is provided along with the IDE. 3.4.1 Install / Un-install And Setup Procedure This section is intended to guide new users of KPIT Eclipse in downloading and installing the KPIT Eclipse IDE for Renesas micros. The tools are free, easy to use and are backed by unlimited free technical support worldwide. KPIT Eclipse is supported on both Windows and Linux but SHC/RXC integration and hardware debug is only available on Windows. 3.4.2 Install the KPIT Eclipse IDE on Windows Host Download the installer from the KPIT Tools website http://www.kpitgnutools.com/latestToolchain.php. The name of this installer has the form „KPITEclipse_<version>‟, where <version> is the IDE version. For example if the version is „v3.00.00‟ then its installer will have the name „KPIT-Eclipse_v3.00.00‟. In the following sections, the installer is referred to as the „windows installer‟. Installation includes acceptance of the license agreement and selection of the installation directory and the components to be installed. Pre-Requisites for Installing the KPIT Eclipse IDE 1. Place the toolchain installer in the same directory as the Eclipse windows installer. Installation Procedure Double click on the Eclipse windows installer and follow the onscreen instructions (use Windows Explorer to navigate to the directory where the installers are saved.). The following series of screenshots shows a typical product installation: Step 1 Double click on the Eclipse windows installer to start installation. This will extract all the files required for installation. Step 2 Here we consider the installation of KE v3.00.00 windows installer in order to demonstrate the installation. The welcome note with appropriate KE version will be displayed. Click „Next‟ to continue. Step 3 If you are register user then click on I am register user and then click on Next .otherwise click on register now. Step 4 To continue with the installation enter your e-mail and activation code this will allow you to continue with the installation. Step 5 To accept the „License Agreement‟ and continue with the installation, click „Yes‟, then click „Next‟. Step 6 Click „Browse‟ to change the installation directory (if required), then click „Next‟. Step 7 Select / deselect components to be installed by clicking on the appropriate checkboxes. Typically no change is required. Select „Install Japanese support‟ for installing the Japanese version of the KPIT Eclipse IDE on Japanese OS. Click „Next‟ to continue. Step 8 Change the „Program Folder‟ (if required) and click „Next‟ to continue. Step 9 This dialog box confirms all chosen options. Click „Next‟ to continue. To change any of the options, click „Back‟ and re-select the options as required. Step 10 The installer shows the status of the installation process. Step 11 The installer can integrate Renesas SHC and RXC toolchains with KPIT Eclipse. This step shows the options provided to the user to integrate Renesas SHC and RXC toolchains. Step 12 Select the „Yes‟ options if the Renesas RXC and SHC toolchains are already installed on the system. Select „Yes, I will manually browse to the toolchain folder‟ option if you want to manually browse to the SHC/RXC toolchain path. Step 13 If you select the option 'Yes, by manual browsing of the toolchain folder', then manually browse to the „bin‟ folder of the corresponding toolchains installed (RXC/SHC) on your system. Step 14 Select the „bin‟ folder of the Renesas RXC or SHC toolchain. The following message box will appear in case SHC toolchain versions below 9.3.0 are installed on your system. SHC toolchain versions below 9.3.0 are not officially supported in KPIT Eclipse. Step 15 After installation, release notes are displayed for the software. A shortcut to these release notes is also available in the „Start Menu‟ folder for future reference. Click „Next‟ to continue. Step 16 Ensure the toolchain installer is placed in the same folder as the Eclipse windows installer. Otherwise the following dialog box will appear. Step 17 When the toolchain to be integrated with the KPIT Eclipse IDE are placed in the same folder as the installer, the installer detects the toolchains and displays a similar dialog box as shown below. Select the toolchains you want to integrate with the KPIT Eclipse IDE and click „Next‟. This step will invoke the KPIT GNU toolchain installers. Step 18 The selected toolchain installers will now be invoked. The following screenshots show the installation of GNURX v10.02 toolchain. Steps in the toolchain installer such as entering activation code have been skipped. The toolchain installer detects whether HEW or KPIT Eclipse is installed. Select the KPIT Eclipse IDE and click „Next‟. Note: GNURX v10.01 does not integrate with previous versions of KPIT Eclipse. GNURX v10.01 toolchain can be integrated only with KPIT Eclipse v2.1 and above. In case the selected toolchain is already installed on the system, the toolchain installer will be invoked in the maintenance mode as shown below. Three options will be available in the maintenance mode i.e. modify, repair and remove. „Modify” mode should be selected if existing installation needs to be modified. For example, if the toolchain was integrated with HEW only, then in the „Modify‟ mode, integration with KPIT Eclipse can be selected. Also, if KPIT Eclipse was un-installed and installed again, the toolchain installer should be run in „Modify‟ mode to integrate with KPIT Eclipse again. „Repair‟ mode should be selected if no changes are required to be done to the existing installation. In this mode, all files installed in the last installation will be re-installed. „Remove‟ should be selected if the toolchain needs to be un-installed. Step 19 Select the features you want to install. Make sure you have minimum space on your hard-disk as displayed in the dialog box below. Step 20 The installer shows the status of the installation process. Step 21 Click „Finish‟ to complete the toolchain installation. Similar installation (Step 16 to Step 18) may continue for SH toolchain if selected in Step 15 above. Please note that there can sometimes be a delay between the toolchain installer ending and control being returned to the KPIT Eclipse installer. This is due to the inherent behavior of MSI installers. Step 22 Click „Finish‟ to complete the installation. 3.4.3 Side By Side Installations of KPIT Eclipse Multiple instances of KPIT Eclipse can be installed on your system. Please refer the procedure given in this section. The existing KPIT Eclipse installation needs to be backed up. Copy all the contents of the "KPIT-Eclipse" installation folder (C:\Program Files\KPIT Cummins\KPIT-Eclipse) to a different location. At this new location, change the contents of the "\internal\projectgen\OtherUtilities.ini" file to add the new short path of the "KPIT-Eclipse Utilities" folder. Change the contents of the "\internal\projectgen\h8 (or sh/rx/)\TC_Supported.txt" file to add the new paths of the toolchain folders. After making the above changes, the KPIT Eclipse installation can be upgraded to the newer version. 3.4.4 Uninstall the KPIT Eclipse IDE from Windows Host The following sections explain the procedure to uninstall the software. Toolchain releases from KPIT GNU Tools v0902 onwards have separate installers rather than being bundled with the KPIT Eclipse IDE installer. Step 1 Go to the toolchain shortcut in „Start‟ menu Step 2 Select option „Uninstall KPIT Eclipse‟. Step 3 Select „Remove‟ and click „Next‟. Step 4 Click „OK‟ to continue. Step 5 In order to completely remove the selected application, click „OK‟ to continue. To uninstall the toolchain integrated with KPIT Eclipse IDE, go to the toolchain shortcut in „Start‟ menu -> Select option „Uninstall <Toolchain VERSION> (ELF)‟. Please verify that the toolchains integrated with KPIT Eclipse are now un-installed. Step 6 The installer shows the status of the un-installation process. Step 7 Click „Finish‟ to complete un-installation. 3.4.5 Install KPIT Eclipse IDE on Linux Host KPIT Eclipse 3.00.00 is supported on Linux host. The KPIT Eclipse IDE is provided as a RPM (Red Hat Package Manager) file for Linux users. The RPM can be downloaded from KPIT GNU Tools website http://www.kpitgnutools.com/latestToolchain.php. Use the command specified below on the command line to install the tools: #rpm –Uvh KPITEclipse-3.0-1.i386.rpm KPIT Eclipse will be installed in the „/usr/share/‟ directory. This command will install and upgrade the KPIT Eclipse rpm version installed on the system. Note: The user should have root-level access to the system to install the RPM in the /usr/share directory. For this the user will have to login as root or use the „su‟ command or precede the above command with „sudo‟ to pseudo login as root. 3.4.6 Uninstall KPIT Eclipse IDE from Linux Host To uninstall KPIT Eclipse rpm package use the following command: #rpm –e KPITEclipse-3.0-1 During un-installation, the RPM removes only the files that were installed by the rpm installer. Note: The user should have root-level access to the system to uninstall the RPM from the /usr/share directory. For this, the user will have to login as root or use the „su‟ command or precede the above command with „sudo‟ to pseudo login as root. 3.4.7 Install KPIT Eclipse Plugins In Generic Eclipse 3.4.8 Install KPIT Eclipse Plugins In Generic Eclipse on Windows Please check if eclipse-cpp-galileo-SR2-win32 is installed. Otherwise; 1. Download eclipse-cpp-galileo-SR2-win32.zip from eclipse website. http://www.eclipse.org/downloads/download.php?file=/technology/epp/downloads/release/galileo /SR2/eclipse-cpp-galileo-SR2-win32.zip 2. Extract eclipse-cpp-galileo-SR2-win32.zip. Step 1 Run the KPIT Eclipse generic installer. (KE_Generic_3.0.exe). Step 2 The welcome note is displayed. Click „Next‟ to continue. Step 3 If you are register user then click on I am register user and then click on Next, otherwise click on register now. Step4 To continue with the installation enter your e-mail and activation code this will allow you to continue with the installation. Step5 To accept the „License Agreement‟ and continue with the installation, click „Yes‟, then click next. Step6 Browse to the eclipse path and select OK. (C:\eclipse-cpp-galileo-SR2-win32\eclipse). Step7 This will add a feature “Update Renesas Components” in the Help menu. Step8 Click „Finish‟ to complete the installation Step9 Launch eclipse. Select Help->Check Updates. This will install the latest Galileo CDT plugins. This is required for KE to function correctly. Step10 Select Help->Update Renesas Components. This will invoke install wizard to install KPIT Eclipse plugins. Step11 Select all the features displayed. This will install KPIT Eclipse plugins. Step12 KPIT Eclipse features have license agreement, select I accept the agreement tab to proceed and click on next. Step13 This will invoke install wizard to install KPIT Eclipse plugins. Step14 Update Manager Window will show the status of installation. Step15 Feature verification dialog appear, click on the install all to proceed. Step16 After the installation, the following message dialog appears. Step 17 Relaunch the eclipse IDE. Select Help->Add Renesas Toolchains. This will copy the required target specific files (internal, DebugComp and KPIT Eclipse Utilities) to the file system (parallel to eclipse folder). This copying happens for the first time or whenever there are updates to the KPIT Eclipse plugins. Step 18 Renesas toolchains can be integrated with eclipse using “Add Renesas Toolchains” feature. KPIT Eclipse searches for the available toolchains on the system and a dialog showing the list of toolchains available for integration is shown. Select the required toolchains. Click on Finish. Step 19 Create a new Renesas C project using File-New->Project->Renesas C Project. Note: Please do not use File->New->C project to create Renesas projects. This will not allow users to create KPIT Eclipse projects. Step 20 KPIT Eclipse project wizard will be displayed. Enter the project name and select required toolchain. Step 21 The project generator offers a choice to select the toolchain version and target CPU for the project. Select the required options for the project. Step 22 Select the required header files and pre-built or project-built library type. Step 23 Select the debug configuration. Select Finish. This will create a project “Test” in the project explorer. 3.4.9 Install KPIT Eclipse IDE in Generic Eclipse on Linux 1. Download eclipse-cpp-galileo-SR2-linux-gtk.tar.gz from eclipse website. http://www.eclipse.org/downloads/download.php?file=/technology/epp/downloads/release/galileo /SR2/eclipse-cpp-galileo-SR2-linux-gtk.tar.gz 2. Extract eclipse-cpp-galileo-SR2-linux-gtk.tar.gz. 3. Run the KPIT Eclipse generic rpm.(rpm -ivh KPITEclipseGeneric-3.00.00-1.i386.rpm -prefix=/home/Test (/home/Test should contain the eclipse directory). 4. This will install KPIT Eclipse update plugin. (com.kpit.updateplugin_3.0.0.jar). Directory containing target specific files 'internal' directory will be copied parallel to the eclipse directory. 5. Launch eclipse. 6. Select Help->Check Updates. This will install the latest Galileo CDT plugins. This is required for KPIT Eclipse to function correctly. Step1 Now open the workspace and go to menu Help->Install New Renesas Software. A dialog will be displayed for entering the activation code. Please enter the activation code. This will invoke install wizard to install KPIT Eclipse plugins Step2 Select all the features displayed. This will install KPIT Eclipse plugins. Step3 Some of the features have license agreement, select “I accept the agreement tab to proceed and click on Next.” Step4 Installation window dialog will appear which shows the installed features. Now click on finish. Step5 Update Manager Window will show the status of installation. Step6 Feature verification dialog appear ,click on the install all to proceed. Step7 This will install the features and show the status of installation. Step8 After the installation, the following message dialog appears. Export the KPIT GNU toolchains path. Relaunch the eclipse IDE. Create Renesas C project and build. 3.5 KPIT Eclipse IDE Directory Structure The default path where the toolchain gets installed on a Windows host is: C:\Program Files\KPIT Cummins\KPIT-Eclipse The installed folders/files include: Eclipse This folder contains all the plug-ins and executables comprising the KPIT Eclipse IDE. This folder also contains the JRE version required by the KPIT Eclipse product. <Toolchain><version>-ELF The toolchain is installed in this folder, for example, GNUSHv10.02-ELF. internal This folder contains all the files that are required for creation of RX, SH, H8 and V850 target projects using Renesas RXC, Renesas SHC, GNUSH, GNURX, GNUH8 and GNUV850 toolchains DebugComp DebugComp contains the files required for hardware debugging. KPIT-Eclipse Utilities This folder contains utilities used by KPIT Eclipse. Release_notes: The release notes provided with the released version of the KPIT Eclipse product. KPIT Eclipse user manual: The user manual released with the KPIT Eclipse product. 4 Using the KPIT Eclipse IDE 4.1 KPIT Eclipse IDE Description The KPIT Eclipse IDE provides a development environment for embedded applications targeted at Renesas microcontrollers (currently supports RX, SuperH and H8 family). KPIT Eclipse IDE v3.03.00 supports integration with Renesas RXC, GNURX, Renesas SHC, KPIT GNUSH, KPIT GNUH8 and KPIT GNUV850 toolchains. The main features of this IDE are: GNUSH, GNUH8, GNURX toolchains integrated with previous versions of KPIT Eclipse, will automatically integrate with v3.03.00 after upgrade. Creation and building of C/C++ projects for selected targets of the RX, SH, H8 and V850 family of microcontrollers. Setting of library generator, compiler, assembler and linker options. Support for application debugging on hardware in KPIT Eclipse / using HEW for RX and SH targets. Currently hardware debugging using KPIT Eclipse is not available for GNUH8 and GNUV. Support for application debugging using KPIT ELF simulator Sample applications that can be easily debugged on hardware in KPIT Eclipse/ HEW. KPIT Eclipse IDE can also be viewed in Japanese language on Japanese OS versions. Extensive documentation has been provided with the KPIT Eclipse IDE. Tooltips provide detailed information about the toolchain options. This information can be viewed by hovering over the options categories. 4.2 Launching KPIT Eclipse On Windows Launch „KPIT Eclipse‟ from the Start menu. Browse to the location of the workspace and click OK. The new workspace will be created in the folder specified Note: If „Use this as default and do not ask again‟ option is checked in the dialog box then this dialog box will not appear in future launches of KPIT Eclipse. The splash screen shown below appears during launch of the KPIT Eclipse workbench: The KPIT Eclipse IDE will be launched. The „Welcome Screen‟ is displayed when the KPIT Eclipse IDE is invoked for the first time. The Welcome screen can also be invoked manually by selecting Help -> Welcome from the menu bar in the Eclipse IDE. The „Welcome Screen‟ offers shortcuts to useful information, sample code and tutorials. Click on the „Go to the Workbench‟ icon to invoke the workbench. The workbench is invoked, where one can create, edit or modify programs. 4.3 Launching KPIT Eclipse on Linux KPIT Eclipse IDE v3.0 is supported on Linux. Change to the install directory "/usr/share/KPITEclipse/eclipse" Export the path of GNURX, GNUSH or GNUH8 toolchain as shown below, #export PATH=/usr/share/<toolchain_version_elf-1>/bin: $PATH KPIT Eclipse IDE is supported on the Fedora Core 9/10/11/12. Launch the KPIT Eclipse IDE (for Fedora Core versions 10 and below), #. /kpit-eclipse Note: Run the shell script "kpit-eclipse-fc11.sh" to launch KPIT Eclipse IDE on Fedora Core 11/12: #sh kpit-eclipse-fc11.sh 4.4 Project Creation in KPIT Eclipse KPIT Eclipse allows creation and building of C/C++ projects for selected targets of the RX, SH and H8 family of microcontrollers. A project wizard is provided for the project creation. The details for project creation are provided in the following sections: Creating GNURX Projects Creating GNUH8 Projects Creating GNUSH Projects Creating GNUV850 Projects Creating SHC Projects Creating RXC Projects KPIT Eclipse IDE version 3.0 has support for multiple debug configurations as mentioned below: Hardware debug This configuration allows debugging on hardware using GDB server within KPIT Eclipse. HEW debug This configuration allows debugging using HEW. Simulator debug This configuration allows debugging using GDB simulator within KPIT Eclipse Custom debug This configuration allows debugging using custom debugger. Release This configuration allows creation of projects in release mode. Projects created using older versions (below version 3.0) of KPIT Eclipse IDE can be used with the KPIT Eclipse IDE v3.0. Only „Debug‟ and „Release‟ configurations will be supported for these projects. In order to build the project for new configurations (Hardware debug / HEW debug /Custom debug), please create a new project in the KPIT Eclipse IDE v3.0 The project workspace created consists of directories and source files as viewed in the „Project Explorer‟ view in KPIT Eclipse IDE. Note: Only „Debug‟ and „Release‟ configurations are supported for GNUH8 and GNUV850. 4.5 Project Files Description The project workspace consists of directories and source files as viewed in the „Project Explorer‟ view in KPIT Eclipse IDE. For SH / RX targets: Binaries: This will contain the binaries which can be downloaded on to the target Includes: This will contain the include directories specified for your project src: This consists of the .c/.cpp, .src, .h, .inc etc files Debug, Hardware Debug, HewDebug, CustomDebug, Release - Depending on the configuration for which the project has been built i.e., Debug/HardwareDebug/HewDebug/CustomDebug/ Release these directories will contain the intermediate files generated during project building such as *.obj, <projectname>.abs or <projectname>.mot or <projectname>.x, <projectname>.map, makefiles such subdir.mk, makefile, objects.mk, sources.mk, <projectname>.lib etc. In addition to the files visible in the „Project Explorer‟ in KPIT Eclipse IDE, following other files are created, Debug: This consists of the „.hidden‟ file (linker script information) used by the IDE to build the project in debug configuration. Hardware: This consists of the „.hidden‟ file (linker script information) used by the IDE to build the project in hardware debug configuration. HewDebug: This consists of the „.hidden‟ file (linker script information) used by the IDE to build the project in HEW debug configuration. CustomDebug: This consists of the „.hidden‟ file (linker script information) used by the IDE to build the project in custom debug configuration. Release: This consists of the „.hidden‟ file (linker script information) used by the IDE to build the project in release configuration. .cproject and .project files: These files consist of the project related information used internally by the Eclipse IDE. .info: This file consists the information of the current project such as the toolchain version of the project, the KPIT Eclipse IDE version etc. This is used internally by KPIT Eclipse IDE for internal verification purpose. .hew.bat: This file contains the path for the HEW workspaces that will be invoked for supported targets. For other targets HEW path will be specified. Please refer to the release notes for the list of supported targets. .HEWDebug: This directory contains the HEW workspaces that will be invoked for supported targets. Please refer to the release notes for information about targets supported. custom.bat: This file is used for specifying the paths of custom debugger that can be used to invoke any third party debuggers. For GNUH8: Binaries - This will contain the binaries which can be downloaded on to the target Includes - This will contain the include directories specified for your project src - This consists of the .c/.cpp, .src, .h, .inc etc files Debug and Release - Depending on the configuration for which the project has been built i.e., Debug/Release these directories will contain the intermediate files generated during project building such as *.obj, <projectname>.abs or <projectname>.mot or <projectname>.x, <projectname>.map, makefiles such subdir.mk, makefile, objects.mk, sources.mk, <projectname>.lib etc. In addition to the files visible in the „Project Explorer‟ in KPIT Eclipse IDE, following other files are created, Debug directory: This consists of the „.hidden‟ file (linker script information) used by the IDE to build the project in debug configuration. Release directory: This consists of the „.hidden‟ file (linker script information) used by the IDE to build the project in release configuration. .cproject and .project files: These files consist of the project related information used internally by the Eclipse IDE. .info: This file consists the information of the current project such as the toolchain version of the project, the KPIT Eclipse IDE version etc. This is used internally by KPIT Eclipse IDE for internal verification purpose. For GNUV850: Binaries - This will contain the binaries which can be downloaded on to the target Includes - This will contain the include directories specified for your project src - This consists of the .c/.cpp, .src, .h, .inc etc files Debug and Release - Depending on the configuration for which the project has been built i.e., Debug/Release these directories will contain the intermediate files generated during project building such as *.obj, <projectname>.abs or <projectname>.mot or <projectname>.x, <projectname>.map, makefiles such subdir.mk, makefile, objects.mk, sources.mk, <projectname>.lib etc. In addition to the files visible in the „Project Explorer‟ in KPIT Eclipse IDE, following other files are created, Debug directory: This consists of the „.hidden‟ file (linker script information) used by the IDE to build the project in debug configuration. Release directory: This consists of the „.hidden‟ file (linker script information) used by the IDE to build the project in release configuration. .cproject and .project files: These files consist of the project related information used internally by the Eclipse IDE. .info: This file consists the information of the current project such as the toolchain version of the project, the KPIT Eclipse IDE version etc. This is used internally by KPIT Eclipse IDE for internal verification purpose. 4.6 Toolchain Management In KPIT Eclipse This feature allows users to integrate toolchains with KPIT Eclipse during while launching KPIT Eclipse and even after the workbench is opened. Step1 After the KPIT Eclipse is installed, launch KPIT Eclipse. Select the workspace. After selecting the workspace, the toolchain management dialog is shown. Select the toolchains you wish to integrate with KPIT Eclipse and click on Register. Deselect the „Enable Auto update UI‟, if you do not wish to see this dialog whenever workspace is launched. This setting is also available in the window preferences and can be turned if required. Step2 After the toolchains are integrated the following message dialog appears. Step3 KPIT Eclipse workbench is opened. At any point of time if any new toolchain is installed and you wish to integrate without closing KPIT Eclipse, you can use the toolchain management feature. Go to Help -> Add Renesas Toolchain.Add Rensas Toolchain window will open. This will show the toolchains that are installed on your system and are not integrated with KPIT Eclipse. Now select the toolchain you wish and click on finish button. Step4 On successful integration of toolchain; the message dialog is displayed. 4.7 Software Update Feature In KPIT Eclipse Step1 If you wish to install updates for KPIT Eclipse, select Help-> Update Renesas Components. 4.8 Creating GNURX Projects 4.8.1 Creating and Building a Sample Project Using GNURX Toolchain Step 1 Select „Create a new Renesas C project‟ by going to the menu File->New. Alternatively, the key combination <Alt-Shift-N> can be pressed. Now select „Renesas C project‟. Step 2 Specify a name for the project in the „Project Name‟ text box. „Test‟ is specified as an example. . Step 3 The project generator offers a choice to select the toolchain version and target CPU for the project. For this tutorial, create a project for an RX600 target using the GNURX v10.02 toolchain versions. The „v10.02‟ should therefore be selected as „Toolchain Version‟ and „RX600‟ should be selected from the „CPU Series‟ list. Here select „CPU Type‟ as „RX610‟. This page also allows selection of some commonly used compiler options, such as „Endianess‟. All the options on this page can also be selected / deselected later by modifying the compiler options in KPIT Eclipse. For now, just leave the options at their default settings and click the „Next‟ button to proceed. Step 4 Select the library source, header files, and library type for the project. For general use, the default options can be used. To speed up your project builds, you may like to use the “Pre-Built” option, which saves time building a custom library. Step 5 This page provides option to select the required debug configuration. Please view the 'Configuration Description' section in the wizard for configuration details. The selected configuration will be set to active. Build configurations will be created in the project for all of the above debug options, however by default the project will be built for debug on hardware. You can select E1/E20 for “Debug hardware setting” for RX targets. Selecting hardware debug configuration will allow debugging on hardware within KPIT Eclipse. Incase debug using HEW is selected; a pre-configured HEW workspace will be added to the project. This will allow the project created and built in KPIT Eclipse to be debugged in HEW. Hardware debug Debug using HEW Step 6 KPIT Eclipse now generates the project according to the chosen settings. A summary of the generated files is displayed for information. Click the „OK‟ button to complete project generation. The project is generated according to the chosen settings and is now ready to build. The project workspace consists of directories and source files as viewed in the „Project Explorer‟ view in KPIT Eclipse IDE. You may view these files through explorer from the path where the project is created. By default the project workspace will be created at, C:\Documents and Settings\<user name>\My Documents\KPIT_Eclipse\workspace\Test Please refer to the file details in project files description Section 4.5 Step 7 Once the project is generated, KPIT Eclipse displays a list of project files on the left in the „Project Explorer‟ window. Individual files shown in this window can be double clicked to display their contents in the main editor window. Double click on file „Test.c‟ to show the application‟s main() function. 4.8.2 Setting and Modifying Build Options Step 1 To change optimization options for a project, right click on the project, select Properties. Alternatively, click on the project and select Project-> Properties -> C/C++ Build -> Settings -> Compiler -> Object from the main menu bar. Step 2 Click on the drop down menu labeled „Optimization level‟ and a menu of optimization options will appear. From this, choose „Speed and code size optimization‟. This optimization level will now be applied to all C/C++ files in the project. Step 3 KE now supports link time optimization (-flto) for GNURX toolchain with the toolchain version v11.01 and above. Selecting this option enables „Enable link-time optimizations (-flto)‟ and „Link using “gcc” command instead of “ld” command‟ options in Linker. Step 4 Next, select „List‟. Select the „Generate list file‟ check box and the additional options as required. This will generate compilation list files in the configuration folder during build. Finally, click „OK‟ to commit the changes to the project. Step 5 Select the „Generate map file‟ checkbox to generate the map file. The mapfile shows the symbols linked into the final object file, the sections to which they were allocated and information about the size and linked addresses of those sections. The mapfile is generated in the configuration folder. To select or de-select the „Generate Map file‟ option go to Properties -> C/C++ Build Settings ->Linker -> Other. Step 6 1. The CPU options for RX target can be set in Project-> Properties -> C/C++ Build -> Settings -> Compiler -> CPU. KE now supports '-mpid' compiler switch („Generate position independent code and data (-mpid)‟ option) for GNURX toolchain with the toolchain version v11.01 and above. Step 7 Next, select the „Sections‟ tab. This tab allows the addresses to which the various code and data sections will be linked in the target devices address space to be changed. The default settings are correctly configured for a sample device in the CPU family selected when generating the project RX600. The section addresses might need to be changed while building code for a different device. Step 8 KE now supports link time optimization (-flto) for GNURX toolchains with the toolchain version v11.01 and above. Step 9 Now that some minor adjustments have been made to the toolchain settings, build the project. Note: When „Build‟ is clicked all the modified resources get saved. If the „Build Automatically‟ option is selected in the „Project‟ toolbar, the project is built automatically after project generation. If you prefer the project to be built automatically whenever a project source files is modified and saved, select the 'Project -> Properties -> C/C++ Build -> Behavior tab -> Build on Resource save (Auto build)' check box. Most users prefer to build their application periodically, rather than after every change. Consequently this option is off by default. Step 10 KPIT Eclipse now compiles, assembles and links the various project files appropriately and shows any warnings, errors or other toolchain output in the „Console‟ window, which is positioned towards the bottom of the KPIT Eclipse IDE window. Any errors or warnings related to a specific project file, appear in the „Problems‟ window. Double clicking the message will typically display the appropriate line of that project file in the editor window. Step 11 Earlier in this document, we briefly mentioned changing of compiler, assembler and linker options on a file-by-file or project-wide basis. Sets of such options can be grouped together into „configurations‟. By default the project generator creates five configurations: To change a configuration click on „Project -> Build configurations -> Set active -> Debug/HardwareDebug/HewDebug/CustomDebug/ Release‟. 4.9 Creating GNUH8 Projects 4.9.1 Creating and Building a Sample Project Using GNUH8 Toolchain Step 1 Select „Create a new Renesas C project‟ by going to the menu File->New. Alternatively, the key combination <Alt-Shift-N> can be pressed. Now select „Renesas C project‟. Step 2 Specify a name for the project in the „Project Name‟ text box. „Test‟ is specified as an example. Step 3 The project generator now offers a choice to select the toolchain version and target CPU for the project. For this tutorial, create a project for an H8/300H target using the GNUH8 v10.02 toolchain version. The „v10.02‟ should therefore be selected as „Toolchain Version‟ and „H8/300H‟ should be selected from the „CPU Series‟ list. Here select „CPU Type‟ as „3001‟. This page also allows selection of some commonly used compiler options, such as „Endianess‟. All the options on this page can also be selected / deselected later by modifying the compiler options in KPIT Eclipse. For now, just leave the options at their default settings and click the „Next‟ button to proceed. Step 4 Select the library source, header files, and library type for the project. For general use, the default options can be used. Step 5 KPIT Eclipse now generates the project according to the chosen settings. A summary of the generated files is displayed for information. Click the „OK‟ button to complete project generation. You may view these files through explorer from the path where the project is created. By default the project workspace will be created at, C:\Documents and Settings\<user name>\My Documents\KPIT_Eclipse\workspace\Eclipse_Test Step 6 Once the project is generated, KPIT Eclipse displays a list of project files on the left in the „Project Explorer‟ window. Individual files shown in this window can be double clicked to display their contents in the main editor window. Double click on file „Eclipse_Test.c‟ to show the application‟s main() function. 4.9.2 Setting and Modifying Build Options Step 1 To change optimization options for a project, right click on the project, select Properties. Alternatively, click on the project and select Project-> Properties -> C/C++ Build -> Settings -> Compiler -> Object from the main menu bar. Step 2 Click on the drop down menu labeled „Optimization level‟ and a menu of optimization options will appear. From this, choose „Speed and code size optimization‟. This optimization level will now be applied to all C/C++ files in the project. Step 3 Next, select „List‟. Select the „Generate list file‟ check box and the additional options as required. This will generate compilation list files in the configuration folder during build. Finally, click „OK‟ to commit the changes to the project. Step 4 Select the „Generate map file‟ checkbox to generate the map file. The mapfile shows the symbols linked into the final object file, the sections to which they were allocated and information about the size and linked addresses of those sections. The mapfile is generated in the configuration folder. To select or de-select the „Generate Map file‟ option go to Properties -> C/C++ Build Settings ->Linker -> Other. Step 5 Next, select the „Sections‟ tab. This tab allows the addresses to which the various code and data sections will be linked in the target devices address space to be changed. The default settings are correctly configured for a sample device in the CPU family selected when generating the project. The section addresses might need to be changed while building code for a different device. Step 6 Now that some minor adjustments have been made to the toolchain settings, build the project. Note: When „Build‟ is clicked all the modified resources get saved. If the „Build Automatically‟ option is selected in the „Project‟ toolbar, the project is built automatically after project generation. If you prefer the project to be built automatically whenever a project source files is modified and saved, select the 'Project -> Properties -> C/C++ Build -> Behavior tab -> Build on Resource save (Auto build)' check box. Most users prefer to build their application periodically, rather than after every change. Consequently this option is off by default. Step 7 KPIT Eclipse now compiles, assembles and links the various project files appropriately and shows any warnings, errors or other toolchain output in the „Console‟ window, which is positioned towards the bottom of the KPIT Eclipse IDE window. Any errors or warnings related to a specific project file, appear in the „Problems‟ window. Double clicking the message will typically display the appropriate line of that project file in the editor window. Step 8 Earlier in this document, we briefly mentioned changing of compiler, assembler and linker options on a file-by-file or project-wide basis. Sets of such options can be grouped together into „configurations‟. By default the project generator creates two configurations: „Debug‟ and „Release‟. To change a configuration click on „Project -> Build configurations -> Set active -> Debug/Release‟. 4.10 Creating GNUSH Projects 4.10.1 Creating and Building a Sample Project Using GNUSH Toolchain Step 1 Select „Create a new Renesas C project‟ by going to the menu File->New. Alternatively, the key combination <Alt-Shift-N> can be pressed. Now select „ Renesas C project‟. Step 2 Specify a name for the project in the „Project Name‟ text box. „Eclipse_test‟ is specified as an example. Step 3 The project generator now offers a choice to select the toolchain version and target CPU for the project. For this tutorial, create a project for an SH-2A (No FPU) target using the GNUSH v10.02 toolchain version. The „v10.02‟ should therefore be selected as „Toolchain Version‟ and „SH-2A (No FPU)‟ should be selected from the „CPU Series‟ list. Here select „CPU Type‟ as „SH7211‟. This page also allows selection of some commonly used compiler options, such as „Endianess‟. All the options on this page can also be selected / deselected later by modifying the compiler options in KPIT Eclipse. For now, just leave the options at their default settings and click the „Next‟ button to proceed. Step 4 Select the library source, header files, and library type for the project. For general use, the default options can be used. Step 5 This page provides option to select the required debug configuration. Please view the 'Configuration Description' section in the wizard for configuration details. The selected configuration will be set to active. Build configurations will be created in the project for all of the above debug options, however by default the project will be built for debug on hardware. E10A will be selected by default for “Debug hardware setting” for SH targets. Selecting hardware debug configuration will allow debugging on hardware within KPIT Eclipse. The required target device can be selected from the list of targets available. In the case where “Debug using HEW” is selected, a pre-configured HEW workspace will be added to the project for a few selected targets (Please refer the release notes for the list of supported targets). For other targets HEW workspaces will not be added, however HEW will be invoked. The debug settings need to be set manually. This will allow the project created and built in KPIT Eclipse to be debugged in HEW. Please refer Section 5.3 for details on debugging using HEW. Step 6 KPIT Eclipse now generates the project according to the chosen settings. A summary of the generated files is displayed for information. Click the „OK‟ button to complete project generation. The project is generated according to the chosen settings and is now ready to build. The project workspace consists of directories and source files as viewed in the „Project Explorer‟ view in KPIT Eclipse IDE. You may view these files through explorer from the path where the project is created. By default the project workspace will be created at, C:\Documents and Settings\<user name>\My Documents\KPIT_Eclipse\workspace\Test Please refer to the file details in project files description Section 4.5 Step 7 Once the project is generated, KPIT Eclipse displays a list of project files on the left in the „Project Explorer‟ window. Individual files shown in this window can be double clicked to display their contents in the main editor window. Double click on file „Eclipse_Test.c‟ to show the application‟s main() function. 4.10.2 Setting and Modifying Build Options Step 1 To change optimization options for a project, right click on the project, select Properties. Alternatively, click on the project and select Project-> Properties -> C/C++ Build -> Settings -> Compiler -> Object from the main menu bar. Step 2 Click on the drop down menu labeled „Optimization level‟ and a menu of optimization options will appear. From this, choose „Speed and code size optimization‟. This optimization level will now be applied to all C/C++ files in the project. Step 3 Next, select „List‟. Select the „Generate list file‟ check box and the additional options as required. This will generate compilation list files in the configuration folder during build. Finally, click „OK‟ to commit the changes to the project. Step 4 Select the „Generate map file‟ checkbox to generate the map file. The mapfile shows the symbols linked into the final object file, the sections to which they were allocated and information about the size and linked addresses of those sections. The mapfile is generated in the configuration folder. To select or de-select the „Generate Map file‟ option go to Properties -> C/C++ Build Settings ->Linker -> Other. Step 5 Next, select the „Sections‟ tab. This tab allows the addresses to which the various code and data sections will be linked in the target devices address space to be changed. The default settings are correctly configured for a sample device in the CPU family selected when generating the project SH-2A (No FPU). The section addresses might need to be changed while building code for a different device. Step 6 Now that some minor adjustments have been made to the toolchain settings, build the project. Note: When „Build‟ is clicked all the modified resources get saved. If the „Build Automatically‟ option is selected in the „Project‟ toolbar, the project is built automatically after project generation. If you prefer the project to be built automatically whenever a project source files is modified and saved, select the 'Project -> Properties -> C/C++ Build -> Behavior tab -> Build on Resource save (Auto build)' check box. Most users prefer to build their application periodically, rather than after every change. Consequently this option is off by default. Step 7 KPIT Eclipse now compiles, assembles and links the various project files appropriately and shows any warnings, errors or other toolchain output in the „Console‟ window, which is positioned towards the bottom of the KPIT Eclipse IDE window. Any errors or warnings related to a specific project file, appear in the „Problems‟ window. Double clicking the message will typically display the appropriate line of that project file in the editor window. Step 8 Earlier in this document, we briefly mentioned changing of compiler, assembler and linker options on a file-by-file or project-wide basis. Sets of such options can be grouped together into „configurations‟. By default the project generator creates five configurations: To change a configuration click on „Project -> Build configurations -> Set active -> Debug/HardwareDebug/HewDebug/CustomDebug/ Release‟. 4.11 Creating V850 Projects 4.11.1 Creating and Building a Sample Project Using GNUV850 Toolchain Step1 Select „Create a new Renesas C project‟ by going to the menu File->New. Alternatively, the key combination <Alt-Shift-N> can be pressed. Now select „Renesas C project‟ Step 2 Specify a name for the project in the „Project Name‟ text box. „test‟ is specified as an example. Step 3 The project generator now offers a choice to select the toolchain version and target CPU for the project. Create a project for V850ES-Jx2 target using the GNUV850 v11.01 toolchain version. The „v11.01‟ should therefore be selected as „Toolchain Version‟ and „V850ES-Jx2‟ should be selected from the „CPU Series‟ list. Here select „CPU Type‟ as „70F3715‟. This page also allows selection of some commonly used compiler options. All the options on this page can also be selected / deselected later by modifying the compiler options in KPIT Eclipse. For now, just leave the options at their default settings and click the „Next‟ button to proceed. Step 4 Select the library source, header files, and library type for the project. For general use, the default options can be used. Step 5 KPIT Eclipse now generates the project according to the chosen settings. A summary of the generated files is displayed for information. Click the „OK‟ button to complete project generation You may view these files through explorer from the path where the project is created. By default the project workspace will be created at, C:\Documents and Settings\<user name>\My Documents\KPIT_Eclipse\workspace\Test Step 6 Once the project is generated, KPIT Eclipse displays a list of project files on the left in the „Project Explorer‟ window. Individual files shown in this window can be double clicked to display their contents in the main editor window. Double click on file „test.c‟ to show the application‟s main() function. 4.11.2 Setting and Modifying Build Options Step 1 To change optimization options for a project, right click on the project, select Properties. Alternatively, click on the project and select Project-> Properties -> C/C++ Build -> Settings -> Compiler -> Object from the main menu bar. Step 2 Click on the drop down menu labeled „Optimization level‟ and a menu of optimization options will appear. From this, choose „Speed and code size optimization‟. This optimization level will now be applied to all C/C++ files in the project. Step 3 Next, select „List‟. Select the „Generate list file‟ check box and the additional options as required. This will generate compilation list files in the configuration folder during build. Finally, click „OK‟ to commit the changes to the project. Step 4 Next, go to the „compiler‟. Select the „cpu‟ option; it gives cpu specific V850 options. Select the required options and click on „OK‟ to commit the changes to the project. Step 5 Next, go to the „Assembler‟. Select the „CPU‟ option, V850 provides some additional cpu specific options as shown in below figure. Check the required option and click „OK‟ to commit the changes to the project. Step 6 Select the „Generate map file‟ checkbox to generate the map file. The mapfile shows the symbols linked into the final object file, the sections to which they were allocated and information about the size and linked addresses of those sections. The mapfile is generated in the configuration folder. To select or de-select the „Generate Map file‟ option go to Properties -> C/C++ Build Settings ->Linker -> Other. Step 7 Next, select the „Sections‟ tab. This tab allows the addresses to which the various code and data sections will be linked in the target devices address space to be changed. The default settings are correctly configured for a sample device in the CPU family selected when generating the project. The section addresses might need to be changed while building code for a different device. Step 8 Now that some minor adjustments have been made to the toolchain settings, build the project. Note: When „Build‟ is clicked all the modified resources get saved. If the „Build Automatically‟ option is selected in the „Project‟ toolbar, the project is built automatically after project generation. If you prefer the project to be built automatically whenever a project source files is modified and saved, select the 'Project -> Properties -> C/C++ Build -> Behavior tab -> Build on Resource save (Auto build)' check box. Most users prefer to build their application periodically, rather than after every change. Consequently this option is off by default. Step9 KPIT Eclipse now compiles, assembles and links the various project files appropriately and shows any warnings, errors or other toolchain output in the „Console‟ window, which is positioned towards the bottom of the KPIT Eclipse IDE window. Any errors or warnings related to a specific project file, appear in the „Problems‟ window. Double clicking the message will typically display the appropriate line of that project file in the editor window. Step10 Earlier in this document, we briefly mentioned changing of compiler, assembler and linker options on a file-by-file or project-wide basis. Sets of such options can be grouped together into „configurations‟. By default the project generator creates two configurations: „Debug‟ and „Release‟. To change a configuration click on „Project -> Build configurations -> Set active -> Debug/Release‟. 4.12 Creating SHC Projects 4.12.1 Creating and Building a Sample Project Using Renesas SHC Toolchain Step 1 Select „Create a new Renesas C project‟ by going to the menu File->New. Alternatively, the key combination <Alt-Shift-N> can be pressed. Now select „Renesas C project‟. Step 2 Enter the project name and select the „Renesas SHC toolchain‟. Step 3 Select the toolchain version, CPU Series, CPU type, Endian and other CPU settings for the project. Step 4 Select the global options required and click „Next‟. Step 5 Include the required header files during project creation. Click „Next‟. Step 6 Allocate stack and heap size. By default stack size is set as displayed in the project wizard. Click „Next‟. Step 7 Select the supporting files you would like to add in your project. By default the vector and I/O register definition files will be added to the project (these are checked by default). Click „Finish‟. Step 8 This page provides option to select the required debug configuration. Please view the 'Configuration Description' section in the wizard for configuration details. The selected configuration will be set to active. Build configurations will be created in the project for all of the above debug options, however by default the project will be built for debug on hardware. E10A will be selected by default for “Debug hardware setting” for SH targets. Selecting hardware debug configuration will allow debugging on hardware within KPIT Eclipse. The required target device can be selected from the list of targets available. In the case where “Debug using HEW” is selected, a pre-configured HEW workspace will be added to the project for a few selected targets (Please refer to the release notes for the list of supported targets). For other targets HEW workspaces will not be added, however HEW will be invoked. The debug settings need to be set manually. This will allow the project created and built in KPIT Eclipse to be debugged in HEW. Please refer Section 5.3 for details on debugging using HEW. Step 9 Summary page is displayed. Click „OK‟ The project is generated according to the chosen settings and is now ready to build. The project workspace consists of directories and source files as viewed in the „Project Explorer‟ view in KPIT Eclipse IDE. You may view these files through explorer from the path where the project is created. By default the project workspace will be created at, C:\Documents and Settings\<user name>\My Documents\KPIT_Eclipse\workspace\Test Please refer to the file details in project files description Section 4.5 Step 10 KPIT Eclipse now compiles, assembles and links the various project files appropriately and shows any warnings, errors or other toolchain output in the „Console‟ window, which is positioned towards the bottom of the KPIT Eclipse IDE window. Any errors or warnings related to a specific project file, appear in the „Problems‟ window. Double clicking the entry in the „Problems‟ window will typically display the appropriate line of that project file in the editor window. 4.12.2 Setting and Modifying Build Options Step 1 To change optimization options for a project, right click on the project, select Properties. Alternatively, click on the project and select Project-> Properties -> C/C++ Build -> Settings -> Compiler -> Object from the main menu bar. Earlier in this document, we briefly mentioned changing of compiler, assembler and linker options on a file-by-file or project-wide basis. Sets of such options can be grouped together into „configurations‟. By default the project generator creates five configurations: To change a configuration click on „Project -> Build configurations -> Set active -> Debug/HardwareDebug/HewDebug/CustomDebug/ Release‟. 4.13 Creating RXC Projects 4.13.1 Creating and Building a Sample Project Using Renesas RXC Toolchain Step 1 Select „Create a new Renesas C project‟ by going to the menu File->New. Alternatively, the key combination <Alt-Shift-N> can be pressed. Now select „ Renesas C project‟. Step 2 Enter the project name and select the „Renesas RXC toolchain‟. Step 3 Select the toolchain version, CPU Series, CPU type, Endian and other CPU settings for the project. Ensure the endian jumper setting on your RX hardware is configured to matching endian before proceeding. Step 4 Select the global options required and click „Next‟. Step 5 Select the global options required and click „Next‟. Step 6 Include the required header files during project creation. Click „Next‟. Step 7 Allocate stack and heap size. By default stack size is set as displayed in the project wizard. Click „Next‟. Step 8 Select the supporting files you would like to add in your project. By default the vector and I/O register definition files will be added to the project (these are checked by default). Click „Finish‟. Step 9 This page provides option to select the required debug configuration. Please view the 'Configuration Description' section in the wizard for configuration details. The selected configuration will be set to active. Build configurations will be created in the project for all of the above debug options, however by default the project will be built for debug on hardware. You can select E1/E20 for “Debug hardware setting” for RX targets. Selecting hardware debug configuration will allow debugging on hardware within KPIT Eclipse. In the case where “Debug using HEW” is selected, a pre-configured HEW workspace will be added to the project. This will allow the project created and built in KPIT Eclipse to be debugged in HEW. Step 10 Summary page is displayed. Click „OK‟ The project is generated according to the chosen settings and is now ready to build. The project workspace consists of directories and source files as viewed in the „Project Explorer‟ view in KPIT Eclipse IDE. You may view these files through explorer from the path where the project is created. By default the project workspace will be created at, C:\Documents and Settings\<user name>\My Documents\KPIT_Eclipse\workspace\Test Please refer to the file details in project files description Section 4.5 Step 11 KPIT Eclipse now compiles, assembles and links the various project files appropriately and shows any warnings, errors or other toolchain output in the „Console‟ window, which is positioned towards the bottom of the KPIT Eclipse IDE window. Any errors or warnings related to a specific project file, appear in the „Problems‟ window. Double clicking the entry in the „Problems‟ window will typically display the appropriate line of that project file in the editor window. 4.13.2 Setting and Modifying Build Options Step 1 To change optimization options for a project, right click on the project, select Properties. Alternatively, click on the project and select Project-> Properties -> C/C++ Build -> Settings -> Compiler -> Object from the main menu bar. Earlier in this document, we briefly mentioned changing of compiler, assembler and linker options on a file-by-file or project-wide basis. Sets of such options can be grouped together into „configurations‟. By default the project generator creates five configurations: To change a configuration click on „Project -> Build configurations -> Set active -> Debug/HardwareDebug/HewDebug/CustomDebug/ Release‟. 4.14 Renesas Quick Settings This feature helps user to set most frequently used MBS options quickly for selected project. Even though, a large number of options are present in the Managed build system and most of them will be used in the project cycle, some options are identified as the very frequently used. The feature “Renesas quick settings” provides a much easier way to access these options. 4.14.1 Usage of Renesas quick settings User can follow any of the three alternatives to open the “Renesas Quick Settings” dialog. Alternative1. Right click on the project and select “Renesas Quick Settings” from the pop-up menu as shown in the figure below: Alternative2. First select the project and then select „Project‟ “Renesas Quick Settings” from KPIT eclipse main menu as shown in the figure below: Alternative3. First select the project and then use the short cut key combination “Alt+Q”. Use of any of the alternative will open “Renesas Quick Settings” dialog. User can see following quick setting options as shown in the figure: 1. Optimization level 2. Debug information. 3. Warning messages 4. List file generation User can change any of the quick setting options as shown in the above figure. Click on „Finish‟ will apply and save the project setting changes for selected project. Click on „Cancel‟ will close the dialog without saving any changes. The detailed description of the quick settings options is given below: 1. Optimization level This option is used to select the optimization level (Renesas SettingsRenesas Tool SettingsCompilerObjectOptimization level) of the current project. 2. Debug information For GNU toolchains: This option is used to switch on/off the „Debug level‟ (Renesas SettingsRenesas Tool Settings CompilerObjectDebug level) of the current project. If “On” is selected, the option “level 2: Standard (-g2)” will be selected. If “Off” is selected, the option “None” will be selected. For Renesas toolchains: This option is used to switch on/off the option „Debug information‟ (Renesas SettingsRenesas Tool SettingsCompilerObjectGenerate debug information) of the current project. 3. Warning messages This option is enabled only for GNU toolchains. This option is grayed out for Renesas toolchains. The following options are used to control the warning messages. 1. Standard warnings (Renesas SettingsRenesas Tool SettingsCompilerWarningsStandard) 2. Advanced warnings (Renesas SettingsRenesas Tool SettingsCompilerWarningsAdvanced) 3. Inhibit all warning messages (Renesas SettingsRenesas Tool SettingsCompilerWarningsinhibit all warning messages) 4. Issue warnings when difference tables altered (Renesas SettingsRenesas Tool SettingsAssemblerOtherIssue warnings when difference tables altered) 5. Warn when two symbols are combined (Renesas SettingsRenesas Tool SettingsLinkerOtherMiscellaneousWarn when two symbols are combined) 6. Warn if any global constructors are used (Renesas SettingsRenesas Tool SettingsLinkerOtherMiscellaneousWarn if any global constructors are used 7. Issue warning once for each defined symbol (Renesas SettingsRenesas Tool SettingsLinkerOtherMiscellaneousIssue warning once for each defined symbol) 8. Suppress warning messages (Renesas SettingsRenesas Tool SettingsAssemblerOtherSuppress warning messages) Options and its Behavior: 1. Enable all warning It will enable all warnings including „Advanced warnings‟‟, „Standard warnings‟, „Issue warnings when difference tables altered‟, „Warn when two symbols are combined‟, „Warn if any global constructors are used‟, „Issue warning once for each defined symbol‟. All other options will be disabled. 2. Enable Advanced warnings It will enable „Advanced warnings‟, „Issue warnings when difference tables altered‟, „Warn when two symbols are combined‟, „Warn if any global constructors are used‟, „and Issue warning once for each defined symbol ‟.All other options will be disabled. 3. Enable Standard warnings It will enable „Standard warnings, „Warn when two symbols are combined‟, „Issue warning once for each defined symbol‟. All other options will be disabled. 4. Off It will switch off the generation of warning messages by setting the options „Suppress warning messages‟, „Inhibit all warning messages‟. 5. None None will be selected if „combination of warning messages‟ does not match with any of combinations described above. 4. List file generation By checking / un-checking “Generate list files” option, the list file generation for the tools “Compiler”, “Assembler” and “Linker” can be switched on/off. The options are mapped as follows: For GNU toolchains: a. Compiler – This check box helps to set/unset the option Generate list file (Renesas SettingsRenesas Tool SettingsCompilerListGenerate list file) of compiler. b. Assembler - This check box helps to set/unset the option Generate list file (Renesas SettingsRenesas Tool SettingsAssemblerListGenerate list file) of assembler. c. Linker - This check box helps to set/unset the option Generate MAP file (Renesas SettingsRenesas Tool SettingsLinkerOtherGenerate MAP file) of linker. For Renesas toolchains: a. Compiler – This check box helps to set/unset the option Generate list file (Renesas SettingsRenesas Tool SettingsCompilerListGenerate list file) of compiler. b. Assembler - This check box helps to set/unset the option Generate list file (Renesas SettingsRenesas Tool SettingsAssemblerListGenerate list file) of assembler. c. Linker - This check box helps to set/unset the option Generate list file (Renesas SettingsRenesas Tool SettingsLinkerListGenerate list file) of linker. 5 Debugging Features in KPIT Eclipse KPIT Eclipse provides the following debug options: Hardware debug Debug using HEW Debug using GDB Simulator Custom Debug 5.1 Hardware Debugging In KPIT Eclipse KPIT Eclipse allows hardware debugging within KPIT Eclipse for SH and RX targets. In order to debug your application on RX hardware targets via an E1/E20 JTAG interface or on SH hardware targets via an E10A-USB JTAG interface you must install the corresponding Windows device drivers first. Typically these drivers are installed by the HEW IDE installer that was supplied on a CD with your development kit or emulator hardware. In the event of any problems installing these drivers, please contact either your distributor, Renesas tools support or the KPIT GNU Support team ([email protected]) for assistance. Currently hardware debug is not supported for H8 target within KPIT Eclipse; however H8 projects can be debugged in HEW. Step 1 Create a project using the project wizard and select hardware debug as the default configuration. Please view the 'Configuration Description' section in the wizard for configuration details. The selected configuration will be set to active. Build configurations will be created in the project for all of the above debug options, however by default the project will be built for debug on hardware. Select E1/E20 for “Debug hardware setting” for RX targets and E10 for SH target. Select the 'Target device' provided in the drop down for 'Target device'. Step 2 Add the required code and files for your project and build the project. To add a breakpoint point, double click the marker bar located in the left margin of the C/C++ Editor beside the line of code where you want to add a breakpoint. A dot is displayed in the marker bar. Step 3 Go to Run->Debug configurations. If the “Hardware Debug” configuration was selected during project generation, a configuration will be created under SH/RX Hardware Debugging. To create a new „SH/RX Hardware Debugging‟ debug configuration, enter the name for the configuration, and choose the project and application to be debugged under the „Main‟ tab. The debug configurations for the project will be seen as below, Step 4 The GDB server path is set automatically when the project is configured for „Hardware Debug‟ configuration. If you experience any problems launching hardware debug, check that the GDB server path and the working directory path are set in the Window->Preferences as shown below. For E1 GDB server, the „rx_server.exe‟ executable path must be set. For E10A GDB server, the „sh_server.exe‟ executable path must be set. For E20 GDB server, the „rx_server.exe‟ executable path must be set. Step 3 Connect the target hardware to your system. Ensure that the hardware you connect matches the setting in the „Debug configuration‟ dialog. If any changes are done to the setting; click on apply and then debug. Alternatively your debug session can be launched by selecting the project and clicking on debug icon. This will launch the debug session. Step 4 Click „Yes‟ when asked to „Confirm perspective switch‟. The debug perspective will open. Step 5 Click „F8‟ to resume the debugging. Step 6 In the debug perspective, breakpoints can be placed throughout the program. To add a breakpoint point, double click the marker bar located in the left margin of the C/C++ Editor beside the line of code where you want to add a breakpoint. A dot is displayed in the marker bar. Step into the main program as shown below. Step 7 You can view the variables in the variables view as shown below. Step 8 The debug perspective opens the „Registers‟ and „Variables‟ views by default. The values in registers and values of variables can be seen under their respective views. Step 9 The disassembly of the selected file can be seen under the „Disassembly‟ view. The „Disassembly‟ view can be opened by clicking on „Window -> Show View -> Disassembly‟. Step 10 „IO View‟ will be displayed by default in the „Debug‟ perspective next to the „Variables‟/‟Breakpoints‟ view. The values from the default file <target>.io will be loaded by default in „IO View‟. Step 11 Alternatively, the „IO View‟ can be opened by clicking on „Window -> Show View -> Others -> Debug -> IO View‟. Step 12 Default values of the registers will be displayed in „IO View‟. The register values will be read from the target memory while debugging (Step over). Step 13 The user can write the required value in the register by editing the register value in the „Value‟ column of the „IO View‟. Alternatively, user can write the required value in the register by double clicking on the register. This will open the „Edit‟ dialog box as shown below. The „Edit‟ dialog box will display two fields, „Current Field‟ and „Next Field‟. Current field will contain the current register value and the required register value can be added in the „Next Field‟. Step 14 The child items of the registers can be refreshed using the „Refresh‟ button. If user clicks on the „Refresh‟ button, the register values will be read from the target memory. Step 15 The user can use the “Lock Refresh” feature to lock the „IO View‟. No memory reading will be done when “Lock Refresh” is set. „IO View‟ will not be updated when user selects „Lock Refresh‟. The user will not able to expand and collapse or read or write to any child node. When “Lock Refresh” is selected, „IO View‟ will be grayed out. Step 16 The user can load the required IO file using „Load New IO file‟ in „IO View‟. Selecting „Load New IO file‟ will allow the user to browse the required IO file as shown below: Step 17 „IO View‟ will display two tabs, „All Registers‟ and „Selected Registers‟. The user can select the required registers from „All Registers‟ and add to the „Selected Registers‟ by using drag and drop feature or by clicking on „Select IO Register‟ button. The selected register can be removed by clicking on the „Remove Selected Register‟ button. Step 18 Any register can be searched using the „Find‟ button. Any register can be searched using „Name‟ or „Address‟ column. The next found item can be highlighted in „IO View‟ by clicking on „Find Next‟ button or using F3 key. The previously found item can be highlighted in „IO View‟ by clicking on „Find Previous‟ button or using Shift-F3 key. Step 19 „IO View‟ can be printed by clicking on the „Print‟ button. All root items and expanded child items will be printed. The “name” “address”, “value” and “access” column data will be printed next to each child item. Step 20 „IO View‟ data can be saved to a text file by clicking on the „Save‟ button. The user can enter the filename and browse the required location. Step 21 The debug session can be terminated by (Ctrl+F2) or by clicking the icon as shown below. Step 22 The debug sessions can be removed by selecting „Remove All Terminated Launches‟ as shown below. This will clear the debug session window. Step 23 You can return to the C/C++ perspective if you want to modify the code and rebuild. Select the C/C++ icon in the „Debug‟ perspective. Step 24 Modify the code and rebuild the project. Select the project in the project explorer and select debug. Debug session will be launched. Please refer the steps above for debugging. 5.2 Debugging Using KPIT Eclipse Simulator Step 1 To create a new debug configuration, select „Run -> Debug Configurations‟ from the KPIT Eclipse menu bar. Step 2 If the “Debug using GDB Simulator” configuration is selected during project generation, a configuration will be created under Sim Debug. To create a new „Sim Debug‟, enter the name for the configuration, and choose the project and application to be debugged under the „Main‟ tab. Step 3 Under the debugger tab, currently four debuggers can be selected, i.e. KPIT Eclipse SH Elf Simulator, KPIT Eclipse H8300 Elf Simulator, KPIT Eclipse RX Elf Simulator and KPIT Eclipse V850 Elf Simulator. The GDB debugger and the GDB command file will be selected by default. Step 4 Click on „Apply‟ and „Debug‟. Click „Yes‟ when asked to „Confirm perspective switch‟. The debug perspective will open. Step 5 The project explorer view can be dragged and positioned as required. The project explorer view has been highlighted in the following screen shots. Step 6 In the debug perspective, breakpoints can be placed throughout the program.To add a breakpoint point, double click the marker bar located in the left margin of the C/C++ Editor beside the line of code where you want to add a breakpoint. A dot is displayed in the marker bar. Step 7 The debug perspective opens the „Registers‟ and „Variables‟ views by default. The values in registers and values of variables can be seen under their respective views. Also the disassembly of the selected file can be seen under the „Disassembly‟ view. The „Disassembly‟ view can be opened by clicking on „Window -> Show View -> Disassembly‟. The registers view has been highlighted in the following figure. 5.3 Debugging Eclipse Generated Code in HEW Environment Code generated in Eclipse can be debugged in the Renesas HEW IDE on both simulator and hardware targets. The procedure to debug code in HEW is given below, Note: This section contains detailed procedure for debugging projects built using GNUSH, GNURX, SHC and RXC toolchain in HEW environment. 5.3.1 Creating HEW Debug Configuration Project Step 1 Create a C/C++ project in KPIT Eclipse for the desired target. Select "Debug using HEW" as the active configuration. KPIT Eclipse provides pre-configured HEW workspaces for few supported targets (please refer release notes for the list of supported targets). The project generation wizard page showing „Debug using HEW‟ as the selected configuration is seen below. This is shown for the supported targets. Please refer to the release notes for list of supported targets. For other targets of SH the following wizard page is shown. Please refer the steps in Section 5.3.2. Step 2 Add all the relevant source files. Build the project. Step 3 Create a hew debug project. Select the debug icon, this will launch hew. Please select "HEW Debugging" and HEW will be launched. Pre-configured workspaces have been added for few supported targets. This will allow you to directly download projects (built in KPIT Eclipse) in HEW environment. Alternatively, go to Run->Debug configurations. If the “Debug using HEW” configuration is selected during project generation, a configuration will be created under HEW Debugging. Step 4 If the “Debug using HEW” configuration is selected during project generation, a configuration will be created under „HEW Debugging‟. To create a new „HEW Debugging‟, enter the name for the configuration, and choose the project and application to be debugged under the „Main‟ tab. Select „Debug‟. This will invoke HEW. Please refer steps in Section 5.3.2 further. You can also launch HEW by selecting Debug as->HEW Debugging in the project explorer view as shown below. 5.3.2 Debugging In HEW The pre-configured workspace will be invoked for all the supported targets. You can directly start debugging. The project binary will be available in the HEW workspace. When projects that are created using KPIT Eclipse version 2.2 and below are imported in KE 3.00.00 workspace for SH targets, HEW will be invoked and you will add need to configure HEW for debugging on hardware or simulator. Please refer the following steps to debug in HEW. Step 1 Create an application project in HEW for the same target as created in KPIT Eclipse. While creating the project choose the appropriate simulator session for debugging. For example, SH2A-FPU Functional Simulator Step 2 After the project is generated, change the session to simulator session. If required you may remove the source files added by default in the project. Step 3 Go to Debug->Debug Settings, select the appropriate 'Target' and 'Debug format = Elf/Dwarf2'. Now click on 'Add' and browse to select the executable (.abs file) created. Click on „OK‟ to save these settings. Step 4 Debug the generated code as you would debug a normal HEW project (refer to Renesas documentation for details). When prompted by HEW to open a source file, browse to the corresponding KPIT Eclipse project file in your filesystem. 5.4 Debugging Samples in KPIT Eclipse IDE Step 1 Save the samples provided for Renesas SHC toolchain along with KPIT Eclipse IDE in a folder. The samples are available on the Welcome page -> KPIT Samples and in Help Contents -> KPIT Samples. Step 2 Import samples provided for Renesas SHC in KPIT Eclipse IDE. In the project explorer right click and select import. Select General - > Existing projects into Workspace Step 3 Browse to the folder where the samples are downloaded. Step 4 Select the required SH sample to be built. Check “Copy projects into workspace”. Click Finish. The sample will now be imported to the workspace. Please note that „Debug‟ will be set as the active configuration. Step 5 Change the active configuration to „HardwareDebug‟. Build the project. This will generate the <executable> (.x file) in the configuration directory i.e. „HardwareDebug‟. Step 6 Go to Run->Debug configurations. To create a new „SH/RX Hardware Debugging‟ debug configuration, enter the name for the configuration, and choose the project and application to be debugged under the „Main‟ tab. Please refer Section 5.1 for details of debugging on hardware. 5.5 Debugging Using Custom Debugger Step 1 Create a C/C++ project in KPIT Eclipse for the desired target. Select „Custom Debug‟ as the active configuration. This will create „Custom Debug‟ configuration in the workspace. KPIT Eclipse provides custom.bat file. You can enter the commands to invoke a custom debugger in this file. Add the required files to the project and build the project. Step 2 A custom debug configuration will be created if „Custom Debug‟ is set as active configuration during project generation. Go to debug configuration, select „Run -> Debug Configurations‟ from the KPIT Eclipse menu bar. Step 3 Select „Debug‟. This will execute the custom.bat file that contains commands for the custom debugger. 6 Trouble Shooting For Hardware Debugging 1. KPIT Eclipse IDE hangs sometimes if the hardware fails to connect to the KPIT Eclipse IDE. In this case please kill the GDB process (rx-elf-gdb / sh-elf-gdb) and the GDB server process (rx_server.exe/sh_server.exe) from the task manager. 2. At times, the following error occurs on clicking the debug icon: In such a case, ensure that the path of rx-elf-gdb path is set for RX targets and the sh-elf-gdb path is set for SH targets, under the “Debug configurations” tab for RX/SH hardware debug. 3 At times, the following error occurs when hardware debug is launched, To fix this issue, go to Windows->Preferences-> Run/Debug-> GDB Servers. Ensure that the path for the rx_server.exe/sh_server.exe is correctly set. 4. HEW does not get launched in the following case: Case 1 Project is created for 'Hardware Debug' configuration settings and debug session for the same is launched Case 2 Now, project is created for "Debug using HEW" configuration and 'Debug' icon is clicked, in such a case, HEW does not get launched on directly clicking the 'Debug' icon. Instead 'RX/SH Hardware debug' dialog gets popped up. In this case, go to 'Debug Configurations' ' 'HEW Debugging' and click on 'Debug'. This should launch the HEW IDE. 7 Limitations 1. Debug configuration for debugging using GDB simulator has been provided in KPIT Eclipse for SH /RX targets. However, debugging feature for simulator debug has limitations for projects created using Renesas RXC toolchain in KPIT Eclipse IDE. 2. For imported projects, 'Debug' is set as the active configuration by default. Please set the required active configuration manually. To change a configuration click on 'Project' -> 'Build configurations' -> 'set active' -> 'Debug/HardwareDebug/HewDebug/CustomDebug/Release‟. The KPIT Eclipse RX and SH samples can be debugged on hardware. Please note that the configuration needs to be changed to 'HardwareDebug' after importing the samples. 3. When the user attempts to change the build phase settings, however does not change any settings ultimately and clicks "OK" or "Apply" rather than "Cancel", the project re-builds on selecting "Build". This is native behavior of Eclipse. 4. Currently, loading an IO file in IO View is not supported in KPIT Eclipse. 5. KPIT Eclipse hangs if the user has not selected any register and the user tries to refresh all the registers. 8 Support Online technical support and information is available at: www.kpitgnutools.com Technical Contact Details: Contact: [email protected] 9 Glossary CDT : C/C++ Development Tools EPL : Eclipse Public License GDB : GNU Debugger HEW : High Performance Embedded Workshop IDE : Integrated Development Environment KE : KPIT Eclipse KGE : KPIT GNU Eclipse KPIT : KPIT Cummins InfoSystems Limited 10 Revision History Version Number Date Overview Of Changes 1.0 22nd April 2009 User manual for KGE v1.0.0 2.0 th 7 September 2009 th User manual for KGE v1.1.0 3.0 28 October 2009 User manual for KE v2.0 4.0 2nd February 2010 User manual for KE v2.1 5.0 19th April 2010 User manual for KE v2.2 6.0 14th September 2010 User manual for KE v3.0 7.0 th User manual for KE v3.01.00 th 11 March 2011 8.0 25 April 2011 User manual for KE v3.02.00 9.0 28th April 2011 User manual for KEv3.03.00