1
HOME
PAGE
SVM 400
Technical Manual
!
General Description
!
Installation
!
Programming
Samsung Telecommunications America reserves the right without prior notice to revise
information in this manual for any reason. Samsung Telecommunications America also
reserves the right without prior notice to make changes in design or components of
equipment as engineering and manufacturing may warrant. Samsung Telecommunications America disclaims all liabilities for damages arising from the erroneous interpretation or use of information presented in this manual.
Table of
Contents
HOME
PAGE
Contents
Table of
Contents
GENERAL DESCRIPTION
■
Overview
●
●
●
●
■
Hardware Description
●
●
●
■
The SVM 400 System
Auto Attendant
Voice Mail
System Capacities
Main System
Memory
Back Up Adapter
Software Features
●
●
Feature List
Feature Descriptions
- System Features
- Auto Attendant Features
- Voice Mail Features
- Administration Features
INSTALLATION
■
Hardware Description
●
■
SVM 400 Main System
- Serial Port
- Memory Connector
- Memory Access LED
- Run Status LED
- Memory
- RJ11 Connectors
Installing the SVM 400 System
●
●
●
●
●
Inspection
Installation
SVM 400 / DS 616 Set Up
Testing the Hardware
System Shutdown
SVM 400 Technical Manual Page 1
HOME
PAGE
Table of
Contents
PROGRAMMING
■
System Administration
●
●
●
■
Programming Methods
●
■
The Screen Interface
- Knowledge Requirements
- Equipment Requirements
- Connections
- Using the Screen Interface
Logging In
Getting Help
Navigation
DTMF System Administration
●
●
●
●
■
The Subscriber
The System Administrator
The Applications Administrator
Accessing DTMF System Administration
Edit System Prompts
Subscriber Administration
Manually Changing the Operating Mode
Programming Categories
●
●
●
Subscriber Options
SVM 400 Administration Options
DS 616 Related Options
- MMC Listing
MMC
MMC
MMC
MMC
MMC
●
110
408
722
740
747
MMC
MMC
MMC
MMC
MMC
207
501
723
741
748
MMC
MMC
MMC
MMC
MMC
308
601
724
745
749
MMC
MMC
MMC
MMC
309
701
727
746
Back Up and Restore
- SVM 400 Directory Structure
- Defaulting the Configuration
SVM 400 Technical Manual Page 2
HOME
PAGE
■
Programming Reference
- Explanation of Default Configuration
●
System Main Menu
-
●
Open Block Table
Save Application
Subscriber List
System Wide Parameters
Voice Studio
Operating Utilities
Port Activity
Site Information
Status Screen
Block Tables
-
■
Table of
Contents
Bye Block
Directory Block
Extension
Mailbox
Menu Block
Station Block
Specialized Applications
●
●
●
●
●
●
●
Setting Up Pager Notification
Creating a Multi-Level Menu
Multiple Language Support
Mailbox Language Selection
Customizing the Directory to Search on First Name
Overflow Destination
Broadcasting to All Mailboxes
APPENDIX A
■
Special Characters Used When Writing Dialing Instructions
APPENDIX B
■
Creating or Modifying Prompts
● About SVM 400 prompts
● Professionally Recorded Prompts
● Prompt Listing
● Index Prompts
APPENDIX C
■
Contact Information
SVM 400 Technical Manual Page 3
HOME
PAGE
Table of
Contents
General Description
OVERVIEW
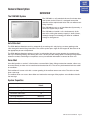
The SVM 400 System
The SVM 400 is a self contained voice mail and auto attendant system for the DS 616. It is designed to meet the
demands of the sophisticated voice mail user without sacrificing simplicity.
The SVM 400 may act as an Auto Attendant System only, a
Voice Mail System only or both.
The SVM 400 can handle 2 calls simultaneously. At this
time of this writing the memory capacity is about 5 hours,
although changes in technology will allow for additional
storage as time goes on.
Auto Attendant
The SVM 400 Auto Attendant works by automatically answering calls and playing a custom greeting to the
caller along with some dialing instructions. The caller may then press digits on the keypad to direct the call to
the appropriate person or department.
The SVM 400 Auto Attendant replaces or works in conjunction with your system operator by answering calls
with a pre recorded greeting, and offering the caller a several possible dialing options including dialing another
extension number, transferring to an operator, access pre recorded information or connect to voice mail.
Voice Mail
Voice Mail provides a service if called stations are unavailable. Upon dialing an extension number, callers may
be routed directly to voice mail or transferred to the extension first. The call may be forwarded from the station
on conditions.
Each mailbox will answer calls with a custom greeting in the mailbox owners own voice. The caller can then
leave a message.
The mailbox owner can access the mailbox and retrieve the messages. Many options are available to handle
the message.
System Capacities
Default
Maximum Ports
Maximum Storage Time
Maximum Subscribers
Message Retention
Total Messages per Mailbox
Total Message Duration
2
9999 days
16
9999 days
9999
600 seconds
SVM 400 Technical Manual Page 4
HOME
PAGE
Table of
Contents
HARDWARE DESCRIPTION
Unlike traditional PC based Voice Mail / Auto Attendant Systems, the SVM 400 has no moving parts. This adds
to the robustness and reliability. All the custom speech prompts and callers messages are stored in digital form
on static memory. This memory is faster and more reliable than conventional disk drives.
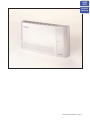
Main System
This is a self contained voice mail system designed to work exclusively with the DS 616.
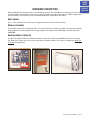
Memory (Included)
The memory unit consists of Compact Flash. The current size of this memory is 64 MB. This allows for the operating program and all the prompt and message storage. The memory for the SVM 400 is available only from
SAMSUNG.
Back Up Adapter (Optional)
The Back Up Adapter allows the removable memory card to be installed in the PCMCIA card slot of a Laptop
PC. When this is done a back up may be made of the customer database. This item is available from www.sandisk.com or Insight Direct.
Memory
Back Up Adapter
SVM 400
SVM 400 Technical Manual Page 5
HOME
PAGE
Table of
Contents
SOFTWARE FEATURES
The software for the SVM 400 is installed at the factory. All that is needed is for it to be customized to meet the
individual requirements of each installation, in some cases even this may not be necessary.
The SVM 400 software comes equipped with many useful features to fit a wide range of call processing requirements.
Feature List
■
System Features
-
■
Auto Attendant Features
-
■
Caller ID Compatible
Keyset Display and Soft Key Support
MOH Supply
Proprietary Design
Recordable System Prompts
Synchronized Clock
Alphabetic Directory (First or Last Name)
Audiotext
Auto Attendant Routing
Automatic After Hours Answering
Camp On Support
Direct to Mailbox
Holidays and Special Events
Incoming Call Overflow
Interruptible Voice Prompts
Multiple Call Handling
Multi-Language Support
Multi Level Menu
Operator Access
Single Digit Call Routing
Voice Mail Features
-
Answer Machine Emulation
Auto Log In
Auto Forward
Automatic Conversation Record
Broadcast
Call Back
Call Forward to Voice Mail
Call Record
Date and Time Stamp
External Number Notification
External Pager Notification
Follow Me
Individual Mailbox Greeting
Individual Mailbox Name
Individual Mailbox Password
Message Counter
Message Delete
Message Fast Forward
Message Forward with Append
Message Pause
Message Play Order
Message Replay
SVM 400 Technical Manual Page 6
HOME
PAGE
■
Message Reply
Message Retrieve
Message Rewind
Message Save
Message Send
Message Scan
Message Skip
Message Undelete
Message Waiting Light Indication
New / Old Selection
One Touch Access
Personal Mailbox Administration
Personal Greetings
Quick Memo / Direct Messaging
Speed Control
Volume Control
Table of
Contents
Administration Features
-
Activity Display
Administrators Mailbox
Automatic Setup
Back Up and Restore
Default Operation
Password Security
Programming – On Site or Remote
Subscriber Database
Voice Prompted Programming
Voice Studio
SVM 400 Technical Manual Page 7
HOME
PAGE
Table of
Contents
Feature Descriptions
SYSTEM FEATURES
Caller ID Compatible If you subscribe to central office based caller ID, the SVM 400 is compatible. Just as
the Caller ID data appears on display keysets, so the same information is saved in your voice mail box for each
message you receive. This can be used for call back or simply to identify the caller.
Keyset Display and Soft Key Support If you have a display keyset the number of new messages will be displayed on it. The display will also echo many of the options available. You will be able to negotiate through the
SVM 400 menus using the keyset display and the soft keys below the display to respond to the prompts.
MOH Supply Music or announcements may be recorded in the SVM 400 memory and used by the phone
system for music on hold. The recorded announcement or music will play in a continuous loop and may be
used to provide custom on hold announcements or promotional messages.
Proprietary Design The SVM 400 is designed to work specifically with the DS 616. This allows tighter integration with the phone system and allows for enhanced features like Call Record and Answer Machine Emulation
and Display, and soft key support not normally available by third party voice mail / auto attendant systems.
Recordable System Prompts Although the SVM 400 contains all the spoken prompts to provide an operational system, some people may want to add or record some additional prompts. This can easily be done using
the built in voice studio.
Synchronized Clock The SVM 400 clock is responsible for providing each message with a date and time
stamp, changing between day and night modes is always synchronized with the phone system.
AUTO ATTENDANT FEATURES
Alphabetic Directory (First or Last Name) Callers who do not know an extension number in the system but
do know a name, may enter the first few letters of the person’s name and be transferred. This system may even
be used internally if an extension number is not known.
Audiotext You may use the SVM 400 to supply recorded announcements or audiotext messages to callers.
Audiotext allows you to provide information only without giving the option to record a message. An example of
this might be directions or movie times.
Auto Attendant Routing The Auto Attendant can transfer or route callers based on the digits they enter.
Callers may be transferred to station, groups or the system directory to select a subscriber based on their
name.
Automatic After Hours Answering The Main Auto Attendant greeting for the SVM 400 changes from the day
to the night greeting automatically when the phone system changes from day to night mode.
Camp On Support Each station user on the system may decide if they want the SVM 400 to transfer additional calls to them if they are on the phone. Calls transferred to a busy station, if unanswered will be sent to voice
mail or any other destination according to the users needs.
Direct to Mailbox You may have mailboxes on the SVM 400 system that do not have associated stations. This
is ideal if you have a small number of employees in your office but numerous employees outside the office that
need to keep in contact.
Holidays and Special Events When your business closes because of a Holiday or special events the SVM
400 can provide an appropriate greeting to your callers.
Incoming Call Overflow The SVM 400 may be programmed to answer any or all lines immediately or answer
only the calls that your operator does not pick up.
Interruptible Voice Prompts At any time during an announcement or greeting, callers may dial a selection
and the SVM 400 will immediately respond. It is not necessary to listen to all the options if you are a ‘power
user’ and know what you are doing.
Multiple Call Handling The SVM 400 can answer and process up to 2 calls simultaneously.
SVM 400 Technical Manual Page 8
HOME
PAGE
Multiple Language Support The SVM 400 can support multiple languages. When additional languages are Table of
installed, callers may select a language option at the beginning of the call and continue in the chosen lanContents
guage. Additionally each mailbox may be assigned a default language, so that each subscriber can use a specific language. Check with your Samsung Representative for language availability.
Multi Level Menu The SVM 400 comes default with 4 menus to answer calls in the day, night, holiday or
weather (which can actually be used for any emergency). The SVM 400 will support the creation on additional
menu blocks allowing you to build complex multilevel routing scenarios with single digit selections.
Operator Access Callers may connect with an available operator any time by dialing 0.
Single Digit Call Routing Any menu can be configured to recognize single digit routing options, or use the
same digit as the leading entry of a multi-digit routing option. For example, in the menu processor, “2” can be
used to route a caller to the sales department and “203” to transfer the caller to a subscriber’s extension.
VOICE MAIL FEATURES
Answer Machine Emulation This feature allows you to monitor calls left in your voice mail box through the
speaker of your keyset. In function it is very much like screening a call on your home answer machine.
Auto Log In When calling Voice Mail, the DS 616 system can correctly identify you as the caller and ask for
your password (optional). The benefit of this is that you do not have to identify yourself to the SVM 400, it
knows who is calling and what mailbox you want to access.
Auto Forward Message auto forward allows messages left in one mailbox to be automatically forwarded to
another mailbox. The delay time before the message is forwarded is programmable between 00:00 (immediately) and 23:59 (1 day). After the message is forwarded it may be deleted or saved in the original mailbox.
Automatic Conversation Record With the SVM 400 card installed in your DS 616 phone system, you may
record all the phone conversations for specific extensions. An optional tone with a programmable delay may be
played to alert callers and employees during the recording process.
Note: Call Record utilizes the conference feature. The number of people who can use the CR feature simultaneously is limited to the number of available conference circuits in the system.
Warning: Before using this feature, make sure that you are not violating any state or federal laws. Some states
require that the recorded party be notified. STA is not responsible for any illegal use of this feature.
Caution: These features make use of on-demand or real time recording, and depend on the availability of a free
port.
There are three reasons for this:
a) The use of this feature places an increased burden on the usage of system ports. The auto attendant takes
only a few seconds to answer and transfer a call, a typical voice mail message takes 20 or 30 seconds, but
a recorded conversation can last several minutes.
b) Although the SVM 400 system employs in-band technology making it more port efficient than conventional
systems, it is still easy for both ports of a two port system to be in use, (e.g. one person checking their
messages and one incoming call being answered). When this happens the SVM 400 can not be accessed,
no auto attendant, no voice mail, and no call record.
c) If all ports are busy, a subscriber can check messages later, an incoming caller can be routed to the operator but the requirement for immediate call recording can occur with no warning and if missed usually can
not be repeated.
Broadcast The designated system administrator can broadcast a message to everyone in the system.
Call Back When listening to your voice mail messages you may press one key to automatically call back the
person who left you the message, this call back feature may be allowed for internal calls and/or external calls.
Long distance may be either allowed or denied and specific area codes may be allowed or denied. For external
calls, Caller ID is used and therefore must be received from the phone company.
SVM 400 Technical Manual Page 9
HOME
PAGE
Call Forward to Voice Mail Any station on the DS 616 phone system may be forwarded to the SVM 400 voiceTable of
mail. Forwarding types are forward all calls, forward only when busy, forward only when no answer, or forward Contents
when either busy or no answer.
Call Record The SVM 400 card installed in your DS 616 phone system, you may record conversations in
progress. Simply press a button to record the current conversation in your mailbox or any other mailbox. An
optional tone with a programmable delay may be played to callers during the recording process.
Note: Call Record utilizes the conference feature. The number of people who can use the CR feature simultaneously is limited by the number of available conference circuits in the system.
Warning: Before using this feature, make sure that you are not violating any state or federal laws. Some states
require that the recorded party be notified. STA is not responsible for any illegal use of this feature.
Caution: These features make use of on-demand or real time recording, and depend on the availability of a free
port.
There are three reasons for this:
a) The use of this feature places an increased burden on the usage of system ports. The auto attendant takes
only a few seconds to answer and transfer a call, a typical voice mail message takes 20 or 30 seconds, but
a recorded conversation can last several minutes.
b) Although the SVM 400 system employs in-band technology making it more port efficient than conventional
systems, it is still easy for both ports of a two port system to be in use, (e.g. one person checking their
messages and one incoming call being answered). When this happens the SVM 400 can not be accessed,
no auto attendant, no voice mail, and no call record.
c) If all ports are busy, a subscriber can check messages later, an incoming caller can be routed to the operator but the requirement for immediate call recording can occur with no warning and if missed usually can
not be repeated.
Date and Time Stamp Each message you receive will be stamped with the time and date of its arrival.
External Number Notification When you have messages in your mailbox, you may be alerted at your cell
phone, home phone or any other phone. The SVM 400 will make 3 attempts to contact you. If it encounters a
busy signal it will try again in 5 minutes, if it encounters a no answer it will try again in 15 minutes.
External Pager Notification When you have messages in your mailbox you may be notified via your pager.
The display on your pager will show your mailbox number. The SVM 400 will make 3 attempts to contact you. If
it encounters a busy signal it will try again in 5 minutes, if it encounters a no answer it will try again in 15 minutes.
Follow Me Each subscriber may set an alternate phone number where they would like their calls transferred.
This feature may be activated for a specified period of time, after which the transfer destination will revert to the
subscribers extension number.
Individual Mailbox Greeting Each mailbox has its own associated individual greeting recorded in the mailbox
owners voice. This may be changed as frequently as you desire.
Individual Mailbox Name Each mailbox has its own associated individual name recorded in the mailbox
owner’s voice.
Individual Mailbox Password Each mailbox has its own associated individual password selected by the user
or system administrator. This provides some security and prevents unauthorized access. The password may be
up to 8 digits long.
Message Counter Whenever you access your mailbox, you are told the number of new and old messages.
You may selectively listen to the new or the old messages.
Message Delete When a message has been heard, you may delete it.
Message Fast Forward When listening to a message you may fast - forward 5 seconds. This is useful if you
are looking for a specific piece of information like a phone number.
Message Forward With Append Messages received in your mailbox may be forwarded to other mailboxes
on the system. Introductory remarks may be added for the recipient in front of the message.
SVM 400 Technical Manual Page 10
HOME
PAGE
Message Pause At any time while listening to your voice mail messages, you can pause the playback.
Message Play Order Each mailbox may be set up to play messages in order of oldest first (FIFO) or newest
first (LIFO).
Table of
Contents
Message Replay Messages may be replayed as many times as you like.
Message Reply When listening to your voice mail messages you may press one key to automatically leave a
message for the person who left you a message, this call return feature may only be used for internal calls.
Message Retrieve Any sent message may be canceled before the recipient has received it.
Message Rewind When listening to a message you may rewind 5 seconds. This is useful if you are looking
for a specific piece of information like a phone number.
Message Save You may save any message. Once saved it will remain as a ‘saved’ message until it is deleted.
Message Send From within your mailbox you may send a message to any other mailbox owner on the system. This makes it easy for any employee who is out of the office to send a message to another internal user.
Message Scan Message Scan allows a user who is retrieving their messages to ‘scan’ through them. The first
few seconds of each message will be played.
Message Skip When listening to new messages, if you a searching for a specific one you can skip over new
messages. This saves the message as a new message. It’s like picking one thing out of your in-basket without
disturbing all the others.
Message Undelete At some time, everyone discards a message, and immediately wishes they had kept it.
The undelete feature of the SVM 400 will allow you to retrieve messages that have been deleted.
Message Waiting Light Indication An indication on your keyset tells you when you have new messages.
Press one button to connect with your voice mail.
New / Old Selection When you access your mailbox you may choose to listen to either new or old messages.
This makes it easier to find specific information contained in an old message without having to listen to all the
new messages first.
One Touch Access The SVM 400 Voice Mail can be accessed to check messages or perform administration
simply by pressing one button on your keyset.
Personal Mailbox Administration You may change settings for your mailbox any time you like. Personalize
the greeting that callers will hear, your name, password and notification options.
Personal Greetings Each mailbox can greet the caller in with a personalized announcement offering instructions. This greeting may be changed as often as necessary. The new message will replace the existing greeting.
Quick Memo / Direct Messaging This feature makes it easier to leave messages for others in the office. It
allows the user to access mailboxes without dialing the extension number first. Easily leave a message for anyone that has a mailbox.
Speed Control The SVM 400 supports two message playback speeds. This allows you to hear the message
in a convenient manner. You can press ‘99’ during message playback to toggle between two speeds.
Volume Control The SVM 400 supports two message playback volumes. This allows you to hear the message in a convenient manner. You can press ‘77’ during message playback to toggle between two volume levels.
SVM 400 Technical Manual Page 11
HOME
PAGE
ADMINISTRATION FEATURES
Activity Display While the SVM 400 system is running, a connected administration terminal will show useful
statistics about the system. Number of calls, average calls per week, number of times all ports were busy, total
messages and space available.
Table of
Contents
Administrators Mailbox The designated system administrator can perform many routine activities from their
mailbox by using the system administration special menu. These activities include adding and removing mailboxes, and changing prompts.
Automatic Setup When the SVM 400 is first installed a range of mailboxes matching the DS 616 database is
created. This reduces set up time.
Back Up And Restore The customer database can be saved to a PC hard drive and restored at a later date.
This is useful in a number of maintenance scenarios. Note: Additional hardware is necessary.
Default Operation The SVM 400 is designed to be in operation as soon as it is installed.
Password Security All administration is under password control to prevent unauthorized access.
Programming - On Site Or Remote Many of the commonly accessed programming options are accessible
from a touch tone telephone. This makes routine administration easy and convenient.
Subscriber Database A database of subscribers can be viewed at the administration terminal.
Voice Prompted Programming From any tone phone in the world an administrator can record custom
prompts and add or delete mailboxes.
Voice Studio An included voice studio lets you re–record any prompt in the system and even edit it for better
sound.
SVM 400 Technical Manual Page 12
HOME
PAGE
Table of
Contents
HARDWARE DESCRIPTION
SVM 400 System
The SVM 400 system is a compact self contained system that is designed exclusively for the DS 616. It can not
be used with any other SAMSUNG product. Do not use other voice mail system in combination with the SVM
400.
Serial Ports The serial interfaces can be used to connect a modem or PC and provide local or remote PC
based administration, or output SMDR information.
Memory Connector This is the connector to install the Compact Flash memory. The memory is used to store
all system programs and data.
Memory Access LED The Memory access LED will flash green whenever the memory is being accessed. This
works in a similar way to the hard disk access LED on a PC.
Run Status LED The Run Status LED shows the operating status of the card. Green indicates that the SVM
400 is running normally, any other condition indicates a fault.
Memory This device is a Compact FLASH Media Card used for storing the main system program as well as
all messages and prompts. The amount of storage time on this module is determined by the size of the media
card measured in Mega Bytes (MB). To remove or insert a memory card, shut the power off to the SVM 400 and
then remove the Compact Flash from the SVM 400 by simply pulling it out.
RJ11 Connectors These connectors are the interface for the DLI ports from the DS 616 system.
SVM 400 Technical Manual Page 13
HOME
PAGE
Table of
Contents
SVM 400
SVM 400 Technical Manual Page 14
HOME
PAGE
Table of
Contents
INSTALLING THE SVM 400
Inspection
Unpack and inspect the unit for obvious damage. This system should be labeled SVM 400. If it is not, you have
the wrong product.
Installation
The SVM 400 voice mail system is a stand-alone system. The SVM 400 is proprietary to the DS 616 system. The
first thing you should do before proceeding is to discharge any static electricity you may have gathered by
touching a ground point, such as the cover of the KSU power supply. Once you have done this, check the
power switch on the KSU and ensure that it is in the OFF position. Next, position the unit above the mounting
screws, and slide the unit downwards until it is inserted onto the screws. Again, ensuring that the power switch
on the KSU is in the OFF position, plug in the power cord and then turn the unit ON.
SVM 400 / DS 616 Set Up
After installing the SVM 400 system and turning the power on there are some key system options that should
be set in order for the SVM 400 to function correctly. These steps are performed in the DS 616. It is necessary
to perform these at this time so that the SVM 400 will initialize properly and synchronize its mailbox database
with that of the key system. For more information on this see INITIAL SET UP.
Assigning Groups All SVM 400 ports installed must be assigned to group 509 in MMC 601.
Ring Mode Select either SEQUENTIAL or DISTRIBUTED ring mode in MMC 601.
VMAA Ports Confirm that all SVM 400 ports are set for VMAA use in MMC 207. This will be done automatically. You are just confirming at this point.
Auto Attendant If you are using SVM 400 for Auto Attendant use MMC 406 to set the desired trunk(s) to ring
group 509.
Call Forwarding If you are using SVM 400 for Voice Mail make sure that all desired stations are forwarded to
group 509.
Mailbox Set Up Select “NO” for each station that you DO NOT want to create a mailbox for in MMC 741.
Testing the Hardware
1. Call each SVM 400 port individually and confirm that it answers.
2. Call group 509 and confirm that the SVM 400 answers.
If steps 1 and 2 above proved to be successful you have completed the installation and setup of the SVM 400
hardware.
You are now ready to begin programming the SVM 400 Voice Mail/Auto Attendant System.
System Shutdown
Whenever possible the following procedure should be followed when shutting down the SVM 400 system.
From the Main Status Screen (showing activity and port status):
1. Press ‘Escape’ and enter passcode.
2. Select ‘Operating Utilities’.
3. Select ‘Exit the SVM 400’.
4. Enter administrator’s passcode.
The SVM 400 will now shutdown. When the system shows a DOS command line you may power off the system
and unplug the SVM 400.
SVM 400 Technical Manual Page 15
HOME
PAGE
Table of
Contents
Programming
The SVM 400 has been designed to simplify the installation procedure and minimize set up time. The following
have been automated.
An extension is created for every extension on the system. This means that the automated attendant will
immediately recognize all extensions and groups on the DS 616 equipment.
●
●
A mailbox is created for all 16 extensions on the phone system.
●
The Day / Night service of the SVM 400 system will change automatically when the phone systems changes.
Menus have been created to answer calls in the Day and Night mode. Here are also default menus for
answering in the Holiday or Bad Weather mode.
●
QUICK SETUP
Although the set up process has been automated as much as possible, the following things must be manually
completed.
Record a greeting for the Day mode operation (prompt number 1001). The Night mode operation (prompt
number 1002) and optionally the Holiday and bad weather modes (prompt numbers 1003 and 1004 respectively).
●
●
Give everyone the user instructions and have them record their name, personal message, and password.
SYSTEM ADMINISTRATION
System administration can be on several levels.
The Subscriber
A subscriber is someone who has an extension or mailbox on the SVM 400 system. Each Subscriber has control over individual options associated with their mailbox and extension settings.
Each subscriber (mailbox owner) will have the option of setting or changing certain mailbox options. These are
listed in the user guide.
The mailbox owner will use DTMF subscriber administration to change and set these options.
For a full description of this process refer to the SVM 400 user guide.
The System Administrator
The Installing Technician or System Administrator has ultimate authority over the operation of the SVM 400 system and can set or change all the options that require specialized knowledge.
It is the responsibility of the Installing Technician to install and program the SVM 400 to suit the customers
requirement. This includes initial set up and creation of the customer database. The Technician will use the
Screen Interface to program and set up the SVM 400.
The Applications Administrator
The Applications Administrator has limited authority to make changes within the SVM 400 system that pertain to
the day to day operation of the system.
Following the installation of the SVM 400, any ongoing changes including the creation and deletion of mailboxes, recording or changing system greetings and activating holiday and emergency greetings.
The system administrator will use DTMF system administration to perform this service.
SVM 400 Technical Manual Page 16
HOME
PAGE
Table of
Contents
PROGRAMMING METHODS
Data may be entered and changed in the SVM 400 by three methods. These are, the Screen Interface, DTMF
system administration, and DTMF subscriber administration.
The Screen Interface
Most of the programming is achieved using a PC attached to the SVM 400 serial port. This makes use of a
Graphical User Interface or GIU, and is considered necessary for initial set up.
KNOWLEDGE REQUIREMENTS
A general knowledge of PC’s and Windows is required. Some understanding of serial port communications is
advised.
EQUIPMENT REQUIREMENTS
A Windows PC running Hyper Term (or equivalent) is needed. You will also require a serial cable with straight
through wiring. If you already have a cable for programming the Samsung CADENCE card, you can use this.
●
A Compact Flash PC card adapter is required if you plan to perform a system backup or reload new update
files. They are inexpensive (less than $20.00) and available from www.sandisk.com.
●
CONNECTIONS
Connect the serial cable between the SVM 400 serial port and the PC serial port.
TERMINAL SETUP
Set up your terminal emulation software to:
●
●
●
●
●
●
●
Com Port: (depends on PC)
38,400 transfer speed
8 Bit Word
No Parity
1 Stop Bit
No Flow Control
ANSI Terminal Emulation
If after connecting you see what looks like double lines being printedon the screen, turn off word wrap.
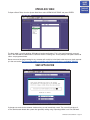
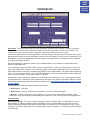
USING THE SCREEN INTERFACE
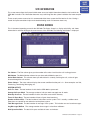
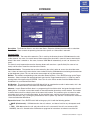
After connecting the terminal equipment press Ctrl ‘L’ to clear and refresh the screen. You will see a status of
the current operating condition including the status of each port and some general system data.
The main screen shows port activity and general statistics, see the screen shot below.
LOGGING IN
To log into the system press the ‘Esc’ Key and enter the password, the default password is 0000. You will now
be at the System Administration Main Menu, and are ready to begin programming.
GETTING HELP
The key-strokes available to you during editing can be viewed by pressing F1, and are as follows:
F1
Ctrl
Ctrl
Ctrl
Ctrl
Ctrl
Ctrl
Ctrl
F3
+
+
+
+
+
+
+
E
A
O
R
N
V
F
Navigation Keys Help
Save and RETURN TO Starting Facility
Save Block As
Save and OPEN Block or Prompt Text under Cursor
Save and RETURN TO LAST Block in Control Path
Save and OPEN Next Block of Same Type or Template Blocks
Save and OPEN Previous Block of Same Type or Templates
Find blocks that refer to the current block
Sort in Current Object or Facility
SVM 400 Technical Manual Page 17
HOME
PAGE
Table of
Contents
Screen Movement Keys
Tab
Ctrl + Q
Arrow Keys
Ctrl + T
Ctrl + B
Ctrl + U
Ctrl + D
Moves Cursor to NEXT Field or Line (Wraps around)
Moves Cursor to BACK to Previous Field or Line
Move Cursor Between Fields or Lines in Arrow Direction
Moves Cursor to TOP Field on Screen
Moves Cursor to BOTTOM Field on Screen
Page Up, Displays previous Page/Screen
Page Down, Displays Next Page/Screen
Editing and Moving within a Field
Delete
Ctrl + Y
Backspace
Deletes Character Under Insert Point in Field
Deletes Contents of Field or Line
Deletes (1) Character to Left of Insert Point in Field
NAVIGATION
As you move the cursor around in each screen you will notice that some fields cannot be accessed. This is normal and is intended to simplify the installation.
As the cursor is placed on different fields the data will be shown in different colors.
YELLOW – You may type new data in the selected field.
GREEN – This indicates that the data represents a Block. You may press the enter key to select a different
block or you may press ‘Ctrl + O’ to open the block beneath the cursor. This non-linear method of navigation
is extremely flexible as you can easily follow the path of any call. To return to the previous block in this path
press ‘Ctrl + R’.
SVM 400 Technical Manual Page 18
HOME
PAGE
DTMF SYSTEM ADMINISTRATION
Some System Administration functions can be accessed by calling the SVM 400 from a touch tone phone.
These administrative functions allow the system administrator to:
Table of
Contents
1. Edit System Prompts.
2. Edit (add and remove) Subscribers.
3. Change the operating mode (Day, Night, etc.)
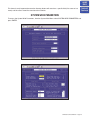
Accessing DTMF System Administration
To access the DTMF system administration mode:
Call the SVM 400 and from the Main Menu press the ‘#’ key followed by 3 zeros. If you are answered by a
prompt to enter your password you are in a mailbox and must first press “✱” to reach the Main Menu.
●
When prompted enter the administrator’s password specified in the System Wide Parameters. You will be
presented with the System Administration Menu.
●
Edit System Prompts
This allows you to create or edit system prompts.
●
Call the SVM 400, and access the System Administration Menu.
●
Press 1 to edit system prompts.
●
Follow the spoken instructions to edit system prompts.
At the very least you will probably need to create the following:
Day Greeting = Prompt 1001
Night Greeting = Prompt 1002
Holiday Greeting = Prompt 1003
Emergency (Bad Weather) Greeting = Prompt 1004
Subscriber Administration
This allows you to add and delete subscribers.
●
Call the SVM 400, and access the System Administration Menu.
●
Press 2 for subscriber information.
●
Follow the spoken instructions to create or delete subscribers.
Manually Changing the Operating Mode
This allows you to change the operating mode of the SVM 400. Changes will remain in effect until you manually
change it again.
●
Call the SVM 400, and access the System Administration Menu.
●
Press 3 for manually set the mode.
●
Follow the spoken instructions to change the operating mode. The following table details the options.
Day Mode = 1
Night Mode = 2
Holiday Mode = 3
Emergency (Bad Weather) Mode = 4
The mode to automatically follow the DCS Day/Night Mode = 0
SVM 400 Technical Manual Page 19
HOME
PAGE
Table of
Contents
PROGRAMMING CATEGORIES
When programming the SVM 400 there are three types of data, Subscriber Options, SVM 400 Administration
Options, and Phone System Options.
Subscriber Options
These are the options entered by a Subscriber and control the individual behavior of their mailbox. The instructions for this can be found in the SVM 400 User Guide.
SVM 400 Administration Options
These are all the programming options for the SVM 400, that are unique to the particular installation.
DS 616 Related Options
This is a collection of DS 616 programming options to make SVM 400 operate correctly. When the SVM 400 is
initialized, much of the set up is completed, but there is still some phone system programming that must be
entered.
Note that if the SVM 400 system is being installed in an existing system (a system that did not previously have
an SVM 400), you will have to use MMC 806 to pre install the system and MMC 724 to assign extension numbers to each SVM 400 port. Use any available numbers.
In addition to the MMCs listed below you must set call forwarding to the SVM 400 at every phone that wants to
use voice mail.
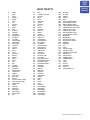
The following is a listing of all the DS 616 MMCs that relate to the SVM 400.
MMC
MMC
MMC
MMC
MMC
110
408
722
740
747
MMC
MMC
MMC
MMC
MMC
207
501
723
741
748
MMC
MMC
MMC
MMC
MMC
308
601
724
745
749
MMC
MMC
MMC
MMC
309
701
727
746
SVM 400 Technical Manual Page 20
HOME
PAGE
Back Up and Restore
You may back up the database of the SVM 400 but must have a PCMCIA to Compact Flash adapter to do it.
Table of
Contents
Follow these steps:
●
Power down the SVM 400.
●
Remove Compact Flash.
●
Place Compact Flash in PC using PC Adapter card.
Open Windows Explorer on the PC. You should see the contents of the Compact Flash appear as a new driver letter.
●
●
Drag and drop files as specified for the back up.
To restore the data connect the Compact Flash as detailed above and drag and drop the appropriate files.
SVM 400 DIRECTORY STRUCTURE
●
All customer configuration is located in the \Dta\ *.tbl files.
●
All Mailbox date is located in the \Mailbox\ *.* files.
●
All Message date is located in the \Msg\ *.* files.
●
All Prompt date is located in the \Prompts\ *.* files.
THE TABLE FILES (*.TBL)
Block.TBL All block parameter data.
Schedule.TBL The schedule table is not a block, so its data is stored separately in this file.
SiteInfo.TBL Useful customer data entered in “Site Information” off of the main menu.
Message.TBL Automatically gets updated every time a new message is recorded, saved, forwarded, or deleted.
PROMPTS
Prompts are stored in the PMT directory. The reference to speak the prompt in a particular block is stored in
the “Block.TBL” file, but the recorded prompt itself and its associated text are stored in the PMT directory. The
file format is ‘{4 digits}.PMT’.
Prompts below 1000 are system prompts.
Defaulting the Configuration
To default the configuration quit the application as described in System Shutdown, when you get to the
c:\DTA> prompt type ‘default’.
This will restore default block tables and delete any existing mailboxes and messages.
Note: Any custom prompts or re-recorded prompts will not be removed!!
SVM 400 Technical Manual Page 21
HOME
PAGE
Table of
Contents
PROGRAMMING REFERENCE
The following section provides in depth definitions and descriptions of all the programmable fields within the
SVM 400 software.
Some fields are not accessible in the SVM 400. If you cannot put the cursor on them you can not change them.
Explanation of Default Configuration
The default configuration in the SVM 400 has been minimized to simplify installation time and reduce the
amount of time it takes to learn the application. Many of the programming options have been disabled or fixed
at a default value.
The default application is built using blocks. Each block has a specific purpose and are chained together to
build the application. This allows the caller to pass from one to the other as the call is processed.
There are only 6 blocks available in the SVM 400. They are the following:
Bye Block Used to terminate a call. One of this exists in the SVM 400.
Directory Block Used to enable a caller to ‘look up’ and extension number. One of this exists in the SVM 400.
Extension Block This block has limited functionality on the SVM 400 and is mostly used to transfer callers to
the physical stations. One exists for each phone on the system.
Mailbox Block This block contains all the parameters for the mailbox including pager and cell phone notification. One usually exists for each phone on the system, but may also be assigned to people who do not have a
phone on the system.
Menu Block This block is responsible for playing prompts, collecting caller entry and routing calls. The Auto
Attendant Main Menu is an example of a menu block.
Station Block The station block is responsible for dialing. When the SVM 400 dials or transfers any calls it
uses a station block.
When a call is answered there it is processed by a number of block behind the scenes. These blocks are hidden for reasons of simplicity. The call is processed in the following way:
New CO Calls These are answered by one of the menu blocks depending on the current mode (day, night,
holiday, or weather). A custom greeting is played and the caller is directed to any other block based on the
DTMSF input.
●
Forwarded Calls These calls are automatically answered by mailbox blocks, and the caller may leave a
message.
●
SVM 400 Technical Manual Page 22
HOME
PAGE
Table of
Contents
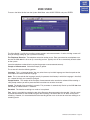
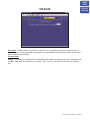
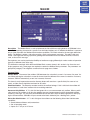
SYSTEM MAIN MENU
To access the System Main Menu, from the Status screen press [escape] and enter the password, then press
ENTER.
The System Main Menu provides easy access to the different areas of SVM 400 programming. The specific
areas can be accessed using the cursor controls or by selecting the designation letter A. The areas that can be
accessed are:
[A] OPEN BLOCK TABLE
[B] SAVE APPLICATION
[C] SUBSCRIBER LIST
[D] SYSTEM WIDE PARAMETERS
[E] VOICE STUDIO
[F] OPERATING UTILITIES
[G] PORT ACTIVITY
[H] SITE INFORMATION
[I] STATUS SCREEN
SVM 400 Technical Manual Page 23
HOME
PAGE
Table of
Contents
OPEN BLOCK TABLE
To Open a Block Table, from the System Main Menu select OPEN BLOCK TABLE and press ENTER.
The block table is used for building SVM 400 call routing applications. This is the most frequently accessed
area in the SVM 400 and determines its behavior when it is routing calls. All the prompts and options offered to
callers are programmed here.
Because most of the programming for any customer will usually be in the block tables these are dealt separately in the next section. For more information on building call routing applications see BLOCK TABLES.
SAVE APPLICATION
If changes are made to the customer database they are not immediately saved. The save will take place if:
●
The administrator reboots the system after gracefully exiting using ‘Operating Utilities’ and ‘Exit SVM 400’.
SVM 400 Technical Manual Page 24
HOME
PAGE
Table of
Contents
OR
●
The nightly maintenance runs. This happens each night at 3 a.m.
The save application option also forces the changes to be written to the database. This will ensure that if the
SVM 400 loses power between the time that the changes are made and the nightly maintenance, the changes
will be preserved.
Warning: For this data to be saved the SVM 400 must lock its ports temporarily. Any idle ports are immediately
locked. As ports become free they are also locked. When all ports are locked the data will be backed up and the
ports placed back online.
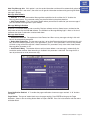
SUBSCRIBER LIST
To access the subscriber list, from the System Main Menu select SUBSCRIBER LIST and press ENTER.
This area of programming is used to quickly view, or edit the subscriber list.
You will see a list of subscribers along with their extension and their mailbox number.
The number of mailboxes activated on your system will depend on the existence of a valid upgrade key.
You will also see an Eclass and Mclass. These are class of service options for the Extension and Mailbox, and
are not accessible in the SVM 400.
To view a subscriber’s data scroll to the correct subscriber using the arrow keys and press ‘enter’. Use the right
arrow key to select extension block or mailbox block. When you have made your selection press ‘Ctrl + O’ (for
open) and the highlighted block will open. You can then edit specific fields. See Extension Block and Mailbox
Block for additional information.
Entering a New Subscriber
To enter a new subscriber, highlight a blank line and press ENTER. Type in the subscriber’s last name, enter a
coma (,) and type the subscriber’s first name. Press enter and then type the extension and mailbox numbers for
this subscriber. SVM 400 automatically creates the extension and mailbox for the subscriber to use and fills in
the EClass and MClass data.
SVM 400 stores the subscriber’s name in ‘last name, first name’ format. When entering the subscriber’s name
this format should be followed.
SVM 400 Technical Manual Page 25
HOME
PAGE
This format is only important because the directory feature will search on a specific field (first name or last
name) and the search should be consistent for all entries.
Table of
Contents
SYSTEM WIDE PARAMETERS
To access the System Wide Parameters, from the System Main Menu select SYSTEM WIDE PARAMETERS and
press ENTER.
SVM 400 Technical Manual Page 26
HOME
PAGE
Table of
Contents
The System Wide Parameters include the software release, version number, the authorized number of ports,
and options. Starred (*) items require the system to be restarted before they take effect.
The first screen provides information only. It may be useful to you or may be needed during a technical support
call.
Screen Timeout This is the time before the administration screen will revert to the port status screen.
Daily Maintenance Time This is the time when SVM 400 performs routine daily maintenance. Daily maintenance will save the system tables and perform message purging (Voice Mail or Announcement features). Inputs
must be specified in 24-hour time. The default setting is 3:00 a.m.
Maintenance will not occur until:
●
It is after the daily maintenance time, and
●
23 hours have elapsed since startup or the last daily maintenance interval.
Additionally the system will perform an orderly reset after approximately 240 days of operation right after daily
maintenance.
Subscriber Default Password The digits used as the default settings for extension and mailbox passwords.
The digit input may be from 1 to 8 digits. When a mailbox or extension password is reset, this is the value that
the password will be reset to. The default setting is 0000.
System Admin This effects both the GUI and the TUI. With the GUI; this password gives the administrator
access to all parameters. It is the highest level password and enables the administrator access to shutting the
system down. With the TUI: this password along with the remote login procedure gives the administrator
access to Recording System Prompts and Overriding the scheduling by engaging a specific mode.
Application Admin This works with the GUI only and denies access to only three areas: System Wide
Parameters, Exit SVM 400, and Port Activity. This is typically given out to an administrator’s assistant. Though
accessing the system with this password could still allow the user to damage the application, they would not be
able to shut down the system or change the passwords.
Subscriber Admin This effects only the GUI and allows access only to the following: Subscriber List, Display
User Log, and Status Screen.
Min Recorded Length This parameter sets the minimum record time that is to be considered valid. It is specified in hundredths of seconds. A setting of 50 means 0.5 seconds or 500 milliseconds. The default value is 75.
If this value is too high, short recordings will be discarded. If it is too low, the system will consider disconnects
as a valid recording.
SVM 400 Technical Manual Page 27
HOME
PAGE
Dial Tone Trim Size This amount is trimmed off the end of any recorded message that is terminated by dial
tone. This parameter is measured in hundredths of seconds.
Table of
Contents
Detect on Leading Edge Not used.
Minimum DTMF Duration This parameter controls the sensitivity of the DTMF (touch-tone) detectors only during recording of voice prompts and announcements. The value represents the minimum time period (in hundredths of seconds) during which a tone must be valid in order to be accepted as a caller entry. A lower value
makes the SVM 400 more sensitive to DTMF tones. If excessive “Talk Off” problems are experienced during
recording operations, the value should be increased. Talk Off occurs when a human voice emulates a DTMF
tone. If users frequently experience difficulty in stopping recording (as evidenced by touch tones being included in the recordings), this value should be reduced. This parameter is expressed in hundredths of a second.
The default is 7 (70 ms).
Note: Drastic changes of this value are not recommended. A small change can make a significant difference.
This parameter has no effect during playback.
DTMF Cutout Period If, during prompt playback, the DTMF detector senses a tone, the SVM 400 will temporarily suspend playback for the time period specified by this parameter. If the tone remains valid during this
time, it is considered to be a valid caller entry and playback is stopped. If the tone becomes invalid while playback is temporarily suspended, it is considered to be “Talk Off” and playback is resumed. This value is
expressed in hundredths of a second. The default is 1 (10 ms). Note: This parameter has no effect during
recording.
*Outbound DTMF Duration This parameter controls the duration of tones dialed by SVM 400. Tone Duration
sets the duration of each tone dialed. This value is expressed in hundredths of a second. The default is 8 (80
ms).
*Outbound Inter-Digit Time These parameters control the duration of tones dialed by SVM 400. Inter-Digit
Time sets the time between dialed tones. This value is expressed in hundredths of a second. The default is 8
(80 ms).
MULTILINGUAL VOICE PROMPT SUPPORT
The multilingual voice prompt support page shows a list of all installed languages. Languages are defined by
Language and Locale (or dialect). The field that you can edit in this page is the ‘Key Code’.
Key Code The key code is the shared digit entered by the caller and used by the SVM 400 to identify a language selection.
Default System Language This sets the default operating language of the system.
Note: All language selection is based on the order of the defined languages in this screen. If the languages are
to be re-ordered, added to or changed, then it should be done first, before any mailbox language options are
set.
SVM 400 Technical Manual Page 28
HOME
PAGE
Table of
Contents
VOICE STUDIO
To access the Voice Studio, from the System Main Menu select VOICE STUDIO and press ENTER.
The Voice Studio is a utility for recording custom prompts and announcements. A series of dialog screens will
lead you through setting up your system for recording.
The Telephone Extension The telephone extension number to use. Enter your extension or telephone number that the SVM 400 will call to set up a recording session. Typically this will be a conveniently located station
on the system.
Leave the telephone number blank to review the prompt or announcement text only.
Prompt or Announcement Select the Prompt (P) option.
The screen will show the following options:
Language This is a language option. You may select from any installed language and from that point on the
Voice Studio will interact with that language.
Code This is the code for the language (actually it represents the directory in which the language is installed).
It is a memo field only and cannot be changed.
Prompt Number The number of the Prompt or Announcement to be recorded or reviewed. After entering a
valid prompt number you will be presented with instructions to record or re-record.
Length The length of the recording in seconds. This parameter is automatically filled in by the SVM 400 when
the Prompt or Announcement is recorded.
Recorded The date the recording was made or last updated.
Text Space is provided for entering the text of the Prompt or Announcement to be recorded. Use this space
to provide information on the intended usage of the recording. The entered text has no effect on the actual
recording. However, it is recommended that the recording be the same as the text to make later editing or rerecording easier.
SVM 400 Technical Manual Page 29
HOME
PAGE
Table of
Contents
OPERATING UTILITIES
To access Operating Utilities, from the System Main Menu select OPERATING UTILITIES and press ENTER.
This menu screen is used for accessing various display logs and System Administrator facilities. The utilities
and parameters contained within the Operating Utilities are as follows:
Display User Log This log provides information on all user accesses to the system. Information displayed
includes subscriber logon, port used, service accessed, Message Center activities, greetings recorded, and all
other user activities.
Display Error Log This is a log of all system errors and other information including startup and System Daily
Maintenance. The information supplied in this log includes: SVM 400 breeding mailbox, lost message file recovered, SVM 400 shutting down and other system information. During system maintenance this log will be truncated. Only the most recent 1MB will be kept.
Activity Log This screen provides a log of all of SVM 400 activities. These include: changing to another mode,
SVM 400 hanging up, new call and call data, or searching on caller ID or entry. Everything SVM 400 does is
logged here. Usually this will only be used under direction of Samsung Technical support. During system maintenance this log will be truncated. Only the most recent 1MB will be kept.
Note: A useful feature of the Activity Log is the ability to search for a specific event. Press “s” to bring up the
Activity Search Dialog Box. Under “Search for:” enter the text to find. Set “Search backward” to Y to search previous entries. Set “Match Case” to N to locate the entry in either upper-case or lower-case type.
Exit SVM 400 Exit SVM 400 does exactly that. It will deactivate SVM 400 and shutdown the application. The
SVM 400 will not answer the telephone until restarted.
Warning: For the system to be shutdown the SVM it must lock its ports temporarily. Any idle ports are immediately locked. As ports become free they are also locked. When all ports are locked the system will exit. You must
restart the system to bring the ports back online.
Exit to Previous menu Returns to the Main Menu.
SVM 400 Technical Manual Page 30
HOME
PAGE
Table of
Contents
PORT ACTIVITY
This screen provides the system administrator the ability to observe, port specific, line by line system activity in
either real time (as it happens) or through the SVM 400 Activity Log (if it’s already happened). This activity contains detailed information for both subscriber and public caller call sessions. Refer to the Port Activity help
screen for detailed options.
The following commands can be typed in at the => prompt to determine how much and what type of information is displayed. These are used mostly for diagnostic and maintenance purposes.
CP [ALL, OFF, or PORT NO.] Turns on/off call progress monitoring for all or specific ports. Must be turned
off with “OFF” command —not done by maintenance. May be used in combination with “MONIT” command
or alone.
DEBUG [ALL, OFF, or PORT NO.] Turns on/off extended debug monitoring for all or specific ports. Must be
turned off with “OFF” command—not done by maintenance. May be used in combination with “MONIT”
and/or “CP”.
DISPLAY [FILESPEC] Equivalent to DOS “Type” command to show contents of test file. Scroll through
files with the arrow keys.
EXITALL Forces shutdown of SVM and returns to the DOS command prompt. Does not wait for ports to
clear—will disconnect all callers.
FILES [path or filespec - default is C:\DTA directory if no path specified] Similar to DOS “DIR” command. Displays listing of files in specified subdirectory, one at a time. At each file, user may press “Enter” to
display next file, or “Tab”, which gives options to “[C]opy, [R]ename, [D]elete” each file. Pressing “Escape”
exits options and displays next file. From filename “Escape” terminates the command.
LOCK/UNLOCK [ALL, or PORT N0.] Busies out all ports or a specific SVM port. Released at maintenance
or with “UNLOCK’ command. Default (no argument) is ALL.
MAINT or MAINTENANCE Forces daily maintenance as soon as user returns to Port Status screen.
MESS or MESSAGE [GROUP NO, optional. Display all groups if not specified] Displays a list of all message files in the form:
●
●
●
Recipient Name (from Mailbox Label)
Sender Name (blank if public or unknown)
Date and Time Sent
SVM 400 Technical Manual Page 31
HOME
PAGE
●
●
●
Table of
Contents
Type (V-Voice)
Message Status (Saved, New)
Filename
MONIT [ALL, OFF, or PORT NO.] Turns on/off monitor function for all or specific ports. Must be turned off
with “OFF” command—not done by maintenance. May be used in combination with “CP” command or
alone.
RX or RECEIVE [Filespec] {where filespec is any valid path and filename} Used with CCTICOM utility
to receive a file from the remote PC.
SHELL [any valid DOS command] Shells out to DOS command screen, executes any valid DOS command. Returns to Calais Port Activity screen upon completion of command. If no command is given, remains
at DOS command prompt until user types “Exit” to retun to Activity screen.
STATUS Displays system information including: Mode and “status number” for all ports, total number of
blocks in the system, available RAM, current (or highest) message index value, minutes of remaining message space available, current message partition in use, and status of RMATS terminal (active/idle).
STOP [PORT NO.]
●
●
●
●
Stops and reinitializes specified port.
Will disconnect any call in progress on that port.
Immediately places port back in service when initialization is complete.
Must be executed on individual ports only.
PORT ACTIVITY FACILITY HELP There are two pages of help screens immediately available to the System
Administrator. To access the help screens, press F1 to bring up the first page of help and page up or down to
move between the two pages. The help screens provide information on commands to control and monitor
Calais’ ports. To execute a command, type the command and arguments at the command line prompt =>
and then press ENTER. To exit the facility and return to the System Main Menu, press F9.
You may be asked to access this screen by Samsung Technical Support.
SVM 400 Technical Manual Page 32
HOME
PAGE
Table of
Contents
SITE INFORMATION
This screen menu allows the System Administrator access to helpful information about the site in which the
SVM 400 is installed. This information becomes very useful long after the system installation has been completed.
These are only memo screens but it is recommended that these screens be filled out for all sites. Having a
record of all port connections helps make troubleshooting easier if it becomes necessary.
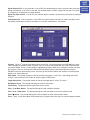
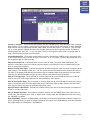
STATUS SCREEN
This is the normal operating screen for the SVM 400. The Status Screen is a display only facility, and shows
information in real time relating to the current status of the SVM 400. The following information is displayed.
Prt. Column The Port column gives you the number of the voice circuit that the call is taking place on.
MN Column The Mode Number column lets you know which Mode the port is in.
Active Block Column This column shows you which block is currently servicing the call, as the call gets
directed through the call session.
Status Column The status column displays the current condition that the port is in. Some examples are: Idle,
Processing, Transferring, Messaging, etc.
SYSTEM ACTIVITY
Calls To – Date The total number of calls that the SVM 400 has processed.
Average Calls per Week The average number of calls per week averaged over all weeks.
Directory Accesses The total number of callers that have accessed the directory.
Times All Ports Busy The total number of times all ports have been busy.
Number of Subscribers The total number of subscribers on the system. This is actually a mailbox count.
Extensions are created for ever extension on the phone system.
Total Message Count The total number of messages in the system. This includes new and saved messages.
Avg Messages/Mailbox The average number of messages in subscriber mailboxes.
Disk Space Available The total disk space available in hours and minutes.
SVM 400 Technical Manual Page 33
HOME
PAGE
Table of
Contents
Block Tables
Block tables are the building blocks for your individual customer application, all call flow is programmed using
these blocks. Each block type has a specific function, and can be chained together with other blocks to provide
a complete call processing solution.
There are only 6 blocks available in the SVM 400, they are:
BYE BLOCK
Speaks a prompt, usually “Good bye”, then terminates
the call session.
DIRECTORY BLOCK This is a utility that sets up the necessary parameters
used in the subscriber’s directory list.
EXTENSION BLOCK Represents the subscriber to a caller. Houses subscriber’s settings.
MAILBOX BLOCK
Receives, records, sends, and stores messages. Contains
default personal greeting, name and password for the
subscriber.
MENU BLOCK
Speaks prompts to caller and routes on Input from
caller entry.
STATION BLOCK
All devices that access an external service, (other station, CO, pager, etc.), require at least one of these.
Each contains the call progress information and instructions to place a call.
EXPLANATION OF DEFAULT CONFIGURATION
The default configuration in the SVM 400 has been simplified to minimize installation time and reduce the
amount of time it takes to learn the application. Many of the programming options have been disabled or fixed
at a default value.
The default application is built using Blocks. Each block has a specific purpose and are chained together to
build the application. This allows the caller to pass from one to the other as the call is processed.
Bye Block Use to terminate a call. One of these exists in the SVM 400.
Directory Block Use to enable a caller to ‘look up’ an extension number. One of these exists in the SVM 400.
Extension Block This block has limited functionality on the SVM 400 and it is mostly used to transfer callers
to the physical stations. One exists for each phone on the system.
Mailbox Block This block contains all the parameters for the mailbox including pager and cell phone notification. One usually exists for each phone on the system, but may also be assigned to people who do not have a
phone on the system.
Menu Block This block is responsible for playing prompts, collecting caller entry and routing calls. The auto
attendant main menu is an example of a menu block. There is a default Menu Block created for answering calls
in each mode (Day, Night, Holiday, and Weather).
Station Block The station block is responsible for dialing. When the SVM 400 dials or transfers any call it uses
a station block. Default Station Blocks exist for Internal Calls, External Calls, and Beepers.
When a call is answered there it is processed by a number of blocks behind the scenes. These blocks are hidden for reasons of simplicity. The call is processed in the following way:
● New CO Calls These are answered by one of the MENU blocks depending on the current mode (day,
night, holiday, or weather). A custom greeting is played and the caller is directed to any other block based on
the DTMF input.
● Forwarded Calls These calls are automatically answered by mailbox blocks, and the caller may leave a
message.
SVM 400 Technical Manual Page 34
HOME
PAGE
Table of
Contents
BYE BLOCK
Description The BYE Block is very simple. Its purpose is to say good-bye to the caller, disconnect the call,
and free the port. The only parameter is the prompt to be spoken before disconnecting. There is only one bye
block available in the SVM 400.
Program Fields
Prompt The number of the prompt that the SVM 400 speaks before disconnecting the caller. Allowable inputs
are 0001 - 9999 with blank indicating “say nothing”. Press ‘Ctrl+O’ at this field to review or edit the prompt
text.
SVM 400 Technical Manual Page 35
HOME
PAGE
Table of
Contents
DIRECTORY BLOCK
Description A Directory Block defines necessary information about how the system Dial-by-Name Directory
will function. Note that in order for the directory feature to work the included subscribers must have recorded
their name and entered the DTMF values for them.
This information includes the maximum number of digits the caller may enter to search for an individual's name,
the maximum number of names matching the caller's entry, and also, whether or not to speak the extension
number of the matching name to the called party. The directory will search on extensions first, if no match is
found then it will search mailboxes.
Program Fields
Maximum Entry Digits The maximum number of digits the caller may enter to search for the target the caller
is trying to locate. This is usually set to three because most people's names do not have the same first three
letters. This number can be between 1 and 10.
Wait For First Digit This is the amount of time, in seconds, the system waits for the caller to enter the first
digit.
Wait For Subsequent Digits The amount of time, in seconds, the system waits for the caller to enter the digits
following his first entry digit.
Repeat Prompts If No Entry The number of times the system repeats prompts if the caller does not enter any
digits.
Retries If No Match This is the maximum number of names a caller may enter if no match is found on the
digits the caller entered. If this occurs, it is considered an INVALID entry.
Maximum Number Of Matches The number of names played to the caller if more than one name matches
the entry. The number can be between 1 and 8.
Search on First Name When an extension is set up, generally people are listed by last name, comma, and
first name. This parameter determines which part of the name (label) that will be searched for a match.
Example: Name is entered in the subscriber list as Smith, John. If this value is set to N (no) the directory will
search on Smith, if this value is set to Y (yes) the directory will search on John.
Include Unnamed Objects If this parameter is set to YES, search targets with no recorded name will be
included in the directory listing played to the caller. In this case, the SVM 400 speaks the number of the search
target. This could, for example, be an extension or mailbox number.
SVM 400 Technical Manual Page 36
HOME
PAGE
Speak Name on Exit If this parameter is set to YES, the selected object's name is played to the caller prior to Table of
exiting the Directory. If no name is recorded, the selected object's number is played to the caller. This could, Contents
for example, be an extension or mailbox number.
Speak Key Value on Exit If set to YES, the selected object's number is played to the caller prior to exiting the
Directory.
Verify Before Exit If this parameter is set to YES, the system requests the caller to confirm the object selection before transferring the caller to that object. If set to NO, confirmation is not needed.
Prompts On the 2nd page of the directory block you will find a list of the prompts that SVM 400 plays to the
caller. Highlight the prompt number and press ‘Ctrl+O’ to review the prompt text and usage. These prompts
may not be edited. To use a custom prompt, highlight the prompt number to be changed, enter the new number, and press ‘Ctrl+O’ to bring up the Prompt Text Generator. Enter the desired prompt text and press
ESCAPE to return to the directory screen. You must go into the Voice Studio and record the custom prompt
before it can actually be used.
Enter Name The prompt asking the caller to spell the called party’s name. This is the prompt you would
change, if you wanted to ask the caller to enter the party’s FIRST name.
Target Name Prefix The prompt spoken in front of the target object’s name. “To reach...”.
No Matches Found The prompt indicating no matches were found.
Invalid Entry The prompt indicating the caller input is invalid.
Press ‘9’ for More Names The prompt offering the caller additional matches.
Press ‘0’ for a New Name The prompt offering the caller the option to search for another name.
Press ‘✱’ to Exit The prompt offering the caller the option to return to the previous menu.
Press... (1-8) A brief description of the prompt that is played to the caller and its associated prompt number.
SVM 400 Technical Manual Page 37
HOME
PAGE
Table of
Contents
EXTENSION
Description The Extension Block is one of the two Blocks (Extension, Mailbox) that describes a subscriber.
The extension Block controls the operating characteristics specific to a Subscriber’s extension.
Program Fields
Extension Name The name of the extension. This is used by the directory feature. SVM 400 stores the subscriber name in ‘last name, first name’ format. When entering the subscriber’s name this format should be followed. If the name is entered as ‘first name, lastname’ SVM 400 will automatically re-sort it to ‘lastname, firstname’.
This format is only important because the directory feature will search on a specific field (first name or lastname) and the search should be consistent for all entries.
Extension Number The number that must be entered by the caller in order to access the subscriber extension. It does not necessarily have to be the same number dialed by SVM 400 when transferring to the extension
on the telephone system. This can not be the same number of any other extension.
Mailbox The mailbox corresponding to the subscriber Extension Block. Press ENTER to bring up the Target
Generator. Select and open the appropriate block type from the Target Generator pick list. Choose a new or
existing block of that type and press ENTER. Press Ctrl+O at this field to review or edit the Mailbox Block or
Distribution List associated with the Block.
Dial Number The actual number that the SVM 400 will dial to complete the transfer. In other words, this is the
number that is dialed when the caller enters the extension number.
Alternate In each Extension Block there is a programming field available called ‘designated location allowed’.
Setting this to ‘Y’ will allow a subscriber to enter an alternate number where they can be reached. This number
is entered here and will be called in place of the normal dial number. This number may be an internal or external number and can be set until further notice, for the next few hours, until the end of current business day,
start of next business day, a coming day of the week or until a specific day and time. To activate this dial 4 then
1 from the Subscriber Main Menu.
Supervision Level Press ENTER at this field to bring up a pick list with the following options:
● NONE (blind transfer) SVM 400 transfers the call, releases, and doesn’t wait for any subsequent condition.
● FULL SVM 400 transfers the call and waits until the call is answered. If the call is not answered (NOANSWER), the call is directed to the CallDirector on page two for instructions on where to send the call.
SVM 400 Technical Manual Page 38
HOME
PAGE
Subscriber Password The digits the extension user enters to gain access to the extension user menu. In the Table of
SVM products, subscribers usually have both an extension block and a mailbox block (but may have only one Contents
of them). Since each of these blocks have a password option, if different password values are entered in each
of these blocks (extension and mailbox) the SVM 400 will try to resolve these two password fields into one
value. The extension password will override the value in the mailbox field.
Language This is a language option. You may select from any installed language and from that point on the
extension will respond to the authorized owner in the language selected. Authorized owner means a user who
has entered a valid password.
The mailbox block also has a Language field, and the SVM 400 will try to resolve these fields to a single value
(make them match). If conflicting information is contained in these fields, the extension block has priority and
the mailbox block will be automatically changed to match.
This selection is based on the order of the defined languages in page 3 of the System Wide Parameters. If the
languages are to be reordered, added to or changed in page 3 of the System Wide Parameters then this field
should be reentered.
Station If there is no entry entered here the system will automatically search the station options for the appropriate station required to send the call. Press ENTER at this field to bring up the Target Generator. Select a
new or existing Station Block from the Target Generator pick list. Press Ctrl+O to review the selected Station
Block.
Directory Public/User A ‘Y’ in these parameters, and the subscribers’ name recorded in the mailbox, allows
this object to be listed in either of the appropriate Directories. The Public Directory is the directory that caller
access, the User Directory is the directory that subscribers access.
Retention Days Remaining The number of days remaining before this block is automatically discarded during system maintenance if unused.
Designated Location Allowed Setting this to ‘Y’ will allow a subscriber to enter an alternate number where
they can be reached. This number is entered in the ‘Alternate’ field and will be called in place of the normal dial
number.
SVM 400 Technical Manual Page 39
HOME
PAGE
Table of
Contents
MAILBOX
Description The Mailbox Block is used to implement the Voice Mail messaging features on SVM 400. It also
controls the operating characteristics specific to an individual mailbox such as whether the Mailbox is announce
only or if the subscriber has Mailbox Administration capabilities. This Block maintains the message notification
details. The Mailbox is where a subscriber receives, sends, and manages messages. The public caller may
record a message after hearing a personal greeting from the Mailbox User and choose to review, re-record,
send, or discard his message.
Event pointers are used to provide the flexibility to handle messaging differently for various modes of operation
(typically at different times of the day).
The information contained within the three Mailbox Block screens shown in this section is for discussion and
display purposes only. Three pages are required to contain the Mailbox Block parameters. The parameters are
grouped by category. The categories contained in each page are as follows.
Program Fields
Mailbox Name The name of the mailbox. SVM 400 stores the subscriber’s name in ‘last name, first name’ format. When entering the subscriber’s name this format should be followed. If the name is entered as ‘firstname,
lastname’ SVM will automatically re-sort it to ‘lastname, firstname’.
This format is only important because the directory feature will search on a specific field (first name or lastname), and the search should be consistent for all entries.
Extension Number The Extension number to which the mailbox belongs. If this is left blank the mailbox will
be considered a ‘stand alone’ mailbox with no matching extension.
Announce Only Mailbox A ‘Y’ in this field designates this as an announcement only mailbox. When a public
caller accesses this mailbox, it will play the greeting message (announcement) and exit immediately without
recording a message. This may be used for bulletin boards and other simple audiotex applications. After playing the announcement, SVM 400 will pass control to the block defined by the <No Msg Left> pointer.
Subscriber Administrator A ‘Y’ in this field gives the mailbox user the following Subscriber Administration
capabilities.
●
●
●
Create/delete mailboxes and/or extensions.
Set an operating mode.
Inputs are ‘Y’ for yes or ‘N’ for no.
SVM 400 Technical Manual Page 40
HOME
PAGE
LIFO / FIFO If set to ‘Y’, messages are reviewed in “Last In First Out” order. If set to ‘N’, they are reviewed in
“First In Last Out” order.
Table of
Contents
Directory Public/User A ‘Y’ in these parameters, and the subscriber’s name recorded in the mailbox, allows
this object to be listed in either of the appropriate directories. The public directory is the directory that callers
access, the user directory is the directory that subscribers access.
Subscriber Password Allows the mailbox password to be changed to the default digits specified by default
password in the System Wide Parameters or removed completely. Inputs are “DEFAULT” or “NONE”. In the
SVM 400 products, subscribers have both an extension block and a mailbox box (but may have only one of
them). Since each of these blocks have a password option, if different password values are entered in each of
these blocks (extension and mailbox), the SVM 400 will try to resolve these two password fields into one value.
The extension password will override the value in the mailbox field.
Language This is a language option. You may select from any installed language and from that point on the
extension will respond to the authorized owner in the language selected. Authorized owner means a user who
has entered a valif password.
The extension block also has a language field, and the SVM 400 will try to resolve these fields to a single value
(make them match). If conflicting information is contained in these fields, the extension block has priority and
the mailbox block will be automatically changed to match.
This selection is based on the order of the defined languages in page 3 of the System Wide Parameters. If the
languages are to be reordered, added to or changed in page 3 of the System Wide Parameters then this field
should be reentered.
Retention Days Remaining The number of days remaining before this block is automatically discarded during system maintenance if unused.
Mailbox Greeting Allowed When set to yes the caller is allowed to record a mailbox greeting.
Message Alert Control Allowed When set to yes the caller is allowed to turn on and off the message alert
and set the alert number.
Enable Extended Prompting A ‘Y’ in this field enables the full length, extended prompting to play to the subscriber the next time he logs into his Mailbox. Once the flag is set to ‘N’, extended prompting does not play
again and the subscriber does not have to listen to the dialing options. The extended prompting is used to aid
the new mailbox user.
Auto Play New Messages If set to “Y”, any new messages, or those messages not saved, will automatically
begin to play when the subscriber logs in to their executary.
SVM 400 Technical Manual Page 41
HOME
PAGE
Auto Play Message Info If this option is set, the sender information and time will be automatically played for
each message. If this is not set to Y, the caller can still get this information on demand by pressing ‘00’ while a
message is playing.
Table of
Contents
Message Alert Controls
● Alert On A ‘Y’ in this field enables Message Alert capabilities for this mailbox. An ‘N’ disables the
Message Alert feature. This parameter setting may be overridden by the phone interface.
● Alert Phone Number This is the phone number where you want to be notified of your new messages if
you have enabled message alert in your mailbox.
Message Waiting Indications
In version 1.2 and later these are not accessible. Previous software versions allowed access to them but the
fields were not used by the SVM 400 software. The ‘Mailbox has Message Waiting Light’ is fixed as Yes for all
mailboxes that have an extension associated with them.
Message Auto Forward
● Enable Auto Forward This option turns Auto Forward on. When set any messages arriving in this mailbox will be automatically forwarded.
● Delete After Forwarding The new message that is to be Auto Forwarded will be discarded from this mailbox, when the forwarding takes place, if this parameter is set to ‘Y’. If this parameter is set to ‘N’ the mailbox
will retain a copy of the message that is Auto-Forwarded. This parameter is only active when ‘Auto-Forward
Message After’ parameter is set.
● Auto-Forward Delay The number of hours and/or minutes before a new message is automatically forwarded to another mailbox. Auto forwarding is disabled if this parameter is left blank. The range for this is
from 0 (no forward) to 23:59 (almost one day).
Pager Notification Enabled A ‘Y’ enables the pager notification of new messages received. A ‘N’ disables
this option.
Pager Station The type of station block to use for pager outdials. Press ENTER to bring up the Target
Generator. Select a new or existing Station Block and press ENTER. Press Ctrl+0 to review or edit the selected Station Block.
SVM 400 Technical Manual Page 42
HOME
PAGE
Dial The pager number to dial to notify of new messages.
Table of
Contents
Operating Mode Indicates the Mode Name and Number for which the displayed Block Pointers’ Targets are
active. Operating Modes are given a unique Number by the system. In the SVM 400 they are 01 - 04, indicating
Day, Night, Holiday and Emergency / Bad weather.
● CallDirector Event Pointers To edit any Event Pointer, press ENTER to bring up the Target Generator.
Highlight and open the appropriate Block type. Select a new or existing Block and press ENTER.
● MSG-LEFT Pointer This is the block that the SVM 400 will pass control to if the caller leaves a message.
The target block allows the caller the option of returning to the beginning of the application, or sending the
caller to the Bye block if the organization or individual does not want to give the caller additional options.
● NO MSG-LEFT Pointer This is the block that the SVM 400 will pass control to if the caller does not leave
a message or if this is an announcement only mailbox. The target block may allow the caller the option of
returning to the beginning of the application, or sending the caller to the Bye block, if the organization or individual does not want to give the caller additional options.
● ESCAPE Pointer This is the block that the SVM 400 will pass control to if the caller presses the escape
digit while listening to the mailbox greeting or while leaving a message in the mailbox. When the Escape digit
is pressed SVM 400 will immediately exit the process it is in and go to the block defined in this pointer.
● GREET-DTMF Pointer This is the block that the SVM 400 passes control to if the caller enters any valid
DTMF while listening to the mailbox greeting. If defined, the admin digit, escape digit, digit to skip the greeting, and the operator digit are not considered valid for this pointer. The target block is a menu which performs a search operation to match the caller ENTRY to the INPUT value of a pointer, or Number of an
Extension, Mailbox or Announcement.
● OPERATOR Pointer This is the target block that the SVM 400 will pass control to if the caller presses the
operator digit while listening to the mailbox greeting or recording a message.
● AUTO-FWD Pointer This is the mailbox to forward new messages to when the time has expired in the
‘Auto-Forward Message After’ parameter. The target must be another mailbox and may not point back to
itself.
SVM 400 Technical Manual Page 43
HOME
PAGE
Table of
Contents
MENU BLOCK
Description The menu is used to speak something to the caller, collect a caller’s DTMF entry, and pass control to another block. A menu can accept entries from 1 to 10 digits in length.
The menu performs a search operation to match the caller ENTRY. For example, a menu prompt may be, “You
may dial an extension directly or for sales press 1, for service press 2.” If the caller presses 1, a pointer with an
input value of <1> directs the caller to an extension group within the phone system called “SALES.” If the
caller entered 223, the MENU may be configured to search for an extension or mailbox.
When a match is found, it transfers control to the block defined in the target name field. It can also translate values into new values before conducting the search. This is all done in the menu processor.
The menu screens consists of a personality page and a specialized form of CallDirector —called an Input
Processor— as the second page.
The Personality section determines the prompts spoken to the caller.
The Input Processor contains Input Pointers which determine the block which receives control of the call.
Program Fields
Administration Digit This is the digit to identify a subscriber on the system. If this digit is entered followed by
a mailbox number you will be asked for a password.
Escape Digit This is the digit to escape out of the current menu and back to the previous menu. If this is
pressed at the main menu the caller will be disconnected.
SVM 400 Technical Manual Page 44
HOME
PAGE
Table of
Contents
Prompts 1 through 6 These are the voice prompts that the SVM 400 speaks when the Menu Block is entered.
Menu prompts 1-6 are spoken in succession and are normally used to prompt the caller for an entry. Allowable
inputs include any four digit prompt number (1000 - 9999). A blank entry means “say nothing.” To use a different, or custom prompt, highlight the field to be changed and enter the desired prompt number. To review or
edit the prompt text, press Ctrl + O (O is for Open). Press F1 to bring up the help screens and page down to
page 2 for instructions on how to edit text boxes.
Invalid Condition Pmt The prompt spoken when no match is found during a MENU search. It normally advises the caller that their entry is invalid, try again. Press Ctrl + O (O is for Open). To review the prompt text, number, recorded length and date recorded.
Request Password Pmt The prompt which asks the caller to enter a password (when appropriate). The
prompt is used when a caller has made an entry that requires a password for access to another block or perform an administrative function.
Maximum Caller Entry Digits Indicates the maximum number of digits the caller may enter in response to the
menu prompts. The allowable values are 1 - 10. This should be set to the length of the maximum valid entry in
this menu. If set greater, SVM 400 will wait unnecessarily for additional digits to be entered. If the caller enters
more than the specified number of digits, the excess will be carried forward to the next block.
Wait for First Entry Digit This is the time, in seconds (from 0 to 99), that SVM 400 will wait for the caller to
make an entry. This timer begins after the last menu prompt has been spoken.
Wait for Subsequent Digits This is the time, in seconds (from 0 to 99), that SVM 400 will wait for the caller to
make a subsequent entry. This timer begins after the first caller entry digit has been received and resets after
each digit pressed by the caller, up to the Max Caller Entry value.
Repeat Prompts if NO ENTRY Indicates the number of times, from 0 to 9, the menu prompts are repeated, if
no entry is made by the caller.
Retry if INVALID Condition The number of additional attempts that this MENU allows if the caller makes an
invalid entry. The allowable inputs are 0 - 9. When retries are exhausted, the SVM 400 will exit the menu using
the <INVALID> condition.
Operating MODE Indicates the Mode Name and Number for which the displayed Block Pointers’ Targets are
active. Operating Modes are given an unique number by the system. In the SVM 400 they are 01-04, indicating
Day, Night, Holiday and Emergency / Bad Weather.
SVM 400 Technical Manual Page 45
HOME
PAGE
Event Pointer To make changes to the No-Entry, Invalid, and Faxcall Pointers, highlight the field and press
Table of
ENTER to bring up the Target Generator. Highlight and open the appropriate Block type. Select a new or exist-Contents
ing Block from the Target Generator pick list and press ENTER. Press Ctrl+O to review or edit the selected
block.
NO-ENTRY Pointer The block that the SVM 400 will execute next if the caller makes no entry in this MENU.
INVALID Pointer The block that the SVM 400 will execute next if the caller has made too many invalid entries
(determined by retries allowed) or a search on a value other than ENTRY failed to find a match.
FAXCALL Pointer The block that the SVM 400 will execute next after hearing a FAX tone. This applies only
when the FAX machine is an extension of the telephone system.
User Defined Event Pointers These are the event pointers the user enters to customize how the SVM 400
functions. They include all the entries below FAXCALL.
To edit User Defined Event Pointers, highlight a new or existing field and press ENTER.
Enter the Input Value. The Input Value can be any digits that are to be processed by the menu. These can
be digits dialed by the caller or digits passed from previous blocks. The origin for these digits are determined
by the contents of the “Input FROM...” field.
● A question mark “?” may be used as the INPUT value to apply to a set of caller entries. An INPUT value of
<2??> will match any 3 digit entry beginning with the ‘2’. An INPUT value of “4?57” will apply to all 4 digit
entries beginning with the digit ‘4’, ending with the digits ‘57’ and having any value in the second digit. The
Wild Card is placed in the INPUT value to indicate that any digit entered in that position will qualify as a
match. The “?” character may also be used in a translation to indicate that the translated value should
include the character which is in the position of the corresponding “?” in the pointer INPUT value. A dot (.) is
used in the translation value to indicate that the corresponding “?” in the INPUT value should be discarded.
●
●
Input Value Column The Input Value is a defined event pointers that directs the SVM 400 to other blocks. The
Input Processor contains Input Pointers that determine which application block receives control of the call.
Upon finding a match, it examines the type of action specified in that pointer and passes control to the object
named in the pointer’s target. These pointers may go directly to an object (with or without requiring the caller to
enter a password), translate the Input Value to a new value or search a large array of objects for one matching
the Input Value.
InputValue Search Order When searching for a match to a caller entry or for a particular pointer, SVM 400 follows a consistent sequence. MENU Blocks require a more elaborate search than other Blocks. However, the
pattern is consistent. It looks for the most specific match. A direct digit match on an INPUT value takes precedence over a wild card match. Also, a wild card pointer with a lesser number of “?” characters will precede one
with a greater number. A match on a pointer in the current mode of operation takes precedence over a pointer
in default mode.
Action Column
Press ENTER to bring up the action pick list. Highlight the appropriate action and press ENTER. The available
actions are described in the next page.
MENU Blocks search and give precedence in the following order:
●
●
●
●
●
Translation Pointers
Other Pointers
Extensions
Mailboxes
Announcements
SVM 400 Technical Manual Page 46
HOME
PAGE
Search Used only with Menu Blocks. This type of action uses the Input Value to search a specified group to Table of
find a block with a number that matches and then passes control to the block. Valid block types to be searchedContents
are extensions and mailboxes. More than one block type may be searched at one time.
Goto Specifies the next block to execute, if the caller’s entry matches the INPUT value.
Translations Translates caller entry, telephone system or network integration information to the translated
value specified. SVM 400 then searches for a match, using the translated value.
Password then Goto Used only with MENU Blocks. A password pointer is used to restrict access to a target
block by requiring the caller to enter a password code before passing control to the target block.
Type Column Represents the three character pneumonic for the type of block targeted. Below are a few
examples:
●
●
●
MBX represents Mailbox
EXT represents Extension
MNU represents Menu
Target Name Column Specifies the block to pass control to when the input value is matched with the input
from the defined input source.
● Select a block type from the Target Generator, pick list and press ENTER. Choose a new or existing block
and press ENTER. Press ‘Ctrl + O’ to review or edit the chosen block.
SVM 400 Technical Manual Page 47
HOME
PAGE
Table of
Contents
STATION BLOCK
Description The Station Block contains all the information needed to call or transfer a caller to a particular
phone number. The bulk of the Station Block defines the various call progress signals. It also contains any
additional dial strings needed to reach a particular station (like dialing ‘9’ to access a trunk).
One of the handiest features of the Station Block is the Call Progress Training facility. This feature allows you to
provide phone numbers and have SVM 400 call them to learn the ringback and busy signals automatically. The
SVM 400 then adjusts the appropriate parameter settings in the Station Block according to the data collected
by calling the provided numbers.
Blocks that reference a telephone number, such as Mailbox Blocks, must reference a Station Block which
allows the SVM 400 to dial.
This is particularly useful for unique stations that must be handled in a special way. However, this usually isn’t
necessary. Station Blocks contain a set of matching strings which allow the SVM 400 to select an appropriate
Station Block based on the kind of number being dialed (all seven digit numbers, four digit numbers beginning
with ‘3’, ‘0’, long distance numbers, etc.). The SVM 400 requires at least one Station Block to make supervised
calls and you can create as many Station Blocks as desired.
Station blocks can be specifically selected. If an instruction to dial a number (such as a message alert number
or pager notification - both found in the mailbox block) does not have a specific station block defined, a station
block will be automatically selected based on the number to dial. See Matching Dial Strings below for more
on this subject.
The SVM 400 comes with the following default station blocks:
●
On Premises Not Used.
●
Off Premises Used for all off premises notification, and calls accepted to beepers.
● Beepers Used to call personal pagers (beepers). You may have to create additional beeper station
blocks if the company employees use multiple pager companies, each with their specific timing parameters.
Program Fields
Matching Dial Strings This area is where the system matches the dialed digits. If a Station Block has not
been explicitly assigned to a phone number SVM 400 will search all Station Blocks to locate the one most
closely matching the number being dialed. Station Blocks can contain up to six matching dial strings. These
strings can include any digits which can be dialed and the wildcard character “?”. Zero would match the operator’s extension.
SVM 400 Technical Manual Page 48
HOME
PAGE
Table of
Contents
Examples:
●
●
●
●
3??? – Match any four-digit number beginning with “3”.
411 – Match “411” only.
???5000 – Match any seven-digit number ending in “5000”.
??? – Match any three-digit number.
Prefix The Dial Prefix instructs SVM 400 what DTMF to dial, if any, prior to the actual number. Prefix examples
include a tie line or trunk access code. One example is shown in the Off-Premise Station Block: ‘9,’ tells SVM
400 to dial “9” and then pause before dialing the actual telephone number. See the instructions for entering
specific characters at the end of this section.
Suffix Enter any DTMF that must be dialed after the actual number. This will usually be left blank but may
include an account code or PBX feature code. Beepers usually require some form of DTMF entry after the telephone number. See the instructions for entering specific characters at the end of this section.
Transfer Controls Simultaneous Xfers - Y/N. Set this parameter to ‘Y’ to allow more than one port to transfer
to the same station simultaneously. This applies to blind transfer conditions only.
Conference Calls - Y/N Allows SVM 400 to place a conference call to the station controlled by the Station
Block.
Message Waiting Indicator Controls
Dial To Set MWI On Enter the string needed to turn message waiting indicators on. Since the SVM 400 knows
how to do this internally, you would only use these to set MSG light on remote systems.
Dial To Set MWI Off Enter the string needed to turn message waiting indicators off. Since the SVM 400 knows
how to do this internally, you would only use these to set MSG lights on remote systems.
Call Progress Training
The station block can be used to train the SVM 400 to recognize different call progress tones (ring back and
busy) for the particular station block. However, this is normally not necessary as default values for North
America are already programmed in.
Ringing Number Enter any string returned by the phone system to indicate ring. The second field indicates
how many times the train routine is to be run using the number entered in the first field.
Busy Number Enter any string returned by the phone system to indicate busy. The second field indicates
how many times the train routine is to be run using the number entered in the first field.
Retrain - Y/N Set to ‘Y’ to preserve the original values. Set to ‘N’ to clear.
Retrain – Train To run the Call Progress Train routine, enter a telephone number in either the ringing number
field, the busy number field, or both fields. Specify the number of times SVM 400 is to try the number to gather
data. Press ENTER to start Call Progress Training. Four conditions apply to the train routine:
● If only the Ringing Number value is filled in, only those values which pertain to a ring signal will be modified by running the Call Progress Train routine.
● If only the Busy Number value is filled in, only those values which pertain to a busy signal will be modified
by running the Call Progress Train routine.
● If no numbers are provided for Ringing or Busy, and Retrain is set to ‘N’, the factory default settings are
automatically filled in by SVM 400.
● If no numbers are provided for Ringing or Busy, and Retrain is set to ‘Y’, SVM 400 will give an error warning.
There are five types of Station Blocks preset on SVM 400: Template, Beeper, Long Distance, Off-Premise, and
On-Premise.
Each of these station block types comes with factory preset settings which should not be changed. If you want
to change any of these parameter settings, press ‘Ctrl + A’ to bring up the Copy Block dialog. Enter a new
name for the block and press ENTER. You now have a new Station Block. Make the necessary parameter setting changes to the new block and assign it as necessary. Save the original five station blocks with their factory
default settings for future reference and use.
SVM 400 Technical Manual Page 49
HOME
PAGE
Table of
Contents
Specialized Applications
Setting Up Pager Notification
Each subscriber may be notified of new voice mail messages on their personal pager. To set this up, follow
these steps:
1. Open the appropriate mailbox block.
2. Press ‘Ctrl + D’ twice to get to page 3 of the mailbox block.
3. Enable pager notification by changing the ‘N’ to a ‘Y’ in ‘pager notification is enabled’.
4. In the ‘Dial:’ field enter the pager number. For example 555-1234.
5. Place your cursor on the ‘station’ field and press return.
6. Every time the SVM 400 dials a number it uses a station block to obtain dialing rules and instructions.
Select the ‘Beepers’ station block and press return. If you need to create a new block to handle different
beeper companies you can also do that here.
7. Now let’s check the contents of the beeper station block. Place your cursor on the ‘Beepers’ field that you
selected in step 6 and press ‘Ctrl + O’ to open it.
8. The matching dial strings are only used to select a station block according to a match with the dialed digits.
We use these when a station block has not been explicitly defined. Because we have explicitly defined this
block by selecting it a station block in the previous mailbox block we do not need to use these matching
dial strings.
In actual fact, in the mailbox block we could have left the station block blank and selected this beeper block
by putting a matching dial string in one of the matching dial string fields (e.g. if the pager number to dial
was 555 1234, we could enter 5551234 in one of the fields of the beeper block. Or we could enter 555????,
in which case any time the SVM 400 needed to dial out a number beginning with 555 it would use this station block).
9. The only two fields we need to be concerned with are the prefix and the suffix. These have been entered for
you so there should be nothing to do here. The prefix determines what number the SVM will dial before
sending the 555-1234 beeper number. The suffix determines what number the SVM will dial after sending
the 555-1234 beeper number.
10. The prefix contains ‘9,’. This means that dial 9 (9) and wait for one second (,). The one second is to get dial
tone.
11. The suffix contains ‘~diW,$K##’. This means to use in band dialing (~di), wait for answer (W), pause for 1
second (,), dial the key value of the mailbox ($K), and send ## to terminate the call (##).
Note: Sometimes you may want to substitute a fixed timer in place of the ‘wait for answer’ command. To do
this insert multiple 1 second pauses (,) or one or more 4 second pauses (\).
All that remains is for the mailbox owner to enter their own personal pager number.
SVM 400 Technical Manual Page 50
HOME
PAGE
Table of
Contents
Creating a Multi-Level Menu
The SVM 400 comes default with 4 menus to answer calls in the day, night, holiday, or weather (which can
actually be used for any emergency). If you need to create additional menus it is easy.
Example: The day main menu prompts a caller to press ‘7’ for ‘additional selections’. The additional selections
will list several departments and offer a single digit selection to reach them.
Programming Steps:
1. Record the appropriate greeting in ‘day main menu’.
2. Press ‘Ctrl + D’ and goto page 2 of 4 of the day main menu.
3. Press the down arrow until you reach a blank line below the last entry of the Menu Input processor.
4. Press return to create a new entry.
5. Press ‘7’.
6. Press enter and then highlight ‘Goto’ and press enter again.
7. You can now select another block to transfer to, if the caller presses ‘7’.
8. Select Menu and choose ‘New’.
9. Name the new Menu ‘departments’.
10. Record a prompt and enter the prompt # in ‘1st Prompt’.
11. Press ‘Ctrl + D’ and go to page 2 of 4 in ‘departments’ menu.
12. You may, if desired, remove any current default entries by selecting them and pressing ‘Ctrl + Y’.
13. Create new entries with single digits. Select ‘Goto’ and pick destinations for each entry. Destinations can be
any other block, but in this example would most probably be extensions or mailboxes.
SVM 400 Technical Manual Page 51
HOME
PAGE
Table of
Contents
Multi-Language Support
The multi-language capability of the SVM includes both Caller Language and Subscriber Language.
Caller Language Selection Callers may select a language option when the SVM 400 answers their call. The
prompts played to the caller will continue in the selected language until the SVM 400 releases the call.
Programming changes to this feature are made in System Wide Parameters, page 3/3.
The Multilingual Voice Prompt Support page shows a list of all installed languages. Languages are defined by
Language and Locale (or dialect). You may enter a ‘Key Code’ for each language. The key code is the digit
entered by the caller and used by the SVM 400 to identify a language selection. Additionally, you may select a
default language for the system.
Subscriber Language Selection Mailboxes may be associated with a specific language so that after a subscriber accesses their mailbox, prompts will play in the language assigned to the mailbox. The call session will
continue in this language even if the caller leaver their mailbox.
Programming changes to this feature are made in the first page of the mailbox and extension block in the field
called ‘Language’.
Example - Caller Language Selection
1. Keep the main automated attendant prompt short (for example: announce the company name but do not
provide other options).
2. Check the languages installed on your system as well as the actual numbers used to select them. They can
be found in page 3 of ‘System Wide Parameters’. Make any necessary changes to the assigned digit for
each language and the default system language.
3. Add a new prompt (any prompt number higher than 1004) to the end of the main menu with an option to
select a language, for example “...for English press 1, for French press 2”.
4. In the main menu for each mode “Menu Input Processor” (page 2), scroll to a new line and press Enter.
5. Add a new entry that has one question mark and press return. This will match any single digit dialed by the
caller (i.e. 1 or 2 for language selection).
6. Select ‘Goto’ and press return.
7. Now we must pick a target to go to if anyone dials a single digit (more correctly, we must pick a target if
anyone dials a single digit not specifically listed in the menu input processor). For this application we will
select ‘menu’.
8. The list of menu blocks displayed is limited and does not fit our requirement so we must create a new one.
Select New and give it a name. We will call this “Language”.
9. It is not necessary for this block to play any prompts in this menu block, so no changes need to be made
to the caller entry options.
10. We want to use this menu block only to tell the software what language to use for the rest of this call. To do
this we must assign the single digit entered by the caller in the previous menu to a language register that is
used by the system to process a call. Fortunately this is easier than it sounds!
11. First we must tell the menu to use the data entered on the previous block. On page 1 of the newly created
“Language” menu block, put the cursor on the field called ‘take input from’ and press return. From the
available list pick ‘Key’ and press enter. The key value means the value passed from the previous block.
12. Next we must tell the system to use the key value to select a language. Move the cursor to the field called
‘store input in’ and press enter. Select Language. Your system is now using select a language based on the
digit entered by the caller in the previous menu.
13. You have successfully implemented language selection, but we must now decide what happens to the call
now. Press ‘Ctrl + D’ to go to the next page of the ‘Language menu block’.
SVM 400 Technical Manual Page 52
HOME
PAGE
14. The Menu Input Processor contains some default values created based on the ‘Template MNU’, you may
remove these by placing the cursor on each one and pressing ‘Ctrl + Y’.
Table of
Contents
15. If you look at the right hand side of the screen you will be reminded that the input that the Menu Input
Processor will search on is taken from the ‘key’ value (i.e., the single digit value that was collected from the
previous block).
16. In the Menu Input Processor make two entries for 1 and 2, and decide where you want the caller to go. The
target(s) can be any valid block and may point to completely different objects. In our example we want to
offer the same call flow to both English and French callers. We want to tell the caller 3 things:
●
●
●
They can dial an extension number if they know it (this is prompt # 0006).
They can access the directory feature by pressing 9 (prompt # 0109).
They may hold for an operator (prompt # 0101). Whatever language the caller has selected, he will be
routed to the same block - it is only the language that will change.
17. Move your cursor to a new line in the 'Menu Input Processor' on page 2 of our language menu block and
press enter. Since we know the digits we are working with from our key value, selection will be only 1 or 2,
and they will both be routed to the same destination, we can do this with one entry for the Menu Input
Processor. Enter a single question mark, which is a wild card for any digit.
18. Press enter. Select 'Goto', and when the 'Target generator' window appears select Menu.
19. Again we have no existing menu that is suitable for our purpose so we must create one.
20. Select 'New' and call the new menu 'Options'.
21. The 'take input from' field will show 'ENTRY'. This means digits entered by the caller, this is fine for our purpose.
22. Go to caller entry options lower on the same page. It is here that we must enter the prompts to play to the
caller. For 1st, 2nd and 3rd prompt enter 0006, 0109, and 0101 (remember step 15?).
Note: When an additional language is installed on the SVM 400 system it consists of a duplicate set of
prompts in a different directory. These prompts are in a different language but use the same numbers. The
menu block will look for them in a specific directory determined by the language selection. This means that
we only need to tell the menu block what prompt to play and the language register will determine what language to play it in.
23. We must now go to page 2 of the 'options menu block' and assign routing instructions in the 'Menu Input
Processor'.
24. The no entry field already points to an operator, 9 is assigned to the directory feature and the '???' (any digits) will first look for an extension to transfer to, and if none is found, it will look for a mailbox to transfer to.
So there is really nothing to do here. Your setup is complete.
SVM 400 Technical Manual Page 53
HOME
PAGE
Mailbox Language Selection
When a caller has selected a language the prompts will continue in the selected language until the SVM 400
releases the call.
Table of
Contents
When a subscriber (owner of an extension / mailbox) call the SVM 400 and identifies themselves by correctly
entering a passcode. A language will be selected based on the mailbox. Once selected the call (from the subscriber) it will continue until it is released by the SVM 400 or the language is deliberately changed. The mailbox
language selection can be found in page 1 of mailbox programming.
Note: Please check with your Samsung Representative for availability of languages. These must be loaded onto
your system before this feature can be used.
Customizing the Directory to Search on First Name
When a directory name is entered for the extension / mailbox it should be entered as 'last name, first name'. If
the name is entered as 'firstname, lastname' SVM 400 will automatically re-sort it to 'lastname, firstname'. This
format is only important because the directory feature will search on a specific field (first name or lastname) and
the search should be consistent for all entries.
By default the directory system will search on the last name (see option on page 1 of Directory block - 'Search
First Name' = N). If you change this to Y (search on the first name) it will work but the prompt that will play to
callers will still prompt them to enter the last name of the requested party. You must now change the prompt
number on page 2 of the directory block titled 'Enter name'. In a default system this is set to prompt number
0127. Change this to 0139.
Note: Directory names can be entered remotely. This is done by accessing the mailbox, correctly entering a
password, selecting # and then 3. Follow the prompts to enter a directory name.
Remember: For the directory to work properly, each subscriber not only has to enter their own name, but must
also record it.
Overflow Destination
When a station call forwards to VM (or a group overflows) the call is passed to the SVM 400 and answered by
either the Main Auto Attendant or the mailbox associated with the forward or overflow.
Overflow to Mailbox Sometimes, when the SVM 400 is being used in a 'part time operator' type of application, the operator phone or group will ring, and if not answered, the call should go to voice mail. It is easy to
program this. Simply create a mailbox for the station or group that forwards or overflows.
Overflow to Auto Attendant Sometimes, when the SVM 400 is being used in a 'delayed ring' type of application, the operator phone or group will ring, and if not answered, the Auto Attendant should pick up. It is easy to
program this. Simply remove the mailbox for the station or group that forwards or overflows.
The above two examples follow a simple rule. Forwarded calls from stations or overflowed calls from a group
will go to the main menu if no mailbox is available. If a mailbox exists the caller will be routed to the mailbox.
Broadcast to All Mailboxes
If you have been designated as a System Administrator, you may send a message to all mailboxes in the system.
●
●
From the mailbox main menu press 6 for mailbox administration.
Press 9 for broadcast messages. This option will only be available if your mailbox has been assigned
system administration privileges.
SVM 400 Technical Manual Page 54
HOME
PAGE
Table of
Contents
Appendix A
Special Characters used when writing dialing instructions
These characters perform special functions:
& – This is a flash-hook which is critical for signaling on analog systems.
, – The comma is a one second pause.
\ – The backslash is a four second pause.
T – “T” tells the port to switch to tone (DTMF) dialing. This is the default.
W – Wait for answer. On encountering this character, SVM 400 will monitor the line for an answer from the
called station before dialing any additional characters. If no answer is detected within 6 ring back cycles or 3
busy cycles, the call will be recalled.
; – The semicolon is use to wait for dial tone. The SVM 400 will wait up to twelve seconds for dial tone before
dialing any additional characters. If no dial tone is detected the call will fail. This is useful in environments that
may have a shortage of resources such as a limited number of trunk lines or DTMF receivers.
$K – Stands for key value and causes the SVM 400 to insert the ID number of the last Extension block, Mailbox
Block, or Menu Block input into a dial string.
~di – This is an instruction to dial in band. It is used only in the pager suffix string, and is present to prevent
conflicts with in band and out of band signaling.
SVM 400 Technical Manual Page 55
HOME
PAGE
Table of
Contents
Appendix B
Creating or Modifying Prompts
About SVM prompts
SVM speaks to callers and subscribers, through a series of System and Custom Prompts stored in the system's
memory. These prompts were recorded and implemented in such a way that the SVM would sound human
and conversational. To allow for greater customization, SVM 400 uses the following naming convention for all
prompts used on the system. Prompts are named XXXX.PMT where XXXX is a four digit, zero padded value.
Prompt numbers less than 1000 are reserved.
This guide will discuss the utilities and steps required to record those prompts you want customized, as well as
list all the system prompts already shipped with the system. We will also go over utilities installed on the system that you can use to convert files that you may have had professionally recorded in a 32 kbs ADPCM "VOX"
format to the required "PMT" format of SVM 400.
The list of System Prompts is in a chart format based on the alphabetical order of what the prompt speaks.
The chart contains the prompt text, the block type that may use it, its category or location within that block, and
its prompt number.
The Utilities and Procedures discussed in this guide will be the "Voice Studio", System Administration - Edit
System Prompts via telephone, and BUILDPMT a VOX file conversion utility.
Voice Studio The Voice Studio can be accessed from the System Main Menu of SVM 400's GUI. This facility
will allow you to record both the Voice Recording and the Text for Prompts. In this guide we will only be discussing Prompts. Operation of the Voice Studio is covered elsewhere in this Manual.
System Administration Prompts can be recorded using SVM 400's Telephone System Administration. This is
accessed by dialing from a touch tone phone into the SVM 400 system, when the system answers enter # plus
three zeros, followed by the System Administration’s password. You will be prompted to press 1 for System
Prompts and then prompted to enter the Prompt Number. Since this procedure is done from a touch tone
phone you will not be able to edit the prompt text. This utility allows the system administrator the ability to
quickly make a last minute or spur of the moment change to a system prompt for holidays or emergency
weather conditions from a remote location.
Professionally Recorded Prompts To convert VOX files recorded professionally or by using some third party
Voice or Multi-Media recording software package to SVM prompts you would use the BUILDPMT.EXE utility.
This is strictly a conversion utility and is not responsible for the quality of the recording. All prompts must be
recorded then saved as an 8Khz 32Kbs Dialogic ADPCM 'VOX' file format in order to use this utility. The
BUILDPMT utility will allow you to embed a text file along with the voice, so it can be seen as well as heard in
SVM 400.
Professionally Recorded Prompts
This section will go over the additional steps and utilities required for converting professionally recorded
prompts to a format usable on SVM.
Choosing a Recording Studio
Like many industries the recording industry undergoes changes, which helps keep them up to date with current
technologies. Today there are many software programs available that allow recording studios accustomed to
using digital technology, to save their recordings in a variety of formats compatible with today's business communications and multi-media equipment.
You must keep in mind that what the engineers hear in the studio is not necessarily how it will sound being
played over a phone. The frequency loss, inherit in telephone transmission, and the combination of the digital
sampling process will alter the sound quality, and in some cases if recorded to 'Hot' it will be over modulated
and distorted, and in other cases depending on the voice talent it will sound weak and/or thin when played over
the telephone. Make sure you and/or your customer(s) choose a Studio that has had experience recording
SVM 400 Technical Manual Page 56
HOME
PAGE
voice prompts for the Telecommunications Industry. If their only experience is Music on Hold, that may not be
sufficient.
Table of
Contents
Studios typically have libraries full of samples that they can give you to try. Take one or two and run the conversions described below and create a test application on SVM 400. Write the application so you can hear the
samples in context with other SVM 400 prompts. This should tell you whether the studio is capable of providing the adequate quality for their customer(s).
Requirements
The studio will need a separate file for every custom prompt recorded. The file will be a {name}.VOX, where
the {name} of the file can only be 8 alpha/numeric characters, because SVM 400 has a DOS based operating
system. For this conversion, it doesn't matter what media or format the studio chooses to record the prompts.
However, the studio must save the file(s) in an 8Khz 32Kbs Dialogic ADPCM 'VOX' file format.
Converting to SVM Prompt Format
To convert the 'VOX' file to a SVM 400 prompt, the utility BUILDPMT.EXE is provided on all SVM 400 installations. The installation program will place BUILDPMT in the DTA directory. You will need to copy that file to the
location where you will perform the conversion. The syntax for BUILDPMT.EXE is as follows:
BUILDPMT /Dname [/Tname] [/I] [/Eflags] /Vname[;name[;name...]]
[name] is the name of a file on disk
[flags] are for setting certain playback attributes and should not be used
Command Line Switches
/D - specifies the destination file name of the converted prompt
/T - specifies an optional text file name for embedding text in a prompt
/I - indicates that the prompt being built should be an indexed prompt
/V - specifies the name of the voice file of the original file
/E - specifies the encoding algorithm to use (8 KHz or 6 KHz, ADPCM, mu-Law, A-Law, etc.)
Because SVM 400 reserves prompt numbers 0000 through 0999 for itself, we suggest you add an easily
remembered number (1000) to the number of your custom prompt. That way, the converted prompt will be fully
editable under SVM 400 and won't conflict with any of the provided system prompts.
Example
To convert studio recording "Hello.VOX" to a SVM 400 custom prompt 2000.PMT, first go into the PMT directory
[C:> cd \pmt ]and create a sub directory called STUDIO [C:\PMT> md studio ]. Change directory to STUDIO
[C:\PMT> cd studio] and copy BUILDPMT.EXE to that directory [C:\PMT\STUDIO> copy c:\dta\buildpmt.exe ].
Assuming Hello.VOX is on a floppy, copy that file to the Studio directory as well [C:\PMT\STUDIO> copy
a:hello.vox ]
To convert the studio recording to a SVM 400 Prompt type the following:
BUILDPMT /D2000.PMT /VHELLO.VOX /E200
This will create a new file (2000.PMT) which will be compatible with SVM 400 using the Dialogic 8KHz ADPCM
algorithm, and leave the original studio VOX file (hello.VOX) unchanged.
After you have run BUILDPMT, you will need to copy 2000.PMT to the PMT directory. Once you have put SVM
400 back online, you will need to assign the new prompt to a Block in SVM 400, so that it can be played to the
caller.
In the example above, when you opened Prompt 2000.PMT in the SVM 400 Voice Studio no text would appear,
so you would have to type it in at that time. Hello.VOX (prompt 2000.PMT) says "Thank you for calling ABC
Company." You could have created an ASCI TXT file prior to running BUILDPMT and embedded the text into
the Prompt at one time.
To convert the studio recording with the embedded text, type the following:
BUILDPMT /D2000.PMT /T2000.TXT /VHELLO.VOX /E200
SVM 400 Technical Manual Page 57
HOME
PAGE
Table of
Contents
PROMPT LISTING
FILE: 0001.PMT
"Thank you for calling."
Usage: System salutation. "Thank you for calling. An operator will be with you in a moment. If you know the extension... (etc.)."
FILE: 0010.PMT
"Sorry, that is not a valid entry. Please try again, or hold for
an operator."
Usage: Optional MENU prompt to indicate invalid entry to
the caller.
FILE: 0002.PMT
"An operator will be with you in a moment."
Usage: System salutation (when an operator is available).
"Thank you for calling. An operator will be with you in a
moment. If you know the extension... (etc.)."
FILE: 0011.PMT
"Please enter your password."
Usage: Used only in a Menu Block to request a Subscriber's
Extension or Mailbox. Also used for Password-Protected
pointers.
FILE: 0003.PMT
"Our office hours are 8 AM to 5 PM, Monday through
Friday."
Usage: System salutation (after hours). "Thank you for calling. Our office hours are 8 AM to 5 PM, Monday through
Friday. If you know the extension... (etc.)."
FILE: 0016.PMT
"Thank you. One moment please."
Usage: Played to a caller prior to initiation of a transfer to an
extension.
FILE: 0004.PMT
"Our office is closed for the holiday."
Usage: System salutation. "Thank you for calling. Our office
is closed for the holiday. If you know the extension... (etc.)."
FILE: 0005.PMT
"Our office is closed due to emergency conditions. We hope
to return to normal operation soon. Some of our employees
may be in."
Usage: System salutation (inclement weather or other emergency conditions). "Thank you for calling. Our office is
closed due to emergency conditions. We hope to return to
normal operations soon. If you know the extension... (etc.)."
FILE: 0006.PMT
"If you know the extension of the person you are calling,
you may enter it now."
Usage: "Thank you for calling. An operator will be with you
in a moment. If you know the extension of the person you
are calling, you may enter it now. To reach the sales department, press 1. For the service department, press 2."
FILE: 0007.PMT
"To reach the sales department, press 2. For the service
department, press 3."
Usage: "Thank you for calling. An operator will be with you
in a moment. If you know the extension of the person you
are calling, you may enter it now. To reach the sales department, press 2. For the service department, press 3."
FILE: 0008.PMT
"To leave a message in our after hours message center,
please stay on the line."
Usage: When an operator is not available and the system is
set up to take messages in a general mailbox. "Thank you
for calling. Our office hours are 8 AM to 5 PM, Monday
through Friday. If you know the extension of the person you
are calling you may enter it now. To leave a message in our
message center, please stay on the line."
FILE: 0009.PMT
"Sorry, that is not a valid entry. Please try again."
Usage: Maybe used in any Block which accepts caller entry.
FILE: 0023.PMT
"Thank you."
Usage: Played to the called party to acknowledge that a
screened call has been rejected or redirected.
FILE: 0040.PMT
For a directory of extensions, press 1.
Usage: Used in a menu block, to tell the caller which digit to
press to access the extension directory.
FILE: 0051.PMT
"Goodbye, and thank you for calling."
Usage: Played to caller prior to the system hanging up.
FILE: 0052.PMT
Subscriber Services. To access your Executary, please enter
your subscriber number.
FILE: 0053.PMT
To access the main menu, press '1'. To return to your
Executary, press the pound key. To exit this call, press the
star key.
FILE: 0054.PMT
"Your call has been directed to the message center".
Usage: Used in a MENU block for non-integrated voice mail
installations to greet the caller. It is typically followed by
instructions to re-enter the called party's extension number.
FILE: 0055.PMT
"An operator will be with you in a moment."
Usage: In a MENU block to inform the caller they will be
connected to a human attendant shortly if no action is
taken.
FILE: 0056.PMT
"To leave a confidential message for the person you are calling, please re-enter the number you called."
Usage: In a MENU block in non-integrated voice mail installations to request the destination mailbox for a public message.
FILE: 0057.PMT
"If you are calling from a rotary phone, please stay on the
line."
Usage: In a MENU block after the opening options to tell
callers that they will be connected to a human operator after
a brief wait.
SVM 400 Technical Manual Page 58
HOME
PAGE
FILE: 0058.PMT
"Please enter the mailbox number for which the message is
intended."
Usage: Menu for subscribers who are transferring a caller
into someone else's mailbox to leave a message.
FILE: 0059.PMT
"To access the main menu, press 1. To end this call, press
the star key."
Usage: Default prompt in menu which follows subscriber
exit from a mailbox or extension menu.
FILE: 0115.PMT
Table of
"Please enter the first few letters of the person's last name. Contents
For the letter 'Q' use the '7' key. For the letter 'Z' use the '9'
key. Please enter the letters now."
Usage: Used in the Directory facility to inform the caller how
to enter a party's name for lookup.
FILE: 0116.PMT
"One moment."
Usage: Optional short prompt to use in an ECLASS or DIAL
block prior to call transfer.
FILE: 0060.PMT
"Please enter the announcement number."
Usage: Default prompt for an audiotex information center.
FILE: 0118.PMT
Press one.
Usage: Used by the System Directory Facility.
FILE: 0061.PMT
"To replay this announcement, press 1."
Usage: Default prompt to offer replay of the announcement.
FILE: 0119.PMT
Press two.
Usage: Used by the System Directory Facility.
FILE: 0062.PMT
No announcements match your entry.
Usage: Used in the Announcement Librarian to inform the
caller that no announcement was found.
FILE: 0120.PMT
Press three.
Usage: Used by the System Directory Facility.
FILE: 0063.PMT
I'm sorry, the message storage unit is full.
Usage: Used in the Announcement Librarian to inform the
administrator that they are unable to record an announcement.
FILE: 0071.PMT
To review, press '1'. To rerecord, press '2'. To confirm, press
'3'. To exit and return to the main menu, press the star key.
FILE: 0101.PMT
"For assistance, please hold. An operator will be with you in
a moment."
Usage: Optional prompt for use in a MENU or SPEAK block.
FILE: 0103.PMT
"Please hold while I connect your call."
FILE: 0109.PMT
For a directory of extensions, press 9.
Usage: Used in a menu block, to tell the caller which digit to
press to access the extension directory.
FILE: 0110.PMT
"I'll transfer you to an operator."
Usage: Optional prompt used prior to transfer to a switchboard attendant in a DIAL or ECLASS block.
FILE: 0111.PMT
"Goodbye."
Usage: Optional hang up prompt for use in a BYE block.
FILE: 0112.PMT
"To leave a confidential message for the person you are calling, please enter the mailbox number now."
Usage: Optional prompt used in a MENU supporting messaging in a non-integrated environment.
FILE: 0114.PMT
"For a directory of mailboxes, press '1'."
Usage: Optional prompt used in a menu to advise a caller
of the availability of directory services.
FILE: 0121.PMT
Press four.
Usage: Used by the System Directory Facility.
FILE: 0122.PMT
Press five.
Usage: Used by the System Directory Facility.
FILE: 0123.PMT
Press six.
Usage: Used by the System Directory Facility.
FILE: 0124.PMT
Press seven.
Usage: Used by the System Directory Facility.
FILE: 0125.PMT
Press eight.
Usage: Used by the System Directory Facility.
FILE: 0126.PMT
"For additional names, press 9."
Usage: When the number of matches, entered by a caller,
exceeds the "Maximum number of matches allowed" value
set in the system directory facility, they will be asked to
press 9 for additional names.
FILE: 0127.PMT
"Enter the first few letters of the party's last name on the
telephone keypad. For the letter 'Q' use the '7' key. For the
letter 'Z' use the '9' key."
Usage: Used by the System Directory Facility.
FILE: 0128.PMT
"No names matching your entry were found."
Usage: Used by the System Directory Facility.
FILE: 0129.PMT
To enter a new name, press '0'.
Usage: Used by the System Directory Facility.
FILE: 0130.PMT
To exit, press the Star key.
Usage: Used by the System Directory Facility.
SVM 400 Technical Manual Page 59
HOME
PAGE
FILE: 0131.PMT
Invalid entry.
Usage: Used by the System Directory Facility.
FILE: 0132.PMT
For...
Usage: Used by the System Directory Facility.
FILE: 0133.PMT
To reach...
Usage: Used by the System Directory Facility.
FILE: 0139.PMT
Enter the first few letters of the party's first name on the telephone keypad. For the letter 'Q' use the '7' key. For the letter 'Z' use the '9' key.
Usage: Used as an alternate prompt for the System
Directory Facility.
FILE: 0200.PMT
"Document number..."
Usage: Played in the Document Librarian prior to announcing a fax document key.
FILE: 0201.PMT
"This document was last revised on..."
Usage: Played in the Document Librarian prior to announcing the last revision date of a fax document.
FILE: 0202.PMT
"This document is currently unavailable."
Usage: Played by the Document Librarian when a fax block
exists but contains no fax document.
FILE: 0203.PMT
"If this selection is correct, press '1'."
Usage: Played in the Document Librarian to describe to the
caller how to confirm a fax document selection.
FILE: 0204.PMT
"If this selection is not correct, press '2'."
Usage: Used in the announcement librarian to explain how
to reject a selected fax document.
FILE: 0205.PMT
"To hear your selection again, press '3'."
Usage: Played by the Document Librarian to explain how to
hear a document selection again.
FILE: 0206.PMT
"To receive the selected fax documents, press '4'."
Usage: Played in the document librarian to explain how to
have requested fax documents delivered.
FILE: 0207.PMT
"To select additional documents, press '5'."
Usage: Played by the Document Librarian to explain how to
select additional fax documents.
FILE: 0208.PMT
"To cancel your selections and access other options, press
the star key.
Usage: Played by the Document Librarian to explain how to
escape from the document selection process.
FILE: 0209.PMT
Table of
"To cancel your selections and to speak with an operator, Contents
press '0'."
Usage: Played by the Document Librarian to explain how to
reach an operator for help.
FILE: 0210.PMT
"If you are calling from your fax machine and would like
your selections faxed to you immediately, press '1'. If you
would like to have your selections faxed to another number,
press '2'."
Usage: Played by the Document Librarian to explain how to
specify the document delivery method.
FILE: 0211.PMT
"Enter the telephone number, including area code, where
you would like your documents delivered. If you make a
mistake, press the star key”.
Usage: Played by the Document Librarian to explain how to
enter a phone number for fax back delivery.
FILE: 0212.PMT
"The telephone number you have entered is..."
Usage: Played by the Document Librarian prior to repeating
the phone number entered for fax back delivery.
FILE: 0213.PMT
"If the telephone number is correct, press '1', otherwise,
press '3'."
Usage: Played by the Document Librarian to ask for confirmation of a telephone number entered for fax back delivery.
FILE: 0214.PMT
"Thank you. The documents you have selected will be delivered shortly. We will make up to 5 attempts to deliver your
selections."
Usage: Played by the Document Library upon completion of
a fax back document selection session.
FILE: 0215.PMT
"Please press the start or manual receive button on your fax
machine."
Usage: Played by the Document Librarian at the end of a
single call fax delivery session.
FILE: 0216.PMT
"We're sorry, but due to technical difficulties, your document
selections cannot be delivered at this time. Please try again
later."
Usage: Played by the Document Librarian in the event of a
system error during the fax retrieval process.
FILE: 0217.PMT
"Invalid entry. Try again."
Usage: Played by the Document Librarian when a caller
makes an invalid entry.
FILE: 0218.PMT
"Please enter your password."
Usage: Played by the Document Librarian to ask the system
administrator to enter their password.
FILE: 0219.PMT
"For voice label administration, press '1'."
Usage: Played by the Document Librarian to ask the administrator to specify voice administration.
SVM 400 Technical Manual Page 60
HOME
PAGE
FILE: 0220.PMT
"To load a new fax document, press '2'."
Usage: Played by the Document Librarian to offer the 'load
a new fax document' option.
FILE: 0311.PMT
To set call blocking, press '3'.
FILE: 0221.PMT
"To discard the fax document currently in memory, press '3'."
Usage: Played by the Document Librarian to instruct the
adminsitrator on how to erase a fax document currently in
the system.
FILE: 0313.PMT
To review saved messages, press '3'.
FILE: 0222.PMT
"To exit, press the star key."
Usage: Played by the Document Librarian explain to the
administrator how to exit fax administration.
FILE: 0315.PMT
FILE: 0223.PMT
"Load the new document into your fax machine and press
the start button."
Usage: Played by the Document Librarian to tell the administrator to start the transmission process.
FILE: 0317.PMT
Call forwarding is canceled.
FILE: 0224.PMT
"The fax document has been received."
Usage: Played by the Document Librarian to confirm that a
fax document has been received and stored.
FILE: 0312.PMT
To cancel call blocking, press '3'.
FILE: 0314.PMT
To group saved messages, press '33'.
...forwarded to...
FILE: 0316.PMT
"Enter the extension to which calls should be forwarded"
FILE: 0318.PMT
...temporarily blocked with...
FILE: 0319.PMT
...indefinitely blocked with...
FILE: 0320.PMT
For the Access Manager, press '4'.
FILE: 0225.PMT
"The fax document has been discarded."
Usage: Played by the Document Librarian to confirm that a
document has been deleted.
FILE: 0321.PMT
Call blocking is canceled.
FILE: 0226.PMT
"I'm sorry, the document storage unit is full."
Usage: Played by the Document Librarian in the event that
the storage system is full during fax administration.
FILE: 0323.PMT
Call screening is canceled.
FILE: 0300.PMT
To listen to new messages, press '1'.
FILE: 0301.PMT
To group new messages, press '11'.
FILE: 0302.PMT
Direct call.
FILE: 0303.PMT
"Enter the telephone number".
FILE: 0304.PMT
For a directory, press the '#' key alone.
FILE: 0305.PMT
Please hold while I dial that number.
FILE: 0306.PMT
When you are finished with the call, press the star key.
FILE: 0307.PMT
Access Manager.
FILE: 0308.PMT
To record and send a message, press '2'.
FILE: 0309.PMT
To forward calls to another extension, press '4'.
FILE: 0310.PMT
To cancel call forwarding, press '4'.
Table of
Contents
FILE: 0322.PMT
Call Screening is set.
FILE: 0324.PMT
For personal greetings, press '5'.
FILE: 0325.PMT
Calais is routing calls from...
FILE: 0326.PMT
...all callers...
FILE: 0327.PMT
...PAN callers and subscribers...
FILE: 0328.PMT
...privileged PAN callers...
FILE: 0329.PMT
...no callers...
FILE: 0330.PMT
...all other callers are...
FILE: 0331.PMT
...all callers are...
FILE: 0332.PMT
"Enter the number of a caller you are taking calls from".
FILE: 0333.PMT
"Enter the next number of a caller you are taking calls from".
FILE: 0334.PMT
When you are finished, press the pound key alone.
FILE: 0335.PMT
...to your designated location.
SVM 400 Technical Manual Page 61
HOME
PAGE
FILE: 0336.PMT
If you are taking all calls, press '1'. If you are taking calls
from PAN callers, press '2'. To limit calls to privileged PAN's
press '3'. If taking calls from a specified list, press '4'. If you
are not taking any calls, press '5'.
FILE: 0337.PMT
...your extension...
FILE: 0338.PMT
"Enter the telephone number where you can be reached".
FILE: 0339.PMT
"For Mailbox Administration, press '6'."
FILE: 0340.PMT
For personal administration, press '7'.
FILE: 0341.PMT
To pause, press '8'.
FILE: 0342.PMT
"For Personal Services, press the pound key."
FILE: 0343.PMT
For additional options, press '0'.
FILE: 0344.PMT
Enter two digits each for the hour and minute.
FILE: 0345.PMT
For AM, press '1'. For PM, press '2'.
FILE: 0346.PMT
For your extension, press the pound key alone.
FILE: 0347.PMT
To exit, press the '*' key.
FILE: 0348.PMT
To place a direct call to the sender, press '5'.
FILE: 0349.PMT
To receive the attached fax document, press '55'.
FILE: 0350.PMT
To forward a copy to someone else, press '6'.
FILE: 0351.PMT
"To review your workload, press '1'."
FILE: 0352.PMT
Until further notice.
FILE: 0353.PMT
To place a direct call, press '5'.
FILE: 0354.PMT
"Personal Services"
FILE: 0355.PMT
To enable auto play of new messages, press '5'.
FILE: 0356.PMT
To disable auto play of new messages, press '5'.
FILE: 0357.PMT
Auto play of new messages is enabled.
FILE: 0358.PMT
Auto play of new messages is disabled.
FILE: 0359.PMT
"To record a reminder, press the pound key."
Table of
Contents
FILE: 0360.PMT
Copy message.
FILE: 0361.PMT
New messages.
FILE: 0362.PMT
Record message
FILE: 0363.PMT
Discarded.
FILE: 0364.PMT
Saved.
FILE: 0365.PMT
Saved messages.
FILE: 0366.PMT
"To go to the previous message, press '11'."
FILE: 0367.PMT
Personal greetings.
FILE: 0368.PMT
This message will be sent to...
FILE: 0369.PMT
Enter your password.
FILE: 0370.PMT
To set message alert options, press '1'.
FILE: 0371.PMT
To enable pager notification, press '1'.
FILE: 0372.PMT
To disable pager notification, press '1'.
FILE: 0373.PMT
To review deleted messages, press '3'.
FILE: 0374.PMT
I'm sorry, the call was not answered.
FILE: 0375.PMT
I'm sorry, the number is busy.
FILE: 0376.PMT
I'm sorry, your call did not go through.
FILE: 0377.PMT
"I'm sorry. That party is not available."
Usage: Played to caller when a screened call is rejected or
when call blocking is set and no target is set for the blocked
pointer. "I'm sorry. That party is not available. To transfer to a
different extension, please enter it now."
FILE: 0378.PMT
To review undelivered messages, press '4'.
FILE: 0379.PMT
To set voice message delivery, press '1'.
FILE: 0380.PMT
"...is holding."
Usage: Used in the ECLASS following the name of the party
holding for a page.
FILE: 0381.PMT
To set fax message delivery, press '2'.
FILE: 0382.PMT
Weekly Schedule.
SVM 400 Technical Manual Page 62
HOME
PAGE
Table of
Contents
FILE: 0383.PMT
All day.
FILE: 0408.PMT
Your blocked greeting is...
FILE: 0384.PMT
To set to all day, press '4'.
FILE: 0409.PMT
To change your phone number, press '1'.
FILE: 0385.PMT
To copy the previous day's setting, press '5'.
FILE: 0410.PMT
The system caller options.
FILE: 0386.PMT
The current setting is...
FILE: 0411.PMT
Enter the options you wish to enable, followed by the pound
key. To enable All Options, press the pound key alone.
FILE: 0387.PMT
To exit, press the star key.
FILE: 0388.PMT
For a list of options, press '0'.
FILE: 0389.PMT
That option is not available.
FILE: 0390.PMT
I could not process your entry.
FILE: 0391.PMT
To accept, press '1'. To change, press '2'.
FILE: 0392.PMT
If this is correct, press the pound key; otherwise...
FILE: 0393.PMT
Start time.
FILE: 0394.PMT
Stop time.
FILE: 0395.PMT
To schedule your availability, press '3'.
FILE: 0396.PMT
To edit your mailbox greeting, press '7'.
FILE: 0397.PMT
To assign your night greeting, press '4'.
FILE: 0398.PMT
To assign your call screening greeting, press '5'.
FILE: 0399.PMT
To edit your personal greetings, press '6'.
FILE: 0400.PMT
Your night greeting is...
FILE: 0401.PMT
Your call screening greeting is...
FILE: 0402.PMT
To assign your no answer greeting, press '1'.
FILE: 0403.PMT
To assign your busy greeting, press '2'.
FILE: 0404.PMT
To assign your blocked greeting, press '3'.
FILE: 0405.PMT
"For private access numbers, press '7'."
FILE: 0406.PMT
Your busy greeting is...
FILE: 0407.PMT
Your no answer greeting is...
FILE: 0412.PMT
How long do you wish calls to be forwarded?
FILE: 0413.PMT
Enter a personal greeting number, '1' through '9'.
FILE: 0414.PMT
To clear the currently assigned greeting, press '0'.
FILE: 0415.PMT
All options enabled.
FILE: 0416.PMT
To edit the greeting, press '2'.
FILE: 0417.PMT
If this is the correct greeting, press '1'.
FILE: 0418.PMT
To select a different greeting, press '3'.
FILE: 0419.PMT
Personal greeting number.
FILE: 0420.PMT
Greeting assigned.
FILE: 0421.PMT
"To stop recording, press '2'."
FILE: 0422.PMT
Subscriber administration.
FILE: 0423.PMT
To change your password, press '1'.
FILE: 0424.PMT
To edit stored telephone numbers, press '2'.
FILE: 0425.PMT
To enable extended prompting, press '4'.
FILE: 0426.PMT
To disable extended prompting, press '4'.
FILE: 0427.PMT
To hear a list of existing numbers, press '9'.
FILE: 0428.PMT
To set call screening, press '5'.
FILE: 0429.PMT
The current password is...
FILE: 0430.PMT
Enter the new password followed by the pound key.
FILE: 0431.PMT
Password set.
FILE: 0432.PMT
To reset the password to the default value, press '1'.
SVM 400 Technical Manual Page 63
HOME
PAGE
Table of
Contents
FILE: 0433.PMT
To record your name, press '2'.
FILE: 0459.PMT
PAN editor.
FILE: 0434.PMT
Subscriber name.
FILE: 0460.PMT
To go to the next PAN, press the ‘#’ key.
FILE: 0435.PMT
Extended prompting enabled.
FILE: 0461.PMT
To set until further notice, press the '#' key.
FILE: 0436.PMT
Extended prompting disabled.
FILE: 0462.PMT
To play the message, press '1'.
FILE: 0437.PMT
To cancel call screening, press '5'.
FILE: 0463.PMT
To edit the interactive message, press '2'.
FILE: 0438.PMT
To edit your access profile, press '2'.
FILE: 0464.PMT
To discard the interactive message, press '3'.
FILE: 0439.PMT
Subscriber editor.
FILE: 0465.PMT
To give this PAN privileged access, press '4'.
FILE: 0440.PMT
This subscriber does not exist.
FILE: 0466.PMT
To take away privileged access, press '4'.
FILE: 0441.PMT
To create an extension, press '1'.
FILE: 0467.PMT
Privilege granted.
FILE: 0442.PMT
To create a mailbox, press '2'.
FILE: 0468.PMT
Privilege revoked.
FILE: 0443.PMT
To create both, press '3'.
FILE: 0469.PMT
To make the interactive message permanent, press '6'.
FILE: 0444.PMT
To delete this subscriber, press '4'.
FILE: 0470.PMT
If you wish the interactive message to be automatically
deleted after it plays to the PAN caller, press '6'.
FILE: 0445.PMT
Subscriber deleted.
FILE: 0446.PMT
To edit the subscriber, press '5'.
FILE: 0447.PMT
Subscriber created.
FILE: 0448.PMT
"Enter a subscriber number".
FILE: 0449.PMT
Private Access Numbers.
FILE: 0450.PMT
Enter the PAN Id. number followed by the pound key.
FILE: 0451.PMT
No recorded name exists.
FILE: 0452.PMT
A privileged caller.
FILE: 0453.PMT
No interactive message exists.
FILE: 0454.PMT
The interactive message is temporary.
FILE: 0455.PMT
The interactive message is permanent.
FILE: 0456.PMT
Your phone number is...
FILE: 0457.PMT
Call blocking is set.
FILE: 0458.PMT
End of PAN list.
FILE: 0471.PMT
To edit stored telephone numbers, press '7'.
FILE: 0472.PMT
Stored telephone numbers.
FILE: 0473.PMT
Enter the stored telephone number position, 1 through 5.
FILE: 0474.PMT
The interactive message was last updated on...
FILE: 0475.PMT
No PAN records are available.
FILE: 0476.PMT
Your message was last played on...
FILE: 0477.PMT
To review statistics, press '0' '0'.
FILE: 0478.PMT
To discard this entire record, press '9'.
FILE: 0479.PMT
For immediate delivery, press the '#' key.
FILE: 0480.PMT
How long do you wish this number to be your designated
location.
FILE: 0481.PMT
How long do you wish calls to be blocked.
FILE: 0482.PMT
...press the pound key.
FILE: 0483.PMT
Enter two digits each for the month and day.
SVM 400 Technical Manual Page 64
HOME
PAGE
FILE: 0484.PMT
To set call blocking, press '1'.
FILE: 0508.PMT
"Enter the sender's number".
FILE: 0485_SRD.PMT
Executary.
FILE: 0509.PMT
"To create a reminder, press '#' '#'."
FILE: 0486.PMT
For pager notification, press '2'.
FILE: 0510.PMT
For urgent messages, press '1'.
FILE: 0487.PMT
To schedule pager notification, press '2'.
FILE: 0511.PMT
For callbacks, press '2'.
FILE: 0488.PMT
To clear the current setting, press '3'.
FILE: 0512.PMT
For reminders, press '3'.
FILE: 0489.PMT
Fax deliver is set.
FILE: 0513.PMT
For messages from a specific sender, press '9'.
FILE: 0490.PMT
Fax deliver is not set.
FILE: 0514.PMT
For private messages, press '4'.
FILE: 0491.PMT
The new setting is...
FILE: 0515.PMT
End of recording.
FILE: 0492.PMT
To enable fax delivery, press '1'.
FILE: 0516.PMT
End of list.
FILE: 0493.PMT
Fax document attached.
FILE: 0517.PMT
Your message was received by...
FILE: 0494.PMT
No fax document is attached.
FILE: 0518.PMT
This message is confidential and cannot be forwarded.
FILE: 0495.PMT
No message is recorded.
FILE: 0519.PMT
For the end of the current business day, press '2'.
FILE: 0496.PMT
For fax messages, press '5'.
FILE: 0520.PMT
This message was forwarded by...
FILE: 0497.PMT
Mailbox greeting.
FILE: 0521.PMT
There is no return address.
FILE: 0498.PMT
If you are calling from your fax machine and would like to
receive the fax documents immediately, press '1'. To deliver
the documents to another number, press '2'.
FILE: 0522.PMT
Reply to sender.
FILE: 0499.PMT
For the current document, press '1'. To receive all documents, press '2'.
FILE: 0500.PMT
Access profile.
FILE: 0501.PMT
To hear your access profile, press the '#' key.
FILE: 0502.PMT
For special scheduling features, press the '#' key.
FILE: 0503.PMT
For the next few hours, press '1'.
FILE: 0504.PMT
Urgent.
FILE: 0505.PMT
Certified.
FILE: 0506.PMT
Confidential.
FILE: 0507.PMT
Callback requested.
Table of
Contents
FILE: 0523.PMT
Forward Message.
FILE: 0524.PMT
For the beginning of the next business day, press '3'.
FILE: 0525.PMT
You can now dispose of the original.
FILE: 0526.PMT
For a coming day of the week, press '4'.
FILE: 0527.PMT
Enter the number of hours, 1 through 9.
FILE: 0528.PMT
Enter the day of week. Monday is day 1.
FILE: 0529.PMT
"Enter the recipient's number".
FILE: 0530.PMT
Delivery options.
FILE: 0531.PMT
For urgent delivery, press '1'.
FILE: 0532.PMT
To cancel urgent delivery, press '1'.
SVM 400 Technical Manual Page 65
HOME
PAGE
Table of
Contents
FILE: 0533.PMT
To request a return receipt, press '2'.
FILE: 0558.PMT
Mailbox Administration.
FILE: 0534.PMT
To cancel return receipt, press '2'.
FILE: 0559.PMT
To hear a list of messages, press the ‘#’ key.
FILE: 0535.PMT
To request a call back, press '3'.
FILE: 0560.PMT
Imperative.
FILE: 0536.PMT
To cancel your callback request, press '3'.
FILE: 0561.PMT
...is in your mailbox.
FILE: 0537.PMT
For private delivery, press '4'.
FILE: 0562.PMT
To have the caller transferred to your location, press '1' and
hang up. Otherwise, press '2'.
FILE: 0538.PMT
To cancel private delivery, press '4'.
FILE: 0539.PMT
To cancel imperative delivery, press '6'.
FILE: 0540.PMT
To enable message alert, press '1'.
FILE: 0541.PMT
To modify call blocking, press '1'.
FILE: 0542.PMT
Message alert is set.
FILE: 0543.PMT
Message alert is not set.
FILE: 0544.PMT
The phone number is...
FILE: 0545.PMT
...blocked with...
FILE: 0546.PMT
When would you like this message to be deliverd.
FILE: 0547.PMT
To enable 'reply required' press '5'.
FILE: 0548.PMT
To cancel 'reply required' press '5'.
FILE: 0549.PMT
To enable imperative delivery, press '6'.
FILE: 0550.PMT
Reminder.
FILE: 0551.PMT
This reminder has been sent.
FILE: 0552.PMT
To add a contact number, press '1'; otherwise, press '2'.
FILE: 0553.PMT
Message hook.
FILE: 0554.PMT
No undelivered message was found.
FILE: 0555.PMT
Reply required.
FILE: 0556.PMT
Pager notification is set.
FILE: 0557.PMT
Pager notification is not set.
FILE: 0563.PMT
To enable 'Find Me', press '6'.
FILE: 0564.PMT
To disable 'Find Me', press '6'.
FILE: 0565.PMT
'Find Me' is enabled.
FILE: 0566.PMT
'Find Me' is disabled.
FILE: 0567.PMT
To retrieve this message, press '2'.
FILE: 0568.PMT
No matching recordings were found.
FILE: 0569.PMT
New messages have arrived.
FILE: 0570.PMT
This message has been retrieved and placed in your new
message queue.
FILE: 0571.PMT
"To enable auto-play of message information, press '6'."
FILE: 0572.PMT
"To disable auto-play of message information, press '6'."
FILE: 0573.PMT
"Auto-play of message information is enabled."
FILE: 0574.PMT
Broadcast message.
FILE: 0575.PMT
"Auto-play of message information is disabled."
FILE: 0576.PMT
No greeting is recorded.
FILE: 0577.PMT
"Personal Administration"
FILE: 0578.PMT
"To send a broadcast message, press '9'."
FILE: 0579.PMT
"To send a broadcast message, press '9'."
FILE: 0580.PMT
Quick Memo.
FILE: 0581.PMT
"...followed by the pound key."
FILE: 0582.PMT
"To create a Follow Up, press '1'."
SVM 400 Technical Manual Page 66
HOME
PAGE
Table of
Contents
FILE: 0583.PMT
"To create a Commitment, press '2'."
FILE: 0607.PMT
"For all, press '3'."
FILE: 0584.PMT
"To create a Task, press '3'."
FILE: 0608.PMT
"To review the greeting, press '4'."
FILE: 0585.PMT
"To review Follow Up reminders, press '1'."
FILE: 0609.PMT
"...for all messages."
FILE: 0586.PMT
"To review Commitment reminders, press '2'."
FILE: 0610.PMT
"...for urgent messages only."
FILE: 0587.PMT
"Sorry. The message storage unit is full."
Usage: Played when a caller has chosen to record something when the disk is full.
FILE: 0611.PMT
"To select all messages, press '3'."
FILE: 0588.PMT
"To review Task reminders, press '3'."
FILE: 0613.PMT
"To change the phone number, press '4'."
FILE: 0589.PMT
Message sent.
FILE: 0614.PMT
To schedule Voice Message Delivery, press '2'.
FILE: 0590.PMT
To play, press '1'.
FILE: 0615.PMT
"To schedule fax delivery, press '2'."
FILE: 0591.PMT
To save, press '2'.
FILE: 0616.PMT
"To disable pager notification, press '1'."
FILE: 0592.PMT
"To rewind, press '7'."
FILE: 0617.PMT
"To disable message alert, press '1'."
FILE: 0593.PMT
"To pause or continue, press '8'."
FILE: 0618.PMT
"To disable fax delivery, press '1'."
FILE: 0594.PMT
"To fast forward press '9'."
FILE: 0619.PMT
"To enable pager notification, press '1'."
FILE: 0595.PMT
"To skip this message, press the pound key."
FILE: 0620.PMT
"For a specific date and time, press '5'."
FILE: 0596.PMT
"For message information, press '00'."
FILE: 0621.PMT
Call forwarding is set.
FILE: 0597.PMT
"To review all reminders, press '4'."
FILE: 0622.PMT
"To set Night Intercept, press '7'."
FILE: 0598.PMT
If you are finished, press the pound key.
FILE: 0623.PMT
"To cancel Night Intercept, press '7'."
FILE: 0599.PMT
"To reply to the message sender, press '4'."
FILE: 0624.PMT
"Night Intercept is set."
FILE: 0600.PMT
"Thank you. The documents you have selected will be delivered shortly."
FILE: 0625.PMT
"Night Intercept is cancelled."
FILE: 0601.PMT
"Please press the start or manual receive button on your fax
machine."
FILE: 0602.PMT
"Select the kind of Follow Ups you wish to review."
FILE: 0603.PMT
"Select the kind of Commitments you wish to review."
FILE: 0604.PMT
"Select the kind of Tasks you wish to review."
FILE: 0605.PMT
"For active only, press '1'."
FILE: 0606.PMT
"For pending only, press '2'.
FILE: 0612.PMT
"To select urgent messages only, press '3'."
FILE: 0700.PMT
"Who's calling please?"
FILE: 0701.PMT
"One moment please."
FILE: 0702.PMT
"Please hold while I connect your call."
FILE: 0703.PMT
"Transfering a call."
Usage: Played to called party when call is answered.
FILE: 0704.PMT
"This call is forwarded from..."
Usage: Played to the forwarded party upon presentation of
a remote forwarded call. "This call is forwarded from...
extension 123."
SVM 400 Technical Manual Page 67
HOME
PAGE
FILE: 0705.PMT
"This call is for..."
Usage: Used in the ECLASS just prior to announcing the
called party name to the called party in a confirmed transfer.
FILE: 0706.PMT
"This call is from..."
Usage: Played to called party before the caller's recorded
name if call screening is set. “This call is from... John Doe.
To accept this call, press 1. To redirect the call, press 2. To
reject the call, press 3 and hang-up immediately."
FILE: 0707.PMT
"...calling for..."
FILE: 0708.PMT
To accept the call, press '1'.
FILE: 0709.PMT
To redirect the call, press '2'.
FILE: 0710.PMT
To reject the call, press '3'.
FILE: 0711.PMT
To record the conversation, press '4'.
FILE: 0712.PMT
"Enter the extension to which this call should be redirected."
Usage: Played to the called party who has chosen to redirect a screened call when call screening is set.
FILE: 0713.PMT
"Thank you. Please hang up now."
Usage: Played to the called party to acknowledge that a
screened call has been rejected or redirected.
FILE: 0714.PMT
I'm sorry, the call was not answered.
FILE: 0715.PMT
I'm sorry, the number is busy.
FILE: 0716.PMT
"I'm sorry. That extension is still busy."
Usage: Played to a caller in the hold queue if the called
party's extension is still busy. "I'm sorry. That extension is
still busy. To leave a message, press 1. To continue holding,
press 2. To transfer to a different extension, please enter it
now."
FILE: 0717.PMT
"I'm sorry. That party is not available."
Usage: Played to caller when a screened call is rejected or
when call blocking is set and no target is set for the blocked
pointer.
"I'm sorry. That party is not available. To transfer to a different extension, please enter it now."
FILE: 0718.PMT
I'm sorry, your call did not go through.
FILE: 0719.PMT
To try another extension, enter it now.
FILE: 0720.PMT
"To leave message, press 1."
Usage: Option given to a caller if a call transfer is not successful. "I'm sorry. That extension was not answered. To
leave a message press 1. To transfer to a different EXT,
Table of
please enter it now."
FILE: 0721.PMT
Contents
"If you would like to hold, press 2."
Usage: If the extension is authorized, option given caller to
hold. "I'm sorry. That extension is busy. To leave a message,
press 1. If you would like to hold, press 2. To transfer to a
different extension, please enter it now."
FILE: 0722.PMT
"To continue holding, press 2."
Usage: Option given a caller in the hold queue if the extension is busy on subsequent attempts to transfer. "I'm sorry.
That extension is busy. To leave a message press 1. To continue holding, press 2. To transfer to a different extension,
please enter it now."
FILE: 0723.PMT
"To have your party paged, press '3'."
Usage: Used in the ECLASS to offer the page option to a
caller.
FILE: 0724.PMT
"For additional options, press 4."
Usage: Played to caller if extension is not answered. "I'm
sorry. That extension was not answered. To leave a message, press 1. To have your party paged, press 3. For additional options, press 4.
FILE: 0725.PMT
For assistance, press '0'.
FILE: 0726.PMT
To exit, press the '*' key.
FILE: 0727.PMT
"If you would like to hold, please stay on the line."
FILE: 0728.PMT
"To continue holding, please stay on the line."
Usage: Used in the ECLASS to inform the caller that they
can hold for a busy extension by doing nothing.
FILE: 0729.PMT
"Please hold while I page your party."
Usage: Used in the ECLASS to inform the caller that a page
is being carried out.
FILE: 0730.PMT
"I'm sorry, your party is already being paged. Please make
another selection."
Usage: Played by the ECLASS if paging is selected from a
custom voice script to inform the caller that the overhead
pager is in use.
FILE: 0731.PMT
"There is a call for"
Usage: Used in the ECLASS to announce an overhead
page.
FILE: 0732.PMT
"...is holding."
Usage: Used in the ECLASS following the name of the party
holding for a page.
FILE: 0733.PMT
"To pick up, dial..."
Usage: Used in the ECLASS to give instructions on how to
pick up a parked caller during a page.
SVM 400 Technical Manual Page 68
HOME
PAGE
FILE: 0734.PMT
"I'm sorry, your page was not answered."
Usage: Played by the ECLASS to inform the caller that the
called party did not respond to their page.
FILE: 0735.PMT
"You are now the..."
Usage: If announce hold position is authorized, played to
caller each time the caller chooses to hold. Updates position
while caller is in queue. "You are now the...fifth caller."
FILE: 0736.PMT
"The estimated hold time is..."
Usage: Played in the ECLASS prior to announcing the
approximate hold time for a busy extension.
FILE: 0737.PMT
"I'll try that extension again in a moment."
FILE: 0738.PMT
Invalid entry, please try again.
FILE: 0739.PMT
Transferring to...
FILE: 0740.PMT
...Forwarding to...
FILE: 0741.PMT
"To record a real time greeting, press '5'."
FILE: 0742.PMT
"Please hold while I locate your party."
FILE: 0743.PMT
"Thank you."
Usage: Played to the called party to acknowledge that a
screened call has been rejected or redirected.
FILE: 0760.PMT
Please begin speaking at the tone. To stop recording, press
'2' or simply hang up.
Usage: Used in the system wide record facility for a public
caller leaving a message.
FILE: 0761.PMT
"Sorry. The message storage unit is full."
Usage: Played when a caller has chosen to record something when the disk is full.
FILE: 0762.PMT
"Message discarded."
Usage: Confirms that a message has been erased.
FILE: 0763.PMT
Message sent.
FILE: 0764.PMT
To send your message with normal delivery, press '1'.
FILE: 0765.PMT
To mark your message urgent, press '2'.
FILE: 0766.PMT
To request a callback, press '3'.
FILE: 0767.PMT
"Enter the telephone number where you can be reached"
FILE: 0768.PMT
Invalid entry. Try again.
Usage: System Administration Prompt. Do not edit.
FILE: 0769.PMT
...is now available.
Table of
Contents
FILE: 0770.PMT
"Please hold while I connect your call."
FILE: 0771.PMT
Recording.
Usage: Used in the system wide record facility to signal the
start of a recording.
FILE: 0900.PMT
<<SPECIAL "EXECUTARY" INDEXED PROMPT>>
Usage: This is a special indexed prompt containing digits,
days of the week, etc. See end of this chapter.
FILE: 0901.PMT
System administration menu. To edit system prompts, press
1. To set system date and time, press 2. To manually set the
mode of one or all ports, press 3. To exit from system
administration, press the star key.
Usage: System Administration Prompt. Do not edit.
FILE: 0902.PMT
Enter the prompt number.
Usage: System Administration Prompt. Do not edit.
FILE: 0903.PMT
Invalid entry. Try again.
Usage: System Administration Prompt. Do not edit.
FILE: 0906.PMT
File saved.
Usage: System Administration Prompt. Do not edit.
FILE: 0907.PMT
File discarded.
Usage: System Administration Prompt. Do not edit.
FILE: 0909.PMT
Enter 2 digits each for the month, day and year, or to exit,
press the star key.
Usage: System Administration Prompt. Do not edit.
FILE: 0910.PMT
Enter 2 digits each for the hour and minute, or to exit, press
the star key.
Usage: System Administration Prompt. Do not edit.
FILE: 0911.PMT
Enter the port number for the new mode, or to change the
mode on all ports, enter 0.
Usage: System Administration Prompt. Do not edit.
FILE: 0912.PMT
Enter the new mode number, or for automatic scheduling,
enter 0.
Usage: System Administration Prompt. Do not edit.
FILE: 0915.PMT
Disk error!
Usage: System Administration Prompt. Do not edit.
FILE: 0916.PMT
System error!
Usage: System Administration Prompt. Do not edit.
SVM 400 Technical Manual Page 69
HOME
PAGE
FILE: 0917.PMT
Enter your password.
FILE: 0918.PMT
"There is a voice message for..."
Usage: Played when a message alert out call is answered.
"There is a voice message for... Pat Smith. Please enter the
password."
FILE: 0921.PMT
Goodbye.
Usage: System Administration Prompt. Do not edit.
FILE: 0923.PMT
To begin, press any key.
Usage: System Administration Prompt. Do not edit.
FILE: 0924.PMT
Recordings cannot be made at this time. Try again later.
Usage: Used in the system wide record facility to denote an
unrecoverable error.
FILE: 0925.PMT
Recording.
Usage: Used in the system wide record facility to signal the
start of a recording.
FILE: 0926.PMT
To review, press '1'.
Usage: Used in the system wide record facility to tell a caller
how to review their recording.
FILE: 0927.PMT
To record, press '2'. To stop, press '2' again.
Usage: Used in the system wide record facility to tell a caller
how to access the record operation.
FILE: 0929.PMT
To discard, press '3'.
Usage: Used in the system wide record facility to tell a caller
how to access the delete operation.
FILE: 0931.PMT
When you are satisfied with the recording, press the pound
key.
Usage: Used in the system wide record facility to tell a caller
how to exit the record facility and save changes to the
recording.
FILE: 0932.PMT
For additional options, press '0'.
Usage: Used in the system wide record facility to tell a caller
how to access context sensitive help.
FILE: 0933.PMT
To cancel, press the star key.
Usage: Used in the system wide record facility to tell a caller
how to exit the record facility and abandon changes to the
recording.
FILE: 0934.PMT
No recording exists.
Usage: Used in the system wide record facility to inform the
caller they attempted an operation like review on an empty
recording.
FILE: 0935.PMT
Table of
End of recording.
Contents
Usage: Used in the system wide record facility to inform the
caller when the end of the recording has been reached.
FILE: 0936.PMT
Discarded.
Usage: Used in the system wide record facility to confirm
that a recording has been deleted.
FILE: 0938.PMT
Playback paused.
Usage: Used in the system wide record facility to inform the
caller they have entered pause mode during recording playback.
FILE: 0939.PMT
Recording paused.
Usage: Used in the system wide record facility to inform the
caller they have entered pause mode during the record
operation.
FILE: 0940.PMT
"To continue, press '8'."
FILE: 0942.PMT
"To fast forward, press '9'."
FILE: 0943.PMT
"To rewind, press '7'."
FILE: 0944.PMT
"To pause or continue, press '8'."
FILE: 0946.PMT
To trim the front, press '1'. To trim the back, press '2'. When
you are finished, press the ‘#’ key.
Usage: Used in the system wide record facility to tell an
administrator.
FILE: 0948.PMT
This is a network message. Please press ‘1’.
FILE: 0951.PMT
"The fax document has been received."
Usage: Played by the Document Librarian to confirm that a
fax document has been received and stored.
FILE: 0952.PMT
"To append to the recording, press '3'."
FILE: 0953.PMT
"To set message attributes, press '4'."
FILE: 0954.PMT
"To schedule delivery, press '5'."
FILE: 0955.PMT
"To send a copy to someone else, press '6'."
FILE: 0956.PMT
"To create a reminder, press '66'."
FILE: 0957.PMT
"To change playback volume, press '77'."
FILE: 0958.PMT
"To change playback speed, press '9''9'."
FILE: 0959.PMT
"To continue recording, press '2'."
SVM 400 Technical Manual Page 70
HOME
PAGE
Table of
Contents
FILE: 0960.PMT
"To discard and re-record, press '3'."
FILE: 0967.PMT
Directory name set.
FILE: 0961.PMT
"To record an introduction, press '2'."
FILE: 0968.PMT
Enter your last name followed by the ‘#’ key. For the letter
'Q' use the '7' key. For the letter 'Z' use the '9' key.
FILE: 0962.PMT
"When you are finished, press the '#' key."
FILE: 0963.PMT
"Paused."
FILE: 0964.PMT
System administration menu. To edit system prompts, press
1. For subscriber administration, press '2'. To manually set
the mode, press ‘3’. To exit from system administration,
press the star key.
FILE: 0965.PMT
To reset the password to the default value, press ‘5’.
FILE: 0969.PMT
Enter your first name followed by the ‘#’ key. For the letter
'Q' use the '7' key. For the letter 'Z' use the '9' key.
FILE: 0970.PMT
Enter your name followed by the ‘#’ key. For the letter 'Q'
use the '7' key. For the letter 'Z' use the '9' key.
FILE: 0971.PMT
The number you have entered is.
FILE: 0972.PMT
The current directory name is.
FILE: 0966.PMT
To enter your directory name, press ‘3’.
SVM 400 Technical Manual Page 71
HOME
PAGE
Table of
Contents
INDEX PROMPTS
0
1
2
3
4
5
6
7
8
9
10
11
12
13
14
15
16
17
18
19
20
21
22
23
24
25
26
27
28
29
30
31
32
33
34
35
36
37
38
39
40
41
42
43
44
45
46
47
48
49
50
"ZERO"
"ONE"
"TWO"
"THREE"
"FOUR"
"FIVE"
"SIX"
"SEVEN"
"EIGHT"
"NINE"
"TEN"
"ELEVEN"
"TWELVE"
"THIRTEEN"
"FOURTEEN"
"FIFTEEN"
"SIXTEEN"
"SEVENTEEN"
"EIGHTEEN"
"NINETEEN"
"TWENTY"
"THIRTY"
"FORTY"
"FIFTY"
"SIXTY"
"SEVENTY"
"EIGHTY"
"NINETY"
"DATE"
"TIME"
"AM"
"PM"
"SUNDAY"
"MONDAY"
"TUESDAY"
"WEDNESDAY"
"THURSDAY"
"FRIDAY"
"SATURDAY"
"NOT SET"
"PAUSE"
"WAIT FOR DIAL TONE"
"WAIT FOR ANSWER"
"IMMEDIATE"
"STAR"
"POUND"
"MAILBOX"
"MESSAGE"
"MESSAGES"
"EXTENSION"
"OH"
51
52
53
54
55
56
57
58
59
60
61
62
63
64
65
66
67
68
69
70
71
72
73
74
75
76
77
78
79
80
81
82
83
84
85
86
87
88
89
90
91
92
93
94
95
96
97
98
99
100
101
"NO"
"A PUBLIC CALLER"
"CALLER"
"NEXT"
"FIRST"
"SECOND"
"THIRD"
"FOURTH"
"FIFTH"
"SIXTH"
"SEVENTH"
"EIGHTH"
"NINTH"
"TENTH"
"ELEVENTH"
"TWELVTH"
"THIRTEENTH"
"FOURTEENTH"
"FIFTEENTH"
"SIXTEENTH"
"SEVENTEENTH"
"EIGHTEENTH"
"NINETEENTH"
"TWENTIETH"
"THIRTIETH"
"CALLER IS"
"CALLERS ARE"
"YOU HAVE"
"NEW MESSAGES"
"SAVED MESSAGES"
"NEW MESSAGE"
"SAVED MESSAGE"
"SECOND"
"SECONDS"
"MINUTE"
"MINUTES"
"OPTIONS"
"JANUARY"
"FEBRUARY"
"MARCH"
"APRIL"
"MAY"
"JUNE"
"JULY"
"AUGUST"
"SEPTEMBER"
"OCTOBER"
"NOVEMBER"
"DECEMBER"
"HUNDRED"
"THOUSAND"
102
103
104
105
106
107
108
109
110
111
112
113
114
115
116
117
118
119
120
121
122
123
124
125
126
127
128
129
130
131
132
133
134
135
136
"MILLION"
"BILLION"
"HOURS"
"HOUR"
"AND"
"TELEPHONE NUMBER"
"DELETED MESSAGE"
"DELETED MESSAGES"
"UNDELIVERED MESSAGE"
"UNDELIVERED MESSAGES"
"URGENT MESSAGE"
"URGENT MESSAGES"
"CALLBACK MESSAGE"
"CALLBACK MESSAGES"
"REMINDER"
"REMINDERS"
"PRIVATE MESSAGE"
"PRIVATE MESSAGES"
"PRIMARY"
"NUMBER"
"TO"
"UNTIL"
"FAX MESSAGE"
"FAX MESSAGES"
"CURRENTLY HOLDING"
"FOLLOW UP"
"FOLLOW UPS"
"COMMITMENT"
"COMMITMENTS"
"TASK"
"TASKS"
"ACTIVE"
"PENDING"
"SENT BY"
"FORWARDED BY"
SVM 400 Technical Manual Page 72
HOME
PAGE
Appendix C
Table of
Contents
Contact Information
Samsung Telecommunications America
2700 NW 87th Avenue
Miami, FL 33172
Telephone: (305) 592-2900
Website: www.samsungusa.com
Technical Support
Telephone: 1-800-876-4782
SVM 400 Technical Manual Page 73