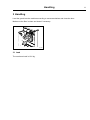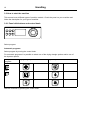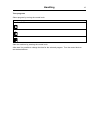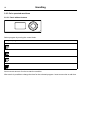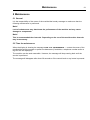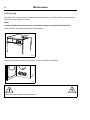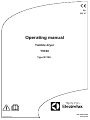
1
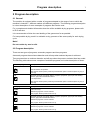
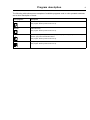
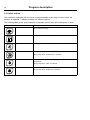
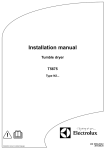
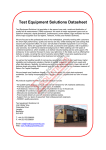
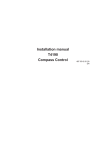
EN
GB, IE
Operating manual
Tumble dryer
T5190
Type N1190..
Original instructions
438 9096-20/EN
2013.03.08
Contents
Contents
1 Safety Precautions ............................................................................................................. 5
1.1 Symbols...................................................................................................................... 6
2 Program description ........................................................................................................... 7
2.1 General....................................................................................................................... 7
2.2 Program description ................................................................................................... 7
2.3 Option buttons ............................................................................................................ 10
3 Handling ............................................................................................................................. 11
3.1 Load............................................................................................................................ 11
3.2 How to start the machine............................................................................................ 12
3.2.1 Panel with buttons and control knob ................................................................... 12
3.2.2 Panel without buttons ......................................................................................... 14
3.2.3 Coin operated machines ..................................................................................... 16
3.3 Additional functions .................................................................................................... 18
3.4 When program has ended .......................................................................................... 19
4 Error codes......................................................................................................................... 20
5 Maintenance....................................................................................................................... 21
5.1 General....................................................................................................................... 21
5.2 Time for maintenance ................................................................................................. 21
5.3 Every day.................................................................................................................... 22
5.4 Fresh air intake and fan motor.................................................................................... 23
5.5 Machines with residual moisture control (RMC) ......................................................... 23
5.6 Maintenance to be carried out by qualified service personnel.................................... 23
The manufacturer reserves the right to make changes to design and component specifications.
Safety Precautions
1 Safety Precautions
This appliance can be used by children aged from 8 years and above and persons with reduced physical,
sensory or mental capabilities or lack of experience and knowledge if they have been given supervision or
instruction concerning use of the appliance in a safe way and understand the hazards involved. Children
shall not play with the appliance. Cleaning and user maintenance shall not be made by children without
supervision.
Children of less than 3 years should be kept away unless continuously supervised.
The machine is not to be used if industrial chemicals have been used for cleaning.
Do not dry unwashed items in the machine.
Items that have been soiled with substances such as cooking oil, acetone, alcohol, petrol, kerosene, spot
removers, turpentine, waxes and wax removers should be washed in hot water with an extra amount
of detergent before being dried in the machine.
Items such as foam rubber (latex foam), shower caps, waterproof textiles, rubber backed articles and
clothes or pillows fitted with foam rubber pads should not be dried in the machine.
Fabric softeners or similar products should be used as specified by the fabric softener instructions.
The final part of a drying cycle occurs without heat (cool down cycle) to ensure that the items are left at a
temperature that ensures that the items will not be damaged.
Remove all objects from pockets such as lighters and matches.
WARNING. Never stop the machine before the end of the drying cycle unless all items are quickly removed
and spread out so that the heat is dissipated.
Adequate ventilation has to be provided to avoid the back flow of gases into the room for appliances
burning other fuels, including open fires.
Exhaust air must not be discharged into a flue which is used for exhausting fumes from appliances burning
gas or other fuels.
The machine must not be installed behind a lockable door, a sliding door or a door with a hinge on the
opposite side to that of the machine.
If the machine has a lint trap this has to be cleaned frequently.
The lint must not be accumulated around the machine.
DO NOT MODIFY THIS APPLIANCE.
All external equipment which is connected to the machine must be CE/EMC-approved and connected using
an approved shielded cable.
All external equipment must be connected according to the instructions in the installation manual.
In order to prevent damage to the electronics (and other parts) that may occur as the result of condensation,
the machine should be placed in room temperature for 24 hours before being used for the first time.
Servicing shall be carried out only by authorized personnel.
Only authorized spare parts shall be used.
When performing service or replacing parts, the power must be disconnected.
5
Safety Precautions
6
Gas heated tumble dryer:
Before installation, check that the local distribution conditions, nature of gas and pressure and the
adjustment of the appliance are compatible.
The machine is not to be installed in rooms containing cleaning machines with perchloroethylene,
TRICHLOROETHYLENE or CHLOROFLUOROCONTAINING HYDROCARBONS as cleaning agents.
If you can smell gas:
• Do not switch on any equipment
• Do not use electrical switches
• Do not use telephones in the building
• Evacuate the room, building or area
• Contact the person responsible for the machine
1.1 Symbols
Caution
Caution, hot surface
Read the instructions before using the machine
Program description
7
2 Program description
2.1 General
The machine is equipped with a number of programs adapted to the range of use to which the
machine is intended — different markets use different programs. The following program description
is a short description of some examples of programs that can be used.
For a complete and detailed information about the all the available drying programs, please refer
to ELS web-site.
It is recommendet to follow the care labelling of the garment as far as possible.
For best possible drying result it is advisable to dry garments of the same quality for each drying
cycle.
Note!
Do not tumble dry wool or silk.
2.2 Program description
There are two types of programs, automatic programs and time programs.
Automatic programs has moisture detection and will stop when selected dryness is achieved.
Time programs has no moisture detection and will stop when the preset or selected time has ended.
The following table shows some examples of available programs and a short description of those:
Automatic programs
Description
NORMAL
Cotton and terry.
Normal/medium temperature.
The program will stop when preset dryness/selected option is achieved (Extra dry, Dry or
Iron dry).
LOW
Synthetic (example of synthetic fabrics: polyester, polyamide, polyacrylic and elastan),
viscose, polycotton and delicate fabrics.
Low temperature.
The program will stop when preset dryness/selected option is achieved (Extra dry, Dry or
Iron dry).
Time programs
Description
NORMAL
Cotton and terry.
Different drying times can be selected.
The program will stop when the time is up.
LOW
Synthetic (example of synthetic fabrics: polyester, polyamide, polyacrylic and elastan),
viscose, polycotton and delicate fabrics.
Different drying times can be selected.
The program will stop when the time is up.
NO HEATING
Airing bedspreads, duvets and bedclothes.
Different drying times can be selected.
The program will stop when the time is up.
Program description
8
The following table shows some examples of different programs that are used for special markets
such as hospitals, restaurants, camping sites etc. and a short description of those:
Automatic programs
Description
NORMAL
EXTRA DRY
Denim and terry.
LOW
EXTRA DRY
Viscose and polycotton.
NORMAL
DRY
Cotton and terry.
LOW
DRY
Synthetic (example of synthetic fabrics: polyester, polyamide, polyacrylic and elastan),
viscose, polycotton and delicate fabrics.
The program will stop when set dryness is achieved.
The program will stop when set dryness is achieved.
The program will stop when set dryness is achieved.
The program will stop when set dryness is achieved.
NORMAL
IRON DRY
Cotton.
LOW
IRON DRY
Synthetic (example of synthetic fabrics: polyester, polyamide, polyacrylic and elastan),
viscose, polycotton and delicate fabrics.
The program will stop when set dryness is achieved.
The program will stop when set dryness is achieved.
Time programs
Description
NORMAL
Cotton and terry.
Different drying times can be selected.
The program will stop when the time is up.
LOW
Synthetic (example of synthetic fabrics: polyester, polyamide, polyacrylic and elastan),
viscose, polycotton and delicate fabrics.
Different drying times can be selected.
The program will stop when the time is up.
NO HEATING
Airing bedspreads, duvets and bedclothes.
Different drying times can be selected.
The program will stop when the time is up.
Program description
The following table shows some examples of available programs used on coin operated machines
and a short description of those:
Time programs
Description
HIGH
Cotton and terry.
The program will stop when the time is up.
MEDIUM
Cotton and terry.
The program will stop when the time is up.
LOW
Synthetic (example of synthetic fabrics: polyester, polyamide, polyacrylic and elastan),
viscose, polycotton and delicate fabrics.
The program will stop when the time is up.
NO HEATING
Airing bedspreads, duvets and bedclothes.
The program will stop when the time is up.
9
Program description
10
2.3 Option buttons
The machine is equipped with a number of options adapted to the range of use to which the
machine is intended — different markets use different options.
The following table shows some examples of available options and a short description of those:
Description
Option button
ECO PROGRAM
Dries using less energy.
CARE PROGRAM
Drying of sensitive fabrics. Only suitable for use with small loads.
QUICK PROGRAM
The program will be ready as quick as possible.
EXTRA DRY
Through drying of thick or multilayered fabrics.
Drying stops when “EXTRA DRY” is achieved.
DRY
Ready to put in cupboard/closet. Through drying of fabrics of even
thicknesses.
Drying stops when “ DRY” is achieved.
IRON DRY
Damp. Ready for ironing. For thin textiles which are to be ironed.
Drying stops when “IRON DRY” is achieved.
Handling
3 Handling
Load the goods into the machine according to recommendations and close the door.
Make sure the filter is clean and clean if necessary.
①
fig.7361
3.1 Load
The maximum load is 10.6 kg.
11
Handling
12
3.2 How to start the machine
This manual cover different types of machine models. Check the panel on your machine and
follow the description for your type of machine.
3.2.1 Panel with buttons and control knob
Select program:
Automatic programs
Select program by turning the control knob.
For automatic programs it is possible to select one of the drying triangle options and/or one of
the dryness options.
Example of
programs
NORMAL
Drying triangle options
Dryness options
ECO PROGRAM
EXTRA DRY
CARE PROGRAM
DRY
QUICK PROGRAM
IRON DRY
LOW
Start the machine by pressing the control knob.
Handling
Time programs
Select program by turning the control knob.
Example of programs
NORMAL
LOW
NO HEATING
Note!
For Time programs no options are available.
Start the machine by pressing the control knob.
After start it is possible to change the time for the selected program. Turn the control knob to
set the desired time.
13
14
Handling
3.2.2 Panel without buttons
Select program:
Automatic programs
Select program by turning the control knob.
Example of programs
NORMAL
EXTRA DRY
LOW
EXTRA DRY
NORMAL
DRY
LOW
DRY
NORMAL
IRON DRY
LOW
IRON DRY
Start the machine by pressing the control knob.
Handling
Time programs
Select program by turning the control knob.
Example of programs
NORMAL
LOW
NO HEATING
Start the machine by pressing the control knob.
After start it is possible to change the time for the selected program. Turn the control knob to
set the desired time.
15
16
Handling
3.2.3 Coin operated machines
3.2.3.1 Panel without buttons
Select program by turning the control knob.
Example of programs
HIGH
MEDIUM
LOW
NO HEATING
Insert correct amount of coins to start the machine.
After start it is possible to change the time for the selected program. Insert more coins to add time.
Handling
17
3.2.3.2 Panel without control knob
Select program by pressing the temperature button.
Example of programs
HIGH
MEDIUM
LOW
NO HEATING
Insert correct amount of coins and press the start button to start the machine.
After start it is possible to change the time for the selected program. Insert more coins to add time.
18
Handling
3.3 Additional functions
There is a menu with additional functions available for selection after start. When pressing the
control knob / start button (on machines without control button) the menu will appear on the display.
Select from the menu by turning the control knob / pressing the temperature button/-s and press the
control knob / start button to activate.
Note!
Some of the functions may not be available or active on your machine.
Stop function
If the machine is programmed with this function, it is possible to stop the machine during program
run by pressing the control knob.
When pressing the control knob again the program will continue.
Pause
It is possible to pause an ongoing program.
Select PAUSE and activate.
For some machines it is also possible to pause directly when pressing the control knob / start button.
When pressing the control knob / start button again the program will continue.
Changing a program after start
It is possible to change a program after start.
Select CHANGE PROGRAM and activate.
When pressing the control knob / start button the program menu will be displayed. Select a new
program and start by pressing the control knob / start button.
End a program
It is possible to end a program after start.
Select END PROGRAM and activate.
When pressing the control knob / start button the program will be ended.
Status
Select STATUS MENU and activate.
The status menu shows the status for inlet air temp, outlet air temp, RMC and heat for the machine.
Statistics
Select STATISTICS and activate.
The statistics menu shows total run hours and trip run hours for the machine.
Change drum speed (only on machines with MCU)
Select CHANGE DRUM SPEED and activate.
Change the drum speed with the control knob / pressing the temperature button/-s.
Handling
3.4 When program has ended
Note!
For the best possible drying result it is important to empty the machine as soon as the
program has ended.
If the machine is not emptied as soon as the program has ended the drum will rotate in short
intervalls in order to keep the goods from being wrinkled.
Clean the filter after each drying cycle for best performance.
②
fig.7570
19
Error codes
20
4 Error codes
A fault in the program or in the machine is indicated by an error code on the display.
Some of these error codes can be solved easily without contacting service personnel.
Error
code
Text
Cause/Action
12:11
DRYING ERROR WITH
RMC PROGRAM
The longest permitted RMC time has been exceeded. (Applies only to
machines with RMC).
12:12
DRYING ERROR WITH
AUTOSTOP PROGRAM
The machine is overfilled or the garment is too wet.
The longest permitted automatic stop time has been exceeded. (Applies only
to machines with automatic stop).
The machine is overfilled or the garment is too wet.
20:1
O.H. DRUM MOTOR
The motor is too hot.
The machine will restart automatically when the temperature on the motor is
OK (if the door has not been opened).
For other error codes or repeated error codes, disconnect the power for 30 seconds. If the error
code keeps coming back, contact authorized service personnel.
Maintenance
21
5 Maintenance
5.1 General
It is the responsibility of the owner of the machine/the laundry manager to make sure that the
following maintenance is performed.
Note!
Lack of maintenance may deteriorate the performance of the machine and may cause
damage to components.
Note!
This is recommended time intervals. Depending on the use of the machine other intervals
may be necessary.
5.2 Time for maintenance
When the display is showing the message TIME FOR MAINTENANCE — contact the owner of the
machine/the laundry manager to perform maintenance (if available, a telephone number and/or a
tag will also be displayed).
The machine can be used meanwhile. However, the message will keep coming back until the
service is perfomed.
The message will disappear after about 30 seconds or if the control knob or any button is pressed.
22
Maintenance
5.3 Every day
Check that the machine does not operate with the door open, if so, the machine must be placed
out of order until repairs are made.
Note!
Contact qualified service personnel to disconnect power from the affected machine.
Clean the door, door gasket and other external parts.
③
fig.7569
Check that the filter is clean and unbroken. Clean or replace if necessary.
④
fig.7570
Remove any lint and dust around the machine.
Maintenance
23
5.4 Fresh air intake and fan motor
At regular basis, check that the fresh air intake on the front of the machine is not clogged by lint and
dust or otherwise blocked.
Disconnect the power to the machine.
Remove the screws to the filter (A) and clean the fresh air inlet and the fan motor with a vacuum
cleaner. Be careful not to damage the parts.
⑤
A
fig.7368A
5.5 Machines with residual moisture control (RMC)
At regular basis, wipe off/clean drum and lifters with citric acid (Acidum citricum). If soap/softener
residue remains, it is recommended also to use a coarse sponge.
Lack of cleaning can reduce the automatic residual moisture control which will make the load being
moister than requested when the program has ended.
5.6 Maintenance to be carried out by qualified service personnel
Contact qualified service personnel to perform the following maintenance:
After 1600 hours of operation or once a year, whichever comes first:
• Clean the fan, the exhaust duct and the fresh-air intake to the room
• On machines with RMC: Clean the glide surface on the RMC graphite collector
• Clean the area around the drum
• Clean the motors
• Check the belt tension
lastpage
Electrolux Laundry Systems Sweden AB
341 80 Ljungby, Sweden
www.electrolux.com/laundrysystems
Share more of our thinking at www.electrolux.com