1
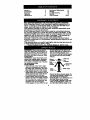
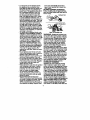
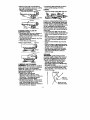
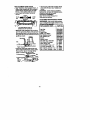
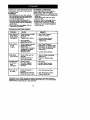
Operator's Manual
2.5 HP Motor
ELECTRIC CHAIN SAW
CRAFTSMAN+
Model No.
358.341240
-- 14 in. Bar
®
Read
and foilow alJ Safety Rules and Operating
ARNING:
Instructions before first use of this product.
_
For answers
to your
questions
this product:
Call
7 am-7 pm,
Mon-Sat;
Sun,about
10 am-7
pm
•
1-800-235-5878
Sears, Roebuck and Co., Hoffman
5,.qo-orte_z oai24/oa
Estates, IL 60179 USA
i
Warranty
Safety Rules
Assembly
Operation
Maintenance
2
2
7
7
12
Service and Adjustments
Storage
Trouble Shooting
Spanish
Parts Ordering
13
15
15
18
Beck
FULL ONEYEAR WARRANTY ON CRAFTSMAN ELECTRIC CHAINSAW.
If this Craftsman Electdc Chain Saw fails to perform properly due to a
defect in matedai or workmanship within (1) year from the date of purchase, Sears will repair or replace it, fr.ee ofc.har,ge.
This warranty excludes the bar and ch_,n, wnnchare expendable parts
and become worn during normal use.
If this Craftsman Electdc Chain Saw is used for commercial purposes,
this warranty applies for only 90 days from the date of purchase. If this
Craftsman Electric Chain Saw is used for rental purposes, this warranty
applies for only 30 days from the date of purchase. This warranty applies only while this product is in use in the United States.
WARRANTY SERVICE IS AVAILABLEBY RETURNINGTHE CRAFTSMAN
ELECTRIC CHAIN SAW TO THE NEAREST SEARS SERVICE CENTER IN THE
UNITEDSTATES.
This warrant
; you specific legal dghts, and you may also have other rig
r from state to state.
Inc.,
IL 60179 U.S,A.
: When using an electric
chain saw. basic safety precautions, including the following, should aiweys be
followed to reduce the risk of fire, electric shock, and injury to persons. Read
all instructions.
WARNING: AlwayscrJsconned
power
banters(earplugsor mufflers)to protectyourhearing.Regularusers
shouldhave hearingchecked regularly as chainsew noisecan damage
hearing.
H=,_r_ _ _
s_,ty Hat
source when maldng repairs. Besause a
Prote_on _'_ O_
Eye
chain saw is a high.speed woodcuttieg
tool, careless or improper use of thistool
Snug -----b. ,_
Protsctlon
can cause sedous injury.
PLAN AHEAD
• Restrictthe use of your sew to adult
users who understandand can follow
the s=fety rules, preceutJc_s,and oparai_ng insbuslJonsfound in this r'ni_ual.
• Kesp childran away. Do not ist visitors
illi_
contest chain eaw or exlansion cord. All
visitorsshoold be kept at isest 80 f_,t
• Secure hair above shoulder isngth. Do
(10 metem) et#ay from w_k area.
• Dress properly.Wear protective gear.
cen ga ceugnt rL mo_.ngip_s.
Al_hYS use steel-toed safetyfootwear • Keep ell par_sof your _
away from
non-slip soles; snug-fitting cloththe chain when sew is nJnning.
ing; heavy-duty, non-aiip gloves; eye
• Do n_ handfe ar oben_e e chain saw
protection such as non-fogging,
whan you ara _ued,
ilI,ups_, ar _
vented goggles or face screen; an epyoo have takan aicoho_, dru_, ar n_
"# i "" oo_
dication.You must be in good physical ; Keep the handles dry and clean and
conditionand mantallyalert, fi you have
free from oil and grease.
any conditionthat might be aggravated • Keep oil cap and fasteners sauuraly
tightened.
by stranunuswork, check with doctor
• Konconfom_ng_
compobeforeoper_ng.
nents or the removal of sandy devioss
Watch whet you ere doing. Use commay _e
danlage to lhe un_ and
mon sense.
pussiblein.luryto the operatoror by• Do not start cutting until you have a
standers, Use c_lJy
Cra_smanasosasoclear work area, secure footing, and
especially if you are felling a tree, a
dasand rsple_anant Pertsas recomretreat path. Keep work area clean.
mended. Never modify yoursaw.
• Maintain chain saw with care.
Cluttered areas invite injuries.
• Keep unit sharp and clean for better
OPERATE YOUR SAW SAFELY
and safer performance.
• Do not operate with one hand. Seri• Follow instructions for lubricating and
ous injury to the operator, helpers, or
changing accessories.
bystanders may result from one• Unplug the chain saw from the power
handed operation. A chain saw is insouroswhan nsHn use,b_
se_tended for two-handed use.
ing, and when changing accessories
• Do not operate saw from a ladder or
and attashmants, such as saw chain
in a tree.
• Make sure the chain will not make
and guard.
• Cbeckfordamagsdparts.Befo_ furcontact with any object while starting
the saw, Never start the saw when the
theruse of the chain caw, a guerd or
other part that is dernagsd should be
guide bar is in a cut,
carefunychecked to detemCne th_ it
• Don't force chain saw. It will do the job
better and safer at the rate for which it
will opande properlyand perform b inwas intended.
tended func_on, Check for alignment of
• Do not put pressure on the saw, esmov_gp_s, un_ngofmov_gParts,
pecially at the end of the cut. Doing
breakage of parts, rnounlJngand any
so can cause you to lose control
other coedi_onsthat may effectits opwhen the cut is completed.
ersfJon.A guard or oS"terpart that is
dan'Bged shouJdbe propedyrepaired
• Stop the saw before setting it down.
Hand carry saw only when motor is
or replaced by a Sears Service Center
stopped. Carry the chain saw by the
unlessothenNiseind'K_.edelsewhere in
front handle with the saw stopped, finthe operator'smanual.
gsr offthe switch, the guide bar and
• Do not operate a chain sawthat is
saw chain to thb rosr,
damaged, improperly adjusted, or is
• Use the right tool, cut wood only.
not completely and securely asDon't use chain saw for purpose not
sembled, Inspect chain saw cords peintended; for example, don't use
riodically,and if damaged have rechain saw for cutting plastic, masonry,
p_red by a Sears Service Center.
• When not in use, chain saws should
non-wood buildin_ matedale.
• Use extreme caution when cutting
be stored in a dry, high or locked-up
small size brush and saplings beRl_eceout of the reach of children.
cause the tender material may catch
• When storing saw, unplug and use a
the saw chain and be whipped toward
bar sheath or carrying case. Store idle
chain saw.
you or pull you offbalance.
• When cutting a limb that is under tenELECTRICAL SAFETY
sion be alert for spring back so you
Use a vo[_gs supply as shown on unit.
will not be struck when the tension in
Avoid dangerous environments. Don't
the wood fibers is released.
use appliances in damp or wet locaMAINTAIN YOUR SAW IN GOOD
tions. Don't use in rain.
WORKING
ORDER
• Avoid dangerous situations. Do not
use in the presence of ifanvnable liq• Have all chain saw sarvice performed
by a Sears Servica Center except the
uids or gases to avoid creating a fire
items listed in the maintenance secor explosion and/or causing damage
to unit.
tion of this manual.
• Make certain saw chainstops moving
when trigger switch is released.
I
• To reduce the riskof electdcel shock,
this appliance has a poledzad plug
(one blade is wider than the other) and
will require the use of e polarized extensi_'_cord.The appflance plug will fit
into a poiodzedextension cord only
one way. If the plug does notfit fully
intothe extensioncord, reverse the
plug, If the plug stilldoes not fit, obtain
a correct poisrized extension cord.A
polarized extension cord win require the
use of a polarized walt outlet.This plug
will _t intothe poledzed w_dloutlet only
one way. If plug does not fitfully into
the wall ou_et, reverse the plug. If the
plug sblfdoes not fit, contact a queli_ed
electricianto installthe properwail outlet. Do not change the equipment plug,
extensioncord receptacle, or extension
cord plug in any way.
• To reduce risk of electrical shock, use
e)dec_ion colds sped_-_ly i'_lrked as
suitable for outdoorappllet_as having
electdcai raitngnot less than the rating
of unit. Cord must be marked with suffix
"W'. Make sure your extenaion cord is
in good concfition,Insped exlension
cord before use and replace If damaged. An undersized extension cord
will cause a drop in line voltage resulting in loss of power and overhea_ng. If
in doubt, ,Re the next heavier gauge.
The lower the gauge number, the
heavier the cord (see 'Select an extension cord'),
• Do not abuse cord. Never carry the
unit by the extension cord or yank extension cord to disconnect unit.
• Secure extension cord to power cord
to prevent disconnection from unit.
• Do not use the unit if the switch does
not turn the unit on end off properly, or
if the lockout does not work. Repairs
to the switch must be made by a
Sears Service Center.
• Keep extension cord clear of operator
and obstacles at all times. Position
cord so that it will not be caught on
branches. Do not expose cords to
heat, oil, water, or sharp edges.
• To avoid the possibitity of electric
shock, avoJd body contact with any
grounded conductor, such as metal
fences or pipes.
• Ground Fault Circuit Interrupter
(GFCi) protection should be provided
on cimuit or outlet to be used. Raceptaulas ere avaitable having built-in
GFCI protection and may be used for
this measure of safety. Inspect chain
saw cords pariodioally and if damaged, have repaired by a Sears Service Center.
GUARD AGAINST
KICKBACK
Follow ell safety ruiss to help avoid kickback and other forces which can result in
serious injury.
Kkddxmk
path
C_earTheWoddngArea
WARNING:
Rotational Kickback can
occur when the moving chain contacts
an object at the upper portion of the tip
of the guide bar, Contact at the upper
portion of the tip of the guide bar can
cause the chain to dig into the object,
which stops the chain for an instant.
The result is a tiQhtningfast, reverse
reaction which kicks the guide bar up
and back toward the operator.
PinchJ_ckback and Pull-In occur when
the chain is suddenly stopped by being
pinched, caught, or by contacting e foreign object in the wood. This sudden
stopping of the chain results in a reversai of the chain force used to cut wood
and causes the sawto move in the opposite direotion of the chain rotation.
Pinch-Kickback ddves the saw straight
back toward the operator. Pull-in pulls
the sew away from the operator.
KICKBACK WARNING:
Kicktmck c_ oca_ whan the moving
chain contacts an obJact_ the upper
podion of the tip of the guide bar or when
the wood doses in and plnchas the saw
chain in the cut.The Computed Wjdd_:eck
Angle (CKA) _sted on your saw and listed
in the following CKA Table represents the
angle of ki_
your bar and chain
combinationswighave when tested in
accordance with CSA and ANSI standards, computed
ang_ r_orasanted
in
the CKA oclumn iodicote total anergy ard
angle _soci_',ed wiU_ut a chain brake.
When purchasingreplacemer_, comider_ions shouldbe given to the lower
CKA veluee. In ell casas, lower CKA vel-
uesrepresent
a safe" operatingenviron-
mant for the user.
Do not rely exclusively upon the safety
devices built into your saw,
• Either of these reactions may cause
you to lose control of the saw which
could result in serious injury.
• Pinching the saw chain along the tip
of the guide bar may push the guide
bar rapidly back toward the operator.
• Tip contactin some cases may cause
a lightningfast REACTION.kickingthe
guide bar up and back toward operator.
CKA TABLE
BAR
MODEL
_N
CKA
7t-_617
111o
OKA requirements per standard.
REDUCE THE CHANCE OF
The following pr_
should be fctlowed to rninirnizeIdckbeck:
• Grip saw firmly. Hold chain saw firmly
with both hands when motor is running.
Use a fin-ngrip with thumbs and _ers
encirclingchain saw handles.
• Do not over reanh.
KICKBACK
I
• Keep proper footing and balance at
all times.
• Don't let the nose of the guide bar
contact e log, branch, ground or other
obstruction.
Don't
cut above
shoulder
Use devices
such
as low height.
kickback
chain, guide bar nose _uards, chain
• brakes, and special guide bars that
CHAIN BRAKE & CKA ANGLE
reduce the risks associated with kickWARNING: The effectivenessof a
back,
chain brake in reducing operatorinjuries • Only use replacement bars and
hes not yat bean fully determined. We
chains specified by the manufacturer
cannot representthat a chain brake is an
or the equivalent.
effactivesafety deride to preveflt or reAvoid Plnch-KJekba_:
duce the hazard of injuriesresultingfTom • Be extremely aware of situations or
kickback. DO NOT ASSUMETHATTHE
obstructions that can cause matefiat
CHAINBRAKEWILLPROTECTYOU IN THE
to pinch the top of or otherwise stop
EVENTOF A K]CI<Z_CK.Instead, use the
the chain.
saw properlyand carefullyto avoid kick: _°Onct
re°re
than as
°nethe
I°gbar
at a
back. Reduced Kickback bars and Low
not cut
twist
the sew
is time'
K_kback chainsreducethe hazard of
withdrawn fToman undercut when
kickbackand are recommended. Repairs
bucking.
Avoid Pull-In:
on a chain brake shouldbe made by a
Sears Service Center. Take your unit to
• Always begin cuttingwith the sawat
the place of purchase if purchesed from
full speed and the saw housing
a Servicing Center, or to the nearest
against wood.
Sears Service Center.
• Use wedges made of plastic or wood,
WARNING: Computedkickbackangle
Never use met_ to hold the cut open.
(CKA) Ibted on your saw and listed in the MAINTAIN CONTROL:
CKA table represents angle of
The following precautions should be folyour bar and chain combinations will
lowed to minimize kickback.
have when tested in accordance with
• A good, firm grip on the sew with both
C,SA and ANSI standards. When purhands will help you maintain control.
chasingreplacement bar and chain, conDon't let go. Grip the rear handle with
s_
should be given to the lower
your right hand whether you ere right
or left handed.
CKA values. Lower CKA values represent safer angl_ to the user, highervatues indicatemorn angle and higher kick
energies. In all cases lower CKA values
represente safer operating environment
for the user.
The guide bar and chain combination(s)
shown in the CKA Table meet kickback
requirements of CSA Z62.1, Z62.3, & • Wrap the fingers of your left hand
over and around the fiont handlebar,
ANSI B175.1 when used on saw(s) listed
and your left thumb under the front
in thismanual. Use of bar and chain comhandlebar.
binations other than those listed is not
recommended and may not meet the
36B,_141240 _
5
• Low Kickback Chain has met kickback performance requirements when
tested on the representative sample
of these chain saws specified in ANSI
B175.1.
LowIqd(back Chain
• When making bucking or pruning
cuts, position your left hand on the
front handlebar so it is in a straight
line with your right hand on the rear
handle. Stand slightly to the left side
of the sew to keep your body from being in e direct line with the cutting
chain. Keep your left arm straight with
the elbow locked,
• Stand with your weight evenly baienced on both feet.
• Do not ovoneach. You could be drawn
or thrown offbalance end Inse control.
• Do not cut above shoulder height. It is
difficultto maintain control of saw
above shoulder height.
KICKBACK
SAFETY FEATURES
WARNING:
The following features are
included on your saw to help reduce
hazard of kickback; however, such feetures will not totally eliminate this danger. Do not rely only on safety devices.
• Handguard: designed to reduce the
chance of your left hand contacting
the chain if your hand slips off the
front handlebar.
• Position of front and rear handlebars:
designed with distance between hendies and "in-line"with each other, The
spread end "in-line" position of the
hands provided by this design work
together to give balance end resistance in controllingthe pivot of the
saw back toward the operator if kickback occurs.
• Reduced-Kickback Guide Bar: designed with a small radius tip which
reduces the size of the kickback danger zone. This type bar has been
demonstrated to significantly reduce
the number and seriousness of kickbecks when tested in accordance
with ANSI B175.1.
SmallRadius
Tip GuideBar
Contoured
D.pthGauge
.ll_.._,---_
Ek_ngaiedGuard Unk
AndAJow=WoodTo
Gredu=dlyRideIntoCutter
SAFETY NOTICE: Exposureto
vibrations throughprolongeduseof
handtoolscould cause bloodvesselor
nervedamage in thefingers,hands,
end Jointsof people proneto blrsulation
disordersor abnormal swelling.
Prolongedusein cold weatherhas
been linkedto bloodvessaidamagein
otherwisehealthypeople.Ifsymptoms
occursuchas numbness,pain, lossof
strength,change inskin coloror
texture,or lossof feellngin the fingers,
hands, or oints,discontinuethe use of
ths too and seek med cel at'tenton. An
anti-vibratlonsystemdoesnot
guaranteethe avoidanceofthese
problems.Userswho operatepower
tools on e continualand regularbasis
must closelymonitortheirphysical
condition and the conditionof thistool.
DOUBLE INSULATION
CONSTRUCTION
This unitis DoubleInsulatedto helpprotactagainstelectricshock.Doubleinsula.
tioncomtn_on consists
of twoseparate
qayers"of alsotriceJ
insulation
insteadof
J_oo_
ndmg°
bu_ withthisinsuJatk_
systemare
not intendedto be grounded.No grounding meansis providedon this unit,nor
should• meansof groundingbe added
tothis unit.
Safety_
rnustbe o_P_.ved
when operetingeny dectricoltool.The
doubleins_
systemonlyprovides
addedp_
againstinjuryresulting
froman internalalactllcelinsulation
failure.
STANDARDS:Thisproductis listedby
UnderwritersLaboratories,Inc. in accordencowith UL Standard1662 and
CSA StandardsZ62.1 and Z62.3 end
ANSI B175.1.
SAVE THESE INSTRUCTIONS
6
CARTONCONTENTS
Model35Q.341240
Chain
Saw(fullyassembled)
NOTE: If you need assbfence or find
parts missing or damaged, please call
1-800-235-5878
ASSEMBLY
Your saw is fully assembled; no
assembly is necessary,
Ear Sheath
Extra Chain
Bar Lube (8 oz,)
Examine parts for damage. Do not use
damaged parts.
KNOW YOUR SAW
READTHIS OPERATOR'SMANUALAND SAFETY RULES BEFORE OPERATING YOUR CHAIN SAW.Comparethe illustrations
withyourunit to familiarlze
yourselfwiththe locationof thevariouscontrols and adjustments. Save this
manualfor future reference.
OilerActuator/
BarOilCap
Lockout
Button
TRIGGER SWITCH
The rigger switah is used to tum on the
unit. Squeeze the tdgger switch to operate the unit after lockout button has
been pushed in. Release the tdgger to
turn the unit off.
LOCKOUT BUTTON
The Lockout Button is e control feature
designed to prevent the motor fi'om being accidently started. When the rear
handle is gripped in a normal cutting
position, the lockout button can be
pushed in by the thumb,permitting the
index finger to squeeze the trigger. It is
not necessary to maintain pressure on
the lockout button once the trigger has
been angaaged.
BAR OIL CAP/OILER
ACTUATOR
The oil Pap is used to access the bar oil
tank and pressed to supply oil to chain.
CHAIN ADJUSTMENT SCREW
The chain adjustment screw Lsused to
adjust the chain tension.
RECESSED PLUG
The receasedplugis used to connect
the saw toan approvedexfensloncord.
CHAIN TENSION
Itis normalfor a new chainto sketch
durinjgfirst30 minutesofoperation.You
shouldcheckyourchaintensionhequentJy.ReadjostP.,haln
a_er every 15
minutes of oparation,SesChain Tensionunderthe Serviceand Adjustments sec_on.
OPERATING INSTRUCTIONS
Use only a voltsge supply as speci_ed
on your unit,
Extensioncords are avaiisbis for this unit.
Secure extsnsion_¢d to powar con:lto
prevent disconnectionfrom unit.
7
I
SELECT
__
AN EXTENSION
CORD
• Stop the sew if the chain strikes e foreign object. Inspect the sew and repair parts as necessary.
• Keep the chain out of dirt and sand.
Even a small amount of did will quickly dull a chain and increese the possibilityof kickback,
MINIMUMWIRE GAUGE
RECOMMENDATIONS
to1son.
•Amerlram_
t4
12
A.W.G.*
G_qle
A,W,G.*
the following steps. This will help you
get the "feel"of using your saw before
you begin e major sewing operation.
_queeze the tdgger switch and allow
unit to reanh full spesd before cuffing.
Begin ouffng with the sew frame
the log, e few small logs using
i against
Pre[aticecutting
Ke_a the motor at full speed the entire time you ere cutting.
Releese tdggar switch as soon as cut
is comp!eted, Allowing motor to stop.
• To avoid losing control when cut is
complete, do not put pressure on sew
at end of cut.
• Stop.motor before setting saw down.
TREE FELLING TECHNIQUES
Check for broken or dead branches
which can fall whge cutting c_=;_l sadous injury.Do notcut near buildingsor
electriuslwiras if you do not know the directionof tres fell, nor out at nightsince
you willnot be able to see well, nor during bad westher eu_ as rain,snow,
strongwinds, etc. Ifthe bee makes con.
tactwith any utilityline, the ublitycomplany shouldbe noUfiedimrnsdiately,
• Carefully
plan your sawing o_n
in
advance.
_ roetemddur_ Oiling,on. Uee e fon- • Clesr the work eru. You nesd a desr
eree dil around the tres so you can
nel to fillthe tank. Replace oil cap sehave secure footing.
curely. Check oillevel ester every 15
• Study the rm_ureJ
conditJor_tha_ran
minutes of operation.
cause the tres to fall in e pefdouisr
STOPPING
YOUR SAW
directbn, such as:
• Release the tdgger switch.
• The wind direction and speed.
• If motor does not stop, disconnect the
• The isan of the b'ee. The lean of e tree
extension cord.
STARTING
YOUR SAW
might not be .ap_tx_ant.
due to uneven
or elOl_ngterrain. Use a plumb or level
• Connect the sawto a power source
to determinethe directionofkes lean.
using the proper size extension cord;
• Weight and branches on one side.
see SELECTAN EXTENSIONCORD.
• Surrounding trees and obstacles.
• Push in switch lock out button.
• Look for decay and rot. If the trunk is
• Squeeze and hold the trigger switch.
rotted, il can snap and fall toward the
OPERATING
TIPS
operator.
• Check chain tension before first use
• Meke sure there is enough room for
and after 1 minute of operation. See
the tree to fall. Melnteln a distance of
Chain Tension in the Maintenance
2-1/2tree lengths from the nearest
"
section and Service and Adjustment
person or other objects. Motor noise
section.
can drown out • warning call.
• Cut wood only. Do not cut metal, plastics, masonry, non-wood building materieds,etc.
BEFORE STARTING
SAW
WARNING:
Be sure to read the electricessafety information in the safety
rules section of this manuel before you
begin. If you do not understand the
electrldai safety information do not attempt to use your unit. Seek help from
someone that does understand the information or cell the customer assistance help line at 1-800-235-5878,
GUIDE BAR AND CHAIN OIL
The manually operated chain oiler providas lubricationto the chain and guide
bar. Be sum to fillthe bar oiltank _efore
each cuttingsaselon. The o_er ac6"v_or/
bar oilcap must be used regularlyand
often enough to maintaina thin filmof oil
on the bar and chain while saw is cutting.
It is recommended that the oiler actuator/
bar og cap be operated six (6) times per
minuteand heldfor appru_rnetely three
(3) seconds each time it is pressed. For
maximum guide bar and chain Iife, we
recommend you use Creltsrnemchain
saw bar oil. If Craftsman bar oil is not
awdlable,you may Use a good grade
SAE 30 oil u_] you are able to obtain
Crsfmman brand. The oiloutput is menu-
8
• Remove
dirt,stones,
loose
bark,
nails, staples, and wire from the tree
where cuts are to be made.
plana clesrretre_ path
Y!
A retreat path should be planned and
cleared as necessary before cuts are
started. The retreat path should extend
b_k and diagonally to the rear of the
e_c_,ctedline of fall as Hlustratedabove,
FELLING LARGE TREES
(6 inches in diameter or larger)
The notch method is used to fell large
trees. A notch is cut on the side of the
tree in the desired direction of fall. A_er
a felling cut is made on the opposite
side of tree. the tree will tend to fail in
the direotion of the notch.
NOTE: If tree has large buttress roots,
remove them bef_a making the notch.
NOTCH CUT AND FELLING TREE
• Make notch cut by cutting the top of
the notch 5rat. Cut through 1/3 of the
diameter of the tree. Next complete
the notch by cutting the bottom. See
illustration. Once notch is cut, remove
the wedge of wood from the tree.
• After removing the wood, make the
foiling cut on the opposite side of the
notch. This is done by making a cut
about two inches higher than the center of the notch. This will leave
enough uncut wood between the felling cut m',dthe notch to form e hinge.
This hinlgewill help prevent the tree
from faiSngin the wrong direction.
t Rna_cuthere
Notching Undercut - Make the notch
1/3 the diameter of the tree, perpendicular to the direction of fail as illustrated.
Make the lower horizontal notching cut
first. This w_l help to avoid pinching of
either the saw chain or the guide bar
when the second notch is being made.
Falling Back Cut - Make the felling
back cut at least 2 inches (50.Smm)
higher than the hodzentai notching cut
as illustrated. Keep the felling back out
parallel to the horizontal notching cut,
Make the felling back cut so enough
wood is left to act as a hinge. The hinge
wood helps the tree from twisting and
falling in the wrong direction. Do not out
through the hinge.
As the feeling cut gets dose at the hinge
the tree shouldbegin to fall. ffthere is
any chance th_ the tree rney not fall in
the desired directionor it may rock ba_k
and i0_d the _
chairt,stop auttinghe-
fore the felSngback cut is complete end
use wedgesofwood,plmUcor aluminum
to open the cut and drop the tree along
the desired line of fall.
When the trea begins to fell, remove the
cheJnsaw from the cut, stop the motor,
put the chain saw down, then use the re-
treat _
p_l.
Be _t
for oved'_l
limb6 falling and watch your footing.
Hinge holds tree on stump and helps
control fall.
Opening
of felling
/
Closingof
_:_tch
NOTE: Before felling cut is complete,
use wedges to open the cut when
necessary to control the direction of fall.
To avoidkickback and chain d_ge,
use wood or plastio wedges, but never
steel or iron wedges.
• Be a_ertto signs that the tree is ready
to fall;cracking sounds, widening of
the felling cut, or movement in the upper branches.
• As tree starts to fall, stop saw, put it
down, and get away qulcldy on your
planned retreat path.
• Be extremely cautious with pmtJaily
fallen trees that may be poorly supported. When e tree doesn't feJl oom_letely, set the saw aside and pull
own the tree with a cabkl winch,
block and teolde, or tractor. Do not
use your saw to cut down a partially
fallen tree.
CUTTING A FALLEN TREE
(BUCKING)
Buoking is the term used for cutting a
fallen tree to the desired log size.
WARNING:
Do not stand on the log
being cut. Any portion can roll causing
9
lossoffooting
andcontrol.
Donotstand
downhill of the log being cut.
IMPORTANT POINTS
• It is impodant to make sure your footing
is _rn and your weight is evenly disttibuted on both feet. When possible,the
log shouldbe raised and supported by
use of limbs, logs, or blocks.
• Cut shattered wood very carefully;
sharp pieces of wood could be flung
• Cut
onlyoperator.
one log at a time.
toward
• Use a sawhorse to out small logs.
Never allow another person to hold
the log while cutting and never hold
the log with your leg or foot.
• Do not cut in an area where logs,
limbs, and roots are tangled. Drag logs
into a dear area before =c_ti_
og them.
• When "cuttingthrough, to maintain
pressure
near
the end of the
cut withcomplete
c°ntr°l,
out loosening
yourreleese
grip onthe
thecutting
chain
saw handles.
• Don't let the chain contact the ground.
• After completing the cut, wait for the
saw chain to stop before you move
the chain saw.
• Always stop the motor before moving
from tree to tree.
_,,
Stand on uphillside
when cuttingbecause
I may roll.
ing in injury and/or damage to the saw,
Stop the saw; ddve a wedge of plastic
or wood into out until the saw can be
removed easily. Restart saw and carefully reenter the cut. Do not use a metal
wedge. Do not attempt to restart your
sew when it is pinched or hung in a log.
Use a wedgeto removepinchedsaw
/..L.I_..
Turnsaw OFF andusea _
or
woodenwedgeto forcecut open.
Ovemuttlng begins on the top side of
the log with the bottom of the saw
against the log. When overcutting use
light downward pressure,
_ia_Ovem'_lng
._iB)
_'
Undercutting_"-._.
Undercutting involves cutting on the
underside of the log with top of saw
against the log. When undercutting use
light upward pressure. Hold saw firmly
and maintain control. The saw will tend
to push back toward you.
WARNING:
Never turn sew upside
down to undercut. The saw cannot be
controlled in this position.
When the log is supported along its entire length as illustrated below, it is cut
from the top (overbuok),
f
JJ
The chain saw operator should keep on AJways make your first cut on the comthe uphillside of the terrain as the tree
pression side of the log.
is likely to roll or slide downhill alter it is
felled.
When buddng on a slope always stand
on the uphiUside of the log, _ iHustraled
above. When =cuttingthrough', to rnalnSecondcut
taln complete control release the cutting
j
Secondcut
pr"'=;:.sure
near the end of the cut without
ralmdngyourgrip on the chain saw handles. Don't let the chetn contact the
ground. After completing the cut, wait for
the saw chain to stop before you move
the chain saw. Always stop the motor beRrst cut on compressionsideof log
f_e movingfrom the tres to tree.
BUCKING WITHOUT A SUPPORT
SUCKING TECHNIQUES
• Overcut through 1/3 of the diameter of
WARNING:
if saw becomes pinched
the log.
or hung in a log, don't try to force it out.
• Roll the log over and finish with a secYou can lose control of the saw, resultond overcut.
10
• Watch for logs with a compression
side. See illustration above for cutting
logs with a compression side.
Using • log for support
ndCut
• Frequently clear branches out of the
way to avoid tripping over them.
LIMBING
Remove Small Limbs _A,rdhOne Cut
Limbing is removing the branches from
a fallen tree. When limbing, leave larger lower limbs to support the log offthe
ground. Remove the small lind_ in one
out as illustrated in the figure above.
Branches under tension should be cut
from the bottom up to avoid binding the
chain saw.
_€/1st Cut
SUCKING USING A LOG OR
SUPPORT STAND
Limb
treelarger
only after
is cut down.the
Leavea the
limbsitunderneath
• Remember your first cut is always on
felled
tree
to
support
the
tree as you
• the compression side of the log.
work.
(Refer to the illustration belowfor your
• Start at the base of the felled tree and
first and second cut)
work toward the top, cuttin_ branches
• Yourfirst cut should extend 1/3 of the
and limbs, Remove small hmbs with
diameter of the log.
one cut.
• Finish with your second cut.
• Keep the tree between you and the
Usinga support stand
!Cut
chain.
/
• Remove larger, supportingbrenohes
with the 1/3,2/s cutting techniques described in the bucking section.
• Always use an overcut to cut small
and fTeely hanging limbs. Undercutting could cause Hmbs to fall end
pinch the saw.
PRUNING
WARNING: Umit pruning to limbs
LIMBING AND PRUNING
WARNING:
Never climb into a tree to
limb or prune. Do not stand on ladders,
platforms, • log, or in any position
which can cause you to lose your balenos or control of the saw.
IMPORTANT POINTS
• Watch out for springpoles.
_a_ringpoles are small size limbs
ish can whip toward you or pull you
offbalance. Use extreme caution
when cutting small size limbs.
• Be alert for springbauk. Watch out for
branches that are bent or under pressure. Avoid being struck by the
branch or the saw when the tension in
the wood fibers is released.
shoulder height or below. Do not out if
branches are higher than your shoulder. Get a professional to do the job.
• Make your first out 1/8 of the way
through the bottom of the limb.
• Next make a second cut all the way
• through the limb.
Finish_thepruning operation by using
an overout so that the stump of the
limb protrudes 1 to 2 inches from the
trunk of the tree.
11
ISecond cut
_
r
F.'sl cut
frsmtresk oftrse
CUSTOMER RESPONSIBILITIES
Fill in dates as you complete
regularservioe
Before After Every Ever_ Yeerly Service
Use
Use 15min.;5hrs,
Dates
Check for damagediwom parts
p,,
p,,
Check for loose fasteners/pads
p-
v,,
Check chain tension
P,,
_'
Check chain sharpness
P,"
Check guide ber
p,,
v"
I,"
Cleon unit & labels
_"
,_
GENERAL RECOMMENDATIONS
The warranty on this unit does not cover items that have been subjected to
operator abuse or negligence. To reostve fulJvalue from the warranty, the
operator must maintain unit as instructed in this manual. Vadous adjustments
will need to be made periodically to
propedy maintain your unit.
• Once a year, check guide bar and
chain for wear.
WARNING:
Disconnect the power
source before performing maintenance.
LUBRICATION
I Bar
Sprocket
j,,,
• Extension Cord - Discontinue use if
chain saw extension cord shows
signs of damage or wear.
CHECK FOR LOOSE
FASTENERS AND PARTS
• Bar Clamp Nut
• Chain
• Bar AdjustingScrew
CHECK CHAIN TENSION
• Use the screwdriver end of the bar
tool to move chain around guide bar
to ensure k|nk,5do not exist. The
chain should rotate freely.
2 Bar oil
RUCap
_
BarC_p
2 Use Craflsrnanchaln saw bar oil
BarTool
Nuts
• Loosen bar clamp nuts until they ere
• finger tight against the _ d mpR.
/um aa|usung screw unttlChainoerefy touches the bottom of guide bar.
CHECK FOR DAMAGED
OR
WORN PARTS
Replacement of damaged/worn parts
should be referred to your Bears Service Center.
NOTS: tt is norrnaJfor a small amount
of oil to appear under the sew after motor stops. Do not confuse this with e
leaking oil tank.
• Tdgger Switch - Ensure the trigger
switch functions propedy by squeezing and holding the tdgger switch.
Make sure motor starts and stops.
• Oil Tank - Discontinue use of chain
saw if oil tank shows signs of damage
or leaks.
• Usingbartool,rollchainaroundguide
barto ensureall linksere in bargroove
• Liftup t p ofguidebar to check for
sag, Release tipof guide bar,then
tom adjustingscrew untilsag does
note:_st.
12
• While lifting tip of guide bar, tighten
bar clamp nuts with the bar tool.
Torque to 10-15 fi-lbs.
/
[
_C_mp
_
• Disconnect the chain sew from the
power source. See instructionsunder
"Chain Replacement'.
• Remove bar and chain from saw.
.,_..
• Clean all sawdust and any other
debris from the guide bar groove and
sprocket hoZeafter each use,
RemoveSawdustFromGuide
Nuts
BarGroovc__
• Use the screwdriver end of the bar
tool to move chain around guide bar.
• If chain does not rotate, it is too tight.
_
__
'
_
SlxocketHole
_._
SUghtlyloosen
clamp
and
Iousen chain bybar
turning
thenuts
adjusting
screw. Retighten bar clamp nuts.
• If chain is too loose, it will sag below
the guide bar. DO NOT operate the
saw if the chain is loose.
CHECK CHAIN SHARPNESS
A sharp chain makes wood chips. A
dullchain makes a sawdust powder
and outs slowly.
CHAIN SHARPENING
Chain sharpening requires special
tools. You can purchase sharpening
tools at Sears or go to a professional
chain sh_Fpener.
CHECK GUIDE BAR
Conditions which require guide bar
maintenance:
• Saw cuts to one side or at an angle.
• Saw has to be forced through the cut.
• Inadequate supply of oil to the bar
and chain.
Check the condition of the guide bar
each time the chain is sharpened. A
worn guide bar will damage the chain
and make cutting difficult.To maintain
guide bar:.
_
•
CHAIN REPLACEMENT
WARNING: Avoid sccidantai starting.
/Uways unplugsaw from power source
before installinga bar and/or chain.
CAUTION: Wear protective gloves
when handling chain. The chain is
sharp and can cut you even when it is
not moving.
It is normal for a new chain to stretch
during the first 30 minutes of operation.
You should recheck your chain tension
frequanUy and adjust the chain tension
as required, See "Check Chain Tension"in the Maintenance section.
• Turn the unit upside down on a fiat
surface. Straighten out chain, then lay
it on a fiat surface.
• Remove bar mounting nuts, bar
clamp plate, and old chain,
• Turn adjusting screw on the bar to
move the tensioning rack as far as it
will go toward the front of the bar.
• Add lubricant to sprocket hole after
each use.
• Burring of guide bar rails is a normal
_roceas of rail wear. Remove these
urrs with a fiat file.
• When rail top is uneven, use a fiat file
to restore square edges and sides.
Rle
sidesSquare
Edgesand
_[_
WornGroove
Co.act Groove
Replace the guide bar when the groove
is worn, the guide bar is bent or
cracked, or when excess heating or
burring of the rails occurs. If replacement is necassa,-y, use only the guide
bar specified for your saw m the repair
pads list or on the decal located on the
chain saw.
CLEAN UNIT & LABELS
• Clean the unit and labels using a
damp cloth with a mild detergent,
• Wipe offthe unit and labels with a
clean dry cloth.
TensioningRack
13
//_
_'.'.'.'.'.'.'.'.'_
REPLACEMENT SAW CHAIN
• See "Customer Serviceable Parts'. A
chain must comply with the kickback
performance requirements of ANSI
13175,1 when tested with this saw,
• Hold chain with cutters facing as
shown.
• Secure the guide bar and bar clamp
plate with the bar nuts. Tighten securely.
CAUTION: If saw chain is installed
backwards, the saw will vibrate excessively and will not cut wood.
CHAIN ADJUSTMENT
See 'Check Chain Tension" in
Maintenance section.
CUSTOMER SERVICEABLE PARTS
WARNING: Use of any otheraccessory or attachmentmightpresenta risk
_finlur
Y tothe operator.
REPLACEMENT
PART
PARTNO.
CUTrF_RS
MUSTFACIEIN
DIRIEEGTION
OF ROTATION
• Slide the chain between the housing
and the sprocket. Place chain around
the sprocket and fit the drive links into
the guide bar groove and then around
guide bar nose.
Hax Nuts
530015306
QI Cap
Rata
Sid_'y Lock Button
Bar._t=.ng Screw
Bar/_usting Pin
Spear
S30(_g285
530_5873
530015514
53001583_
530015835
71-36524
Rle (5/_" die=)TwinPak
71-365_
Rle Guide (Rle Holder)
71.-36557
DepthGauge Tool
_ra GUARD®Chin -14"
71-3617
Lo-K]ck®Guide Bar- 14"
71,-3_94
Bar& ChainLubricant-1 qt 71.-36556
Bar& ChainLulxicant-1 gai 71-36554
Spa_r ,Scr_v
Sprock_[_
Rig_ Housing _
• Hold the guide bar against the saw
frame and install the bar clamp plate.
Be sure the tab on the bar clamp
plate is toward the rear of bar.
AdjustingPinSlot -.
14
Prepare
yourunitforstorage
sttheend
oftheseason
orifitwillnotbeusedfor
30daysormore.
WARNING:
• Allow the motor to cool, then secure
the unit before storing or transporting.
• Store chain saw and extension cord
in a well ventilated area
• Store chain saw with all guards in
place and position chain saw so that
any sharp ob ect cannot accidentally
cause injury.
• Store chain saw unplugged, well out
of the reach of children.
EXTERNAL
SURFACES
if your chain saw is to be storedfor a
period of time, clsan it thoroughly
before storage. Store in a clean dry area.
• Lightlyoil external metal surfaces and
guide bar.
• Oil the chain and wrep it in heavy
paper or cloth.
To prevent chain oilseepage during
storage, store the sew as follows:
• ups=dedown if stored on • shelf, or
• hung on a hook or nail through the
hole in the bar
TROUBLE SHOOTING CHART
TROUBLE
Chain does not
move when
trigger switch
is engaged.
CAUSE
REMEDY
Chain tension too tight.
Guide bar rails
_inched.
rigger Switch failure.
• See "chain Tension,"
• Repair or replace.
Contact Sears Service.
Reset circuit breaker/
replace fuse.
Circuitbreaker
tripped/fueeblown,
Chain cletters
or cuts
roughly.
Chainstops
within the cut.
Chain tension incorrect,
Cutters damaged.
Chain wom.
Cutters dull, improperly
sharpened, or depth
_auges too high.
procket worn.
Chain cutter tops not
filed fiat.
Guide bar burred or
bent; rails uneven.
• See •Chain Tension."
i
asherpen or replace chain.
chain.
Resherpen
See Chain Sharpening"
instructions.
Contact Sears Service.
See the chain sharpening
instructions.
Repair or replace guide
bar.
Oil inadequate
for bar and
chain
lubrication.
Oil tank empty.
Oil outlet clogged.
• Guide bar oil hole
blocked.
• Fill oil tank.
• Contact Sears Service.
• Remove bar and clean.
Chain cuts at
an angle.
• Cutters damaged on
one side.
• Chain dull on one side,
• Guide bar bent orworn.
• See "Sharpening Chain."
• See "Sharpening Chain."
• Replace guide bar.
If situations occur which are not covered in this manual, use care and good
judgement. If you need assistance, contact Sears Service or the CUSTOMER
ASSISTANCEHELPLINE at 1-800-235-5878.
15
FrontHandle
LeftSide
_- Sew Chain
r
\
_
Manual Oiler Control
/ r s,,Itch
t.ocko=
_rHandl.
Right Side
*'3J
Sprocket J
_. Spocket Guide
Guide Bar - A solid railed structure that
E,er Tip Guide - An attachment that
may be provided on the end cf the guide supports and guides the saw chain.
bar to prevent the chain at the and of the Kickt_ck ~ The backward cr upward
motion, or both of the guide bar ocCur_uide ber from _
the weed.
uctdng - The process of cross cutting ring when the saw chain near the nose
a fe4tsd tree or log into lengths.
of the top area of the guide bar contacts
Chain Brake - A device used to stop
any object such as a leg cr branch, or
the chain saw.
when the wocd closesin and pinches
Chain Saw Pcwerheed - A chain saw the saw chain In the cut.
withoutthe saw chain and guide bar,
Kickback, Pinch - The rapid pushClutch - A mechanism for connecting
back of the saw which can occur when
and disconnecting a driven member to
the wood closes in and pinches the
and from a rotating eoume of power.
moving saw chain in the cut along the
Drive Sprocket or Sprocket - The
top of the guide bar.
toothed pad that drives the sew chain.
Kickback, Rotational - The rapid upFelting - The process of cutting down a ward end backward motion of the saw
tree.
which can occur when the moving saw
Failing Back Cut - The final cut in a
chain near the upper portion of the tip of
tree felling operation rnade on the opthe guide bar contacts an object, such
posite of the tree from the notching unas a log or branch.
dercut.
Low-Kickback Chain - A chain that
Front Handle ~ The support handle lo- complies with the kickback perforcated at or toward the front of the chain mance requirements of ANSi
SaW.
B175.1-1991 when tested on a repreFront Handle Guard - A structural bar- sentative sample of chain saws.
der between the front handle of a chain
Normal Cutting PoMtlon - Those
saw and the guide, typically located
positions assumed in performing the
close to the hand position on the front
bucking and felling cuts.
handle and sometimes employed as an Notching Undercut - A notch cut in e
activating lever for a chain brake.
tree that directs the tree's fall.
Continued on next page
16
OilerControl- Asystem
foroilingthe
_uide bar and saw chain.
ear Handle -The support handle Iorated at or toward the rear of the saw.
Reduced Kickback Guide Bar - A
guide bar which has been demonstrated to reduce kickback significantly.
Replaoement Saw Chain - A chain
that complies with the kickback performance requirements of ANSi
B175.1-1991 when tested with specific
chain saws. It may not meet the ANSI
performance requirements when used
with other sews.
Saw Chain - A loop of chain having
cutting teeth, that cut the wood, and
that is driven by the motor and is supsPOrted
bythe guide bar.
piked Bumper (Spike) - The pointed
tooth or teeth for use when felling or
bucking to pivot the saw and maintain
,_ositionwhile sawing.
witch - A device that when operated
will complete or interrupt an electdcai
power circuit to the motor of the chain
saw.
Switch Unkage - The mechanism that
transmits motion from the tdgger to the
switch.
Switch Lookout - A movable stop that
prevents the unintentional operation of
the switch until manually actuated.
17
For the repair or replacement parts you need
delivered directly to your home
Call 7 am - 7 pm, 7 days a week
1-800-366-PART
(1-800-366-7278)
Para ordenar piezas con entrega a
domicilio - 1-800-659-7084
For in-house major brand repair service
Call 24 hours a day, 7 days a week
1-800-4-REPAIR
• RW/ftaV/C_
(1-800-473-7247)
Para pedir servicio de reparaci6n a
domicilio - 1-800-676-5811
For the location of a Sears Parts and
Repair Center in your area
Call 24 hours a day, 7 days a week
1-800-488-1222
For information on purchasing a Sears
Maintenance Agreement or to inquire
about an existing Agreement
Call 9 am - 5 pm, Monday-Saturday
1-800-827-6655
When requesting service or ordering
parts, always provide the following
information:
• Product Type
• Model Number
SE4R$
• Part Number
• Part Description
America's Repair Specialists