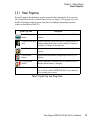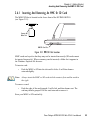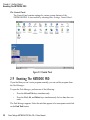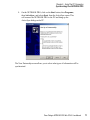
1
NETBOOK PRO
Win CE 4.2
User Manual
October 10, 2003 P/N 8100012 Rev A
ISO 9001 Certified
Quality Management System
© Copyright 2003 by Psion Teklogix Inc., Mississauga, Ontario
This document and the information it contains is the property of Psion Teklogix Inc.,
is issued in strict confidence, and is not to be reproduced or copied, in whole or in
part, except for the sole purpose of promoting the sale of Psion Teklogix manufactured goods and services. Furthermore, this document is not to be used as a basis for
design, manufacture, or sub-contract, or in any manner detrimental to the interests of
Psion Teklogix Inc.
All trademarks are the property of their respective holders.
Return-To-Factory Warranty
Psion Teklogix warrants a return-to-factory warranty for a period of one year. In
some regions, the warranty exceeds this period. Please contact your local Psion
Teklogix office for details. For a list of offices, please refer to Appendix A: “Support
Services And Worldwide Offices”. The warranty on Psion Teklogix manufactured
equipment does not extend to any product that has been tampered with, altered, or
repaired by any person other than an employee of an authorized Psion Teklogix
service organization. See Psion Teklogix terms and conditions of sale for full details.
Service
When requesting service, please provide information concerning the nature of the
failure and the manner in which the equipment was used when the failure occurred.
Type, model, and serial number should also be provided. Before returning any
products to the factory, call the Customer Services Group for a Return
Authorization number.
Support Services
Psion Teklogix provides a complete range of product support services to its
customers. For detailed information, please refer to Appendix A: “Support Services
And Worldwide Offices”.
Disclaimer
Every effort has been made to make this material complete, accurate, and up-todate. Psion Teklogix Inc. reserves the right to make changes without notice and shall
not be responsible for any damages, including but not limited to consequential
damages, caused by reliance on the material presented, including but not limited to
typographical errors.
TABLE
Approvals and Safety Summary
Chapter 1: Introduction
1.1
1.2
1.3
1.4
OF CONTENTS
. . . . . . . . . . . . . . . . . . . . . . . . . vii
About This Manual . . . . . . . . . . . . . . . .
Text Conventions . . . . . . . . . . . . . . . . .
Applications Installed On The NETBOOK PRO.
1.3.1 About ActiveSync . . . . . . . . . . . .
Caring For The NETBOOK PRO. . . . . . . . .
.
.
.
.
.
.
.
.
.
.
.
.
.
.
.
.
.
.
.
.
.
.
.
.
.
.
.
.
.
.
.
.
.
.
.
.
.
.
.
.
.
.
.
.
.
.
.
.
.
.
.
.
.
.
.
.
.
.
.
.
3
4
4
5
5
Features Of The NETBOOK PRO . . . . . . . . . . . . . . . .
Turning On And Off . . . . . . . . . . . . . . . . . . . . . . .
Passwords . . . . . . . . . . . . . . . . . . . . . . . . . . . . .
Finding And Using The Stylus . . . . . . . . . . . . . . . . . .
Power Management . . . . . . . . . . . . . . . . . . . . . . . .
2.5.1 Power Properties . . . . . . . . . . . . . . . . . . . . .
2.5.1.1 Battery . . . . . . . . . . . . . . . . . . . . .
2.5.1.2 Battery Calibration . . . . . . . . . . . . . . .
2.5.1.3 Power Saving Schemes . . . . . . . . . . . .
2.5.1.4 The Advanced Tab . . . . . . . . . . . . . . .
2.5.2 Battery Care . . . . . . . . . . . . . . . . . . . . . . .
2.5.2.1 Fitting The Main Battery. . . . . . . . . . . .
2.5.2.2 Charging The NETBOOK PRO Battery Pack .
2.5.2.3 Changing Battery Packs . . . . . . . . . . . .
2.5.2.4 Prolonging Battery Life . . . . . . . . . . . .
2.5.2.5 The Internal Backup Battery . . . . . . . . . .
Memory Cards . . . . . . . . . . . . . . . . . . . . . . . . . .
2.6.1 Inserting And Removing An MMC Or SD Card . . . .
.
.
.
.
.
.
.
.
.
.
.
.
.
.
.
.
.
.
.
.
.
.
.
.
.
.
.
.
.
.
.
.
.
.
.
.
.
.
.
.
.
.
.
.
.
.
.
.
.
.
.
.
.
.
. 11
. 11
. 12
. 13
. 14
. 15
. 16
. 16
. 18
. 21
. 22
. 22
. 22
. 22
. 23
. 24
. 24
. 25
Chapter 2: Getting Started
2.1
2.2
2.3
2.4
2.5
2.6
Psion Teklogix NETBOOK PRO Win CE 4.2 User Manual
i
Contents
2.6.2 Inserting And Removing A Compact Flash Card
2.6.3 Inserting And Removing A PCMCIA Card . . .
2.7 Connecting USB Accessories . . . . . . . . . . . . . . .
2.8 The Start Button And Taskbar . . . . . . . . . . . . . . .
2.9 Resetting The NETBOOK PRO. . . . . . . . . . . . . .
2.9.1 Performing A Soft Reset . . . . . . . . . . . . .
2.9.2 Performing A Hard Reset . . . . . . . . . . . . .
2.10 First Steps . . . . . . . . . . . . . . . . . . . . . . . . .
2.10.1 Navigating Between Files And Folders. . . . . .
2.10.2 Starting Programs . . . . . . . . . . . . . . . . .
2.10.3 Programs And Files . . . . . . . . . . . . . . . .
2.10.4 Entering Information . . . . . . . . . . . . . . .
2.10.5 Using Menus . . . . . . . . . . . . . . . . . . .
2.10.6 Using Dialogs . . . . . . . . . . . . . . . . . . .
2.10.6.1 Dialog Buttons . . . . . . . . . . . . .
2.10.7 Copying Information Between Programs. . . . .
.
.
.
.
.
.
.
.
.
.
.
.
.
.
.
.
.
.
.
.
.
.
.
.
.
.
.
.
.
.
.
.
.
.
.
.
.
.
.
.
.
.
.
.
.
.
.
.
.
.
.
.
.
.
.
.
.
.
.
.
.
.
.
.
.
.
.
.
.
.
.
.
.
.
.
.
.
.
.
.
.
.
.
.
.
.
.
.
.
.
.
.
.
.
.
.
.
.
.
.
.
.
.
.
.
.
.
.
.
.
.
.
26
27
28
29
30
31
32
33
33
34
34
34
34
35
36
36
Things To Do First. . . . . . . . . . . . . . . . . . . . . . . . .
3.1.1 Entering Owner and Password Information . . . . . . .
3.1.2 Setting The Time, Date, And Time Zone . . . . . . . . .
Things To Do Next . . . . . . . . . . . . . . . . . . . . . . . .
3.2.1 Setting Up ActiveSync . . . . . . . . . . . . . . . . . .
3.2.1.1 Partnerships . . . . . . . . . . . . . . . . . . .
3.2.1.2 Connecting Via RS232 Serial. . . . . . . . . .
3.2.1.3 Connecting Via Infrared (IrDA) . . . . . . . .
3.2.1.4 Connecting Via Ethernet (802.11b). . . . . . .
3.2.2 Backing Up To A PC . . . . . . . . . . . . . . . . . . .
3.2.2.1 Backing Up To A Memory Card . . . . . . . .
3.2.2.2 Restoring Files From A Memory-Card Backup
3.2.3 Exploring The Control Panel . . . . . . . . . . . . . . .
3.2.4 Securing Your Information . . . . . . . . . . . . . . . .
.
.
.
.
.
.
.
.
.
.
.
.
.
.
.
.
.
.
.
.
.
.
.
.
.
.
.
.
.
.
.
.
.
.
.
.
.
.
.
.
.
.
39
39
39
40
40
40
41
42
42
43
43
43
44
45
Chapter 3: Configuring The Unit
3.1
3.2
ii
Psion Teklogix NETBOOK PRO Win CE 4.2 User Manual
Contents
Chapter 4: Files, Folders, and Programs
4.1
4.2
4.3
4.4
4.5
Introduction . . . . . . . . . . . . . . . . . . . . . . .
Moving Around . . . . . . . . . . . . . . . . . . . . .
Opening Files, Folders And Programs . . . . . . . . .
Closing Programs/Files . . . . . . . . . . . . . . . . .
Creating New Folders. . . . . . . . . . . . . . . . . .
4.5.1 Creating New Files . . . . . . . . . . . . . . .
4.6 Start Menu - Documents . . . . . . . . . . . . . . . .
4.7 Changing File Attributes . . . . . . . . . . . . . . . .
4.8 Managing Folders . . . . . . . . . . . . . . . . . . . .
4.9 Memory-Card Folders . . . . . . . . . . . . . . . . .
4.10 The Flash Folder . . . . . . . . . . . . . . . . . . . .
4.11 Checking System Memory Use . . . . . . . . . . . . .
4.11.1 What Happens When System Memory Is Full?
4.11.2 Additional Memory And Programs . . . . . .
4.12 The Storage Manager . . . . . . . . . . . . . . . . . .
4.12.1 Formatting A Memory Card . . . . . . . . . .
4.12.2 Creating Partitions . . . . . . . . . . . . . . .
4.12.3 Partition Management . . . . . . . . . . . . .
.
.
.
.
.
.
.
.
.
.
.
.
.
.
.
.
.
.
.
.
.
.
.
.
.
.
.
.
.
.
.
.
.
.
.
.
.
.
.
.
.
.
.
.
.
.
.
.
.
.
.
.
.
.
.
.
.
.
.
.
.
.
.
.
.
.
.
.
.
.
.
.
.
.
.
.
.
.
.
.
.
.
.
.
.
.
.
.
.
.
.
.
.
.
.
.
.
.
.
.
.
.
.
.
.
.
.
.
.
.
.
.
.
.
.
.
.
.
.
.
.
.
.
.
.
.
.
.
.
.
.
.
.
.
.
.
.
.
.
.
.
.
.
.
. 49
. 49
. 49
. 50
. 50
. 51
. 51
. 51
. 52
. 53
. 54
. 55
. 55
. 55
. 56
. 56
. 57
. 59
Introduction . . . . . . . . . . . . . . . . . . . . . . . .
Using ActiveSync . . . . . . . . . . . . . . . . . . . . .
Getting Help. . . . . . . . . . . . . . . . . . . . . . . .
5.3.1 Where Can I Find More Help? . . . . . . . . . .
5.3.2 Tips On Using ActiveSync Help . . . . . . . . .
Working With Your Files . . . . . . . . . . . . . . . . .
5.4.1 Looking At Files On Your NETBOOK PRO . .
5.4.2 Copying A File Using Drag And Drop. . . . . .
5.4.3 Copying A File Using Copy And Paste . . . . .
5.4.4 Opening NETBOOK PRO Files From Your PC .
Backing Up Your NETBOOK PRO With ActiveSync . .
5.5.1 Performing Your First Backup . . . . . . . . . .
.
.
.
.
.
.
.
.
.
.
.
.
.
.
.
.
.
.
.
.
.
.
.
.
.
.
.
.
.
.
.
.
.
.
.
.
.
.
.
.
.
.
.
.
.
.
.
.
.
.
.
.
.
.
.
.
.
.
.
.
.
.
.
.
.
.
.
.
.
.
.
.
.
.
.
.
.
.
.
.
.
.
.
.
. 65
. 65
. 66
. 66
. 66
. 67
. 67
. 67
. 68
. 69
. 69
. 69
Chapter 5: Using The PC Connection
5.1
5.2
5.3
5.4
5.5
Psion Teklogix NETBOOK PRO Win CE 4.2 User Manual
iii
Contents
5.6
5.7
5.5.2 Performing Regular Backups . . . . .
Synchronizing Your NETBOOK PRO . . . .
5.6.1 What Is Synchronization?. . . . . . .
5.6.2 Synchronizing Your NETBOOK PRO
5.6.2.1 Creating The Partnership . .
5.6.3 Using An Existing Partnership . . . .
On-Schedule Outlook Sync . . . . . . . . . .
.
.
.
.
.
.
.
.
.
.
.
.
.
.
.
.
.
.
.
.
.
.
.
.
.
.
.
.
.
.
.
.
.
.
.
.
.
.
.
.
.
.
.
.
.
.
.
.
.
.
.
.
.
.
.
.
.
.
.
.
.
.
.
.
.
.
.
.
.
.
.
.
.
.
.
.
.
.
.
.
.
.
.
.
.
.
.
.
.
.
.
70
70
70
70
70
73
73
Introduction . . . . . . . . . . . . . . . . . . . . . . . . . . . .
802.11b Radio Configuration . . . . . . . . . . . . . . . . . . .
GSM/GPRS Radio Configuration . . . . . . . . . . . . . . . . .
Bluetooth Radio Configuration . . . . . . . . . . . . . . . . . .
6.4.1 NETBOOK PRO Bluetooth Settings . . . . . . . . . . .
Internet And E-Mail Settings . . . . . . . . . . . . . . . . . . .
6.5.1 Overview . . . . . . . . . . . . . . . . . . . . . . . . .
6.5.1.1 Using The Internet On The NETBOOK PRO .
6.5.1.2 Using E-mail On The NETBOOK PRO . . . .
6.5.1.3 Types Of E-mail Account. . . . . . . . . . . .
6.5.1.4 If You Don’t Have An Internet/E-mail Account
6.5.1.5 Glossary Of Terms . . . . . . . . . . . . . . .
6.5.2 Setting Up Your NETBOOK PRO . . . . . . . . . . . .
6.5.2.1 How To Use Internet Explorer/Inbox. . . . . .
6.5.2.2 Getting Help . . . . . . . . . . . . . . . . . .
6.5.2.3 What Information Do I Need? . . . . . . . . .
6.5.3 Setting Up E-mail On NETBOOK PRO . . . . . . . . .
6.5.3.1 Connecting The Modem . . . . . . . . . . . .
6.5.3.2 Setting Up Dialing . . . . . . . . . . . . . . .
6.5.3.3 Setting Up The Internet Service . . . . . . . .
6.5.3.4 Setting Up The Modem. . . . . . . . . . . . .
6.5.3.5 Setting Up The E-mail Program . . . . . . . .
.
.
.
.
.
.
.
.
.
.
.
.
.
.
.
.
.
.
.
.
.
.
.
.
.
.
.
.
.
.
.
.
.
.
.
.
.
.
.
.
.
.
.
.
.
.
.
.
.
.
.
.
.
.
.
.
.
.
.
.
.
.
.
.
.
.
77
77
80
85
86
89
89
89
89
90
90
91
92
92
92
93
94
94
95
96
96
97
Chapter 6: Configuring Communications
6.1
6.2
6.3
6.4
6.5
Chapter 7: Troubleshooting And Tips
7.1
iv
General Tips . . . . . . . . . . . . . . . . . . . . . . . . . . . . . . . 101
Psion Teklogix NETBOOK PRO Win CE 4.2 User Manual
Contents
7.1.1
7.1.2
7.1.3
7.1.4
7.1.5
7.2
7.3
Times Aren’t Correct In The Time Program . . . . . .
If You Forget Your Password. . . . . . . . . . . . . .
The NETBOOK PRO Doesn’t Turn On/Off . . . . . .
Resetting The NETBOOK PRO . . . . . . . . . . . .
Battery Life Of The NETBOOK PRO . . . . . . . . .
7.1.5.1 Charging Times . . . . . . . . . . . . . . .
ActiveSync Connection Problems
Using Windows® 95/98/NT 4.0 . . . . . . . . . . . . . . . .
7.2.1 Tips When Installing ActiveSync . . . . . . . . . . .
7.2.2 Basic Troubleshooting For Your NETBOOK PRO . .
7.2.3 Basic Troubleshooting For Your PC . . . . . . . . . .
7.2.4 Device Conflicts . . . . . . . . . . . . . . . . . . . .
7.2.5 Fax/Modem On COM 1/2/3/4 . . . . . . . . . . . . .
7.2.6 Temp Folder . . . . . . . . . . . . . . . . . . . . . .
Troubleshooting ActiveSync
Synchronization Problems . . . . . . . . . . . . . . . . . . .
7.3.1 Basic Troubleshooting For Synchronization Problems
7.3.2 Other Things To Try . . . . . . . . . . . . . . . . . .
.
.
.
.
.
.
.
.
.
.
.
.
.
.
.
.
.
.
.
.
.
.
.
.
101
101
101
102
102
103
.
.
.
.
.
.
.
.
.
.
.
.
.
.
.
.
.
.
.
.
.
.
.
.
.
.
.
.
103
103
104
104
106
108
109
. . . . 111
. . . . 111
. . . . 112
Chapter 8: Specifications
8.1
8.2
Hardware Specifications . . . . . . . . .
8.1.1 Physical. . . . . . . . . . . . . .
8.1.2 Environmental Characteristics . .
8.1.3 Standard Display . . . . . . . . .
8.1.4 Power Requirements . . . . . . .
8.1.5 Standard Processor And Memory
8.1.6 Miscellaneous . . . . . . . . . .
Standard Operating System . . . . . . . .
.
.
.
.
.
.
.
.
.
.
.
.
.
.
.
.
.
.
.
.
.
.
.
.
.
.
.
.
.
.
.
.
.
.
.
.
.
.
.
.
.
.
.
.
.
.
.
.
.
.
.
.
.
.
.
.
.
.
.
.
.
.
.
.
.
.
.
.
.
.
.
.
.
.
.
.
.
.
.
.
.
.
.
.
.
.
.
.
.
.
.
.
.
.
.
.
.
.
.
.
.
.
.
.
.
.
.
.
.
.
.
.
.
.
.
.
.
.
.
.
115
115
115
116
116
116
116
116
Psion Teklogix NETBOOK PRO Win CE 4.2 User Manual
v
Contents
Appendices
Appendix A: Support Services And Worldwide Offices
A.1 Technical Support . . . . . . . . . . . . . . . . . . . . . . . . . . . .A-1
A.2 Product Repairs . . . . . . . . . . . . . . . . . . . . . . . . . . . . .A-1
A.3 WorldWide Offices. . . . . . . . . . . . . . . . . . . . . .
Company Headquarters
And Canadian Service Centre . . . . . . . . . .
Americas . . . . . . . . . . . . . . . . . . . . . . . . .
North American Headquarters And U.S. Service Centre
International Subsidiaries . . . . . . . . . . . . . . . .
. . . . . .A-2
.
.
.
.
.
.
.
.
.
.
.
.
.
.
.
.
.
.
.
.
.A-2
.A-2
.A-2
.A-2
A.4 Worldwide Web . . . . . . . . . . . . . . . . . . . . . . . . . . . . .A-3
Appendix B: Program License Agreement
B.1 PROGRAM LICENSE AGREEMENT . . . . . . . . . . . . . . . . . B-3
B.2 MICROSOFT END USER LICENSE AGREEMENT (EULA):. . . . B-4
Index
vi
. . . . . . . . . . . . . . . . . . . . . . . . . . . . . . . . . . . . . . . . . . . I
Psion Teklogix NETBOOK PRO Win CE 4.2 User Manual
APPROVALS
AND SAFETY SUMMARY
DECLARATION OF CONFORMITY
Product:
NETBOOK PRO
Application of Council Directives:
EMC Directive: 89/336/EEC
Low Voltage Directive: 73/23/EEC
Conformity Declared to Standards:
EN 55022: 1998; Class B;
EN 55024: 1998;
EN 61000-4-2; ±4kV CD; ±8kV AD
EN 61000-4-3; 3V/m, 80-1000 MHz, 900 MHz
EN 61000-4-4; ±1kV Power lines
EN 61000-4-5; ±2kV Common;
±1kV Differential mode
EN 61000-4-6; 3VRMS, 150 kHz-80 MHz
EN 61000-4-11; AC Mains Ports
EN 61000-3-2; EN 61000-3-3
EN 60950: 1992 + A1 + A2 + A3 + A4 + A11
Manufacturer:
PSION TEKLOGIX INC.
2100 Meadowvale Blvd.
Mississauga, Ontario; Canada L5N 7J9
Year of Manufacture:
2003
Manufacturer’s Address in the
European Community:
PSION TEKLOGIX S.A.
La Duranne; 135 Rue Rene Descartes
BP 421000
13591 Aix-En-Provence
Cedex 3; France
Type of Equipment:
Information Technology Equipment
Equipment Class:
Commercial and Light Industrial
Manufacturer:
Psion Teklogix Inc. Ontario
Legal Representative in Europe:
Psion Teklogix S.A. France
Psion Teklogix NETBOOK PRO Win CE 4.2 User Manual
vii
Approvals And Safety Summary
FCC INFORMATION FOR THE USA
FCC DECLARATION OF CONFORMITY (DOC)
Applicant’s Name & Address:
PSION TEKLOGIX
2100 Meadowvale Blvd.
Mississauga, Ontario, Canada L5N 7J9
Telephone No.: (905) 813-9900
US Representative’s Name & Address: Psion Teklogix Corp.
1810 Airport Exchange Blvd., Suite 500
Erlanger, Kentucky, 41018, USA
Telephone No.: (859) 371-6006
Equipment Type/ Environment Use:
Computing Devices for Home and Office Use
Trade Name / Model No.:
NETBOOK PRO
Year of Manufacture:
2003
Standard(s) to which Conformity is Declared:
The NETBOOK PRO, supplied by Psion Teklogix, has been tested and found to comply
with FCC PART 15, SUBPART B - UNINTENTIONAL RADIATORS, CLASS B
COMPUTING DEVICES FOR HOME & OFFICE USE.
viii
Applicant:
Psion Teklogix Inc.
Mississauga, Ontario, Canada
Legal Representative in US:
Psion Teklogix Corp.
Erlanger, Kentucky, USA
Psion Teklogix NETBOOK PRO Win CE 4.2 User Manual
Approvals And Safety Summary
CE MARKING
When used in a residential, commercial or light industrial environment, the
product and its approved UK and European peripherals fulfill all requirements
for CE marking.
R&TTE DIRECTIVE 1999/5/EC
This equipment complies with the essential requirements of EU Directive
1999/5/EC (Declaration available: www.psionteklogix.com).
Cet équipement est conforme aux principales caractéristiques définies dans la
Directive européenne RTTE 1999/5/CE. (Déclaration disponible sur le site:
www.psionteklogix.com).
Die Geräte erfüllen die grundlegenden Anforderungen der RTTE-Richtlinie
(1999/5/EG). (Den Wortlaut der Richtlinie finden Sie unter:
www.psionteklogix.com).
Questa apparecchiatura è conforme ai requisiti essenziali della Direttiva Europea
R&TTE 1999/5/CE. (Dichiarazione disponibile sul sito: www.psionteklogix.com).
Este equipo cumple los requisitos principales de la Directiva 1995/5/CE de la UE,
“Equipos de Terminales de Radio y Telecomunicaciones”. (Declaración disponible
en: www.psionteklogix.com).
Este equipamento cumpre os requisitos essenciais da Directiva 1999/5/CE do Parlamento Europeu e do Conselho (Directiva RTT). (Declaração disponível no
endereço: www.psionteklogix.com).
Ο εξοπλισµός αυτός πληροί τις βασικές απαιτήσεις της κοινοτικής οδηγίας EU
R&TTE 1999/5/EΚ. (Η δήλωση συµµόρφωσης διατίθεται στη διεύθυνση:
www.psionteklogix.com)
Deze apparatuur voldoet aan de noodzakelijke vereisten van EU-richtlijn betreffende radioapparatuur en telecommunicatie-eindapparatuur 199/5/EG. (verklaring
beschikbaar: www.psionteklogix.com).
Dette udstyr opfylder de Væsentlige krav i EU's direktiv 1999/5/EC om Radio- og
teleterminaludstyr. (Erklæring findes på: www.psionteklogix.com).
Dette utstyret er i overensstemmelse med hovedkravene i R&TTE-direktivet
(1999/5/EC) fra EU. (Erklæring finnes på: www.psionteklogix.com).
Psion Teklogix NETBOOK PRO Win CE 4.2 User Manual
ix
Approvals And Safety Summary
Utrustningen uppfyller kraven för EU-direktivet 1999/5/EC om ansluten teleutrustning och ömsesidigt erkännande av utrustningens överensstämmelse (R&TTE).
(Förklaringen finns att läsa på: www.psionteklogix.com).
Tämä laite vastaa EU:n radio- ja telepäätelaitedirektiivin (EU R&TTE Directive
1999/5/EC) vaatimuksia. (Julkilausuma nähtävillä osoitteessa:
www.psionteklogix.com).
FCC INFORMATION TO THE USER
RADIO AND TELEVISION INTERFERENCE
This equipment radiates radio frequency energy and if not used properly—that is,
in strict accordance with the instructions in this manual—may cause interference to
radio communications and television reception. It has been tested and found to comply with the limits for a Class B digital device pursuant to part 15 of the FCC Rules.
Operation is subject to the following two conditions:
1. This device may not cause harmful interference, and
2. This device must accept any interference received, including interference that may cause undesired operation.
These limits are designed to provide reasonable protection against harmful interference in a residential installation. However, there is no guarantee that interference
will not occur in a particular installation. If this equipment does cause harmful interference to radio or television reception, which can be determined by turning the
equipment off and on, the user is encouraged to try to correct the interference by one
or more of the following measures:
x
•
Reorient or relocate the receiving antenna.
•
Increase the separation distance between the equipment and the receiver.
•
If you are using the equipment with a mains adaptor, plug it into an outlet
which is on a different circuit from that to which the receiver is connected.
•
Consult an experienced radio/TV technician for help.
Psion Teklogix NETBOOK PRO Win CE 4.2 User Manual
Approvals And Safety Summary
For customers in the USA, the following booklet prepared by the Federal Communications Commission may be of help: “How to Identify and Resolve Radio-TV
Interference Problems”. This booklet is available from the US Government Printing
Office, Washington, DC 20402 - Stock No 004-000-00345-4.
RADIO FREQUENCY EMISSIONS
Do not use in aircraft or hospitals. Some equipment in hospitals and aircraft are not
shielded from radio frequency energy. Do not use the NETBOOK PRO on board
aircraft, or in hospitals, without first obtaining permission.
Do not use near pacemakers. The product may affect the operation of some medically implanted devices such as pacemakers, causing them to malfunction. Avoid
placing your product next to such devices. Keep a minimum distance of 15 cm
between the device and the product to reduce the risk of interference. If you have
any reason to suspect that interference is taking place, turn off the NETBOOK PRO
and contact your cardiologist for assistance.
Note:
In August 1996 the Federal Communications Commission (FCC) of the
US adopted an updated safety standard for human exposure to radio frequency energy emitted by FCC regulated transmitters. The design of this
product complies with the FCC guidelines and those standards.
Use of non-approved accessories may violate FCC RF exposure guidelines.
IMPORTANT SAFETY INSTRUCTIONS
This equipment was tested for FCC compliance under conditions that included the
use of shielded cables and connectors between it and the peripherals. It is important
that you use shielded cable and connectors to reduce the possibility of causing radio
and television interference. Shielded cables, suitable for the NETBOOK PRO, can
be obtained from an authorised Psion Teklogix dealer.
If the user modifies the equipment or its peripherals in any way, and these modifications are not approved by Psion Teklogix, the FCC may withdraw the user’s right to
operate the equipment.
Psion Teklogix NETBOOK PRO Win CE 4.2 User Manual
xi
Approvals And Safety Summary
EMISSIONS INFORMATION FOR CANADA
This Class B digital apparatus meets all requirements of the Canadian InterferenceCausing Equipment Regulations.
Cet appareil numérique de la classe B respecte toutes les exigences du Règlement
sur le matériel brouilleur du Canada.
INFRARED DEVICE SAFETY
CLASS 1 LED PRODUCT
This product includes an Infrared device for transmitting and receiving files from
devices supporting the IrDA format. Although this invisible beam is not considered
harmful, and complies with EN60825-1 (IEC825-1), we recommend the following
precautions when the Infrared device is transmitting:
•
Do not stare into the Infrared beam.
•
Do not view directly with optical instruments.
No parts in the device may be serviced by the user.
BATTERY SAFETY PRECAUTIONS
CAUTION!
Danger of explosion if a NETBOOK PRO battery is incorrectly handled, charged,
disposed of or replaced. Replace only with the same or equivalent type recommended by the manufacturer. Dispose of used batteries according to the instructions
described in “Lithium-Ion Battery Safety Precautions” on page xiii. Carefully
review all battery safety issues listed in that section.
VORSICHT!
Explosiongefahr bei unsachgemäßem Austausch der Batterie Ersatz nur durch
denselben oder einen vom Hersteller empfohlenen gleichwertigen Typ. Entsorgung
gebrauchter Batterien nach Angaben des Herstellers.
xii
Psion Teklogix NETBOOK PRO Win CE 4.2 User Manual
Approvals And Safety Summary
LITHIUM-ION BATTERY SAFETY PRECAUTIONS
Do not store batteries at temperatures in excess of +60°C; the optimum storage temperature for maximum battery life is +10°C to +35°C.
Important:
It is critical that this safety information be reviewed and that all
warnings be strictly followed.
BATTERIES ARE CONSIDERED HAZARDOUS WASTE. Used batteries must
be disposed of in accordance with the manufacturer’s instructions, taken to an
appropriate local battery recycling facility, or returned to one of the following Psion
Teklogix offices for proper disposal.
Teklogix Inc.
2100 Meadowvale Blvd.
Mississauga, Ontario
Canada
L5N 7J9
Warning:
Teklogix Corp.
1810 Airport Exchange Blvd.
Suite 500
Erlanger, Kentucky
USA 41018
Teklogix S.A.
Parc Club Du Golf-Bat 1.
13856 Aix-En-Provence
Cedex 3
France
TO PREVENT the battery from leaking acid, generating heat or
exploding, adhere to the precautions listed below.
•
Use only with the authorized Psion Teklogix power adaptor.
•
Do not dispose of in fire.
•
Do not incinerate or subject battery cells to temperatures in excess of 100°C
(212°F). Such treatment can vaporize the liquid electrolyte causing cell rupture. Incineration may result in harmful emissions or explosion.
•
Do not charge, use or store batteries below -30º C (-22° F). Batteries must
be handled in accordance with all applicable state and federal laws and regulations.
•
The battery incorporates built-in safety devices. To ensure their proper function, do not disassemble or alter any parts of the battery.
•
Do not short-circuit the battery by directly connecting any of the exposed
terminals with metal objects such as wire. Do not transport or store the
battery together with metal objects such as necklaces, hair pins, etc.
•
Do not use or leave the battery near a heat source such as a fire or heater.
Psion Teklogix NETBOOK PRO Win CE 4.2 User Manual
xiii
Approvals And Safety Summary
xiv
•
Do not immerse the battery in water.
•
When charging, use the battery charger specifically designed for the battery.
•
Do not crush, puncture, open, dismantle, or otherwise mechanically interfere with batteries.
•
Do not directly solder the battery.
•
Do not connect the battery to an electrical outlet, vehicle cigarette lighter,
etc.
•
Do not put battery into a microwave oven or pressurized container.
•
Do not use the rechargeable battery in combination with non-rechargeable
batteries (such as dry-cell batteries) or batteries of different capacities or
brands.
•
Immediately remove the battery from the device or battery charger and stop
use if the battery gives off an odour, generates heat, becomes discoloured or
deformed, or in any way appears abnormal during use.
•
Do not continue charging the battery if it does not recharge within the specified charge time.
•
The battery may burst or ignite if the battery leaks. Always ensure that it is
away from any exposed flames.
•
If a battery should leak, do not allow the contents to come into contact with
your skin or your eyes. If it does, wash immediately with plenty of cold
water and seek medical advice.
•
Do not store the battery in extremely high temperatures (e.g., a vehicle,
strong direct sunlight, etc.). This may cause the battery to overheat or ignite,
and it may also reduce the performance and service life of the battery.
•
Do not use in areas where static electricity is greater than what the manufacturer guarantees.
•
Keep batteries out of reach of children.
Psion Teklogix NETBOOK PRO Win CE 4.2 User Manual
1
INTRODUCTION
1.1 About This Manual . . . . . . . . . . . . . . .
1.2 Text Conventions. . . . . . . . . . . . . . . . .
1.3 Applications Installed On The NETBOOK PRO
1.3.1 About ActiveSync . . . . . . . . . .
1.4 Caring For The NETBOOK PRO . . . . . . . .
.
.
.
.
.
.
.
.
.
.
.
.
.
.
.
.
.
.
.
.
.
.
.
.
.
. . . . . . . . 3
. . . . . . . . 4
. . . . . . . . 4
. . . . . . . .5
. . . . . . . . 5
Psion Teklogix NETBOOK PRO Win CE 4.2 User Manual
1
Chapter 1: Introduction
About This Manual
1.1 About This Manual
This manual provides information on the operation and features of the Psion
Teklogix NETBOOK PRO. For additional information, refer to the NETBOOK
PRO online help, or the documentation supplied with the application you are using.
The manual references other user documents, where applicable.
Chapter 1: Introduction
provides an overview of this manual, NETBOOK PRO applications, including
the PC connectivity software, ActiveSync, and care of the NETBOOK PRO.
Chapter 2: Getting Started
describes the NETBOOK PRO features and how to get the NETBOOK PRO
ready for use, including installation of a PC Card, Compact Flash card, or MultiMedia / Secure Digital Card. Important battery installation and use information is also detailed.
Chapter 3: Configuring The Unit
provides instructions on configuring the NETBOOK PRO’s security and
Control Panel features. It also explains how to use ActiveSync to connect the
NETBOOK PRO to a PC serially, or through Infrared or radio communication.
File transfers and file synchronization can be done via ActiveSync.
Chapter 4: Files, Folders, and Programs
describes the NETBOOK PRO’s file manager and how to move around and
manage the information on your NETBOOK PRO.
Chapter 5: Using The PC Connection
explains how to use ActiveSync for file transfers, file synchronization and
sending e-mail.
Chapter 6: Configuring Communications
instructs on the configuration of Bluetooth, GSM/GPRS, and 802.11b radios,
and the programs Internet Explorer (the Internet browser) and Inbox (the e-mail
application).
Chapter 7: Troubleshooting And Tips
assists in the recognition and correction of problems that you may encounter
when operating the NETBOOK PRO and ActiveSync. Includes detailed information on battery use and power consumption.
Psion Teklogix NETBOOK PRO Win CE 4.2 User Manual
3
Chapter 1: Introduction
Text Conventions
Chapter 8: Specifications
details the physical, environmental and various operating specifications for
the NETBOOK PRO.
Appendix A: Support Services And Worldwide Offices
presents information for technical support, contacts and the Psion Teklogix
worldwide web address.
1.2 Text Conventions
Note:
Notes highlight additional helpful information.
Important:
These statements provide particularly important instructions or
additional information that is critical to the operation of the
computer and other equipment.
Warning:
These statements provide important information that may prevent
injury, damage to the equipment, or loss of data.
1.3 Applications Installed On The NETBOOK PRO
The NETBOOK PRO is capable of running a wide variety of applications but the
ones available on your particular NETBOOK PRO depend on the purpose for which
the NETBOOK PRO is provided. A number of standard applications exist and
custom programs can be installed easily.
The following standard programs are available:
4
•
Inbox, for sending and receiving e-mail.
•
Internet Explorer, for browsing the World Wide Web.
•
MSN Messenger, an instant-messaging program.
•
Pocket On-Schedule, a personal-information manager.
•
JEM-CE, Java ‘virtual machine’ software.
•
Stellent File Viewer, software for viewing files.
•
Windows Explorer, a file browser.
•
Windows Media Player, software for viewing multimedia files.
Psion Teklogix NETBOOK PRO Win CE 4.2 User Manual
Chapter 1: Introduction
About ActiveSync
•
Wordpad, a word processor for writing letters and other documents.
1.3.1 About ActiveSync
The Microsoft PC connectivity software, ActiveSync, can be used to connect
the NETBOOK PRO to PCs running Windows® 95/98/ME/2000/XP or NT 4.0. By
connecting the NETBOOK PRO to a PC with a cable and running ActiveSync on
the PC, you can:
•
View your NETBOOK PRO files from Windows Explorer by using the
Mobile Device icon in the PC’s My Computer window.
•
Drag and drop files between the NETBOOK PRO and the PC in the same
way that you would between PC drives, and they will be automatically converted to the appropriate file format at the same time.
•
Synchronize e-mail and your address book on the NETBOOK PRO with
the PC to keep them in step with each other.
•
Back up your NETBOOK PRO files to the PC, then restore them from the
PC to the NETBOOK PRO again, if needed.
For detailed information, please refer to Chapter 5: “Using The PC Connection”.
1.4 Caring For The NETBOOK PRO
Screen
When used with the approved stylus, the NETBOOK PRO screen is very resistant to
wear and impact and should last for a considerable time. Use of any object, other
than the approved stylus, may result in damage to the NETBOOK PRO screen.
To maintain the life of the NETBOOK PRO screen, keep the screen clean.
To clean the screen: switch off the NETBOOK PRO and use a soft, clean, dry cloth
to gently wipe the screen. (If the unit is set to turn on automatically when the screen
is tapped, you should turn this preference off before cleaning the screen.)
Warning:
Under no circumstances use chemical solvents to clean the screen.
Charging
To avoid damage to the NETBOOK PRO or the NETBOOK PRO battery packs, use
only Psion Teklogix approved chargers and docking stations.
Psion Teklogix NETBOOK PRO Win CE 4.2 User Manual
5
Chapter 1: Introduction
Caring For The NETBOOK PRO
Backup Battery
The NETBOOK PRO has replaceable backup batteries designed to retain data while
the main battery pack is charging or being changed over.
The backup batteries are a pair of AAA cells. These may be replaced by the user.
Important:
If both the main battery pack and the backup battery are allowed
to fully discharge, you will lose all your information on the internal disk. However, some of your data can be protected from loss
using the flash folder. Please refer to page 54 for details.
Drop Rating
The NETBOOK PRO is designed to survive being dropped onto carpet, from a
height of 0.7 m.
Dropping the NETBOOK PRO from greater heights or onto harder surfaces may
result in damage to the NETBOOK PRO.
IP Rating
The NETBOOK PRO is rated to IP30.
Operating Temperature
The NETBOOK PRO is designed to operate within the temperature limits of 0°C to
+50°C (32°F and 120°F). Use of the NETBOOK PRO outside of these temperature
limits may reduce its life. Avoid exposing the NETBOOK PRO to sudden changes in
temperature, since such exposure may result in damage.
Important:
As a safety precaution, charging the NETBOOK PRO battery
should be limited to the temperature range: 0°C to +50°C
(32°F to 120°F) Outside of these limits, the safety circuits of the
NETBOOK PRO battery pack will not allow the battery to charge.
Storage Temperature
The NETBOOK PRO is designed to be stored within the temperature ranges of
-10°C to +60°C (14°F and 140°F). Storage of the NETBOOK PRO outside of these
temperature limits may reduce its life.
6
Psion Teklogix NETBOOK PRO Win CE 4.2 User Manual
Chapter 1: Introduction
Caring For The NETBOOK PRO
To prolong the life of the NETBOOK PRO battery packs during normal storage,
store the NETBOOK PRO (and the battery pack) between +10°C and +35°C (+50°F
and +95°F).
When storing the NETBOOK PRO for a long period of time, the main battery
should be removed and stored fully discharged.
Humidity
The NETBOOK PRO is designed to operate in humidity ranging from 5 to 93%
(non-condensing). Use of the NETBOOK PRO in environments with condensing
humidity or humidity outside these limits may result in damage to the NETBOOK
PRO.
Magnetic Fields And Static Electricity
The magnet of the NETBOOK PRO speaker may corrupt data stored on magnetic
media. Do not keep the NETBOOK PRO next to credit cards or other magnetic
media.
Avoid exposing the NETBOOK PRO to strong magnetic fields or static electricity.
Such exposure may cause loss of data or result in damage to the NETBOOK PRO.
Service
Do not attempt to dismantle the NETBOOK PRO. There are no user-serviceable
parts inside, and any attempt to dismantle the NETBOOK PRO will invalidate the
warranty.
Psion Teklogix NETBOOK PRO Win CE 4.2 User Manual
7
GETTING STARTED
2.1
2.2
2.3
2.4
2.5
2.6
2.7
2.8
2.9
2
Features Of The NETBOOK PRO. . . . . . . . . . . . . . . . . . . . . 11
Turning On And Off . . . . . . . . . . . . . . . . . . . . . . . . . . . . 11
Passwords . . . . . . . . . . . . . . . . . . . . . . . . . . . . . . . . . 12
Finding And Using The Stylus. . . . . . . . . . . . . . . . . . . . . . . 13
Power Management . . . . . . . . . . . . . . . . . . . . . . . . . . . . 14
2.5.1 Power Properties . . . . . . . . . . . . . . . . . . . . . . . 15
2.5.1.1 Battery . . . . . . . . . . . . . . . . . . . . . . . . . 16
2.5.1.2 Battery Calibration . . . . . . . . . . . . . . . . . . 16
2.5.1.3 Power Saving Schemes . . . . . . . . . . . . . . . . 18
2.5.1.4 The Advanced Tab. . . . . . . . . . . . . . . . . . . 21
2.5.2 Battery Care . . . . . . . . . . . . . . . . . . . . . . . . . 22
2.5.2.1 Fitting The Main Battery . . . . . . . . . . . . . . . 22
2.5.2.2 Charging The NETBOOK PRO Battery Pack. . . . . 22
2.5.2.3 Changing Battery Packs . . . . . . . . . . . . . . . . 22
2.5.2.4 Prolonging Battery Life . . . . . . . . . . . . . . . . 23
2.5.2.5 The Internal Backup Battery. . . . . . . . . . . . . . 24
Memory Cards . . . . . . . . . . . . . . . . . . . . . . . . . . . . . . . 24
2.6.1 Inserting And Removing An MMC Or SD Card . . . . . . 25
2.6.2 Inserting And Removing A Compact Flash Card . . . . . . 26
2.6.3 Inserting And Removing A PCMCIA Card . . . . . . . . . 27
Connecting USB Accessories . . . . . . . . . . . . . . . . . . . . . . . 28
The Start Button And Taskbar . . . . . . . . . . . . . . . . . . . . . . . 29
Resetting The NETBOOK PRO . . . . . . . . . . . . . . . . . . . . . . 30
2.9.1 Performing A Soft Reset . . . . . . . . . . . . . . . . . . . 31
2.9.2 Performing A Hard Reset . . . . . . . . . . . . . . . . . . 32
Psion Teklogix NETBOOK PRO Win CE 4.2 User Manual
9
2.10 First Steps . . . . . . . . . . . . . . . . . . . . . . .
2.10.1 Navigating Between Files And Folders . .
2.10.2 Starting Programs . . . . . . . . . . . . .
2.10.3 Programs And Files . . . . . . . . . . . .
2.10.4 Entering Information . . . . . . . . . . .
2.10.5 Using Menus . . . . . . . . . . . . . . .
2.10.6 Using Dialogs . . . . . . . . . . . . . . .
2.10.6.1 Dialog Buttons . . . . . . . . . . .
2.10.7 Copying Information Between Programs .
10
Psion Teklogix NETBOOK PRO Win CE 4.2 User Manual
.
.
.
.
.
.
.
.
.
.
.
.
.
.
.
.
.
.
.
.
.
.
.
.
.
.
.
.
.
.
.
.
.
.
.
.
.
.
.
.
.
.
.
.
.
. . . .
. . . .
. . . .
. . . .
. . . .
. . . .
. . . .
. . . .
. . . .
33
33
34
34
34
34
35
36
36
Chapter 2: Getting Started
Features Of The NETBOOK PRO
2.1 Features Of The NETBOOK PRO
The NETBOOK PRO is a sub-notebook mobile computer using the Windows®
CE.Net operating system, with an SVGA touch-sensitive screen. The NETBOOK
PRO is lightweight and designed for use in a wide range of business areas including
field service, field sales, transport, health care, hospitality, manufacturing and insurance.
Figure 2.1 The NETBOOK PRO
2.2 Turning On And Off
To switch on:
open the NETBOOK PRO.
Note:
In its default configuration, the NETBOOK PRO will wake up when the
case is opened, and sleep when the case is closed. These and other poweron/power-off options can be changed on the Advanced tab of the Power
Properties control panel.
Psion Teklogix NETBOOK PRO Win CE 4.2 User Manual
11
Chapter 2: Getting Started
Passwords
To switch off:
press and hold the Fn key, then press the Esc/On button to turn off the
NETBOOK PRO. You can switch off at any time. You do not have to save
information stored in the NETBOOK PRO’s internal memory, as it is automatically saved for you. If you are working with a file on a memory card, save the
file before switching off the NETBOOK PRO and removing the card.
Note:
If you do not use the NETBOOK PRO, it will automatically switch off
after a few minutes to save battery power. To continue using the NETBOOK PRO where you left off, switch the NETBOOK PRO on again
using the On/Off button. Your information will be saved as long as the
backup battery retains charge. See “Power Management” on page 14 for
information on checking battery-charge levels and power settings.
2.3 Passwords
The NETBOOK PRO may be configured to require a password when it is turned on.
To do this:
1. Select Start, Control Panel. The Control Panel appears.
2. Double-click on the Password icon. The Password Properties dialog
appears:
3. Enter a new password, and enter it again to confirm it. The Enable
Password Protection section of the dialog becomes active.
4. Select the At Power On checkbox to enable the power-on password.
5. Press the OK button. When the NETBOOK PRO is turned on, it will
request the power-on password before opening the Desktop. Changes
to the Owner and Password settings will also require the password.
12
Psion Teklogix NETBOOK PRO Win CE 4.2 User Manual
Chapter 2: Getting Started
Finding And Using The Stylus
To disable the power-on password:
1. Select Start, Control Panel. The Control Panel appears.
2. Double-click on the Password icon. A dialog appears, requesting the
existing password.
3. Enter the existing password. The Password Properties dialog appears.
4. Deselect the At Power On checkbox.
5. Press the OK button.
The existing password will still be active. Any changes to the Owner or Password
settings will still require this password for access.
To completely disable the password, clear the two password-entry fields and press
the OK button. The password will not be then needed for access to the Owner or
Password settings.
2.4 Finding And Using The Stylus
The stylus is located in the NETBOOK PRO, in a holder at the right.
Stylus
Stylus Eject Button
Figure 2.2 Location Of The Stylus
To remove the stylus, push the square button next to it. The stylus pops out. To
replace the stylus, push it back in. You can use your fingers to tap on the screen,
though it is best to use the stylus to avoid fingerprints or smudges on the screen.
Psion Teklogix NETBOOK PRO Win CE 4.2 User Manual
13
Chapter 2: Getting Started
Power Management
Do not tap the screen with any object that has a sharp tip or you may damage the
screen. Don’t use any type of ink pen, as the ink may be impossible to remove.
See “Caring For The NETBOOK PRO” on page 5 for instructions on how to clean
the screen.
You can usually tap on (“click on”) an item with the stylus to select or change it,
simulating the standard mouse clicks. For example, you can:
•
Single-tap (or single-click) to select an item.
•
Double-tap (or double-click) a program icon, to open a program.
•
Hold down the Alt key, then tap, to right-click. Right-click on an item to
display its ‘context menu’, which gives access to the object’s properties.
2.5 Power Management
The NETBOOK PRO is powered by a Lithium Ion rechargeable battery pack (for
details, see “Battery Life Of The NETBOOK PRO” on page 102). The NETBOOK
PRO can be powered from AC when used with the AC adaptor. When the
NETBOOK PRO is powered from the AC adaptor, it will also charge the battery
pack.
Note:
How long your batteries last will depend upon how you use your NETBOOK PRO. The NETBOOK PRO will use considerably more battery
power when you have the brightness turned up, are using files stored on a
memory card, or are using infrared or a communications card.
You can take steps to help prolong your battery’s life:
• Turn the screen brightness down.
• Set the delay time to 10 minutes in the Switch to Suspend option of the
Battery Power scheme of the Power Schemes tab in the Power Properties control panel (see page 20).
• Open and use files from internal storage instead of from a memory card,
as the NETBOOK PRO requires more power to write to memory cards.
14
Psion Teklogix NETBOOK PRO Win CE 4.2 User Manual
Chapter 2: Getting Started
Power Properties
2.5.1 Power Properties
Power Properties for the battery can be accessed either through the Power icon in
the Control Panel (for the Control Panel screen, see Figure 2.14 on page 30), or by
double-clicking the taskbar power icon (this icon changes depending on power
status, as described in Table 2.1).
System Tray Icon
Description
Low Back-up
Battery
Appears when back-up battery charge is less than 25% of
capacity.
External Power Indi- Appears when the NETBOOK PRO is connected to the AC
cator
adaptor and the main battery is fully charged. Disappears
when the AC adaptor is disconnected.
Low Main Battery
Appears when main battery charge drops below 50% of
capacity.
Critical Main
Battery
Appears when main battery charge drops below 25% of
capacity.
Charging Main
Battery
Appears when the NETBOOK PRO is connected to the AC
adaptor, and the battery is charging.
No Charge Icon
All charge-related icons disappear if battery levels are not
low or critical, and the NETBOOK PRO is not connected
to an external power source.
Table 2.1 System Tray Icon Charge States
Psion Teklogix NETBOOK PRO Win CE 4.2 User Manual
15
Chapter 2: Getting Started
Power Properties
2.5.1.1
Battery
To check the battery power status, click on the Battery tab:
Figure 2.3 Power Properties: Battery
This tab describes the main and backup batteries, and their state. A warning message
to change or recharge the battery appears when the main or backup battery levels
become critically low.
This tab includes a checkbox, Using multiple main battery packs. When this checkbox is selected, the NETBOOK PRO calibrates each battery pack anew each time
the pack is inserted. When this checkbox is not checked, the NETBOOK PRO
retains the battery calibration information when the battery pack is removed. See
“Battery Calibration” below for details.
This tab also displays an indication of charge or discharge current for the main battery.The user can see how the current varies as the main battery charges and discharges, the backlight is adjusted, or a peripheral card is inserted.
Note:
2.5.1.2
The current measurement displayed may be up to ten seconds old.
Battery Calibration
The NETBOOK PRO uses ‘battery calibration’ to increase the accuracy of the
remaining charge indication for its rechargeable battery.
When a battery pack is first connected, the NETBOOK PRO tracks its discharge and
charge current and voltage over a full discharge/charge cycle. This enables it to form
a picture of how the battery behaves, and thus give accurate estimates of how long
16
Psion Teklogix NETBOOK PRO Win CE 4.2 User Manual
Chapter 2: Getting Started
Power Properties
the charge will last during day-to-day use. An indicator beside the estimate of
remaining charge in the main battery displays either ‘Not calibrated’, ‘Calibrating’,
or nothing:
•
When the Battery tab of the Power Properties dialog displays the ‘Not calibrated’ message, the NETBOOK PRO has not yet calibrated the battery.
•
When it displays the ‘Calibrating’ message, the NETBOOK PRO is setting
up its battery calibration. To do this, it tracks the performance of the battery
through a complete discharge and charge cycle.
The percentage capacity estimate of the battery is not very accurate in the 'Not calibrated' state, somewhat more accurate in the 'Calibrating' state, and should be very
accurate once the battery has been calibrated.
Note:
Psion Teklogix recommends that the battery be fully charged when first
used, then fully discharged before being charged again.
When the battery is calibrated, the ‘Calibrating’ indication vanishes. Once the
battery is calibrated, the NETBOOK PRO continues to refine its estimate every time
it sees a full charge or discharge cycle. The battery-charge indication is thus adjusted
for ageing battery packs.
A calibration cycle will abort if the AC power state is changed (if the power cable is
plugged in or removed). Calibration during charging can also abort if the unit gets
too hot.
The ‘Not calibrated’ indicator will reappear, and calibration of the gauge is lost, if
any of these four conditions occur:
•
The unit automatically shuts off due to low battery, when the capacity estimate is greater than 6%.
•
Battery charging ceases (charge current less than 100mA) and the capacity
estimate is less than 94%.
•
Capacity estimate reaches 0% and unit continues to run for more than 15
minutes.
•
Capacity estimate reaches 100% and unit continues to charge with charge
current greater than 100mA for more than 15 minutes.
Psion Teklogix NETBOOK PRO Win CE 4.2 User Manual
17
Chapter 2: Getting Started
Power Properties
2.5.1.3
Power Saving Schemes
The Power Schemes tab specifies the settings for the two ‘power schemes’ named
On AC Power, and On Battery Power. These power schemes group settings to be
used when the NETBOOK PRO is running on battery power or when it is connected
to external power.
Figure 2.4 Power Properties: Schemes
Note:
The Power Properties Schemes settings are cumulative—that is, to determine when the NETBOOK PRO enters ‘Suspend’ state, the unit waits for
the ‘Switch to Dim’ time to elapse, followed by the ‘Switch to Stand-By’
time, and then, once the ‘Switch to Suspend’ time has elapsed, ‘Suspend’
state is activated.
When setting the Switch to Dim, Switch to Stand-By, and Switch to Suspend states,
keep the following in mind. Because the NETBOOK PRO ‘wakes up’ from the Dim
and Stand-By states almost instantaneously following any user input (button press,
screen tap), the timeouts you set will not slow user activity. The sum of the Switch to
Dim, Switch to Stand-By, and Switch to Suspend timeouts should be selected
carefully since the NETBOOK PRO will go to sleep (appear off) when this time has
elapsed, saving battery power.
Psion Teklogix recommends starting with a total of 10 minutes for this overall
timeout. Setting any of these timeouts to Never does not affect the other timeout
options, but will adversely affect the battery run time. If all three timeouts are set to
Never, the NETBOOK PRO will remain on. To further reduce power consumption,
carefully consider the duration of time that the display backlight is ON or turned up
(see “Backlight Properties” on page 30).
18
Psion Teklogix NETBOOK PRO Win CE 4.2 User Manual
Chapter 2: Getting Started
Power Properties
The following are the default values for the power schemes options:
Option
AC Power
Battery Power
Switch to Dim
After 1 minute
After 30 seconds
Switch to Stand-By
Never
Never
Switch to Suspend
Never
After 10 minutes
Table 2.2 Power Schemes Default Values
Power Scheme
This dropdown menu allows you to identify whether the unit is using AC Power or
Battery Power.
Switch To Dim
During the Dim state the backlight brightness is turned down after the specified time
has elapsed, if the NETBOOK PRO does not receive any user input, including activities such as a screen tap—any user-initiated activity. When the NETBOOK PRO
enters the Dim state, it begins to monitor the time specified in the Switch to Stand-By
menu.
Figure 2.5 Power Schemes: Switch To Dim Menu
Press any button to bring the unit out of Dim state.
Switch to Stand-By
In Stand-By state, the NETBOOK PRO turns off the display, but the programs and
NETBOOK PRO hardware remain active. System activity includes computer
activity such as serial data, an activity initiated by an application, and so on—any
Psion Teklogix NETBOOK PRO Win CE 4.2 User Manual
19
Chapter 2: Getting Started
Power Properties
activity not executed by the user. Stand-By is activated when the time specified in
the Switch to Stand-By and the Switch to Stand-By options have elapsed without
any activity. The NETBOOK PRO then begins to monitor the Suspend time.
Figure 2.6 Power Schemes: Switch To Standby Menu
Press any button to bring the unit out of Standby state.
Switch to Suspend
Once the time specified in the Switch to Dim and the Switch to Stand-By states have
elapsed, the NETBOOK PRO begins to count down the time specified in the Switch
to Suspend option. When the time in the Suspend option elapses, the unit enters
Suspend state.
In Suspend state, the NETBOOK PRO CPU suspends all activity, turns off the display, and goes into a low power state. The state of the device (RAM contents) is preserved.
Select Suspend from the Start Menu or press the Fn and Esc keys together to put
the NETBOOK PRO into Suspend state. The NETBOOK PRO may be configured
to allow entry into Suspend state if external communications connections are active;
these options can be set in the Advanced tab of the Power Properties dialog.
Press the Esc/On key to wake up the unit. You can also enable the unit to wake from
Suspend when a number of external events occur, by checking the appropriate
option box in the Advanced tab of the Power Properties dialog.
Note:
20
When the NETBOOK PRO is in suspend state, any network connection is
broken. To resume, you must re-establish the network connection.
Psion Teklogix NETBOOK PRO Win CE 4.2 User Manual
Chapter 2: Getting Started
Power Properties
Figure 2.7 Power Schemes: Switch To Suspend Menu
2.5.1.4
The Advanced Tab
The Advanced tab of the Power Properties dialog contains settings that govern when
the NETBOOK PRO will switch on and off:
Figure 2.8 Power Properties: Advanced
The NETBOOK PRO can be configured to switch off when its case is closed, and
switch on when its case is opened (these are the default settings).It can also be configured to switch on when a serial cable is connected, or when the screen is tapped.
The NETBOOK PRO can be configured to enter the Suspend state when it has an
active PPP, network, device, or infrared (IrDA) connection. By default, it will not
enter Suspend state when one of these connections is active.
Psion Teklogix NETBOOK PRO Win CE 4.2 User Manual
21
Chapter 2: Getting Started
Battery Care
2.5.2 Battery Care
2.5.2.1
Fitting The Main Battery
Before you can use the NETBOOK PRO you must fit the main battery—slide it into
place, then slide the cover across until it latches into place, as shown in Figure 2.9
on page 22.
Important:
Always switch off the NETBOOK PRO before removing the main
battery.
Figure 2.9 Main Battery Removal
Important:
2.5.2.2
Take care when replacing batteries! The NETBOOK PRO will
warn you when its main battery is getting low, in plenty of time to
charge it.
Charging The NETBOOK PRO Battery Pack
To charge the battery, attach the battery pack to the NETBOOK PRO and connect
the supplied AC adapter. The standard (2200 mAH) NETBOOK PRO battery will
normally be fully charged within 3 to 4 hours.
2.5.2.3
Changing Battery Packs
If you are using your NETBOOK PRO away from the charger and a spare battery
pack is available, you can change batteries when the battery warning is displayed.
To do this:
22
Psion Teklogix NETBOOK PRO Win CE 4.2 User Manual
Chapter 2: Getting Started
Battery Care
1. Switch the NETBOOK PRO off.
2. Slide the battery pack latch towards the rear of the NETBOOK PRO.
3. Pull the battery away from the NETBOOK PRO to remove it.
4. Push in the replacement battery pack.
The backup battery preserves the contents of the NETBOOK PRO.
If you are going to use more than one battery pack, you should indicate this on the
Battery tab of the Power Properties dialog by selecting the check-box ‘Using multiple main battery packs’. This option indicates that any time you remove a battery,
you may be replacing it with a different one. When the battery is removed, the
NETBOOK PRO discards the current battery capacity information, and starts from
the ‘Not calibrated’ state for the battery gauge.
Important:
2.5.2.4
Always switch off the NETBOOK PRO before removing the main
battery.
Prolonging Battery Life
When your NETBOOK PRO is switched off, it is in the ‘Suspend’ state and will
continue to use a small amount of battery power. If you are going to leave your
NETBOOK PRO switched off for a long period of time, you are advised to back up
your data beforehand because the batteries will eventually run out. For details on
battery usage and life, please refer to “Battery Life Of The NETBOOK PRO” on
page 102.
Psion Teklogix NETBOOK PRO Win CE 4.2 User Manual
23
Chapter 2: Getting Started
Memory Cards
2.5.2.5
The Internal Backup Battery
The NETBOOK PRO has an internal backup battery designed to retain data while
the main battery pack is charging or being changed over. The backup battery is a
pair of non-rechargeable alkaline AAA cells that may be changed by the user.
Figure 2.10 Backup Battery Insertion
Important:
If both the main battery pack and the backup battery are allowed
to fully discharge, you will lose all your information in internal
memory. However, some of your data can be protected from loss
using the flash folder. Please refer to page 54 for details.
2.6 Memory Cards
The NETBOOK PRO accepts non-volatile memory cards, which fit into dedicated
slots in the unit and can be used to store application software and/or data. The
NETBOOK PRO accepts the following types of memory cards:
•
Compact Flash (CF) cards.
•
MultiMedia Cards (MMCs).
•
Secure Digital (SD) cards.
•
PCMCIA cards.
Each memory card appears as a separate folder in the file browser. See section 4.9
on page 53.
24
Psion Teklogix NETBOOK PRO Win CE 4.2 User Manual
Chapter 2: Getting Started
Inserting And Removing An MMC Or SD Card
2.6.1 Inserting And Removing An MMC Or SD Card
The MMC/SD slot is located on the lower front of the NETBOOK PRO
(see Figure 2.11).
Contacts On
Other Side
MMC/SD Card Slot
Figure 2.11 MMC/SD Slot Location
MMC cards are keyed so that they may not be inserted incorrectly (SD cards cannot
be inserted incorrectly). When a memory card is inserted, a folder for it appears in
the Windows Explorer file browser.
To insert a card:
•
Note:
Push the MMC or SD into the slot until it clicks. It will then bounce
outward slightly.
Always insert the MMC or SD card with the contacts first and the notch to
the right.
To remove a card:
•
Push the edge of the card inwards. It will click, and then bounce out. The
end may then be grasped. Pull the card outward to remove it.
Store your MMC or SD card safely.
Psion Teklogix NETBOOK PRO Win CE 4.2 User Manual
25
Chapter 2: Getting Started
Inserting And Removing A Compact Flash Card
2.6.2 Inserting And Removing A Compact Flash Card
The CF slot is located on the left-hand side of the NETBOOK PRO (see Figure
2.12).
Eject Button
Compact Flash Card Slot
Figure 2.12 Compact Flash Slot Location
CF cards are keyed so that they may not be inserted incorrectly. When a memory
card is inserted, a folder for it appears in the Windows Explorer file browser.
Note:
The CF eject button must first be pressed in and released so that the
button pops out. Then the button can be pressed in to pop the card out.
To insert a CF card:
•
Push the Compact Flash card into the card slot on the left-hand side of the
NETBOOK PRO.
To remove a CF card:
•
Press the eject button next to the slot inwards. The card pops outward, and
can then be pulled outwards.
Store your Compact Flash card safely.
26
Psion Teklogix NETBOOK PRO Win CE 4.2 User Manual
Chapter 2: Getting Started
Inserting And Removing A PCMCIA Card
2.6.3 Inserting And Removing A PCMCIA Card
The PCMCIA card slot is located on the right-hand side of the NETBOOK PRO
(see Figure 2.13).
PCMCIA Card Slot
Eject Button
Figure 2.13 PCMCIA Slot Location
PCMCIA cards are keyed so that they may not be inserted incorrectly. When a
memory card is inserted, a folder for it appears in the Windows Explorer file
browser.
To insert a PCMCIA card:
•
Push the card into the card slot until it clicks. The eject button next to the
card slot pops out.
Note:
The Eject button may be folded back against the side of the NETBOOK
PRO when a PCMCIA card is inserted.
To remove a card:
•
Press the eject button next to the slot inwards. The card pops loose, and can
then be pulled outwards.
Store your PCMCIA card safely.
Psion Teklogix NETBOOK PRO Win CE 4.2 User Manual
27
Chapter 2: Getting Started
Connecting USB Accessories
2.7 Connecting USB Accessories
The NETBOOK PRO can accept USB accessories, such as a mouse or printer. The
NETBOOK PRO’s USB connector is located at the lower left of the device:
USB Mini Type-A Connector
To USB Peripheral
To connect:
plug the accessory into the USB port. The NETBOOK PRO will search the
USB interface for the device and display a dialog that it has been found.
Note:
28
If the connected accessory requires drivers, they must be loaded through
ActiveSync or from a memory card before the accessory is connected.
Psion Teklogix NETBOOK PRO Win CE 4.2 User Manual
Chapter 2: Getting Started
The Start Button And Taskbar
2.8 The Start Button And Taskbar
By default, the NETBOOK PRO screen has a ‘taskbar’ across the lower edge of the
display. At the left of the taskbar is a ‘Start button’, which gives easy access to the
programs in the device.
Start Menu:
The Start menu provides convenient access to the NETBOOK PRO’s programs
and settings. Display it by clicking on the Start button:
Psion Teklogix NETBOOK PRO Win CE 4.2 User Manual
29
Chapter 2: Getting Started
Resetting The NETBOOK PRO
The Control Panel:
The Control Panel contains settings for various system features of the
NETBOOK PRO. It is accessible by selecting Start, Settings, Control Panel:
Figure 2.14 Control Panel
2.9 Resetting The NETBOOK PRO
If you find that you can’t exit a program normally, you can end the program from
the Task Manager.
To open the Task Manager, perform one of the following:
•
Press the Alt and Tab keys simultaneously.
•
Press the Ctrl, Alt, and Delete keys simultaneously for less than three seconds:
The Task Manager appears. Select the task that appears to be unresponsive and click
on the End Task button.
30
Psion Teklogix NETBOOK PRO Win CE 4.2 User Manual
Chapter 2: Getting Started
Performing A Soft Reset
If this does not work, or your NETBOOK PRO appears to have ‘locked up’, you can
perform a ‘soft reset’. This should restart your NETBOOK PRO while preserving
most of your information. After a soft reset, any changes to open files will be lost.
Files in internal flash storage are preserved.
It is worth trying a soft reset if the keys on the NETBOOK PRO do not appear to
respond, or if the NETBOOK PRO appears to switch on and you are sure that the
batteries are good, but the screen is otherwise blank.
It is possible, though unlikely, that performing a soft reset after a program failure
would cause the NETBOOK PRO to lose the information in its internal flash storage; it could even prevent the reset from working at all. If this happens, you will
have to perform a ‘hard reset’. This will erase all data in internal storage.
Important:
A hard reset resets the NETBOOK PRO completely. All running
programs, unsaved information, or programs installed to the
RAM disk will be lost.
Anything saved to non-volatile (flash disk) storage will be preserved. Any registry settings that have been written to non-volatile
storage will be preserved.
2.9.1 Performing A Soft Reset
To perform a soft reset:
1. Do one of the following:
• Execute the ‘warmboot.exe’ program found in the Windows folder.
• Hold down the Ctrl, Alt, and Delete keys for three seconds.
Psion Teklogix NETBOOK PRO Win CE 4.2 User Manual
31
Chapter 2: Getting Started
Performing A Hard Reset
• Gently press a thin object, such as an unfolded paper clip, onto the Reset
button. This is located in a hole to the right of the righthand Shift key
(see Figure 2.15 below). Hold the reset switch down for a second.
Reset Button (In Hole)
Figure 2.15 Reset Button Location
If the NETBOOK PRO turns off:
2. Press the On/Off button to turn the NETBOOK PRO back on.
Note:
Pressing the On/Off button is only necessary if the unit has been reset
through use of the reset switch.
After a soft reset, any changes to open files will be lost. Your other files in internal
storage will almost always be safe. When you use the warmboot.exe program,
changes made to the registry will be saved.
2.9.2 Performing A Hard Reset
To perform a hard reset:
•
Remove all batteries and AC power.
Notes:
1. When performing a hard reset, it is a good idea to remove the backup
batteries before the main battery, to avoid unnecessary drain of the
backup batteries.
2. Hard resetting the NETBOOK PRO will delete the ActiveSync
partnership on the NETBOOK PRO. You may delete and recreate the
partnership on the PC, or create another partnership with a new
name. Refer to ActiveSync’s online help for more detail on this
operation.
32
Psion Teklogix NETBOOK PRO Win CE 4.2 User Manual
Chapter 2: Getting Started
First Steps
2.10 First Steps
When you first switch on the NETBOOK PRO, you will see the Windows CE
desktop. At this time it is a good idea to set the date and time. To do this:
1. Press the Start button. Select Settings, Control Panel. The Windows
Control Panel opens.
2. Double-tap on Date/Time Properties. The Date/Time Properties dialog
appears.
3. Set the desired date and time values.
4. Click the OK button in the Date/Time Properties dialog to close and
save your changes.
Note:
You can also double tap the time indication in the taskbar to open the
Date/Time Properties dialog.
2.10.1 Navigating Between Files And Folders
•
Double-click on a folder icon to open that folder. To close the folder, click
on the X icon at the far right of the menu bar. Click on the Up Folder icon
to move back up one level.
•
Click on a file to select it. Double-click to open it.
‘Up Folder’ Icon
‘Close’ Icon
Psion Teklogix NETBOOK PRO Win CE 4.2 User Manual
33
Chapter 2: Getting Started
Starting Programs
2.10.2 Starting Programs
When you open a file, the correct program for this file is started automatically. You
can also start programs by clicking on them from the Start Menu. You don’t have to
close one program before opening another. The taskbar displays all open applications.
2.10.3 Programs And Files
To create a new file:
open the program, select the New command on the File menu and type in the
name for the new file (see “Entering Information”, below). The file will now be
created. You can start entering your information. It is a good idea to keep related
files together in a folder, to make the files easier to find later.
2.10.4 Entering Information
You can enter information and complete tasks using the stylus or the keyboard.
2.10.5 Using Menus
You can usually select a menu command to perform tasks.
•
Click on the menu you want to access from the menu bar.
•
Click on the menu names and commands, or use the arrow keys to move
around the menus. Click on commands marked with a
or press the right
arrow key to see further commands.
A menu command with three dots at the end means that selecting the command will
display a “dialog” where you enter more information (see “Using Dialogs” on
page 35).
If a menu command is grey, it means that it’s not currently available; for example,
you cannot Copy unless you have first selected something to copy.
34
Psion Teklogix NETBOOK PRO Win CE 4.2 User Manual
Chapter 2: Getting Started
Using Dialogs
2.10.6 Using Dialogs
A “dialog” appears when you need to make selections and enter further information.
You can move between dialog items by clicking on them, or by pressing the Tab or
Shift + Tab keys. The selected item is highlighted.
Dialogs contain one or more of the following elements:
Textbox:
where you just type in your information.
Dropdown:
where you select from a number of options. The current selection in the list is
highlighted. You can change the selection by tapping on the arrow next to the
list; the list drops down so that you may choose one of the options. You may
also select options by pressing the arrow keys or by typing the first letter of the
option you want.
Checkbox:
where you make a choice between selecting an option or not selecting it. Tap on the
checkbox, or press the Space key, to add or remove a checkmark.
Radio buttons:
where you make one choice from a number of options. Just tap on an option, or
use the Left arrow and Right Arrow keys to make a selection. Press the Tab
key to leave the set of radio buttons and go on to the next item.
If an item is grey, it is currently not available. For example, if you are not connecting
to the Internet through a proxy server, the Bypass proxy server for local addresses
checkbox in Internet Settings, Connection tab, will be greyed out. Some dialogs
comprise a number of “pages”; each page has a “tab” at the top (see Figure 2.16 on
page 36). Tap on the tab, or move the highlight to the tab name, to go to that page.
You can also move a dialog around the screen by holding the stylus on the dialog
title bar and dragging it across the screen.
Psion Teklogix NETBOOK PRO Win CE 4.2 User Manual
35
Chapter 2: Getting Started
Copying Information Between Programs
Tabs in dialog page
Checkbox
Dropdown box
Figure 2.16 Dialog Pages
2.10.6.1 Dialog Buttons
Dialogs usually include standard buttons such as Ok and X. Some buttons have a
standard keypress equivalent:
•
Usually, you can click on the OK button or press the Enter key if you want
to save information and remove the dialog.
•
Click on the Cancel button, the X button, or press the Esc key if you want
to close the dialog without saving the information.
•
For dialogs that ask a question, you can click on the Yes button or press the
Y key for ‘yes’. Click on the No button, press the N key, or press the Esc key
for ‘no’.
2.10.7 Copying Information Between Programs
You can insert information created in one program into a different program.
For example, you may want to compose text in Wordpad before copying it into
an e-mail message in the Inbox. If you try to insert an object into a program that is
not designed to handle that type of object, you will be unable to Paste. Trying to
copy a file from Windows Explorer into a Wordpad document will not work because
Wordpad will keep the Paste option greyed out until it detects that text is ready to
be pasted.
36
Psion Teklogix NETBOOK PRO Win CE 4.2 User Manual
3
CONFIGURING THE UNIT
3.1 Things To Do First . . . . . . . . . . . . . . . . . . . .
3.1.1 Entering Owner and Password Information .
3.1.2 Setting The Time, Date, And Time Zone . .
3.2 Things To Do Next. . . . . . . . . . . . . . . . . . . .
3.2.1 Setting Up ActiveSync . . . . . . . . . . . .
3.2.1.1 Partnerships . . . . . . . . . . . . . .
3.2.1.2 Connecting Via RS232 Serial . . . . .
3.2.1.3 Connecting Via Infrared (IrDA) . . . .
3.2.1.4 Connecting Via Ethernet (802.11b) . .
3.2.2 Backing Up To A PC. . . . . . . . . . . . .
3.2.2.1 Backing Up To A Memory Card . . .
3.2.3 Exploring The Control Panel . . . . . . . .
3.2.4 Securing Your Information. . . . . . . . . .
.
.
.
.
.
.
.
.
.
.
.
.
.
.
.
.
.
.
.
.
.
.
.
.
.
.
. . . . . . . 39
. . . . . . 39
. . . . . . 39
. . . . . . . 40
. . . . . . 40
. . . . . . 40
. . . . . . 41
. . . . . . 42
. . . . . . 42
. . . . . . 43
. . . . . . 43
. . . . . . 44
. . . . . . 45
Psion Teklogix NETBOOK PRO Win CE 4.2 User Manual
37
Chapter 3: Configuring The Unit
Things To Do First
Entering Owner and Password Information
3.1 Things To Do First
This section describes what you may need to do to set up your NETBOOK PRO:
•
Enter owner information in the Owner control panel, so that your
NETBOOK PRO can be returned if you lose it.
•
Set a password for your machine, so that other people cannot access
your information.
•
Set the current time and date.
3.1.1 Entering Owner and Password Information
It is a good idea to enter “owner information”, so that if the NETBOOK PRO is lost,
it can be returned when found:
1. Select the Owner icon from the Control Panel. Fill in the fields on the
Identification tab. Click OK to save your information.
2. Select the Password icon from the Control Panel. Enter a password in
the first textbox and confirm it by typing it again in the second textbox.
The text will be displayed as an asterisk (*) for security.
3. Click At Power On if you want to display the password request screen
when switching the machine on after a suspend.
4. Click OK to save your changes.
Note:
The system password does not protect files stored on memory cards or
files copied to other machines. However, when connecting via ActiveSync
to a unit that is password protected, you will be asked to enter the unit’s
password on the PC.
Important:
Don’t forget your password! If you have forgotten the system
password then you will have to reset the machine.
3.1.2 Setting The Time, Date, And Time Zone
1. In the Control Panel, open the Date/Time icon. The Date/Time Properties dialog is also accessible by double-clicking on the system time in
the system tray.
Psion Teklogix NETBOOK PRO Win CE 4.2 User Manual
39
Chapter 3: Configuring The Unit
Things To Do Next
Setting Up ActiveSync
2. You will see a dialog in which you can set the time, date, and time zone.
Move the highlight in the date box by tapping on the correct date. Use
the arrow buttons to change month and year. In the Current Time box,
type in the time or use the up and down arrows to set the time.
3. Click on the OK button and the time and date are saved.
3.2 Things To Do Next
This section gives a brief overview of what else you may want to do when you first
use your NETBOOK PRO.
3.2.1 Setting Up ActiveSync
ActiveSync allows you to connect the NETBOOK PRO to a PC serially, or through
infrared or radio communication. File transfers, file synchronization and sending email can all be done via ActiveSync.
ActiveSync must be connected through serial or infrared at least once before other
connection types (Bluetooth, Ethernet, 802.11) are possible.
Install the most recent version of ActiveSync on your PC (check the Microsoft
website for the latest software).
3.2.1.1
Partnerships
There are two types of connection provided for by ActiveSync:
•
Guest - A guest connection allows file transfers. No synchronization is performed. If the NETBOOK PRO is password protected, the password
prompt will appear when connecting as guest.
•
Partnership - A partnership connection allows for synchronization of files,
e-mail and other data. If the NETBOOK PRO is password protected, a password prompt will appear before allowing synchronization. It is necessary to
establish a partnership before trying to connect to ActiveSync via Ethernet,
Bluetooth, or 802.11.
You can disconnect any ActiveSync connection by double-clicking on the blue icon
in the NETBOOK PRO’s system tray and selecting the Disconnect button from the
dialog.
40
Psion Teklogix NETBOOK PRO Win CE 4.2 User Manual
Chapter 3: Configuring The Unit
Things To Do Next
Connecting Via RS232 Serial
3.2.1.2
Connecting Via RS232 Serial
To connect using ActiveSync via RS232 serial:
1. Connect the NETBOOK PRO ActiveSync serial cable to the serial
communications port on your computer (usually COM1 or COM2).
2. Connect the other end of the serial cable to the NETBOOK PRO serial
port. The port is behind the rubber cover on the left hand side of the unit
RS232 symbol).
(labelled with the
On the NETBOOK PRO...
3. Open the NETBOOK PRO’s Control Panel.
4. Double-click on the PC Connection icon. The PC Connection dialog
opens.
5. Verify that the Use Connection checkbox is checked and that the unit
will connect using ‘Serial Cable on Com 1’.
On the PC...
6. Select File, Connection Settings in the ActiveSync window, or doubleclick on the ActiveSync icon in the system tray. The ActiveSync menu
appears.
7. Select Connection Settings. The Connection Settings dialog appears.
8. Place a checkmark in the checkbox labeled ‘Allow serial cable or infrared connection to this COM port:’.
9. Select the COM port to which you connected the cable in Step 1.
10. Press OK. The Settings dialog disappears.
11. Select File, Get Connected. The Get Connected wizard appears.
12. Press Next. ActiveSync searches for a connection.
On the NETBOOK PRO...
13. Click on the Start button, then Programs, then ActiveSync, and select
direct from the ActiveSync menu. A dialog appears, indicating that the
NETBOOK PRO is attempting to connect.
Psion Teklogix NETBOOK PRO Win CE 4.2 User Manual
41
Chapter 3: Configuring The Unit
Things To Do Next
Connecting Via Infrared (IrDA)
14. A successful connection is indicated by a blue icon
in the
NETBOOK PRO’s system tray. The NETBOOK PRO and the PC will
also play sounds to indicate that they are connected, if sound is enabled
on the devices.
3.2.1.3
Connecting Via Infrared (IrDA)
To connect using ActiveSync via infrared, a partnership must already be established
between the PC and the NETBOOK PRO (see “Creating The Partnership” on page
70).
1. On the PC, open ActiveSync and go to the Connection Settings
screen. The first checkbox concerns both serial and IrDA connections.
Set the dropdown to use the Infrared connection. The NETBOOK PRO
supports Fast IrDA.
2. On the NETBOOK PRO, go into Control Panel and open PC Connection. Make sure the checkbox is checked. Make sure it will connect
using the Infrared Port. If this is not the case, click on the Change
button and set the dropdown to the correct connection type.
3. Align the IrDA port on the NETBOOK PRO with the IrDA port on the
PC. Infrared requires a clear path between ports. Make sure nothing is
blocking the Infrared ports.
4. On the NETBOOK PRO, click on the Start button, then Programs,
then ActiveSync, and select direct from the ActiveSync menu.
3.2.1.4
Connecting Via Ethernet (802.11b)
To connect using ActiveSync via Ethernet, a partnership must already be established
between the PC and the NETBOOK PRO.
1. On the PC, open ActiveSync and look at the Connection Settings
screen. Uncheck all checkboxes except Ethernet.
2. On the NETBOOK PRO, go into Control Panel. Open Network and
Dial-up Connections. Open the Properties for the network connection
by double-clicking on the icon.
42
Psion Teklogix NETBOOK PRO Win CE 4.2 User Manual
Chapter 3: Configuring The Unit
Things To Do Next
Backing Up To A PC
3. Click on the Name Servers tab and fill in the WINS information. If
your network does not have a WINS server, you must set this information to use the IP of your PC. If you do not know this information,
please contact your system administrator.
4. Click on OK to save the network settings.
5. On the NETBOOK PRO, click on the Start button, then Programs,
then ActiveSync, and select wireless from the ActiveSync menu.
Important:
You must have a correctly configured access point to use 802.11b
Ethernet to access your PC via ActiveSync. The PC and the
NETBOOK PRO must be on the same network, or networks that
have access to each other, for this to function correctly.
3.2.2 Backing Up To A PC
You can use ActiveSync to back up individual files, folders, or the NETBOOK
PRO’s entire internal storage to the PC. It is possible to configure ActiveSync to
automatically back up the NETBOOK PRO every time it synchronizes.
3.2.2.1
Backing Up To A Memory Card
You can back up individual files, individual folders or groups of files and folders to
a MultiMedia, Secure Digital, Compact Flash, or PCMCIA card fitted in the appropriate slot. To back up the files and folders, copy them from the internal disk to the
card using the Copy and Paste commands in the System screen.
1. Select the files and folders you want to back up.
2. Choose the Copy command from the Edit menu.
3. Select the folder of the memory card.
4. Choose the Paste command from the Edit menu.
3.2.2.2
Restoring Files From A Memory-Card Backup
To restore the files and folders on a memory card to your NETBOOK PRO, they
may be copied them from the memory card to internal storage in the same way as
when they were backed up. To do this:
1. Select the folder of the memory card.
2. Choose the Copy command from the Edit menu.
Psion Teklogix NETBOOK PRO Win CE 4.2 User Manual
43
Chapter 3: Configuring The Unit
Things To Do Next
Exploring The Control Panel
3. Select a folder on the NETBOOK PRO as a destination.
4. Choose the Paste command from the Edit menu.
3.2.3 Exploring The Control Panel
To display the Control panel:
select the Start, Settings, Control Panel menu. The Control Panel opens.
Initially, Date/Time should already be set, and possibly Password and
PC Connections as well. You may wish to change other settings later.
Some of the other options include:
44
•
Regional Settings, to change settings that may vary from country to country, such as the currency and date formats.
•
Power, to control how and when the NETBOOK PRO switches on and off.
For example, you might like it to switch on when you tap the screen, and off
when you haven’t used it for three minutes.
•
Display Properties, to set the appearance of the desktop and the windows
on it, and the brightness of the backlight.
•
Volume & Sound, to control the sounds that the NETBOOK PRO makes
when you press navigation keys, tap the screen and perform other actions.
•
Stylus, to set the accuracy needed for two taps of the touch-screen to register as a ‘double-tap’, and also to calibrate the touch-screen.
Psion Teklogix NETBOOK PRO Win CE 4.2 User Manual
Chapter 3: Configuring The Unit
Things To Do Next
Securing Your Information
3.2.4 Securing Your Information
There are no known problems with passing the NETBOOK PRO through airport
security machines and other X-rays.
There are several things that you can do to secure your files against other hazards.
•
To prevent accidental alterations to the contents of a file, the file can be
made “read-only”. For more information see Chapter 4: “Files, Folders,
and Programs”.
•
To prevent accidental loss of data, files should be backed up regularly (see
“Backing Up To A Memory Card” on page 43), in case they become corrupted or are deleted accidentally.
•
To prevent unauthorized access to sensitive information, a password can be
set to restrict access to data files.
•
Enter owner information so that the NETBOOK PRO can be returned if it is
lost. See “Entering Owner and Password Information” on page 39.
Note:
It is not possible for anyone to copy information from or to your machine
using Infrared, unless they are able to access the Infrared ‘Send’ and
‘Receive’ commands on the NETBOOK PRO.
Psion Teklogix NETBOOK PRO Win CE 4.2 User Manual
45
FILES, FOLDERS, AND PROGRAMS
4
4.1
4.2
4.3
4.4
4.5
Introduction . . . . . . . . . . . . . . . . . . . . . . . . . . . . . . . . 49
Moving Around . . . . . . . . . . . . . . . . . . . . . . . . . . . . . . 49
Opening Files, Folders And Programs. . . . . . . . . . . . . . . . . . . 49
Closing Programs/Files . . . . . . . . . . . . . . . . . . . . . . . . . . 50
Creating New Folders . . . . . . . . . . . . . . . . . . . . . . . . . . . 50
4.5.1 Creating New Files. . . . . . . . . . . . . . . . . . . . . . 51
4.6 Start Menu - Documents . . . . . . . . . . . . . . . . . . . . . . . . . . 51
4.7 Changing File Attributes . . . . . . . . . . . . . . . . . . . . . . . . . . 51
4.8 Managing Folders . . . . . . . . . . . . . . . . . . . . . . . . . . . . . 52
4.10 The Flash Folder . . . . . . . . . . . . . . . . . . . . . . . . . . . . . 54
4.12 The Storage Manager . . . . . . . . . . . . . . . . . . . . . . . . . . . 56
4.11 Checking System Memory Use. . . . . . . . . . . . . . . . . . . . . . 55
4.11.1 What Happens When System Memory Is Full? . . . . . . 55
4.11.2 Additional Memory And Programs. . . . . . . . . . . . . 55
Psion Teklogix NETBOOK PRO Win CE 4.2 User Manual
47
Chapter 4: Files, Folders, and Programs
Introduction
4.1 Introduction
Windows® Explorer is the NETBOOK PRO’s file manager. It is accessible by
double-clicking on the My Computer icon.
Note:
When you turn the NETBOOK PRO on from a suspend, the programs that
were previously open will still be open and will be displayed on the
screen. When you turn on the NETBOOK PRO from a cold or warm boot,
you will see the Desktop.
4.2 Moving Around
To move the highlight between the files and folders on the screen:
click on the names, or use the arrow keys. If there are more files in the folder
than can be displayed on screen, scroll the screen using the scroll bar.
To view the files on a memory card:
change the current folder by opening the My Computer folder and selecting the
appropriate memory card icon.
4.3 Opening Files, Folders And Programs
To open a file or folder in Windows Explorer:
double-click, or highlight it and press Enter. In most cases, if a program is
already running, opening a file associated with that program will open another
instance of that program.
To run a program:
Open the Start Menu by clicking on the Start button in the bottom left corner of
the screen. Click on Programs to display all the programs available. Click on
the name of the program you wish to run.
Psion Teklogix NETBOOK PRO Win CE 4.2 User Manual
49
Chapter 4: Files, Folders, and Programs
Closing Programs/Files
How can I see which programs are open?
The taskbar across the bottom of the screen displays buttons for programs that are
open. To switch between programs, click on the button in the taskbar.
The Task Manager displays a list of programs that are open. To open the Task Manager, press Ctrl Alt Del or Alt Tab.
4.4 Closing Programs/Files
To close the current folder:
click on the X icon at the top left corner of the screen. When you close all open
folders, you will see the Desktop.
To close a file:
use the Close command on the File menu, in the program in which the file is
open.You will be prompted to save your changes.
You can also close files or programs by selecting the list of open files and programs
by using the X button in the upper right corner of any window.
4.5 Creating New Folders
New folders (or directories) can be created anywhere in the NETBOOK PRO’s
system.
A convenient place to keep the user documents is the My Documents folder under
My Computer. It is possible to create folders inside My Documents, in which to
store all your files to prevent the My Documents screen from becoming too full.
Folders can also be created in the flash disk folder or on memory cards. The contents of these folders will not be lost during a hard reset.
To create a new folder:
1. Move to the folder in which you wish to create the new folder.
2. Select the New folder command from the File menu, and type in the
folder name. You can also right-click on the blank space in a folder and
select New folder from the context menu.
You cannot use the following characters in a folder name: < > : / \ * ?
50
Psion Teklogix NETBOOK PRO Win CE 4.2 User Manual
Chapter 4: Files, Folders, and Programs
Creating New Files
If you use NETBOOK PRO files with a PC, you may wish to create folders that
match equivalent folders on your PC. This will make transferring files between the
NETBOOK PRO and PC easier.
4.5.1 Creating New Files
You can create files from within programs. As a general rule, open the program in which
you want to create the file, and select New from the File menu. A file name is suggested.
If you do not wish to use this, type a name of your own before pressing the OK button.
What names can I use for my files & folders?
You can use most characters in file and folder names including spaces, for example,
“2002 Purchase Orders and Invoices”. The only characters which cannot be used in
a file or folder name are: / < > : \ * ?
You may encounter difficulties if you use very long file names for files stored in
folders with long names, which are nested within other folders with long names, and
so on. If you do exceed the maximum allowed length, rename a folder or file to a
shorter name.
4.6 Start Menu - Documents
A quick way to find a file that has been recently used is to look in the Documents
menu on the Start menu. The Documents menu will list up to ten of the most recent
files opened.
4.7 Changing File Attributes
You can prevent a file from being accidentally changed by making it a “read-only”
file. To do this, right-click on the file and select Properties from the context menu.
Then check the Read-only box.
Psion Teklogix NETBOOK PRO Win CE 4.2 User Manual
51
Chapter 4: Files, Folders, and Programs
Managing Folders
Files that have been created on a PC and then transferred to the NETBOOK PRO
will also be “read-only” files.
Note:
If you transfer a “read-only” file to another machine, it can be viewed,
and the “read-only” attribute can be removed.
4.8 Managing Folders
To move one or more folders or files from one location to another:
1. First highlight the file(s) or folder(s) to select them. Drag with the
stylus to select more than one file.
To select all the files/folders in the current folder, use the Select all
command on the Edit menu. To deselect items, press the Esc key.
2. Select the Cut command from the Edit menu. A dotted line appears
around the file/folder icon(s).
3. Go to the folder into which the highlighted items are to be moved.
4. Select the Paste command from the Edit menu.
Note:
Moving a folder also moves all the files within that folder.
To copy a file or folder, or multiple files/folders to a different folder:
follow the earlier instructions, but select the Copy as opposed to the Cut
command from the Edit menu.
To make a copy of a file or folder within the same folder:
highlight it and select the Copy command followed by the Paste command. A
new file is automatically created for you using the following naming convention
(with Wordpad as the example): Copy of Doc1, etc. You can rename the file or
folder later if you wish.
To rename a single file or folder:
right-click, select Rename from the context menu, and then type in a new name.
To remove one or more files or folders:
first highlight them and then either press the Delete key, or select the Delete
command from the File menu. You can also right-click and select Delete.
52
Psion Teklogix NETBOOK PRO Win CE 4.2 User Manual
Chapter 4: Files, Folders, and Programs
Memory-Card Folders
Important:
If you are deleting folders, remember that the entire contents of
the folders (including all the other folders contained within them
and all their files) will also be deleted.
4.9 Memory-Card Folders
Each memory card appears as a separate folder in My Computer.
Folder For MMC/SD Card
Folder For First CF/PCMCIA Card
Folder For Second CF/PCMCIA Card
The MMC/SD card has folder name 'MMC Card'. In the Storage Manager, it has
device name 'SMC1:' (see section 4.12 on page 56 for details about the Storage
Manager).
CompactFlash and PCMCIA cards are treated identically by the system. Whichever
of them is inserted first is assigned folder name 'Storage Card' and device name
'DSK2:'. Whichever is inserted second is assigned folder name 'Storage Card2' and
device name 'DSK3:'. These folder and device names remain constant while the
cards are connected (if one is removed, the names for the other do not change), but if
both the CF and PCMCIA cards are removed and replaced in reverse order, the designations will be swapped.
Note:
This assumes that there is only one partition on each card.
Psion Teklogix NETBOOK PRO Win CE 4.2 User Manual
53
Chapter 4: Files, Folders, and Programs
The Flash Folder
4.10 The Flash Folder
The Flash folder, accessed from the My Computer icon on the desktop, can be used
both to store data securely in case of power loss, and to install .cab (cabinet) files.
Folder For Internal Flash Storage
Data stored in this directory will still exist even if the main battery and backup
battery are discharged. Data will also remain in this directory after a “soft” or “hard”
reset. The size of storage is limited—to see the amount of space available in this
folder, right-click on the Flash icon in My Computer, and select Properties in the
dropdown menu.
The Flash folder can also be used to store .cab files that you want installed automatically following a cold boot. Place any .cab files you want installed into the Flash
folder named Auto Restore. If there are some files you don’t want installed automatically with a cold boot but want to keep secure, either back those up to your PC
or place in another folder within the Flash folder.
The Flash folder has device name ‘DSK1:’ in the Storage Manager.
54
Psion Teklogix NETBOOK PRO Win CE 4.2 User Manual
Chapter 4: Files, Folders, and Programs
Checking System Memory Use
4.11 Checking System Memory Use
To display the amount of system memory (RAM) remaining:
double-click the System icon in the Control Panel and select the Memory tab.
You can see the amount of free memory in the slider bar.
4.11.1 What Happens When System Memory Is Full?
When the system memory is nearly full, you will see warning dialogs when running
programs to indicate that the NETBOOK PRO’s memory is almost full, and there is
not enough memory to perform some tasks. Many actions need just a little free
memory in order to work—displaying dialogs, menus, etc. These can fail with a
message like ‘Memory full’. The NETBOOK PRO will not allow you to use all of
the available memory; it will always set aside enough memory for you to close a
program or save an open file to a multimedia card.
Files saved on the internal flash memory, files saved on memory cards, and ‘open’
programs do not use system memory.
Applications running from RAM, or files stored outside the Flash folder or memory
cards, do use system memory. To free memory, close these files, delete any
unwanted files, or move files to a multimedia card or your PC.
4.11.2 Additional Memory And Programs
You can insert memory cards into the slots of the NETBOOK PRO. You might use
them as additional memory for storing files, or to add more programs to the
NETBOOK PRO. For details, please refer to “Memory Cards” on page 24.
If a memory card contains additional programs:
their icons will be available in the card’s folder.
Psion Teklogix NETBOOK PRO Win CE 4.2 User Manual
55
Chapter 4: Files, Folders, and Programs
The Storage Manager
4.12 The Storage Manager
Double-click on the Storage Manager icon to open the Storage Manager dialog:
The Storage Manager allows the user to view information about the storage devices
that are present in the NETBOOK PRO. Storage devices include MMC/SD flash
cards, PCMCIA flash cards and microdrives, and CompactFlash cards and microdrives.
4.12.1 Formatting A Memory Card
Formatting a memory card bulk-erases it. Once a card is erased, partitions may be
created in it, similarly to those on a hard drive.
Memory-card devices are normally ‘mounted’ (made available to the system)
automatically when they are inserted. They must be dismounted before they can be
formatted.
To format an entire memory card:
1. Select Start, Control Panel.
2. Double-click on the Storage Manager icon. The Storage Manager
opens:
56
Psion Teklogix NETBOOK PRO Win CE 4.2 User Manual
Chapter 4: Files, Folders, and Programs
Creating Partitions
3. Select the memory card from the drop-down list.
4. Press the Dismount button to dismount the memory card. All partitions
on the card will be dismounted.
5. Press the Format button to format the memory card.
Warning:
All partitions and information on the card will be erased during the
formatting process.
4.12.2 Creating Partitions
Once the card is formatted, new partitions can be created in it. The default is to
create one partition that occupies the whole card, but a card can be divided into
more than one partition if desired. Each partition appears as a separate folder in
Windows Explorer.
To create new partitions:
1. Press the New button next to the Partitions listbox. The New Partition
dialog appears:
2. Enter a name for the partition.
Psion Teklogix NETBOOK PRO Win CE 4.2 User Manual
57
Chapter 4: Files, Folders, and Programs
Creating Partitions
3. If more than one partition is desired, uncheck the Use All Available
Diskspace checkbox, then specify the desired number of sectors to be
used by the partition:
Note:
The sector size of the card is given on the left-hand side of the Storage
Properties dialog.
4. Press OK. The new partition appears in the Partitions list:
The new partition is automatically mounted. This is indicated by an asterisk (*) next
to its name in the partition list. Any unallocated space on the card is indicated at the
left, and additional partitions can be created in it.
58
Psion Teklogix NETBOOK PRO Win CE 4.2 User Manual
Chapter 4: Files, Folders, and Programs
Partition Management
4.12.3 Partition Management
Partitions can be individually dismounted, mounted, deleted, or formatted as well.
These and additional tasks are available from the Partition Properties dialog:
To dismount a partition:
1. Select the desired partition.
2. Press the Properties button. The Partition Properties dialog appears.
3. Press the Dismount button. The partition is dismounted. The asterisk
disappears next to its name in the partitions list.
To delete a partition:
1. Select the desired partition.
2. Press the Delete button. A warning dialog appears.
3. Press the OK button. The partition is deleted.
To format a partition:
1. Select the desired partition.
Psion Teklogix NETBOOK PRO Win CE 4.2 User Manual
59
Chapter 4: Files, Folders, and Programs
Partition Management
2. Press the Properties button. The Partition Properties dialog appears.
3. Press the Dismount button. The partition is dismounted. The asterisk
disappears next to its name in the partitions list.
4. Press the Format button. The Format dialog appears:
5. Choose your format options. These options include:
•
Version of filesystem (FAT-12, for devices holding up to 32 MB; FAT16, for devices containing 16 MB to 4 GB; or FAT-32, for devices containing more than 32 MB).
•
Number of file-allocation tables.
•
Number of entries allowed in the root directory.
•
Cluster size (512 B to 64 kB).
There are also two checkboxes, which govern:
•
Whether to use the transaction-safe FAT filesystem (TFAT). This filesystem keeps multiple copies of the file-allocation table, changing one
while maintaining another as a backup.
•
Whether to perform a quick format. Quick formatting removes all reference to data in the partition without erasing the actual partition. The
partition will be treated as empty, and new data will overwrite it.
6. Press Start. The partition is formatted.
To mount a partition:
60
Psion Teklogix NETBOOK PRO Win CE 4.2 User Manual
Chapter 4: Files, Folders, and Programs
Partition Management
1. Select the desired partition.
2. Press the Properties button. The Partition Properties dialog appears.
3. Press the Mount button. The partition is mounted. The asterisk appears
next to its name in the partitions list.
The Partition Properties dialog has buttons for additional functions. Partitions can be
defragmented, and their file structure can be scanned.
Psion Teklogix NETBOOK PRO Win CE 4.2 User Manual
61
USING THE PC CONNECTION
5
5.1 Introduction . . . . . . . . . . . . . . . . . . . . . . . . . . . . . . . . . 65
5.2 Using ActiveSync . . . . . . . . . . . . . . . . . . . . . . . . . . . . . . 65
5.3 Getting Help. . . . . . . . . . . . . . . . . . . . . . . . . . . . . . . . . 66
5.3.1 Where Can I Find More Help?. . . . . . . . . . . . . . . . 66
5.3.2 Tips On Using ActiveSync Help . . . . . . . . . . . . . . . 66
5.4 Working With Your Files . . . . . . . . . . . . . . . . . . . . . . . . . . 67
5.4.1 Looking At Files On Your NETBOOK PRO . . . . . . . . 67
5.4.2 Copying A File Using Drag And Drop . . . . . . . . . . . 67
5.4.3 Copying A File Using Copy And Paste . . . . . . . . . . . 68
5.4.4 Opening NETBOOK PRO Files From Your PC . . . . . . . 69
5.5 Backing Up Your NETBOOK PRO With ActiveSync . . . . . . . . . . . 69
5.5.1 Performing Your First Backup . . . . . . . . . . . . . . . . 69
5.5.2 Performing Regular Backups . . . . . . . . . . . . . . . . 70
5.6 Synchronizing Your NETBOOK PRO . . . . . . . . . . . . . . . . . . . 70
5.6.1 What Is Synchronization? . . . . . . . . . . . . . . . . . . 70
5.6.2 Synchronizing Your NETBOOK PRO. . . . . . . . . . . . 70
5.6.2.1 Creating The Partnership . . . . . . . . . . . . . . . 70
5.6.3 Using An Existing Partnership. . . . . . . . . . . . . . . . 73
Psion Teklogix NETBOOK PRO Win CE 4.2 User Manual
63
Chapter 5: Using The PC Connection
Introduction
5.1 Introduction
This chapter explains how to use ActiveSync to copy files between a PC and the
NETBOOK PRO, and to ‘synchronize’ files between the two devices. It assumes
some basic knowledge of Windows® PC operating systems.
These instructions assume that you have established a link between your PC and
NETBOOK PRO. See “Setting Up ActiveSync” on page 40 for details on communication links.
•
Check that a link exists between the NETBOOK PRO and the PC by
looking in the PC’s System tray in the bottom right-hand corner of your
desktop. There should be a green circle in the system tray if you have successfully linked, as shown.
If this circle is grey there is no connection.
•
Make sure that your link cable is connected.
•
On the NETBOOK PRO, check the taskbar for the blue monitor icon. If
there is no icon, your unit is not connected.
5.2 Using ActiveSync
ActiveSync allows Windows Explorer to see files on your NETBOOK PRO, using
the Explore icon in the ActiveSync window. You can copy your NETBOOK PRO
files in most of the ways you can copy any normal PC file, including copying or
moving files to your PC in order to print them. The methods outlined in this chapter
are representative of ways that you might use Explorer, but are not the only possibilities.
Psion Teklogix NETBOOK PRO Win CE 4.2 User Manual
65
Chapter 5: Using The PC Connection
Getting Help
Note:
You can change the look of Explorer using options in the View menu;
therefore, the appearance of your own screen may vary slightly from
those shown.
5.3 Getting Help
5.3.1 Where Can I Find More Help?
ActiveSync includes comprehensive online help, which describes all of the application's features and functionality. Please consult the online help for further information or guidance on using ActiveSync.
You can display the help topics by double-clicking on the ActiveSync icon on the
PC system tray and selecting Help from the menu, then Microsoft ActiveSync
Help.
Note:
You can display help for a particular task or dialog by pressing the
F1 key.
5.3.2 Tips On Using ActiveSync Help
From the Help window, you can find the information you require as follows:
From the Contents tab
you can select a topic from a structured list, e.g. how to perform a particular
task, or troubleshooting information about how to solve a problem. To find the
topic you want, double-click on the topic to find the general area of interest, and
then choose the topic you want to display.
From the Index page
you can find the topic you want by entering any word linked to the subject, such
as ‘backup’ to find topics containing information about how to back up
your NETBOOK PRO.
From the Find page
you can search for an exact word or phrase contained within a topic, such as
‘serial port’ to find all the topics in the online Help containing this phrase.
66
Psion Teklogix NETBOOK PRO Win CE 4.2 User Manual
Chapter 5: Using The PC Connection
Working With Your Files
5.4 Working With Your Files
5.4.1 Looking At Files On Your NETBOOK PRO
Using Windows Explorer, you can open, move, copy and delete files stored on your
NETBOOK PRO from your PC.
•
On the PC, double-click on the Mobile Device
icon in your PC’s My Computer folder. The
Mobile Device window opens, displaying icons
for the files and folders in the My Computer
folder.
•
Double-click on the NETBOOK PRO’s My
Computer folder under Mobile Device, to
display the files and folders on the drive. There
will be a folder for each inserted memory card.
5.4.2 Copying A File Using Drag And Drop
1. Go to the folder you want to copy files from. The left-hand pane of the
Explorer window shows a list of all the disk drives on your PC, along
with NETBOOK PRO and network drives (if any). You can expand a
branch by clicking on the
symbol next to it, or close the branch by
clicking on the
symbol. The right-hand side of Explorer shows the
contents of the folder selected on the left.
2. Use the scroll bar on the right of the left-hand Explorer pane until you
can see the drive that contains the folder that you want to copy the file
from. Left-click and hold to drag the file or folder to copy.
3. Drag the file or folder up the folder list in the left pane, until you can
see the folder that you wish to copy the file into. If the folder you want
to copy to is not visible because its branch has not been expanded,
hover the dragged file over the folder for a second and it should expand.
This step can be repeated until the folder you want is visible.
4. Drop the file onto the folder name in the left pane, or into the right pane
if the folder is open, by releasing the left mouse button.
Psion Teklogix NETBOOK PRO Win CE 4.2 User Manual
67
Chapter 5: Using The PC Connection
Copying A File Using Copy And Paste
If necessary, the file is converted into the correct PC format. The file can be used in
the same way as any other file on your PC.
5.4.3 Copying A File Using Copy And Paste
Using Windows Explorer, you can copy files between your PC and NETBOOK
PRO in the same way you would copy files to a floppy disk, or another PC on a network. ActiveSync can convert files as they are copied so that you can open them on
the other computer immediately.
Within Windows, clicking the right mouse button often displays a context-sensitive
(pop-up) menu – a range of commands relevant to the object that you right-click on.
In Explorer, you can use these menus to copy files between folders, regardless of
whether they are on the PC or the NETBOOK PRO.
1. Open Windows Explorer.
2. Navigate to, and expand, the Mobile Device branch of the folder list.
Find the folder that contains the file you wish to copy to the PC and
click on it so that its contents are shown in the right-hand pane of the
Explorer window.
3. Right-click on the file and select Copy from the pop-up menu that
appears.
4. Navigate to the folder you want to copy this file to, and select it, so that
its contents (if any) appear in the right-hand pane of the Explorer
window. Right-click in the right-hand pane of the Explorer window,
and select Paste from the pop-up menu.
68
Psion Teklogix NETBOOK PRO Win CE 4.2 User Manual
Chapter 5: Using The PC Connection
Opening NETBOOK PRO Files From Your PC
You can use Windows Explorer to manage files and folders stored on your
NETBOOK PRO in the same way as you can on your PC’s drives.
Warning:
When you delete a file on your NETBOOK PRO using your PC, it
is permanently removed from the NETBOOK PRO’s internal storage. The file cannot be retrieved from the PC’s Windows Recycle
Bin, which only stores files deleted from the PC’s drives.
5.4.4 Opening NETBOOK PRO Files From Your PC
You can open a file on your NETBOOK PRO using a PC application without first
having to copy it to your PC drive. You can edit the file on your PC and then save it
back to your NETBOOK PRO when you have finished. To open a file from
Windows Explorer, navigate to the Mobile Device section of the file tree, locate the
file, then double-click on the file icon or press Enter.
When you save the file from within the PC application, ActiveSync transfers the
saved file back to your NETBOOK PRO.
5.5 Backing Up Your NETBOOK PRO With ActiveSync
5.5.1 Performing Your First Backup
You can use ActiveSync to back up all the files stored on your NETBOOK PRO to
your PC. Keeping backups of your NETBOOK PRO files on your PC means that
you have a separate copy of all your work that can be restored to your NETBOOK
PRO. For example, you can restore backed up files to your NETBOOK PRO if you
accidentally delete a file, wish to revert back to an older version of a file, or need to
restore files if you forget to change the batteries.
To make a backup:
1. Open ActiveSync on the PC by double-clicking on the green circle in
the taskbar.
2. Click on the Tools menu, then on Backup/Restore.
3. Click Back Up Now to start backing up the files on your NETBOOK
PRO. ActiveSync displays a progress window showing how long the
backup will take and will inform you when it has completed.
Psion Teklogix NETBOOK PRO Win CE 4.2 User Manual
69
Chapter 5: Using The PC Connection
Performing Regular Backups
5.5.2 Performing Regular Backups
You can set ActiveSync to automatically backup when the device connects, so you
do not need to back up your NETBOOK PRO manually.
5.6 Synchronizing Your NETBOOK PRO
5.6.1 What Is Synchronization?
You can use synchronization to manage information that you wish to keep up to date
on both your PC and NETBOOK PRO. When you synchronize, ActiveSync checks
the information in your PC program with the matching information on your
NETBOOK PRO, and then updates the files on both your PC and NETBOOK PRO
to include the new information. To synchronize, you must set up a partnership
between the NETBOOK PRO and the PC.
5.6.2 Synchronizing Your NETBOOK PRO
This section details the set-up and day-to-day use of ActiveSync to synchronize files
on the PC. The instructions assume some familiarity with the use of Windows, and
that you are using ActiveSync.
Partnerships are only necessary for synchronization, not to simply copy files from
the PC to the NETBOOK PRO.
5.6.2.1
Creating The Partnership
1. Make sure that your NETBOOK PRO is connected to the PC via the
serial cable.
2. Set the PC to listen on the port the serial cable is connected to.
3. On the NETBOOK PRO, check the PC Connection control panel to
make sure it is set to send to the correct port.
70
Psion Teklogix NETBOOK PRO Win CE 4.2 User Manual
Chapter 5: Using The PC Connection
Synchronizing Your NETBOOK PRO
4. On the NETBOOK PRO, click on the Start button, then Programs,
then ActiveSync, and select direct from the ActiveSync menu. This
will connect the NETBOOK PRO to the PC and bring up the
ActiveSync dialog on the PC.
The New Partnership screen allows you to select what types of information will be
synchronized.
Psion Teklogix NETBOOK PRO Win CE 4.2 User Manual
71
Chapter 5: Using The PC Connection
Synchronizing Your NETBOOK PRO
5. Check all items to be synchronized. These can be changed after the
partnership has been created.
6. To customize settings for file synchronization, click on the Settings
button. This can also be done after the partnership has been created.
More information on customized settings can be found by referring to
ActiveSync’s online help.
Note:
Pocket On-Schedule, included with the NETBOOK PRO, does not use
ActiveSync for its data synchronization. See “On-Schedule Outlook Sync”
on page 73.
7. Click Next.
8. ActiveSync will display the Setup Complete screen with further information on using ActiveSync. Click Finish.
72
Psion Teklogix NETBOOK PRO Win CE 4.2 User Manual
Chapter 5: Using The PC Connection
Using An Existing Partnership
5.6.3 Using An Existing Partnership
Once you have set up the partnership as above, you can use it whenever you wish.
When the NETBOOK PRO and the PC are connected afterward, it will automatically use the current partnership.
To force synchronization, make sure the NETBOOK PRO and the PC are already
connected. Press the Sync button in the PC’s ActiveSync window. To stop synchronization, click on the Stop button.
Note:
Hard resetting the NETBOOK PRO will delete the partnership on the
NETBOOK PRO. You may delete and re-create the partnership on the PC,
or create another partnership with a new name. Refer to ActiveSync’s
online help for more details on this operation.
5.7 On-Schedule Outlook Sync
The NETBOOK PRO includes Pocket On-Schedule, a full-featured email, schedule,
and contact-management program. Pocket On-Schedule comes with On-Schedule
Outlook Sync, which enables it to synchronize information with Microsoft Outlook
running on Windows 2000. On-Schedule Outlook Sync runs on your PC and uses
the ActiveSync connection to communicate with the NETBOOK PRO.
To use On-Schedule Outlook Sync, you must be running Windows 2000 and
Microsoft Outlook, and you must have already established a partnership through
ActiveSync with the NETBOOK PRO.
On-Schedule Outlook Sync can be installed from the CD that accompanies the
NETBOOK PRO. After installation, help for the program is available from Start,
Programs, On-Schedule, On-Schedule Outlook Sync Help.
Help for Pocket On-Schedule itself is available on the NETBOOK PRO by selecting
Start, Programs, Pocket On-Schedule to open the program, then selecting File,
Help Contents. The manuals for both Pocket On-Schedule and On-Schedule
Outlook Sync can also be found on the CD.
Psion Teklogix NETBOOK PRO Win CE 4.2 User Manual
73
CONFIGURING COMMUNICATIONS
6.1
6.2
6.3
6.4
6.5
6
Introduction . . . . . . . . . . . . . . . . . . . . . . . . . . . . . . . . 77
802.11b Radio Configuration . . . . . . . . . . . . . . . . . . . . . . . 77
GSM/GPRS Radio Configuration . . . . . . . . . . . . . . . . . . . . . 80
Bluetooth Radio Configuration . . . . . . . . . . . . . . . . . . . . . . 85
Internet And E-Mail Settings . . . . . . . . . . . . . . . . . . . . . . . 89
6.5.1 Overview . . . . . . . . . . . . . . . . . . . . . . . . . . . . . 89
6.5.1.1 Using The Internet On The NETBOOK PRO . . . . . . . . 89
6.5.1.2 Using E-mail On The NETBOOK PRO . . . . . . . . . . . 89
6.5.1.3 Types Of E-mail Account . . . . . . . . . . . . . . . . . . 90
6.5.1.4 If You Don’t Have An Internet/E-mail Account. . . . . . . 90
6.5.1.5 Glossary Of Terms . . . . . . . . . . . . . . . . . . . . . . 91
6.5.2 Setting Up Your NETBOOK PRO . . . . . . . . . . . . . . . . 92
6.5.2.1 How To Use Internet Explorer/Inbox . . . . . . . . . . . . 92
6.5.2.2 Getting Help . . . . . . . . . . . . . . . . . . . . . . . . . 92
6.5.2.3 What Information Do I Need? . . . . . . . . . . . . . . . . 93
6.5.3 Setting Up E-mail On NETBOOK PRO . . . . . . . . . . . . . 94
6.5.3.1 Connecting The Modem . . . . . . . . . . . . . . . . . . . 94
6.5.3.2 Setting Up Dialing . . . . . . . . . . . . . . . . . . . . . . 95
6.5.3.3 Setting Up The Internet Service . . . . . . . . . . . . . . . 96
6.5.3.4 Setting Up The Modem . . . . . . . . . . . . . . . . . . . 96
6.5.3.5 Setting Up The E-mail Program . . . . . . . . . . . . . . . 97
Psion Teklogix NETBOOK PRO Win CE 4.2 User Manual
75
Chapter 6: Configuring Communications
Introduction
6.1 Introduction
Before you can use Internet Explorer (the Internet browser) and Inbox (the e-mail
application), some basic configuration is necessary for the specific type of radio
card that you’ve inserted in your NETBOOK PRO.
6.2 802.11b Radio Configuration
The following are the basic settings necessary to be able to run the NETBOOK PRO
on an 802.11b radio network.
1. When the NETBOOK PRO is turned on, the radio configuration icon
should be in the system tray. It may take a few minutes to appear. The
configuration dialog is also displayed.
Psion Teklogix NETBOOK PRO Win CE 4.2 User Manual
77
Chapter 6: Configuring Communications
802.11b Radio Configuration
2. By clicking on Advanced in the Wireless Information tab, you can
access the settings screen to adjust priority of network connections.
3. Select the Use Windows to configure my wireless settings checkbox.
4. You can add a network, configure WEP for security, and enable IEEE
802.1X authentication by double-clicking on the Add New selection in
the Wireless Information tab
5. The Wireless Network Properties dialog opens for a new network.
Note:
78
Double-click on an existing network in the list to open the Wireless
Network Properties dialog and display the parameters of the existing network.
Psion Teklogix NETBOOK PRO Win CE 4.2 User Manual
Chapter 6: Configuring Communications
802.11b Radio Configuration
6. IEEE 802.1X is an authentication protocol that can be used with IEEE
802.11b networks (see menu screen on next page). Currently, MD5
Challenge and TLS are the EAP (Extensible Authentication Protocol)
types supported by the NETBOOK PRO. The EAP type setting must
match the configuration of the RADIUS Server on the wired network.
In addition to this, the access point must support IEEE 802.1X and
must be configured appropriately.
7. Selecting Advanced in the Wireless Information tab will allow you to
configure the types of networks to connect to.
Psion Teklogix NETBOOK PRO Win CE 4.2 User Manual
79
Chapter 6: Configuring Communications
GSM/GPRS Radio Configuration
8. Click on OK to save your settings. These settings can also be changed
by entering the Control Panel and clicking on Network and Dial-Up
Connections, then on the adaptor name.
6.3 GSM/GPRS Radio Configuration
The following menus provide the configuration settings for the GSM/GPRS Globetrotter Option radio card. For details on setting up a modem through the serial port,
please refer to “Connecting The Modem” on page 94.
The following information is required from the GSM/GPRS network operator:
•
Access Point Name (APN).
•
Username and Password (if applicable).
•
Some network operators also specify the IP address and NDS settings to be
used. Please consult the network operator for specific configuration parameters.
You will also need a SIM for a GSM account that has GPRS enabled. To set up the
GSM/GPRS connection:
1. Insert the GSM/GPRS radio card, with SIM, in the NETBOOK PRO.
2. Open the Control Panel.
3. Double-click on the Networks and Dial-Up Connections icon. The
following selections will appear.
80
Psion Teklogix NETBOOK PRO Win CE 4.2 User Manual
Chapter 6: Configuring Communications
GSM/GPRS Radio Configuration
4. Double-click on the Make New Connection wizard to access the following menu. Type the connection name “GPRS” into the text box, and
verify that the Dial-Up Connection radio button is selected. Click on
the Next button.
5. Select the GSM/GPRS card from the dropdown list in the Modem
dialog.
6. Click on the Configure button next to the dropdown list, and the following menu appears. From the Baud Rate dropdown list, select 115200.
Psion Teklogix NETBOOK PRO Win CE 4.2 User Manual
81
Chapter 6: Configuring Communications
GSM/GPRS Radio Configuration
7. Then click on the Call Options tab to access the following menu.
8. Uncheck the Wait for dialtone before dialing box and click OK. The
Modem selection screen will return. Click on the Next button.
9. The following menu appears. Enter the phone number. Most providers
use *99# as the GSM/GPRS phone number.
10. Click on the Finish button. The Network and Dial-Up Connections
screen reappears. You should now see a connection called “GPRS”.
11. Open the Control Panel.
12. Double-click on the APN Manager icon. The APN Manager dialog
appears:
82
Psion Teklogix NETBOOK PRO Win CE 4.2 User Manual
Chapter 6: Configuring Communications
GSM/GPRS Radio Configuration
13. In the APN Manager, click on the Add button.
14. Enter the name of the APN, as supplied by the GSM/GPRS service provider, in the box.
15. Click on the OK button. The APN Manager dialog disappears, and the
Network Connections screen reappears.
16. Double-click on the new GPRS connection. This will bring up the
Dial-Up Connection dialog. Click on the Dial Properties... button.
17. This will bring up the Dialing Properties dialog box.
18. Click the New button. The Create New Location dialog appears.
Psion Teklogix NETBOOK PRO Win CE 4.2 User Manual
83
Chapter 6: Configuring Communications
GSM/GPRS Radio Configuration
19. Enter the name GSM-GPRS for the new dial location.
20. Press OK. The New Dial Location dialog reappears.
21. Press the Dialing Patterns button. The Dialing Patterns dialog
appears.
22. Enter ‘g’ for the dial strings. This instructs the connection to dial the
phone number with no additional characters.
23. Press the OK button. The Dialing Properties dialog reappears.
24. Press the OK button. The new dial location is saved.
25. From the When dialing from: dropdown list, select GSM-GPRS. Click
OK.
84
Psion Teklogix NETBOOK PRO Win CE 4.2 User Manual
Chapter 6: Configuring Communications
Bluetooth Radio Configuration
26. The Dial-Up Connection screen reappears.
The new GSM/GPRS dial-up connection is now configured.
You may need a username and password to use the connection. These are provided
by your service provider.
Note:
Not all providers require a user name or password.
To use the GSM/GPRS connection:
1. Double-click on the connection icon. The Dial-Up Connection
dialog appears.
1. Enter your User Name and Password, if your provider has given
you one.
2. Click on the Connect button.
Important:
While GSM/GPRS is active, ActiveSync will not be available.
6.4 Bluetooth Radio Configuration
Bluetooth is a global standard for wireless connectivity for digital devices. The technology is based on a short-range radio link that operates in the ISM band at 2.4 GHz.
When two Bluetooth-equipped devices come within 10 meters’ range of each other,
they can establish a connection. Because Bluetooth uses a radio-based link, it
doesn't require a line-of-sight connection in order to communicate.
Note:
The Bluetooth radio card uses an internal antenna.
The following menus provide the configuration settings for the Bluetooth radio
card. For details on setting up a modem through the serial port, please refer to “Connecting The Modem” on page 94.
Psion Teklogix NETBOOK PRO Win CE 4.2 User Manual
85
Chapter 6: Configuring Communications
NETBOOK PRO Bluetooth Settings
Important:
Other Bluetooth devices that connect with the NETBOOK PRO
may use different terminology for some features (i.e. Authentication, Pairing, Bonding, etc.). Verify that the features being configured are the same on each device.
6.4.1 NETBOOK PRO Bluetooth Settings
1. Open the Control Panel and double-click on the Bluetooth Device
Properties icon.
The Bluetooth Manager dialog opens.
2. Ensure that the intended device (another NETBOOK PRO, a Zebra®
printer, etc.) is powered on and that its Bluetooth radio is enabled (this
is automatic for Zebra printers and the NETBOOK PRO).
3. Click on the Scan Device button and wait for the NETBOOK PRO to
complete its scan (approximately 20 seconds). Services offered by
discovered devices will be displayed on the left side in the Untrusted
86
Psion Teklogix NETBOOK PRO Win CE 4.2 User Manual
Chapter 6: Configuring Communications
NETBOOK PRO Bluetooth Settings
list box. Each service of a device receives a separate entry:
If the discovered device has been given a unique name by its owner,
that name is used to identify it.
Note:
You can change the device-name and description of your radio by clicking
on the System icon in Control Panel, which will open the System Properties page. Click on the Device Name tab to access the menu and change
your settings. Then click on OK.
Although the name will have changed in the Property screen, the radio only
reads it on boot-up. Therefore, for the changes to take effect, you must reset
the NETBOOK PRO (see “Resetting The NETBOOK PRO” on page 30).
4. A discovered device may display several service profiles that it can use
to communicate. Supported services that can be activated include: dialup networking service, serial connections for printing, and LAN access
using PPP.
Psion Teklogix NETBOOK PRO Win CE 4.2 User Manual
87
Chapter 6: Configuring Communications
NETBOOK PRO Bluetooth Settings
5. Highlight the desired service profile in the Untrusted list, then click on
the right arrow ( -> ) button to transfer it to the Trusted list. A dialog
appears asking whether authentication is needed:.
If authentication is needed for the service, click Yes, then enter the PIN:
6. When the device’s service profiles are displayed in the Trusted list box,
double-click the desired service to display its popup menu, then select
Activate or Deactivate, which will make the required service “active”
or “inactive”.
7. When the NETBOOK PRO tries to connect with a remote device that
has Authentication enabled, you will be prompted to verify the PIN. The
Authentication Request dialog will appear. Enter the PIN, press OK, and
the devices will be connected.
The NETBOOK PRO is now ready to run application software to communicate
with the required device.
88
Psion Teklogix NETBOOK PRO Win CE 4.2 User Manual
Chapter 6: Configuring Communications
Internet And E-Mail Settings
6.5 Internet And E-Mail Settings
6.5.1 Overview
Before you can use Internet Explorer (the Internet browser) and Inbox (the e-mail
application) on your NETBOOK PRO, you need to set up certain details. This
section covers some general questions that people ask about using e-mail and the
Internet, and provides a glossary of terms. The later sections list the information you
will need to know before you start setting up the NETBOOK PRO, and then provide
step-by-step instructions.
6.5.1.1
Using The Internet On The NETBOOK PRO
You can use your NETBOOK PRO to:
•
Access the Internet and view web pages using the Internet Explorer program.
•
View locally stored web pages and graphics files.
•
Download files, e.g. additional programs for your NETBOOK PRO.
6.5.1.2
Using E-mail On The NETBOOK PRO
You can use your NETBOOK PRO to send and receive e-mail messages by connecting to a remote mailbox:
Connecting By Telephone Line To A Remote Mailbox
This is for making a ‘live’ connection to your e-mail mailbox via a telephone line
(without needing a PC). For example, you could access your personal mailbox by
dialing your Internet Service Provider (ISP), or access your work mailbox by dialing
your company's service provider or office mailbox.
What to do next…
If you want to access your work mailbox, you will first need to contact your
network administrator to find out whether you can make a ‘remote’ (dial-up) connection to your mailbox. See “Types Of E-mail Account” on page 90 to continue.
Psion Teklogix NETBOOK PRO Win CE 4.2 User Manual
89
Chapter 6: Configuring Communications
Overview
6.5.1.3
Types Of E-mail Account
There are a number of different types of e-mail account. See the list below to find
out which types of account you can connect to using the e-mail program on
your NETBOOK PRO.
Personal Dial-up Account
This is most likely a dial-up e-mail account which you’ve signed-up for with an
Internet Service Provider (ISP).
Which ISPs can I use?
You can use most ISPs which use ‘Internet standard’ methods for connecting to
your e-mail account. However, some ISPs (such as America Online) use proprietary methods for connecting, and cannot be accessed by your NETBOOK PRO
(i.e. you must use a PC). Move on to ‘Setting up your NETBOOK PRO’ to continue.
Remote (e.g. Office) E-mail Account
This is most likely an e-mail account at your workplace, e.g. using Microsoft
Exchange or Lotus Notes.
How do I find out if I can use my account?
You will need to find out from your network administrator whether you can
access your e-mail mailbox using this type of account. If you can, move on to
“Setting Up Your NETBOOK PRO” on page 92 to continue.
Web-based E-mail Account
This is an e-mail account that you must connect to using a web browser, such as
HotMail or Yahoo! Mail.
Note:
You can’t connect to this type of account using the e-mail program.
To use web-based e-mail, you must first set up your NETBOOK PRO for
Internet access. You will need to use the Internet Explorer program to
access your e-mail provider’s web site.
6.5.1.4
If You Don’t Have An Internet/E-mail Account
You will require an e-mail account before you can access the Internet, and send and
receive e-mail messages on your NETBOOK PRO.
90
Psion Teklogix NETBOOK PRO Win CE 4.2 User Manual
Chapter 6: Configuring Communications
Overview
•
To get a personal e-mail account, you must ‘sign-up’ with an Internet
Service Provider (ISP). ISPs usually provide an e-mail account as part of an
Internet access package.
•
Most ISPs will provide software (e.g. a CD-ROM) which will help you set
up Internet access and the e-mail account on a PC.
Important:
6.5.1.5
Some ISPs require that you connect to them using a PC in order
to sign-up. If you can’t do this, contact the ISP to find out if you
can sign-up without using a PC. If you have Internet access, see
www.psion.com/mobile for more details.
Glossary Of Terms
DNS
The Domain Name System (DNS) is an Internet service that translates domain
(or ‘host’) names into IP addresses. Domain names are alphabetic but the Internet is based on numeric IP addresses. Therefore when a domain name is used, a
DNS service must translate the name into the corresponding IP address. For
example, the domain name www.psionteklogix.com might translate into the IP
address 194.129.243.153.
Hostname (or Domain Name)
A unique identifier in alphabetic characters for a network device.
The hostname corresponds to the device’s numeric IP address. For example,
www.psionteklogix.com could be the same as the IP address 194.129.243.153.
IP address
A computer’s unique Internet address, e.g. 194.129.243.153, used by computers
to communicate with each other.
ISP
Internet Service Providers are companies that provide you with access to the
Internet. An ISP ‘account’ normally includes the facility to send and receive email using a personal e-mail address.
POP3/IMAP4
Internet ‘protocols’ (standards) for receiving e-mail.
SMTP
An Internet protocol used for sending e-mail.
TCP/IP
An Internet protocol used by computers to communicate with each other.
Psion Teklogix NETBOOK PRO Win CE 4.2 User Manual
91
Chapter 6: Configuring Communications
Setting Up Your NETBOOK PRO
6.5.2 Setting Up Your NETBOOK PRO
6.5.2.1
How To Use Internet Explorer/Inbox
To access the Internet, and send and receive e-mail on your NETBOOK PRO you
must have the following:
1. An appropriate e-mail account.
To access the Internet and use e-mail, you will need a standard
e-mail account.
2. A modem.
You will need a modem to connect your NETBOOK PRO to the telephone network. You can use the following types of modem with your
NETBOOK PRO:
• Standard external PC modems.
• PCMCIA- and CF-card modems.
• GSM radio modem, see “GSM/GPRS Radio Configuration” on page 80
for details. These are available as PCMCIA and CF cards.
• Infrared-enabled or Bluetooth-enabled mobile phones with built-in
modems.
3. A telephone connection.
If you are using a standard external modem, you will need to connect
your modem to a telephone socket. If you are using a mobile phone,
your network operator will need to enable your account so that you can
make fax and data calls on your phone. If your phone has been enabled
for fax and data calls, you should have two extra phone numbers.
Contact your network operator if you are unsure whether your account
is ‘data-enabled’.
6.5.2.2
Getting Help
If you are having connection problems, you can find information about connecting
using specific service providers, modems or mobile phones on our web site at
www.psion.com/mobile/.
92
Psion Teklogix NETBOOK PRO Win CE 4.2 User Manual
Chapter 6: Configuring Communications
Setting Up Your NETBOOK PRO
6.5.2.3
What Information Do I Need?
Before you can set up your NETBOOK PRO, you will need to find out some information about your modem and your Internet e-mail account by:
•
Checking any documentation your ISP supplied about your Internet
account, or contacting your network administrator at work.
•
Checking your ISP’s web site for technical support.
•
Contacting your ISP by e-mail or phone for technical support.
•
Checking the Psion Teklogix web site at www.psion.com/mobile for
details of worldwide ISPs.
Information Checklist
The checklist in Table 6.1 shows what information you will need to set up your
NETBOOK PRO. Only your ISP or your network administrator can supply all the
information required about your Internet e-mail account.
Information You Need
Where To Find It
Write It Here
Speed at which you should Your modem’s documentation.
use your modem (called the
baud rate or bit rate).
Phone Number you need to From your ISP/administrator.
dial to connect to your ISP
(often called a Point of Presence or POP).
User name for your Internet From your ISP/administrator,
account.
e.g. “jrook” or “nd44”.
Password for your Internet
account.
From your ISP/administrator, or
you may have chosen this yourself.
POP3 or IMAP4 server
address (for incoming messages).
From your ISP/administrator
e.g. “pop3.myisp.com”.
Table 6.1 Information Checklist
Psion Teklogix NETBOOK PRO Win CE 4.2 User Manual
93
Chapter 6: Configuring Communications
Setting Up E-mail On NETBOOK PRO
SMTP server address (for
outgoing messages).
From your ISP/administrator
e.g. “smtp.myisp.com”.
E-mail Address (your personal address).
From your ISP/administrator
e.g. “[email protected]”.
Table 6.1 Information Checklist
Some service providers require additional information to ‘log on’ to their server.
You may need the following information when using some service providers.
Optional Information
Where To Find It
IP Address (if your ISP’s
server doesn’t provide one
automatically).
From your ISP/administrator
e.g. “194.129.243.153”.
DNS Addresses (primary and
secondary DNS addresses if
your ISP’s server doesn’t
provide them automatically).
From your ISP/administrator
e.g. “123.255.78.90” and
“123.255.78.92”.
Write It Here
Mailbox Login (if different
From your ISP/administrator.
from your Internet account user
name).
Mailbox Password (if different from your Internet account
password).
From your ISP/administrator,
or you may have chosen this
yourself.
Table 6.2 ISP Additional Information
6.5.3 Setting Up E-mail On NETBOOK PRO
If you have collected all the information in the checklist, you are now ready to set up
your NETBOOK PRO to connect to your ISP.
6.5.3.1
Connecting The Modem
1. Connect your NETBOOK PRO to the modem using the NETBOOK
PRO’s serial cable.
94
Psion Teklogix NETBOOK PRO Win CE 4.2 User Manual
Chapter 6: Configuring Communications
Setting Up E-mail On NETBOOK PRO
What Do I Need To Do This?
To connect your NETBOOK PRO serial cable to your modem you may require
a Psion Teklogix modem cable adaptor. You can only use a Psion Teklogix
adaptor, which can be obtained from your local distributor.
2. Connect your modem to the telephone socket and switch on
the modem.
6.5.3.2
Setting Up Dialing
When you connect to the Internet, your NETBOOK PRO will need to dial your
service provider’s telephone. You can set up different dialing ‘locations’ so that your
NETBOOK PRO knows how to dial the number correctly, e.g. if you're dialing from
the ‘office’ location, you might need to add a ‘9’ before the number you want to
dial.
To set a dialing location:
1. Open the Control Panel by left-clicking the Start Menu command icon
on the far right-hand side of the display, or by clicking on Start in the
taskbar, then Settings, and then Control Panel.
2. Open the Dialing icon
menu.
to display the Dialing Properties
3. The NETBOOK PRO comes with two default locations, Home and
Work. Adjust these to suit your needs by selecting the location in the
dropdown box and editing the associated information. For more control
over dialing patterns, push the Dialing Patterns... button.
Psion Teklogix NETBOOK PRO Win CE 4.2 User Manual
95
Chapter 6: Configuring Communications
Setting Up E-mail On NETBOOK PRO
If you don’t want to use any of these pre-defined locations, you can add a new location. It will appear selected in the drop-down list, ready to edit.
4. Click on New and enter the name of the new location.
5. The dropdown will display the new location. Edit as described above.
6. Click on OK when you have finished setting up your dialing location.
6.5.3.3
Setting Up The Internet Service
To set up a new dial-up connection:
1. Open the Control Panel.
2. Open the Networks and Dial Up Connection icon.
3. Double-click on the Make New Connection icon.
4. Enter the name for the dial-up connection, usually the name of the ISP.
Select the Dial-Up Connection radio button. Click Next.
6.5.3.4
Setting Up The Modem
After you have named your connection, you will set and configure your mode.
5. From the dropdown menu, select the correct modem.
6. Click on Configure to open the modem properties. The default settings
for the modem should only be changed if the modem manufacturer’s
instructions indicate such.
7. After selecting and configuring a modem, click Next to continue to the
Phone Number screen. Set the phone number. Click Finish.
96
Psion Teklogix NETBOOK PRO Win CE 4.2 User Manual
Chapter 6: Configuring Communications
Setting Up E-mail On NETBOOK PRO
8. The Dial-Up Networking screen should show your new connection
with the dial-up icon.
9. To connect, double-click on the connection. You must enter your user
name and password.
10. When you have finished entering the settings, click on Connect to dial
the modem and make the connection.
6.5.3.5
Setting Up The E-mail Program
Once you have set up your Internet service, you can set up your e-mail account in
the email, contacts, and scheduling program, Pocket On-Schedule.
To create a new email account:
1. On the NETBOOK PRO, click on the Start button, then Programs,
then Pocket On-Schedule.
2. Select Options from the View menu. The Options dialog appears.
Psion Teklogix NETBOOK PRO Win CE 4.2 User Manual
97
Chapter 6: Configuring Communications
Setting Up E-mail On NETBOOK PRO
3. Select Email from the options tree at the left. General email options
appear.
4. Expand the Email part of the tree. Select Account. Options for the
email account appear.
5. In the Email Account Management tab:
• Click Add. The Account Name screen appears.
• Enter a name. Press the Next button.
• Enter your email address. Press the Next button.
• Select the type of email server, and enter the addresses for its inbound
and outbound servers. Press the Next button.
• Enter your username and password.
• After configuring the email account and clicking Finish, you should see
your account listed on the Account Management dialog. Click OK.
Note:
In the Account Management dialog, you can select the account, the press
the Properties button, to review and change the account’s settings.
Additional options for configuring On-Schedule are available from the
other parts of the Options dialog.
98
Psion Teklogix NETBOOK PRO Win CE 4.2 User Manual
TROUBLESHOOTING AND TIPS
7
7.1 General Tips . . . . . . . . . . . . . . . . . . . . . . . . . . . . . . . 101
7.1.1 Times Aren’t Correct In The Time Program . . . . . . . . . .101
7.1.2 If You Forget Your Password . . . . . . . . . . . . . . . . . .101
7.1.3 The NETBOOK PRO Doesn’t Turn On/Off . . . . . . . . . .101
7.1.4 Resetting The NETBOOK PRO . . . . . . . . . . . . . . . .102
7.1.5 Battery Life Of The NETBOOK PRO . . . . . . . . . . . . .102
7.1.5.1 Charging Times . . . . . . . . . . . . . . . . . . . .103
7.2 ActiveSync Connection Problems Using Windows® 95/98/NT 4.0 . . 103
7.2.1 Tips When Installing ActiveSync . . . . . . . . . . . . . . . .103
7.2.2 Basic Troubleshooting For Your NETBOOK PRO . . . . . . .104
7.2.3 Basic Troubleshooting For Your PC . . . . . . . . . . . . . .104
7.2.4 Device Conflicts . . . . . . . . . . . . . . . . . . . . . . . .106
7.2.5 Fax/Modem On COM 1/2/3/4. . . . . . . . . . . . . . . . . .108
7.2.6 Temp Folder . . . . . . . . . . . . . . . . . . . . . . . . . . .109
7.3 Troubleshooting ActiveSync Synchronization Problems . . . . . . . . 111
7.3.1 Basic Troubleshooting For Synchronization Problems . . . . . 111
7.3.2 Other Things To Try . . . . . . . . . . . . . . . . . . . . . .112
Psion Teklogix NETBOOK PRO Win CE 4.2 User Manual
99
Chapter 7: Troubleshooting And Tips
General Tips
7.1 General Tips
You should read this chapter if you have any questions or experience problems
using your NETBOOK PRO.
7.1.1 Times Aren’t Correct In The Time Program
This is likely to be because of “daylight saving” or “summer time” settings (where
clocks are put forward for the summer months).
The dates that clocks are set to change vary from country to country, and sometimes
even within a country; some countries do not use summer times at all. Therefore, the
NETBOOK PRO clock will not change automatically on the date that the clocks
change. You will need to make sure that each zone is set to use its “summer time”
setting when the clocks change in those countries.
7.1.2 If You Forget Your Password
If you forget the power-on password, you will not be able to use the NETBOOK
PRO unless you reload the operating system. To do this:
1. Press a thin object such as an unfolded paper clip onto the reset switch.
The NETBOOK PRO turns off.
2. Press and hold the Ctrl, D, and On keys simultaneously. The
NETBOOK PRO’s boot loader appears.
3. Press the ! (exclamation mark) key. The NETBOOK PRO reloads its
operating system and displays the Desktop.
Warning:
All installed programs and files in internal storage, except for those
in the Flash folder, will be lost and cannot be retrieved. Registry
entries will also be deleted.
7.1.3 The NETBOOK PRO Doesn’t Turn On/Off
If the NETBOOK PRO doesn’t seem to turn on:
Psion Teklogix NETBOOK PRO Win CE 4.2 User Manual
101
Chapter 7: Troubleshooting And Tips
Resetting The NETBOOK PRO
•
Recharge the main battery. If you continue to use the NETBOOK PRO
when the main battery is low, it will eventually not have enough power and
the NETBOOK PRO will switch off. You will not be able to switch it on
again until you reconnect the AC power to recharge the battery, or replace
the main battery with a charged one.
If the NETBOOK PRO doesn't seem to turn off:
•
Check the automatic switch off time using the Power icon from the
Control Panel. See “Power Management” on page 14.
7.1.4 Resetting The NETBOOK PRO
If you find that you cannot exit a program normally, right-click or alt-tap on the
taskbar and select Task Manager from the context menu. Select the task that
appears to be unresponsive and click on the End Task button.
Press Alt Tab or Ctrl Alt Delete briefly to bring up the task manager. This is useful
when a misbehaving program is monopolizing system resources and slowing the
system.
Note:
If you hold Ctrl Alt Delete for more than 3 seconds, the NETBOOK PRO
will soft reset.
If this does not work, or if your NETBOOK PRO appears to have “locked up”, you
can always perform a “reset”. For instructions, please see “Performing A Soft
Reset” on page 31. This should restart your NETBOOK PRO while preserving most
of your information.
It is worth trying a reset if the keys on the NETBOOK PRO do not appear to
respond, or if the NETBOOK PRO appears to switch on and you are sure that the
batteries are good, but the screen is otherwise blank.
7.1.5 Battery Life Of The NETBOOK PRO
Many variables affect NETBOOK PRO power consumption and battery life. Unlike
batteries using other chemistries, Lithium Ion batteries do not suddenly fail unless
they have been abused in some way. The battery capacity gradually reduces over the
lifetime of the battery. Typically, the capacity of a NETBOOK PRO battery pack
will decline by approximately 15-20% of initial capacity over 400 charge/discharge
cycles. The battery capacity also declines slowly with aging, i.e. in storage.
102
Psion Teklogix NETBOOK PRO Win CE 4.2 User Manual
Chapter 7: Troubleshooting And Tips
ActiveSync Connection Problems Using Windows® 95/98/NT 4.0
Conventionally, the NETBOOK PRO battery pack is considered to have reached
'end-of-life' when its capacity has declined to 50% of the pack’s initial capacity.
Therefore, a NETBOOK PRO battery pack will typically reach its ‘end of life’ after
approximately 1000 charging/discharge cycles (although the battery will still work
for some time after this point).
7.1.5.1
Charging Times
The standard NETBOOK PRO battery charging solution does not use trickle charging or fast charging. The NETBOOK PRO battery pack is charged at a constant rate.
The actual charge time experienced is dependant on capacity of the battery pack and
the ambient temperature. The approximate charging time is 3 to 4 hours.
7.2 ActiveSync Connection Problems
Using Windows® 95/98/NT 4.0
This section is a guide to troubleshooting connection problems between a
NETBOOK PRO and a PC running Windows® 95/98/NT 4.0 and ActiveSync. It
also presumes you have already gone through the online help documents that come
with ActiveSync, and still have no success in linking. A basic knowledge of using
the NETBOOK PRO and Windows 95/98/NT 4.0 is necessary. For information
about using Windows 95/98/NT 4.0, check your Windows manual or contact the
Windows helpline.
7.2.1 Tips When Installing ActiveSync
Close any other programs that are running. This includes virus checkers, uninstallers, floating toolbars etc. If you need to re-install ActiveSync, make sure you uninstall the previous version first.
1. Click on the Start button and select Settings, then Control Panel.
2. Double click the Add/Remove Programs icon. Select ActiveSync in
the list and then click the Add/Remove button.
Important:
You must re-start your PC before re-installing ActiveSync or you
will experience problems.
Psion Teklogix NETBOOK PRO Win CE 4.2 User Manual
103
Chapter 7: Troubleshooting And Tips
Basic Troubleshooting For Your NETBOOK PRO
.
7.2.2 Basic Troubleshooting For Your NETBOOK PRO
1. Close down all applications. To see all active programs, look on the
taskbar. Each program running will have a button. The programs can be
activated then closed normally, or if necessary, you can right-click on
the program’s taskbar button and choose Close from the context menu.
2. Check that the PC Connection setting in the Control Panel is enabled
and set to the correct serial port. Note that a partnership must already
exist for the Infrared port to use ActiveSync correctly.
3. Perform a soft reset on the NETBOOK PRO.
7.2.3 Basic Troubleshooting For Your PC
1. Close down any other open applications in Windows.
2. If you have a laptop:
• Make sure you have no PC Cards (PCMCIA cards) plugged in.
104
Psion Teklogix NETBOOK PRO Win CE 4.2 User Manual
Chapter 7: Troubleshooting And Tips
Basic Troubleshooting For Your PC
• Most laptops have power-saving features that disable the COM ports.
Turn these power saving options OFF.
• If your PC has an Infrared port, make sure it is disabled and your
serial/COM ports are enabled. Psion Teklogix can support you with any
of these issues. Check the laptop’s manual or contact the manufacturers
support department to get these issues rectified.
3. The ActiveSync Connection server icon is in the bottom right-hand
corner of your PC Screen. When you are not connected, it is a grey
circle. When you have made a successful connection, it becomes a
green circle.
• Right-click the ActiveSync icon and
choose Connection Settings from the
context menu.
• Make sure that the correct connection
type is checked.
Psion Teklogix NETBOOK PRO Win CE 4.2 User Manual
105
Chapter 7: Troubleshooting And Tips
Device Conflicts
• It is possible for ActiveSync to conflict with a modem or mouse.
Symptoms are the mouse pointer intermittently locking up or software
that uses the modem intermittently freezing. Check your PC’s device
manager for conflicts.
4. If you are using Windows NT 4.0, check that you have at least
Service Pack 3 installed. If necessary, install it or contact your
Systems Administrator.
7.2.4 Device Conflicts
To check for device conflicts:
1. Click on the Start button, select Settings and then Control Panel.
2. Double-click on the System icon.
3. On the Device manager page of the System properties dialog, check for
icons marked with a
symbol.
Note:
106
This symbol means that the marked device is conflicting with another
device. If a modem or COM port is conflicting, this could be a cause of
ActiveSync not connecting. Contact the person or organization that supports your PC to resolve the conflict.
Psion Teklogix NETBOOK PRO Win CE 4.2 User Manual
Chapter 7: Troubleshooting And Tips
Device Conflicts
4. There is no Device Manager in Windows NT 4.0. The closest is a list of
IRQs, I/O ports and DMA channels. These are accessed by the Start
button, selecting Programs, then Administrative Tools (Common),
then Windows NT Diagnostics. Select the Resources page in the
Windows NT Diagnostics dialog box. If you do not have this option or
you are in any doubt about it, you should contact your Systems Administrator.
Psion Teklogix NETBOOK PRO Win CE 4.2 User Manual
107
Chapter 7: Troubleshooting And Tips
Fax/Modem On COM 1/2/3/4
7.2.5 Fax/Modem On COM 1/2/3/4
If you have a Fax/Modem using COM Port 3 or 4, and ActiveSync on COM 1 or 2
(or vice versa), you may have trouble when trying to connect with the NETBOOK
PRO.
Because of the way a PC handles COM ports, COM1 and COM3 are ‘linked’, as are
COM2 and COM4. Specifically, they share the same Interrupt Request (IRQ).
In practice, this means that if you have a modem on COM3, it may conflict with the
NETBOOK PRO on COM1 (and the same applies for COM4 and COM2). The
solution is to try using ActiveSync on a different port or to assign a different IRQ.
You can check the COM port properties by following the steps above to get to the
Device Manager page and double-clicking on the COM port.
Again, if you are in any doubt about whether you are able to do this safely, you
should contact the person or organization that supports your PC.
108
Psion Teklogix NETBOOK PRO Win CE 4.2 User Manual
Chapter 7: Troubleshooting And Tips
Temp Folder
If you have an external modem and have unplugged it to use the Psion Teklogix
serial cable on the same port, you will not get a connection. Windows 95/98/NT 4.0
reserves this port for use with the modem and so you will have to use another port.
7.2.6 Temp Folder
The ActiveSync connection can be affected if you have not specified, or have incorrectly specified, your Temp folder. To specify this:
1. Click Start and
select Run. Type
sysedit in the dialog
and click OK.
Psion Teklogix NETBOOK PRO Win CE 4.2 User Manual
109
Chapter 7: Troubleshooting And Tips
Temp Folder
A screen with multiple windows is displayed.
2. Click on the AUTOEXEC.BAT title bar.
3. Look in this window to see if it has a line that starts SET TEMP=. If this
line exists, check that the folder that it points to exists, and create the folder
if not.
If this line doesn’t exist, place the cursor on a new line and type SET
TEMP=C:\TEMP.
Close the window. Select Yes when asked if you want to save the changes.
4. Create a folder on the root of your C drive and call it Temp.
5. Finally, restart your PC.
110
Psion Teklogix NETBOOK PRO Win CE 4.2 User Manual
Chapter 7: Troubleshooting And Tips
Troubleshooting ActiveSync Synchronization Problems
7.3 Troubleshooting ActiveSync
Synchronization Problems
This section discusses various problems that may be encountered when synchronizing using a partnership.
Some familiarity with these applications, Windows 95/98/NT 4.0, and your
NETBOOK PRO is assumed. You will also need a full installation of your PC PIM.
Note:
This section should be used in conjunction with the manual to setting up a
synchronization for each application.
The majority of synchronization problems are caused by setting up a synchronization incorrectly. Please make sure you have read the appropriate sections in
Chapter 5: “Using The PC Connection” first. These explain the correct way to set
up a synchronization.
7.3.1 Basic Troubleshooting For Synchronization Problems
Some common causes of sychronization errors include incorrect settings, and
e-mail issues.
Incorrect settings can result from the wrong program being associated with a particular synchronization event. If you have Outlook installed on your PC, ActiveSync
will most likely automatically assume that Tasks, E-mails, etc., should all be associated with Outlook. Verify that the programs you are using are associated with the
type of synchronization you require.
E-mail issues usually stem from conflicts in address books, and conflicting settings
in ActiveSync itself. To verify that e-mails get synchronized to and from the
NETBOOK PRO correctly, verify that the e-mail addresses in the NETBOOK PRO
outbox are valid. ActiveSync will provide some error text on synchronization to
help you detect such problems. Conflicting settings in ActiveSync can result in emails being transferred as headers only, or without attachments. Check the settings
for the ActiveSync service in Inbox on the NETBOOK PRO to resolve this issue.
Psion Teklogix NETBOOK PRO Win CE 4.2 User Manual
111
Chapter 7: Troubleshooting And Tips
Other Things To Try
7.3.2 Other Things To Try
1. Delete and recreate your partnership in ActiveSync.
When ActiveSync connects to a machine using a partnership for the
first time, it uses the name “WindowsCE”. Every subsequent partnership created after the first asks you to enter a name for that machine.
Partnerships register details about your NETBOOK PRO on your PC.
Sometimes this information can become corrupt.
• Open ActiveSync by double-clicking on the ActiveSync icon in the
PC’s system tray. This will bring up the ActiveSync dialog.
• Click on the File menu and select Delete Partnership from the menu.
The Delete Partnership menu item will not be available if there are no
partnerships.
If you have deleted all the partnerships, the next time you connect your
NETBOOK PRO, the partnership will be created as “WindowsCE”.
2. Make a new backup and recreate any synchronizations.
112
Psion Teklogix NETBOOK PRO Win CE 4.2 User Manual
8
SPECIFICATIONS
8.1 Hardware Specifications . . . . . . . . . . .
8.1.1 Physical . . . . . . . . . . . . .
8.1.2 Environmental Characteristics . .
8.1.3 Standard Display . . . . . . . . .
8.1.4 Power Requirements . . . . . . .
8.1.5 Standard Processor And Memory
8.2 Standard Operating System . . . . . . . . .
.
.
.
.
.
.
.
.
.
.
.
.
.
.
.
.
.
.
.
.
.
.
.
.
.
.
.
.
.
.
.
.
.
.
.
.
.
.
.
.
.
.
.
.
.
.
.
.
.
. . . . . . . 115
. . . . . . .115
. . . . . . .115
. . . . . . .116
. . . . . . .116
. . . . . . .116
. . . . . . . 116
Psion Teklogix NETBOOK PRO Win CE 4.2 User Manual
113
Chapter 8: Specifications
Hardware Specifications
Note:
Specifications are subject to change without notification.
8.1 Hardware Specifications
8.1.1 Physical
Enclosure:
IP 30 Sub-notebook.
Dimensions:
235 x 184 x 35 mm (9.25 x 7.24 x 1.38 inches)
Weight:
1100 g / 2.95 lb. (incl. 2200 mAh battery pack)
8.1.2 Environmental Characteristics
Shock:
Withstands 0.7 m (2 ft.) drop onto carpet.
Dust and Water:
IP30 Rating.
Temperature Range:
Operating
High
Low
+50°C (+122°F)
-0°C (32°F)
Storage
High
Low
+60°C (+140°F)
-10°C (14°F)
Relative Humidity:
Operating
0% to 93% maximum at 40°C, non-condensing.
EMI/RFI:
USA: FCC Part 15 Class B
Europe: EN55022 Class B, EN 55024
Safety:
Complies with EN60950
Psion Teklogix NETBOOK PRO Win CE 4.2 User Manual
115
Chapter 8: Specifications
Standard Display
8.1.3 Standard Display
High-quality SVGA size.
800 X 600 pixels 16-bit colour display with backlight.
8.1.4 Power Requirements
DC Power:
AC Power:
Rechargeable: 2200 mAh 12.6 V Lithium-Ion battery
pack, providing 8 to 14 hours operation.
Backup Battery: 2 AAA-size alkaline batteries.
Adaptor for battery charging.
8.1.5 Standard Processor And Memory
Intel ARM-PXA 255 X-Scale, running at 400 MHz.
Internal ROM: 32 MB flash.
Internal RAM: 128 MB SDRAM.
8.1.6 Miscellaneous
Keyboard:
58 full-size keys, compact layout.
Data Storage:
MultiMedia, Secure Digital, Compact Flash, and
PCMCIA Card for expandable, removable data storage.
Pointing Device:
Pen and touch-sensitive screen.
I/O:
IrDA 1.1 (115 Kb/s).
One RS-232 serial port (115 Kb/s).
One USB mini type-A port for peripherals
Sound:
Integrated headphone jack and speaker.
8.2 Standard Operating System
Operating System:
116
Microsoft Windows® CE.NET.
Psion Teklogix NETBOOK PRO Win CE 4.2 User Manual
Chapter 8: Specifications
Standard Operating System
Development Environment:
Compatible with Microsoft SDK for Win CE.NET.
Fully supported by Psion Teklogix SDK for Mobile
Devices.
Web Browser:
Microsoft Internet Explorer.
PC Connectivity:
Microsoft Active Sync.
Psion Teklogix NETBOOK PRO Win CE 4.2 User Manual
117
APPENDIX
A
SUPPORT SERVICES AND WORLDWIDE OFFICES
Psion Teklogix provides a complete range of product support services to its customers worldwide. These services include technical support and product repairs.
A.1 Technical Support
Technical Support for Mobile Computing Products is provided via e-mail through
the Psion Teklogix customer and partner extranets. To reach the website, go to
www.psionteklogix.com and click on the appropriate Teknet link on the home page.
Then click on the Log-in button or the Register button, depending on whether you
have previously registered for Teknet. Once you have logged in, search for the
“Support Request Form”.
A.2 Product Repairs
International
For product repairs, please contact your local Psion Teklogix office (see
page A-2).
Canada/U.S.A
Canadian and U.S. customers can receive access to repair services, by calling
the toll-free number below, or via our secure website (see Technical Support,
above).
Note:
Customers calling the toll-free number should have their Psion Teklogix
customer number or trouble ticket number available.
Voice:
1 800 387-8898 (press option “2”)
Fax:
1 905 812-6304
Psion Teklogix NETBOOK PRO Win CE 4.2 User Manual
A-1
A.3 WORLDWIDE OFFICES
COMPANY HEADQUARTERS
AND CANADIAN SERVICE CENTRE
NORTH AMERICAN HEADQUARTERS
AND U.S. SERVICE CENTRE
Psion Teklogix Inc.
2100 Meadowvale Boulevard
Mississauga
Ontario
Canada L5N 7J9
Tel:
+1 905 813 9900
Fax:
+1 905 812 6300
E-mail: [email protected]
Psion Teklogix Corp.
1810 Airport Exchange Boulevard
Suite 500
Erlanger, Kentucky
USA 41018
Tel:
+1 859 371 6006
Fax:
+1 859 371 6422
E-mail: [email protected]
AMERICAS
INTERNATIONAL SUBSIDIARIES
Psion Teklogix de Mexico, S.A. de C.V.
Sierra Mojada 626, 2º Piso
Col. Lomas Barrilaco, C.P. 11010
Mexico, D.F., Mexico
Tel:
+52 55 5 327 1124
Fax:
+52 55 5 327 1123
E-mail: [email protected]
Psion Teklogix GmbH
Jakob Kaiser Straße 3
D-47877 Willich Münchheide
Deutschland
Tel:
+49 2154 9282 0
Fax:
+49 2154 9282 59
E-mail: [email protected]
Psion Teklogix Danmark
Vesterballevej 4-6
7000 Fredericia
Danmark
Tel:
+45 76 24 0133
Fax:
+45 75 94 4679
E-mail: [email protected]
Psion Teklogix do Brasil, Ltda.
Al. Casa Branca, 851 - conj. 101 e 102
São Paulo - SP - 01408-001
Brasil
Tel:
+55 11 3064 0868
Fax:
+55 11 3068 8198
WWW: www.teklogixbrasil.com.br
E-mail: [email protected]
Psion Teklogix S.A.
La Duranne
135 Rue Rene Descartes
BP 421000
13591 Aix-En-Provence
Cedex 3; France
Tel:
+33 (0) 4.42.908.809
Fax:
+33 (0) 4.42.908.888
E-mail: [email protected]
Psion Teklogix Italia S.r.I
Via Galilei, 47
20092 Cinisello Balsamo
Milan, Italy
Tel:
+39 2 6604 5410
Fax:
+39 2 6604 5412
E-mail: [email protected]
Psion Teklogix de Argentina, S.A.
Avenida Moreau de Justo 1180
Piso 1, Oficina C-105
Buenos Aires 1107
Argentina
Tel:
+54 11 4343 0193
Fax:
+54 11 4343 6310
E-mail: [email protected]
Psion Teklogix (UK) Ltd.
Bourne End Business Centre
Cores End Road
Bourne End
Buckinghamshire SL8 5AR, England
Tel:
+44 1628 648800
Fax:
+44 1628 648810
WWW: www.teklogix.co.uk
E-mail: [email protected]
Psion Teklogix AB
Stora Badhusgatan 18-20
411 21 Göthenburg, Sweden
Tel:
+46 31 13 15 50
Fax:
+46 31 13 57 80
E-mail: [email protected]
A- 2
Psion Teklogix NETBOOK PRO Win CE 4.2 User Manual
Psion Teklogix Inc. (Singapore)
583 Orchard Road
# 15-01 Forum
Singapore 238884
Tel:
+65 735 8108
Fax:
+65 733 5990
E-mail: [email protected]
Psion Teklogix España, S.L.
Cityparc Ronda de Dalt
Ctra. Hospitalet 147-149
Edificio Atenas 2° 3ª
08940 Cornellà de Llobregat (Barcelona)
España
Tel:
+34 9 3475 0220
Fax:
+34 9 3475 0230
E-mail: [email protected]
Psion Teklogix Africa
Postnet Suite 39, Private Bag x11
Halfwayhouse, 1685 Ground Floor East
Waterfall Edge Phase 2, Waterfall Park
Bekker Road MIDRAND 1685
South Africa
Tel:
+27 11 805 7440/1/2
Fax:
+27 11 805 7444
Psion Teklogix B.V.
Venrayseweg 57,
5928 NZ Venlo
Nederlands
Tel:
+31 77 32400 44
Fax:
+31 77 32400 53
Psion Teklogix Wireless
Technologies (Shanghai) Ltd.
Unit 1507-08, Mingshen Building,
No.3131 Kai Xuan Rd.
Shanghai 200030, PRC
Tel:
+86-21-54071991
Fax:
+86-21-54071992
Psion Teklogix Benelux
Nieuwe weg 1,
Psion Teklogix Systems India Pvt. Ltd. 2070 Zwijndrecht
M-74, 1st Floor, “M” Block Market
Belgium
Greater Kailash-Il
Tel:
+32 (0)3 250 22 00
New Delhi - 110048
Fax:
+32 (0)3 250 22 20
India
E-mail: [email protected]
Tel:
+91 11 2621 9257
Fax:
+91 11 2621 9076
E-mail: [email protected]
A.4 WORLDWIDE WEB
www.psionteklogix.com
Psion Teklogix NETBOOK PRO Win CE 4.2 User Manual
A-3
APPENDIX
B
PROGRAM LICENSE AGREEMENT
B.1 PROGRAM LICENSE AGREEMENT. . . . . . . . . . . . . . B-3
B.2 MICROSOFT END USER LICENSE AGREEMENT (EULA): B-4
Psion Teklogix NETBOOK PRO User Manual
B-1
Appendix B: Program License Agreement
PROGRAM LICENSE AGREEMENT
B.1 PROGRAM LICENSE AGREEMENT
Your use of this product is based on your acknowledgement that you have read this
license, understand it and agree to be bound by its terms and conditions.
This product includes software developed by and proprietary information of Psion
Teklogix and its licensors. Software restrictions are as follows and shall be enforced
to the fullest extent possible by applicable law:
1.
License Restrictions.
a.
You shall not, or permit any third party to: (i) use or duplicate the Software for any purpose other than as specified in the agreement; (ii)
alter, reverse-engineer, decompile, disassemble or attempt to reconstruct or discover any source code or underlying ideas or algorithms of
the Software by any means whatsoever; (iii) modify or create any
derivative work of the Software or any copy or portion thereof; or (iv)
remove or alter any software identification, notice of patent, copyright,
trade secret, trademark or other proprietary right related to the Software.
b.
You shall not distribute Software as a stand-alone product.
c.
You may not use trademarks, logos, trade dress, or titles of Psion Teklogix or its licensors in any way, except as provided herein or with
Psion Teklogix' express prior written permission.
2.
No Warranty. THE SOFTWARE IS PROVIDED “AS IS” AND
NEITHER PSION TEKLOGIX NOR ITS LICENSORS MAKE
WARRANTIES OF ANY KIND, WHETHER EXPRESS, IMPLIED,
OR STATUTORY REGARDING THE SOFTWARE. PSION TEKLOGIX AND ITS LICENSORS EXPRESSLY DISCLAIM ANY
IMPLIED WARRANTIES OF MERCHANTABILITY, FITNESS
FOR A PARTICULAR PURPOSE, FREE OF DEFECTS, TITLE
FREE, NON-INFRINGEMENT OF INTELLECTUAL PROPERTY
RIGHTS REGARDING THE SOFTWARE, AND ANY WARRANTY OTHERWISE ARISING OUT OF ANY PROPOSAL,
SPECIFICATION OR SAMPLE. PSION TEKLOGIX AND ITS
LICENSORS DO NOT WARRANT THAT THE SOFTWARE WILL
MEET YOUR REQUIREMENTS OR THAT ITS USE WILL BE
UNINTERRUPTED OR ERROR FREE.
Psion Teklogix NETBOOK PRO User Manual
B-3
Appendix B: Program License Agreement
MICROSOFT END USER LICENSE AGREEMENT (EULA):
3.
Limitation of Liability. IN NO EVENT SHALL PSION TEKLOGIX
OR ITS LICENSORS BE LIABLE FOR ANY DAMAGES WHATSOEVER, INCLUDING WITHOUT LIMITATION, DIRECT, INDIRECT, INCIDENTAL, CONSEQUENTIAL OR SPECIAL
DAMAGES, LOSS OF PROFITS, REVENUE, LOSS OF BUSINESS, LOSS OF DATA OR LOSS OF USE, WHETHER SUCH
CLAIM ARISES IN TORT OR CONTRACT AND IRRESPECTIVE
OF WHETHER PSION TEKLOGIX OR ITS LICENSORS HAVE
ADVANCE NOTICE OF THE POSSIBILITY OF SUCH DAMAGES.
4.
Ownership of Intellectual Property. All title and intellectual property
rights in the Software provided hereunder, and any copies of the Software, are owned by Psion Teklogix or its licensors. This agreement
does not transfer to you any title in or ownership of the Software or
any Psion Teklogix or third party trademarks, nor (except as provided
herein) any right to use Psion Teklogix or third party copyrighted
material, or confidential information embodied therein except the
rights to use the Software as expressly permitted by this agreement.
5.
NOTE ON JAVA TECHNOLOGY. The Software contains support for
programs written in Java programming language. Java Technology is
not fault tolerant and is not designed, manufactured or intended for use
or resale as on-line control equipment in hazardous environments
requiring fail-safe performance, such as in the operation of nuclear
facilities, aircraft navigation or communication systems, air traffic
control, certain medical devices, or weapons systems, in which the
failure of Java Technology could lead directly to death, personal
injury, or severe physical or environmental damage. Psion Teklogix
and its licensors disclaim any express or implied warranties for any
such use.
B.2 MICROSOFT END USER LICENSE AGREEMENT (EULA):
You have acquired a device (“DEVICE”) that includes software licensed by
Psion Teklogix Inc. from Microsoft Licensing Inc. or its affiliates ('MS”).
Those installed software products of MS origin, as well as associated
B-4 Psion Teklogix NETBOOK PRO User Manual
Appendix B: Program License Agreement
MICROSOFT END USER LICENSE AGREEMENT (EULA):
media, printed materials, and “online” or electronic documentation
(“SOFTWARE”) are protected by international intellectual property laws
and treaties. The SOFTWARE is licensed, not sold. All rights reserved.
IF YOU DO NOT AGREE TO THIS END USER LICENSE AGREEMENT (“EULA”), DO NOT USE THE DEVICE OR COPY THE SOFTWARE. INSTEAD, PROMPTLY CONTACT PSION TEKLOGIX INC.
FOR INSTRUCTIONS ON RETURN OF THE UNUSED DEVICE(S)
FOR A REFUND. ANY USE OF THE SOFTWARE, INCLUDING BUT
NOT LIMITED TO USE ON THE DEVICE, WILL CONSTITUTE
YOUR AGREEMENT TO THIS EULA (OR RATIFICATION OF ANY
PREVIOUS CONSENT).
GRANT OF SOFTWARE LICENSE. This EULA grants you the following
license:
· You may use the SOFTWARE only on the DEVICE.
· NOT FAULT TOLERANT. THE SOFTWARE IS NOT FAULT TOLERANT. PSION TEKLOGIX INC. HAS INDEPENDENTLY DETERMINED HOW TO USE THE SOFTWARE IN THE DEVICE, AND MS
HAS RELIED UPON PSION TEKLOGIX INC. TO CONDUCT SUFFICIENT TESTING TO DETERMINE THAT THE SOFTWARE IS SUITABLE FOR SUCH USE.
· NO WARRANTIES FOR THE SOFTWARE. THE SOFTWARE is provided “AS IS” and with all faults. THE ENTIRE RISK AS TO SATISFACTORY QUALITY, PERFORMANCE, ACCURACY, AND EFFORT
(INCLUDING LACK OF NEGLIGENCE) IS WITH YOU. ALSO,
THERE IS NO WARRANTY AGAINST INTERFERENCE WITH
YOUR ENJOYMENT OF THE SOFTWARE OR AGAINST INFRINGEMENT. IF YOU HAVE RECEIVED ANY WARRANTIES REGARDING
THE DEVICE OR THE SOFTWARE, THOSE WARRANTIES DO NOT
ORIGINATE FROM, AND ARE NOT BINDING ON, MS.
· Note on Java Support. The SOFTWARE may contain support for programs
written in Java. Java technology is not fault tolerant and is not designed,
manufactured, or intended for use or resale as online control equipment in
hazardous environments requiring fail-safe performance, such as in the
operation of nuclear facilities, aircraft navigation or communication systems, air traffic control, direct life support machines, or weapons systems,
Psion Teklogix NETBOOK PRO User Manual
B-5
Appendix B: Program License Agreement
MICROSOFT END USER LICENSE AGREEMENT (EULA):
·
·
·
·
in which the failure of Java technology could lead directly to death, personal injury, or severe physical or environmental damage. Sun Microsystems, Inc. has contractually obligated MS to make this disclaimer.
No Liability for Certain Damages. EXCEPT AS PROHIBITED BY LAW,
MS SHALL HAVE NO LIABILITY FOR ANY INDIRECT, SPECIAL,
CONSEQUENTIAL OR INCIDENTAL DAMAGES ARISING FROM
OR IN CONNECTION WITH THE USE OR PERFORMANCE OF THE
SOFTWARE. THIS LIMITATION SHALL APPLY EVEN IF ANY
REMEDY FAILS OF ITS ESSENTIAL PURPOSE. IN NO EVENT
SHALL MS BE LIABLE FOR ANY AMOUNT IN EXCESS OF U.S.
TWO HUNDRED FIFTY DOLLARS (U.S.$250.OO).
Limitations on Reverse Engineering, Decompilation, and Disassembly. You
may not reverse engineer, decompile, or disassemble the SOFTWARE,
except and only to the extent that such activity is expressly permitted by
applicable law notwithstanding this limitation.
SOFTWARE TRANSFER ALLOWED BUT WITH RESTRICTIONS.
You may permanently transfer rights under this EULA only as part of a permanent sale or transfer of the Device, and only if the recipient agrees to this
EULA. If the SOFTWARE is an upgrade, any transfer must also include all
prior versions of the SOFTWARE.
EXPORT RESTRICTIONS. You acknowledge that SOFTWARE is subject
to U.S. export jurisdiction. You agree to comply with all applicable international and national laws that apply to the SOFTWARE, including the U.S.
Export Administration Regulations, as well as end-user, end-use and destination restrictions issued by U.S. and other governments. For additional
information see http://www.microsoft.com/exporting/.
B-6 Psion Teklogix NETBOOK PRO User Manual
INDEX
Boldface indicates a parameter, menu or sub-menu name.
A
accessories
connecting USB accessories 28
ActiveSync
about 5
backing up data 43
backup 69
connection problems 103
copying files 63, 67–69
Ethernet connection 42
guest connection 40
infrared serial connection 42
installing 103
partnership 40
RS232 serial connection 41
synchronizing files 63, 70–73
troubleshooting 111
Advanced tab
Power Properties 21
alt-tap
defined 14
APN Manager 82
applications installed on the NETBOOK
PRO 4
attributes
of files 51
B
backing up data
through ActiveSync 43
backlight properties 30
Backlight to Minimum Level (Power
Properties) 18
backup
battery, caring for 6
restoring files 43
to a PC 43
to multimedia cards 43
with ActiveSync 69
backup batteries 24
batteries
backup 24
changing main battery 22
battery
backup, caring for 6
calibration 16
charging times 103
fitting 22
internal backup 16, 24
life 102
Power Properties 15
prolonging life 23
safety xii, xiii
Schemes 18
status 16
Baud Rate 81
Bluetooth Manager 86
Bluetooth radio
device service profiles 87
ISM band 85
radio configuration 86–88
brightness control 30
browsing folders 51
C
cab files, installing 54
calibration
batter 16
cancelling a transfer 42
Cards
type of 24
cards
inserting CF 26
inserting MMC/SD 25
inserting PCMCIA 27
removing CF 26
removing MMC
SD 25
removing PCMCIA 27
care and safety 5
CF Cards
inserting and removing 26
changing
Psion Teklogix NETBOOK PRO Win CE 4.2 User Manual
I
Index
main battery 22
changing file attributes 51
checkbox
Using Multiple Main Battery Packs 16
city, setting location 39
clicking (mouse terms) See stylus
closing
folders 50
programs/files 50
programs and files 50
Command Icons 29
connecting NETBOOK PRO
to modem 94
with Ethernet (802.11b) 42
with Infrared (IrDA) 42
connecting USB accessories 28
contrast control 30
Control Panel 44
exploring 44
copying
files 52
files, using ActiveSync 67–69
folders 52
information between programs 36
creating
files 51
folders 50
partnerships 70
creating files 51
creating folders 50
D
data
backing up 43
loss prevention 54
securing 45
transfer 40
date, setting 39
deleting
partitions 59
device conflicts 106
dialing, setting up 95
dialogs
buttons 36
using 35
dial-up account 90
dimensions, NETBOOK PRO 115
disks, viewing files 49
dismounting
II
partitions 59
display, specifications 116
displaying
amount of memory 55
control panel 44
Display Off (Power Properties) 18
DNS, definition of 91
double-click
stylus effect 13
double-tap
defined 14
double-tap, stylus effect 13
drop rating 6
DUN service, Bluetooth 87
E
e-mail 89
account 90
checklist 93
optional information 94
remote account 90
setting up 75, 94, 97
types of account 90
web-based account 90
Emissions Information, Canada xii
entering
data 34
owner information 39
environmental specifications 115
Ethernet connection 42
Ethernet connection for ActiveSync 42
F
Fast IrDA 42
fax/modem 108
figure
Main Battery Insertion 22, 24
MMC insertion
NETBOOK PRO 11
Power Properties menus 16–21
file attributes, changing 51
files 34, 47
attributes 51
changing attributes 51
closing 50
copying 52
creating 51
memory use 55
moving around 49
Psion Teklogix NETBOOK PRO Win CE 4.2 User Manual
Index
naming 51
navigating 33
opening 49, 50
viewing on disk 49
fitting the main battery 22
flash folder 54
folders 47
closing 50
copying 52
creating 50
flash 54
managing 52
memory cards 53
moving around 49
naming 51
navigating 33
opening 49
formatting
entire memory card 56
partitions 59
infrared serial connection for ActiveSync
42
Input Panel 34
inserting
CF cards 26
MMC/SD cards 25
PCMCIA cards 27
internal
backup battery 24
Internet 89
account 90
setting up 75, 96
IP address, definition of 91
IP rating 6
IP67 Rating 115
IrDA See Infrared
ISM band, Bluetooth radio 85
ISP
definition 91
information 94
G
K
Globetrotter Option radio card,
configuration 80
glossary of terms 91
GSM/GPRS radio
modem card 81
radio configuration 80–85
guest connection, ActiveSync 40
H
hard reset 32
hardware specifications 115
hostname, definition of 91
How to
reset the NETBOOK PRO 102
see which programs are open 50
use Internet Explorer/Inbox 92
humidity 7
I
icon
power status, in taskbar 15
icons, system command 30
IMAP4, definition of 91
Infrared
connection 42
device safety xii
Fast IrDA 42
keyboard
display 30
entering information 34
Input Panel 34
languages 34
Software Input Panel 30
L
LAN access using PPP service, Bluetooth
87
languages, keyboard 34
lithium-ion battery safety xiii
location of stylus 13
low temperature backlight setting 30
M
magnetic fields 7
mailbox
accounts 90
connecting to remote by modem 89
main battery
fitting 22
Make New Connection 81
managing folders 52
MD5 Challenge 79
memory 116
additional 55
Psion Teklogix NETBOOK PRO Win CE 4.2 User Manual
III
Index
card, additional programs 55
displaying 55
file sizes 55
system 55
use, checking 55
memory card
creating partitions 57
folders 53
formatting entire 56
formatting partition 59
types of 24
menu
Start 29
using 34
Microsoft Windows CE.NET 116
MMC
backup 43
MMC/SD Cards
inserting and removing 25
Mobile Device 67
modem
cable adaptor 95
connecting 94
setting up 96
troubleshooting 108
mounting
partitions 60
moving
highlight between files/folders 49
to a program 49
multimedia cards See MMC
N
naming
files 51
folders 51
NETBOOK PRO
care and safety 5
connecting to modem 94
front view 11
overview 4
O
On-Schedule Outlook Sync 73
on-screen keyboard See keyboard
opening
files 49
files and programs 49
folders 49
IV
operating
system 116
temperature 6
P
partitions
creating 57
deleting 59
dismounting 59
formatting 59
management 59
mounting 60
partnership, ActiveSync 40
partnerships 40
creating with ActiveSync 70
password
at power on 12
PC card radio
802.11b configuration 77–80
PCMCIA Cards
inserting and removing 27
personal dial-up account 90
Pocket On-Schedule 73
POP3, definition 91
power
management 14
Power Properties menus 16–21
requirements 116
specifications 116
status icon 15
power management 14
power-on password 12
Power Properties
Advanced tab 21
Power Properties 15
Power Scheme 19
Power state
Switch to Dim 19
Switch to Stand-By 19
Switch to Suspend 20
Printer (serial service), Bluetooth 87
printing, using PC 65
processor specifications 116
programs 34, 47
additional 55
closing 50
moving to 49
opening 49, 50
starting 34
Psion Teklogix NETBOOK PRO Win CE 4.2 User Manual
Index
R
radio
Bluetooth 86–88
GSM/GPRS 80–85
802.11b 77–80
RAM 116
remote e-mail account 90
removing
CF cards 26
MMC/SD cards 25
PCMCIA Cards 27
resetting NETBOOK PRO
hard 32
soft 31
resetting the NETBOOK PRO
hard 32
soft 31
restoring files from backup 43
ROM 116
RS232 serial connection for ActiveSync
41
S
safety
battery xii, xiii
Infrared xii
instructions xi
summary vii
Schemes (Power Properties) 18
screen
caring for 5
overview 29
SDRAM 116
Securing data 45
securing your information 45
Serial service, Bluetooth 87
setting up
ActiveSync 40
dialing 95
e-mail 75, 94, 97
Internet service 75, 96
modem 96
time, date, home city 39
single-tap
defined 14
single-tap, stylus effect 13
SMTP, definition of 91
soft reset 31, 32
Software Input Panel, keyboard 30
specifications 113–117
display 116
environmental 115
IP30 Rating 115
operating system 116
physical 115
power 116
power requirements 116
processor 116
temperature range 115
standard
display 116
processor and memory 116
Start Menu 29
static electricity 7
status
battery 16
Storage Manager 56
storage temperature 6
stylus
double-tap 13
location 13
single-tap 13
tap-and-hold 13
using 13
Suspend (Power Properties) 18
switching off 12
switching on 11
Switch to
Dim 19
Stand-By 19
Suspend 20
Switch to Dim 19
Switch to Stand-By 19
Switch to Suspend 20
synchronizing files
ActiveSync 70–73
system command icon 30
system memory 55
T
tap-and-hold, stylus effect 13
TCP/IP, definition of 91
temperature range, resetting NETBOOK
PRO
soft 115
temp folder 109
text conventions 4
time 39
Psion Teklogix NETBOOK PRO Win CE 4.2 User Manual
V
TLS 79
toolbar 29
transferring information 40
troubleshooting
ActiveSync 103, 111
fax/modem 108
for your NETBOOK PRO 104
for your PC 104
general tips 101
NETBOOK PRO basics 104
NETBOOK PRO on/off 101
passcode (password) 101
synchronization problems 111
temp folder 109
world times 101
turning on/off 11, 28
U
Using Multiple Main Battery Packs 16
W
weight, NETBOOK PRO 115
802.11b
IEEE 802.1X authentication 79
radio configuration 77–80