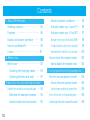
1
Thank you very much for choosing a SEIKO watch.
For proper and safe use of your SEIKO watch,
please read carefully the instructions in this
booklet before using.
Keep this manual handy for easy reference.
*Length adjustment service for metallic bands is available at the
retailer from whom the watch was purchased or SEIKO CUSTOMER
SERVICE CENTER.
The service may also be available on a chargeable basis at other
retailers, however, some retailers may not undertake the service.
Contents
1. About This Product
About reception conditions ………… 96
Handing cautions………………………… 84
Radio signal reception range:In Japan (JJY)…… 96
Features… ………………………………… 86
Radio signal reception range:In China (BPC)… … 97
Display and button operation… ……… 88
Radio signal reception range: In the United States (WWVB)… … 98
How to use Button B… ………………… 90
To enable the watch to easily receive a radio signal… … 99
Crown… …………………………………… 91
Environments in which it is difficult to receive a radio signal …100
2. Before Use
How to check the reception status …102
Before use… ……………………………… 92
How to display the reception result …102
Checking the charging status……… 92
4. Time Zone Adjustment Function (Selecting transmitting station)
Checking the time and date … …… 93
What is the time zone adjustment function? …104
3.How to Set the Time and Date (Radio Signal Reception)
Features of time zone adjustment function …104
Setting the time and date by receiving a radio signal… … 94
Questions and answers regarding time zone adjustment function …105
Mechanism of radio signal reception… … 94
How to set the time zone (Selecting transmitting station)
Automatic reception and manual reception… … 95
List of major time zones around the world …108
82
…106
5. Solar Charging Function
Guarantee ……………………………132
About charging ………………………110
After-sales service
How to charge the watch
7.Troubleshooting
………110
………………134
The indication time for charging the watch …111
How to conduct manual reception (Receiving a radio signal manually)
About energy …………………………112
Conditions in which the watch may be unable to receive radio signals …138
…136
Energy depletion forewarning function …112
How to manually set the time
…138
Power save function ………………113
How to manually set the date
…140
6. To Preserve the Quality of Your Watch
Preliminary position …………………142
To preserve the quality of your watch …114
Things around you which generate magnetism …143
Daily care ……………………………114
How to set the preliminary position …144
Performance and type ……………115
Setting the preliminary position of the date …144
Water resistance
Setting the preliminary positions of the hour and minute hands manually …146
…………………116
Magnetic resistance
……………120
Troubleshooting ………………………148
Band……………………………………122
In case of an abnormal movement …156
Special clasps ………………………124
How to reset the Built-in IC system …156
Lumibrite ……………………………129
8. Specifications
Power source ………………………130
Specifications …………………………162
1
2
3
4
5
6
7
8
83
Handling cautions
About This Product
WARNING
To indicate the risks of serious consequences such as severe injuries unless the
following safety regulations are strictly observed.
・Immediately stop wearing the watch in following cases.
○ If the watch body or band becomes edged by corrosion etc.
○ If the pins protrude from the band.
※ Immediately consult the retailer from whom the watch was purchased or SEIKO CUSTOMER SERVICE CENTER.
・Keep the watch and accessories out of the reach of babies and children.
Care should be taken to prevent a baby or a child accidentally swallowing the accessories.
If a baby or child swallows the battery or accessories, immediately consult a doctor, as it will be harmful to the health of the baby or child.
※ Immediately consult the retailer from whom the watch was purchased or SEIKO CUSTOMER SERVICE CENTER.
84
・Avoid the following places for wearing or keeping the watch.
○ Places where volatile agents(cosmetics such as polish remover, bug repellent, thinners etc.)are vaporizing
○ Places where the temperature drops below 5℃ or rises above 35 ℃ for a long time
○ Places of high humidity
○ Dusty places
○ Places affected by strong magnetism or static electricity
○ Places affected by strong vibrations
About This Product
CAUTIONS
To indicate the risks of light injuries or material damages unless the following safety
regulations are strictly observed.
・If you observe any allergic symptoms or skin irritation
Stop wearing the watch immediately and consult a specialist such as a dermatologist or an allergist
・Other cautions
○ Do not disassemble or tamper with the watch.
○ Keep the watch out of the reach of babies and children.
Extra care should be taken to avoid risks of any injury or allergic rash or itching that may be caused when they touch the watch.
85
Features
About This Product
86
This solar-drive and radio-controlled watch is equipped with a radio signal adjustment function.
・T he watch is operated by using “electric energy” which is converted from the light received by the solar panel.
・This watch displays the precise time by receiving radio signals conveying time information. It can receive official standard frequencies
from Japan (from either of two transmitting stations), the People's Republic of China, and the United States of America.
■ Radio Signal Receiving Function・・・・・・・・・・・・・・・・・・・・・・・・・・ T his watch adjusts the time and the date precisely by automatically
receiving radio signals daily.
→ pages 94 – 101
In addition, radio signals can be forcibly received with manual
operation.
T his watch can receive official standard radio signals from Japan
(from 2 transmitting stations), China, and the United States (the
transmitting station for receiving radio signals can be selected using
the time zone adjustment function).
■ Display Function of Radio Signal Reception Level・・・・・・・・ T he movement of the second hand indicates the radio signal
→ page137
reception level during radio signal reception attempts.
■ Display Function of Radio Signal Reception Results・・・・・・ T he movement of the second hand indicates radio signal reception
→ page 102
results (Yes/No).
This watch can display local time around the world by
setting the appropriate time zone. In addition, setting
the time zone enables the watch to receive official
standard radio signals to set the time if the watch is
worn in a radio signal reception range.
■ Solar Charging Function…
A solar cell underneath the dial converts any form
→ pages 110 -111
of light into electrical energy to charge it. Once fully
charged, the watch continues to run for approximately
six months.
■ Energy Depletion Forewarning Function…
The movement of the second hand indicates that the
→ page 112
battery should be charged.
■ Power Save Function…
This watch is equipped with a function which can
→ page 113
suppress energy consumption when it is left without
receiving an adequate light source for a certain length
of time.
■ Automatic Hand Position Alignment Function… When the hand positions display an incorrect time as
→ page 142
a result of external influences such as magnetism, the
watch automatically corrects the hand misalignment.
About This Product
■ Time Zone Adjustment Function…
(Selecting Transmitting Station)
→ pages 104 - 109
87
Display and button operation
About This Product
Button A
【Reception result confirmation】→ page 102
【Manual reception】→ page 136
【Time zone adjustment】→ page 106
【Manual time and date setting】→ page 138
Minute hand
Hour hand
Second hand
Date
Crown
012
First click【Manual date setting mode】→ page 140
Second click【Manual time setting mode】→ page 138
※ In case of a screw lock type crown, when
the crown is unlocked, it is at the 0-click
position.
Button B
【Time zone adjustment mode (setting
the time to a local time abroad)】→ page 106
88
【automatic reception and
manual reception】
H・・・・High reception level
(50second
position)
L・・・・Low reception level
(40second
position)
N・・・・Unable to receive
radio signals
(20second
position)
Reception Result Display
【Confirmation of
reception result】
Y・・・・Reception Successful
(10second position)
About This Product
Reception Level Display
N・・・・Reception Failed
(20second position)
※ "Confirm reception result"
refer to page 102
※ "About the reception level
display" refer to page 137
※ Positions of above displays may differ depending on the model.
89
How to use Button B
About This Product
Button B is recessed in the watchcase to prevent accidental input.
Types of buttons differ depending on the design of the watch
Upper half of Button B is covered.
Press the lower half of Button
B or press the hollow in the
middle of the button using an
object with a long tapered tip.
90
Button B is covered except the
hollow in the middle of the button.
Button B is recessed in the watchcase.
Button B is recessed in the watchcase.
P r e s s t h e h o l l o w u s i n g a n Press the hollow in the middle
of the button using an object
object with a long tapered tip.
with a ling tapered tip.
Crown
Turn the
crown
clockwise.
The crown
turns.
The
crown
does not
turn.
Normal crown
Pull out the crown and operate it.
About This Product
There are two types of crowns, a normal crown and a screw-lock crown.
Check the crown on your watch.
Screw-lock type crown
Unlock the crown before operating it.
Unscrew
After operating
the crown, lock it.
While pressing
the crown
Screw
※ If your watch has a screw-lock crown, the crown screws into the watch to prevent malfunction and increase water resistance.
※ Be careful not to screw the crown in by force as it may damage the slots of the crown.
91
Before use
1 Checking the charging status
When the movement of the second hand shows an energy depletion state, the battery requires charging.
Before Use
The second hand moves
at one-second intervals.
The second hand moves
at two-second intervals.
The second hand moves
at five-second intervals.
The second hand
is stopped.
92
The watch is
sufficiently charged.
The energy depletion
forewarning function is
activated. → page112
As the charged energy is running
out, charge the battery fully.
The power save function
is activated. → page113
Check the movements of the second hand
after releasing the Power Save mode
The watch completely
stops operating.
As the charged energy is depleted,
charge the battery fully.
How to
charge the
battery →
page 110
※ If the second hand does not move at one-second intervals even after fully charging the battery → At Trouble on page 150
2 Checking the time and date
※T
he hands of this watch cannot be moved by turning the crown. So when
adjusting the time, refer to the following pages regarding the procedures.
When the
time and
date are
incorrect
Use the watch
without adjustment.
How to set the time
zone → page 106
※W
hen setting
a time zone for
regions other than
Tokyo (Japan),
the radio signal
reception function
will not work.
When the radio
signal can be
received
Setting the time and date
by receiving a radio signal
→ page 94
Before Use
When the time and
date are correct
Radio signal reception range indication
→ pages 96 - 98
Environments in which it is difficult to receive a radio signal → page 100
When a radio
signal cannot
be received
Manually set the
time and date
→ pages 138-141
※ When the watch is not displaying the precise time and date even after successfully receiving a radio signal → In this
case, refer to Misalignment of the time and hands on page 152 and Misalignment of the date on page 154.
93
Setting the time and date by receiving a radio signal
■ Mechanism of radio signal reception
The radio-controlled watch displays the precise time and date by automatically receiving
and synchronizing itself with the radio signal of an official standard frequency.
How to Set the Time and Date (Radio Signal Reception)
94
Radio-controlled watch
Transmitting
Station
Official standard
frequency
Cesium
Atomic Clock
Receive radio signals
through the antenna
inside the watch
↓
Analyze time
information
↓
Display the current
time, date and day
Time signal transmitted by a standard frequency is based on a super accurate "Cesium
Atomic Clock" that may have a 1 second loss or gain per one hundred thousand years.
■ Automatic reception and manual reception
This watch sets the time and date by automatically receiving a radio
signal at a fixed time.
・Automatic reception
This watch automatically receives a radio signal at 2:00 AM.
※ If the watch fails to receive receives a radio signal at 2:00 AM, it will attempt to receive a
radio signal at 3:00 AM. If it fails again, it will attempt to receive a radio signal at 4:00 AM.
When receiving radio signals, place the watch in a
place where it can easily receive a radio signal.
・Manual reception
W
hen this watch cannot automatically receive a radio signal due to a difficult
receiving environment, it is possible to receive them arbitrarily at any time.
How to conduct manual reception → pages 136-137
※When setting a time zone for regions other than radio signal reception range, the radio signal reception function will not work.
C
heck the setting of the time zone → How to set the time zone (Selecting transmitting station) on pages 106-107
※Radio signal reception results depend on a receiving condition. → Environments in which it is difficult to receive a radio signal on page 100
※This watch is unable to receive radio signals outside a reception range → Radio signal reception range indication on pages 96-98
※When the watch is not displaying the precise time and date even after successfully receiving a radio signal → At Trouble: Misalignment of the
time and hands on page 152, Misalignment of the date on page 154.
How to Set the Time and Date (Radio Signal Reception)
The antenna for receiving radio
signals inside the watch is at the
9 o’clock position. Turning the
antenna toward the outside of
the window enables the watch to
receive radio signals more easily.
95
About reception conditions
■ Radio signal reception range: In Japan (JJY)
The reception range from each transmitting station is approximately
1,000 km(1,000 km radius of each station)
.
How to Set the Time and Date (Radio Signal Reception)
96
Ohtakadoya-yama
transmitting station
(40 kHz)
Hagane-yama
transmitting
station(60 kHz)
1,000km
1,000km
JJY is operated by the National
Institute of Information and
Communications Technology(NICT)
.
JJY is transmitted from two stations
in Japan. Each station transmits JJY
in a different frequency.
Fukushima (Ohtakadoya-yama
transmitting station: 40 KHz)
Kyushu(Hagane-yama transmitting
station: 60 KHz)
※ NICT:National Institute of Information and Communications Technology
※ Whether the watch succeeds in receiving radio
signals or not depends on the receiving conditions.
Refer to "Environments in which it is difficult to
receive a radio signal" on page 100.
■ Radio signal reception range:In China (BPC)
The reception range from the transmitting station is approximately 1,500
km (1,500 km radius of the transmitting station).
※ NTSC:National Time Service Center
Shangqiu National
Time Service Center
Frequency: 68.5kHz
※T
he watch may be able to receive radio
signals outside a reception range if the
receiving conditions are favorable.
※ T he watch may fail to receive radio signals
depending on the reception conditions
(weather, geographic locations, radio
disturbances such as tall buildings, and
orientation of the watch).
Environments in which it is difficult to
receive a radio signal on page 100.
How to Set the Time and Date (Radio Signal Reception)
1,500km
BPC is operated by NTSC.
Shangqiu National Time Service
Center
Frequency: 68.5kHz
97
■ Radio signal reception range: In the United States (WWVB)
The reception range from the transmitting station is approximately 1,500 km (1,500 km
radius of Fort Collins radio station). There are four time zones within the reception range.
1,500km
How to Set the Time and Date (Radio Signal Reception)
98
WWVB is operated by NIST.
Fort Collins transmitting station
Frequency: 60 KHz
※ NIST:National Institute of Standards and
Technology
Fort Collins
transmitting station
Frequency: 60 KHz
※T
he watch may be able to receive radio
signals outside a reception range if the
receiving conditions are favorable.
※ T he watch may fail to receive radio signals
depending on the reception conditions
(weather, geographic locations, radio
disturbances such as tall buildings, and
orientation of the watch).
Environments in which it is difficult to
receive a radio signal on page 100.
■ To enable the watch to easily receive a radio signal
Place the watch where it can
receive radio signals more
easily, such as by the window.
In order to secure a stable radio signal
r e c e p t i o n , ke e p t h e w a t c h s t a t i o n a r y
without changing the direction of the watch
or tilting it during radio signal reception.
How to Set the Time and Date (Radio Signal Reception)
The antenna for receiving radio
signals inside the watch is located
at the 9 o'clock position.
Turning the antenna toward the
w indow enables t he wa tch to
receive radio signals more easily.
99
■ Environments in which it is difficult to receive a radio signal
How to Set the Time and Date (Radio Signal Reception)
100
・In p l a c e s g e n e r a t i n g
radio interference, such
as construction sites
・C l o s e t o h o m e e l e c t r i c a l
or places with heavy
appliances such as TV's,
traffic.
refrigerators or air conditioners
・C l o s e t o O A d e v i s e s s u c h
as mobile phones, personal
computers or fax machines
・C lose to steel desks or other
furniture made of metal
・Close to overhead power ・Inside a building, between tall
buildings, underground.
lines, TV stations, train
cables.
Avoid putting the watch
in such places when it
receives radio signals.
・Inside a vehicle, train, or airplane
NOTICE
How to Set the Time and Date (Radio Signal Reception)
・T he watch may display the wrong time if it fails to receive radio signals properly
because of interference. The watch may also fail to receive radio signals properly
depending on the location or radio wave receiving conditions. In this case, move the
watch to another place where it can receive radio signals.
・When the watch is out of reception range, its accurate quartz movement will continue
to keep the time.
・The time signal transmission may be stopped during maintenance of the facilities of each
transmitting station or because of a lightning strike. In such a case, see each station's
website for further information or contact SEIKO CUSTOMER SERVICE CENTER.
・Websites of transmitting stations(as of November, 2007)
Japan: NICT(Japan Standard Time Group)http://www.jjy.nict.go.jp/
China: NTSC http://www.ntsc.ac.cn
The United States of America: NIST http://www.boulder.nist.gov/timefreq/
stations/wwvb.htm
・SEIKO CUSTOMER SERVICE CENTER: 0120-612-911(toll free in Japan)
101
How to check the reception status
■ How to display the reception results
This watch displays the latest reception results (Yes/No) of a radio signal for five seconds.
1 Press Button A once and then release it.
How to Set the Time and Date (Radio Signal Reception)
102
Press Button A
once and then
release it.
※W
hen But ton A is kept
pressed for three seconds
or longer, the second hand
starts to move to the “Zero
Second Position,” and then
the watch switches to the
Manual Reception Mode. In
this case, press Button A
again to display the time.
2 The second hand indicates the reception results.
If a reception was
successful: The second
hand points to Y
(Yes; the 10 second
position)
C
BP JY
J
If a reception has
failed: The second
hand points to N
(No; the 20 second
position)
※ If Button A is pressed after five seconds or while the second hand is moving to display the reception results, the reception results display function is cancelled and the second hand resumes its normal movement.
If a reception was successful: The second hand points to Y
・ A radio signal has been received successfully. Use the watch without any adjustments.
※W
hen the watch is not displaying the precise time and date even after successfully receiving a radio signal → In this case, refer to Misalignment of the time and hands on page 152 and Misalignment of the date on page 154.
If reception has failed: The second hand points to N.
・ Place the watch in a place where it can easily receive a radio signal, or change its direction.
T his watch is unable to receive radio signals outside a reception range → Radio signal reception range indication on pages 96 - 98
・ Attempt to receive a Radio Signal in a different time period (In the case of manual reception).
Receiving environments differ according to time periods even at the same place.
Due to radio signal characteristics, the watch is able to easily receive radio signals during nighttime hours.
・ When manually adjusting the time even after successfully receiving a radio signal, reception results are reset to “N.”
※ When pulling the crown to the second click, the watch enters the manual time setting mode, and resets the reception results without adjusting the time.
・ When the watch is unable to receive radio signals, it may move depending on the quartz movement.
※ Accuracy of loss / gain: ±15 seconds per month
How to Set the Time and Date (Radio Signal Reception)
E
ven within the radio signal reception range, this watch may fail to receive a radio signal depending
on the condition (due to the influence of weather, geographical features, buildings, or direction). →
In this case, refer to Environments in which it is difficult to receive a radio signal on page 100.
103
What is the time zone adjustment function?
■ Features of time zone adjustment function
0 second position: UTC
・This watch is able to be set to an overseas local time in one-hour units.
・ T his watch can automatically display the local time of a desired area by
selecting its time zone.
Time Zone Adjustment Function
When the watch is set in the time zone adjustment mode, the second
hand indicates the time zone.
Press the button to set the time zone referring to the position of the
second hand.
om
Fr
−10
urs to + 1
1 ho
3
−5
5
ho
ur
10
−11
・ This watch selects a radio signal transmitting station by setting the time zone.
104
‒1
s
ost of the regions around the world adopt time differences based on one-hour units.
M
The watch set time difference based on UTC (Coordinated Universal Time).
The range of time differences around the world centered from UTC is “from – 11 hours to
+ 13 hours.”
13
When the watch is used in Tokyo, set the second hand to “Tokyo (Japan): 9 second position”
to receive the official standard frequency of Japan.
When the watch is used in China, set the second hand to “Hong Kong (China): 8 second position” to receive the official
standard frequency of Japan.
If a time zone other than a radio signal reception range is selected, the radio signal reception function will not work.
→ How to set the time zone pages 106-107
→ List of major time zones around the world page 108
■ Questions and answers regarding time zone adjustment function
Q:When returning to Japan from overseas, is the time automatically set to Japan time?
A:Just moving cannot adjust the time to Japan time. After setting the time difference, radio
signal reception is not performed. When wearing a watch in Japan, set to Japan time by
use of the time zone adjustment function.
Q:How accurate is the watch while the time difference is being set.
A:W hile the time zone is being set, the watch has an accuracy of a normal quartz watch.
(Monthly rate: ±15 seconds)
Q:H ow is adjustment made to a local time with a time difference of 15 minutes or 30
minutes?
A:The time can be adjusted on a 1 hour basis by use of the time zone adjustment function. When adjusting to a local time with a time zone difference of 15 minutes or 30 minutes,
please refer to the " How to manually set the time " on pages 138-139.
Time Zone Adjustment Function
Q:The hands stop during operation of time zone setting, therefore, does time lag occur?
A:The internal circuit stores the time, therefore, no time lag occurs.
105
How to set the time zone (Selecting transmitting station)
1 Press and hold But ton B until the
second hand moves (for four seconds).
The second hand starts to move, and then the
watch enters the time zone adjustment mode.
Time Zone Adjustment Function
106
When a no movement state of the second
hand is kept for ten seconds or more, the
watch automatically switches to the time
display state.
When it is in the middle of operation, reattempt the operation from procedure “1.”
※P
ress Button
with a
Press and hold Bpointed
object.
Button B for → page 90
four seconds,
2 Set the Time Zone by pressing the
button to move the second hand.
The second hand
moves clockwise by
pressing Button A.
Pressing the button once moves
the second hand every one second.
The second hand
moves counterclockwise
by pressing Button B.
※ The buttons can be pressed continuously.
The radio signal transmitting station can be changed by setting the time zones.
When setting a time zone for regions other than reception range, the radio
signal reception function will not work.
Set the time zone by moving the second hand.
The one-second movement of the second hand is equivalent to one hour in the time zone.
If the watch is used in China
Set the second hand to
the 9-second position.
Set the second hand to
the 8-second position.
C
BPJJY
C
BPJJY
If the watch is
used in other
areas
List of major
time zones
around the world
→ page 108
When the no movement state of the second hand is kept for ten seconds or
more, the watch automatically switches to the time display state.
When it is in the middle of operation, re-attempt the operation from procedure “1.”
When the no movement state
of the minute and hour hands is
kept for ten seconds, the watch
automatically terminates the Time
zone adjustment mode.
In the case that the date
changes, the date display
changes afterward.
※D uring movement of the
date, neither the buttons
nor the crown can be
operated.
Time Zone Adjustment Function
If the watch is used in Japan
watch automatically
3 The
terminates the mode.
107
List of major time zones around the world
When setting a time zone for a region where no receivable official standard frequency is mentioned in the table below, the radio signal reception function will not work.
Time Zone Adjustment Function
108
Name of representative city
(Time zone)
Receivable
official
standard
frequency
Time difference
with UTC
0-second position
±0 hour
London/UTC ★
-
0-second position
±0
London/UTC ★
-
1-second position
+1 hours
Paris/Berlin ★
-
59-second position
-1 hours
Azores ★
-
2-second position
+2 hours
Cairo ★
-
58-second position
-2 hours
(DST Rio de Janeiro)
-
3-second position
+3 hours
Moscow ★
-
57-second position
-3 hours
Rio de Janeiro ★
-
4-second position
+4 hours
Dubai
-
56-second position
-4 hours
Santiago ★
WWVB △
5-second position
+5 hours
Karachi
-
55-second position
-5 hours
New York ★
WWVB
6-second position
+6 hours
Dhaka
-
54-second position
-6 hours
Chicago ★
WWVB
7-second position
+7 hours
Bangkok
-
53-second position
-7 hours
Denver ★
WWVB
8-second position
+8 hours
Hong Kong (China)
BPC
52-second position
-8 hours
Los Angels ★
WWVB
9-second position
+9 hours
Tokyo (Japan)
JJY
51-second position
-9 hours
Anchorage ★
-
10-second position +10 hours
Sydney ★
11-second position +11 hours
Position that the
second hand indicates
Time difference
with UTC
Name of representative city
(Time zone)
Receivable
official
standard
frequency
Position that the
second hand indicates
JJY △
50-second position -10 hours
Honolulu
-
Nouméa
-
49-second position -11 hours
Midway Islands
-
12-second position +12 hours
Wellington ★
-
13-second position +13 hours
(DST Wellington)
-
Daylight Saving Time (Summer Time) is in effect in time zones indicated with a “ ★ “ mark.
(As of November 2007)
If a receivable official standard frequency is indicated with a “△” mark, summer time in the time zone can be set by receiving the frequency if the time zone is within the radio signal reception range.
There are time differences around the world based on “Coordinated Universal
Time (UTC).” There are 24 regions (Time Zones) around the world with a
time difference of one hour. This system has been adopted internationally by
setting the total time difference around the world as 24 hours.
In addition, Daylight Saving Time (Summer Time) is individually adopted in
some regions.
[What is summer time (DST)?]
S
ummer time is daylight saving time. Advancing the watch one hour to prolong
daytime during longer daylight hours in summer. Daylight saving time has
been adopted in about 80 countries, mainly in Europe and North America. The
adoption and duration of daylight saving time vary depending on the country.
※ Time differences between regions and daylight saving time may change due to circumstances of a country or region.
※ A time difference established in 15 minute or 30 minute units is adopted in very limited regions (ex. India).
Time Zone Adjustment Function
[What is UTC (Coordinated Universal Time)?]
U
TC is the universal standard time coordinated through international agreement. It is used as the official time around the world. UTC is determined by adding
a leap second to GMT (Greenwich Mean Time), which is determined through
astronomical measurement, in order to keep the precise time.
109
Solar Charging Function
About charging
■ How to charge the watch
To enjoy optimal performance of this watch, make sure that the watch is kept sufficiently charged at all times.
To charge the watch, expose the
dial (solar cell) to adequate light.
110
If the watch is concealed under a long sleeve shirt, or if it is used
or stored continually under conditions where it cannot receive
sufficient light, the power stored in the solar cell may be easily
depleted because the watch cannot be sufficiently charged.
※ When changing the watch, keep the watch temperature under 60℃
※ B efore initially using the watch or when the watch has stopped as a result of complete depletion of
stored power, charge the watch sufficiently.
Standard charging time
Illumination
(LUX)
Light
source
500
700
1,000
3,000
5,000
10,000
10,000
Incandescent light
Fluorescent light
Fluorescent light
Fluorescent light
Fluorescent light
Fluorescent light
Sunlight
100,000
Sunlight
Condition
(Example)
60W 60cm
General offices
30W 70cm
30W 20cm
30W 12cm
30W 5cm
Cloudy day
Sunny day(Under the direct
sunlight on a summer day)
Time required for fully
charging the watch
-
-
-
90 hours
70 hours
25 hours
25 hours
8 hours
Time required for charging the watch to
start moving at one- second intervals ★
-
-
120 hours
30 hours
24 hours
8 hours
8 hours
2 hours
Time required for charging
the watch to run for one day
5 hours
3 hours
2 hours
30 minutes
24 minutes
9 minutes
9 minutes
Solar Charging Function
■ The indication time for charging the watch
3 minutes
★ T he figures in the table above refer to the time required to charge the stopped watch by exposure to light until the watch moves
at steady one-second intervals. Even if the watch is partially charged for a period shorter than the time provided in the above
table, it will resume one-second interval movement, however, the one-second interval movement will change to two-second interval
movement shortly. To avoid this and charge the watch to a sufficient level, use the charging time mentioned above as a measure.
※ The required charging time slightly varies depending on the model of the watch.
※ The movement of the second hand checking the charging status → page 92
111
Solar Charging Function
About energy
■ Energy depletion forewarning function
The energy depletion forewarning function is activated when the energy stored in the
watch runs low. In such a case, the second hand moves at two-second intervals. If
the watch continues to be in the state of two-second interval movement, the watch
switches to five-second interval movement, followed by a completely stopped state.
If the energy depletion forewarning function is activated, charge the watch sufficiently.
How to charge the watch・・・・・・ page 110
Standard charging time・・・・・・・・ page 111
112
※ Neither the buttons nor the crown can be operated while the second hand moves at two-second or
five-second intervals(this is not a malfunction).
※ W hile the second hand moves at five-second intervals, the hour and minute hands, date and day
stop operating.
※ W hile the second hand moves at five-second intervals, the watch is unable to receive radio signals
automatically. After the watch is charged sufficiently and the second hand returns to normal onesecond interval movement, conduct the manual reception of radio signals to set the watch to the
correct time.(Refer to "How to set the time, date and day" on page 95.)
This watch is equipped with a power save function (Power Saving) which can suppress energy
consumption when it is left without receiving an adequate light source for a certain length of time.
Power Save 1
When the watch is exposed to a state without receiving
Condition
an adequate light source for 72 hours or longer.
Situation
The second hand
stops pointing at
t h e 15 - s e c o n d
position, and the
hour and minute
hands also stop.
Power Save 2
When the watch is in an insufficient
charging state for a long time.
The second hand stops
pointing at the 45-second
position, and the hour and
minute hands also stop.
Solar Charging Function
■ Power save function
The watch does not
c o n d u c t a u to m a t i c
radio signal receiving.
How to handle When the watch is exposed to an adequate light source for five seconds or longer, After sufficiently charging the battery, set
the situation it displays the current time again after the second hand is rapidly advanced.
the watch for the current time, if necessary.
Power Save 2
※ While the watch is being charged, the second hand moves at “Five-second Intervals.”
During the “Five-second Interval Movement,” neither the buttons nor the crown can be operated.
※ If the “Power Save 2” mode is prolonged, the stored power amount drops and the internal current time information stored will be lost.
W hen the watch returns to its normal movement of one-second interval after sufficiently charging the battery, set the current time by
receiving a radio signal. (Refer to Setting the time and date by receiving a radio signal → page 95)
113
To Preserve the Quality of Your Watch
To preserve the quality of your watch
■ Daily care
・The watch requires good daily care
・Wipe away moisture, sweat or dirt with a soft cloth
・To clean the clearances (around the metallic band, crown or case back), a
soft toothbrush is convenient. ・After soaking the watch in seawater, be sure to wash the watch in clean
pure water and wipe it dry carefully.
・Turn the crown from time to time
・In order to prevent corrosion of the crown, turn the crown from time to time.
・The same practice should be applied to a screw lock type crown.
(No need to pull out the screw lock type crown.)
Crown → page 91
114
■ Performance and type
Water resistant
performance
Refer to pages
116 - 119.
To Preserve the Quality of Your Watch
The case back shows the caliber and performance of your watch
Caliber number
The number to identify
the type of your watch
※ The figure above is one example. Performance of your watch is different from above sample.
115
■ Water resistance
To Preserve the Quality of Your Watch
Refer the table below for the description of each degree of
water resistant performance of your watch before using.
(Refer to " page 115 ")
Indication on the case back
No indication
WATER RESISTANT
WATER RESISTANT 5 BAR
WATER RESISTANT 10 (20) BAR
116
Water resistant performance
Non-water resistance
Water resistance for everyday life
Water resistance for everyday life at
5 barometric pressures
Water resistance for everyday life at
10(20) barometric pressures.
Avoid
Avoid
drops
drops
of water
of water
or sweat
or sweat
The The
watch
watch
withstands
withstands
accidental
accidental
contact
contact
withwith
water
water
in everyday
in everyday
life. life.
To Preserve the Quality of Your Watch
Condition
Condition
of use
of use
NotNot
suitable
suitable
for for
swimming
swimming
WARNING
WARNING
TheThe
watch
watch
is suitable
is suitable
for for
sports
sports
such
such
as as
swimming.
swimming.
TheThe
watch
watch
is suitable
is suitable
for for
diving
diving
notnot
using
using
an an
air air
cylinder.
cylinder.
117
To Preserve the Quality of Your Watch
WARNING
Do not use the watch in scuba diving or
saturation diving.
The various tightened inspections under simulated harsh environment, which are
usually required for watches designed for scuba diving or saturation diving, have
not been conducted on the water-resistant watch with the BAR (barometric
pressure) display. For diving, use special watches for diving.
CAUTION
※
If the inner surface of the glass is clouded with condensation or water droplets appear
inside of the watch for a long time, the water resistant performance of the watch is
deteriorated. Immediately consult the retailer from whom the watch was purchased or
SEIKO CUSTMER SERVICE CENTER (listed on the end of a book).
Do not turn or pull out the crown when the
watch is wet.
Water may get inside of the watch.
118
Do not leave moisture, sweat and dirt on the
watch for a long time.
Be aware of a risk that a water resistant watch may lessen its water
resistant performance because of deterioration of the adhesive on
the glass or gasket, or the development of rust on stainless steel.
Do not wear the watch while taking a bath or a sauna.
Steam, soap or some components of a hot spring may accelerate the
deterioration of water resistant performance of the watch.
To Preserve the Quality of Your Watch
CAUTION
Do not pour running water directly from faucet.
The water pressure of tap water from a faucet is high enough to
degrade the water resistant performance of a water resistant watch
for everyday life.
119
■ Magnetic resistance
To Preserve the Quality of Your Watch
Affected by nearby magnetism,
a quartz watch may temporarily gain or lose time or stop operating.
※When the hand positions deviate to display incorrect time as a result of influence of
magnetism, this watch automatically corrects the hand alignment itself. (Refer to page 142)
Indication on the case back
No indication
Condition of use
Keep the watch more than 10 cm away from
magnetic products.
Keep the watch more than 5 cm away from
magnetic products. (JIS level-1 standard)
Keep the watch more than 1 cm away from
magnetic products. (JIS level-2 standard)
120
Cellular phone
(speaker)
Magnetic health belt
Bag (with magnet buckle)
Magnetic necklace
AC-powered shaver
Magnetic health mat
Portable radio
Magnetic health pillow
(speaker)
To Preserve the Quality of Your Watch
Examples of common magnetic products that may affect watches
Magnetic cooking device etc
The reason why analogue
quartz watch is affected
by magnetism.
It is because the built-in motor of the watch, which harnesses
magnetic power and external strong magnetism, affect each other
to stop the motor or suppresses the turn of the motor.
121
■ Band
To Preserve the Quality of Your Watch
The band touches the skin directly and becomes dirty with sweat or dust.
Therefore, lack of care may accelerate deterioration of the band or cause skin irritation
or stain on the sleeve edge. The watch requires a lot of attention for long usage.
・Metallic band
122
・Moisture, sweat or soil will cause rust even on a stainless steel band if they are left for a long time.
・Lack of care may cause a yellowish or gold stain on the lower sleeve edge of shirts.
・Wipe off moisture, sweat or soil with a soft cloth as soon as possible
・To clean the soil around the joint gaps of the band, wipe it out in water and then brush it off with a
soft toothbrush.
(Protect the watch body from water splashes by wrapping it up in plastic wrap etc.)
・B ecause some titan bracelets use pins made of stainless steel, which has outstanding strength,
rust may form in the stainless steel parts.
・If rust advances, pins may poke out or drop out, and the watch case may fall off the bracelet, or the
clasp may not open.
・If a pin is poking out, personal injury may result. In such a case, refrain from using the watch and
request repair.
・Leather band
・A leather band is susceptible to discoloration and deterioration from moisture, sweat and direct sunlight.
・Wipe off moisture and sweat as soon as possible by gently blotting them up with a dry cloth.
・Do not expose the watch to direct sunlight for a long time.
・Please take care when wearing a watch with light-colored band, as dirt is likely to show up.
・R efrain from wearing a leather band watch other than Aqua Free bands while bathing,
swimming, and when working with water even if the watch itself is water-resistant enforced
for daily use(10-BAR water resistant).
・Polyurethane band
・A polyurethane band is susceptible to discoloration from light, and may be deteriorated by
solvent or atmospheric humidity.
・Especially a translucent, white, or pale colored band easily adsorbs other colors, resulting in
color smears or discoloration.
・Wash out dirt in water and clean it off with a dry cloth.
(Protect the watch body from water splashes by wrapping it up in plastic wrap etc.)
・When the band becomes less flexible or cracked, replace the band with a new one.
Notes on skin irritation and allergy
Skin irritation caused by a band has various reasons such as allergy to metals or leathers, or skin reactions against friction on
dust or the band itself.
Notes on the
length of the band
Adjust the band to allow a little clearance with your wrist to
ensure proper airflow. When wearing the watch, leave enough
room to insert a finger between the band and your wrist.
To Preserve the Quality of Your Watch
123
■ Special Clasps
To Preserve the Quality of Your Watch
There are 3 type of special clasps as described below;
If the clasp of the watch you purchased is one of them,
please refer to the indications.
A
A Type → page 125
C
C Type → page 128
B
B Type
→ page 126
Push button
124
1 Lift up the clasp to release
2 Open the flap.
the buckle.
Flap
Flap
Fixed loop
Moveable loop
3 Take the pin out of the adjustment hole, adjust the
size of the strap by sliding it back and forth, and then
put the pin back into the appropriate adjustment
hole.
Pin
4 Close the flap.
To Preserve the Quality of Your Watch
A A Type
Adjustment hole
125
To Preserve the Quality of Your Watch
B B Type
・How to wear or take off the watch
1 Press the button on both sides of the buckle ;
pull the buckle up.
The band will automatically come out of the loop.
※Fixed loop
Moveable
loop
126
2 Place the tip of the band into the moveable loop
and fixed loop, and fasten the clasp by pressing
the frame of the buckle.
Push button
Buckle
※ No Fixed loop with Metal Bracelets.
・How to adjust the length of the leather band
2 Press the push but tons again to
buckle, pull the leather band out of the moveable
loop and fixed loop. Then open the clasp.
unfasten the buckle.
Push button
Fixed loop
Moveable
loop
Buckle
3 Pull the pin out of a adjustment hole of the band. Slide the band to adjust its length and find an
appropriate hole. Place the pin into the hole.
Pin
4 Fasten the buckle with pressing the
push buttons.
To Preserve the Quality of Your Watch
1 With pressing buttons on both sides of the
Adjustment hole
127
To Preserve the Quality of Your Watch
C C Type
1 Press the button on the buckle, and
lift to open the clasp.
Push button
2 To adjust : Pull the pins out of the
adjustment holes on the band. Slide
the band to the appropriate length.
Push the pins into the new holes on
the band.
Adjustment hole
128
Pins
■ Lumibrite
Lumibrite is a luminous paint that is completely harmless to human beings and natural environment, containing no noxious
materials such as radioactive substance.
Lumibrite is a newly-developed luminous paint that absorbs the light energy of the sunlight and lighting apparatus in a short
time and stores it to emit light in the dark.
For example, if exposed to a light of more than 500 lux for approximately 10 minutes, LumiBrite can emit light for 3 to 5 hours.
Please note, however, that, as Lumibrite emits the light it stores, the luminance level of the light decreases gradually over time.
The duration of the emitted light may also differ slightly depending on such factors as the brightness of the place where the
watch is exposed to light and the distance from the light source to the watch.
Condition
Sunlight
Indoor (Windowside during
daytime)
Lighting apparatus
(40-watt daylight
fluorescent light)
Fine weather
Cloudy weather
Fine weather
Cloudy weather
Rainy weather
Distance to the
watch: 1 m
Distance to the watch: 3 m
Distance to the watch: 4 m
Illumination
100,000 lux
10,000 lux
more than 3,000 lux
1,000 to 3,000 lux
less than 1,000 lux
To Preserve the Quality of Your Watch
If your watch has Lumibrite
1,000 lux
500 lux (average room luminance)
250 lux
129
■ Power source
To Preserve the Quality of Your Watch
・Overcharge prevention function
When the secondary battery is fully charged, the overcharge prevention function is automatically activated
to avoid further charging. There is no need to worry about damage caused by overcharging no matter how
much the secondary battery is charged in excess of the "time required for fully charging the watch".
※ Refer to "Standard charging time" on page 111 to check the time required for fully charging the watch.
NOTICE
■(Notes on charging the watch)
・W h e n c h a r g in g t h e w a t c h , d o n o t p la c e t h e w a t c h in cl o s e
proximity to an intense light source such as lighting equipment for
photography, spotlights or incandescent lights, as the watch may be
excessively heated resulting in damage to its internal parts.
・When charging the watch by exposure to direct sunlight, avoid places
that easily reach high temperatures, such as a car dashboard.
・A
lways keep the watch temperature under 60℃ .
130
The battery used in this watch is a special secondary battery, which is different from ordinary batteries.
Unlike an ordinary silver oxide battery, the secondary battery does not require periodic replacement.
H
owever, if the secondary battery is charged or discharged repeatedly over an extended period of time,
its life may shorten.(This condition changes depending upon usage condition and storage environment.)
The secondary battery is an environmentally friendly, clean energy storage device.
NOTICE
To Preserve the Quality of Your Watch
・Power source
・When replacing the secondary battery, make sure that the exclusive
secondary battery for this watch is used. Installation of an ordinary silver
oxide battery can generate heat that can cause bursting or ignition.
・E ven when a silver oxide battery is substituted, electrical continuity
cannot be obtained.
131
■ Guarantee
To Preserve the Quality of Your Watch
Within one year from the date of purchase, we guarantee free repair/adjustment service against any defects according
to the following guarantee regulations, provided that the watch was properly used as directed in this instruction booklet.
・Guarantee coverage
The watch body (movement・case) and metallic band.
・Exceptions from guarantee
132
In following cases, repair/adjustment services will be at cost even within the
guarantee period or under guarantee coverage.
・Change of leather/urethane/cloth band
・Troubles or damage caused by accidents or improper usage
・Scratches or grime caused by use
・P roblems and damage caused by acts of god, natural disasters including
fire, floods or earthquakes.
・T he certificate of guarantee is valid only if all the necessary items are properly filled in.
We will not honor an altered or tampered certificate of guarantee for free repair services.
・Procedure to claim free repair services
・For any defects under guarantee, submit the watch together with the attached
certificate of guarantee to the retailer from whom the watch was purchased.
・If repair services cannot be provided by the retailer from whom the watch
was purchased, contact SEIKO CUSTOMER SERVICE CENTER. In this
case, the attached certificate of guarantee is also needed.
To Preserve the Quality of Your Watch
Free repair services are guaranteed only under the period and conditions specified
in the certificate of guarantee. It does not affect specific legal rights of a consumer. The certificate of guarantee is valid only in Japan.
・Others
・T he case, dial, hands, glass and bracelet, or parts thereof may be repaired with
substitutes if the originals are not available. If necessary, movements will be replaced.
・F or length adjustment ser vice of a metallic band, ask the retailer from
whom the watch was purchased or SEIKO CUSTOMER SERVICE CENTER.
Other retailers may undertake the service on a chargeable basis.
133
■ After-sale service
To Preserve the Quality of Your Watch
・Repair parts
・ The repair parts of this watch will be retained usually for 7 years.
・ Some alternative parts may be used for repair if necessary.
・Notes on overhaul
134
P eriodic inspection and adjustment by disassembly and cleaning (overhaul) is
recommended approximately once every 3 to 4 years in order to maintain optimal
performance of the watch for a long time. According to use conditions, the oil retaining
condition of your watch mechanical parts may deteriorate, abrasion of the parts may
occur due to contamination of oil, which may ultimately lead the watch itself to stop.
As the parts such as gasket may deteriorate, water-resistant performance may be
impaired due to intrusion of perspiration and moisture. Please contact the retailer
from whom the watch was purchased for inspection and adjustment by disassembly
and cleaning (overhaul). For replacement of parts, please specify "SEIKO GENUINE
PARTS." When asking for inspection and adjustment by disassembly and cleaning
(overhaul), make sure that the gasket and push pin are also replaced with new ones.
・C ontact the retailer the watch was purchased from or SEIKO CUSTOMER
SERVICE CENTER for repair or overhaul.
・W ithin the guarantee period, present the cer tificate of guarantee to
receive repair services.
・G uarantee coverage is provided in the cer tificate of guarantee. Read
carefully and retain it.
To Preserve the Quality of Your Watch
・Notes on guarantee and repair
135
How to conduct manual reception (Receiving a radio signal manually)
1 Placing the watch
When receiving a radio signal,
place the watch where it can
easily receive a signal.
Troubleshooting
The antenna for receiving radio
signals inside the watch is at
the 9 o’clock position.
Turning the antenna toward the
outside of the window enables
the watch to receive radio
signals more easily.
→T
o enable the watch to easily
receive a radio signal page 99
136
2 Keep pressing Button A until the second hand has finished
its movement to the zero second position (Four seconds).
When the second hand has moved to the zero second position, the watch
will start to receive a radio signal.
Keep
pressing
Button A for
four second.
※W
hen setting a time zone for regions other than Tokyo (Japan), the function
of the manual radio signal reception will not work. (The second hand does
not move to the zero second position.) Confirm the time zone setting.
→ How to set the time zone pages 106-107
3 Do not move the watch while receiving a radio signal.
※ The reception of a radio signal cannot be conducted unless the watch is still.
It takes 12 minutes at the
longest according to the
receiving state of a radio signal.
After about one minute from the start of receiving a radio signal,
the second hand will start to indicate the receiving level.
Receiving Level is
Receiving Level is
High: The second
Low: The second
hand points to H
hand points to L
(High, the 50
(Low, the 40
second position)
second position)
Reception level is updated by moving the second hand every one minute.
※ The minute hand moves by one minute along with the movement of the second hand.
a radio signal and after receiving a signal.
Check whether the receiving a radio
signal has been successful. → page 102
※During the movement of the date, neither the
buttons nor the crown can be operated.
Not receivable
If the Reception has
failed: The Second
Hand Points to” N”
(No; the 20 second
position)
After five seconds, the watch
will resume displaying the time.
Troubleshooting
Display during reception
4 The watch displays the time when receiving
※ It is difficult to receive the signals in some receiving conditions. → Environments in which it is difficult to receive a radio signal Indication on page 100
※ This watch is unable to receive a radio signal outside a reception range → Radio signal reception range on pages 96-98
※ When the watch is unable to receive radio signals → If the Reception has failed: The second hand points to N on page 103.
137
Conditions in which the watch may be unable to receive radio signals
■ How to manually set the time
When the watch is used continuously
in conditions in which the watch may
be unable to receive a radio signal, it
Troubleshooting
can be manually adjusted.
※When the watch is unable to receive a radio signal, it can move depending on
normal quartz movement (accuracy of loss / gain: ±15 seconds per month).
・When adjusting the time, the date will be
accordingly adjusted.
・When the watch receives a radio signal after
manual adjustment of the time, it displays the
received time.
・When using the watch again in regions in which
the watch is able to receive a radio signal, it is
recommended to perform “Manual reception.”
→ H ow to conduct manual reception on pages 136-137
138
1 Pulling the crown to the second click
The Second hand moves to point to the
“Zero second” position and the watch
enters the manual time setting mode.
※W
hen t he crow n is
a s c rew l o c k t y p e ,
unlock it. → page 91
Pulling the
Crown to the
Second Click
※W
hen the watch enters the manual time setting
mode, the reception results will be indicated as
“N,” since the reception results data will be lost.
2 Press Button A to set
the time.
One minute Advance Press Button A once and then release it.
Continuous
Advance
3 Push the crown back In.
Operation has been completed.
The watch resumes its normal movement.
When Button A is kept pressed for two
seconds or longer, the hand will start to move.
Press Button A again to stop.
※The hand will not move
by turning the crown.
※A d v a n c e t h e h a n d
to adjust the time.
The hand cannot be
turned reversely.
※ The point in which the date changes at 0:00 AM (12:00 PM).
Adjust the time taking into consideration that it is set during the AM and PM.
※W
hen t he crow n
is a screw lock
type, unlock it. →
page 91
Troubleshooting
Button A
Pushing
the Crown
Back In
The watch will resume its normal movement
after pushing the crown back in.
Push the crown back in according to the
time signal.
139
■ How to manually set the date
When the date is not changed due to
an environment in which the watch is
unable to receive a radio signal (when
changing from months with 30 days to
months with 31 days or less), adjust
the date manually.
1 Pulling the crown to the first click
The watch enters the manual date
setting mode.
(The watch keeps moving.)
Troubleshooting
・ T
he date can be adjusted independently
regardless of the time.
※W
h e n t h e crow n is
a s c re w l o c k t y p e ,
unlock it. → page 91
・ W
hen using the watch again in regions in which
the watch is able to receive the radio signals, it is
recommended to perform “Manual Reception.”
Pulling the
Crown to the
First Click
・ W
hen the watch receives a radio signal
after conducting manual adjustment of
the date, it displays the received date.
→ How to conduct manual reception on pages 136-137
140
※ W hen the date is not correct even if the watch successfully receives
a radio signal, the preliminary position of the date may be misaligned.
Setting the preliminary position for the date → page 144
2 Press Button A to set
the date.
3 Push the crown back in.
Operation has been completed.
One day Advance Press Button A once and then release it.
Continuous
Advance
When Button A is kept pressed for two seconds
or longer, the date will start to move.
Press Button A again to stop.
※T h e d a t e w i l l n o t
move by turning the
crown.
※D uring movement of
the date, the button
cannot be operated.
Pushing
the Crown
Back In
※ W hen the crown is
a screw lock type,
lock it. → page 91
Troubleshooting
Button A
※Adjust the date by advancing the date. The date cannot be reversely moved.
141
Preliminary position
When the watch is unable to display the precise time or date even if it successfully receives a
radio signal with the correct time zone setting, the preliminary position may be misaligned.
The radio-controlled watch can automatically adjust the time, however if the preliminary hand position is an
improper one, the watch will be unable to display the precise time even when receiving a radio signal.
When comparing the state of “Misaligned Preliminary Hand Position” to that of a weight scale, it is like “a scale
which is unable to display the correct weight because its needle is not set to the zero position before weighing.”
Troubleshooting
・ When it is necessary to adjust the preliminary position
When displaying a wrong date after receiving a radio signal correctly, or when
performing system reset, the preliminary position of the date must be adjusted.
→ How to set the preliminary position on page 144
・ Function to automatically align the preliminary position of the hand (Automatic hand Position adjustment function)
The hand has an “Automatic hand position adjustment function,” which automatically corrects a wrong preliminary position.
Automatic hand position alignment function activates once a minute for the second hand and at 12:00 both for the AM and PM for the minute and hour hands.
※ The preliminary position of the hour and minute hands can be adjusted manually.
Since the preliminary position of the date is not automatically adjusted, it must be adjusted manually.
142
※W
hen the watch is not displaying the precise time and date even after successfully receiving a radio signal due to factors other than
above mentioned ones → At Trouble: Misalignment of the time and the hands on page 152, Misalignment of the date on page 154.
〈Misalignment of the time and date〉
・In the case of having a strong impact: Misalignment of the time and date may occur when dropping or hitting the watch.
・In the case of a magnetic influence: Misalignment of the time and date may occur when bringing the watch close to an
object which generates magnetism.
■ Things around you which generate magnetism
・Accessories using a magnet
・M agnetic therapy devices (a heating
pad, bedding, a lumbago band, etc.)
・M agnet of doors for a ・Speakers used for such as audiovisual apparatus, ・Clasps for a bag or wallet
refrigerator or furniture
radio, an earphone, and a cellular phone.
Troubleshooting
・Magnetic Clip
143
How to set the preliminary position
■ Setting the preliminary position of the date
The preliminary position of the date is the “1st.”
Troubleshooting
144
When the preliminary position of the date is
incorrect, the correct date cannot be displayed
even if the watch receives a radio signal.
Loss or gain of the date can be adjusted by
setting the preliminary position of the date as
the “1st.”
In the case that the numerical number of the date does
not locate at the center of the window, it also can be
corrected by the same procedures as mentioned above.
When setting the preliminary position of the hour and minute
hands right after setting the preliminary position of the date,
after completing procedure 2 of preliminary position setting
of the date, go to procedure 2 on page 147.
1 Press and hold Button A and Button B simultaneously until the
second hand stops at the 13-second position (for four seconds).
The date will start to advance and stop at the preliminary position.
Button A
Press the Buttons
Simultaneously for
Four Seconds
※ Never pull the crown out.
Button B
※P
ress Button B
with a pointed
object. → page 90
※ In order to perform the
procedures easily, it is
re co m m e n d e d to f irs t
press and hold Button B,
and then press Button A.
・ While dates are advancing, no button operation can be made.
・ A
fter the date stops, when the watch has no operation
and no movement of the hands for ten seconds or
longer, it automatically displays the time again.
・ When it is in the middle of operation, re-attempt the operation from procedure “1.”
2 Pressing But ton B to set
the date to the “1.”
Set the preliminary position to the precise date.
Adjust the date so that the position of “1” will locate
at the center of the window.
1
Button B
If Button B is kept pressed for two seconds
Continuous
or longer, the dates advance continuously.
advancement
Press Button B again to stop.
Fine-tuning:
When the date movement stops, the
preliminary position adjustment mode
will be terminated in ten seconds.
Confirm whether the date is correct after
the watch resumes displaying time.
In the case that the date is not correct,
adjust the date.
Adjusting the date by receiving
a radio signal.
How to conduct manual reception
→ page 136
Troubleshooting
1
3 Automatic mode termination
If the watch is unable to receive radio signals
How to manually set the date → page 140
Each pressing of Button B advances the
date gradually.
※The date can only be advanced. It cannot be turned back.
145
■ Setting the preliminary positions of the hour and minute hands manually
1 Press and hold But ton A and But ton B
simultaneously until the second hand stops
No button operation is needed if setting the
at the 13-second position (for four seconds).
hands to the preliminary positions automatically.
→ Automatic hand position alignment
function on page 142
Troubleshooting
146
Conduct the following
procedures when set ting
the hour and minute hands
manually.
When setting the preliminary position of the
hour and minute hands right after setting the
preliminary position of the date, after completing
procedure “2” of preliminary position setting of
the date on page 145, go to procedure “2.”
The watch enters the mode to adjust the preliminary position of the
date.
Button A
Press the Buttons
Simultaneously
for Four Seconds
※ Never pull the crown out.
Button B
※P
ress Button B
with a pointed
object. → page 90
※ In order to per form the
procedures easily, it is
recommended to first
press and hold Button B,
and then press Button A.
・ While dates are advancing, no button operation can be made.
・ A fter the date stops, when the watch has no operation and no movement of
the hands for ten seconds or longer, it automatically displays the time again.
・ When it is in the middle of operation, re-attempt the operation from procedure “1.”
2 After the date stops, press and hold
Button A until the second hand stops at
the 0-second position (for two seconds).
Enter the mode to adjust the preliminary
positions of the hour and minute hands.
3 Press Button B Once.
The preliminary positions of the hour and
minute hands are automatically adjusted. The
hour and minute hands start to move, and then
all hands will stop at the 0-second position.
1
1
Press
Button B
Once.
・ While dates are advancing, no button operation can be made.
・ A fter the date stops, when the watch has no operation and no movement of
the hands for ten seconds or longer, it automatically displays the time again.
・ When it is in the middle of operation, re-attempt the operation from procedure “1.”
Troubleshooting
Button A
Press for Two
Seconds
After 10 seconds when the all hands
will stop at the 0-second position, the
watch will return to display the time.
147
Troubleshooting
Troubles
The second hand moves
at two-second intervals.
Troubleshooting
The second hand moves
at five-second intervals.
The stopped second hand
Movement pointing to the 15-second
of the watch position started moving.
The stopped second hand
hands
pointing to the 45-second
position started moving.
The watch hands were fastforwarded even though no button
had been pressed, and then the
watch resumed regular movement.
148
Possible causes
The energy depletion forewarning function is activated.(page 112)
If this function is activated even though you wear the watch
everyday, the watch may be unable to receive sufficient light
because it is concealed under a long sleeve shirt, etc.
The Power Save has been activated to limit energy consumption.(page 113)
When the watch is used or stored continually under conditions where it
cannot receive sufficient light, the power save function is automatically
activated in order to reduce unnecessary energy consumption.
The Power Save has been activated to limit energy consumption.(page 113)
When the watch is used or stored continually under conditions where it
cannot receive sufficient light, the power save function is automatically
activated in order to reduce unnecessary energy consumption.
The Power Save function has been activated.(page 113)
The automatic hand alignment function has been activated.(page 142)
When the hand positions deviate to display incorrect time as a result of
influence of various external sources, the watch automatically corrects
the hand alignment itself.
Solutions
Reference page
Sufficiently charge the watch until it starts moving at one-second intervals.
Wait until the watch returns to the current time display.
Use the watch as it is(this is not a malfunction).
① Sufficiently charge the watch until it starts moving at one-second intervals.
② Set the time, date and day.
Use the watch as it is(this is not a malfunction).
-
page 110
page 95
Troubleshooting
M ake sure that the watch is not concealed under a sleeve while you are page 110
wearing the watch. When taking the watch off, place the watch in a location
as bright as possible.
-
149
At trouble
When the watch is
unable to receive a
radio signal
The watch was moved while it was receiving a
radio signal.
The watch was left where the radio signal was
weak or where it was unable to receive a radio
Troubleshooting
Reception
The reception results signal (page 100).
of a radio
have failed and the
Transmitting stations may have stopped
signal second hand points
transmitting radio signals for some reason
to N (the watch does
not receive a radio
signal).
The stopped watch was exposed to
Charging an adequate light for longer than “the
the solar time required to fully charge the watch,”
battery however, it does not resume its normal
one-second interval movements.
150
Possible causes
(Transmission stop).
The watch is set to a time zone other than
a r a d i o s i g n a l r e c e p t i o n r a n g e (a w r o n g
transmitting station is selected).
The light is too weak or the manner of lighting
the watch has been altered while the watch is
being charged.
The Built-in IC of the watch has fallen into an
unstable condition.
Solution
Reference page
Do not move the watch while it is receiving a radio signal.
The reception of the radio signals cannot be conducted unless the page 99
watch is still.
Place the watch where it is able to easily receive a radio signal.
page 99
Charge t he watch in an env ironment w here t he watch can b e
page 110
exposed to an adequate intensity of light in a stable condition.
Troubleshooting
C h e c k t h e w e b s i t e o f e a c h t r a n s m i t t i n g s t a t i o n fo r f u r t h e r
information concerning a transmission stop. Attempt to receive a page 101
radio signal again after a while.
① C heck the time zone that the watch is currently set for (the transmitting station that is
page 106
currently selected), and select the right time zone.
page 95
② When the watch is not displaying the precise time, receive a radio signal again if necessary.
Refer to the " In Case of an Abnormal Movement " section and
page 156
perform the operations as instructed.
151
At Trouble
The watch
temporarily gains or
loses time.
Troubleshooting
152
Misalignment The watch displays an incorrect time
of the time hour unit, even though it displays the
and hand
positions
Possible causes
The watch fails to receive a radio signal
correctly as a result of external influence
(incorrect reception).
The watch has been left in an extremely high
or low temperature place for a long time.
precise time of minutes and seconds
The watch may be set to a time in a different
time zone from the region where the watch is
currently used.
The reception results are
successful, but the precise
time is not displayed.
The hand positions were misaligned as a result of external influence.
The hands are out of the preliminary position as a result of external
influence. → Preliminary position on page 142
The second hand position is
not correctly aligned in “the
reception results display” or
“the reception level display.”
The second hand is out of the preliminar y
position as a result of external influence.
→ Preliminary position on page 142
Solution
Reference pages
①P
lace the watch where it is able to receive a radio signal more
page 99
easily.
page 136
② Conduct manual reception if necessary.
-
page 136
-
Check the time zone that the watch is currently set for, and select
the right time zone.
page 106
①N
o crown or button operation is needed, since the automatic hand position
adjustment function will be activated to align the hand positions. Automatic Hand
Position Adjustment Function activates once a minute for the second hand and
at 12:00 both for the AM and PM for the minute and hour hands.
If you are in a hurry, the preliminary position of the hour and minute hands can be adjusted manually.
② If the misalignment of the hand is not corrected, refer to the "In case of an
abnormal movement" section and perform the operations as instructed.
③ If the misalignment of the hand is not corrected even after performing the operations
as instructed in the ② , consult the retailer from whom the watch was purchased.
page 142
Troubleshooting
① When the watch returns to a normal temperature, it will display the precise time as before.
② If the watch still gains or loses the time, conduct manual reception if necessary.
③ If the watch cannot resume normal movement even after conducting the above mentioned procedures, consult the retailer from whom the watch was purchased.
page 156
-
153
At Trouble
The reception result display
Misalignment confirms successful reception,
of the date and the correct time is displayed,
but the wrong date is displayed.
The date is out of preliminary position.
This happens when the date is out of preliminary position as a result
of influence of various external sources or after the built-in IC is reset.
Troubleshooting
The stored electric power is running short.
The crown or buttons
cannot be operated. Date and day are moving right after a setting
is carried out by the crown or button operation.
Operation
You get lost in
the middle of the
operation.
Others
154
Possible causes
Blur on the dial glass
persists.
-------------------------
Small amount of water has got inside the
watch due to deterioration of the gasket, etc.
※ For the solution of troubles other than the above, consult the retailer from whom the watch was purchased.
Solution
Reference pages
Check if the date is set to the correct preliminary position. If not,
page 144
correct the preliminary position for date.
Sufficiently charge the watch until it starts moving at one-second
intervals.
page110
-
Leave the watch as it is for a while. The watch resumes regular
movement. If the crown is pulled out, push it back in. After a while,
carry out the setting procedures again from the beginning.
-
Contact the retailer from whom the watch was purchased.
-
Troubleshooting
Wait for a while without doing anything.
155
In case of an abnormal movement
In the case that the watch moves abnormally or that the watch does not move at one-second intervals even
after fully charging the battery, perform the procedures from ① - ⑧ to re-establish normal function.
■ How to reset the Built-in IC, ( ① - ③ )
1 When pulling the crown to the second click, the
second hand stops at the zero second position.
Troubleshooting
※W
hen the crown
is a screw lock
type, unlock it.
→ page 91
Pulling the
Crown to the
Second Click
156
2 Press and hold Button A and Button B simultaneously for four seconds, and then release them.
In five seconds after releasing the buttons, the second hand makes a full
rotation and stops at the zero second position. Then the hands of the
hour and minute will start to move toward the Zero second position.
Button A
Press and hold Button A and
Button B simultaneously for
four seconds
Button B
※P
ress Button B
with a pointed
object. → page 90
※ I n o r d e r t o p e r f o r m t h e
p ro c e d u re s e a s i l y, i t i s
recommended to first press
and hold Button B, and then
press Button A.
■ Adjusting the preliminary position of the date(④~⑤)
3 When all the hands return to the zero
second position, push the crown back in.
The second hand will start to
move from 0:0:0 AM
Press and hold Button A and Button B
4 simultaneously
until the second hand stops at
the 13-second position (for four seconds).
The watch enters the mode to adjust the
preliminary position of the date.
Button A
Button B
※ Never pull the crown out
※W
hen the crown is
a screw lock t ype,
unlock it. → page 91
※ If the second hand does not start to
move from “0:0:0 AM,” the resetting
of the Built-in IC may not activate.
In such a case, re -attempt the
operation from the procedure “2.”
Troubleshooting
Push
the crown
back in
Press Button A and
Button B simultaneously
for four seconds
・ W hen the watch has no operation for ten seconds or
longer, the mode automatically terminates.
・ W hen it is in the middle of operation, re-attempt
the operation from procedure“4.”
Go on to the next page
157
5 Pressing But ton B to Set the
Preliminary Position to the “1.”
Adjust the date so that the position of “1” will
locate at the center of the window.
1
Troubleshooting
1
Button B
Each pressing of Button A advances the date by one day.
If Button A is kept pressed for the dates advance continuously. Press
Continuous Button A again to stop it.
advancement Continuous advancement: If Button B is kept pressed for two seconds or
Fine-tuning
158
longer, the dates advance continuously. Press Button B again to stop.
Each pressing of Button B advances the date gradually.
The preliminary position
adjusting mode terminates
10 s e c o n d s a f te r t h e
procedure “5” has been
completed.
■ Setting the time zone(⑥~⑦)
6 Press and hold Button B until the second hand
moves (for four seconds) to the 0-second position.
The watch enters the time zone adjustment mode.
1
When a no movement state of the second hand is kept for ten seconds or more,
the watch automatically switches to the time display state.
When it is in the middle of operation, re-attempt the operation from procedure “6.”
Go on to the next page
Troubleshooting
Press and hold
Button B for
four seconds.
159
7 Set the time zone by pressing the button to move the
second hand (selecting a transmitting station).
Set the time zone of the area where the watch is used.
Troubleshooting
The second hand
moves clockwise by
pressing Button A.
1
Pressing the but ton
once moves the second
hand every one second.
The second hand
moves counterclockwise
by pressing Button B.
Japan; the 9
second position
C
BPJJY
China; the 8
second position
C
BPJJY
※ T he buttons can
be pressed continuously.
Other areas: List of major time zones around the world → page 108
160
8 Set the Time
Set the time by receiving a
radio signal.
If t he watch is unable to recei ve
radio signals
How to manually set the time
→ page 138
Troubleshooting
The time zone adjusting
mode ter minates 10 seconds
af ter the procedure “7” has
been completed.
How to conduct manual reception
→ page136
The operation has been
completed when set ting the
time.
161
Specifications
Specifications
162
1. Frequency of crystal oscillator・・・・・・・ 32,768 Hz (Hz = Hertz ... Cycles per second)
2. Loss/gain (monthly rate)・・・・・・・・・・・・・ L oss / gain ±15 seconds on a monthly rate (Except the case
when the watch is used without an automatic time setting by
receiving a radio signal and when it is worn on the wrist within
a normal temperature range between 5℃ and 35℃ ).
3. Operational temperature range ・・・・・・ Between −10℃ 〜 +60℃
4. Driving systems・・・・・・・・・・・ Step motor (Hour and minute hands, second hand, and the date)
5. Power source・・・・・・・・・・・・・・・・・・・・・・・・ Secondary battery, 1 piece
6. Duration of operation・・・・・ A pproximately six months (Fully charged, and the Power Save is not
activated).
※ If the Power Save is activated after it is fully charged, the watch
continues to run for approximately one year and a half at maximum.
7. Time setting by receiving the JJY-LF radio signal・・・・・・・ A utomatic reception (at 2:00 AM 3:00 AM
and 4:00 AM)
※ R eception attempts depend on the radio
signal receiving conditions.
※ A fter having received a radio signal, the
watch will start to move depending on the
quartz movement until the next reception.
※ Manual reception is also possible
8. IC (Integrated Circuit)・・・・・ Oscillator, frequency divider and driving circuit C-MOS-IC, 3 pieces
※ The specifications are subject to change without prior notice for product improvement.