1
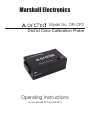
Marshall Electronics
Model No. OR-CP2
Orchid Color Calibration Probe
Operating Instructions
For use with OR-3210 and OR-2410
Installation and Initial Setup
n
Unpacking
Carefully unpack the OR-CP2 Probe and verify that the following items are included:
1. OR-SM Service Module
2. 9-Pin D Service Cable
3. USB to Mini USB Data Cable
4. OR-CP2 Probe
5. 9V Battery
Inspect the unit for any physical damage that may have occurred during shipping. Should there be any damage,
immediately call Marshall Electronics Customer Service at (800) 800-6608. If you are not located within the
continental United States, call +1 (310) 333-0606.
Your Marshall OR-CP2 color probe requires Orchid firmware version 2.1 or newer.
If you need to update your monitor’s firmware, the Orchid firmware updater can be downloaded from the Marshall
website and use the supplied OR-SM module. Connect the OR-SM to your computer with an appropriate USB
cable only.
2
n
Quick Start
Assemble the System
a. Connect the supplied 9-Pin D cable to the OR-SM Service Module Board and the OR-CP2 probe.
b. Insert the 9V battery in to the OR-CP2 probe and switch the module to ON. Observe that the green LED will flash three times with the sensor cover in place and continuously if the cover is removed. The probe will NOT power from the USB connection.
c. Turn the probe to OFF making sure you have replaced the cover.
The Calibration Procedure
Step 1
Connect the System
a. Turn off the monitor from the rear panel switch. Do not use the front panel power switch!
b. Locate the service port on rear panel of your Orchid monitor and with the power of both units remaining OFF, insert the service module board in to your monitor noting the correct orientation of the key slot in the OR-SM board.
c. Power the monitor from the rear power switch.
d. With the sensor cover still in place, switch the OR-CP2 probe to ON. The probe will flash three times indicating is is ready for use.
Step 2
Select the Calibration Mode
Using the Orchid monitor MENU, select Color/ Color Temp. and Highlight the Temperature Range to be calibrated:
CAL D65
Rec 601and Rec 709
Calibrating your monitor in D65 insures that both REC 601 and Rec 709 content will be accurately displayed.
CAL D93
“Cold” Setting
Is a Traditional Consumer Television Preference.
This is a “preference” setting used in many countries around the world. While NOT an official Color Standard,
most consumer monitors it will refer to it as the ”Cool” picture setting.
3
n
Quick Start
Step 3
Calibrate
a. Remove the protective cover on the OR-CP2 and gently center it on the face of the monitor making sure that the probe lays flat on the face of the display. DO NOT USE EXCESSIVE PRESSURE as you may scratch or otherwise damage your monitor screen.
The Calibration process will take approximately 15 seconds. Therefore no mounting hardware is supplied with this unit and none should be be required in normal usage.
However, there are open brackets on the sides of the probe and they can be used if a harness is desired.
b. Press “Enter” on the monitor menu control to begin the process.
Observe the Calibration Data Table advancing in the upper left quadrant of the monitor. The process is complete when the prompt “Calibration Completed” appears.
If you observe “Calibration Failed”, follow these steps again from the beginning. If the calibration process continues to fail, contact Marshall Customer Support.
Theory of Operation
White Balancing is the combining of Red, Green and Blue channels to match desired white temperature. Usually,
6500K for professional displays.
LCD panels divide each color channel into 256 steps(8 bits) or 1024 steps(10 bits).
To achieve desired white point, all of these colors have to be adjusted.
Typically the Monitor does not know the actual color of the panel without using an optical external sensor. The
OR-CP2 provides the monitor with actual color information from its panel.
Orchid monitors are precisely calibrated from the factory for white balance and gamma curve. As time goes by,
the color temperature of back light unit begins to shift into yellowish, bluish, or greenish hues. The Gamma curve
is the characteristics of LCD semiconductor panel and not related to back light levels.
During calibration, the monitor reads the actual color temperature from the monitor several times.
The internal color science algorithm determines each level for the color channels and adjusts them to the desired
white point. After calibration, the monitor confirms its results with pre-calibration data and the updated results.
Thus the Calibration Table located in the upper left hand corner of the display shows both color coordinates;
pre-cal and post-cal.
The table also shows the current brightness of pure white for proper backlight amount.
Please note that calibration does NOT adjust brightness of backlight on the monitor. This adjustment needs to
be set manually.
4
Specifications
n
ELECTRICAL
n
PROB
Dimensions;Power Consumption; 12VDC
9.8cm (w) x 5.55cm (h) x 3.49cm (d)Voltage Requirement; 12VDC
Maintenance
n
Cleaning the Imager Lens
Remove the cover from the bottom of the probe and locate the clear plastic lens.
Dampen an appropriate lens cloth and gently clean the surface with distilled water or alcohol taking great care to
avoid scratching the surface. Make sure that the surface is dry prior to using the system or replacing the cover.
Warranty
Marshall Electronics warranties to the first consumer that OR-CP2 ORCHID Color Calibration Probe will, under
normal use, be free from defects in workmanship and materials, when received in its original container, for a
period of one year from the purchase date. This warranty is extended to the first consumer only, and proof of
purchase is necessary to honor the warranty. If there is no proof of purchase provided with a warranty claim,
Marshall Electronics reserves the right not to honor the warranty set forth above. Therefore, labor and parts
may be charged to the consumer. This warranty does not apply to the product exterior or cosmetics. Misuse,
abnormal handling, alterations or modifications in design or construction void this warranty. It is considered
normal for a minimal amount of pixels, not to exceed three, to fail on the periphery of the display active viewing
area. Marshall Electronics reserves the option to refuse service for display pixel failure if deemed unobtrusive to
effective use of the monitor by our technicians. No sales personnel of the seller or any other person is authorized
to make any warranties other than those described above, or to extend the duration of any warranties on behalf
of Marshall Electronics, beyond the time period described above. Due to constant effort to improve products and
product features, specifications may change without notice.
Marshall Electronics
1910 East Maple Ave.
El Segundo, CA 90245
Tel: (800) 800-6608 / (310) 333-0606 • Fax: 310-333-0688
www.LCDRacks.com • [email protected]
5